Manual de Reparacion de Maquinas de Coser
311
Transcript of Manual de Reparacion de Maquinas de Coser

8/13/2019 Manual de Reparacion de Maquinas de Coser
http://slidepdf.com/reader/full/manual-de-reparacion-de-maquinas-de-coser 1/311
8/13/2019 Manual de Reparacion de Maquinas de Coser
http://slidepdf.com/reader/full/manual-de-reparacion-de-maquinas-de-coser 2/311
2
SewingThe World’s Greatest
Hobby
ByDonna And David Trumble
8/13/2019 Manual de Reparacion de Maquinas de Coser
http://slidepdf.com/reader/full/manual-de-reparacion-de-maquinas-de-coser 3/311
3
DISCLAIMERAll Rights Reserved.
The contents of this publication reflect only the author’sviews and those of the contributing writers. The editors,research team, and contributors share their experience andknowledge without any improper motivations or intent.Every effort is made to ensure that the informationpresented in this publication is accurate and helpful. Norepresentations or warranties of any kind are made withregard to the completeness or accuracy of the contents of
this publication.
None of our contributing team are engaged in renderingany legal professional service. Please contact a professionalperson if legal advice or assistance is required. Thepublisher and editors disclaim any personal loss or liabilitycaused or alleged to be caused, directly or indirectly, by theutilization of any information presented herein.
All product names, trademarks, or logos used herein arecopyrights and trademarks of their respective owners.
“Sewing Answers. Com” is copyright 2006 bySewing Answers. Com.
All Rights Reserved.By
Sewing Answers. Com.
502 San Gabriel Blvd.Georgetown, Texas 78628
U.S.A.Web: http://www.sewinganswers.com Email: [email protected]
8/13/2019 Manual de Reparacion de Maquinas de Coser
http://slidepdf.com/reader/full/manual-de-reparacion-de-maquinas-de-coser 4/311
4
Table of ContentsDISCLAIMER * TABLE OF CONTENTS
INTRODUCTIONPREFACE
HOW TO USE THIS PRODUCT
Chapter One Sewing, The World’s Greatest Hobby
Chapter Two Origins Of Modern Sewing
Chapter Three Tools of the Trade
Chapter Four What is a sewing show and tell?
Chapter Five What are the differences between different fabrics,
and how to I know the right fabric?
Chapter Six What do I need to know about needles?
Chapter Seven How Do You Use Patterns And Templates?
Chapter Eight The Advent of The Zipper And Velcro
Chapter Nine How does a rotary tool cut?
Chapter Ten
Care And Feeding of quilting fabric?
Chapter Eleven What are safety tips for the sewing machine?
Chapter Twelve
YOUR WORLD’S GREATEST HOBBY
8/13/2019 Manual de Reparacion de Maquinas de Coser
http://slidepdf.com/reader/full/manual-de-reparacion-de-maquinas-de-coser 5/311
5
PREFACE
T h e W o r l d ’ s Gr e a t e s t H o b b y is the first book ina series of dynamic resource books designed to give youdetailed how to explanations, directions, and information onhundreds of questions concerning sewing and quilting. Theaim is to provide simple straightforward practicalexplanations and helpful information that you will find easyto use and understand. We hope you will find theinformation here to be quickly understood, simple to follow,and easy to use.
SEW I NG ANSW ERS. COM is a work in progress.Sewing Answers.Com is developed to provide practicalanswers to your sewing and quilting questions. Thesequestions have been collected from among thousands ofquestions asked by sewing students and requested over theinternet, user groups, and search engines.
If you have sewing or quilting questions, please submityour questions to: [email protected].
For more answers to your sewing questions check out:www.sewinganswers.com :
In addition to our eBooks, please check outour online store with its hundreds of sewingtools, supplies, notions, and more.
www.sewinganswer.com www.sewandquiltstore.com
8/13/2019 Manual de Reparacion de Maquinas de Coser
http://slidepdf.com/reader/full/manual-de-reparacion-de-maquinas-de-coser 6/311
6
INTRODUCTION
Dear Reader,
Our hope is that you will enjoysewing more and sew with muchgreater confidence by having thesesewing and quilting resources at yourfingertips.
The Sewing Answers.Com teamincludes professional sewing machine
technicians, sewing educators, and professional sewingbusiness owners and managers.
The Sewing Answers.Com team brings over fifty yearsof professional sewing experience: Custom sewing,Alterations, Drapery Production, Sewing Machine Repair,Embroidery Design, and Teaching Sewing.
The Sewing Answers. Com team brings over 10,000
hours of sewing education, workshops, and trainings. Ourteam includes graduates of Baby Lock Tech, BerninaUniversity, Necchi Sewing Machine School, V.D.T.A., MilliganCollege, Towson University, Indiana University, andnumerous other state universities.
Donna Trumble fell in love with sewing as a nine yearold girl and has been fascinated by sewing, home décor,heirloom sewing, custom sewing, costume design,
alterations, and quilting ever since. She has been aprofessional seamstress since 1968, when she conducted herown alterations business to pay her way through college.
While teaching in public schools, she was constantlyamazing her fellow teachers and friends with her sewing
8/13/2019 Manual de Reparacion de Maquinas de Coser
http://slidepdf.com/reader/full/manual-de-reparacion-de-maquinas-de-coser 7/311
7
skills. As mother of five children, Donna provided steadyflow of quality clothes, suits, dresses, window dressings, andmore.
Donna has original designs that have appeared acrossthe country in Revolutionary War reenactments, wrestlingrings, and formal events. Over the past fifteen years, Donnahas managed an alterations shop, a drapery and windowcovering workroom, custom sewing center, and opened herown sewing and quilting stores. Today, Donna is responsiblefor the sewing education of three sewing centers in centralTexas.
Donna and her husband, David have been married foralmost forty years. They have five grown children, foursons and a daughter. They have seven grandchildren.
David Trumble is a minister, author, sewing machinetechnician, and educator. David earned his doctor’s degreein 1985, and has worked as a Minister Of The Gospel forover thirty years. He has vast experience with sewingincluding work with Donna in several sewing businesses(alterations shop, a drapery and window covering workroom,and custom sewing center). David has completed advancedtechnical training as a sewing machine technician and hasworked in the repair shop for over eight years. He also hasnumerous articles and books published in multiple areas ofinterest. David and Donna are part owners of TempleSewing and Supply, Inc. of Temple, Texas a chain of sewingand quilting stores in central Texas.
8/13/2019 Manual de Reparacion de Maquinas de Coser
http://slidepdf.com/reader/full/manual-de-reparacion-de-maquinas-de-coser 8/311
8
HOW TO USE THISRESOURCE
Sewing, The World’s Greatest Hobby is first andforemost a practical sewing resource composed of practicalanswers to frequently asked sewing and quilting questions.Use it as a sewing encyclopedia dictionary to look upanswers to your questions.
Sewing, The World’s Greatest Hobby is also aresource listing of many charts, lists, and practical bits ofinformation to help make your sewing easier.
To Use:
• Click on the chapters listed by question to be takendirectly to that article.
To the left you will find a tab marked “pages”. Scroll tothe page of interest and click on that page.
• Use your up/down arrows or navigation scroll bar toscroll up/down to articles of interest.
• If you prefer, you can read each volume straightthrough like a book.
8/13/2019 Manual de Reparacion de Maquinas de Coser
http://slidepdf.com/reader/full/manual-de-reparacion-de-maquinas-de-coser 9/311
9
Chapter OneSewingThe World’s Greatest Hobby
The wonderful world of sewing welcomes you.
The air is filled with excitement. Thrills and fun are justwaiting for you. Sewing offers you limitless opportunitiesfor self expression. Sewing gives well deserved feelings ofpride and personal satisfaction. You can achieve untoldcreative possibilities.
You may sew for practical purposes, and know youhave saved money. You may take pride in solving some bigchallenge. You may take great satisfaction from achievingyour goals.
Or you may creating something truly special. You maysew as an art form to express your inner self. You maymake beautiful things. Or you may create a treasuredheirloom. In any case, you will always find sewingrewarding, uplifting, and satisfying.
The keys to success in sewing are:1.
Knowledge.
2. The right equipment and tools.
In this extensive sewing course we will teach you theback ground information, the skills and techniques, and theright tools and equipment for the many different kinds ofsewing. Together these keys to success ensure your success
8/13/2019 Manual de Reparacion de Maquinas de Coser
http://slidepdf.com/reader/full/manual-de-reparacion-de-maquinas-de-coser 10/311
10
in each and every project. The answers, instruction,guidance, and support are here to meet your needs.
Confidence comes with experience. The whole world ofsewing awaits you. So, relax, enjoy, and take pride in yourcreative possibilities.
What are your possibilities?
There are virtually no limits.
Yes, you can alter and repair your ready made clothing.
Custom made clothing and other items now come inthe size, color and fabric YOU want and choose.
Yes, you can make clothing, draperies, homedecorations, wall hangings, table runners, heirloomtreasures, beautiful gifts, quilts, crafts, and so muchmore.
You can make exciting personal items like lingerie,robes, and sleepwear. .
You can make all kinds of practical things for yourhome, family, and heritage. .
You can create beautiful artwork. .
Yes you can design, layout, sew, and quilt gorgeousquilts and wall hangings for you home, for heritage, forwhatever you desire. .
You can sew all kinds of decorative accessories likepurses, vests, and throws. .
You can take your ordinary ready made clothes andembellish them with embroidery, appliqué, sequins,cording, and decorative stitching to turn the ordinary
8/13/2019 Manual de Reparacion de Maquinas de Coser
http://slidepdf.com/reader/full/manual-de-reparacion-de-maquinas-de-coser 11/311
11
into fabulous one of a kind wearable art or elegantmasterpieces.
The possibilities are endless, but you may want to trythem all. The sources of inspiration and new ideas areendless. You may create something totally off the top ofyour head, or you may be inspired to make some of thethousands of projects available in books, magazines,videos, and sewing discussion groups. When you makesomething yourself, it is uniquely yours.
Once you begin, the whole world opens up. Your newskills become a great reservoir of resources that you can usein a thousand different ways. Try dyeing your own fabrics,adding sequins, making a hat, decorating a sweatshirt. Mixyour sewing, embroidery, crafting, and other skills togetherto express yourself.
Whatever you can imagine, you can create.
Long before the first writtenword, needle and thread were usedto make clothing. Across theworld, Asians, Europeans, Africans,and American Indians sewedclothing, tents, shoes, bags, andmore.
For nearly 20,000 years everystitch of sewing was done by hand– one stitch at a time.
The wealthy would decoratetheir clothing with jewelry, braid,
and gold leaf.
Soldiers wore coats lined with pieces of metal poundedflat and tied together as armor.
8/13/2019 Manual de Reparacion de Maquinas de Coser
http://slidepdf.com/reader/full/manual-de-reparacion-de-maquinas-de-coser 12/311
12
The need to sew led to advances in taxidermy and thetreatment of animal hides. Over time animal skins gave wayto other fibers. In recent years man has developed fabuloussynthetic fabrics as well.
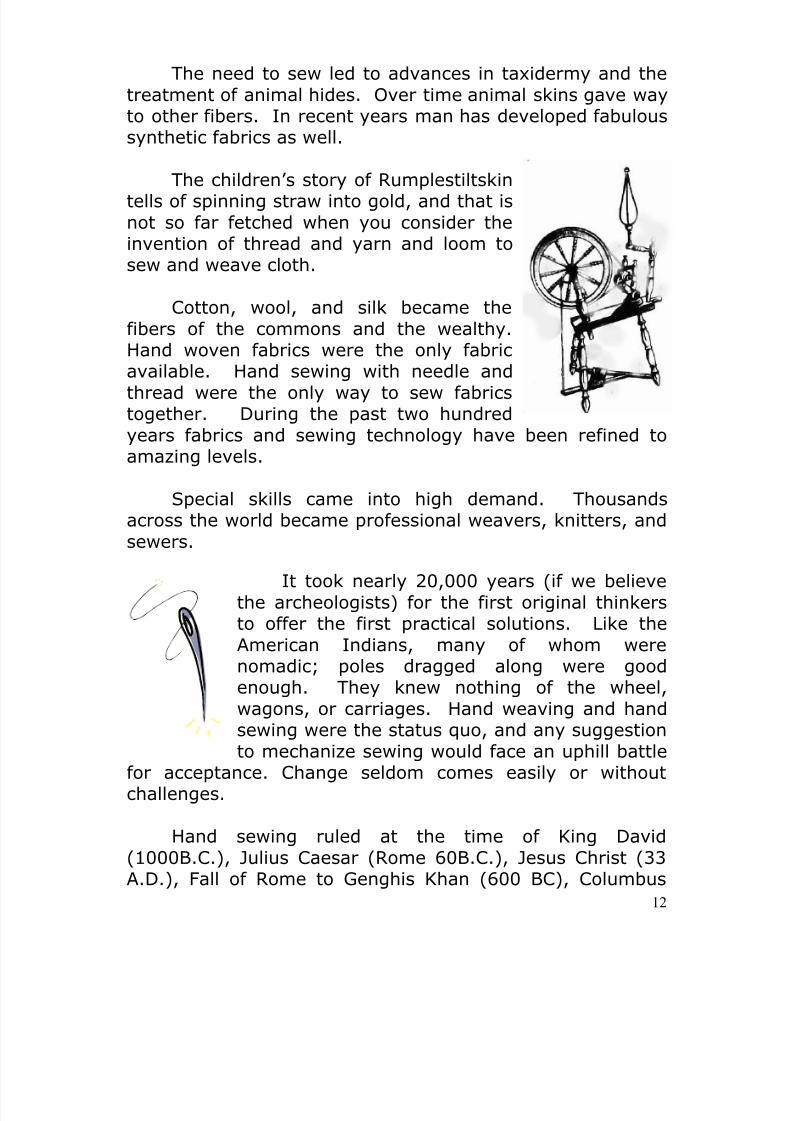
The children’s story of Rumplestiltskintells of spinning straw into gold, and that isnot so far fetched when you consider theinvention of thread and yarn and loom tosew and weave cloth.
Cotton, wool, and silk became thefibers of the commons and the wealthy.Hand woven fabrics were the only fabricavailable. Hand sewing with needle andthread were the only way to sew fabricstogether. During the past two hundredyears fabrics and sewing technology have been refined toamazing levels.
Special skills came into high demand. Thousandsacross the world became professional weavers, knitters, andsewers.
It took nearly 20,000 years (if we believethe archeologists) for the first original thinkersto offer the first practical solutions. Like theAmerican Indians, many of whom werenomadic; poles dragged along were goodenough. They knew nothing of the wheel,wagons, or carriages. Hand weaving and handsewing were the status quo, and any suggestionto mechanize sewing would face an uphill battle
for acceptance. Change seldom comes easily or withoutchallenges.
Hand sewing ruled at the time of King David(1000B.C.), Julius Caesar (Rome 60B.C.), Jesus Christ (33A.D.), Fall of Rome to Genghis Khan (600 BC), Columbus
8/13/2019 Manual de Reparacion de Maquinas de Coser
http://slidepdf.com/reader/full/manual-de-reparacion-de-maquinas-de-coser 13/311
13
discovers America (1942 A.D.), King James Bible(1611A.D.), The Declaration of Independence (1776 A.D.)and The Battle of the Alamo (1836A.D.)
Today, Sewing is the world’s greatest hobby. While ituse to be a crucial skill for survival, sewing today offers newhorizons of self expression and creative joy. Today sewingis fun, relaxing, and deeply satisfying.
When we think of sewing, different people think ofdifferent things. In the narrow sense, sewing today relatesto the Machine Sewing Arts which is the focus of this book.In the broader sense, however, the term “Sewing” denotesthe use of thread and needle in a much wider range ofactivities and needle arts.
Before we launch in to our adventures with machinesewing arts, lets take a glimpse at the full range of whatsewing has traditionally included.
WHAT IS THE SCOPE OF SEWING?
“Sewing” may be divided into two categories:1. Hand Sewing Arts2.Machine Sewing Arts.
8/13/2019 Manual de Reparacion de Maquinas de Coser
http://slidepdf.com/reader/full/manual-de-reparacion-de-maquinas-de-coser 14/311
8/13/2019 Manual de Reparacion de Maquinas de Coser
http://slidepdf.com/reader/full/manual-de-reparacion-de-maquinas-de-coser 15/311
15
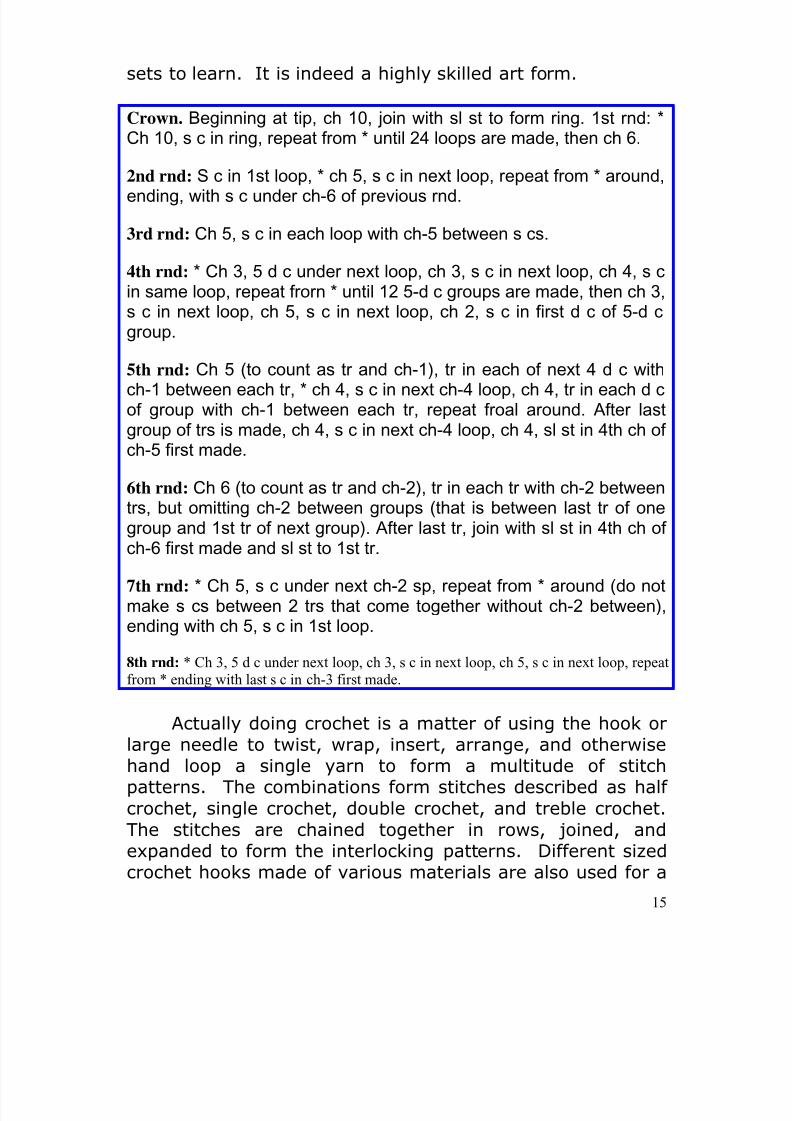
sets to learn. It is indeed a highly skilled art form.
Crown. Beginning at tip, ch 10, join with sl st to form ring. 1st rnd: *Ch 10, s c in ring, repeat from * until 24 loops are made, then ch 6.
2nd rnd: S c in 1st loop, * ch 5, s c in next loop, repeat from * around,
ending, with s c under ch-6 of previous rnd.
3rd rnd: Ch 5, s c in each loop with ch-5 between s cs.
4th rnd: * Ch 3, 5 d c under next loop, ch 3, s c in next loop, ch 4, s cin same loop, repeat frorn * until 12 5-d c groups are made, then ch 3,s c in next loop, ch 5, s c in next loop, ch 2, s c in first d c of 5-d cgroup.
5th rnd: Ch 5 (to count as tr and ch-1), tr in each of next 4 d c withch-1 between each tr, * ch 4, s c in next ch-4 loop, ch 4, tr in each d cof group with ch-1 between each tr, repeat froal around. After lastgroup of trs is made, ch 4, s c in next ch-4 loop, ch 4, sl st in 4th ch ofch-5 first made.
6th rnd: Ch 6 (to count as tr and ch-2), tr in each tr with ch-2 betweentrs, but omitting ch-2 between groups (that is between last tr of onegroup and 1st tr of next group). After last tr, join with sl st in 4th ch ofch-6 first made and sl st to 1st tr.
7th rnd: * Ch 5, s c under next ch-2 sp, repeat from * around (do notmake s cs between 2 trs that come together without ch-2 between),ending with ch 5, s c in 1st loop.
8th rnd: * Ch 3, 5 d c under next loop, ch 3, s c in next loop, ch 5, s c in next loop, repeatfrom * ending with last s c in ch-3 first made.
Actually doing crochet is a matter of using the hook orlarge needle to twist, wrap, insert, arrange, and otherwise
hand loop a single yarn to form a multitude of stitchpatterns. The combinations form stitches described as halfcrochet, single crochet, double crochet, and treble crochet.The stitches are chained together in rows, joined, andexpanded to form the interlocking patterns. Different sizedcrochet hooks made of various materials are also used for a
8/13/2019 Manual de Reparacion de Maquinas de Coser
http://slidepdf.com/reader/full/manual-de-reparacion-de-maquinas-de-coser 16/311
16
variety of purposes. The end result is an intricate designsuch as one of the afghan stitch patterns (Basic, Cluster,Crossed Tunisian, Framed Squares, Mesh, Purl, etc.) Thereare hundreds of different patterns and variations producingtruly amazing crochet art.
Hand Embroidery
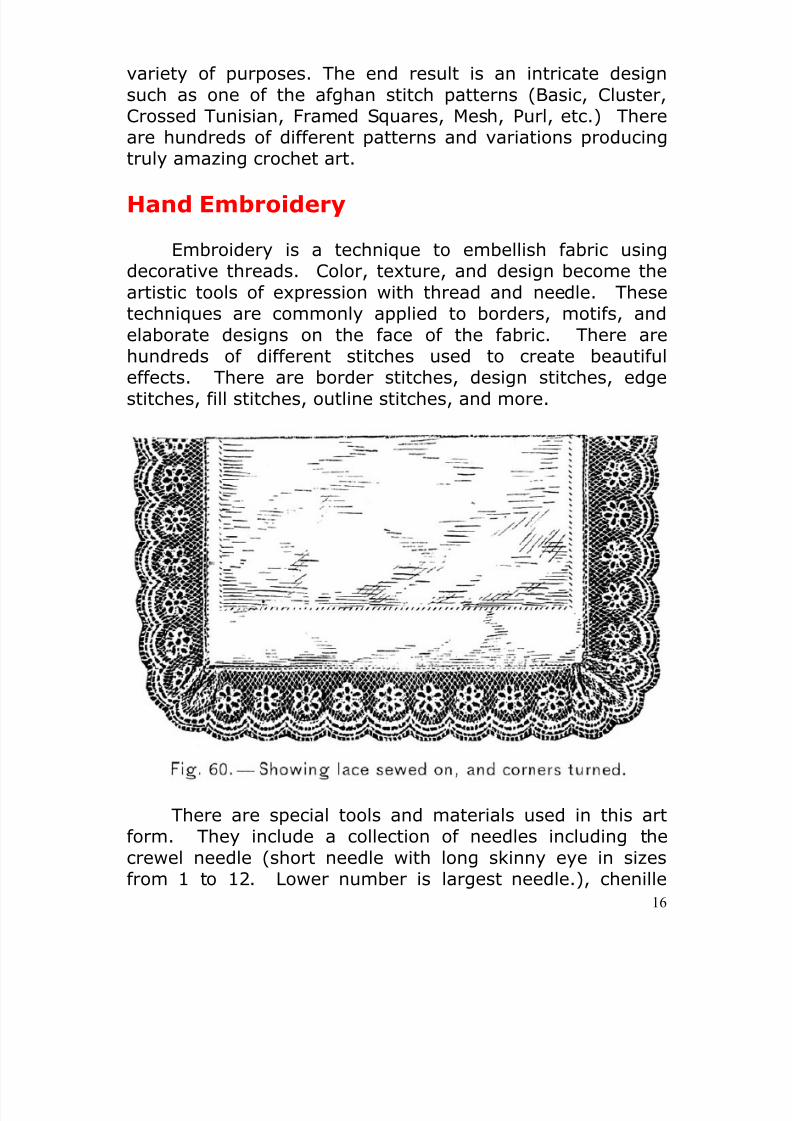
Embroidery is a technique to embellish fabric usingdecorative threads. Color, texture, and design become theartistic tools of expression with thread and needle. Thesetechniques are commonly applied to borders, motifs, andelaborate designs on the face of the fabric. There arehundreds of different stitches used to create beautiful
effects. There are border stitches, design stitches, edgestitches, fill stitches, outline stitches, and more.
There are special tools and materials used in this artform. They include a collection of needles including thecrewel needle (short needle with long skinny eye in sizesfrom 1 to 12. Lower number is largest needle.), chenille
8/13/2019 Manual de Reparacion de Maquinas de Coser
http://slidepdf.com/reader/full/manual-de-reparacion-de-maquinas-de-coser 17/311
17
needle (sizes 13 to 26), and tapestry needles (sizes 13 to26). Embroidery frames are used to stabilize the fabricwhile it is being worked on. These come in many sizes fromsmall lap circles to large free standing square frames.Fabrics may range from simple open mesh canvas toelaborate tapestry. Embroidery scissors both large andsmall are essential for cutting yarns and threads. A stilettomay be used to make eyelet holes. A thimble is essential forprotecting the finger from the sharp end of the needle whenpushing through the fabric. Yarns and threads of all kindsare used to create amazing color, texture, and design.
Embroidery stitches may be classified by how they layon a fabric. Flat stitches lay flat. Knotted stitches are moreraised. Liked stitches offer an interlocking appearance.Looped stitches include the blanket and feather stitcheswhich offer a combination of flat and raised appearance.Hand embroidery stitches rival the most advanced sewingmachines in complexity and number of different stitches.
As sheer artwork, hand embroidery is often consideredsuperior to the more modern machine embroidery. Thereare designs and features of hand embroidery that can andwill probably never be reproduced through machineembroidery. Although, machine embroidery is much faster,hand embroidery is like painting by hand with thread andyarn.
Hand Knitting
Hand knitting is very similar to crochet in that it is a
needlework system of interlocking looped stitches formed byusing two (instead of one hook as in crochet) large knittingneedles and a single yarn for creating delicate open designs.It has been traced back to about 200AD from the region ofmodern day Arabia. Theory has it that Arabian travelerssuch as sailors, traders, and adventurers took this special
8/13/2019 Manual de Reparacion de Maquinas de Coser
http://slidepdf.com/reader/full/manual-de-reparacion-de-maquinas-de-coser 18/311
18
skill with them and taught it to people wherever theytraveled.
Knitting remains a popular fashion oriented needle art.Among the more common items made today includeafghans, baby blankets, booties, and other novel heirloomitems.
Like crochet, knitting has a special code of its own.When you begin looking at a knitting pattern for the firsttime, it looks like long lists of gibberish. The code mightlook something like this: inc R for increase to the right; pssofor pass or pull slipped stitch over; or wyib for yarn to backof work. It takes some time to figure out all the details of
8/13/2019 Manual de Reparacion de Maquinas de Coser
http://slidepdf.com/reader/full/manual-de-reparacion-de-maquinas-de-coser 19/311
19
the code, and even longer to master the intricate skill sets tomake the almost limitless stitches and patterns.
Basically, the vast array of knitting stitches arevariations on either the basic knit stitch or the purl stitch.These variations are applied in many different designs aswell.
Knitting needles are available in both an American anda British system of identification. In the British system, theyrun from eighteen down to eight (18, 17, 16,…13,… 8).From the British thirteen to the British eight you haveequivalent American size zero to ten and a half 0,1,2,3,…).There are also circular needles, double pointed straightneedles, jumper needles, and single point straight needles.
Knitting yarn comes in a wide range of fibers (wool,cotton, silk, linen, synthetics), colors, textures, sizes, andtwists. Each yarn offers its own special uses and qualities.It is simplest, however, to simply follow the pattern for bestresults.
Macrame’
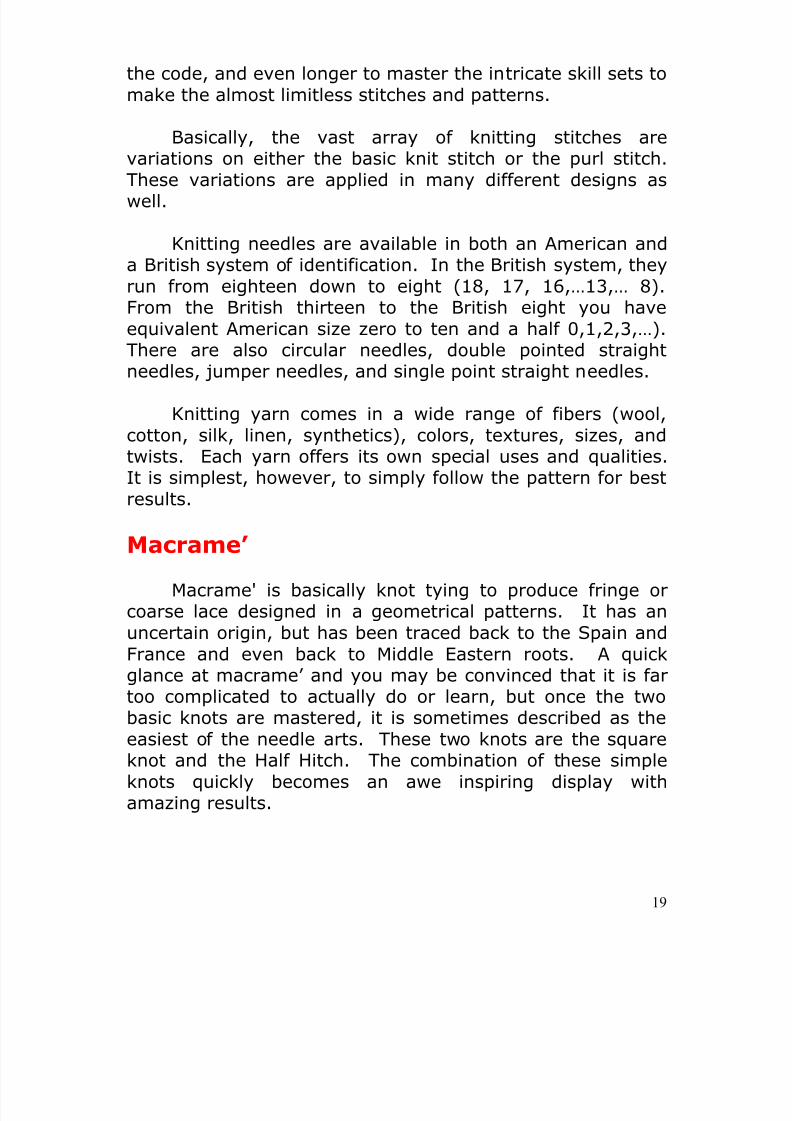
Macrame' is basically knot tying to produce fringe orcoarse lace designed in a geometrical patterns. It has anuncertain origin, but has been traced back to the Spain andFrance and even back to Middle Eastern roots. A quickglance at macrame’ and you may be convinced that it is fartoo complicated to actually do or learn, but once the twobasic knots are mastered, it is sometimes described as theeasiest of the needle arts. These two knots are the square
knot and the Half Hitch. The combination of these simpleknots quickly becomes an awe inspiring display withamazing results.
8/13/2019 Manual de Reparacion de Maquinas de Coser
http://slidepdf.com/reader/full/manual-de-reparacion-de-maquinas-de-coser 20/311
20
The materials used for macrame’ are quite simple:yarns, cord, rope, pins, measuring tape, pins, pinning board,rubber bands, glue, and crochet hook for occasional pokingand twisting. This needle art certainly reminds one of theexceptional knot tying skills of sailors.
Rug Making
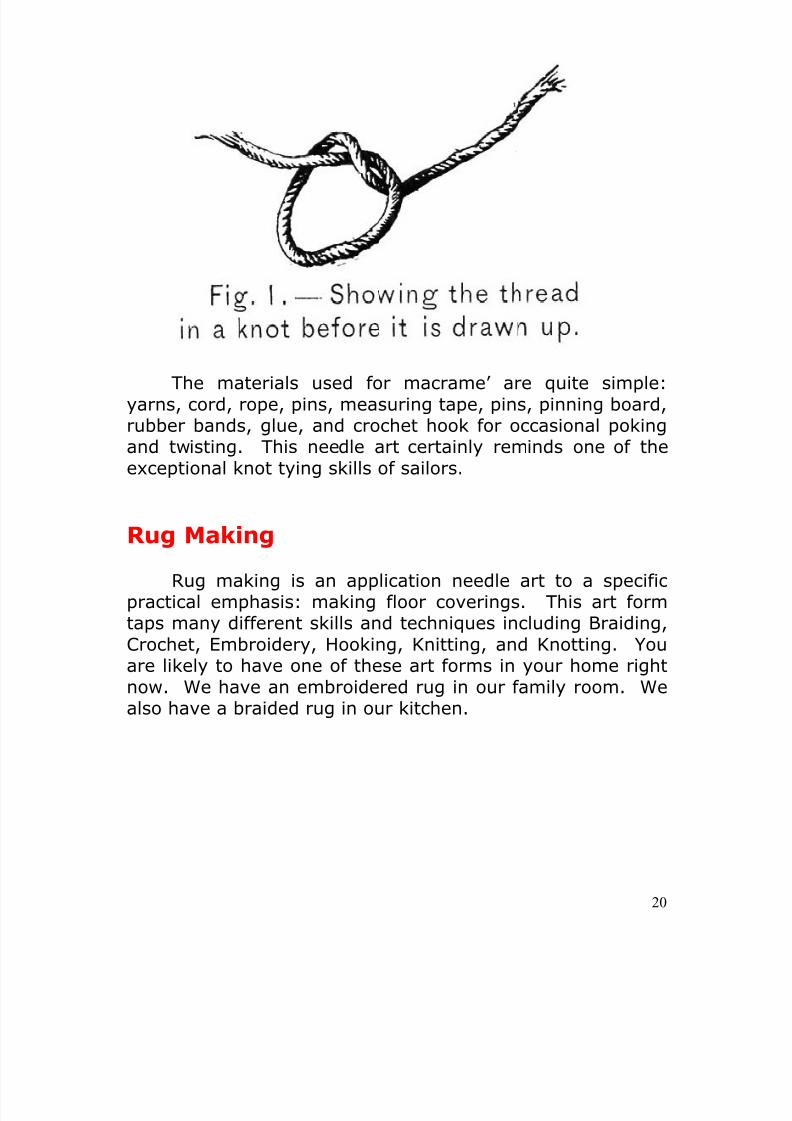
Rug making is an application needle art to a specificpractical emphasis: making floor coverings. This art formtaps many different skills and techniques including Braiding,Crochet, Embroidery, Hooking, Knitting, and Knotting. Youare likely to have one of these art forms in your home rightnow. We have an embroidered rug in our family room. Wealso have a braided rug in our kitchen.

8/13/2019 Manual de Reparacion de Maquinas de Coser
http://slidepdf.com/reader/full/manual-de-reparacion-de-maquinas-de-coser 21/311
21
8/13/2019 Manual de Reparacion de Maquinas de Coser
http://slidepdf.com/reader/full/manual-de-reparacion-de-maquinas-de-coser 22/311
22
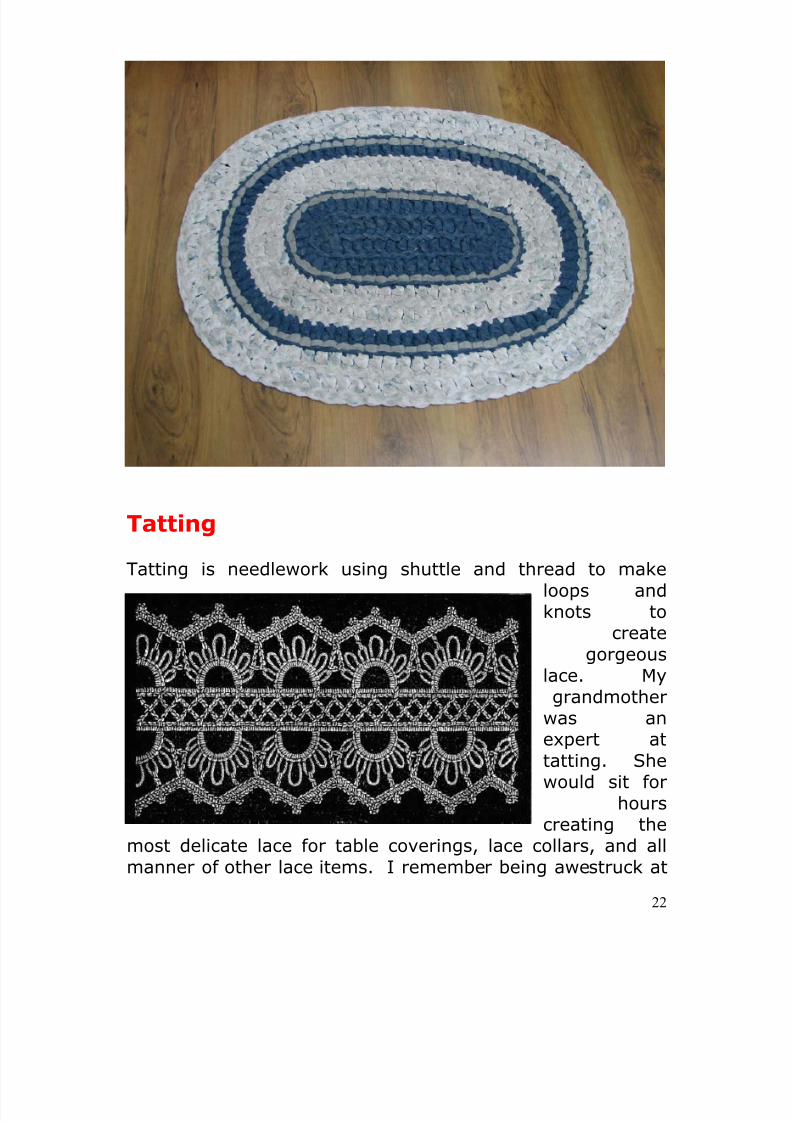
Tatting
Tatting is needlework using shuttle and thread to makeloops andknots to
creategorgeous
lace. Mygrandmother
was anexpert at
tatting. Shewould sit for
hourscreating the
most delicate lace for table coverings, lace collars, and allmanner of other lace items. I remember being awestruck at
8/13/2019 Manual de Reparacion de Maquinas de Coser
http://slidepdf.com/reader/full/manual-de-reparacion-de-maquinas-de-coser 23/311
23
how complicated it all seemed. Later, I was assured that ifyou learn the basic stitch, everything else comesautomatically.
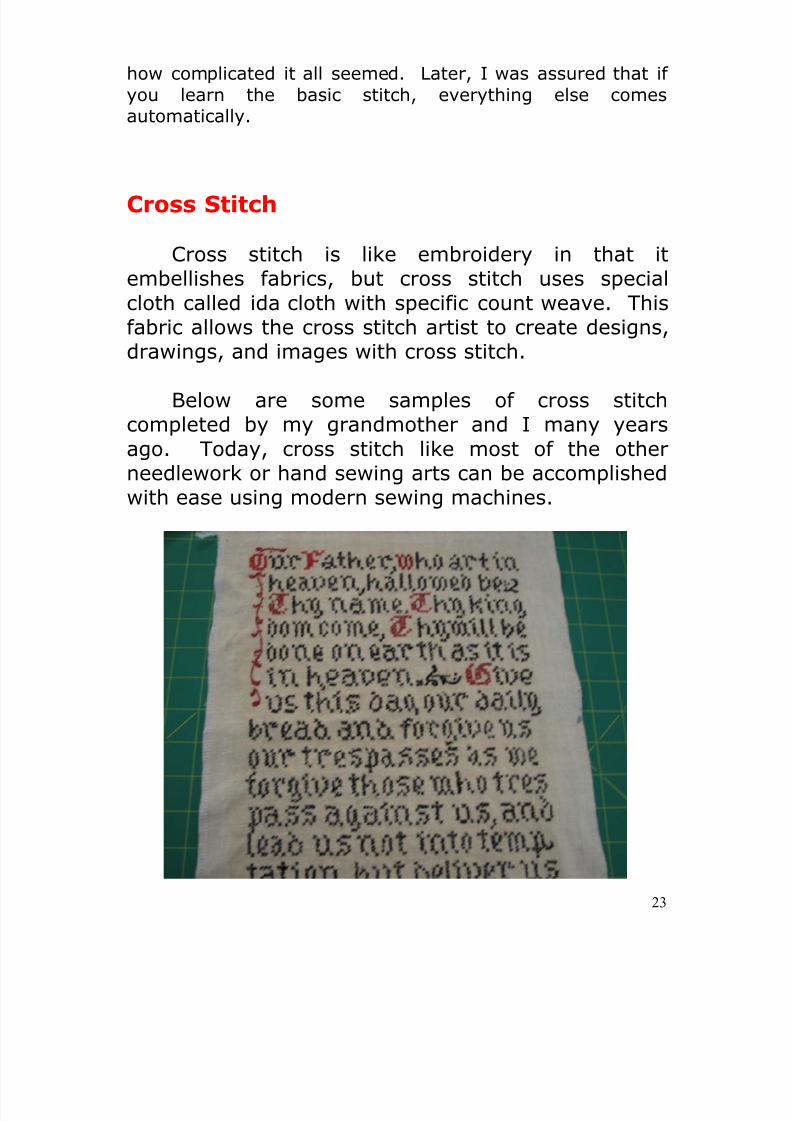
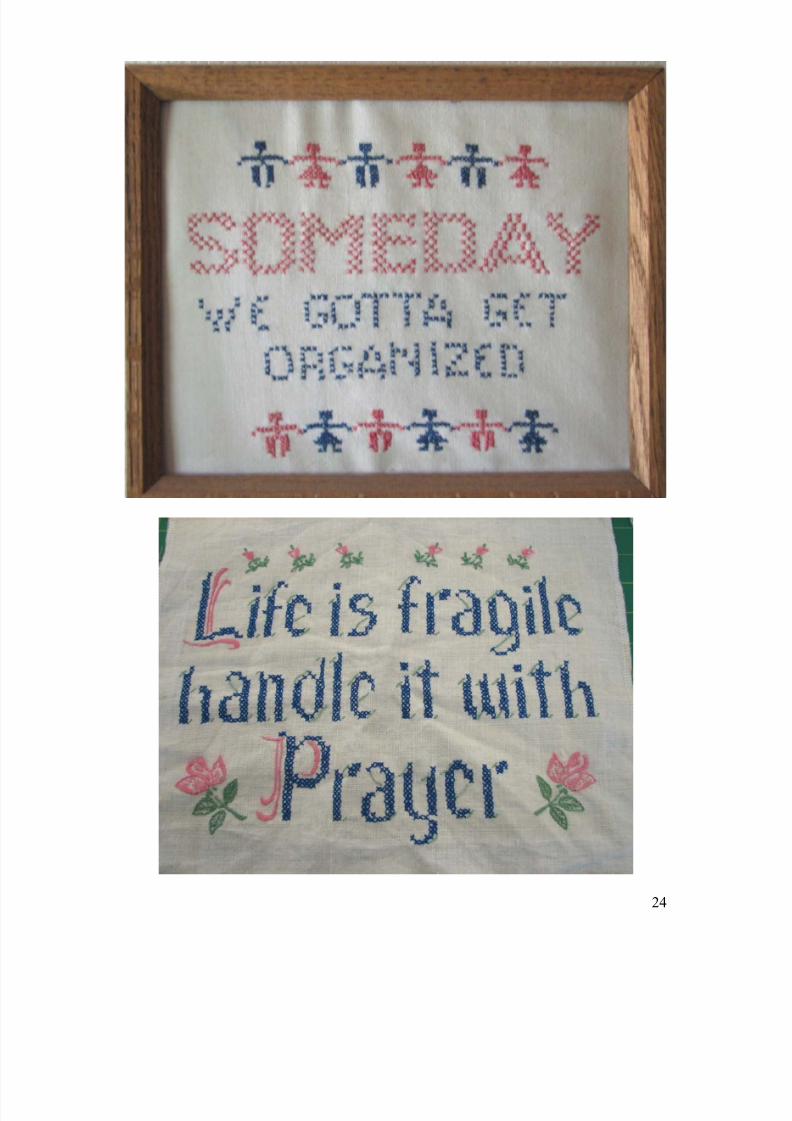
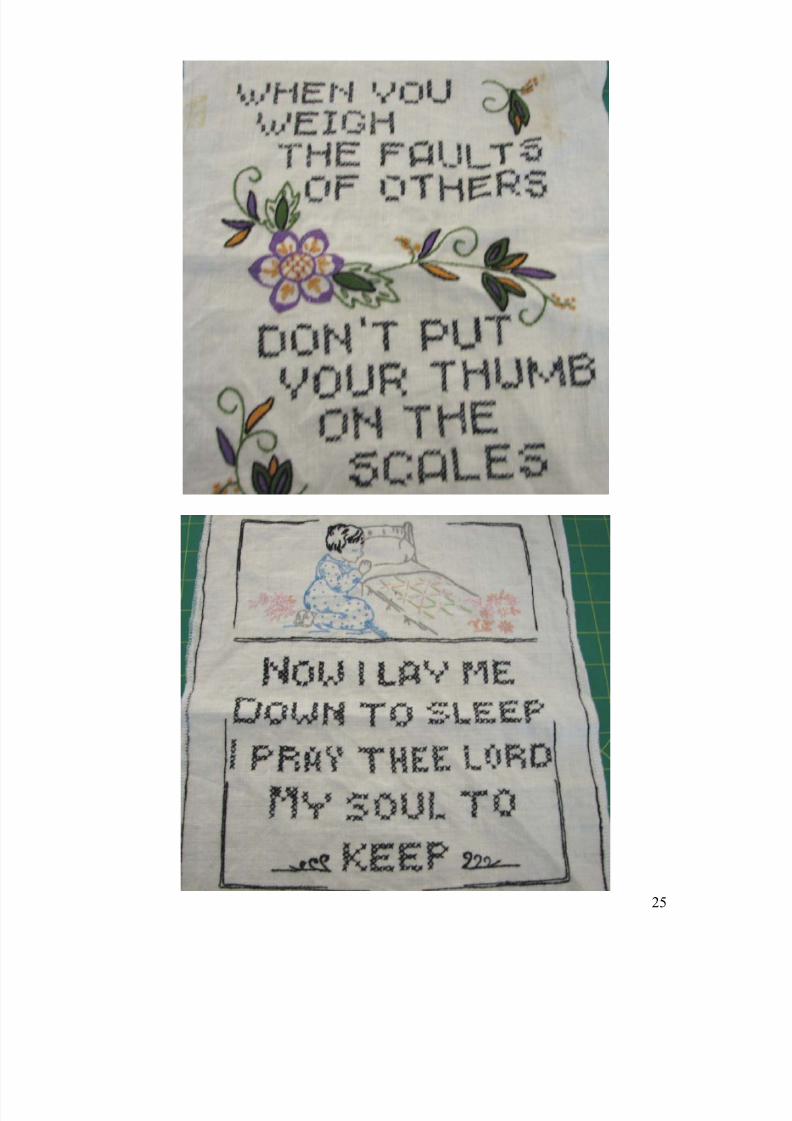
Cross Stitch
Cross stitch is like embroidery in that itembellishes fabrics, but cross stitch uses specialcloth called ida cloth with specific count weave. Thisfabric allows the cross stitch artist to create designs,drawings, and images with cross stitch.
Below are some samples of cross stitchcompleted by my grandmother and I many yearsago. Today, cross stitch like most of the otherneedlework or hand sewing arts can be accomplishedwith ease using modern sewing machines.
8/13/2019 Manual de Reparacion de Maquinas de Coser
http://slidepdf.com/reader/full/manual-de-reparacion-de-maquinas-de-coser 24/311
8/13/2019 Manual de Reparacion de Maquinas de Coser
http://slidepdf.com/reader/full/manual-de-reparacion-de-maquinas-de-coser 25/311
25
8/13/2019 Manual de Reparacion de Maquinas de Coser
http://slidepdf.com/reader/full/manual-de-reparacion-de-maquinas-de-coser 26/311
26
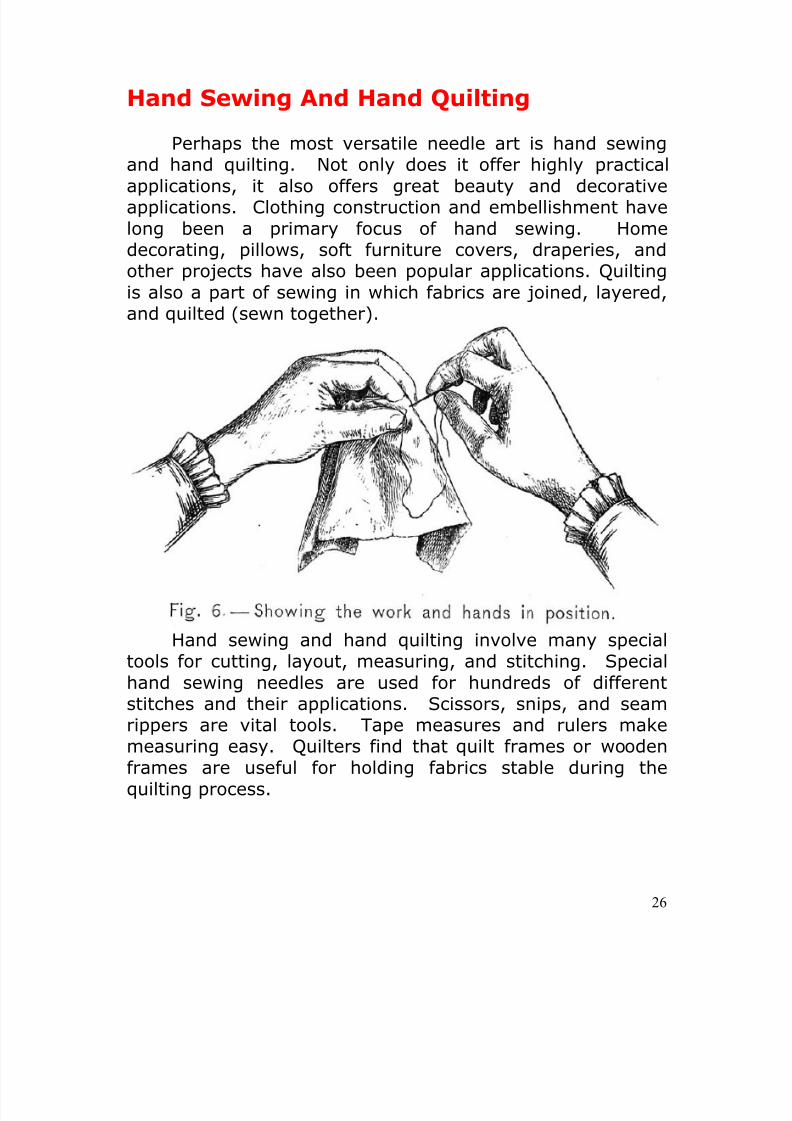
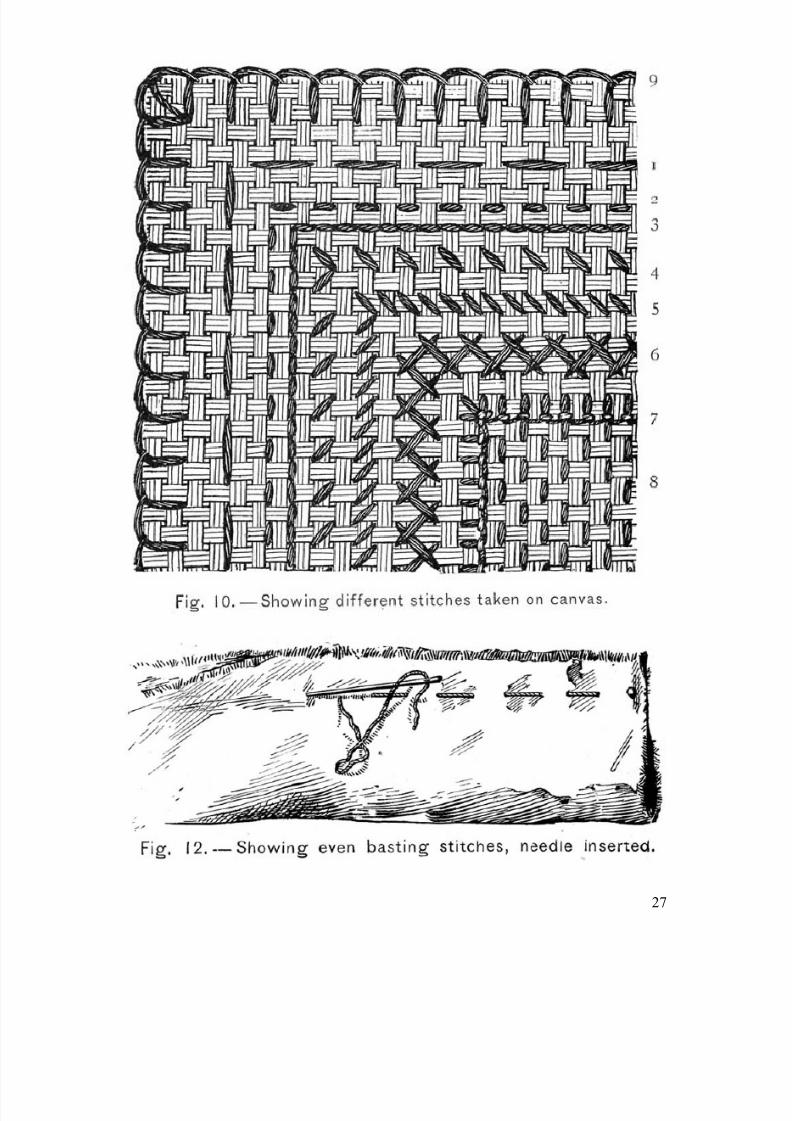
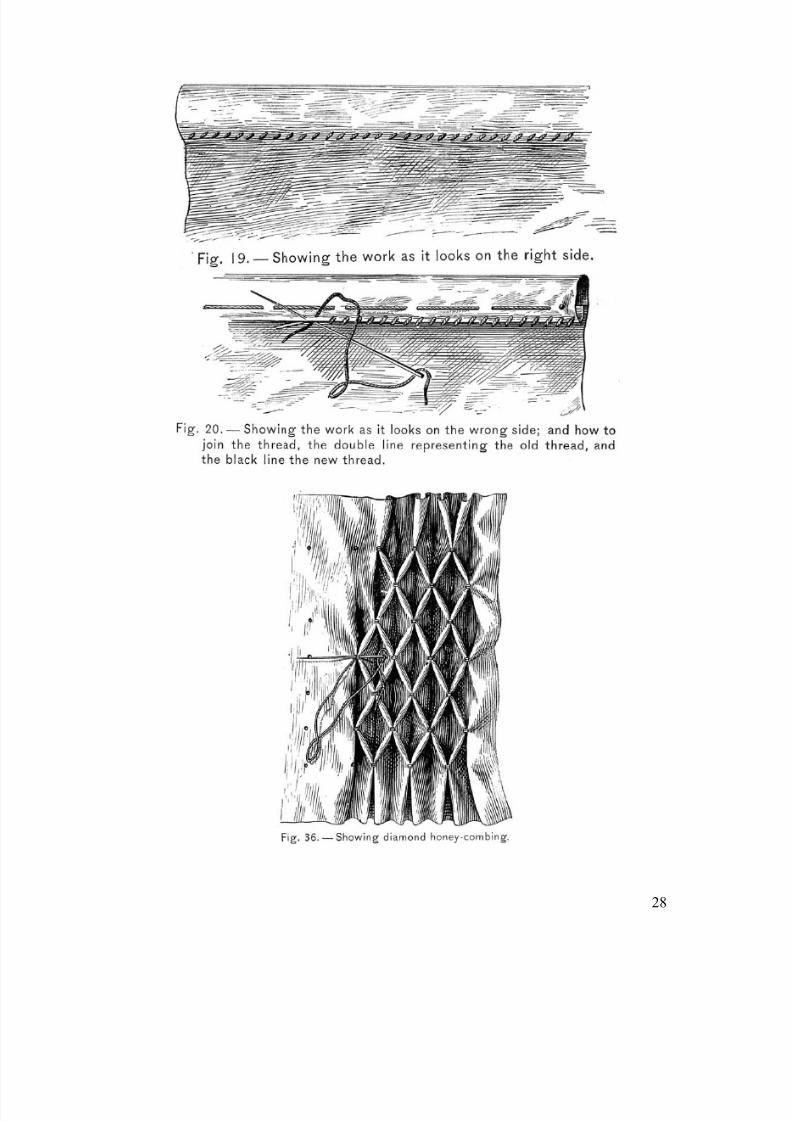
Hand Sewing And Hand Quilting
Perhaps the most versatile needle art is hand sewingand hand quilting. Not only does it offer highly practical
applications, it also offers great beauty and decorativeapplications. Clothing construction and embellishment havelong been a primary focus of hand sewing. Homedecorating, pillows, soft furniture covers, draperies, andother projects have also been popular applications. Quiltingis also a part of sewing in which fabrics are joined, layered,and quilted (sewn together).
Hand sewing and hand quilting involve many specialtools for cutting, layout, measuring, and stitching. Specialhand sewing needles are used for hundreds of differentstitches and their applications. Scissors, snips, and seamrippers are vital tools. Tape measures and rulers makemeasuring easy. Quilters find that quilt frames or wooden
frames are useful for holding fabrics stable during thequilting process.
8/13/2019 Manual de Reparacion de Maquinas de Coser
http://slidepdf.com/reader/full/manual-de-reparacion-de-maquinas-de-coser 27/311
27
8/13/2019 Manual de Reparacion de Maquinas de Coser
http://slidepdf.com/reader/full/manual-de-reparacion-de-maquinas-de-coser 28/311
28
8/13/2019 Manual de Reparacion de Maquinas de Coser
http://slidepdf.com/reader/full/manual-de-reparacion-de-maquinas-de-coser 29/311
29
All of these activities and traditional needle arts may be
described as handwork or Hand Sewing Arts.
CHAPTER THREEMachine Sewing Arts.
The focus of this book as well as Sewing Answers. Comis Machine Sewing Arts. From this point on, this book willdetail, discuss, and illustrate the world’s greatest hobby interms of sewing and the machine sewing arts.
These include: Clothing Construction, Embellishment,Quilting, Heirloom Sewing, Home Décor, and Crafting. Thecommon thread linking all of these needle arts is the sewingmachine. Each of these areas of sewing arts uses thesewing machine in slightly different ways and apply it ondifferent kinds of projects, but all of them use the sewingmachine.
Sewing Machine Clothing Construction
Clothing Construction is the grandmother of allsewings, and includes use of hundreds of different stitchesand techniques. The sewing machine is used to sew seams,hems, staystitching, understitching, and decorativeapplications.
8/13/2019 Manual de Reparacion de Maquinas de Coser
http://slidepdf.com/reader/full/manual-de-reparacion-de-maquinas-de-coser 30/311
30
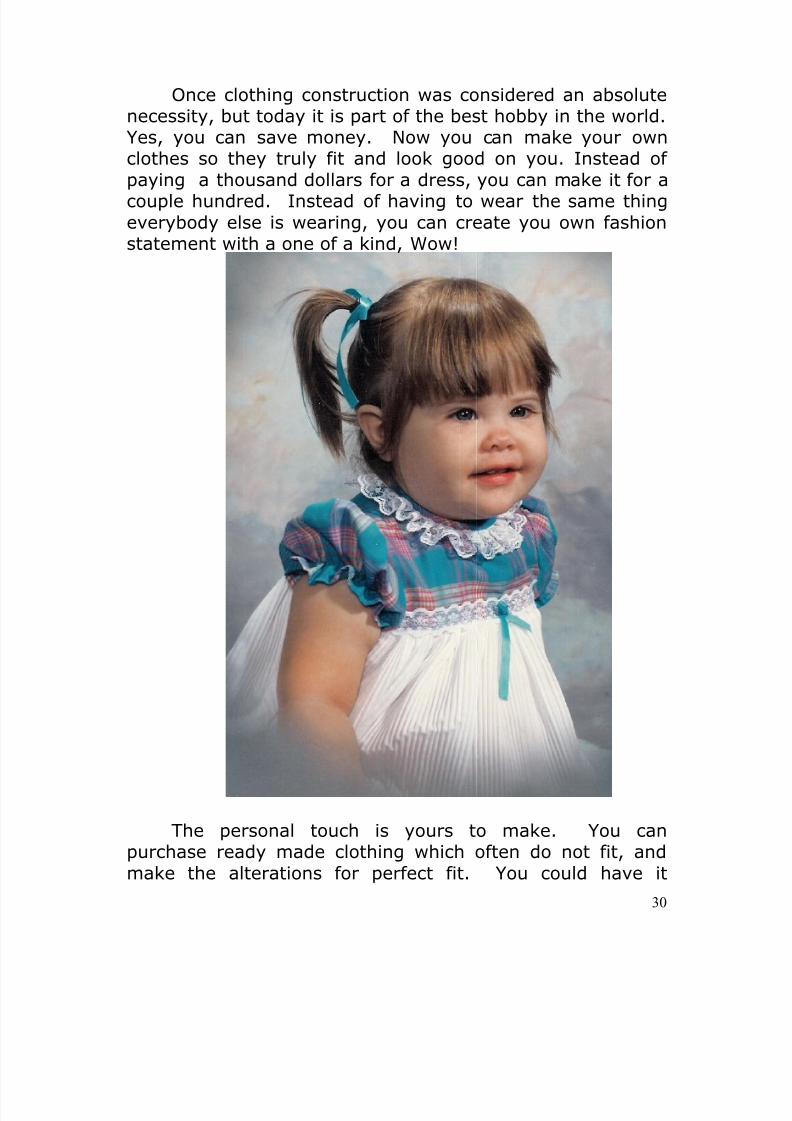
Once clothing construction was considered an absolute
necessity, but today it is part of the best hobby in the world.Yes, you can save money. Now you can make your ownclothes so they truly fit and look good on you. Instead ofpaying a thousand dollars for a dress, you can make it for acouple hundred. Instead of having to wear the same thingeverybody else is wearing, you can create you own fashionstatement with a one of a kind, Wow!
The personal touch is yours to make. You canpurchase ready made clothing which often do not fit, andmake the alterations for perfect fit. You could have it
8/13/2019 Manual de Reparacion de Maquinas de Coser
http://slidepdf.com/reader/full/manual-de-reparacion-de-maquinas-de-coser 31/311
31
altered at seventy five to a hundred dollars, or do it yourselffor free. Imagine buying a hundred dollar suit with amissing button, or poor fit for just a few dollars onclearance. You can quickly and easily turn that reject into atreasured suit. You can do it.
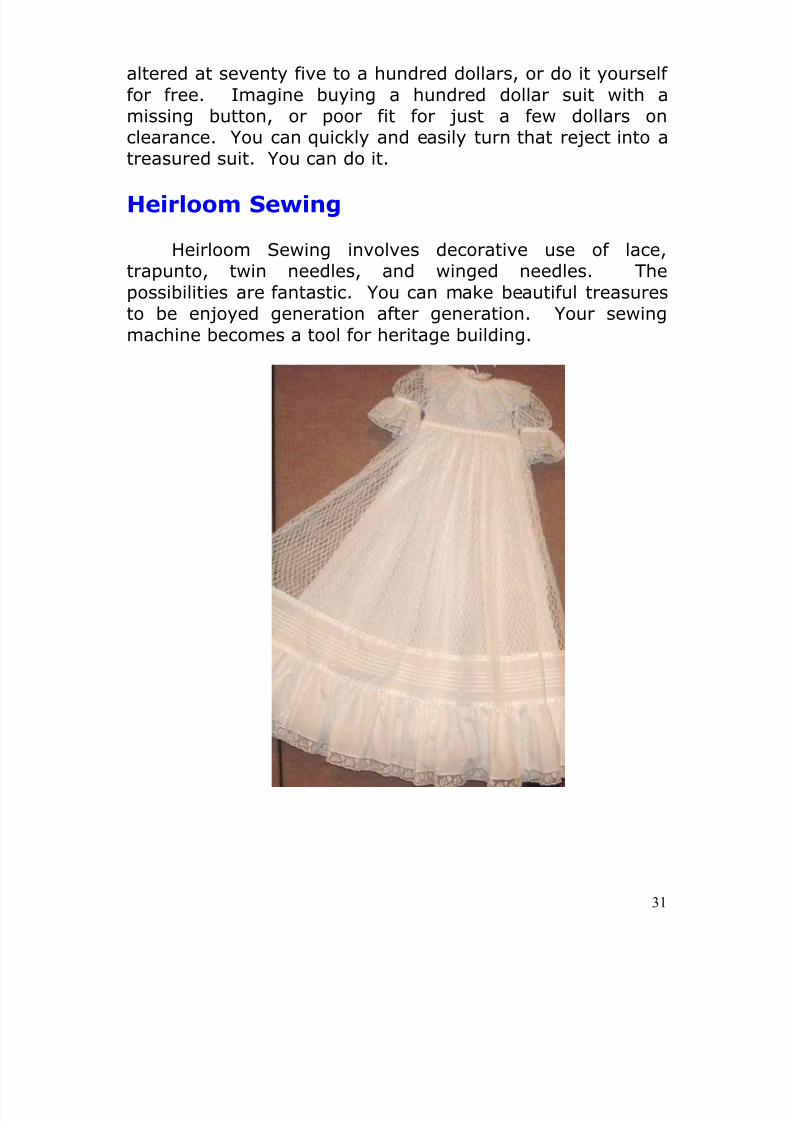
Heirloom Sewing
Heirloom Sewing involves decorative use of lace,trapunto, twin needles, and winged needles. Thepossibilities are fantastic. You can make beautiful treasuresto be enjoyed generation after generation. Your sewingmachine becomes a tool for heritage building.
8/13/2019 Manual de Reparacion de Maquinas de Coser
http://slidepdf.com/reader/full/manual-de-reparacion-de-maquinas-de-coser 32/311
32
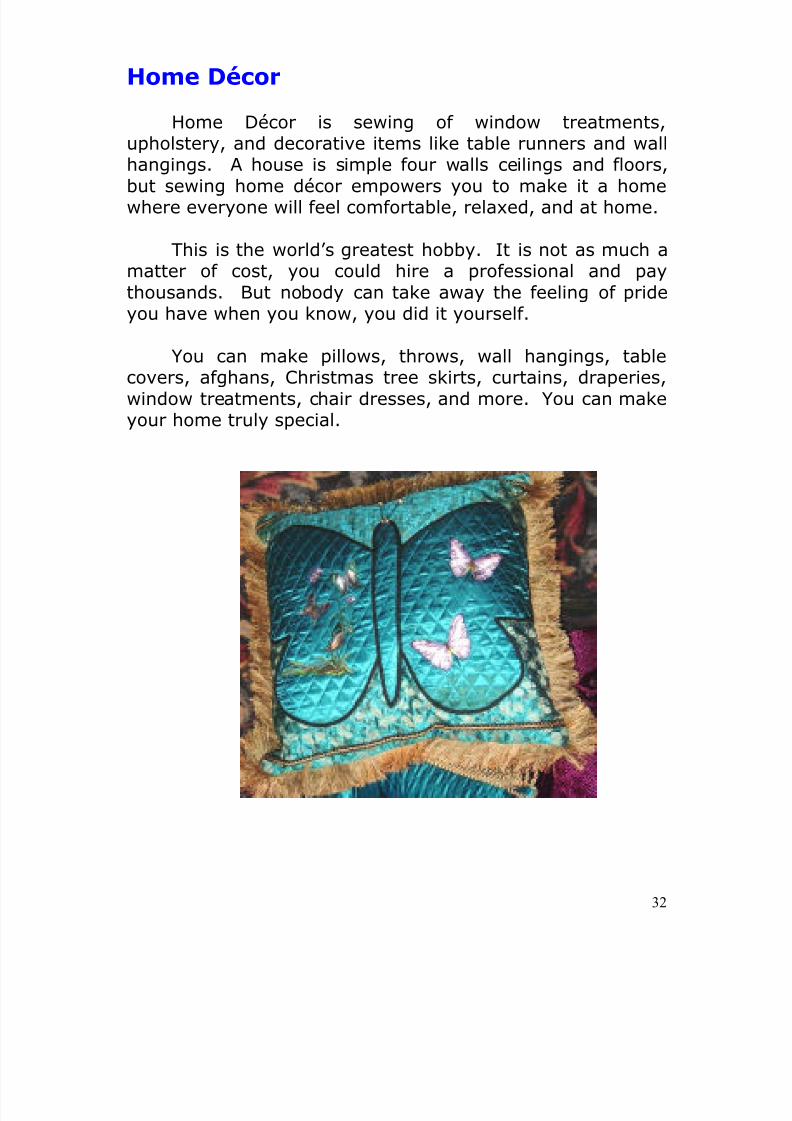
Home Décor
Home Décor is sewing of window treatments,upholstery, and decorative items like table runners and wallhangings. A house is simple four walls ceilings and floors,
but sewing home décor empowers you to make it a homewhere everyone will feel comfortable, relaxed, and at home.
This is the world’s greatest hobby. It is not as much amatter of cost, you could hire a professional and paythousands. But nobody can take away the feeling of prideyou have when you know, you did it yourself.
You can make pillows, throws, wall hangings, table
covers, afghans, Christmas tree skirts, curtains, draperies,window treatments, chair dresses, and more. You can makeyour home truly special.
8/13/2019 Manual de Reparacion de Maquinas de Coser
http://slidepdf.com/reader/full/manual-de-reparacion-de-maquinas-de-coser 33/311
33
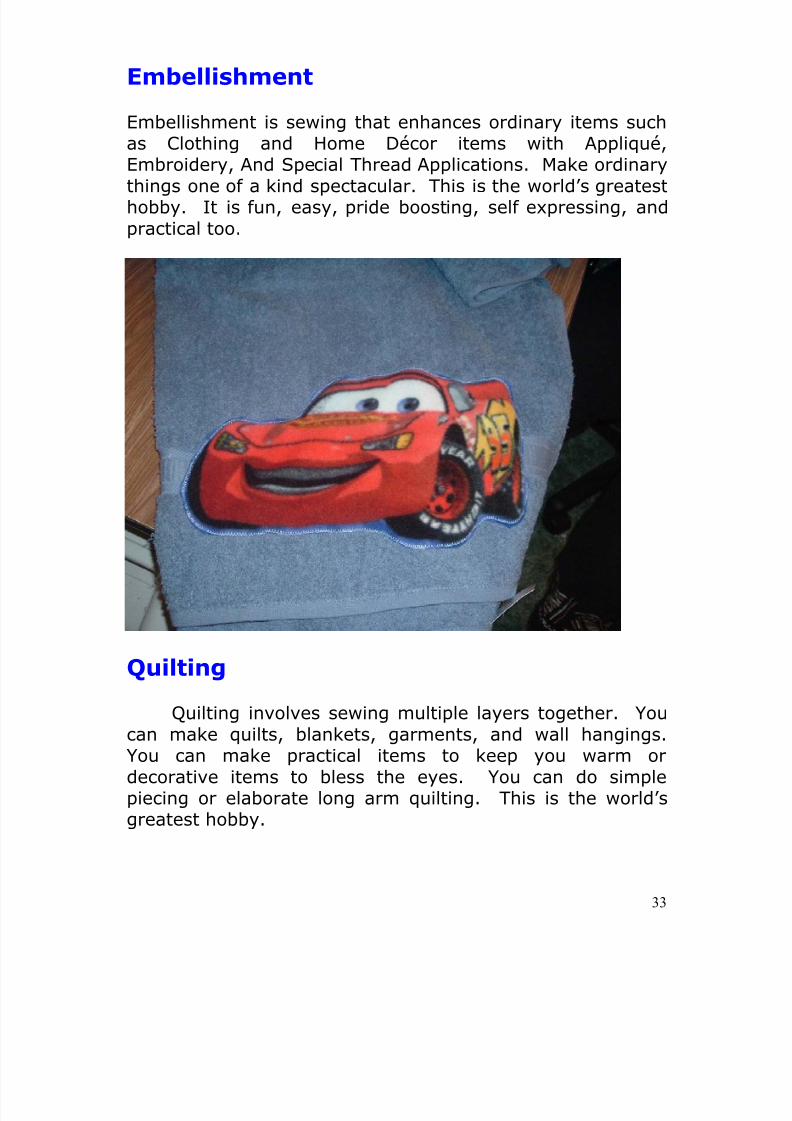
Embellishment
Embellishment is sewing that enhances ordinary items suchas Clothing and Home Décor items with Appliqué,Embroidery, And Special Thread Applications. Make ordinary
things one of a kind spectacular. This is the world’s greatesthobby. It is fun, easy, pride boosting, self expressing, andpractical too.
Quilting
Quilting involves sewing multiple layers together. Youcan make quilts, blankets, garments, and wall hangings.
You can make practical items to keep you warm ordecorative items to bless the eyes. You can do simplepiecing or elaborate long arm quilting. This is the world’sgreatest hobby.
8/13/2019 Manual de Reparacion de Maquinas de Coser
http://slidepdf.com/reader/full/manual-de-reparacion-de-maquinas-de-coser 34/311
34
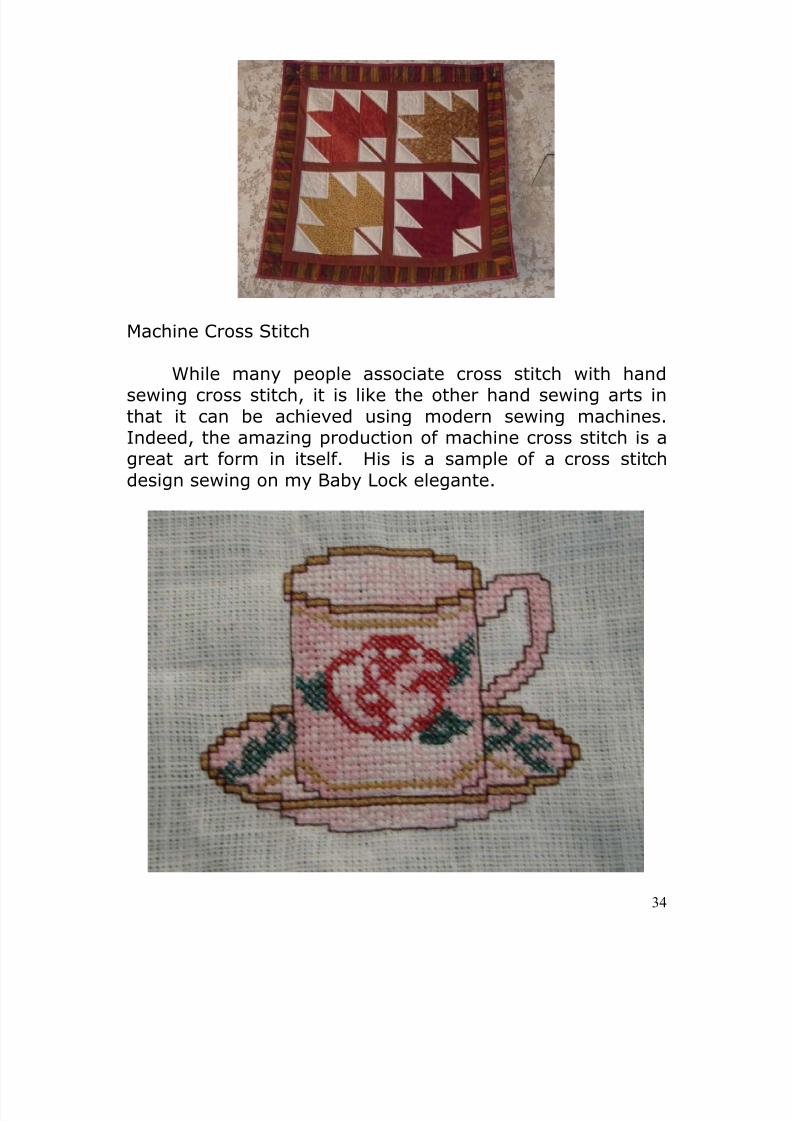
Machine Cross Stitch
While many people associate cross stitch with handsewing cross stitch, it is like the other hand sewing arts inthat it can be achieved using modern sewing machines.Indeed, the amazing production of machine cross stitch is agreat art form in itself. His is a sample of a cross stitchdesign sewing on my Baby Lock elegante.
8/13/2019 Manual de Reparacion de Maquinas de Coser
http://slidepdf.com/reader/full/manual-de-reparacion-de-maquinas-de-coser 35/311
35
Sewing Is The World’s Greatest Hobby
What makes sewing such a great hobby?
This is a hobby you can do.
It is easy to learn. Classes are available atamazingly low costs from experts who have a realpassion for sewing.
There are loads of support and opportunities toshare your hobby.
It is inexpensive as hobbies go. For a fewhundred dollars you can do amazing things. For afew thousand you can transform your world.
Spending on your hobby will make huge savingsover having a professional do the same job.
Your hobby builds self confidence.
Your hobby boosts your pride in yourself.
Your hobby provides relaxing personalsatisfaction.
Your hobby gives practical solutions to everydaychallenges.
Your hobby is fun to do and fun to share.

8/13/2019 Manual de Reparacion de Maquinas de Coser
http://slidepdf.com/reader/full/manual-de-reparacion-de-maquinas-de-coser 36/311
36
Your hobby sets you aside from the crowd makingyou truly special.
Sewing is the greatest hobby in the world.
The more time and resources you invest in yourhobby the more pleasure, satisfaction, and profityou gain.
8/13/2019 Manual de Reparacion de Maquinas de Coser
http://slidepdf.com/reader/full/manual-de-reparacion-de-maquinas-de-coser 37/311
37
CHAPTER FOURThe Origins of Modern Sewing
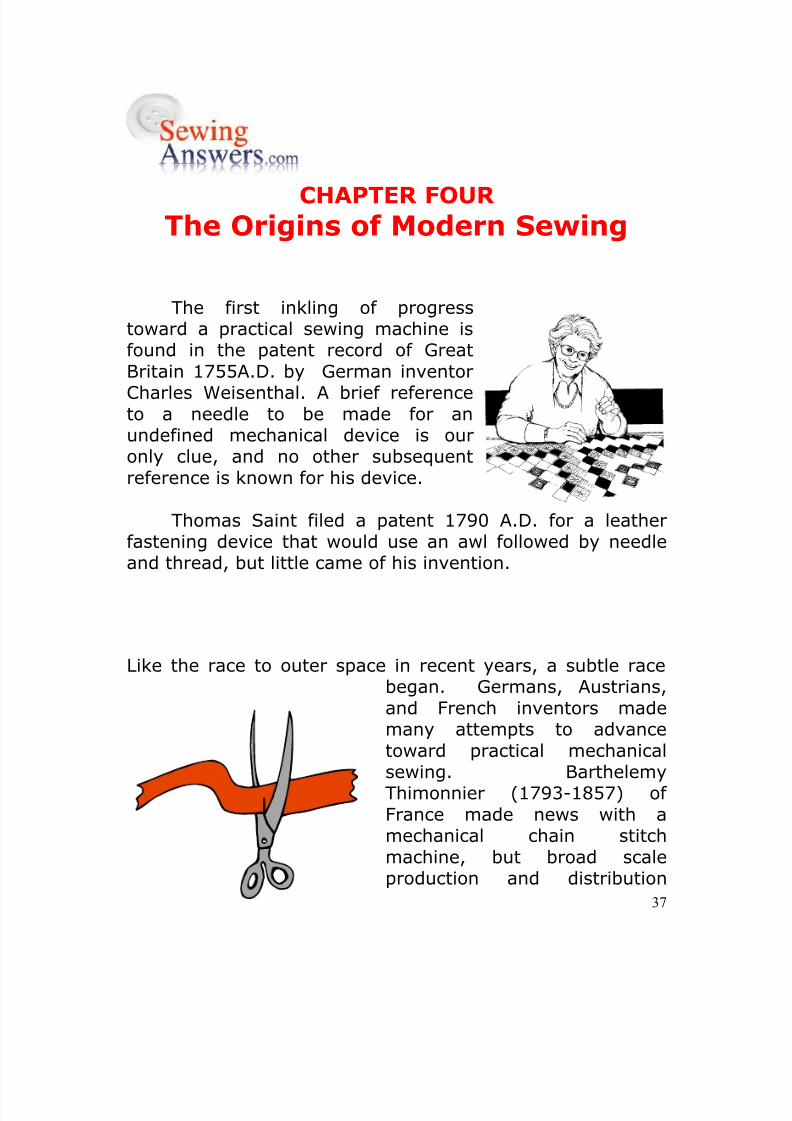
The first inkling of progresstoward a practical sewing machine isfound in the patent record of GreatBritain 1755A.D. by German inventorCharles Weisenthal. A brief referenceto a needle to be made for anundefined mechanical device is ouronly clue, and no other subsequentreference is known for his device.
Thomas Saint filed a patent 1790 A.D. for a leatherfastening device that would use an awl followed by needleand thread, but little came of his invention.
Like the race to outer space in recent years, a subtle racebegan. Germans, Austrians,and French inventors mademany attempts to advancetoward practical mechanicalsewing. BarthelemyThimonnier (1793-1857) ofFrance made news with amechanical chain stitchmachine, but broad scaleproduction and distribution
8/13/2019 Manual de Reparacion de Maquinas de Coser
http://slidepdf.com/reader/full/manual-de-reparacion-de-maquinas-de-coser 38/311
38
never emerged. Some inventors attempted to mimic handsewing with their devices like Thomas Stone and JamesHenderson, Frenchmen who filed a patent in France in 1804.Failures seemed to be everywhere. One inventor afteranother attempted what was thought almost impossible bymany only to see their futile attempts dash hopes again.John Knowles and John Doge were among the firstAmericans to attempt creation of the first sewing machine in1818, but again failure.
ELIAS HOWE SEWING MACHINE
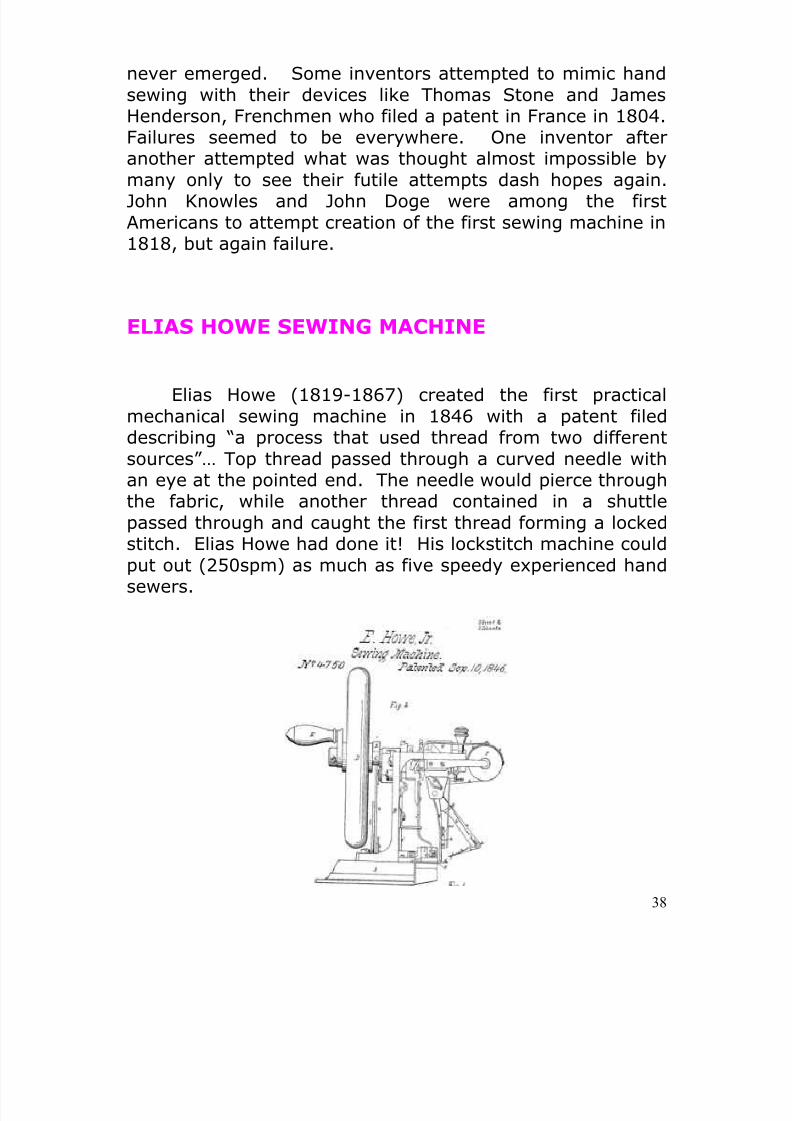
Elias Howe (1819-1867) created the first practicalmechanical sewing machine in 1846 with a patent fileddescribing “a process that used thread from two differentsources”… Top thread passed through a curved needle withan eye at the pointed end. The needle would pierce throughthe fabric, while another thread contained in a shuttlepassed through and caught the first thread forming a lockedstitch. Elias Howe had done it! His lockstitch machine could
put out (250spm) as much as five speedy experienced handsewers.
8/13/2019 Manual de Reparacion de Maquinas de Coser
http://slidepdf.com/reader/full/manual-de-reparacion-de-maquinas-de-coser 39/311
39
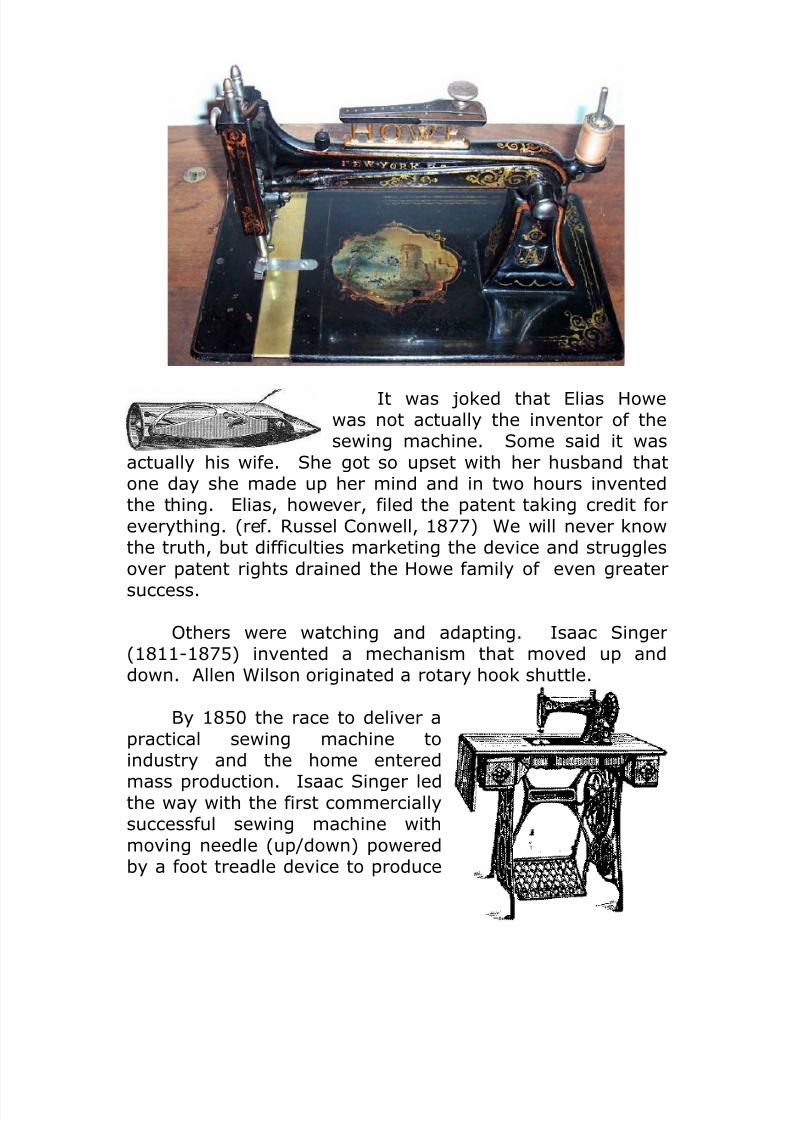
It was joked that Elias Howewas not actually the inventor of thesewing machine. Some said it was
actually his wife. She got so upset with her husband thatone day she made up her mind and in two hours inventedthe thing. Elias, however, filed the patent taking credit foreverything. (ref. Russel Conwell, 1877) We will never knowthe truth, but difficulties marketing the device and struggles
over patent rights drained the Howe family of even greatersuccess.
Others were watching and adapting. Isaac Singer(1811-1875) invented a mechanism that moved up anddown. Allen Wilson originated a rotary hook shuttle.
By 1850 the race to deliver apractical sewing machine to
industry and the home enteredmass production. Isaac Singer ledthe way with the first commerciallysuccessful sewing machine withmoving needle (up/down) poweredby a foot treadle device to produce

8/13/2019 Manual de Reparacion de Maquinas de Coser
http://slidepdf.com/reader/full/manual-de-reparacion-de-maquinas-de-coser 40/311
40
the same lockstitch designed by Howe. The famous foottreadle device was a huge advancement. Previous machineshad all been hand crank machines. .
Walter Hunt(1796-1860))
launched a lockstitchmachine (1834) usingtwo threads and aneye-pointed needle,but he never filed apatent. Elias Howe
sued Hunt for patentinfringement, and apanic among garmentworkers fearing
unemployment crushed Hunt’s enthusiasm. Huntabandoned his efforts and the patent pursuit.
Legal battles ensued over patent infringements. In
spite of winning the court battle (1854), Elias Howe largelylost the marketing battle. Elias Howe marketed his machineearning an estimated two million dollars by the end of theCivil War.
8/13/2019 Manual de Reparacion de Maquinas de Coser
http://slidepdf.com/reader/full/manual-de-reparacion-de-maquinas-de-coser 41/311
41
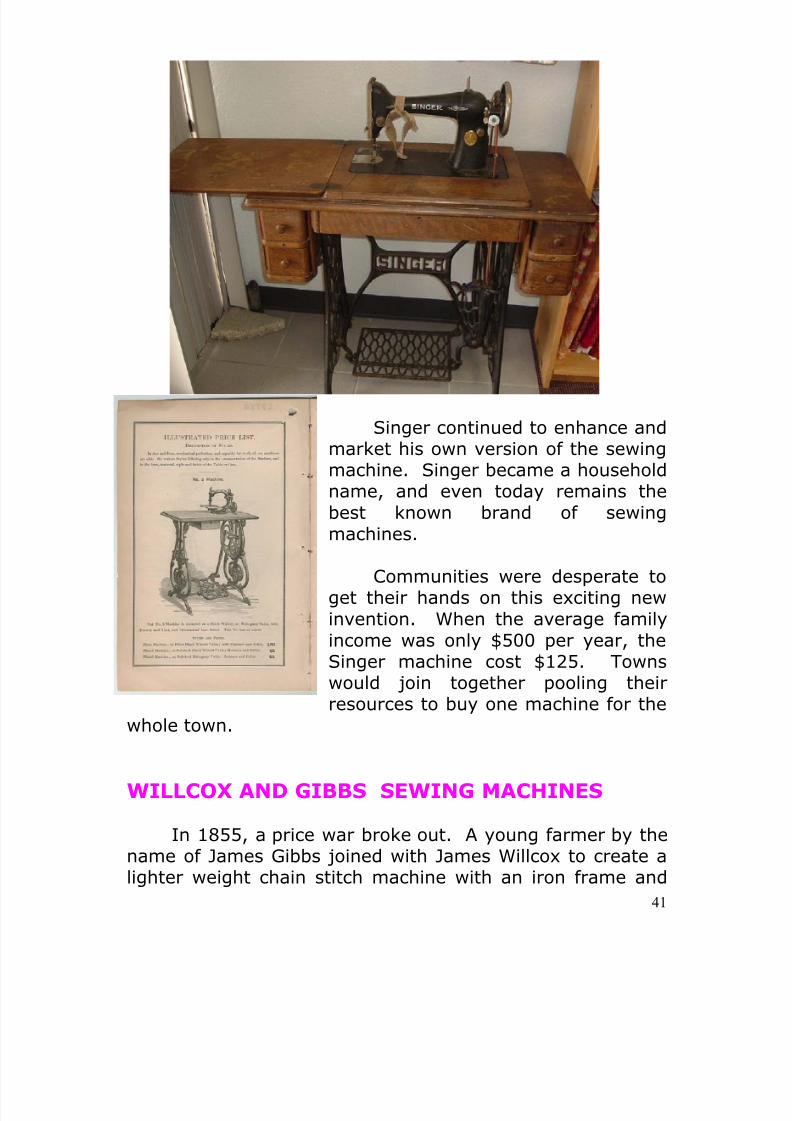
Singer continued to enhance andmarket his own version of the sewingmachine. Singer became a householdname, and even today remains thebest known brand of sewingmachines.
Communities were desperate toget their hands on this exciting newinvention. When the average familyincome was only $500 per year, theSinger machine cost $125. Townswould join together pooling theirresources to buy one machine for the
whole town.
WILLCOX AND GIBBS SEWING MACHINES
In 1855, a price war broke out. A young farmer by thename of James Gibbs joined with James Willcox to create alighter weight chain stitch machine with an iron frame and
8/13/2019 Manual de Reparacion de Maquinas de Coser
http://slidepdf.com/reader/full/manual-de-reparacion-de-maquinas-de-coser 42/311
42
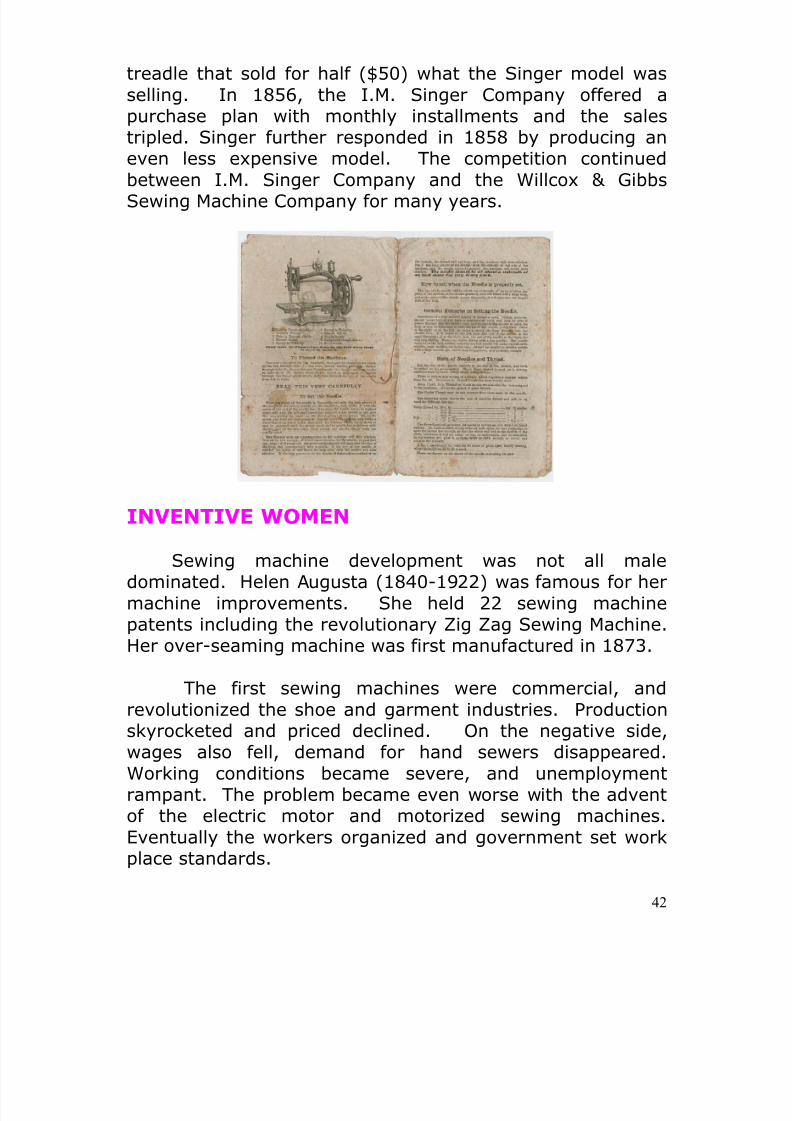
treadle that sold for half ($50) what the Singer model wasselling. In 1856, the I.M. Singer Company offered apurchase plan with monthly installments and the salestripled. Singer further responded in 1858 by producing aneven less expensive model. The competition continuedbetween I.M. Singer Company and the Willcox & GibbsSewing Machine Company for many years.
INVENTIVE WOMEN
Sewing machine development was not all maledominated. Helen Augusta (1840-1922) was famous for hermachine improvements. She held 22 sewing machinepatents including the revolutionary Zig Zag Sewing Machine.Her over-seaming machine was first manufactured in 1873.
The first sewing machines were commercial, andrevolutionized the shoe and garment industries. Productionskyrocketed and priced declined. On the negative side,wages also fell, demand for hand sewers disappeared.Working conditions became severe, and unemploymentrampant. The problem became even worse with the adventof the electric motor and motorized sewing machines.Eventually the workers organized and government set workplace standards.
8/13/2019 Manual de Reparacion de Maquinas de Coser
http://slidepdf.com/reader/full/manual-de-reparacion-de-maquinas-de-coser 43/311
43
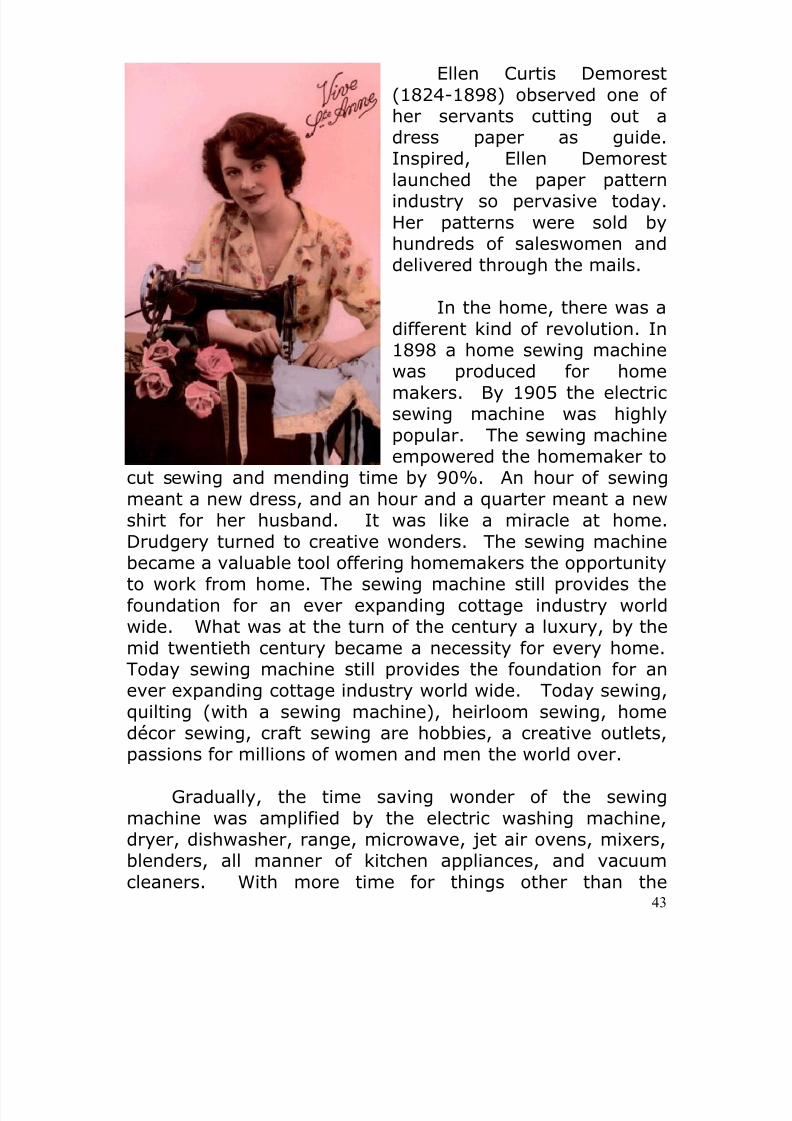
Ellen Curtis Demorest(1824-1898) observed one ofher servants cutting out adress paper as guide.Inspired, Ellen Demorestlaunched the paper patternindustry so pervasive today.Her patterns were sold byhundreds of saleswomen anddelivered through the mails.
In the home, there was adifferent kind of revolution. In1898 a home sewing machinewas produced for homemakers. By 1905 the electricsewing machine was highlypopular. The sewing machineempowered the homemaker to
cut sewing and mending time by 90%. An hour of sewingmeant a new dress, and an hour and a quarter meant a newshirt for her husband. It was like a miracle at home.Drudgery turned to creative wonders. The sewing machinebecame a valuable tool offering homemakers the opportunityto work from home. The sewing machine still provides thefoundation for an ever expanding cottage industry worldwide. What was at the turn of the century a luxury, by themid twentieth century became a necessity for every home.Today sewing machine still provides the foundation for anever expanding cottage industry world wide. Today sewing,quilting (with a sewing machine), heirloom sewing, homedécor sewing, craft sewing are hobbies, a creative outlets,passions for millions of women and men the world over.
Gradually, the time saving wonder of the sewingmachine was amplified by the electric washing machine,dryer, dishwasher, range, microwave, jet air ovens, mixers,blenders, all manner of kitchen appliances, and vacuumcleaners. With more time for things other than the
8/13/2019 Manual de Reparacion de Maquinas de Coser
http://slidepdf.com/reader/full/manual-de-reparacion-de-maquinas-de-coser 44/311
44
humdrum of cleaning and household chores, many womenbegan to pursue creative outlets, education, and careeropportunities outside the home.
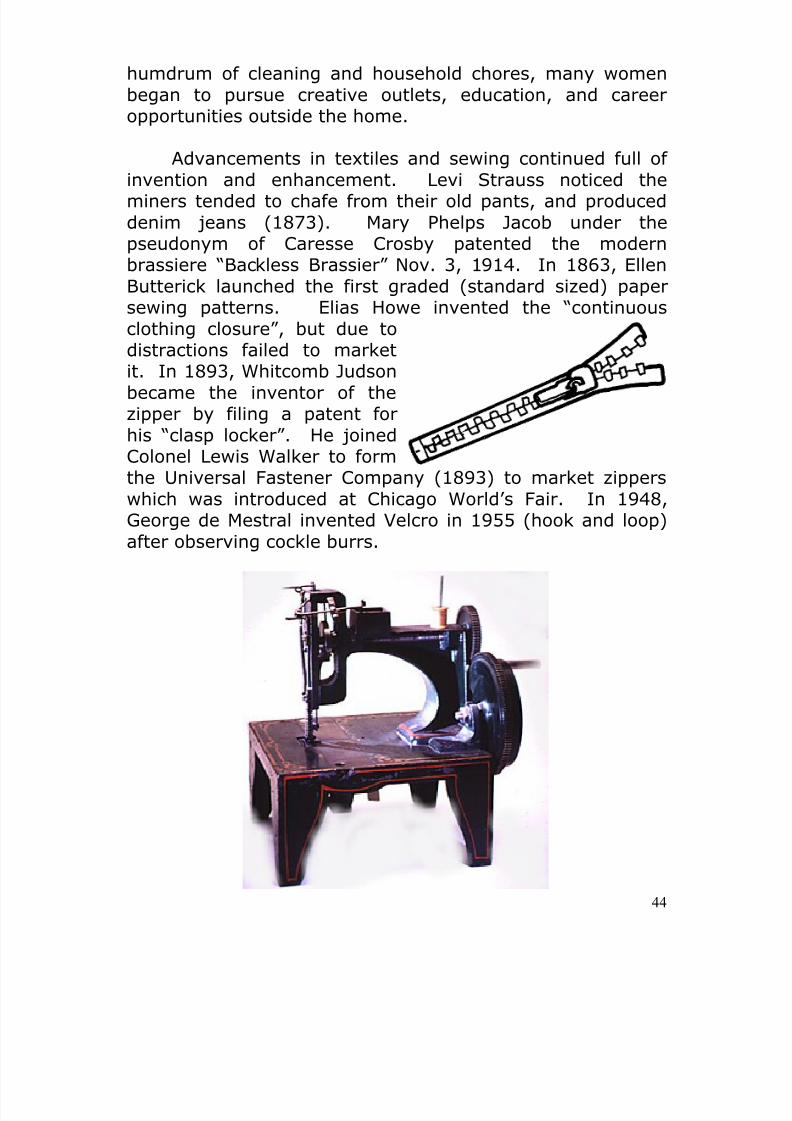
Advancements in textiles and sewing continued full ofinvention and enhancement. Levi Strauss noticed theminers tended to chafe from their old pants, and produceddenim jeans (1873). Mary Phelps Jacob under thepseudonym of Caresse Crosby patented the modernbrassiere “Backless Brassier” Nov. 3, 1914. In 1863, EllenButterick launched the first graded (standard sized) papersewing patterns. Elias Howe invented the “continuousclothing closure”, but due todistractions failed to marketit. In 1893, Whitcomb Judsonbecame the inventor of thezipper by filing a patent forhis “clasp locker”. He joinedColonel Lewis Walker to formthe Universal Fastener Company (1893) to market zipperswhich was introduced at Chicago World’s Fair. In 1948,George de Mestral invented Velcro in 1955 (hook and loop)after observing cockle burrs.
8/13/2019 Manual de Reparacion de Maquinas de Coser
http://slidepdf.com/reader/full/manual-de-reparacion-de-maquinas-de-coser 45/311
45
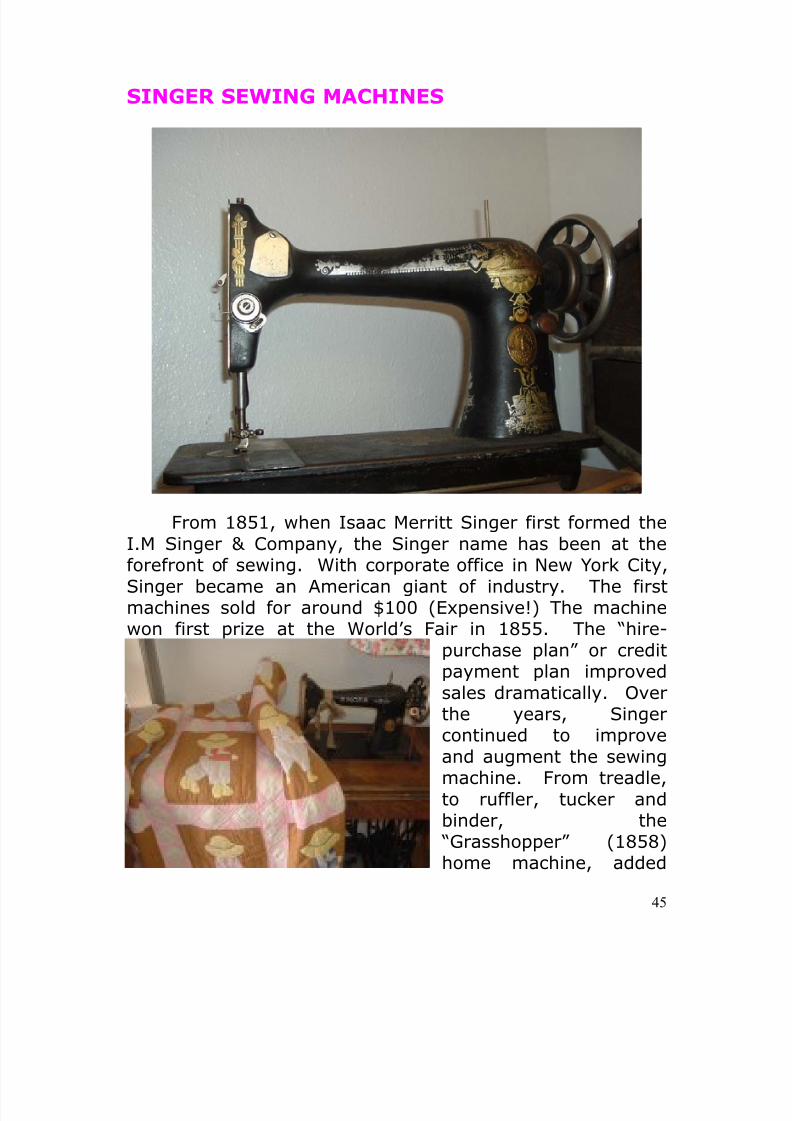
SINGER SEWING MACHINES
From 1851, when Isaac Merritt Singer first formed theI.M Singer & Company, the Singer name has been at the
forefront of sewing. With corporate office in New York City,Singer became an American giant of industry. The firstmachines sold for around $100 (Expensive!) The machinewon first prize at the World’s Fair in 1855. The “hire-
purchase plan” or creditpayment plan improvedsales dramatically. Overthe years, Singercontinued to improve
and augment the sewingmachine. From treadle,to ruffler, tucker andbinder, the “Grasshopper” (1858)home machine, added
8/13/2019 Manual de Reparacion de Maquinas de Coser
http://slidepdf.com/reader/full/manual-de-reparacion-de-maquinas-de-coser 46/311
46
the Edison electric motor (1880), and finally in 1889introduced the first practical electric sewing machine.Singer introduced a commercial zig zag machine in 1892. In1905, Singer acquired the Wheeler Wilson Sewing MachineCompany continuing the evolution of the rise and fall ofsewing machine companies. By 1929 nine manufacturingand distribution centers operated in New York, New Jersey,Illinois, Conneticut, Canada, England, and Russia employingover 27,000 people and making over 3,000 models.
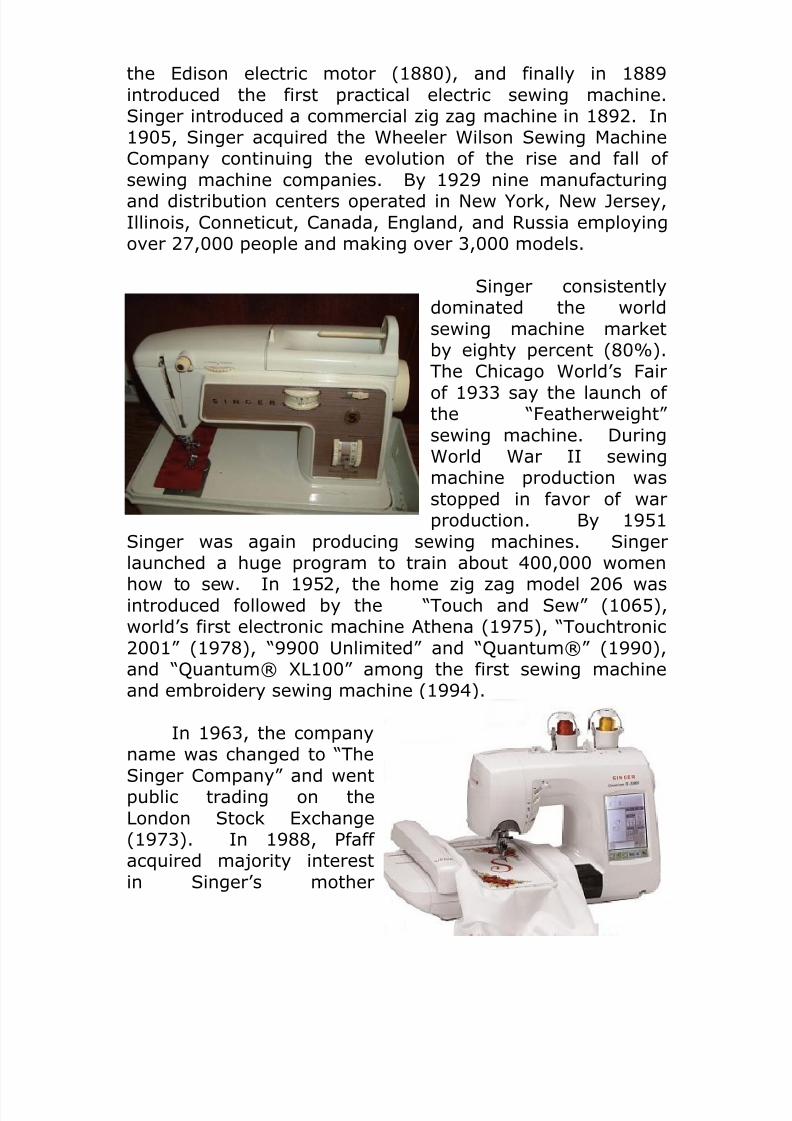
Singer consistentlydominated the worldsewing machine marketby eighty percent (80%).The Chicago World’s Fairof 1933 say the launch ofthe “Featherweight”sewing machine. DuringWorld War II sewingmachine production wasstopped in favor of warproduction. By 1951
Singer was again producing sewing machines. Singerlaunched a huge program to train about 400,000 womenhow to sew. In 1952, the home zig zag model 206 wasintroduced followed by the “Touch and Sew” (1065),world’s first electronic machine Athena (1975), “Touchtronic2001” (1978), “9900 Unlimited” and “Quantum®” (1990),and “Quantum® XL100” among the first sewing machineand embroidery sewing machine (1994).
In 1963, the companyname was changed to “TheSinger Company” and wentpublic trading on theLondon Stock Exchange(1973). In 1988, Pfaffacquired majority interestin Singer’s mother
8/13/2019 Manual de Reparacion de Maquinas de Coser
http://slidepdf.com/reader/full/manual-de-reparacion-de-maquinas-de-coser 47/311
47
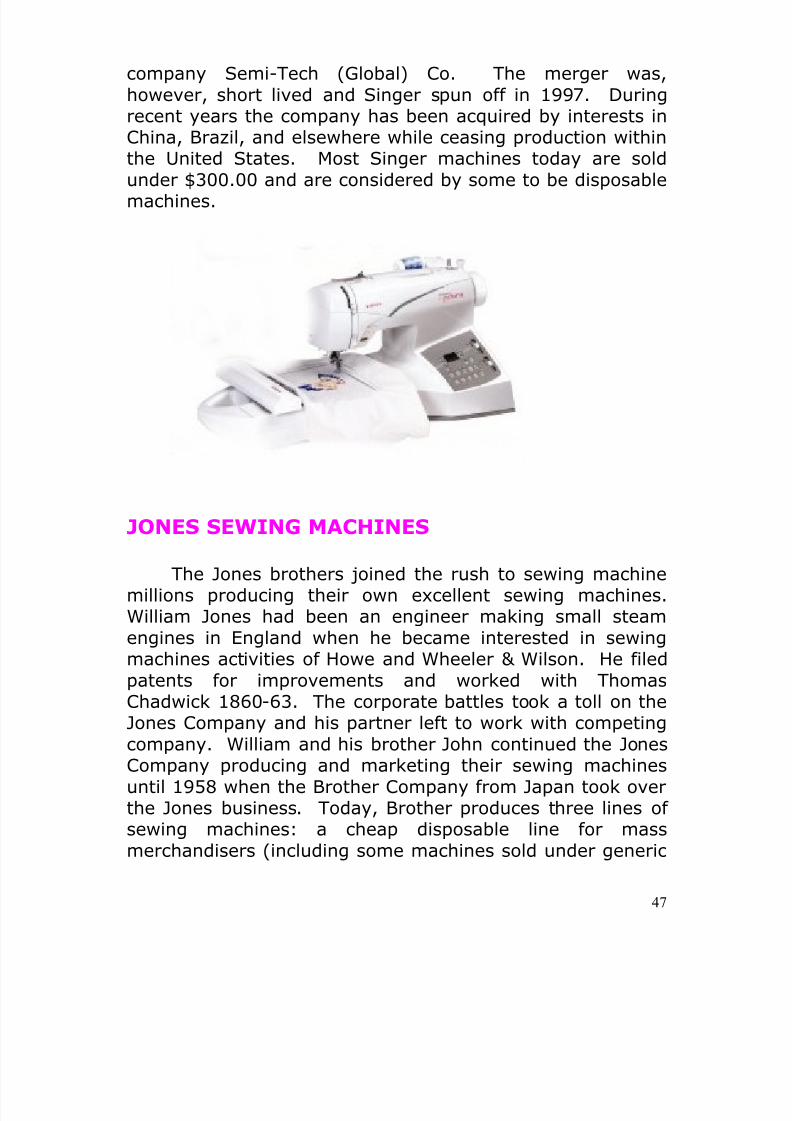
company Semi-Tech (Global) Co. The merger was,however, short lived and Singer spun off in 1997. Duringrecent years the company has been acquired by interests inChina, Brazil, and elsewhere while ceasing production withinthe United States. Most Singer machines today are soldunder $300.00 and are considered by some to be disposablemachines.
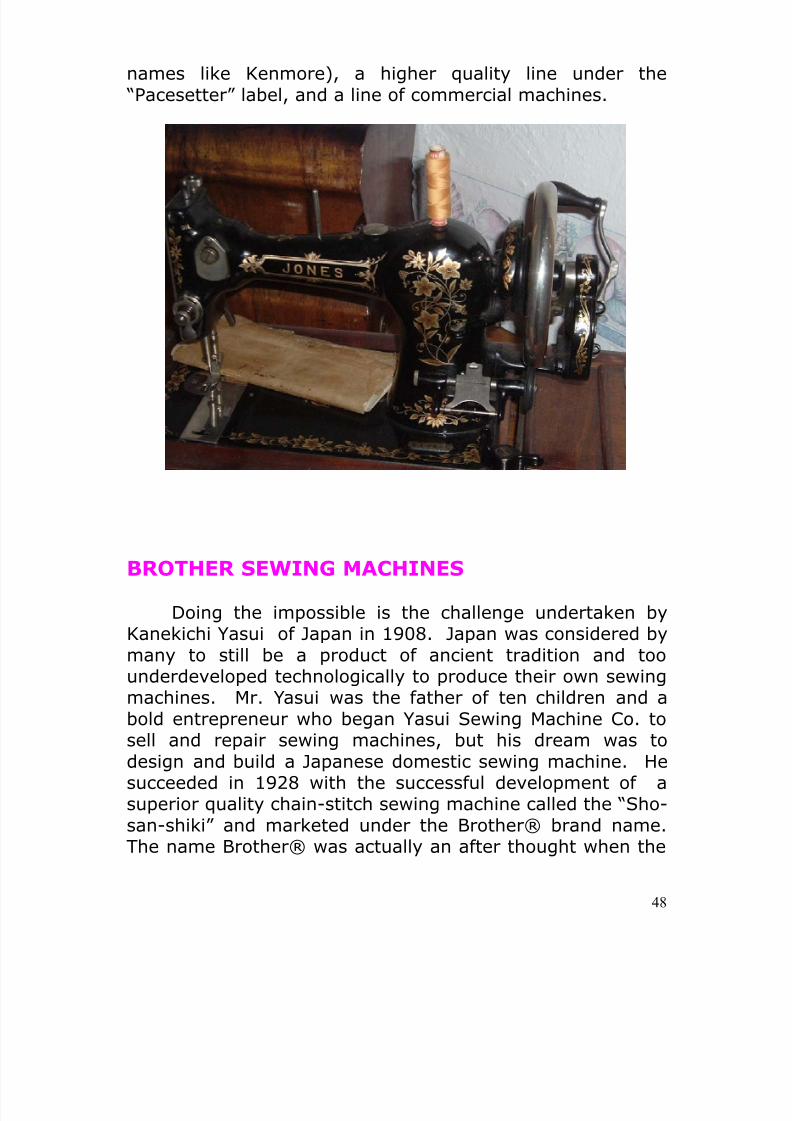
JONES SEWING MACHINES
The Jones brothers joined the rush to sewing machinemillions producing their own excellent sewing machines.William Jones had been an engineer making small steamengines in England when he became interested in sewingmachines activities of Howe and Wheeler & Wilson. He filedpatents for improvements and worked with ThomasChadwick 1860-63. The corporate battles took a toll on theJones Company and his partner left to work with competingcompany. William and his brother John continued the Jones
Company producing and marketing their sewing machinesuntil 1958 when the Brother Company from Japan took overthe Jones business. Today, Brother produces three lines ofsewing machines: a cheap disposable line for massmerchandisers (including some machines sold under generic
8/13/2019 Manual de Reparacion de Maquinas de Coser
http://slidepdf.com/reader/full/manual-de-reparacion-de-maquinas-de-coser 48/311
48
names like Kenmore), a higher quality line under the “Pacesetter” label, and a line of commercial machines.
BROTHER SEWING MACHINES
Doing the impossible is the challenge undertaken byKanekichi Yasui of Japan in 1908. Japan was considered bymany to still be a product of ancient tradition and toounderdeveloped technologically to produce their own sewingmachines. Mr. Yasui was the father of ten children and abold entrepreneur who began Yasui Sewing Machine Co. tosell and repair sewing machines, but his dream was to
design and build a Japanese domestic sewing machine. Hesucceeded in 1928 with the successful development of asuperior quality chain-stitch sewing machine called the “Sho-san-shiki” and marketed under the Brother® brand name.The name Brother® was actually an after thought when the
8/13/2019 Manual de Reparacion de Maquinas de Coser
http://slidepdf.com/reader/full/manual-de-reparacion-de-maquinas-de-coser 49/311
49
family discovered their preferred name (Sister) was alreadyregistered.
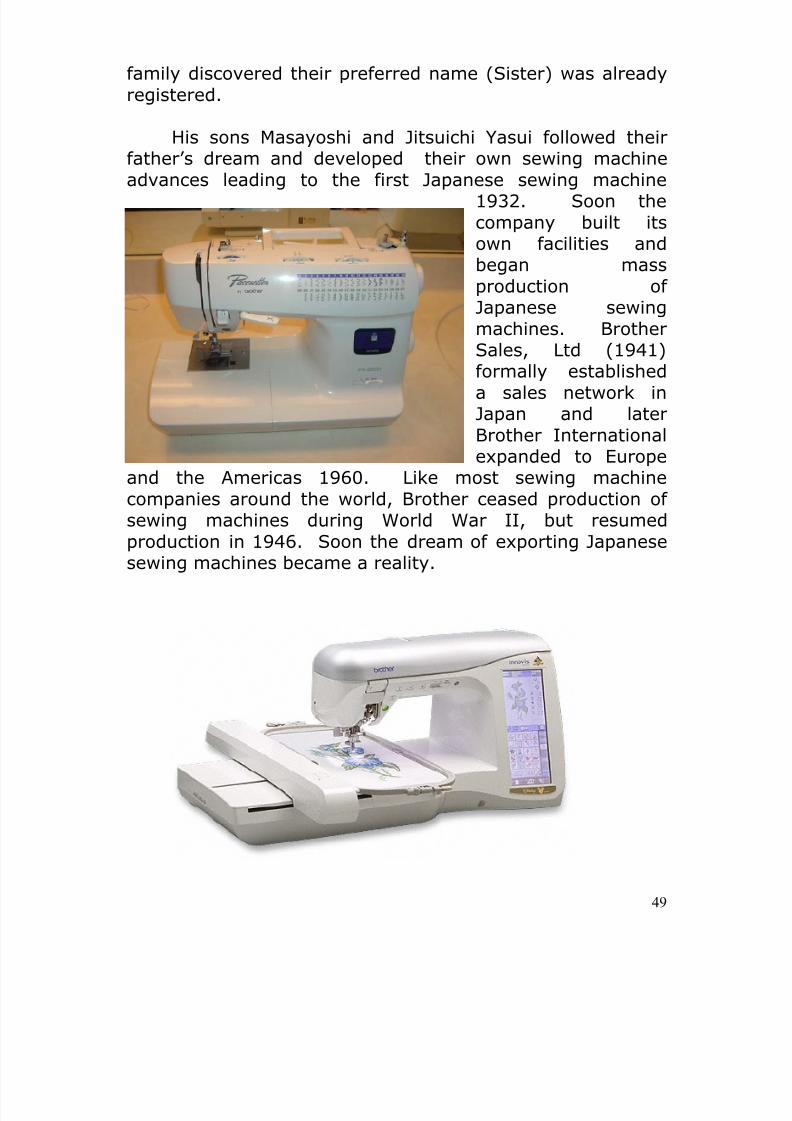
His sons Masayoshi and Jitsuichi Yasui followed theirfather’s dream and developed their own sewing machineadvances leading to the first Japanese sewing machine
1932. Soon thecompany built itsown facilities andbegan massproduction ofJapanese sewingmachines. BrotherSales, Ltd (1941)formally establisheda sales network inJapan and laterBrother Internationalexpanded to Europe
and the Americas 1960. Like most sewing machinecompanies around the world, Brother ceased production ofsewing machines during World War II, but resumedproduction in 1946. Soon the dream of exporting Japanesesewing machines became a reality.
8/13/2019 Manual de Reparacion de Maquinas de Coser
http://slidepdf.com/reader/full/manual-de-reparacion-de-maquinas-de-coser 50/311
50
Brother International was a progressive company with abroad vision. During the 1960’s the company expanded itsdesign and production efforts into typewriters, whichbecame its “flagship” product. Soon the company launchedelectronic sewing machines, typewriters, printers, faxmachines, and an increasingly broad offering of leadingtechnology products.
Today Brother International continues to producesewing machines for the world. In the United States,Brother products fill the mass merchandisers shelves withlow cost sewing machines, fax machines, and otherproducts. A network of independent sewing machine dealersoffer the leading sewing machine line called the “Pacesetter”by Brother.
BRADBURY SEWING MACHINES
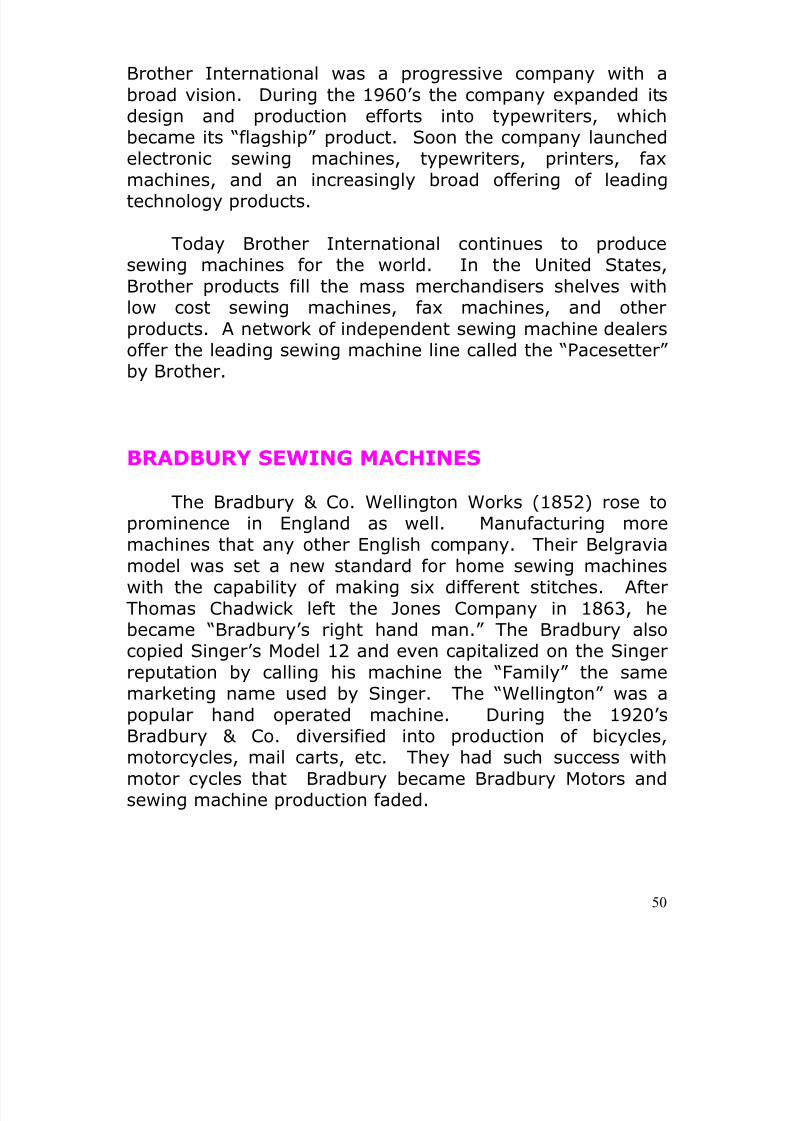
The Bradbury & Co. Wellington Works (1852) rose toprominence in England as well. Manufacturing moremachines that any other English company. Their Belgravia
model was set a new standard for home sewing machineswith the capability of making six different stitches. AfterThomas Chadwick left the Jones Company in 1863, hebecame “Bradbury’s right hand man.” The Bradbury alsocopied Singer’s Model 12 and even capitalized on the Singerreputation by calling his machine the “Family” the samemarketing name used by Singer. The “Wellington” was apopular hand operated machine. During the 1920’sBradbury & Co. diversified into production of bicycles,
motorcycles, mail carts, etc. They had such success withmotor cycles that Bradbury became Bradbury Motors andsewing machine production faded.
8/13/2019 Manual de Reparacion de Maquinas de Coser
http://slidepdf.com/reader/full/manual-de-reparacion-de-maquinas-de-coser 51/311
51
WHITE SEWING MACHINES
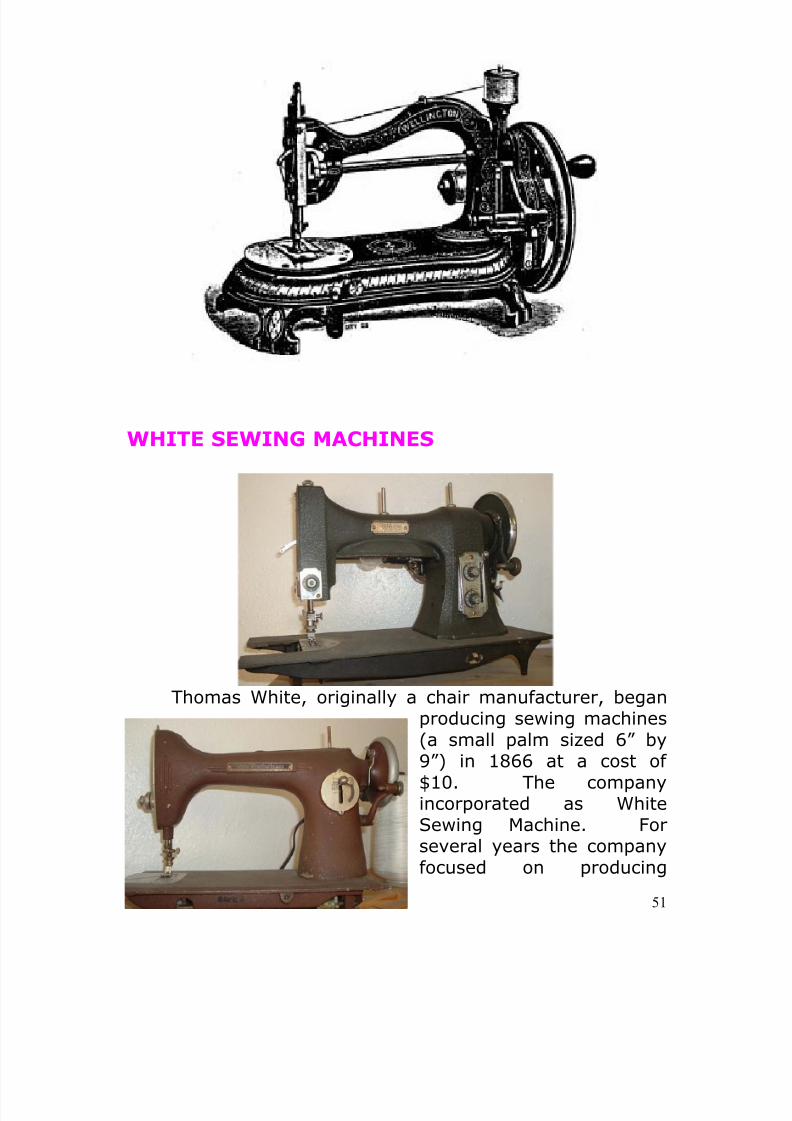
Thomas White, originally a chair manufacturer, beganproducing sewing machines(a small palm sized 6” by
9”) in 1866 at a cost of$10. The companyincorporated as WhiteSewing Machine. Forseveral years the companyfocused on producing
8/13/2019 Manual de Reparacion de Maquinas de Coser
http://slidepdf.com/reader/full/manual-de-reparacion-de-maquinas-de-coser 52/311
52
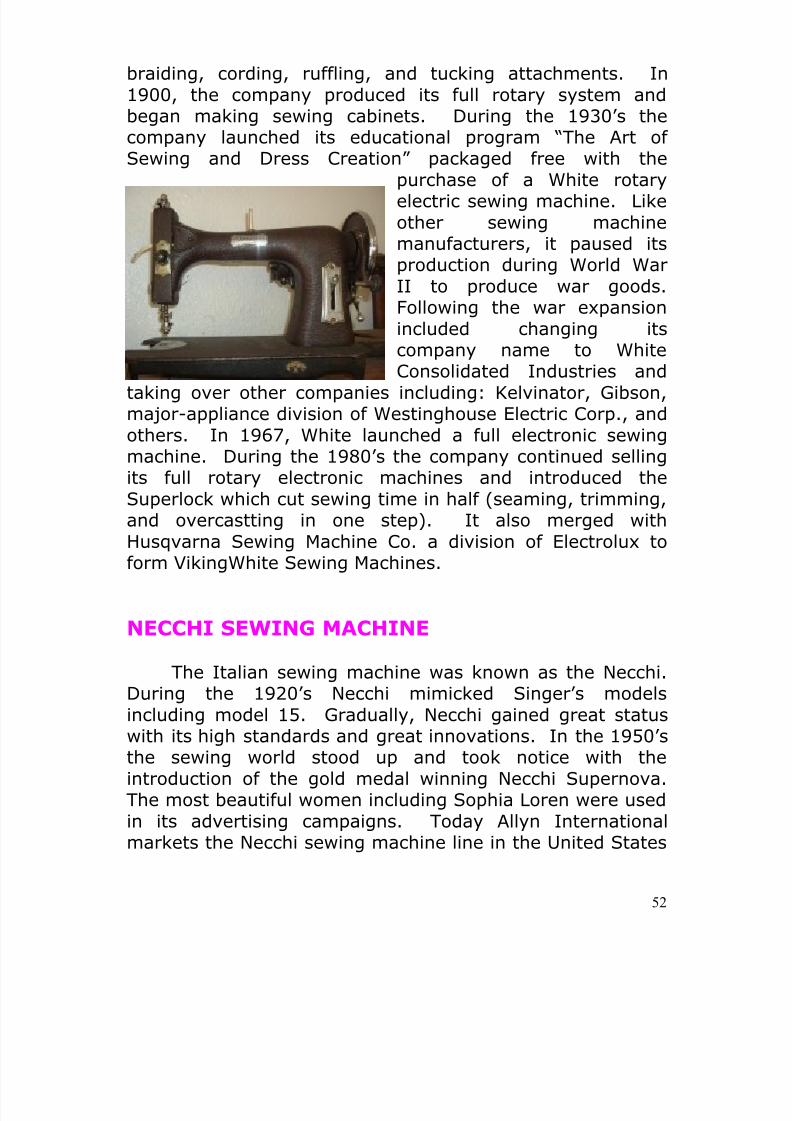
braiding, cording, ruffling, and tucking attachments. In1900, the company produced its full rotary system andbegan making sewing cabinets. During the 1930’s thecompany launched its educational program “The Art ofSewing and Dress Creation” packaged free with the
purchase of a White rotaryelectric sewing machine. Likeother sewing machinemanufacturers, it paused itsproduction during World WarII to produce war goods.Following the war expansionincluded changing itscompany name to WhiteConsolidated Industries and
taking over other companies including: Kelvinator, Gibson,major-appliance division of Westinghouse Electric Corp., andothers. In 1967, White launched a full electronic sewingmachine. During the 1980’s the company continued sellingits full rotary electronic machines and introduced theSuperlock which cut sewing time in half (seaming, trimming,and overcastting in one step). It also merged withHusqvarna Sewing Machine Co. a division of Electrolux toform VikingWhite Sewing Machines.
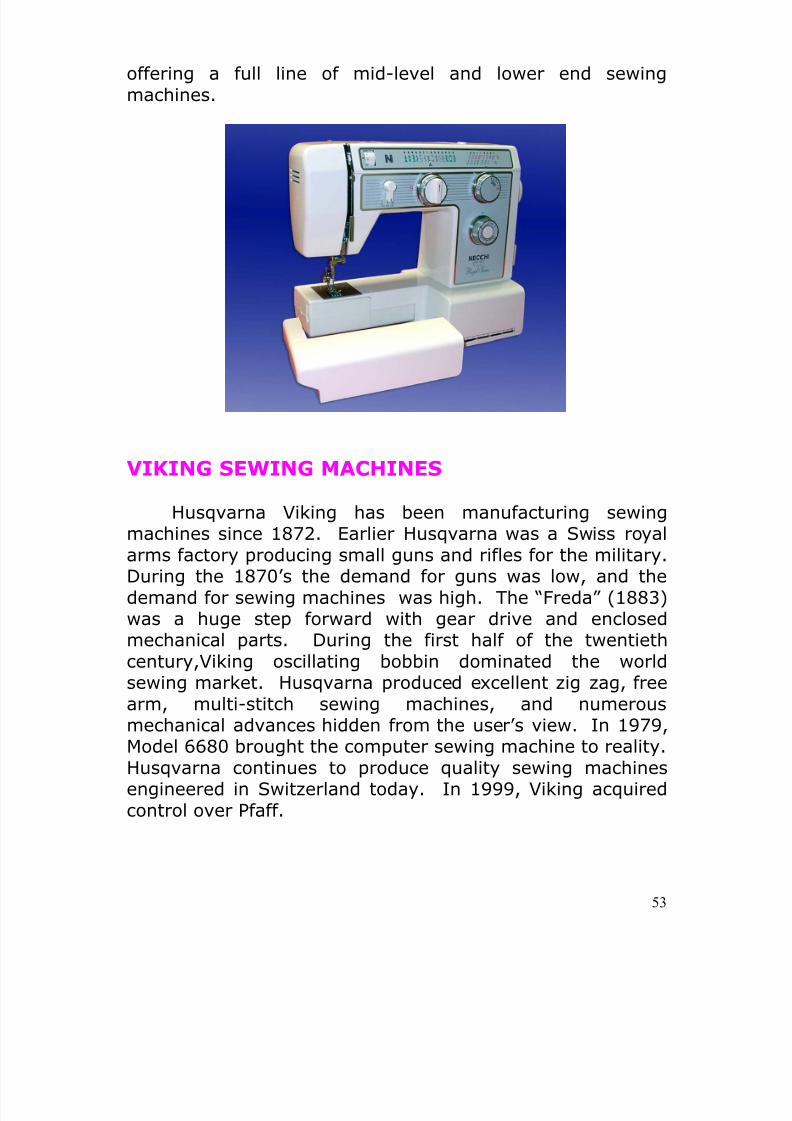
NECCHI SEWING MACHINE
The Italian sewing machine was known as the Necchi.During the 1920’s Necchi mimicked Singer’s modelsincluding model 15. Gradually, Necchi gained great statuswith its high standards and great innovations. In the 1950’s
the sewing world stood up and took notice with theintroduction of the gold medal winning Necchi Supernova.The most beautiful women including Sophia Loren were usedin its advertising campaigns. Today Allyn Internationalmarkets the Necchi sewing machine line in the United States
8/13/2019 Manual de Reparacion de Maquinas de Coser
http://slidepdf.com/reader/full/manual-de-reparacion-de-maquinas-de-coser 53/311
53
offering a full line of mid-level and lower end sewingmachines.
VIKING SEWING MACHINES
Husqvarna Viking has been manufacturing sewingmachines since 1872. Earlier Husqvarna was a Swiss royalarms factory producing small guns and rifles for the military.
During the 1870’s the demand for guns was low, and thedemand for sewing machines was high. The “Freda” (1883)was a huge step forward with gear drive and enclosedmechanical parts. During the first half of the twentiethcentury,Viking oscillating bobbin dominated the worldsewing market. Husqvarna produced excellent zig zag, freearm, multi-stitch sewing machines, and numerousmechanical advances hidden from the user’s view. In 1979,Model 6680 brought the computer sewing machine to reality.
Husqvarna continues to produce quality sewing machinesengineered in Switzerland today. In 1999, Viking acquiredcontrol over Pfaff.
8/13/2019 Manual de Reparacion de Maquinas de Coser
http://slidepdf.com/reader/full/manual-de-reparacion-de-maquinas-de-coser 54/311
54
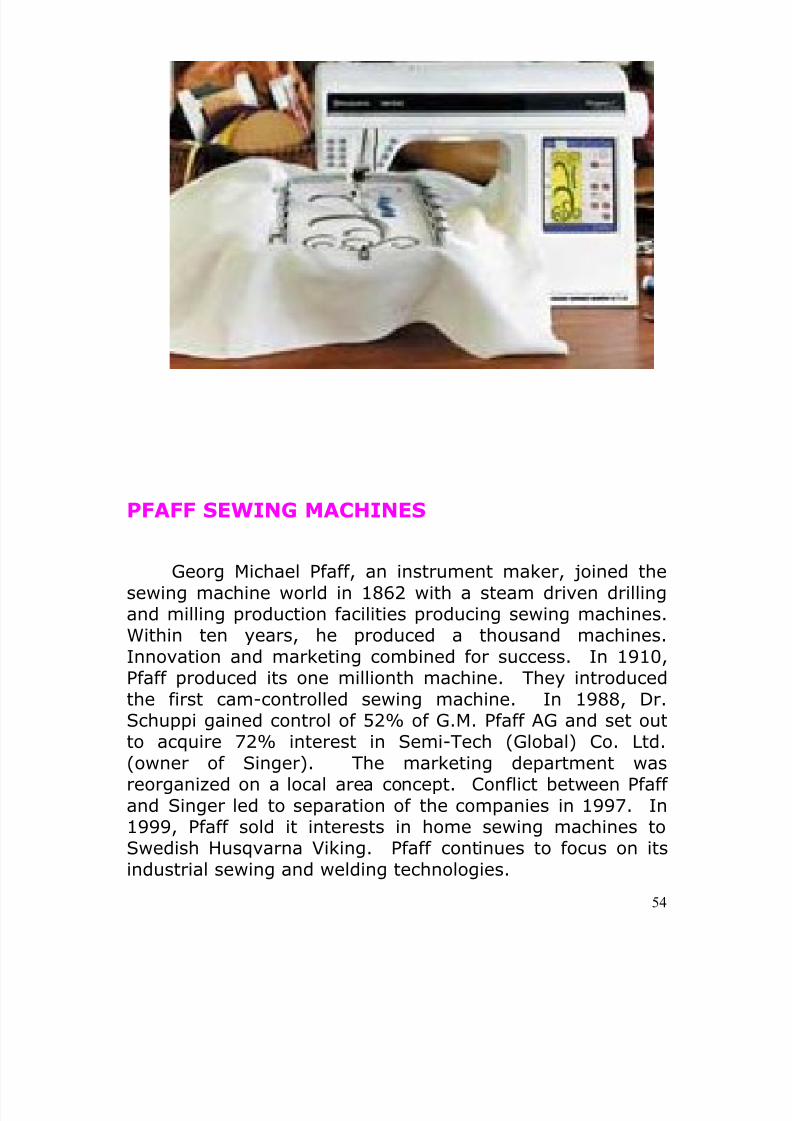
PFAFF SEWING MACHINES
Georg Michael Pfaff, an instrument maker, joined thesewing machine world in 1862 with a steam driven drillingand milling production facilities producing sewing machines.Within ten years, he produced a thousand machines.Innovation and marketing combined for success. In 1910,Pfaff produced its one millionth machine. They introducedthe first cam-controlled sewing machine. In 1988, Dr.Schuppi gained control of 52% of G.M. Pfaff AG and set outto acquire 72% interest in Semi-Tech (Global) Co. Ltd.
(owner of Singer). The marketing department wasreorganized on a local area concept. Conflict between Pfaffand Singer led to separation of the companies in 1997. In1999, Pfaff sold it interests in home sewing machines toSwedish Husqvarna Viking. Pfaff continues to focus on itsindustrial sewing and welding technologies.
8/13/2019 Manual de Reparacion de Maquinas de Coser
http://slidepdf.com/reader/full/manual-de-reparacion-de-maquinas-de-coser 55/311
55
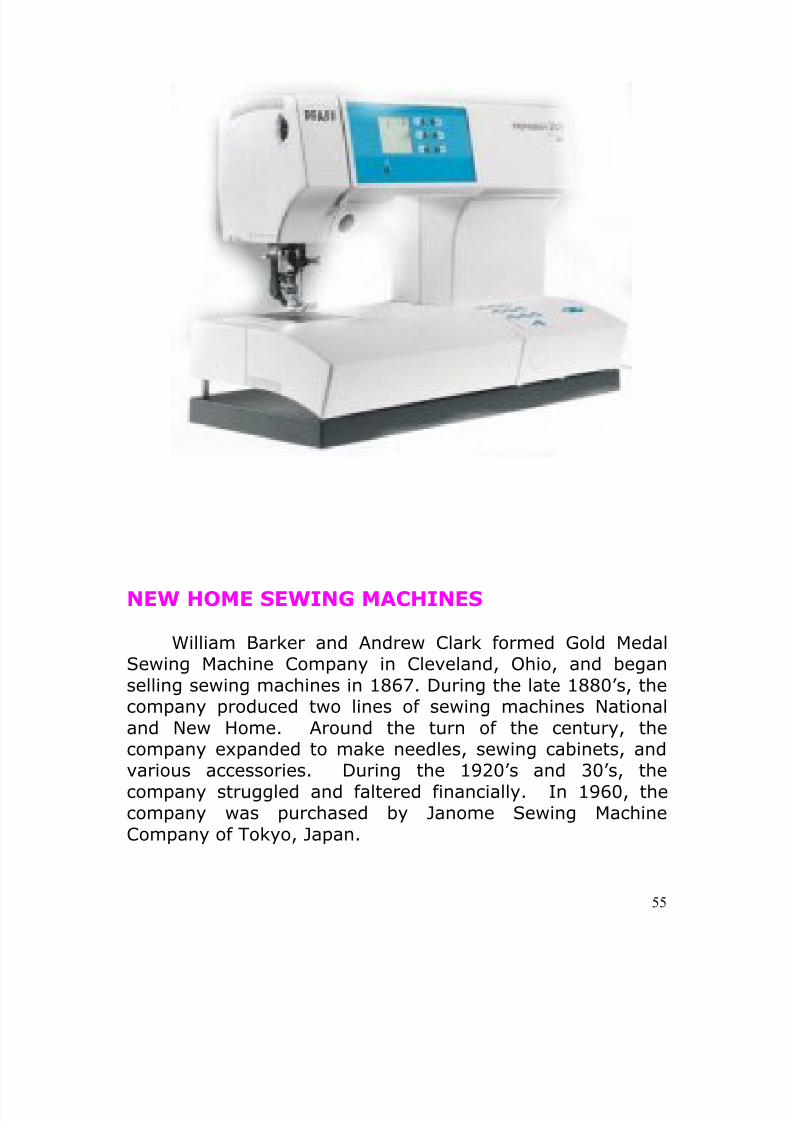
NEW HOME SEWING MACHINES
William Barker and Andrew Clark formed Gold MedalSewing Machine Company in Cleveland, Ohio, and beganselling sewing machines in 1867. During the late 1880’s, thecompany produced two lines of sewing machines Nationaland New Home. Around the turn of the century, thecompany expanded to make needles, sewing cabinets, and
various accessories. During the 1920’s and 30’s, thecompany struggled and faltered financially. In 1960, thecompany was purchased by Janome Sewing MachineCompany of Tokyo, Japan.
8/13/2019 Manual de Reparacion de Maquinas de Coser
http://slidepdf.com/reader/full/manual-de-reparacion-de-maquinas-de-coser 56/311
56
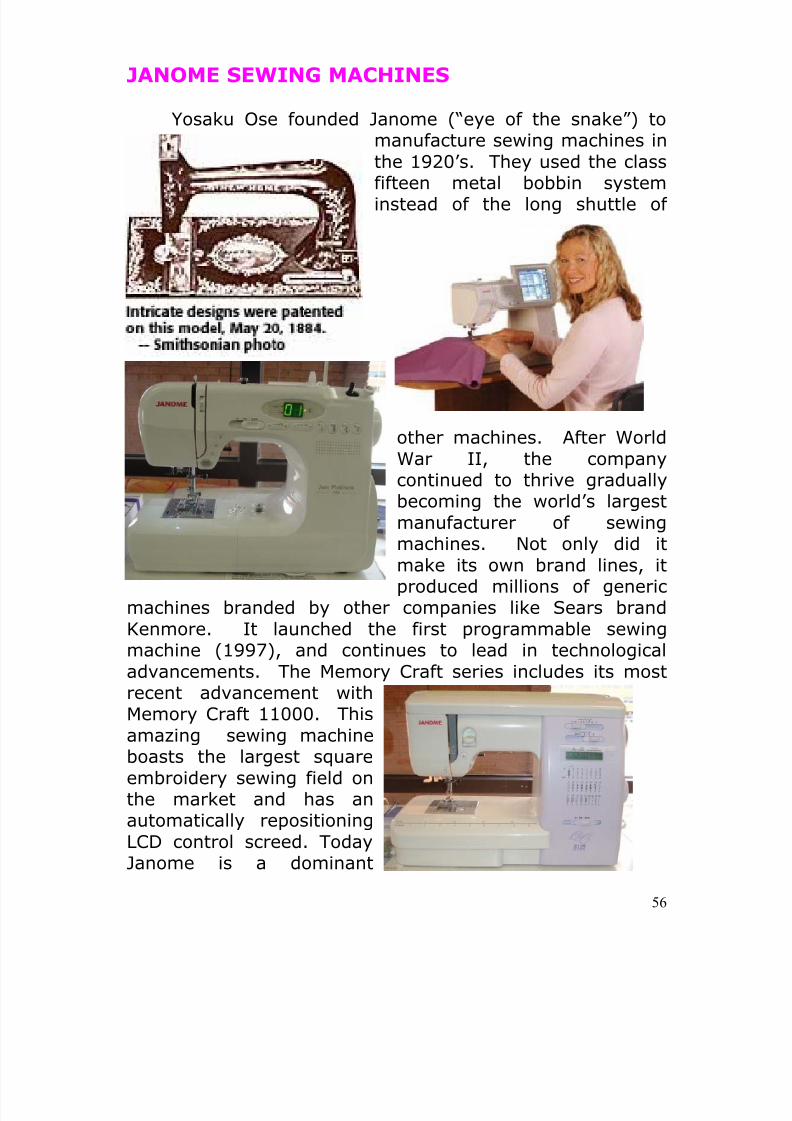
JANOME SEWING MACHINES
Yosaku Ose founded Janome (“eye of the snake”) tomanufacture sewing machines inthe 1920’s. They used the class
fifteen metal bobbin systeminstead of the long shuttle of
other machines. After WorldWar II, the companycontinued to thrive graduallybecoming the world’s largestmanufacturer of sewingmachines. Not only did it
make its own brand lines, itproduced millions of genericmachines branded by other companies like Sears brandKenmore. It launched the first programmable sewingmachine (1997), and continues to lead in technologicaladvancements. The Memory Craft series includes its mostrecent advancement withMemory Craft 11000. Thisamazing sewing machine
boasts the largest squareembroidery sewing field onthe market and has anautomatically repositioningLCD control screed. TodayJanome is a dominant
8/13/2019 Manual de Reparacion de Maquinas de Coser
http://slidepdf.com/reader/full/manual-de-reparacion-de-maquinas-de-coser 57/311
8/13/2019 Manual de Reparacion de Maquinas de Coser
http://slidepdf.com/reader/full/manual-de-reparacion-de-maquinas-de-coser 58/311
58
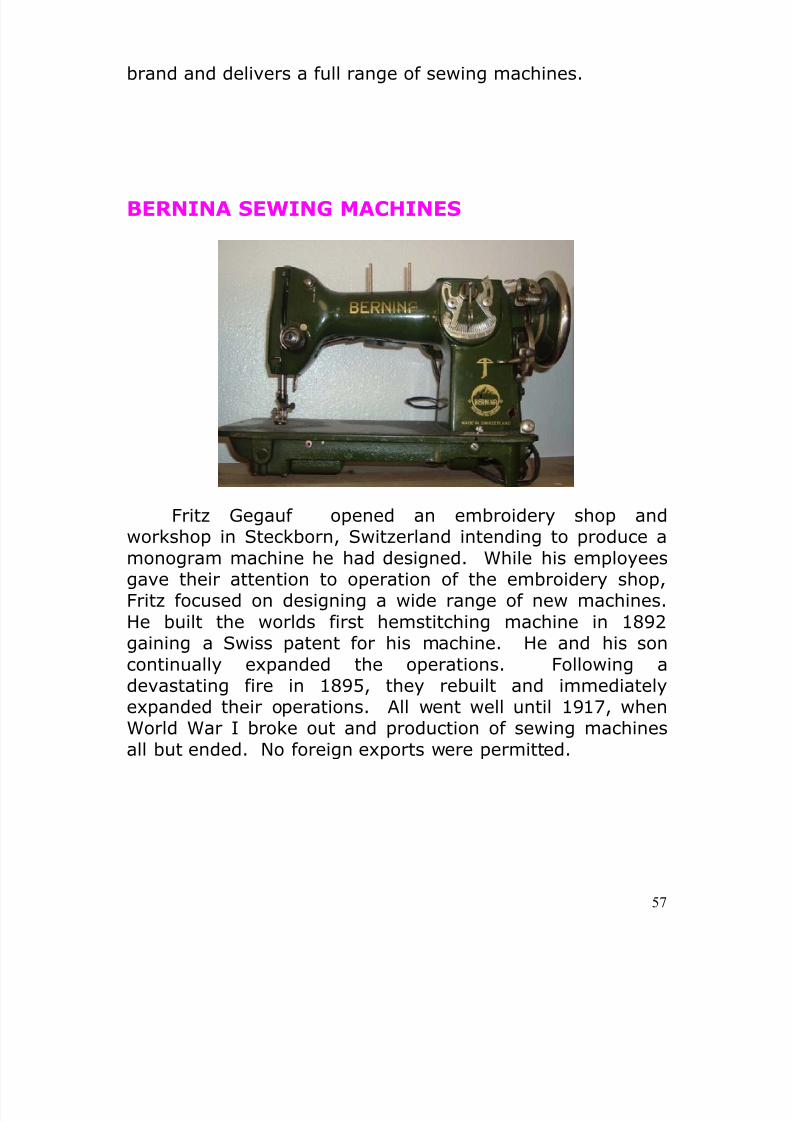
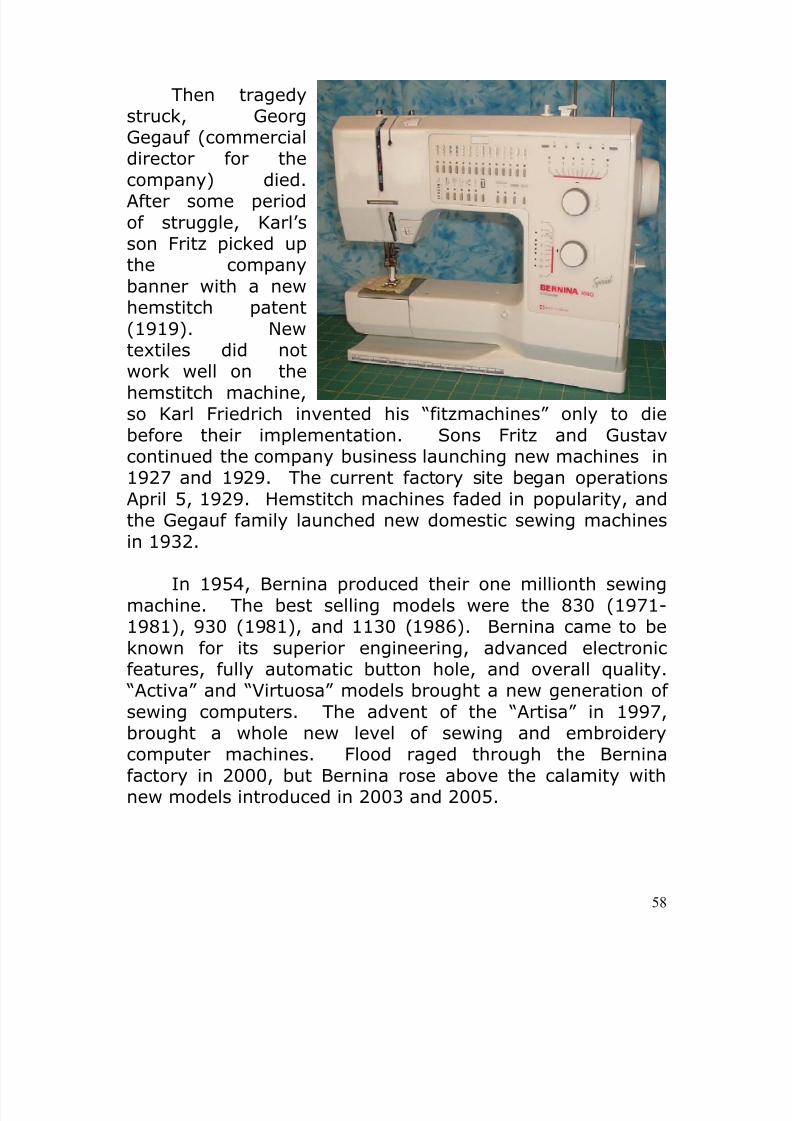
Then tragedy
struck, GeorgGegauf (commercialdirector for thecompany) died.After some periodof struggle, Karl’sson Fritz picked upthe companybanner with a newhemstitch patent(1919). Newtextiles did notwork well on thehemstitch machine,so Karl Friedrich invented his “fitzmachines” only to diebefore their implementation. Sons Fritz and Gustavcontinued the company business launching new machines in1927 and 1929. The current factory site began operationsApril 5, 1929. Hemstitch machines faded in popularity, andthe Gegauf family launched new domestic sewing machinesin 1932.
In 1954, Bernina produced their one millionth sewingmachine. The best selling models were the 830 (1971-1981), 930 (1981), and 1130 (1986). Bernina came to beknown for its superior engineering, advanced electronicfeatures, fully automatic button hole, and overall quality. “Activa” and “Virtuosa” models brought a new generation ofsewing computers. The advent of the “Artisa” in 1997,brought a whole new level of sewing and embroiderycomputer machines. Flood raged through the Berninafactory in 2000, but Bernina rose above the calamity withnew models introduced in 2003 and 2005.
8/13/2019 Manual de Reparacion de Maquinas de Coser
http://slidepdf.com/reader/full/manual-de-reparacion-de-maquinas-de-coser 59/311
59
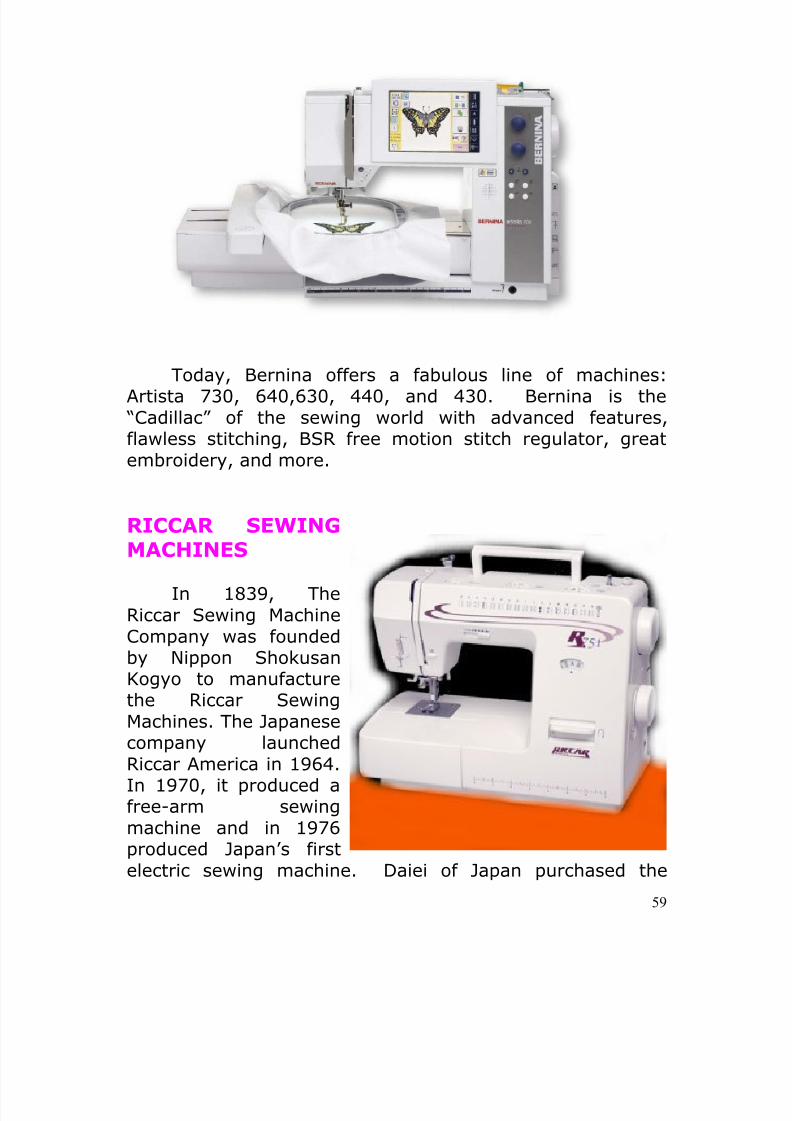
Today, Bernina offers a fabulous line of machines:Artista 730, 640,630, 440, and 430. Bernina is the “Cadillac” of the sewing world with advanced features,flawless stitching, BSR free motion stitch regulator, greatembroidery, and more.
RICCAR SEWINGMACHINES
In 1839, TheRiccar Sewing MachineCompany was foundedby Nippon ShokusanKogyo to manufacturethe Riccar SewingMachines. The Japanesecompany launched
Riccar America in 1964.In 1970, it produced afree-arm sewingmachine and in 1976produced Japan’s firstelectric sewing machine. Daiei of Japan purchased the
8/13/2019 Manual de Reparacion de Maquinas de Coser
http://slidepdf.com/reader/full/manual-de-reparacion-de-maquinas-de-coser 60/311
60
Riccar Company in 1985 and during the late 1990’s itsAmerican rights were acquired by Tacony Corporation.
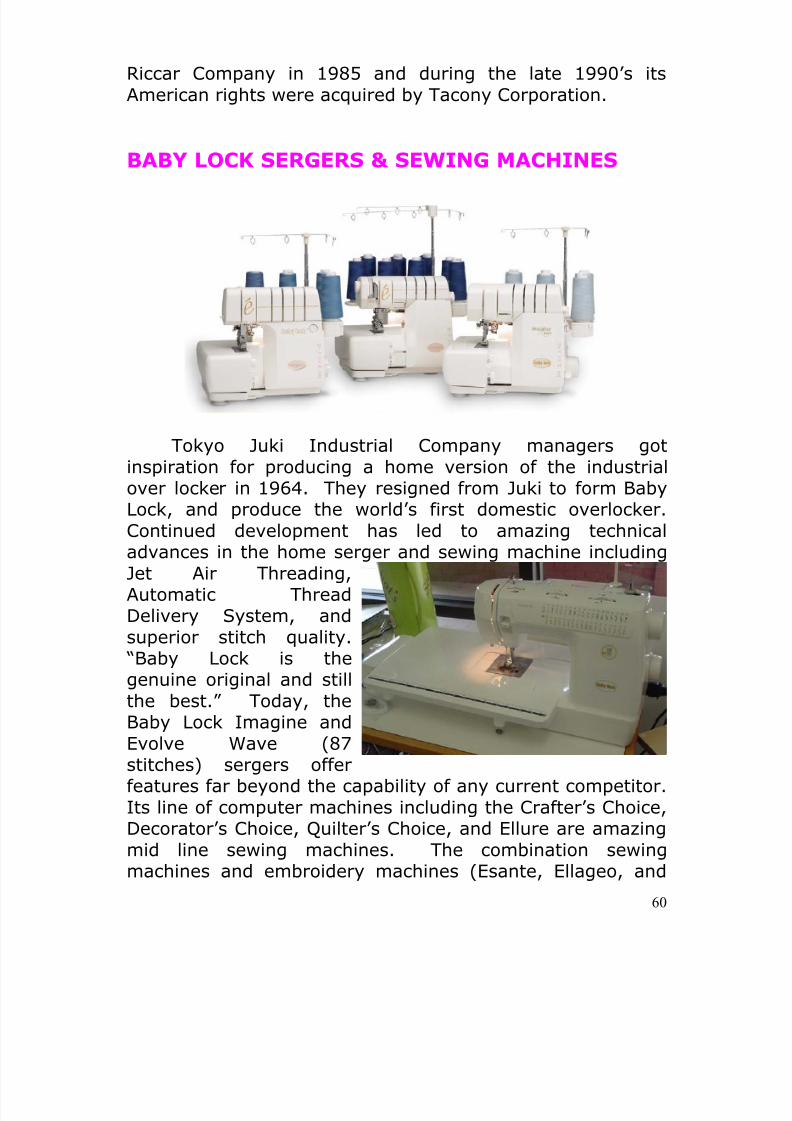
BABY LOCK SERGERS & SEWING MACHINES
Tokyo Juki Industrial Company managers gotinspiration for producing a home version of the industrialover locker in 1964. They resigned from Juki to form BabyLock, and produce the world’s first domestic overlocker.Continued development has led to amazing technicaladvances in the home serger and sewing machine including
Jet Air Threading,Automatic ThreadDelivery System, andsuperior stitch quality. “Baby Lock is thegenuine original and stillthe best.” Today, theBaby Lock Imagine andEvolve Wave (87
stitches) sergers offerfeatures far beyond the capability of any current competitor.Its line of computer machines including the Crafter’s Choice,Decorator’s Choice, Quilter’s Choice, and Ellure are amazingmid line sewing machines. The combination sewingmachines and embroidery machines (Esante, Ellageo, and
8/13/2019 Manual de Reparacion de Maquinas de Coser
http://slidepdf.com/reader/full/manual-de-reparacion-de-maquinas-de-coser 61/311
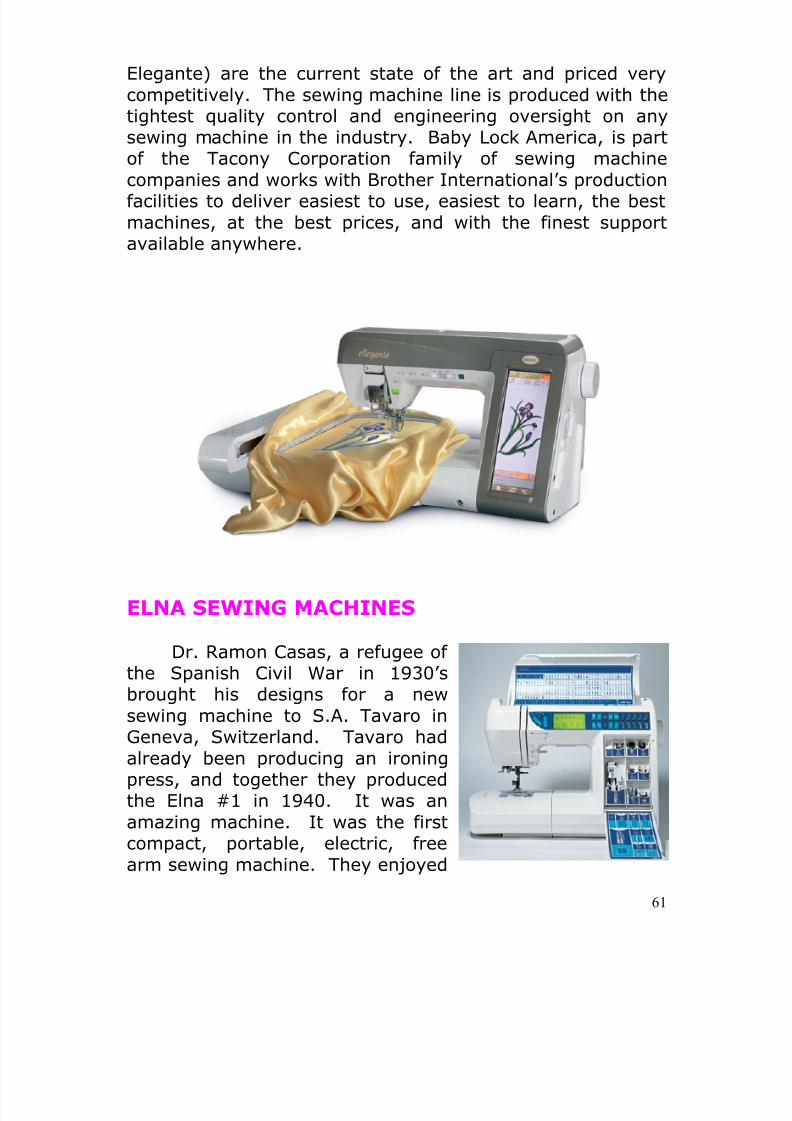
61
Elegante) are the current state of the art and priced verycompetitively. The sewing machine line is produced with thetightest quality control and engineering oversight on anysewing machine in the industry. Baby Lock America, is partof the Tacony Corporation family of sewing machinecompanies and works with Brother International’s productionfacilities to deliver easiest to use, easiest to learn, the bestmachines, at the best prices, and with the finest supportavailable anywhere.
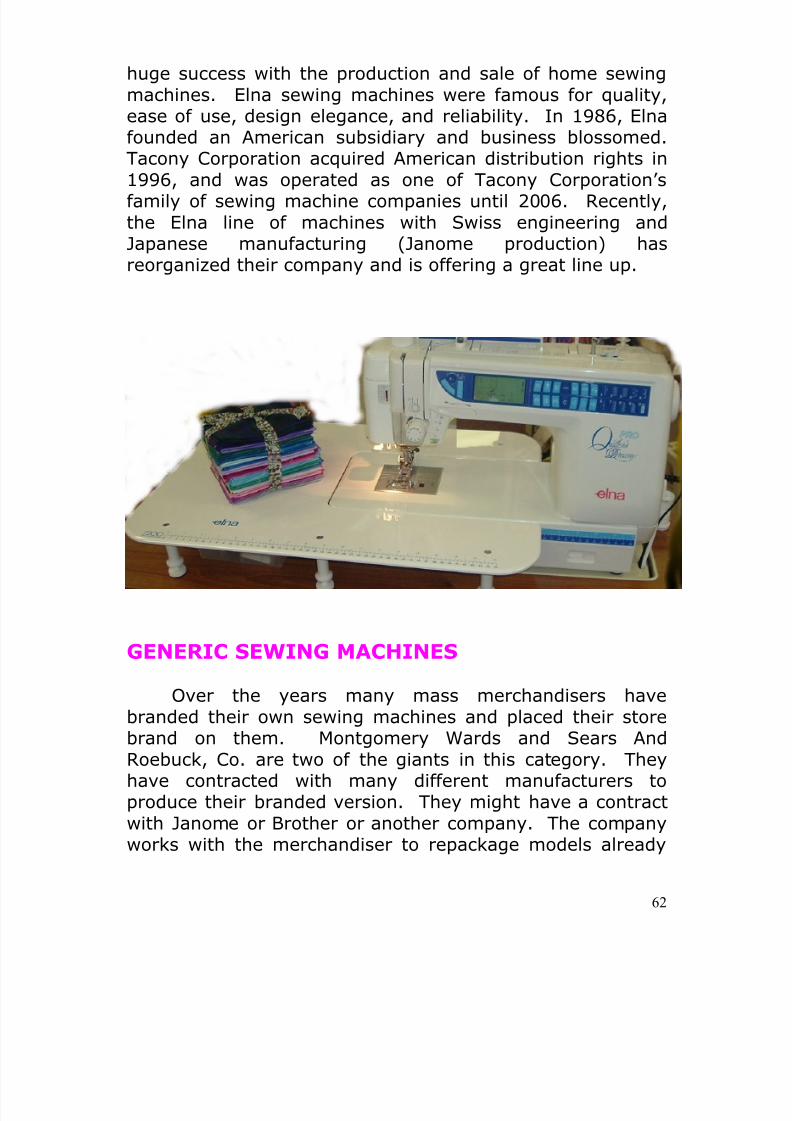
ELNA SEWING MACHINES
Dr. Ramon Casas, a refugee ofthe Spanish Civil War in 1930’sbrought his designs for a newsewing machine to S.A. Tavaro inGeneva, Switzerland. Tavaro had
already been producing an ironingpress, and together they producedthe Elna #1 in 1940. It was anamazing machine. It was the firstcompact, portable, electric, freearm sewing machine. They enjoyed
8/13/2019 Manual de Reparacion de Maquinas de Coser
http://slidepdf.com/reader/full/manual-de-reparacion-de-maquinas-de-coser 62/311
62
huge success with the production and sale of home sewingmachines. Elna sewing machines were famous for quality,ease of use, design elegance, and reliability. In 1986, Elnafounded an American subsidiary and business blossomed.Tacony Corporation acquired American distribution rights in1996, and was operated as one of Tacony Corporation’sfamily of sewing machine companies until 2006. Recently,the Elna line of machines with Swiss engineering andJapanese manufacturing (Janome production) hasreorganized their company and is offering a great line up.
GENERIC SEWING MACHINES
Over the years many mass merchandisers havebranded their own sewing machines and placed their storebrand on them. Montgomery Wards and Sears And
Roebuck, Co. are two of the giants in this category. Theyhave contracted with many different manufacturers toproduce their branded version. They might have a contractwith Janome or Brother or another company. The companyworks with the merchandiser to repackage models already
8/13/2019 Manual de Reparacion de Maquinas de Coser
http://slidepdf.com/reader/full/manual-de-reparacion-de-maquinas-de-coser 63/311
63
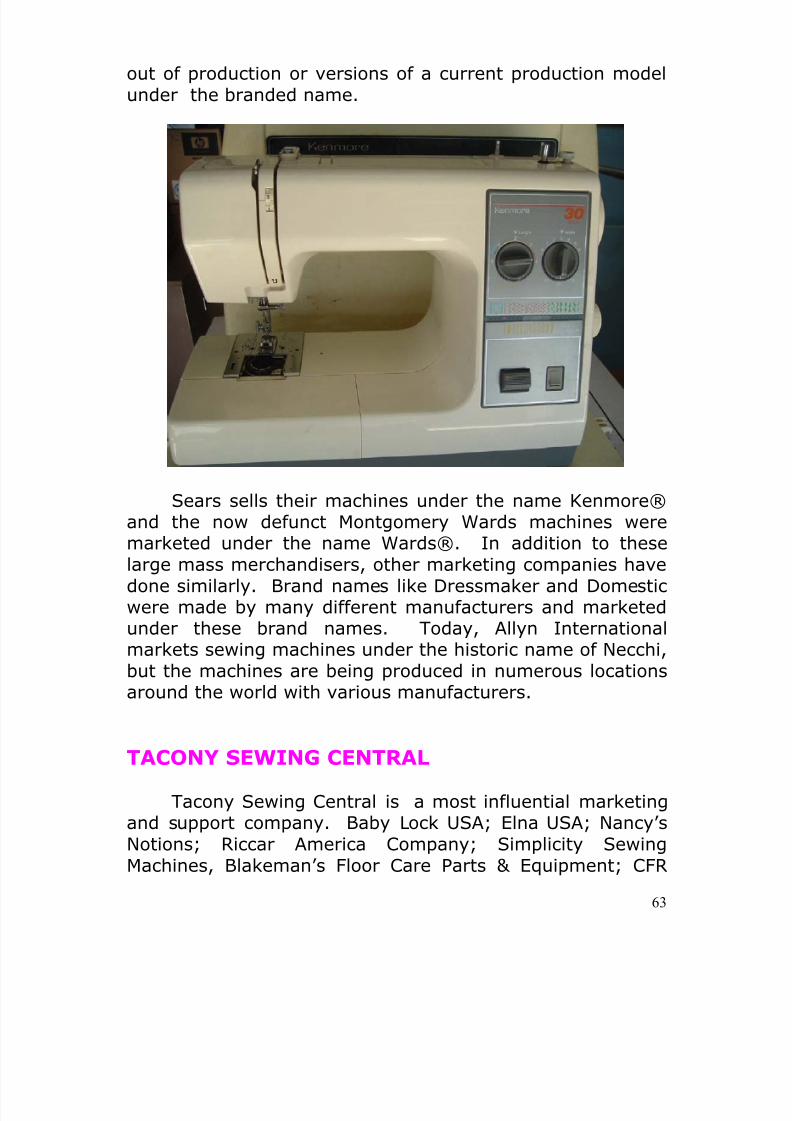
out of production or versions of a current production modelunder the branded name.
Sears sells their machines under the name Kenmore®and the now defunct Montgomery Wards machines weremarketed under the name Wards®. In addition to these
large mass merchandisers, other marketing companies havedone similarly. Brand names like Dressmaker and Domesticwere made by many different manufacturers and marketedunder these brand names. Today, Allyn Internationalmarkets sewing machines under the historic name of Necchi,but the machines are being produced in numerous locationsaround the world with various manufacturers.
TACONY SEWING CENTRAL
Tacony Sewing Central is a most influential marketingand support company. Baby Lock USA; Elna USA; Nancy’sNotions; Riccar America Company; Simplicity SewingMachines, Blakeman’s Floor Care Parts & Equipment; CFR
8/13/2019 Manual de Reparacion de Maquinas de Coser
http://slidepdf.com/reader/full/manual-de-reparacion-de-maquinas-de-coser 64/311
64
Corporation; and Regency Ceiling Fans are the principalsubsidiaries of Tacony Corporation making Tacony a giant onthe American sewing machine stage.
Over these past one hundred sixty years, a revolutionin textiles, garment construction, and economy. It has beenmarked by amazing invention, competition, and creativity.During this time over 250 different sewing machinecompanies have produced and marketed machines. Only afew of these remain. We seldom hear mention today of theBartlett, Bradberry, Empire, J.W. Greene, H.G. Hawley,Walcott, Wilson, Jones, or Willcox sewing machines. Theseand hundreds of other sewing machine manufacturers arehistory.
Today, the modern sewing machine is a wonder oftechnology and convenience. While the sewing machine useto make work faster and easier; today the modern sewingmachine makes sewing a great joy and passion of creativeexpression.
The major brands today include Janome, Bernina, BabyLock, Singer, Elna, Pfaff, and Viking. Sears still marketsgeneric machines under the name Kenmore. Walmart,Target, Hancock Fabrics, and other mass merchandisersmarket low end models which in many cases may beconsidered disposable machines.
CHOOSE THE RIGHTSEWING MACHINE FORYOU
Remember your grandmother’s old sewing machine. Itperformed miracles in her day. Think of those Hand Crank orTreadle machines. A little work and wow. Nostalgia is awonderful way to remember those “good old days”.

8/13/2019 Manual de Reparacion de Maquinas de Coser
http://slidepdf.com/reader/full/manual-de-reparacion-de-maquinas-de-coser 65/311
65
Today things are very different. Sewing use to bework, now it is fun and relaxing. With the right machine,you can easily and quickly create treasured beauty.
8/13/2019 Manual de Reparacion de Maquinas de Coser
http://slidepdf.com/reader/full/manual-de-reparacion-de-maquinas-de-coser 66/311
66
CHAPTER FIVETHE SEWING MACHINE
THE MODERNSEWING MACHINE
Sewing is as old as the hills. Since the first animal skinwrap, people have tied, knotted, twisted, fastened, andsewn materials together to make clothing, shelter, andall manner of other practical items. Archaeologistshave found crude bone needles in some of the oldestexcavations.
For thousands of years, ever stitch was sewn by hand.Many different kinds, sizes, and shapes of needles wereused, but they all depended on manual labor to formthe stitches.
In 1886, a man by the name of Elias Howe patentedthe first truly practical sewing machine. It lookedstrange by today’s standards, but it worked. Indeed, itwould produced as many stitches as five expert handsewers, and it never got tired.
As part of the industrial revolution, the sewing machinebecame a vital tool of production. Unlike manymachines used in big factories, however, the sewingmachine became a hit with cottage industry and thehome. By the mid 1980’s, the sewing machine becamea must have appliance for the home.
8/13/2019 Manual de Reparacion de Maquinas de Coser
http://slidepdf.com/reader/full/manual-de-reparacion-de-maquinas-de-coser 67/311
8/13/2019 Manual de Reparacion de Maquinas de Coser
http://slidepdf.com/reader/full/manual-de-reparacion-de-maquinas-de-coser 68/311
68
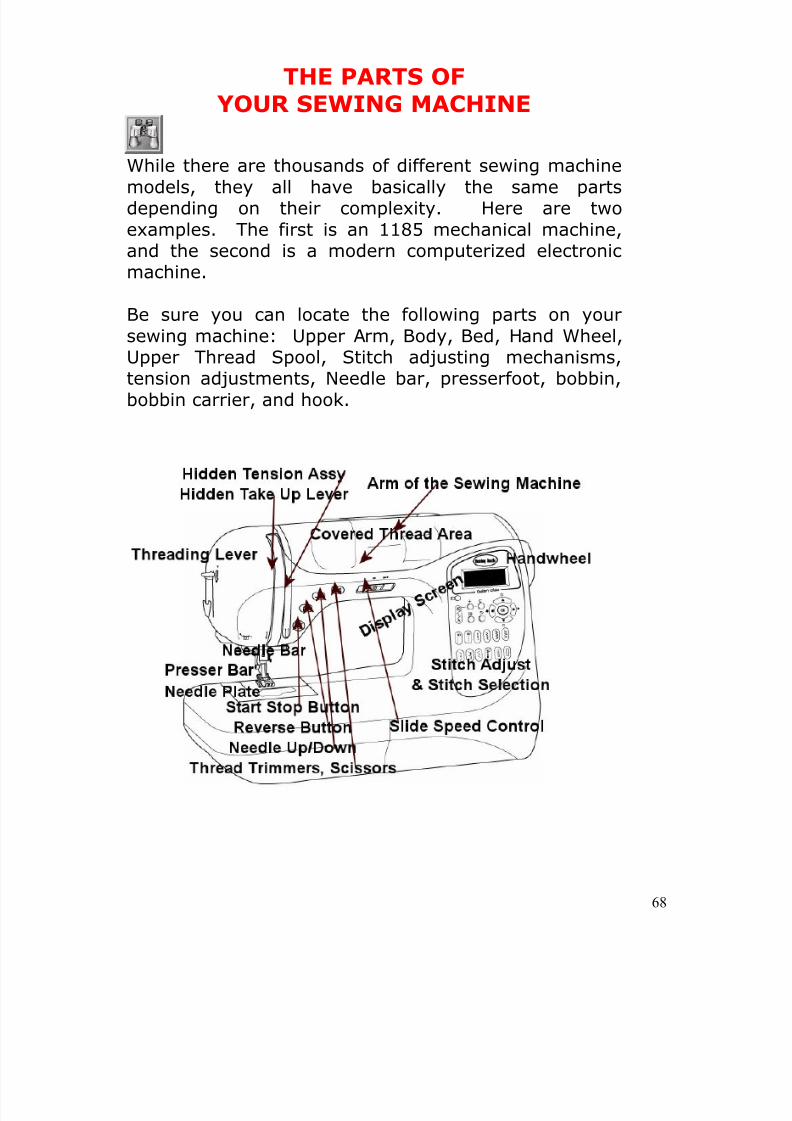
THE PARTS OFYOUR SEWING MACHINE
While there are thousands of different sewing machine
models, they all have basically the same partsdepending on their complexity. Here are twoexamples. The first is an 1185 mechanical machine,and the second is a modern computerized electronicmachine.
Be sure you can locate the following parts on yoursewing machine: Upper Arm, Body, Bed, Hand Wheel,Upper Thread Spool, Stitch adjusting mechanisms,
tension adjustments, Needle bar, presserfoot, bobbin,bobbin carrier, and hook.
8/13/2019 Manual de Reparacion de Maquinas de Coser
http://slidepdf.com/reader/full/manual-de-reparacion-de-maquinas-de-coser 69/311
69
8/13/2019 Manual de Reparacion de Maquinas de Coser
http://slidepdf.com/reader/full/manual-de-reparacion-de-maquinas-de-coser 70/311
70
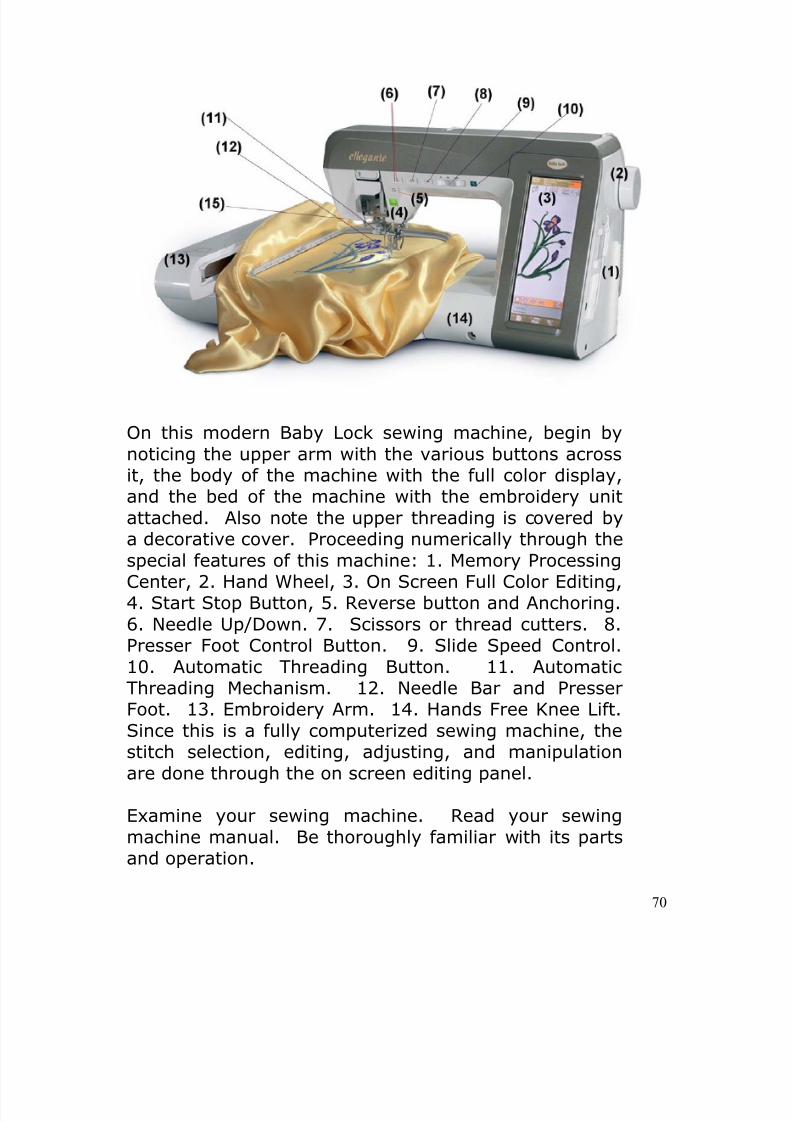
On this modern Baby Lock sewing machine, begin bynoticing the upper arm with the various buttons acrossit, the body of the machine with the full color display,and the bed of the machine with the embroidery unitattached. Also note the upper threading is covered bya decorative cover. Proceeding numerically through thespecial features of this machine: 1. Memory ProcessingCenter, 2. Hand Wheel, 3. On Screen Full Color Editing,4. Start Stop Button, 5. Reverse button and Anchoring.6. Needle Up/Down. 7. Scissors or thread cutters. 8.Presser Foot Control Button. 9. Slide Speed Control.10. Automatic Threading Button. 11. AutomaticThreading Mechanism. 12. Needle Bar and PresserFoot. 13. Embroidery Arm. 14. Hands Free Knee Lift.Since this is a fully computerized sewing machine, thestitch selection, editing, adjusting, and manipulationare done through the on screen editing panel.
Examine your sewing machine. Read your sewingmachine manual. Be thoroughly familiar with its partsand operation.
8/13/2019 Manual de Reparacion de Maquinas de Coser
http://slidepdf.com/reader/full/manual-de-reparacion-de-maquinas-de-coser 71/311
71
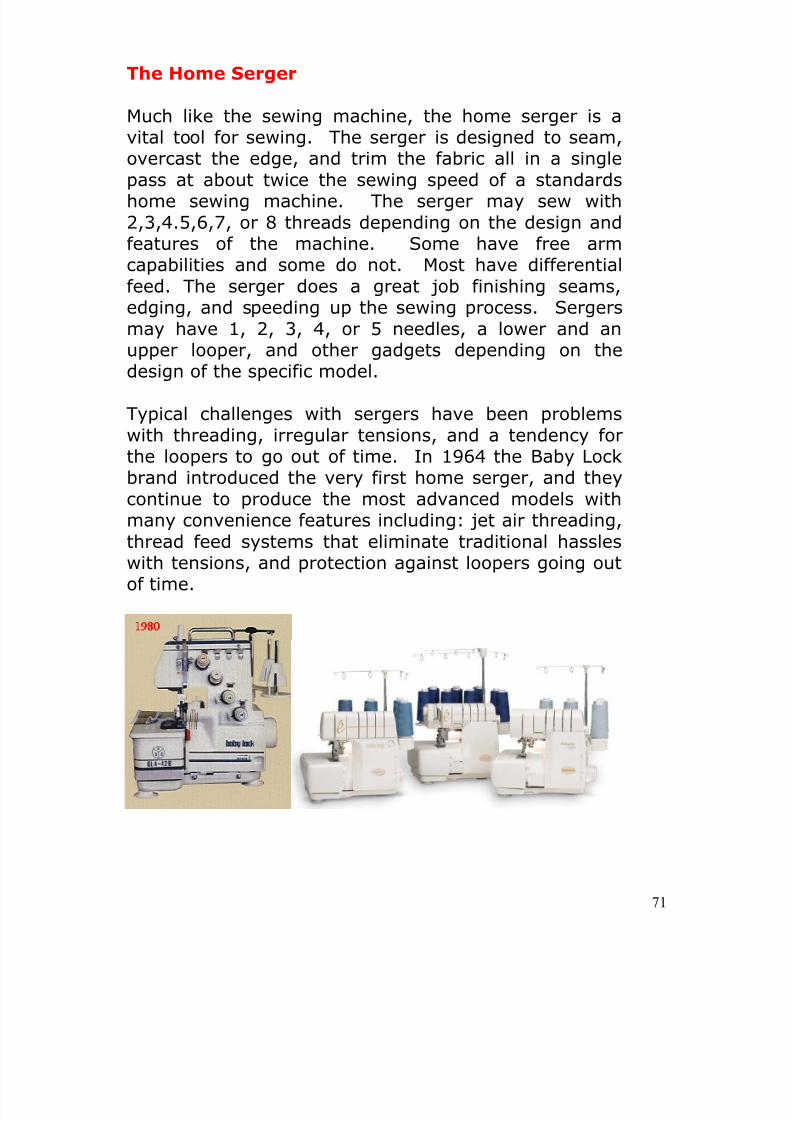
The Home Serger
Much like the sewing machine, the home serger is avital tool for sewing. The serger is designed to seam,overcast the edge, and trim the fabric all in a singlepass at about twice the sewing speed of a standardshome sewing machine. The serger may sew with2,3,4.5,6,7, or 8 threads depending on the design andfeatures of the machine. Some have free armcapabilities and some do not. Most have differentialfeed. The serger does a great job finishing seams,edging, and speeding up the sewing process. Sergersmay have 1, 2, 3, 4, or 5 needles, a lower and anupper looper, and other gadgets depending on thedesign of the specific model.
Typical challenges with sergers have been problemswith threading, irregular tensions, and a tendency forthe loopers to go out of time. In 1964 the Baby Lockbrand introduced the very first home serger, and theycontinue to produce the most advanced models withmany convenience features including: jet air threading,thread feed systems that eliminate traditional hassleswith tensions, and protection against loopers going outof time.
8/13/2019 Manual de Reparacion de Maquinas de Coser
http://slidepdf.com/reader/full/manual-de-reparacion-de-maquinas-de-coser 72/311
8/13/2019 Manual de Reparacion de Maquinas de Coser
http://slidepdf.com/reader/full/manual-de-reparacion-de-maquinas-de-coser 73/311
73
HOW YOURSEWING MACHINE WORKS
But, have you ever wondered exactly how does your
sewing machine work? What happens when you press thefoot control – inside the sewing machine? What happenswhen you select a stitch – inside the sewing machine?
How do stitches form? If we base our understandingon experience with hand sewing, we may become terriblyconfused. In hand sewing, we typically use only one thread,but a sewing machine uses a thread on top and on thebottom. The stitches are made very differently, but how?
How does the machine know when to lower the needleor move the thread? What keeps the stitches balanced anddependable stitch after stitch? How does the thread on topof the machine relate to the thread in the bobbin? How doesthe sewing machine make the fabric move the way it issuppose to?
If you think about it, you may even come up with more
questions about how your sewing machine really works.
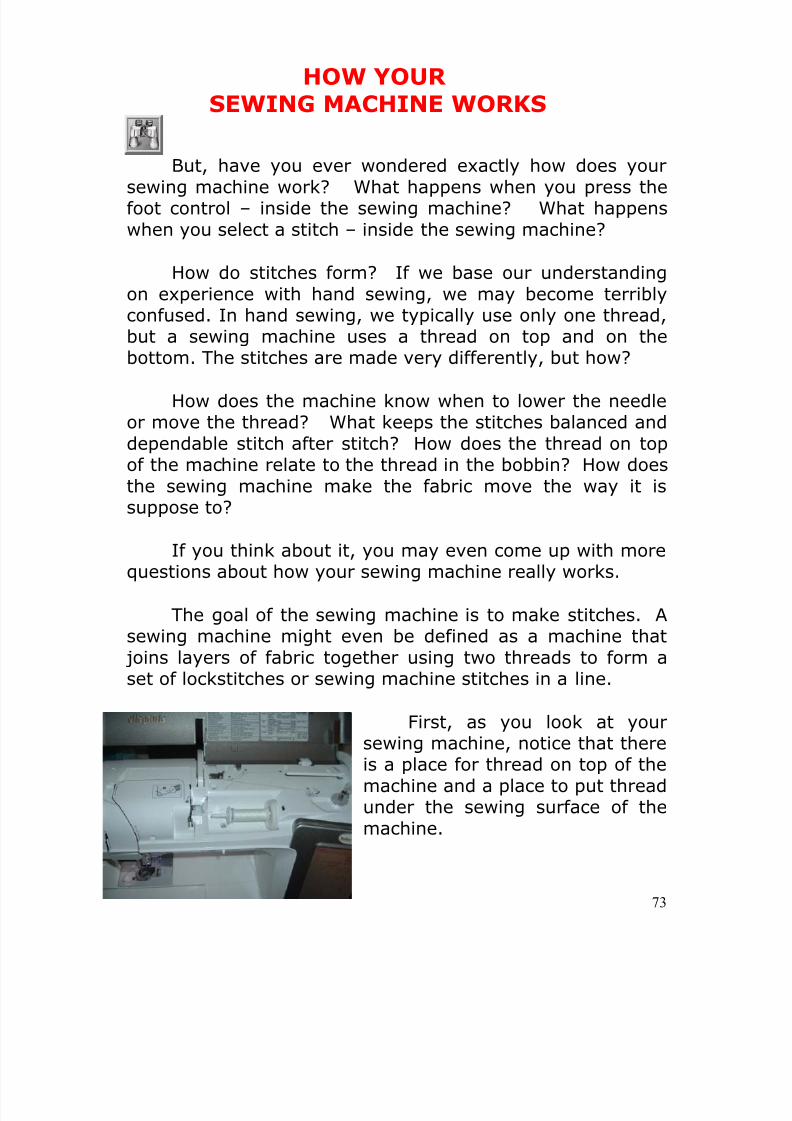
The goal of the sewing machine is to make stitches. Asewing machine might even be defined as a machine that joins layers of fabric together using two threads to form aset of lockstitches or sewing machine stitches in a line.
First, as you look at yoursewing machine, notice that there
is a place for thread on top of themachine and a place to put threadunder the sewing surface of themachine.
8/13/2019 Manual de Reparacion de Maquinas de Coser
http://slidepdf.com/reader/full/manual-de-reparacion-de-maquinas-de-coser 74/311
74
The upper thread is drawn through some thread guidesto a mechanism called tension or upper tension assembly.Then the thread goes through a little spring next to thetension, on up to the little lever on the front of the machinethat is called the take up lever. Finally, the upper thread isdrawn down and threaded through the eye of the needle.
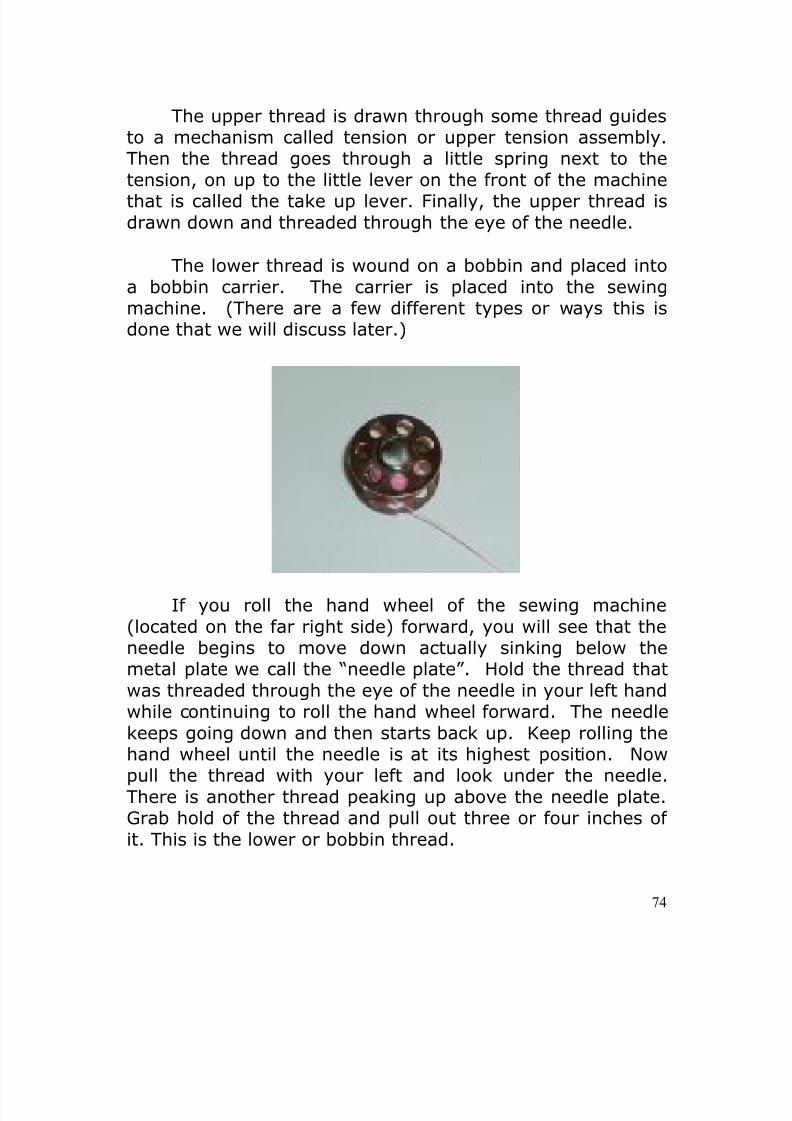
The lower thread is wound on a bobbin and placed intoa bobbin carrier. The carrier is placed into the sewingmachine. (There are a few different types or ways this isdone that we will discuss later.)
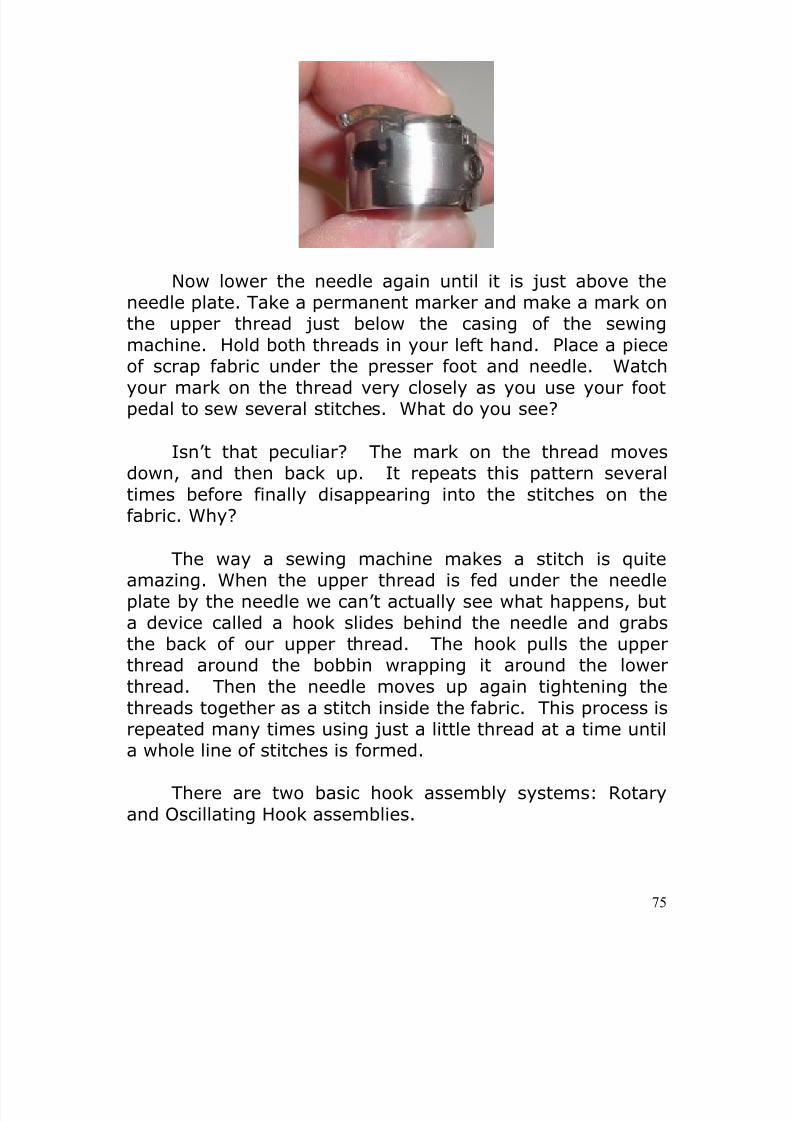
If you roll the hand wheel of the sewing machine(located on the far right side) forward, you will see that theneedle begins to move down actually sinking below themetal plate we call the “needle plate”. Hold the thread thatwas threaded through the eye of the needle in your left handwhile continuing to roll the hand wheel forward. The needlekeeps going down and then starts back up. Keep rolling thehand wheel until the needle is at its highest position. Nowpull the thread with your left and look under the needle.There is another thread peaking up above the needle plate.Grab hold of the thread and pull out three or four inches ofit. This is the lower or bobbin thread.
8/13/2019 Manual de Reparacion de Maquinas de Coser
http://slidepdf.com/reader/full/manual-de-reparacion-de-maquinas-de-coser 75/311
75
Now lower the needle again until it is just above theneedle plate. Take a permanent marker and make a mark onthe upper thread just below the casing of the sewingmachine. Hold both threads in your left hand. Place a pieceof scrap fabric under the presser foot and needle. Watch
your mark on the thread very closely as you use your footpedal to sew several stitches. What do you see?
Isn’t that peculiar? The mark on the thread movesdown, and then back up. It repeats this pattern severaltimes before finally disappearing into the stitches on thefabric. Why?
The way a sewing machine makes a stitch is quiteamazing. When the upper thread is fed under the needleplate by the needle we can’t actually see what happens, buta device called a hook slides behind the needle and grabsthe back of our upper thread. The hook pulls the upperthread around the bobbin wrapping it around the lowerthread. Then the needle moves up again tightening thethreads together as a stitch inside the fabric. This process isrepeated many times using just a little thread at a time untila whole line of stitches is formed.
There are two basic hook assembly systems: Rotaryand Oscillating Hook assemblies.
8/13/2019 Manual de Reparacion de Maquinas de Coser
http://slidepdf.com/reader/full/manual-de-reparacion-de-maquinas-de-coser 76/311
76
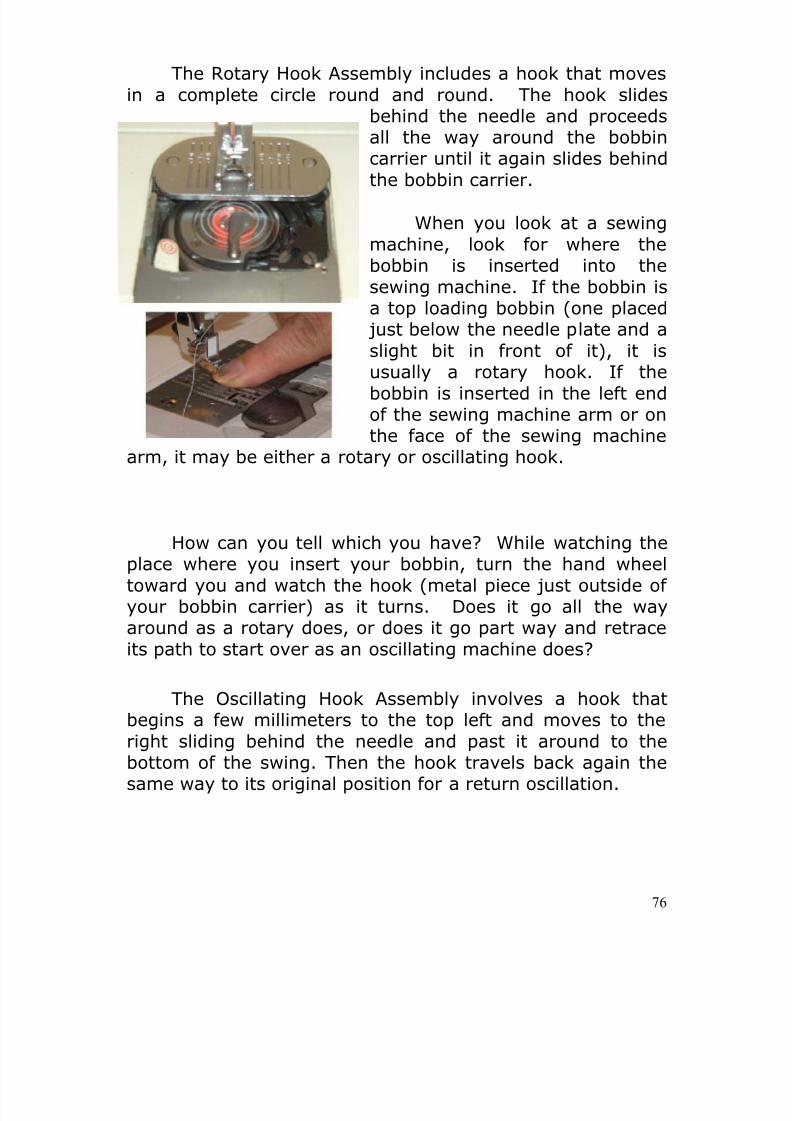
The Rotary Hook Assembly includes a hook that movesin a complete circle round and round. The hook slides
behind the needle and proceedsall the way around the bobbincarrier until it again slides behindthe bobbin carrier.
When you look at a sewingmachine, look for where thebobbin is inserted into thesewing machine. If the bobbin isa top loading bobbin (one placed just below the needle plate and aslight bit in front of it), it isusually a rotary hook. If thebobbin is inserted in the left endof the sewing machine arm or onthe face of the sewing machine
arm, it may be either a rotary or oscillating hook.
How can you tell which you have? While watching the
place where you insert your bobbin, turn the hand wheeltoward you and watch the hook (metal piece just outside ofyour bobbin carrier) as it turns. Does it go all the wayaround as a rotary does, or does it go part way and retraceits path to start over as an oscillating machine does?
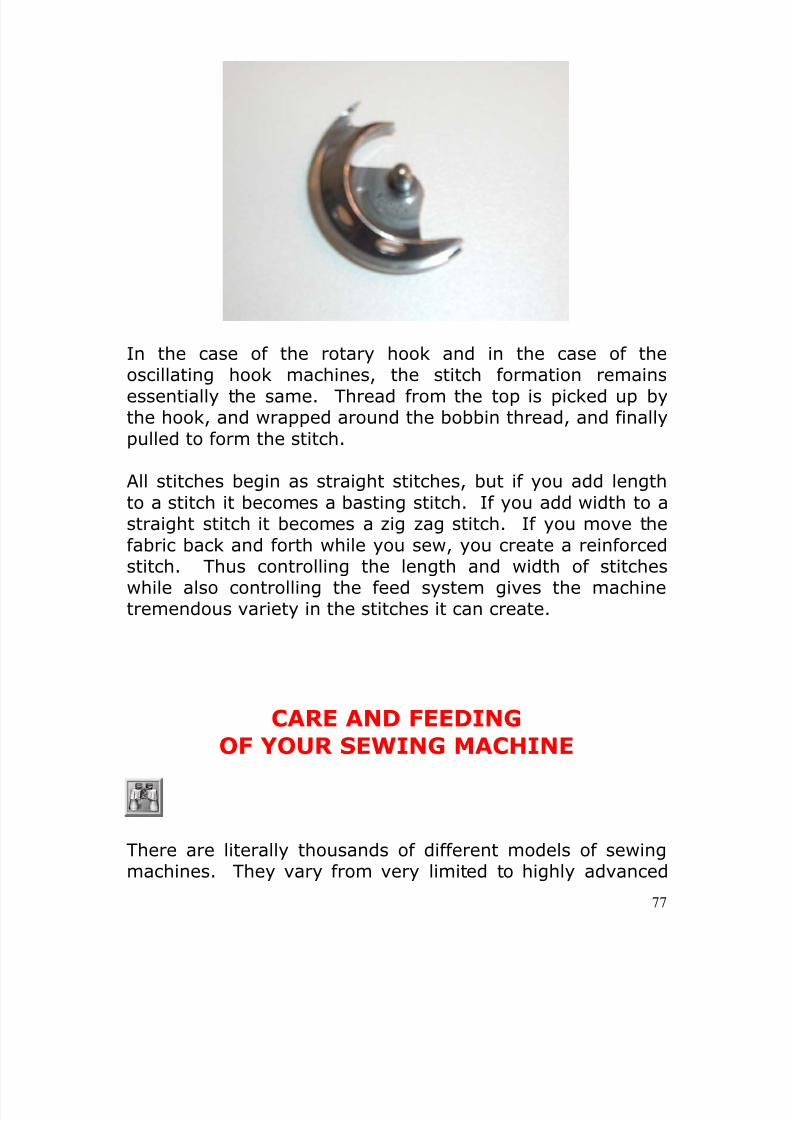
The Oscillating Hook Assembly involves a hook thatbegins a few millimeters to the top left and moves to theright sliding behind the needle and past it around to the
bottom of the swing. Then the hook travels back again thesame way to its original position for a return oscillation.
8/13/2019 Manual de Reparacion de Maquinas de Coser
http://slidepdf.com/reader/full/manual-de-reparacion-de-maquinas-de-coser 77/311
77
In the case of the rotary hook and in the case of the
oscillating hook machines, the stitch formation remainsessentially the same. Thread from the top is picked up bythe hook, and wrapped around the bobbin thread, and finallypulled to form the stitch.
All stitches begin as straight stitches, but if you add lengthto a stitch it becomes a basting stitch. If you add width to astraight stitch it becomes a zig zag stitch. If you move thefabric back and forth while you sew, you create a reinforced
stitch. Thus controlling the length and width of stitcheswhile also controlling the feed system gives the machinetremendous variety in the stitches it can create.
CARE AND FEEDINGOF YOUR SEWING MACHINE
There are literally thousands of different models of sewingmachines. They vary from very limited to highly advanced
8/13/2019 Manual de Reparacion de Maquinas de Coser
http://slidepdf.com/reader/full/manual-de-reparacion-de-maquinas-de-coser 78/311
78
sewing technologies. You may never have used a sewingmachine, or you may already be expert with your machine.Each sewing machine has its own set of features, ways toadjust, and little quirks to consider. Regardless, whatsewing machine you currently have, the first and mostimportant consideration is how to get it working, keep itworking, and insure carefree sewing.
So, How do you set up your sewing machine?
You may have a sewing cabinet or simply use a kitchentable. In either case, when you pick up your machine, bevery careful. Even the smallest sewing machine can beheavier and more awkward to carry than you might firstexpect.
To pick up your sewing machine, look for a handle on thetop of the machine. If it has one, use one hand to lift themachine, while using the other hand under the front of themachine to stabilize it. If it is too heavy for your to liftcomfortably, find someone stronger to help.
If your machine does not have a handle, reach one handover the top of the machine and down behind the upper armof the machine. Reach your fingers under the upper arm ofthe machine making it into a (rather large) handle. Useyour other hand under the front of the machine to lift it.Always keep in mind, the sewing machine can be awkwardto carry even if it is not too heavy. Take precautions toinsure you do not drop the machine or hurt yourself whilecarrying it.
Set Up you machine on the table or cabinet. Inspect thepower cord for any possible problems. Frayed or otherwisepower cords can be very dangerous. Also attach the footcontrol. Plug them in and turn on the sewing machine.The sewing machine light should light up. If you gently pushon your foot control, the machine should begin to move theneedle bar up and down. If it appears sluggish or slow, take
8/13/2019 Manual de Reparacion de Maquinas de Coser
http://slidepdf.com/reader/full/manual-de-reparacion-de-maquinas-de-coser 79/311
79
hold of your hand wheel and turn it toward you. Do you feelconsiderable resistance? If so, you may have a problem.This may be resolved by cleaning out the bobbin area or byhaving the machine serviced by your local sewing machinerepair center.
Keep the surface of the machine clean at all times. Cover itwith a quilted cloth sewing machine cover to protect againstsunlight, moisture, dust, etc. Hard covers protect wellagainst the slight bump. Plastic covers protect against dust,but quilted cloth covers protect the best. Avoid clutteraround your sewing machine.
How do you clean the bobbin area?
Remove the needle and presser foot (optional). Just belowthe presser foot is a metal plate called the needle platebecause the needle rises and falls through a hole in theplate. Remove the needle plate by removing the screws ontop.
In some machines the bobbin is inserted from the top into acarrier just in front of the needle. Removing the needleplate and cover plate (if it has one), will expose the bobbinarea.
In some machines the bobbin is inserted from the front orleft end of the machine. A small door covers the bobbinarea. The bobbin is normally contained in a carrier that isinserted here.
Remove the bobbin from the carrier. It just comes out.
Remove the carrier from the machine. Front loading andside loading machine carriers usually have a little lever onthe front of the carrier. Pull the lever back and the carrier

8/13/2019 Manual de Reparacion de Maquinas de Coser
http://slidepdf.com/reader/full/manual-de-reparacion-de-maquinas-de-coser 80/311
80
removes quite easily. Top loading bobbins just slip out oncethe face plate is removed.
Look for lint or other debris. Notice where the feed dogs areand how they make contact. This is an important areawhere lint often collects and for best sewing, it needs to bekept clean. The feed dogs should not have “felt pads”between their teeth. Clean out all this debris. To do so, usea small brush to loosen any solid debris. Us a vacuum withspecial attachment to vacuum out the area, or use a can ofcompressed air, “Blow Off”, to blow out the area. If you usecompressed air, avoid tilting the can. When the can is tilted,
moisture inside the can sprays out with the air getting intoyour machine. Moisture in sewing machine is a bad thing.Look for threads that may have gotten caught or wrappedinside the bobbin area and remove them with tweezers.
Notice the carrier sits inside groove or “race” that turnsaround it. This is the sewing machine hook assembly. If

8/13/2019 Manual de Reparacion de Maquinas de Coser
http://slidepdf.com/reader/full/manual-de-reparacion-de-maquinas-de-coser 81/311
81
you look closely, as you turn the hand wheel toward you,you will see a sharp prong or hook with a point on it. Thishook moves around the bobbin. It picks up the thread fromthe needle, and forms a stitch with the bobbin thread.Some machines use rotary hook systems in which the hookmoves continuously around the bobbin. Other machines usean oscillating system where the hook moves around thebobbin and then moves back to its start point for anotheroscillation.
Inspect the bobbin, carrier, hook, and other parts for anysign of excessive wear, rust, thread scoring, knicks, roughspots, needle pricks, etc. If you see any of these, you mayneed to take your machine to your local sewing machinetechnician and have the parts buffed, ground, treated, orreplaced. Avoid problems before they become extreme.
This raceway or area where the hook moves around thecarrier is where you will need to keep one drop of oilperiodically. Do not over oil. This hook moves around thecarrier when the needle comes down the thread from a loopon the back side of the needle. The hook grabs this thread,wraps it around the bobbin thread to form the stitch.
8/13/2019 Manual de Reparacion de Maquinas de Coser
http://slidepdf.com/reader/full/manual-de-reparacion-de-maquinas-de-coser 82/311
82
ESSENTIAL MAINTANENCE: Keep the surface of themachine clean at all times. Cover it with a quilted cloth
sewing machine cover to protect against sunlight, moisture,dust, etc. Clean out the bobbin area after every project orafter every 3 to 4 hours of sewing. If you are working withlinty material, clean more often. Oil the race with one dropof pure clean sewing machine oil every two to three hours ofsewing. Change your needle every five hours of sewing orevery two to three projects. Have the machineprofessionally serviced annually.
What kind of oil should I use?
Only use clean clear sewing machine oil. Many householdoils contain paraffin which gets gummy and can mess upyour sewing machine.
Things You Need To Care For Your Machine:Sewing Machine OilerCanned Air
Vacuum Attachment KitTooth Brush & Straight BrushButton Hole Block & CutterBobbinsQuality Threads & Needles
REVIEW: Caution: Be careful when moving and carrying your
sewing machine. Caution: Check cords to insure safety. Plug in cords and test for mechanical turning ease.
Use hand wheel test as needed.
8/13/2019 Manual de Reparacion de Maquinas de Coser
http://slidepdf.com/reader/full/manual-de-reparacion-de-maquinas-de-coser 83/311
83
Clean Out Bobbin Area.o Remove Needleo Remove Needle Plateo Remove Bobbin & Bobbin Carriero Remove lint and debris.o Put One Drop of Oil On the Race.o Use Only Pure Clean Sewing Machine Oil
Reassemble.
CHOOSING THE RIGHTSEWING MACHINE
WHY BUY A NEW – MODERN SEWING MACHINE?
There are many different reasons. Most commonly: A newmachine will be easier to use. . A new machine will do more.. A new machine will have amazing new features such as
Needle Up/Down, Finger Control On/Off & Speed Control,Easy Reverse, Automatic Tension, Automatic Threading, builtin thread cutters, pulse motor drive, improved stitching,hundreds of utility and decorative stitches, hands freepresser foot control, embroidery, more possibilities than youcould imagine.
A new machine will be more fun to use. . A new machine willtake the work out of sewing. . A new machine will be clean
and fresh to look at with no rust or grime. Whatever yourreasons, choose the right machine for you. You deserve it.
ASK YOURSELF SOME QUESTIONS?
What kind of sewing do you do now?
What kinds of sewing would you like to do?
8/13/2019 Manual de Reparacion de Maquinas de Coser
http://slidepdf.com/reader/full/manual-de-reparacion-de-maquinas-de-coser 84/311
84
What possibilities can you imagine doing if you could?
What features do you have in your current machine that you
really like?
What features would you like in your new machine?
Is this machine intended as your last sewing machine
purchase, or just to get you by until you can afford what you
really want?
If you are a beginner, it may be difficult to determine whatmachine is truly best for you. Buying a “starter” machine,may seem a good idea, but it may also limit your horizonsrather quickly. It might be better to find a group class, orclub where the machines are provides while you learn.
Experimenting on new machines is always a good idea.Many independent sewing machine dealers will allow you topractice on their display models for and hour or two to makesure the machine is right for you.
The more you learn, and the more possibilities you discoverfor your creative expression – the more features andcapabilities you will want in your machine.
EXPLORE YOUR OPTIONS.
There are several different types of sewing machines today. “Mechanical” sewing machine makes basic stitches withgears and levers driven by an electric motor. The traditionalAC sewing machine motor revolutionized earlier treadle andhand crank machines, but commonly make noise whilebuilding up enough torque to drive the sewing mechanisms.Mechanical machines also are a bit difficult to control when
first starting a seam and tight places.
An “Electronic Sewing Machine” gives you the added benefitof improved power and stitch control through use ofelectronics.
A “Computerized Sewing Machine” gives you more variety
8/13/2019 Manual de Reparacion de Maquinas de Coser
http://slidepdf.com/reader/full/manual-de-reparacion-de-maquinas-de-coser 85/311
85
in stitches, better stitch control, and smoother operations.
Many “Computerized Sewing Machines” have the addedbenefit of being able to do beautiful embroidery andmonogramming.
A cheap mechanical sewing machine may be purchasedthrough a big box store like Walmart for under $200.Unfortunately, they do not offer support, repair services, orinstruction on how to use the machines. A basic sewingmachine can be purchased for under $500 throughthousands of independent sewing machine dealers acrossthe country. The advantage of purchasing this bettermachine from a local dealer is that the local dealer will teachyou how to use the machine, provide repair serves whenneeded, and provide technical support year after year. Still,you may have good reason to consider a better machine. Ifyou only want a machine for very occasional emergencyfixes, a basic machine may meet your needs. If you want aconvenient, full featured machine for maximum ease of useand creative potential, you may want a midline or even ahigh end sewing machine.
When choosing a sewing machine, it is important to considerquality.
A buyer who buys cheap, may feel pleased at the point ofpurchase, but will most certainly regret it every time shestruggles to use it.
A buyer who buys Quality, may feel extravagant at the pointof purchase, but will be thrilled every time she uses thequality machine.
A cheap sewing machine may get the job done, but it is somuch easier and more enjoyable to use a quality machine.
Baby Lock, Bernina, Janome, and Pfaff are the highest
8/13/2019 Manual de Reparacion de Maquinas de Coser
http://slidepdf.com/reader/full/manual-de-reparacion-de-maquinas-de-coser 86/311
86
quality and most full featured sewing machines on themarket today.
WHERE DO YOU BUY A QUALITY SEWINGMACHINE?
You have three choices today: Internet, MassMerchandisers, Independent Sewing Machine Dealers.
Internet purchases may offer good pricing, but you maysacrifice more than expected. Internet sales send you a box,provide no classes, provide no service, and provide nosupport. Only outdated, voided models and models that donot sell well through more traditional means are usually sold
over the internet. For those few that provide services, youmust cover shipping every time. Often the manufacturer’swarranties are voided if sold over the internet.
To get the best quality sewing machines you will have to lookelsewhere. Half of the value of a sewing machine is the supportyou receive with the purchase. If you just get a box, you just get abox. Buying a sewing machine is very different from mostpurchases. You will need instruction, repair services, technical
support, and more that do not come in a box.
Mass Merchandisers generally offer only the cheapest lowend often disposable machines. They offer no support, nolocal repair services, and no classes to learn how to use themachine.
Independent Sewing Machine Dealers generally offer a wide
selection of quality sewing machines plus a whole set ofadded benefits: classes, expert help, repair services,technical support, and access to accessories and supplies.
In the opinion of the authors, it is best to purchase a sewingmachine from a reputable dealer that provides help, classes,
8/13/2019 Manual de Reparacion de Maquinas de Coser
http://slidepdf.com/reader/full/manual-de-reparacion-de-maquinas-de-coser 87/311
87
clubs, technical support, and quality repair services. Unlessyou are a sewing machine expert, it is always advisable tobuy from someone who is, and who is going to be at youside for many years. Indeed, half the value of a new sewingmachine may be in the support you receive when and afteryou buy.
Remember, the most expensive sewing machine is alwaysthe one in the closet no matter how much it cost. If you fallin love with your machine, find it easy and exciting to use,and have the support you need when you need it; you willsew more and enjoy it more.
How To ThreadYour Sewing Machine
Threading your sewing machine is a daunting task ifyou are unfamiliar with your machine and how it works.It becomes easy and automatic, once you understand
your machine.
Here is a quick easy way to thread your machine rightevery time.
o Place thread spool on the spool pin making surethe thread easily flows off the spool. Verticalspool pins need to make sure the spool turnseasily or the thread is lifted high above the spool
without snagging on the edge of the spool.Horizontal spools require spool caps (plasticpieces) that hold the spool in place and are largeenough to proved a lift off the edge of the spool.Many spools have slits or bumps or rough edged.These must not interfere with the easy smoothdeliver of the thread.

8/13/2019 Manual de Reparacion de Maquinas de Coser
http://slidepdf.com/reader/full/manual-de-reparacion-de-maquinas-de-coser 88/311
88
o Guide the thread from the spool through, over,around every thread guide. Normally you can seethe natural flow from Right to Left toward theneedle and tension areas.
o Make sure the presser foot is raised.o Guide the thread through the tension discs. These
are often hidden, but the thread flow should benatural. On front mounted and side mountedtensions, take care to guide the thread around thetension set, through the tension discs, and backacross the tension spring.
o Continue to follow the thread guides to the needlebar take up lever. This is essential. Unless thetake up lever picks up the thread, you will get noor irregular stitches.
o Continue the thread down and through the eye ofthe needle.
o The upper thread is threaded.
To thread the bottom thread, will depend on the kind ofbobbin and hook assembly you have. First, wind thebobbin making sure the thread winds smoothly on thebobbin. Avoid winding more than one thread on abobbin at a time, and be alert to any loose windingsthat could get messed up.
If your machine has a drop in bobbin, simply place thebobbin in the carrier and drag the thread through thebobbin tension.
If you machine has a front or side loading bobbin, it willhave an external bobbin carrier. Place the bobbin inthe carrier. Draw the thread back through the bobbintension. Please note, the thread must draw backthrough the tension. In most cases the thread willcome off the bobbin clockwise, and draw backcounterclockwise.
8/13/2019 Manual de Reparacion de Maquinas de Coser
http://slidepdf.com/reader/full/manual-de-reparacion-de-maquinas-de-coser 89/311
89
HOW TOADJUST TENSIONS
Tensions are a common source of problems in sewing.Understanding how tensions work is essential for everysewing machine user. It is not as complicated as somebelieve, and not as simple as some might think.
Tension is the amount of drag or resistance on the thread asit moves through the sewing machine. When the tension ontop and on bottom are balanced properly, the threads will join in the middle of the fabric with no excess thread on topor the bottom of the fabric.
Upper Tension. The thread on the top of the sewingmachine is threaded from the thread spool over and througha series of thread guides, through the tension assembly (aset of discs with adjustable pressure on the discs), throughthe take up spring, through the take up lever, and finallythrough the eye of the needle. There are minor differencesin how sewing machines are threaded, but there is amazingsimilarity too.
Important:
1. Make sure the thread on the spool is evenly flowing offthe spool.
2. Follow the prescribed thread line through all guides.
8/13/2019 Manual de Reparacion de Maquinas de Coser
http://slidepdf.com/reader/full/manual-de-reparacion-de-maquinas-de-coser 90/311
90
3. Look for any abnormality that might snag the thread. Fixit.
4. Always thread the take up spring and take up lever
properly.
5. Thread the needle as manufacturer recommends. Mostthread front to back, but some older machines thread rightto left or left to right.
6. ALWAYS thread the machine with the presser foot UP until
you are ready to thread the eye of the needle.
7. Test the thread tension with the presser foot up. Makesure it easily flows through the machine.
8. Put the presser foot down and thread the eye of theneedle.
9. Test the thread flow by gently tugging on the thread.Avoid bending the needle. You should feel a serious drag onthe thread.
10. Lift the presser foot and retest. There should be little orno resistance.
The upper thread tension is adjusted by tightening orloosening the tension adjusting knob. You may have beentold that on your machine, the tension is right when theknob says 3 or 4. This is not necessarily true as we will soonsee.

8/13/2019 Manual de Reparacion de Maquinas de Coser
http://slidepdf.com/reader/full/manual-de-reparacion-de-maquinas-de-coser 91/311
91
Lower Tension. The lower thread system is even a littlemore mysterious than the upper thread system, but it is inmany ways even more simple. The lower thread system mayinvolve top loading bobbins, front loading bobbins, or evenside loading bobbins. Older machines often used shuttles
mounted underneath the machine. While there are a varietyof different designs, the essentials are the same. Thread iswound on a bobbin (older machines used shuttles the sameway). The bobbin is placed into a case or holder. The threadin the bobbin is drawn through a tension device and up tothe top of the sewing platform.
Important:
1. Be sure you have the right bobbin.
2. Be sure the bobbin thread is properly wound.
3. Be sure to place the bobbin in the bobbin carrier exactly
the way your sewing machine manual says. The bobbinthread usually moves from left to right or clockwise aroundthe bobbin as it turns.
4. Thread through the lower tension. Usually, this means thebobbin thread will peal back through the bobbin tensionrather than follow along or just flop in the wind. Notice thepiece of metal on top right of the carrier. A small metalspring usually built into the bobbin carrier applies pressureor resistance to the bobbin thread. This is the bobbin tensionspring. A tiny screw holds the tension spring in place.Turning this screw to the right will tighten the lower tension.Turning it to the left will loosen the bobbin tension. (“RightyTighty, Lefty Loosey”)
8/13/2019 Manual de Reparacion de Maquinas de Coser
http://slidepdf.com/reader/full/manual-de-reparacion-de-maquinas-de-coser 92/311
92
5. Some bobbin carriers are built in, but many are insertedafter loading the bobbin.
a. In the later case, test the tension by doing the
following. Pull off about six inches of bobbin threadthrough the tension. Dangle the bobbin carrier with thebobbin in it while holding the thread above it. The lowertension should hold the carrier so that it does not drop.If it does, just turn the screw a quarter turn to theright. If it does not drop, try bouncing the carrier alittle. If the tension is properly set, the carrier will dropa little and stop. If it does drop a couple of inches andstops, all is good. If the carrier does not drop at all
even after pretty good bounce, the tension is too tight.Turn the screw a quarter turn to the left. Try again.
b. Many machines have a drop in bobbin that fits into abobbin carrier below the needle plate. Once the bobbinis placed in the carrier, the thread is drawn under atension spring. The same gentle pull test used in thefront loading bobbin can be used with the drop in
bobbin, but it is a bit less precise. If you continue toexperience difficulties with the bobbin tension, it maybe adjusted by turning the small tension screw on thespring of the bobbin carrier. You may also seek theexpert assistance of your local sewing machinetechnician if needed.
6. Make sure there are no snags in the thread line after you
bring the thread up through the needle plate hole.
BALANCING TENSIONS. When the thread from thetop and the thread from the bottom meet and form stitches
8/13/2019 Manual de Reparacion de Maquinas de Coser
http://slidepdf.com/reader/full/manual-de-reparacion-de-maquinas-de-coser 93/311
93
in the center of the fabric with not excess thread on top orbottom, tensions are said to be balanced.
Think of your fabric like a stream of water. There are twoteams with ropes (threads) tugging in opposite directions.Sew a straight stitch seam four or five inches long. Look at
the thread. Where does the stitch tie off or connect? Do yousee small loops, nubbies, or other signs of excess thread onthe top or bottom of the thread. The team that pulls thehardest wins the excess thread. If the upper tension istighter than the lower tension, excess thread will appear ontop of the fabric. If the bobbin tension is tighter than theupper tension, you will see excess threads underneath thefabric.
To balance the tensions, simply adjust the upper tension inrelation to the lower tension. If you have tested the bobbintension as indicated above, you should not have to adjustthe bobbin tension unless you significantly change the sizeof thread.
If there is excess thread on the bottom of the fabric,increase the tension on top by turning the adjustment knob
to a larger number (usually turn clockwise). If there isexcess thread on the top of the fabric, decrease the toptension by adjusting the tension knob to a lower number(counterclockwise).
If you continue to have tension challenges, take the machineto your local sewing machine service center for a thoroughservice.
Important When You Have Tension Challenges:
1. Rethread & Double Check threading.
2. Test lower and upper tensions as you thread.
8/13/2019 Manual de Reparacion de Maquinas de Coser
http://slidepdf.com/reader/full/manual-de-reparacion-de-maquinas-de-coser 94/311
94
3. Test sew and adjust upper tension – increase ordecrease.
4. Have a professional sewing machine technicianservice the machine.
How ToSew A Seam
To sew a seam, the first question you must ask is “Do I
Need An Anchor Stitch?” If you intend this seam to betemporary or if it will be secured by a crossing seam, it maynot need an anchor stitch. If you intend the seam to standon its own forever, start the stitch by lining the fabric upunder the presser foot with at least enough space to sewthree to four reverse stitches. Sew your anchor stitch.(Sew three to four reverse stitches.) Then proceed to sewnormally.
Guide the fabric for all stitches in the same way. Place thefabric about one half inch under the presser foot.
Place your guide hand (right hand) along the edge of thefabric 4 to 5 inches in front of the needle in order to guidethe fabric accurately.
Place your smoothing hand (left hand) on the top of thefabric to the left and in front of the needle to keep the fabriclying flat and flowing smoothly.
Never place your hands behind the needle. Do not pull thefabric through the machine. Not only is this dangerouspotentially leading to serious injury, it can ruin your finishedproduct. Allow the sewing machine to drive the fabricthrough the machine. If the fabric does not move is it
8/13/2019 Manual de Reparacion de Maquinas de Coser
http://slidepdf.com/reader/full/manual-de-reparacion-de-maquinas-de-coser 95/311
95
should, something is wrong. Feed dogs may be out ofposition, filled with lint, or there may be too many layers offabric. A walking foot may be needed to assist the feeddogs. If the machine is working properly, it should draw thefabric through smoothly without any difficulty. If it is notworking properly, it needs to be fixed.
When sewing curves, remember not to turn too sharply. Agradual run will keep the stitch looking good. When usingzig zag or satin stitches it may be necessary to slightlyshorten the stitch length, if you are find too many openspaces between threads along curves.
GO TO BEGINNER PROJECT # 1.1
How ToSelect and Adjust Stitches
If you include all the hand stitches, sewing machine utilitystitches, sewing machine decorative stitches, sergerstitches, and industrial manufacturing stitches, you have abunch of stitches. On a moderately priced home sewingmachine you will find twenty to two hundred differentstitches plus variations in stitch length and stitch width aswell as stretch factors. A top quality home sewing machine
will have eight hundred to a thousand different stitches.
There are several distinctly different types of sewingmachines and each type uses slightly different systems toselect and form stitches.
8/13/2019 Manual de Reparacion de Maquinas de Coser
http://slidepdf.com/reader/full/manual-de-reparacion-de-maquinas-de-coser 96/311
96
Mechanical sewing machines are the least expensive sewingmachines and use the most primitive technologies. An ACelectric motor turns a belt which turns the upper sewingmachine shaft. The upper shaft transfers the mechanicalenergy along the shaft past the cam system to the needlesystem. A lever on a parabola connection transfers themechanical movement down to the lower sewing machineshaft which may be split into a dual lower shaft one to drivethe hook and a second to drive the feed dogs. Stitches areformed in a mechanical machine by aligning cam trackers(levers that rub against a cam gear with bumps andshallows) with the cam gear so that when the cam gearmoved the tracker lever will bounce back and forth. Thismovement is then transferred by lever to the needleassembly moving the needle bar back and forth and up anddown to form the desired stitches. The alignment of thecam trackers is achieved by use of levers, buttons, or dialsprotruding on the top or face of the sewing machine. Theuser moves the stitch selector to the proper position, andthe trackers line up to form that stitch. Additional dials orlevers are used to adjust the stitch length and stitch width.
Electronic sewing machines use electronics to control thepower drive system and the stitch selection system. Notemany machines are blends of mechanicals and electronictechnologies, and others are blends of electronics andcomputer technologies. Fully electronic sewing machinesuse electronic circuits to manage motor output giving thesewing machine greater torque, increased consistency, andsmoother sewing. Stitches are selected with electronicbuttons that control the production of stitches. Electronicsewing machines usually offer more different stitches andmore dependable sewing.
Computerized sewing machines use the most advancedtechnologies to produce the greatest number of differentstitches, smoothest sewing, and most dependableoperations. Computer input is made either by touchingbuttons on the computer keypad or a touch screen. The
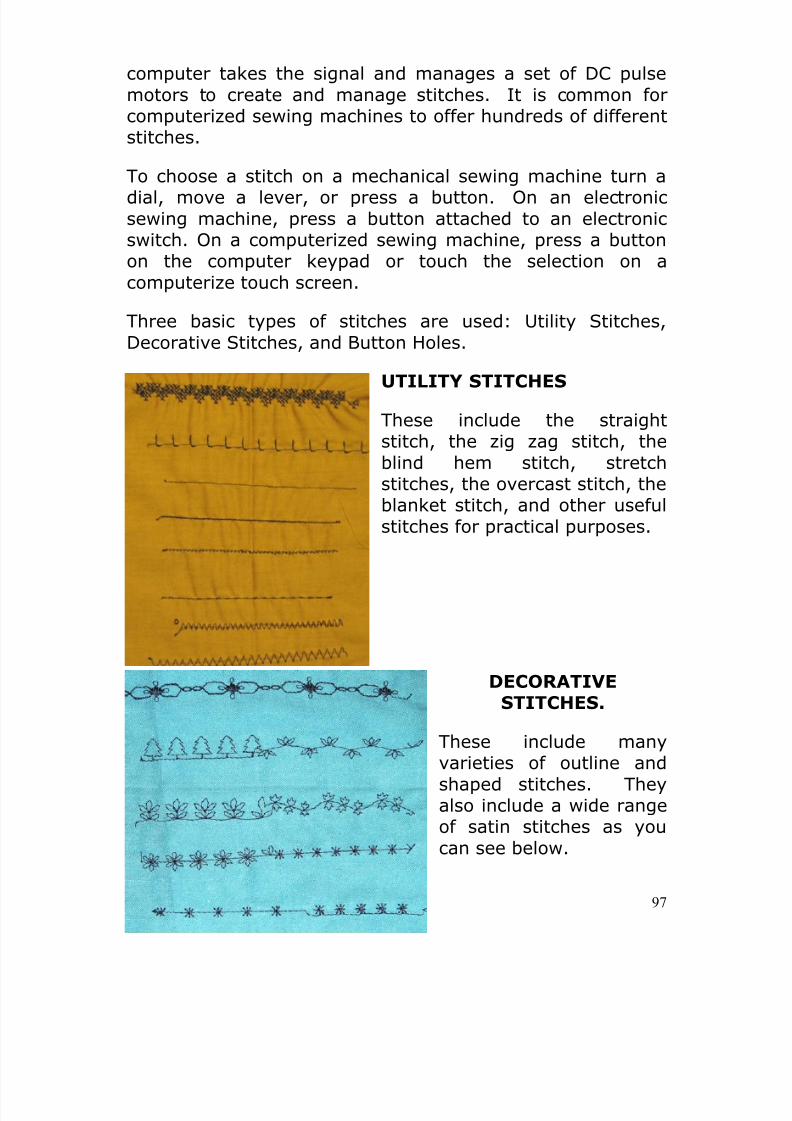
8/13/2019 Manual de Reparacion de Maquinas de Coser
http://slidepdf.com/reader/full/manual-de-reparacion-de-maquinas-de-coser 97/311
97
computer takes the signal and manages a set of DC pulsemotors to create and manage stitches. It is common forcomputerized sewing machines to offer hundreds of differentstitches.
To choose a stitch on a mechanical sewing machine turn a
dial, move a lever, or press a button. On an electronicsewing machine, press a button attached to an electronicswitch. On a computerized sewing machine, press a buttonon the computer keypad or touch the selection on acomputerize touch screen.
Three basic types of stitches are used: Utility Stitches,Decorative Stitches, and Button Holes.
UTILITY STITCHES
These include the straightstitch, the zig zag stitch, theblind hem stitch, stretchstitches, the overcast stitch, theblanket stitch, and other usefulstitches for practical purposes.
DECORATIVESTITCHES.
These include many
varieties of outline andshaped stitches. Theyalso include a wide rangeof satin stitches as youcan see below.
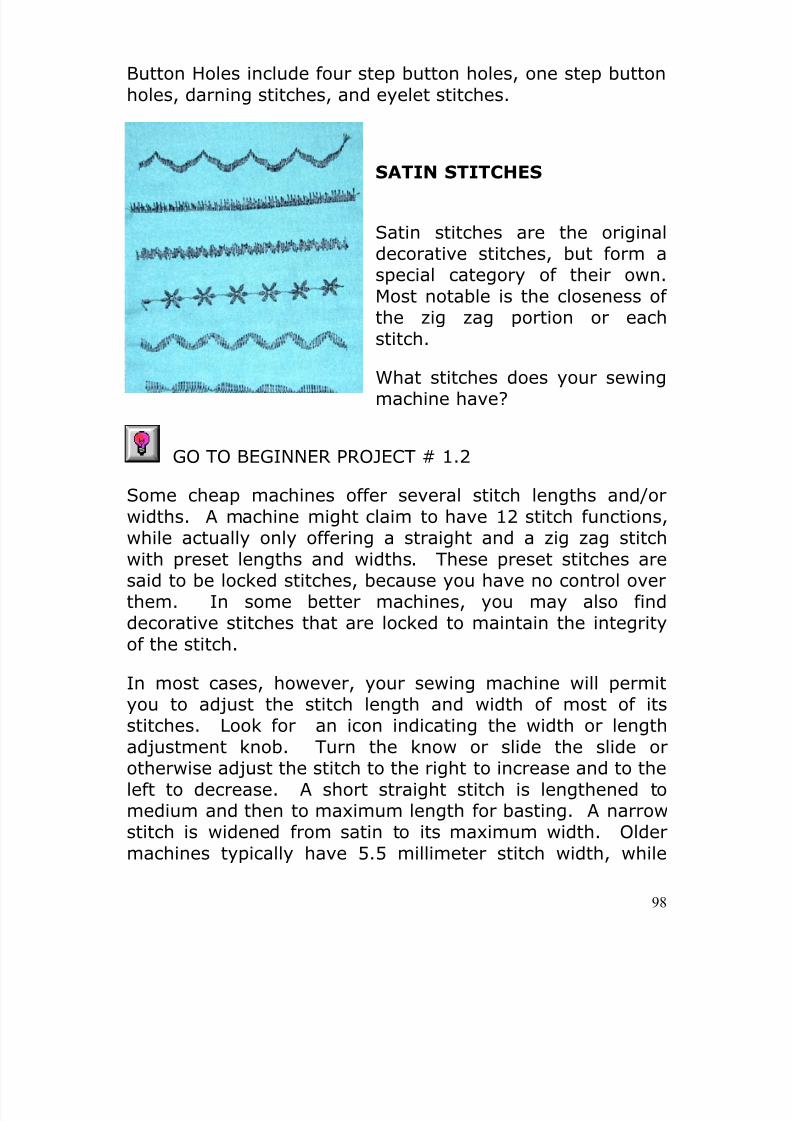
8/13/2019 Manual de Reparacion de Maquinas de Coser
http://slidepdf.com/reader/full/manual-de-reparacion-de-maquinas-de-coser 98/311
98
Button Holes include four step button holes, one step buttonholes, darning stitches, and eyelet stitches.
SATIN STITCHES
Satin stitches are the originaldecorative stitches, but form aspecial category of their own.Most notable is the closeness ofthe zig zag portion or eachstitch.
What stitches does your sewingmachine have?
GO TO BEGINNER PROJECT # 1.2
Some cheap machines offer several stitch lengths and/orwidths. A machine might claim to have 12 stitch functions,while actually only offering a straight and a zig zag stitchwith preset lengths and widths. These preset stitches aresaid to be locked stitches, because you have no control overthem. In some better machines, you may also finddecorative stitches that are locked to maintain the integrityof the stitch.
In most cases, however, your sewing machine will permityou to adjust the stitch length and width of most of itsstitches. Look for an icon indicating the width or lengthadjustment knob. Turn the know or slide the slide or
otherwise adjust the stitch to the right to increase and to theleft to decrease. A short straight stitch is lengthened tomedium and then to maximum length for basting. A narrowstitch is widened from satin to its maximum width. Oldermachines typically have 5.5 millimeter stitch width, while
8/13/2019 Manual de Reparacion de Maquinas de Coser
http://slidepdf.com/reader/full/manual-de-reparacion-de-maquinas-de-coser 99/311
99
more modern machines will have widths between 7 and 9millimeters.
SEWING MACHINEFEATURES & BENEFITS TO DIE FOR
When we think of sewing, we automatically think of thesewing machine. But there are some wonderfulspecialty sewing machines that can make sewing
quicker and easier and more professional. In additionto a quality sewing machine, a fully outfitted sewingstudio will include: a serger, a blind hemmer, and anembroidery machine.
The serger seams, overcasts, and trims in a single passat roughly twice the speed of the home sewingmachine. It is used as a mainstay in garmentconstruction and home décor, but has great usefulness
in all areas of sewing. It even has some wonderfuldecorative capabilities. Also note there are manydifferent kinds of sergers. The most common is a 2 -3-4 thread serger, but you can also get 5 thread, 6thread, even an 8 thread serger.
The blind hemmer is a single purpose machinedesigned to produce professional blind hems ingarments and similar applications. If you plan to alter
or construct clothing this is a vital tool.
Embroidery is where the action is today. Each yearmore and more people are discovering the thrill ofembellishing for clothing, home décor, and much more.The embroidery machine may be a stand alone
8/13/2019 Manual de Reparacion de Maquinas de Coser
http://slidepdf.com/reader/full/manual-de-reparacion-de-maquinas-de-coser 100/311
8/13/2019 Manual de Reparacion de Maquinas de Coser
http://slidepdf.com/reader/full/manual-de-reparacion-de-maquinas-de-coser 101/311
101
and you want to stop sewing. You lift your presserfoot, adjust your hand wheel, and pull the fabric andthread out to use the old style thread trimmer. Or, youare ready to stop sewing and you touch the scissorsbutton. The machine automatically trims threads topand bottom. It is wonderful.
Reverse/Anchor: Machines have had reverse levers foryears, but the newer machines have a little buttonconveniently located just above the needle. Hold it inand the machine back stitches two or three stitches toanchor your seam. Or hold it in a bit longer and it willcontinue sewing in reverse. So convenient and easy.
Needle Up/Down: Older machine just stoppedwherever, but more modern machines empower youwith control over the position your needle stops whenyou stop sewing. If you want the needle up, touch thebutton. If you want the needle down, touch the button.Set it to consistently stop in the up or down position.Just the way you want. This makes pivoting quick as aflash.
Adjustable Foot Control: Older foot controls respondedonly to the amount of pressure you used to push downwith your foot. Adjustable foot controls enable you toslow the machine response down or speed it updepending on your desires at the time. If you adjust itslow, you can push the control all the way to the floorand the machine will still sew slowly. Adjust it fast,and zoom on down with even a light touch on thecontrol.
Lighting: Remember that rear mounted light on the oldsingers. What a wonderful addition they made at thetime. Today, better machines have great cool lights inall the right places.
Start/Stop Button: This is a revolutionary feature. At
8/13/2019 Manual de Reparacion de Maquinas de Coser
http://slidepdf.com/reader/full/manual-de-reparacion-de-maquinas-de-coser 102/311
102
the touch of a finger, your machine sews. You nolonger need that foot control, though you may want touse it sometime. The Start/Stop Button gives you awhole new way to control your sewing machine.
Slide Speed Control: On some machines this deviceworks exclusively with the Start/Stop Button giving youfull control over the speed of your sewing. On others,the slide control may also control the foot control orserve as a manual stitch width control.
Free Hand Sewing: The knee lift lever lifts the presserfoot with a gentle nudge of your knee. How great it isto lift that presser foot without having to reach to theback of the machine manually.
Presser Foot Control Button: Like the knee lift theautomatic presser foot button is a God send. It is soconvenient to touch the button and watch the presserfoot rise automatically.
Semi-Automatic Threading: Most modern machineshave what we call automatic threaders. Wrap thethread and turn a lever to thread the needle. You don’teven have to be able to see the eye of the needleanymore.
Fully-Automatic Threading: A few spectacular sewingmachines have fully-automatic threading. Just touchthe button, and the machine robotically threads itself.Whalla!
Magnifiers: A great aid for sewing is the machinemounted magnifying glasses. They really help you seewhat you are doing.
Thread Stands: Many machines today come withmultiple thread stands. Some have two spool pins builtin. Others have secondary spool pins as accessories to
8/13/2019 Manual de Reparacion de Maquinas de Coser
http://slidepdf.com/reader/full/manual-de-reparacion-de-maquinas-de-coser 103/311
103
attach to the top of the machine. Still others offerspecial tread stands that sit or fasten to the back of thesewing machine offering as many as ten spool pins withguides for easy color changes.
Presser Feet Systems: Perhaps the most elegant andrugged is the presser feet system by Bernina. Over ahundred special feet enable the Bernina user to achievethings with their sewing machines others just dreamabout. Most other companies offer a line of specialtyfeet for the snap on systems. Using the right presserfoot can make any sewing project quicker and easier.
EssentialSewing Machine Skills
Here is list of topics covered in this lesson:
Origins of Modern Sewing: How important is thesewing machine to modern sewing?
How Your Sewing Machine Works: Understanding thebasics of threading, stitch formation, and tension isessential.
Care And Feeding Of Your Sewing Machine: As a user,you must frequently clean out the bobbin area of your
machine and oil the hook race to keep the machineworking properly.
Choosing The Right Sewing Machine: The rightequipment makes sewing quicker, easier, and morecarefree.
8/13/2019 Manual de Reparacion de Maquinas de Coser
http://slidepdf.com/reader/full/manual-de-reparacion-de-maquinas-de-coser 104/311
104
How To Thread Your Sewing Machine: Follow the upperthread line making sure to through every thread guide,through the tension spring, through the take up lever,
and through the eye of the needle.
How To Adjust Tensions: A properly balanced stitchhas the upper and lower threads meeting in the middleof the fabric with no excess on top or bottom.
How To Sew A Seam: Guide from the front. Let themachine do the work. Complete Beginner Project 1.1.
How To Select And Adjust Stitches: Know yourmachine and learn how to select and adjust yourstitches. Complete Beginner Project 1.2.
Features & Benefits To Die For: When you haveopportunity to explore a new machine look for all theneat features that are possible. Convenience featuresmake sewing more carefree, less stressful, and morefun.
MY BEGINNINGSEWING MACHINE
Ok! Run down to Target or Walmart and grab one off theshelf. Or, you might drive past a garage sale and pick up asteel or cast iron antique.
Maybe not.
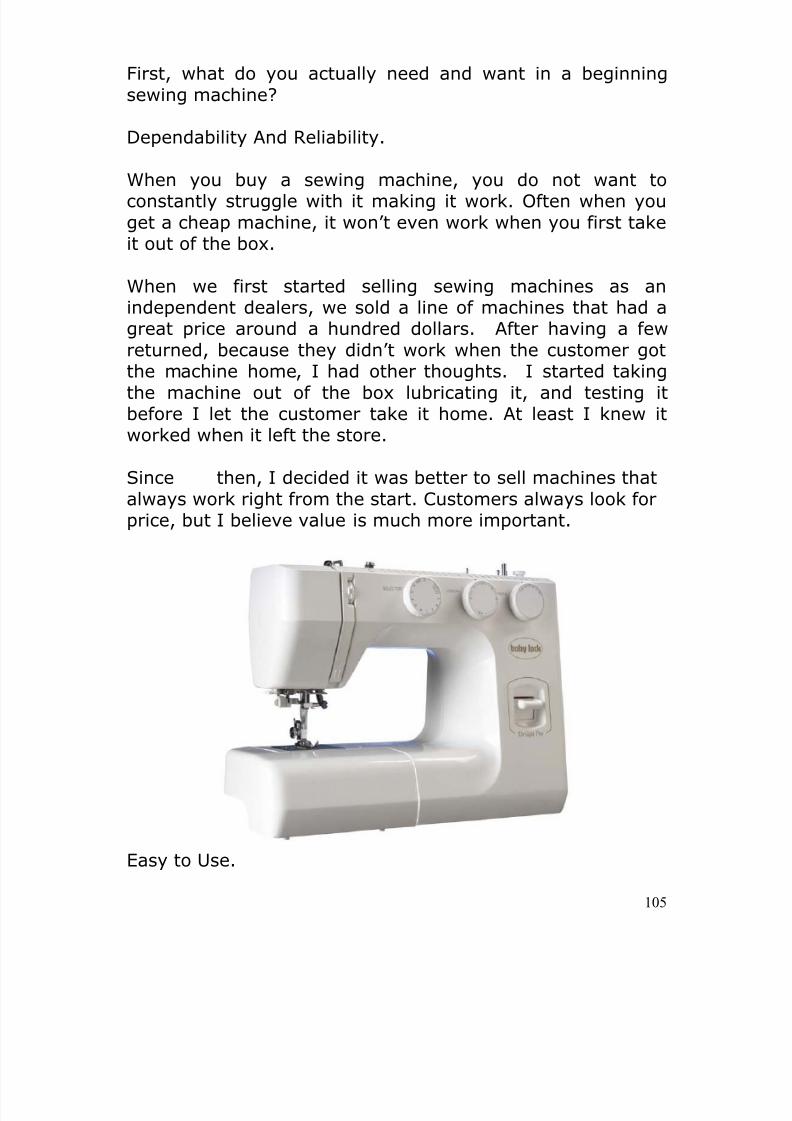
8/13/2019 Manual de Reparacion de Maquinas de Coser
http://slidepdf.com/reader/full/manual-de-reparacion-de-maquinas-de-coser 105/311
105
First, what do you actually need and want in a beginningsewing machine?
Dependability And Reliability.
When you buy a sewing machine, you do not want toconstantly struggle with it making it work. Often when youget a cheap machine, it won’t even work when you first takeit out of the box.
When we first started selling sewing machines as anindependent dealers, we sold a line of machines that had agreat price around a hundred dollars. After having a fewreturned, because they didn’t work when the customer gotthe machine home, I had other thoughts. I started takingthe machine out of the box lubricating it, and testing itbefore I let the customer take it home. At least I knew itworked when it left the store.
Since then, I decided it was better to sell machines thatalways work right from the start. Customers always look forprice, but I believe value is much more important.
Easy to Use.
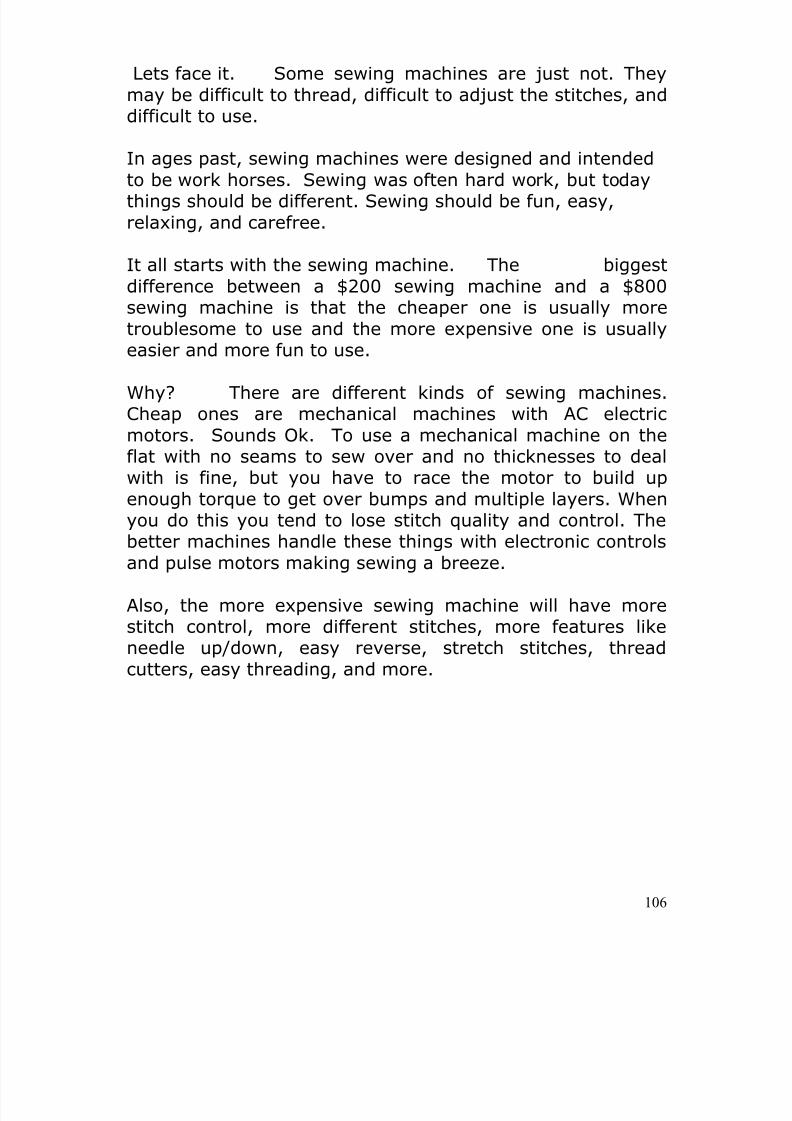
8/13/2019 Manual de Reparacion de Maquinas de Coser
http://slidepdf.com/reader/full/manual-de-reparacion-de-maquinas-de-coser 106/311
106
Lets face it. Some sewing machines are just not. Theymay be difficult to thread, difficult to adjust the stitches, anddifficult to use.
In ages past, sewing machines were designed and intendedto be work horses. Sewing was often hard work, but todaythings should be different. Sewing should be fun, easy,relaxing, and carefree.
It all starts with the sewing machine. The biggestdifference between a $200 sewing machine and a $800sewing machine is that the cheaper one is usually moretroublesome to use and the more expensive one is usuallyeasier and more fun to use.
Why? There are different kinds of sewing machines.Cheap ones are mechanical machines with AC electricmotors. Sounds Ok. To use a mechanical machine on theflat with no seams to sew over and no thicknesses to dealwith is fine, but you have to race the motor to build upenough torque to get over bumps and multiple layers. Whenyou do this you tend to lose stitch quality and control. Thebetter machines handle these things with electronic controlsand pulse motors making sewing a breeze.
Also, the more expensive sewing machine will have morestitch control, more different stitches, more features likeneedle up/down, easy reverse, stretch stitches, threadcutters, easy threading, and more.
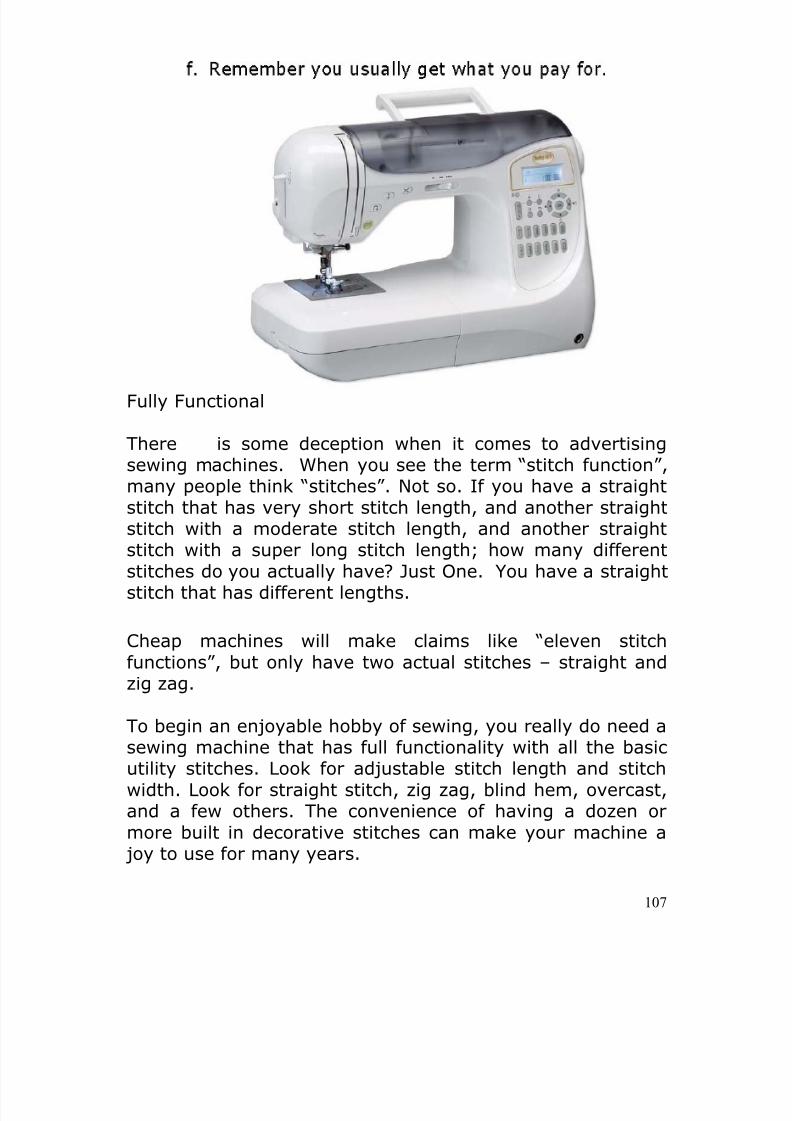
8/13/2019 Manual de Reparacion de Maquinas de Coser
http://slidepdf.com/reader/full/manual-de-reparacion-de-maquinas-de-coser 107/311
107
Fully Functional
There is some deception when it comes to advertisingsewing machines. When you see the term “stitch function”,many people think “stitches”. Not so. If you have a straightstitch that has very short stitch length, and another straightstitch with a moderate stitch length, and another straightstitch with a super long stitch length; how many different
stitches do you actually have? Just One. You have a straightstitch that has different lengths.
Cheap machines will make claims like “eleven stitchfunctions”, but only have two actual stitches – straight andzig zag.
To begin an enjoyable hobby of sewing, you really do need asewing machine that has full functionality with all the basic
utility stitches. Look for adjustable stitch length and stitchwidth. Look for straight stitch, zig zag, blind hem, overcast,and a few others. The convenience of having a dozen ormore built in decorative stitches can make your machine a joy to use for many years.
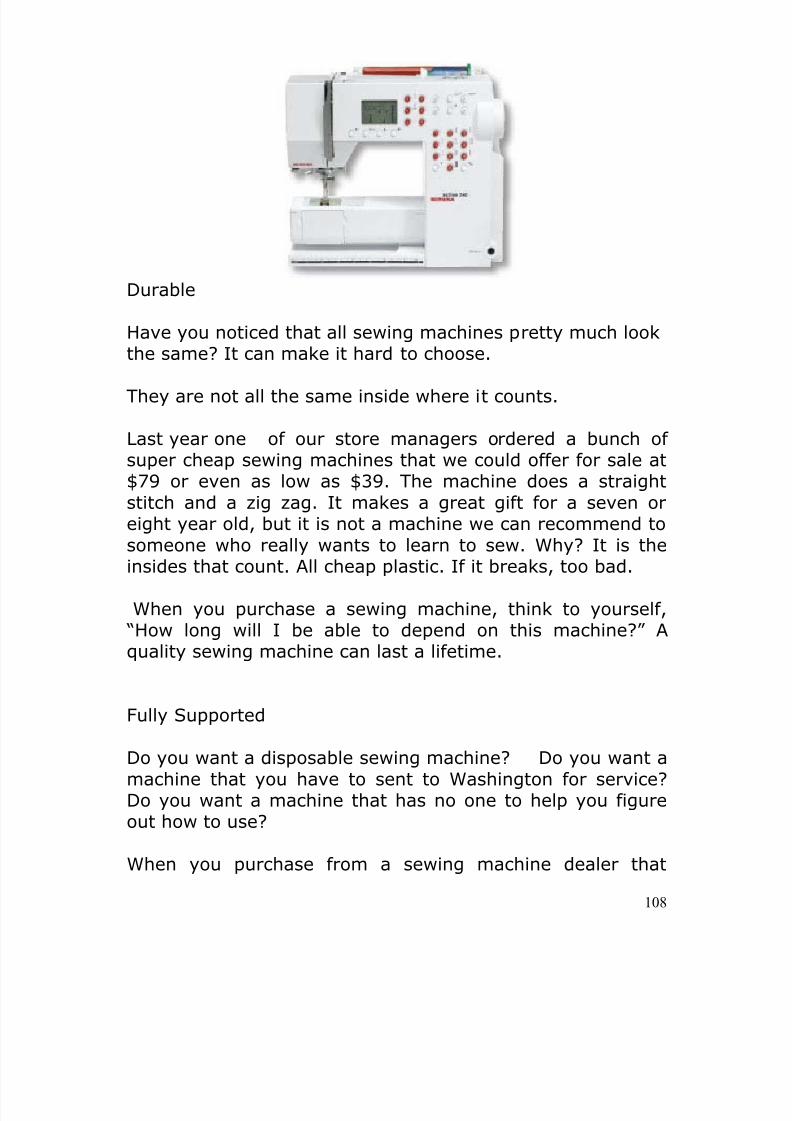
8/13/2019 Manual de Reparacion de Maquinas de Coser
http://slidepdf.com/reader/full/manual-de-reparacion-de-maquinas-de-coser 108/311
8/13/2019 Manual de Reparacion de Maquinas de Coser
http://slidepdf.com/reader/full/manual-de-reparacion-de-maquinas-de-coser 109/311
109
provides local repair, classes, technical support, and expertservice, you get much more than a machine.
You could buy a machine for $400 from a department store,but what do you get? A machine in a box.
Or you could pay $450 for the same sewing machine from afull service dealer. What do you get? A machine in a box,classes worth $40 to $120, technical support worth $200 peryear, local repair service $??, expert support $??...
Always buy value.
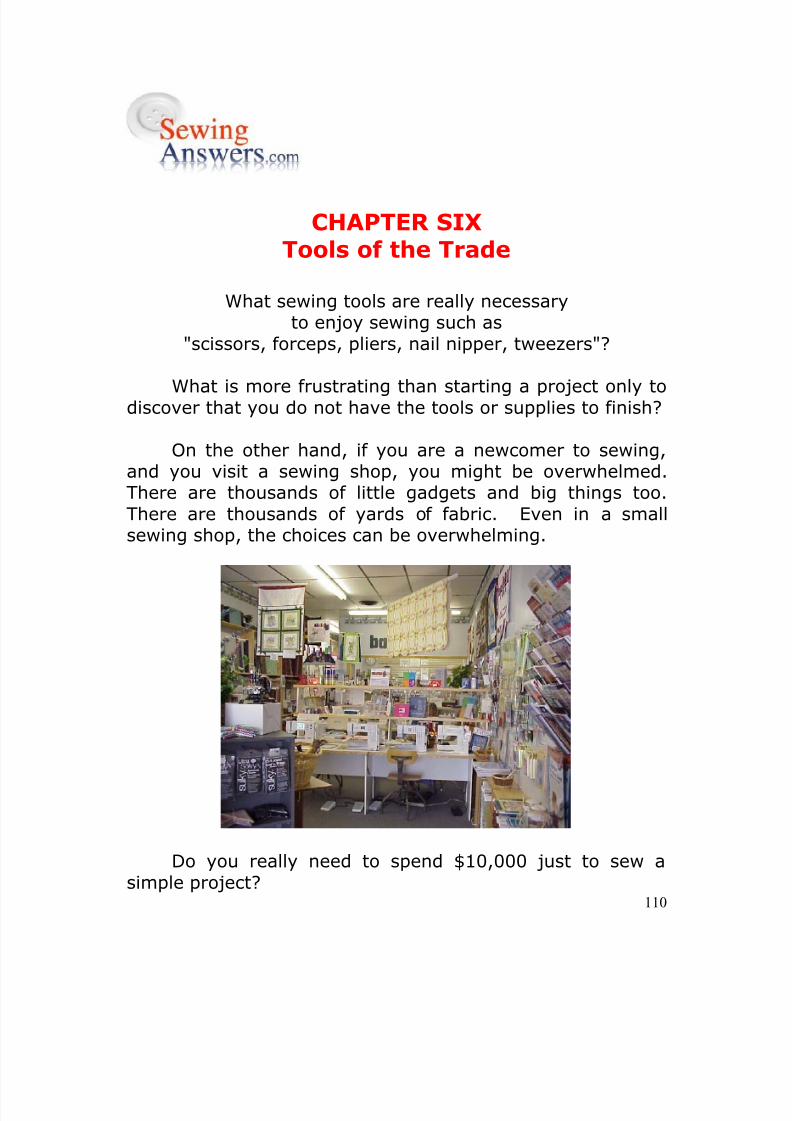
8/13/2019 Manual de Reparacion de Maquinas de Coser
http://slidepdf.com/reader/full/manual-de-reparacion-de-maquinas-de-coser 110/311
110
CHAPTER SIXTools of the Trade
What sewing tools are really necessaryto enjoy sewing such as
"scissors, forceps, pliers, nail nipper, tweezers"?
What is more frustrating than starting a project only todiscover that you do not have the tools or supplies to finish?
On the other hand, if you are a newcomer to sewing,and you visit a sewing shop, you might be overwhelmed.There are thousands of little gadgets and big things too.There are thousands of yards of fabric. Even in a smallsewing shop, the choices can be overwhelming.
Do you really need to spend $10,000 just to sew asimple project?
8/13/2019 Manual de Reparacion de Maquinas de Coser
http://slidepdf.com/reader/full/manual-de-reparacion-de-maquinas-de-coser 111/311
111
No!
It might take a lifetime of sewing to spend that kind ofmoney. There are costs associated with sewing, but therewards far outweigh the costs. To get started, even if youhave nothing to start with, should cost less than $500 andcertainly less than $1,000 even if you go all out.
Depending on the type of sewing you choose to do, youwill almost certainly sew for less than what you mightpurchase the same quality product. If you buy ready madeclothing at a huge discount say a pair of slacks for $2.00.The actual purchase may be less than what it would be ifyou made it, but usually it does not fit and could use yourown personal touch. Add in the cost of hiring a professionalto adjust or alter that garment and the price goes way up.Add in the cost of have a designer embellish that pair ofslacks, and the rockets red glare. When you have the skills,you can turn that $2.00 purchase into a one of a kindperfect fitting custom garment worth maybe $100.00.Would you believe there are people who do exactly that as abusiness with blue jeans and make big money?
While we are talking about the initial cost of beginningto sew, it is important to remember that you get what youpay for. For example, you can buy a $2.00 pair of scissors,a $10.00 pair of scissors, or a $39.00 pair of scissors.Which one is the best buy?
You decide.
The $2.00 pair is poorly balanced making cuttingawkward and uncomfortable. It is probably going tobe worthless and unusable within a very short time andcan’t be sharpened. .
The $10.00 pair will do a much better job for manyprojects, but will eventually go dull. It can be
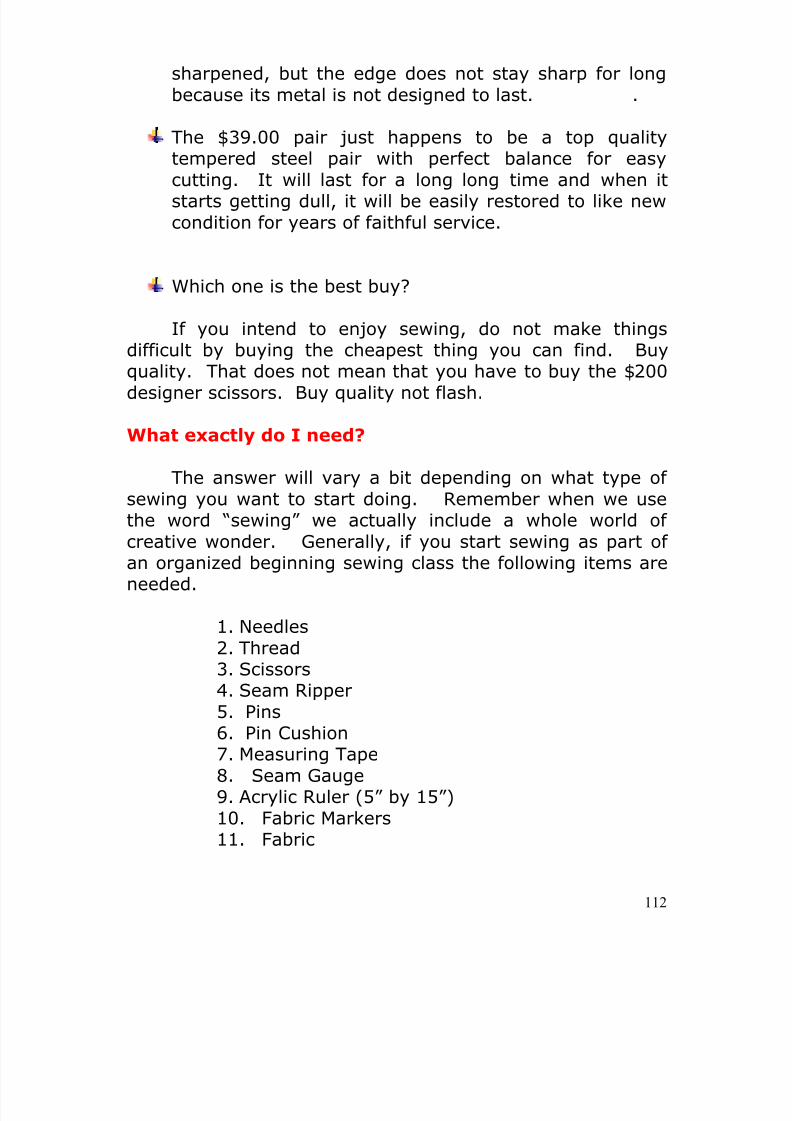
8/13/2019 Manual de Reparacion de Maquinas de Coser
http://slidepdf.com/reader/full/manual-de-reparacion-de-maquinas-de-coser 112/311
112
sharpened, but the edge does not stay sharp for longbecause its metal is not designed to last. .
The $39.00 pair just happens to be a top qualitytempered steel pair with perfect balance for easycutting. It will last for a long long time and when itstarts getting dull, it will be easily restored to like newcondition for years of faithful service.
Which one is the best buy?
If you intend to enjoy sewing, do not make thingsdifficult by buying the cheapest thing you can find. Buyquality. That does not mean that you have to buy the $200designer scissors. Buy quality not flash.
What exactly do I need?
The answer will vary a bit depending on what type ofsewing you want to start doing. Remember when we usethe word “sewing” we actually include a whole world ofcreative wonder. Generally, if you start sewing as part ofan organized beginning sewing class the following items areneeded.
1. Needles2. Thread3. Scissors4. Seam Ripper5. Pins6. Pin Cushion7.
Measuring Tape
8. Seam Gauge9. Acrylic Ruler (5” by 15”)10. Fabric Markers11. Fabric
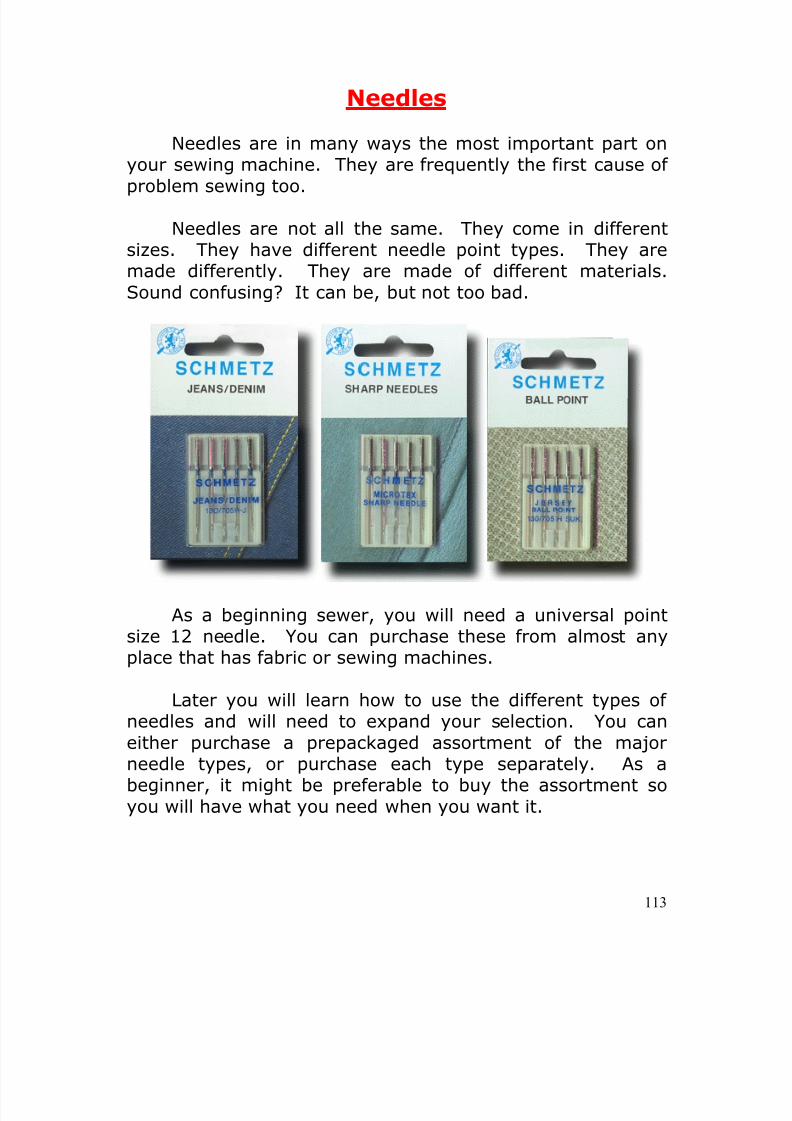
8/13/2019 Manual de Reparacion de Maquinas de Coser
http://slidepdf.com/reader/full/manual-de-reparacion-de-maquinas-de-coser 113/311
113
Needles
Needles are in many ways the most important part onyour sewing machine. They are frequently the first cause of
problem sewing too.
Needles are not all the same. They come in differentsizes. They have different needle point types. They aremade differently. They are made of different materials.Sound confusing? It can be, but not too bad.
As a beginning sewer, you will need a universal pointsize 12 needle. You can purchase these from almost anyplace that has fabric or sewing machines.
Later you will learn how to use the different types ofneedles and will need to expand your selection. You caneither purchase a prepackaged assortment of the major
needle types, or purchase each type separately. As abeginner, it might be preferable to buy the assortment soyou will have what you need when you want it.
8/13/2019 Manual de Reparacion de Maquinas de Coser
http://slidepdf.com/reader/full/manual-de-reparacion-de-maquinas-de-coser 114/311
114
THREAD
This is a must. The right thread willmake your project and the wrong thread canruin it.
We think of filaments as yarn if the materialsare knitted together, but we think of them asthreads if they are woven together into fabric.Yet, the filaments used to join fabrics togetherare almost universally called thread. Wemight even say that this is the thread thatbinds.
THREAD MYTHS
Myth #1. All threads are the same.
Myth #2. Thread content does not matter, anythread will do.
Myth #3. Threads last forever, old or new it is allthe same.
Myth #4. Threads are not affected by theelements.
8/13/2019 Manual de Reparacion de Maquinas de Coser
http://slidepdf.com/reader/full/manual-de-reparacion-de-maquinas-de-coser 115/311
115
Myth #5. Switching between sizes of thread does
not affect stitch quality.
Myth #6. Thread colors do not change.
THREAD FACTS
Fact #1. There are many different kinds of thread,made from different kinds of fibers andmanufactured very differently.
Fact #2. Threads are designed for different purposes. Theircontent may be synthetic, natural, or blended.Some threads stretch. Some threads break easily,and others are difficult to break. Some threadsare designed for clothing construction. Some aremade for quilting. Some are made for decorativepurposes and others are made for practicalnecessity. Spun polyester threads and cottoncovered polyester threads tend to break easily,
while long fiber threads are stronger. There arehuge differences in quality. Some threads are twoply or three ply or are made in other special ways.
Fact #3. Threads, especially those made with naturalfibers, decay over time. They lose their color,texture, strength, and generally the qualities forwhich they were manufactured. Even the syntheticfiber threads will lose their quality over time. If
you have old thread, throw them away. Do notuse them.
Fact #4. Moisture, exposure to sunlight, and heat causethreads to deteriorate. Always keep threads outof direct sunlight, away from moisture, and away

8/13/2019 Manual de Reparacion de Maquinas de Coser
http://slidepdf.com/reader/full/manual-de-reparacion-de-maquinas-de-coser 116/311
116
from heat. Natural threads can rot on the spool ina matter of days when exposed to extremeelements.
Fact #5. Unless your sewing machine has automatictension, you must adjust your sewing machinetension every time you change thread size. Onmachines with poor quality tension systems, youmay find that you have to adjust tensionsfrequently even when using the same sizethreads. Threads sizes are marked largest tosmallest. A 30 weight thread is large and used fordecorative applications. A 50 weight thread isnormal sewing thread used for general sewing.An 80 weight thread is thin and used for delicatesituations.
Fact #6. Threads do not look the same under differentlighting. While poor quality threads may actuallyfade or lose their color; all threads reflect the lightslightly differently. Florescent lighting,incandescent lighting, and natural sunlight mayreveal very different appearances of the thread.When choosing thread it is a good idea to doublecheck the color in natural lighting. Also, note thatthread colors will take on the character or blendwith the colors in the fabrics of our projects.
COTTON COVERED POLYESTER THREADS
The most popular sewing thread is what is called cottoncovered polyester thread. It is sold at all the cheap sewingsupply stores. The idea behind the thread is to use thestronger coarser thread core made of polyester and soften
8/13/2019 Manual de Reparacion de Maquinas de Coser
http://slidepdf.com/reader/full/manual-de-reparacion-de-maquinas-de-coser 117/311
117
it by wrapping cotton around the core. (The polyester isspun or manufactured like cotton candy, from very tinyparticles stuck together to form this abrasive core of thethread. It is often called spun polyester. The soft fibers ofcotton are wrapped around the polyester core to form thethread.) This thread is usually used in clothingconstruction, but may be seen in many different settings.Good idea until you use it.
When you use cotton covered polyester thread, watch theeye of the needle. See that fine powder. That powder is thecotton fibers being torn away by passing through the eye ofthe needle.
Now think for a moment. If those fibers are stripping offthere, what about elsewhere?
Do you suppose that lint and fibers are collecting inside thesewing machine bobbin tension area or the upper tensionarea? You bet.
The same thing happens less noticeably when the threadpassed through the upper tension discs and the bobbintension. If fact, that powdery stuff can really mess up yourtensions causing poor stitch quality, and it can mess up therest of your sewing machine too.
Recommendation: Avoid cheap threads and especially cottoncovered polyester threads. They may be labeled as CottonCovered Poly, Dual Duty, or some similar name. Theprimary manufacturer of this kind of thread is Coats andClark.
If you are going to use cotton covered poly threads, use aslightly larger needle eye and decrease the tensionpressures. This will help reduce the stripping of the cottonfibers.
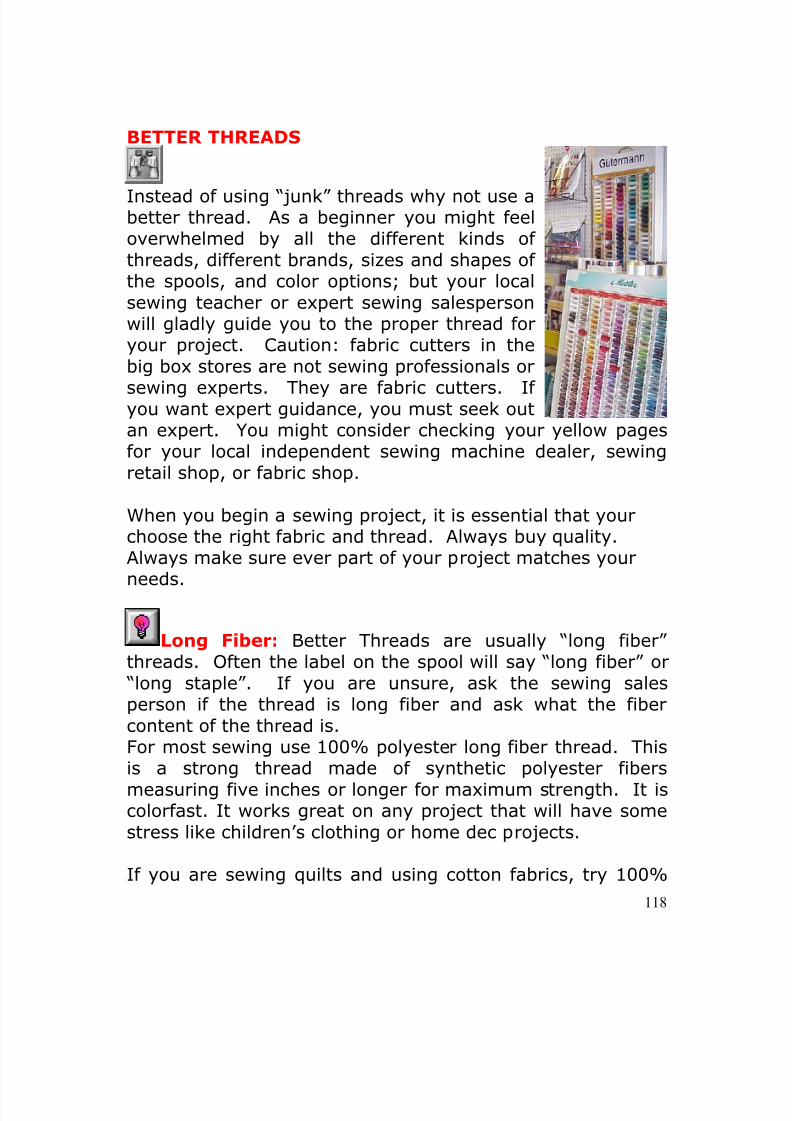
8/13/2019 Manual de Reparacion de Maquinas de Coser
http://slidepdf.com/reader/full/manual-de-reparacion-de-maquinas-de-coser 118/311
118
BETTER THREADS
Instead of using “junk” threads why not use abetter thread. As a beginner you might feeloverwhelmed by all the different kinds ofthreads, different brands, sizes and shapes ofthe spools, and color options; but your localsewing teacher or expert sewing salespersonwill gladly guide you to the proper thread foryour project. Caution: fabric cutters in thebig box stores are not sewing professionals or
sewing experts. They are fabric cutters. Ifyou want expert guidance, you must seek outan expert. You might consider checking your yellow pagesfor your local independent sewing machine dealer, sewingretail shop, or fabric shop.
When you begin a sewing project, it is essential that yourchoose the right fabric and thread. Always buy quality.Always make sure ever part of your project matches your
needs.
Long Fiber: Better Threads are usually “long fiber”threads. Often the label on the spool will say “long fiber” or “long staple”. If you are unsure, ask the sewing salesperson if the thread is long fiber and ask what the fibercontent of the thread is.For most sewing use 100% polyester long fiber thread. This
is a strong thread made of synthetic polyester fibersmeasuring five inches or longer for maximum strength. It iscolorfast. It works great on any project that will have somestress like children’s clothing or home dec projects.
If you are sewing quilts and using cotton fabrics, try 100%
8/13/2019 Manual de Reparacion de Maquinas de Coser
http://slidepdf.com/reader/full/manual-de-reparacion-de-maquinas-de-coser 119/311
119
long fiber cotton thread. You will be very happy with theresults. The threads will blend into the quilt providing agreat finished product. You will see almost no lint, stitchproblems, or sewing machine problems.
When you are sewing on a given type of fabric, it is always agood idea to use the same fiber content in the thread. Ifyou sewing on silk, you can use long fiber silk threads. Ifyou are sewing on rayon, you can use rayon threads. If youare sewing on cottons, cotton does nicely. If you are sewingon -- get the idea?
If for some reason, you find yourself concerned about thestrength of the thread. Maybe you need a stronger threadbecause of stresses on the project you expect in its use.Here is a simple rule of thumb: natural fibers break easily,while synthetic fibers are stronger and break less. Polyesteris stronger than cotton.
THREAD SIZES
What size do you need? Yes, thread comes in all sizes.
The smaller the number the bigger the thread. For mostsewing try using a 50 or 60 weight thread. For more delicatefabrics, you might consider a 70 or 80. For decorativeapplications you might consider a 30 or 40 weight.
Cording is very similar to thread and is generally, treatedthe same. In most cases, you will use cording for decorative
applications to give some size and distinction to a project.
Before you invest in thread, check with your local sewingexpert and let them know what kind of project and materialsyou plan to use.

8/13/2019 Manual de Reparacion de Maquinas de Coser
http://slidepdf.com/reader/full/manual-de-reparacion-de-maquinas-de-coser 120/311
120
The size of thread may be measured in two different ways.In the sewing shop it is usually sized by its weight, butcommercially it may be sized according to the “DenierSystem” or “Tex System” by length.
As already mentioned, the thread size for larger or thickerthread is a smaller number. For example: A thick threadused for decorative sewing would be a 12, 20, or 30 weightthread. A general sewing thread might be a 50 weightthread, and a delicate sewing thread would be say an 80weight thread. What this actually means is that threadactually weights 1 gram if it is 12, 20, 30, 50, or 80 meterslong. Whatever the length of the thread is when it reaches aweight of 1 gram is the size of the thread. Therefore, it iseasy to understand that a piece of 12 weight thread is muchheavier and thicker than an 80 weight thread if you have thesame length of thread say two feet in length. We might alsosay, the higher the thread size number – the thinner andlighter weight it is.
In the “Denier System” thread is measured by its length. Inthis system, the bigger the denier number - the thicker andheavier the thread. It is determined by how much thethread weighs if you have a spool of 9000 meters. If thespool weighs 120 grams, it is sized as 120 d thread. If thethread is a two strand thread the size is indicated as 120/2denier or two strands of 120 denier thread. The thread isactually 240 denier or 240 grams per 9000 meters, but sinceit has two strands it is so indicated. If you are buyingembroidery thread, you may find the denier systemindicated. Just remember the larger the denier threadnumber is the thicker and heavier the thread is.
You may also run into the designation of “Tex”. It has littleto do with Texas. Essentially, it the same measuring systemas the Denier System except instead of using 9,000 metersit uses 1,000 meters.
Therefore, if you have a thread that is Tex 25, it is roughly
8/13/2019 Manual de Reparacion de Maquinas de Coser
http://slidepdf.com/reader/full/manual-de-reparacion-de-maquinas-de-coser 121/311
121
equivalent to a 240 denier, and also equivalent to a 40weight general sewing thread. A Tex 33 thread is equal toa 300 denier thread which also equals a 30 heavy weightsewing thread.
Your Thread Collection
Since every project requires thread, it is a good idea tocollect your own selection of basics. This way you will nothave to run out and buy a spool of thread for every differentpart of your next project.
What should you include?
This depends largely on the kinds of sewing project youwant to sew. If you are interested in clothing construction,you will need to plan your collection around these types ofprojects. If you plan to do home dec, quilting, orembroidery, you will need to plan accordingly. Somethreads can be used in many different kinds of sewing andshould be kept on hand at all times. Other threads may only
be used for special situations, and would be something tocollect later.
The more different kinds of thread in the more differentcolors the more convenient your sewing will be. If youalready have the thread, you do not have to get in the carand drive to the sewing store to get more.
Sometimes it is cheaper to buy quality thread in thread sets.
For example: you might find a box of a hundred spools of aparticular thread for twenty percent less than buying spoolsindividually.
Basic Sewing Thread: You will almost always need basicsewing thread. Specifically, choose a quality brand of long

8/13/2019 Manual de Reparacion de Maquinas de Coser
http://slidepdf.com/reader/full/manual-de-reparacion-de-maquinas-de-coser 122/311
122
fiber polyester thread and long fiber cotton thread. Thesetoo are suitable for lots of different applications.
You will need white, off white, black, and gray as basiccolors.
In addition to these basics, choose half dozen colors thatyou think you might be able to use.
Thread Storage: You may keep threadon a thread rack, in plastic thread boxes,in drawers, lots of different places. It isimportant that you keep thread out ofsunlight and away from moisture andheat. Example: do not store your threadon the window sill or under the hot airvent.
Scissors
Scissors are essentials. You may want several. Makesure you buy quality or you will regret it. Two things toconsider when buying your first scissors:
1. Different Types of Scissors
a. You will need a pair of six inch bent handledsewing fabric scissors. Insist on quality. The oldstandby is Gingher, but Heritage Cuttlery isbecoming very popular. There are less expensivescissors, but be careful to buy value.
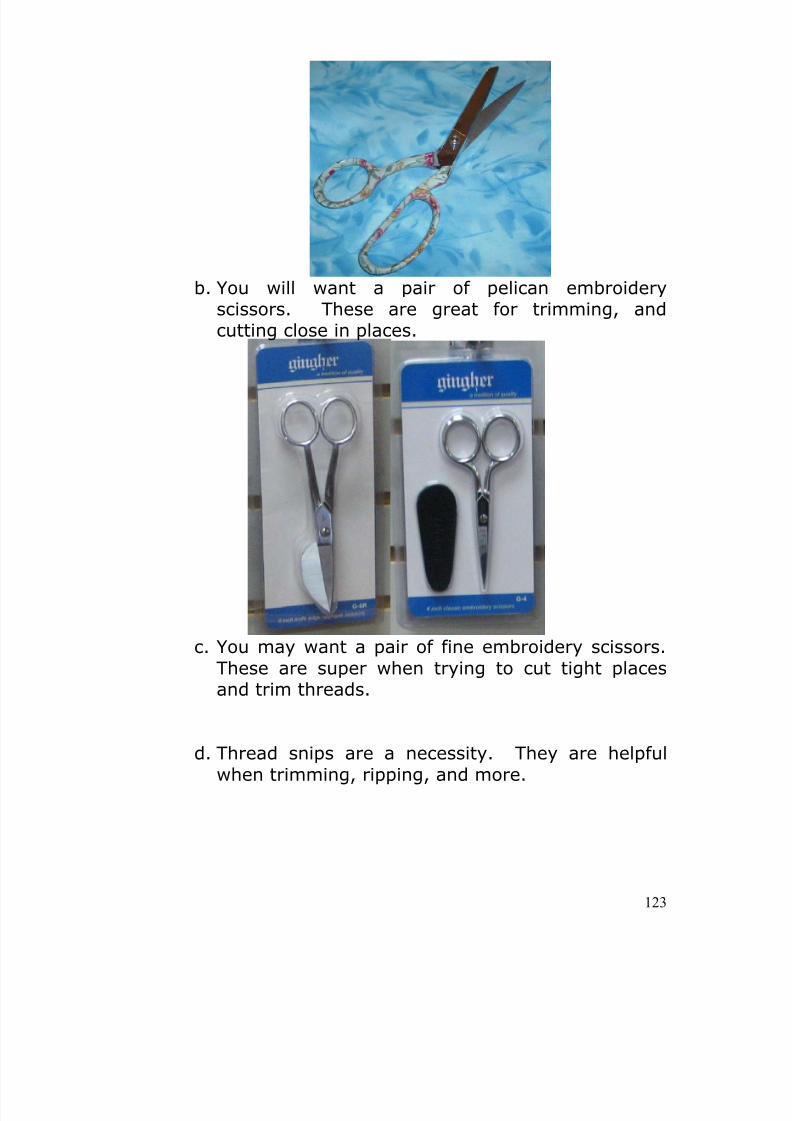
8/13/2019 Manual de Reparacion de Maquinas de Coser
http://slidepdf.com/reader/full/manual-de-reparacion-de-maquinas-de-coser 123/311
123
b. You will want a pair of pelican embroidery
scissors. These are great for trimming, andcutting close in places.
c. You may want a pair of fine embroidery scissors.These are super when trying to cut tight placesand trim threads.
d. Thread snips are a necessity. They are helpfulwhen trimming, ripping, and more.
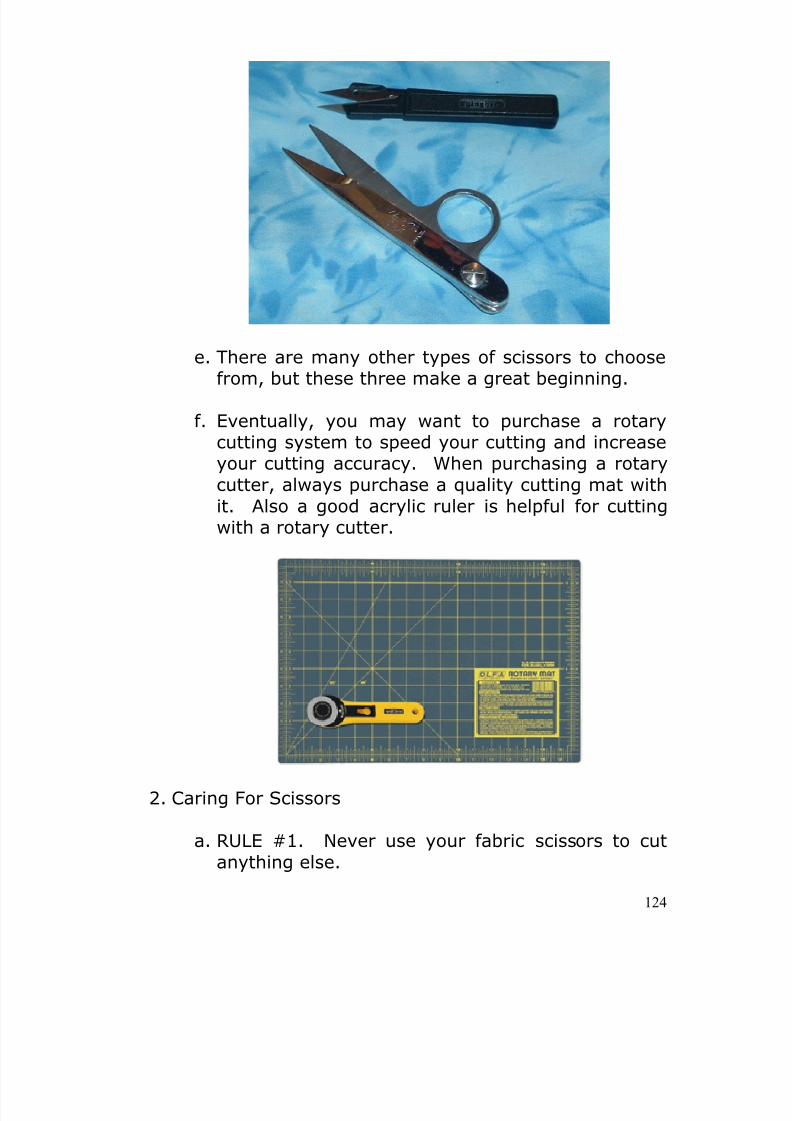
8/13/2019 Manual de Reparacion de Maquinas de Coser
http://slidepdf.com/reader/full/manual-de-reparacion-de-maquinas-de-coser 124/311
124
e. There are many other types of scissors to choose
from, but these three make a great beginning.
f. Eventually, you may want to purchase a rotarycutting system to speed your cutting and increaseyour cutting accuracy. When purchasing a rotarycutter, always purchase a quality cutting mat withit. Also a good acrylic ruler is helpful for cuttingwith a rotary cutter.
2. Caring For Scissors
a. RULE #1. Never use your fabric scissors to cutanything else.
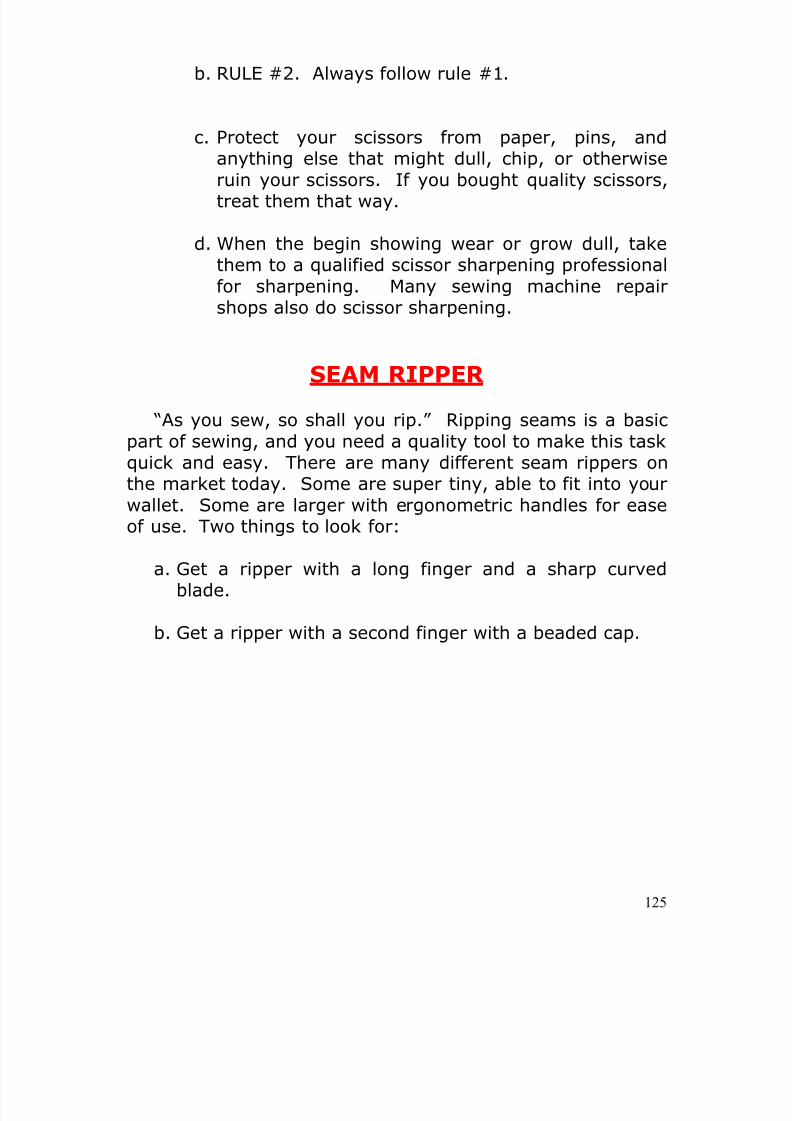
8/13/2019 Manual de Reparacion de Maquinas de Coser
http://slidepdf.com/reader/full/manual-de-reparacion-de-maquinas-de-coser 125/311
125
b. RULE #2. Always follow rule #1.
c. Protect your scissors from paper, pins, andanything else that might dull, chip, or otherwiseruin your scissors. If you bought quality scissors,treat them that way.
d. When the begin showing wear or grow dull, takethem to a qualified scissor sharpening professionalfor sharpening. Many sewing machine repairshops also do scissor sharpening.
SEAM RIPPER “As you sew, so shall you rip.” Ripping seams is a basic
part of sewing, and you need a quality tool to make this taskquick and easy. There are many different seam rippers onthe market today. Some are super tiny, able to fit into yourwallet. Some are larger with ergonometric handles for easeof use. Two things to look for:
a. Get a ripper with a long finger and a sharp curvedblade.
b. Get a ripper with a second finger with a beaded cap.
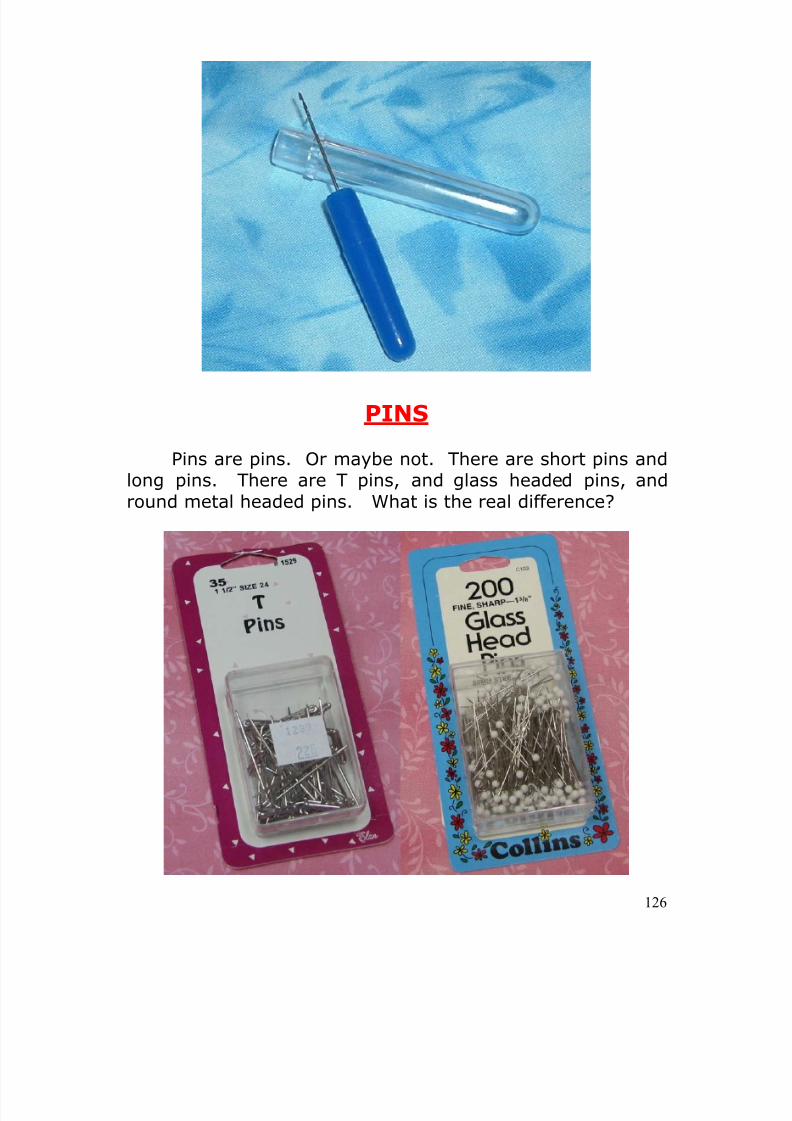
8/13/2019 Manual de Reparacion de Maquinas de Coser
http://slidepdf.com/reader/full/manual-de-reparacion-de-maquinas-de-coser 126/311
126
PINS
Pins are pins. Or maybe not. There are short pins andlong pins. There are T pins, and glass headed pins, andround metal headed pins. What is the real difference?
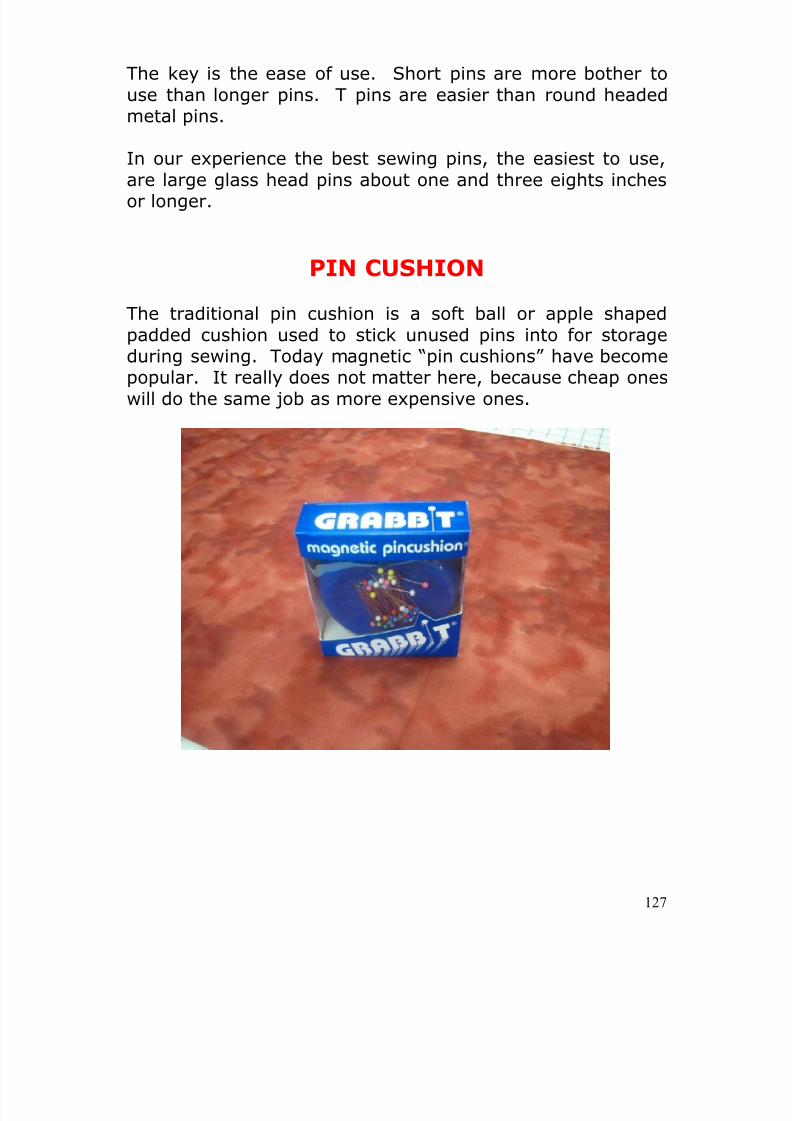
8/13/2019 Manual de Reparacion de Maquinas de Coser
http://slidepdf.com/reader/full/manual-de-reparacion-de-maquinas-de-coser 127/311
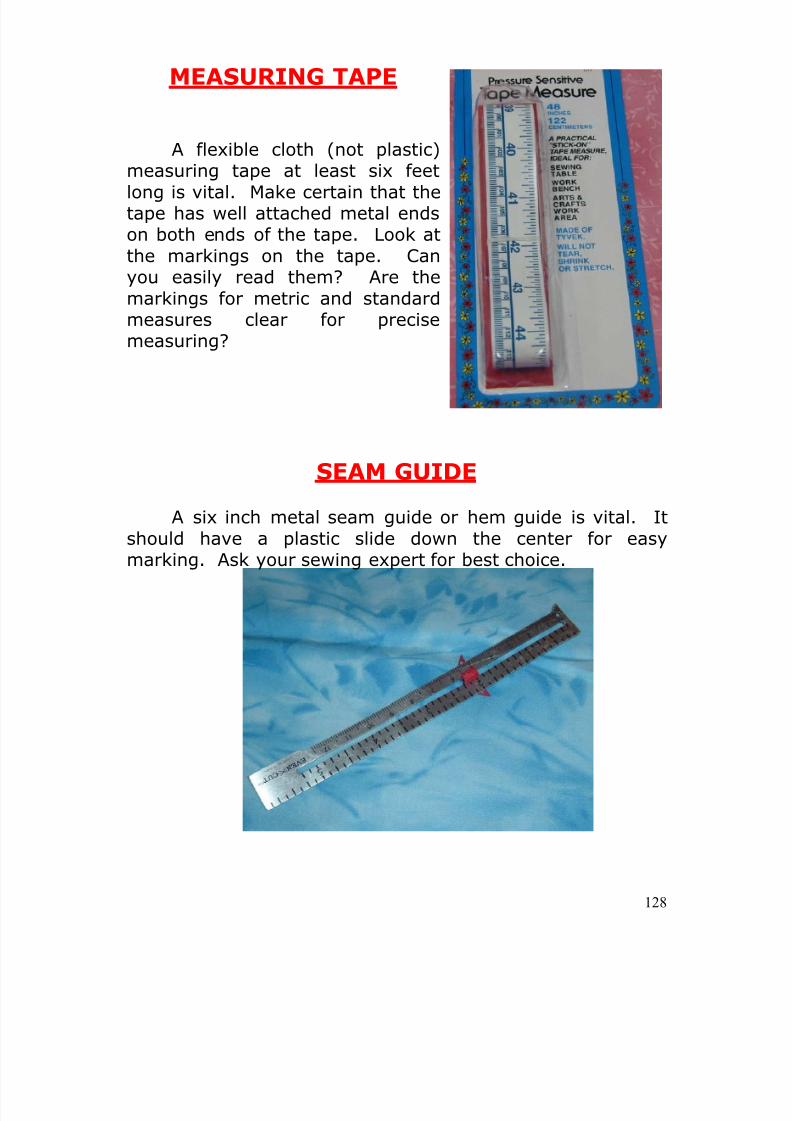
8/13/2019 Manual de Reparacion de Maquinas de Coser
http://slidepdf.com/reader/full/manual-de-reparacion-de-maquinas-de-coser 128/311
128
MEASURING TAPE
A flexible cloth (not plastic)measuring tape at least six feet
long is vital. Make certain that thetape has well attached metal endson both ends of the tape. Look atthe markings on the tape. Canyou easily read them? Are themarkings for metric and standardmeasures clear for precisemeasuring?
SEAM GUIDE
A six inch metal seam guide or hem guide is vital. Itshould have a plastic slide down the center for easymarking. Ask your sewing expert for best choice.
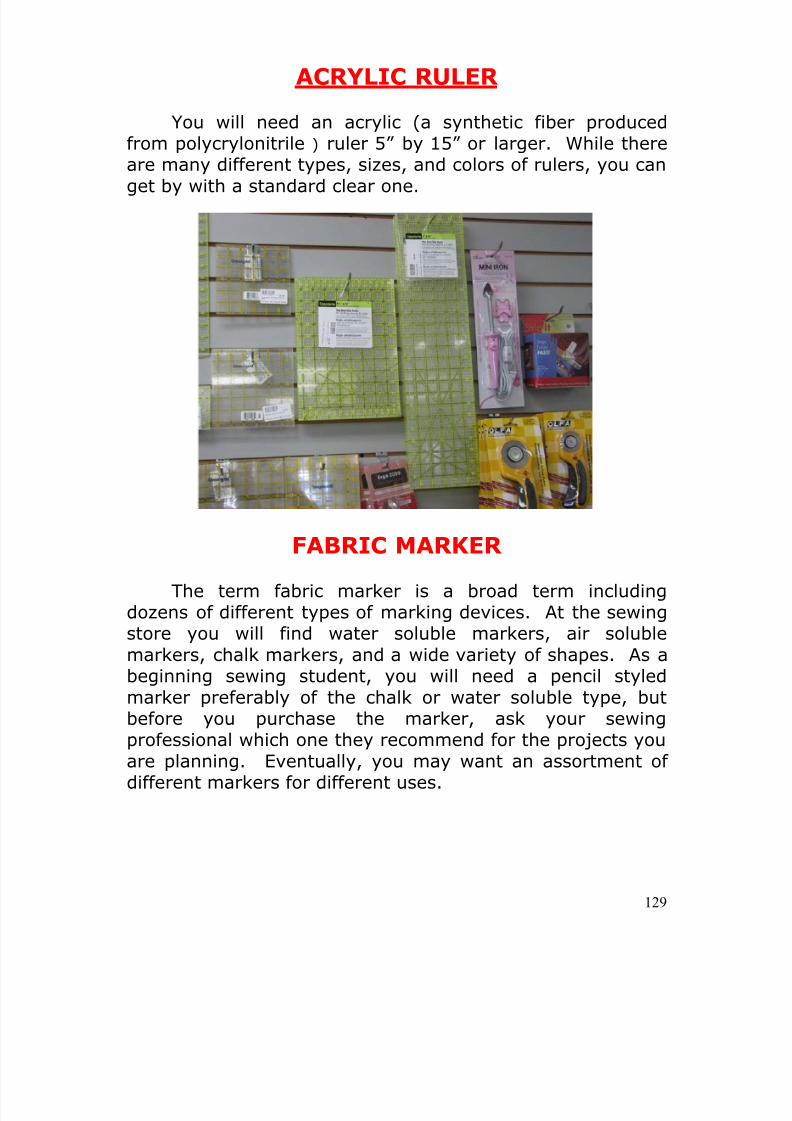
8/13/2019 Manual de Reparacion de Maquinas de Coser
http://slidepdf.com/reader/full/manual-de-reparacion-de-maquinas-de-coser 129/311
129
ACRYLIC RULER
You will need an acrylic (a synthetic fiber producedfrom polycrylonitrile ) ruler 5” by 15” or larger. While thereare many different types, sizes, and colors of rulers, you can
get by with a standard clear one.
FABRIC MARKER
The term fabric marker is a broad term includingdozens of different types of marking devices. At the sewingstore you will find water soluble markers, air solublemarkers, chalk markers, and a wide variety of shapes. As abeginning sewing student, you will need a pencil styledmarker preferably of the chalk or water soluble type, butbefore you purchase the marker, ask your sewingprofessional which one they recommend for the projects you
are planning. Eventually, you may want an assortment ofdifferent markers for different uses.
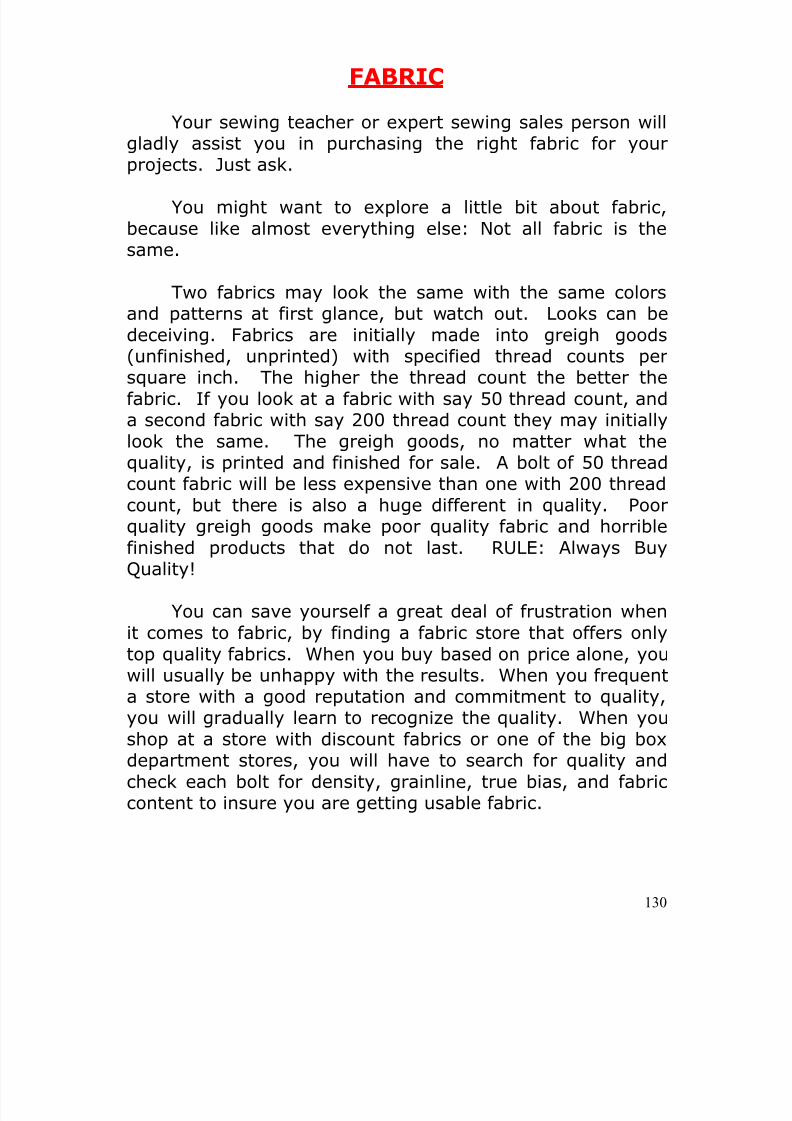
8/13/2019 Manual de Reparacion de Maquinas de Coser
http://slidepdf.com/reader/full/manual-de-reparacion-de-maquinas-de-coser 130/311
130
FABRIC
Your sewing teacher or expert sewing sales person willgladly assist you in purchasing the right fabric for yourprojects. Just ask.
You might want to explore a little bit about fabric,because like almost everything else: Not all fabric is thesame.
Two fabrics may look the same with the same colorsand patterns at first glance, but watch out. Looks can bedeceiving. Fabrics are initially made into greigh goods(unfinished, unprinted) with specified thread counts per
square inch. The higher the thread count the better thefabric. If you look at a fabric with say 50 thread count, anda second fabric with say 200 thread count they may initiallylook the same. The greigh goods, no matter what thequality, is printed and finished for sale. A bolt of 50 threadcount fabric will be less expensive than one with 200 threadcount, but there is also a huge different in quality. Poorquality greigh goods make poor quality fabric and horriblefinished products that do not last. RULE: Always Buy
Quality!
You can save yourself a great deal of frustration whenit comes to fabric, by finding a fabric store that offers onlytop quality fabrics. When you buy based on price alone, youwill usually be unhappy with the results. When you frequenta store with a good reputation and commitment to quality,you will gradually learn to recognize the quality. When youshop at a store with discount fabrics or one of the big box
department stores, you will have to search for quality andcheck each bolt for density, grainline, true bias, and fabriccontent to insure you are getting usable fabric.
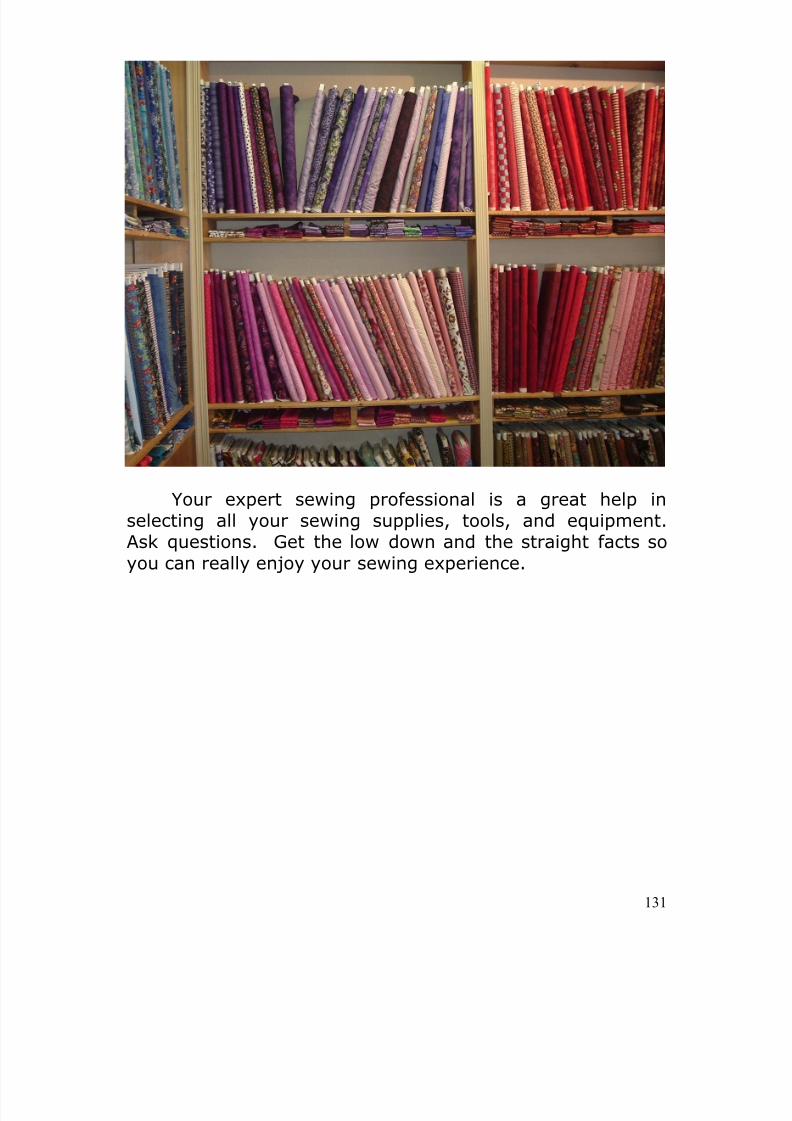
8/13/2019 Manual de Reparacion de Maquinas de Coser
http://slidepdf.com/reader/full/manual-de-reparacion-de-maquinas-de-coser 131/311
131
Your expert sewing professional is a great help inselecting all your sewing supplies, tools, and equipment.Ask questions. Get the low down and the straight facts soyou can really enjoy your sewing experience.
8/13/2019 Manual de Reparacion de Maquinas de Coser
http://slidepdf.com/reader/full/manual-de-reparacion-de-maquinas-de-coser 132/311
132
CHAPTER SEVENWhat is a Sewing Show n’ Tell?
When we discover new things, there is somethingspecial about sharing our discoveries. Kindergarten teacherslearned a long time ago that children get excited aboutlearning when they are permitted to tell others about thosethings that are important, interesting, or fun to them. Theprinciple remains the same.
Sewing is an exciting hobby full of creative wonders.The wonders of sewing are almost without limit. Garmentconstruction, alterations, wearable art, embellishments,embroidery, applique’, dolls, vintage creations, threadpainting, quilt piecing, quilting, home décor, wall hangings,heirloom, and crafting are just the broad categories. Thenumber of specializations within the sewing hobby are as bigas the world of imagination. Beginners and experts alike
continue to be amazed by the amazing possibilities availablethrough sewing.
But we are adults. Show N’ Tell is fine for five yearolds, but how does that apply to adults.
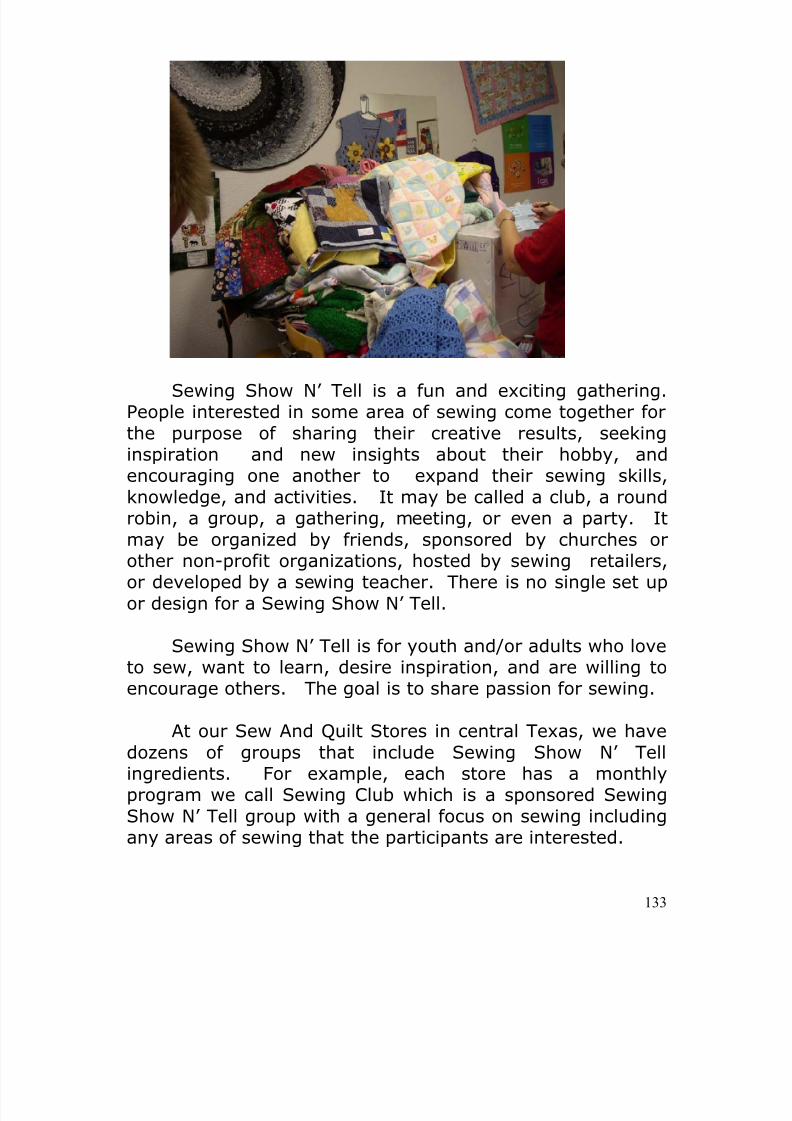
8/13/2019 Manual de Reparacion de Maquinas de Coser
http://slidepdf.com/reader/full/manual-de-reparacion-de-maquinas-de-coser 133/311
133
Sewing Show N’ Tell is a fun and exciting gathering.People interested in some area of sewing come together forthe purpose of sharing their creative results, seekinginspiration and new insights about their hobby, andencouraging one another to expand their sewing skills,knowledge, and activities. It may be called a club, a roundrobin, a group, a gathering, meeting, or even a party. Itmay be organized by friends, sponsored by churches orother non-profit organizations, hosted by sewing retailers,or developed by a sewing teacher. There is no single set upor design for a Sewing Show N’ Tell.
Sewing Show N’ Tell is for youth and/or adults who loveto sew, want to learn, desire inspiration, and are willing toencourage others. The goal is to share passion for sewing.
At our Sew And Quilt Stores in central Texas, we havedozens of groups that include Sewing Show N’ Tellingredients. For example, each store has a monthlyprogram we call Sewing Club which is a sponsored SewingShow N’ Tell group with a general focus on sewing includingany areas of sewing that the participants are interested.
8/13/2019 Manual de Reparacion de Maquinas de Coser
http://slidepdf.com/reader/full/manual-de-reparacion-de-maquinas-de-coser 134/311
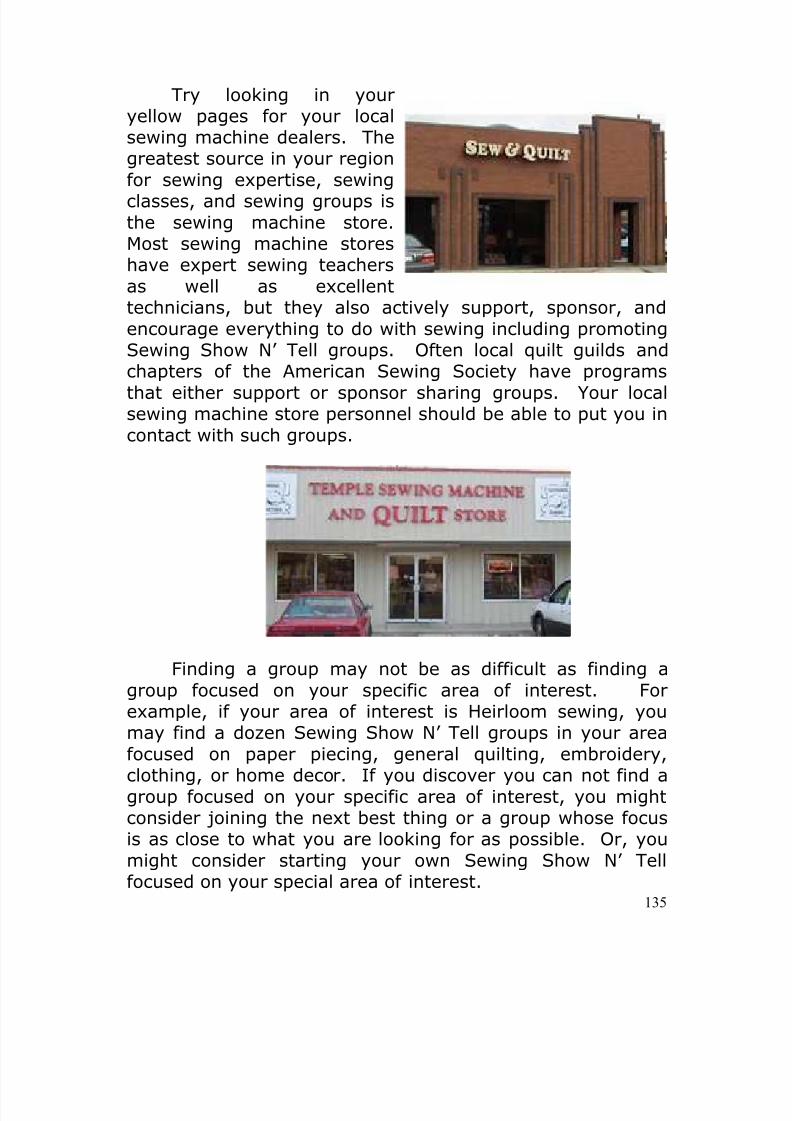
8/13/2019 Manual de Reparacion de Maquinas de Coser
http://slidepdf.com/reader/full/manual-de-reparacion-de-maquinas-de-coser 135/311
135
Try looking in your
yellow pages for your localsewing machine dealers. Thegreatest source in your regionfor sewing expertise, sewingclasses, and sewing groups isthe sewing machine store.Most sewing machine storeshave expert sewing teachersas well as excellenttechnicians, but they also actively support, sponsor, andencourage everything to do with sewing including promotingSewing Show N’ Tell groups. Often local quilt guilds andchapters of the American Sewing Society have programsthat either support or sponsor sharing groups. Your localsewing machine store personnel should be able to put you incontact with such groups.
Finding a group may not be as difficult as finding agroup focused on your specific area of interest. Forexample, if your area of interest is Heirloom sewing, youmay find a dozen Sewing Show N’ Tell groups in your areafocused on paper piecing, general quilting, embroidery,clothing, or home decor. If you discover you can not find agroup focused on your specific area of interest, you mightconsider joining the next best thing or a group whose focusis as close to what you are looking for as possible. Or, youmight consider starting your own Sewing Show N’ Tellfocused on your special area of interest.
8/13/2019 Manual de Reparacion de Maquinas de Coser
http://slidepdf.com/reader/full/manual-de-reparacion-de-maquinas-de-coser 136/311
136
How To Set Up Your Own Sewing Show N’ Tell?
First, you have some decisions to make. What is theintended point of focus or emphasis for your group and howdo you choose your focus? Will you want or needsponsorship? How many participants do you need for yourgroup? How is your group going to be organized? Whowill lead your group? Where will you meet? What are thecosts you can expect? Where do you find people to join yourgroup? How get started, and how do you keep the groupgoing and growing?
What is the intended point of focus or emphasis, andhow do you choose it?
Ask yourself, what do you enjoy about sewing? Do youenjoy clothing construction, patterns, alterations,embellishment, wearable art, embroidery, applique’, lacework, heirloom sewing, quilting, paper piecing, wallhangings, home décor, crafting, doll making, or some othereven more specific area of sewing? Or do enjoy everythingabout sewing? Your group will need to enjoy the samethings if it is to be successful. Indeed, the question of whatyou enjoy may not be the right question at all. A betterquestion might be, what are you passionate about? Yourgroup will be all about sharing your passion!
Often it is easier to broaden the focus to include morepeople, than to restrict your group with overly narrow limits.For example, you might have interest in making decorativepurses. Ask your self what associated projects might beincluded in a group of sewers with some interest in handbags? Is it possible your group could include a more generalfocus on accessorizing with purses, hand bags, travel bags,business cases, decorative boxes, book covers, etc.?Remember, your Sewing Show N’ Tell needs to have a largeenough scope to keep new ideas streaming. If the focus is
8/13/2019 Manual de Reparacion de Maquinas de Coser
http://slidepdf.com/reader/full/manual-de-reparacion-de-maquinas-de-coser 137/311
137
too narrow, you might find your group fizzling because itruns out of creative ideas.
What happens when there is no focus? Try to imagineyour group has eight members. You come together monthlyto share your accomplishments and ideas. One membershows six pot holders. Another shows a queen size memoryquilt with intricate designed blocks. Another shows a lacyheirloom pillow case. Another shows a picture of a chair sheupholstered. Eight participants share eight totally differentprojects in totally different areas of interest. Is there achance, that someone is going to get bored when lookingand listening to all the endless details of a project in whichthey have no interest? When a group is designed to be allinclusive, it is often very difficult to keep the individualparticipants satisfied. There are some general areas ofsewing interest that might have greater success than tryingto be everything to everyone.
When selecting a general theme for your group, thetraditional areas of interest include: Clothing Construction,Embellishment (Applique, Wearable Art, and sometimesembroidery), Embroidery, Quilting (General, Paper Piecing,specific quilt projects), Home Décor (Window Dressings,Table Coverings, Wall Hangings, etc.), Heirloom Sewing(Delicate Lace and Victorian Recreations), and Crafting. Anyone of these would make a great theme for a group as longas the group members understand the focus and arepassionate about it.
Will you want or need sponsorship? What issponsorship and how does it work?
A sponsor is an individual or group that endorses,promotes, and supports your group. The Sew And QuiltStores sponsor several groups. The store provides aconvenient and comfortable place to meet, a hostess,refreshments (may or may not), and a general frameworkfor the group. The store promotes the group to all its
8/13/2019 Manual de Reparacion de Maquinas de Coser
http://slidepdf.com/reader/full/manual-de-reparacion-de-maquinas-de-coser 138/311
138
customers and encourages them to plug in. The storelistens to the interests of its customers and even createsnew groups to bring people of similar interests together.The store takes responsibility for contacting and supportinggroup members with email notices and phone calls.
Many churches, sewing guilds, quilt guilds, and fabricstores sponsor sewing groups as well. The sponsor may doa lot or very little to support the group. Sponsorship mayinclude a posting on a bulletin board and a generalrecognition that the group exists. The sponsor may providemoney, promotion, a place to meet, instructors, hostesses,etc.
If your group is going to be sponsored, it is vital thatyou understand what the sponsor is committing to do andwhat responsibility you and your group might have to yoursponsor. For example, if your sponsor is a church, it isexpected that the group demonstrate sincere respect for andappreciation for the church. That does not mean that everyparticipant has to be a tithing member of that church, butthe more the group does to show loyalty to the sponsor themore willing the sponsor will be to dole out more support.
Often the sponsor will have specific expectations ordemands of the group. For example, those groupssponsored by Sew And Quilt Stores are expected to promoteits products not the products of some competitor. Do yourmembers buy thread? Buy it the day you meet to show yoursupport for your sponsor. Do you buy other products yoursponsor sells? Then show loyalty in your purchases. It isreally disrespectful for a member of a group meeting at onesewing machine store to promote the products at anotherstore or to criticize the sponsor’s store for not having someparticular product. It is important to respect and cooperatewith your sponsor. Know what they expect, and do all youcan to get your group to exceed those expectations.
8/13/2019 Manual de Reparacion de Maquinas de Coser
http://slidepdf.com/reader/full/manual-de-reparacion-de-maquinas-de-coser 139/311
8/13/2019 Manual de Reparacion de Maquinas de Coser
http://slidepdf.com/reader/full/manual-de-reparacion-de-maquinas-de-coser 140/311
140
How is your group going to be organized? Who will leadyour group? How?
There are many different ways to organize your group,but the key underlying your choices for organization is thegoal or purpose of your group:
“Sewing Show N’ Tell is for youth and/or adultswho love to sew, want to learn, desire inspiration,and are willing to encourage others. The goal isto share passion for sewing.”
With your purpose and goal clearly in mind, what is the bestway to organize your group? Stating it a little differently,how can your group organization insure that you meet yourgoals and satisfy your purpose?
Here a few options:1. Hostess Led meetings in a sponsored location.2. Teacher Led meetings in a classroom setting.3. Chair Led meetings in a Robert’s Rules of Order
setting.
Hostess Led implies that someone is responsible forsetting up the meeting for guests to participate. This worksgreat whether you are the hostess of your own sponsoredgroup or someone else representing the sponsor hostessesthe group. The hostess greets the participants, helps makethem feel at home, get settled in, and generally create apositive environment for the group. Once the group is readyto begin its meeting, the Hostess officially welcomeseveryone, explains the plans for the day, and introduces thefirst speaker or presenter. The hostess may actually beginthe process by sharing some special project, new product, orother item of interest before introducing other to share. Thegroup may have a guest presenter (introduced by thehostess) who comes as an expert of otherwise distinguishedperson. As each presenter ends their presentation, theHostess affirms and introduces the next presenter. Once all
8/13/2019 Manual de Reparacion de Maquinas de Coser
http://slidepdf.com/reader/full/manual-de-reparacion-de-maquinas-de-coser 141/311
141
presenters have made their presentations (or at the end ofeach presentation), the hostess will moderate questions andanswers or perhaps open the group to discussion. At anypoint that a participant become unruly, overly long winded,disruptive, or needs other encouragement, it is theresponsibility of the hostess to manage the situation onbehalf of the group.
Teacher Led or Expert Led groups are more like aclassroom activities. The expert or teacher serves as thehostess carrying out all her responsibilities, but adding aningredient of instruction. In the Teacher Led model thepurpose and goal set forth for the sharing group remain, buta second goal is added. The group aims to learn new skills,new techniques, and new information from the gathering aswell as sharing. In this model, the teacher may makerecommendations, explanations, or corrections as needed toinsure learning.
Chair Led implies a group governed by the principles ofRobert’s Rules of Order. The Chair person may be chosenby the group or otherwise emerge to this responsibility.Unlike the hostess, the Chair remains simply as a traffic copor steering wheel. The Chair usually sacrifices their personalcontributions in order to insure that all participants receivetheir allotted time and privilege. Once all participants haveconcluded their contribution the Chair may add somepersonal contribution or close the session. Maintaining orderis a primary concern in the Chair Led structure.
You probably already have your own favorite way toorganize your group, and you may have you own ideas ofwhat may work. Feel free to experiment. Just rememberwhenever you have more than one person involved inanything, you usually have more than one opinion abouteverything. Try to set a clear structure for your meetingsthat includes flexibility, but maintains a smooth operationflow.
8/13/2019 Manual de Reparacion de Maquinas de Coser
http://slidepdf.com/reader/full/manual-de-reparacion-de-maquinas-de-coser 142/311
142
As you plan your group structure, always rememberyour goals.
If you are going to work with a sponsor, your planningmust include discussions and considerations with thatsponsor. Prevention of problems is always better thansolving problems after the whole world has collapsed.
Where will you meet?
Groups need a place to meet, but your options a huge.You can meet in your living room, at a local restaurant, at apublic library meeting room, at a local sewing machinestore, and you can probably think of a few dozen morepossibilities. What kind of place would be best? Do youneed to set up sewing machines? Do you need displayspace? Do you want supplies handy? Do you need expertassistance? Just what kind of place is best for your group?
What are the costs you can expect?
In an ideal world, we would make a wish and the geniewould instantly grant our wish no strings attached – withoutcost or consideration. As you plan your group, anticipatethe needs, costs, and considerations needed to get startedand to maintain a healthy group.
Have you ever noticed that every little thing has a pricetag? Sometimes the tag is stamped right up front.Sometimes it is hidden. Recently, I contacted the managerof an apartment complex about using their meeting room.He informed me that the cost would only be $25 for thewhole day. I was all excited. A week or two passed and Iwas sure that I had found the right place for my meeting.Sure beats the $95 at Holiday Inn. Then I stopped by totake a good look at the meeting room. The managerinformed me that he only had five folding chairs, a six footfolding table, and no PA system. Ouch! Where was I going
8/13/2019 Manual de Reparacion de Maquinas de Coser
http://slidepdf.com/reader/full/manual-de-reparacion-de-maquinas-de-coser 143/311
143
to find chairs, tables, and a PA system? How much was thatgoing to cost me? That Holiday Inn began looking a wholelot better.
If you decide to meet in your sewing room or livingroom, what costs will you have? Someone is going to haveto clean up and set up before the meeting. Someone is alsogoing to have to clean up and take down after the meeting.Who do you think that someone might end up being? Youmay not notice the slight increase in utility bills for amonthly meeting, but a weekly meeting might start beingnoticed. What about parking?
If you decide to meet at a local church or public library,will your group be expected to make a donation of say $25or $50? What expectations will they have on your group?
If you get a sewing machine store to sponsor yourgroup, you may escape all the direct expenses, but whatdoes the store expect from your group? If your group failsto meet those expectations, how will the relationshipbetween the store and the group develop?
If you decide to offer refreshments, what will they cost?Who is going to pay the bill?
If you decide to bring in an expert or educator as aguest or as a regular part of your group’s activities, what willit cost? Who is going to pay the costs?
Create a plan for your group including a detailedbudget showing all the possible costs you might face and aplan to pay for those expenses. This does not have to beexpensive. You don’t have to mortgage your home or sellone of your children. It is likely that you can develop aworkable plan in which you get all the benefits you desire fora hand full of dollars per meeting to be shared by theparticipants. The important things here is to anticipate andplan. Act on facts not wishes.
8/13/2019 Manual de Reparacion de Maquinas de Coser
http://slidepdf.com/reader/full/manual-de-reparacion-de-maquinas-de-coser 144/311
144
Where do you find people to join your group?
You could attend your local High School football game,and stand up with a megaphone inviting anyone who isinterested to meet you after the game. You could rent anad in your local newspaper, radio, or TV. You could lease abillboard on the highway coming into town. You could signup with the Welcome Wagon and pay a dollar or two foreach new resident in town. I just don’t recommend theseapproaches, because they cost too much and probably won’twork anyway.
You may already know two or three people who wouldbe interested in your group. Do not hesitate. Approachthem and explain your vision. Invite them to help you buildyour group. You will be surprised how much faster thingsgo when you have a few key friends to help at the verybeginning.
Where do you find people who already share yourinterests? Maybe you have a local fabric store, or one ofthe Big Box Merchandisers with a fabric department, or aparks and recreation sewing group, or a sewing machinestore, or a ladies group at church. Go where you get yoursupplies and support for your hobby, but don’t go shoppingfor supplies. Go shopping for people who share yourpassion. Ask the workers, or leaders about people theyknow who are interested in your area of interest.
If you have found a sponsor for your group, ask themfor help promoting your group. Remember, the ideal size ofa Sewing Show N’ Tell group is eight to ten people. Youdon’t need a hundred. You don’t need everybody. You onlyneed that special group of people who will enjoy sharingyour passion together.
When you find one person with whom you can share,make that person a true friend. Get them to bring people
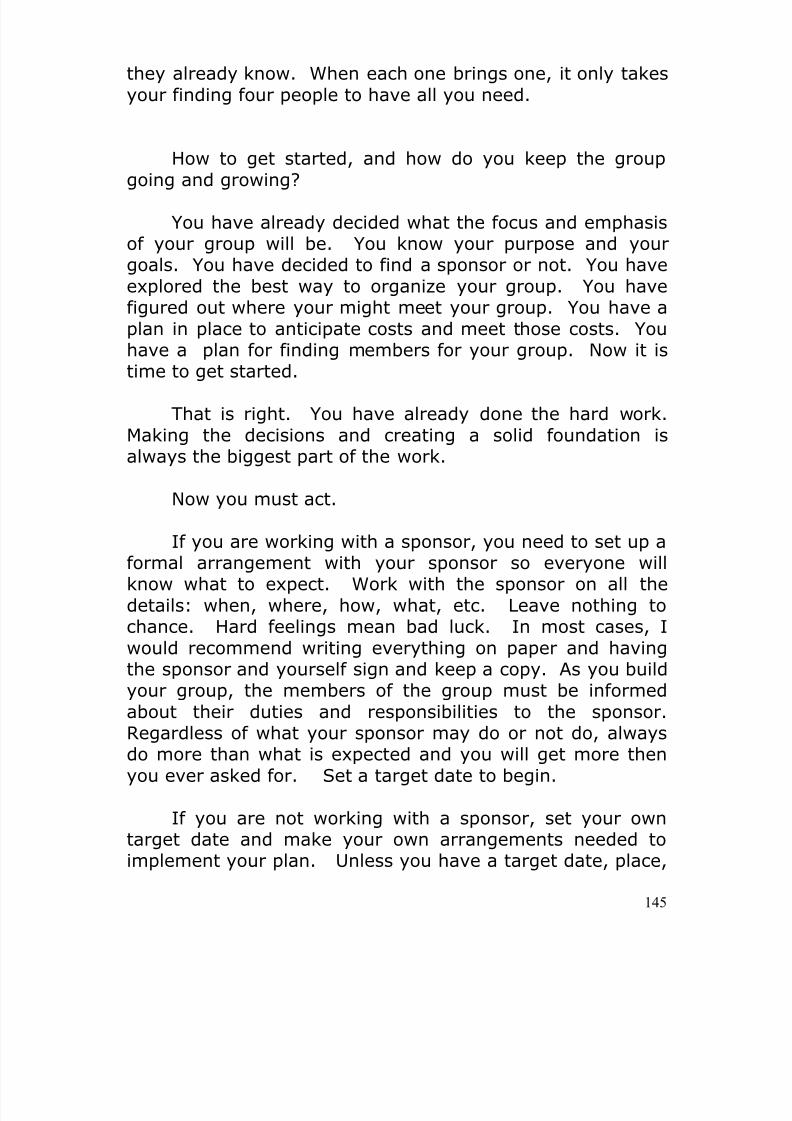
8/13/2019 Manual de Reparacion de Maquinas de Coser
http://slidepdf.com/reader/full/manual-de-reparacion-de-maquinas-de-coser 145/311
145
they already know. When each one brings one, it only takesyour finding four people to have all you need.
How to get started, and how do you keep the groupgoing and growing?
You have already decided what the focus and emphasisof your group will be. You know your purpose and yourgoals. You have decided to find a sponsor or not. You haveexplored the best way to organize your group. You havefigured out where your might meet your group. You have aplan in place to anticipate costs and meet those costs. Youhave a plan for finding members for your group. Now it istime to get started.
That is right. You have already done the hard work.Making the decisions and creating a solid foundation isalways the biggest part of the work.
Now you must act.
If you are working with a sponsor, you need to set up aformal arrangement with your sponsor so everyone willknow what to expect. Work with the sponsor on all thedetails: when, where, how, what, etc. Leave nothing tochance. Hard feelings mean bad luck. In most cases, Iwould recommend writing everything on paper and havingthe sponsor and yourself sign and keep a copy. As you buildyour group, the members of the group must be informedabout their duties and responsibilities to the sponsor.Regardless of what your sponsor may do or not do, alwaysdo more than what is expected and you will get more thenyou ever asked for. Set a target date to begin.
If you are not working with a sponsor, set your owntarget date and make your own arrangements needed toimplement your plan. Unless you have a target date, place,
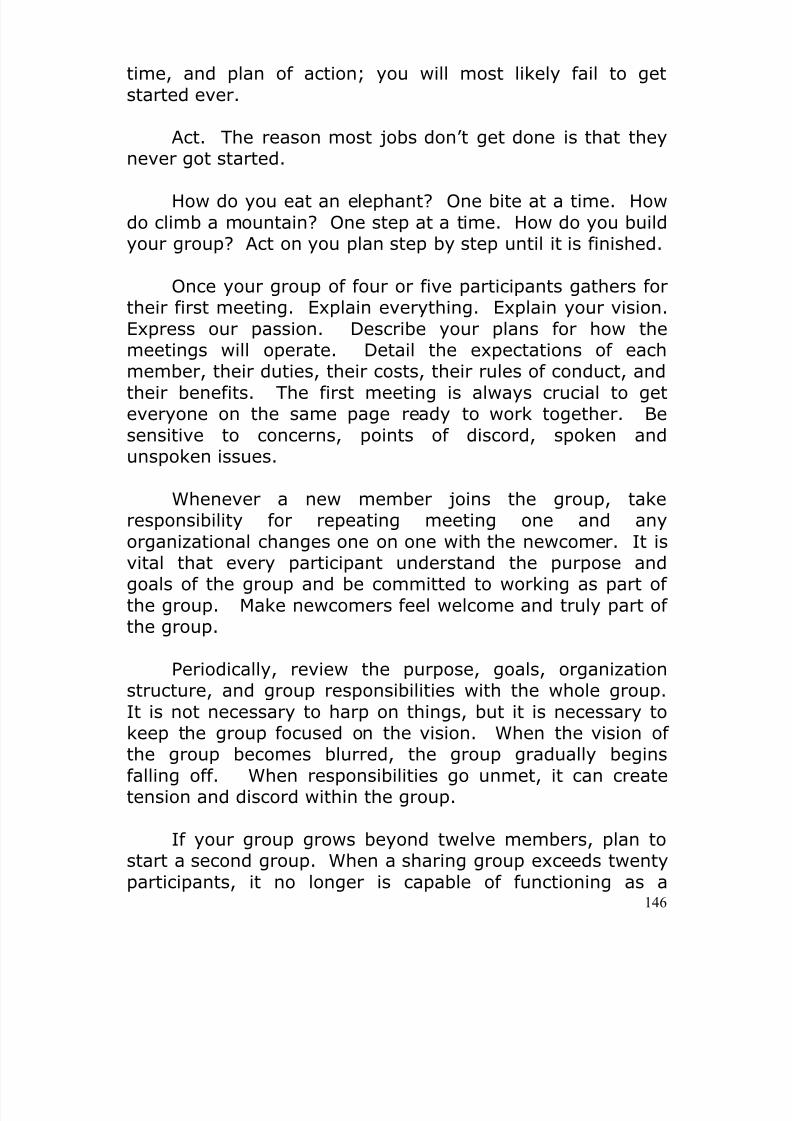
8/13/2019 Manual de Reparacion de Maquinas de Coser
http://slidepdf.com/reader/full/manual-de-reparacion-de-maquinas-de-coser 146/311
146
time, and plan of action; you will most likely fail to getstarted ever.
Act. The reason most jobs don’t get done is that theynever got started.
How do you eat an elephant? One bite at a time. Howdo climb a mountain? One step at a time. How do you buildyour group? Act on you plan step by step until it is finished.
Once your group of four or five participants gathers fortheir first meeting. Explain everything. Explain your vision.Express our passion. Describe your plans for how themeetings will operate. Detail the expectations of eachmember, their duties, their costs, their rules of conduct, andtheir benefits. The first meeting is always crucial to geteveryone on the same page ready to work together. Besensitive to concerns, points of discord, spoken andunspoken issues.
Whenever a new member joins the group, takeresponsibility for repeating meeting one and anyorganizational changes one on one with the newcomer. It isvital that every participant understand the purpose andgoals of the group and be committed to working as part ofthe group. Make newcomers feel welcome and truly part ofthe group.
Periodically, review the purpose, goals, organizationstructure, and group responsibilities with the whole group.It is not necessary to harp on things, but it is necessary tokeep the group focused on the vision. When the vision ofthe group becomes blurred, the group gradually beginsfalling off. When responsibilities go unmet, it can createtension and discord within the group.
If your group grows beyond twelve members, plan tostart a second group. When a sharing group exceeds twentyparticipants, it no longer is capable of functioning as a
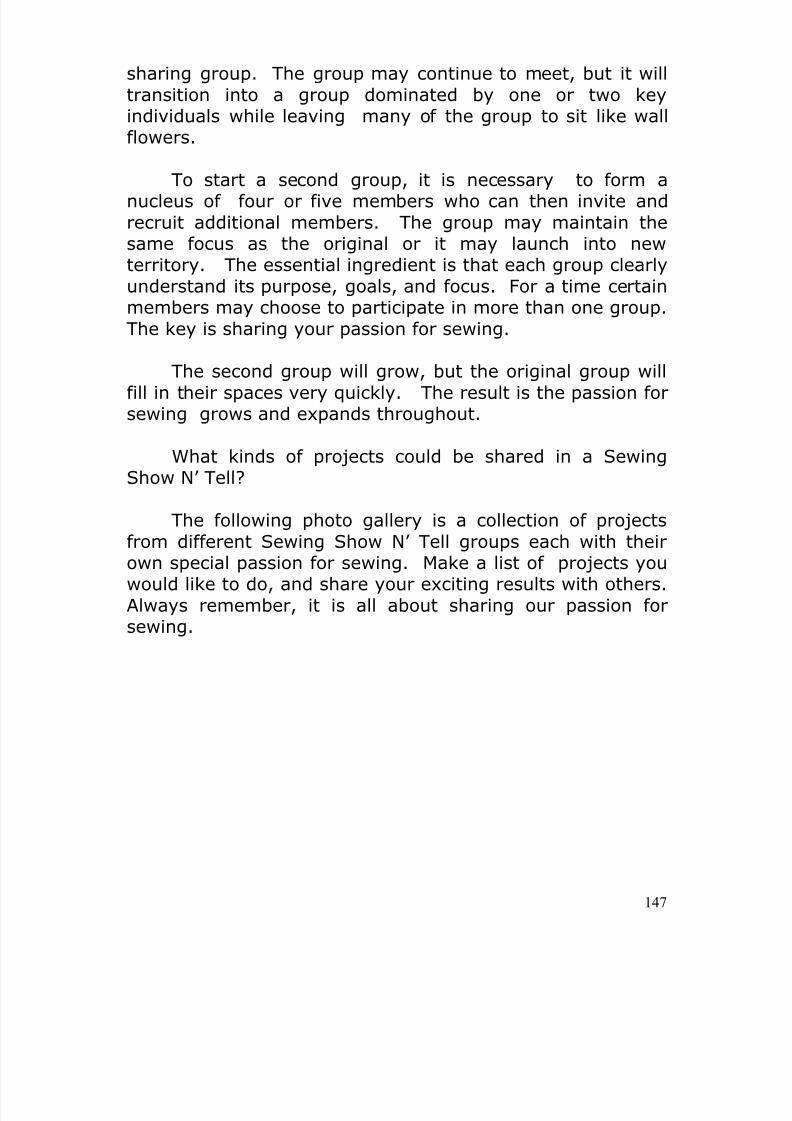
8/13/2019 Manual de Reparacion de Maquinas de Coser
http://slidepdf.com/reader/full/manual-de-reparacion-de-maquinas-de-coser 147/311
147
sharing group. The group may continue to meet, but it willtransition into a group dominated by one or two keyindividuals while leaving many of the group to sit like wallflowers.
To start a second group, it is necessary to form anucleus of four or five members who can then invite andrecruit additional members. The group may maintain thesame focus as the original or it may launch into newterritory. The essential ingredient is that each group clearlyunderstand its purpose, goals, and focus. For a time certainmembers may choose to participate in more than one group.The key is sharing your passion for sewing.
The second group will grow, but the original group willfill in their spaces very quickly. The result is the passion forsewing grows and expands throughout.
What kinds of projects could be shared in a SewingShow N’ Tell?
The following photo gallery is a collection of projectsfrom different Sewing Show N’ Tell groups each with theirown special passion for sewing. Make a list of projects youwould like to do, and share your exciting results with others.Always remember, it is all about sharing our passion forsewing.
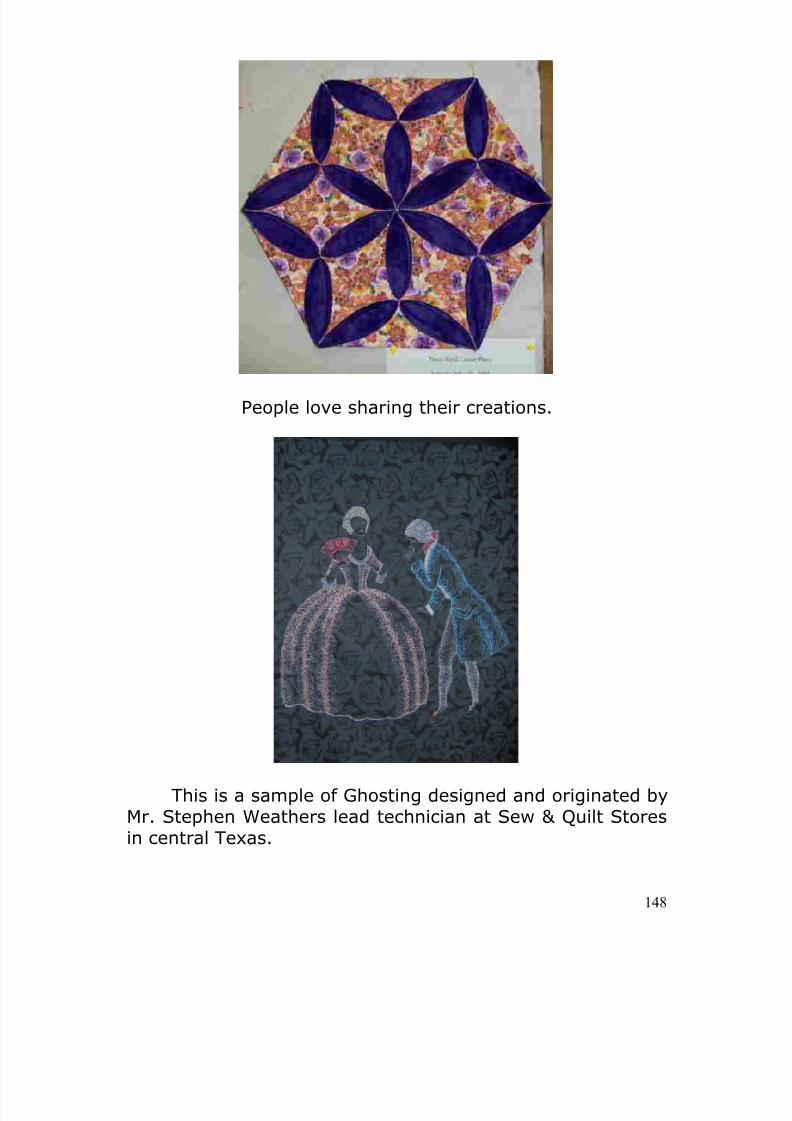
8/13/2019 Manual de Reparacion de Maquinas de Coser
http://slidepdf.com/reader/full/manual-de-reparacion-de-maquinas-de-coser 148/311
148
People love sharing their creations.
This is a sample of Ghosting designed and originated byMr. Stephen Weathers lead technician at Sew & Quilt Storesin central Texas.

8/13/2019 Manual de Reparacion de Maquinas de Coser
http://slidepdf.com/reader/full/manual-de-reparacion-de-maquinas-de-coser 149/311
149
Purses are all the rage right now and we have seem many
different kinds, shapes, designs, colors – wonderful!
Patriotic Themes are always popular like this one we saw ata Baby Lock convention in St. Louis, Missouri.
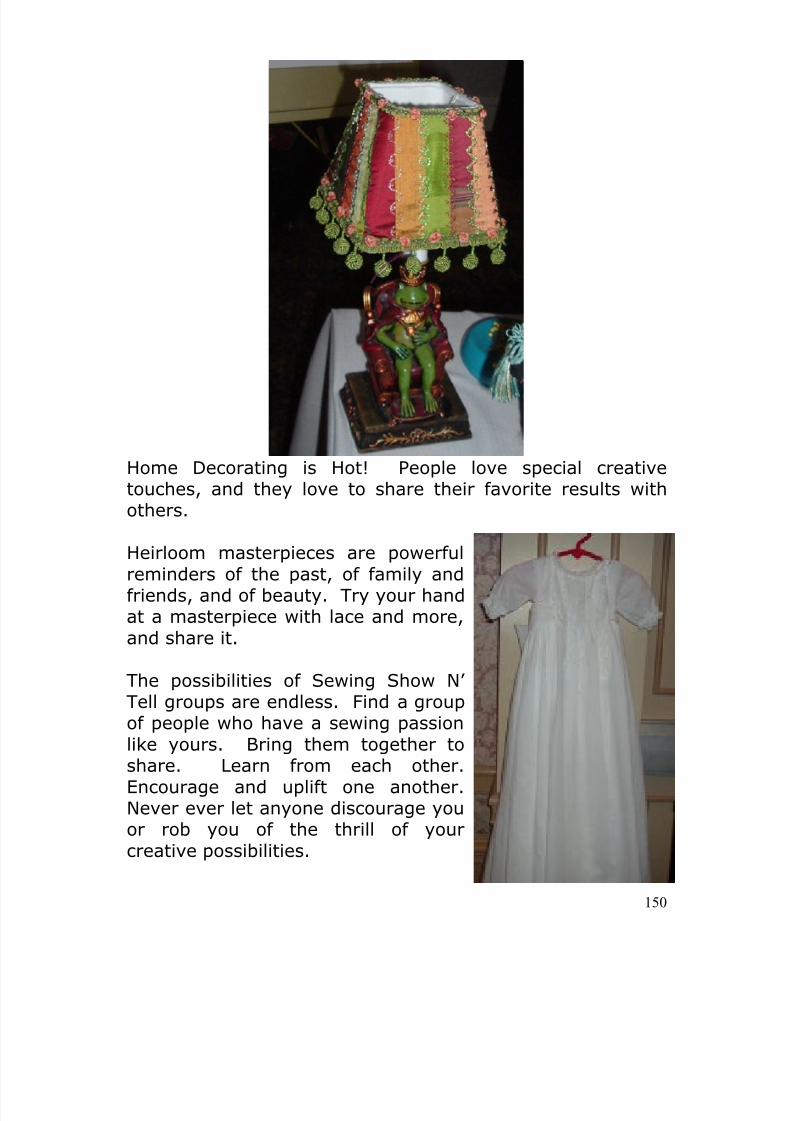
8/13/2019 Manual de Reparacion de Maquinas de Coser
http://slidepdf.com/reader/full/manual-de-reparacion-de-maquinas-de-coser 150/311
150
Home Decorating is Hot! People love special creativetouches, and they love to share their favorite results withothers.
Heirloom masterpieces are powerful
reminders of the past, of family andfriends, and of beauty. Try your handat a masterpiece with lace and more,and share it.
The possibilities of Sewing Show N’Tell groups are endless. Find a groupof people who have a sewing passionlike yours. Bring them together to
share. Learn from each other.Encourage and uplift one another.Never ever let anyone discourage youor rob you of the thrill of yourcreative possibilities.
8/13/2019 Manual de Reparacion de Maquinas de Coser
http://slidepdf.com/reader/full/manual-de-reparacion-de-maquinas-de-coser 151/311
151
CHAPTER EIGHT
UNDERSTANDING FABRICS
KINDS OF FABRIC
Choosing fabric requires that youunderstand a little about fabric. Not all fabric isthe same. Not all fabric sews the same. Fabriccomes in many different sizes, textures,
compositions, and constructions. Your patternwill usually suggest fabric options to you for thespecific project, but it is important to understand
the basics.
Natural Fiber Fabrics: Natural fibers “breathe”, butwrinkle. Sources of natural fibers include animal skins,animal hair, animal proteins,vegetable and other crop fibers.
Leather is made from animalskins. Vicuna, cashmere, andcamel hair are made fromanimals. Wool and mohair aremade from the fleece of sheepand goats. Silk is made from
8/13/2019 Manual de Reparacion de Maquinas de Coser
http://slidepdf.com/reader/full/manual-de-reparacion-de-maquinas-de-coser 152/311
152
filaments or protein fibers produced in the cocoons of thesilkworm. Cotton is made from a vegetable crop grown inthe fields, picked or harvested, and processed to makecotton. Linen is made from flax a crop grown like cotton.
Some natural fibers are so processed; they aredescribed as man made fibers because of the extremestaken to process them. They include Rayon, Viscose,Acetate, and Triacetate.
Each type of fiber has its own characteristics. Woolgives warmth, but shrinks when exposed to moisture andheat. This quality makes wool a great fiber for men’s suitsbecause it is easily molded to fit. Linen is soft and absorbsmoisture but it wrinkles easily. Silk dyes well, but easilywater spots. Cotton is soft and comfortable.
Synthetic Fiber Fabrics: Synthetic are man madefibers like polyester, nylon, ninyl, mettallic fibers, and glass.These fibers are produced directly from man made chemicalprocesses. They do not “Breathe” or wrinkle.
BLENDS: To make things even more complicated,manufacturers are always doing interesting things toimprove the character of different fibers. One of the mostpopular combinations is the blending of cotton andpolyester. While the breathe ability of cotton is desirable, ithad a terrible tendency to wrinkle. Polyester, however, doesnot wrinkle. Blending them makes a great wrinkle freebreathable fabric.
CHOOSING THE RIGHT FABRICSChoosing the right fabric is always a bit of a challenge.Fabrics are made differently, woven differently, havedifferent features, and in many cases require specialconsideration in terms of sewing with the different fabrics.
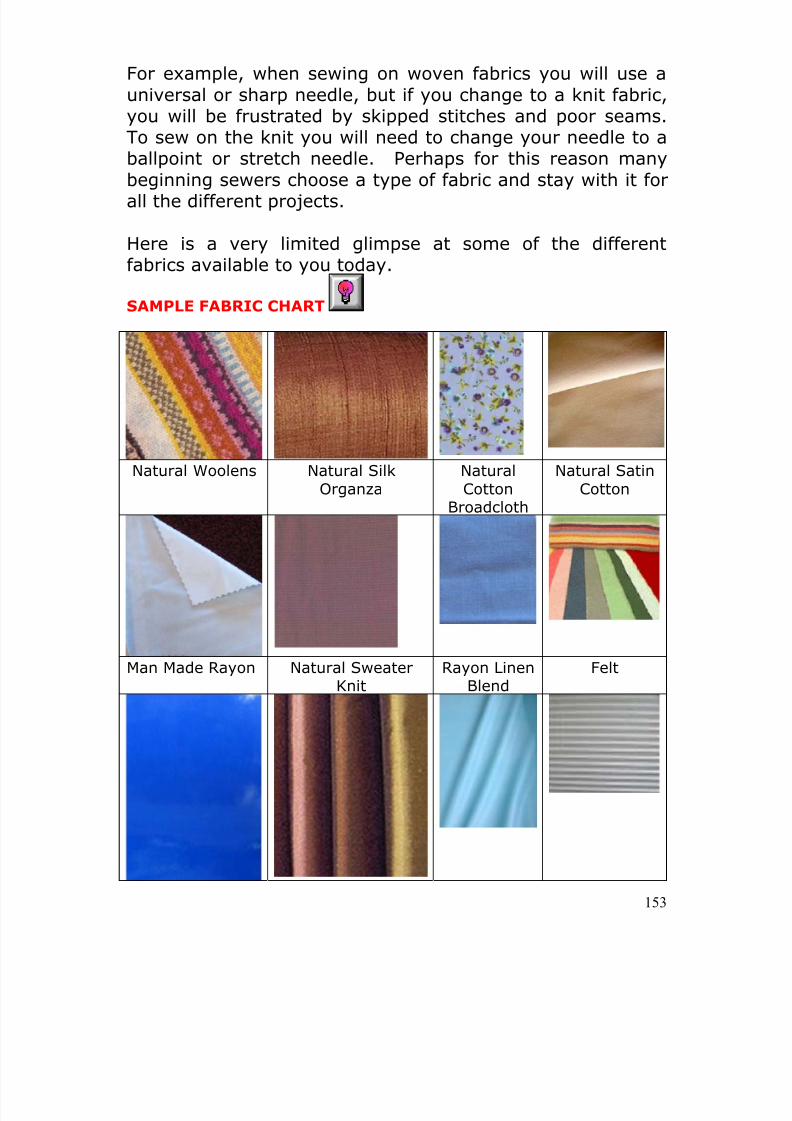
8/13/2019 Manual de Reparacion de Maquinas de Coser
http://slidepdf.com/reader/full/manual-de-reparacion-de-maquinas-de-coser 153/311
153
For example, when sewing on woven fabrics you will use auniversal or sharp needle, but if you change to a knit fabric,you will be frustrated by skipped stitches and poor seams.To sew on the knit you will need to change your needle to aballpoint or stretch needle. Perhaps for this reason manybeginning sewers choose a type of fabric and stay with it forall the different projects.
Here is a very limited glimpse at some of the differentfabrics available to you today.
SAMPLE FABRIC CHART
Natural Woolens Natural SilkOrganza
NaturalCotton
Broadcloth
Natural SatinCotton
Man Made Rayon Natural SweaterKnit
Rayon LinenBlend
Felt
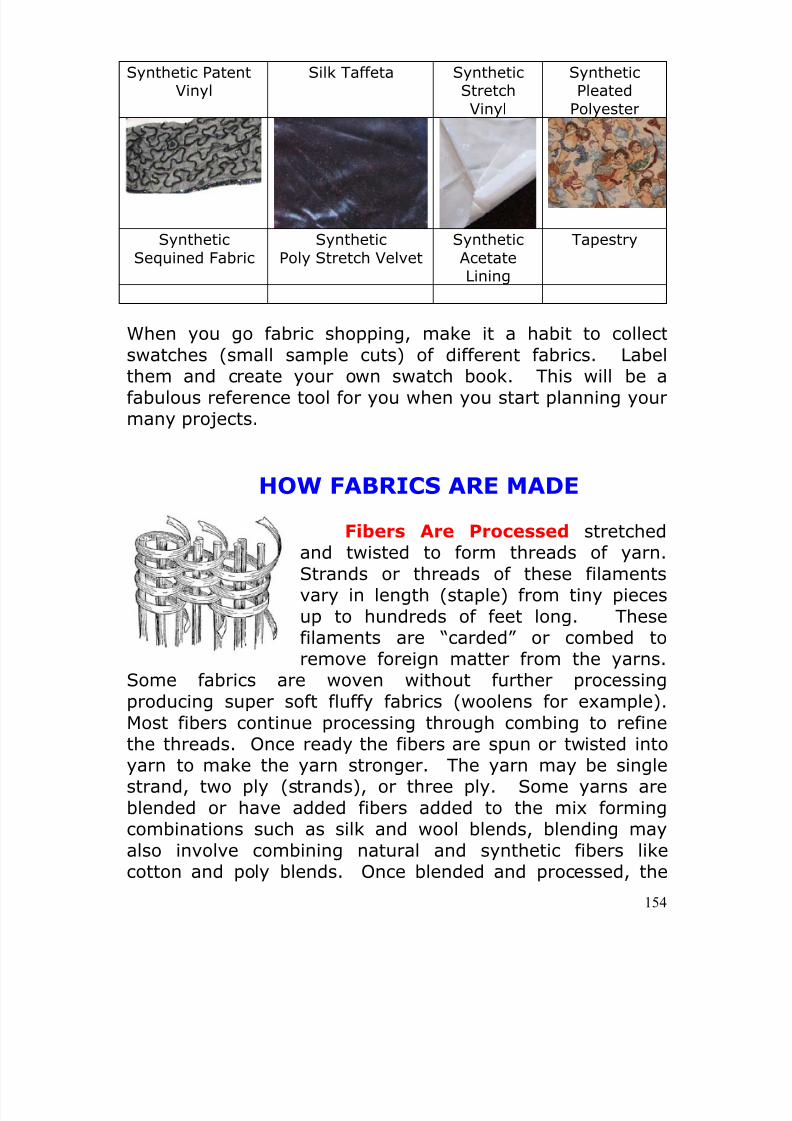
8/13/2019 Manual de Reparacion de Maquinas de Coser
http://slidepdf.com/reader/full/manual-de-reparacion-de-maquinas-de-coser 154/311
154
Synthetic PatentVinyl
Silk Taffeta SyntheticStretchVinyl
SyntheticPleated
Polyester
SyntheticSequined Fabric
SyntheticPoly Stretch Velvet
SyntheticAcetateLining
Tapestry
When you go fabric shopping, make it a habit to collectswatches (small sample cuts) of different fabrics. Label
them and create your own swatch book. This will be afabulous reference tool for you when you start planning yourmany projects.
HOW FABRICS ARE MADE
Fibers Are Processed stretchedand twisted to form threads of yarn.
Strands or threads of these filamentsvary in length (staple) from tiny piecesup to hundreds of feet long. Thesefilaments are “carded” or combed toremove foreign matter from the yarns.
Some fabrics are woven without further processingproducing super soft fluffy fabrics (woolens for example).Most fibers continue processing through combing to refinethe threads. Once ready the fibers are spun or twisted into
yarn to make the yarn stronger. The yarn may be singlestrand, two ply (strands), or three ply. Some yarns areblended or have added fibers added to the mix formingcombinations such as silk and wool blends, blending mayalso involve combining natural and synthetic fibers likecotton and poly blends. Once blended and processed, the
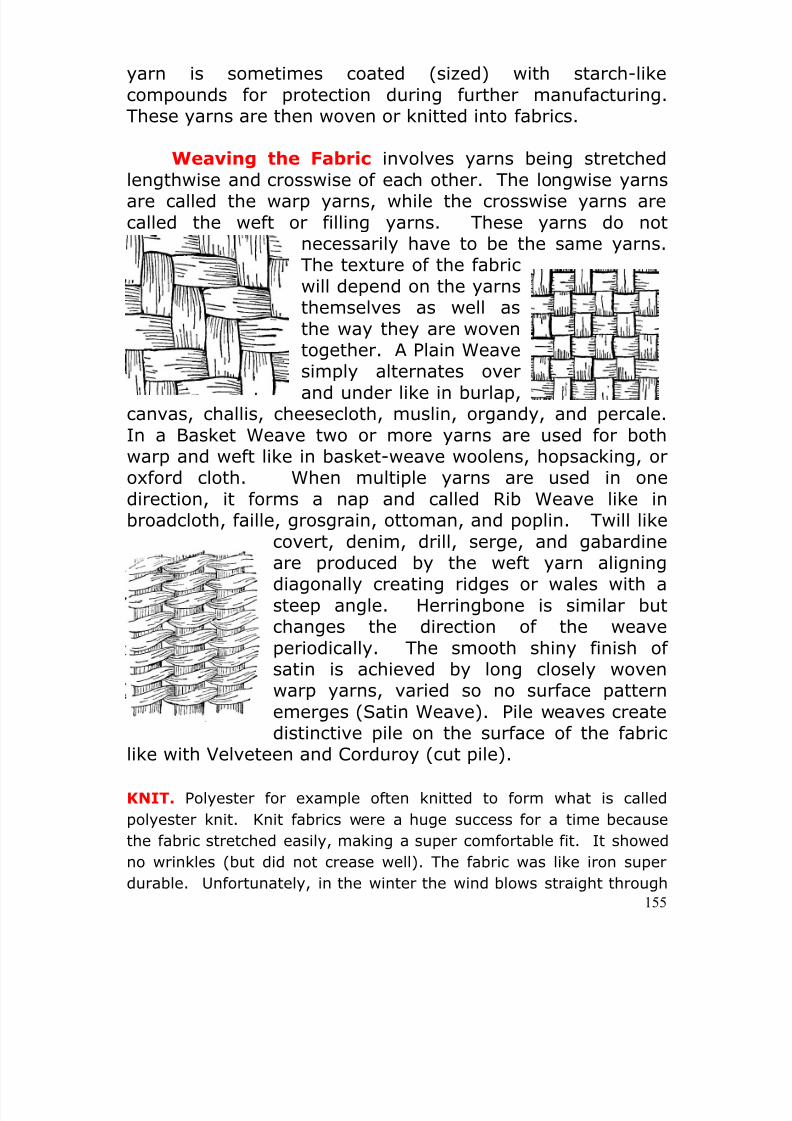
8/13/2019 Manual de Reparacion de Maquinas de Coser
http://slidepdf.com/reader/full/manual-de-reparacion-de-maquinas-de-coser 155/311
155
yarn is sometimes coated (sized) with starch-likecompounds for protection during further manufacturing.These yarns are then woven or knitted into fabrics.
Weaving the Fabric involves yarns being stretchedlengthwise and crosswise of each other. The longwise yarnsare called the warp yarns, while the crosswise yarns arecalled the weft or filling yarns. These yarns do not
necessarily have to be the same yarns.The texture of the fabricwill depend on the yarnsthemselves as well asthe way they are woventogether. A Plain Weavesimply alternates overand under like in burlap,
canvas, challis, cheesecloth, muslin, organdy, and percale.In a Basket Weave two or more yarns are used for bothwarp and weft like in basket-weave woolens, hopsacking, oroxford cloth. When multiple yarns are used in onedirection, it forms a nap and called Rib Weave like inbroadcloth, faille, grosgrain, ottoman, and poplin. Twill like
covert, denim, drill, serge, and gabardineare produced by the weft yarn aligningdiagonally creating ridges or wales with asteep angle. Herringbone is similar butchanges the direction of the weaveperiodically. The smooth shiny finish ofsatin is achieved by long closely wovenwarp yarns, varied so no surface patternemerges (Satin Weave). Pile weaves createdistinctive pile on the surface of the fabric
like with Velveteen and Corduroy (cut pile).
KNIT. Polyester for example often knitted to form what is called
polyester knit. Knit fabrics were a huge success for a time because
the fabric stretched easily, making a super comfortable fit. It showed
no wrinkles (but did not crease well). The fabric was like iron super
durable. Unfortunately, in the winter the wind blows straight through
8/13/2019 Manual de Reparacion de Maquinas de Coser
http://slidepdf.com/reader/full/manual-de-reparacion-de-maquinas-de-coser 156/311
156
and it feels cold; and in the summer the fibers feel super hot. It has
been made into all kinds of garments for men and women. Knitted
fabrics may be single (weft) or double knit with interlocking layers.
Some fabrics are manufactured through bonding fibers under
chemical, heat, moisture, adhesives, and pressure applications. Fabrics
like felt, non-woven, and laminated fabrics are produced in this
manner including polar fleece and pellon.
Greigh Goods. Before the final finish is applied to the fabric, it is
called greigh goods. The thread count and quality of the greigh goods
determines the ultimate quality of the fabric. Once fabrics are printed
or treated with final finishes most people can not tell good fabrics from
poor fabric just by looking. Durability, sew ability; straight grain-line,
and the feel of the fabric quickly appear after washing and limited
wear. While the quality of most fabrics is not labeled, you can get an
idea of this truth by looking at sheets at the mass merchandiser.
Some sheets are marked “150 count” or “250 Count” or “400 Count”.
This is the count of threads per square inch. The more threads the
better the sheets. The same is true of other fabrics, but it is more
difficult to judge.
Buy Value. Rest assured the price differences on fabrics that look
alike actually reflect the quality or lack of quality in the greigh goods.
The fabrics may look the same; but after you have poured out your
heart and time making something very special, you will quickly see the
difference. Often, the greigh goods used by many mass merchandisers
are 30 to 40% thinner and weaker than fabrics found in specialty
shops.
Test Your Fabric. To some degree you can evaluate the quality and
content of the fabric by doing the following:
Find a dependable fabric outlet with a solid reputation of selling onlytop quality goods. Buy quality and value. Many of the larger fabricchain stores have emphasized price and sales of 40 to 50% off, butavoid buying just for price, because you usually get what you pay for.
Lay out a full spread of the fabric and closely examine the grain andcrossgrain of the fabric. Some poor goods are made off grain.
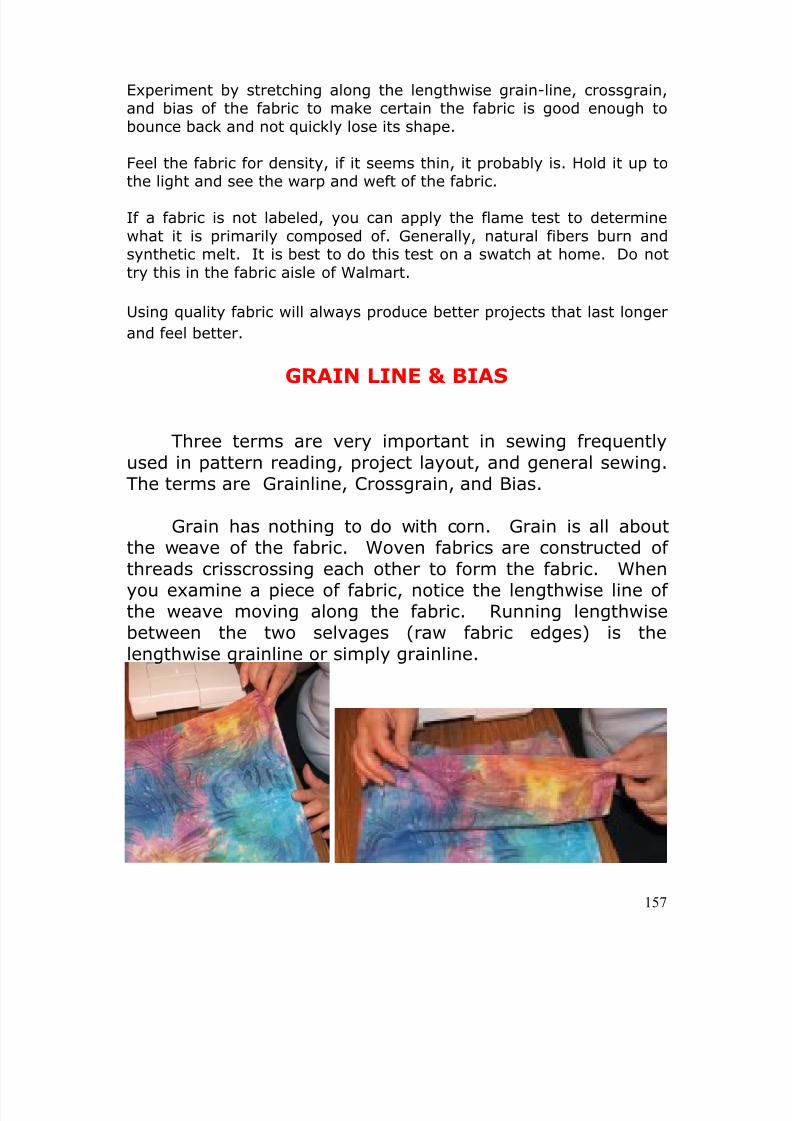
8/13/2019 Manual de Reparacion de Maquinas de Coser
http://slidepdf.com/reader/full/manual-de-reparacion-de-maquinas-de-coser 157/311
157
Experiment by stretching along the lengthwise grain-line, crossgrain,and bias of the fabric to make certain the fabric is good enough tobounce back and not quickly lose its shape.
Feel the fabric for density, if it seems thin, it probably is. Hold it up tothe light and see the warp and weft of the fabric.
If a fabric is not labeled, you can apply the flame test to determinewhat it is primarily composed of. Generally, natural fibers burn andsynthetic melt. It is best to do this test on a swatch at home. Do nottry this in the fabric aisle of Walmart.
Using quality fabric will always produce better projects that last longer
and feel better.
GRAIN LINE & BIAS
Three terms are very important in sewing frequentlyused in pattern reading, project layout, and general sewing.The terms are Grainline, Crossgrain, and Bias.
Grain has nothing to do with corn. Grain is all aboutthe weave of the fabric. Woven fabrics are constructed of
threads crisscrossing each other to form the fabric. Whenyou examine a piece of fabric, notice the lengthwise line ofthe weave moving along the fabric. Running lengthwisebetween the two selvages (raw fabric edges) is thelengthwise grainline or simply grainline.
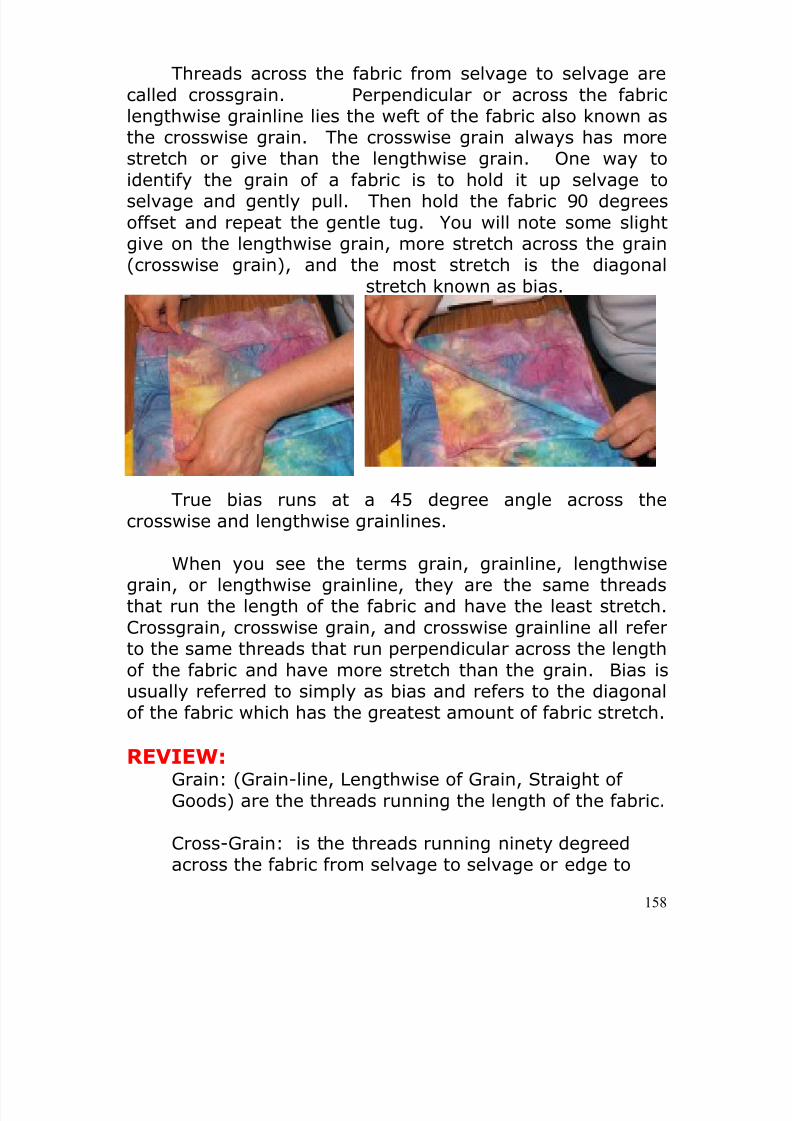
8/13/2019 Manual de Reparacion de Maquinas de Coser
http://slidepdf.com/reader/full/manual-de-reparacion-de-maquinas-de-coser 158/311
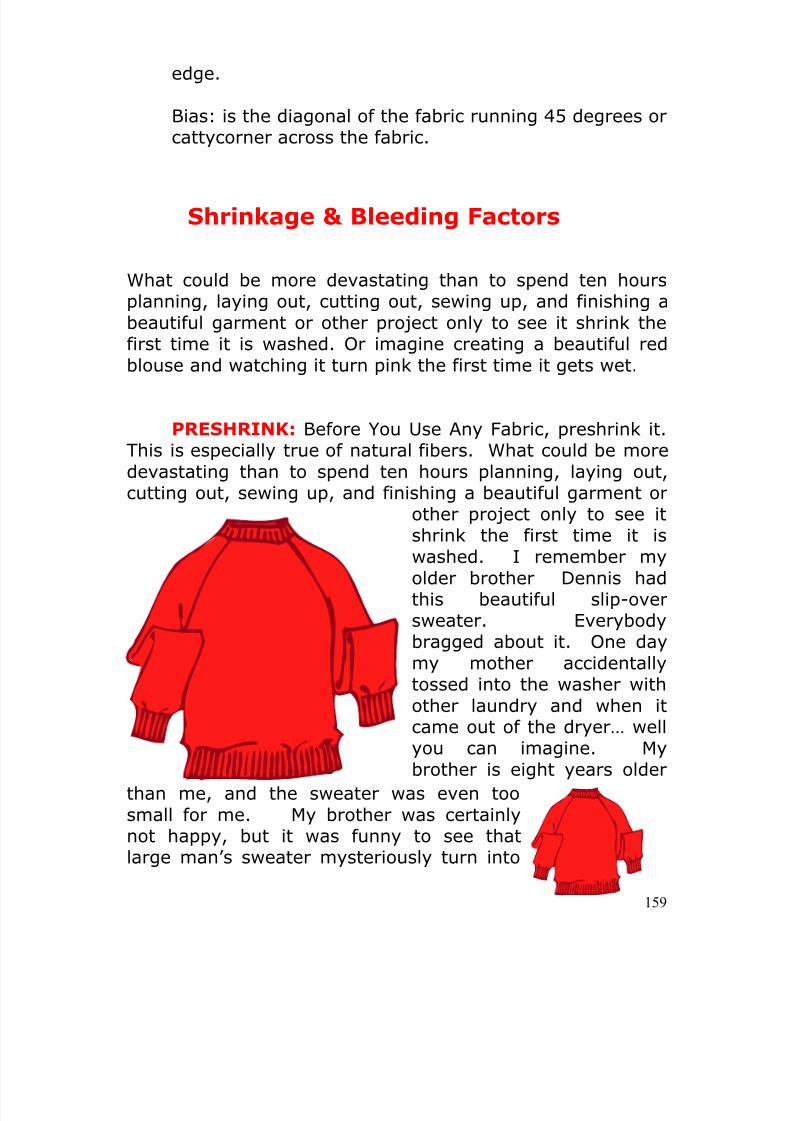
8/13/2019 Manual de Reparacion de Maquinas de Coser
http://slidepdf.com/reader/full/manual-de-reparacion-de-maquinas-de-coser 159/311
159
edge.
Bias: is the diagonal of the fabric running 45 degrees orcattycorner across the fabric.
Shrinkage & Bleeding Factors
What could be more devastating than to spend ten hoursplanning, laying out, cutting out, sewing up, and finishing abeautiful garment or other project only to see it shrink thefirst time it is washed. Or imagine creating a beautiful redblouse and watching it turn pink the first time it gets wet.
PRESHRINK: Before You Use Any Fabric, preshrink it.This is especially true of natural fibers. What could be moredevastating than to spend ten hours planning, laying out,cutting out, sewing up, and finishing a beautiful garment or
other project only to see itshrink the first time it iswashed. I remember my
older brother Dennis hadthis beautiful slip-oversweater. Everybodybragged about it. One daymy mother accidentallytossed into the washer withother laundry and when itcame out of the dryer… wellyou can imagine. My
brother is eight years olderthan me, and the sweater was even toosmall for me. My brother was certainlynot happy, but it was funny to see thatlarge man’s sweater mysteriously turn into
8/13/2019 Manual de Reparacion de Maquinas de Coser
http://slidepdf.com/reader/full/manual-de-reparacion-de-maquinas-de-coser 160/311
160
a perfect doll’s sweater.
Natural fibers tend to shrink whenever exposed to heat andmoisture. Wools are especially problematic. Cotton fabricsshrink too. Although, cotton does not typically shrink to thedegree that wool does, even a little shrinkage can alter thefabric significantly. Cotton is a natural fiber produced from aplant grown much like soybeans in fields by farmers. Thefibers are processed, stretched, pulled, and straightened.Various coatings are applied for stiffening to the fibers andthreads produced.
These threads or yarns are woven together to form thecotton fabric. Exposure to heat and moisture causes thefibers to relax or go limp like the original state of the fiber.
This is the shrinkage process. Some of the newer naturalfabrics have been processed to limit or prevent shrinkage,but “it is better to be safe than sorry”.
Washing the fabric in a washing machine causes thematerials to absorb moisture. The result is shrinkage.Applying heat in the dryer amplifies the problem. Theamount of shrinkage varies from fabric to fabric. If you canimagine, you just finished a queen size quilt. It has taken
maybe a hundred hours of tender loving sewing. You neatlylaid the finished quilt over the back of the couch. A few dayspass and the grandchildren come to visit. One of themcomes in and jumps up on the couch with his dirty shoesand the dirt goes straight on to the your magnificent quilt.You quickly try to rescue the quilt, but it is soiled, maybepermanently. What are you going to do?
Obviously, the solution is to wash the quilt, right?
Sure, but only if before you ever started sewing youfully prepared your fabrics. If not, ouch!
When cotton is exposed to moisture and heat, it notonly shrinks it does so in unpredictable and inconsistent
8/13/2019 Manual de Reparacion de Maquinas de Coser
http://slidepdf.com/reader/full/manual-de-reparacion-de-maquinas-de-coser 161/311
161
ways. If you have a whole quilt of different cotton pieces,you may get a bunch of puckers, pulls, and distortions. Thisis due to the irregular ways cotton shrinks.
Some quilters prefer to use unwashed fabrics duringconstruction of the quilt, and then do a careful moistening
and stretching in an attempt to control the shrinkage whileproducing an appearance of aging. This can also be donewith other projects like shirts and pants.
It is usually best, however, to do a pre-wash or pre-shrinking of fabrics so the finished product will have a muchmore polished appearance. At least test the fabic, beforespending endless hours making a project that willdisintegrate on the first washing. If you have any question
at all, Before You Use Any Fabric, Preshrink It. This isespecially true of natural fibers.
PREWASHING accomplishes several things at once. Itremoves the excess chemicals, sizings, protective coatings,
debris, and loose fibers. These excess chemicals can be bigirritants if you are sensitive. Their touch, sell, and feel canmake working with the fabric a challenge. After washing,the fabric is far easier to handle.
It removes some of the crispness of the new fabric. Thefabric takes on a bit softer appearance, but if you prefer thatcrispness of new fabric, it can still be yours. Just use a canof spray starch or sizing and spray a light mist over the
fabric. That crispness returns. Now you have control overthe chemicals. Take a look at the ingredients label to seeexactly what chemicals you may be adding. Choose a spraythat is less irritating by scrutinizing those ingredients.
It allows the fabric to shrink before it is sewn. Once the
8/13/2019 Manual de Reparacion de Maquinas de Coser
http://slidepdf.com/reader/full/manual-de-reparacion-de-maquinas-de-coser 162/311
162
fabric shrinks, it may shrink more when further exposed tomoisture and heat, but the shrinkage is significantlyreduced.
Here are some simple steps to prewashing: Use a large
washtub, large dish pan, bathtub, or clothes washer. Fill itand prepare a cool washing solution of premixed milddetergent, Ivory Soap Flakes (not powdered detergent) orOrvus soap. Never use any soap containing bleach or otherharsh chemicals that could ruin your fabric. Thoroughly stirthe soap in the water so it completely dissolves beforeadding fabric. Check with your sewing expert at your closestsewing center or quilt store for more details.
Unfold the fabric to be washed. Gently place the fabric intothe washing solution. Push it down into the water. Soak thefabric thoroughly. Gently agitate or swish the fabric by handor by machine using maximum delicate cycle. Do as muchsoaking as washing. Thoroughly rinse the fabric to removeall the detergent or soap.
Air dry at room temperature or dry in a clothes dryer at lowheat and use the delicate cycle. Remove the fabric from the
dryer as soon as the fabric is dry.
Once the fabric is thoroughly dry it may be pressed with aniron, but it is usually optimum to do so just before yourbegin cutting and sewing with the fabric. Pressing should bedone with a hot dry iron to press out the wrinkles from thefabric. Once done, the fabric is ready to cut and sew.
Testing Prevents Problems: If you believe your fabricsare not going to shrink significantly, it is not alwaysnecessary to pre-wash them. In many cased you can test asquare piece of the fabric and measure the shrinkage factor.If it less than ten percent, you are probably ok.
8/13/2019 Manual de Reparacion de Maquinas de Coser
http://slidepdf.com/reader/full/manual-de-reparacion-de-maquinas-de-coser 163/311
163
PRESHRINK: You may also preshrink instead of washingthe fabric. To preshrink or prepare fabric for sewing,dampen the fabric. Stretch it out so it can dry thoroughly.
Some fabrics will shrink five to ten percent the first timethey are washed. Preshrinking will safeguard furthershrinkage. Some fabrics shrink far more than others. Woolhas the reputation of a shrinking “violet”, but preshrinkingand pretreatment will go a long way to prevent massiveshrinkage. Some fabrics are labeled as pre-shrunk, butotherwise preshrink. Some better fabrics in specialty shopsare designed to minimize shrinkage, color fade, and similardeterioration through laundry. Always check the laundry
instructions and follow them explicitly.
Other problems can also sometimes be averted during thefabric preparation process. Sometimes fabrics are not ascolor fast as desired. You may add color stay to preventdiscoloration later during the preshrink fabric preparationprocess.
Prevent Bleeding: Sometimes when some fabrics get wet,
they bleed. They are said not to be color fast. Fabrics thatdo not bleed are described as color fast. Natural fibers aremore vulnerable to this problem than synthetic fibersbecause of the manufacturing process.
Bleeding is especially noticeable with reds. If you spendmany hours creating something wonderful and then wash it,some terrible things can happen. If your fabric has not beenprewashed and the colors set, the vivid red and purple dyes
may well bleed all over the rest of the quilt ruining it. So,prevent bleeding. No, don’t use bandaids. They don’t work.
Caution: anytime you use a fabric with really deep reds,purples, or other colors; test it for color fastness or bleeding.
8/13/2019 Manual de Reparacion de Maquinas de Coser
http://slidepdf.com/reader/full/manual-de-reparacion-de-maquinas-de-coser 164/311
164
Use A Bleed Test. Double Check before using a fabric toinsure that it is color fast (won’t bleed) by using a bleedtest. Cut a two to three inch square piece of each fabric youplan to use. Mix some washing solution in a large dish orpan, pour in a water soap solution just like you would use inyour washer to wash the quilt in the future. The temperatureshould also match your washing situation as close aspossible. Set the square of fabric into the bowl or pan ofwashing solution. Make sure you dunk it so it really getswet, and doesn’t just float on top of the water. Wait thirty toforty five minutes or so. Check the color of the water. Ifthe water has a colored tint, the fabric was not color fast. Itdid bleed. . If the color of the water was clear, it does notnecessarily mean that the fabric is colorfast. To doublecheck, take the fabric out and lay it on a piece of whitepaper towel. Wait a few minutes. Lift the fabric piece. Isthere color on the paper towel? Yes, then it may still bleedonto other fabrics in the quilt. No, then it is likely colorfast.
Prevent catastrophe by pre-treating the fabric with acolor stay product. . A cap full of Synthrapol or similarproduct (read directions on bottle) per load of wash will
usually clean away loose dyes preventing most bleeding, butmay not prevent all transfers from actual contact withanother fabric. In the worst cases, it may be necessary totreat the fabric with a dye fixative like Retayne to set thedyes. Once you have treated the fabrics, do another bleedtest just to be sure.
If the project is already assembled (sewn together) withouthaving been pre-washed; perform the bleed test before
washing. The bleed test should be done on each of thevarious fabrics in the finished quilt especially those with boldcolors. Use a cotton swab or cotton ball. Dip the cottonswab into warm water and rub it on the fabric pieces.Saturate the fabric with the water, but do not soak the quilt.Test the top layer of the fabric only. Avoid soaking the other
8/13/2019 Manual de Reparacion de Maquinas de Coser
http://slidepdf.com/reader/full/manual-de-reparacion-de-maquinas-de-coser 165/311
165
layers of the quilt. Inspect the cotton for any color transfer.If the cotton changes color, it will likely bleed if you washthe quilt. If you see not color transfer, there is still a chancethat if the quilt is exposed to a full soaking, soap, and heat;it may still bleed.
Other problems can also sometimes be averted during thefabric preparation process. Sometimes fabrics are not ascolor fast as desired. You may add color stay to preventdiscoloration later during the preshrink fabric preparationprocess.
STARCHING: When you are planning an embellishmentproject is is a good idea to starch the material before doingthe embroidery or embellishment. This prevents the fabricfrom stretching during the embellishment process, andleaves a beautiful finish.
Sewing TechniquesFor Different Fabrics
There are hundreds of different fabrics among thethousands of different kinds of fabric that you may choosefrom. As we have already discussed, there are fabrics madefrom natural fibers, manmade or manufactured naturalfibers, and synthetic fibers.
There are hundreds of different weaves and knittingconstructions. You can have satin weaves made of cotton,rayon, silk, even polyester. Then there are chiffons,broadcloths, felts, crepes, taffetas, suede, velvets, leathers,vinyl, snake skin, organza, jacquards… Your options areendless.
8/13/2019 Manual de Reparacion de Maquinas de Coser
http://slidepdf.com/reader/full/manual-de-reparacion-de-maquinas-de-coser 166/311
166
As you learn to sew and your skills increase, you willgradually learn to recognize the different fabric contents andtheir weaves. You will become especially accustomed toworking those fabrics you use most often. You will alsodiscover special ways to work with each fabric.
When you look for fabric, check the labels for fiber contentand weave designations. You will find lots of blended fabricswith polyester and cotton and similar combinations. Theseblended fabrics are designed to overcome the weaknesses ofone fiber with the strengths of the other.
As a general rule, if the fabric is woven and medium weight;use a universal needle 80/12 or 90/14. If the weave isespecially tight, use a sharp needle. If the materials arethicker use a heavier needle.
If the fabric is stretchy as knits typically are, use of anuniversal needle will leave your seems with skipped anddistorted stitches. Therefore, use a stretch or ball pointneedle of appropriate size.
You will also find that some fabrics are slipper, or do notslide easily. Special adjustments to your presser feet, andthe ways your feed the material may be necessary. If youhave thick multiple layers of fabric, you will likely need awalking foot.
With experience, will come the special skills with regard tospecific fabrics.
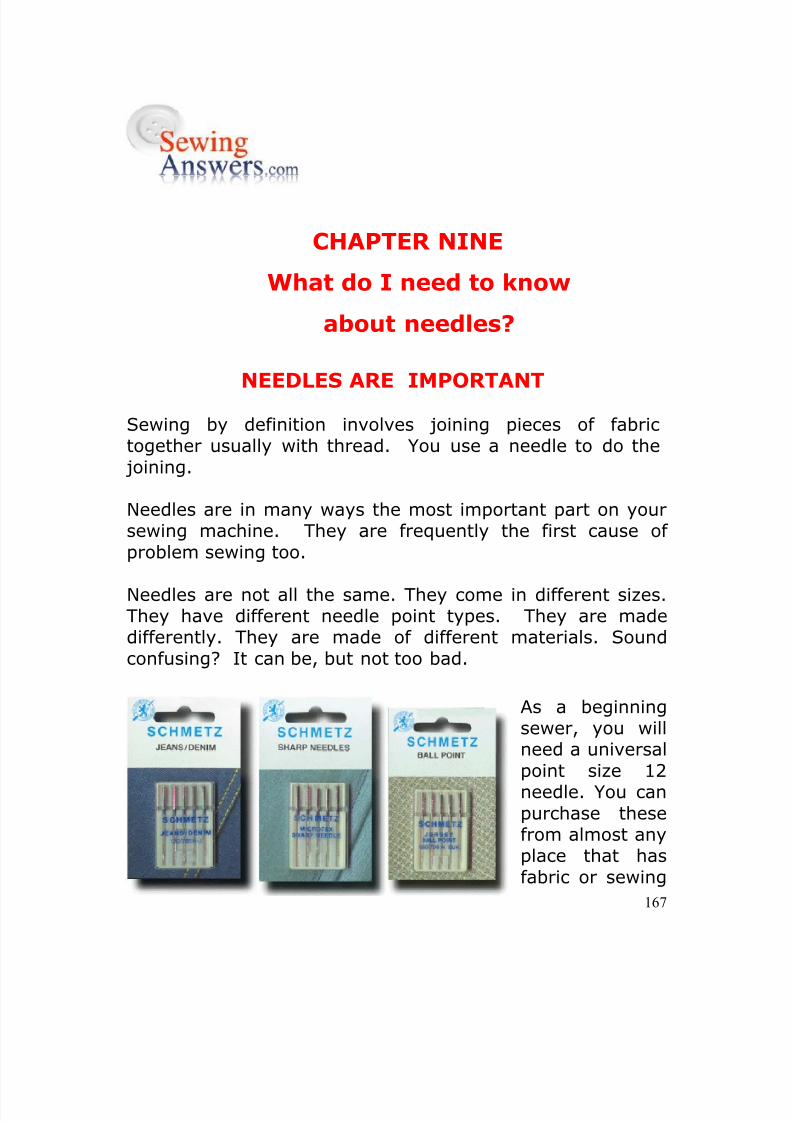
8/13/2019 Manual de Reparacion de Maquinas de Coser
http://slidepdf.com/reader/full/manual-de-reparacion-de-maquinas-de-coser 167/311
167
CHAPTER NINE
What do I need to know
about needles?
NEEDLES ARE IMPORTANT
Sewing by definition involves joining pieces of fabrictogether usually with thread. You use a needle to do the joining.
Needles are in many ways the most important part on yoursewing machine. They are frequently the first cause ofproblem sewing too.
Needles are not all the same. They come in different sizes.They have different needle point types. They are madedifferently. They are made of different materials. Soundconfusing? It can be, but not too bad.
As a beginningsewer, you willneed a universal
point size 12needle. You canpurchase thesefrom almost anyplace that hasfabric or sewing
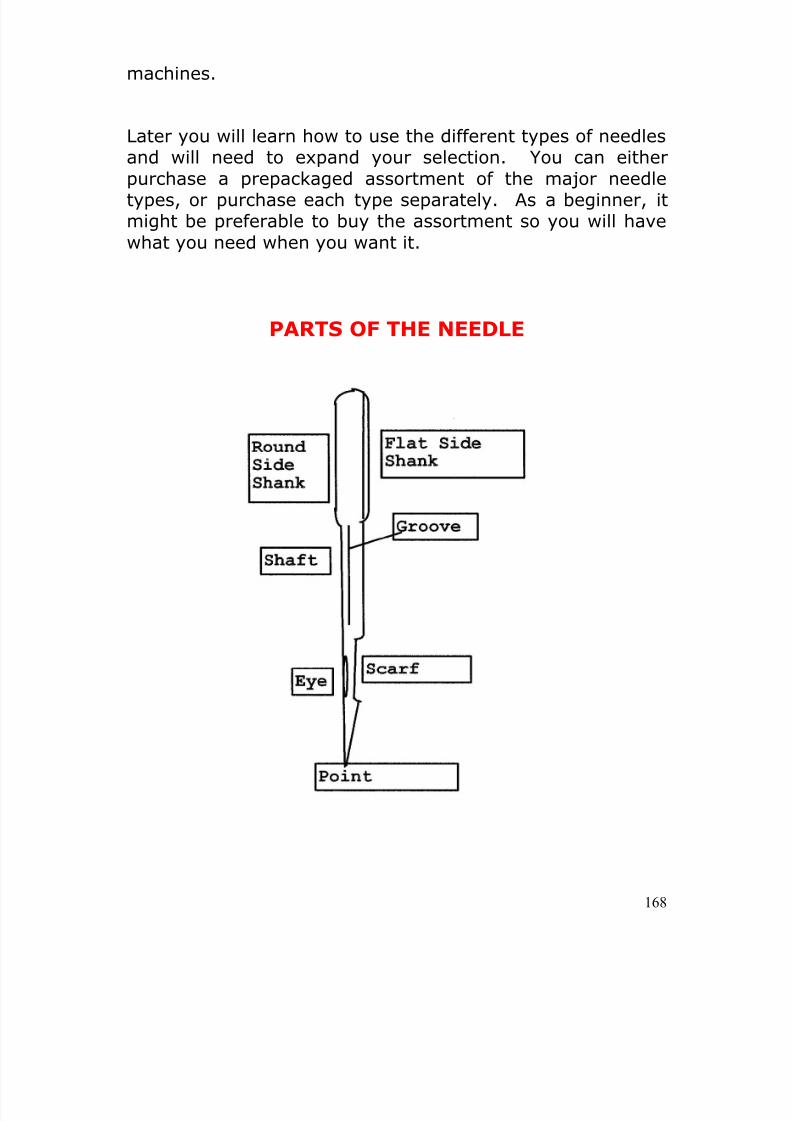
8/13/2019 Manual de Reparacion de Maquinas de Coser
http://slidepdf.com/reader/full/manual-de-reparacion-de-maquinas-de-coser 168/311
168
machines.
Later you will learn how to use the different types of needlesand will need to expand your selection. You can eitherpurchase a prepackaged assortment of the major needletypes, or purchase each type separately. As a beginner, itmight be preferable to buy the assortment so you will havewhat you need when you want it.
PARTS OF THE NEEDLE
8/13/2019 Manual de Reparacion de Maquinas de Coser
http://slidepdf.com/reader/full/manual-de-reparacion-de-maquinas-de-coser 169/311
169
Notice (on drawing of the needle below), the scarf is acut out area just behind the needle. As the needle movesdown the thread lies smoothly in the groove. As the needlerises, a loop forms in the scarf. The hook snags the loopand proceeds to form the stitch.
While we are considering needles, it is important tokeep in mind that today needles are generally standardizedby size. (You will notice two systems usually listed on apackage of needles together. The Singer or SAE systemuses numbers like 8, 10, 12, 14 while the Metric system forthe same needles use 60, 70, 80, 90. It does not matterwhich system you remember, the needles are exactly thesame. Size 8 equals size 60, etc. In both cases the largerthe number, the larger the needle.)
Please note, the size of hand sewing needles is just theopposite. Hand sewing needles and hand quilting needlesare sized with the larger number actually being the smallerneedle.
While the sizes of needles has been standardized, the qualityand special features have not. Needles will frequently havealpha identifiers to designate special applications for theneedle. H stands for Schmetz household or universalneedle. HS means stretch needle. SUR is ballpoint. N is TopStitching. NTW is Leather. Gold or Yellow Band Singerneedles may be helpful on specific Singer machines that skipstitches “no matter what”.
Manufacturers of needles have discovered that minorchanges in how the needle is made can make a hugedifference in how the needle performs during sewing. Thecommon areas for specialization have included increasing ordecreasing the size, width, or length of the needle eye,scarf, and groove. The thickness of the shaft is alsoadjusted for certain applications. Finally, the point of theneedle is adjusted to meet specific sewing needs.
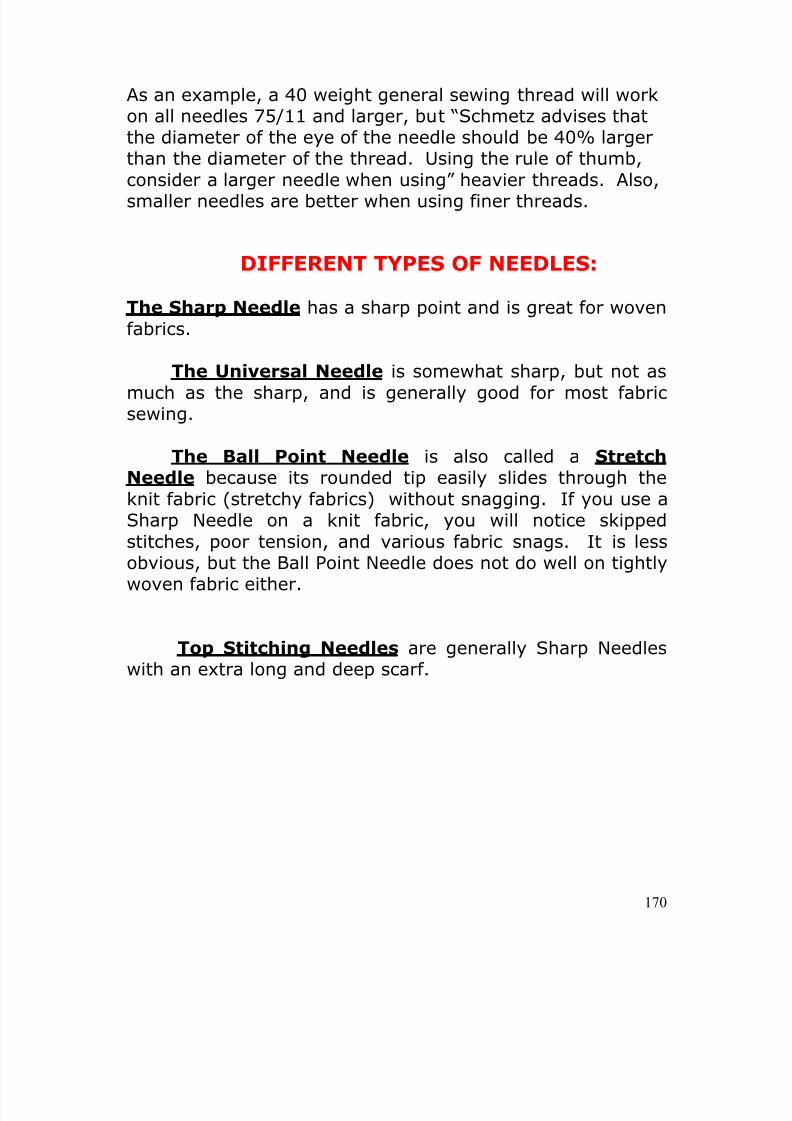
8/13/2019 Manual de Reparacion de Maquinas de Coser
http://slidepdf.com/reader/full/manual-de-reparacion-de-maquinas-de-coser 170/311
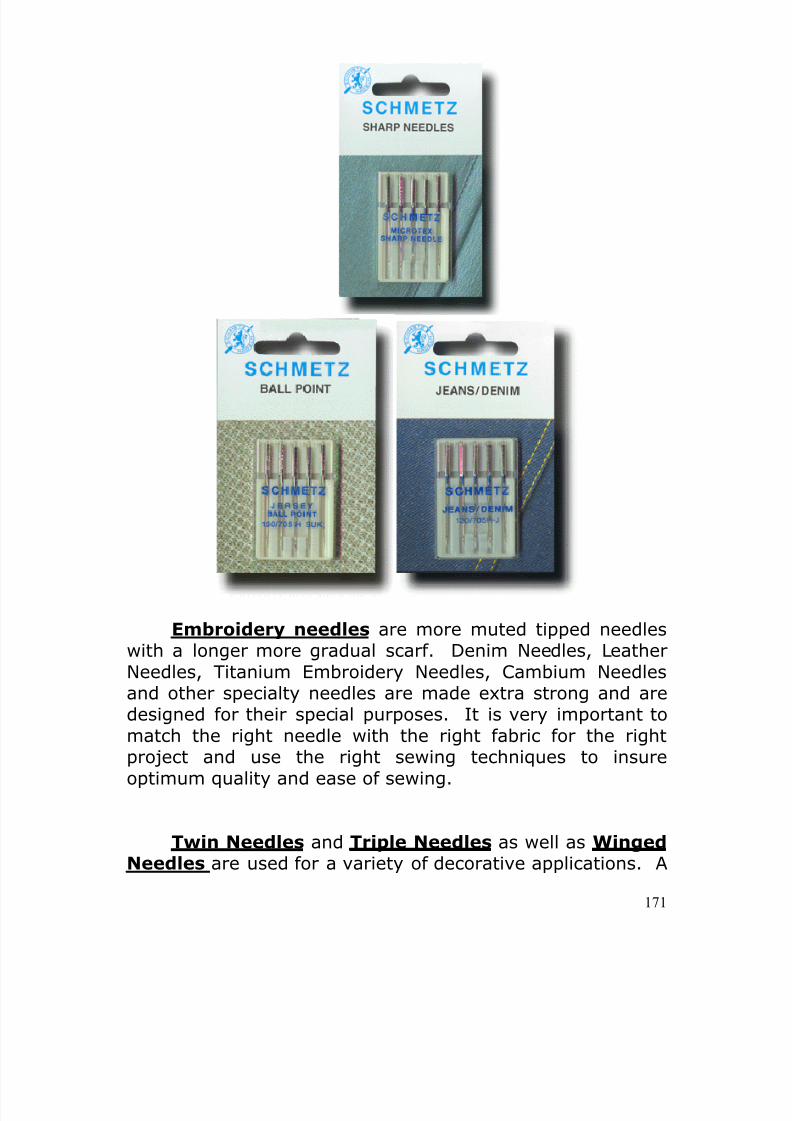
8/13/2019 Manual de Reparacion de Maquinas de Coser
http://slidepdf.com/reader/full/manual-de-reparacion-de-maquinas-de-coser 171/311
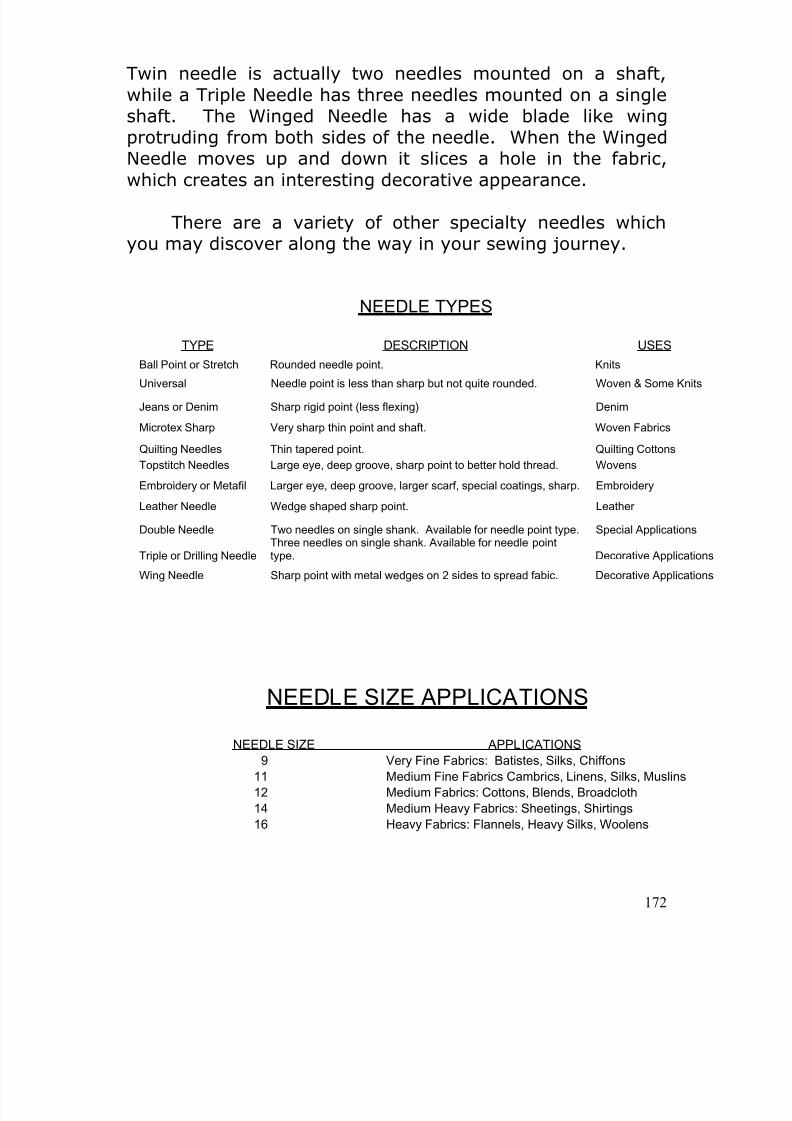
8/13/2019 Manual de Reparacion de Maquinas de Coser
http://slidepdf.com/reader/full/manual-de-reparacion-de-maquinas-de-coser 172/311
172
Twin needle is actually two needles mounted on a shaft,while a Triple Needle has three needles mounted on a singleshaft. The Winged Needle has a wide blade like wingprotruding from both sides of the needle. When the WingedNeedle moves up and down it slices a hole in the fabric,which creates an interesting decorative appearance.
There are a variety of other specialty needles whichyou may discover along the way in your sewing journey.
NEEDLE TYPES
TYPE DESCRIPTION USES
Ball Point or Stretch Rounded needle point. Knits
Universal Needle point is less than sharp but not quite rounded. Woven & Some Knits
Jeans or Denim Sharp rigid point (less flexing) Denim
Microtex Sharp Very sharp thin point and shaft. Woven Fabrics
Quilting Needles Thin tapered point. Quilting Cottons
Topstitch Needles Large eye, deep groove, sharp point to better hold thread. Wovens
Embroidery or Metafil Larger eye, deep groove, larger scarf, special coatings, sharp. Embroidery
Leather Needle Wedge shaped sharp point. Leather
Double Needle Two needles on single shank. Available for needle point type. Special Applications
Triple or Drilling NeedleThree needles on single shank. Available for needle pointtype. Decorative Applications
Wing Needle Sharp point with metal wedges on 2 sides to spread fabic. Decorative Applications
NEEDLE SIZE APPLICATIONS
NEEDLE SIZE APPLICATIONS
9 Very Fine Fabrics: Batistes, Silks, Chiffons11 Medium Fine Fabrics Cambrics, Linens, Silks, Muslins
12 Medium Fabrics: Cottons, Blends, Broadcloth
14 Medium Heavy Fabrics: Sheetings, Shirtings
16 Heavy Fabrics: Flannels, Heavy Silks, Woolens

8/13/2019 Manual de Reparacion de Maquinas de Coser
http://slidepdf.com/reader/full/manual-de-reparacion-de-maquinas-de-coser 173/311
173
NEEDLE THREAD CHART
Needle Size Thread Type Fabric Type Fabric Weight
18/100 Sharp or U Buttonhole Twist General Fabrics Avg to Heavy(Decorative)
18/100 Sharp or U 50 Poly or 40 Cotton Upholstery, Canvas Heavy to Medium
16/100 LeatherLong FiberPolyester Heavy Leather Very Heavy
16/100 Sharp or U Buttonhole Twist General FabricsLight to Mid(Decorative)
16/100 Sharp or U 40 Cotton, 50 Poly Denim, Drapery, Heavy Pile, Vinyl Med-Heavy
14/90 Leather 40 Cotton, 50 Poly Suede Heavy
14/90 Ballpoint 50 Cotton, 50 Poly Knits, Bonded, Double Knit, Stretch Medium Stretch
14/90 Denim 50 Poly or Cotton Denim or Jeans Medium
14/90 Sharp or U 50 Poly or Cotton Pile, Cottons, Linen, Velvet, Satin Medium
12/85 Quilting 50 Cotton Cotton Three Ply Quilting Layers
12/85 Embroidery 40 Poly Stabilized Fabric Embroidery
12/85 Sharp or U 50 Poly or Cotton Cottons, Pile, Linen, Velvet, Satin Medium to Med-Light
11/80 Sharp or U 50 Poly or Cotton Batiste, Crepe, Chiffon, Velvet, Jersey Light
9/70 Sharp or U 50 Poly or Cotton Chiffon, Lace,Organza, Tulle Delicate
8/60 Sharp or U 60 Cotton Chiffon, Lace,Organza, Tulle, Voile Very Delicate
Sharp Point 8-18 Cotton or Poly Woven Fabrics Any Weight
Universal Point 8-18 Cotton or Poly Woven Fabrics Any Weight
Ball Point 8-16 Cotton or Poly Knit Fabrics Any Weight
Wedge Point 11-18 Cotton or Poly Leather and Vinyl Thick or Heavy
System Needle Sizes NEEDLE COMPOSITIONSEuropean 60-120 Stainless Steel
American SAE 8-19 Titanium
130/795H Home Machine Needle System
Notes:Sharp Needles are also called MicrotecSharp
Ball Point means the same as Stretch Point

8/13/2019 Manual de Reparacion de Maquinas de Coser
http://slidepdf.com/reader/full/manual-de-reparacion-de-maquinas-de-coser 174/311
8/13/2019 Manual de Reparacion de Maquinas de Coser
http://slidepdf.com/reader/full/manual-de-reparacion-de-maquinas-de-coser 175/311
175
making them highly economical for repeated projectproductions.
Many designers especially those focusing on quiltingactivities, have developed acrylic rulers with special shapesand sizes. These rulers function much like templates,because they can be used over and over again to producesimilar design features. Technically, however, they areconsidered rulers instead of templates. Templates areusually designed for a specific project, and rulers may beapplied to many different projects with similar designfeatures.
Patterns, templates, and rulers are vital tools for thesewer, because they take most of the design work out of theproject. When you want to do a project, and you have aprofessionally designed pattern (template, or ruler withinstructions); the job is greatly simplified.
What happens when you do not have a pattern? Whatif you do not have a template?
Before pattern companies began publishing patternsand templates, the seamstress or sewer would create theirown pattern. The process of making your own patterns foryour project (especially as it applies to garmentconstruction) is called draping.
The process is fairly simple. You use cheap fabric likemuslin or you use paper like butcher’s paper. You find amodel or a person for whom the garment is going to becustom designed. You drape the fabric (or paper – notusually as accurate), over the portion of the model’s bodymarking it carefully with a marker. Add appropriate seamallowances, ease, and other elements, and cut out thedraped “pattern piece”. The designer would take manymeasurements to insure accuracy throughout the project.
8/13/2019 Manual de Reparacion de Maquinas de Coser
http://slidepdf.com/reader/full/manual-de-reparacion-de-maquinas-de-coser 176/311
176
The pattern maker or designer makes a bodice, front,back, shoulder, whatever garment element you anticipatemaking. Soon the draped pattern is ready. Construction ofthe garment or project proceeds the same way with with thedraped pattern as you would a published pattern from any ofthe pattern design houses. Usually, when seamstresses ortailors use this approach, they make a trial garment bastingit together before constructing the final garment.
LAY OUT AND CUT OUT
Your pattern envelope provides crucial information on everydetail of your project. Treat it like a chapter of the “Sewing” Bible.
Your pattern contains multiple views, options, and details aboutyour project. It includes information on body sizes, amounts of fabricneeded, and finished measurements. Take special note of the fabricwidths, because fabric comes in a variety of different widths. A yardof 35” wide fabric obviously has less fabric than 45” or 60” fabric.Instructions are given concerning how to lay out the pattern and cutout the fabric.
Since most patterns include optional views, you must choose
your view. Once chosen, the instructions will list what pattern piecesare needed to create that garment or project views. They arenumbered or lettered to make easy identification. Make certain youuse the right layout pieces for your project, your pattern size, and youfabric.
Patterns are intended to be adjusted. They are designed basedon average body length and distance around the body at variouspoints. It is common for your body measurements to be a bit differentfrom the pattern. Therefore, the first step before final layout is to
adjust the pattern so it fits your body. There are twelvemeasurements needed for women and nine for men. You may wantmore depending on you personal needs.
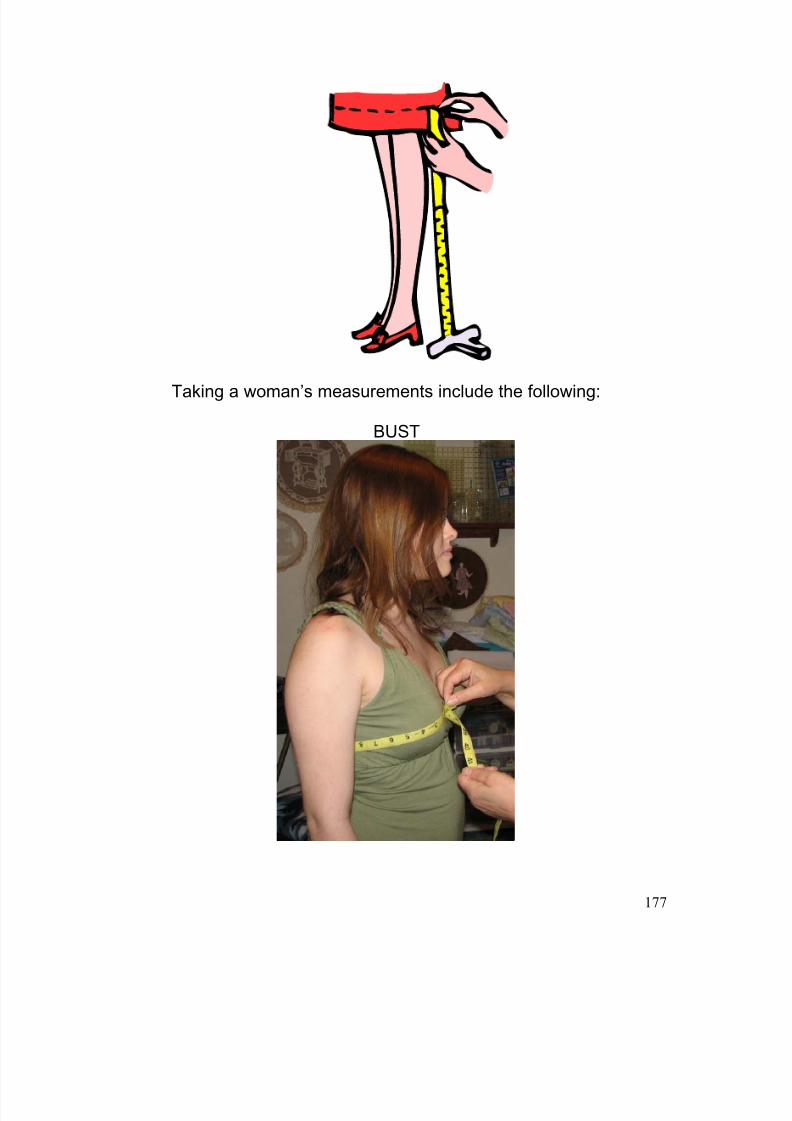
8/13/2019 Manual de Reparacion de Maquinas de Coser
http://slidepdf.com/reader/full/manual-de-reparacion-de-maquinas-de-coser 177/311
177
Taking a woman’s measurements include the following:
BUST
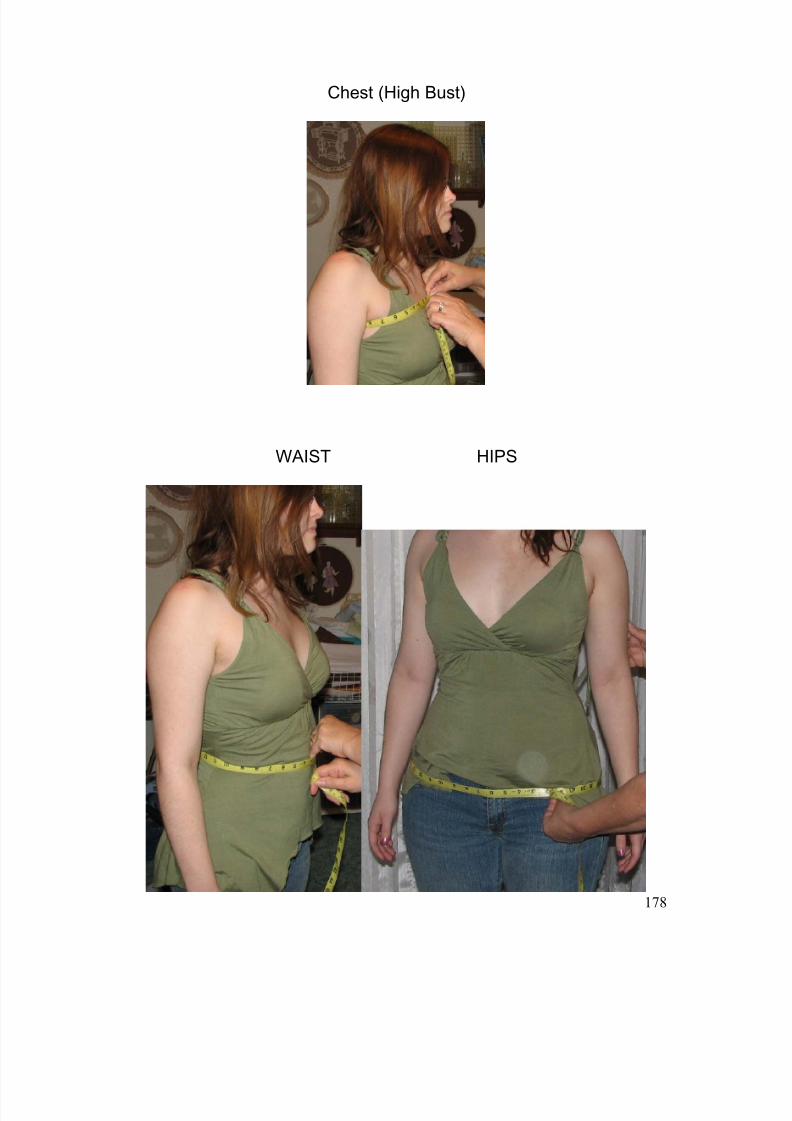
8/13/2019 Manual de Reparacion de Maquinas de Coser
http://slidepdf.com/reader/full/manual-de-reparacion-de-maquinas-de-coser 178/311
178
Chest (High Bust)
WAIST HIPS

8/13/2019 Manual de Reparacion de Maquinas de Coser
http://slidepdf.com/reader/full/manual-de-reparacion-de-maquinas-de-coser 179/311
179
CENTER BACK ARM GIRTH
SHOULDER TO ELBOW ARM MEASURMENT
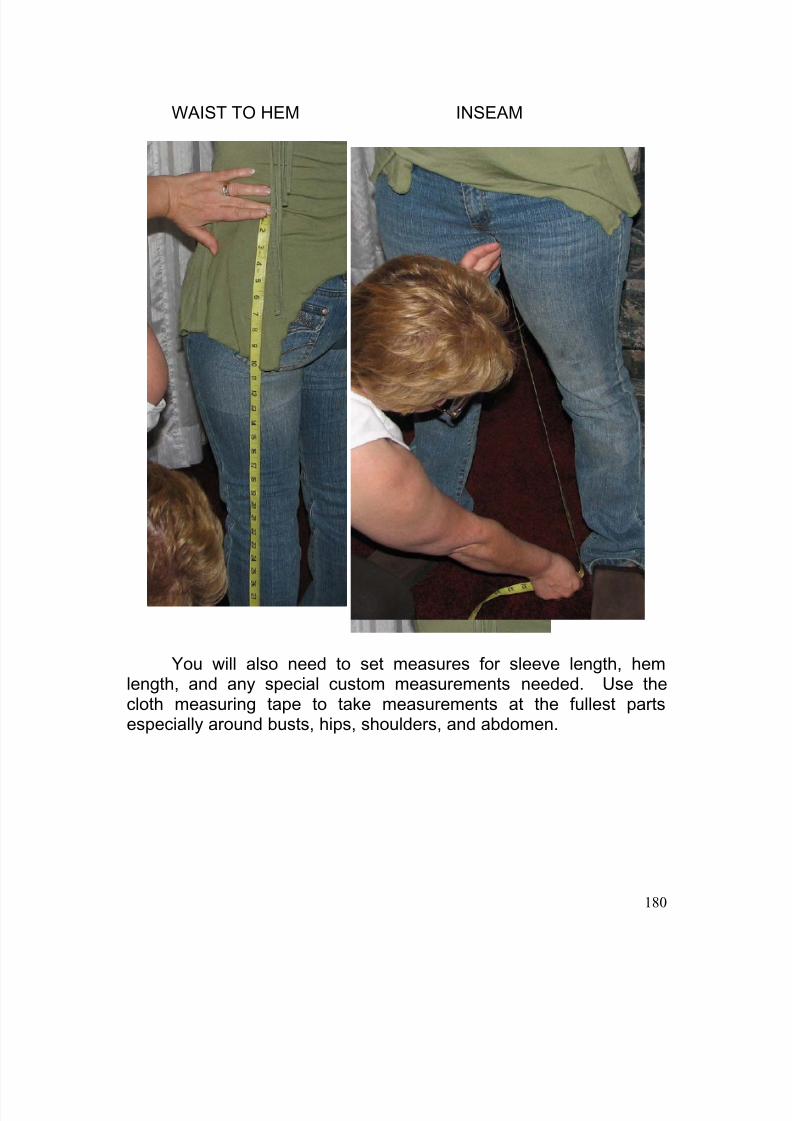
8/13/2019 Manual de Reparacion de Maquinas de Coser
http://slidepdf.com/reader/full/manual-de-reparacion-de-maquinas-de-coser 180/311
180
WAIST TO HEM INSEAM
You will also need to set measures for sleeve length, hemlength, and any special custom measurements needed. Use thecloth measuring tape to take measurements at the fullest partsespecially around busts, hips, shoulders, and abdomen.
8/13/2019 Manual de Reparacion de Maquinas de Coser
http://slidepdf.com/reader/full/manual-de-reparacion-de-maquinas-de-coser 181/311
181
A man’s measurements should include: Neck, Chest, Waist,Sleeve Length, Height, Hip (Seat), LengthWaist to Seat, Pants Length, InseamLength. Be sure to allow one half inchease around the neck for collarmeasurement. Measure sleeve length
with arm bent. Measure height withshoes off. Measure inseam along theinseam (inside seam) of slacks that arealready comfortable.
Take your measurements andcompare them with the pattern measures.Notice the differences so you can adjust accordingly. Frequently, themeasurements given in the patterns are unreliable. When you make
your measurements be sure to “Measure twice and cut once.” Also,be sure to include appropriate space for ease in your measurements.
Before cutting anything, measure twice. Double check everymeasurement and every detail. Calculate appropriate ease or thegive necessary to make a comfortable fit.
Ease is a term that essentially means extra clearance or room.It has two basic applications in sewing. From a design perspective,ease is the fullness of a garment that makes the garment look good
while you wear the finished garment.
First, it describes the squeezing or allowance needed to fitfabrics of different sizes, shapes, or contours together for proper fit.
A longer piece of fabric is said to be eased to fit a shorter piece. Thecap of a sleeve is eased into the armhole to form a proper fittingsleeve. Ease is simply fitting two fabrics that are different in someway together so that the fit properly. Commonly, a hem may be sewnwith a slightly shorter fabric held tightly (maybe even stretched) a bit
on the bottom and a larger piece eased more loosely on top. Whenelastic is attached at a waistline, it is stretched and sewn onto theless stretchy fabric.
Second, the term ease refers to the difference between theactual measurements of the body and the measurement of agarment. Ease, in this case, refers to the allowance - tightness or
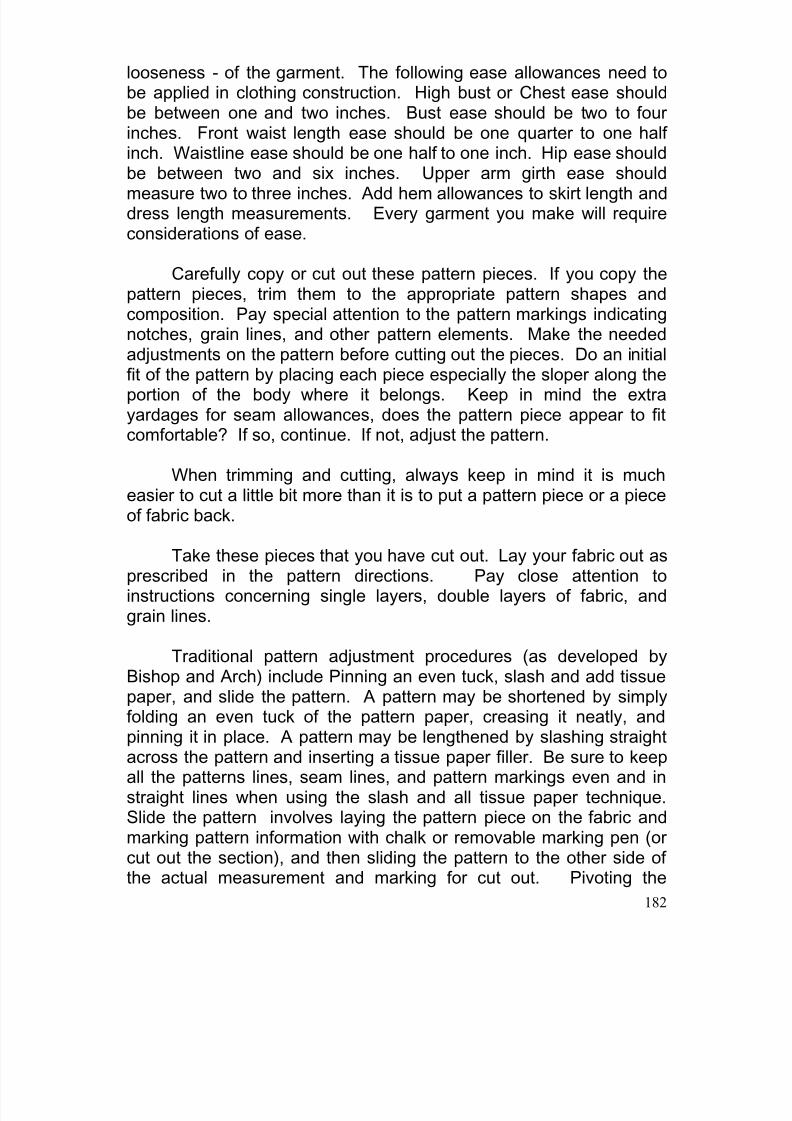
8/13/2019 Manual de Reparacion de Maquinas de Coser
http://slidepdf.com/reader/full/manual-de-reparacion-de-maquinas-de-coser 182/311
182
looseness - of the garment. The following ease allowances need tobe applied in clothing construction. High bust or Chest ease shouldbe between one and two inches. Bust ease should be two to fourinches. Front waist length ease should be one quarter to one halfinch. Waistline ease should be one half to one inch. Hip ease shouldbe between two and six inches. Upper arm girth ease should
measure two to three inches. Add hem allowances to skirt length anddress length measurements. Every garment you make will requireconsiderations of ease.
Carefully copy or cut out these pattern pieces. If you copy thepattern pieces, trim them to the appropriate pattern shapes andcomposition. Pay special attention to the pattern markings indicatingnotches, grain lines, and other pattern elements. Make the neededadjustments on the pattern before cutting out the pieces. Do an initial
fit of the pattern by placing each piece especially the sloper along theportion of the body where it belongs. Keep in mind the extrayardages for seam allowances, does the pattern piece appear to fitcomfortable? If so, continue. If not, adjust the pattern.
When trimming and cutting, always keep in mind it is mucheasier to cut a little bit more than it is to put a pattern piece or a pieceof fabric back.
Take these pieces that you have cut out. Lay your fabric out as
prescribed in the pattern directions. Pay close attention toinstructions concerning single layers, double layers of fabric, andgrain lines.
Traditional pattern adjustment procedures (as developed byBishop and Arch) include Pinning an even tuck, slash and add tissuepaper, and slide the pattern. A pattern may be shortened by simplyfolding an even tuck of the pattern paper, creasing it neatly, andpinning it in place. A pattern may be lengthened by slashing straight
across the pattern and inserting a tissue paper filler. Be sure to keepall the patterns lines, seam lines, and pattern markings even and instraight lines when using the slash and all tissue paper technique.Slide the pattern involves laying the pattern piece on the fabric andmarking pattern information with chalk or removable marking pen (orcut out the section), and then sliding the pattern to the other side ofthe actual measurement and marking for cut out. Pivoting the
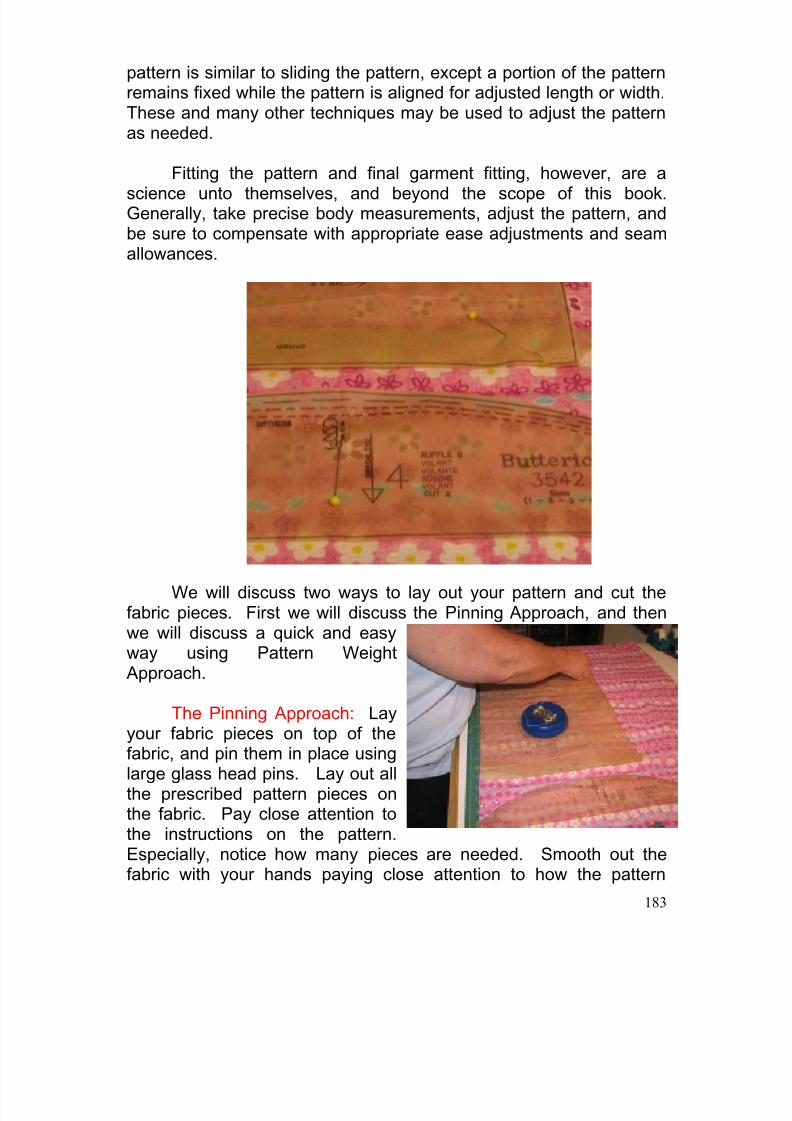
8/13/2019 Manual de Reparacion de Maquinas de Coser
http://slidepdf.com/reader/full/manual-de-reparacion-de-maquinas-de-coser 183/311
183
pattern is similar to sliding the pattern, except a portion of the patternremains fixed while the pattern is aligned for adjusted length or width.These and many other techniques may be used to adjust the patternas needed.
Fitting the pattern and final garment fitting, however, are a
science unto themselves, and beyond the scope of this book.Generally, take precise body measurements, adjust the pattern, andbe sure to compensate with appropriate ease adjustments and seamallowances.
We will discuss two ways to lay out your pattern and cut thefabric pieces. First we will discuss the Pinning Approach, and thenwe will discuss a quick and easyway using Pattern Weight
Approach.
The Pinning Approach: Layyour fabric pieces on top of thefabric, and pin them in place usinglarge glass head pins. Lay out allthe prescribed pattern pieces onthe fabric. Pay close attention tothe instructions on the pattern.Especially, notice how many pieces are needed. Smooth out thefabric with your hands paying close attention to how the pattern
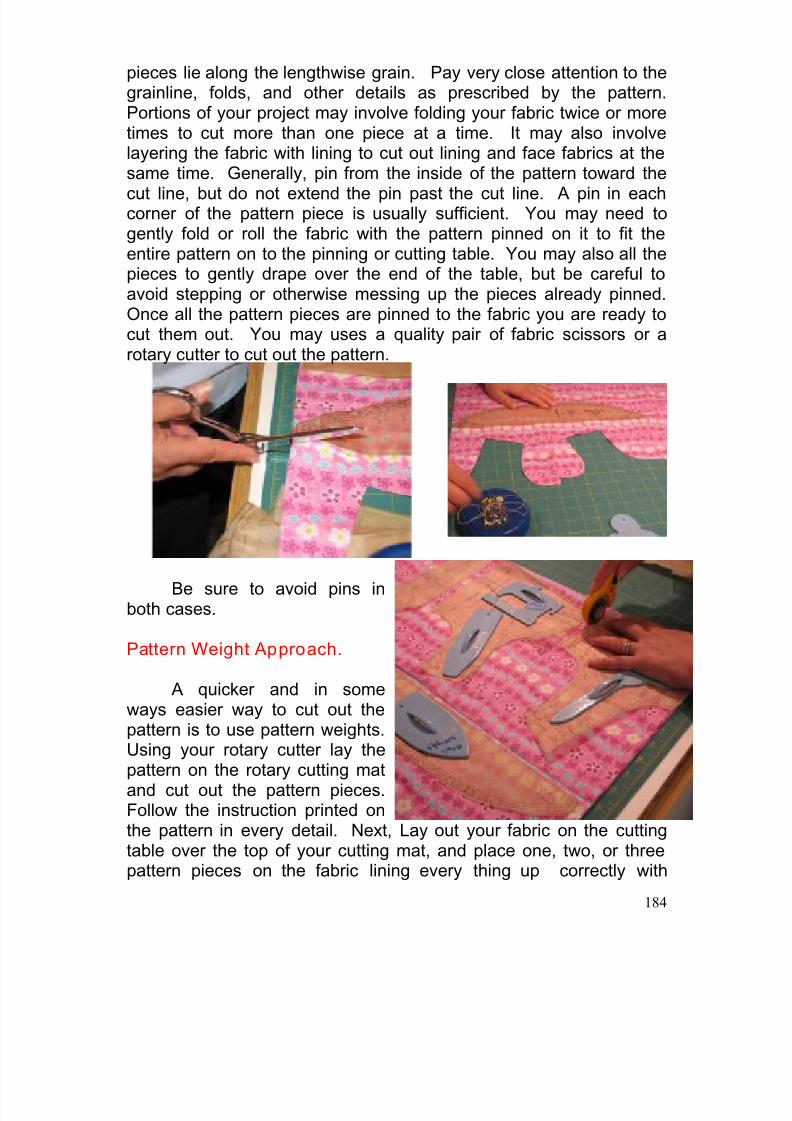
8/13/2019 Manual de Reparacion de Maquinas de Coser
http://slidepdf.com/reader/full/manual-de-reparacion-de-maquinas-de-coser 184/311
184
pieces lie along the lengthwise grain. Pay very close attention to thegrainline, folds, and other details as prescribed by the pattern.Portions of your project may involve folding your fabric twice or moretimes to cut more than one piece at a time. It may also involvelayering the fabric with lining to cut out lining and face fabrics at thesame time. Generally, pin from the inside of the pattern toward the
cut line, but do not extend the pin past the cut line. A pin in eachcorner of the pattern piece is usually sufficient. You may need togently fold or roll the fabric with the pattern pinned on it to fit theentire pattern on to the pinning or cutting table. You may also all thepieces to gently drape over the end of the table, but be careful toavoid stepping or otherwise messing up the pieces already pinned.Once all the pattern pieces are pinned to the fabric you are ready tocut them out. You may uses a quality pair of fabric scissors or arotary cutter to cut out the pattern.
Be sure to avoid pins inboth cases.
Pattern Weight Approach.
A quicker and in someways easier way to cut out thepattern is to use pattern weights.Using your rotary cutter lay the
pattern on the rotary cutting matand cut out the pattern pieces.Follow the instruction printed onthe pattern in every detail. Next, Lay out your fabric on the cuttingtable over the top of your cutting mat, and place one, two, or threepattern pieces on the fabric lining every thing up correctly with
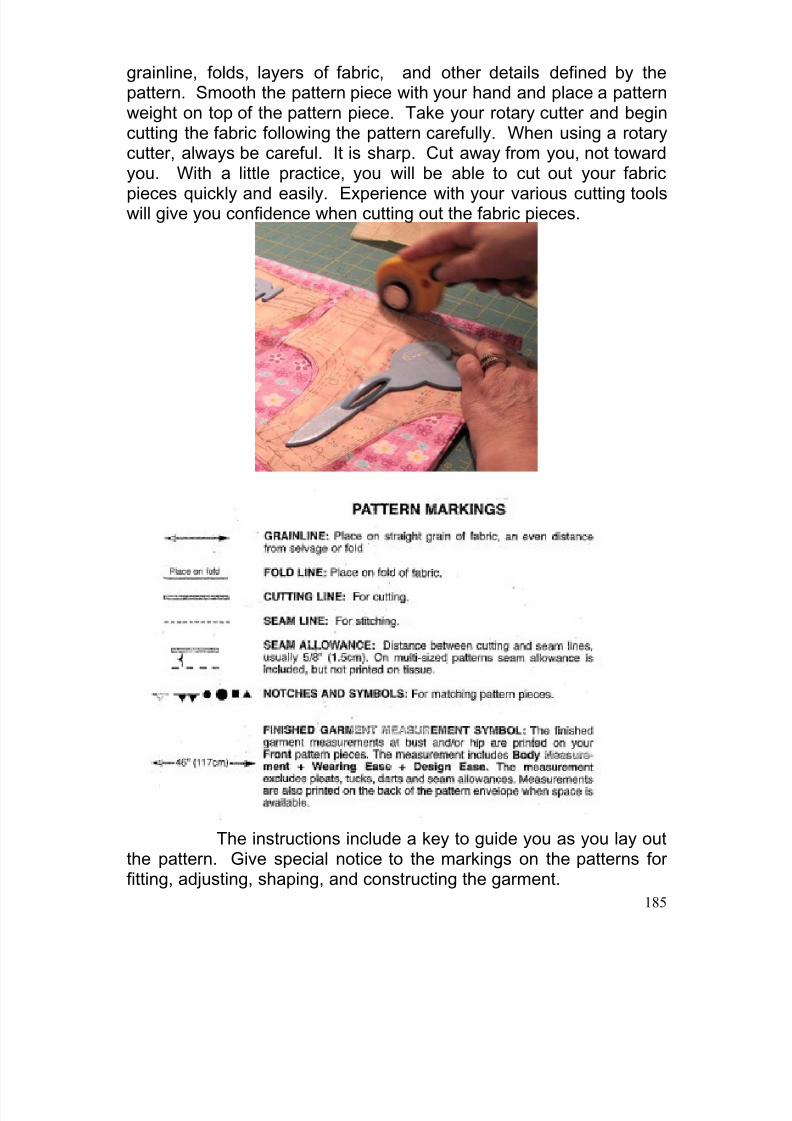
8/13/2019 Manual de Reparacion de Maquinas de Coser
http://slidepdf.com/reader/full/manual-de-reparacion-de-maquinas-de-coser 185/311
185
grainline, folds, layers of fabric, and other details defined by thepattern. Smooth the pattern piece with your hand and place a patternweight on top of the pattern piece. Take your rotary cutter and begincutting the fabric following the pattern carefully. When using a rotarycutter, always be careful. It is sharp. Cut away from you, not towardyou. With a little practice, you will be able to cut out your fabric
pieces quickly and easily. Experience with your various cutting toolswill give you confidence when cutting out the fabric pieces.
The instructions include a key to guide you as you lay outthe pattern. Give special notice to the markings on the patterns forfitting, adjusting, shaping, and constructing the garment.
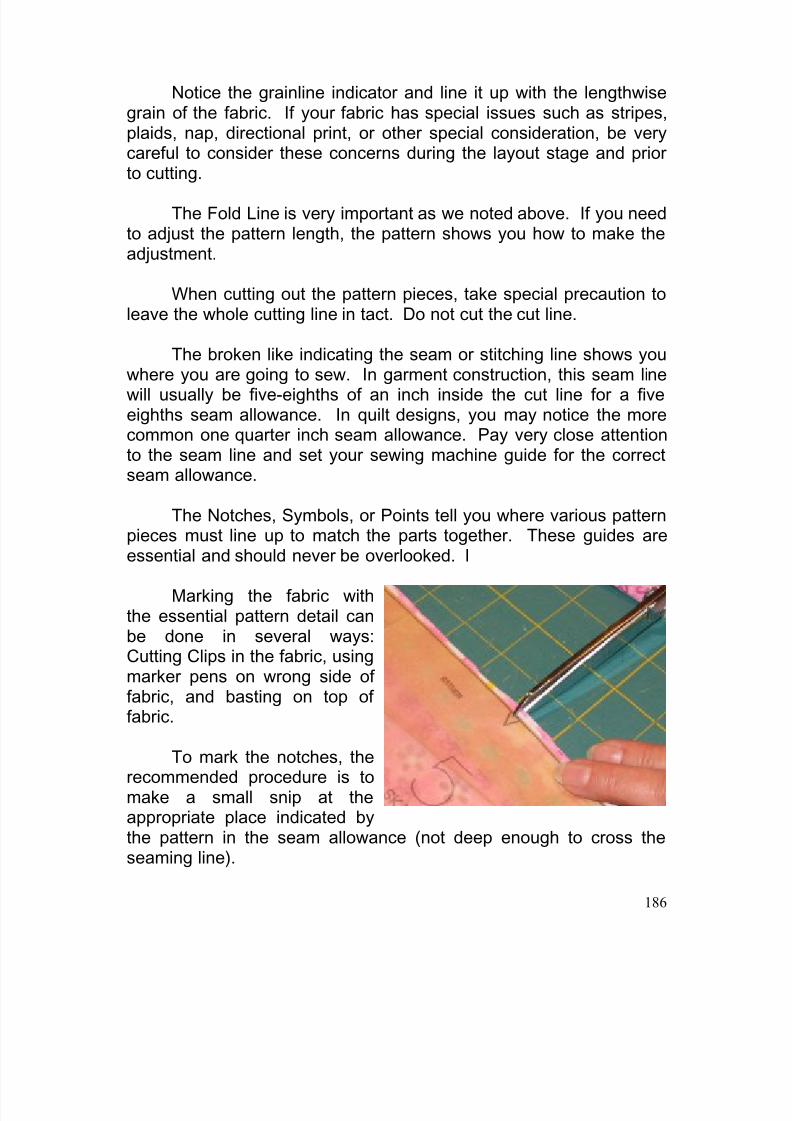
8/13/2019 Manual de Reparacion de Maquinas de Coser
http://slidepdf.com/reader/full/manual-de-reparacion-de-maquinas-de-coser 186/311
186
Notice the grainline indicator and line it up with the lengthwise
grain of the fabric. If your fabric has special issues such as stripes,plaids, nap, directional print, or other special consideration, be verycareful to consider these concerns during the layout stage and priorto cutting.
The Fold Line is very important as we noted above. If you needto adjust the pattern length, the pattern shows you how to make theadjustment.
When cutting out the pattern pieces, take special precaution toleave the whole cutting line in tact. Do not cut the cut line.
The broken like indicating the seam or stitching line shows you
where you are going to sew. In garment construction, this seam linewill usually be five-eighths of an inch inside the cut line for a fiveeighths seam allowance. In quilt designs, you may notice the morecommon one quarter inch seam allowance. Pay very close attentionto the seam line and set your sewing machine guide for the correctseam allowance.
The Notches, Symbols, or Points tell you where various patternpieces must line up to match the parts together. These guides areessential and should never be overlooked. I
Marking the fabric withthe essential pattern detail canbe done in several ways:Cutting Clips in the fabric, usingmarker pens on wrong side offabric, and basting on top offabric.
To mark the notches, therecommended procedure is tomake a small snip at theappropriate place indicated bythe pattern in the seam allowance (not deep enough to cross theseaming line).
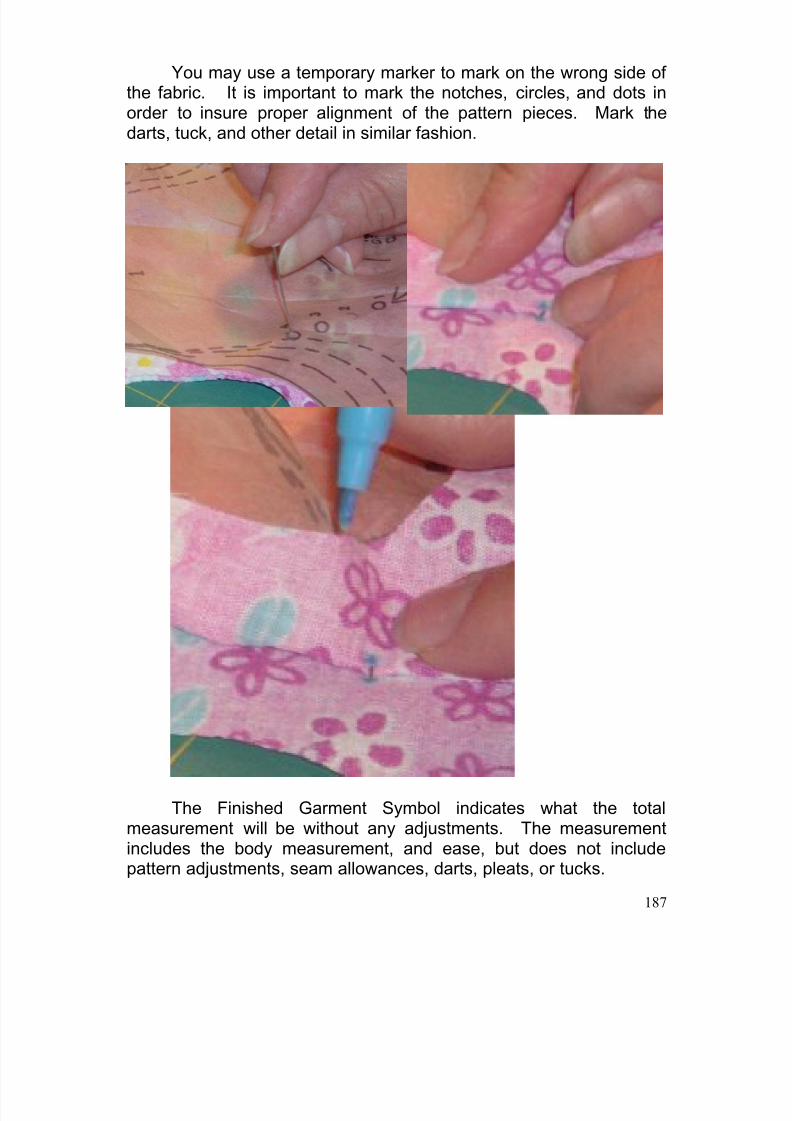
8/13/2019 Manual de Reparacion de Maquinas de Coser
http://slidepdf.com/reader/full/manual-de-reparacion-de-maquinas-de-coser 187/311
187
You may use a temporary marker to mark on the wrong side ofthe fabric. It is important to mark the notches, circles, and dots inorder to insure proper alignment of the pattern pieces. Mark thedarts, tuck, and other detail in similar fashion.
The Finished Garment Symbol indicates what the totalmeasurement will be without any adjustments. The measurementincludes the body measurement, and ease, but does not includepattern adjustments, seam allowances, darts, pleats, or tucks.
8/13/2019 Manual de Reparacion de Maquinas de Coser
http://slidepdf.com/reader/full/manual-de-reparacion-de-maquinas-de-coser 188/311
188
Once the pattern is laid out, transfer the information to the
wrong side of the fabric by using appropriate marking tools.
Another technique for transferring markings to the right side ofthe fabric is to use a long basting stitches and sew along the marks
(Tailor Tacks).
When all pattern pieces are layout and each fabric piece isready, then you may begin the cutting process. While cutting, avoidmoving the fabric. As much as possible physically move around thecutting table yourself. Moving the fabric can cause distortions in thefinished pattern due to wrinkles and misalignment. If you must movethe fabric during the cut out phase, be sure to lay it flat, smooth outany wrinkles, and double check that it is ready to cut before
proceeding.
Remember, “Measure Twice and Cut Once.”
Various detailed tips, instructions, and guidelines are alsoprinted on the pattern instruction sheets. It is essential to follow stepby step each pattern instruction, at least until you are proficient atpattern layout and cutout. It will save time and grief to complete eachstep before moving on to the next.

8/13/2019 Manual de Reparacion de Maquinas de Coser
http://slidepdf.com/reader/full/manual-de-reparacion-de-maquinas-de-coser 189/311
189
8/13/2019 Manual de Reparacion de Maquinas de Coser
http://slidepdf.com/reader/full/manual-de-reparacion-de-maquinas-de-coser 190/311
190
CHAPTER ELEVEN
SEWING & PRESSING
In this chapter, we will explore some of the most common sewing
techniques used in a variety of different sewing projects. As you learn more,
you will discover many other sewing techniques, but these will be used over
and over again.
Here we will explore How to Baste; Sew A Satin Stitch, How to Sew A
Blanket Stitch, How to Sew a Blind Stitch hem, How to Sew A Mitered
Corner, How to Stitch In The Ditch, How to do Free Motion sewing. And
we will examine the essential techniques for Ironing And Pressing.
HOW TO YOU BASTE
HOW DO YOU SEW A SATINSTITCH?
All stitches begin as a straight stitch. The straightstitch may be adjusted for stitch length to create fine,medium, and long straight stitches. The longest straightstitch is called a basting stitch.
When you add width to the straight stitch, you createthe zig zag stitch. Long zig zag stitches form zig zag bastingstitches. When the zig zag stitch is shortened very short sothat the threads lie flat against each other, it forms a satinstitch.
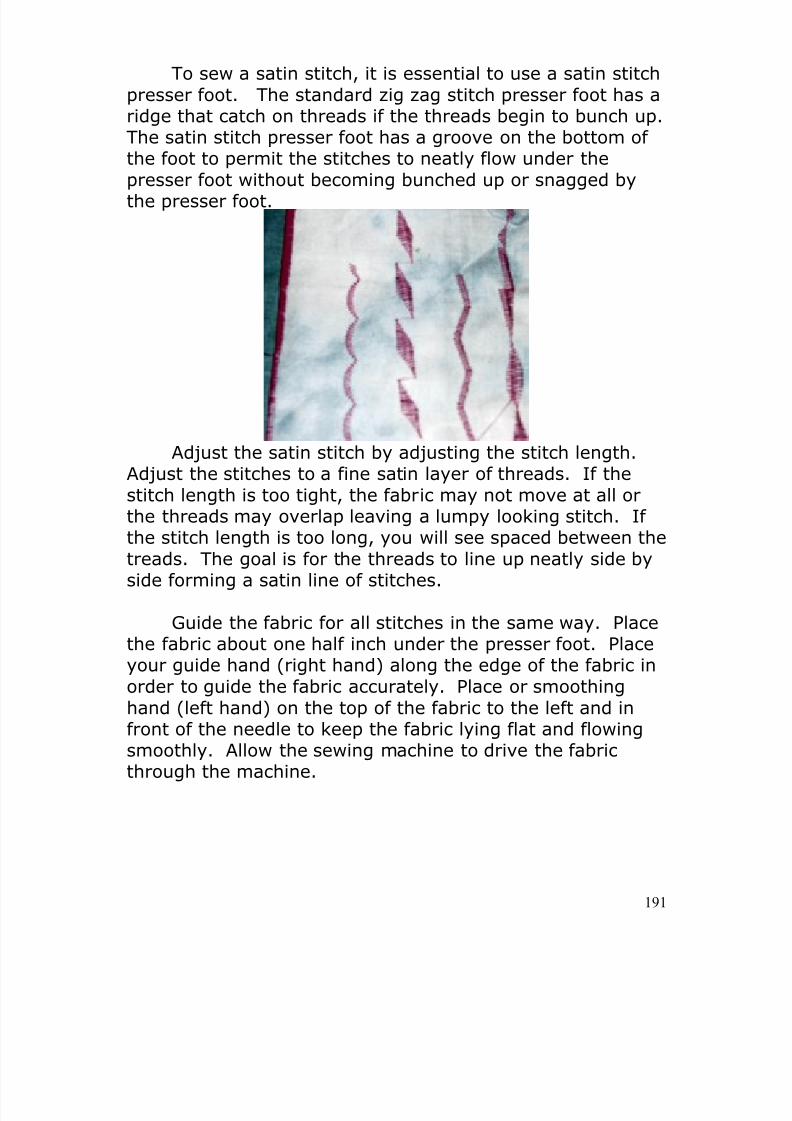
8/13/2019 Manual de Reparacion de Maquinas de Coser
http://slidepdf.com/reader/full/manual-de-reparacion-de-maquinas-de-coser 191/311
191
To sew a satin stitch, it is essential to use a satin stitchpresser foot. The standard zig zag stitch presser foot has aridge that catch on threads if the threads begin to bunch up.The satin stitch presser foot has a groove on the bottom ofthe foot to permit the stitches to neatly flow under thepresser foot without becoming bunched up or snagged bythe presser foot.
Adjust the satin stitch by adjusting the stitch length.Adjust the stitches to a fine satin layer of threads. If thestitch length is too tight, the fabric may not move at all orthe threads may overlap leaving a lumpy looking stitch. Ifthe stitch length is too long, you will see spaced between thetreads. The goal is for the threads to line up neatly side byside forming a satin line of stitches.
Guide the fabric for all stitches in the same way. Placethe fabric about one half inch under the presser foot. Placeyour guide hand (right hand) along the edge of the fabric inorder to guide the fabric accurately. Place or smoothinghand (left hand) on the top of the fabric to the left and infront of the needle to keep the fabric lying flat and flowingsmoothly. Allow the sewing machine to drive the fabricthrough the machine.
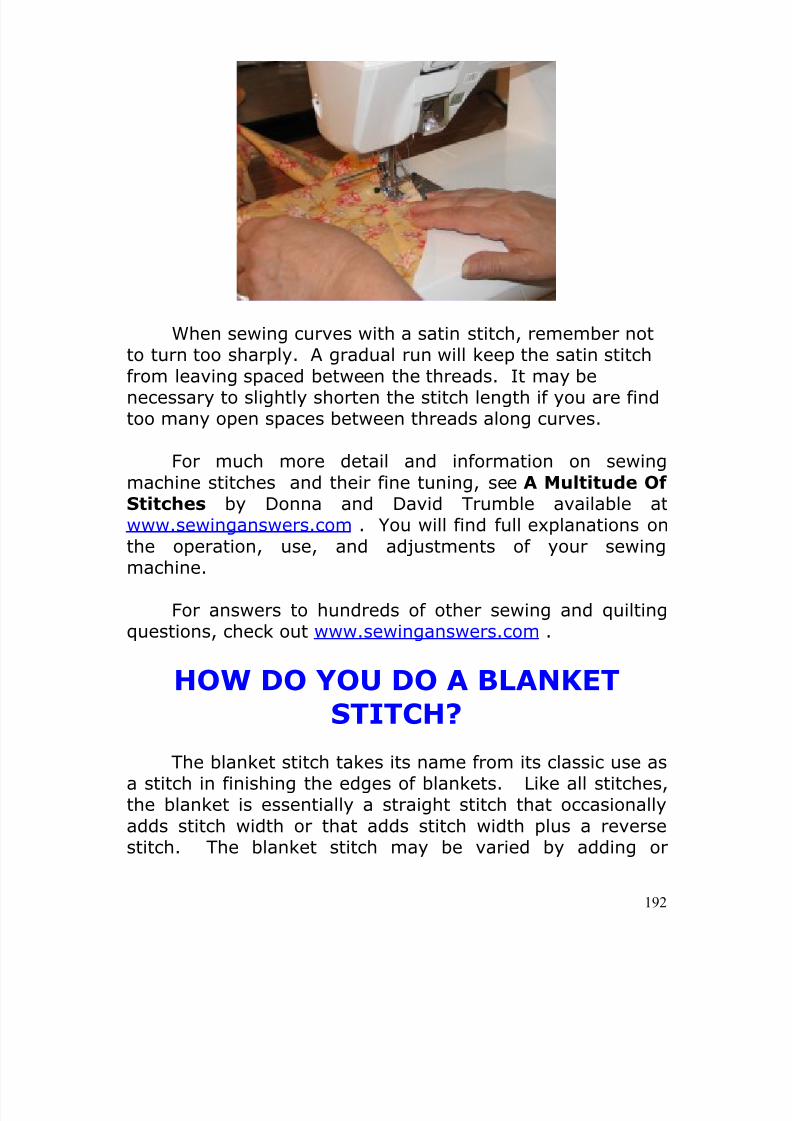
8/13/2019 Manual de Reparacion de Maquinas de Coser
http://slidepdf.com/reader/full/manual-de-reparacion-de-maquinas-de-coser 192/311
192
When sewing curves with a satin stitch, remember notto turn too sharply. A gradual run will keep the satin stitch
from leaving spaced between the threads. It may benecessary to slightly shorten the stitch length if you are findtoo many open spaces between threads along curves.
For much more detail and information on sewingmachine stitches and their fine tuning, see A Multitude OfStitches by Donna and David Trumble available atwww.sewinganswers.com . You will find full explanations onthe operation, use, and adjustments of your sewing
machine.
For answers to hundreds of other sewing and quiltingquestions, check out www.sewinganswers.com .
HOW DO YOU DO A BLANKETSTITCH?
The blanket stitch takes its name from its classic use asa stitch in finishing the edges of blankets. Like all stitches,the blanket is essentially a straight stitch that occasionallyadds stitch width or that adds stitch width plus a reversestitch. The blanket stitch may be varied by adding or
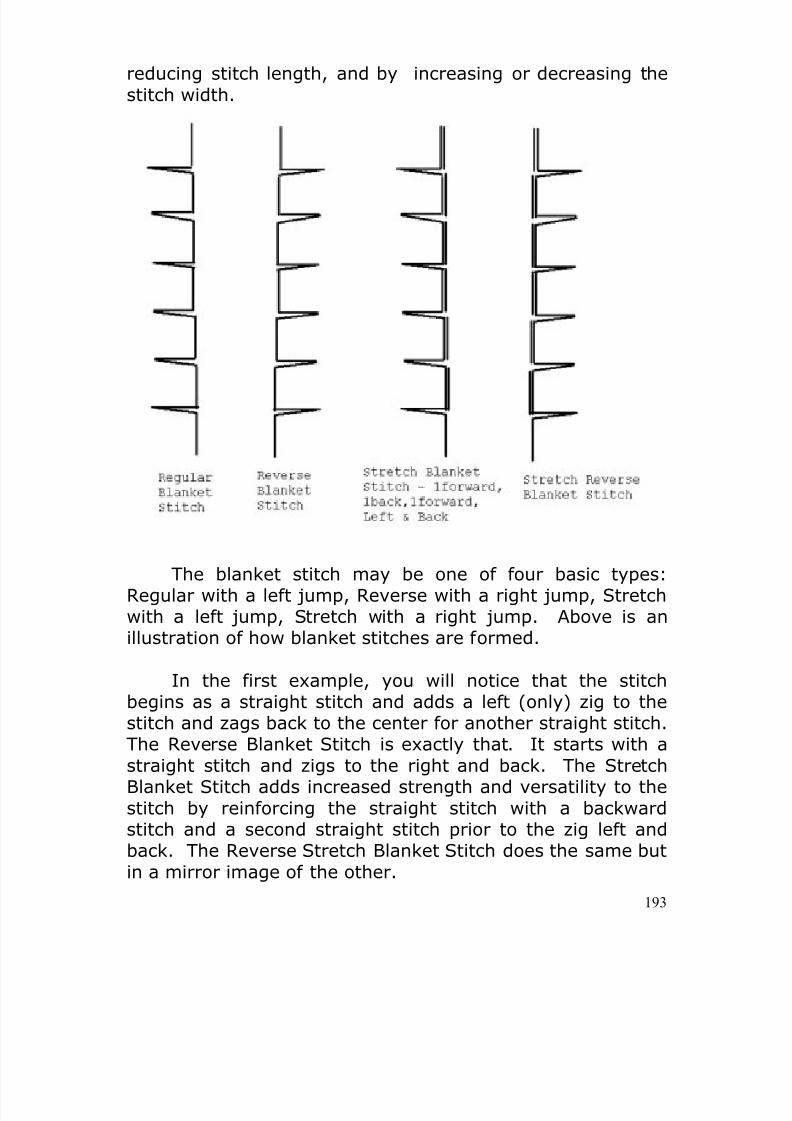
8/13/2019 Manual de Reparacion de Maquinas de Coser
http://slidepdf.com/reader/full/manual-de-reparacion-de-maquinas-de-coser 193/311
193
reducing stitch length, and by increasing or decreasing thestitch width.
The blanket stitch may be one of four basic types:Regular with a left jump, Reverse with a right jump, Stretchwith a left jump, Stretch with a right jump. Above is anillustration of how blanket stitches are formed.
In the first example, you will notice that the stitchbegins as a straight stitch and adds a left (only) zig to thestitch and zags back to the center for another straight stitch.The Reverse Blanket Stitch is exactly that. It starts with a
straight stitch and zigs to the right and back. The StretchBlanket Stitch adds increased strength and versatility to thestitch by reinforcing the straight stitch with a backwardstitch and a second straight stitch prior to the zig left andback. The Reverse Stretch Blanket Stitch does the same butin a mirror image of the other.
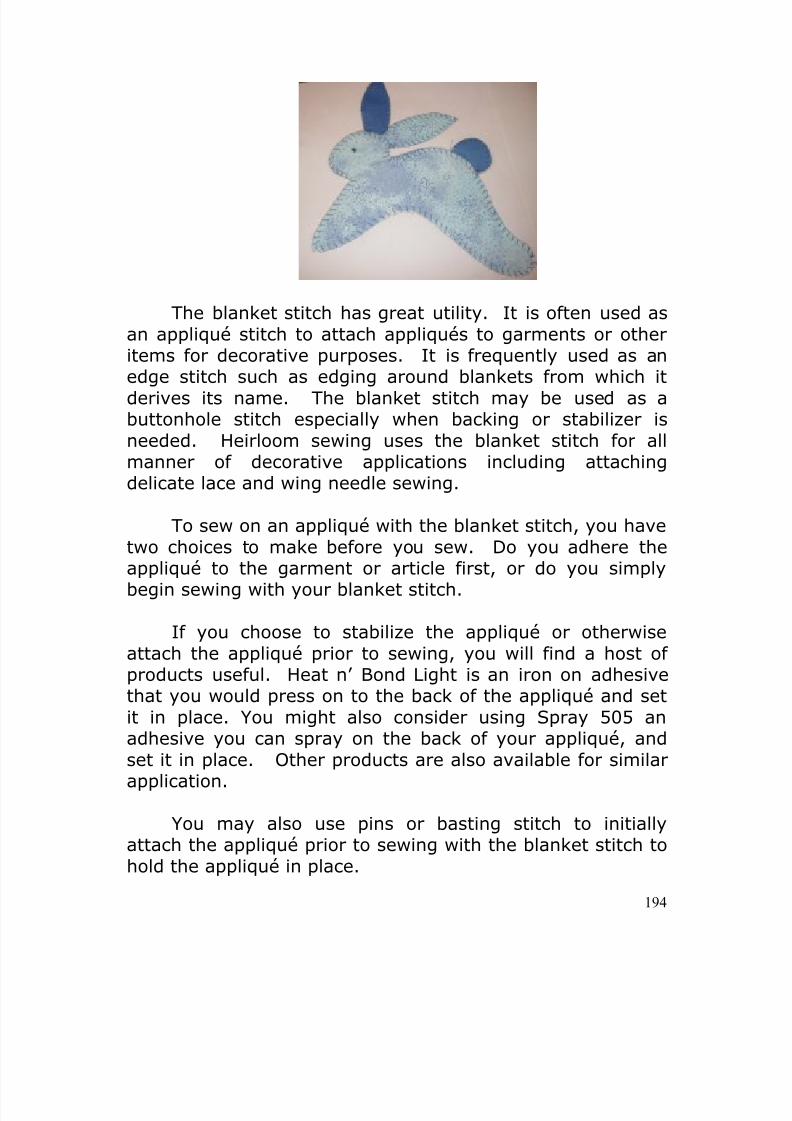
8/13/2019 Manual de Reparacion de Maquinas de Coser
http://slidepdf.com/reader/full/manual-de-reparacion-de-maquinas-de-coser 194/311
194
The blanket stitch has great utility. It is often used asan appliqué stitch to attach appliqués to garments or otheritems for decorative purposes. It is frequently used as an
edge stitch such as edging around blankets from which itderives its name. The blanket stitch may be used as abuttonhole stitch especially when backing or stabilizer isneeded. Heirloom sewing uses the blanket stitch for allmanner of decorative applications including attachingdelicate lace and wing needle sewing.
To sew on an appliqué with the blanket stitch, you havetwo choices to make before you sew. Do you adhere the
appliqué to the garment or article first, or do you simplybegin sewing with your blanket stitch.
If you choose to stabilize the appliqué or otherwiseattach the appliqué prior to sewing, you will find a host ofproducts useful. Heat n’ Bond Light is an iron on adhesivethat you would press on to the back of the appliqué and setit in place. You might also consider using Spray 505 anadhesive you can spray on the back of your appliqué, and
set it in place. Other products are also available for similarapplication.
You may also use pins or basting stitch to initiallyattach the appliqué prior to sewing with the blanket stitch tohold the appliqué in place.
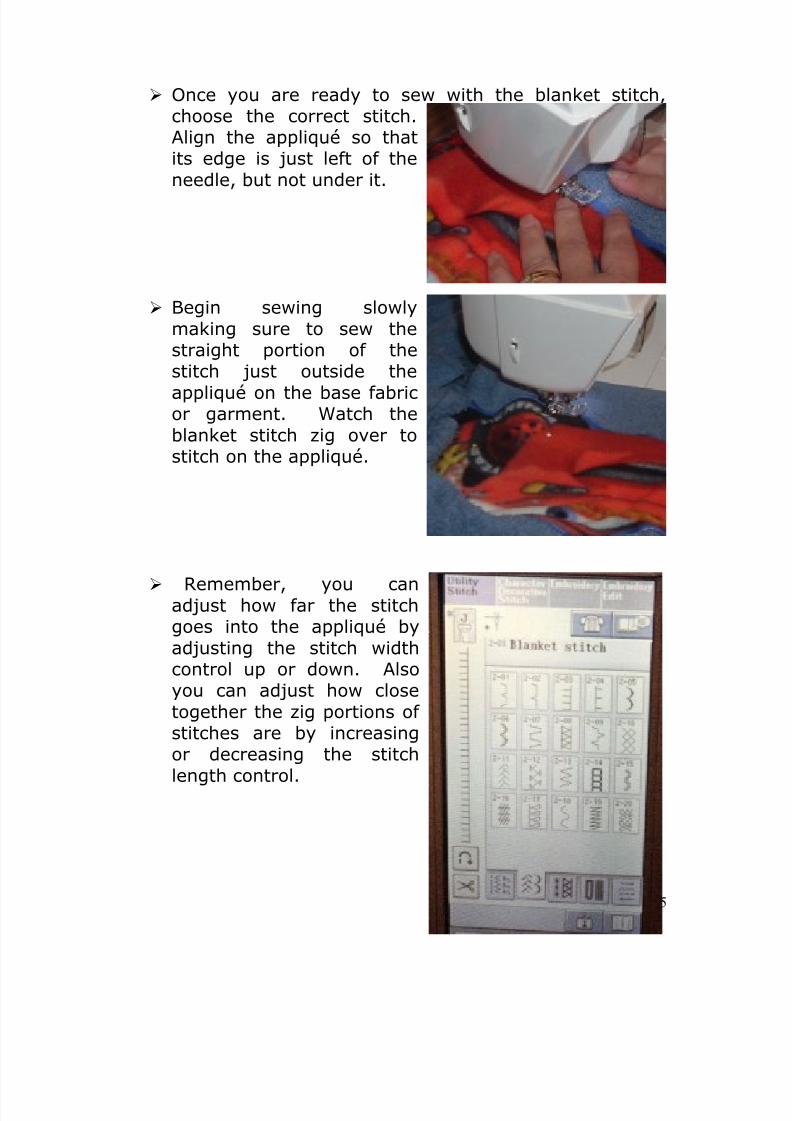
8/13/2019 Manual de Reparacion de Maquinas de Coser
http://slidepdf.com/reader/full/manual-de-reparacion-de-maquinas-de-coser 195/311
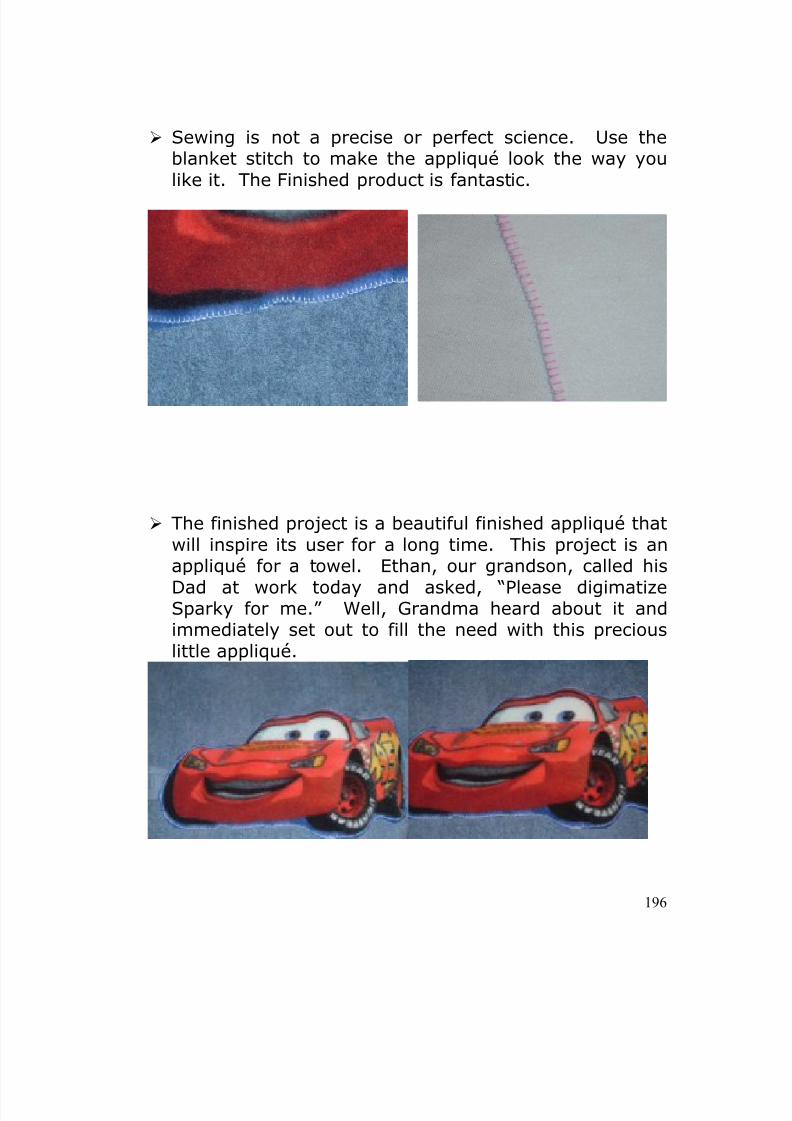
8/13/2019 Manual de Reparacion de Maquinas de Coser
http://slidepdf.com/reader/full/manual-de-reparacion-de-maquinas-de-coser 196/311
196
Sewing is not a precise or perfect science. Use theblanket stitch to make the appliqué look the way youlike it. The Finished product is fantastic.
The finished project is a beautiful finished appliqué thatwill inspire its user for a long time. This project is an
appliqué for a towel. Ethan, our grandson, called hisDad at work today and asked, “Please digimatizeSparky for me.” Well, Grandma heard about it andimmediately set out to fill the need with this preciouslittle appliqué.
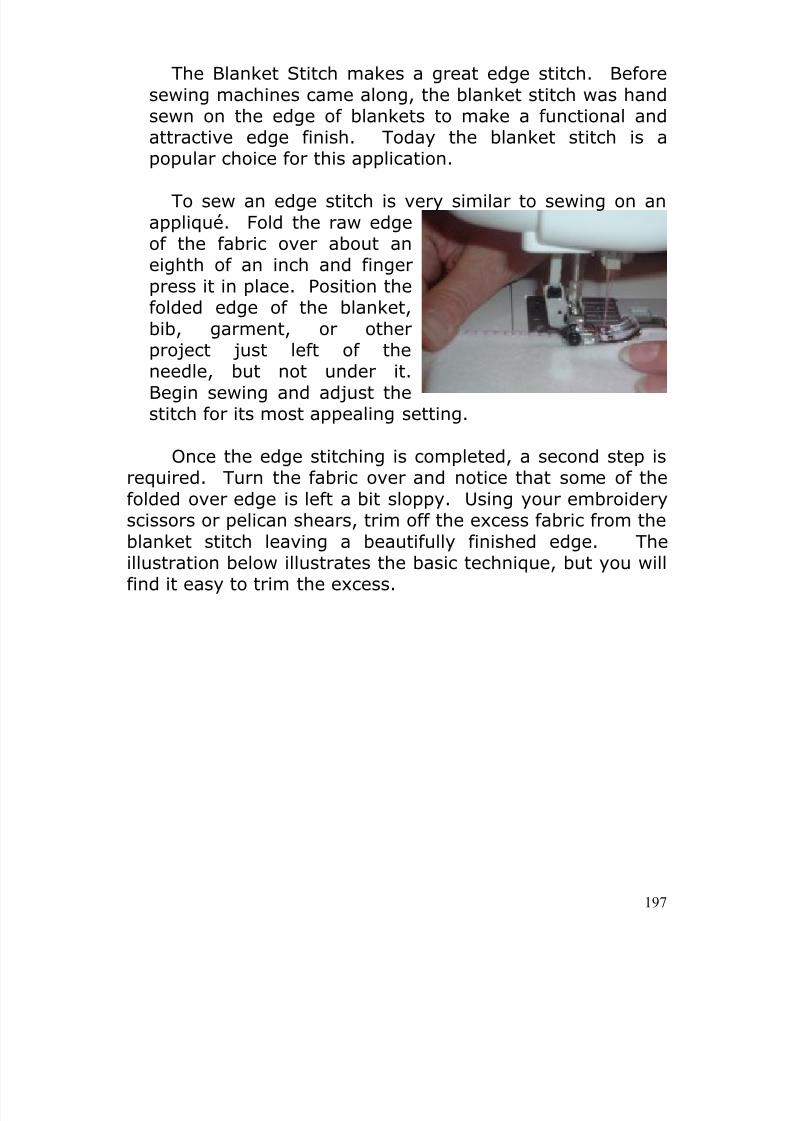
8/13/2019 Manual de Reparacion de Maquinas de Coser
http://slidepdf.com/reader/full/manual-de-reparacion-de-maquinas-de-coser 197/311
197
The Blanket Stitch makes a great edge stitch. Beforesewing machines came along, the blanket stitch was handsewn on the edge of blankets to make a functional andattractive edge finish. Today the blanket stitch is apopular choice for this application.
To sew an edge stitch is very similar to sewing on anappliqué. Fold the raw edgeof the fabric over about aneighth of an inch and fingerpress it in place. Position thefolded edge of the blanket,bib, garment, or otherproject just left of theneedle, but not under it.Begin sewing and adjust thestitch for its most appealing setting.
Once the edge stitching is completed, a second step isrequired. Turn the fabric over and notice that some of thefolded over edge is left a bit sloppy. Using your embroideryscissors or pelican shears, trim off the excess fabric from theblanket stitch leaving a beautifully finished edge. Theillustration below illustrates the basic technique, but you willfind it easy to trim the excess.
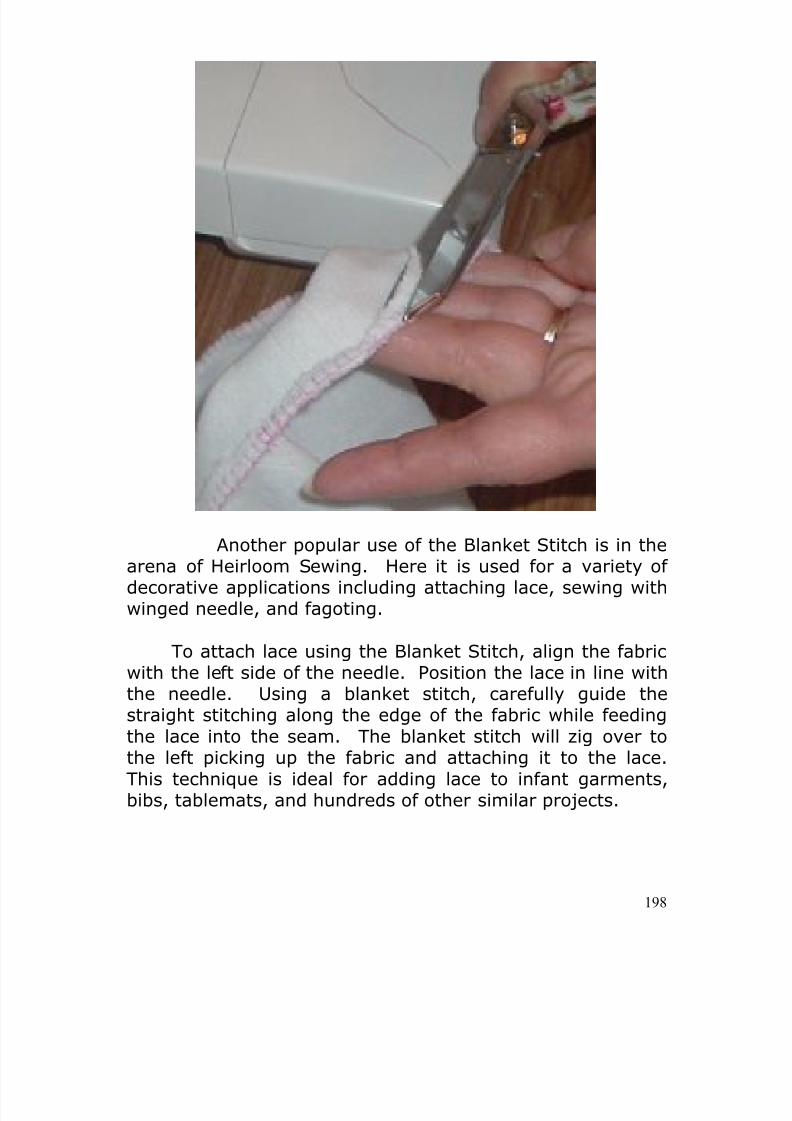
8/13/2019 Manual de Reparacion de Maquinas de Coser
http://slidepdf.com/reader/full/manual-de-reparacion-de-maquinas-de-coser 198/311
198
Another popular use of the Blanket Stitch is in the
arena of Heirloom Sewing. Here it is used for a variety ofdecorative applications including attaching lace, sewing withwinged needle, and fagoting.
To attach lace using the Blanket Stitch, align the fabricwith the left side of the needle. Position the lace in line withthe needle. Using a blanket stitch, carefully guide thestraight stitching along the edge of the fabric while feedingthe lace into the seam. The blanket stitch will zig over to
the left picking up the fabric and attaching it to the lace.This technique is ideal for adding lace to infant garments,bibs, tablemats, and hundreds of other similar projects.

8/13/2019 Manual de Reparacion de Maquinas de Coser
http://slidepdf.com/reader/full/manual-de-reparacion-de-maquinas-de-coser 199/311
199
Align the fabric with theleft side of needle.
Align the lace with the rightside of the needle.
Straight stitch along lace.
Zig over to pick up thefabric.
Guide the fabric with yourleft hand.
Feed the lace along withyour right hand.
The Blanket Stitch will jointhem perfectly.
The finished product is notonly functional, it isbeautiful.
Using the Blanket Stitch willmake you proud of yoursewing.
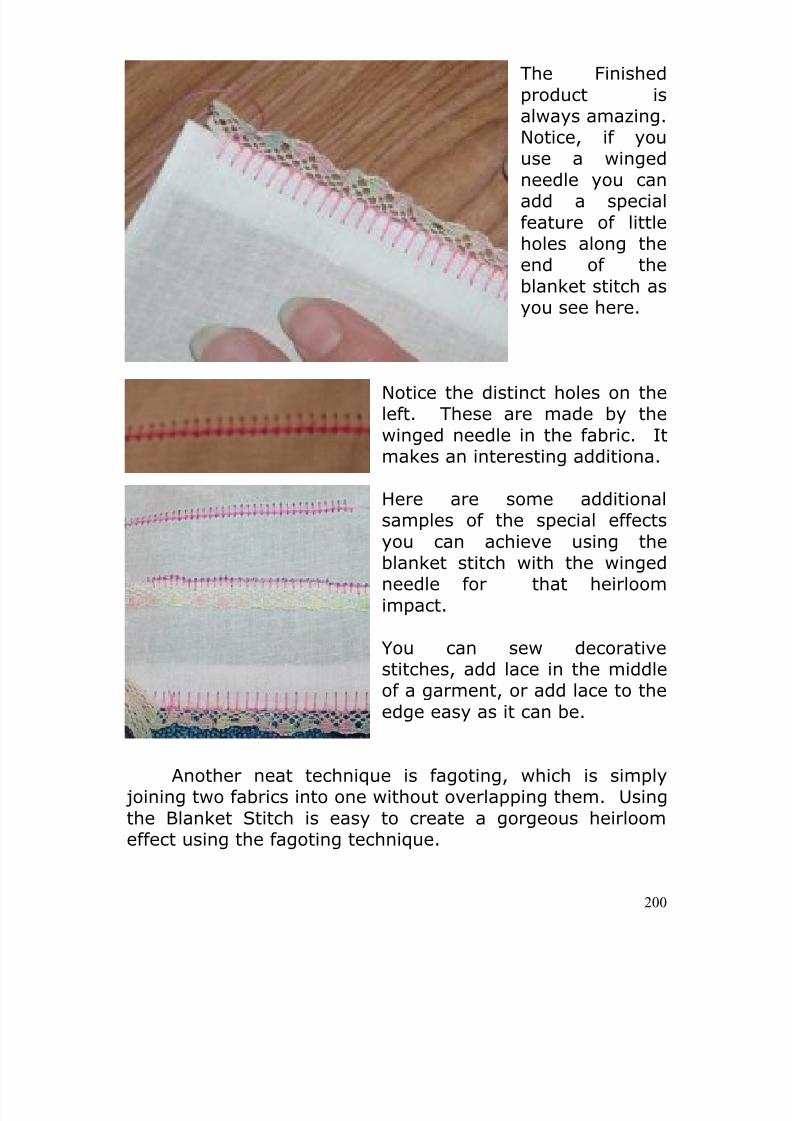
8/13/2019 Manual de Reparacion de Maquinas de Coser
http://slidepdf.com/reader/full/manual-de-reparacion-de-maquinas-de-coser 200/311
200
The Finishedproduct isalways amazing.Notice, if youuse a wingedneedle you canadd a specialfeature of littleholes along theend of theblanket stitch asyou see here.
Notice the distinct holes on theleft. These are made by thewinged needle in the fabric. Itmakes an interesting additiona.
Here are some additionalsamples of the special effectsyou can achieve using theblanket stitch with the wingedneedle for that heirloomimpact.
You can sew decorativestitches, add lace in the middleof a garment, or add lace to theedge easy as it can be.
Another neat technique is fagoting, which is simply joining two fabrics into one without overlapping them. Usingthe Blanket Stitch is easy to create a gorgeous heirloomeffect using the fagoting technique.
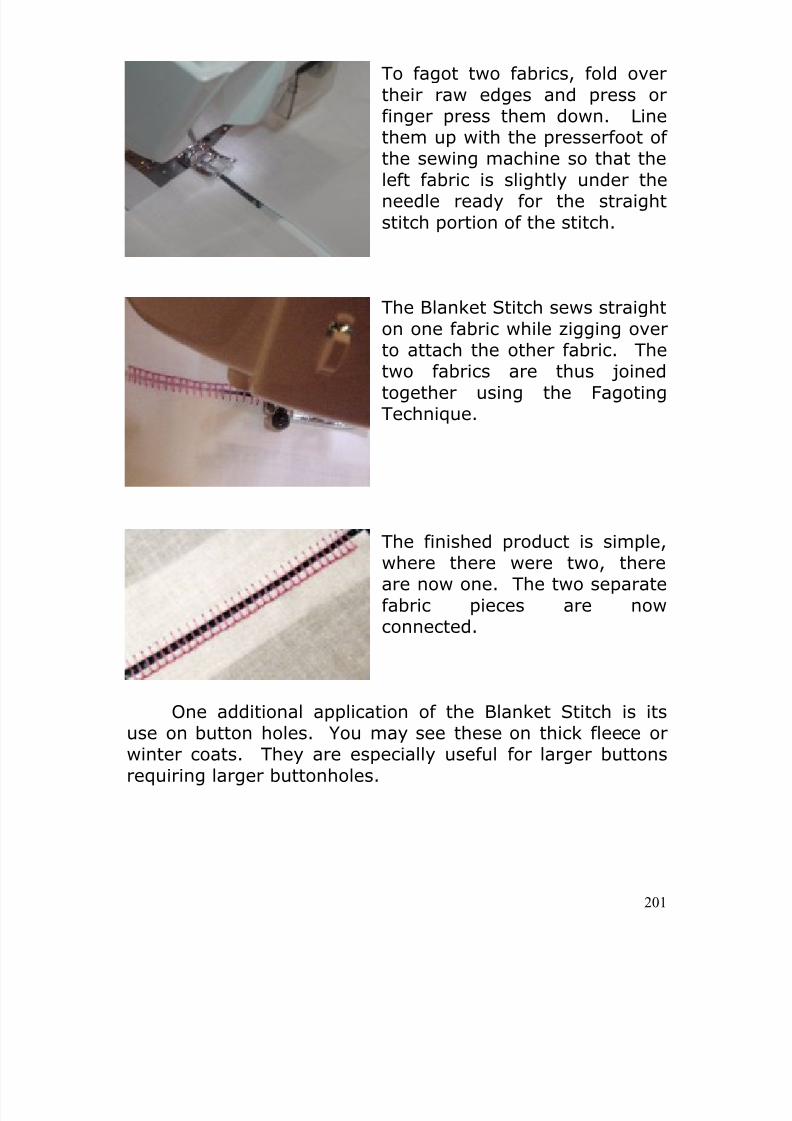
8/13/2019 Manual de Reparacion de Maquinas de Coser
http://slidepdf.com/reader/full/manual-de-reparacion-de-maquinas-de-coser 201/311
201
To fagot two fabrics, fold overtheir raw edges and press orfinger press them down. Linethem up with the presserfoot ofthe sewing machine so that theleft fabric is slightly under theneedle ready for the straightstitch portion of the stitch.
The Blanket Stitch sews straighton one fabric while zigging overto attach the other fabric. Thetwo fabrics are thus joinedtogether using the FagotingTechnique.
The finished product is simple,where there were two, thereare now one. The two separatefabric pieces are nowconnected.
One additional application of the Blanket Stitch is itsuse on button holes. You may see these on thick fleece orwinter coats. They are especially useful for larger buttonsrequiring larger buttonholes.

8/13/2019 Manual de Reparacion de Maquinas de Coser
http://slidepdf.com/reader/full/manual-de-reparacion-de-maquinas-de-coser 202/311
202
Begin by marking the start and stop of the button holeby measuring the button (laythe button down) and markingthe ends with pins. It is alwaysa good idea to stabilizebuttonholes by placing specialstabilizer fabric under thelocation where you intend tomake the buttonhole.
Then proceed to sew completelyaround the buttonhole carefullypivoting around the ends.
The zig of the stitch shouldreach into the buttonhole, while the straight stitch portionmaintains a solid perimeter.
The finished button hole isstrong and dependable. It isalso a beautiful buttonholethanks to the Blanket Stitch.
HOW DO YOU
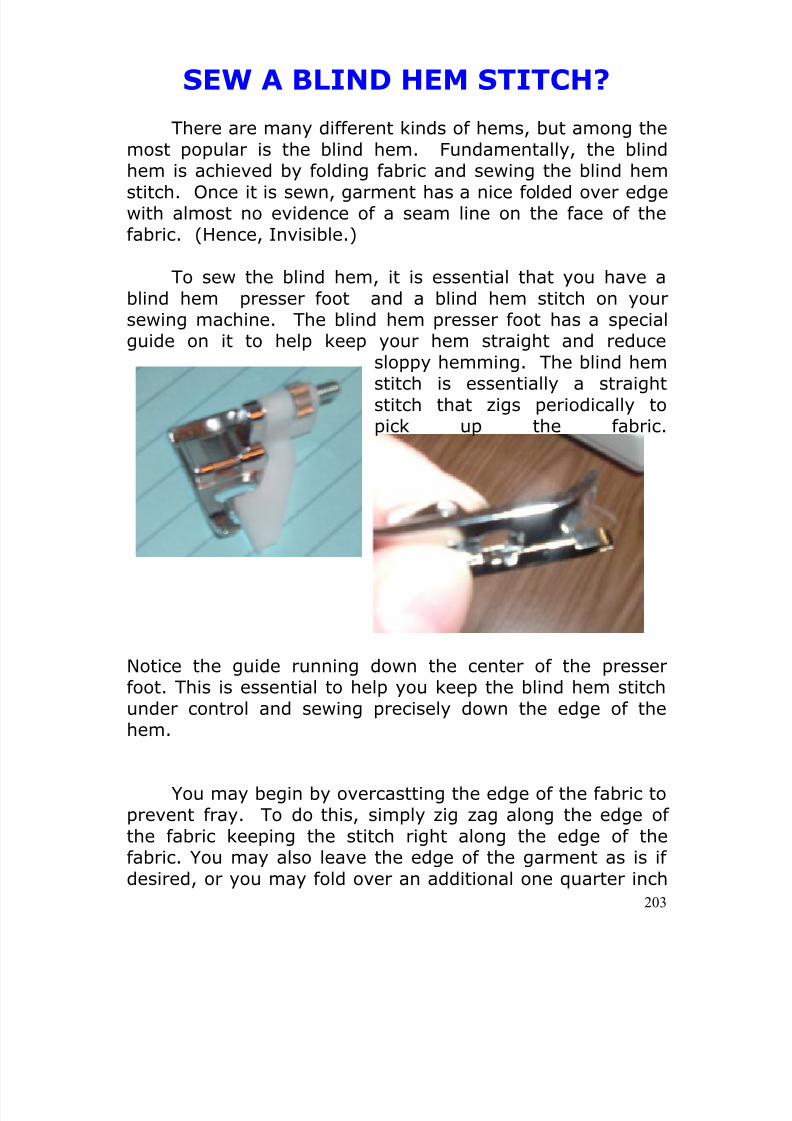
8/13/2019 Manual de Reparacion de Maquinas de Coser
http://slidepdf.com/reader/full/manual-de-reparacion-de-maquinas-de-coser 203/311
203
SEW A BLIND HEM STITCH?
There are many different kinds of hems, but among themost popular is the blind hem. Fundamentally, the blindhem is achieved by folding fabric and sewing the blind hem
stitch. Once it is sewn, garment has a nice folded over edgewith almost no evidence of a seam line on the face of thefabric. (Hence, Invisible.)
To sew the blind hem, it is essential that you have ablind hem presser foot and a blind hem stitch on yoursewing machine. The blind hem presser foot has a specialguide on it to help keep your hem straight and reduce
sloppy hemming. The blind hem
stitch is essentially a straightstitch that zigs periodically topick up the fabric.
Notice the guide running down the center of the presserfoot. This is essential to help you keep the blind hem stitchunder control and sewing precisely down the edge of thehem.
You may begin by overcastting the edge of the fabric toprevent fray. To do this, simply zig zag along the edge ofthe fabric keeping the stitch right along the edge of thefabric. You may also leave the edge of the garment as is ifdesired, or you may fold over an additional one quarter inch
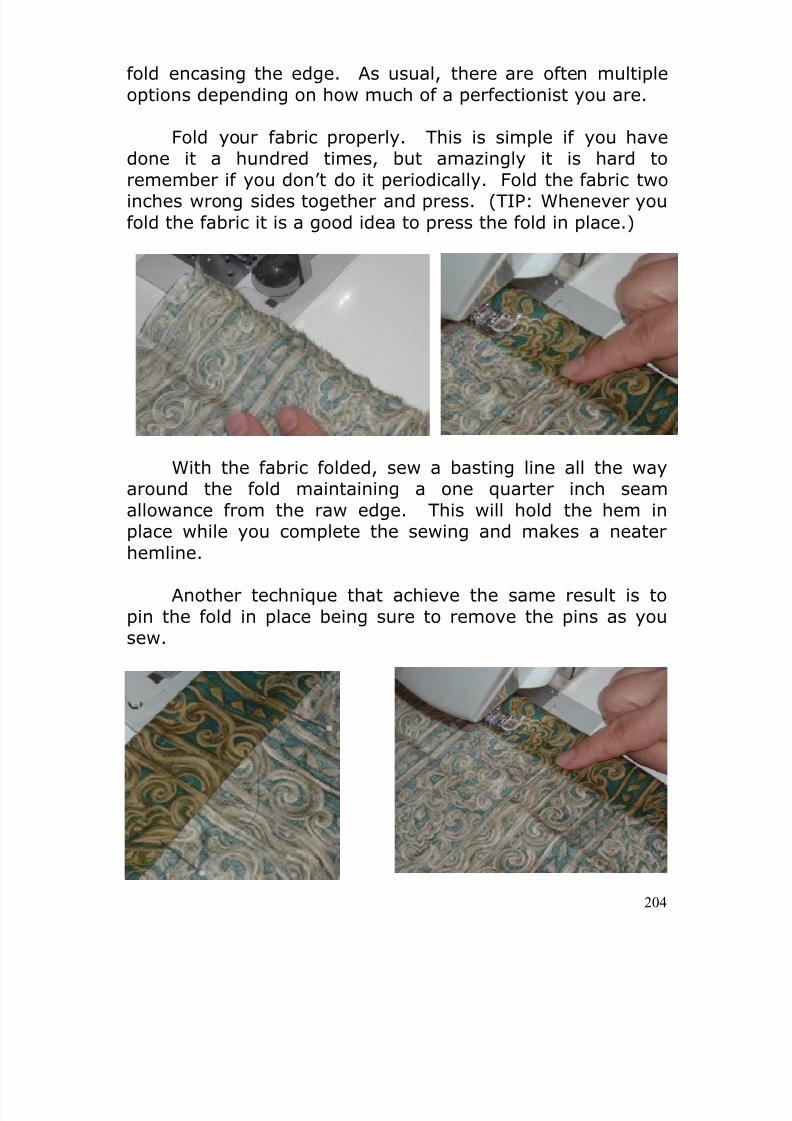
8/13/2019 Manual de Reparacion de Maquinas de Coser
http://slidepdf.com/reader/full/manual-de-reparacion-de-maquinas-de-coser 204/311
204
fold encasing the edge. As usual, there are often multipleoptions depending on how much of a perfectionist you are.
Fold your fabric properly. This is simple if you havedone it a hundred times, but amazingly it is hard toremember if you don’t do it periodically. Fold the fabric twoinches wrong sides together and press. (TIP: Whenever youfold the fabric it is a good idea to press the fold in place.)
With the fabric folded, sew a basting line all the wayaround the fold maintaining a one quarter inch seamallowance from the raw edge. This will hold the hem inplace while you complete the sewing and makes a neaterhemline.
Another technique that achieve the same result is topin the fold in place being sure to remove the pins as yousew.
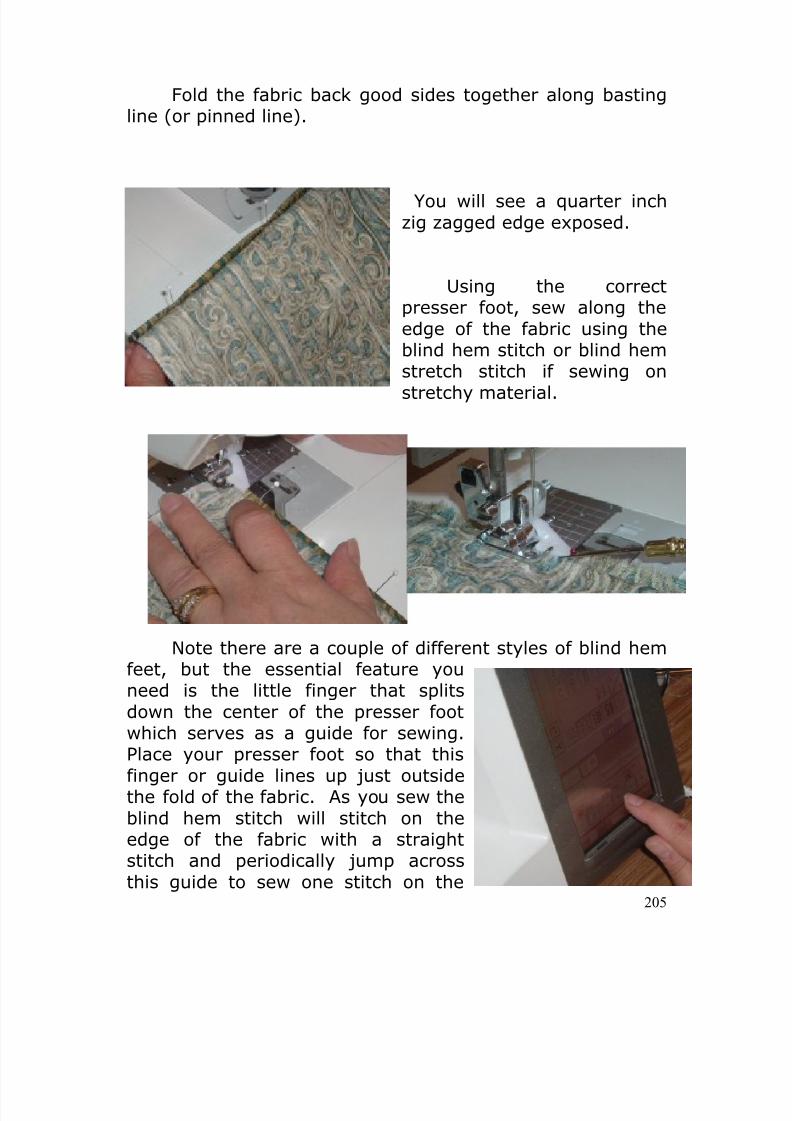
8/13/2019 Manual de Reparacion de Maquinas de Coser
http://slidepdf.com/reader/full/manual-de-reparacion-de-maquinas-de-coser 205/311
205
Fold the fabric back good sides together along basting
line (or pinned line).
You will see a quarter inchzig zagged edge exposed.
Using the correctpresser foot, sew along theedge of the fabric using theblind hem stitch or blind hemstretch stitch if sewing onstretchy material.
Note there are a couple of different styles of blind hemfeet, but the essential feature youneed is the little finger that splitsdown the center of the presser footwhich serves as a guide for sewing.Place your presser foot so that thisfinger or guide lines up just outsidethe fold of the fabric. As you sew theblind hem stitch will stitch on theedge of the fabric with a straightstitch and periodically jump acrossthis guide to sew one stitch on the
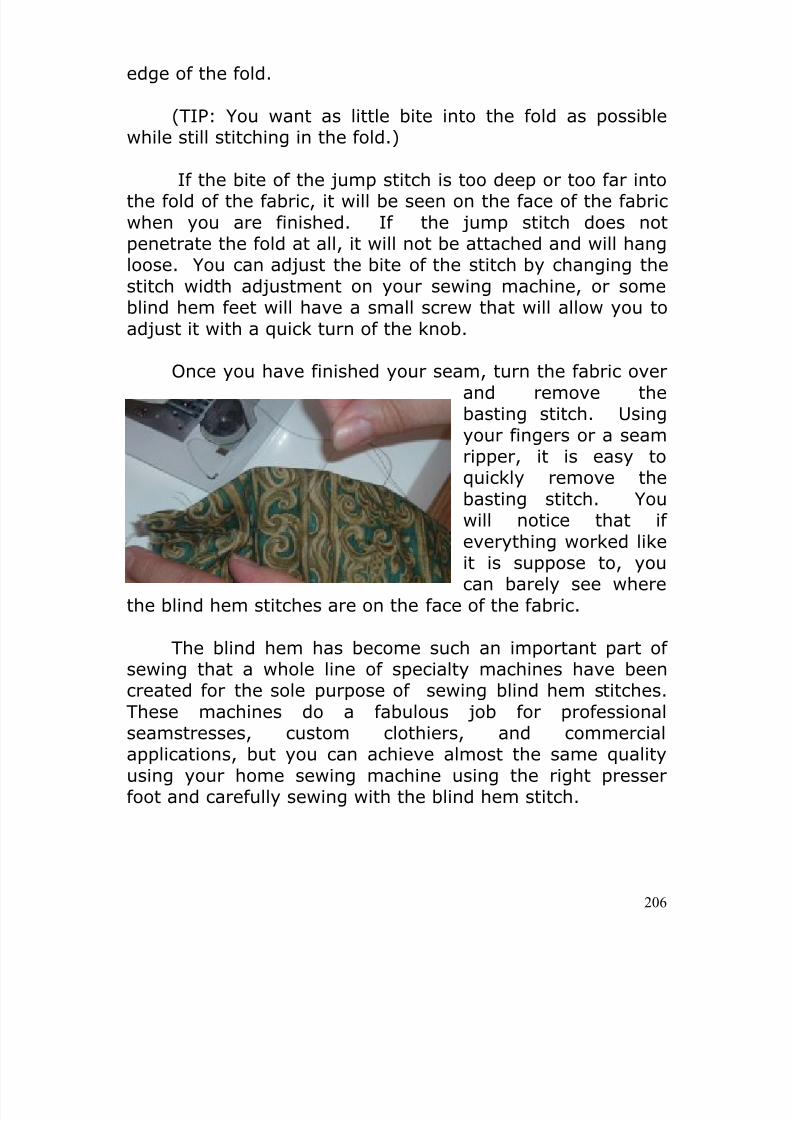
8/13/2019 Manual de Reparacion de Maquinas de Coser
http://slidepdf.com/reader/full/manual-de-reparacion-de-maquinas-de-coser 206/311
206
edge of the fold.
(TIP: You want as little bite into the fold as possiblewhile still stitching in the fold.)
If the bite of the jump stitch is too deep or too far intothe fold of the fabric, it will be seen on the face of the fabricwhen you are finished. If the jump stitch does notpenetrate the fold at all, it will not be attached and will hangloose. You can adjust the bite of the stitch by changing thestitch width adjustment on your sewing machine, or someblind hem feet will have a small screw that will allow you toadjust it with a quick turn of the knob.
Once you have finished your seam, turn the fabric overand remove thebasting stitch. Usingyour fingers or a seamripper, it is easy toquickly remove thebasting stitch. Youwill notice that ifeverything worked likeit is suppose to, youcan barely see where
the blind hem stitches are on the face of the fabric.
The blind hem has become such an important part ofsewing that a whole line of specialty machines have beencreated for the sole purpose of sewing blind hem stitches.These machines do a fabulous job for professionalseamstresses, custom clothiers, and commercialapplications, but you can achieve almost the same qualityusing your home sewing machine using the right presserfoot and carefully sewing with the blind hem stitch.
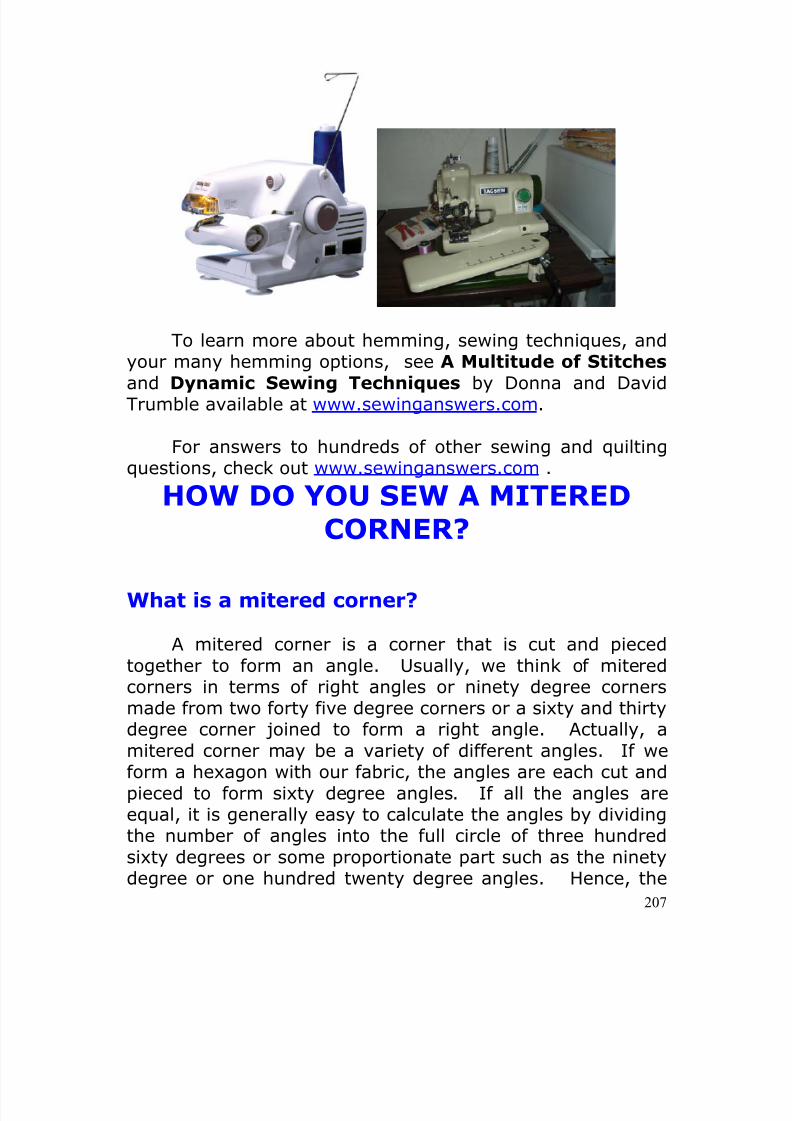
8/13/2019 Manual de Reparacion de Maquinas de Coser
http://slidepdf.com/reader/full/manual-de-reparacion-de-maquinas-de-coser 207/311
207
To learn more about hemming, sewing techniques, andyour many hemming options, see A Multitude of Stitches
and Dynamic Sewing Techniques by Donna and DavidTrumble available at www.sewinganswers.com.
For answers to hundreds of other sewing and quiltingquestions, check out www.sewinganswers.com .
HOW DO YOU SEW A MITEREDCORNER?
What is a mitered corner?
A mitered corner is a corner that is cut and piecedtogether to form an angle. Usually, we think of miteredcorners in terms of right angles or ninety degree cornersmade from two forty five degree corners or a sixty and thirtydegree corner joined to form a right angle. Actually, amitered corner may be a variety of different angles. If weform a hexagon with our fabric, the angles are each cut andpieced to form sixty degree angles. If all the angles areequal, it is generally easy to calculate the angles by dividingthe number of angles into the full circle of three hundredsixty degrees or some proportionate part such as the ninetydegree or one hundred twenty degree angles. Hence, the
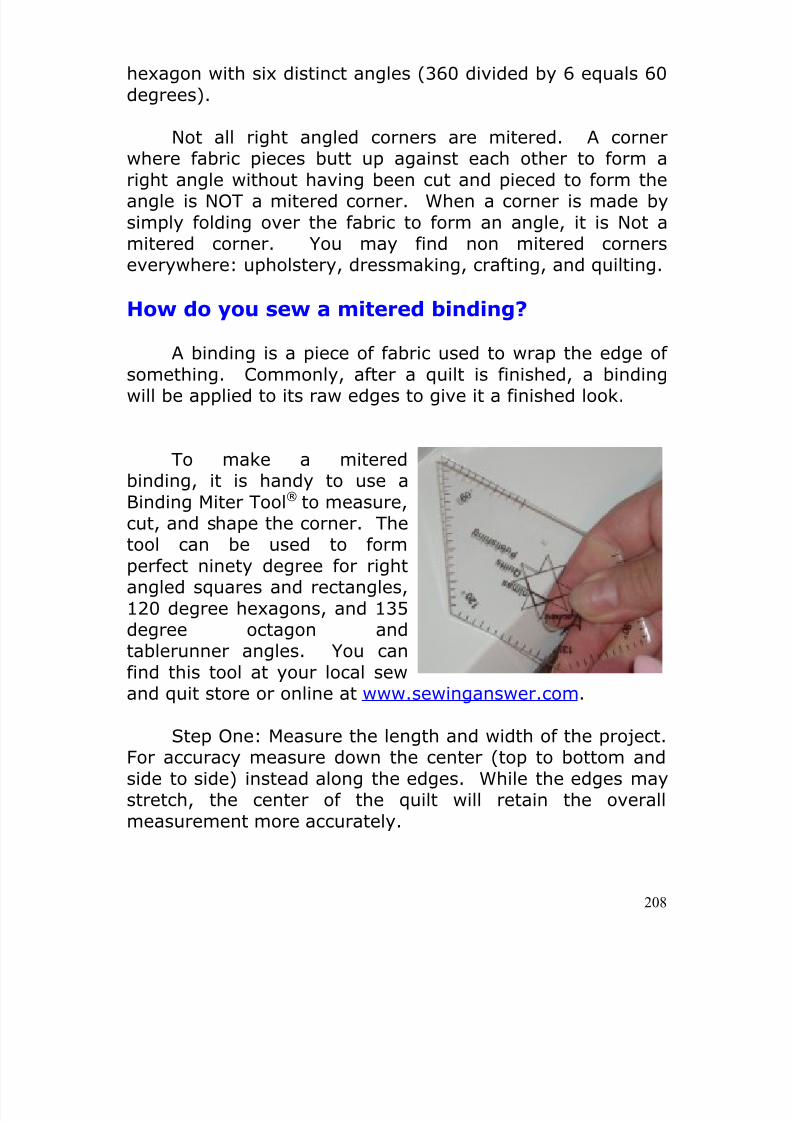
8/13/2019 Manual de Reparacion de Maquinas de Coser
http://slidepdf.com/reader/full/manual-de-reparacion-de-maquinas-de-coser 208/311
208
hexagon with six distinct angles (360 divided by 6 equals 60degrees).
Not all right angled corners are mitered. A cornerwhere fabric pieces butt up against each other to form aright angle without having been cut and pieced to form theangle is NOT a mitered corner. When a corner is made bysimply folding over the fabric to form an angle, it is Not amitered corner. You may find non mitered cornerseverywhere: upholstery, dressmaking, crafting, and quilting.
How do you sew a mitered binding?
A binding is a piece of fabric used to wrap the edge of
something. Commonly, after a quilt is finished, a bindingwill be applied to its raw edges to give it a finished look.
To make a miteredbinding, it is handy to use aBinding Miter Tool® to measure,cut, and shape the corner. Thetool can be used to form
perfect ninety degree for rightangled squares and rectangles,120 degree hexagons, and 135degree octagon andtablerunner angles. You canfind this tool at your local sewand quit store or online at www.sewinganswer.com.
Step One: Measure the length and width of the project.
For accuracy measure down the center (top to bottom andside to side) instead along the edges. While the edges maystretch, the center of the quilt will retain the overallmeasurement more accurately.
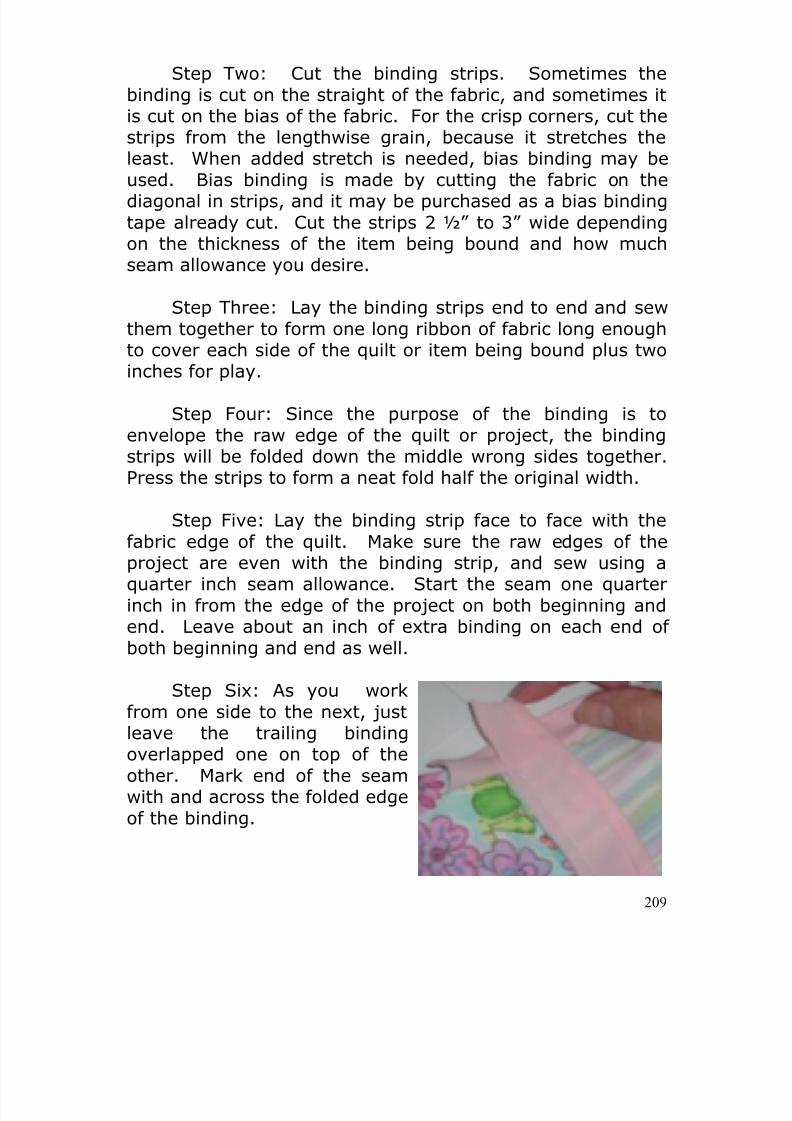
8/13/2019 Manual de Reparacion de Maquinas de Coser
http://slidepdf.com/reader/full/manual-de-reparacion-de-maquinas-de-coser 209/311
209
Step Two: Cut the binding strips. Sometimes thebinding is cut on the straight of the fabric, and sometimes itis cut on the bias of the fabric. For the crisp corners, cut thestrips from the lengthwise grain, because it stretches theleast. When added stretch is needed, bias binding may beused. Bias binding is made by cutting the fabric on thediagonal in strips, and it may be purchased as a bias bindingtape already cut. Cut the strips 2 ½” to 3” wide dependingon the thickness of the item being bound and how muchseam allowance you desire.
Step Three: Lay the binding strips end to end and sewthem together to form one long ribbon of fabric long enoughto cover each side of the quilt or item being bound plus twoinches for play.
Step Four: Since the purpose of the binding is toenvelope the raw edge of the quilt or project, the bindingstrips will be folded down the middle wrong sides together.Press the strips to form a neat fold half the original width.
Step Five: Lay the binding strip face to face with thefabric edge of the quilt. Make sure the raw edges of theproject are even with the binding strip, and sew using aquarter inch seam allowance. Start the seam one quarterinch in from the edge of the project on both beginning andend. Leave about an inch of extra binding on each end ofboth beginning and end as well.
Step Six: As you workfrom one side to the next, justleave the trailing bindingoverlapped one on top of theother. Mark end of the seamwith and across the folded edgeof the binding.
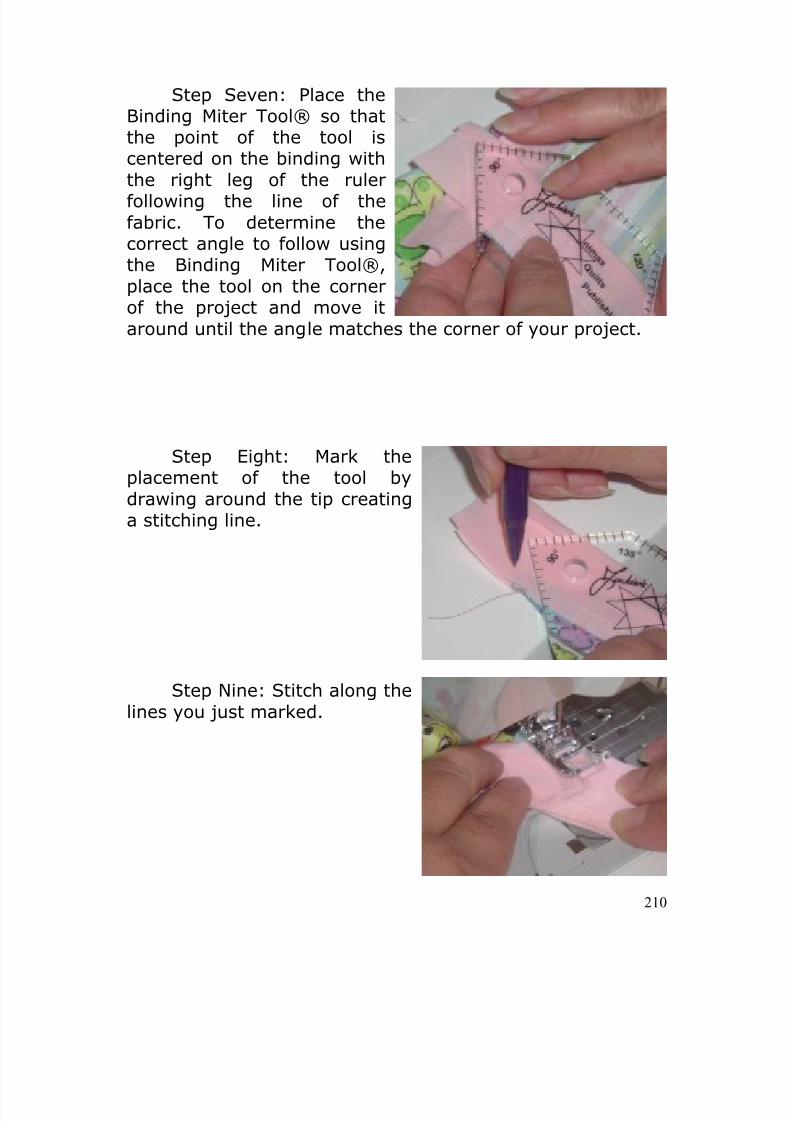
8/13/2019 Manual de Reparacion de Maquinas de Coser
http://slidepdf.com/reader/full/manual-de-reparacion-de-maquinas-de-coser 210/311
210
Step Seven: Place the
Binding Miter Tool® so thatthe point of the tool iscentered on the binding withthe right leg of the rulerfollowing the line of thefabric. To determine thecorrect angle to follow usingthe Binding Miter Tool®,place the tool on the cornerof the project and move itaround until the angle matches the corner of your project.
Step Eight: Mark theplacement of the tool bydrawing around the tip creatinga stitching line.
Step Nine: Stitch along thelines you just marked.
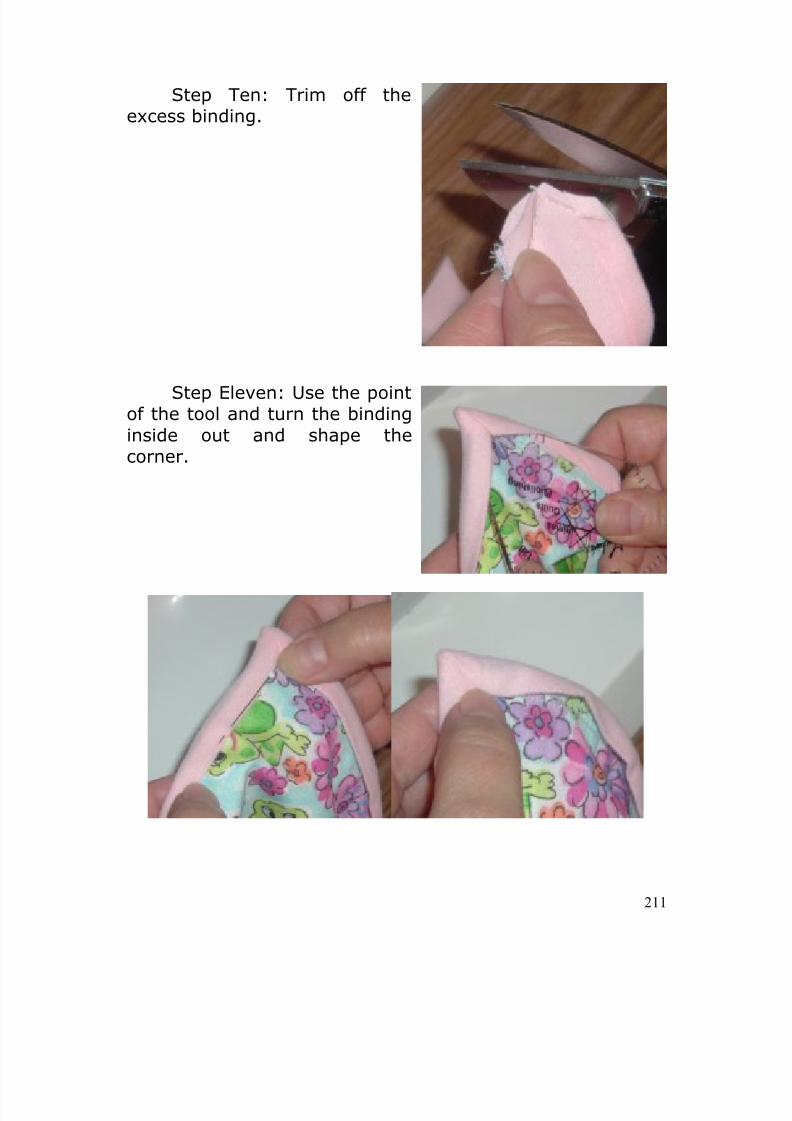
8/13/2019 Manual de Reparacion de Maquinas de Coser
http://slidepdf.com/reader/full/manual-de-reparacion-de-maquinas-de-coser 211/311
211
Step Ten: Trim off the
excess binding.
Step Eleven: Use the pointof the tool and turn the bindinginside out and shape thecorner.
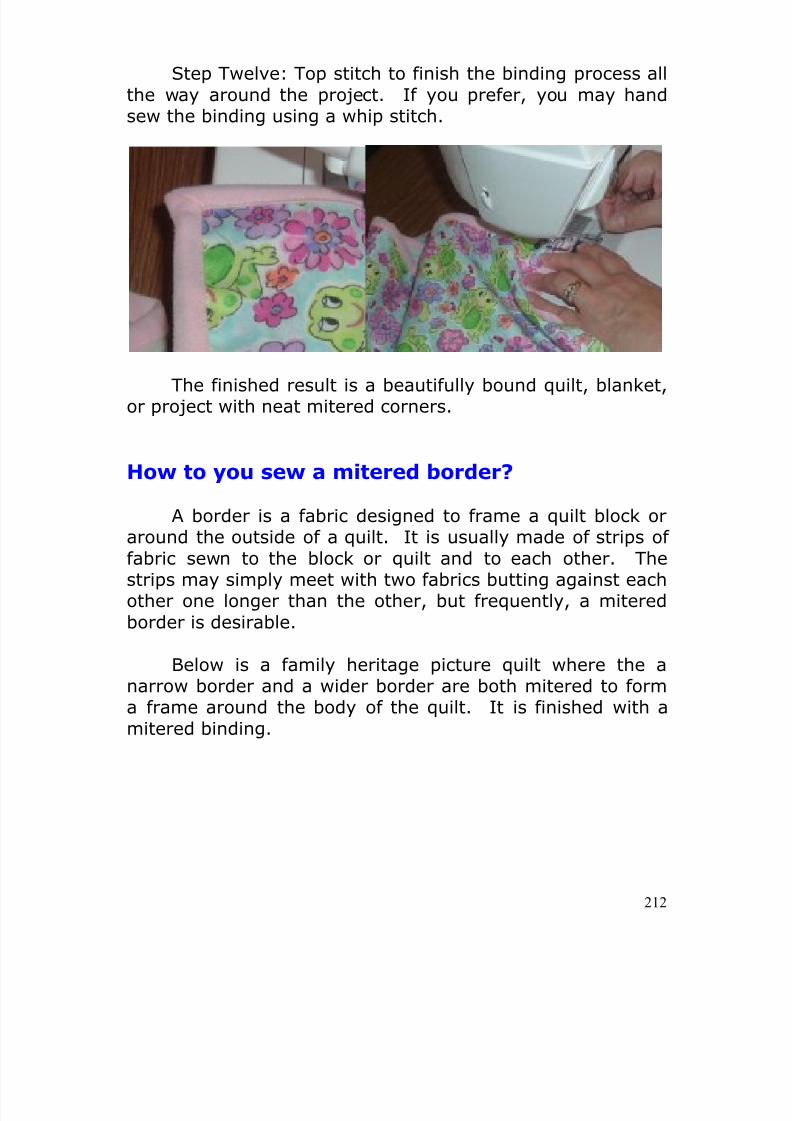
8/13/2019 Manual de Reparacion de Maquinas de Coser
http://slidepdf.com/reader/full/manual-de-reparacion-de-maquinas-de-coser 212/311
212
Step Twelve: Top stitch to finish the binding process allthe way around the project. If you prefer, you may handsew the binding using a whip stitch.
The finished result is a beautifully bound quilt, blanket,or project with neat mitered corners.
How to you sew a mitered border?
A border is a fabric designed to frame a quilt block oraround the outside of a quilt. It is usually made of strips offabric sewn to the block or quilt and to each other. The
strips may simply meet with two fabrics butting against eachother one longer than the other, but frequently, a miteredborder is desirable.
Below is a family heritage picture quilt where the anarrow border and a wider border are both mitered to forma frame around the body of the quilt. It is finished with amitered binding.
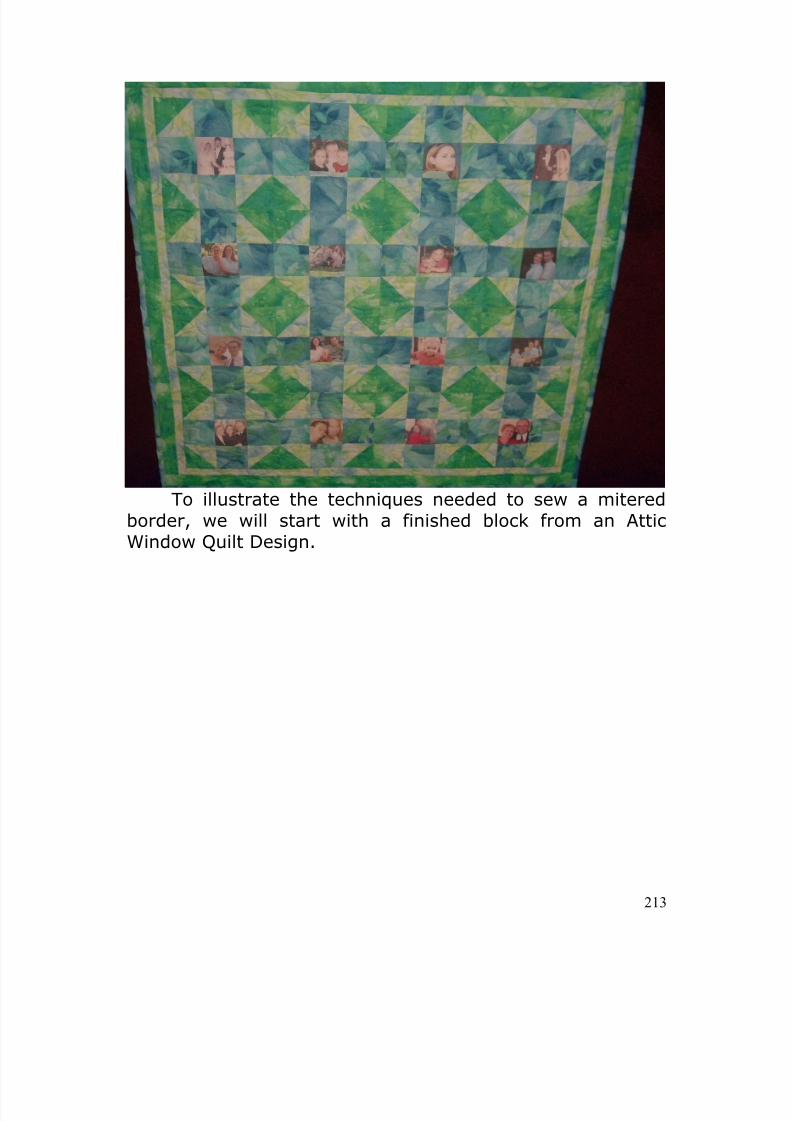
8/13/2019 Manual de Reparacion de Maquinas de Coser
http://slidepdf.com/reader/full/manual-de-reparacion-de-maquinas-de-coser 213/311
213
To illustrate the techniques needed to sew a miteredborder, we will start with a finished block from an AtticWindow Quilt Design.
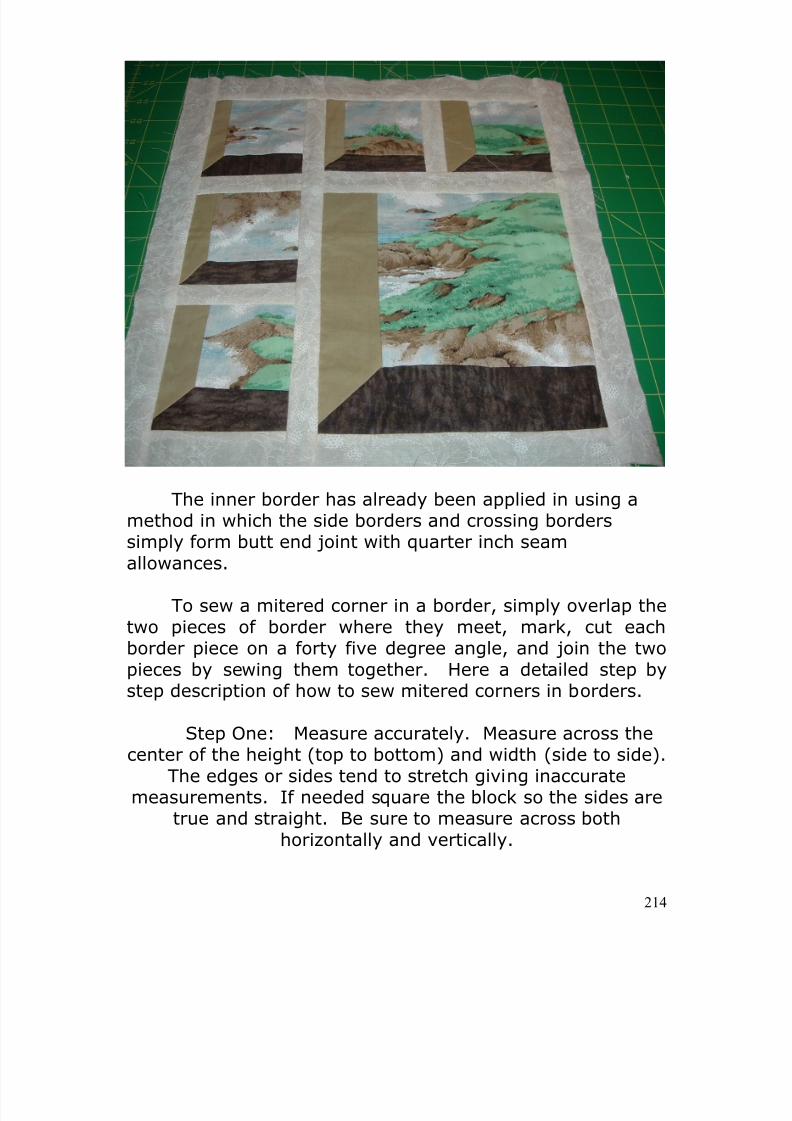
8/13/2019 Manual de Reparacion de Maquinas de Coser
http://slidepdf.com/reader/full/manual-de-reparacion-de-maquinas-de-coser 214/311
214
The inner border has already been applied in using amethod in which the side borders and crossing borderssimply form butt end joint with quarter inch seamallowances.
To sew a mitered corner in a border, simply overlap thetwo pieces of border where they meet, mark, cut eachborder piece on a forty five degree angle, and join the twopieces by sewing them together. Here a detailed step bystep description of how to sew mitered corners in borders.
Step One: Measure accurately. Measure across the
center of the height (top to bottom) and width (side to side).The edges or sides tend to stretch giving inaccuratemeasurements. If needed square the block so the sides are
true and straight. Be sure to measure across bothhorizontally and vertically.
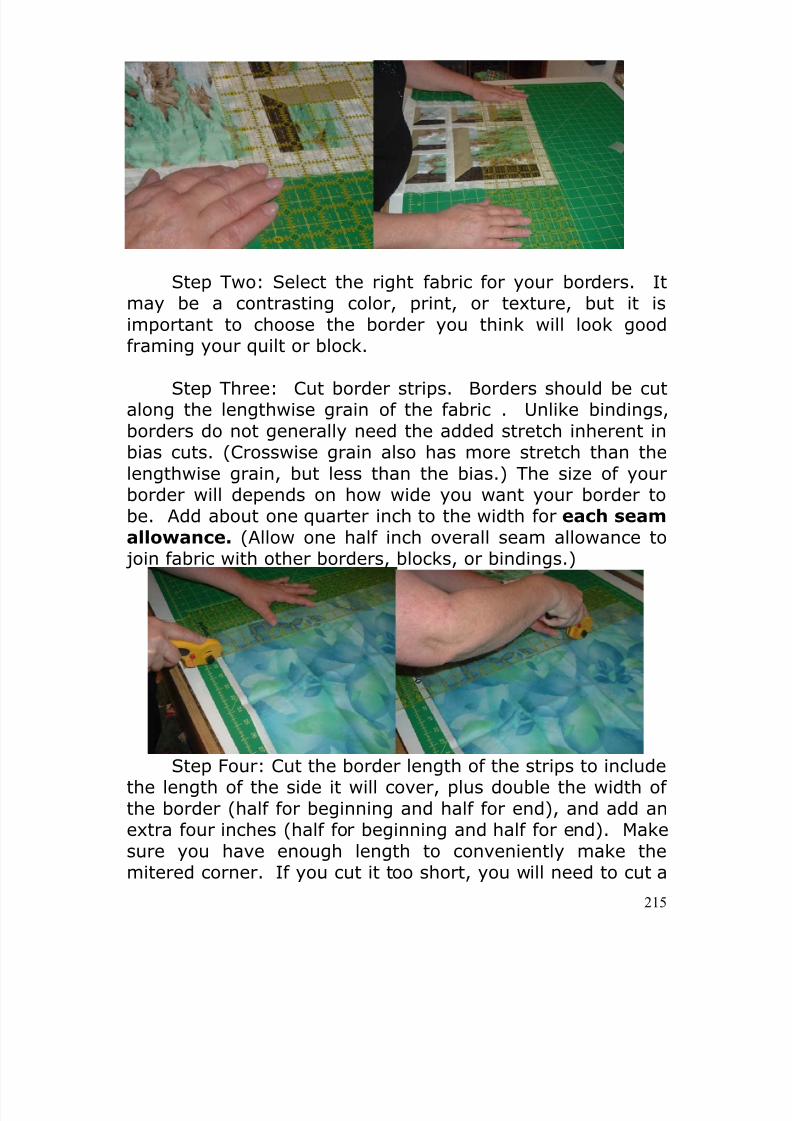
8/13/2019 Manual de Reparacion de Maquinas de Coser
http://slidepdf.com/reader/full/manual-de-reparacion-de-maquinas-de-coser 215/311
215
Step Two: Select the right fabric for your borders. Itmay be a contrasting color, print, or texture, but it isimportant to choose the border you think will look goodframing your quilt or block.
Step Three: Cut border strips. Borders should be cutalong the lengthwise grain of the fabric . Unlike bindings,borders do not generally need the added stretch inherent inbias cuts. (Crosswise grain also has more stretch than thelengthwise grain, but less than the bias.) The size of yourborder will depends on how wide you want your border tobe. Add about one quarter inch to the width for each seamallowance. (Allow one half inch overall seam allowance to join fabric with other borders, blocks, or bindings.)
Step Four: Cut the border length of the strips to includethe length of the side it will cover, plus double the width ofthe border (half for beginning and half for end), and add anextra four inches (half for beginning and half for end). Makesure you have enough length to conveniently make themitered corner. If you cut it too short, you will need to cut a
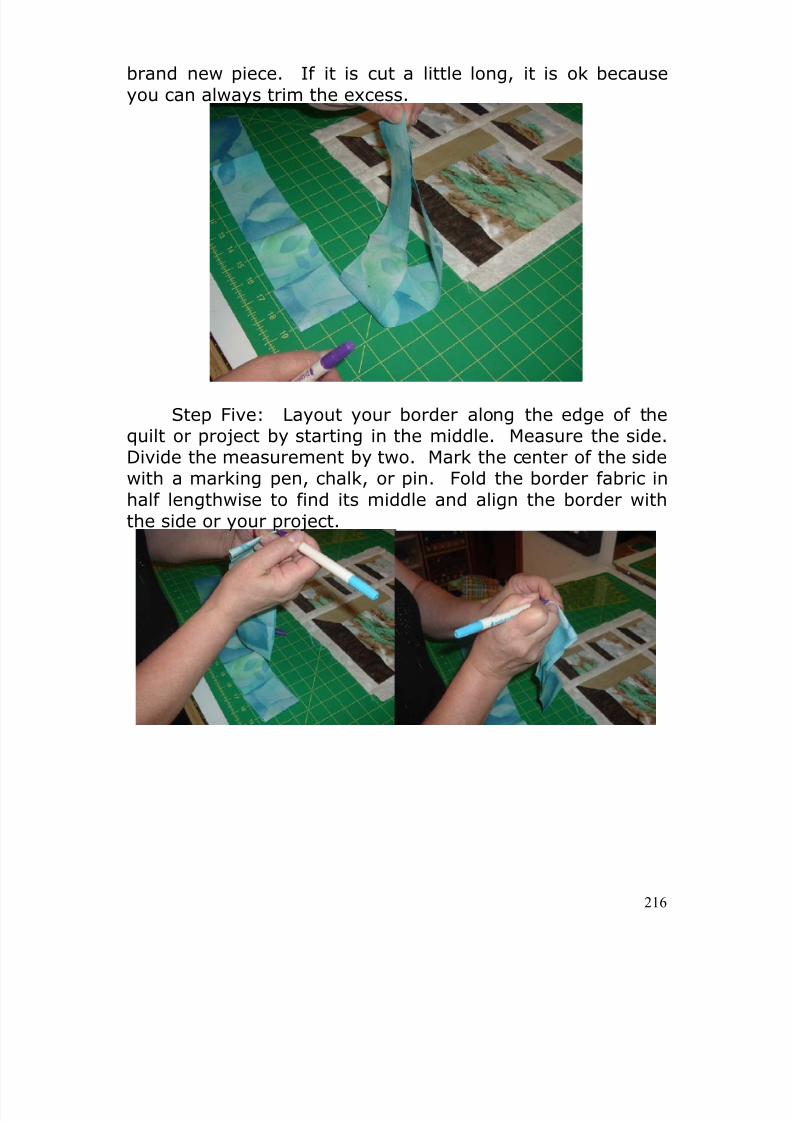
8/13/2019 Manual de Reparacion de Maquinas de Coser
http://slidepdf.com/reader/full/manual-de-reparacion-de-maquinas-de-coser 216/311
216
brand new piece. If it is cut a little long, it is ok becauseyou can always trim the excess.
Step Five: Layout your border along the edge of thequilt or project by starting in the middle. Measure the side.Divide the measurement by two. Mark the center of the sidewith a marking pen, chalk, or pin. Fold the border fabric inhalf lengthwise to find its middle and align the border withthe side or your project.
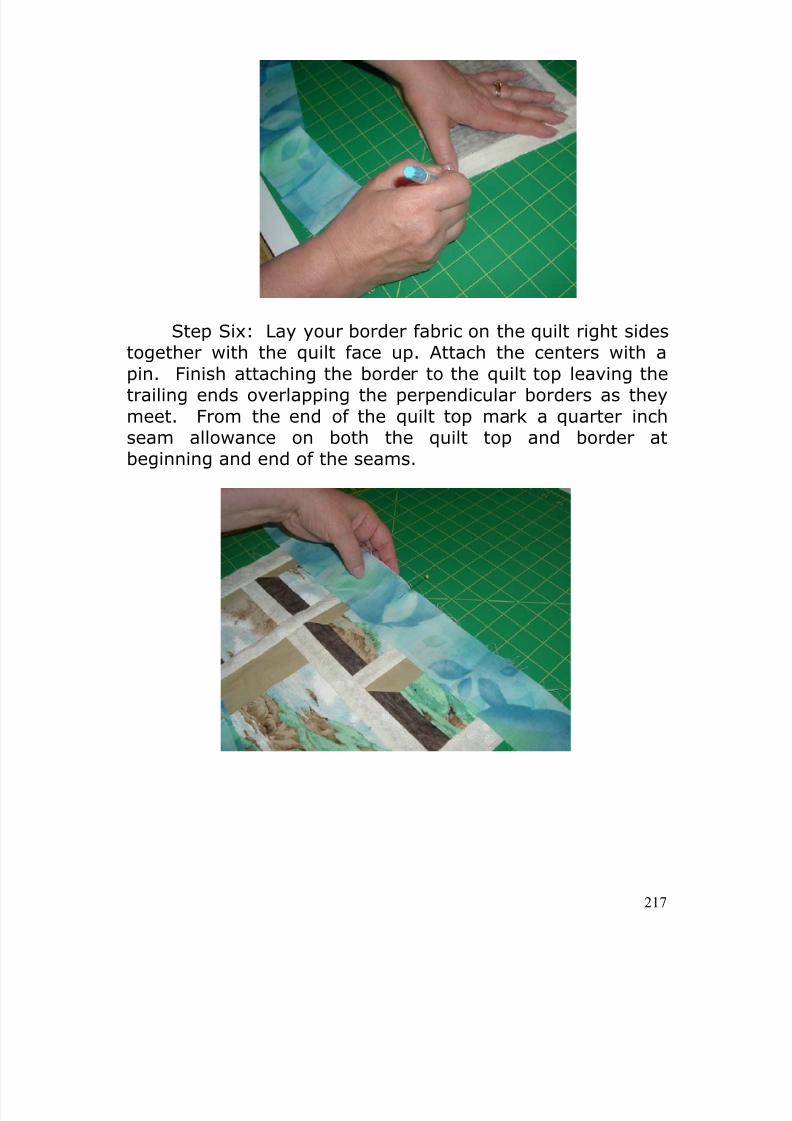
8/13/2019 Manual de Reparacion de Maquinas de Coser
http://slidepdf.com/reader/full/manual-de-reparacion-de-maquinas-de-coser 217/311
217
Step Six: Lay your border fabric on the quilt right sidestogether with the quilt face up. Attach the centers with a
pin. Finish attaching the border to the quilt top leaving thetrailing ends overlapping the perpendicular borders as theymeet. From the end of the quilt top mark a quarter inchseam allowance on both the quilt top and border atbeginning and end of the seams.
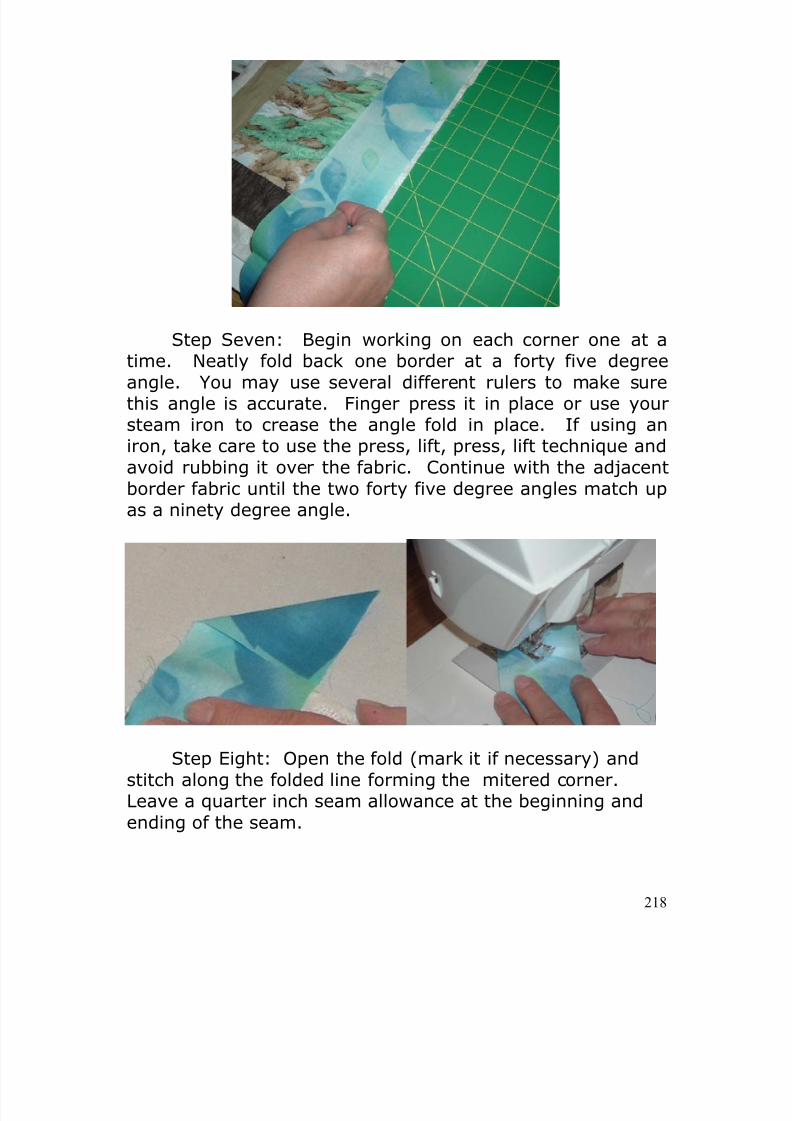
8/13/2019 Manual de Reparacion de Maquinas de Coser
http://slidepdf.com/reader/full/manual-de-reparacion-de-maquinas-de-coser 218/311
218
Step Seven: Begin working on each corner one at atime. Neatly fold back one border at a forty five degree
angle. You may use several different rulers to make surethis angle is accurate. Finger press it in place or use yoursteam iron to crease the angle fold in place. If using aniron, take care to use the press, lift, press, lift technique andavoid rubbing it over the fabric. Continue with the adjacentborder fabric until the two forty five degree angles match upas a ninety degree angle.
Step Eight: Open the fold (mark it if necessary) andstitch along the folded line forming the mitered corner.Leave a quarter inch seam allowance at the beginning andending of the seam.
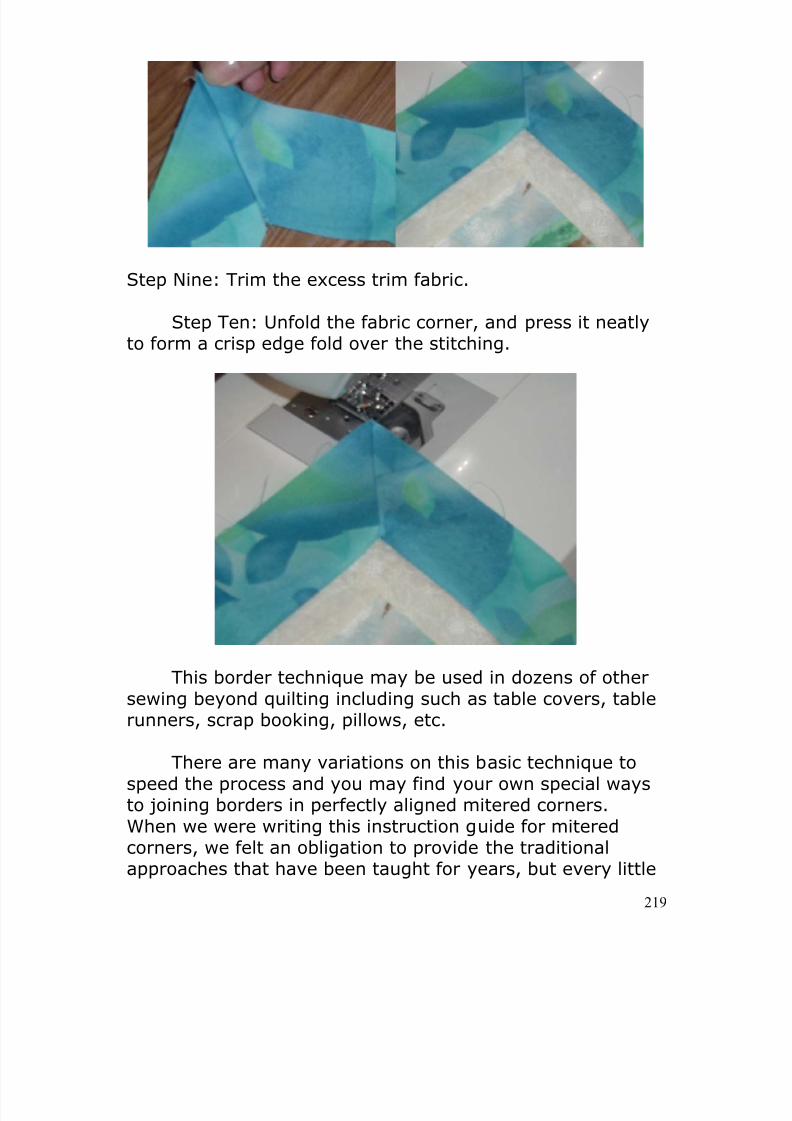
8/13/2019 Manual de Reparacion de Maquinas de Coser
http://slidepdf.com/reader/full/manual-de-reparacion-de-maquinas-de-coser 219/311
219
Step Nine: Trim the excess trim fabric.
Step Ten: Unfold the fabric corner, and press it neatlyto form a crisp edge fold over the stitching.
This border technique may be used in dozens of othersewing beyond quilting including such as table covers, tablerunners, scrap booking, pillows, etc.
There are many variations on this basic technique tospeed the process and you may find your own special waysto joining borders in perfectly aligned mitered corners.When we were writing this instruction guide for miteredcorners, we felt an obligation to provide the traditionalapproaches that have been taught for years, but every little
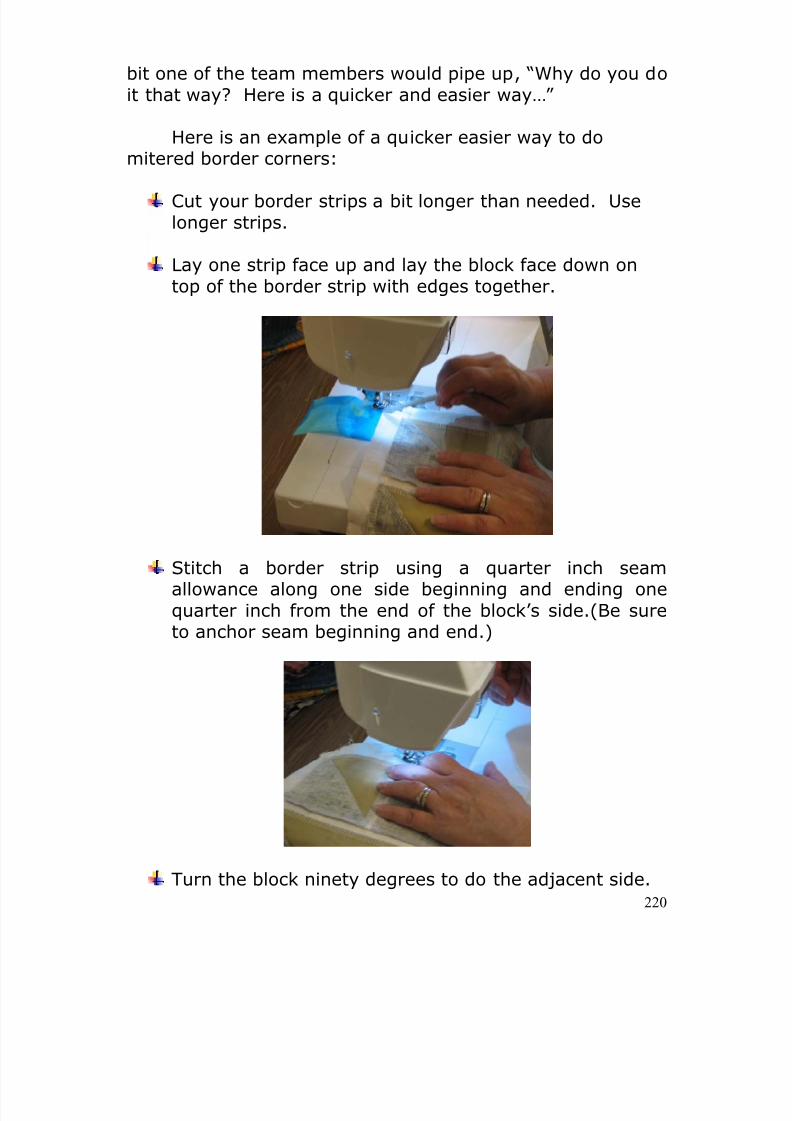
8/13/2019 Manual de Reparacion de Maquinas de Coser
http://slidepdf.com/reader/full/manual-de-reparacion-de-maquinas-de-coser 220/311
220
bit one of the team members would pipe up, “Why do you doit that way? Here is a quicker and easier way…”
Here is an example of a quicker easier way to domitered border corners:
Cut your border strips a bit longer than needed. Uselonger strips.
Lay one strip face up and lay the block face down ontop of the border strip with edges together.
Stitch a border strip using a quarter inch seamallowance along one side beginning and ending onequarter inch from the end of the block’s side.(Be sureto anchor seam beginning and end.)
Turn the block ninety degrees to do the adjacent side.
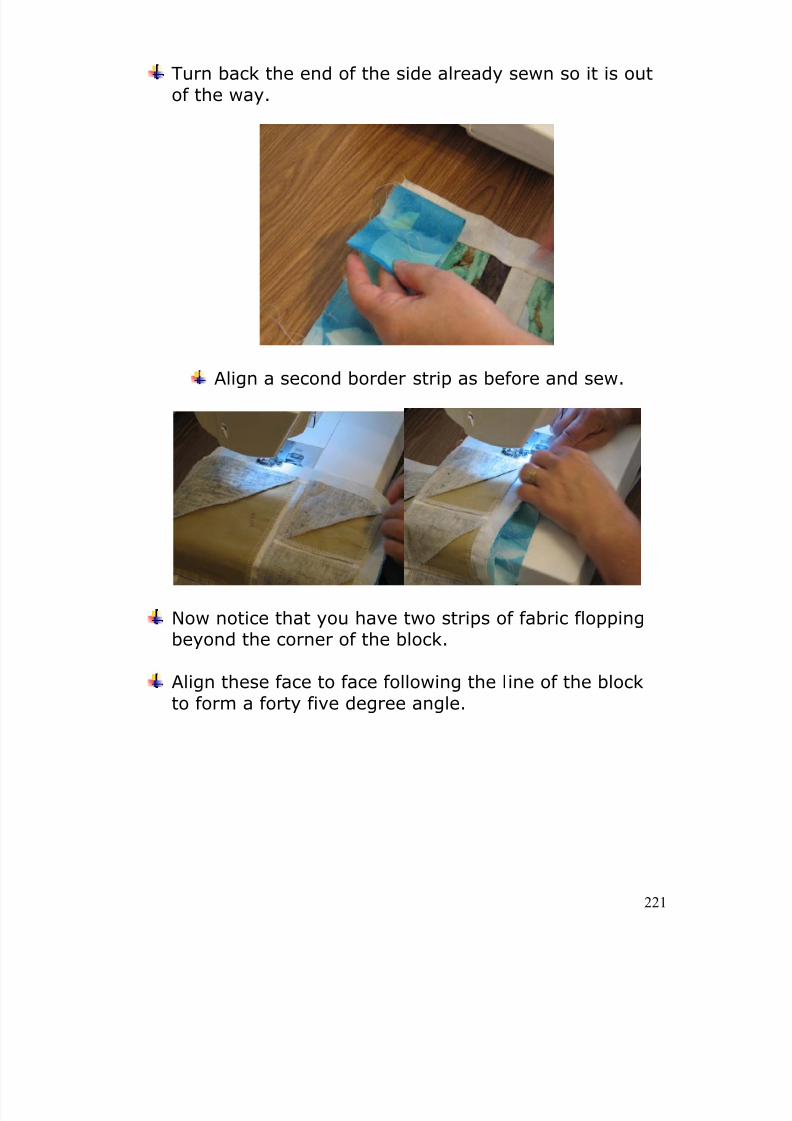
8/13/2019 Manual de Reparacion de Maquinas de Coser
http://slidepdf.com/reader/full/manual-de-reparacion-de-maquinas-de-coser 221/311
221
Turn back the end of the side already sewn so it is outof the way.
Align a second border strip as before and sew.
Now notice that you have two strips of fabric floppingbeyond the corner of the block.
Align these face to face following the line of the blockto form a forty five degree angle.
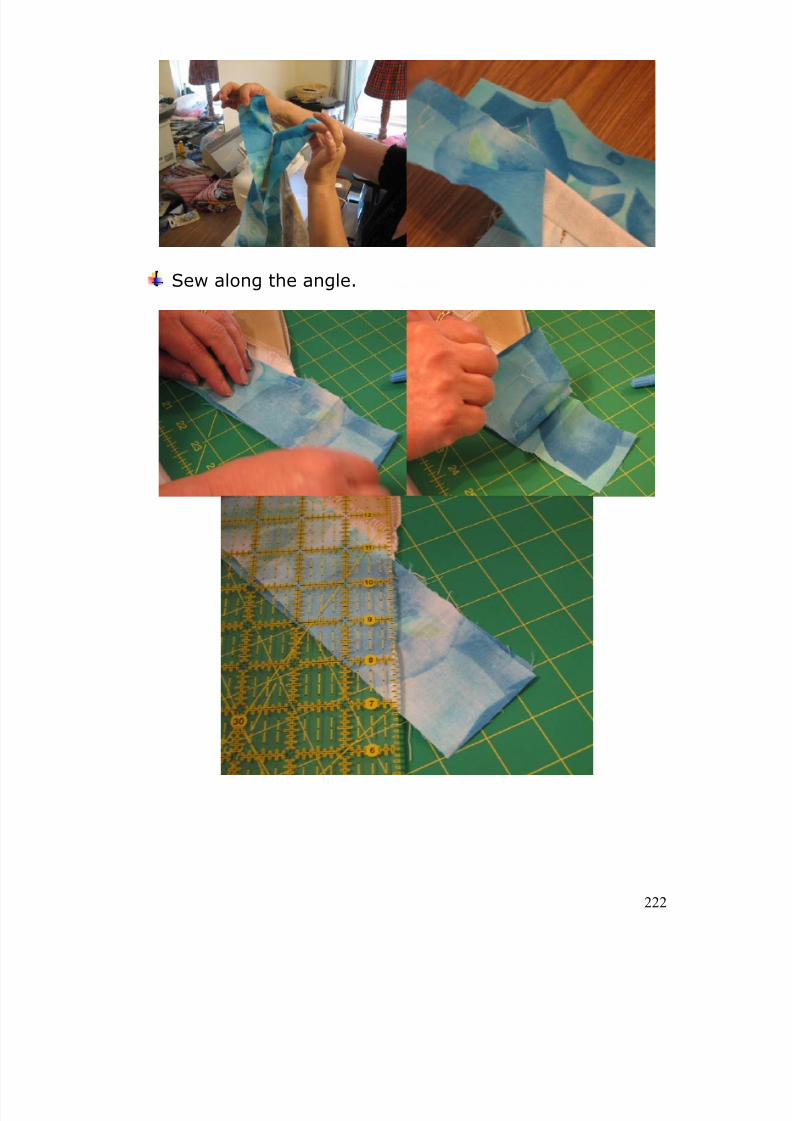
8/13/2019 Manual de Reparacion de Maquinas de Coser
http://slidepdf.com/reader/full/manual-de-reparacion-de-maquinas-de-coser 222/311
222
Sew along the angle.
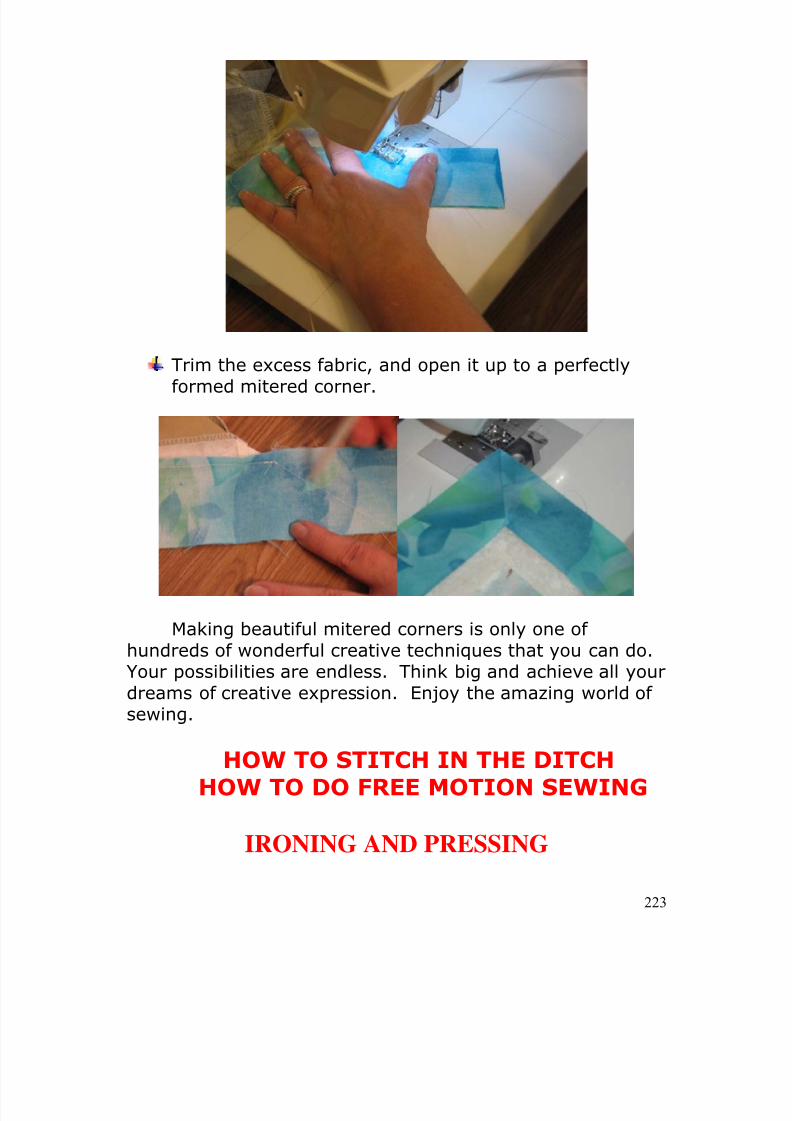
8/13/2019 Manual de Reparacion de Maquinas de Coser
http://slidepdf.com/reader/full/manual-de-reparacion-de-maquinas-de-coser 223/311
223
Trim the excess fabric, and open it up to a perfectly
formed mitered corner.
Making beautiful mitered corners is only one ofhundreds of wonderful creative techniques that you can do.Your possibilities are endless. Think big and achieve all yourdreams of creative expression. Enjoy the amazing world ofsewing.
HOW TO STITCH IN THE DITCHHOW TO DO FREE MOTION SEWING
IRONING AND PRESSING
8/13/2019 Manual de Reparacion de Maquinas de Coser
http://slidepdf.com/reader/full/manual-de-reparacion-de-maquinas-de-coser 224/311
224
CHAPTER TWELVESEWING WITH SPECIAL NOTIONS
Elastic, Zippers,And Velcro
HOW DO YOU ADDAN ELASTIC WAISTBAND?
How do you add an Elastic Waistline?
For comfort and convenience an elastic waistline is
ideal. There are several different ways to add elastic to thewaistline of slacks or skirt. In this article, I am going toexplain two ways to achieve the same results. The first isthe quick and easy way that I have developed over years ofsewing, and the second is the traditional “old fashioned” wayyou may find in dozens of other sewing books.
The Quick and Easy Way
involves folding fabric, pressing,measuring the elastic, anchoring theelastic, and sewing the fabric foldclosed to form a casing around theelastic.
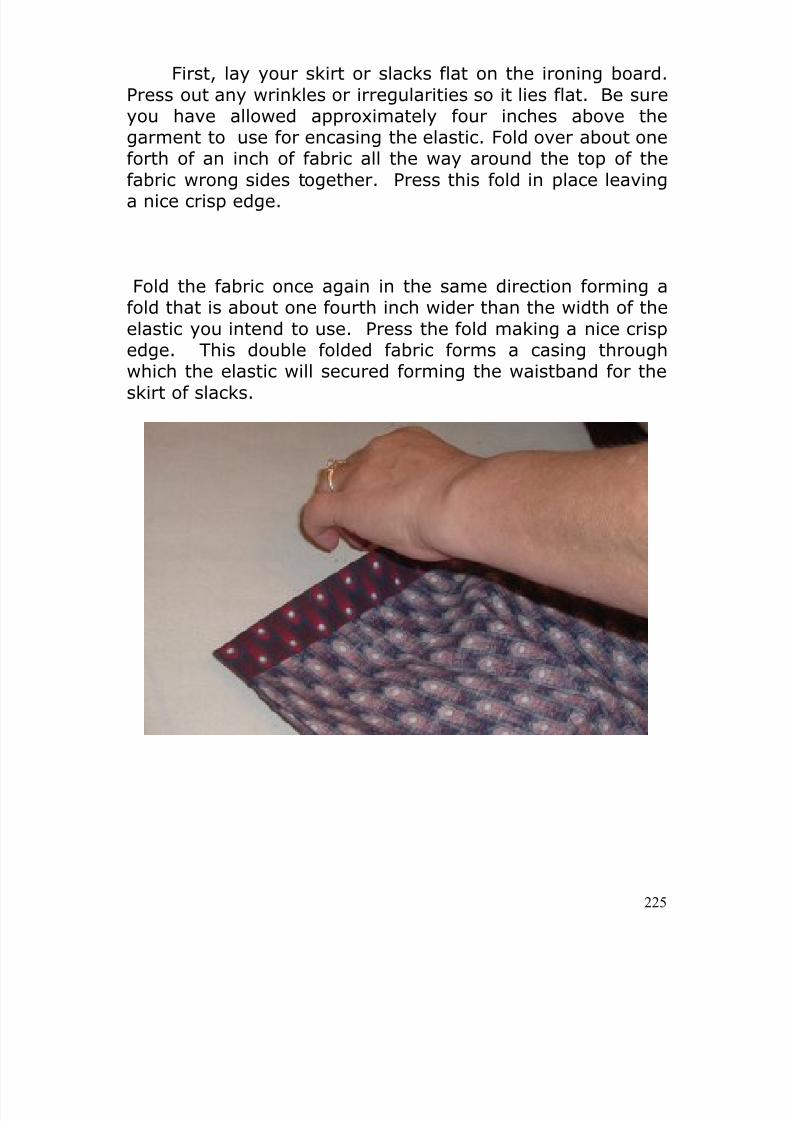
8/13/2019 Manual de Reparacion de Maquinas de Coser
http://slidepdf.com/reader/full/manual-de-reparacion-de-maquinas-de-coser 225/311
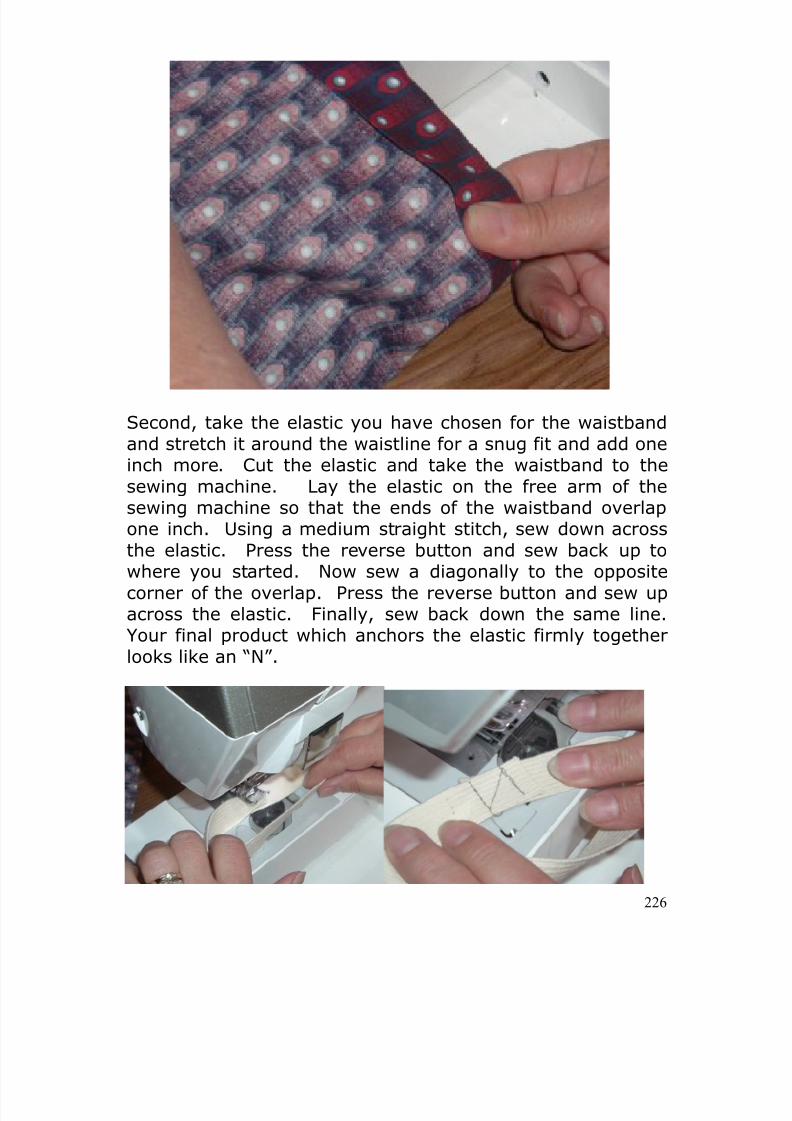
8/13/2019 Manual de Reparacion de Maquinas de Coser
http://slidepdf.com/reader/full/manual-de-reparacion-de-maquinas-de-coser 226/311
226
Second, take the elastic you have chosen for the waistbandand stretch it around the waistline for a snug fit and add oneinch more. Cut the elastic and take the waistband to thesewing machine. Lay the elastic on the free arm of thesewing machine so that the ends of the waistband overlapone inch. Using a medium straight stitch, sew down acrossthe elastic. Press the reverse button and sew back up to
where you started. Now sew a diagonally to the oppositecorner of the overlap. Press the reverse button and sew upacross the elastic. Finally, sew back down the same line.Your final product which anchors the elastic firmly togetherlooks like an “N”.
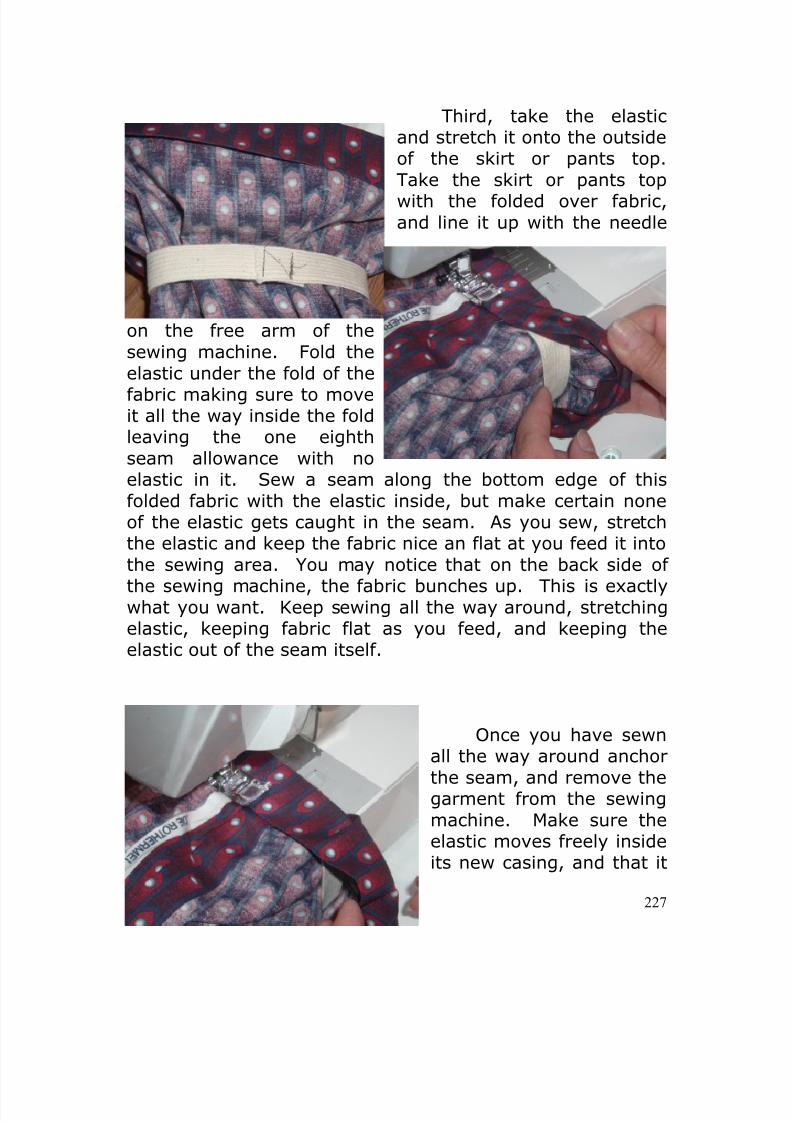
8/13/2019 Manual de Reparacion de Maquinas de Coser
http://slidepdf.com/reader/full/manual-de-reparacion-de-maquinas-de-coser 227/311
227
Third, take the elasticand stretch it onto the outsideof the skirt or pants top.Take the skirt or pants topwith the folded over fabric,and line it up with the needle
on the free arm of thesewing machine. Fold the
elastic under the fold of thefabric making sure to moveit all the way inside the foldleaving the one eighthseam allowance with noelastic in it. Sew a seam along the bottom edge of thisfolded fabric with the elastic inside, but make certain noneof the elastic gets caught in the seam. As you sew, stretchthe elastic and keep the fabric nice an flat at you feed it into
the sewing area. You may notice that on the back side ofthe sewing machine, the fabric bunches up. This is exactlywhat you want. Keep sewing all the way around, stretchingelastic, keeping fabric flat as you feed, and keeping theelastic out of the seam itself.
Once you have sewn
all the way around anchorthe seam, and remove thegarment from the sewingmachine. Make sure theelastic moves freely insideits new casing, and that it

8/13/2019 Manual de Reparacion de Maquinas de Coser
http://slidepdf.com/reader/full/manual-de-reparacion-de-maquinas-de-coser 228/311
8/13/2019 Manual de Reparacion de Maquinas de Coser
http://slidepdf.com/reader/full/manual-de-reparacion-de-maquinas-de-coser 229/311
229
sew anchoring lines on each side of the garment,and in front and back along these grooves.
Once the casing is sewn closed and the elastic isanchored, you are done. A couple of fabric folds and a quickseam, and you have added your elastic waistband. If youchoose, you may add top stitching or other decorative finish,but you are essentially finished.
The Traditional Way is to make a casing and pull theelastic through with a bodkin (looks like a giant safety pin).This way involves overcastting the raw edge with a zig zagstitch, folding over and pinning the casing, seaming thecasing, inserting the elastic waistband, and anchoring thewaistband.
First, make sure you have enough fabric at the top ofthe garment to fold over to form the waistband casing.Finish the edge of the garment by zig zagging orovercastting the edge. Fold the fabric over wrong sidestogether the width of your waistband plus one quarter inch.Press the fold to form a nice crisp edge at the top of thegarment.
Second, the side seam needs to be sewn up to the topof the casing on one side and to the bottom of the casingfold on the other. Press the side seam allowance open(good sides together), and refold the casing. Make sure toleave one side seam allowance free of stitching to keep thebeginning and ending points of insertion open. Pin thecasing in place to prevent creeping during sewing. Stitchthe seam line along a one eighth inch seam allowanceleaving space for the elastic to be inserted.
Third, measure the elastic around the waistline with alittle stretch but still comfortable plus an inch or two foranchoring. Insert the elastic using a bodkin or you can usea large safety pin on a string. Feed the elastic from thebeginning point until it comes out the other side. Match the
8/13/2019 Manual de Reparacion de Maquinas de Coser
http://slidepdf.com/reader/full/manual-de-reparacion-de-maquinas-de-coser 230/311
230
correct length and stitch the ends together across the widthof the elastic.
Fourth, anchor the elastic inside the casing bystretching the elastic while sewing down the center of thecasing and waistband. Use a long stitch length to reduce thenumber of penetrations through the elastic.
Finally, you may top stitch or edge stitch along the topof the waistband if desires to finish the waistband.
For much more detail and information on sewing techniquesand using your sewing machine, see “Dynamic SewingTechniques” by Donna and David Trumble available atwww.sewinganswers.com.
ADVENT OF THE ZIPPER
What impact has the Zipper had on the world?
Imagine purchasing a pair of men’s slacks without azipper?
What about all those movie scenes, where theattractive lady asks someone to zip up that long zipper onthe back of her dress?
Today, the zipper is everywhere. Upholstery, pillows,coats, jackets, pants, purses, travel bags, boots, overshoes,
gloves, even books open and close with a zipper.
What would the world be like, without the zipper? Forthousands of years, buttons and strings dominated thefastener world. Shirts, pants, coats, and most other articlesof clothing were either tied or buttoned.
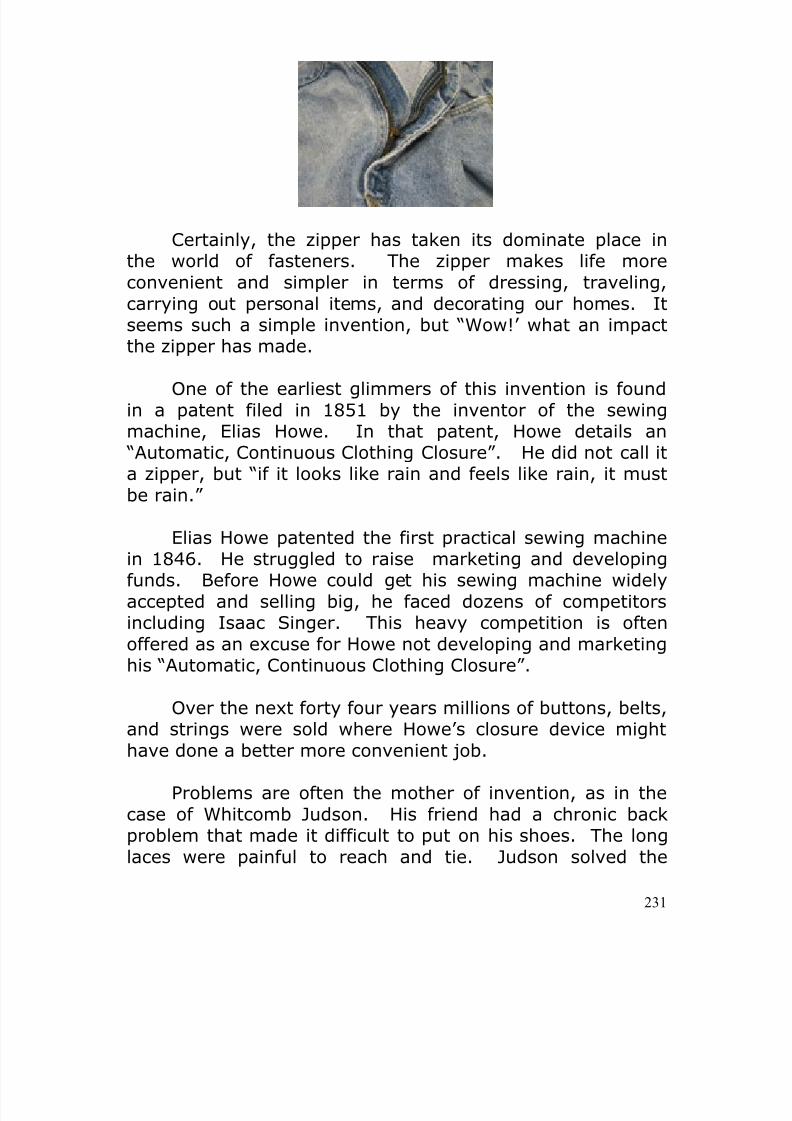
8/13/2019 Manual de Reparacion de Maquinas de Coser
http://slidepdf.com/reader/full/manual-de-reparacion-de-maquinas-de-coser 231/311
231
Certainly, the zipper has taken its dominate place inthe world of fasteners. The zipper makes life moreconvenient and simpler in terms of dressing, traveling,carrying out personal items, and decorating our homes. Itseems such a simple invention, but “Wow!’ what an impactthe zipper has made.
One of the earliest glimmers of this invention is foundin a patent filed in 1851 by the inventor of the sewingmachine, Elias Howe. In that patent, Howe details an “Automatic, Continuous Clothing Closure”. He did not call ita zipper, but “if it looks like rain and feels like rain, it mustbe rain.”
Elias Howe patented the first practical sewing machinein 1846. He struggled to raise marketing and developingfunds. Before Howe could get his sewing machine widelyaccepted and selling big, he faced dozens of competitorsincluding Isaac Singer. This heavy competition is oftenoffered as an excuse for Howe not developing and marketinghis “Automatic, Continuous Clothing Closure”.
Over the next forty four years millions of buttons, belts,and strings were sold where Howe’s closure device mighthave done a better more convenient job.
Problems are often the mother of invention, as in thecase of Whitcomb Judson. His friend had a chronic backproblem that made it difficult to put on his shoes. The longlaces were painful to reach and tie. Judson solved the
8/13/2019 Manual de Reparacion de Maquinas de Coser
http://slidepdf.com/reader/full/manual-de-reparacion-de-maquinas-de-coser 232/311
232
problem by creating his “hookless fastener” which enabledhis friend to “zip” up his shoes with a single easy motion.
At the 1893 World’s Fair in Chicago, the well knowninventor of the pneumatic street railway, Whitcomb Judson,introduced his “Clasp Locker” which he patented the sameyear. This device was still primitive by today’s standards didnot work well and received a fairly cool reception selling onlya couple dozen at the fair. The “Clasp Locker” still not calleda “zipper”. The device consisted of a hook and eye fasteningsystem. Initially, Judson applied the fastener to shoes. Hebelieved the fastener would make putting on shoes easierthan using shoe strings.
Colonel Lewis Walker joined Witcomb Judson to createthe Universal Fastener Company to manufacture and marketthe “Clasp Locker” fastening system. Introduced at theChicago World’s Faith, the device did not receiveoverwhelming acceptance. It took great effort, designadjustments and serious improvement before the devicebegan impacting the shoe market and eventually the rest ofthe world.
Universal Fastener Company hired Gideon Sundback,who married the local plan manager’s daughter ElviraAronson. Sunback was a skilled electrical engineer anddesigner. He eventually rose to the status of head designer.Grief, however, stuck with full fury in 1911, when his wifeElvira died. Sundback buried himself in his work. Heworked day and night at his design table designing themodern zipper which he produced by year’s end 1913. Hefiled his patent in 1917, described as a “Talon, SeparableFastener”.
The new zipper design included an increase in thenumber of teeth or fastening elements from four per inch toeleven. Teeth in two rows face each other. As the clasp orslider moved, it pulled the teeth together joining andinterlocking with each other. Pull the clasp one direction and
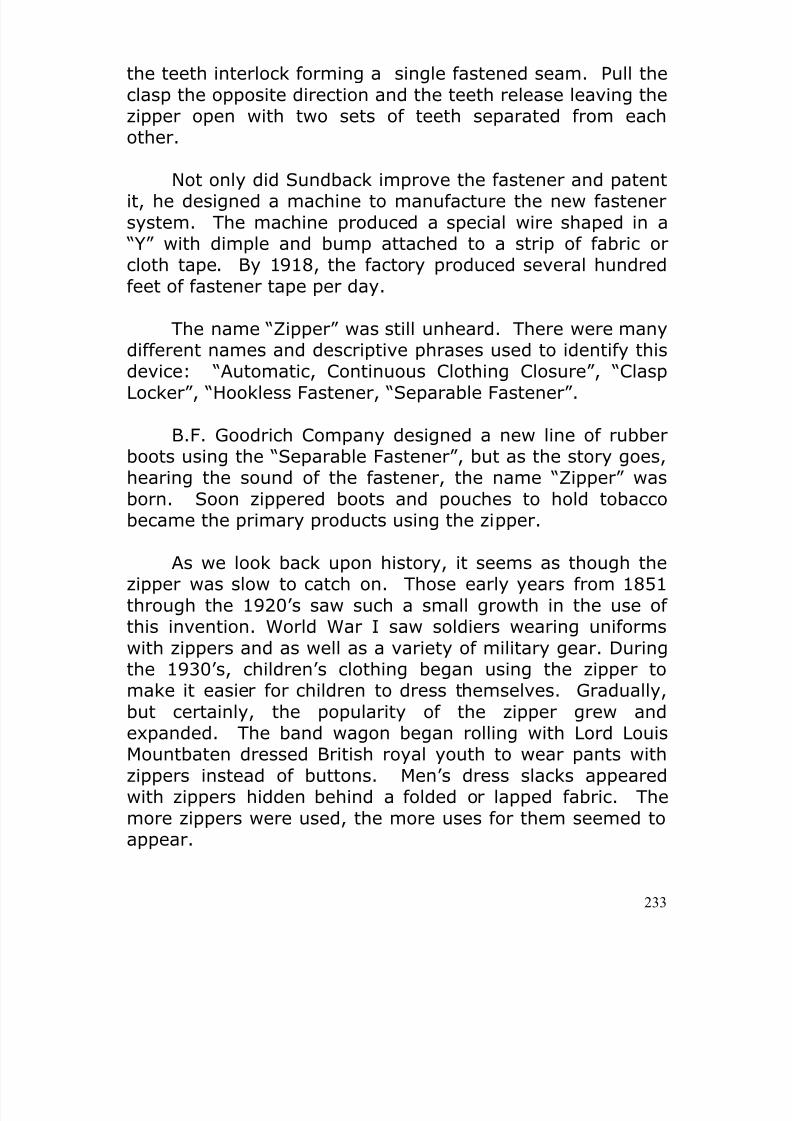
8/13/2019 Manual de Reparacion de Maquinas de Coser
http://slidepdf.com/reader/full/manual-de-reparacion-de-maquinas-de-coser 233/311
233
the teeth interlock forming a single fastened seam. Pull theclasp the opposite direction and the teeth release leaving thezipper open with two sets of teeth separated from eachother.
Not only did Sundback improve the fastener and patentit, he designed a machine to manufacture the new fastenersystem. The machine produced a special wire shaped in a “Y” with dimple and bump attached to a strip of fabric orcloth tape. By 1918, the factory produced several hundredfeet of fastener tape per day.
The name “Zipper” was still unheard. There were manydifferent names and descriptive phrases used to identify thisdevice: “Automatic, Continuous Clothing Closure”, “ClaspLocker”, “Hookless Fastener, “Separable Fastener”.
B.F. Goodrich Company designed a new line of rubberboots using the “Separable Fastener”, but as the story goes,hearing the sound of the fastener, the name “Zipper” wasborn. Soon zippered boots and pouches to hold tobaccobecame the primary products using the zipper.
As we look back upon history, it seems as though thezipper was slow to catch on. Those early years from 1851through the 1920’s saw such a small growth in the use ofthis invention. World War I saw soldiers wearing uniformswith zippers and as well as a variety of military gear. Duringthe 1930’s, children’s clothing began using the zipper tomake it easier for children to dress themselves. Gradually,but certainly, the popularity of the zipper grew andexpanded. The band wagon began rolling with Lord LouisMountbaten dressed British royal youth to wear pants withzippers instead of buttons. Men’s dress slacks appearedwith zippers hidden behind a folded or lapped fabric. Themore zippers were used, the more uses for them seemed toappear.
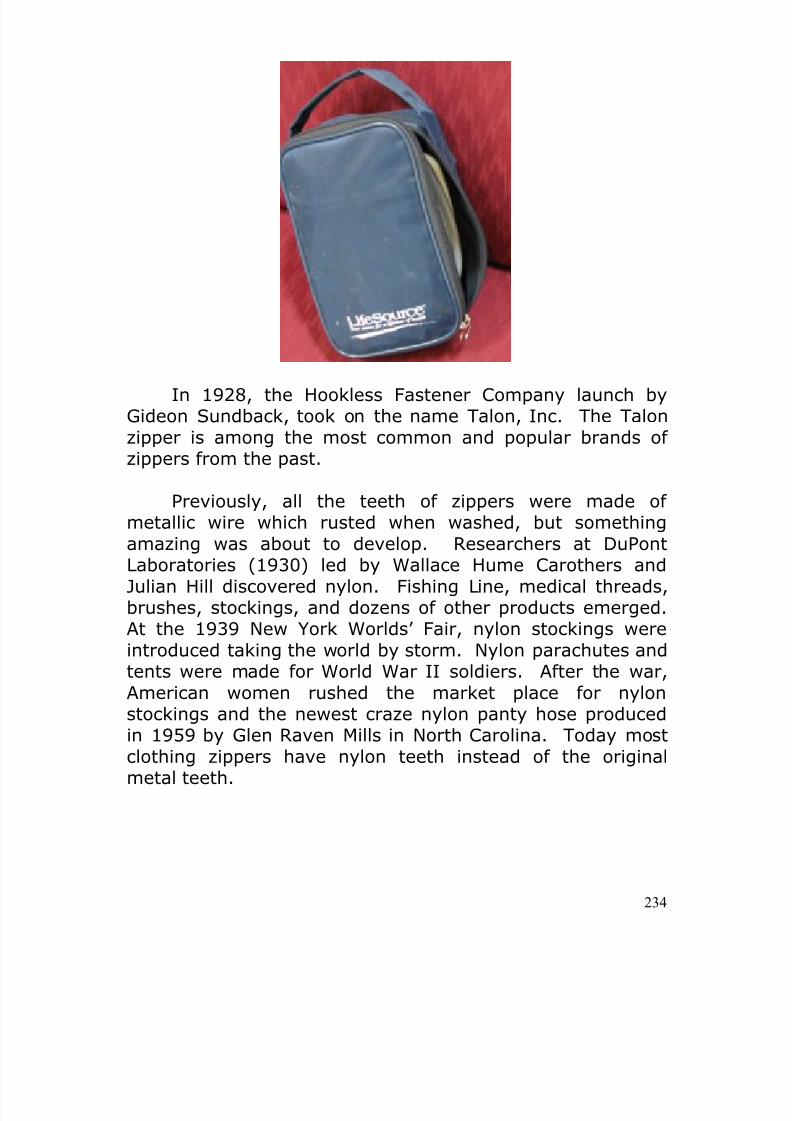
8/13/2019 Manual de Reparacion de Maquinas de Coser
http://slidepdf.com/reader/full/manual-de-reparacion-de-maquinas-de-coser 234/311
234
In 1928, the Hookless Fastener Company launch byGideon Sundback, took on the name Talon, Inc. The Talonzipper is among the most common and popular brands ofzippers from the past.
Previously, all the teeth of zippers were made ofmetallic wire which rusted when washed, but somethingamazing was about to develop. Researchers at DuPont
Laboratories (1930) led by Wallace Hume Carothers andJulian Hill discovered nylon. Fishing Line, medical threads,brushes, stockings, and dozens of other products emerged.At the 1939 New York Worlds’ Fair, nylon stockings wereintroduced taking the world by storm. Nylon parachutes andtents were made for World War II soldiers. After the war,American women rushed the market place for nylonstockings and the newest craze nylon panty hose producedin 1959 by Glen Raven Mills in North Carolina. Today most
clothing zippers have nylon teeth instead of the originalmetal teeth.
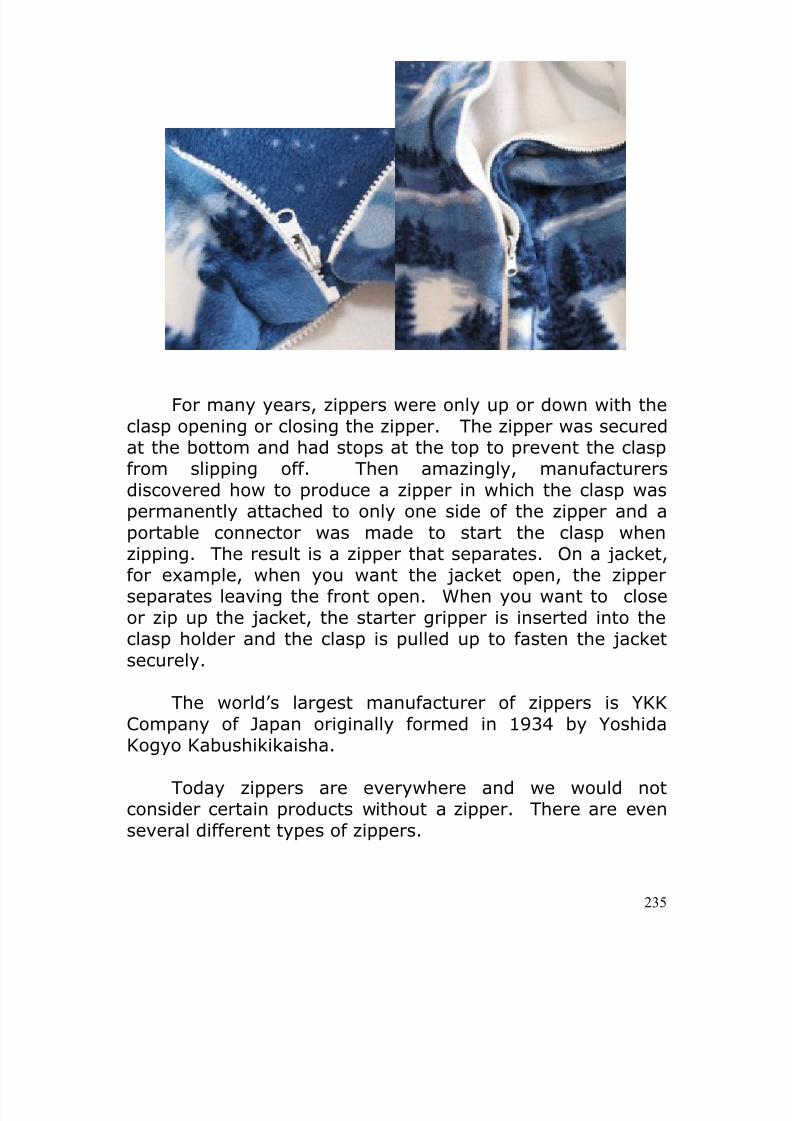
8/13/2019 Manual de Reparacion de Maquinas de Coser
http://slidepdf.com/reader/full/manual-de-reparacion-de-maquinas-de-coser 235/311
235
For many years, zippers were only up or down with theclasp opening or closing the zipper. The zipper was securedat the bottom and had stops at the top to prevent the claspfrom slipping off. Then amazingly, manufacturersdiscovered how to produce a zipper in which the clasp waspermanently attached to only one side of the zipper and aportable connector was made to start the clasp whenzipping. The result is a zipper that separates. On a jacket,
for example, when you want the jacket open, the zipperseparates leaving the front open. When you want to closeor zip up the jacket, the starter gripper is inserted into theclasp holder and the clasp is pulled up to fasten the jacketsecurely.
The world’s largest manufacturer of zippers is YKKCompany of Japan originally formed in 1934 by YoshidaKogyo Kabushikikaisha.
Today zippers are everywhere and we would notconsider certain products without a zipper. There are evenseveral different types of zippers.
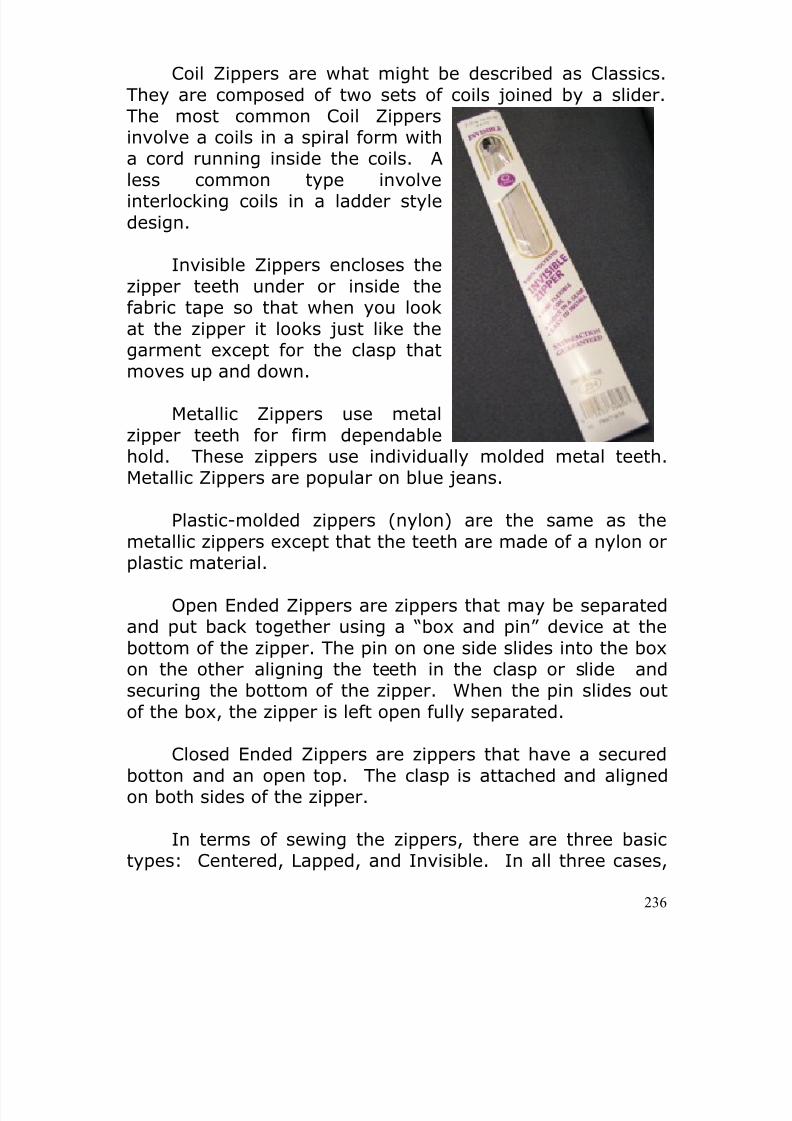
8/13/2019 Manual de Reparacion de Maquinas de Coser
http://slidepdf.com/reader/full/manual-de-reparacion-de-maquinas-de-coser 236/311
236
Coil Zippers are what might be described as Classics.They are composed of two sets of coils joined by a slider.The most common Coil Zippersinvolve a coils in a spiral form witha cord running inside the coils. Aless common type involveinterlocking coils in a ladder styledesign.
Invisible Zippers encloses thezipper teeth under or inside thefabric tape so that when you lookat the zipper it looks just like thegarment except for the clasp thatmoves up and down.
Metallic Zippers use metalzipper teeth for firm dependablehold. These zippers use individually molded metal teeth.Metallic Zippers are popular on blue jeans.
Plastic-molded zippers (nylon) are the same as themetallic zippers except that the teeth are made of a nylon orplastic material.
Open Ended Zippers are zippers that may be separatedand put back together using a “box and pin” device at thebottom of the zipper. The pin on one side slides into the boxon the other aligning the teeth in the clasp or slide andsecuring the bottom of the zipper. When the pin slides outof the box, the zipper is left open fully separated.
Closed Ended Zippers are zippers that have a securedbotton and an open top. The clasp is attached and alignedon both sides of the zipper.
In terms of sewing the zippers, there are three basictypes: Centered, Lapped, and Invisible. In all three cases,
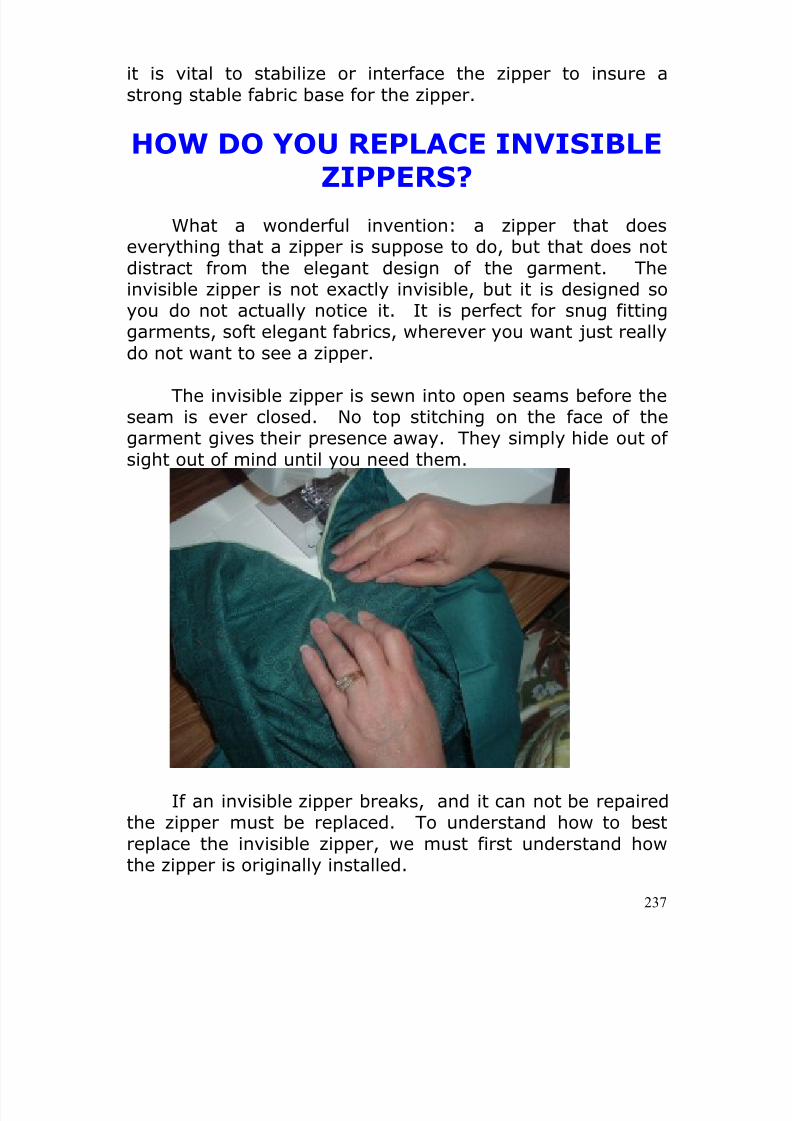
8/13/2019 Manual de Reparacion de Maquinas de Coser
http://slidepdf.com/reader/full/manual-de-reparacion-de-maquinas-de-coser 237/311
237
it is vital to stabilize or interface the zipper to insure astrong stable fabric base for the zipper.
HOW DO YOU REPLACE INVISIBLE
ZIPPERS?What a wonderful invention: a zipper that does
everything that a zipper is suppose to do, but that does notdistract from the elegant design of the garment. Theinvisible zipper is not exactly invisible, but it is designed soyou do not actually notice it. It is perfect for snug fittinggarments, soft elegant fabrics, wherever you want just reallydo not want to see a zipper.
The invisible zipper is sewn into open seams before theseam is ever closed. No top stitching on the face of thegarment gives their presence away. They simply hide out ofsight out of mind until you need them.
If an invisible zipper breaks, and it can not be repairedthe zipper must be replaced. To understand how to bestreplace the invisible zipper, we must first understand howthe zipper is originally installed.
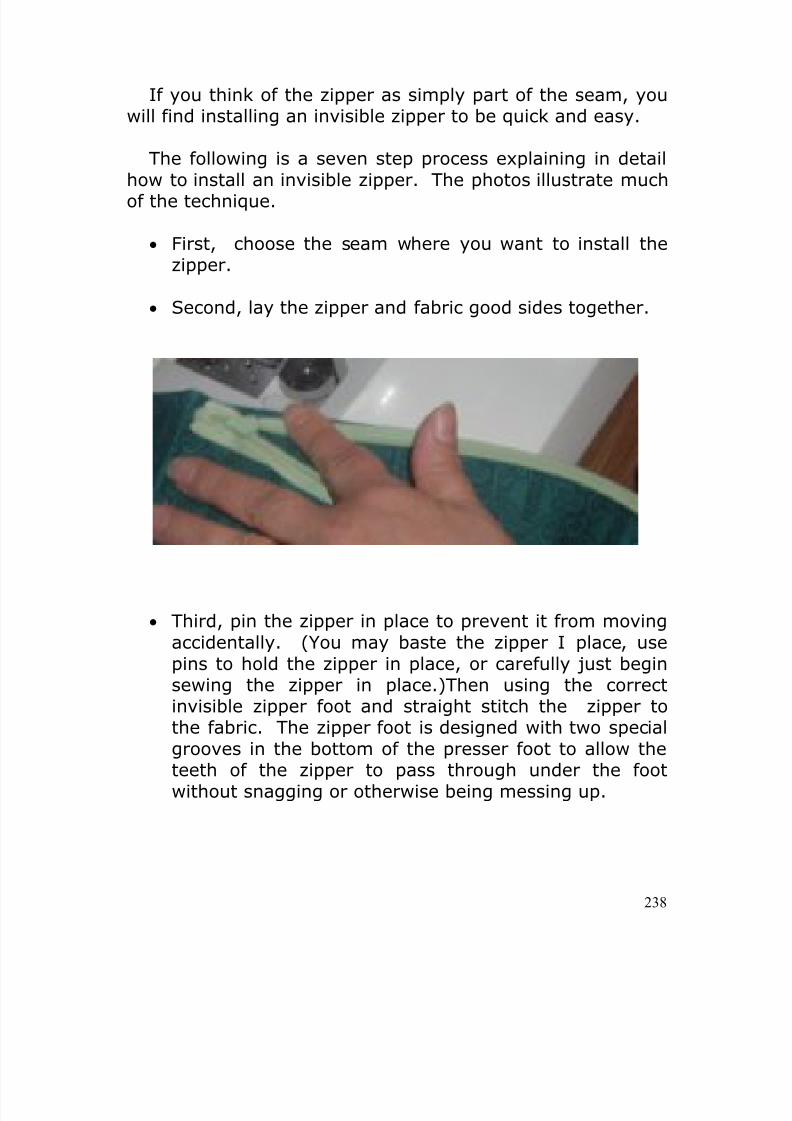
8/13/2019 Manual de Reparacion de Maquinas de Coser
http://slidepdf.com/reader/full/manual-de-reparacion-de-maquinas-de-coser 238/311
238
If you think of the zipper as simply part of the seam, you
will find installing an invisible zipper to be quick and easy.
The following is a seven step process explaining in detailhow to install an invisible zipper. The photos illustrate muchof the technique.
• First, choose the seam where you want to install thezipper.
• Second, lay the zipper and fabric good sides together.
• Third, pin the zipper in place to prevent it from movingaccidentally. (You may baste the zipper I place, usepins to hold the zipper in place, or carefully just beginsewing the zipper in place.)Then using the correctinvisible zipper foot and straight stitch the zipper tothe fabric. The zipper foot is designed with two specialgrooves in the bottom of the presser foot to allow the
teeth of the zipper to pass through under the footwithout snagging or otherwise being messing up.
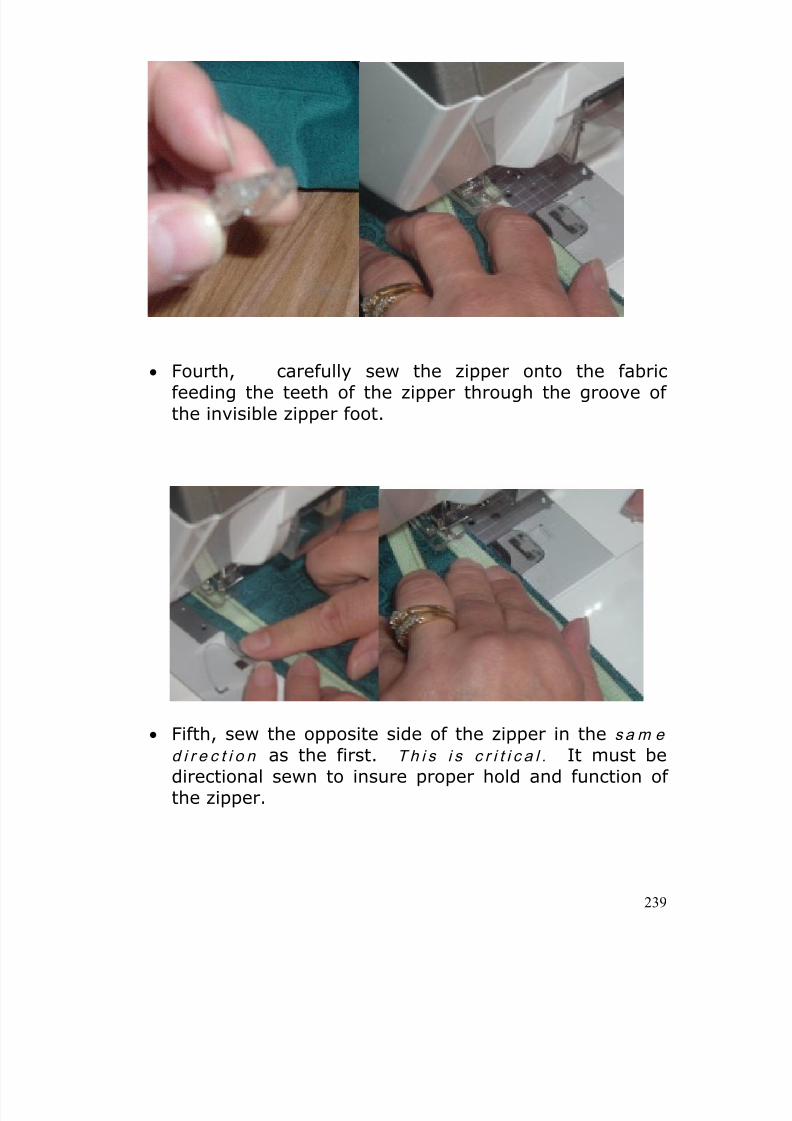
8/13/2019 Manual de Reparacion de Maquinas de Coser
http://slidepdf.com/reader/full/manual-de-reparacion-de-maquinas-de-coser 239/311
239
• Fourth, carefully sew the zipper onto the fabricfeeding the teeth of the zipper through the groove ofthe invisible zipper foot.
• Fifth, sew the opposite side of the zipper in the s a m e
d i r e c t i o n as the first. T h i s i s c r i t i c a l . It must bedirectional sewn to insure proper hold and function ofthe zipper.
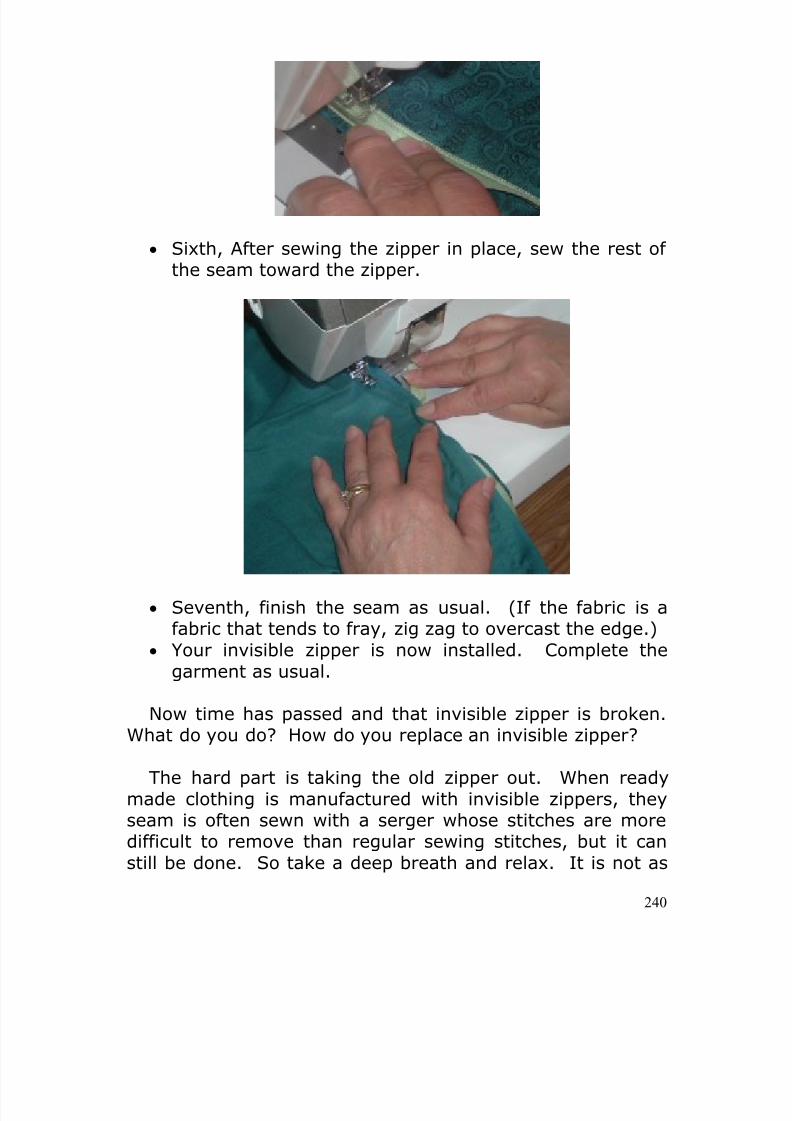
8/13/2019 Manual de Reparacion de Maquinas de Coser
http://slidepdf.com/reader/full/manual-de-reparacion-de-maquinas-de-coser 240/311
240
• Sixth, After sewing the zipper in place, sew the rest ofthe seam toward the zipper.
• Seventh, finish the seam as usual. (If the fabric is afabric that tends to fray, zig zag to overcast the edge.)
• Your invisible zipper is now installed. Complete thegarment as usual.
Now time has passed and that invisible zipper is broken.What do you do? How do you replace an invisible zipper?
The hard part is taking the old zipper out. When readymade clothing is manufactured with invisible zippers, theyseam is often sewn with a serger whose stitches are moredifficult to remove than regular sewing stitches, but it canstill be done. So take a deep breath and relax. It is not as
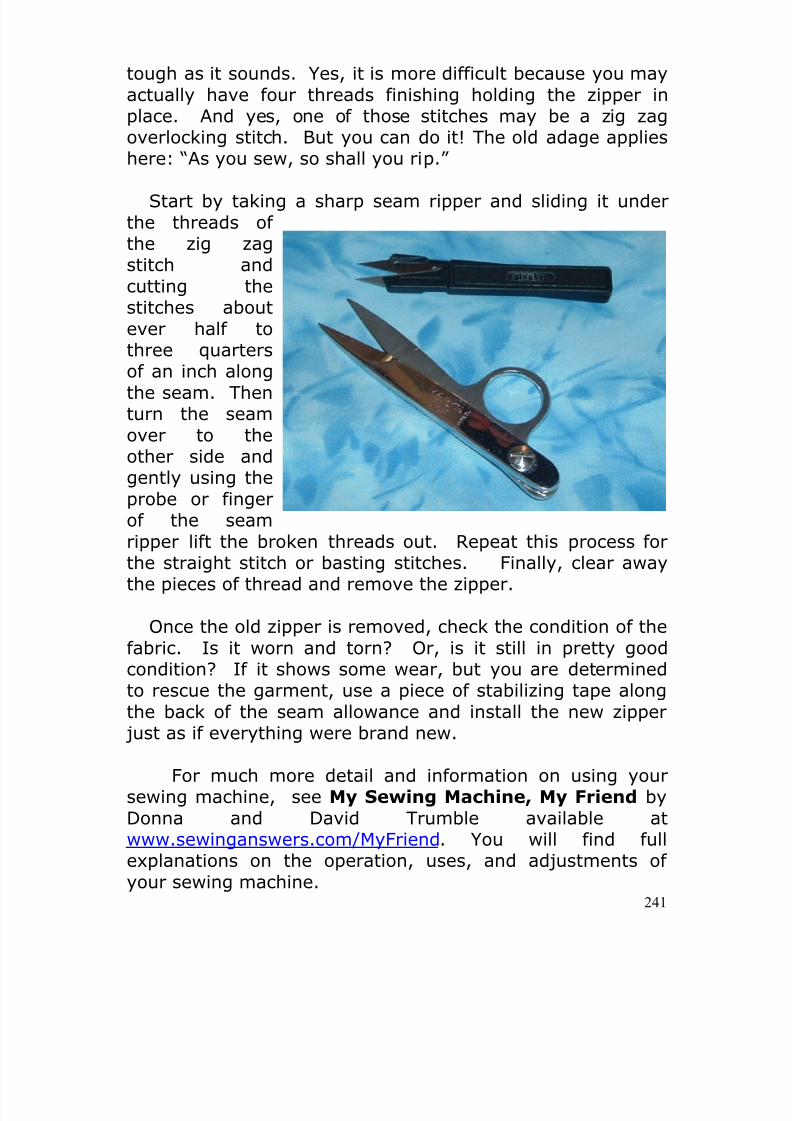
8/13/2019 Manual de Reparacion de Maquinas de Coser
http://slidepdf.com/reader/full/manual-de-reparacion-de-maquinas-de-coser 241/311
241
tough as it sounds. Yes, it is more difficult because you mayactually have four threads finishing holding the zipper inplace. And yes, one of those stitches may be a zig zagoverlocking stitch. But you can do it! The old adage applieshere: “As you sew, so shall you rip.”
Start by taking a sharp seam ripper and sliding it underthe threads ofthe zig zagstitch andcutting thestitches aboutever half tothree quartersof an inch alongthe seam. Thenturn the seamover to theother side andgently using theprobe or fingerof the seamripper lift the broken threads out. Repeat this process forthe straight stitch or basting stitches. Finally, clear awaythe pieces of thread and remove the zipper.
Once the old zipper is removed, check the condition of thefabric. Is it worn and torn? Or, is it still in pretty goodcondition? If it shows some wear, but you are determinedto rescue the garment, use a piece of stabilizing tape alongthe back of the seam allowance and install the new zipper just as if everything were brand new.
For much more detail and information on using yoursewing machine, see My Sewing Machine, My Friend byDonna and David Trumble available atwww.sewinganswers.com/MyFriend. You will find fullexplanations on the operation, uses, and adjustments ofyour sewing machine.

8/13/2019 Manual de Reparacion de Maquinas de Coser
http://slidepdf.com/reader/full/manual-de-reparacion-de-maquinas-de-coser 242/311
242
To learn more about zippers, sewing techniques with
zippers, and the many uses of zippers; see T h e Z ip p e r
B o o k by Donna and David Trumble available atwww.sewinganswers.com.
For answers to hundreds of other sewing and quiltingquestions, check out www.sewinganswers.com .
The Velcro Crop Or The Advent Of Velcro
When people think about the cultures of the RomanEmpire, Ancient Greece, and Egypt, many marvel at the
strange ideas people had. The Romans traced their originsto a couple of kids raised by wolves? The Greeks andRomans believed all manner of strange stories about superbeings interacting with ordinary people and super heroesfighting strange unimaginable creatures. Finally, theEgyptians even thought their pharaohs were gods and builtweird pyramid tombs for them. Myths, strange stories,weird ideas?
Maybe we have outgrown such primitive thinking.Certainly we are more cultured and scientifically awaretoday. Of course, we have modern technology to help usget the facts and get them right. False information isquickly and easily exposed today. We expect the facts, theevidence, and the unabashed truth.
Or not. Amazingly, even we are vulnerable to halftruths, deception, misinformation, and lies. We have
become highly skeptical about the claims and promises ofpoliticians. We often feel it is hard to believe anyoneanymore. Even in the world’s greatest hobby there are afew myths of which be amusing if some did not actuallybelieve them.
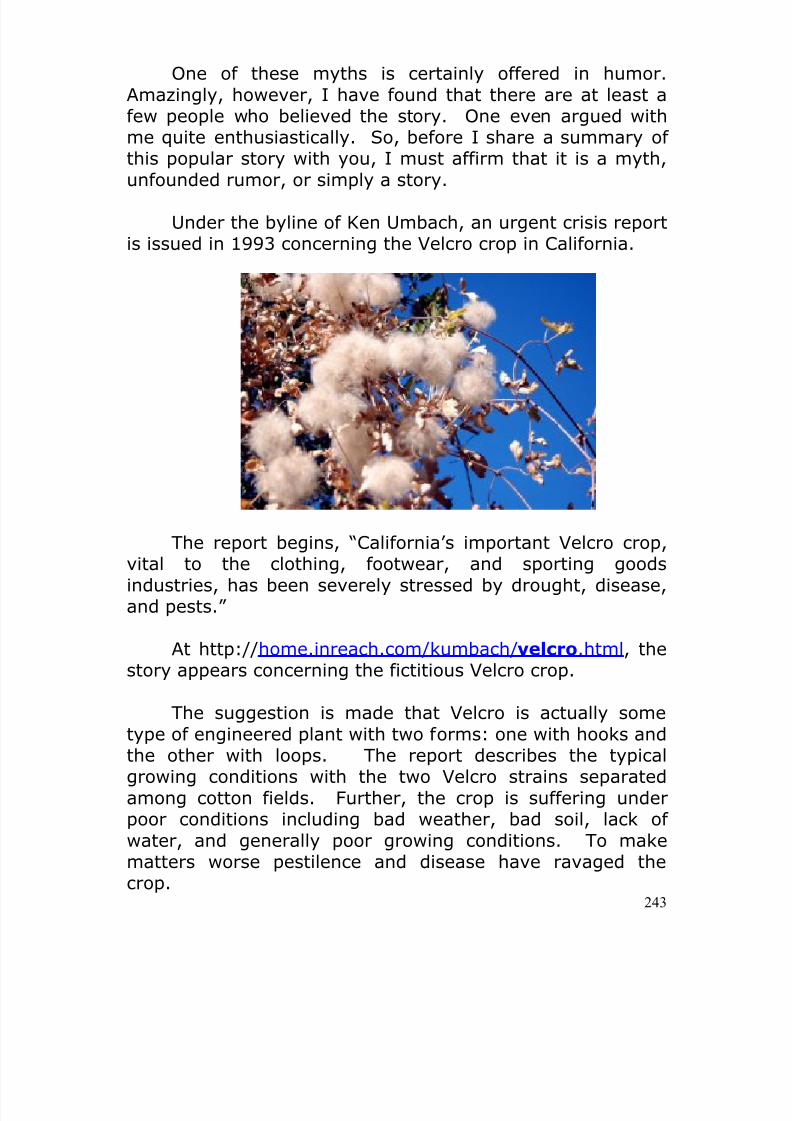
8/13/2019 Manual de Reparacion de Maquinas de Coser
http://slidepdf.com/reader/full/manual-de-reparacion-de-maquinas-de-coser 243/311
243
One of these myths is certainly offered in humor.Amazingly, however, I have found that there are at least afew people who believed the story. One even argued withme quite enthusiastically. So, before I share a summary ofthis popular story with you, I must affirm that it is a myth,unfounded rumor, or simply a story.
Under the byline of Ken Umbach, an urgent crisis reportis issued in 1993 concerning the Velcro crop in California.
The report begins, “California’s important Velcro crop,
vital to the clothing, footwear, and sporting goodsindustries, has been severely stressed by drought, disease,and pests.”
At http://home.inreach.com/kumbach/velcro.html, thestory appears concerning the fictitious Velcro crop.
The suggestion is made that Velcro is actually sometype of engineered plant with two forms: one with hooks and
the other with loops. The report describes the typicalgrowing conditions with the two Velcro strains separatedamong cotton fields. Further, the crop is suffering underpoor conditions including bad weather, bad soil, lack ofwater, and generally poor growing conditions. To makematters worse pestilence and disease have ravaged thecrop.
8/13/2019 Manual de Reparacion de Maquinas de Coser
http://slidepdf.com/reader/full/manual-de-reparacion-de-maquinas-de-coser 244/311
244
The suggestion is made that this is some sort of high
security confidential industrial secret is at stake. Theaccount becomes even more bizarre suggesting that the fieldworkers are required to wear Teflon (another spurious crop) jumpsuits to protect them against the rigors of the hooksand loops threatening the workers’ hair, body, and health.The myth details the threats to the Velcro crop and theassociated crisis in clothing, shoe, and other manufacturing.
The story proceeds to explain the historic ups anddowns of crop production. The current crisis is brought on bythe infestation of swarms of insects, and plant diseases.The adverse growing conditions plague crop production.
Note the photo above is not of naturally growingVelcro, but rather naturally growing cotton. This is a totallydifferent crop of interest.
The story concludes with a forecast of renewedbeneficial growing conditions, reduction of infestations, andincreased crop production. The final note, however,suggests that the future growth of the Velcro crop remainsuncertain, and the wise investor should consider investing inzippers and buttons.
The story is interesting, but far far from true.
So the questions arise, who invented Velcro, how,when, and why?
According to my reading, a Swiss engineer by the nameof George de Mestral invented Velcro after observing naturalfield cocklebur plants.
As the record goes, sometime during the early 1940’s,he was walking with his dog through the fields. Hunting?Hiking? Or Just walking is dog? Does it matter?
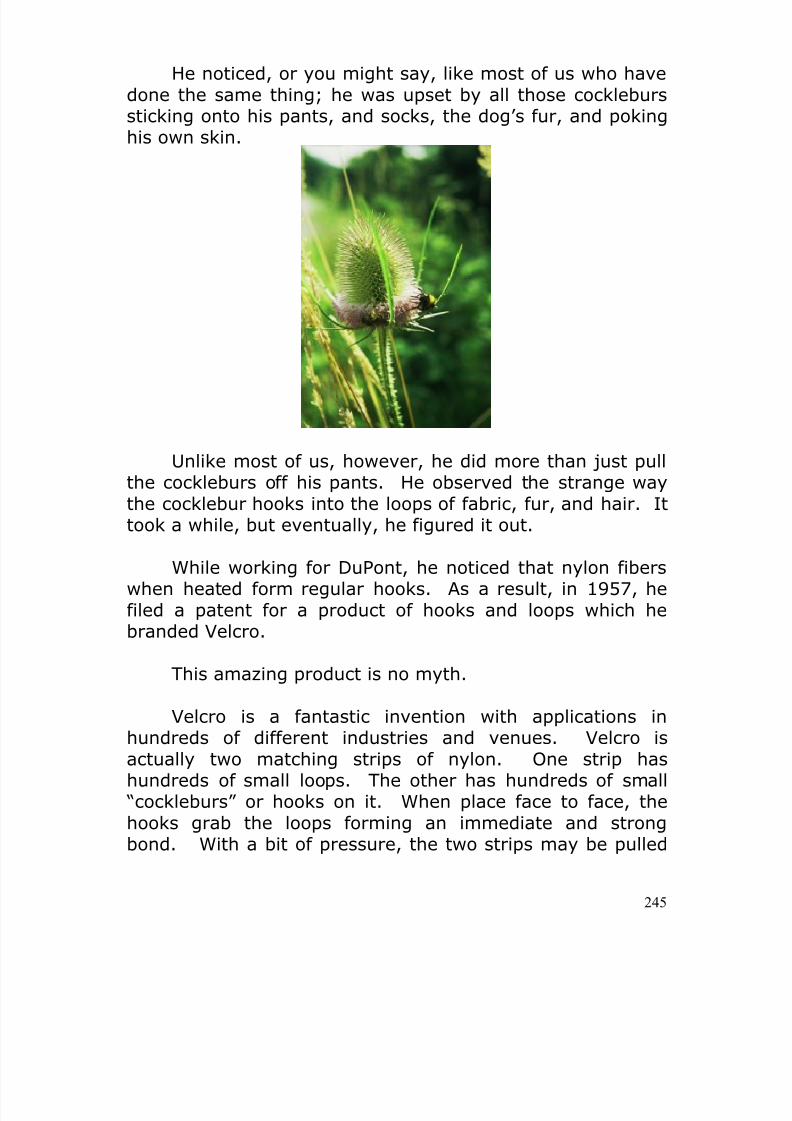
8/13/2019 Manual de Reparacion de Maquinas de Coser
http://slidepdf.com/reader/full/manual-de-reparacion-de-maquinas-de-coser 245/311
245
He noticed, or you might say, like most of us who havedone the same thing; he was upset by all those cockleburssticking onto his pants, and socks, the dog’s fur, and pokinghis own skin.
Unlike most of us, however, he did more than just pullthe cockleburs off his pants. He observed the strange waythe cocklebur hooks into the loops of fabric, fur, and hair. Ittook a while, but eventually, he figured it out.
While working for DuPont, he noticed that nylon fiberswhen heated form regular hooks. As a result, in 1957, hefiled a patent for a product of hooks and loops which hebranded Velcro.
This amazing product is no myth.
Velcro is a fantastic invention with applications inhundreds of different industries and venues. Velcro is
actually two matching strips of nylon. One strip hashundreds of small loops. The other has hundreds of small “cockleburs” or hooks on it. When place face to face, thehooks grab the loops forming an immediate and strongbond. With a bit of pressure, the two strips may be pulled

8/13/2019 Manual de Reparacion de Maquinas de Coser
http://slidepdf.com/reader/full/manual-de-reparacion-de-maquinas-de-coser 246/311
246
apart without any damage to either strip. The process maybe repeated again and again almost forever.
It can be made in many different forms: tapes, dots,strips, sheets, and more. Each set of Velcro consists of apiece with hundreds of nylon hooks per square inch whichperfectly grip onto a matching piece of looped Velcro.
Velcro is almost a magicalfastener. In many projects, Velcroreplaces buttons, snaps, and zippers.Often, Velcro can be used in strips ofvarious lengths from an inch toseveral inches. Sometimes the Velcrocan be used as various buttons orcircles. It is nearly invisible whenfastened.
Sewing on Velcro is quick and easy. Generally, treatthe Velcro as a synthetic fabric. Use a universal needle andstitch the Velcro to the base fabric.
Cleaning Velcro is a snap. Just launder with yourgarment, bag, or whatever the Velcro is sewn to. It doesgreat. Do avoid strong bleach and other chemicals,however, that might interact with the nylon. The hook sideof the Velcro sometimes collects or snags lint, dirt, and otherdebris, but this is fairly easily cleaned. Use a comb ortoothbrush to simply comb out the junk.
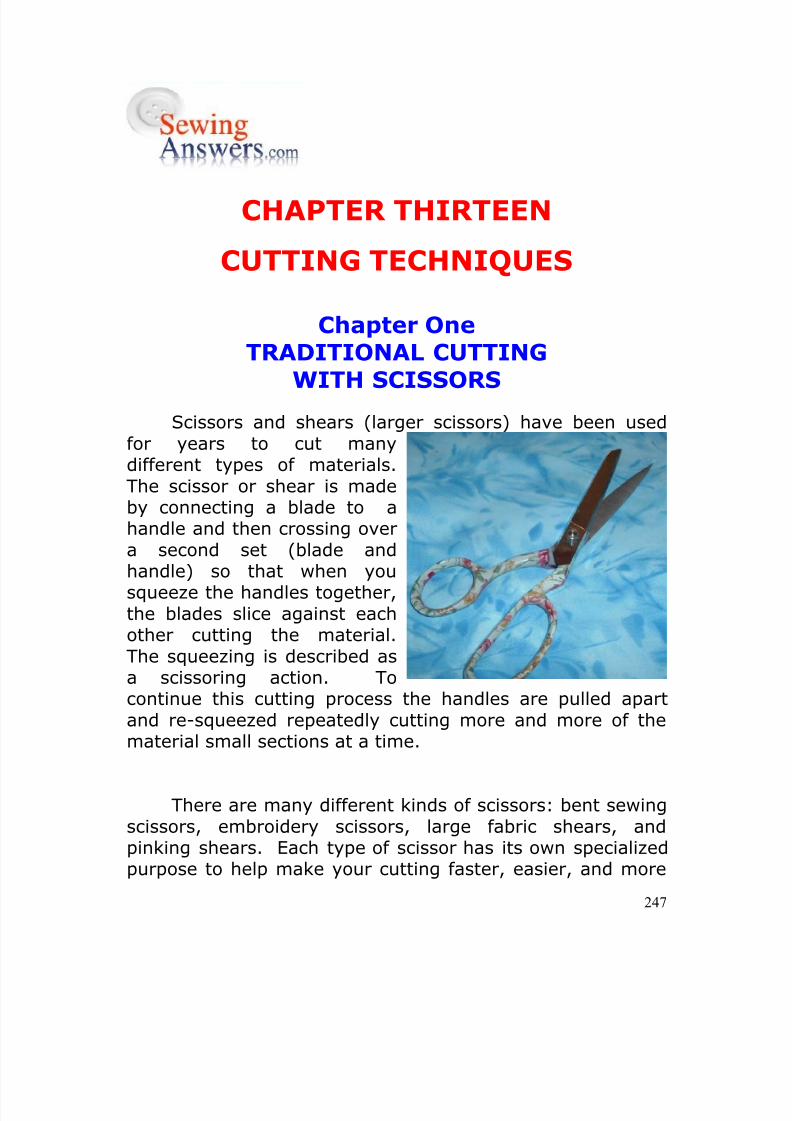
8/13/2019 Manual de Reparacion de Maquinas de Coser
http://slidepdf.com/reader/full/manual-de-reparacion-de-maquinas-de-coser 247/311
247
CHAPTER THIRTEEN
CUTTING TECHNIQUES
Chapter OneTRADITIONAL CUTTING
WITH SCISSORSScissors and shears (larger scissors) have been used
for years to cut manydifferent types of materials.The scissor or shear is madeby connecting a blade to ahandle and then crossing overa second set (blade and
handle) so that when yousqueeze the handles together,the blades slice against eachother cutting the material.The squeezing is described asa scissoring action. Tocontinue this cutting process the handles are pulled apartand re-squeezed repeatedly cutting more and more of thematerial small sections at a time.
There are many different kinds of scissors: bent sewingscissors, embroidery scissors, large fabric shears, andpinking shears. Each type of scissor has its own specializedpurpose to help make your cutting faster, easier, and more
8/13/2019 Manual de Reparacion de Maquinas de Coser
http://slidepdf.com/reader/full/manual-de-reparacion-de-maquinas-de-coser 248/311
248
accurate. Good quality bent scissors are a must for anysewing project because they will allow the fabric to lie flat onthe cutting table while your slide the scissors forward cuttingwith ease. Embroidery scissors are small narrow bladedvery sharp scissors designed to easily cut embroidery jumpstitches, trim excess, and generally do the finest sewingcuts. Large shears are used to cut large sections of fabric.These are common in fabric shops where many yards offabric are cut every day. Pinking shears are a specialfinishing scissor designed to leave a triangular finish alongthe raw edge of fabric. Select your scissors very carefully.Remember this is not the area to scrimp.
Properly holding scissors is a bit of an art form. Noticethe index finger actuallypoints down the blade in thedirection of the cut while thethumb and the two middlefingers squeeze the handlestogether. Each time you
squeeze, the blades cut partof the fabric or othermaterial, but when thethumb and fingers pull thescissors back apart it isnecessary to realign the scissors for the next cut.
8/13/2019 Manual de Reparacion de Maquinas de Coser
http://slidepdf.com/reader/full/manual-de-reparacion-de-maquinas-de-coser 249/311
249
Some Basic Guidelines for Cutting With Scissors
• Lay out and cut out along the grainline as much aspossible.
• Hold your scissors correctly.
• If you are right handed, you will find it morecomfortable to cut along the fabric if it is stabilized byyour left hand. If you are left handed, try the reverse.
• Avoid lifting the fabric while you cut.
• Make long generally full blade cuts with steady strokesfor straight cuts.
• Make shorter more precise cuts on curves, turns, andother tight spots.
• It is possible to cut along the cut line in tight areasleaving a little extra ease, and go back to more finelytrim after the initial cut.
• Take special care around pattern notches to mark thesewith a short clip of the fabric for later fabric joining. Donot cut notches into the body of a pattern.
•
Take your time and be careful to cut smoothly andaccurately. If you are not careful, however, the cut canbecome choppy instead of perfectly straight.
8/13/2019 Manual de Reparacion de Maquinas de Coser
http://slidepdf.com/reader/full/manual-de-reparacion-de-maquinas-de-coser 250/311
250
CUTTING WITH A ROTARY CUTTER
A modern alternative to scissors is the rotary cutter.Invented in 1979, by the Olfa company, the rotary cutter
has become a must have sewing tool. It is the moderncutting alternative.
Notice in the picture belowthat the rotary cutter consists ofa single handle with a razorsharp wheel shaped blade at oneend.
The rotary cutter offerssome huge advantages over themore traditional sewing scissors.
First, the rotary cutterfits snugly in the hand withfingers wrapped around it for amore even distribution of forceover the entire hand.
Second, the rolling actionof the rotary cutting processreduces stress and fatigue on the hand and wrist(especially important for those suffering from carpel tunnelsyndrome).
Third, the safety switch is conveniently positioned for easy finger tip control which provides an added measure
of safety over the open blade of scissors.
Fourth, rotary cutters are designed for easy use bythose who are left handed as well as those who are righthanded without the hassle of purchasing a custom set.
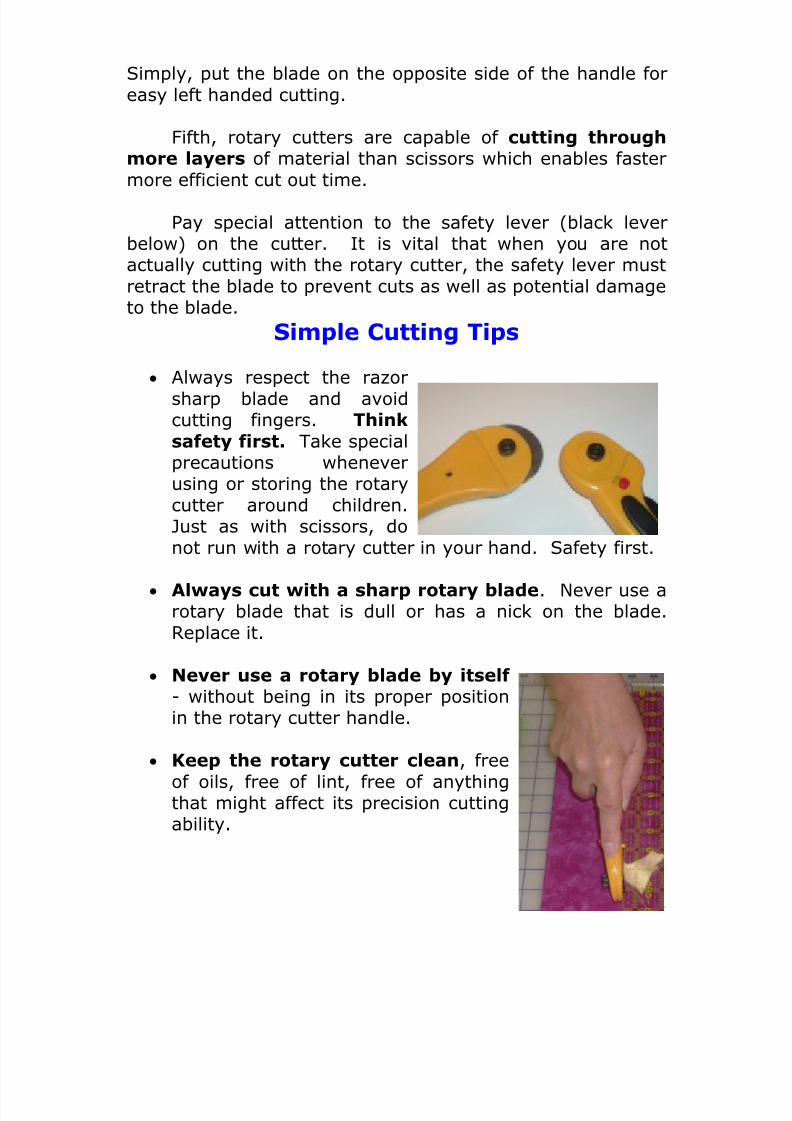
8/13/2019 Manual de Reparacion de Maquinas de Coser
http://slidepdf.com/reader/full/manual-de-reparacion-de-maquinas-de-coser 251/311
251
Simply, put the blade on the opposite side of the handle foreasy left handed cutting.
Fifth, rotary cutters are capable of cutting throughmore layers of material than scissors which enables fastermore efficient cut out time.
Pay special attention to the safety lever (black leverbelow) on the cutter. It is vital that when you are notactually cutting with the rotary cutter, the safety lever mustretract the blade to prevent cuts as well as potential damageto the blade.
Simple Cutting Tips
•
Always respect the razorsharp blade and avoidcutting fingers. Thinksafety first. Take specialprecautions wheneverusing or storing the rotarycutter around children.Just as with scissors, donot run with a rotary cutter in your hand. Safety first.
• Always cut with a sharp rotary blade. Never use arotary blade that is dull or has a nick on the blade.Replace it.
• Never use a rotary blade by itself - without being in its proper positionin the rotary cutter handle.
• Keep the rotary cutter clean, freeof oils, free of lint, free of anythingthat might affect its precision cuttingability.
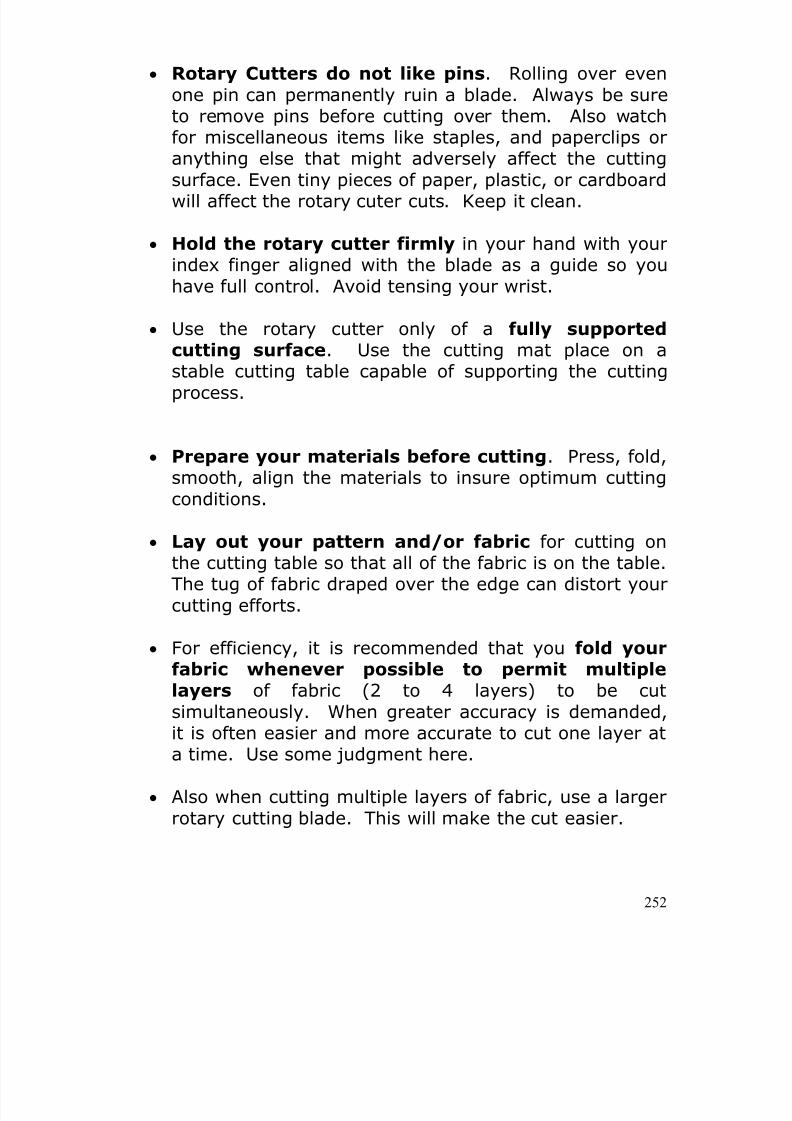
8/13/2019 Manual de Reparacion de Maquinas de Coser
http://slidepdf.com/reader/full/manual-de-reparacion-de-maquinas-de-coser 252/311
252
• Rotary Cutters do not like pins. Rolling over evenone pin can permanently ruin a blade. Always be sureto remove pins before cutting over them. Also watchfor miscellaneous items like staples, and paperclips oranything else that might adversely affect the cuttingsurface. Even tiny pieces of paper, plastic, or cardboardwill affect the rotary cuter cuts. Keep it clean.
• Hold the rotary cutter firmly in your hand with yourindex finger aligned with the blade as a guide so youhave full control. Avoid tensing your wrist.
• Use the rotary cutter only of a fully supportedcutting surface. Use the cutting mat place on astable cutting table capable of supporting the cuttingprocess.
• Prepare your materials before cutting. Press, fold,smooth, align the materials to insure optimum cuttingconditions.
• Lay out your pattern and/or fabric for cutting onthe cutting table so that all of the fabric is on the table.The tug of fabric draped over the edge can distort yourcutting efforts.
• For efficiency, it is recommended that you fold yourfabric whenever possible to permit multiplelayers of fabric (2 to 4 layers) to be cutsimultaneously. When greater accuracy is demanded,it is often easier and more accurate to cut one layer ata time. Use some judgment here.
• Also when cutting multiple layers of fabric, use a largerrotary cutting blade. This will make the cut easier.
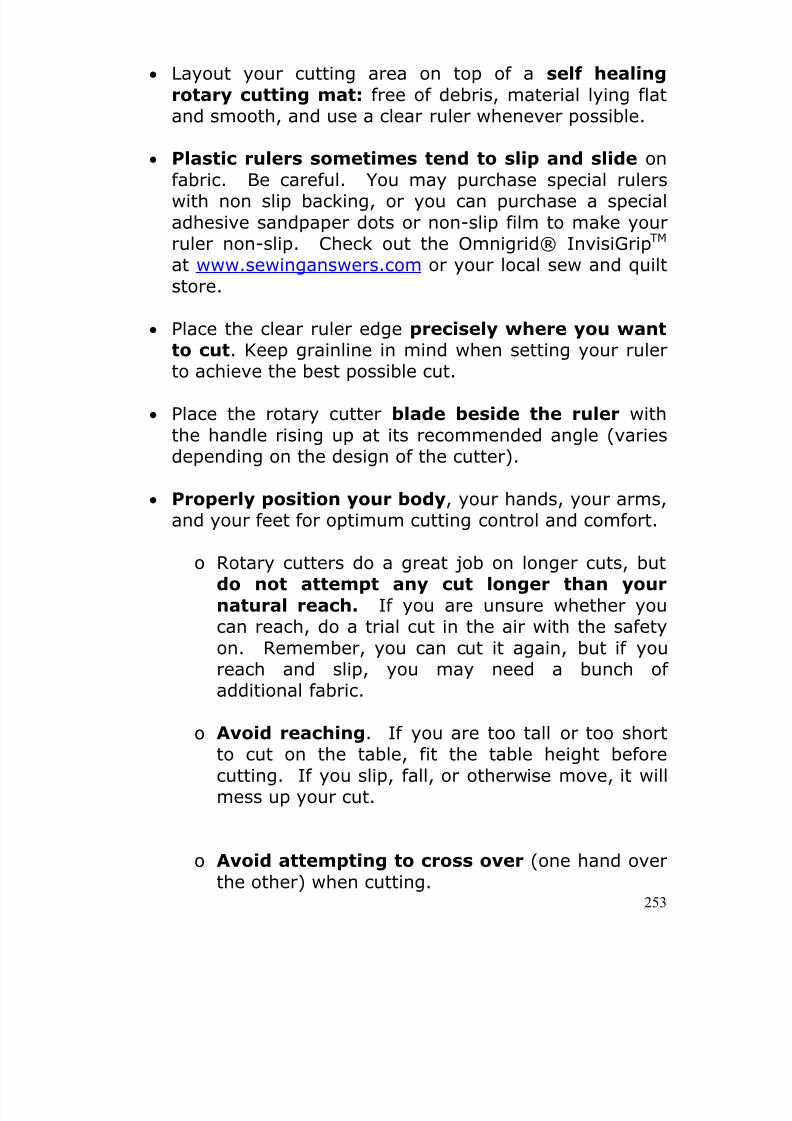
8/13/2019 Manual de Reparacion de Maquinas de Coser
http://slidepdf.com/reader/full/manual-de-reparacion-de-maquinas-de-coser 253/311
253
• Layout your cutting area on top of a self healingrotary cutting mat: free of debris, material lying flatand smooth, and use a clear ruler whenever possible.
• Plastic rulers sometimes tend to slip and slide onfabric. Be careful. You may purchase special rulerswith non slip backing, or you can purchase a specialadhesive sandpaper dots or non-slip film to make yourruler non-slip. Check out the Omnigrid® InvisiGripTM
at www.sewinganswers.com or your local sew and quiltstore.
• Place the clear ruler edge precisely where you wantto cut. Keep grainline in mind when setting your rulerto achieve the best possible cut.
• Place the rotary cutter blade beside the ruler withthe handle rising up at its recommended angle (variesdepending on the design of the cutter).
• Properly position your body, your hands, your arms,and your feet for optimum cutting control and comfort.
o Rotary cutters do a great job on longer cuts, butdo not attempt any cut longer than yournatural reach. If you are unsure whether youcan reach, do a trial cut in the air with the safetyon. Remember, you can cut it again, but if youreach and slip, you may need a bunch ofadditional fabric.
o Avoid reaching. If you are too tall or too shortto cut on the table, fit the table height beforecutting. If you slip, fall, or otherwise move, it willmess up your cut.
o Avoid attempting to cross over (one hand overthe other) when cutting.
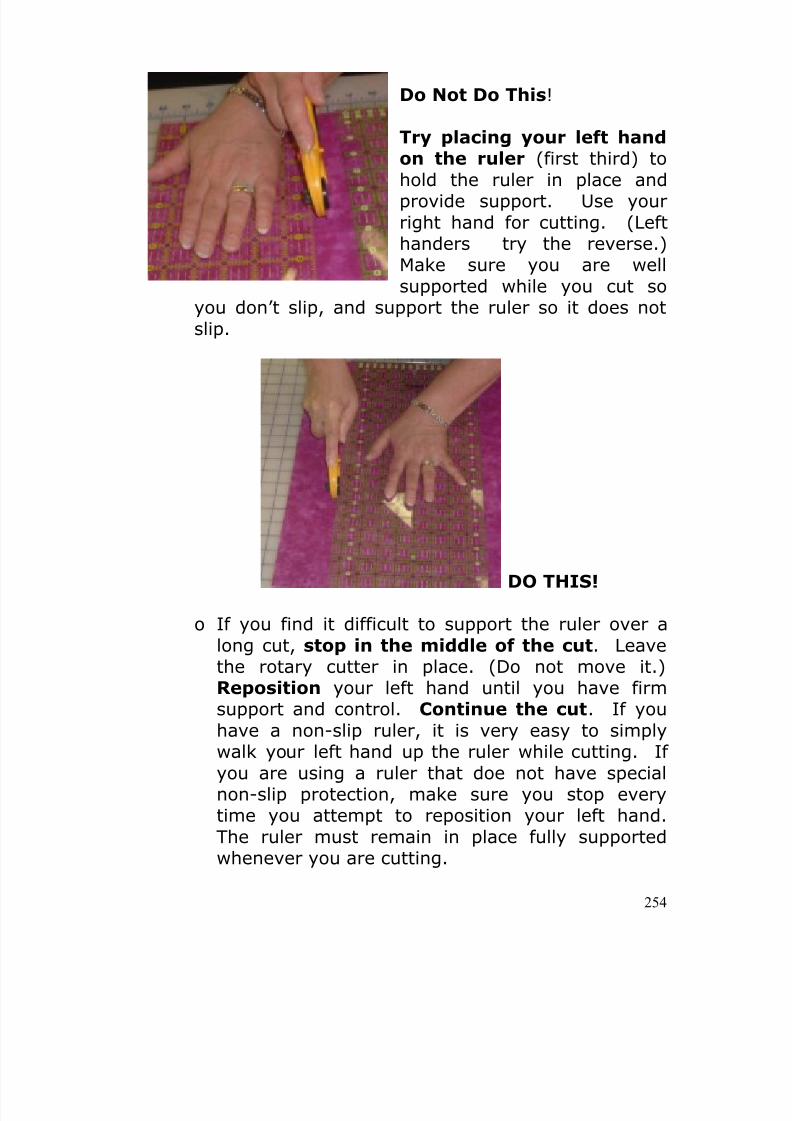
8/13/2019 Manual de Reparacion de Maquinas de Coser
http://slidepdf.com/reader/full/manual-de-reparacion-de-maquinas-de-coser 254/311
254
Do Not Do This!
Try placing your left handon the ruler (first third) tohold the ruler in place andprovide support. Use yourright hand for cutting. (Lefthanders try the reverse.)Make sure you are wellsupported while you cut so
you don’t slip, and support the ruler so it does notslip.
DO THIS!
o If you find it difficult to support the ruler over along cut, stop in the middle of the cut. Leavethe rotary cutter in place. (Do not move it.)Reposition your left hand until you have firmsupport and control. Continue the cut. If youhave a non-slip ruler, it is very easy to simplywalk your left hand up the ruler while cutting. Ifyou are using a ruler that doe not have specialnon-slip protection, make sure you stop everytime you attempt to reposition your left hand.The ruler must remain in place fully supportedwhenever you are cutting.
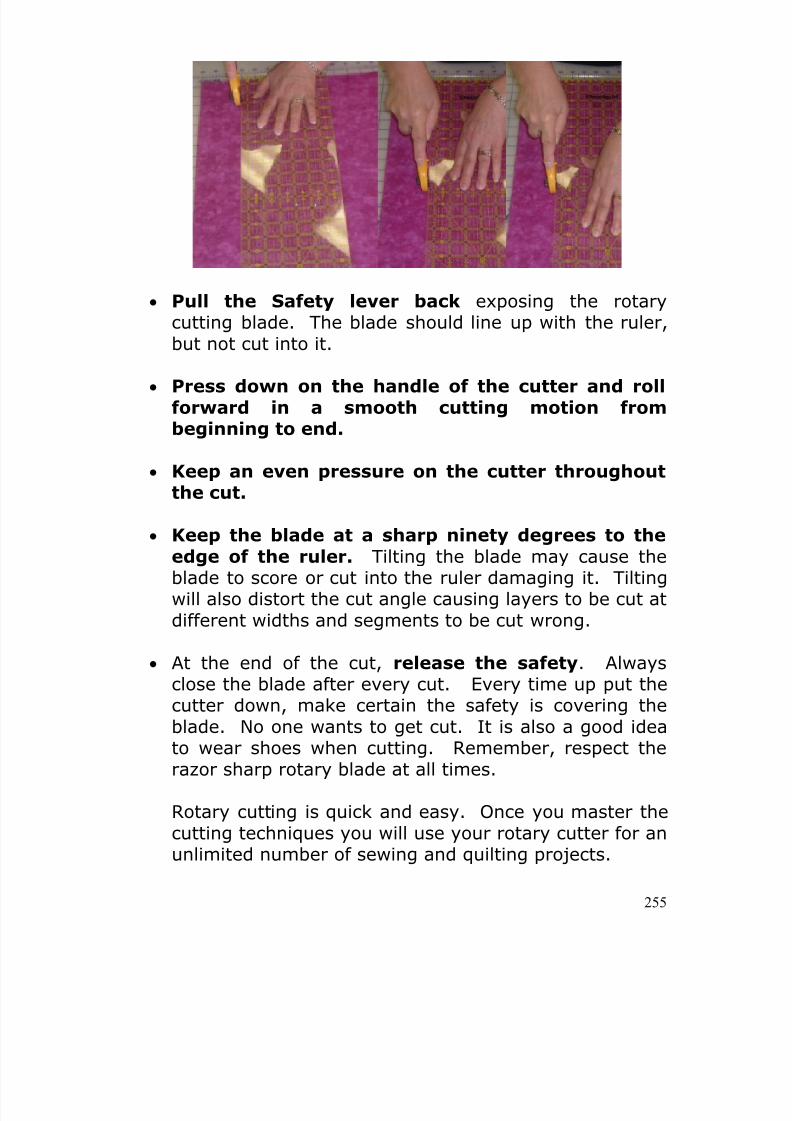
8/13/2019 Manual de Reparacion de Maquinas de Coser
http://slidepdf.com/reader/full/manual-de-reparacion-de-maquinas-de-coser 255/311
255
• Pull the Safety lever back exposing the rotarycutting blade. The blade should line up with the ruler,but not cut into it.
• Press down on the handle of the cutter and rollforward in a smooth cutting motion frombeginning to end.
• Keep an even pressure on the cutter throughoutthe cut.
• Keep the blade at a sharp ninety degrees to theedge of the ruler. Tilting the blade may cause the
blade to score or cut into the ruler damaging it. Tiltingwill also distort the cut angle causing layers to be cut atdifferent widths and segments to be cut wrong.
• At the end of the cut, release the safety. Alwaysclose the blade after every cut. Every time up put thecutter down, make certain the safety is covering theblade. No one wants to get cut. It is also a good ideato wear shoes when cutting. Remember, respect the
razor sharp rotary blade at all times.
Rotary cutting is quick and easy. Once you master thecutting techniques you will use your rotary cutter for anunlimited number of sewing and quilting projects.
8/13/2019 Manual de Reparacion de Maquinas de Coser
http://slidepdf.com/reader/full/manual-de-reparacion-de-maquinas-de-coser 256/311

8/13/2019 Manual de Reparacion de Maquinas de Coser
http://slidepdf.com/reader/full/manual-de-reparacion-de-maquinas-de-coser 257/311
257
Whether it is alive or not, your quilt needs anddeserves some very special care and feeding.
Before the quilt is even born, it is an idea in the mindof the quilter. It takes hours, days, maybe even months tosee that tiny seed grow and develop into a real quilt. Thereare so many steps involved in the birth of a quilt, hundredsof books have been written about the vast number of designoptions, the myriad of techniques, and the whole process ingeneral. In this article, however, we want to focus on thebasic issue of how to care for the fabric before and after thebirth of the quilt. If you think about it, the fabric is the quilt.
While other fabrics are sometimes used in crazy quiltsand other special quilt projects, the vast majority of quiltsare made of 100% cotton fabrics. These fabrics come in somany different colors, designs, and prints that it boggles themind. Of course the fabrics are what make quilting so muchfun.

8/13/2019 Manual de Reparacion de Maquinas de Coser
http://slidepdf.com/reader/full/manual-de-reparacion-de-maquinas-de-coser 258/311
258
Did you know that there are different qualities of cotton
quilting fabric? Yep.
The next time you go to a fabric store or quilt shop, just feel the density or thickness of different fabrics. Hold apiece up to the light. It doesn’t take most people very longbefore they begin to see little differences. These differencescome from three different sources: greigh goods threadcount, finishing processes, and printing/dyeing processes.The greigh goods are the cotton fabrics before they gothrough the final finishing processes. One of the big issueshere is the number of cotton threads per square inch of thefabric. If the fabric has 75 count, it is less durable and lessquality than a fabric with a 300 count. The more threadsyou have per square inch, the better the fabric will be.
The finishing processes include lots of technical stuff:soaking in chemicals, rinsing, combing, etc. The more
8/13/2019 Manual de Reparacion de Maquinas de Coser
http://slidepdf.com/reader/full/manual-de-reparacion-de-maquinas-de-coser 259/311
8/13/2019 Manual de Reparacion de Maquinas de Coser
http://slidepdf.com/reader/full/manual-de-reparacion-de-maquinas-de-coser 260/311
260
Prevent Bleeding.
I know we talked about your quilt being alive, but I amnot suggesting that real blood comes out when you cut apiece of fabric. On the other hand, sometimes when somefabrics get wet, they bleed. This is especially noticeable
with reds. If you wash your finished quilt without firstprewashing and setting the colors, the vivid red and purpledyes may well bleed all over the rest of the quilt ruining it.So, prevent bleeding. No, don’t use a bandaid. They don’twork.
o Use A Bleed Test. Double Check before using afabric to insure that it is color fast (won’t bleed)by using a bleed test. .
Cut a two to three inch square piece of eachfabric you plan to use. .
Mix some washing solution in a large dish orpan, pour in a water soap solution just likeyou would use in your washer to wash thequilt in the future. The temperature shouldalso match your washing situation as close as
possible.
Set the square of fabric into the bowl or panof washing solution. Make sure you dunk itso it really gets wet, and doesn’t just float ontop of the water. .
Wait thirty to forty five minutes or so.
Check the color of the water. If the waterhas a colored tint, the fabric was not colorfast. It did bleed. .

8/13/2019 Manual de Reparacion de Maquinas de Coser
http://slidepdf.com/reader/full/manual-de-reparacion-de-maquinas-de-coser 261/311
261
If the color of the water was clear, it does notnecessarily mean that the fabric is colorfast.
To double check, take the fabric out and layit on a piece of white paper towel.
Wait a few minutes. Lift the fabric piece.
Is there color on the paper towel?
• Yes, then it may still bleed onto otherfabrics in the quilt. .
• No, then it is likely colorfast.
o Prevent catastrophe by pre-treating thefabric with a color stay product. .
A cap full of Synthrapol or similar product(read directions on bottle) per load of washwill usually clean away loose dyes preventingmost bleeding, but may not prevent alltransfers from actual contact with anotherfabric.
In the worst cases, it may be necessary totreat the fabric with a dye fixative likeRetayne to set the dyes. .
Once you have treated the fabrics, doanother bleed test just to be sure. .
o
If the quilt is already assembled (sewn together)without having been prewashed, perform thebleed test before washing the quilt. .
The bleed test should be done on each of thevarious fabrics in the finished quilt especially
8/13/2019 Manual de Reparacion de Maquinas de Coser
http://slidepdf.com/reader/full/manual-de-reparacion-de-maquinas-de-coser 262/311

8/13/2019 Manual de Reparacion de Maquinas de Coser
http://slidepdf.com/reader/full/manual-de-reparacion-de-maquinas-de-coser 263/311
263
These threads or yarns are woven together to form thecotton fabric. Exposure to heat and moisture causes thefibers to relax or go limp like the original state of the fiber.This is the shrinkage process.
Washing the fabric in a washing machine causes the
materials to absorb moisture. The result is shrinkage.Applying heat in the dryer amplifies the problem. Theamount of shrinkage varies from fabric to fabric. If you canimagine, you just finished a queen size quilt. It has takenmaybe a hundred hours of tender loving sewing. You neatlylaid the finished quilt over the back of the couch. A fewdays pass and the grandchildren come to visit. One of themcomes in and jumps up on the couch with his dirty shoesand the dirt goes straight on to the your magnificent quilt.
You quickly try to rescue the quilt, but it is soiled, maybepermanently. What are you going to do?
Obviously, the solution is to wash the quilt, right?
Sure, but only if before you ever started sewing youfully prepared your fabrics. If not, ouch!
When cotton is exposed to moisture and heat, it not
only shrinks it does so in unpredictable and inconsistentways. If you have a whole quilt of different cotton pieces,you may get a bunch of puckers, pulls, and distortions. Thisis due to the irregular ways cotton shrinks.
Some quilters prefer to use unwashed fabrics duringconstruction of the quilt, and then do a careful moisteningand stretching in an attempt to control the shrinkage whileproducing an appearance of aging.
It is usually best, however, to do a pre-wash or pre-shrinking of fabrics so the finished product will have a muchmore polished appearance.
Prewashing accomplishes several things at once.
8/13/2019 Manual de Reparacion de Maquinas de Coser
http://slidepdf.com/reader/full/manual-de-reparacion-de-maquinas-de-coser 264/311
264
1. It removes the excess chemicals, sizings,protective coatings, debris, and loose fibers.These excess chemicals can be big irritants ifyou are sensitive. Their touch, sell, and feel canmake working with the fabric a challenge. Afterwashing, the fabric is far easier to handle.
2. It removes some of the crispness of the newfabric. The fabric takes on a bit softerappearance, but if you prefer that crispness ofnew fabric, it can still be yours. Just use a canof spray starch or sizing and spray a light mistover the fabric. That crispness returns. Nowyou have control over the chemicals. Take alook at the ingredients label to see exactly whatchemicals you may be adding. Choose a spraythat is less irritating by scrutinizing thoseingredients.
3. It allows the fabric to shrink before it is sewn.Once the fabric shrinks, it may shrink morewhen further exposed to moisture and heat, butthe shrinkage is significantly reduced.
Here are some simple steps to prewashing:
1. Use a large washtub, large dish pan, bathtub, orclothes washer.
2. Fill it and prepare a cool washing solution ofpremixed mild detergent, Ivory Soap Flakes (not
powdered detergent) or Orvus soap. Never use anysoap containing bleach or other harsh chemicals thatcould ruin your fabric. Thoroughly stir the soap in thewater so it completely dissolves before adding fabric.Check with your sewing expert at your closest
8/13/2019 Manual de Reparacion de Maquinas de Coser
http://slidepdf.com/reader/full/manual-de-reparacion-de-maquinas-de-coser 265/311
265
sewing center or quilt store for more details.
3. Unfold the fabric to be washed. Gently place thefabric into the washing solution. Push it down intothe water. Soak the fabric thoroughly. .
4. Gently agitate or swish the fabric by hand or bymachine using maximum delicate cycle. Do as muchsoaking as washing. .
5. Thoroughly rinse the fabric to remove all thedetergent or soap.
6. Air dry at room temperature or dry in a clothes dryerat low heat and use the delicate cycle.
7. Remove the fabric from the dryer as soon as thefabric is dry.
8. Once the fabric is thoroughly dry it may be pressedwith an iron, but it is usually optimum to do so justbefore your begin cutting and sewing with the fabric.Pressing should be done with a hot dry iron to pressout the wrinkles from the fabric. Once done, thefabric is ready to cut and sew.
After many hours, you complete your quilt top, youhave it quilted with a long arm quilt sewing machine. It isall done, a true masterpiece, a treasure for the ages.
From this point on the issue is how do you keep thequilt fresh and new forever. Like most things that die,decay is common. Many different forces can affect the quilt
causing it to wear and deteriorate. Here is a list of some ofthe more common things that can cause your vibrant quilt togrow old and die before its time.
1. Daily use.
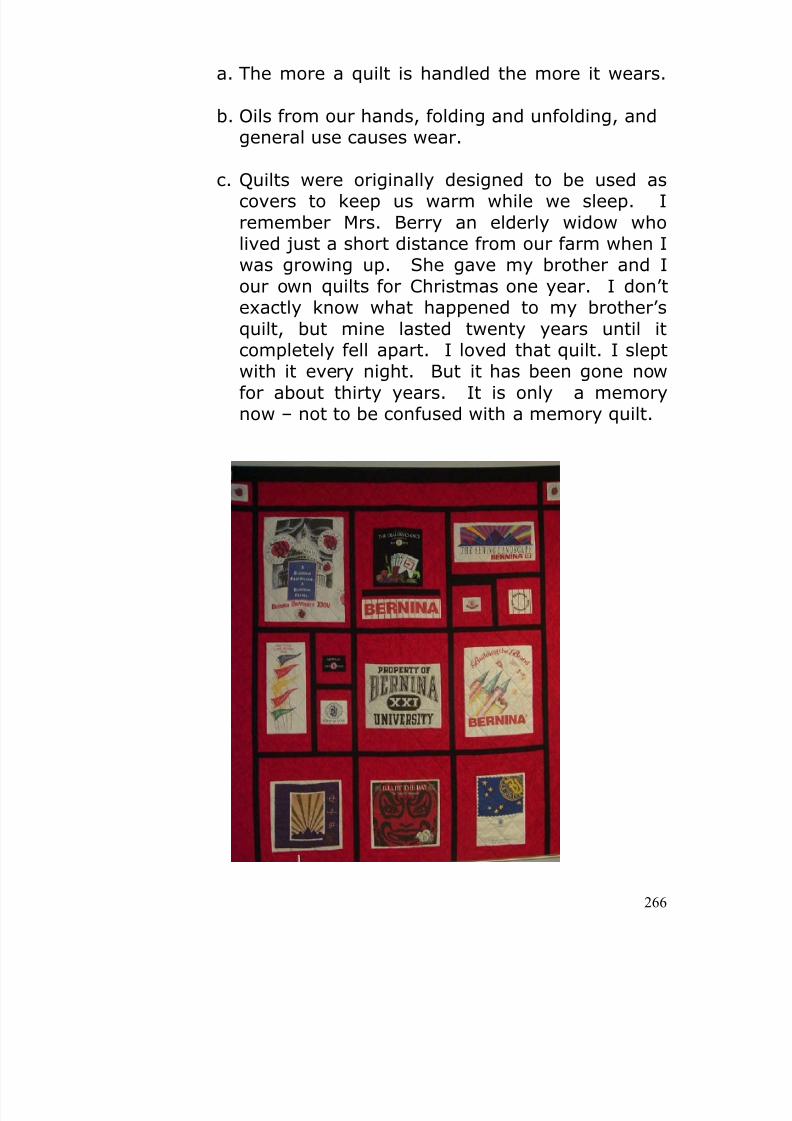
8/13/2019 Manual de Reparacion de Maquinas de Coser
http://slidepdf.com/reader/full/manual-de-reparacion-de-maquinas-de-coser 266/311
266
a. The more a quilt is handled the more it wears.
b. Oils from our hands, folding and unfolding, andgeneral use causes wear.
c. Quilts were originally designed to be used ascovers to keep us warm while we sleep. Iremember Mrs. Berry an elderly widow wholived just a short distance from our farm when Iwas growing up. She gave my brother and Iour own quilts for Christmas one year. I don’texactly know what happened to my brother’squilt, but mine lasted twenty years until itcompletely fell apart. I loved that quilt. I sleptwith it every night. But it has been gone nowfor about thirty years. It is only a memorynow – not to be confused with a memory quilt.
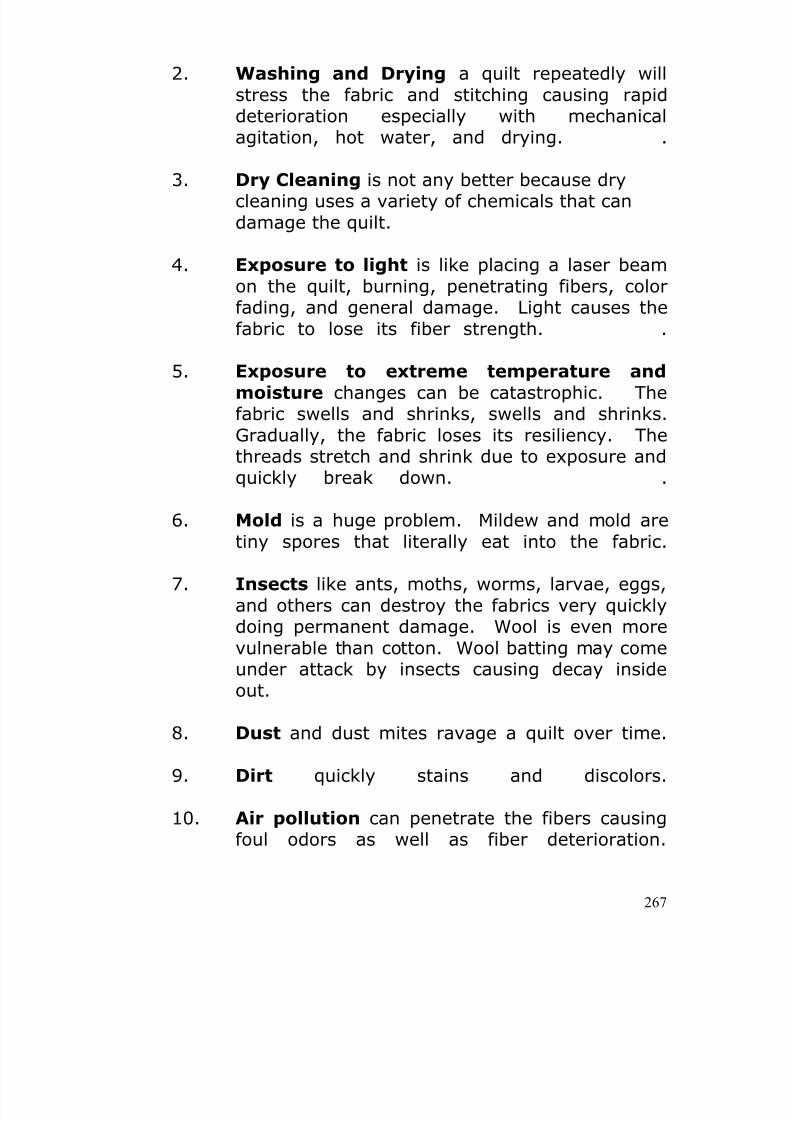
8/13/2019 Manual de Reparacion de Maquinas de Coser
http://slidepdf.com/reader/full/manual-de-reparacion-de-maquinas-de-coser 267/311
8/13/2019 Manual de Reparacion de Maquinas de Coser
http://slidepdf.com/reader/full/manual-de-reparacion-de-maquinas-de-coser 268/311
268
11. Improper storage can also contribute to thewear and tear on the quilt.
There are actually three venues involved in preservinga quilt.
1. The first is the venue of how it is used and treatedduring use.
2. The second venue is the cleaning, repairing, andrestoration of the quilt.
3. The third is how it is stored and treated duringstorage. In both venues, the major concern is toeliminate those things already mentioned that
cause the premature wear and tear and decay ofthe quilt.
If a quilt is properly cared for and the above sources of quiltdamager are avoided, a quilt will last a long long time.
1. During Use:
Quilts are not intended just to be boxed up and placed
in storage.
Quilts are created for a purpose, and that purposeincludes being used either for the practicalities of bedding orthe artistic expression.
When I was a kid, a quilt was an extra special, extrawarm and comfy blanket to be used nightly on my bed.
Today many Quilts are treasured masterpieces that
deserve to be seen, admired, and displayed. The hours andskills necessary to produce a quilt are worthy of recognition.Therefore, a quilt deserves at least a portion of its life to beon display, used, and treasured.
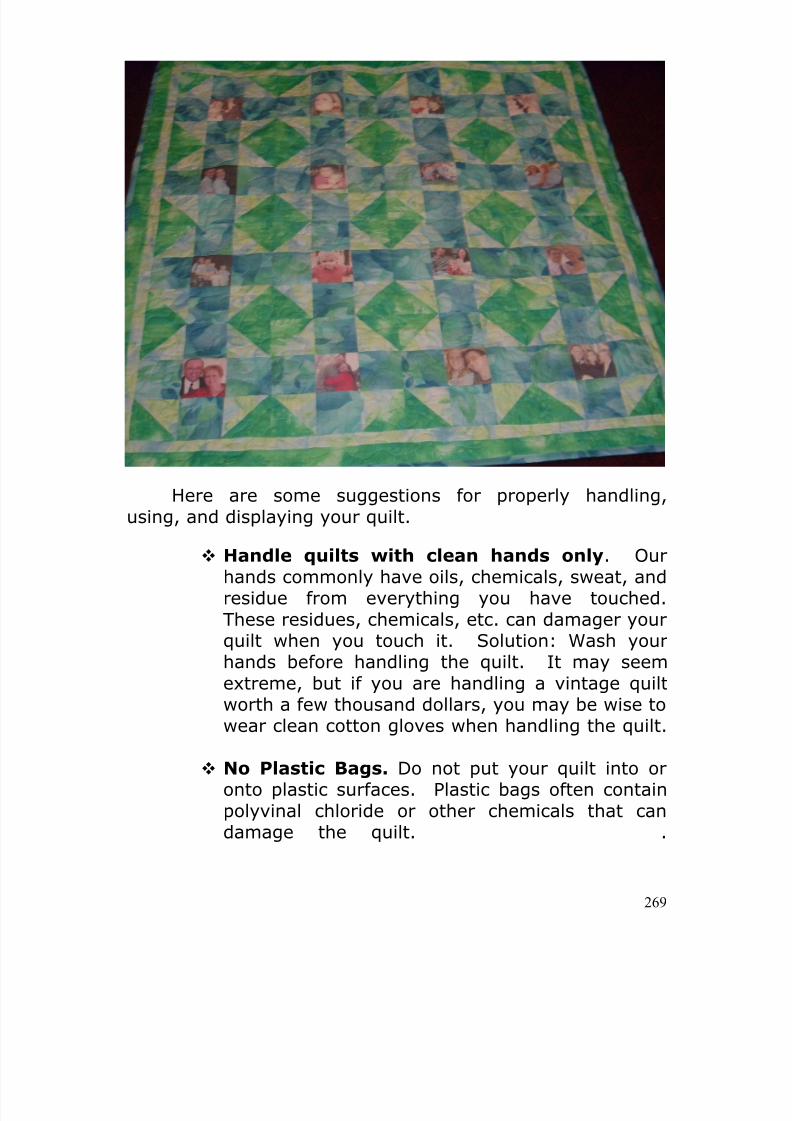
8/13/2019 Manual de Reparacion de Maquinas de Coser
http://slidepdf.com/reader/full/manual-de-reparacion-de-maquinas-de-coser 269/311
8/13/2019 Manual de Reparacion de Maquinas de Coser
http://slidepdf.com/reader/full/manual-de-reparacion-de-maquinas-de-coser 270/311
270
Horizontal Display. The best way to display aquilt is over a bed horizontally. Avoid permittingthe quilt edges to drape over the edge of the bed,and avoid stressing the quilt by hangingunsupported. Keep the quilt from dragging thefloor. Also avoid contact with metal or wood bedframes.
Avoid Light. Protect the quilt from exposure toultraviolet and sun light. Here in Texas, grassunder a shade tree will grow all summer long fullof its flexible natural green color. Grass that isnot shaded by a tree, will turn dark brown and itwill loose its flexibility. It feels like dried strawbaked by the hot Texas sun. The same thinghappens to quilts exposed to ultraviolet interiorlighting or sun light. Damage from light ispermanent.
Avoid folding and creasing. These foldsprovide opportunities for dust, insects, and otherdamaging sources to collect. Avoid stackingquilts for the same reason. .
Hanging quilts is quite popular, but there are someproblems with hanging them.
The walls themselves may cause problems.Outside walls are often damp and may haveextremes of temperature and moisture. This canpromote mildew and mold. .
Hanging quilts may put undue stress on thefabric stretching it under its own weight. Onlyhand quilts that are in good condition. Takeprecautions to even distribute the weight acrossthe entire quilt. Nails, pins, staples, and other

8/13/2019 Manual de Reparacion de Maquinas de Coser
http://slidepdf.com/reader/full/manual-de-reparacion-de-maquinas-de-coser 271/311
271
similar fasteners are to be completely avoided.Putting holes in a quilt do permanent irreparabledamage to the quilt. .
Avoid hanging quilts over radiator, electricaloutlets, fireplaces, air vents, kitchen appliances,humidifiers, and similar high risk areas.
The way quilts are attached to the rod or hooksfor hanging can cause problems. Therecommended way to hang a quilt is to sew a rodpocket along the top of the quilt through whichthe rod passes. This provides consistent supportacross the full length of the quilt. A rod pocket iseasy to make. Simply cut a piece of fabric wideenough to wrap around the rod or holder plus ½”for ease, and an inch an a half for seamallowances. Cut the strip the same length as thequilt plus two inches. Fold over one inch on eachend and stitch closed. Fold the strip in half andsew it to the backing of the quilt. Open thepocket and slide the rod or holder through it.
Enameled drapery rods, special decorative rods,and wooden poles may be used to hand quilts,but avoid direct contact with the quilt itself.
Tab tops are also popular, but do not provide asmuch support. Note: avoid hanging worn orfragile quilts. Make sure the quilt can handle thedownward stresses of hanging. .
Avoid contact with wooden poles or quilt holders.Avoid metallic grippers in contact with the quilt.If you are using grippers cover them first with afabric cover so only the fabric makes contact withthe quilt itself. This protects the quilt from the
8/13/2019 Manual de Reparacion de Maquinas de Coser
http://slidepdf.com/reader/full/manual-de-reparacion-de-maquinas-de-coser 272/311
272
hangers.
Suggestion: Display quilts for a limited time only.After several months, place one quilt in storageand place another quilt on display. In this way,the quilts will remain in good condition.
Quilts may also be displayed on special quiltdisplay racks. The larger the quilt is, the moredifficult it is to display the quilt. Avoid folding thequilt if possible. Simply drape the quilt over therack. If you need to fold the fabric, fold the fabrictogether with a special acid free tissue inside thefold to protect the quilt.
2. Cleaning & Restoring A Quilt
A quilt that is used whether as a comforter as part ofbedding or displayed prominently, is a quilt that gets worn,dirty, and needs care.
Periodic inspection during use is a good idea, buteventually a thorough inspection to care for the quilt isnecessary. Look for the signs of damage.
Inspect the threads. Look for broken and loose threadsalong the seams.
Look for flaws, wrinkles and puckers.
Inspect the fabric for signs of shrinkage or bleedingsuch as distorted fabric shapes, irregular grainlines,and other distortions.
Examine the surface of the quilt for stains and dirtspots. These may be spot cleaned or may require moregeneral cleaning applications.
8/13/2019 Manual de Reparacion de Maquinas de Coser
http://slidepdf.com/reader/full/manual-de-reparacion-de-maquinas-de-coser 273/311
273
Mildew and mold are unsightly and highly damaging,but it is not possible to fully clean and eradicate them.Damage is likely permanent.
Look for holes, rips, and tears in the fabric. Heavy useand carelessness can make a mess out of the bestquilt. Many times small holes, rips, and tears can be atleast partially repaired. It is essential that these berepaired before washing or more extreme cleaningefforts are taken. Otherwise, these flaws may getworse.
Check for any prior repair efforts. Is the previous effortstill in tact or does it require additional repair beforeproceeding?
Study the quilt for discoloration, fading, bleeding, andother signs of exposure to ultraviolet light or otherabuse.
Scrutinize any creases in the fabric, any folds that maybecome set in over time.
The result of your quilt examination should lead to anobvious conclusion: What can be done to restore the quilt?Here are a few simple options:
Dust It. Remove lint, loose debris, dust, and flakingdirt from the surface of the quilt by using a dustingbrush, a Velcro styled lint remover, or lint free cloth.Be very careful to avoid damaging the surface of thequilt while gently brushing away loose dirt. Never useany type of dusting assist such as Endust or Pledge.
Vacuum It. You vacuum can be a great cleaning tool toremove dirt, dust, and debris. However, manyvacuums have more suction than your quilt may beable to tolerate. To compensate, some vacuumcleaners have special adjustments to reduce the
8/13/2019 Manual de Reparacion de Maquinas de Coser
http://slidepdf.com/reader/full/manual-de-reparacion-de-maquinas-de-coser 274/311
274
amount of actual suction reaching the surface of thequilt. Many vacuum cleaners come with special dustingattachments that aid in the removal of dirt. Do not useany type of carpet sanitizer or freshener on a quilt. Ifthe quilt is especially fragile, lay the quilt on a cleanfloor and stretch it out. Cover the quilt with plastic ornylon screen netting (like that available for screendoors). Vacuum through the netting screen to reducedamages to the fabric.
Wash It. Never Dry Clean! Beware before wetwashing! Two of the biggest enemies of a quilt areheat and moisture. Even if the fabric was preshrunk, itmay still respond poorly to washing. Consider thefollowing before deciding to wash your quilt:
o Examine the fabric content of the quilt. Is itdelicate or vulnerable to heat or moisture?
o Is it likely that the fabric would bleed whenexposed to washing moisture?
o Is the fabric in delicate condition?
o Does the quilt have beads, feathers, drawings,yarns, or other embellishment?
o Does the quilt have surface damage? Beforewatching repair all rips, holes, worn spots, tears,or frayed seams?
o
Is this quilt super special (high value antique)?
o Has the fabric been prewashed and preshrunk? Ifthe cotton fabric has a shiny glaze, it has likelynot been prewashed.

8/13/2019 Manual de Reparacion de Maquinas de Coser
http://slidepdf.com/reader/full/manual-de-reparacion-de-maquinas-de-coser 275/311
275
As you examine these features, if none of theseelements seems likely, washing may be appropriate. Ifyou inspection reveals any of these problems to beprominent, avoid wet washing entirely.
How to wash a quilt: Here are some simple steps forwashing a quilt:
1. Disclaimer: Washing a quilt will almost alwaysdamage a quilt or at least increase its naturalaging process.
2. Spot cleaning is always preferable to wet soakingwashing. Using a damp sponge or clean cottoncloth, rub dirty spots to clean them.
3. If you must wash a quilt do not place a delicatequilt into an automatic washing machine or dryer.Use a large washtub or bathtub. .
4. Fill the tub with cool washing solution. If youhave water with high chlorine or mineral content,either filter the water or use processed (bottled)water. Remember minerals and chemicals in thewater itself can damage the quilt. Mix milddetergent, Ivory Soap Flakes (not powdereddetergent) or Orvus soap. Never use any soapcontaining bleach, “brighteners”, or other harshchemicals that could ruin your quilt. Thoroughlystir the soap in the water so it completelydissolves before adding the quilt. .
5. Unfold the quilt to be washed. Gently place thefabric into the washing solution. Push it down intothe water. Soak the fabric thoroughly.
6. Gently agitate or swish the fabric by hand. Rubespecially dirty spots. Do as much soaking aswashing. The quilt should soak at least fifteen to
8/13/2019 Manual de Reparacion de Maquinas de Coser
http://slidepdf.com/reader/full/manual-de-reparacion-de-maquinas-de-coser 276/311
276
thirty minutes. During this soaking, it isnecessary to force the washing solution throughthe fibers of the quilt. This may be done by hand,walking (wading) back and forth on the soakingquilt, or by gently lifting and agitating the fabricusing an extra large plastic spoon. .
7. When washing is complete, drain the tub and addrinse water over the quilt still in the tub. Forbetter rinsing (but more work) remove the quiltfrom the tub. Use a bedding sheet. Stretch thesheet under the quilt and roll the quilt onto thesheet. Avoid lifting the wet quilt itself, because thefabric may tear under pressure. Instead, lift thequilt out of the tub using the sheet. .
8. Empty the cleaning solution from the tub and fillthe tub with fresh clean rinse water. Thoroughlyrinse the fabric to remove all the detergent orsoap.
9. If the rinse water turns dark, remove the quiltagain, and refresh the rinse water. Place the quiltback into the rinse (repeating the rinse processseveral times) until the rinse water not longerturns dark greigh or black. Be sure all the soaphas been rinsed out of the quilt, or the soap willunduly attract new dirt. .
10. Remove the quilt after thoroughly rinsing it.Drain the tub a final time and place the quilt in thetub to drain. Gently squeeze or push out as muchwater as you can by hand, but do not twist orwring the fabric. The fibers of the quilt are attheir most vulnerable condition when wet, so treatthem gently. Avoid using a mechanical ringer orother device that might unduly stress the quilt.
8/13/2019 Manual de Reparacion de Maquinas de Coser
http://slidepdf.com/reader/full/manual-de-reparacion-de-maquinas-de-coser 277/311
277
11. Remove the wet quilt from the tub by using abedding sheet (stretch the sheet under the quiltand roll the quilt onto the sheet) to carry the quiltto where it can be thoroughly dried.
12. Air dry at room temperature.
Ideally lay the quilt over a plastic wirescreen mesh frame to allow the air fullcirculation. A screen frame is fairly easy tomake with supplies from your localhardware store. .
An alternative is to lay the quilt on theground. Place a sheet under the quilt toprotect it against dirt and grass stains.Place a second sheet over the top of thequilt to protect it from the sun, insects, andflying debris. .
Do not place a delicate quilt into a hotautomatic clothes dryer.
It may be necessary to turn the quilt over toassist drying.
Make sure, however, the quilt is thoroughlydry before moving to storage or display. Itmay take several hours or even days to drythoroughly. Be patient. You are preservinga treasure.
13.
Once the fabric is thoroughly dry it mayplaced in storage or displayed. If the quiltappears unduly wrinkled it may be pressed withan iron, but avoid using steam.
3. Storage
8/13/2019 Manual de Reparacion de Maquinas de Coser
http://slidepdf.com/reader/full/manual-de-reparacion-de-maquinas-de-coser 278/311
278
When a quilt is not being used, it needs to be properlystored. Improper storage will ruin the best of quilts.
What not to do:
Store quilts in plastic bags or boxes. These may
promote mildew and mold.
Store quilts in the basement, garage, or attic.
Store quilts in direct sunlight.
Store quilts where insects and rodents can reachthem.
Store quilts in the linen closet.
What to do:
Document your quilt before you forget. Manytimes we finish a project after hours, days, evenmonths of dedicated labor and forget to label it.Years later, we can’t quite remember when and
why we made the quilt. So, first things first.Create a quilt label and hand sew or otherwiseattach it to the back of the quilt. Include whenthe quilt was made; who made it; for whom it wasmade; the occasion or purpose. .
Repair, refurbish, and clean the quilt beforeplacing it in storage. When the quilt is stored inits best possible condition, it will come out of
storage in its best possible condition. .
Store the quilt in a dry, well ventilated, climate(temperature and moisture) controlled, low light,dust free environment. Does that sound like yourspare bedroom? Right on! This is one of the best
8/13/2019 Manual de Reparacion de Maquinas de Coser
http://slidepdf.com/reader/full/manual-de-reparacion-de-maquinas-de-coser 279/311
279
places to store a quilt. Lay the quilt on the bedover the mattress pad and under sheet so that thequilt is fully supported and does not flop to overthe edges or drag the floor. If you have severalquilts to be stored, it is permissible to layer themone on top of another. A sheet spread over the topof the quilts will prevent dust collection.
Quilts may also be rolled up for storage. To do so,spread the quilt out and spread a protective sheet(acid-free paper or tissue, clean sheeting likemuslin or Tyvek) over the top that is several feetlonger than the quilt. Roll the quilt up keeping theprotective sheeting material covering all contactpoints. The goal is to insure that the entire quilt isblanketed with the protective sheeting. Interlacethe protective sheeting thoroughly to maximizethe protection. A tube may be useful as a corearound which the quilt can be rolled, but whetherusing a cardboard tube or a plastic pipe cover thetube with the protective sheeting before rolling thequilt. Once rolled the protective sheeting shouldwrap the quilt several more times for greatestprotection. The protective sheeting should protectagainst most of the elements that causedeterioration. The quilt roll should be turnedperiodically to prevent the quilt from flattening outon the bottom. .
Once rolled the quilt may be placed in a specialstorage box or tube for long term storage. Askyour local quilt shop about local sources forstorage containers. .
Folding is usually discouraged especially for morefragile quilts, but if you must fold. Use the samebasic principle as above for rolls. Layer the quiltwith protective sheeting. Also use an accordion

8/13/2019 Manual de Reparacion de Maquinas de Coser
http://slidepdf.com/reader/full/manual-de-reparacion-de-maquinas-de-coser 280/311
280
style fold. Be aware that the folds may set increating a permanent crease in the quilt.
8/13/2019 Manual de Reparacion de Maquinas de Coser
http://slidepdf.com/reader/full/manual-de-reparacion-de-maquinas-de-coser 281/311
281
CHAPTER FIFTEENWhat are sewing safety tips?
What are safety tips for the sewing machine?
Sewing and quilting are among the absolute safesthobbies to engage in. Normally you should not face anygigantic explosions. You should not expect to fall perilouslythrough the skies or off a cliff. You should not anticipate
ferocious animals charging at you from the bush. It isunlikely that you will suffer high voltage shock. Sewing isindeed, safe. However, certain precautions arerecommended to insure the full enjoyment of your hobbyfree of calamity.
Here are some common sources for problems:
Sharp Objects
Chemicals And Tactile Sensitivity – Allergens Electrical Shock Dirt and Lint Burn Potential Clutter Posture Exposure to Heat
1. SHARP OBJECTS
Sharp objects often create dangers. The manner inwhich we use and handle sharp objects determines thedegree of risk and potential severity of injuries. Engaging inthe hobbies of sewing and quilting involves several sharpobjects that require cautious use. These sharp objects
8/13/2019 Manual de Reparacion de Maquinas de Coser
http://slidepdf.com/reader/full/manual-de-reparacion-de-maquinas-de-coser 282/311
282
include: needles, pins, shears, scissors, rotary cutters,embroidery scissors, seam rippers, and similar tools.
Needles:
o The most dangerous needle is the one on the sewingmachine that speeds up and down at six hundredand fifty penetrations per minute. The sewingmachine needle is capable of driving straight througha finger nail, skin, and bone. Many a seamstress hasfelt the agony and seen the blood splatter fromplacing their finger too close to the needle.
To avoid this danger, learn to properly guidethe fabric through the sewing machine.
Position your left hand to the left of the needletwo to three inches away from the needle. Useyour left hand to smooth the fabric as itadvanced through the feed dogs. .
Take hold of the fabric edge with your righthand and guide the fabric toward the needlefrom about two inches to five inches ahead ofthe needle. .
Do not place either hand behind the needle.Allow the feed dogs to advance the fabric. Donot try to force the fabric through the machine.
Avoid breaking needles because the canpotentially fly into the air and becomedangerous projectiles. .
Use good sewing technique, and very fewneedles will actually break. .
Change needles frequently.
8/13/2019 Manual de Reparacion de Maquinas de Coser
http://slidepdf.com/reader/full/manual-de-reparacion-de-maquinas-de-coser 283/311
283
Avoid forcing the fabric through the machine..
Loose Pins And Needles: Loose needles, hand sewingneedles, and pins are also potential sources of danger..
Use a pin cushion or magnetic pin cushion tohold loose pins and needles.
Avoid allowing loose pins and needles to lie onthe table or fall on the floor. Pick them upimmediately. A needle driven through the footis a pain.
When using hand sewing needles be careful tohold the needle properly and use a thimble toprotect your receiver finger.
Caution is essential.
Scissors are designed to cut. Whether the scissors arelarge shears, basic sewing scissors, small embroideryscissors, or thread clippers; scissors of all types areintended to be sharp and to cut. Therefore, caution isessential when using all of these tools. .
o Do not run with scissors in your hand. Do not walkwith open scissors in your hand. .
o Do not hand someone scissors with the bladeextended toward the receiver. Instead, turn thescissors around and hold the blades yourself as youhand the handle portion to someone else. .
o Learn how to properly hold your scissors. Hold yoursewing scissors you’re your index finger aligned with
8/13/2019 Manual de Reparacion de Maquinas de Coser
http://slidepdf.com/reader/full/manual-de-reparacion-de-maquinas-de-coser 284/311
284
the blade to properly guide and control the cut.
o Learn how to use them correctly. .
o Always close scissors when not in use and storethem in this manner. .
o Keep scissors sharp.
o Practice good use habits and you will avoid manydangers. .
Rotary cutters have very sharp circular blades. They arefully capable of slicing off skin or slicing deep painful cuts.
o To avoid the dangers always use the safety guardon the rotary cutter. Every time you put it down,slide the safety on. Never leave the blade exposed.
o To prevent cutting yourself, use the rotary cutteronly as recommended by the manufacturer. Whencutting with a rotary cutter, use an acrylic ruler toguide the cutter, and use a rotary cutting mat to rollthe blade against when cutting. .
o Avoid reaching while cutting. Do not cross over yourhand to cut. Reposition yourself as needed tomaintain control and cut safely. .
o Always store rotary cutters with the safety on.Proper cutting habits will help prevent mishaps.
o
Replace dull or chipped blades.
Seam Rippers can be tricky to use and include both asharp blade and a sharp point. .
8/13/2019 Manual de Reparacion de Maquinas de Coser
http://slidepdf.com/reader/full/manual-de-reparacion-de-maquinas-de-coser 285/311
285
o Learn how to properly use the seam ripper andpractice safe ripping. When you need to rip out aseam, hold the seam ripper firmly in your right handwhile holding the seam open with your left. Slide theblade of the seam ripper under the threads and whilepressing forward away from you, cut the threadsagainst the sharp blade of the ripper. .
o Do not use the seam ripper pointed toward yourself.Always rip away from your body. .
o A slight slip could really hurt. Seam rippers comewith covers or cases to prevent problems. Alwaysstore seam rippers in their cases. .
Other sharp sewing equipment such as an awl, abuttonhole cutter, and even tweezers can be dangerous ifused improperly. .
o Whenever using sharp tools, point the tool and cutwith the tool away from your body. .
o Keep all cutting tools off the floor. Keep all cuttingtools in obvious places, and do not bury them underpatterns, fabric, or other materials. Always expectsharp tool to slip, roll, fall, or otherwise accidentallymove to dangerous places. Anticipate. Prevent. Stayalert.
o Always cut slowly. Stop if you sense your grip isslipping.
o
Always wear shoes when sewing. I know, it justfeels better to go barefoot, but if you drop a sharptool your shoe can be very helpful protecting yourfeet. If you do drop a sharp tool, quickly move outof the way. .
8/13/2019 Manual de Reparacion de Maquinas de Coser
http://slidepdf.com/reader/full/manual-de-reparacion-de-maquinas-de-coser 286/311
286
1. CHEMICALS
Sewing and quilting uses a variety of aerosol sprays,liquids, and chemical content. Exposure to chemicals in theair and on surfaces can cause serious harm if breathed,ingested, or absorbed through the skin or eyes. When weuse these chemicals, we seldom know what chemicals arecontained in the sprays and liquids we use. We are usuallyunaware of what chemicals pose what risks. Manufacturerswork very hard to avoid putting toxic chemicals into theirproducts, but many times the chemicals and substancescause allergic reactions. Our individual sensitivities impactmay affect one person and not another. What we can becertain about is that, there is risk here.
Aerosol Sprays put chemicals into the air. We often usespray adhesives. We use steam from our irons, spray air toclean our bobbin areas, spray stabilizers, spray cleaningsolutions, spray dusting aerosols, spray starches, and avariety of other sprays. Generally, these to not pose hugerisk factors, but they can. If we are especially sensitive tocertain substances, they can cause severe repercussions.
Avoid breathing aerosol sprays. Avoid breathinggasses.
Always work in good ventilation – rooms withgood air circulation. When spraying, do it outsideif possible.
Always spray away from you.
When using a product for the first time,thoroughly read the ingredients and anycautionary directions. .
If the spray is particularly toxic, odorous, orobjectionable; consider wearing a surgical mask,dust mask, or respirator to protect yourself.
8/13/2019 Manual de Reparacion de Maquinas de Coser
http://slidepdf.com/reader/full/manual-de-reparacion-de-maquinas-de-coser 287/311
287
These may be purchased at local hardware andmedical supply stores. .
Liquids put chemicals on surfaces. Liquid adhesiveslike Superglue can create problems. We use oil to lubricatethe hook. We use cleaning solutions to clean the outersurfaces of our tables, sewing machines, and other surfaces.We use creams and pastes. Normally, we don’t notice muchrisk, but the potential is there for exposure to chemicals thatmay irritate and cause health risks. .
When using a product new to you, thoroughly readits ingredients, directions, and precautions.
When appropriate use disposable paper towels, orclean fabric rags to spread liquids.
Follow the directions thoroughly.
Avoid skin contact with chemicals. Whenever it isnecessary to actually touch the liquid, paste, or otherchemical; use protective gloves. .
Content of the materials we use is laced with allkinds of finishing chemicals. Fabrics, elastics, trims, andother materials contain many unknown chemicals. Oftenthese chemicals are absorbed into the skin or aerated bycutting and manipulating the materials. .
Be aware. Be alert to the risks.
Be conscious of your own body responses. If you feelwoozy, nauseated, get a head ache, or your eyesbecome irritated while you are handling materials,presume that your are sensitive to something in thematerials.
8/13/2019 Manual de Reparacion de Maquinas de Coser
http://slidepdf.com/reader/full/manual-de-reparacion-de-maquinas-de-coser 288/311
288
If the material causes a reaction to your skin, wearprotective gloves when handling the material.
I am especially sensitive to wool. No, it is not toxic ordangerous to most people, but every time I work withwool I break out. I choose to avoid working with woolas much as possible. There are so many other fabrics, Istill have lots to choose from. If you know you aresensitive to a particular material, just avoid it. Or, wearprotective gloves and clothing if you must work with it.Gloves are far more comfortable than itching,scratching, and burning skin.
Prewashing will usually remove most of the surfacechemicals from fabric. Prewashing is a good ideabefore using fabrics both because it removesundesirable chemicals and because it preshrinks thefabric making it more stable after sewing the project.
2. ELECTRIC SHOCK
The sewing machine is an electric appliance. InEurope, the sewing machine connects to 240 Volts AC. Inthe United States, the sewing machine connects to 110Volts AC. Touch the wrong spot and “Ouch!” Electricshock can really hurt. It has been known in rare cases toeven cause heart attacks. A bad wire, moisturegrounding, and other circumstances may cause electricalspark or shock. This is a very real risk, but one youshould be able to avoid.
Inspect your electrical outlet and power cord. Doyou see any frayed wires? Do you see any burnmarks? Is the outlet overloaded with multipleplugs. If so, have the wires repaired before usingyour sewing machine. .
8/13/2019 Manual de Reparacion de Maquinas de Coser
http://slidepdf.com/reader/full/manual-de-reparacion-de-maquinas-de-coser 289/311
289
Do not remove the casings or covers of yoursewing machine. Avoid this especially if yourmachine is plugged into the power outlet.
Avoid eating or drinking near your sewingmachine. Moisture is a huge enemy of electricity.A spill can be disastrous for your sewing machine.
Keep the machine away from all forms of moistureincluding wet floors. Do not mop the floor and sitdown to sew. Wait for the floor to thoroughly dry.
Keep your sewing machine in a dry fully climatecontrolled environment free of temperature andmoisture swings. Store your machine at roomtemperature.
3. DIRT AND LINT
Dirt and Lint are big enemies of your sewing machine, butthey are also possible problems for your fabric andyourself. Dirt and lint can interfere with proper sewingmachine operations increasing the risks of breakingneedles which may fly into the air causing harm. Use ofcertain threads and other materials increases the volumeof dust and lint often causing them to become airborneexposing the user to airborne allergens and toxins. Theyalso have the potential of aerating the dust and lint forpossible breathing.
Clean your sewing machine bobbin area at leastevery few hours of use. Do not permit lint toaccumulate. Many times when I take a sewingmachine in for service, I take off the needle plateexposing these neat felt pads on the feed dogs. Ihave even had customers get upset with me whenI remove these felt pads. Fact is there is not feltpad, it is pressed and piled lint. .
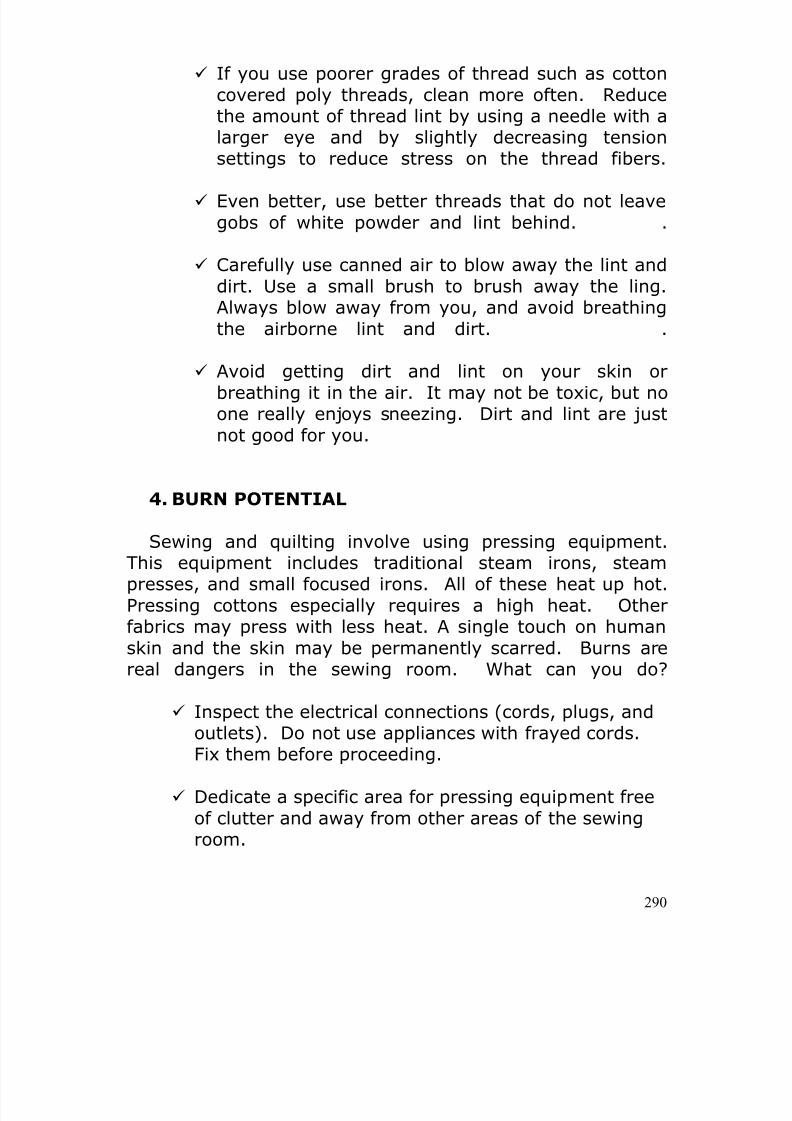
8/13/2019 Manual de Reparacion de Maquinas de Coser
http://slidepdf.com/reader/full/manual-de-reparacion-de-maquinas-de-coser 290/311
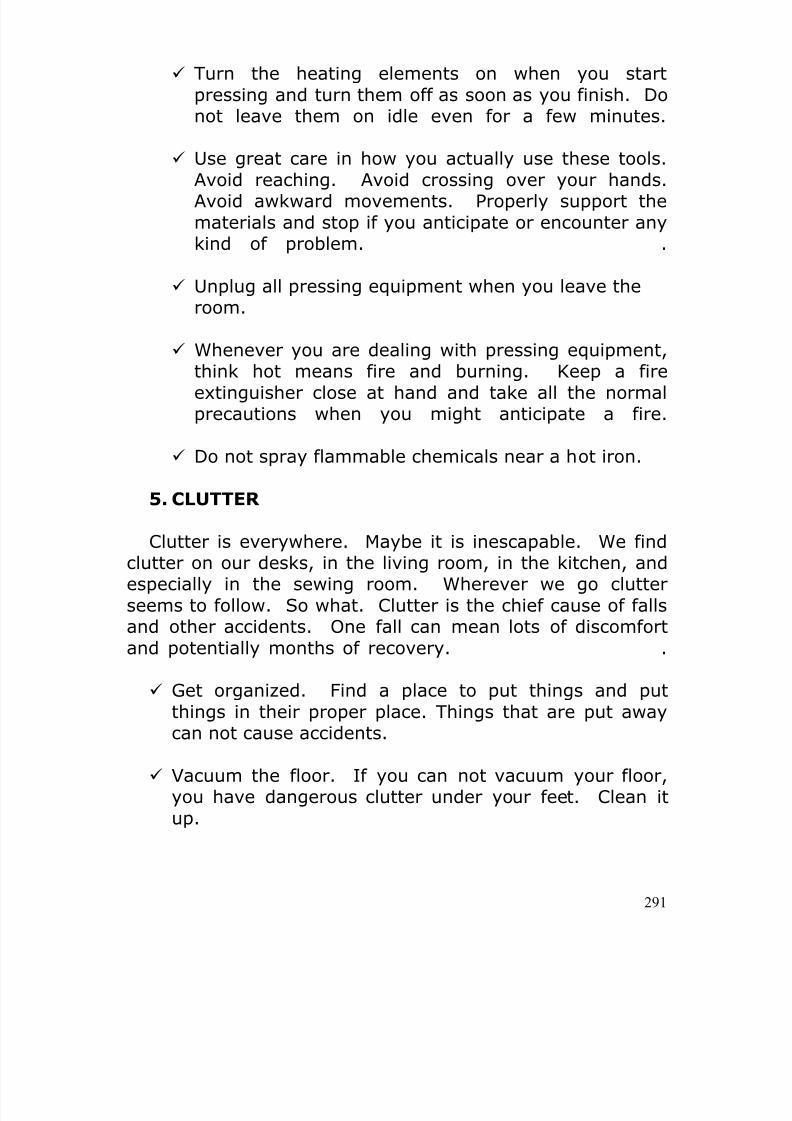
8/13/2019 Manual de Reparacion de Maquinas de Coser
http://slidepdf.com/reader/full/manual-de-reparacion-de-maquinas-de-coser 291/311
291
Turn the heating elements on when you startpressing and turn them off as soon as you finish. Donot leave them on idle even for a few minutes.
Use great care in how you actually use these tools.Avoid reaching. Avoid crossing over your hands.Avoid awkward movements. Properly support thematerials and stop if you anticipate or encounter anykind of problem. .
Unplug all pressing equipment when you leave theroom.
Whenever you are dealing with pressing equipment,think hot means fire and burning. Keep a fireextinguisher close at hand and take all the normalprecautions when you might anticipate a fire.
Do not spray flammable chemicals near a hot iron.
5. CLUTTER
Clutter is everywhere. Maybe it is inescapable. We findclutter on our desks, in the living room, in the kitchen, andespecially in the sewing room. Wherever we go clutterseems to follow. So what. Clutter is the chief cause of fallsand other accidents. One fall can mean lots of discomfortand potentially months of recovery. .
Get organized. Find a place to put things and putthings in their proper place. Things that are put awaycan not cause accidents.
Vacuum the floor. If you can not vacuum your floor,you have dangerous clutter under your feet. Clean itup.
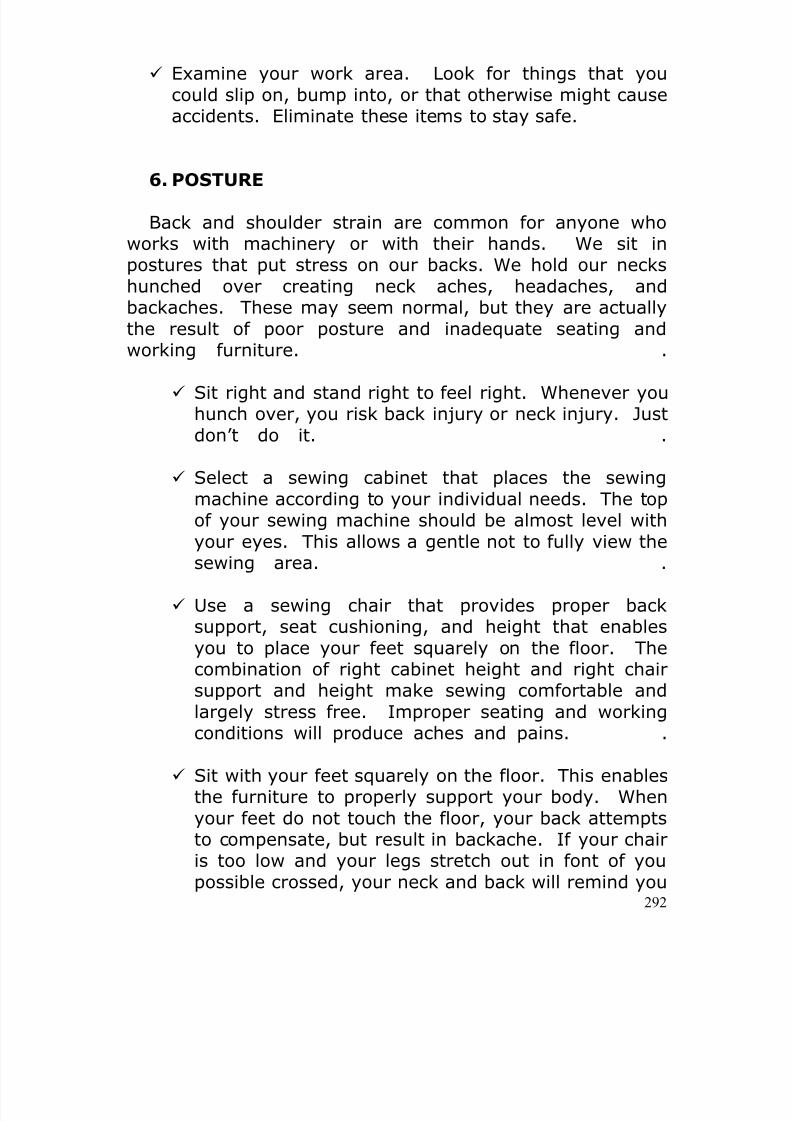
8/13/2019 Manual de Reparacion de Maquinas de Coser
http://slidepdf.com/reader/full/manual-de-reparacion-de-maquinas-de-coser 292/311
292
Examine your work area. Look for things that youcould slip on, bump into, or that otherwise might causeaccidents. Eliminate these items to stay safe.
6. POSTURE
Back and shoulder strain are common for anyone whoworks with machinery or with their hands. We sit inpostures that put stress on our backs. We hold our neckshunched over creating neck aches, headaches, andbackaches. These may seem normal, but they are actuallythe result of poor posture and inadequate seating andworking furniture. .
Sit right and stand right to feel right. Whenever youhunch over, you risk back injury or neck injury. Justdon’t do it. .
Select a sewing cabinet that places the sewingmachine according to your individual needs. The topof your sewing machine should be almost level withyour eyes. This allows a gentle not to fully view thesewing area. .
Use a sewing chair that provides proper backsupport, seat cushioning, and height that enablesyou to place your feet squarely on the floor. Thecombination of right cabinet height and right chairsupport and height make sewing comfortable andlargely stress free. Improper seating and workingconditions will produce aches and pains. .
Sit with your feet squarely on the floor. This enablesthe furniture to properly support your body. Whenyour feet do not touch the floor, your back attemptsto compensate, but result in backache. If your chairis too low and your legs stretch out in font of youpossible crossed, your neck and back will remind you

8/13/2019 Manual de Reparacion de Maquinas de Coser
http://slidepdf.com/reader/full/manual-de-reparacion-de-maquinas-de-coser 293/311
293
that this arrangement is not enough support. .
Right posture produces stress free sewing.
7. EXPOSURE TO HEAT AND LIGHT.
Heat and light are sources of problems for fabric,electronics, and the outsides of your sewing machine.Natural fabrics especially deteriorate when exposed toultraviolet light and heat. Heat and cold adversely affectelectronics and computer systems. Most sewing machinesno longer are made of cast iron with black enable paintfinishes. Today a special nylon or plastic material coversmost sewing machines. These are easy to clean, but willmelt when exposed to excessive heat and will fade or yellowwhen exposed to light.
Set up your sewing room with good lighting, but noexposure to the extremes of direct sunlight.
Set up your sewing room in a climate controlledspace that is maintained at room temperature.
Store supplies, fabrics, and sewing machines out ofdirect sunlight and in a climate controlled space.
What not to do:
Do not run with scissors or other sharp objects.
Do not use needles that are dull or have burrs.
Do not force the fabric through the machine.
Do not put your fingers or hands behind thesewing machine needle. .
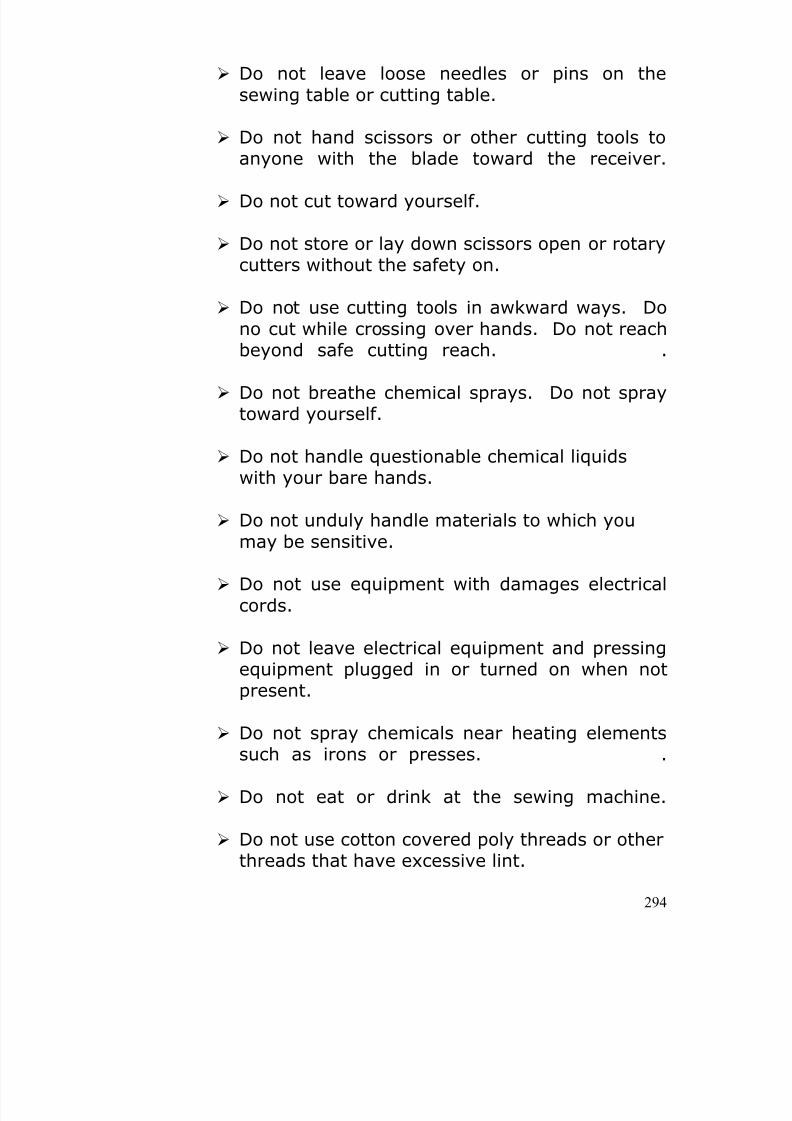
8/13/2019 Manual de Reparacion de Maquinas de Coser
http://slidepdf.com/reader/full/manual-de-reparacion-de-maquinas-de-coser 294/311
294
Do not leave loose needles or pins on thesewing table or cutting table.
Do not hand scissors or other cutting tools toanyone with the blade toward the receiver.
Do not cut toward yourself.
Do not store or lay down scissors open or rotarycutters without the safety on.
Do not use cutting tools in awkward ways. Dono cut while crossing over hands. Do not reachbeyond safe cutting reach. .
Do not breathe chemical sprays. Do not spraytoward yourself.
Do not handle questionable chemical liquidswith your bare hands.
Do not unduly handle materials to which youmay be sensitive.
Do not use equipment with damages electricalcords.
Do not leave electrical equipment and pressingequipment plugged in or turned on when notpresent.
Do not spray chemicals near heating elementssuch as irons or presses. .
Do not eat or drink at the sewing machine.
Do not use cotton covered poly threads or otherthreads that have excessive lint.
8/13/2019 Manual de Reparacion de Maquinas de Coser
http://slidepdf.com/reader/full/manual-de-reparacion-de-maquinas-de-coser 295/311
295
Do not allow lint and dirt to collect in yourmachine.
Do not sit at your sewing machine with yourlegs dangling or crossed.
Do not touch hot surfaces of irons or pressingequipment.
Do not expose fabric and sewing equipment toextremes of heat and moisture.
Do not expose fabric, sewing supplies, orsewing equipment to direct sunlight.
What to do:
Only use equipment that is in good workingcondition.
Change needles frequently.
Allow the sewing machine to pull the fabricthrough the machine while you guide it from infront of the needle.
Use a soft pin cushion or a magnetic pincushion to hold loose pins and needles.
When handing cutting tools to others, alwaysturn the blade back to yourself and hand thehandle portion to the other person.
Close the blades of scissors and set the safetyon rotary cutters after use. When not in use,store cutting tools in plain sight and away fromthe work area to avoid accidental dropping.
8/13/2019 Manual de Reparacion de Maquinas de Coser
http://slidepdf.com/reader/full/manual-de-reparacion-de-maquinas-de-coser 296/311
296
Use cutting tools properly in deliberate carefulmanner. Cut a comfortable distance, reset, andcut some more. Always cut away from you.
Spray chemical sprays away from you and userespirators or masks as needed. .
Use protective gloves when handlingquestionable chemicals. .
Limit exposure to irritating chemicals, allergens,and materials. Prewash fabrics to preshrinkand eliminate potential irritants. .
Repair all electrical problems before usingequipment.
Turn off all irons, pressing equipment, andelectrical appliances (including sewing machine)when you are finished or leave the room. .
Keep the sewing area free of food, drink,miscellaneous liquids, debris, and otherunnecessary items. Avoid clutter.
Use quality low lint threads.
Guide fabric to the needle with your left handsmoothing the fabric and your right handguiding the edge of the fabric. Keep you handsand fingers in front of the needle at all times.
Frequently clean out the bobbin area of yoursewing machine using canned air blown awayfrom you. Maintain clean working equipment.
8/13/2019 Manual de Reparacion de Maquinas de Coser
http://slidepdf.com/reader/full/manual-de-reparacion-de-maquinas-de-coser 297/311
297
Get organized. Vacuum the sewing room floor
and keep clutter from accumulating.
Select sewing table and chair to enable goodposture during sewing. Sit with your feetsquare on the floor, with your back fullysupported by the chair. .
Keep fabric, sewing supplies, and sewingequipment in uncluttered, climate controlledareas.
Avoid exposure to direct sunlight.
Practice good old common sense when it comes to allsewing activities. Maintain a quality work environment voidof clutter, well organized, stable room temperature and airquality, comfortable sewing furniture, and appropriate tools.It is always easier to avoid calamity than it is to recoverfrom accidents. Plan ahead. Use good judgment. Useproper techniques for cutting and sewing. Preventaccidents. By doing all of this, sewing is one of the safesthobbies in which you can participate.
8/13/2019 Manual de Reparacion de Maquinas de Coser
http://slidepdf.com/reader/full/manual-de-reparacion-de-maquinas-de-coser 298/311
298
CHAPTER SIXTEENYour
World’s Greatest Hobby
Some people enjoy sky diving, scuba diving, ormountain climbing. Others enjoy stock car races, horseraces, or NASCAR. Some pass their time watching TV.Some love baseball, basketball, or football. Others maydraw, or paint, or mold ceramics. There are a fewworkaholics that never experience personal satisfaction ofcreating or sharing a special passion most of us discover inour hobbies.
But Sewing is your passion. You love every minute.When you look at, feel, and caress fabric; you experience aspecial thrill something like fireworks or goosebumps. Youlove to imagine new creations, and the experience offinishing your project is like no other.
Sewing relaxes you. It gives you peace and deep innersatisfaction.
The rest of the world may spend its time in hundreds ofother ways, but every minute of sewing is like living on acloud.
You have your own specialization that gives you thatadded boost, but it is all part of the wonderful world ofsewing – Your World’s Greatest Hobby.
8/13/2019 Manual de Reparacion de Maquinas de Coser
http://slidepdf.com/reader/full/manual-de-reparacion-de-maquinas-de-coser 299/311
299
What makes sewing such a great hobby?
This is a hobby you can do.
It is easy to learn. Classes are available atamazingly low costs from experts who have a realpassion for sewing.
There are loads of supports, and opportunities toshare your hobby.
It is inexpensive as hobbies go. For a fewhundred dollars you can do amazing things. For afew thousand you can transform your world.
Spending on your hobby will make huge savingsover having a professional do the same job.
Your hobby builds self confidence.
Your hobby boosts your pride in yourself.
Your hobby provides relaxing personalsatisfaction.
Your hobby gives practical solutions to everydaychallenges.
Your hobby is fun to do and fun to share.

8/13/2019 Manual de Reparacion de Maquinas de Coser
http://slidepdf.com/reader/full/manual-de-reparacion-de-maquinas-de-coser 300/311

8/13/2019 Manual de Reparacion de Maquinas de Coser
http://slidepdf.com/reader/full/manual-de-reparacion-de-maquinas-de-coser 301/311
301
Is it the “eye candy” appeal of fabric that seduces meinto walking clear across a busy store just to touch a fabric Igot a glimpse from the other side of the store?
Is it the urge to feel something very special that drawsmeet to wrap that fabric over my arm?
The thrill is so deep and so stirring, it may seemsomehow just a little wicked. Yet, all I am doing is shoppingfor the right fabric. I may not know what my project is yet,but I just love shopping for that special piece.
When I leave the fabric store, I usually have an armload of my treasures. “Lord, Forbid, they run a sale too.”
If you are like me, you share this love of fabric. Oursewing hobby uses some of the most beautiful things tomake our own creations.
Please don’t tell my husband about my feelings forfabric.
YES, I CAN
I started sewing by watching my mother when is waseight or nine years old. I always thought it was almostmiraculous the way Mom could take a piece of fabric andturn it into a new dress or blouse. I can remember makingmy own skirt. I was so excited. That thrill has never left. I
can go into my sewing room anytime I want to and makesome thing brand new and wonderful.
Along the way, there have been a few bumps in theroad. In Junior High School, I took Home Economics. (Theymay call it Life Skills or something else today, or girls may
8/13/2019 Manual de Reparacion de Maquinas de Coser
http://slidepdf.com/reader/full/manual-de-reparacion-de-maquinas-de-coser 302/311
302
never even get a sewing class depending on the school.) Ithought it would be fabulous, but to my disappointment, myteacher did not actually sew. At least she did not sew likemy mom. She said to do things is such dumb ways, Istarted getting discouraged. The teacher couldn’t figure outhow I got my projects to come out some much nicer thanhers. It did not rest well, but the class was soon over, andMom still shared my passion.
When I was attending college, I was surprised todiscover that I was almost all alone. That is in so far asmy passion for sewing. Soon other students would come tome and ask, “Could you please…” My answer was always “Yes, I Can!” I still find it very hard to say that other word– you know that word that starts with an “N” and end withan “Oh”.
Over the years, I have discovered that many peoplewho want to learn to sew take make it harder than it shouldbe. In fact, I consider sewing easy to learn and easy to do.
While there are some basics, once you get the hang ofit, sewing gets easier and easier. I love doing alterations,because it give me quick satisfaction, but the same skills Iuse to make alterations easily translate into clothingconstruction, embellishments, home décor, crafting, quilting,and just about every other part of sewing.
I use to do knitting (I made the proverbial sweater formy then boyfriend in college.). I use to do rug hooking, andseveral other hand sewing and needlework activities, butabout twenty years ago carpel tunnel syndrome struck.Cutting with scissors, turning and twisting those needles,and tugging and pulling just took their tole on my wrist. Fora while I even found it difficult to sew at my sewingmachine. Today, I love to see and talk with those who sewand do needle work by hand, but I find it just hurts toomuch for me.
8/13/2019 Manual de Reparacion de Maquinas de Coser
http://slidepdf.com/reader/full/manual-de-reparacion-de-maquinas-de-coser 303/311
303
Fortunately, I can still sew and sew and sew with littleor no pain or discomfort. I let my sewing machine to all thework for me. I discovered the rotary cutter which has madecutting a breeze. Although, I still use my thread snips,gingher scissors, and seam ripper occasionally, the rotarycutter and mat have been a blessing. I find now that mywrist does not even bother my sewing most of the time.
Almost daily, customers will come into the store withchallenges on one project or another. I get a thrill out ofencouraging them. With just a few minutes of assistance,they are on their way confident and excited again abouttheir project.
In my beginning sewing classes, I have discovered twostrange attitudes (strange to me). One is the student thatcomes in with an arrogant, “I already know all there is toknow about sewing. Just stick the fabric under the needleand go. That’s all there is to it.” The other is the studentwho comes in petrified, “I don’t know if I can do this? Thisis so complicated. I’m all thumbs.”
The right attitudes is essential. If you already know allthere is to know, why attend class anyway? Just maybe,learning to sew should be approached with an eager openmind ready to explore, learn, and create. If you are afraid,take a deep breath. I assure you, sewing is not as hard asyou might think. Just relax, enjoy, and get ready to havefun.
Here is the attitude you must have to learn and enjoysewing:
1. Yes, You Can! You can do this!2. Listen, Watch, Copy, and Do.3. Learning to sew is one of those things that requiresLearning by Doing and by Inspiration.4. Relax and Enjoy.5. Get Excited About Your Possibilities!
8/13/2019 Manual de Reparacion de Maquinas de Coser
http://slidepdf.com/reader/full/manual-de-reparacion-de-maquinas-de-coser 304/311
304
Learning to sew is easy!There are resources available that make learning quick
and easy.
Many High Schools still teach sewing classes.
Sewing classes are often available through communityprograms such as Parks And Recreation, AdultEducation, Girl Scouts, 4H, and churches.
Sewing and Quilting Classes are available throughSewing Machine Stores, Sew And Quilt Stores, FabricStores, Quilt Guilds, and the Home Sewing Association.
Periodically, special sewing event are held offeringexpert instruction in workshop formats sponsored bylocal businesses or organizations.
Libraries, Bookstores, and the Internet offer vastresources to the beginner and expert sewer.
Volumes of Information is available throughmagazines, books, and videos.
Sewing Answers. Com is here for you. We offer a widerange of materials and resources to help make learningto sew easy, fun, and quick.
The most important consideration when attempting tolearn anything new, is to find an expert you can work with.Please note there are actually two essentials here: First, findan expert. Second, find someone you can feel comfortablelearning from.
8/13/2019 Manual de Reparacion de Maquinas de Coser
http://slidepdf.com/reader/full/manual-de-reparacion-de-maquinas-de-coser 305/311
305
What is an expert? In common practice, an expert isanyone who is a distance from you who says they knowsomething or other. What you need is more than that. Youneed someone who has demonstrated the knowledge andskills you seek. If you want to learn to quilt, find a skilledquilter with a passion for quilting who is able to explain whatthey do. If you want to learn home decor or clothingconstruction, find someone who is passionate and skilled inthose areas with several years of successfully completedprojects that reveal their skills and expertise. If they live inyour house, great. My mom was my expert. If they teachin a school, that may be ok too. Just remember, a teachercan really only teach what they know. If they don’t know,they can’t teach it, and you probably won’t learn it.
If you have ever been with someone that makes youfeel inadequate, uncomfortable, threatened, or just angry,then you know how important it is to find the right teacher.It is vital that you find someone you can respect, and thatmakes you feel at ease during the learning process. Youmay have to actually try a few different teachers to find theyright one for you. If, however, you go through a dozen orso expert teachers, and you find that none click with you;you might take a good look in the mirror.
Remember, your attitudes makes a huge difference.
Yes, You Can! Don’t let anyone tell you otherwise.
You can do this! You can learn the techniques. Youcan develop the skills. You can make beautiful things. Youcan create. You can achieve. You can do it.
Get the right attitude! Find the right teacher. Read,listen, explore, copy success, and create.
Warning! Do not get hung up on perfection. Sewing isa creative art. “Close counts!” Resist those skeptics andcritics who only see the flaws. Celebrate every
8/13/2019 Manual de Reparacion de Maquinas de Coser
http://slidepdf.com/reader/full/manual-de-reparacion-de-maquinas-de-coser 306/311
306
accomplishment. Gain confidence by enjoying yourcreations.
SHARING THE PASSION
I suppose there are a few quiet souls who love sewingand produce wonderful creations, without sharing theirpassion with others. To me, that would be very lonely.
If you are a beginner, I can tell you there is no greaterthrill that to walk into a room of adoring fans who come up
to you eager for your attention. Yes, they may want thatripped pocket fixed, or that hole in the blue jeans patched,but it still feels soooo good.
After being in the sewing business for a while, I was atthe grocery store, and a man approached me that I did notrecognize. “Say, aren’t you’re the Sewing Lady?” A chillwent down my spine, and I thought, “Yes, that’s me!”
There are many wonderful opportunities today to shareyour passion with friends who sew as well as with others.
How to find those who share your passion:
1. Ask about clubs, groups, etc. at fabric stores.2. Look for local guilds or sewing clubs.3. Call local church for sewing groups.4. Check out your local sewing machine shop.5. Attend some classes.
6. DISPLAY YOUR CREATIVE TREASURES.
Sharing is such a blessing. Seeing the creativeachievements of others and copying their ideas if fun.Explaining how you did such and so, is exciting. Justremember to share, and avoid dominating.
8/13/2019 Manual de Reparacion de Maquinas de Coser
http://slidepdf.com/reader/full/manual-de-reparacion-de-maquinas-de-coser 307/311
307
COST AND RETURN
If you look at the time, money, energy, and otherresources you used in your hobby, you may wonder if it isreally a good investment.
First, let me say, sewing for me is not an investment.Yes, the hundreds of thousands of dollars I have invested inmy sewing businesses are an investment, but sew is not.For me, sewing is like breathing fresh air. I use mydiaphragm muscle to pull my chest cavity open and such air
into my lungs. I then squeeze my lungs to expel the carbondioxide, but it is not an investment perse’. It is life. Notsewing would be like choking.
On the other hand, sewing is “just a hobby”. Thereare certain things I need to pursue my hobby. Dependingon the kind of sewing I do, the specifics will varyconsiderably, however, there are costs.
I typically need a sewing machine, fabric, needles,threads, cutting tools, measuring tools, and various notions.These costs of these vary considerably.
It is possible to find a “sewing machine” for under ahundred dollars. It is also possible to spend thousands ofdollars on a sewing machine. Generally, the more I invest inquality the easier, smoother, and more dependable mysewing machine will be. Cheap machines are typically
noisy, clunky, undependable, and hard to use. When I buyquality, I reap vast benefits and capabilities.
8/13/2019 Manual de Reparacion de Maquinas de Coser
http://slidepdf.com/reader/full/manual-de-reparacion-de-maquinas-de-coser 308/311
308
The same thing is true when purchasing fabric, notions,supplies, etc. The quality of goods used impacts the qualityof finished product. It is a fact.
As far as hobbies go, sewing is not the cheapest.Collecting bugs, climbing rocks, or fishing might be cheaper.
On the other hand, it is far from the most expensivehobby. Compare it to flying, golf, woodworking, andhundred of other hobbies, and sewing comes off prettyconservative.
Can you imagine paying $1,000 for an afternoon ofsewing? Ask an avid golfer?
Can you imagine a skilled woodworker using old dullrusty worn out tools?
A new sewing machine is a bunch less expensive than anew bass boat, and it comes with a free motor.
What if you calculate all the costs of sewing andmaybe even double them; how would sewing stack up?
Fact: Sewing clothing from scratch produces clothes
that fit, express the exact style you desire, and use qualityfabrics far superior to ready made clothing. Otherwise, itmay be slightly cheaper to just go out and buy the cheapestsale ready made item.
Fact: Sewing Alterations enables you to take thatdiscounted readymade item that you got on sale for $10 andsaved $40 on; and make it fit. Every time I go to Kohls, orone of the other clothing stores, I come home with
something from the clearance or damaged bin. It would beworthless, except I sew! In minutes, I transform thatdiscard into a brand new, perfect fit garment. It would costa bundle to pay someone to fix it.
8/13/2019 Manual de Reparacion de Maquinas de Coser
http://slidepdf.com/reader/full/manual-de-reparacion-de-maquinas-de-coser 309/311
309
Fact: Sewing Embellishing gives me the power to takeordinary readymade items and turn tem into one of a kinddesigner piece. A tiny investment produces fabulousreturns. It makes me feel fantastic too!
Fact: Sewing Home Décor turns drap surroundings intoextraordinary custom furnishings for penneys on the dollar.Instead of $5,000 draperies, I can sew $500 ones that areeven better. Instead of empty tables I can make $200 tablerunners for $20. What an investment.
Fact: It does not matter what area of sewing youmight examine, the return on investment is awesome.
Your World’s Greatest Hobby enables you to experienceall the thrills of creativity, all the joys of self expression, allthe peace and calm, all the grand achievements, and more.While at the same time empowering you to produce a hugereturn on your investments.
8/13/2019 Manual de Reparacion de Maquinas de Coser
http://slidepdf.com/reader/full/manual-de-reparacion-de-maquinas-de-coser 310/311
310
MY HOBBY IS THE GREATEST BECAUSE
It is Mine. My Passion. My Expression.
It is Easy And Challenging at the same time.
I have loads of support, and opportunities tolearn, explore, and share my hobby.
It is My Best Return On Investment. For a fewhundred dollars I can do amazing things. For afew thousand I can transform my world.
I save big with every project over having aprofessional custom job done for me.
Your hobby builds self confidence.
My sewing hobby boosts my pride in myself.
My sewing hobby provides relaxing personalsatisfaction.
My sewing hobby gives practical solutions toeveryday challenges.
My hobby is fun to do and fun to share.
My hobby sets me apart from the crowd, makingme truly special.
Sewing is my greatest hobby in the world.
8/13/2019 Manual de Reparacion de Maquinas de Coser
http://slidepdf.com/reader/full/manual-de-reparacion-de-maquinas-de-coser 311/311