iPhone/iPad User Guide -...
55
Copyright Notice Copyright © 2006 ClickSoftware Technologies Ltd. All rights reserved. No part of this publication may be copied without the express written permission of: ClickSoftware Technologies Ltd. Publication Notice The information contained herein does not constitute a warranty of any kind. ClickSoftware Technologies Ltd. reserves the right to revise this publication and make changes without notification. ClickSoftware Technologies Ltd. assumes no liability for losses incurred as a result of information contained herein. iPhone/iPad User Guide Last Updated On: Sep 23, 2017
Transcript of iPhone/iPad User Guide -...

Copyright Notice Copyright © 2006 ClickSoftware Technologies Ltd. All rights reserved. No part of this publication may be copied without the express written permission of: ClickSoftware Technologies Ltd. Publication Notice The information contained herein does not constitute a warranty of any kind. ClickSoftware Technologies Ltd. reserves the right to revise this publication and make changes without notification. ClickSoftware Technologies Ltd. assumes no liability for losses incurred as a result of information contained herein.
iPhone/iPad User Guide Last Updated On: Sep 23, 2017

iPhone/iPad User Guide Page 1 of 54
Table of contents
1. Application Requirements -------------------------------------------------------------------------------------------------- 3
2. Installation & Initial Setup Steps ------------------------------------------------------------------------------------------ 4
3. Launching ClickSoftware StreetSmart™ on Your Mobile Phone --------------------------------------------------- 5
4. Logging Out --------------------------------------------------------------------------------------------------------------------- 6
4.1. Navigating the mobile app ------------------------------------------------------------------------------------- 7
4.2. Take a Phone Call ------------------------------------------------------------------------------------------------ 8
4.3. Make a Phone call ----------------------------------------------------------------------------------------------- 8
4.4. To return to StreetSmart after your call -------------------------------------------------------------------- 8
5. Jobs ------------------------------------------------------------------------------------------------------------------------------- 9
5.1. Job List Screen ---------------------------------------------------------------------------------------------------- 9
5.2. Job Summary Screen ------------------------------------------------------------------------------------------- 11
5.3. Job Details Screen ----------------------------------------------------------------------------------------------- 15
5.4. Job Actions -------------------------------------------------------------------------------------------------------- 15
5.4. Navigate to Job Location -------------------------------------------------------------------------------------- 16
5.5. Mobile Job Create----------------------------------------------------------------------------------------------- 17
5.6. E-mail Completed Jobs ---------------------------------------------------------------------------------------- 18
5.7. Job Invoice on Mobile App ------------------------------------------------------------------------------------ 19
6. Trips ----------------------------------------------------------------------------------------------------------------------------- 22
7. Locations ----------------------------------------------------------------------------------------------------------------------- 24
8. Messages ----------------------------------------------------------------------------------------------------------------------- 28
8.1. Message Screen ------------------------------------------------------------------------------------------------- 28
8.2. Message Detail Screen ----------------------------------------------------------------------------------------- 29

iPhone/iPad User Guide Page 2 of 54
9. Notifications ------------------------------------------------------------------------------------------------------------------- 30
10. Timesheets ------------------------------------------------------------------------------------------------------------------- 31
10.1. Smart Notification for Timesheet Actions --------------------------------------------------------------- 35
11. Forms -------------------------------------------------------------------------------------------------------------------------- 38
11.1. Submit Form ---------------------------------------------------------------------------------------------------- 38
11.2. Save Form ------------------------------------------------------------------------------------------------------- 40
11.3. Capture Picture using StreetSmart ------------------------------------------------------------------------ 43
11.4. Capture Signature using StreetSmart: -------------------------------------------------------------------- 47
11.5. E-mail Completed Forms ------------------------------------------------------------------------------------ 50
12. Barcode Scanning ----------------------------------------------------------------------------------------------------------- 52
13. Settings Menu --------------------------------------------------------------------------------------------------------------- 54
iPhone/iPad User Guide Page 3 of 54
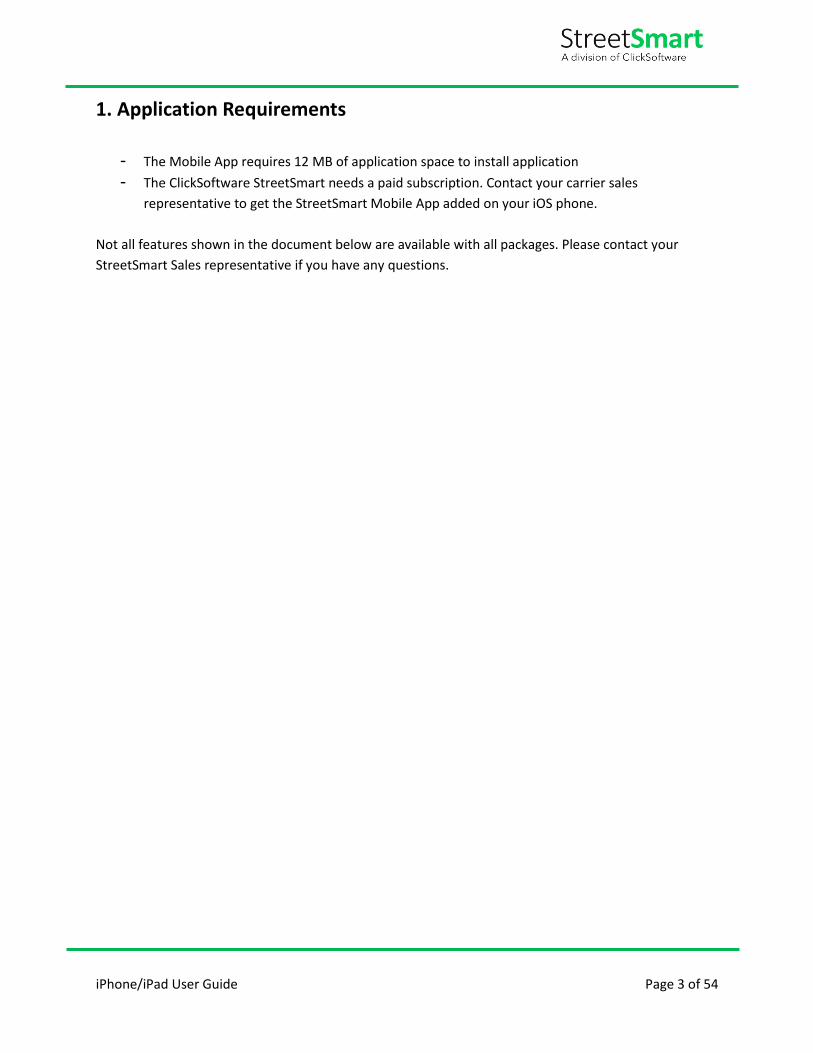
1. Application Requirements
- The Mobile App requires 12 MB of application space to install application
- The ClickSoftware StreetSmart needs a paid subscription. Contact your carrier sales
representative to get the StreetSmart Mobile App added on your iOS phone.
Not all features shown in the document below are available with all packages. Please contact your
StreetSmart Sales representative if you have any questions.
iPhone/iPad User Guide Page 4 of 54
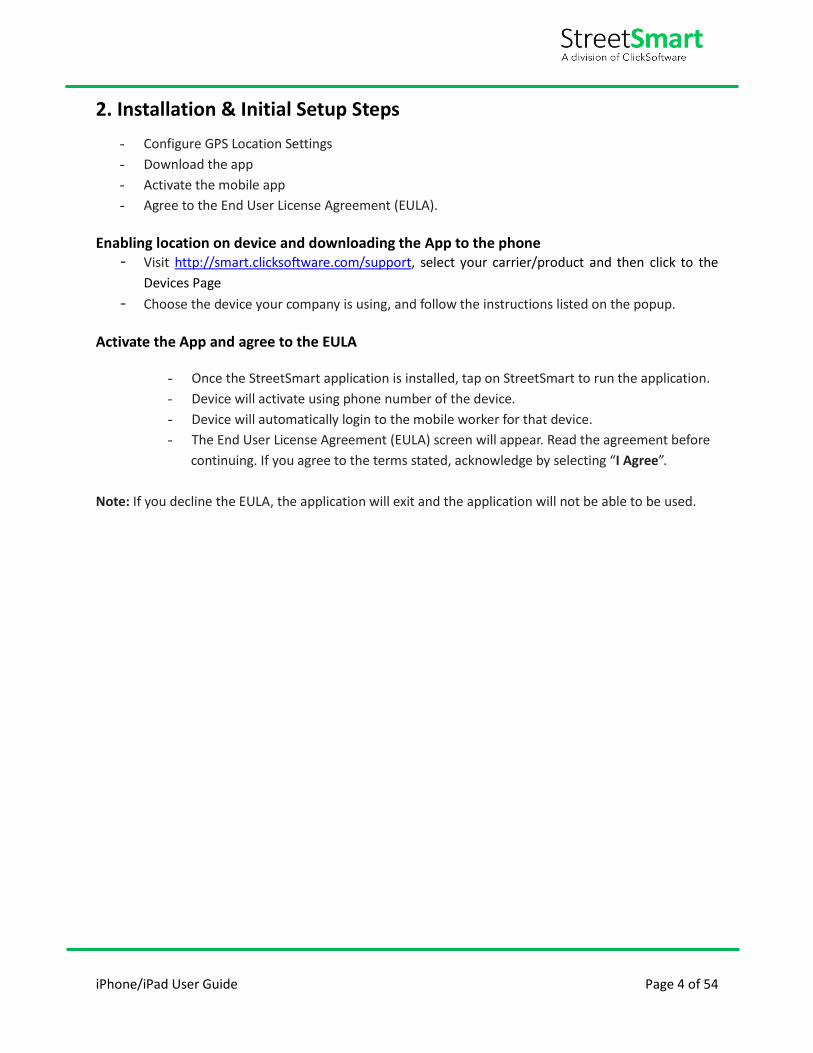
2. Installation & Initial Setup Steps
- Configure GPS Location Settings
- Download the app
- Activate the mobile app
- Agree to the End User License Agreement (EULA).
Enabling location on device and downloading the App to the phone - Visit http://smart.clicksoftware.com/support, select your carrier/product and then click to the
Devices Page
- Choose the device your company is using, and follow the instructions listed on the popup.
Activate the App and agree to the EULA
- Once the StreetSmart application is installed, tap on StreetSmart to run the application.
- Device will activate using phone number of the device.
- Device will automatically login to the mobile worker for that device.
- The End User License Agreement (EULA) screen will appear. Read the agreement before
continuing. If you agree to the terms stated, acknowledge by selecting “I Agree”.
Note: If you decline the EULA, the application will exit and the application will not be able to be used.
iPhone/iPad User Guide Page 5 of 54
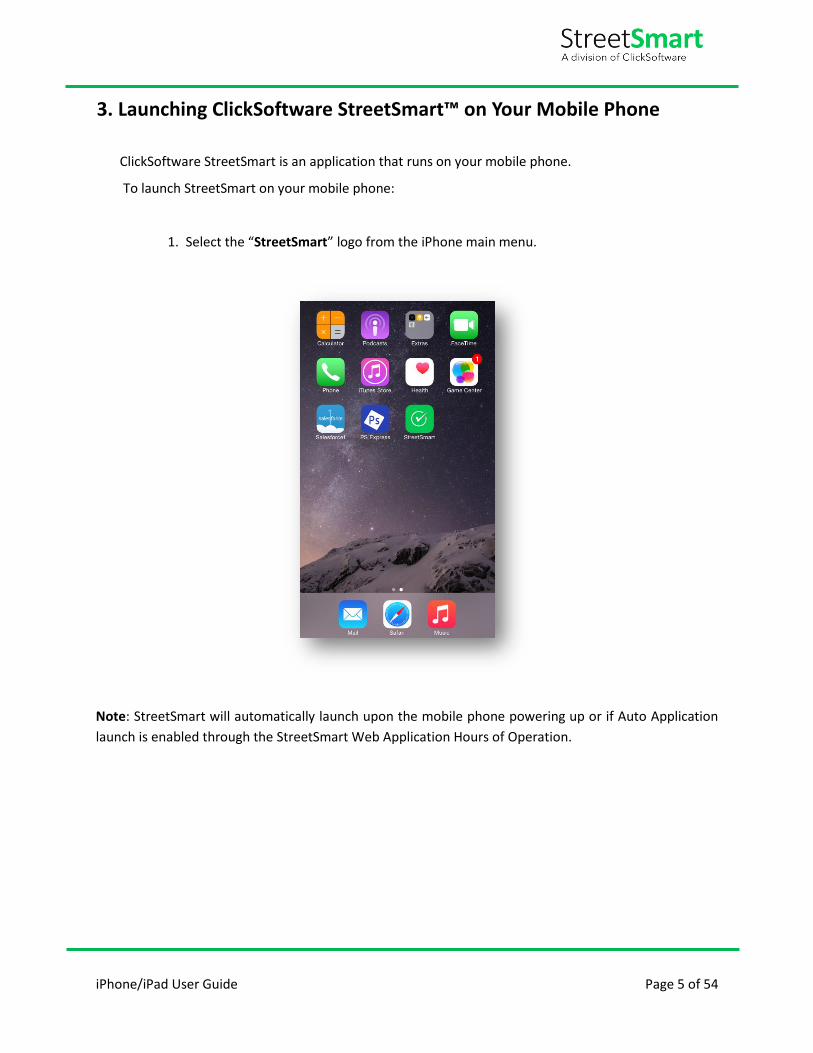
3. Launching ClickSoftware StreetSmart™ on Your Mobile Phone
ClickSoftware StreetSmart is an application that runs on your mobile phone.
To launch StreetSmart on your mobile phone:
1. Select the “StreetSmart” logo from the iPhone main menu.
Note: StreetSmart will automatically launch upon the mobile phone powering up or if Auto Application
launch is enabled through the StreetSmart Web Application Hours of Operation.

iPhone/iPad User Guide Page 6 of 54
4. Logging Out
To exit StreetSmart:
1. Select the “Exit” option from the main menu.
2. Select the “Yes” option to confirm that you want to exit the mobile app.
Note: The StreetSmart Mobile App cannot locate GPS or send and receive information when the
application has been exited.
Note: You cannot exit the mobile app before ending the Shift, if the “Confirm end shift on exit” option is
set to “true” in company settings in the web application.

iPhone/iPad User Guide Page 7 of 54
4.1. Navigating the mobile app
Throughout StreetSmart, you will see the commands displayed as icons placed in a 3 by 3 grid. These
commands are touch sensitive and once you tap on any one of these commands, the application will
navigate to the item you selected.
For example, in the image below, the “Timesheets” command will take you to the Timesheets page, from
where you can perform the Timesheet actions such as Shift and Break.
Symbol Description
Tap on this icon to get into the StreetSmart home page on your
iPhone/iPad.
Tap on this icon to perform “server sync”.
This icon represents the GPS connectivity. If this icon turns Red
that means no GPS connectivity. If turns Orange, that means
initializing the GPS connectivity and if turns Grey, that means the
Location is turned off on your mobile phone. If the color of the
icon represents Green, that means good GPS connectivity.

iPhone/iPad User Guide Page 8 of 54
• If you want to suspend the StreetSmart Mobile App, click on the Home button
4.2. Take a Phone Call
When someone calls you, StreetSmart goes into Suspend mode automatically, so you can take
your call as if StreetSmart wasn’t even running.
4.3. Make a Phone call
To place a phone call from within the mobile app
• Press the button to go to the phone home screen.
4.4. To return to StreetSmart after your call
Select the StreetSmart icon from the Main Menu.
Note: While on a voice call, StreetSmart will attempt to collect GPS points that will be sent upon hanging
up the phone call.

iPhone/iPad User Guide Page 9 of 54
5. Jobs
StreetSmart mobile app can receive job information that is dispatched from the StreetSmart Web
Application. This job information is displayed on your mobile phone and supplies you with valuable
information that helps you get your work done. The job functionality available is different based on the
package selected.
5.1. Job List Screen
The Job List screen displays single-line summary information for each of the jobs that have been dispatched to you on your phone. To find a specified job from the list:
• Start typing the Job name, Job address, or Job ID in the search box, the search result will appear on the mobile screen.
To view detailed job information for a specific job, tap on the searched job result.
Note: Job titles will display only as many characters as can be displayed on-screen horizontally. To view
the entire job title, select the job from the list.

iPhone/iPad User Guide Page 10 of 54
• At the bottom of the Job List screen, you will see the following four sorting options:
- By Name: Tap on this option to sort the jobs in alphabetical order (A – Z).
- By Closest: Tap on this button to sort the jobs based on the distance of the job location.
Such as, once you tap on this option, it will display those jobs at the top of the list which
are closer to your current location.
- By Schedule: Tap on this button to sort the jobs based on the schedule.
- By Status: Tap on this button to sort the jobs based on their status. Such as, started,
completed etc.
- By Priority: Tap on this button to sort jobs based on their priority (from emergency to low or vice-versa).
Note: Update StreetSmart mobile app to v18.10 to use “sort by priority” feature.
• Once you tap on the job from the jobs list, you will see the below four options highlighted in
orange.
- Summary: Tap on this option to view the “Job
Summary” page on your iPhone.
- Actions: Tap on this option to get the “Job Action”
screen. On this screen, you can perform several job
actions such as Job Start, Travel Start etc.
- Navigate: Tap on this option to get the navigation
screen, where you will see the turn by turn driving
direction towards your job location.
- Call: Tap on this option to get the “Call Job
Contact” screen from where you can make a call to
your job contact.
- Strat Trip: Tap on this option to get the trip screen,
where you can enter the odometer readings,
category, and purpose of trip.

iPhone/iPad User Guide Page 11 of 54
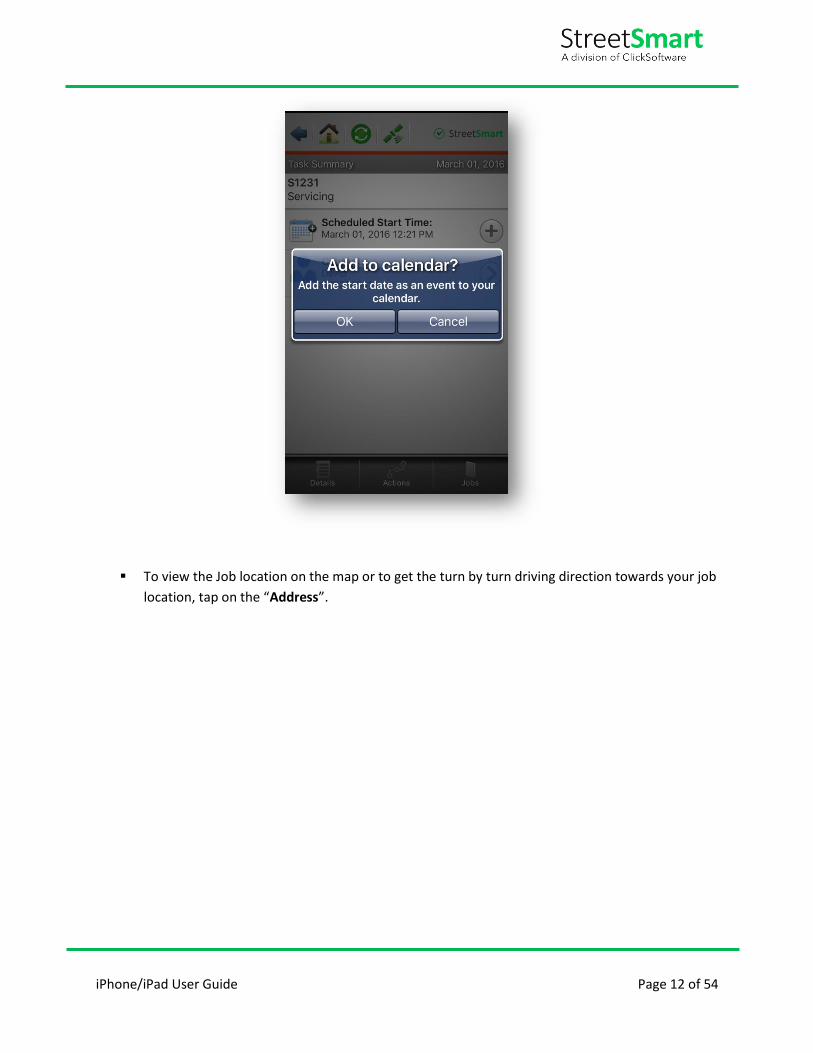
5.2. Job Summary Screen
The Job Summary screen lists high-level details regarding a job, including its current status. From here,
you can access the Job Detail screen, the Job Actions screen, Job Calendar screen, Job Navigation screen,
and the Call Job Contact screen.
Note: Once you tap on the “Jobs” button at the bottom of the screen, you will be brought back to the
Jobs List screen.
▪ To add the job to your calendar, tap on the “Scheduled Start time”.
iPhone/iPad User Guide Page 12 of 54
▪ To view the Job location on the map or to get the turn by turn driving direction towards your job
location, tap on the “Address”.

iPhone/iPad User Guide Page 13 of 54
▪ To get the “Call Job Contact” screen from where you will be able to make call to your job contact,
tap on the “Contact”.

iPhone/iPad User Guide Page 14 of 54
Note: At the bottom of the “Job Summary” screen, you will see the following three options:
• Details: Tap on this option to get the Job Details screen on your phone.
• Actions: Tap on “Actions” to get the Job Actions screen displayed on your phone. From this
screen, you can perform several job actions, such as Travel Start, Job Start etc.
• Jobs: Tap on “Jobs” to go back to the Jobs List screen.

iPhone/iPad User Guide Page 15 of 54
5.3. Job Details Screen
The Job Details screen displays all the information that has been dispatched to your mobile worker. This
information includes the customer’s name, the scheduled start time, the estimated duration, the current
status and a comments field.
To return to the Job Summary screen, tap on the “Summary” at the bottom of the screen. To start the
job actions, tap on “Actions”.
5.4. Job Actions
The Jobs Actions screen allows you to perform several actions which are associated with the job. Such as
Travel Start, Job Start, Job End etc.

iPhone/iPad User Guide Page 16 of 54
5.4. Navigate to Job Location
You can navigate to job location using “iOS maps” or “Google maps”. To navigate using google maps:
• Install Google maps on your iOS device
• Clicking on navigation will open a pop-up menu
• Select “Open in Google Maps” to navigate.
Note: To navigate using Google maps, you need to update the StreetSmart mobile app to v 18.10.

iPhone/iPad User Guide Page 17 of 54
5.5. Mobile Job Create
StreetSmart now also allows you to create and start jobs manually on your phone.
To create and start a new job on the phone, follow these steps:
• Tap Jobs > Tap icon from the StreetSmart Mobile App on your iPhone.
• In the next screen select the appropriate job type from the drop –down list.
• Now enter the data in each of the fields and tap Start Job.
• If ‘Automatically Start Job’ is turned on, then you will get into the job actions screen with the
first action performed automatically on job creation. If any form is attached to the first job
action, you will see the form page on your phone. If ‘Automatically Start Job’ is turned off, the
job will be created and will get added to your Jobs List automatically and can be started in
future.
Notes –
• StreetSmart mobile app remembers your selection for Automatically Start Job and behaves
accordingly next time you create a job from your mobile device.
• Mobile “Job Create” screen now allows you to scan Barcodes using the camera in your phone.
iPhone/iPad User Guide Page 18 of 54
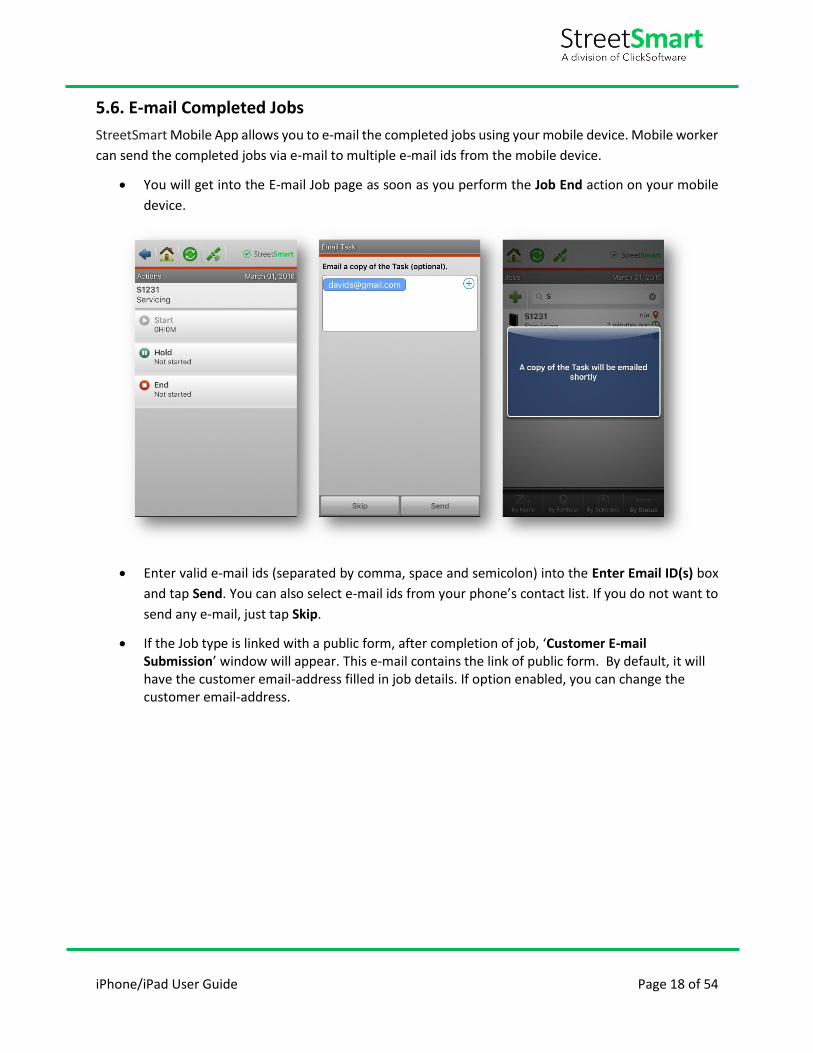
5.6. E-mail Completed Jobs
StreetSmart Mobile App allows you to e-mail the completed jobs using your mobile device. Mobile worker
can send the completed jobs via e-mail to multiple e-mail ids from the mobile device.
• You will get into the E-mail Job page as soon as you perform the Job End action on your mobile
device.
• Enter valid e-mail ids (separated by comma, space and semicolon) into the Enter Email ID(s) box
and tap Send. You can also select e-mail ids from your phone’s contact list. If you do not want to
send any e-mail, just tap Skip.
• If the Job type is linked with a public form, after completion of job, ‘Customer E-mail Submission’ window will appear. This e-mail contains the link of public form. By default, it will have the customer email-address filled in job details. If option enabled, you can change the customer email-address.

iPhone/iPad User Guide Page 19 of 54
5.7. Job Invoice on Mobile App
The Mobile App will show a new menu “Invoice” which allows your mobile worker to report used parts
and labor quickly.
Note – You need to upgrade your mobile app to v18.9 to use the Invoice feature.
Reporting used parts or labor:
To report a used item on the device, tap on the ‘Invoice’ icon from the main menu. Once in the Invoices
page, you will see the following options:
• Select a Job – Used items (parts or labor) information can only be submitted along with a job. You
need to select any new or in progress job by clicking ‘Select a Job’ button.
Note: If an item has already been submitted along with a job, you can’t select that job for another item
submission
iPhone/iPad User Guide Page 20 of 54
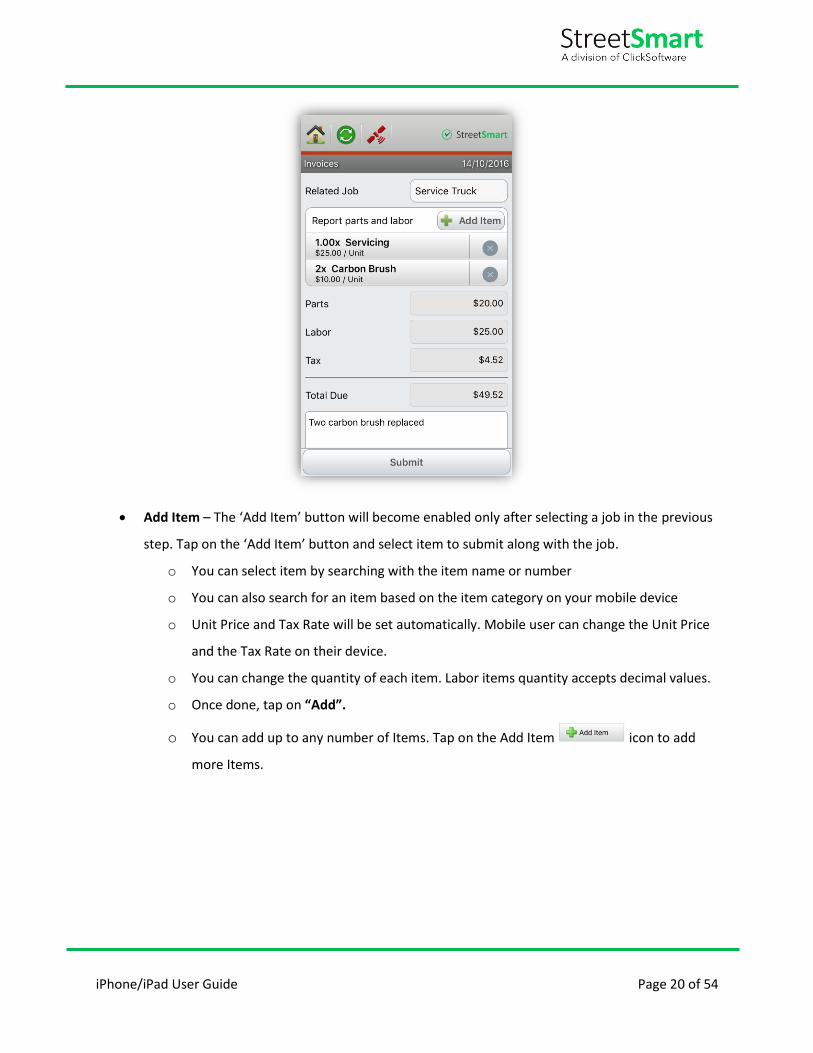
• Add Item – The ‘Add Item’ button will become enabled only after selecting a job in the previous
step. Tap on the ‘Add Item’ button and select item to submit along with the job.
o You can select item by searching with the item name or number
o You can also search for an item based on the item category on your mobile device
o Unit Price and Tax Rate will be set automatically. Mobile user can change the Unit Price
and the Tax Rate on their device.
o You can change the quantity of each item. Labor items quantity accepts decimal values.
o Once done, tap on “Add”.
o You can add up to any number of Items. Tap on the Add Item icon to add
more Items.

iPhone/iPad User Guide Page 21 of 54
Summary:
After an item is being added, a summary will be presented with the Parts, Labor and Tax subtotals. These values are calculated based on the chosen items and their quantities. The worker can then choose to add a comment to the invoice, in case this field was provided by his manager (controlled through a preference under Settings > Jobs).

iPhone/iPad User Guide Page 22 of 54
6. Trips Using the StreetSmart application, you will be able to start and
end your trips. This allows you to keep track of the miles
traveled by your field worker and calculate the re-imbursement
based on the data provided by the StreetSmart Web
Application.
Start Trip:
Tap on the Trips icon from the StreetSmart home screen.
The Start Trip page appears on your phone screen. Perform the
following action on the Start Trip page:
• Enter the Start Odometer value
• Enable “Auto-fill with last end odometer” to fill in the
Start Odometer field automatically with your last end
odometer value
• Select Category
• Select Purpose
• Select a job to link to your current trip
Note – You can only select those jobs which are already present
in your Jobs List.
• Enter Vehicle ID
• Enter notes related to your trip
• Tap Start
End Trip:
You will now see the End Trip screen on your phone. To end a
trip:
• Enter the End Odometer value
• Odometer distance will automatically be calculated
based on your start and end odometer entries
• Enter Commuter Distance (non-business miles)
• Enter Additional Expenses if any
• Enter trip related notes
• Tap End

iPhone/iPad User Guide Page 23 of 54
View Trip List and Details:
Once you end the trip, Trip log screen appears on your phone showing the list of all the trips performed
by you. Trips can be sorted based on Date/Distance/Dollars from this screen. Clicking on any trip from this
screen will open the Trip details page for that trip on your mobile device.

iPhone/iPad User Guide Page 24 of 54
7. Locations
StreetSmart lets you receive Locations from your dispatcher and request turn by turn driving directions
from your current address to the Location.
To view the location on Map and get the Driving Directions towards the location:
1. Select “Locations” from the StreetSmart Menu.
2. Locations List appears on your phone screen. Tap on the location you want to view on map.
3. You will be prompted with the below screen. Tap on “Navigation”.

iPhone/iPad User Guide Page 25 of 54
4. You will see the Location highlighted on Google Map on your iPhone.

iPhone/iPad User Guide Page 26 of 54
Delete Location:
StreetSmart now also allows you to delete unwanted locations from your device without affecting the
web application.
Go to Locations and select any location from the list. Click Delete as shown in the following screen. This
action will only delete the location from your device and not from the web application.

iPhone/iPad User Guide Page 27 of 54
iPhone/iPad User Guide Page 28 of 54
8. Messages
8.1. Message Screen
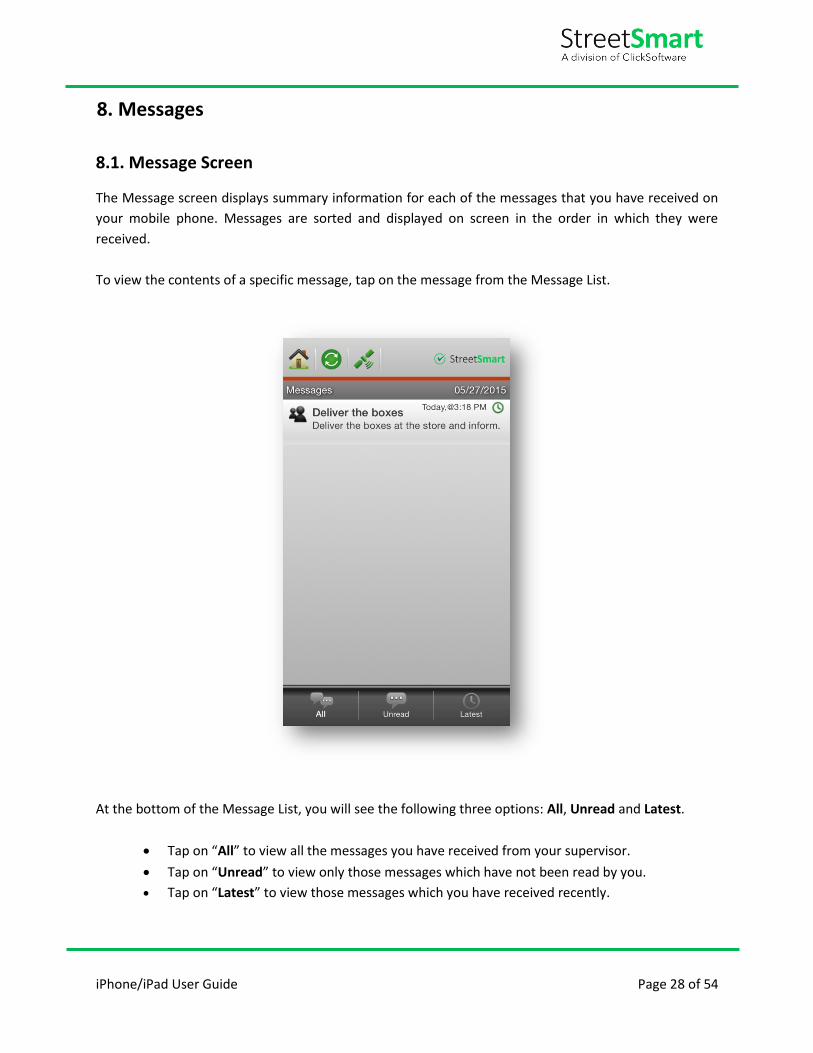
The Message screen displays summary information for each of the messages that you have received on
your mobile phone. Messages are sorted and displayed on screen in the order in which they were
received.
To view the contents of a specific message, tap on the message from the Message List.
At the bottom of the Message List, you will see the following three options: All, Unread and Latest.
• Tap on “All” to view all the messages you have received from your supervisor.
• Tap on “Unread” to view only those messages which have not been read by you.
• Tap on “Latest” to view those messages which you have received recently.

iPhone/iPad User Guide Page 29 of 54
8.2. Message Detail Screen
The Message Detail Screen displays the contents of the message and details about the Sender.
To delete the message that you are currently viewing tap on the “Delete” button.

iPhone/iPad User Guide Page 30 of 54
9. Notifications
iOS 5 and later versions can display all your notifications in a single place. The Notification Center
displays all the notifications related to the StreetSmart Mobile App under one roof. Once you receive a
new job or location, your phone will automatically sync with the StreetSmart server and display the
corresponding notification.
To get into the Notification Center, drag down the home screen from top on your iPhone.

iPhone/iPad User Guide Page 31 of 54
10. Timesheets
StreetSmart lets you log your hours quickly and easily. Just select the appropriate timesheet action from
the list, and StreetSmart will automatically log the time and send the data back to the web application.
The administrator may also add a form to the timesheet actions to collect data associated with your
hours.
To log your time:
1. Select “Timesheets” from the StreetSmart Main Menu.
2. Select “Start Shift” when you want to punch in.
3. Select “Start Break” whenever you take a break.

iPhone/iPad User Guide Page 32 of 54
4. Select “End Break” whenever you go back to work.

iPhone/iPad User Guide Page 33 of 54
5. Select “End Shift” when you’re ready to punch out.

iPhone/iPad User Guide Page 34 of 54
Note: You will see the Timesheet history at the bottom of the Timesheets screen under “Recent
Events”.
6. The “Summary” tab will display the reported time entries for the past days and weeks. It
includes:
o History of timesheet actions grouped by days
o Sum of pay hours and break time for each shift
o Sum of pay hours and break time for each week.

iPhone/iPad User Guide Page 35 of 54
10.1. Smart Notification for Timesheet Actions
StreetSmart mobile app allows you to set reminder to perform your timesheet actions on schedule.
Mobile Smart Notifications’ enables your field worker to get a notification in case an expected action
wasn’t performed on time. Field workers will have the option to turn on notification to perform various
timesheet actions, such as ‘Start Shift’, ‘End Shift’, ‘Start Break’ and ‘End Break’.
Setup Smart Notification:
The notification can be setup from the StreetSmart mobile app. Go to ‘Settings’ > ‘Notification’ on your
mobile app and setup when you want to be notified on a specific type of timesheet action.
Note – Hours of operation (HOO) from the StreetSmart web application should be defined to use Mobile
Smart Notification.
You will see following option in the Notification screen:
• Start Shift – Set the timer to certain minutes or hours after which you will be notified to start your
shift as per the ‘Shift Start’ time set under ‘Hours of Operation’
• Start Break – Specify the time when you want to start your break

iPhone/iPad User Guide Page 36 of 54
• End Break – Specify the time after which you should receive the End Break notification. Timer gets
activated based on what time the break was started
• End Shift – Set the timer to certain minutes or hours after, which you will be notified to end your
shift as per the Shift End time set under the ‘Hours of Operation’
.
Enable those options for which you want to receive notification
Smart Notification on Mobile Device
Once you have completed setting up the Smart Notification on your mobile device, you will receive
notification to perform certain timesheets actions as per the setup. The notification will be displayed at
the top of the home screen of your mobile device. You can perform the timesheet action either via a single
touch from the home screen of your mobile device or from your phone’s notification center. Just tap on
the notification and drag your fingers towards left and you will see a red button to complete the timesheet
action.

iPhone/iPad User Guide Page 37 of 54
Note – If any form is attached to any of your timesheet actions, then you will get into the forms screen
upon tapping the timesheet action from the phone’s notification center.

iPhone/iPad User Guide Page 38 of 54
11. Forms
StreetSmart allows you to complete your paperwork using Forms on your mobile phone. Forms can be
completed as a part of Timesheet, Jobs or Standard Forms. Standard Forms are available from the Forms
menu on the mobile phone. The Administrator will create these forms from the web application assign
them to specific mobile workers.
Forms can be of three types:
Ad-hoc Forms: Ad-hoc forms will be available under “Forms” from StreetSmart main menu.
Timesheet Forms: Timesheet forms will be associated with the Timesheet action, such as shift
and break.
Job Forms: This type of forms will be associated with the Jobs.
11.1. Submit Form
To complete Ad-hoc form:
1. Select “Forms” from the StreetSmart Menu.
2. Select the Form you want to fill out.
3. Enter a value for each field.
4. Select “Submit”, once you have completed the form. The submitted form will immediately be sent
to Web Application.

iPhone/iPad User Guide Page 39 of 54
Notes:
• You will see the button “By Name” at the bottom of the Forms list screen. Once you tap on this
button, the Forms get arranged in the alphabetical order (A – Z) in the list.
• Submitting a form for Timesheet action or job action is done on the same manner only the form
is being opened once choosing the action.
You will get the following types of fields in the forms:
Cascading List: This is a hierarchical list where the available options in one level depend on
the selection of the previous level.
Text / Numeric: This type of field allows you to enter text or numbers in the field. This field
also allows you to create expandable text area for the betterment of the mobile data
collection.
Select List: This field contains a set of pre-defined options
Label: This field displays labels (notice, headlines, or any other information) on a form. The labels can be presented in regular font or the large bold font.
Multi Select List: This fields allows you to choose multiple options from a list of checkboxes
Number: This field only captures numerical entries
Checkbox: This field allows you to check or uncheck a box
Odometer: This numeric field allows you to enter odometer readings from your vehicles
which are used in specific reports to determine shift mileage.

iPhone/iPad User Guide Page 40 of 54
Money: This field allows you to enter a number with two decimal places. Text is entered right
to left, so entering 123 will result in 1.23.
Picture Capture: This field allows you to capture picture using phone camera or add pictures
form your phone gallery.
Signature Capture: This type of field allows you to capture the signature of your customer on
the iPhone.
Time: Captures either phone time or custom time
Date: Captures either phone date or custom date
URL: lets your mobile worker access a configured web page on the mobile device
11.2. Save Form
Mobile workers can save ad-hoc forms on their mobile phones as drafts to be completed and submitted on a later stage.
• Draft tab is present in Forms menu and displays the list of all saved forms.
• The mobile worker has two options to save a form as draft:
I) Tap on the “Save” button at the bottom
II) Close the form and choose “Save”.

iPhone/iPad User Guide Page 41 of 54
• The user can access any form draft to edit details and/or submit it.
• A draft form can be deleted by swiping left and selecting “Delete”. A deleted draft form can never be recovered.
iPhone/iPad User Guide Page 42 of 54
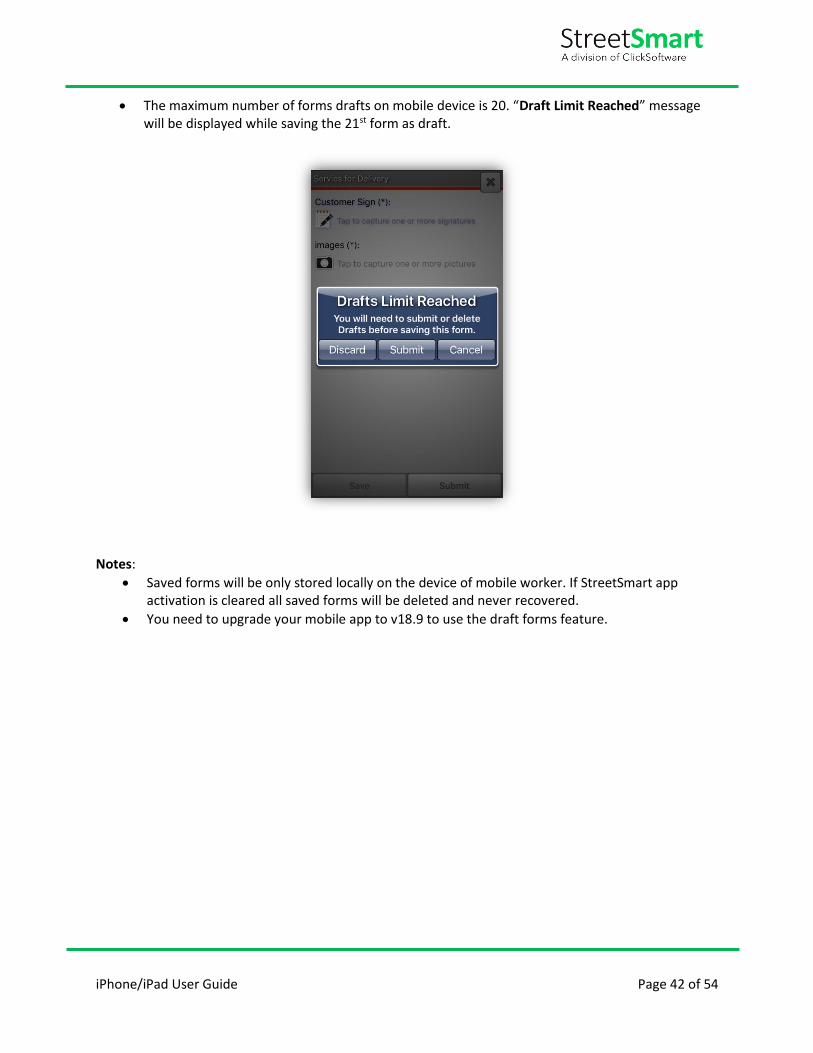
• The maximum number of forms drafts on mobile device is 20. “Draft Limit Reached” message will be displayed while saving the 21st form as draft.
Notes:
• Saved forms will be only stored locally on the device of mobile worker. If StreetSmart app activation is cleared all saved forms will be deleted and never recovered.
• You need to upgrade your mobile app to v18.9 to use the draft forms feature.

iPhone/iPad User Guide Page 43 of 54
11.3. Capture Picture using StreetSmart
Picture Capture is a feature that can be added as a field type on a form. Mobile workers can add multiple
pictures from their mobile phone (camera or phone gallery) to a form as a proof of service. A mobile
worker can also annotate the images to increase visibility on the work done.
• Tap on the form which is associated to the Picture Capture option from the Forms list.
• Tap on the Picture capture icon to add images.

iPhone/iPad User Guide Page 44 of 54
• A pop-up window will appear to choose the image source option as Camera and Gallery.
• Tap on ‘Camera’ to take the pictures from the phone’s native camera.
iPhone/iPad User Guide Page 45 of 54
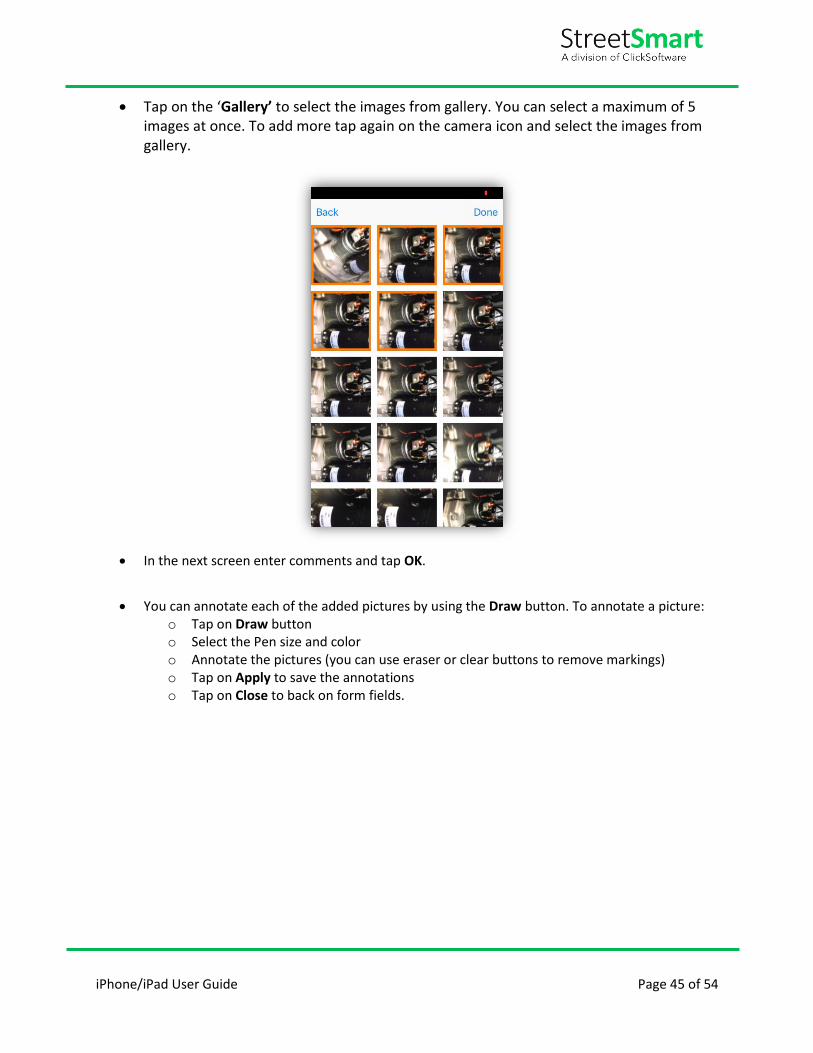
• Tap on the ‘Gallery’ to select the images from gallery. You can select a maximum of 5 images at once. To add more tap again on the camera icon and select the images from gallery.
• In the next screen enter comments and tap OK.
• You can annotate each of the added pictures by using the Draw button. To annotate a picture: o Tap on Draw button o Select the Pen size and color o Annotate the pictures (you can use eraser or clear buttons to remove markings) o Tap on Apply to save the annotations o Tap on Close to back on form fields.

iPhone/iPad User Guide Page 46 of 54
• You can add notes to each of the added pictures.
• Tap on the icon for preview at the top right corner of the phone screen.
• Tap on “Submit” or “Save”.

iPhone/iPad User Guide Page 47 of 54
Note: You need to upgrade your mobile app to v18.9 to use the annotate feature.
11.4. Capture Signature using StreetSmart:
There is a StreetSmart feature on the iPhone that allows you to capture a customer's signature directly
on the phone's screen. The main benefit of this feature is that it is a paperless solution to obtaining
customers signatures and attaching them to a variety of activities.
For example, you may want to use this feature in the following scenarios:
Closing out a job that has been successfully completed
Accepting deliveries
Approving Change Orders to a job that has been pushed out to the phone
Approving a Work Order that will allow you to start work.
• Tap on the form which is associated with the Signature capture option from the Forms list.

iPhone/iPad User Guide Page 48 of 54
• Tap on the Sign icon.

iPhone/iPad User Guide Page 49 of 54
• The Signature capture screen appears. Capture the signature using your finger (hard objects like
stylus or fingernail will not work). Once done tap on “Save”.
A sample signature is shown in this image.
• Now you will be brought back to the Signature capture form screen. Tap on the icon for
preview of the signature at the top right corner of your phone screen. Tap on the “Submit” button
to attach the signature with the form. If you want to capture more than one signature, follow the
same procedure to capture and attach multiple signatures to your form.
iPhone/iPad User Guide Page 50 of 54
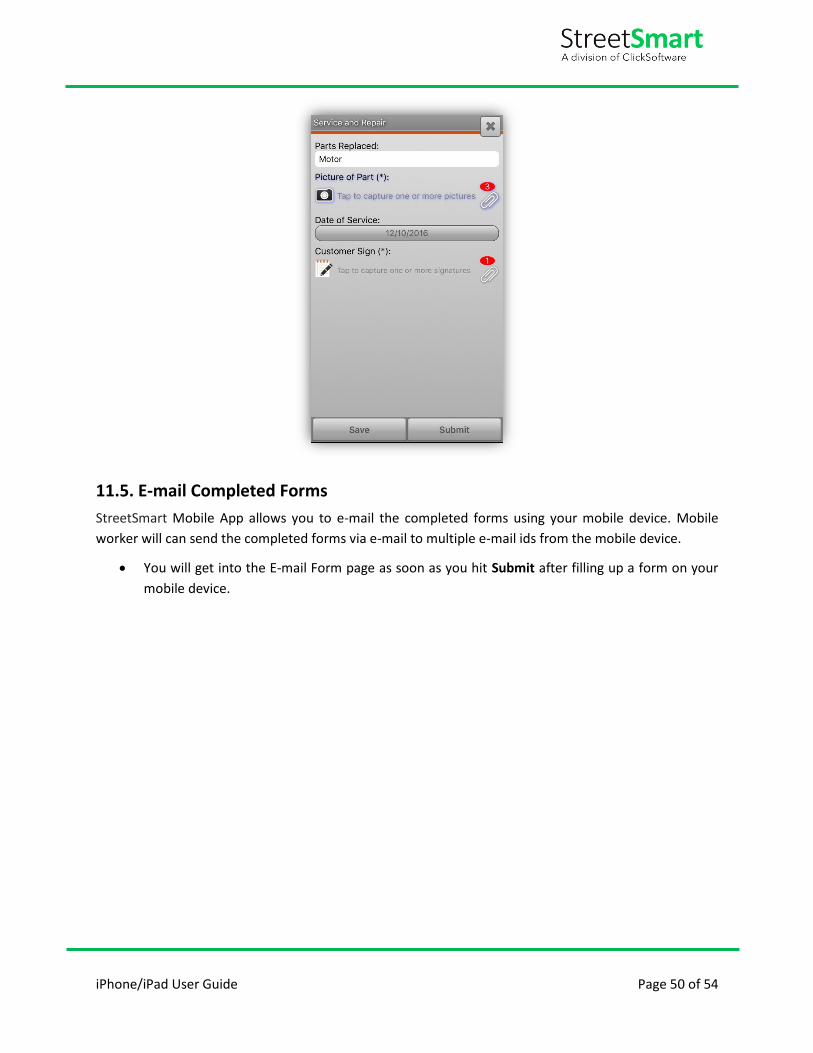
11.5. E-mail Completed Forms
StreetSmart Mobile App allows you to e-mail the completed forms using your mobile device. Mobile
worker will can send the completed forms via e-mail to multiple e-mail ids from the mobile device.
• You will get into the E-mail Form page as soon as you hit Submit after filling up a form on your
mobile device.

iPhone/iPad User Guide Page 51 of 54
• Enter valid e-mail ids (separated by comma, space and semicolon) into the Enter Email ID(s) box
and tap Send. You can also select e-mail ids from your phone’s contact list. If you do not want to
send any e-mail, just tap Skip.

iPhone/iPad User Guide Page 52 of 54
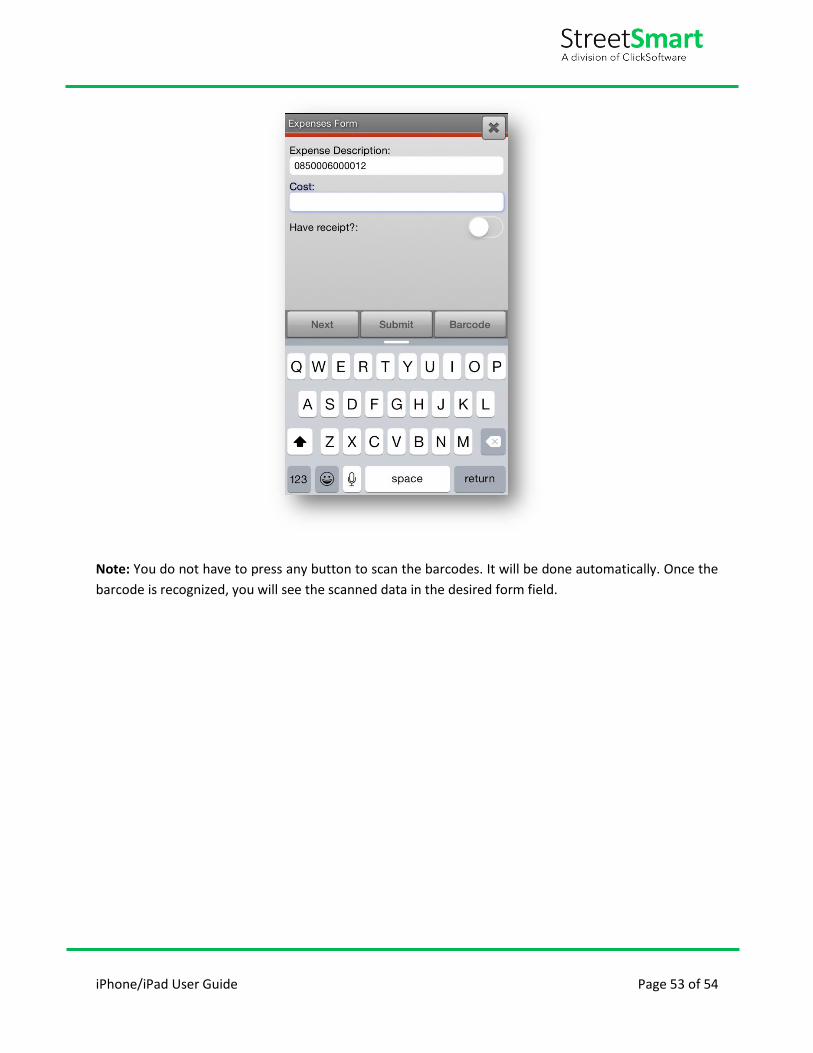
12. Barcode Scanning
The StreetSmart Mobile App allows you to scan barcodes using the camera built into the phone.
To scan barcodes, follow these steps:
• On StreetSmart Mobile App, tap and hold on the field in a form, where you want to enter the
scanned data. Tap on Barcode once presented with the options as shown in the following
illustration.
• The Barcode scanner will automatically start on your phone. Place the barcode inside the
viewfinder rectangle to scan it.
iPhone/iPad User Guide Page 53 of 54
Note: You do not have to press any button to scan the barcodes. It will be done automatically. Once the
barcode is recognized, you will see the scanned data in the desired form field.

iPhone/iPad User Guide Page 54 of 54
13. Settings Menu
Pressing the Settings will bring the user to the Settings menu. You will then be prompted to enter a pin
number (default is 4321). This menu offers administrative and troubleshooting features.
• Device Summary
▪ View detailed device info under device summary
▪ This contains helpful information when calling customer support.
• Server Sync
▪ Force the application to download new or updated jobs, locations, messages and
preferences.
• Clear Activation
▪ Reset the device activation on the device and the server.
▪ The device now resets the activation on the server as well, eliminating the need for a web
user to login and clear the activation.
▪ Same as the traditional nine 3’s functionality, however now the user does not need to
logout.
• Clear Record Store
▪ Clear all data stored on the device
▪ Same as the traditional nine 0’s functionality, however now the user does not need to
logout.
• Volume
▪ Change the new/changed item notification volume (low, medium, high, beep)
• Force Login
▪ Force the user to login upon the next application restart.
▪ This replace the traditional * 0 functionality.
▪ Useful if the login mode is set to automatic and you need to log another user in.
• Retrieve GPS
▪ Force the application to collect and store a GPS point.
Note – ‘Settings’ menu could be made hidden from the StreetSmart home screen on your worker’s mobile
phone to prevent them from making any unwanted changes in the StreetSmart settings.