e-Builder User Guide e-Builder User Guide 1 e-Builder Online User Assistance 1.1Processes 1.1.1About...
47
© 2016 e-Builder, Inc. e-Builder User Guide Processes Module
Transcript of e-Builder User Guide e-Builder User Guide 1 e-Builder Online User Assistance 1.1Processes 1.1.1About...
© 2016 e-Builder, Inc.
e-Builder User Guide
Processes Module

e-Builder 8.12 Help
by e-Builder, Inc.

All rights reserved. No parts of this work may be reproduced in any form or by any means - graphic, electronic, ormechanical, including photocopying, recording, taping, or information storage and retrieval systems - without thewritten permission of e-Builder.
Products that are referred to in this document may be either trademarks and/or registered trademarks of therespective owners. The publisher and the author make no claim to these trademarks.
While every precaution has been taken in the preparation of this document, the publisher and the author assume noresponsibility for errors or omissions, or for damages resulting from the use of information contained in this documentor from the use of programs and source code that may accompany it. In no event shall the publisher and the author beliable for any loss of profit or any other commercial damage caused or alleged to have been caused directly orindirectly by this document.
Printed: March 2016
e-Builder User Guide
© 2016 e-Builder, Inc.
e-Builder User Guide4
Table of Contents
Part I e-Builder Online User Assistance 6
................................................................................................................................... 61 Processes
......................................................................................................................................................... 6About the Processes Module
......................................................................................................................................................... 15Access Project Processes
......................................................................................................................................................... 16Access Process Details Page
......................................................................................................................................................... 16Using the Filter
......................................................................................................................................................... 17Working with Processes
.................................................................................................................................................. 18Start Processes
.................................................................................................................................................. 19Starting an External Workflow Process
.................................................................................................................................................. 20Accept/Decline Process Step
.................................................................................................................................................. 21Take Action on a Process
.................................................................................................................................................. 22eSign Documents
.................................................................................................................................................. 23Forward Process Step
.................................................................................................................................................. 24Comment/Request Comments on Processes
.................................................................................................................................................. 25Attach Documents to a Process
.................................................................................................................................................. 26Attach Processes to a Process
.................................................................................................................................................. 27Attach Forms to a Process
.................................................................................................................................................. 28About Delegating Process Steps
.................................................................................................................................................. 28Delegate Process Steps
.................................................................................................................................................. 29View Routing History
.................................................................................................................................................. 29View Workflow Diagram
.................................................................................................................................................. 30Print Process Information
......................................................................................................................................................... 31Working with Lookup Processes
.................................................................................................................................................. 31View Linked Processes
.................................................................................................................................................. 32Add New Dependent Processes
.................................................................................................................................................. 33Attach Existing Dependent Process
......................................................................................................................................................... 34Processes – Page Overviews
.................................................................................................................................................. 35Project Processes Page Overview
.................................................................................................................................................. 37Process Instance Page Overview
.................................................................................................................................................. 41Routing History Page Overview
.................................................................................................................................................. 43Process History Page Overview
.................................................................................................................................................. 44Request Comment Page Overview
.................................................................................................................................................. 46Unfinished Drafts Page

Part
I
6 e-Builder User Guide
1 e-Builder Online User Assistance
1.1 Processes
1.1.1 About the Processes Module
The e-Builder Processes module (also referred to as Structured Workflow) is acollaborative system that automates business process according to a set ofbusiness rules.
The following sections are included in this topic:
· Collaboration
· Benefits of a Structured Workflow
· Typical Job Functions Using this Module
· Key Concepts
Collaboration
A core capability of the e-Builder system is its ability to facilitate collaboration.Effective collaboration and communication among the project teams is an essentialingredient for success on each construction project. The e-Builder Processesmodule facilitates collaboration by providing a mechanism to route informationbased on defined business rules, track communications and ensure accountabilityfor all parties along the process work path.
The system will empower an organization to store, retrieve, change and use thebusiness rules that affect its operations in a simulated and repeatableenvironment. Consistent and standardized processes within an organization thatwould normally require human knowledge to carry out can now be taken care of bythe system. In other words, the system allows all project team members to accessand update a process with little to no knowledge of the entire process, because theprocess is automated.
Automated steps help do away with many of the project participant mundanetasks, leaving them time to focus their energy on their jobs. A business process isstructured so each instance is managed according to the same business rules, everytime. This consistency provides stability in the business and predictability for theresources.
For example, if a subcontractor had to fill out an RFI in the real world via a paperprocess the subcontractor has to know whom to send it to for a particular project.Let's say procedurally it is defined that the subcontractor must send the RFI to thegeneral contractor project manager before routing it to the owner project managerand the A/E. Traditionally, outside of a system like e-Builder, the subcontractor
7e-Builder Online User Assistance
would have to know to do that based on their contractual agreement. In thestructured workflow enhanced feature set the subcontractor could 'submit' the RFIand the system would know to route it to the general contractor project managerautomatically. There is no thought required other than filling out the question inthe RFI. And when the general contractor project manager received the RFI andreviewed it, he/she could determine there was a cost and/or a schedule impact. Ifthere was such an impact then when the general contractor project manager'submitted', the system could automatically route to the owner project managerfirst to give him/her visibility to manage the exposure, and if not it could routedirectly to the A/E project manager to answer; it all depends on the way thestructured workflow is configured. The e-Builder Processes module makes theprocess efficient and less prone to error because the system is routing the processfor you based on a set of predefined business rules.
Benefits of a Structured Workflow
· Improved Project Execution
· Faster "On-Boarding" of Employees
· Improved Employee Productivity
· Eliminate Redundancy
· Tighter Compliance with Regulatory Organizations
Improved Project Execution
Well-defined processes that can be enforced in a system eliminate the chance ofmistakes. An audit trail assists in identifying any mistakes in the process. A standardprocess also will drive standard reporting, which results in clear visibility into theprojects. This enables the project team to act on information early in the processbefore they become too costly or time consuming to address.
Automated workflow allows for continuous process improvement. The moduleallows for the collection of detailed information on work processes over time. Asbusiness environments change the organization can modify its processes based onlessons learned and data collected to further improve project execution.
Faster "On-Boarding" of Employees
Faster "on-boarding" of employees enables the organization to scale. The process isconsistent and easy to follow based on user roles and permissions. It does notrequire in depth knowledge of the process rules or policies and procedures. These

8 e-Builder User Guide
variables are all addressed in the system so the new user simply follows the stepsin the process. Additionally, employee turnover does not result in loss of quality ora break in the process.
Improved Employee Productivity
Improved employee productivity eliminates dead time between steps. Reportablestatistics are automatically generated as a measure to continuously improve theprocess over time. Processes are transparent and result in increased accountability,which in turn results in improved productivity. Repetitive tasks are automatedfreeing resources to focus on tasks that add more value to the organization.Business rules are placed throughout each step in the process to ensure that thedata is entered correctly and escalation occurs automatically if any of the steps aredelayed unnecessarily. And, using defined workflow to automate these types ofprocesses streamlines the organization by reducing data entry to key people,thereby reducing errors and improving productivity.
Elimination of Redundancy
In e-Builder many of the work processes result in action taken in the cost ordocument management modules. Therefore, the enhanced workflow featuresprovide the capability to integrate cost and document functions into one process. Atypical example of this would be a change order approval process that results in achange to the committed costs and backup or supporting documentation in thecentral file library for the project. In this example the commitment change can becreated and the status of it (via routing for approval) can update and reflectautomatically in the cost module for exposure. And the supporting documentationcan automatically be configured to be placed in a predefined folder. No extra workrequired. It is completely managed in the process definition.
Tighter Compliance with Regulatory Organizations
The system provides an automatic audit trail for compliance reporting. Automaticrouting of information through a process ensures that no steps are forgotten ormissed resulting in improved compliance. In addition, a structured process ine-Builder can be demonstrated to auditors and regulators and information caneasily be reported.
Typical Job Functions Using this Module

9e-Builder Online User Assistance
e-Builder supports the different team members that are involved in the project.Based on their job function users may be able to configure, initiate, view, update orclose processes. Processes are project and role permission based. If required, awork flow (routing of process steps) can be defined to point to a set of projects oreven a specific data field in a process layout can be set up to only be visible to a setof key roles. Any user who is involved in communication of a project can beinvolved with processes. Which users, process types, data fields, layouts, and workflows are utilized are specific to the process requirements.
Each role or job function will have access to create or respond to specific processesdefined by your managers and administrators. Listed below are a subset of usersthat have responsibilities and influence in defining, configuring and maintaining aset of processes in e-Builder.
· Project or Executive Assistant – Account Administrator
· Project Manager – Workflow Initiator
· Financial Director – Workflow Responder
· Executive – Workflow Responder and Reporter
Title: Project or Executive Assistant
User Role: Account Administrator
Background
The project or executive assistant for an owner company is responsible forcoordinating, organizing, and handling the day-to-day activities or tasksrequired to support the executive or project manager, which includes managingproject files, distributing all correspondence as directed by the executive orproject manager, maintaining logs, and coordinating meetings. The projectassistant needs to communicate to other departments and update theexecutive or project manager on messages and the status of delegated work. Inaddition, the assistant will ensure the adequacy of supporting documents(contracts, change orders, legal documents, invoices, etc.)
Role
During an e-Builder implementation, the project assistant will be workingclosely with the e-Builder implementation team to set up the work flows. Thismeans the assistant will be providing feedback and designing the work flowprocesses using the front end designer. Once the implementation team rolls offof the project, the assistant will be responsible for creating new work flows ormodifying existing ones. Basically the assistant will manage the work flow
10 e-Builder User Guide
environment. In addition, the assistant will override specific instances of a workflow should the need arise due to a user leaving the company (for example) toaddress the processes in their court.
Title: Project Manager
User Role: Work flow Initiator
Background
The project manager is intimately familiar with each of the key processesrequired to successfully deliver capital projects within budget and on time. Theprimary responsibility is to project manage the project. Specifically, themanager will provide advice and consultation with respect to design, scope ofwork, and cost estimating. The manager will also assist and manage theprequalification and selection of the architect/engineer and general contractorand negotiate on unforeseen conditions or oversights from the designer orgeneral contractor. The project manager will use a schedule as a tool to assist incontrolling the timing and performance of building the project and a costmanagement system to ensure the project remains within budget.
Role
The project manager is involved with the business process. The projectmanager will go to the work flow area to initiate a process – or go to thespecific module and start the process there. Two options exist for each processinitiation. The manager may not initiate a process every day. Once the managerstart’s a process the system will support the manager to do what is required. Itwill not let the project manager do something he should not do. The projectmanager will also be able to delegate work to his team members easily whenneeded.
Title: Financial Director
User Role: Work flow Responder
Background
The financial director is responsible for enhancing financial controls, deliveringstrategic financial assistance to the board and continuing the development ofexternal relationships to ensure future finance and investment opportunitiesare recognized. The director will assist in earned value analysis, projecting cashflow management, and reporting on overall profitability performance.
11e-Builder Online User Assistance
Role
As the work flow responder, the financial director will be able to act on workflow items sent in an easy way. The director will be instantly notified via emailso that the item can responded to in a timely manner requiring little to nothought on what needs to happen next. Once in the system the steps will beclearly outlined on what the director needs to do within each process. Thedirector may need to approve a funding request or a budget, for example,within e-Builder and the process will be intuitive to ensure the process iscompleted in a timely manner.
Title: Executive
User Role: Work flow Responder and Reporter
Background
The executive is primarily responsible for ensuring the company meets specificgoals and objectives. The executive devises strategies and formulates policies toensure that these types of objectives are met. The executive meets with thesubordinate executives regularly to ensure that operations are conducted inaccordance with the company’s goals. The executive also meets with the boardregularly and is required to report to them the overall health of the projectportfolios. The executive is held accountable for the success or failure of theorganization.
Role
The executive will be required from time to time to respond to work flow thatrequires their approval. As such, is it critical that the process required fromthem (starting with the email notification and finishing with the approvalaction) is very easy to access and complete. If the executive, for example, isreviewing cost items (budget, contract, etc.) then it can be configured so thatthe executive can review the financial data within the work flow itself to ensurethe approval is efficient and automatically updated in the Cost module whereappropriate.
The executive needs to maintain visibility of all the projects within the program.Reporting is a key requirement for the executive to be able to quickly ascertainthe overall healthiness of the program. Ultimately, the solution will provideadequate reports and dashboard views to allow the executive to manage thework flow processes by exception. The reports will be dynamic (or real time)and require little to no effort by the executive to generate.

12 e-Builder User Guide
Key Concepts
Before you start reading the e-Builder Processes module help, you shouldfamiliarize yourself with some key concepts used throughout this section.
· Project
· Process Types
· Module Integration
· Data Fields
· Page Layouts
· Sections
· Workflow
· Actor
· Action
· Data Assignments
· Step
· Data Entry Step
· Conditional Step
· Connector
· Spawn Process Step
Project
Most everything in e-Builder takes place within the context of a project. Projects ine-Builder refer to the various projects that you are participating in. Each 'real world'project is associated with a project in e-Builder. If you are working on the 'realworld' project, then you can be added as a member of the project in e-Builder.Your Project Administrator or Manager will be able to add you as a member of aproject in e-Builder.
Process Type
The process type is the name of the process. Examples of process types are ChangeOrder Request, Submittal and Project Issue. Each process type has a work flowcomprised of a series of steps. Each step has permissions assigned to it. Thisdetermines who can act or view on each step. Because of this, you may be able toact and view certain instances of process types, but, unable to initiate or act on aninstance of another process type.
Module Integration
13e-Builder Online User Assistance
If the Cost Module is activated for your account process types can be integratedwith cost items. A process type can include one and only one cost item. The costitems available are budget change, commitment, commitment change,commitment invoice and general invoice. When integrated the cost item details arecontained in the process type automatically. That means that when a process isfilled out that is configured as such, then the status and details of the cost item willautomatically be updated in the Cost Module. This solution eliminates redundancy.
Data Fields
Fields can be configured to store information related to the process. These fieldscan present as drop down boxes, to date fields, to file fields and many other typesthat you may be familiar with as it relates to filling data out on an electronicdocument. Data fields automatically create unique variable names for use inreports and mail merge. Data fields have permissions assigned to them so that thefield can be restricted only to certain roles.
Page Layouts
Page Layouts organize data fields into custom displays. A layout is associated with astep in a work flow. There can be both actor and non-actor layouts associated witheach step, allowing you to restrict proprietary data not meant for to be edited oreven viewable by non-actor users accessing the step. Data fields are added tolayouts and each field can be marked as read-only or required based on yourbusiness requirements.
Sections
There are one to many sections in a page layout. Each section is a collection of datafields. The purpose of a section is to separate data into like areas to organize yourdata layout in a way that resonates with the potential actors.
Workflow
Workflow is the automation of a business process (entirely or partially) duringwhich documents and other pertinent information is passed from one participantto another for action, according to a set of procedural or business rules. Eachprocess type can have one or more work flows assigned to it. Each project has onework flow assigned to it. In each work flow there are a series of flows consisting ofsteps and connectors with a start and finish.
14 e-Builder User Guide
Actor
An actor is a person that can 'act' on a step. When a work flow enters a step theactors receive a notification via email to login e-Builder and accept or decline theresponsibility to complete that step. Once an actor takes an action the step isconsidered to be completed.
Action
An action is a trigger to complete a step in a work flow. Data entry steps are thosesteps where it requires a human to act on it. Each of these steps include one ormore actions. When an action is taken the work flow routes to the next step.
Data Assignments
Data assignments can be configured to automatically set a value to a data field.There can one or more data assignments set for an action.
Step
A work flow step organizes the page layouts, actors and non-actors, actions, dataassignments and standard due dates. Each step represents an activity that needs tobe completed by an actor in order for the work flow to move on its path towardscompletion (or finish).
Data Entry Step
The data entry step requires a person in an actor role to complete it. Each dataentry will require an actor to take an action in order for the work flow to move onits path towards completion. In addition, there can be data fields that are requiredto be entered or updated.
Conditional Step
A conditional step is a defined statement that can take a path of true or false. It isconfigured to let the system determine the route in the work flow.
15e-Builder Online User Assistance
Connector
A connector connects two steps together. A connector requires a from step, actionand to step.
Spawn Process Step
A spawn process step allows a process to spawn another process when the workflow enters that step. A classic example of this would be a potential change order(PCO) that can spawn a change order request (COR) if it is approved by theappropriate parties.
1.1.2 Access Project Processes
There are two methods of accessing the Processes module. The first method isfrom the Top Navigation Tabs, which should be used if you are not already in aproject. However, if you are in another module within the same project, the bestway to access the project processes is from the project menu - this will help youavoid having to reselect your project.
From the Top Navigation Tabs
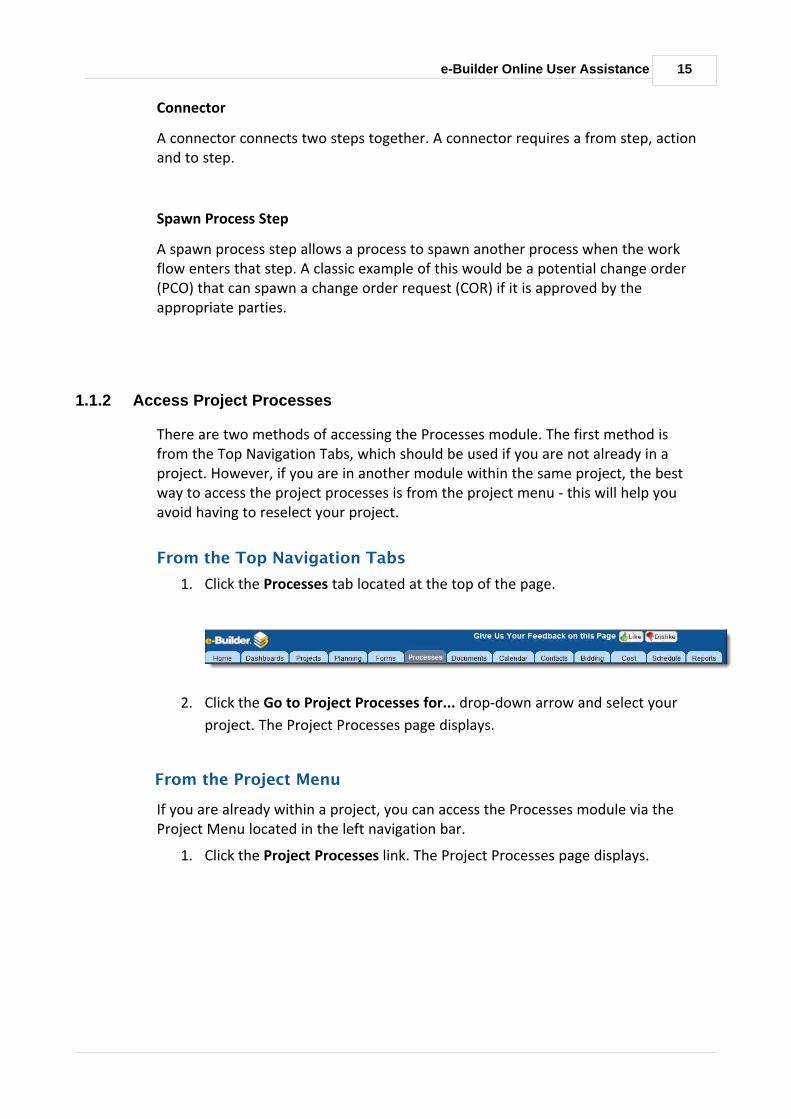
1. Click the Processes tab located at the top of the page.
2. Click the Go to Project Processes for... drop-down arrow and select your
project. The Project Processes page displays.
From the Project Menu
If you are already within a project, you can access the Processes module via theProject Menu located in the left navigation bar.
1. Click the Project Processes link. The Project Processes page displays.

16 e-Builder User Guide
1.1.3 Access Process Details Page
To access the Process Details page:
1. Go to the project processes. For more information, see Access the Project
Processes.
2. Filter for the process whose details you want to view.
3. Click the process number or subject of the process you want to access. The
Process Details page opens up for that process.
1.1.4 Using the Filter
The project processes filter gives you the ability to narrow your search results tojust the process types you need by providing fields that help you specify criteria foryour search. This filter is located on the Project Processes page, which displaysafter a project is selected in the Processes module.
17e-Builder Online User Assistance
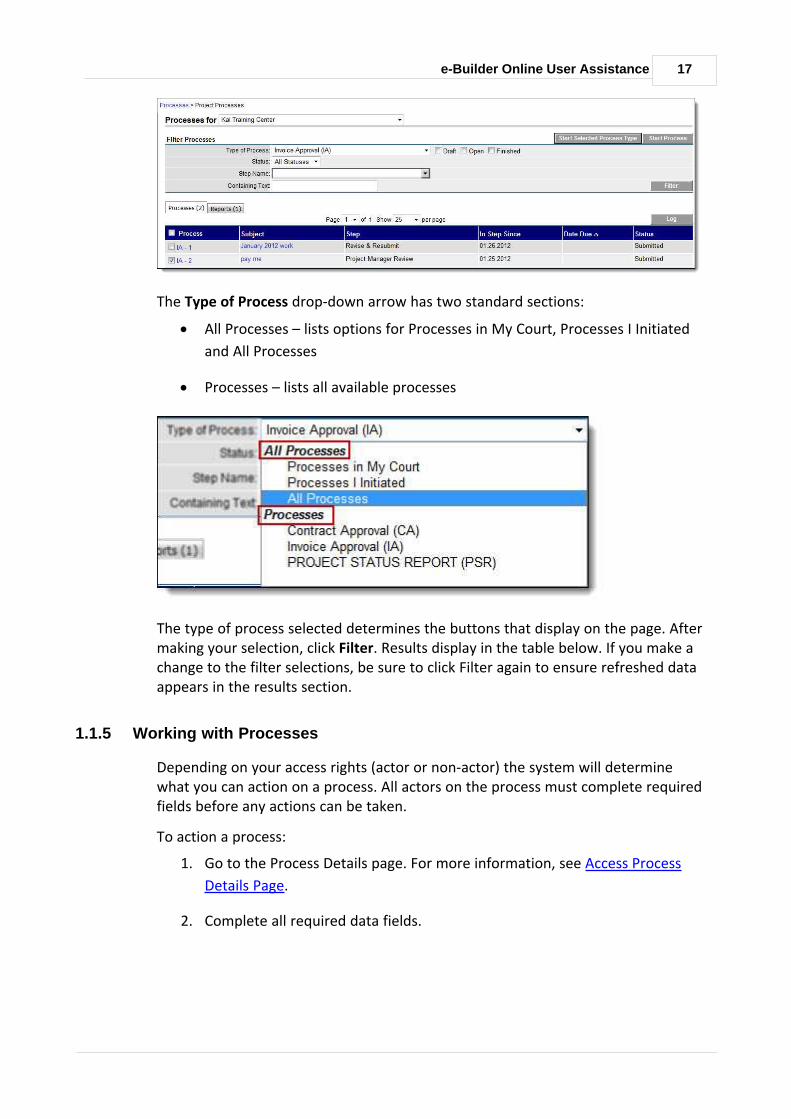
The Type of Process drop-down arrow has two standard sections:
· All Processes – lists options for Processes in My Court, Processes I Initiated
and All Processes
· Processes – lists all available processes
The type of process selected determines the buttons that display on the page. Aftermaking your selection, click Filter. Results display in the table below. If you make achange to the filter selections, be sure to click Filter again to ensure refreshed dataappears in the results section.
1.1.5 Working with Processes
Depending on your access rights (actor or non-actor) the system will determinewhat you can action on a process. All actors on the process must complete requiredfields before any actions can be taken.
To action a process:
1. Go to the Process Details page. For more information, see Access Process
Details Page.
2. Complete all required data fields.

18 e-Builder User Guide
3. Depending on your account settings, you may or may not have the option to
take any of the following actions:
· Accept/Decline the Process Step
· Take an Action
· Comment /Request Comments
· Attach Documents to a Process
· Attach Processes to a Process
· Attach Forms to a Process
· Delegate Process Steps
4. Before finalizing the process step you can take any of the following actions:
· Click Check Spelling to check the spelling of the selected tab.
· Click the Show Routing History link to view the routing history of thisprocess step.
· Click the Show Workflow Diagram link to view the workflow diagramof this process.
· Click Print to print the select tab.
· Click Save to save changes to the process step and return to the itemlater.
· Click Cancel to close this window and cancel this action. All unsaveddata will be lost.
Related Topics:
· Starting an External Workflow Process
1.1.5.1 Start Processes
To start a process:
1. Go to the Project Processes page. For more information, see Access Project
Processes.
2. Click Start Process. The Start Process page displays with a list of all available
processes for this account.
3. Click the name of the process you want to start.
4. Complete all required data fields.
5. Depending on your account settings, you may or may not have the option to
take any of the following actions:

19e-Builder Online User Assistance
· Attach Documents to a Process
· Attach Processes to a Process
· Attach Forms to a Process
· Check Spelling
· View Process Instructions
6. To finalize the process, take any of the following actions:
· Click Submit to submit the process step.
· Click Print to print the select tab.
· Click Save Draft to save changes to the process step and return to theitem later.
· Click Cancel to close this window and cancel this action. All unsaveddata will be lost.
Related Topic:
· Starting an External Workflow Process
1.1.5.2 Starting an External Workflow Process
Once a workflow process has been configured with the ability to start the workflow
offline, it is saved as a Microsoft WordÒ document that an internal e-Builder usercan download and send to the external user to fill out and email back to a generice-Builder email account, which will start the workflow process. The steps of thisprocedure are outlined below:
To start an external workflow process:
1. Internal e-builder user: Go to the project processes. For more information,
see Access Project Processes.
2. Click Start Process. The Start a process on [Project Name] dialog box
displays.

20 e-Builder User Guide
All workflows configured for offline initiation have a Download link in the
Offline Document column.
3. Click the Download link.
4. Save this file to your computer.
5. Email this file to the external process participant so that they can start the
process workflow.
6. External Participant: Open the process document, complete necessary fields,save the file, and then email it to the address located in the directions towardthe end of the document.
The workflow process has been initiated and updated in e-Builder, ready for
action to be taken on the next step in the workflow.
Related Topics:
· About External Workflow Processes
1.1.5.3 Accept/Decline Process Step
The option to accept or decline to act on a process step is only available if there aremultiple actors on the step and if this option is configured in the account settings.To accept or decline to act on a process step, click Accept or Decline located in theupper left-hand corner of the page.
If you are a potential actor on a step (a user that can take action) and there aremore than one potential actors, then each of you can choose to accept or declineownership of the step. Accepting or declining a process step lets other potentialactors know of your intentions. This feature is strictly informative; you do not have
21e-Builder Online User Assistance
to accept or decline the step to take action on it. If all other potential actors havedeclined the step and you are the last one then you can only accept taking actionon the step.
Process steps with the option for you to accept or decline, display in your court onthe Home Tab. When you decline taking action on a step, the item no longerdisplays in your court. When you accept or decline to take ownership of a processstep, e-Builder automatically makes a record is action and the date and time isavailable in the Routing History.
Tip: To see who else has accepted or declined this process step, click the ShowRouting History link, click the Step Name, and then click the Actors tab.
1.1.5.4 Take Action on a Process
To take action on a process step:
1. Go to the Process Details page. For more information, see Access Process
Details Page.
2. Click the drop-down arrow located to the left of the Take Action button and
make a selection from available options.
3. Click Take Action.
Note: You are not required to click the Take Action button if theprocess has been configured to allow the action to take place by simplymaking a selection from this drop-down menu. For more information onthis setting, see Workflow Properties Page Overview.
Note: If this action requires you to electronically sign a document, thesigning process instance page will appear. Watch this brief video to learnabout electronically signing documents.
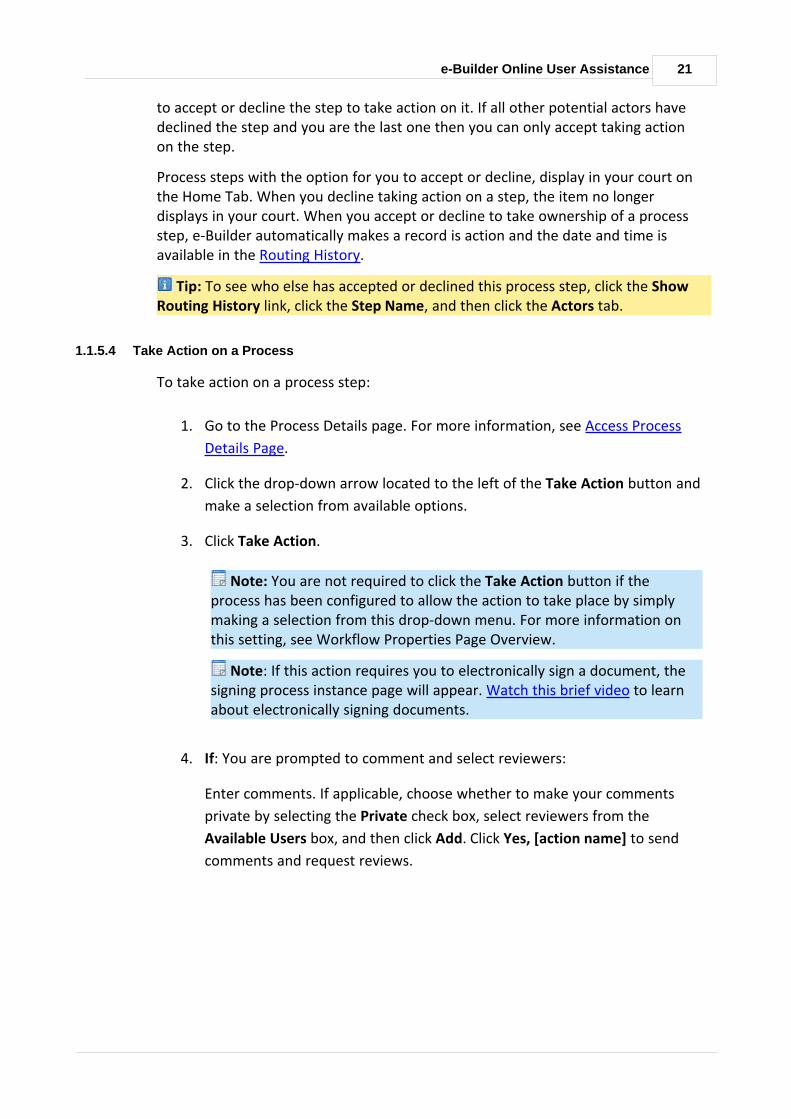
4. If: You are prompted to comment and select reviewers:
Enter comments. If applicable, choose whether to make your comments
private by selecting the Private check box, select reviewers from the
Available Users box, and then click Add. Click Yes, [action name] to send
comments and request reviews.
22 e-Builder User Guide
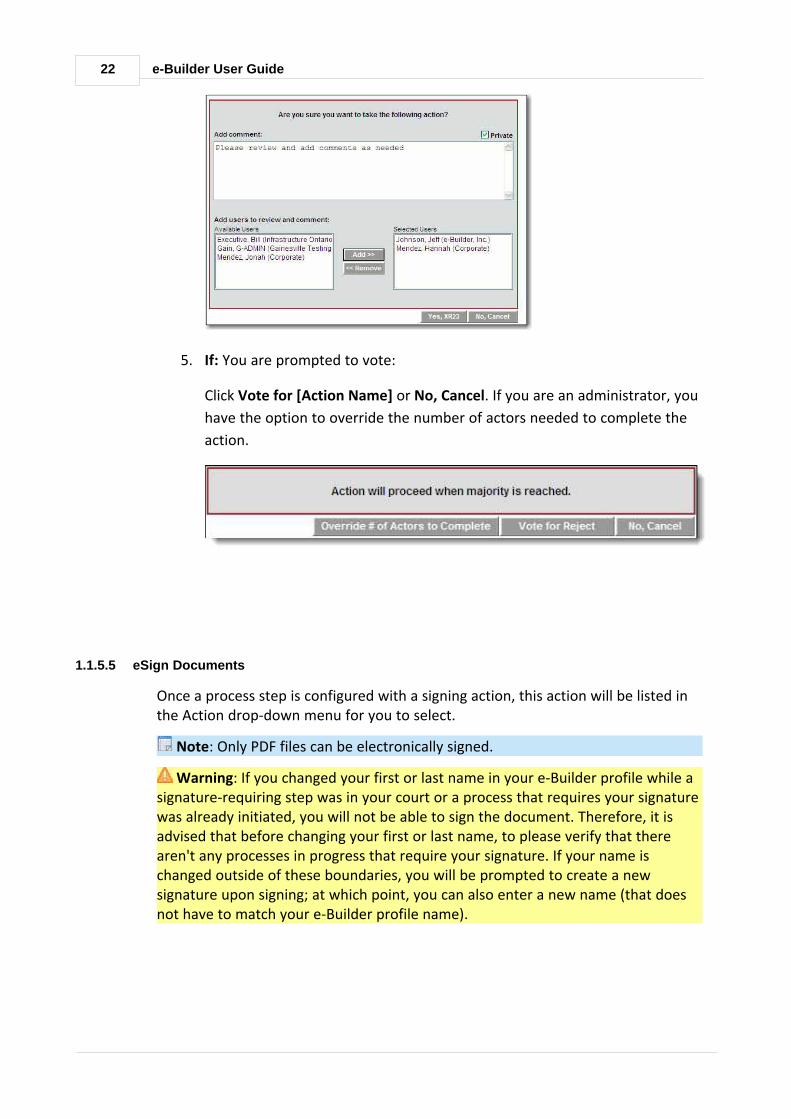
5. If: You are prompted to vote:
Click Vote for [Action Name] or No, Cancel. If you are an administrator, you
have the option to override the number of actors needed to complete the
action.
1.1.5.5 eSign Documents
Once a process step is configured with a signing action, this action will be listed inthe Action drop-down menu for you to select.
Note: Only PDF files can be electronically signed.
Warning: If you changed your first or last name in your e-Builder profile while asignature-requiring step was in your court or a process that requires your signaturewas already initiated, you will not be able to sign the document. Therefore, it isadvised that before changing your first or last name, to please verify that therearen't any processes in progress that require your signature. If your name ischanged outside of these boundaries, you will be prompted to create a newsignature upon signing; at which point, you can also enter a new name (that doesnot have to match your e-Builder profile name).

23e-Builder Online User Assistance
To electronically sign a document:
1. Go to the process step. For instructions, see Access Process Details Page.
2. Complete all necessary fields.
3. Click the Action drop-down arrow and select the signing action.
Note: Step names are configurable; therefore, the name of this stepwill be different for every user.
4. Click Take Action. A message displays prompting you for an electronicsignature.
Note: You are not required to click the Take Action button if theprocess has been configured to allow the action to take place by simplymaking a selection from this drop-down menu. For more information onthis setting, see Workflow Properties Page Overview in the Online Help.
5. Click the link, Click here to review and sign your document(s).
6. Click Review Document. The file opens in DocuSign.
7. Review and locate where your signature is necessary.
8. Drag and drop your signature from the Signature Context menu.
Note: This context menu displays by default, but should you need to
reopen it, click the pencil icon .
9. Click Finish. You are prompted for confirmation.
10. Click Yes. A success message displays on the e-Builder Process Instancepage.
11. Click Continue to complete this step.
1.1.5.6 Forward Process Step
The ability to forward a process instance may or may not be available on a processstep depending on process settings. If your e-Builder administrator enabled flexiblerouting, then the Forward option is available, otherwise you are not able toforward the process step. You can only forward to non-actors on the step. You arenot restricted on taking action on the step while you wait for a reply from therecipient.

24 e-Builder User Guide
To forward a process step:
1. Go to the Process Details page. For more information, see Access Process
Details Page.
2. Click Forward. The Forward Process page displays.
3. Click the Select Recipient drop-down arrow and select a recipient.
4. If applicable, to make your comment private, click the Private check box.
5. Enter your comment in the Comment box.
6. If these options are available, you can optionally take any of the following
actions:
· Attach Documents
· Attach Processes
7. Click Forward.
1.1.5.7 Comment/Request Comments on Processes
The following instructions are included in this topic:
· Comment on Processes
· Request Comment on Processes
Comment on Processes
To comment on a process, the process does not need to be in your court. Thatmeans you can add a comment any time, even when the process step is closed.Both actors and non-actors have the ability to comment on a process step.
To add a comment:
1. Go to the Process Details page. For more information, see Access Process
Details Page.
2. Click the Comments tab.
3. Click Comment. The Add Comment dialog box displays.

25e-Builder Online User Assistance
4. Enter your comment in the Comment box.
5. If these options are available, you can optionally take any of the following
actions:
· Attach Documents
· Attach Processes
· Attach Forms
6. Click Add Comment.
Request Comment on Processes
Only actors on the step can request comments. Comments can be requested frominternal e-Builder users or external project participants who may not have access tothe project via e-Builder.
To request comments:
1. Go to the Process Details page. For more information, see Access Process
Details Page.
2. Click the Comments tab.
3. Click Request Comment. The Request Comment dialog box displays.
4. Complete all required fields. For detailed information about the fields located
on this page, see Request Comment Page Overview.
Tip: When adding external participants to the message, use yourkeyboard to auto-fill the desired email addresses. Begin typing therecipient's name or email address then use the arrows to highlight the emailof choice, and then click Tab to make the selection.
5. Click Request Comment.
1.1.5.8 Attach Documents to a Process
To attach documents to a process:
1. Go to the Process Details page. For more information, see Access Process
Details Page.

26 e-Builder User Guide
2. Click the Attached Documents tab.
3. Click Attached Documents. The Attach Documents dialog box displays.
4. In the Select Attachment Method section, select your method of
attachment.
5. Click Browse For Files...
6. Search for and select the file you want to attach. You are returned to the
Attach Documents dialog box.
7. If you are attaching files from e-Builder, go to step 8.
Or
If you are uploading files from your computer, in the Select an e-BuilderDestination folder field, click Browse.
8. Search for and select the e-Builder destination folder.
9. Click Attach Selected.
1.1.5.9 Attach Processes to a Process
To attach processes to a process:
1. Go to the Process Details page. For more information, see Access Process
Details Page.
2. Click the Attached Processes tab.
3. Click Attached Processes. The Attach Processes from [Project Name] filter
displays.
4. Filter for the processes you want to see. Results display in the table below.
5. Select the check box next to the process(es) you want to attach.
6. Click Attach.

27e-Builder Online User Assistance
1.1.5.10 Attach Forms to a Process
Depending on your account settings you may or may not be able to attach forms toa process. If this option is available to you or if you are the account administrator,you can remove form attachments at any time.
The following procedures are included below:
· Attach Forms to a Process
· Removed Attached Forms from a Process
Attach Forms to a Process
To attach forms to a process:
1. Go to the Process Details page. For more information, see Access Process
Details Page.
2. Click the Attached Forms tab.
3. Click Attached Forms. The Attach Forms from [Project Name] filter displays.
4. Filter for the forms you want to see. Results display in the table below.
5. Select the check box next to the form(s) you want to attach.
6. Click Attach.
Remove Attached Forms from a Process
To remove an attached form from a process:
1. Go to the Process Details page. For more information, see Access Process
Details Page.
2. Click the Attached Forms tab.
3. Select the check box next to the form(s) you want to remove, and then click
Remove Form.
Note: For process instances that have already been submitted (not drafts)
28 e-Builder User Guide
the word "Removed" displays in parentheses in red text next to the formtitle, indicating that this form was removed from the process. You're able toreattach the same form by clicking the Reattach link located underneath thetitle of the form.
1.1.5.11 About Delegating Process Steps
The ability to delegate process steps is only available is specified by your e-BuilderAdministrator. If you are an actor in a step you can choose to delegate the work toanother project participant. You can only delegate if the step is not a ball in courtstep and there is not an action that requires a vote. A ball in court step is a stepwhere you can choose to forward to another user and that user can forward orreply. When an action requires a vote (or requires a majority or all to vote on theaction to execute it) then you cannot delegate the process. In this instance, thedelegate button will not even display.
You may choose to delegate a process step because you do not have the time toaddress the item or could use some help to address it. When you delegate theprocess you are granting this user to be a temporary actor. In other words you havegiven this other user absolute rights to act on your behalf as an actor.
Related Topics:
· Delegate Process Steps
1.1.5.12 Delegate Process Steps
To delegate a process step to another user on the project:
1. Go to the process details page for the process you want to delegate. For
more information, see Access Process Details Page.
2. Click the Delegate button located in the upper, right-hand corner of the
page. The Delegate Full Authority page displays.
3. Click the Select a Role drop-down arrow to select the role that the delegate
belongs to.
4. Click the Select a User drop-down arrow to select the delegate.
5. Click Delegate Authority. The delegate receives an email notification and can
take action on the process. The subject of the email contains ‘DELEGATED’.
29e-Builder Online User Assistance
Tip: After the task has been delegated, you are returned to the Process Detailspage. To view a history of this delegation and all other actions that surround thisprocess, click the Show Routing History link. For step-specific information, click thestep name on the Routing History page, and then the Actors tab; the name of thedelegate is listed, and then “Delegated” in the Actor Type column. See RoutingHistory Page Overview for a description of the fields located on this page. Also, theComments Tab lists a history of all transactions taken on this process, including itemsthat have been attached.
Related Topics:
· About Delegating Process Steps
1.1.5.13 View Routing History
Users have the ability to view the routing history for the process steps that theyhave access to. The routing history of a process step includes the actors that havetaken action on each step of the process thus far. You can view the action takenand the date and time stamp when it was completed. The age of the step andcurrent status is also available.
To view routing history:
1. Go to the Process Details page. For more information, see Access Process
Details page.
2. Click the Show Routing History link located toward the top of the page.
For more information about the Routing History page, see Routing History PageOverview.
1.1.5.14 View Workflow Diagram
The workflow diagram is available for you to see the process in its entirety. Whileworking on a process step, as the actor (or non-actor) you are taking action on aspecific step that is part of a larger process. The workflow diagram can be viewedfrom two pages within the Processes module:
· Process Details Page – Click the Show Workflow Diagram link.
· Routing History Page – Click the Show Workflow button.

30 e-Builder User Guide
1.1.5.15 Print Process Information
Printable process information is based on the mail merge templates created byyour e-Builder administrator. You have the ability to print process details, whichincludes line item information and process logs, which do not include specific lineitems.
· Print Process Details
· Print Process Logs
To print process details:
Note: The Print button only displays if there is an active process details mailmerge template assigned to the selected process type.
1. Go to the Project Processes. For more information, see Access Project
Processes.
2. Filter for the process type you want to print. For more information, see Using
the Filter.
3. Select the check box next to the desired process(es).
4. Click Print. A Microsoft Word® document displays with the selected process
information.
To print process logs:
1. Go to the Project Processes. For more information, seeAccess Project
Processes.
2. Filter for the process type you want to print. For more information, see Using
the Filter.
3. Select the check box next to the desired process(es).
4. Click Log. A Microsoft Word® document displays with the selected process
information.
31e-Builder Online User Assistance
1.1.6 Working with Lookup Processes
Lookup processes are configured by the account administrator. They link primaryand dependent processes to one another. In many cases e-Builder workflowprocesses are connected and flow from one to another through the project lifecycle. Lookup processes allow you to see with ease if, for example, a change orderis tied to a potential change order, and if that potential change order is linked toone or more RFIs so that it is clear what led to the change order. E-Builder providesyou with a way to view primary processes that are linked to dependent processesfrom both the Primary process page and the Dependent process pages. For everyPrimary process, there is a list of all its dependent process data-field combinations,along with functionality so that you can directly add a new dependent process orattach an existing dependent process.
The following are actions you take regarding lookup processes:
· View Linked Processes
· Add New Dependent Process
· Attach Existing Dependent Process
For account administrators who wish to configure lookup processes, see Set upLookup Processes.
1.1.6.1 View Linked Processes
To view linked processes:
1. Go to the project processes. For more information, see Access Project
Processes.
2. Filter for the primary process type you want to view. For more information,
see Using the Filter.
3. Click the process number or subject of the process you want to view. The
process details page displays with tabs of dependent processes.
32 e-Builder User Guide
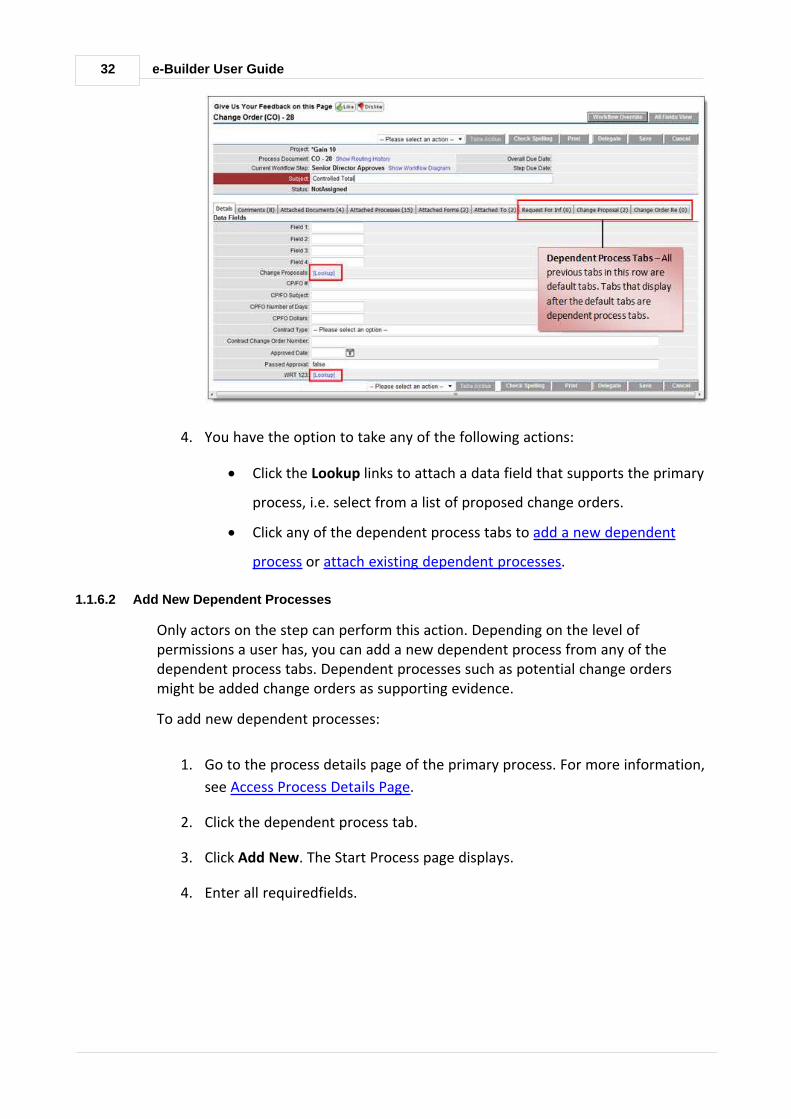
4. You have the option to take any of the following actions:
· Click the Lookup links to attach a data field that supports the primary
process, i.e. select from a list of proposed change orders.
· Click any of the dependent process tabs to add a new dependent
process or attach existing dependent processes.
1.1.6.2 Add New Dependent Processes
Only actors on the step can perform this action. Depending on the level ofpermissions a user has, you can add a new dependent process from any of thedependent process tabs. Dependent processes such as potential change ordersmight be added change orders as supporting evidence.
To add new dependent processes:
1. Go to the process details page of the primary process. For more information,
see Access Process Details Page.
2. Click the dependent process tab.
3. Click Add New. The Start Process page displays.
4. Enter all requiredfields.

33e-Builder Online User Assistance
5. Click Submit. The dependent process you just added appears on the
dependent process tab.
Note: After this task is complete, you can take any of the following actions tofinalize the process step:
· Click Check Spelling to check the spelling of the selected tab.
· Click the Show Routing History link to view the routing history of this
process step.
· Click the Show Workflow Diagram link to view the workflow diagram
of this process.
· Click Print to print the select tab.
· Click Save to save changes to the process step and return to the item
later.
· Click Cancel to close this window and cancel this action. All unsaved
data will be lost.
· Take an Action
· Delegate Process Steps (Only actors are able to perform this action.
This action may or may not be available, depending on the process
settings)
1.1.6.3 Attach Existing Dependent Process
Only actors on the step can perform this action. Depending on the level ofpermissions a user has, you can add an existing dependent process from any of thedependent process tabs.
To add existing dependent processes:
1. Go to the process details page of the primary process. For more information,
see Access Process Details Page.
2. Click the dependent process tab.
3. Click Attach Existing. The Filter Process page displays.

34 e-Builder User Guide
4. Filter for the dependent process(es) you want to add.
5. Select the check box next to the process(es) you want to add.
6. Click Attach Existing. The dependent process you just added appears on the
dependent process tab.
Note: After this task is complete, you can take any of the following actions tofinalize the process step:
· Click Check Spelling to check the spelling of the selected tab.
· Click the Show Routing History link to view the routing history of this
process step.
· Click the Show Workflow Diagram link to view the workflow diagram
of this process.
· Click Print to print the select tab.
· Click Save to save changes to the process step and return to the item
later.
· Click Cancel to close this window and cancel this action. All unsaved
data will be lost.
· Take an Action
· Delegate Process Steps (Only actors are able to perform this action.
This action may or may not be available, depending on the process
settings)
1.1.7 Processes – Page Overviews
This section includes an overview of the pages that display throughout theProcesses module:
· Project Processes Page Overview
· Project Details Page Overview
· Routing History Page Overview
· Request Comment Page Overview

35e-Builder Online User Assistance
1.1.7.1 Project Processes Page Overview
The Project Processes page is the first to display after a project is selected withinthe Processes module. All existing processes display for your access, but a filter isalso provided allowing you to filter based on certain criteria. You can start aprocess from here and also access active processes in order to take further actionor view detailed information. Below is an overview of this page.
Field/Section Description
Processes for Click this drop-down arrow to access processes for different
projects. This menu gives you a quick and easy way to switch
between projects.
Start Selected
Process Type
This button displays only when a specific process type is
selected from the Type of Process drop-down arrow. Click this
button to start the filtered process.
Start Process Click this button to start a process. A list of all available
processes display in a separate popup window.

36 e-Builder User Guide
Filter Processes The filter has a number of components to help you find just
the processes you’re looking for.
Search In: These options help you narrow search results. Search forprocesses that you've initiated, those in your court or both.
Type of Process:Click to choose either all processes or a specific process byname. If a status option is selected in combination with the 'All'option, you will filter for all processes of the selected status. Ifa status is not selected, 'All' will filter for all processes of everystatus that you have the permissions to see.
· Draft: Only users in roles authorized to see draftprocesses, account and project administrators are able tofilter for drafts. Drafts can also be managed from the Unfinished Drafts page.
· Open: Only users in roles authorized to see all processinstances account and project administrators are able tofilter for open processes.
· Finished: Only users in roles authorized to see all processinstances account and project administrators are able tofilter for finished processes.
To learn more about process view settings, see ProcessesProperties Tab Overview.
Status: Select to filter by a specific process status.
Containing Text:Enter text to search for keywords located in the processdetails, such as the process name, subject or field descriptions.
Filter Click this button after entering search criteria. Results display
in the processes table toward the bottom of the page.
37e-Builder Online User Assistance
Reports Tab Click this tab to access a list of reports that have been
generated for the selected process type. On this tab, there is
an option to add a new report, which will take you into the
Reports module.
Print This button displays only if there is an active process details
mail merge template assigned to the selected process type. To
print process details, select the check box next to the desired
process and then click print for a printed copy of the process.
Log If a process log mail merge template is not assigned to this
process, the default template is used. To print a process log,
select the check box next to the desired process(es) and then
click Log to generate a Microsoft Word® version of the process
log. Please note that specific line items are not available in the
process log. If available, the log includes merged data fields
and comments.
Note: Your e-Builder administrator can customize theprocess log mail merge template, if you have a need foradditional fields please contact your e-Builder administrator.
Processes Table This table displays the results of your filter. This table lists
detailed information about the process, including the process
name, subject, in which step it’s in, its duration in the current
step, the due date and status.
Processes that are grayed out are completed and those whose
titles are in blue are currently active. Click the process number
or subject to open the Process Details page.
1.1.7.2 Process Instance Page Overview
The Process Details page displays when a process number or subject is selected onthe Project Processes page. For instructions on starting a process instance, see Start Processes. Below are descriptions of the fields and buttons located on thispage.
38 e-Builder User Guide
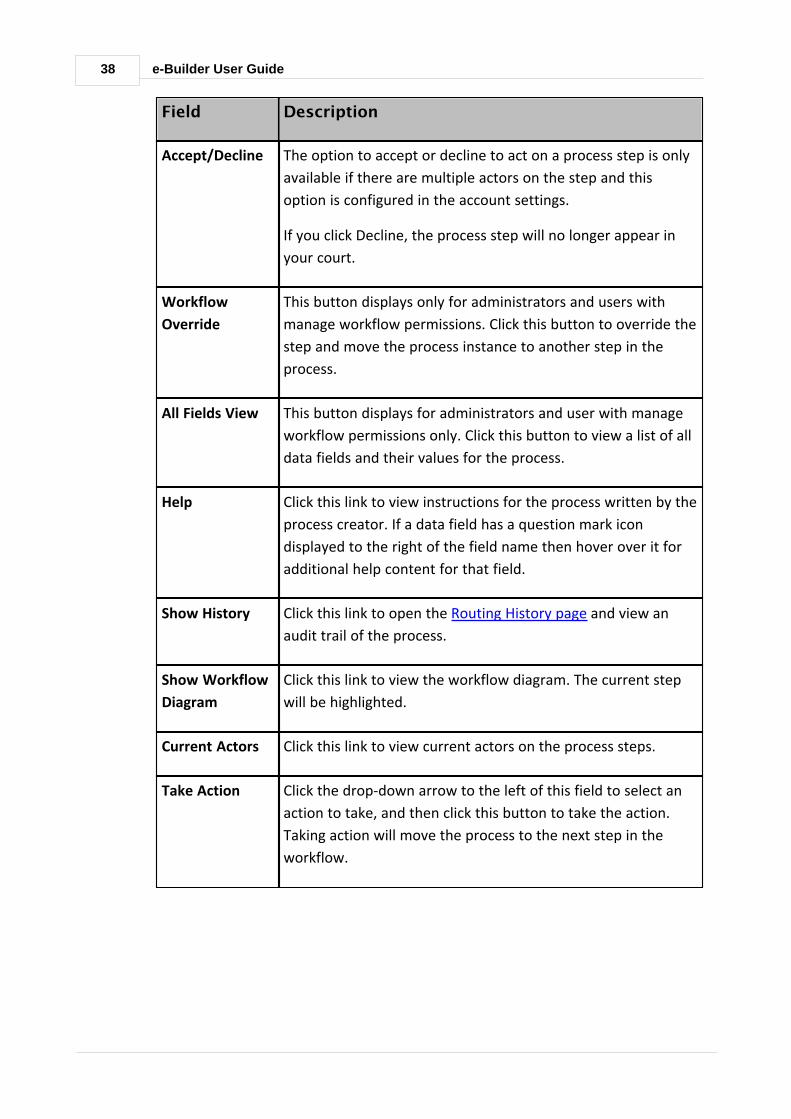
Field Description
Accept/Decline The option to accept or decline to act on a process step is only
available if there are multiple actors on the step and this
option is configured in the account settings.
If you click Decline, the process step will no longer appear in
your court.
Workflow
Override
This button displays only for administrators and users with
manage workflow permissions. Click this button to override the
step and move the process instance to another step in the
process.
All Fields View This button displays for administrators and user with manage
workflow permissions only. Click this button to view a list of all
data fields and their values for the process.
Help Click this link to view instructions for the process written by the
process creator. If a data field has a question mark icon
displayed to the right of the field name then hover over it for
additional help content for that field.
Show History Click this link to open the Routing History page and view an
audit trail of the process.
Show Workflow
Diagram
Click this link to view the workflow diagram. The current step
will be highlighted.
Current Actors Click this link to view current actors on the process steps.
Take Action Click the drop-down arrow to the left of this field to select an
action to take, and then click this button to take the action.
Taking action will move the process to the next step in the
workflow.

39e-Builder Online User Assistance
Check Spelling Click this button to check the spelling of data fields on this
page.
Submit Click this button to complete the start step when initiating a
process.
Forward This button only display if the step has been configured for
flexible routing by your account administrator. Click this button
to forward the process to another user on the project.
Reply This button only display if the step has been configured for
flexible routing by your account adminitrator. Click this button
to reply to the user on the project that forwarded the process
to you.
Print Click this button to print the process step. Based the settings
for this step, this button may or may not appear. For more
information, on disabling the printing option for a process step,
see Edit Step Page Overview.
Copy This button displays for processes that are already in progress.
Click this button to duplicate the process instance. This
capability allows you to carry over existing, reusable
information, reducing data entry efforts. Once a process
instance is copied, data entry fields are copied as well, such as
custom fields, data fields, company and contact information
and reason codes. If this is a cost process, all cost data is also
carried over with the exception of line items and dynamic line
items.
Delegate Click this button to delegate the current step to another user
on the project.
Save Click this button to Save the current filled out data and return
to it at a later time.
40 e-Builder User Guide
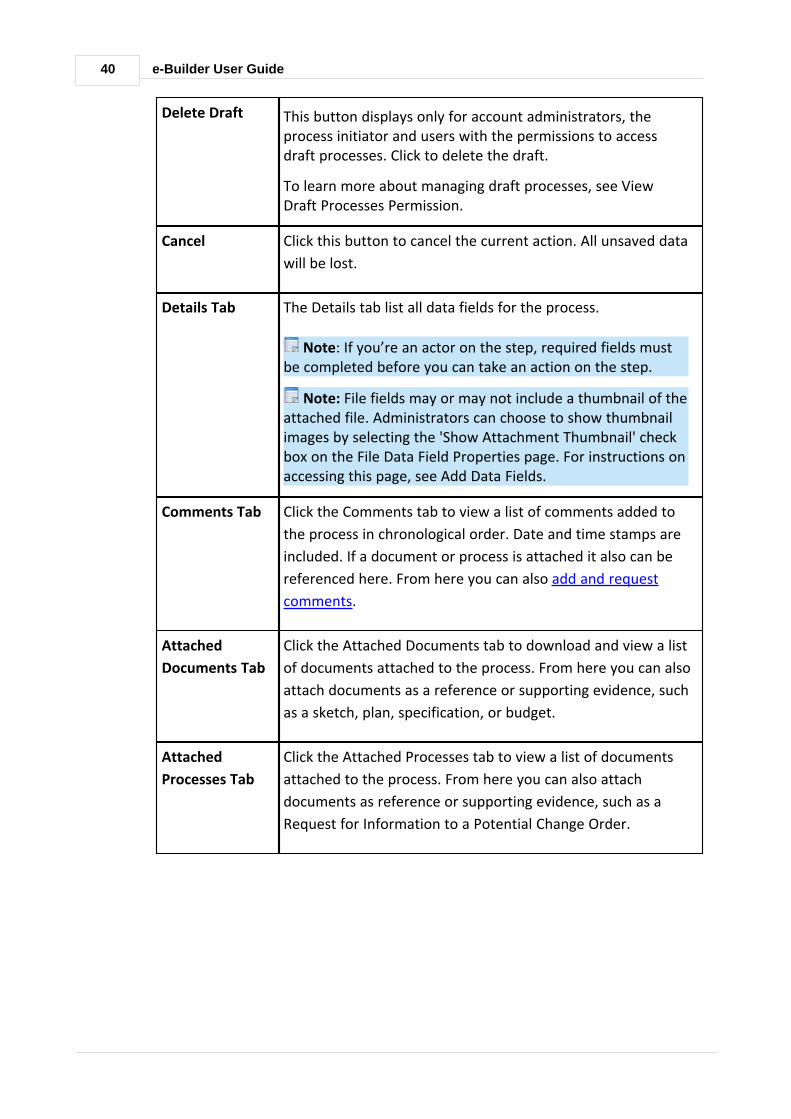
Delete Draft This button displays only for account administrators, theprocess initiator and users with the permissions to accessdraft processes. Click to delete the draft.
To learn more about managing draft processes, see ViewDraft Processes Permission.
Cancel Click this button to cancel the current action. All unsaved data
will be lost.
Details Tab The Details tab list all data fields for the process.
Note: If you’re an actor on the step, required fields mustbe completed before you can take an action on the step.
Note: File fields may or may not include a thumbnail of theattached file. Administrators can choose to show thumbnailimages by selecting the 'Show Attachment Thumbnail' checkbox on the File Data Field Properties page. For instructions onaccessing this page, see Add Data Fields.
Comments Tab Click the Comments tab to view a list of comments added to
the process in chronological order. Date and time stamps are
included. If a document or process is attached it also can be
referenced here. From here you can also add and request
comments.
Attached
Documents Tab
Click the Attached Documents tab to download and view a list
of documents attached to the process. From here you can also
attach documents as a reference or supporting evidence, such
as a sketch, plan, specification, or budget.
Attached
Processes Tab
Click the Attached Processes tab to view a list of documents
attached to the process. From here you can also attach
documents as reference or supporting evidence, such as a
Request for Information to a Potential Change Order.
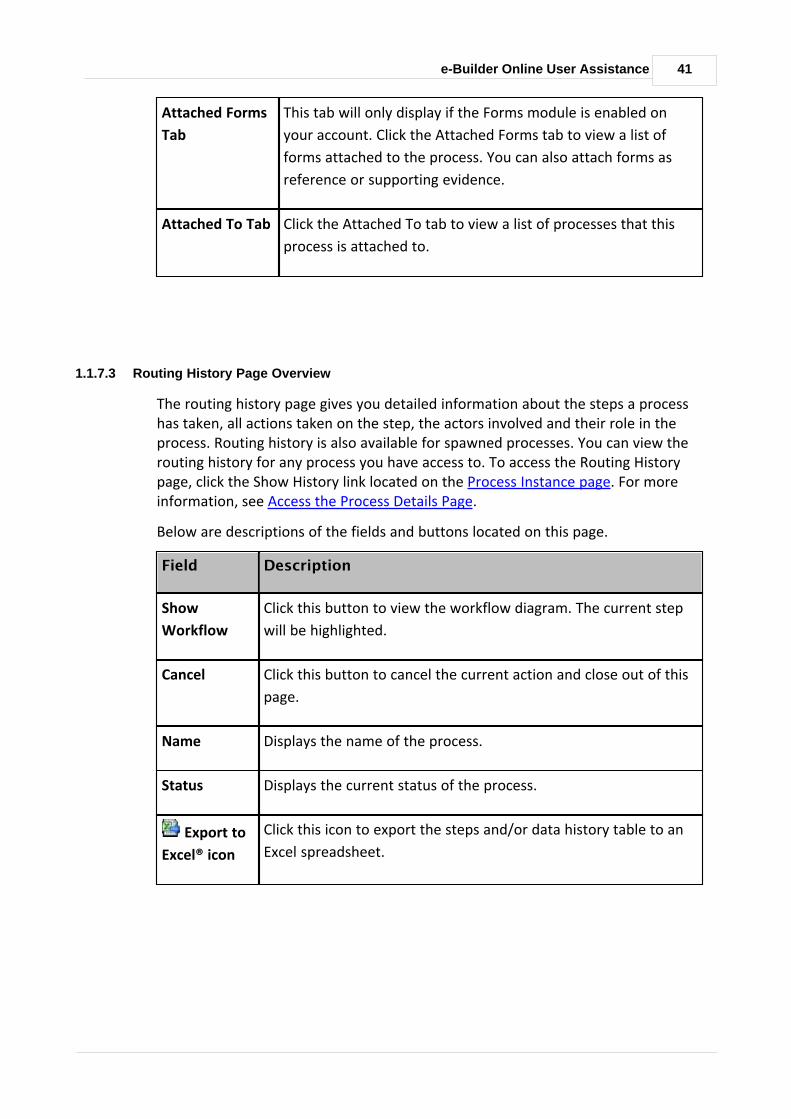
41e-Builder Online User Assistance
Attached Forms
Tab
This tab will only display if the Forms module is enabled on
your account. Click the Attached Forms tab to view a list of
forms attached to the process. You can also attach forms as
reference or supporting evidence.
Attached To Tab Click the Attached To tab to view a list of processes that this
process is attached to.
1.1.7.3 Routing History Page Overview
The routing history page gives you detailed information about the steps a processhas taken, all actions taken on the step, the actors involved and their role in theprocess. Routing history is also available for spawned processes. You can view therouting history for any process you have access to. To access the Routing Historypage, click the Show History link located on the Process Instance page. For moreinformation, see Access the Process Details Page.
Below are descriptions of the fields and buttons located on this page.
Field Description
Show
Workflow
Click this button to view the workflow diagram. The current step
will be highlighted.
Cancel Click this button to cancel the current action and close out of this
page.
Name Displays the name of the process.
Status Displays the current status of the process.
Export to
Excel® icon
Click this icon to export the steps and/or data history table to an
Excel spreadsheet.
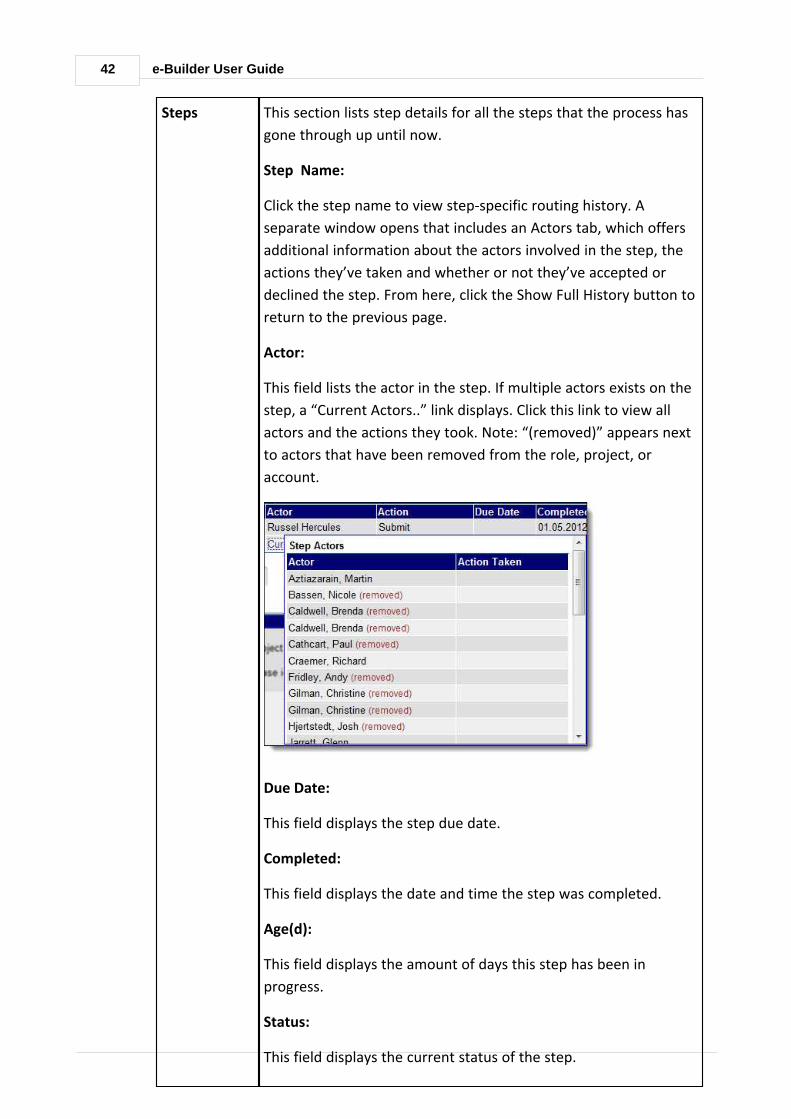
42 e-Builder User Guide
Steps This section lists step details for all the steps that the process has
gone through up until now.
Step Name:
Click the step name to view step-specific routing history. A
separate window opens that includes an Actors tab, which offers
additional information about the actors involved in the step, the
actions they’ve taken and whether or not they’ve accepted or
declined the step. From here, click the Show Full History button to
return to the previous page.
Actor:
This field lists the actor in the step. If multiple actors exists on the
step, a “Current Actors..” link displays. Click this link to view all
actors and the actions they took. Note: “(removed)” appears next
to actors that have been removed from the role, project, or
account.
Due Date:
This field displays the step due date.
Completed:
This field displays the date and time the step was completed.
Age(d):
This field displays the amount of days this step has been in
progress.
Status:
This field displays the current status of the step.
43e-Builder Online User Assistance
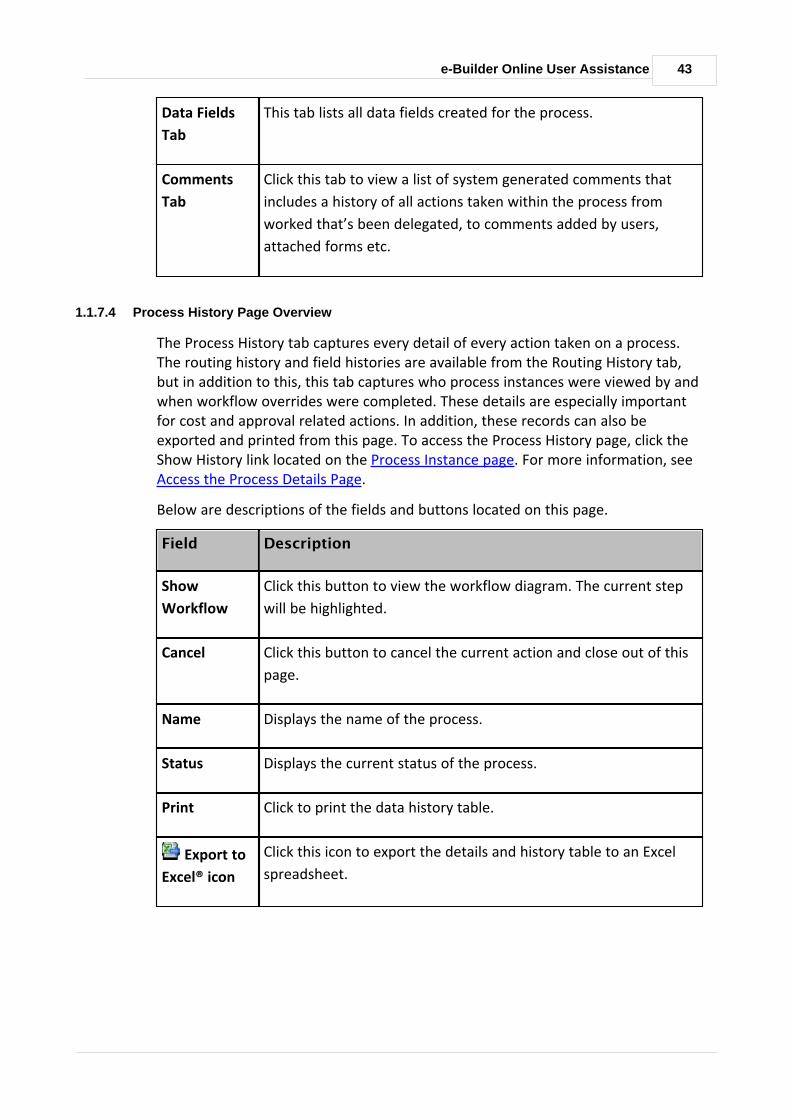
Data Fields
Tab
This tab lists all data fields created for the process.
Comments
Tab
Click this tab to view a list of system generated comments that
includes a history of all actions taken within the process from
worked that’s been delegated, to comments added by users,
attached forms etc.
1.1.7.4 Process History Page Overview
The Process History tab captures every detail of every action taken on a process.The routing history and field histories are available from the Routing History tab,but in addition to this, this tab captures who process instances were viewed by andwhen workflow overrides were completed. These details are especially importantfor cost and approval related actions. In addition, these records can also beexported and printed from this page. To access the Process History page, click theShow History link located on the Process Instance page. For more information, seeAccess the Process Details Page.
Below are descriptions of the fields and buttons located on this page.
Field Description
Show
Workflow
Click this button to view the workflow diagram. The current step
will be highlighted.
Cancel Click this button to cancel the current action and close out of this
page.
Name Displays the name of the process.
Status Displays the current status of the process.
Print Click to print the data history table.
Export to
Excel® icon
Click this icon to export the details and history table to an Excel
spreadsheet.
44 e-Builder User Guide
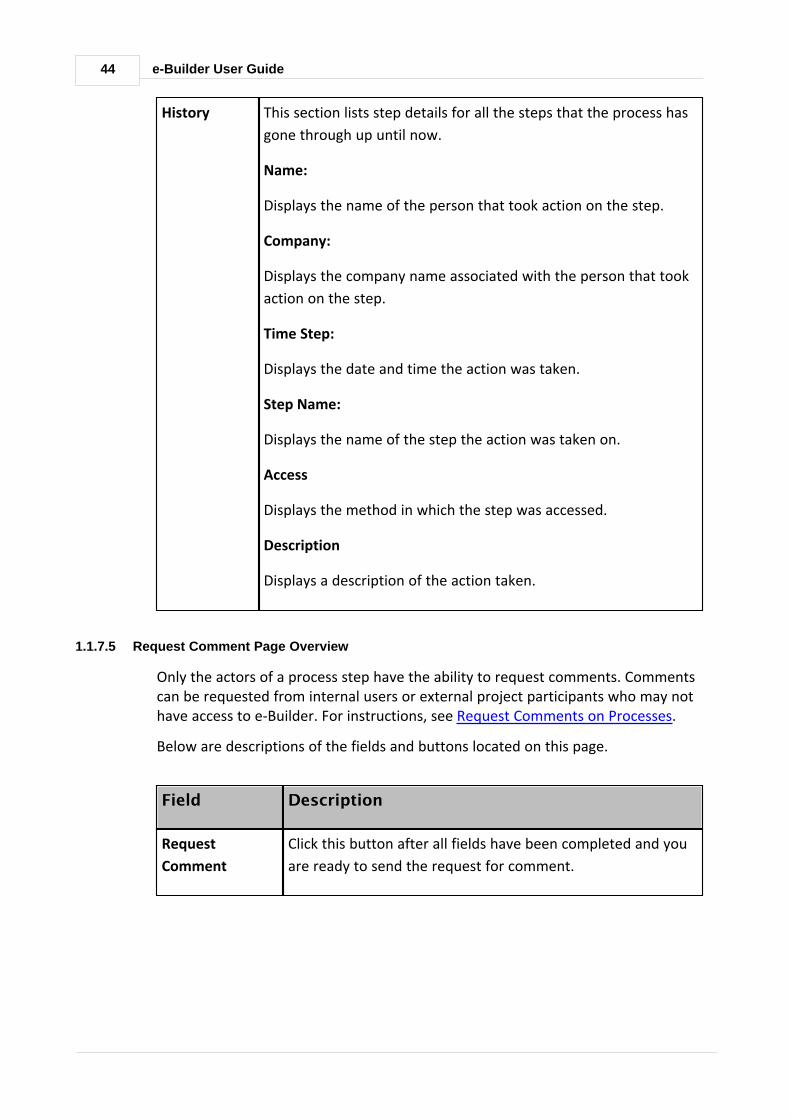
History This section lists step details for all the steps that the process has
gone through up until now.
Name:
Displays the name of the person that took action on the step.
Company:
Displays the company name associated with the person that took
action on the step.
Time Step:
Displays the date and time the action was taken.
Step Name:
Displays the name of the step the action was taken on.
Access
Displays the method in which the step was accessed.
Description
Displays a description of the action taken.
1.1.7.5 Request Comment Page Overview
Only the actors of a process step have the ability to request comments. Commentscan be requested from internal users or external project participants who may nothave access to e-Builder. For instructions, see Request Comments on Processes.
Below are descriptions of the fields and buttons located on this page.
Field Description
Request
Comment
Click this button after all fields have been completed and you
are ready to send the request for comment.

45e-Builder Online User Assistance
Cancel Click this button to cancel the comment request and close this
window. All data will be lost.
All Users Click this drop-down arrow to arrow your search for users to
request comments from based on user roles.
Select from Users
on Project
Selections in this box are a result of the option selected in the
previous drop-down arrow. Select the users you wish to
request a comment from, and then click the right arrow to add
them to the adjacent box.
Add External
Users via Email
You have the ability to request comments from external
project participants who may not have e-Builder access. Enter
their e-mail addresses (one per line) in this box. If these
participants are saved in the project’s contact list, you can
click Lookup to search for them or begin typing the recipient's
name or email address to use the auto-fill feature.
Tip: Use your keyboard to input this field. Start typing therecipient's name or email address then use the arrows tohighlight the email of choice, and then click Tab to make aselection.
Lookup 1. Click this button to search for external users who aresaved in your project’s contact list. The Lookup filterwindow displays.
2. Enter information to filter the contacts you need.
Tip: To render maximum search results, leave allfields empty and click Filter.
3. Select the check box next to the contact(s) you want toadd. Click Insert Selected.
Allow external
users to attach
files?
Click this check box to allow external users to attach files with
their comment. When selected, you are prompted to select a
folder that recipient’s files will be loaded into.
Respond By Enter a date by which recipients should respond by. Click the
Calendar icon to select a date from the calendar.
46 e-Builder User Guide
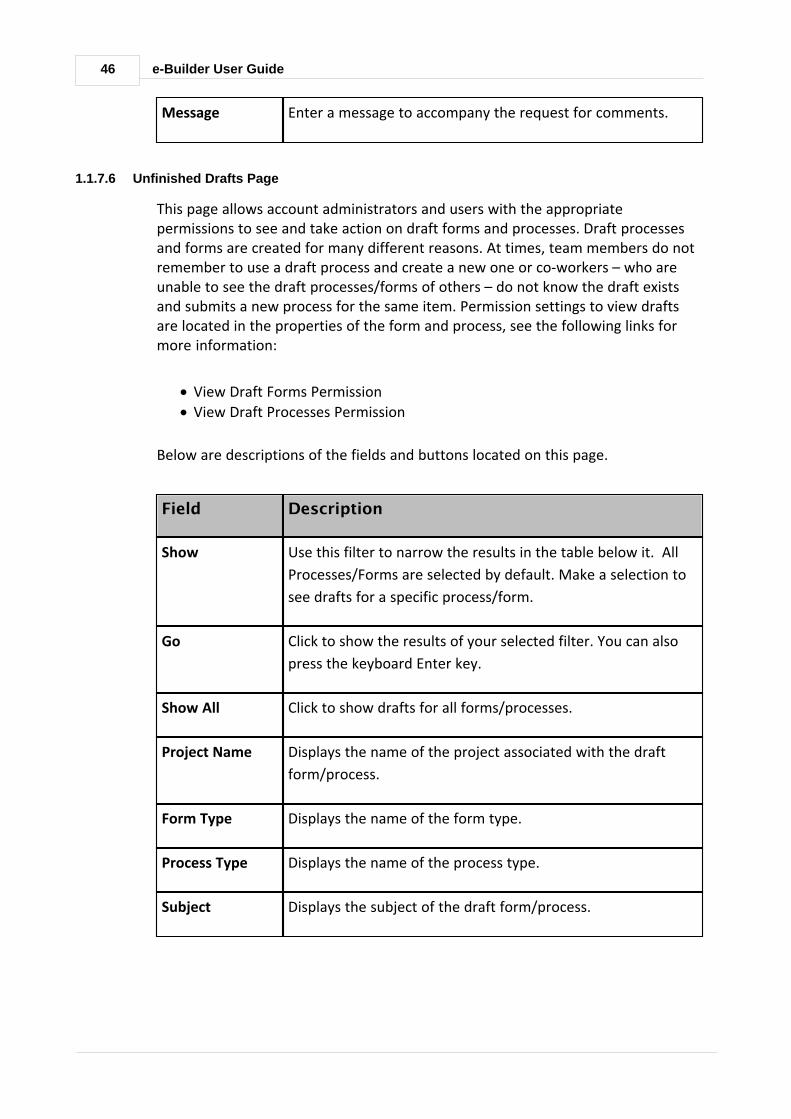
Message Enter a message to accompany the request for comments.
1.1.7.6 Unfinished Drafts Page
This page allows account administrators and users with the appropriatepermissions to see and take action on draft forms and processes. Draft processesand forms are created for many different reasons. At times, team members do notremember to use a draft process and create a new one or co-workers – who areunable to see the draft processes/forms of others – do not know the draft existsand submits a new process for the same item. Permission settings to view draftsare located in the properties of the form and process, see the following links formore information:
· View Draft Forms Permission
· View Draft Processes Permission
Below are descriptions of the fields and buttons located on this page.
Field Description
Show Use this filter to narrow the results in the table below it. All
Processes/Forms are selected by default. Make a selection to
see drafts for a specific process/form.
Go Click to show the results of your selected filter. You can also
press the keyboard Enter key.
Show All Click to show drafts for all forms/processes.
Project Name Displays the name of the project associated with the draft
form/process.
Form Type Displays the name of the form type.
Process Type Displays the name of the process type.
Subject Displays the subject of the draft form/process.
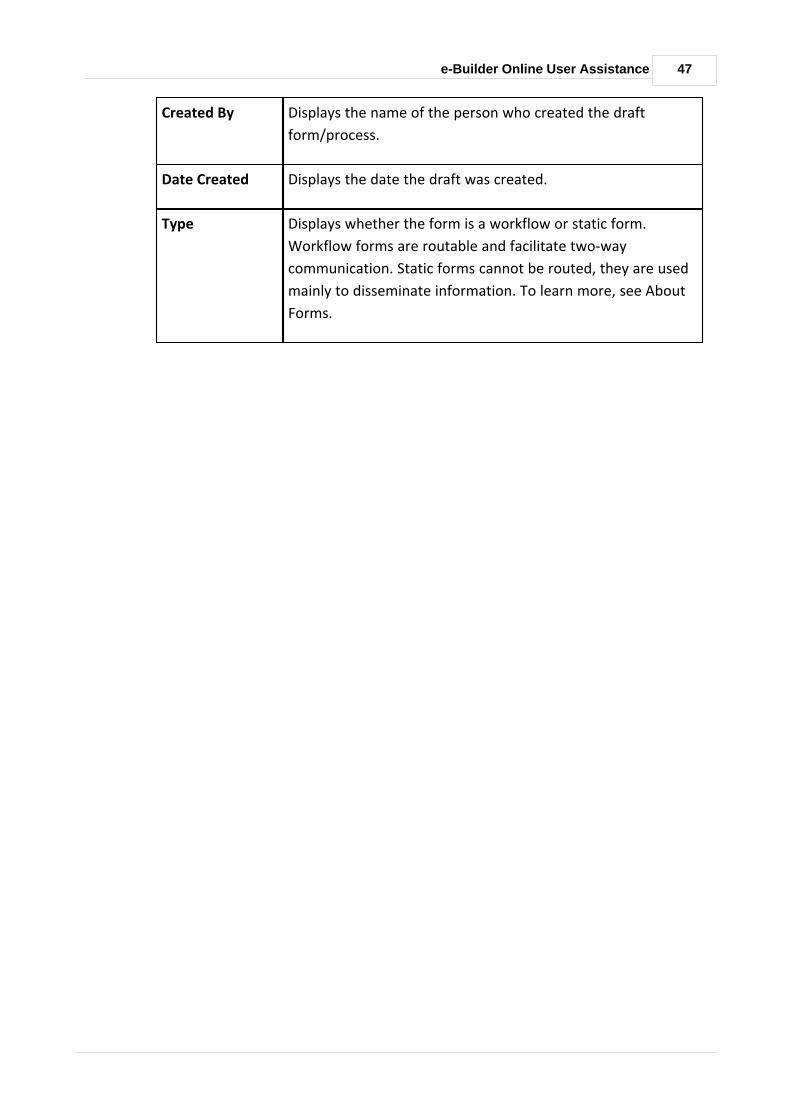
47e-Builder Online User Assistance
Created By Displays the name of the person who created the draft
form/process.
Date Created Displays the date the draft was created.
Type Displays whether the form is a workflow or static form.
Workflow forms are routable and facilitate two-way
communication. Static forms cannot be routed, they are used
mainly to disseminate information. To learn more, see About
Forms.