Compliance Module: Audits, Protocols, Findings & Actions
48
V1.03 1 of 48 Copyright © 2018 BSI. All rights reserved Compliance Module: Audits, Protocols, Findings & Actions
Transcript of Compliance Module: Audits, Protocols, Findings & Actions

V1.03 1 of 48
Copyright © 2018 BSI. All rights reserved
Compliance Module: Audits, Protocols, Findings & Actions

V1.03 2 of 48
Copyright © 2018 BSI. All rights reserved
Contents 1. Introduction ................................................................................................. 4
2. Audits ........................................................................................................... 4
2.1 Creating an Audit Protocol (audit questionnaire) ............................................ 4
2.2 Create an Audit Schedule ............................................................................. 8
2.3 Conducting a Scheduled Audit .................................................................... 12
2.4 Creating and Conducting a Quick Audit ....................................................... 14
2.5 Raising Findings and Actions from a Scheduled Audit/Quick Audit ................. 18
2.6 Audit Calendar .......................................................................................... 19
3. Findings ...................................................................................................... 19
3.1 Creating a Finding (Draft Status) ................................................................ 20
3.1.1 Submit for Acceptance (Awaiting Acceptance status) .................................... 23
3.1.2 Submit Finding (Open status) ..................................................................... 23
3.2 Closing a Non-Conformance Finding ........................................................... 24
3.2.1 Submit NCR for Approval (Awaiting Approval status) .................................... 24
3.2.2 Close NCR (Closed status) ......................................................................... 24
4. Actions ....................................................................................................... 25
4.1 Creating an Action (Draft Status) ................................................................ 25
4.2 Submit for Acceptance (Awaiting Acceptance status) .................................... 27
4.3 Submit Action (Active status) ..................................................................... 27
4.4 Closing an Action ...................................................................................... 28
4.4.1 Submit action for Approval (Awaiting Approval status) ................................. 28
4.4.2 Submit action for completion (Completed status) ......................................... 28
5. Recurring Actions ....................................................................................... 29
5.1 Creating a Recurring Action (Draft Status) ................................................... 29
5.2 Submit Recurring Action for Acceptance (Awaiting Acceptance status) ........... 31
5.3 Submit Recurring Action (Active status) ...................................................... 31
5.4 Updating a Recurring Action ....................................................................... 32
5.4.1 Submit Recurring Action for Approval (Awaiting Approval status) .................. 32
5.4.2 Submit Recurring Action for completion (Completed status) .......................... 33
6. Configuration and Workflow ...................................................................... 33
6.1 Audit configuration and workflow ............................................................... 33

V1.03 3 of 48
Copyright © 2018 BSI. All rights reserved
6.1.1 Audit workflow - Finding and Action types available to an audit ..................... 34
6.1.2 Audit workflow - enable NCR approval ........................................................ 35
6.1.3 Audit workflow - enable Action approval ..................................................... 36
6.1.4 Audit workflow - close Findings with open Actions? ...................................... 37
6.1.5 Audit workflow - Secondary Signature (e-signature) ..................................... 38
6.2 Finding configuration and workflow ............................................................ 38
6.2.1 Finding workflow - enable NCR acceptance ................................................. 39
6.2.2 Finding workflow - enable NCR approval ..................................................... 40
6.2.3 Finding workflow - enable Action acceptance ............................................... 40
6.2.4 Finding workflow - enable Action approval .................................................. 41
6.2.5 Finding workflow - close NCR with open Actions? ......................................... 42
6.2.6 Finding workflow - configuring the Responsible Role .................................... 42
6.2.7 Finding workflow - adding an Executive Sponsor to a Finding ....................... 43
6.2.8 Finding workflow - secondary signature (e-signature) .................................. 43
6.3 Action Workflow ........................................................................................ 44
6.3.1 Action workflow - enable Action acceptance ................................................ 45
6.3.2 Action workflow - enable Action approval .................................................... 46
6.3.3 Action workflow - secondary signature (e-signature) .................................... 47
7. Summary .................................................................................................... 48
8. Additional Support ..................................................................................... 48
9. Revision History ......................................................................................... 48
V1.03 4 of 48
Copyright © 2018 BSI. All rights reserved
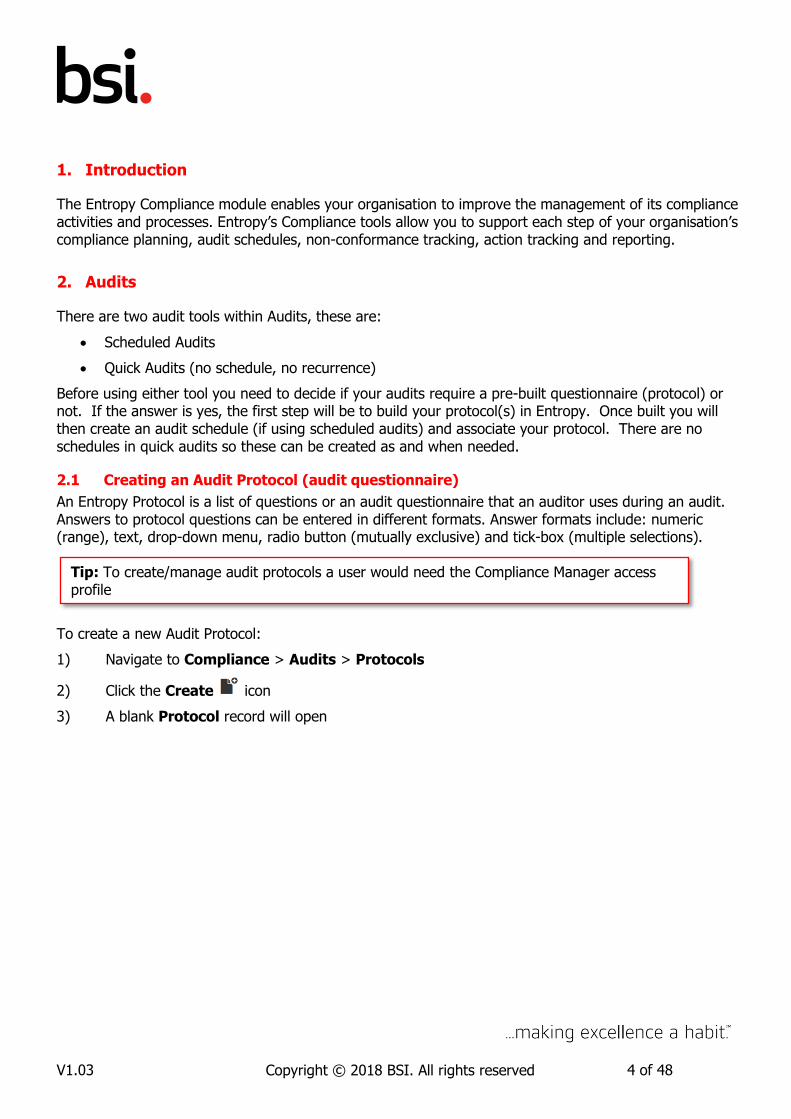
1. Introduction
The Entropy Compliance module enables your organisation to improve the management of its compliance activities and processes. Entropy’s Compliance tools allow you to support each step of your organisation’s compliance planning, audit schedules, non-conformance tracking, action tracking and reporting.
2. Audits
There are two audit tools within Audits, these are:
Scheduled Audits
Quick Audits (no schedule, no recurrence)
Before using either tool you need to decide if your audits require a pre-built questionnaire (protocol) or not. If the answer is yes, the first step will be to build your protocol(s) in Entropy. Once built you will then create an audit schedule (if using scheduled audits) and associate your protocol. There are no schedules in quick audits so these can be created as and when needed.
2.1 Creating an Audit Protocol (audit questionnaire)
An Entropy Protocol is a list of questions or an audit questionnaire that an auditor uses during an audit. Answers to protocol questions can be entered in different formats. Answer formats include: numeric (range), text, drop-down menu, radio button (mutually exclusive) and tick-box (multiple selections).
To create a new Audit Protocol:
1) Navigate to Compliance > Audits > Protocols
2) Click the Create icon
3) A blank Protocol record will open
Tip: To create/manage audit protocols a user would need the Compliance Manager access profile

V1.03 5 of 48
Copyright © 2018 BSI. All rights reserved
4) Enter the Name of your audit protocol e.g. ISO9001:2015 Internal Audit
5) Select the Management System(s) you want to associate with this record e.g. Quality
6) Add a Category (optional)
7) Add an Owner for this record. The owner is the person responsible for setting the questions and updating the protocol as necessary
8) Add a Description in the box provided
9) Click the Save icon
10) You will now see that the Editor is enabled
11) Select the folder and click Create to add a Section
12) Enter the Section Title
13) Select the Default Display. If there are a lot of questions it is recommended that you leave the display Closed which is the default setting
14) Section Guidance is optional. If you want to add some guidance notes for the auditor then tick the guidance tick box and add the details in the field below. Likewise there is a notes section which behaves in exactly the same way as guidance notes

V1.03 6 of 48
Copyright © 2018 BSI. All rights reserved
15) Click the Save icon
16) Highlight the section you have just created and click Create to add a Question
17) Add a question into the Question Title field
18) The Remarks tick box allows you to specify whether the additional remarks field will be available for Auditors to add their comments to an audit answer. Adding remarks to your question can be useful for obtaining clarifications or evidence for question answers. Tick this box as necessary
19) The Not Applicable tick box allows you to specify whether or not the auditor can mark the question as not applicable
Note: Please click the Save icon directly above the Section Title, and not the icon at the top of the screen.

V1.03 7 of 48
Copyright © 2018 BSI. All rights reserved
20) From the Answer Type drop down select the appropriate answer type for the question
21) Once you have selected your answer type you can enter your answers
22) Selecting the Default option for a particular answer means that this will be completed by default during an audit. It is recommended that you leave these blank to ensure the auditor is completing the answer for each question
23) You are able to add Auto Comments for each answer, which will auto-populate the answer with comments. To do this click on the auto complete icon , tick the auto create comment box and add a title, description followed by OK
24) The Next Question option gives you the ability to jump to another question in the audit, depending on your response. For example, if you had “Is this section applicable to this audit?” as your first question, if the auditor selected No, then you could specify which question the auditor went to next
25) If you are using scoring for your audits, you can specify the score for each answer in the Score box provided
26) You can also indicate an answer’s compliance using the Compliance Indicator traffic light buttons
27) If you have more than two answers, click

V1.03 8 of 48
Copyright © 2018 BSI. All rights reserved
28) Click the Save icon
29) To add another question or section, repeat the above steps
30) When you have completed adding all of your Sections and Questions to your audit, click the Save
icon located at the top of the screen followed by the Activate icon
2.2 Create an Audit Schedule
Entropy’s audit scheduling tool allows flexible planning of internal audits. Each audit must be assigned to a ‘lead auditor’ for the conducting and closing of the audit. You have the option to recur audits based on your desired frequency, e.g. daily, weekly, monthly, and yearly.
To schedule an audit:-
1) Click Compliance > Audits > Audit Schedules
2) Click the Create
Note: You can copy the answer options to questions if they are the same e.g. Yes & No. Use the “Copy answer options from previous question” dropdown to do this
Note: If you forget to activate your protocol it will not be available for selection when scheduling your audits

V1.03 9 of 48
Copyright © 2018 BSI. All rights reserved
3) Enter the Title of your audit
4) Enter the Associations:
Management System > use the picker to select the Management System (s) you want to associate with your audit
Category > use the picker to select category(s) you want to associate with your audit. Optional field
Owner > the owner has full edit rights to the audit schedule, their role is to create & mange the schedule
Responsible > use the picker to select a responsible person(s) you want to associate with your audit schedule. Optional field
Restricted Access > this field will restrict who will be able to view the Audit. This should only be used if the information in the record is sensitive or confidential. Using the picker select the individual(s) that you want to include in the Restricted Access Group from the Organizational Unit tree. Optional field
5) Enter the Scope of your audit as required

V1.03 10 of 48
Copyright © 2018 BSI. All rights reserved
6) If using recurring audits, select the Recurrence tick box as required e.g. Daily/Weekly, Monthly and Yearly
7) Set recurrence pattern as described in the screen shot below. Use Automatically set due date for Initial Audit? if you require the initial audit to be out of sync with the on-going schedule i.e. first audit to take place 15th Jan all other audits to recur 1st of every month thereafter.
8) If this is a one off audit then do not select the Recurrence tick box, simply enter the Due Date of the one off audit
9) To add a protocol to the schedule click Select Protocol (remember you must have first created a protocol and it must be in active state before it can be linked to an audit schedule)
10) Select the Protocol you wish to use and click OK
11) If you are not using Protocols, then you do not need to add anything under the protocol section

V1.03 11 of 48
Copyright © 2018 BSI. All rights reserved
12) Click Save followed by Submit. Click OK to changing the status to Not Started
13) Your schedule is now created, so the next step is to add audits to this schedule
14) To add audits to your schedule, click the Create icon under the Audits section
15) Select Add One
16) You have the option to change the Audit Title (the audit title is pre-populated with the audit schedule title)
17) Create the Associations
Management System > the management system(s) from the schedule are carried through to the audit, this information can be changed if required by using the picker
Organisation Scope – Location (Internal) > ensure this is the correct site/location the audit relates to, this information can be changed if required by using the picker.
Organisation Scope – Location (External) > if you have Customers/Suppliers set up in your system and you want to link them to audit, select using the picker
Organisation Scope – Others (Internal) > if you want to tag people/department/processes to the audit for information purposes, select using the picker. Optional field
Lead Auditor > select the lead auditor(s) using the picker
Audit Team > select the audit team using the picker. Optional field
Restricted Access > this field will restrict who will be able to view the Audit. This should only be used if the information in the record is sensitive or confidential. Using the picker select the individual(s) that you want to include in the Restricted Access Group from the Organizational Unit tree. Optional field
18) Enter the Schedule Date. This is the first date the audit can start
19) Enter the Due Date. This is when the audit needs to be completed by
Note: Only ONE protocol may be assigned to an audit schedule
Note: You can add one audit to the schedule or many audits. Many audits across multiple locations

V1.03 12 of 48
Copyright © 2018 BSI. All rights reserved
20) Click Save the audit and the Conduct button will now appear
2.3 Conducting a Scheduled Audit
1) From within the Audit Schedule record, navigate to the Audits section and click on the title of audit you wish to conduct
2) Click the Conduct button, located at the top of the record. Click OK to the Change the record status to In progress? prompt
3) In the General Information section, you are able to add an Introduction and an Executive Summary as necessary.
4) If you have linked a protocol containing audit questions, the questions are available below the Executive Summary field
Note: The lead auditor will receive a task to complete the audit and an email notification (as long as the email notification has been set up)

V1.03 13 of 48
Copyright © 2018 BSI. All rights reserved
5) Work through the questions adding your answers and remarks
6) Documentary or photographic evidence can be uploaded to each answer by clicking the References link
7) Supporting comments can be added by the auditor by clicking the Comments link
8) If the protocol sections/questions have been set up with notes or guidance click on the corresponding icons to see more information:
Notes
Guidance
9) Save your audit as you progress, the Progress Bar will change as you add your answers
10) Once all questions have been answered and you have saved the questionnaire you can go back and add any findings and/or actions.
Tip: Complete all of the questions and save the record before adding any findings or actions

V1.03 14 of 48
Copyright © 2018 BSI. All rights reserved
11) If you are conducting a questionnaire based audit, the findings and/or actions can be assigned at question level
12) If you are doing a process based audit (no protocol) your findings, actions, comments and supporting evidence will be added to the section at the bottom of the audit record
13) Once all references, comments, findings and actions have been added you can complete the audit by selecting the Complete button located at the top of the record
14) Once the audit has been completed the next audit will schedule as per the recurrence rule within the schedule
2.4 Creating and Conducting a Quick Audit
Entropy’s quick audit tool is primarily used for unplanned audits, inspections and external audits such as customer audits (if a customer audits your Organisation you can create a record within quick audits, attach the audit report, raise and track any findings that come out of that audit).
1) Click Compliance > Audits > Quick Audits
Note: When to complete an audit will depend on your internal process. Some businesses complete the audit when the audit has taken place, whereas some businesses will only complete the audit when all of the associated Findings and Actions have been resolved. Be aware that until the audit is completed, the next audit will not schedule.

V1.03 15 of 48
Copyright © 2018 BSI. All rights reserved
2) Click the Create
3) Enter the Title of your audit
4) Enter the Associations:
Management System > use the picker to select the Management System (s) you want to associate with your audit
Organisation Scope – Location (Internal) > use the picker to select the site/location the audit relates to
Organisation Scope – Location (External) > if you have customers/suppliers set up in your system and you want to link them to audit, select using the picker. Optional field
Organisation Scope – Others (Internal) > if you want to tag people/department/processes to the audit, select using the picker. Optional field
Category > use the picker to select category(s) you want to associate with your audit. Optional field
Lead Auditor > select the lead auditor(s) using the picker
Audit Team > select the audit team using the picker. Optional field
Restricted Access > this field will restrict who will be able to view the Audit. This should only be used if the information in the record is sensitive or confidential. Using the picker select the individual(s) that you want to include in the Restricted Access Group. Optional field
5) Under General Information, enter the Scope Description of your audit as required
6) To add a protocol to the audit click Select Protocol (remember you must have first created a protocol and it must be in active state before it can be linked to an audit)
7) Select the Protocol you wish to use and click OK

V1.03 16 of 48
Copyright © 2018 BSI. All rights reserved
8) If you are not using protocols, then you do not need to add anything under the protocol section
9) Click Save
10) Once you are ready to conduct the audit and update the details in Entropy click Start. Click OK to changing the status to In Progress
11) In the General Information section, you are able to add to the Scope Description and an Introduction field as necessary.
12) If you have linked a protocol containing audit questions, the questions are available below the Executive Summary field
13) Work through the questions adding your answers and remarks
14) Documentary or photographic evidence can be uploaded to each answer by clicking the References link
15) Supporting comments can be added by the auditor by clicking the Comments link
Note: Only ONE protocol may be assigned to a quick audit

V1.03 17 of 48
Copyright © 2018 BSI. All rights reserved
16) If the protocol sections/questions have been set up with notes or guidance click on the corresponding icons to see more information:
Notes
Guidance
17) Save your audit as you progress, the Progress Bar will change as you add your answers
18) Once all questions have been answered and you have saved the questionnaire you can go back and add any findings and/or actions.
19) If you are conducting a questionnaire based audit, the findings and/or actions can be assigned at question level
20) If you are doing a process based audit (no protocol) your findings, actions, comments and supporting evidence will be added to the section at the bottom of the audit record
Tip: Complete all of the questions and save the record before adding any findings or actions
V1.03 18 of 48
Copyright © 2018 BSI. All rights reserved
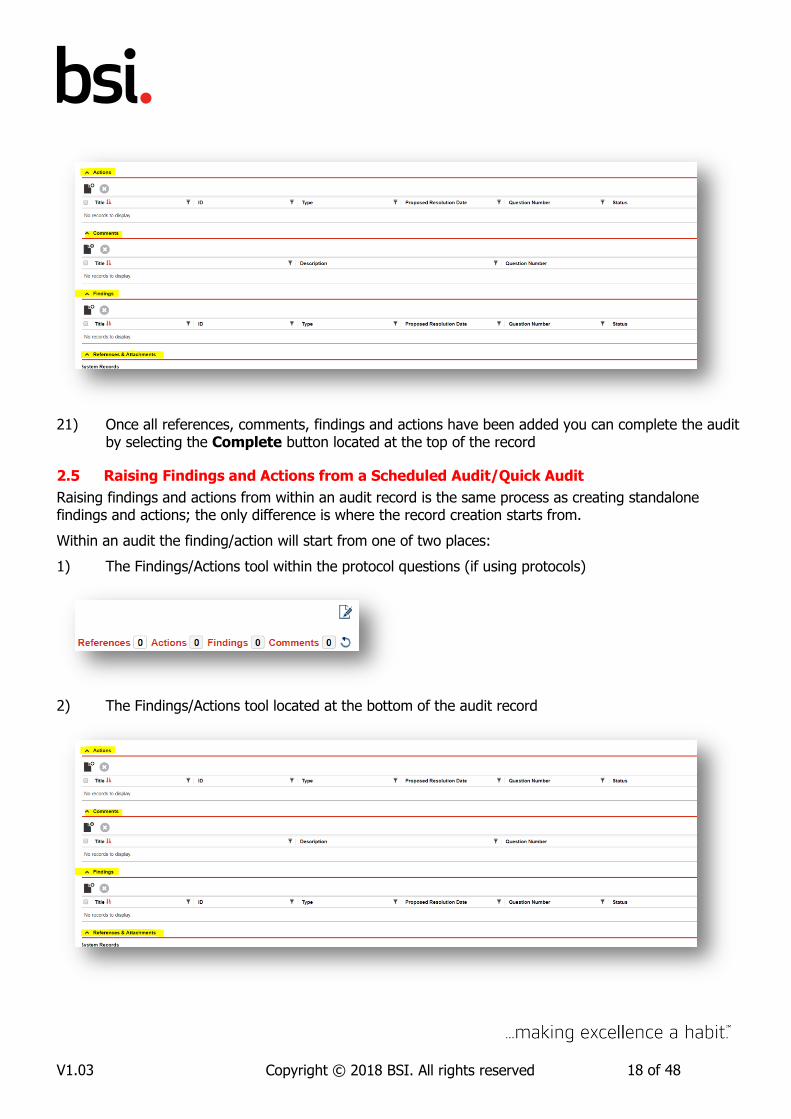
21) Once all references, comments, findings and actions have been added you can complete the audit by selecting the Complete button located at the top of the record
2.5 Raising Findings and Actions from a Scheduled Audit/Quick Audit
Raising findings and actions from within an audit record is the same process as creating standalone findings and actions; the only difference is where the record creation starts from.
Within an audit the finding/action will start from one of two places:
1) The Findings/Actions tool within the protocol questions (if using protocols)
2) The Findings/Actions tool located at the bottom of the audit record

V1.03 19 of 48
Copyright © 2018 BSI. All rights reserved
3) For instructions on raising Findings click here
4) For instructions on raising Actions click here
2.6 Audit Calendar
The Audit Calendar provides a calendar view of audits, audit schedules or both. The calendar provides a look ahead for the day, week, year or month.
Filters are used to configure ‘views’ the calendar and these ‘views’ can be saved for future use. In addition the views can be shared with other Entropy users.
The calendar provides a summary of information when hovering over the Audit. Overdue audits are also displayed on the calendar
As the audit calendar is part of the master calendar you can find more information in the Calendar and Dashboard Userguide
3. Findings
The Entropy findings tool allows you to record and manage your Organization’s findings. A finding is information discovered as a result of an audit or investigation.
There are 5 Finding Types in the system: Best Practice, Non-conformance, Observation, Opportunity for Improvement and Recommendation. It is possible to rename any of these 5 Finding Types, for example Recommendation could be renamed to ‘Customer Feedback’ and the form customised according to requirements. Your Entropy consultant can assist you with this. You can also remove Findings if you do not want to use the 5 available.
In this user-guide we will show you how to how to create a finding record and how to configure the workflow for a finding record. As all finding behaviour is the same, we will use the NCR finding type in this guide as this is the most commonly used finding.
Basic Finding Workflow
DraftFindings Lifecycle * Awaiting Acceptance
Open* Awaiting Approval
Closed
Option to add Actions to a Finding
Draft* Awaiting
AcceptanceActive
* Awaiting
ApprovalCompletedAction Lifecycle
Opportunity to send a Notification * Optional decision gate

V1.03 20 of 48
Copyright © 2018 BSI. All rights reserved
3.1 Creating a Finding (Draft Status)
The diagram below explains the Finding workflow. There are a number of optional workflow paths that are denoted by the symbol *
This user-guide will cover all of the workflow paths in detail, skip the sections that are not applicable to you.
Findings and Actions Flowchart
Creation Phase
(Draft status)
* Acceptance Phase
(Awaiting
Acceptance Status)
Investigation Phase
(Open/Active status)
Closed Out Phase
(Closed/Completed
status)
* Approval Phase
(Awaiting Approval
status)
No
Acti
on
sFin
din
gs
Create Finding
Investigate root
cause & corrective
action
Submit for
Acceptance?
Yes
YesNoFinding
Accepted?
Yes No
Create Action
Execute Action
Submit for
Acceptance?
Action
Accepted?
Raise Action?
Yes
Submit for
Approval?
Finding
Approved?
NoYes
Finding ClosedNo
No
Yes
Yes
No
Yes
Submit for
Approval?
Action
Approved?Action Closed
No
Yes Yes No
Yes
YesNo
* Optional workflow,
can be enabled or
disabled in the
record type workflow
1) Click Compliance from the menu bar. Select Findings & Actions from the menu followed by Findings from the sub menu
Note: The following instructions have been created using the default Entropy NCR form. If you have done any customisation to your NCR finding form (such as adding custom fields or removing default fields) then the following steps will differ from your record workflow

V1.03 21 of 48
Copyright © 2018 BSI. All rights reserved
2) Click the Create icon
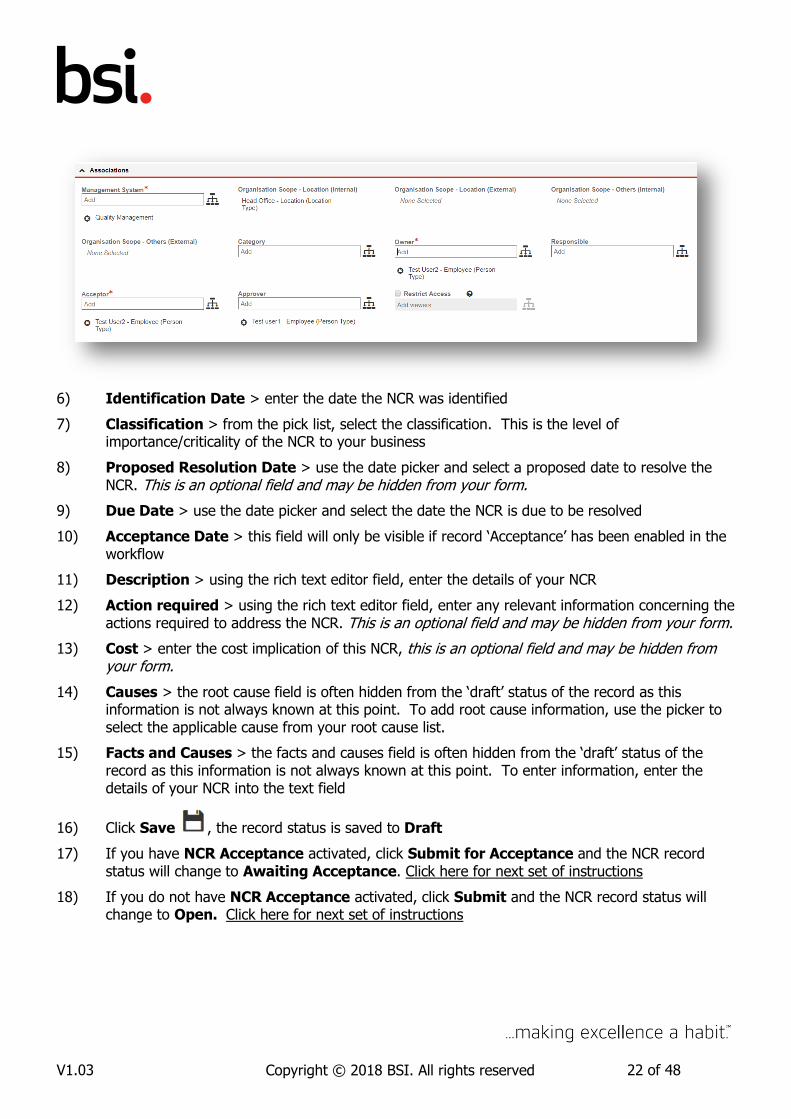
3) Select the finding type from the list presented (NCR will be used in this example) 4) Enter the Title of your NCR 5) Enter the Associations:
Management System > use the picker to select the Management System(s) you want to associate with your NCR
Organisation Scope – Location (Internal) > use the picker to select the site/location the NCR relates to
Organisation Scope – Location (External) > if you have customers/suppliers set up in your system and you want to link them to NCR, select using the picker. Optional field
Organisation Scope – Others (Internal) > if you want to tag people/department/processes to the NCR, select using the picker. Optional field
Category > use the picker to select category(s) you want to associate with your NCR. Optional field (unless it has been set to mandatory in the workflow)
Owner > the owner is ultimately responsible for the NCR
Responsible > the responsible person(s) is anyone that needs to be aware of the NCR and is often the person/people who the escalation email will go to if the NCR is not completed on time. Optional field (unless it has been set to mandatory in the workflow)
Acceptor > this field will only be visible if acceptance has been enabled in the workflow. The acceptor is the person who will accept the NCR, once accepted the NCR will be passed to the designated owner
Approver > this field will only be visible if approval has been enabled in the workflow. The approver is the person who will approve the NCR for closure
Restricted Access > this field will restrict who will be able to view the NCR record. This should only be used if the information in the record is sensitive or confidential. Using the picker select the individual(s) that you want to include in the Restricted Access Group. Optional field
V1.03 22 of 48
Copyright © 2018 BSI. All rights reserved
6) Identification Date > enter the date the NCR was identified
7) Classification > from the pick list, select the classification. This is the level of importance/criticality of the NCR to your business
8) Proposed Resolution Date > use the date picker and select a proposed date to resolve the NCR. This is an optional field and may be hidden from your form.
9) Due Date > use the date picker and select the date the NCR is due to be resolved
10) Acceptance Date > this field will only be visible if record ‘Acceptance’ has been enabled in the workflow
11) Description > using the rich text editor field, enter the details of your NCR
12) Action required > using the rich text editor field, enter any relevant information concerning the actions required to address the NCR. This is an optional field and may be hidden from your form.
13) Cost > enter the cost implication of this NCR, this is an optional field and may be hidden from your form.
14) Causes > the root cause field is often hidden from the ‘draft’ status of the record as this information is not always known at this point. To add root cause information, use the picker to select the applicable cause from your root cause list.
15) Facts and Causes > the facts and causes field is often hidden from the ‘draft’ status of the record as this information is not always known at this point. To enter information, enter the details of your NCR into the text field
16) Click Save , the record status is saved to Draft
17) If you have NCR Acceptance activated, click Submit for Acceptance and the NCR record status will change to Awaiting Acceptance. Click here for next set of instructions
18) If you do not have NCR Acceptance activated, click Submit and the NCR record status will change to Open. Click here for next set of instructions

V1.03 23 of 48
Copyright © 2018 BSI. All rights reserved
3.1.1 Submit for Acceptance (Awaiting Acceptance status)
1) The NCR acceptor will receive an email notification advising them they have an NCR to accept (if this does not happen please speak to your Entropy Administrator to ensure the email notification has been set up)
2) Open the NCR record and go to the section Reviews.
3) Click the link (reviewer user name) to open up the review. Add Comments in the mandatory field and select Accept or Reject
4) If accepted the record status will change to Open.
3.1.2 Submit Finding (Open status)
1) The NCR owner will receive an email notification advising them they have been assigned an NCR (if this does not happen please speak to your Entropy Administrator to ensure the email notification has been set up)
2) In most cases, the owner is responsible for investigating the cause of the NCR and putting corrective actions in place
3) Click the Facts and Causes Description rich text editor field and enter any information that supports/explains why the non-conformance occurred
4) Click the Causes picker and select a root cause to associate with this finding
5) Click the Cost field and enter the estimated cost of the NCR. This is an optional field and may be hidden from your form.
6) Click Save
7) Once you have saved your NCR you can create Actions (click here to go to Actions section)
Note: You will only see this record state if ‘Mandatory Acceptance’ has been activated in your NCR
workflow.

V1.03 24 of 48
Copyright © 2018 BSI. All rights reserved
3.2 Closing a Non-Conformance Finding
1) If you have NCR Approval activated Click here for next set of instructions
2) If you do not have NCR Approval activated Click here for next set of instructions
3.2.1 Submit NCR for Approval (Awaiting Approval status)
1) Once the NCR is ready for closure it can be submitted for approval 2) Click Submit for Approval, the record status will change to Awaiting Approval 3) The NCR approver will receive an email notification advising them they have an NCR to approve (if
this does not happen please speak to your Entropy Administrator to ensure the email notification has been set up)
4) The ‘Approver’ will click the link under the Reviewer section (user name) to open up the review.
Select Approve or Reject approval of the NCR adding comments
5) The Completed Date and Approved Date are automatically entered and the record status
changes to Closed
3.2.2 Close NCR (Closed status)
1) Once the NCR is ready for closure it can be closed by the finding Owner 2) Click Close. The Completed Date is automatically entered and the record status changes to
Closed
Note: You can only submit an NCR for approval if ‘Mandatory Approval’ has been activated in your NCR workflow.

V1.03 25 of 48
Copyright © 2018 BSI. All rights reserved
4. Actions
Actions can be raised as independent records, which are not connected to any findings, audits, meetings etc or they can be raised from and connected to another record. The example below uses an independent action not connected to any other records.
4.1 Creating an Action (Draft Status)
1) Click Compliance from the menu bar. Select Findings & Actions from the menu followed by Actions from the sub menu
2) Click the Create icon
3) Select the action type from the list presented (Corrective Action will be used in this example) 4) Enter the Title of your action 3) Enter the Associations:
Management System > use the picker to select the Management System(s) you want to associate with your action
Organisation Scope – Location (Internal) > use the picker to select the site/location the action relates to
Organisation Scope – Location (External) > if you have customers/suppliers set up in your system and you want to link them to the action, select using the picker. Optional field

V1.03 26 of 48
Copyright © 2018 BSI. All rights reserved
Organisation Scope – Others (Internal) > if you want to tag people/department/processes to the action, select using the picker. Optional field
Category > use the picker to select category(s) you want to associate with your action. Optional field (unless it has been set to mandatory in the workflow)
Owner > the owner is ultimately responsible for the action
Responsible > the responsible person(s) is anyone that needs to be aware of the action and is often the person/people who the escalation email will go to if the action is not completed on time. Optional field (unless it has been set to mandatory in the workflow)
Acceptor > this field will only be visible if acceptance has been enabled in the workflow. The acceptor is the person who will accept the action, once accepted the action will be passed to the designated owner
Approver > this field will only be visible if approval has been enabled in the workflow. The approver is the person who will approve the action for closure
Restricted Access > this field will restrict who will be able to view the action record. This should only be used if the information in the record is sensitive or confidential. Using the picker select the individual(s) that you want to include in the Restricted Access Group. Optional field
4) Description > using the rich text editor field, enter the details of your action
5) Start Date > enter the date the action was created/needs to be started by
6) Due Date > use the date picker and select the date the action is due to be resolved
7) Priority > from the pick list, select the priority. This is the level of importance/criticality of the action to your business
8) Proposed Resolution Date > use the date picker and select a proposed date to resolve the action. This is an optional field and may be hidden from your form.
9) Acceptance Due Date > this field will only be visible if record ‘Acceptance’ has been enabled in the workflow
10) Cost > enter the cost implication of this action, this is an optional field and may be hidden from your form.

V1.03 27 of 48
Copyright © 2018 BSI. All rights reserved
11) Notes > using the rich text editor field, enter any relevant information concerning the action. This is an optional field and may be hidden from your form.
12) Click Save , the record status is saved to Draft
13) If you have Action Acceptance activated, click Submit for Acceptance, the action record status will change to Awaiting Acceptance. Click here for next set of instructions
14) If you do not have Action Acceptance activated, click Submit and the action record status will change to Active. Click here for next set of instructions
4.2 Submit for Acceptance (Awaiting Acceptance status)
1) The action acceptor will receive an email notification advising them they have an action to accept (if this does not happen please speak to your Entropy Administrator to ensure the email notification has been set up)
2) Open the action record and go to the section Reviews.
3) Click the link (reviewer user name) to open up the review. Add Comments in the mandatory field and select Accept or Reject
4) If accepted the record status will change to Active.
4.3 Submit Action (Active status)
1) The action owner will receive an email notification advising them they have been assigned an action (if this does not happen please speak to your Entropy Administrator to ensure the email notification has been set up)
2) The action owner can update the action record with any notes/comments/attachment before closing the action
Note: You will only see this record state if ‘Mandatory Acceptance’ has been activated in your action workflow.

V1.03 28 of 48
Copyright © 2018 BSI. All rights reserved
3) Click Save
4.4 Closing an Action
1) If you have action Approval activated Click here for next set of instructions
2) If you do not have action Approval activated Click here for next set of instructions
4.4.1 Submit action for Approval (Awaiting Approval status)
1) Once the action is ready for closure it can be submitted for approval 2) Enter the Actual Resolution Date into the date field 3) Click Submit for Approval, the record status will change to Awaiting Approval 4) The action approver will receive an email notification advising them they have an action to
approve (if this does not happen please speak to your Entropy Administrator to ensure the email notification has been set up)
5) The ‘Approver’ will click the link under the Reviewer section (user name) to open up the review.
Select Approve or Reject approval of the action adding comments
6) The action will change to status Completed
4.4.2 Submit action for completion (Completed status)
1) If you do not have action approval enabled, once the action has been completed it can be closed by the action owner
2) Enter the Actual Resolution Date into the date field 3) Click Complete. The record status changes to Completed
Note: You can only submit an action for approval if ‘Mandatory Approval’ has been activated in your
action workflow.

V1.03 29 of 48
Copyright © 2018 BSI. All rights reserved
5. Recurring Actions
Entropy’s Recurring Actions function allows you to record and manage your organisation’s recurring actions. The difference between recurring actions and non-recurring actions is the ability to schedule your recurring actions. By using one of Entropy’s Recurring Action Types you will be able to schedule either a yearly, weekly or daily Action record.
5.1 Creating a Recurring Action (Draft Status)
1) Click Compliance from the menu bar. Select Findings & Actions from the menu followed by Recurring Actions from the sub menu
2) Click the Create icon
3) Select the recurring action type from the list presented (Recurring Action will be used in this
example) 4) Enter the Title of your action 3) Enter the Associations:
Management System > use the picker to select the Management System(s) you want to associate with your action
Organisation Scope – Location (Internal) > use the picker to select the site/location the action relates to
Organisation Scope – Location (External) > if you have customers/suppliers set up in your system and you want to link them to the action, select using the picker. Optional field

V1.03 30 of 48
Copyright © 2018 BSI. All rights reserved
Organisation Scope – Others (Internal) > if you want to tag people/department/processes to the action, select using the picker. Optional field
Category > use the picker to select category(s) you want to associate with your action. Optional field (unless it has been set to mandatory in the workflow)
Owner > the owner is ultimately responsible for the action
Responsible > the responsible person(s) is anyone that needs to be aware of the action and is often the person/people who the escalation email will go to if the action is not completed on time.)
Acceptor > this field will only be visible if acceptance has been enabled in the workflow. The acceptor is the person who will accept the action, once accepted the action will be passed to the designated owner
Approver > this field will only be visible if approval has been enabled in the workflow. The approver is the person who will approve the action for closure
Restricted Access > this field will restrict who will be able to view the action record. This should only be used if the information in the record is sensitive or confidential. Using the picker select the individual(s) that you want to include in the Restricted Access Group. Optional field
4) Description > using the rich text editor field, enter the details of your action
5) Start Date > enter the date the recurring action will start
6) End Date/Time > use the date picker and select when the recurrence will stop
7) Priority > from the pick list, select the priority. This is the level of importance/criticality of the action to your business
8) Acceptance Due Date > this field will only be visible if record ‘Acceptance’ has been enabled in the workflow
9) Cost > enter the cost implication of this action, this is an optional field and may be hidden from your form.
10) Recurrence > select your recurrence frequency

V1.03 31 of 48
Copyright © 2018 BSI. All rights reserved
11) In the Creation Period field, enter the number of days to wait before beginning the Recurring
Action
12) Click Save , the record status is saved to Draft
13) If you have Action Acceptance activated, click Submit for Acceptance, the action record status will change to Awaiting Acceptance. Click here for next set of instructions
14) If you do not have Action Acceptance activated, click Submit and the action record status will change to Active. Click here for next set of instructions
5.2 Submit Recurring Action for Acceptance (Awaiting Acceptance status)
1) The action acceptor will receive an email notification advising them they have an action to accept (if this does not happen please speak to your Entropy Administrator to ensure the email notification has been set up)
2) Open the action record and go to the section Reviews.
3) Click the link (reviewer user name) to open up the review. Add Comments in the mandatory field and select Accept or Reject
4) If accepted the record status will change to Active.
5.3 Submit Recurring Action (Active status)
1) The action owner will receive an email notification advising them they have been assigned an action (if this does not happen please speak to your Entropy Administrator to ensure the email notification has been set up)
Note: You will only see this record state if ‘Mandatory Acceptance’ has been activated in your action workflow.

V1.03 32 of 48
Copyright © 2018 BSI. All rights reserved
2) The action owner can update the action record with any notes/comments/attachment before closing the action
3) Click Save
5.4 Updating a Recurring Action
1) When a recurring action is due, the owner will receive an email notification. Click into the record and go to the section Actions
2) Click the title of the action to open it
3) Add any notes to the Notes section
4) If you have action Approval activated Click here for next set of instructions
5) If you do not have action Approval activated Click here for next set of instructions
5.4.1 Submit Recurring Action for Approval (Awaiting Approval status)
7) Once the action is ready for completion it can be submitted for approval 8) Enter the Actual Resolution Date into the date field 9) Click Submit for Approval, the record status will change to Awaiting Approval 10) The action approver will receive an email notification advising them they have an action to
approve (if this does not happen please speak to your Entropy Administrator to ensure the email notification has been set up)
11) The ‘Approver’ will click the link under the Reviewer section (user name) to open up the review.
Select Approve or Reject approval of the action adding comments
Note: You can only submit an action for approval if ‘Mandatory Approval’ has been activated in your
action workflow.

V1.03 33 of 48
Copyright © 2018 BSI. All rights reserved
12) The action will change to status Completed
5.4.2 Submit Recurring Action for completion (Completed status)
4) If you do not have action approval enabled, once the action has been completed it can be closed by the action owner
5) Enter the Actual Resolution Date into the date field 6) Click Complete. The record status changes to Completed
6. Configuration and Workflow
6.1 Audit configuration and workflow
The following section details the workflow of the audit tool. As with all areas of Entropy, workflow and configuration tools are only available to system administrators and module super users.
This section is for users who have Administrator / Compliance Super User privileges.
The most common areas of workflow you may consider changing are:
Finding and action types available to an audit record
NCR approval
Action approval
NCR completion rules
E-signature rules
Click Compliance from the menu toolbar 1) Select Audit Templates from the drop down menu 2)
Note: This guide only covers scheduled audit configuration, however configuration of the quick audit tool is the same as the configuration of the scheduled audit tool

V1.03 34 of 48
Copyright © 2018 BSI. All rights reserved
Select Audit Schedule Template from the menu 3) The record must be in Draft to make any changes to the workflow. Click New Version and select 4)
either Minor or Major (choose minor or major depending on the scope of the change). Click OK to confirm 5) Select Business Rules from the tabs 6)
6.1.1 Audit workflow - Finding and Action types available to an audit
You can limit what finding and action types are available to an audit. For example, when creating a finding from an audit you may want to make NCR and observations available but hide the other finding types.
Following on from section 5.1 steps 1 – 6:
Click Enable Optional Record Types 1)
Select which record types you would like enabled for use (i.e. when raising an action or finding 2)
from an audit you may only want certain findings and actions available to the user) In the screenshot below only NCR, observations and corrective actions can be created from an 3)
audit

V1.03 35 of 48
Copyright © 2018 BSI. All rights reserved
Click Apply to save the changes (click Save and Activate if you have no further changes) 4)
6.1.2 Audit workflow - enable NCR approval
By default findings can be completed by the finding owner. You can activate the finding approval workflow which will force the finding to go to a designated approver for approval before it is closed.
Following on from section 5.1 steps 1 – 6: 1) Click Workflow 2)
Select the Record Type from the drop down box (for the purpose of this guide we are using non-3)conformance)
You have the option to apply Mandatory Approval for all NCR classifications (High, Medium, 4)
Low) or you can apply the approval to a particular classification e.g. all ‘High’ classification NCRs will require approval whilst ‘Medium’ and ‘Low’ require no approval.
To apply Mandatory Approval for all classifications 5)
To apply Mandatory Approval to one or more classifications 6)

V1.03 36 of 48
Copyright © 2018 BSI. All rights reserved
Go to the section Finding Completion Rules and select Yes to enable Mandatory Approval 7)
Click Apply to save the changes (click Save and Activate if you have no further changes) 8)
6.1.3 Audit workflow - enable Action approval
By default actions can be completed by the action owner. You can activate the action approval workflow which will force the action to go to a designated approver for approval before it is closed.
Following on from section 5.1 steps 1 – 6: 1) Click Workflow 2)
Select the Record Type from the drop down box (for the purpose of this guide we are using non-3)conformance)
Mandatory action approval can be set for all action types and all classifications or you can apply 4)conditional approval i.e. the image below shows that only corrective actions, created from an NCR, require action approval regardless of their priority:

V1.03 37 of 48
Copyright © 2018 BSI. All rights reserved
Once you have configured your action approval rules, click Apply to save the changes (click Save 5)and Activate if you have no further changes)
6.1.4 Audit workflow - close Findings with open Actions?
By default findings can be closed if they still have associated actions which are open. You can activate the applicable workflow which will force the finding to remain open until all associated actions are closed.
Following on from section 5.1 steps 1 – 6: 1) Click Workflow 2)
Select the Record Type from the drop down box (for the purpose of this guide we are using non-3)conformance)
Mandatory action closure can be set for all action types and all finding types or you can apply 4)
conditional approval i.e. the image below shows that all action types that have been created from an NCR must be closed before the NCR can be closed:

V1.03 38 of 48
Copyright © 2018 BSI. All rights reserved
Once you have configured your NCR closure rules, click Apply to save the changes (click Save and 5)Activate if you have no further changes)
6.1.5 Audit workflow - Secondary Signature (e-signature)
If your Management System(s) require secondary authentication password (e-signature), follow the steps below.
Following on from section 5.1 steps 1 – 6: 1) Click Workflow 2)
Select the Record Type from the drop down box (for the purpose of this guide we are using non-3)conformance)
At the bottom of the screen you will see the conditions for e-signatures which will be disabled by 4)
default. Make the necessary changes
Click Apply to save the changes (click Save and Activate if you have no further changes) 5)
6.2 Finding configuration and workflow
The following section is for users who have Administrator privileges.
In this guide we will show you how to how to configure the workflow for an NCR finding type. All finding behaviour is the same, we will use the NCR finding type in this guide as this is the most commonly used finding.
1) Click Compliance from the primary toolbar 2) Select Finding Types from the drop down menu
Note: Users are required to set up an e-signature on their Entropy account (for information on how to do this, please refer to User Guide Getting Started with Entropy)

V1.03 39 of 48
Copyright © 2018 BSI. All rights reserved
3) Select Non-conformance from the list 4) The record must be in Draft to make any changes to the workflow. Click New Version and select
either Minor or Major (choose Minor or Major depending on the scope of the change). 5) Click OK to confirm 6) Select Business Rules from the tabs 7) Click Workflow
6.2.1 Finding workflow - enable NCR acceptance
If you require an NCR to first be ‘accepted’ by someone in the organisation then enable NCR acceptance by following the steps below:
1) You have the option to apply Mandatory Acceptance for all NCR classifications (High, Medium, Low) or you can apply the acceptance to a particular classification e.g. all ‘High’ classification NCRs will have acceptance whilst ‘Medium’ and ‘Low’ require no acceptance.
2) To apply Mandatory Acceptance for all classifications
3) To apply Mandatory Acceptance to one or more classifications
4) Go to the section Finding Workflow Rules and select Yes to enable Mandatory Acceptance

V1.03 40 of 48
Copyright © 2018 BSI. All rights reserved
5) If there are no more changes click Apply then Save and Activate to confirm the changes
6.2.2 Finding workflow - enable NCR approval
If you require an NCR to be approved by a designated approver before the NCR is closed down then enable this functionality by following the steps below
1) You have the option to apply Mandatory Approval for all NCR classifications (High, Medium, Low) or you can apply the approval to a particular classification e.g. all ‘High’ classification NCRs will require approval whilst ‘Medium’ and ‘Low’ require no approval.
2) To apply Mandatory Approval for all classifications
3) To apply Mandatory Approval to one or more classifications
4) Go to the section Finding Workflow Rules and select Yes to enable Mandatory Approval
5) If there are no more changes click Apply then Save and Activate to confirm the changes
6.2.3 Finding workflow - enable Action acceptance
If you require an Action (which has been created from an NCR) to first be ‘accepted’ by someone in the organisation then enable this functionality by following the steps below
1) You have the option to apply Mandatory Acceptance for all NCR classifications (High, Medium, Low) or you can apply the acceptance to a particular classification e.g. all ‘High’ classification NCRs will require action acceptance whilst ‘Medium’ and ‘Low’ require no action acceptance.
2) To apply Mandatory Acceptance for all classifications

V1.03 41 of 48
Copyright © 2018 BSI. All rights reserved
3) To apply Mandatory Acceptance to one or more classifications
4) Go to the section Associated Action Workflow Rules and select Yes to enable Mandatory Acceptance
5) If there are no more changes click Apply then Save and Activate to confirm the changes
6.2.4 Finding workflow - enable Action approval
If you require an Action (which has been created from an NCR) to be approved by a designated approver before the Action is closed then enable this functionality by following the steps below
1) You have the option to apply Mandatory Approval for all NCR classifications (High, Medium, Low) or you can apply the approval to a particular classification e.g. all ‘High’ classification NCRs will require action approval whilst ‘Medium’ and ‘Low’ require no action approval.
2) To apply Mandatory Approval for all classifications
3) To apply Mandatory Approval to one or more classifications
4) Go to the section Associated Action Workflow Rules and select Yes to enable Mandatory Approval

V1.03 42 of 48
Copyright © 2018 BSI. All rights reserved
5) If there are no more changes click Apply then Save and Activate to confirm the changes
6.2.5 Finding workflow - close NCR with open Actions?
If you want to ensure that an NCR cannot be closed until ALL actions associated to that NCR are also closed, follow the steps below
1) Go to Finding Workflow Rules 2) Select Yes to enable All Actions must be closed 3) OR select No (to allow NCRs to be closed with open actions)
4) If there are no more changes click Apply then Save and Activate to confirm the changes
6.2.6 Finding workflow - configuring the Responsible Role
Configuring the Responsible record role will give that user(s) more privileges to the Finding record
1) Go to Record Role Rules
2) Select one, some or all of the options available:
Can Transition Records – selecting this option will allow the Responsible person in the record to change the record status i.e. go from Draft to Open or Open to Awaiting Approval
Can Edit Record Roles – selecting this option will allow the Responsible person to change the other users in the record i.e. the Responsible may change the record owner from User A to User B as User A is going to be absent for a period of time
Is Mandatory – selecting this option will make the Responsible role field in a Finding record mandatory
3) If there are no more changes click Apply then Save and Activate to confirm the changes

V1.03 43 of 48
Copyright © 2018 BSI. All rights reserved
6.2.7 Finding workflow - adding an Executive Sponsor to a Finding
The Executive Sponsor is a User who has a vested interest in the Finding being created, a department head for example. The Executive Sponsor can’t do anything with a record, except for view it.
1) Go to Record Role Rules
2) Click the drop down box and select one of the following:
Disabled (Executive Sponsor field is not available in the record)
Optional (Executive Sponsor field is available but it is not mandatory)
Mandatory (Executive Sponsor field is available and it is mandatory)
3) If there are no more changes click Apply then Save and Activate to confirm the changes
6.2.8 Finding workflow - secondary signature (e-signature)
If your Management System(s) require secondary authentication password (e-signature), follow the steps below
1) You are able to activate e-signature authorisation for:
Note: Users are required to set up an e-signature on their Entropy account (for information on how to do this, please refer to User Guide Getting Started with Entropy)

V1.03 44 of 48
Copyright © 2018 BSI. All rights reserved
Closing an NCR Accepting an NCR Approving an NCR
2) If there are no more changes click Apply then Save and Activate to confirm the changes
6.3 Action Workflow
The following section is for users who have Administrator privileges.
In this guide we will show you how to how to configure the workflow for a corrective action type. All action behaviour is the same, we will use corrective action type in this guide as this is the most commonly used action type.
1) Click Compliance from the primary toolbar 2) Select Action Types from the drop down menu
3) Select Corrective Action from the list 4) The record must be in Draft to make any changes to the workflow. Click New Version and select
either Minor or Major (choose Minor or Major depending on the scope of the change).
Note: You will need to do the following for ALL action types: Action, Correction & Corrective

V1.03 45 of 48
Copyright © 2018 BSI. All rights reserved
5) Click OK to confirm 6) Select Business Rules from the tabs 7) Click Workflow
6.3.1 Action workflow - enable Action acceptance
If you require an Action to first be accepted by its designated owner then enable this functionality by following the steps below
1) You have the option to apply Mandatory Acceptance for all action Priorities (High, Medium, Low) or you can apply the acceptance to a particular priority e.g. all ‘High’ priority Action’s will require action acceptance whilst ‘Medium’ and ‘Low’ require no action acceptance.
2) To apply Mandatory Acceptance for all priorities
3) To apply Mandatory Acceptance to one or more priorities

V1.03 46 of 48
Copyright © 2018 BSI. All rights reserved
4) Select Yes to enable Mandatory Acceptance
5) If there are no more changes click Apply then Save and Activate to confirm the changes
6.3.2 Action workflow - enable Action approval
If you require an action to be approved by a designated approver before the action is closed down then enable this functionality by following the steps below
1) You have the option to apply Mandatory Approval for all Action priorities (High, Medium, Low) or you can apply the approval to a particular priority e.g. all ‘High’ priority Actions will require action approval whilst ‘Medium’ and ‘Low’ require no action approval.
2) To apply Mandatory Approval for all priorities
3) To apply Mandatory Approval to one or more priorities

V1.03 47 of 48
Copyright © 2018 BSI. All rights reserved
4) Select Yes to enable Mandatory Approval
5) If there are no more changes click Apply then Save and Activate to confirm the changes
6.3.3 Action workflow - secondary signature (e-signature)
If your Management System(s) require secondary authentication password (e-signature), follow the steps below
1) You are able to activate e-signature authorisation for: Accepting an Action Approving an Action
2) If there are no more changes click Apply then Save and Activate to confirm the changes
Note: Users are required to set up an e-signature on their Entropy account (for information on how to do this, please refer to User Guide Getting Started with Entropy)

V1.03 48 of 48
Copyright © 2018 BSI. All rights reserved
7. Summary
After reading this section, you should now understand how to:
Create an Audit Protocol Schedule and Audit Conduct an Audit Audit Calendar Finding Workflow Create a Finding Close a Finding Action Workflow Create an Action Complete an Action
8. Additional Support
If you require any further support in using the Entropy Software, please contact our Helpdesk Teams as follows:
For UK & EMEA
Email: [email protected]
Tel: +44 (0)345 5049524
For USA & Americas
Email: [email protected]
Tel: +1 888 640 6776
9. Revision History
Version Reason Date Author
V1.00 Initial version ZL
V1.01 Changes and updates ZL
V1.02 Changes due to re-skin & new sections added 27.03.18 ZL