Business Range 2014 - Reckon AU
166
Business Range 2014 Startup guide Hosted
Transcript of Business Range 2014 - Reckon AU

Business Range 2014
Startup guideHosted


Reckon Accounts HostedStartup Guide
SetupKey ConceptsEssential Tasks

iv
Copyright
Copyright © 2014 Reckon Ltd.
All rights reserved
Reckon Software
Locked bag 7522
McMahons Point NSW 2060
Trademarks
Acrobat Reader is copyright Adobe Systems Incorporated and Adobe, the Adobe logo, and Reader are either registered trademarks or trademarks of Adobe Systems Incorporated in the United States and/or other countries. Macromedia, Shockwave, and Flash are trademarks of Macromedia, Inc.
Reckon, R logos, Reckon Accounts and Reckon logos are trademarks of Reckon Ltd. Microsoft and Windows are registered trademarks of Microsoft Corporation in the United States and/or other countries. Intel and Pentium are trademarks of Intel Corporation in the United States and other countries. Other products are trademarks of the respective manufacturers.
Software © 2014 Intuit Inc.

v
Australian Development Team
Product Management: Dean Darke, Samantha Stone, Jasmina Cahill, Simon Hutchinson, Piyush Mittal, Eddie Krabs
Software Development: Pranoy Sinha, Michael Davis, Wayne Qiu, Andrew Appleby, Peng Wang, Raymond Cheung, Ramesh Ramalingam, Alvin Zeng, Ela Pishkouhi, Brent Kwon
Information Technology: Zack Levy, Mitch Beaumont, Ashwin Kumar, Martin Woodroofe, Kowser Hossain,
Technical Documentation: Shuang Guo, Samantha Stone
Quality Assurance: Phillip Osman, Khen Chu, John Li, Scott Montgomerie, Neil Rustidge, Elvis Olic
Marketing: Matthew Butler, Perrine Mignot, Adrian Ireland, Trang Phan, Min Kumar, Rogier de Jonge, Rebecca Kington, Rianti Pramira, Jane Chan, Matt Tran

vi
Contents
1 | Welcome � � � � � � � � � � � � � � � � � � � � � � � � � � � � � � � � � � � � � � � � � � � � � � � � � � � � � � � � � � � � � � � � � � � � � � � � � � � � � � � �1
Welcome. . . . . . . . . . . . . . . . . . . . . . . . . . . . . . . . . . . . . . . . . . . . . . . . . . . . . . . . . . . . . . . . . . . . . . . . .2How to use this guide . . . . . . . . . . . . . . . . . . . . . . . . . . . . . . . . . . . . . . . . . . . . . . . . . . . . . . . . . . . . . . .2
2 | Accessing Reckon Accounts Hosted � � � � � � � � � � � � � � � � � � � � � � � � � � � � � � � � � � � � � � � � � � � � � 5
Changes in Reckon Accounts Hosted . . . . . . . . . . . . . . . . . . . . . . . . . . . . . . . . . . . . . . . . . . . . . . . . . . . .6Accessing Reckon Accounts Hosted . . . . . . . . . . . . . . . . . . . . . . . . . . . . . . . . . . . . . . . . . . . . . . . . . . . . .7The Dashboard . . . . . . . . . . . . . . . . . . . . . . . . . . . . . . . . . . . . . . . . . . . . . . . . . . . . . . . . . . . . . . . . . . . .9
The Control Panel. . . . . . . . . . . . . . . . . . . . . . . . . . . . . . . . . . . . . . . . . . . . . . . . . . . . . . . . . . . . . . . .9View backup log . . . . . . . . . . . . . . . . . . . . . . . . . . . . . . . . . . . . . . . . . . . . . . . . . . . . . . . . . . . . . . . .10Check your internet speed . . . . . . . . . . . . . . . . . . . . . . . . . . . . . . . . . . . . . . . . . . . . . . . . . . . . . . . .10
Converting data from other applications . . . . . . . . . . . . . . . . . . . . . . . . . . . . . . . . . . . . . . . . . . . . . . . . .10Setting Up Your Company in Reckon Accounts . . . . . . . . . . . . . . . . . . . . . . . . . . . . . . . . . . . . . . . . . . . . .12
Creating your company file . . . . . . . . . . . . . . . . . . . . . . . . . . . . . . . . . . . . . . . . . . . . . . . . . . . . . . . .12Completing your company setup . . . . . . . . . . . . . . . . . . . . . . . . . . . . . . . . . . . . . . . . . . . . . . . . . . . .15
Next steps . . . . . . . . . . . . . . . . . . . . . . . . . . . . . . . . . . . . . . . . . . . . . . . . . . . . . . . . . . . . . . . . . . . . . .20
3 | Learning Reckon Accounts � � � � � � � � � � � � � � � � � � � � � � � � � � � � � � � � � � � � � � � � � � � � � � � � � � � � � � � � � � � � � 21
Getting Around Reckon Accounts . . . . . . . . . . . . . . . . . . . . . . . . . . . . . . . . . . . . . . . . . . . . . . . . . . . . . .22Using the Home page to move around in Reckon Accounts . . . . . . . . . . . . . . . . . . . . . . . . . . . . . . . . .23Finding your data in the Reckon Accounts Centres . . . . . . . . . . . . . . . . . . . . . . . . . . . . . . . . . . . . . . .24Displaying multiple windows or one window . . . . . . . . . . . . . . . . . . . . . . . . . . . . . . . . . . . . . . . . . . . .26Adding icons to the icon bar . . . . . . . . . . . . . . . . . . . . . . . . . . . . . . . . . . . . . . . . . . . . . . . . . . . . . . .27
vii
Contents
Getting Answers to Your Questions . . . . . . . . . . . . . . . . . . . . . . . . . . . . . . . . . . . . . . . . . . . . . . . . . . . . . .28Using in-product Help . . . . . . . . . . . . . . . . . . . . . . . . . . . . . . . . . . . . . . . . . . . . . . . . . . . . . . . . . . . . .28Additional Self-Help Tools . . . . . . . . . . . . . . . . . . . . . . . . . . . . . . . . . . . . . . . . . . . . . . . . . . . . . . . . . .32Getting Assisted Support . . . . . . . . . . . . . . . . . . . . . . . . . . . . . . . . . . . . . . . . . . . . . . . . . . . . . . . . . .33Working with a Reckon Accredited Partner . . . . . . . . . . . . . . . . . . . . . . . . . . . . . . . . . . . . . . . . . . . . . .33
Reckon Accounts Basics . . . . . . . . . . . . . . . . . . . . . . . . . . . . . . . . . . . . . . . . . . . . . . . . . . . . . . . . . . . . .34How Reckon Accounts lists work . . . . . . . . . . . . . . . . . . . . . . . . . . . . . . . . . . . . . . . . . . . . . . . . . . . . .34Writing cheques versus paying bills . . . . . . . . . . . . . . . . . . . . . . . . . . . . . . . . . . . . . . . . . . . . . . . . . . .37
4 | Essential Tasks� � � � � � � � � � � � � � � � � � � � � � � � � � � � � � � � � � � � � � � � � � � � � � � � � � � � � � � � � � � � � � 39
Reckon Accounts Workflow | Visual Overview . . . . . . . . . . . . . . . . . . . . . . . . . . . . . . . . . . . . . . . . . . . . .40Learning how to do essential Reckon Accounts tasks. . . . . . . . . . . . . . . . . . . . . . . . . . . . . . . . . . . . . . . . .41Setting Up Your Business | Preferences . . . . . . . . . . . . . . . . . . . . . . . . . . . . . . . . . . . . . . . . . . . . . . . . .42
Changing Reckon Accounts for the way you like to work. . . . . . . . . . . . . . . . . . . . . . . . . . . . . . . . . . . . .43Setting Up Your Business | Adding an Account. . . . . . . . . . . . . . . . . . . . . . . . . . . . . . . . . . . . . . . . . .45Adding an Account . . . . . . . . . . . . . . . . . . . . . . . . . . . . . . . . . . . . . . . . . . . . . . . . . . . . . . . . . . . . . . .46Setting Up Your Business | Adding Customers . . . . . . . . . . . . . . . . . . . . . . . . . . . . . . . . . . . . . . . . . .51Adding Customers . . . . . . . . . . . . . . . . . . . . . . . . . . . . . . . . . . . . . . . . . . . . . . . . . . . . . . . . . . . . . . .52Setting Up Your Business | Adding Suppliers . . . . . . . . . . . . . . . . . . . . . . . . . . . . . . . . . . . . . . . . . . .55Adding Suppliers . . . . . . . . . . . . . . . . . . . . . . . . . . . . . . . . . . . . . . . . . . . . . . . . . . . . . . . . . . . . . . . .56Setting Up Your Business | Adding Items . . . . . . . . . . . . . . . . . . . . . . . . . . . . . . . . . . . . . . . . . . . . . .58Adding Items . . . . . . . . . . . . . . . . . . . . . . . . . . . . . . . . . . . . . . . . . . . . . . . . . . . . . . . . . . . . . . . . . . .59Setting Up Your Business | Setting up tax . . . . . . . . . . . . . . . . . . . . . . . . . . . . . . . . . . . . . . . . . . . . .64Setting up tax . . . . . . . . . . . . . . . . . . . . . . . . . . . . . . . . . . . . . . . . . . . . . . . . . . . . . . . . . . . . . . . . . .65Setting Up Your Business | Setting Up Your Payroll . . . . . . . . . . . . . . . . . . . . . . . . . . . . . . . . . . . . . . .72Setting up your Payroll . . . . . . . . . . . . . . . . . . . . . . . . . . . . . . . . . . . . . . . . . . . . . . . . . . . . . . . . . . . .72Setting Up Your Business | Setting up Employees . . . . . . . . . . . . . . . . . . . . . . . . . . . . . . . . . . . . . . .77

viii
Setting up Employees. . . . . . . . . . . . . . . . . . . . . . . . . . . . . . . . . . . . . . . . . . . . . . . . . . . . . . . . . . . .79Money In | Creating an Estimate. . . . . . . . . . . . . . . . . . . . . . . . . . . . . . . . . . . . . . . . . . . . . . . . . . . . . .81
Creating an Estimate . . . . . . . . . . . . . . . . . . . . . . . . . . . . . . . . . . . . . . . . . . . . . . . . . . . . . . . . . . . .82Money In | Creating an Invoice . . . . . . . . . . . . . . . . . . . . . . . . . . . . . . . . . . . . . . . . . . . . . . . . . . . .84Creating an Invoice. . . . . . . . . . . . . . . . . . . . . . . . . . . . . . . . . . . . . . . . . . . . . . . . . . . . . . . . . . . . . .85Money In | Entering Sales Receipts . . . . . . . . . . . . . . . . . . . . . . . . . . . . . . . . . . . . . . . . . . . . . . . . .87Entering Sales Receipts . . . . . . . . . . . . . . . . . . . . . . . . . . . . . . . . . . . . . . . . . . . . . . . . . . . . . . . . . .87Money In | Receiving a Payment . . . . . . . . . . . . . . . . . . . . . . . . . . . . . . . . . . . . . . . . . . . . . . . . . . .89Receiving a Payment . . . . . . . . . . . . . . . . . . . . . . . . . . . . . . . . . . . . . . . . . . . . . . . . . . . . . . . . . . . .89Money In | Making a Deposit . . . . . . . . . . . . . . . . . . . . . . . . . . . . . . . . . . . . . . . . . . . . . . . . . . . . .91Making a Deposit . . . . . . . . . . . . . . . . . . . . . . . . . . . . . . . . . . . . . . . . . . . . . . . . . . . . . . . . . . . . . . .93
Money Out | Paying Bills. . . . . . . . . . . . . . . . . . . . . . . . . . . . . . . . . . . . . . . . . . . . . . . . . . . . . . . . . . . .94Paying Bills . . . . . . . . . . . . . . . . . . . . . . . . . . . . . . . . . . . . . . . . . . . . . . . . . . . . . . . . . . . . . . . . . . .94Money Out | Writing Cheques . . . . . . . . . . . . . . . . . . . . . . . . . . . . . . . . . . . . . . . . . . . . . . . . . . . . .98Writing Cheques. . . . . . . . . . . . . . . . . . . . . . . . . . . . . . . . . . . . . . . . . . . . . . . . . . . . . . . . . . . . . . . .99Money Out | Issuing Credits or Refunds. . . . . . . . . . . . . . . . . . . . . . . . . . . . . . . . . . . . . . . . . . . . .101Issuing Credits or Refunds . . . . . . . . . . . . . . . . . . . . . . . . . . . . . . . . . . . . . . . . . . . . . . . . . . . . . . .102Money Out | Paying Employees . . . . . . . . . . . . . . . . . . . . . . . . . . . . . . . . . . . . . . . . . . . . . . . . . . .104Paying Employees. . . . . . . . . . . . . . . . . . . . . . . . . . . . . . . . . . . . . . . . . . . . . . . . . . . . . . . . . . . . . .106
Managing Your Business | Using Reports . . . . . . . . . . . . . . . . . . . . . . . . . . . . . . . . . . . . . . . . . . . . . .108Using Reports to see how your business is doing . . . . . . . . . . . . . . . . . . . . . . . . . . . . . . . . . . . . . . .109Other add-ons to help you manage your business . . . . . . . . . . . . . . . . . . . . . . . . . . . . . . . . . . . . . . .113

ix
5 | Contacting Reckon � � � � � � � � � � � � � � � � � � � � � � � � � � � � � � � � � � � � � � � � � � � � � � � � � � � � � � � � � � � � � � � � � � � � � � � � � � � � �115
Contacting Reckon. . . . . . . . . . . . . . . . . . . . . . . . . . . . . . . . . . . . . . . . . . . . . . . . . . . . . . . . . . . . . . . . . . . . . . . 116Reckon Contacts . . . . . . . . . . . . . . . . . . . . . . . . . . . . . . . . . . . . . . . . . . . . . . . . . . . . . . . . . . . . . . . . . . . . . 120
Licence Agreement � � � � � � � � � � � � � � � � � � � � � � � � � � � � � � � � � � � � � � � � � � � � � � � � � � � � � � � � � � � � � � � � � � � � � � � � � � � � � � � � �125

x

1 | Welcome

2
WelcomeWelcome to Reckon Accounts Hosted. Whether you’ve been running your business for years or are just starting out, having an organised, efficient way to manage your business can save you time, money, and a lot of frustration.
Use this Startup Guide to get up and running as fast as possible. In this guide, you’ll learn about:
• How to access Reckon Accounts and set up your company file
• Important Reckon Accounts terms and concepts
• How to get around in Reckon Accounts
• Where to look for help when you have questions
• How to perform common tasks
How to use this guide
Page
6 Changes in Hosted
Page
7 Access Reckon Accounts
Page
10 Convert data from other applications
Page
12 Create and set up your company file

3
Page
28 Learn how to get help if you have questions
Page
41 Learn about essential Reckon Accounts tasks

4

2 | Accessing Reckon Accounts Hosted
6
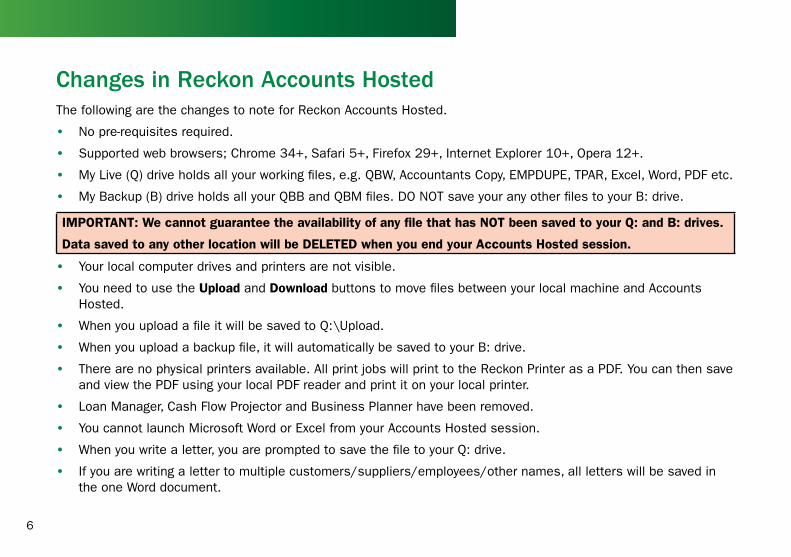
Changes in Reckon Accounts Hosted The following are the changes to note for Reckon Accounts Hosted.
• No pre-requisites required.
• Supported web browsers; Chrome 34+, Safari 5+, Firefox 29+, Internet Explorer 10+, Opera 12+.
• My Live (Q) drive holds all your working files, e.g. QBW, Accountants Copy, EMPDUPE, TPAR, Excel, Word, PDF etc.
• My Backup (B) drive holds all your QBB and QBM files. DO NOT save your any other files to your B: drive.
IMPORTANT: We cannot guarantee the availability of any file that has NOT been saved to your Q: and B: drives.
Data saved to any other location will be DELETED when you end your Accounts Hosted session.
• Your local computer drives and printers are not visible.
• You need to use the Upload and Download buttons to move files between your local machine and Accounts Hosted.
• When you upload a file it will be saved to Q:\Upload.
• When you upload a backup file, it will automatically be saved to your B: drive.
• There are no physical printers available. All print jobs will print to the Reckon Printer as a PDF. You can then save and view the PDF using your local PDF reader and print it on your local printer.
• Loan Manager, Cash Flow Projector and Business Planner have been removed.
• You cannot launch Microsoft Word or Excel from your Accounts Hosted session.
• When you write a letter, you are prompted to save the file to your Q: drive.
• If you are writing a letter to multiple customers/suppliers/employees/other names, all letters will be saved in the one Word document.

7
• You cannot customise the new letter template.
• You cannot create envelopes.
• When you export a report to Excel, it will prompt you to save as XLS to your Q: drive.
Any queries, please contact Reckon.
Accessing Reckon Accounts HostedAfter you have purchased Reckon Accounts Hosted you now have access to gain the many benefits this application has to offer. To access Reckon Accounts Hosted:
A Open your Internet Browser, go to hosted.reckon.com/ for Australia, or hostednz.reckon.com for New Zealand.
B Enter your User ID and Password and click Login.
Accessing Reckon Accounts Hosted

8
C If this is the first time you are logging in to Reckon Accounts Hosted, you will be asked to create a username.
D Enter your chosen username and click Continue.
If this username already exists you have to enter a new username.
IMPORTANT: If you have an accountant create your account for you, please make sure that you change your password once you have access to your file.
The Reckon Accounts Hosted Dashboard opens.
E Click the ACCOUNTS 2014 icon to access Reckon Accounts Hosted.

9
The DashboardThe Reckon Accounts Hosted Dashboard is where you can access the Control Panel and view your backup log.
The Control PanelYou can use the Control Panel to access your user management, account administration, file management and system maintenance.
To access your Control Panel, simply click Control Panel from the Reckon Accounts Hosted Dashboard.
Accessing Reckon Accounts Hosted

10
View backup logThe backup log shows you all the backups that you have done in Reckon Accounts Hosted to your B: drive.
• Click View backup log to open this log.
Check your internet speedThe internet speed test will measure your connection speed to Reckon’s server. It should take no more than 30 seconds to completed.
A Click Check your internet speed.
B Click Check your internet speed again.
C Once the test is complete, click Close.
Converting data from other applicationsIf you are converting financial data from another application (such as Microsoft Excel), follow the instructions below.
Excel
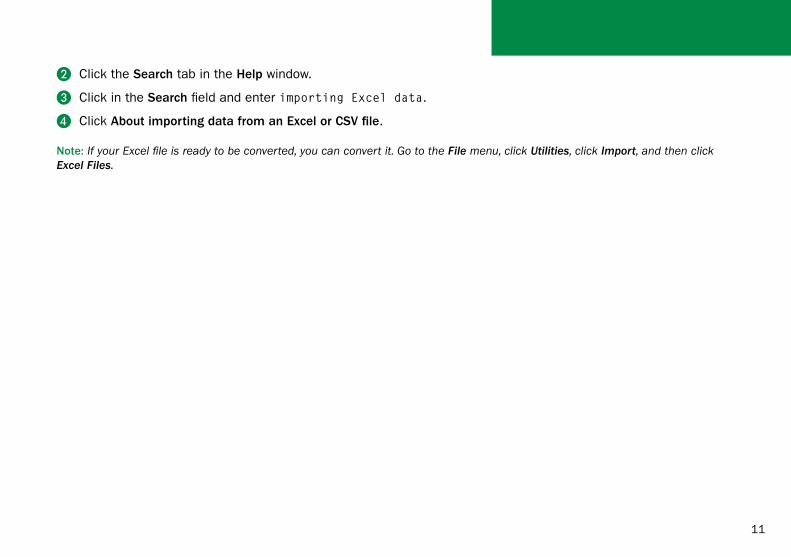
Detailed instructions about importing Excel® (.xls) and comma separated values (.csv) data into your Reckon Accounts company file are provided in the Reckon Accounts in-product Help. Importing data from Excel and .csv files is not difficult, but does require you to prepare the file properly.
To view the file preparation and conversion instructions:
A Start Reckon Accounts. Go to the Help menu and click Reckon Accounts Help.
11
B Click the Search tab in the Help window.
C Click in the Search field and enter importing Excel data.
D Click About importing data from an Excel or CSV file.
Note: If your Excel file is ready to be converted, you can convert it. Go to the File menu, click Utilities, click Import, and then click Excel Files.

12
Setting Up Your Company in Reckon AccountsThe first thing you need to do in Reckon Accounts is create a company file for your business. Setting up your company file properly is the most important thing you can do to have Reckon Accounts help you manage your business efficiently.
The setup process is easy with the EasyStep Interview and should take you about 15 minutes to complete. Then, depending on the complexity of your business, completing your company setup can take anywhere from a few minutes to a few hours. The amount of time varies based on how much detail you add about your accounts, customers, suppliers, employees, products, and services, as well as the number of historical transactions you want to enter.
When you set up your company file, Reckon Accounts will prompt you for details about your company. Before you begin the setup process, gather the information shown in the Getting Started Checklist. Some of this information you’ll need for the EasyStep Interview; other information you will need as you begin to use Reckon Accounts.
Creating your company fileAfter you have gathered the company information listed in the Getting Started Checklist, you can set up your business using the Reckon Accounts EasyStep Interview. (Not all of the information in the checklist is required for the EasyStep Interview; however, you will need this information as you use Reckon Accounts to run your business.) The EasyStep Interview walks you through the setup procedure and helps you tailor Reckon Accounts for your business.
13
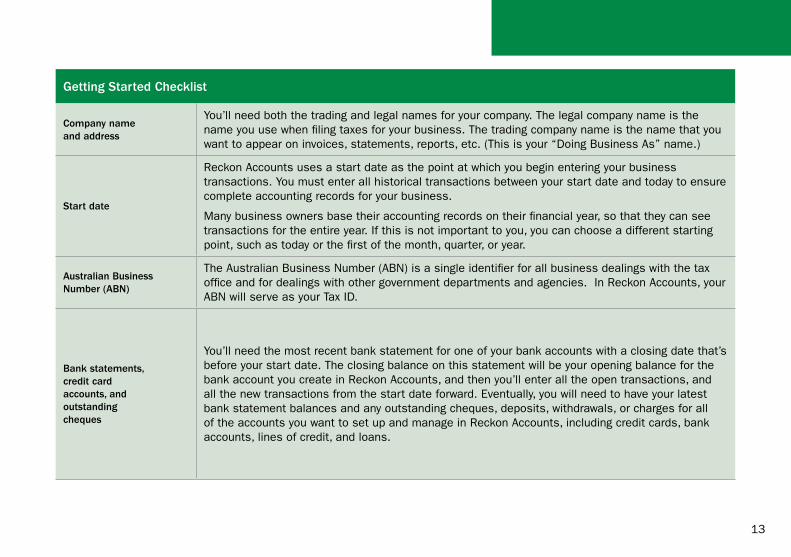
Getting Started Checklist
Company name and address
You’ll need both the trading and legal names for your company. The legal company name is the name you use when filing taxes for your business. The trading company name is the name that you want to appear on invoices, statements, reports, etc. (This is your “Doing Business As” name.)
Start date
Reckon Accounts uses a start date as the point at which you begin entering your business transactions. You must enter all historical transactions between your start date and today to ensure complete accounting records for your business.
Many business owners base their accounting records on their financial year, so that they can see transactions for the entire year. If this is not important to you, you can choose a different starting point, such as today or the first of the month, quarter, or year.
Australian Business Number (ABN)
The Australian Business Number (ABN) is a single identifier for all business dealings with the tax office and for dealings with other government departments and agencies. In Reckon Accounts, your ABN will serve as your Tax ID.
Bank statements, credit card accounts, and outstanding cheques
You’ll need the most recent bank statement for one of your bank accounts with a closing date that’s before your start date. The closing balance on this statement will be your opening balance for the bank account you create in Reckon Accounts, and then you’ll enter all the open transactions, and all the new transactions from the start date forward. Eventually, you will need to have your latest bank statement balances and any outstanding cheques, deposits, withdrawals, or charges for all of the accounts you want to set up and manage in Reckon Accounts, including credit cards, bank accounts, lines of credit, and loans.

14
Getting Started Checklist
Assets and LiabilitiesYou will need the balance of each loan your business owes (liabilities) such as a bank loan, hire purchase, or director’s loan; or is owed (assets). If you have stock, you need to know its value as of your start date.
PAYG LiabilityIf you are operating payroll, you need to know how much PAYG tax you owe to the ATO as of your start date.
PayrollIf you are using Payroll, you should gather the following information from your employees: company information; compensation, benefits, and miscellaneous additions and deductions; tax information; employee information; year-to-date history; and liability payment information.
Optional information
Eventually, you will need to enter detailed information about your customers, suppliers, and employees, as well as the products and services you sell, the products that you hold in stock, and any additional assets.
To create your company file:
A Open your Internet Browser, go to hosted.reckon.com/ for Australia, or hostednz.reckon.com for New Zealand.
B Enter your Reckon Accounts Hosted login details.
C Click the Accounts Hosted icon.
D Click Create a new company file, or go to the File menu and click New Company.
E The Welcome screen for the Setup Interview opens. Click Start Interview.
Note: We recommend that you do not skip the interview process. The more information you enter with the Setup Interview, the more accurate your company file will be when you begin to use Reckon Accounts for your business.
However, if you are an experienced Reckon Accounts user and prefer to create your company file manually, you can skip the
15
EasyStep Interview by clicking Skip Interview on the Setup Interview Welcome screen. You will be prompted to enter some basic company information and to save the company file.
F Follow the onscreen instructions and complete the interview.
Completing your company setupAfter you’ve created your company file, you can begin using Reckon Accounts to run your business. But before you do, we recommend that you review the information in this section to make sure your company file is properly set up and that your data is complete.
This section describes some additional tasks you might need to do as you begin using Reckon Accounts. Depending on how much information you entered during the Setup Interview, some of these tasks might not apply to you.
Enter your company information
Do this task if you did not enter this information in the Setup Interview.
To enter the contact and legal information for your company, go to the Company menu and click Company Information. To learn more about each of the fields and where the information you enter will be used in Reckon Accounts, click the Help button.
Review your Chart of Accounts
If you used the Setup Interview, a chart of accounts based on your type of business was set up for you. Review the chart of accounts to be sure it accurately reflects the accounts you need to run your business. You can change account names and edit, delete, or add accounts as necessary. For example, you will need to add any personal bank, credit card, or loan accounts.
To view your Chart of Accounts, go to the Lists menu and click Chart of Accounts.

16
Numbering your accounts
Some businesses prefer to organise their accounts by number. Adding numbers can help you identify the type of accounts, thereby speeding up your account selection on various forms. You might want to develop and follow a consistent account naming and numbering convention. For example:
1000-1999 - Assets
2000-2999 - Liabilities
3000-3999 - Equity
4000-4999 - Income
5000-5999 - Cost of Goods Sold
6000-6999 - Expenses
7000-7999 - Other Income
8000-8999 - Other Expense
If you want to use numbers to identify your accounts, you need to turn on this preference in Reckon Accounts, as follows.
A Go to the Edit menu and click Preferences.
B In the Preferences window, click Accounting in the list on the left.
C Click Company Preferences.
D Select the Use account numbers checkbox.
E Click OK.

17
Create your customer, supplier, and items lists
To bill customers and pay your bills with Reckon Accounts, you must update your customer, supplier, and item lists so that they accurately reflect your business. Instructions for setting up these lists are provided in Chapter 4:
• “Adding Customers” on page 52
• “Adding Suppliers” on page 56
• “Adding Items” on page 59
Enter historical transactions
If your start date is before today’s date, you’ll need to enter past transactions from the start date to today. This ensures that your Reckon Accounts records are completely up-to-date and your reports will be accurate.
Enter historical transactions in chronological order. For example, Reckon Accounts won’t know how to credit a customer payment unless you’ve previously recorded the invoice to that customer. The most efficient way to enter historical transactions is in the account register.
Note: Entering historical transactions is especially important if customers don’t pay you at the time they receive goods or services. If you don’t enter historical transactions early on, it’s hard to track and collect late customer payments.
Reckon recommends that you enter your transactions in this order (verify with accountant):
• Invoices or statements you’ve sent out since your start date
• Purchase orders you’ve issued since your start date that you haven’t received in full
• Cash or cheques you’ve received since your start date
• Bills you’ve received since your start date
• Bills you’ve paid since your start date
• Deposits you’ve made to any of your accounts since your start date

18
• Any other cheques you’ve written (for things other than bills) since your start date
• Employee year-to-date information accrued from the beginning of the financial year through your start date
• Payroll liabilities owed at the time of your start date (for manual payroll and tracking payroll transactions only)
Note: If you don’t have time to enter all your historical transactions right away, don’t worry. You don’t need to enter all your past transactions before you start using Reckon Accounts for new transactions. Enter new transactions as they occur. Then catch up with historical transactions when you can. Remember, though, that your account balances will be incorrect (and your reports may be wrong) until you enter all the past transactions.
Complete your bank account information
After you’ve entered your historical transactions, your account registers will contain entries reflecting bills you’ve paid, cheques and payroll payments you’ve written, and deposits you’ve received. To make your account registers complete, you must also enter these transactions:
• Cheques or other charges that happened before your start date but didn’t appear on statements before your start date (i.e., didn’t clear)
• Other cheques you wrote after your start date that were not for bills or accounts payable (for example, credit card payments)
• Deposits you made after your start date that were not customer deposits
• Deposits you made before your start date but that didn’t appear on statements before your start date
• Bank charges and fees
• Interest paid on your account
Refer to the in-product Help for step-by-step instructions on how to enter these transactions to make your account registers accurate.

19
Enter any optional adjustments
After you’ve created your company file, you might need to make a few adjustments as of your start date. Depending on your company, you might need to:
• Enter any tax liabilities
• Adjust the Uncategorised Income and Uncategorised Expense accounts (for accrual basis only)
• Adjust for current income and expenses if your start date is not at the beginning of the financial year
• Distribute earnings and equity before your start date
Refer to the in-product Help for step-by-step instructions on how to enter these optional adjustments. If you are unsure whether you need to enter these optional adjustments, check with your accountant.
Backing up your company file
The Reckon Accounts backup file is a compressed version of your Reckon Accounts company file that contains all transactions through the date the company backup was made. A backup file provides insurance against accidental data loss and can be used to restore your data. Reckon Accounts backups have a .qbb extension and cannot be opened directly.
Reckon Accounts provides the following backup options for securing your data:
• Standard backup
• Portable Company File
To use one of the backup options, go to the File menu and click Save Copy or Backup.
To restore your backup, go to the File menu and click Open or Restore Company.
To learn more about backing up your company file, refer to the in-product Help.
20
Next stepsAfter you’ve set up your company file as described in this chapter, you should:
• Learn how to use Reckon Accounts and get answers to your questions (see Chapter 3).
• Learn how to perform basic Reckon Accounts tasks (see Chapter 4).
Accounts3 | Learning Reckon
22
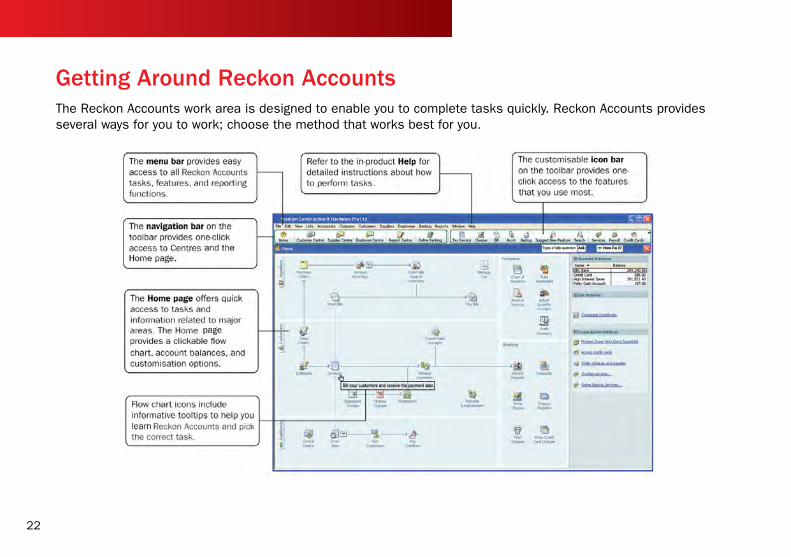
Getting Around Reckon AccountsThe Reckon Accounts work area is designed to enable you to complete tasks quickly. Reckon Accounts provides several ways for you to work; choose the method that works best for you.

23
Using the Home page to move around in Reckon AccountsWhen you open a company file in Reckon Accounts, the Home page is displayed automatically. The Reckon Accounts Home page provides a big picture of how all your essential business tasks fit together. Tasks are organised into logical categories (Customers, Suppliers, Employees, Company, and Banking) with workflow arrows to help you learn how tasks relate to each other and to help you decide what to do next.
Note: The workflow arrows indicate a logical progression of business tasks in Reckon Accounts. However, these arrows do not restrict you from doing tasks in a different order, or an order that works better for your business needs.
To start a task, simply click the icon for the task you want to do. For example, to create an invoice, click the Invoices icon.
To return to the Home page, click the Home button on the navigation bar.
The Home page also provides a quick glance about the state of your business. You can see your current account balances, updated automatically as you do work in Reckon Accounts, in the Account Balances list.
The Home page you see has been customised to display only those tasks and features that you use, based on the questions you answer in the EasyStep Interview. Functions you don’t need won’t clutter your workspace. However, if you decide to use these functions later, you
Customising the desktopYou can modify the way that the Reckon Accounts desktop behaves and looks to suit your working style. To modify the Reckon Accounts desktop, go to the Edit menu and click Preferences.
Customising the icon barYou can add, rearrange, and remove shortcuts from the icon bar to suit your needs. To modify the icon bar, go to the View menu and then click the Customise Icon Bar.
Too many windows open?If your Reckon Accounts work area becomes too cluttered with windows that you have open, you can close them all at once instead of closing them one at a time. To close all open windows, go to the Window menu and click Close All.
When you close your company file at the end of the day, it’s good practice to close all windows that you have open. The next time you open your company file, Reckon Accounts will open all the windows that you had open when you closed your company file. If you forget to close open windows when you exit Reckon Accounts, hold down the Alt key while opening your company file. Reckon Accounts will open your company file with no windows open in your work area.
Learning Reckon Accounts
Did You Know?

24
can always add them back to the Home page by clicking the Customise Reckon Accounts link in the Getting Started section of the Home page.
Finding your data in the Reckon Accounts CentresReckon Accounts includes Customer, Supplier, and Employee Centres where you can view and manage all of your customer, supplier, and employee information and transactions. You can go to one of the Reckon Accounts Centres by clicking the appropriate button in the navigation bar (on the left side of the toolbar).
Customer Centre
The Customer Centre lets you view and work with all your customer information. Without having to sift through multiple screens, you can view a list of all your customers and see pertinent information for each of them. Click on a customer’s name and you’ll immediately see all the activity you’ve had with them as well as their pertinent contact information (phone number, fax number, and payment terms).
You can use the Customer Centre to find out how much money a specific customer owes you, or to view a list of all your customers with open balances. You can also look at all your customer transactions (estimates, sales orders, invoices, adjustment notes, refunds, etc.) across all of your customers in the Transactions list rather than having to run separate reports.

25
Supplier Centre
The Supplier Centre gives you a complete picture of where your money is going. From one screen, you can see all your suppliers and exactly what you owe them. Simply click a supplier’s name to view your entire history with that
Learning Reckon Accounts
can always add them back to the Home page by clicking the Customise Reckon Accounts link in the Getting Started section of the Home page.
Finding your data in the Reckon Accounts CentresReckon Accounts includes Customer, Supplier, and Employee Centres where you can view and manage all of your customer, supplier, and employee information and transactions. You can go to one of the Reckon Accounts Centres by clicking the appropriate button in the navigation bar (on the left side of the toolbar).
Customer Centre
The Customer Centre lets you view and work with all your customer information. Without having to sift through multiple screens, you can view a list of all your customers and see pertinent information for each of them. Click on a customer’s name and you’ll immediately see all the activity you’ve had with them as well as their pertinent contact information (phone number, fax number, and payment terms).
You can use the Customer Centre to find out how much money a specific customer owes you, or to view a list of all your customers with open balances. You can also look at all your customer transactions (estimates, sales orders, invoices, adjustment notes, refunds, etc.) across all of your customers in the Transactions list rather than having to run separate reports.

26
supplier. You no longer need to run separate reports to see exactly how much business you’re doing with each individual supplier. And, you can sort your bills by due date so you can stay on top of your finances.
If you need to talk to a supplier, click their name and you’ll see all their contact information. If a supplier calls you to follow up on a late payment, you can quickly look up the bill and see when you paid it and what the cheque number was.
Employee Centre
From the Employee Centre, you can see exactly what you’re paying each employee. Simply click an employee’s name to view that person’s payroll history. And if you need to get in touch with an employee, their contact information is right in front of you.
Payroll Centre
The Payroll Centre is the hub for managing all payroll activities. The Payroll Centre reminds you of important payroll dates so you pay your employees, pay your payroll liabilities, and file forms on time.
To view the Payroll Centre, go to the Employees menu and click Payroll Centre.
Displaying multiple windows or one windowReckon Accounts is preset to show multiple windows at a time. By doing so, you can easily navigate between tasks as well as compare data in multiple windows. When you open a window, it opens to a preset size and location. You can resize and move each window as you see fit.
Depending on how you size or arrange the windows, some windows might not be visible. Use the Window menu to view a list of the open windows. Simply click the window name in the list to bring it to the front.

27
Alternatively, you can open the Open Window List to have the list of open windows always visible on the left side of the Reckon Accounts application window. If you prefer to view only one window at a time, go to the View menu and click One Window.
Adding icons to the icon barFor quick access to the areas of Reckon Accounts you use most, you can customise the icon bar by adding many of the features and reports that you use most frequently.
View Lists
Open Window List
Icon BarCustomise Icon Bar...Add “Chart of Accounts” to Icon Bar...
Accountant Company
Navigation Bar
Custom
To add a shortcut to Accountswindow, open the window and thengo to the View menu and clickthe Add to Icon Bar option.
You can add, rearrange, or removeshortcuts from the icon bar in theCustomise Icon Bar window.
Note: Some Reckon Accounts windows cannot be added to the icon bar.
Learning Reckon Accounts

28
Getting Answers to Your QuestionsReckon Accounts provides a variety of tools and resources to help you find answers to questions you might have when using Reckon Accounts. Available resources include:
• In-product Help
• Additional self-help tools
• Assisted support
• Reckon Professional Partners
Using in-product HelpReckon Accounts in-product Help provides background information and instructions for doing Reckon Accounts tasks. You can access the Help content and features in several ways.
To use in-product Help, go to the Help menu and click Reckon Accounts Help.

29
Getting step-by-step instructions
Throughout Reckon Accounts you’ll find windows with a How Do I button. Clicking this button provides quick access to instructions for tasks associated with the window.
Learning Reckon Accounts

30
Viewing Help for a window you have open
If you are unsure how to use a particular Reckon Accounts window, press the F1 key on your keyboard to get help. (You can also click the Help button to view these Help topics.) These Help topics provide answers to questions such as:
• What can I use this form for?
• What does this button do?
• What kind of information is displayed in this column?
• What happens when I select this option?

31
Using Help Search and Index to find information
Reckon Accounts in-product Help is quite extensive. Use the Help Search and Index to find answers to your questions quickly.
To find information using Search:
• Type your question in the Ask field in the title bar of most Reckon Accounts windows and click Ask; or
• Go to the Help menu, click Reckon Accounts Help, and then click the Search tab. Enter your question in the Search field and click Ask.
Tip: Using Search Effectively Entering questions of 3-10 words produces better search results than simple keywords. For example, instead of typing “invoices,” enter How do I create invoices? in the Ask field.
Make your questions as specific as possible. They should not get too long or contain too many keywords. For example, “How do I add customers?” will return better results than “How do I add new customers and suppliers?”
If you get no search results, check the spelling in your question. Reckon Accounts knows about some common misspellings, but other misspellings will not be caught. Do not use abbreviations. Try different keywords.
If you can’t find your answer in the topics returned by search, click the Show all results checkbox to see more topics.
To find information using the Index:
A Go to the Help menu, click Reckon Accounts Help, and then click the Index tab.
B Enter a term in the blank field. The index will scroll and display the available entries.
C Double-click the index entry that best describes that information you want.
Learning Reckon Accounts

32
Additional Self-Help ToolsIf you cannot find the answer you want in the in-product Help, try these other resources.
Support Resources page in Reckon Accounts
From the Support Resources page, you can:
• Learn about your assisted support options and how to contact Reckon
• Learn about and sign up for support plans
• Find a Reckon Accredited Partner
• Learn about training resources
To open the Support Resources page, go to the Help menu and click Contact Support.
Online Knowledge Browser
The online Reckon Accounts Knowledge Browser (www�reckon�com�au/FAQs) provides a free library of articles for each Reckon product family. In the Knowledge Browser, you can find:
• Answers to common user questions
• Product update information
• Useful links to product updates, support plans, customer service, and current news articles
• Technical help for a variety of Reckon Accounts issues

33
Getting Assisted SupportIf you cannot find the answer you want using the in-product Help or other self-help tools, get assistance from a Reckon Accounts expert.
To learn more about free and paid Reckon Accounts Assisted Support options and how to get help, go to the Help menu and click Contact Support, or open a web browser and visit www�reckon�com�au.
Working with a Reckon Accredited PartnerFrom time to time, you might need advice that is very specific to your business situation. In this case, you’ll want to contact your accountant or another specialised professional.
If you do not have an accountant or bookkeeper working for you, you can find a Reckon Accredited Partner located near you from our website. Reckon Accredited Partners are independent accountants, bookkeepers, computer consultants, and trainers who work with small businesses every day. They can offer guidance on everything from business planning to tax advice.
To find a Reckon Accredited Partner in your area, open a web browser and visit www�reckon�com�au/FindAnAp.
Getting help from Reckon Accounts professionalsWant local professional help setting up or customising your Reckon Accounts? You’ll get the most out of Reckon Accounts when a Reckon Accredited Partner helps you customise the software for your unique needs.
• Save time and money by getting your Reckon Accounts setup right the first time, rather than fixing mistakes down the road.
• Reckon Accredited Partners can help you set up appropriate reports so you can easily understand the health of your business
If you don’t currently work with an accounting professional, or your accountant isn’t a Reckon Accounts expert, you can look for a Reckon Accredited Partner in your area who can help you set up and customise your Reckon Accounts by visiting www�reckon�com and clicking Partners.
Did You Know?
Learning Reckon Accounts

34
Reckon Accounts BasicsTo take full advantage of Reckon Accounts, there are some important concepts you need to understand.
How Reckon Accounts lists workLists are one of the important building blocks that make Reckon Accounts so powerful and efficient. You use information stored in lists to fill out most Reckon Accounts forms. For example, to create an invoice, you choose the customer name from your Customers & Jobs list. Reckon Accounts automatically enters the customer information on the form for you. This saves you time and prevents typing errors. You can also change the information directly on the form as needed. Lists are easy to set up in Reckon Accounts, but do require careful planning.
Depending on the type of list you want to use, you can get to the list in one of two ways:
• Reckon Accounts Centres: Your Customers & Jobs, Suppliers, and Employees lists are available in the Customer, Supplier, and Employee Centres, respectively. Click the appropriate Reckon Accounts Centre button on the navigation bar to go to a Reckon Accounts Centre. Then, click the tab for your list.
• List windows: Other lists, such as the Chart of Accounts and Item list, appear in separate windows. To view one of these lists, click the Lists menu and then click the list you want. To enter information in these lists, use the menu button at the bottom of the list to add, edit, or delete list items. The list menu also provides access to common features associated with the list.
The more detail you enter for each list item, the more information Reckon Accounts can use to pre-populate forms, track financial data, and display useful reports about your business. Another advantage of lists is that common tasks like adding list entries, editing list information, and deleting list entries are performed the same way.
The figure below illustrates how Reckon Accounts uses list information across multiple windows and tasks to simplify data entry and to give you a complete picture of how your business is doing.

35
6. To view a list of in use the Transactions
1. Click Ne to your list.
1
2
4
2. Enter customer information in the New Customer window.
5. All invoices for this customer are listed in the Transaction Details area.
voices for all your customers, tab.
3. The information for the new customer appears in the Customers & Jobs list.
Use the Customer Centre to view customer data.w Customer & Job to add a customer
6 5
3
4. Pick a customer name from the list and choose to create an invoice from the New Transactions menu. The customer information is entered automatically.
Learning Reckon Accounts

36
Entering list information as you work
There are two basic methods you can use to enter list information in Reckon Accounts. You can enter account, customer, supplier, product, and service information before you enter transactions in Reckon Accounts, or you can enter this information “on the fly” as you use the product.
If you prefer to enter information as you use Reckon Accounts to perform your daily tasks, Reckon Accounts prompts you to immediately set up any entry it does not know about. For example, if you try to create an invoice for a customer named John Walker and you have not entered information about John Walker into Reckon Accounts, Reckon Accounts will prompt you.
Clicking Fast Add creates a new customer list entry for John Walker in the Customers & Jobs list and adds all the information you enter about the customer on the invoice form (billing address, payment terms, taxable status).
Clicking Set Up takes you to another window where you can enter information not covered by the invoice. For example, you could click Set Up to enter John Walker’s phone number, fax number, and credit limit.

37
Writing cheques versus paying billsIn Reckon Accounts, you can manage your bills and payments in two ways:
Write cheques to pay bills now� Use the Write Cheques window and assign the amounts to appropriate expense accounts. This method is recommended when you don’t receive a bill, such as when you go to the store and write a cheque and then you need to record that expense in Reckon Accounts. You can also use Write Cheques to pay a bill as soon as you receive it, as long as you don’t need to track the bill.
Enter bills when you receive them and pay them later� Use the Enter Bills window to enter bills when you receive them. Then use the Pay Bills window to pay bills when they are due. You can set up Reckon Accounts to remind you to pay bills when they are due. Using this method, you keep your money in your business for as long as possible. You might still use a cheque to pay the bill, but this method enables you to track how much money you owe. And at any time, you can run reports to analyse unpaid bills for information such as which suppliers you owe money.
Note: Do not simply write a cheque in the Write Cheques window to pay bills that you entered in the Enter Bills window or the accounts payable registers.
The following figure illustrates the difference between writing cheques versus entering and paying bills.
Learning Reckon Accounts

38

4 | Essential Tasks

40
Reckon Accounts Workflow | Visual Overview

41
Learning how to do essential Reckon Accounts tasksThe diagram to the left shows a visual overview of the essential tasks that most people use to run their company in Reckon Accounts. This chapter describes how to perform each of these tasks and offers important usage tips.
The tasks are written assuming that you want to set up all the information for your business (for example, customer, supplier, and account information) before you begin creating invoices, receiving payments, or paying your bills.
However, you might prefer to enter information as you need it. For example, you might create an invoice for a new customer and use Fast Add to enter the customer information “on the fly.” Either method works fine. You choose the method that works best for you.
Essential Tasks

42
Setting Up Your Business | Preferences
Preferences: Modify Reckon Accounts for the way you work
Set personal and companypreferences for each Reckon Accounts area.
Choose a group from the preference list to set behaviour for other Reckon Accounts areas.
Click General to setgeneral Reckon Accountspreferences.
❷
❸
43
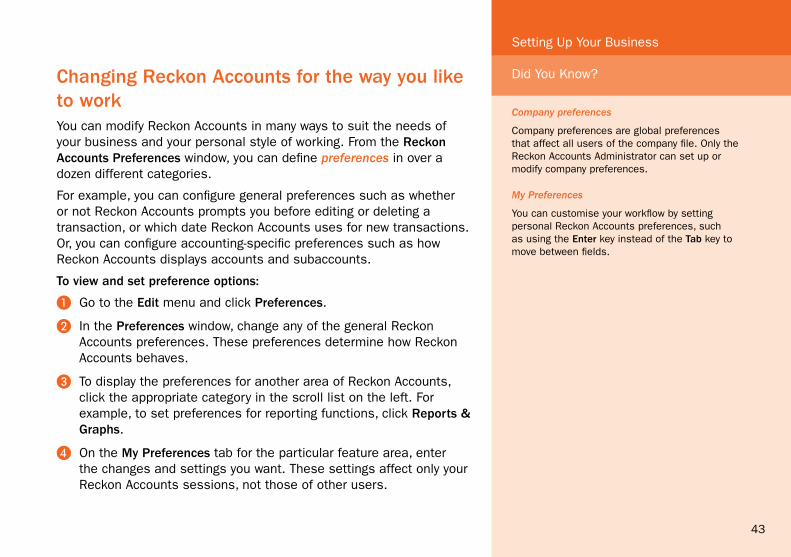
Company preferences
Company preferences are global preferences that affect all users of the company file. Only the Reckon Accounts Administrator can set up or modify company preferences.
My Preferences
You can customise your workflow by setting personal Reckon Accounts preferences, such as using the Enter key instead of the Tab key to move between fields.
Setting Up Your Business
Did You Know?Changing Reckon Accounts for the way you like to workYou can modify Reckon Accounts in many ways to suit the needs of your business and your personal style of working. From the Reckon Accounts Preferences window, you can define preferences in over a dozen different categories.
For example, you can configure general preferences such as whether or not Reckon Accounts prompts you before editing or deleting a transaction, or which date Reckon Accounts uses for new transactions. Or, you can configure accounting-specific preferences such as how Reckon Accounts displays accounts and subaccounts.
To view and set preference options:
A Go to the Edit menu and click Preferences.
B In the Preferences window, change any of the general Reckon Accounts preferences. These preferences determine how Reckon Accounts behaves.
C To display the preferences for another area of Reckon Accounts, click the appropriate category in the scroll list on the left. For example, to set preferences for reporting functions, click Reports & Graphs.
D On the My Preferences tab for the particular feature area, enter the changes and settings you want. These settings affect only your Reckon Accounts sessions, not those of other users.

44
E Do one of the following:
• Click OK to close the Preferences window and save your changes.
• Click another feature area in the scroll box to enter other preferences. Click Yes when prompted to save your changes.
F Click OK.

45
Setting Up Your Business
Setting Up Your Business | Adding an Account
46
Adding an AccountWhen you set up your company file, Reckon Accounts sets up certain accounts for you automatically. However, as your business grows or changes, you might need to add new accounts to your chart of accounts to better organise your finances. Or, you might need an account that was not provided during setup. For example, you might want to create expense accounts to track office supply purchases separately from advertising costs.
To add an account:
A Go to the Lists menu and click Chart of Accounts.
B Click the Account button and then click New.
C In the Add New Account: Select Account Type window, select the type of account you want to create and then click Continue.
Note: Refer to pages 48 and 49 for a description of the different types of income, expense, and balance sheet accounts.
D Enter the account’s name in the Account Name field. This name will appear on your company financial statements.
E If you want to make this account a subaccount of another account, select the Subaccount of checkbox. From the drop-down list, click the account that will be the higher-level account for this subaccount.
47
Setting Up Your Business
F (Optional) Enter a short description, note, bank account number, or credit card number, depending on the type of account you are adding.
G For balance sheet accounts, enter an opening balance based on the account’s balance as of your Reckon Accounts start date. Generally, you should enter any balance sheet balances as of the day before your start date. That way it’s all exactly correct at the opening of your start date. If you’re putting money into the account with a transaction, do not use the opening balance field, since this will create an additional transaction. If you’re not sure of the balance, you can leave the field blank and enter the information later. Click OK when finished.
H Click Save & Close or Save & New to add another account.
Why use Subaccounts?
When you need more detail about what’s going on in an account, you can divide the account into one or more subaccounts. Subaccounts let you track several related types of income or expenses independently yet keep them all under the “umbrella” of a single parent account. Subaccounts appear indented immediately below their parent account in your chart of accounts. If you create subaccounts, it’s best not to post anything to the “parent” account. For example, if your business has substantial advertising expenses, you might decide to divide your Advertising expense account into several subaccounts, such as Newspaper Ads, Signs, Yellow Pages Listing, and Direct Mailings.
Accounts
There are two types of accounts:
• Balance sheet accounts track your assets and liabilities (such as bank accounts or accounts payable).
• Income and Expense accounts are used to track where your income came from and what you spent the money on, such as office supplies, rent, and utilities.
Refer to pages 48 and 49 for a description of the different Reckon Accounts accounts.
Chart of Accounts
A complete list of your business’ accounts and their balances. You use a chart of accounts to track how much money your company has, how much money it owes, how much money is coming in, and how much is going out.
It is recommended that you open a business current account for writing cheques as one of the first things you do when starting a new business.
Key Terms
Did you know?
48
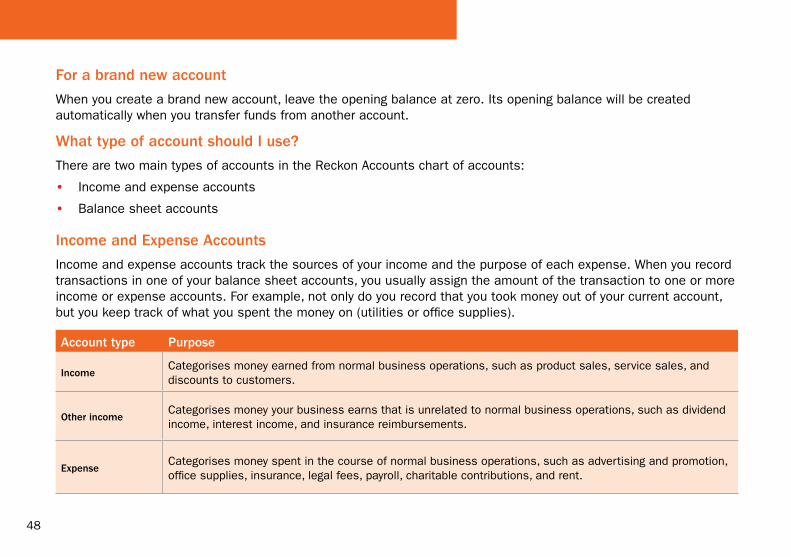
For a brand new account
When you create a brand new account, leave the opening balance at zero. Its opening balance will be created automatically when you transfer funds from another account.
What type of account should I use?
There are two main types of accounts in the Reckon Accounts chart of accounts:
• Income and expense accounts
• Balance sheet accounts
Income and Expense Accounts
Income and expense accounts track the sources of your income and the purpose of each expense. When you record transactions in one of your balance sheet accounts, you usually assign the amount of the transaction to one or more income or expense accounts. For example, not only do you record that you took money out of your current account, but you keep track of what you spent the money on (utilities or office supplies).
Account type Purpose
IncomeCategorises money earned from normal business operations, such as product sales, service sales, and discounts to customers.
Other incomeCategorises money your business earns that is unrelated to normal business operations, such as dividend income, interest income, and insurance reimbursements.
ExpenseCategorises money spent in the course of normal business operations, such as advertising and promotion, office supplies, insurance, legal fees, payroll, charitable contributions, and rent.

49
Account type Purpose
Other expenseCategorises money your business spends that is unrelated to normal business operations, such as corporation taxes and penalties and legal settlements.
Cost of goods soldTracks the direct costs to produce the items that your business sells, such as cost of materials, cost of labour, subcontractors, and shipping.
Note: Reckon Accounts does not display balances for income and expense accounts in the Chart of Accounts. To see these balances, go to the Reports menu, click Report Centre, and then click the Company & Financial category. You can also select the income or expense account in the chart of accounts and click FastReport.
Balance Sheet Accounts
Reckon Accounts provides 10 types of balance sheet accounts to choose from as you create and add to your Chart of Accounts. Use the type of account that best describes the type of data you are tracking.
Account type Purpose
BankTracks money you have in your cash accounts. Create one for each cash account, such as petty cash, current, and savings.
Accounts receivable (A/R)
Tracks money your customers owe you on unpaid invoices. Most businesses require only the A/R account that Reckon Accounts automatically creates.
Other current assetTracks the value of things that you can convert to cash or use up within one year, such as prepaid expenses, employee cash advances, stock, and loans from your business.
Setting Up Your Business

50
Account type Purpose
Fixed assetTracks the value of significant items (consult your accountant for a minimum cash amount) that have a useful life of more than one year, such as buildings, land, machinery and equipment, and vehicles.
Other assetTracks the value of things that are neither Fixed Assets nor Other Current Assets, such as Goodwill, long-term notes receivable, and security deposits paid.
Accounts payable (A/P)
Tracks money you owe to suppliers for purchases made on credit. Most businesses require only the A/P account that Reckon Accounts automatically creates.
Credit card Tracks credit card purchases, bills, and payments. Create one for each credit card your business uses.
Other current liabilityTracks money your business owes and expects to pay within one year, such as tax or security deposits/retainers from customers.
Long-term liabilityTracks money your business owes and expects to pay back over more than one year, such as mortgages, long-term loans, and notes payable.
EquityTracks money invested in, or money taken out of, the business by owners or shareholders. Payroll and reimbursable expenses should not be included.

51
Setting Up Your Business
Setting Up Your Business | Adding Customers
Click New Customer & Job to add new customers to the list.
View the amount of money each customer owes you in the Balance Total column.
Click a customer’s name in the list to view the contact information and notes for that customer.
See all transactions for this customer in the transaction list, which can be sorted and filtered.
52
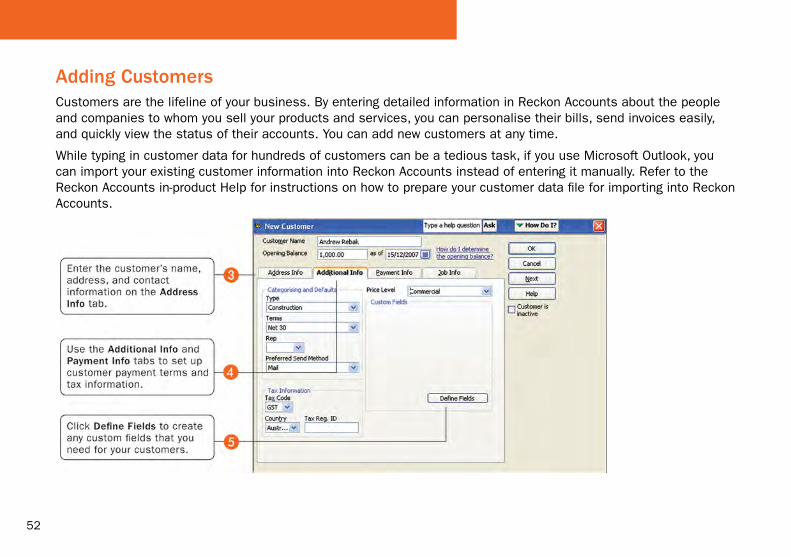
Adding CustomersCustomers are the lifeline of your business. By entering detailed information in Reckon Accounts about the people and companies to whom you sell your products and services, you can personalise their bills, send invoices easily, and quickly view the status of their accounts. You can add new customers at any time.
While typing in customer data for hundreds of customers can be a tedious task, if you use Microsoft Outlook, you can import your existing customer information into Reckon Accounts instead of entering it manually. Refer to the Reckon Accounts in-product Help for instructions on how to prepare your customer data file for importing into Reckon Accounts.
53
Setting Up Your Business
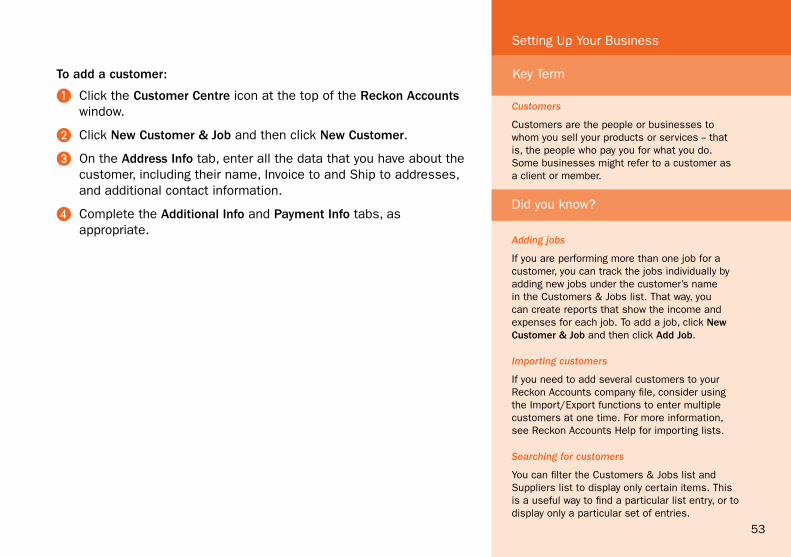
To add a customer:
A Click the Customer Centre icon at the top of the Reckon Accounts window.
B Click New Customer & Job and then click New Customer.
C On the Address Info tab, enter all the data that you have about the customer, including their name, Invoice to and Ship to addresses, and additional contact information.
D Complete the Additional Info and Payment Info tabs, as appropriate.
Customers
Customers are the people or businesses to whom you sell your products or services -- that is, the people who pay you for what you do. Some businesses might refer to a customer as a client or member.
Adding jobs
If you are performing more than one job for a customer, you can track the jobs individually by adding new jobs under the customer’s name in the Customers & Jobs list. That way, you can create reports that show the income and expenses for each job. To add a job, click New Customer & Job and then click Add Job.
Importing customers
If you need to add several customers to your Reckon Accounts company file, consider using the Import/Export functions to enter multiple customers at one time. For more information, see Reckon Accounts Help for importing lists.
Searching for customers
You can filter the Customers & Jobs list and Suppliers list to display only certain items. This is a useful way to find a particular list entry, or to display only a particular set of entries.
Key Term
Did you know?

54
E If you want to add additional fields to the form, click Define Fields to customise the form.
F Click OK or Next (if you want to enter another customer).
You can also add customers as you perform your everyday tasks. For example, if you enter the name of a new customer when filling out an invoice, Reckon Accounts will prompt you to enter information about this customer. You can choose from two quick setup options:
• Fast Add -- Adds just the name to the list. You must add the details later.
• Set Up -- Enables you to enter additional information (such as a phone number, tax number, and alternate contact) to the list you choose.

55
Setting Up Your Business
Setting Up Your Business | Adding Suppliers
Click New Supplier to add new suppliers to the list.
Click a supplier’s name in the list to view the contact information and notes for that supplier.
View the amount of money you owe each supplier in the Balance Total column.
See all transactions for this supplier in the transaction list, which can be sorted or filtered.

56
Adding SuppliersReckon Accounts uses the supplier list to hold information about the people and companies you buy goods and services from to run your business; for example, this list could include the phone company, your office stationery supplier, and your Utilities provider. You can add new suppliers at any time.

57
Setting Up Your Business
To add a supplier:
A Click the Supplier Centre icon at the top of the Reckon Accounts window.
B Click New Supplier.
C On the Address Info tab, enter all the data that you have about the supplier, including their name, address, and additional contact information.
D If you owe the supplier money as of your company’s start date, enter the amount in the Opening Balance field.
E Click the Additional Info tab and complete the form.
F If you want to add additional fields to the form, click Define Fields to customise the form.
G Click the Bank Details tab and complete the form.
H Click OK or Next (if you want to enter another supplier).
Suppliers
Suppliers are any businesses or people from whom you buy or rent goods or services for your business -- office supplies, phone or computer services, or products that you sell. The tax agencies that you pay are also your suppliers. Nearly everyone you pay other than employees are suppliers.
Importing suppliers
If you need to add several suppliers to your Reckon Accounts company file, consider importing all your suppliers at the same time. Refer to the in-product Help for instructions on how to import lists.
Key Term
Did you know?

58
You can also add suppliers as you perform your everyday tasks. For example, if you enter the name of a new supplier when paying a bill, Reckon Accounts will prompt you to enter information about this supplier. You can choose from two quick setup options:
• Fast Add -- Adds just the name to the list. You must add the details later.
• Set Up -- Enables you to enter additional information (such as a phone number, tax number, and alternate contact) to the list you choose.
Setting Up Your Business | Adding Items

59
Setting Up Your Business
Adding ItemsIn Reckon Accounts, an item is anything that your company buys, sells, or resells to run your business. Items are your products, services, and things such as discounts and shipping and handling charges.
When you choose an item from the Item list, Reckon Accounts fills in a description of the line item and calculates its amount for you.
Reckon Accounts provides 9 different types of items, described in the table on page 61. Some items, such as service or inventory part items, help you record the services and products your business sells. Other items, such as the subtotal or discount items, are used to perform calculations on the amounts in a sale.
To add an item:
A Go to the Lists menu and click Item List.
B Click Item at the bottom of the list and then click New.
C Click the Type drop-down arrow and choose the type of item you want to create. (See table on page 61.)
D Enter an item name as you want it to appear on purchase and sales forms.
E Enter the description that you want to appear on sales forms when you use the payment item.
F In the Rate field, enter the amount you want to charge for the item.
Items
An item is anything that might appear as a line item on an invoice, including subtotals, discounts, and tax, as well as the products and/or services that you sell. You enter items on your invoices and sales receipts. For example, a writing consultant might set up one item for editing services with an hourly rate, and another item for writing services with a different hourly rate. On an invoice, the items would be entered with the number of hours worked as the quantity.
While providing a quick means of data entry, items also handle the behind-the-scenes accounting. When you create an item you link it to an account. When the item is used on a form it posts an entry to that account and another to the appropriate accounts receivable, accounts payable, current, or other account.
Key Term

60
G In the Tax Code list, select the appropriate tax code or create a new one. If you do not see the Tax Code list, you must turn the tax preference on in the tax area under Edit | Preferences.
H In the Account field, choose the account that is associated with this item. (In most cases, you will assign the item to an income account.)
I Click OK or Next (if you want to enter another item).

61
Which Item Type Should I Choose?
Reckon Accounts provides 9 different types of items to help you fill out sales and purchase forms quickly.
Item Type Purpose
ServiceUse for services you either charge for or purchase, like specialised labour, consulting hours, and professional fees.
Inventory part Use for goods you purchase, track as inventory, and resell.
Inventory assembly Use for assembled goods you build or purchase, track as inventory, and resell.
Non-inventory partUse for goods you buy but don’t track, like office supplies, or materials you buy for a specific job that you charge back to your customer.
Other chargeUse for miscellaneous labour, material, or part charges, such as delivery charges, setup fees, and service charges.
Setting Up Your Business

62
Item Type Purpose
SubtotalUse for showing sum of all items above it on a form, up to the previous subtotal. Useful for applying a percentage discount or surcharge to multiple items.
GroupUse for associating a set of individual items that often appear together on invoices, purchase orders, and so on, so that all items in the group can be added to the form at one time.
DiscountUse to subtract a percentage or fixed amount from a total or subtotal. Do not use this item type for an early payment discount.
PaymentUse to record a partial payment you received at the time of a sale. It reduces the amount owed on an invoice.
Why item types are important
Although you can use items as a quick means of entering data, items fulfil a much more important Reckon Accounts role: to handle the behind-the-scenes accounting.
When you create an item, you link it to an account; when the item is used on a form, it posts an entry to that account and another entry to the appropriate accounts receivable, accounts payable, current, fixed asset, or other account.
While items are easy to set up, you should spend some time deciding how they can best work for you before you start setting them up and using them. Use your current list of services and products as a starting point. Consider

63
how much detail you want on your invoices or statements and set up your items with that level of detail in mind. For example, if you are a seamstress who creates and sells home accessories, you can set up a single item and charge a flat rate for a certain size of couch pillow, or you can break that pillow down further into labour and materials.
Furthermore, Reckon Accounts provides many useful reports that break information down by the goods or services you purchase and sell. That way, you can quickly find out:
• How much income your items bring in
• What you are spending to purchase items
• How well you estimate the cost of items
• How much time you spent on each type of job or item
Setting Up Your Business

64
Setting Up Your Business | Setting up taxHow tax tracking works in Reckon Accounts
Assign Tax Codes to your items.
Reckon Accounts tracks your output tax and input tax in the Tax Liability account, which Reckon Accounts creates by default.
Invoice
Buy items
Enter Bills
Sell items
Fill in your tax return, and send your payment to your tax agency.

65
Setting up taxIf you are registered to collect tax, you need to enable tax tracking in Reckon Accounts. Reckon Accounts then tracks the tax that your company pays on expenses, reclaiming it from the tax that you collect and pay to your tax agency.
Reckon Accounts supports the two most common tax schemes: Standard Accrual Tax Accounting and Cash Tax Accounting.
• Standard Accrual Tax Accounting scheme: you track tax on sales and purchases when you send an invoice or receive a bill, and very likely before you have received any money for these transactions from your customers.
• Cash Tax Accounting scheme: you pay and reclaim tax only on the basis of cash received and cash paid out by you. This scheme is meant to help smaller businesses with their cash flow. To qualify, your annual turnover must be below a certain value.
Important: You must follow the rules and regulations from your tax agency for collecting and paying tax.
Understanding how tax works in Reckon Accounts
You use tax codes on transaction forms to set how tax applies to the products and services that you buy and sell. For example, when you create an invoice, you assign an appropriate tax code to each line item on the invoice.
Each tax code is associated with one or both of a tax item for sales, and a different tax item for purchases. This lets Reckon Accounts properly track both output tax (from your sales) and input tax (from your purchases).
Reckon Accounts uses tax items to calculate and add tax charges when you make a taxable sale. When you set up a tax item, you assign a tax rate to it and associate it with the tax agency to which you pay the tax. After you enable and set up tax, Reckon Accounts applies the appropriate tax rate to the sale of your taxable items, based on the tax code.
Setting Up Your Business

66
Tip: Reckon Accounts sets up default tax codes, tax items, and your tax agency for you. These become available when you enable tax, either from the EasyStep interview or through the Preferences window.
Preferences: Set tax preferences
Verify that you have taxturned on.
Choose settings that re�ectthe way you manage tax.
❹
Setting up tax
If you need to make changes to how tax is configured, you need to know the following:
• Tax rates for the new tax situation that you need to handle.
• Tax agencies to which you pay the collected tax.
67
Setting Up Your Business
Setting up tax is a three-step process:
• Step 1: Enabling tax in preferences
• Step 2: Setting your tax reporting period
• Step 3: Entering an opening balance for your tax payable (what you owe)
Don’t forget to specify your Tax Rego ID (ABN) in the Company Information window. (Go to the Company menu and click Company Information.)
Tip: Reckon Accounts series includes a Manage Tax window to help you complete your common tax tasks, like setting tax preferences, creating tax reports, and paying tax liabilities. To open this window, go to the Suppliers menu, click Tax Activities, and then click Manage Tax.
Step 1: Enabling tax in preferences
In this procedure, you’ll turn on tax and then set up basic information about how you report tax to your tax agency.
To set up your tax payment schedule:
A Go to the Edit menu and click Preferences.
B In the scrolling list on the left, click Tax.
C Click the Company Preferences tab.
D For the question Do you track tax?, click Yes.
Step 2: Setting your tax reporting periods
Your tax reporting periods are when and how often you need to file tax with your tax agency. You set this up in the tax supplier (i.e., the tax agency’s supplier) record. While Reckon Accounts creates the supplier record for you, you still have to specify the tax reporting period yourself.
68
To set up your tax reporting periods:
A Open the Supplier Centre (go to the Suppliers menu and click Supplier Centre).
B In the lists on the left side of the screen, click the Suppliers tab.
C Double-click the supplier used to pay tax. Typically, this is “Australian Taxation Office”.
D In the Edit Supplier window, click the Tax Agency Info tab.
E In Period and Period Ending, select the schedule at which you file tax. For example, if you file tax four times a year at the end of March, June, September, and December, choose a Period of “Quarterly” and a Period Ending of “Mar/Jun/Sep/Dec”.
F Click OK to close the Edit Supplier window.
Step 3: Entering an opening balance for your tax payable (what you owe)
You need to enter an opening balance for your Tax Payable account (what you owe as of your Reckon Accounts start date). After your start date, your tax is included on your sales forms and entered into this account.
Caution: Do not do this if you entered all historical invoices or sales receipts dated before your Reckon Accounts start date. Your tax will already be included on them and posted to this account.

69
Default tax codes
When you enable tax Reckon Accounts sets up the following tax codes by default. In most cases, these will be all you’ll need.
Tax code Description Linked to Tax Item
ADJ Tax AdjustmentsADJ-P -- Purchases
ADJ-S -- Sales
CAF Cap. Acq. -- GST Free CAF
CAG Cap. Acq. -- Inc GST CAG
CAI Cap. Acq. -- for making Input Taxed Supplies CAI
CDC Combined Cellar Door CDC Tax Group
CDG Cellar Door GST CDG
CDS Cellar Door WET CDS
EXP GST Free Exports EXP
FRE GST Free Supplies FRE
GST 10% GST GST
INP Input Taxed Sales INP
NCF Non-Cap. Acq. -- GST Free NCF
NCG Non-Cap. Acq. -- Inc GST NCG
NCI Non-Cap. Acq. -- for making Input Taxed Supplies NCI
WC Combined WET & WGST WC Tax Group
WET Wine Equalisation Tax WET
WGST GST on Wine Equalisation Tax WGST
Setting Up Your Business

70
Default tax items
When you enable tax Reckon Accounts sets up the following tax items by default. In most cases, these will be all you’ll need.
Tax item Description Rate Agency Sales or Purchase
ADJ -- S Tax Adjustments (Sales) 10.00% Default S
ADJ -- P Tax Adjustments (Purchases) 10.00% Default P
CAF Cap. Acq. -- GST Free 0.00% Default P
CAG Cap. Acq. -- Inc GST 10.00% Default P
CAICap. Acq. -- for making Input Taxed Supplies
0.00% Default P
CDG Cellar Door GST 11.90% Default S
CDS Cellar Door WET 18.98% Default S
EXP GST Free Exports 0.00% Default S
FRE GST Free Supplies 0.00% Default S
GST 10% GST 10.00% Default S
INP Input Taxed Sales 0.00% Default S
NCF Non-Cap. Acq. -- GST Free 0.00% Default P
NCG Non-Cap. Acq. -- Inc GST 10.00% Default P
NCINon-Cap. Acq. -- for making Input Taxed Supplies
0.00% Default P
WET Wine Equalisation Tax 29.00% Default S

71
Tax item Description Rate Agency Sales or Purchase
WGST GST on Wine Equalisation Tax 12.90% Default S
CDC
(Tax Group)Combined Cellar Door
CDG 11.90% +CDS 18.98%
= 30.88%Default S
WC
(Tax GroupCombined WET & WGST
WET 29.00% +WGST 12.90%
= 41.90%Default S
Setting Up Your Business
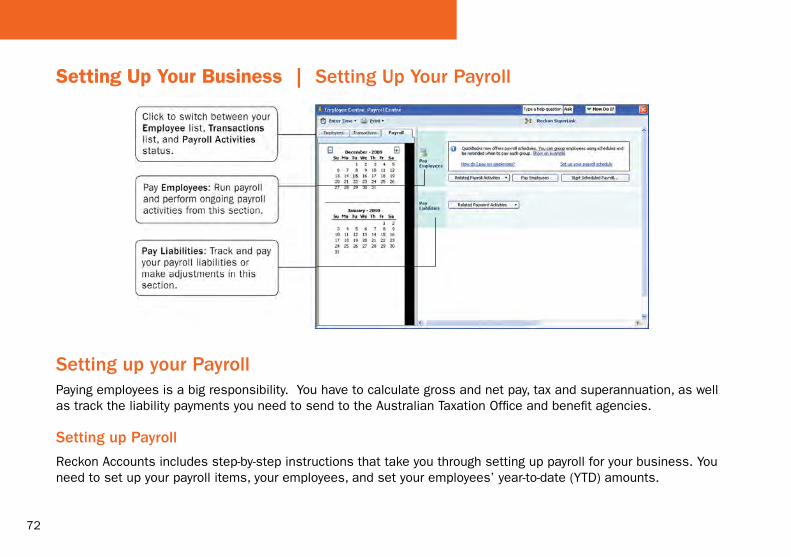
72
Setting Up Your Business | Setting Up Your Payroll
Setting up your PayrollPaying employees is a big responsibility. You have to calculate gross and net pay, tax and superannuation, as well as track the liability payments you need to send to the Australian Taxation Office and benefit agencies.
Setting up Payroll
Reckon Accounts includes step-by-step instructions that take you through setting up payroll for your business. You need to set up your payroll items, your employees, and set your employees’ year-to-date (YTD) amounts.

73
Tip: Depending on the size of your company, payroll setup can take a long time to complete. Before you begin setting up payroll, we recommend you gather all of the information in the Payroll Setup Checklist.
The following sections describe common activities you will perform during payroll setup.
Setting up Payroll Items
You add payroll items to payroll payments the same way you add items to invoices. Payroll items track amounts such as wages you pay and taxes you deduct from your employees’ payroll payments. There are payroll items for commission, taxes, other additions and deductions, and employer-paid expenses. You can assign these payroll items to different accounts as needed.
By default, Reckon Accounts creates common payroll items that you’ll need, such as tax deductions and superannuation. However, you may need to add other payroll items for your own company.
To create a payroll item:
A Go to the Lists menu and click Payroll Item List.
B From the Payroll Item menu button, choose New.
The Payroll Item Wizard opens.
C Choose the type of payroll item you want to create and click Next:
• Wage: Money you pay to employees for salaries, hourly wages, commissions, and Paid Parental Leave
• Addition: Money you pay to employees above their base earnings, such as a bonus
• Deduction: Money you deduct from your employee other than taxes, such as life insurance
• Company Contribution: Company-paid benefits for your employees
• Superannuation Contribution: Company and employer contributions
D Follow the onscreen instructions. When you’re done, click Finish.
Setting Up Your Business

74
Entering year-to-date amounts for your employees
If you begin using Payroll part way through the current tax year, you must enter year-to-date amounts for each employee that you’ve paid thus far in the tax year. In Australia, PAYG is calculated on a cumulative basis, so Reckon Accounts needs to take into account an employee’s total pay and tax amounts for a given tax year in order to be able to deduct the right amount of tax from his or her pay.
You can use the Year-to-Date Wizard to help you enter year-to-date amounts for your employees.
Follow the steps below to summarise and enter the payroll payments you processed for each employee from the beginning of your financial year (e.g., in Australia this is July 1) to the date that you started using Reckon Accounts Payroll.
To summarise and enter year-to-date amounts for each employee:
A From the Employees menu, click Payroll Setup, then click the YTD Amounts tab.
B Follow the onscreen instructions until you get to the Employee YTD summary information window. Select an employee from the list and click Enter Summary.
The YTD Adjustment window opens.
C Enter the details of the year-to-date payroll amounts for this employee.
We recommend that you create one entry to summarise the payroll payments that you’ve paid to this employee thus far.
D Click OK, then select the next employee.
E Click Finish when you are done, or if you need to enter prior payroll liability payments, click Next and refer to the steps below.
To learn more about entering year-to-date amounts, see the in--product Help.

75
To enter prior payroll liability payments:
A Open the Year-to-Date Wizard as described in the steps above.
B Follow the onscreen instructions until you get to the Summarising prior liability payments window.
C Click the Prior Payments button to enter a summary of all the taxes and liability payments you’ve made to the government.
Payroll Setup Checklist
Before you begin setting up your payroll, you should gather the information listed in the following table. You can find this information in your own records, from your accountant or Reckon Accredited Partner, or from government agencies.
Information Reckon Accounts needs Where to find it
Tax office number and reference Your accountant or company records
Current tax tables covering payroll withholdings Your tax agency or download from Reckon
How you pay your employees and directors (hourly wages, salaries, and/or commissions)
Your accountant or company records
How often you pay your employees Your accountant or company records
Additions you make to your employees’ pay that increases their earnings base (bonus payments, statutory payments, etc.)
Your accountant or company records
Setting Up Your Business

76
Information Reckon Accounts needs Where to find it
Deductions you make to your employees’ pay (student loan repayments, union dues, employee loans, health insurance, etc.)
Your accountant or company records
Payroll expenses that your company pays Your accountant or company records
Employee personal information (Tax File Number, date of birth, contact details)
Your accountant or employee records
Employees’ rate of pay and payroll payment additions, deductions, and employer contribution amounts
Payslips, reports, or your accountant
If paying using direct deposit, employee’s bank or building society details (account number, name of account holder, bank name and address)
Employees
Holiday and personal leave accruing policies and amounts Existing payments, reports
Total employee payroll amounts that you’ve paid out so far this payroll year up to the date you start using Reckon Accounts, including amounts withheld from payroll payments, commissions, and bonuses
Copies of employee payroll payments, payslips, previous accounting software or service provider, reports, your accountant or company records
If you are already operating payroll, total amount of PAYG income tax owed to your tax agency as of your start date
Previous accounting software or service provider, accountant or company records
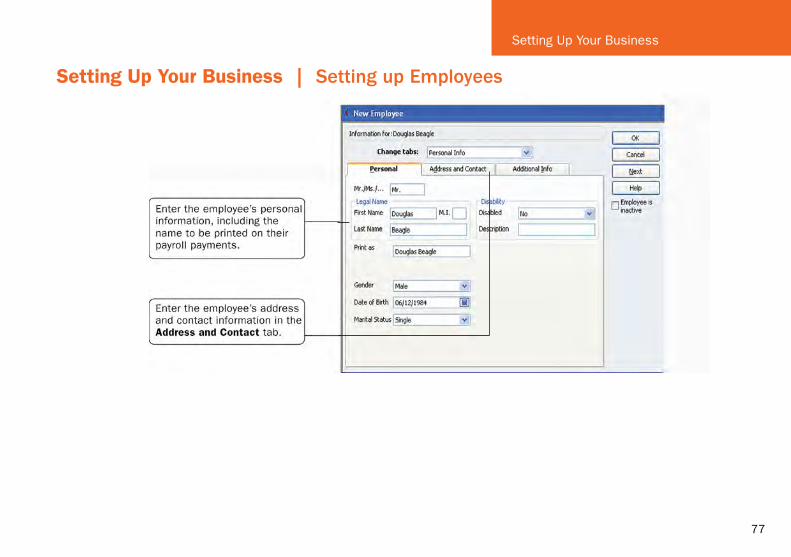
77
Setting Up Your Business | Setting up Employees
Setting Up Your Business
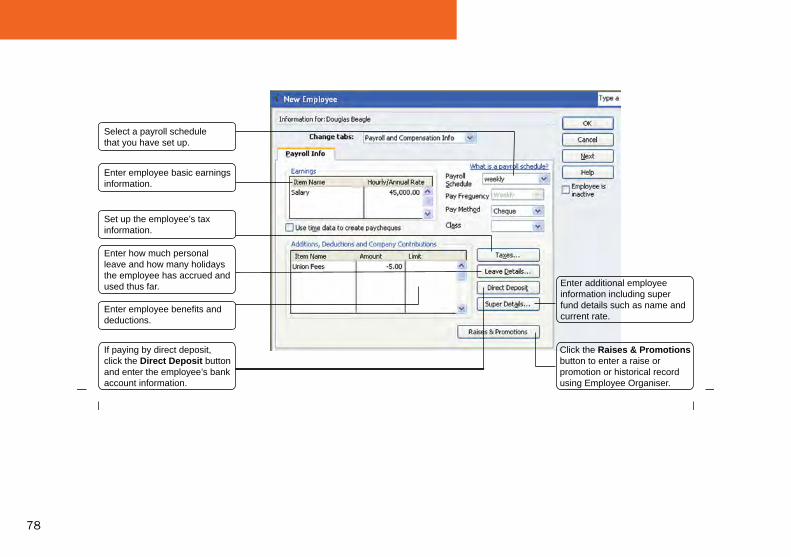
78
Select a payroll schedule that you have set up.
Enter employee basic earnings information.
Edit Employee: Payroll Info
Set up the employee’s tax information.
Enter how much personal leave and how many holidays the employee has accrued and used thus far.
Enter employee benefits and deductions.
If paying by direct deposit, click the Direct Deposit button and enter the employee’s bank account information.
Click the Raises & Promotions button to enter a raise or promotion or historical record using Employee Organiser.
Enter additional employee information including super fund details such as name and current rate.

79
Setting up EmployeesTo process payroll payments and prepare tax documents for your employees, you need to enter specific information about each of your employees in Reckon Accounts.
Refer to the Payroll Setup Checklist on page 75 for a list of employee information to gather.
To set up an employee’s personal information:
A Click the Employee Centre icon at the top of the Reckon Accounts window.
B Click New Employee.
C On the Personal tab, fill in the form.
D Click the Address and Contact tab, fill in the form, and then click OK.
E When prompted to set up the employee’s payroll information, click Leave As Is. Or, continue with the instructions below.
To set up an employee’s payroll information:
A Click the Employee Centre icon at the top of the Reckon Accounts window.
B Click the Employees tab and then double-click the employee’s name.
Setting Up Your Business
Earnings Base
An earnings base is the wages or earnings due to an employee before any deductions are made. It is also referred to as gross pay or taxable income. An employee's earnings base can include wages, salaries, overtime, bonuses, and commission. Reckon Accounts uses the earnings base to work out payroll withholding amounts, such as tax.
Directors
A director is a person who, traditionally, manages the business of the company on a day-to-day basis.
For more information on directors, refer to the in-product Help.
Hire an Employee Wizard
The Hire Employee wizard guides you through the process of hiring an employee.
Go to the Employees menu, choose Employee Organiser, and then click Hire Employees.
For more information, refer to the in-product Help.
Key Terms

80
C From the Change tabs drop-down list, click Payroll and Compensation Info.
D Fill in the Payroll Info form.
E Click the Taxes button. Fill in the form, based on the employee’s tax information.
F Click the Leave Details button. Fill in the form to specify how personal leave and holidays are accrued.
G If you pay the employee using online banking, click the Direct Deposit button to set up the employee’s bank account information.
H Click the Super Details button. Fill in the form to set up the employee's superannuation information.
I Click OK.
Once you’ve set up your employees, refer to “Paying Employees” on page 106 to learn about paying them.

81
Money In | Creating an Estimate
Money In
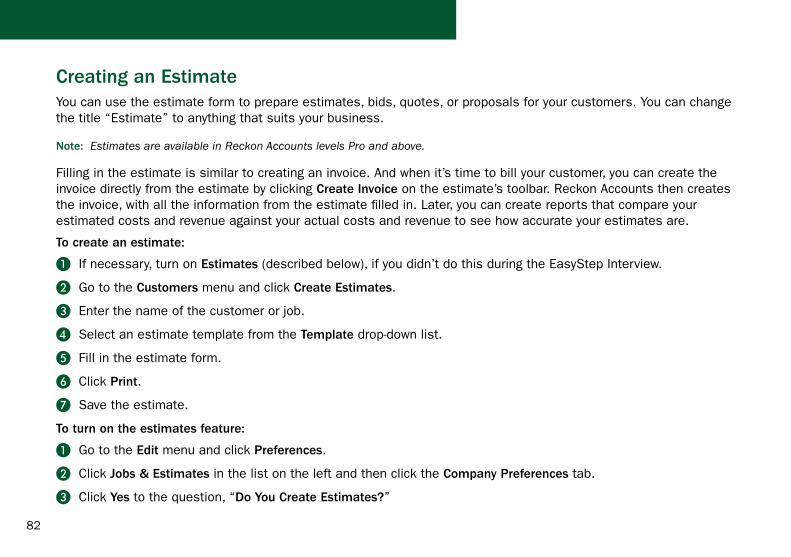
82
Creating an EstimateYou can use the estimate form to prepare estimates, bids, quotes, or proposals for your customers. You can change the title “Estimate” to anything that suits your business.
Note: Estimates are available in Reckon Accounts levels Pro and above.
Filling in the estimate is similar to creating an invoice. And when it’s time to bill your customer, you can create the invoice directly from the estimate by clicking Create Invoice on the estimate’s toolbar. Reckon Accounts then creates the invoice, with all the information from the estimate filled in. Later, you can create reports that compare your estimated costs and revenue against your actual costs and revenue to see how accurate your estimates are.
To create an estimate:
A If necessary, turn on Estimates (described below), if you didn’t do this during the EasyStep Interview.
B Go to the Customers menu and click Create Estimates.
C Enter the name of the customer or job.
D Select an estimate template from the Template drop-down list.
E Fill in the estimate form.
F Click Print.
G Save the estimate.
To turn on the estimates feature:
A Go to the Edit menu and click Preferences.
B Click Jobs & Estimates in the list on the left and then click the Company Preferences tab.
C Click Yes to the question, “Do You Create Estimates?”

83
D To have Reckon Accounts warn you when you try to record an estimate with the same number as the existing estimate, select the Warn about duplicate estimates numbers checkbox.
E If you do progress invoicing:
• Make sure Yes is selected in response to the question, “Do You Do Progress Invoicing?”
• Specify whether you want line items that have zero amounts to print on your progress invoice
F Click OK.
Money In

84
Money In | Creating an Invoice

85
Creating an InvoiceWhen your customers don’t pay you in full at the time you provide your service or product, or when they pay in advance, you need to track how much they owe you. You can use an invoice to help you keep track of what your customers owe you (or your “accounts receivable”).
Invoices list all the details about the sale, including the services you’re providing or the products you’re selling (your “items”). Invoices also show the quantity and price or rate of each item. If you need to make automatic adjustments to prices (for example, discounts or markups), invoices will work for you.
Note: If your customers pay in full at the time of purchase, do not create an invoice. Instead, create a sales receipt, described on page 87.
To create an invoice:
A Go to the Customers menu and click Create Invoices.
B In the Customer:Job drop-down list, click the name of the customer or job.
C Click the Template drop-down arrow and then click the invoice template you want to use.
D Click the Terms drop-down arrow and then click the sales terms that apply to this customer.
E In the lower part of the form, enter each of the items (including the proper quantity) that the customer has purchased.
Key Term
Money In
Estimate
An estimate is a form you use to itemise the work you propose to do or the products you intend to sell to a customer. Your company might use a different term, such as bid, grant, or proposal. Estimates are optional, not mandatory, for all businesses.
Using sales orders
In Reckon Accounts levels Pro and above, you can create sales orders to help you keep track of items that your customers have ordered but you have not yet delivered to them, for example because you do not have them in stock.
Refer to the in-product Help for instructions and tips on how to use sales orders.
Did you know?

86
F Click Print on the toolbar to print the invoice. Optionally, you can select the To be printed checkbox to print the form later.
G Save the invoice.
Tip: You can customise your invoices (or any other sales form) for your business. Click Customise to open the Basic Customisation window, where you can add your company logo, change fonts and colours, and access more advanced options.

87
Money In | Entering Sales Receipts
Entering Sales ReceiptsWhen your customers pay in full at the time they receive your service or product, you don’t need to track how much they owe you. However, you might want to record the sale, calculate its tax, or print a receipt for the sale. In these cases, you can create a sales receipt.
Examples of businesses that commonly use sales receipts include hairdressers, beauty salons, and DIY shops.
Note: If you need to track how much a customer owes you or you do not receive full payment at the time of the transaction, do not use a sales receipt. Instead, create an invoice, described on page 85.
To enter a sales receipt:
A Go to the Customers menu and click Enter Sales Receipts.
B Fill in the top part of the form, including the Customer:Job, Date, and Payment Method.
C Click the Template drop-down arrow and then click the sales receipt template you want to use.
D In the bottom part of the form, select or enter the items purchased.
E Save the transaction.
Key Term
Money In
Invoice
An invoice is the form you use to charge customers for the products and services they purchase from you.
You can create an invoice letter directly from the invoice form by clicking the Letters button on the Create Invoices toolbar. Refer to the in-product Help for more detailed information about this feature.
Did you know?

88

89
Money In | Receiving a Payment
Receiving a Payment When you receive money from a customer, you must receive the payment in Reckon Accounts so Reckon Accounts can record the transaction and mark the invoice as being paid. When you receive a payment, the accounts receivable records are updated, and the payment is ready to be deposited into an account.
To receive a payment:
A Go to the Customers menu and click Receive Payments.
B Fill in the top portion of the form, including the customer’s name, the payment amount, payment method, and the date on which the payment was received.
C Check the column to the left of the invoice to which you want to apply the payment. You might be asked to decide how to apply the payment for one of the following scenarios:
• Overpayment can become a credit or refund
• Underpayment can be left as is or written off
• Customer has unused credit to be applied
• Customer has available discounts
Did You Know?
Money In
Sales Receipt
A sales receipt is the form you use when you make a sale for which you receive full payment at the time of the sale. Sales receipts can include payments by cash, cheque, or credit card.
You can also use a sales receipt to create a summary of sales income and tax owed. You can summarise daily or weekly sales on a sales receipt.
Did you know?

90
D Choose the appropriate selection and you should see your choices reflected in total amounts for selected invoices.
If the customer has a discount or available credits, you can choose how to apply them.
E Save the payment.

91
Money In | Making a Deposit
Money In

92
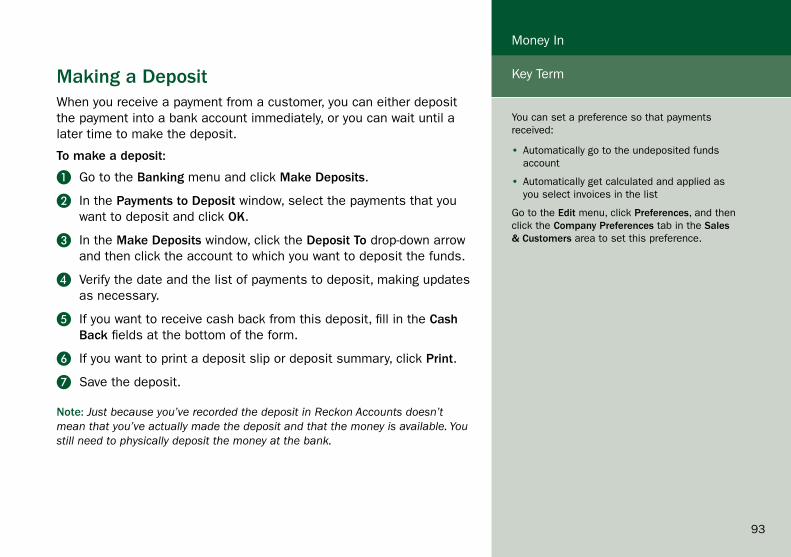
93
Making a DepositWhen you receive a payment from a customer, you can either deposit the payment into a bank account immediately, or you can wait until a later time to make the deposit.
To make a deposit:
A Go to the Banking menu and click Make Deposits.
B In the Payments to Deposit window, select the payments that you want to deposit and click OK.
C In the Make Deposits window, click the Deposit To drop-down arrow and then click the account to which you want to deposit the funds.
D Verify the date and the list of payments to deposit, making updates as necessary.
E If you want to receive cash back from this deposit, fill in the Cash Back fields at the bottom of the form.
F If you want to print a deposit slip or deposit summary, click Print.
G Save the deposit.
Note: Just because you’ve recorded the deposit in Reckon Accounts doesn’t mean that you’ve actually made the deposit and that the money is available. You still need to physically deposit the money at the bank.
Key Term
You can set a preference so that payments received:
• Automatically go to the undeposited funds account
• Automatically get calculated and applied as you select invoices in the list
Go to the Edit menu, click Preferences, and then click the Company Preferences tab in the Sales & Customers area to set this preference.
Money In
94
Money Out | Paying Bills
Paying BillsAs you purchase equipment, supplies, products, or services to run your business, you will also receive bills that need to be paid. Entering these bills in Reckon Accounts enables you to not only track information about your purchases, but also to pay these bills. Reckon Accounts remembers all of your unpaid bills, enabling you to easily choose the bills you want to pay. Reckon Accounts then writes and saves the cheques or credit card charges or sends the online banking payment instructions, depending on the payment method you choose.
Note: Before paying a bill, be sure you read the section “Writing cheques versus paying bills” to make sure you are using the correct payment method.
To enter a bill:
A Go to the Suppliers menu and click Enter Bills.
B In the Supplier field, choose or enter a new supplier.
Note: If an open purchase order exists for this supplier, you are prompted to receive against it. Click Yes to receive against one or more purchase orders; then, in the Open Purchase Orders window, click each purchase order that contains items you’ve received and are being billed for.
C In the Amount Due field, enter the amount of the bill.
D Fill in the Date, Ref� No�, Terms, and Memo fields as necessary.
95
E For expenses (money you spend to run your business, such as utilities), assign the invoice to one or more expense accounts on the Expenses tab. For items (products or services your business buys), edit items that were entered from your purchase order or enter new items on the Items tab.
F Click Save & Close or Save & New to save the transaction.
To pay a bill:
A Go to the Suppliers menu and click Pay Bills.
B All outstanding bills are displayed. To limit the number of bills displayed, click Due on or before and then click the due date for the bills you want to display.
C Specify the Payment Account, Payment Method, and Payment Date.
D Click Pay Selected Bills to complete the transaction.
Do not use the Write Cheques window to write a payroll payment, pay your payroll liabilities, pay tax, or pay bills you’ve already entered in the Pay Bills window.
Refer to the in-product Help for more information on how to make these types of payments.
Paying employeesRefer to page 106 for instructions on paying employees.
Paying billsYou don’t need to use the Pay Bills window to pay your bills. You can enter cheques, credit card payments, and cash expenditures directly in the appropriate account register. However, if you enter bills using either the Enter Bills window or the Accounts Payable register, you must use the Pay Bills window for your bill payment. Do not use the Write Cheques window to pay a bill that you’ve entered with either of these methods.
Money Out
Did You Know?

96

97
Money Out

98
Money Out | Writing Cheques

99
Writing ChequesYou can write a cheque for any kind of expense that you track with Reckon Accounts expense accounts and for non-inventory part, service, and other charge items. If you are using inventory or purchase orders, you can write cheques for inventory part items too.
Note: Before writing a cheque, be sure you read the section “Writing cheques versus paying bills” to make sure you are using the correct payment method.
To write a cheque:
A Go to the Banking menu and click Write Cheques.
B Click the Bank Account drop-down arrow and then click the account from which you want to write the cheque.
C Fill in the onscreen cheque as you would a paper cheque.
D Itemise your expenses (shipping charges, taxes, or other expenses not associated with any one item) on the Expenses tab.
E If you are purchasing items for your stock, enter the items on the Items tab.
F Save the transaction.
To find and print a single cheque:
A Load the blank cheque form into the printer.
B Go to the Banking menu and click Write Cheques.
C Click the Find button and search for the cheque you want to print.
You should not use the Write Cheques window to write a payroll payment, pay your payroll liabilities, pay tax, or pay bills you’ve already entered in the Pay Bills window.
Paying employeesRefer to page 106 for instructions on paying employees.
Money Out
Did You Know?

100
D Double-click to view the cheque you want to print.
E Click Print.
F In the Print Cheques window, choose the options you want and click Print.
Note: To learn how to print multiple cheques at the same time, refer to the in-product Help.

101
Money Out | Issuing Credits or Refunds
Money Out

102
Issuing Credits or RefundsUse an adjustment note to record a credit when a customer returns items and you’ve already recorded an invoice, customer payment, or sales receipt. You can also use an adjustment note for an overpayment.
To enter an adjustment note or record a return:
A Go to the Customers menu and click Create Adjustment Notes/Refunds.
B In the Customer:Job field, click the customer and job for which you are creating the adjustment note or refund cheque.
Note: If you have created more than one job for the customer, be sure to assign the adjustment note to the correct job. You can apply the adjustment note only to the same job for which it was created.
C Click the Template drop-down arrow and then click a template.
D Enter the items being returned in the line item area.
E Describe the reason for the adjustment and enter the quantity and rate, if applicable.
F (Optional) Enter a memo for this transaction.
Note: The memo does not print on the adjustment note, but it does appear in the Accounts Receivable register and in the customer register.
G Indicate whether you want to print or email the adjustment note to the customer.
H Save the adjustment note.

103
I In the Available Credit window, choose how to use the credit. You can:
• Retain as an available credit
• Give a refund
• Apply it to a tax invoice
Note: Reckon Accounts enters a negative amount in your Accounts Receivable register for the adjustment note.
Adjustment noteA document that notifies a customer that you have reduced the customer’s balance (for example, when a customer cancels a sale, returns something, or overpays).
Did You Know?
Money Out

104
Money Out | Paying Employees

105
Money Out

106
Paying EmployeesYour employees can be paid weekly, fortnightly, half monthly, monthly, or four weekly, and you can create their payments using cash, cheques or direct deposit. The employee’s tax is calculated automatically using the tax code that you entered in the employee’s profile.
Note: Before you begin paying your employees, ensure that your payroll is set up completely and correctly in Reckon Accounts.
The following steps create payments for unscheduled payroll. If you want to use payroll schedules, see the sidebar to the right.
To create payroll payments:
A Click the Payroll Centre icon.
B In the Payroll Centre, click the Pay Employees button.
C Select the employee or employees you’re creating the payroll payment for.
D Verify that the Payment Date and Pay Period Ends date are correct.
E Click the Bank Account drop-down arrow to choose the account that Reckon Accounts uses to record this transaction.
F Click each employee’s name to open the Review or Change Payroll payment window by clicking Open Paycheque Detail. Make any necessary changes and click Done.
G Click Continue�
H Review the payroll payment information in the Review and Create Payroll Payments window.
I Click Continue.
J Click Create Payment.
107
Using Payroll SchedulesA payroll schedule defines when you should run your payroll so that you can pay employees on their pay day. You can use payroll schedules to group together employees in whichever way makes the most sense for you to your business. However, all employees grouped in the same payroll schedule must have the same pay frequency (weekly, fortnightly, monthly, and so on).
If you want to use payroll schedules, click the Payroll Centre icon. From the Pay Employees section, click Set Up Your Payroll Schedule. After you create a new payroll schedule, you can assign employees to it.
To run a scheduled payroll, go to the Employees menu, click Pay Employees, and then click Scheduled Payroll. In the Pay Employees section, click to select the payroll schedule you want to run and then click Start Scheduled Payroll.
For more information, see the in-product Help.
Money Out
Did You Know?K In the Confirmation and Next Steps window that appears, click Print Cheques or Print Payslips, or both.
L After printing your payroll payments or payslips, click Close.

108
Managing Your Business | Using ReportsReport Centre
Click More… for details about content, dates, and customisation.
3
Click the thumbnail reporticon to view a sample of a report.
3
Report choices displayed inthe window are based on thecategory you choose. 2
View detailed Help topics tolearn how to use and modify reports.

109
Using Reports to see how your business is doingOne of Reckon Accounts’ most robust features is its ability to generate data-rich reports about your business. Everything you enter in Reckon Accounts can be found and generated into a report.
Reckon Accounts comes with dozens of prepared reports that you can run. You can use the Report Centre to learn about Reckon Accounts reports and locate the ones that contain the information you need. Once you’ve found a report, you can change its date range, customise the way it looks, print a copy of it, export it to Microsoft Excel, or display it on your screen.
To find and display the right report:
A Click the Report Centre icon at the top of the Reckon Accounts window.
B Click a report category from the list on the left. Reports for the selected category are displayed on the right.
C From the report list, you can view a thumbnail picture of the report by moving your mouse over the thumbnail icon . To learn more about a specific report, click the More link. The in-product Help window opens with information about the data and specific ways to customise the report.
The Report Centre includes its own Learning Centre, where you can find detailed information about how to run, modify, and manage reports. You can view the Report Centre Learning Centre by clicking the Learning Centre link in the top-right corner of the Report Centre.
Managing Your Business
Did You Know?

110
D When you find the report you need, click its name to view the report.
Tip: In addition to the powerful reports available in the Report Centre, you can also use the Reckon Accounts Centres to get a quick snapshot of how your business is doing and the status of your relationships with your customers, suppliers, and employees. For example, from the Centres you can easily see all of your unpaid bills, all of the invoices that your customers haven’t paid, and the detailed history of each of your customers and suppliers. For more information about the Reckon Accounts Centres, refer to “Reckon Accounts Centres” in the in-product Help.
How to Use Reports to Find the Information You Want
The Reckon Accounts Report Centre describes all the available reports. Here are 10 common questions that people ask and the Reckon Accounts report you can use to find the answer.
Item Type Purpose
How much money did my company make or lose over a specific period of time?Profit & Loss Standard (In Company & Financial)
Which invoices or statement charges haven’t been paid and when are they due?Open Invoices (In Customers & Receivables)
How much does my company owe each supplier and are any payments overdue?Unpaid Bills Detail (In Suppliers & Payables)
What is the value of my company (its assets, liabilities, and equity), and where can I see the total balance for each type of account?
Balance Sheets (In Company & Financial)

111
Item Type Purpose
What is the recent activity in all my company’s accounts, with beginning and ending balances for each account?
General Ledger (In Accountant & Taxes)
What are the total sales for each customer and job?Sales by Customer Summary (In Sales)
Which items and/or services bring in the most/least income?Sales by Item Summary (In Sales)
What are my company’s total expenses for each supplier?Expenses by Supplier Summary (In Company & Financial)
Where is the information I need for my income tax forms?Income Tax Summary Income Tax Detail (In Accountant & Taxes)
For my company’s total sales, how much is taxable, at what rate, and how much tax is currently due to be paid?
Tax Liability (In Suppliers & Payables)
Managing Your Business

112
Memorising a report for reuse
Whenever you change the settings for a report (modify it), you can memorise the report with the new settings and save it in the Memorised Report List. Then, when you want to create a similar report, you can click the Memorised Report List to find it.
Note: Reckon Accounts memorises the report settings, not the data in the report. When you display a memorised report, it applies the settings you memorised, but displays the latest data. For example, if the report date is set for the period Last Month and you memorise the report in September but recall it in December, the recalled report will have data for November, not August.
To memorise a report:
A Click the Report Centre icon at the top of the Reckon Accounts window.
B Open the report you want to modify and save.
C After you have customised a report, click Memorise at the top of the report.
D If you have changed an existing memorised report, indicate whether you want Reckon Accounts to replace the earlier report (under the same name) or create a new memorised report (under a new name).
E In the Memorise Report window, enter a title for the report.
F If you want to assign the report to a memorised report group, choose Save in Memorised Report Group and choose the group from the drop-down list. (You must already have the group set up on your Memorised Report List. You cannot create a new group here.)
G Click OK.

113
Tip: When you create a report, you can change the way it looks (reformat it). You can change the fonts, change the header and footer, and resize the columns.
You can also move and sort the data that the report contains. For example, you can add or delete columns, sort by columns, move columns, change how numbers display, change how transactions sort, and change the subtotal groupings.
For more information about how to modify the look and content for a report, refer to the in-product Help.
Other add-ons to help you manage your businessReckon add-ons enable you to streamline management of your business and automate essential business activities. They offer easy-to-use, tightly integrated solutions that will enable you to manage your business efficiently and with confidence.
They include:
• Stationery
• Credit Card Payments
To learn more about these business solutions, visit the Products and Services areas of our website at www�reckon�com�
Managing Your Business

114

5 | Contacting Reckon

116
Contacting ReckonIf you can’t solve a problem you’re experiencing with Reckon Accounts, you can get help by telephone, fax or email. Reckon also provides a website, (www�reckon�com�au/support), which includes a database of support articles (Knowledge Browser) as well as contacts for Reckon Accredited Partners.
Fee based services
Reckon offers a number of support plans to meet your individual needs.
• Timed Call Support: A one-off support call that is charged by the minute. For instant help during business hours, ring our telephone support service for the advice you need.
• Data Recovery: If your Reckon Accounts data file becomes damaged, we can provide data recovery service, which is available for a fee.
• Password removal: If you forget your Administrator password, we can remove your password so you can access your important data, a service that is also available for a fee.
Reckon Advantage
Reckon Advantage membership entitles you to free weekday technical and installation phone support, product upgrades and special offers. Terms and conditions apply. For more information, visit www�reckon�com�au/support.
Reckon's Accounts website
The Reckon Accounts website, (www�reckon�com), is the official site for Reckon Accounts users. You can get answers to many Reckon Accounts questions, important updates, and access to help through it. If you have an Internet connection, you can access the Reckon Accounts website directly from the Help menu in Reckon Accounts.

117
Contacting Reckon
Reckon Accredited Partners
Developing a strong, knowledgeable network of professionals is an important part of our commitment to delivering exceptional support to our Reckon Accounts customers. Whatever your individual needs, Reckon has an expert to help.
The Reckon Accredited Partners referral service is free. The professional you select will provide you with information about their fees.
If you are an accountant, bookkeeper, or computer consultant, consider becoming a member of this unique community. To find a Reckon Accredited Partner, or to become one yourself, visit the Reckon Accounts website. Details for contacting Reckon Australia are provided below.
Talking to a technical support representative
Be prepared when you call
If you need to call for assistance, you will get an answer quicker if you:
• Make sure you have your customer ID number ready.
• Have Reckon Accounts Hosted open.
• Try to remember the windows you opened and the tasks you did before encountering the problem. Know the exact wording of any message that appeared on the screen.
• Have your company file set up for multiple users who have access to different areas of Reckon Accounts, as you’ll need to have access to most of the software. You might also want to switch to single-user mode.
• Have a pencil and paper handy to take notes.

118
• Have the following information ready when you call:
• Model of computer and amount of memory (RAM) and hard disk space
• Accessory manufacturer, type and model (for example, monitor or printer)
• Operating system version
• Network configuration and software version
Solving problems on your own
Note: We recommend you back up your data before you start solving your problems. For more information, see the in-product Help.
Guidelines for solving typical problems
Use the following examples as a guide to solve the problems you have.
Try the procedure again
Start at the beginning. Examine windows where you filled in fields to be sure you are asking the program for what you want.
For example, if invoices you just entered are not showing on your Profit and Loss statement, you should ask questions such as:
• Does the date of the report include those invoices?
• Do the invoices appear if you change the report from cash to accrual basis?
• Does this problem occur with only invoices for one particular customer?
• Have you changed any filters on the report? (Try to create a new report from scratch to see if the problem is solved.)

119
Contacting Reckon
Try a related procedure
For example, if you have a printing problem:
• Ensure the printer is working by trying to print something else. If you have trouble printing cheques, try printing a report. If you can’t print one of the sales forms, try printing a similar form.
• If you can’t print from Reckon Accounts, try printing from another program such as Microsoft Notepad. If nothing prints from Notepad, you know the problem is related to the printer, not the software. Check the printer connections, printer driver, print queue and so forth.
Think about what has been changed
If something used to work but no longer does, think about what changed.
• Have you changed or added other programs on your computer?
• Have you added a new printer?
• Have you moved the Reckon Accounts company file to a new location?
• Have you changed a setting in the Preferences window?
If the program “hangs” or locks up
There are a number of reasons why your system may freeze while using Reckon Accounts. Try restarting your computer. If restarting doesn’t help, go through the following list of questions and take any related action:
• Does your computer system or network meet the minimum requirements necessary for Reckon Accounts?
• Are you making the best use of available system resources by shutting down other programs that are running? (Check for programs that may be running in the background without your knowledge.)

120
• Do you have any conflicts with sound or video drivers?
Note: If you encounter system freezes while using Reckon Accounts, you may want to call for technical support.
Reckon Contacts
Australia
Product Reactivation You can reactivate your program through this service.
Reactivation is a service that attracts a small per-minute charge. (Charges include GST and only apply once you are connected to a representative.)
Call: 1800 732 566
Customer Service and Reckon Sales For pre-sale, product-specific information, to purchase an upgrade, for order inquiries, or information on Reckon Advantage and so on.
Call: 1300 784 253
Email: customerservice@reckon�com�au
Fax: 02 9577 5557

121
Contacting Reckon
Australia
General Product Information For general product information and FAQs.
Visit: http://www�reckon�com
Technical Support Call cost $4.90/min
(Charges include GST and only commence once you are connected to a technical support representative.) Charges are higher from public and mobile phones.
Search the Knowledge Browser for answers to common questions.
Call: 1902 223 101
Call costs subject to change. See http: //www�reckon�com�au/support for available hours.
Visit: http://www�reckon�com�au/support

122
Australia
Training Reckon Training provides classroom training to assist you in getting the most from your software.
Or you can visit a Reckon accredited trainer near you. The Reckon Accounts website provides a list of all the Reckon accredited trainers.
Call: 1300 655 975
Data Recovery To request data recovery for a damaged Reckon Accounts file.
For more information on data recovery online.
To prevent having to request data recovery, use Online Backup.
Call: 1300 784 253
Password Removal To request a forgotten password be removed from your file.
Call: 1300 784 253
Reckon stationery Reckon offers a range of stationery that works with your Reckon software. Cheques, invoices, pay slips and more -- Reckon stationery helps deliver the most from your accounting software!
Call: 1300 301 166
Fax: 1300 131 972
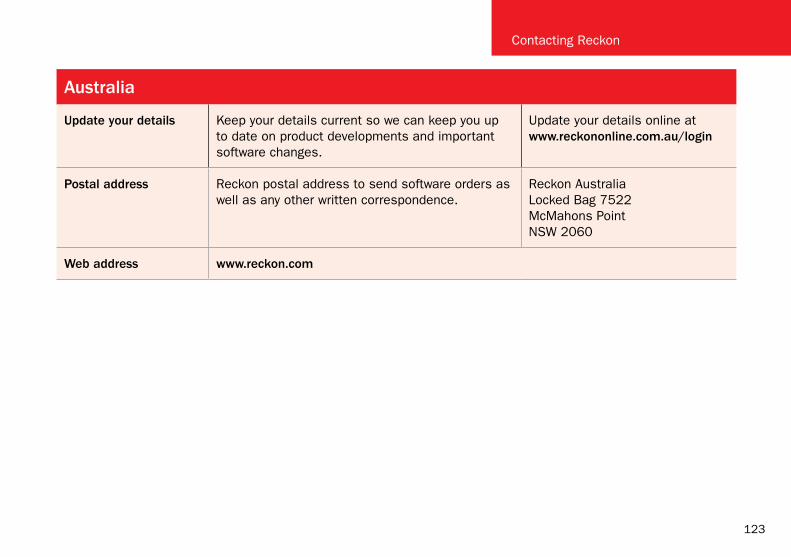
123
Australia
Update your details Keep your details current so we can keep you up to date on product developments and important software changes.
Update your details online at www�reckononline�com�au/login
Postal address Reckon postal address to send software orders as well as any other written correspondence.
Reckon Australia Locked Bag 7522 McMahons Point NSW 2060
Web address www�reckon�com
Contacting Reckon

124
New Zealand
Product Registration Call: 0800 933 606 (from within New Zealand) +64 9 489 9440 (from abroad)
Customer Service Call: 0800 414 3650
Email: presales@reckon�co�nz
Visit: www�reckon�co�nz
Technical Support Call: 0800 933 666 (attracts small charge per incident) Charges are higher from public and mobile phones.
Visit: www�reckon�co�nz

Licence Agreement
126
Licence AgreementThis licence agreement applies to Reckon Accounts Hosted. Please see www.reckononline.com.au or www.reckononline.co.nz for more details.
THIS IS AN IMPORTANT DOCUMENT� PLEASE READ IT CAREFULLY�
This is a contract between Reckon Limited (ACN 003 348 730) (Reckon) and you. By using Reckon Accounts Hosted, the contents and features, related user guides and materials, including all functionalities (“the Services”), available through www.reckononline.com.au or www.reckononline.co.nz hereinafter referred to as the “Website”, you agree to be bound by the terms of this Licence and the application of Reckon’s Privacy Policy www.reckon.com to information collected from you. The Privacy Policy can also be viewed on the Website. The defined terms and the rules of interpretation in this Licence are set out in clause 13.
Important: Please note the following features of the Services and the terms of use of these Services as detailed in this Licence as outlined below. Please refer to the Licence for full details of the Services and terms of use.
(This summary is a guide only and is not intended to cover all references in the Licence agreement, you should review all the terms of the Licence to determine how these terms relate to you.)
Please also refer to Reckon’s Privacy Policy at www.reckon.com.
• Subscription: This is a subscription to use the Services for a minimum of 12 months. The Subscription Fee for the initial 12 months is non-refundable. After the initial 12 month Subscription your Subscription will be renewed for a further 12 months at the applicable rates unless otherwise instructed by you. If after the initial 12 months, you do not renew your subscription or your subscription expires or is terminated, you will no longer have access to the Services. However, an electronic copy of your data as at the date of termination, stored or backed up by us on your behalf (“Data at Termination) will be made available for you to download for your subsequent

127
reference. The Data at Termination would comprise the last version of your data at the date of termination stored or backed up by us on your behalf using the Data Storage Space included as part of the Services, comprising: (a) your day to day transaction data; and (b) the last version of any data backed up by you, if any, using the Data Storage Space included as part of the Service. Thereafter your data will be destroyed 30 days after the expiry of your subscription. You remain solely responsible for complying with all applicable accounting, tax and other laws, especially regarding document retention.
• Access to the Service: Use of the Services is solely verified by user login and password. You are entirely responsible for maintaining the confidentiality of all access details of every user of your Account. Reckon does not accept any responsibility for breaches of your security.
• Your Data:
Your data includes the information contained in the files that you or your other users create, upload, download and access using the Services for yourself or on the behalf of others. You own the data, or are responsible for the data on behalf of third parties, and you are solely responsible for the content of the data.
• Use of the Service:
• You will not yourself or allow others to engage in any unlawful or prohibited use.
• You are responsible for any and all activities that occur under your Account by any person. Reckon will not be liable for any loss that you may incur as a result of unauthorised use. You may be held responsible for losses incurred by Reckon or any third party due to any unauthorised use of your Account.
• Internet access, telecommunications networks, firewalls and security:
License Agreement

128
• You acknowledge and agree that use of the Services requires internet access which may be affected by factors beyond the control of Reckon. Any access to the internet and storage of data on servers may involve risks and that while as far as possible Reckon will try to, it cannot guarantee security.
• Submissions made via email are not protected by encryption and may be vulnerable to interception during transmission.
• Reckon does not guarantee the uninterrupted availability of the Services, its website, applications hosted by the website, its servers (or the servers of third parties, which Reckon may engage to provide the whole or part of the Services) including connections to its online activation server because these may be dependent upon third party networks and security measures over which Reckon has no control.
• BankData: You require a current subscription to Reckon BankData to access bank data feeds. Your access to the bank data feeds are subject to your bank’s terms and conditions and their acceptance of your application to supply the bank data feeds. This Licence will entitle you to the number of bank data feed import transactions for you which you have subscribed and paid. The Reckon Bank Data licence is transferable between the Services and the Reckon desktop products as specified on the Website, which may be updated from time to time. You must purchase a separate licence if you want to import bank data feeds bank feeds into other Reckon products, such as Reckon One.
• Data Collection & Privacy:
• You acknowledge and agree that Reckon collects information from you when registering, activating and validating the Services and when you use the Services including your use of technical support in relation to the Services.
• This information is collected to enable you to access and use the Services and to enable the Services to be provided to you, it is also collected for other purposes such as to improve our Services to you.

129
• For details on: why, when and how we collect, use, store and to whom we may disclose your personal information; and how you can contact us if you want to access or correct personal information or make a complaint, please refer to Reckon’s Privacy Statement on our Website.
• By activating and using the Services, including technical support, you consent to Reckon’s collection and use of the information collected from you in accordance with Reckon’s then current Privacy Policy.
• Third Party access to your information:
• Reckon may use certain third parties to help Reckon to analyse, provide and improve the Services (including but not limited to data storage, maintenance services, database management, web analytics, payment processing, and improvement of the Service’s features), and some technical support services.
• Reckon uses third party hosting services to host some of your information (for example, customer data) in Australia.
• Reckon may also collate your data which has been created or stored using the Services in unidentified form, for the purpose of disclosing it to third parties, for example, for benchmarking purposes.
• Please refer to Reckon’s Privacy Policy for more details of third party access to your information.
Third Party Online Services
• The Services may contain access to, or features that interface with, third party online services (“Third Party Online Services”), such as bank data feeds. Where Third Party Online Services are available, separate terms and conditions with the provider of the Third Party Online Services may apply. Charges may apply for the use of Third Party Online Services and access to the Third Party Online Services may be terminated if you do not pay the required charges. Except as required by the Consumer Guarantees, access to Third Party Online Services may be withdrawn by Reckon at any time. Reckon does not make any recommendations in relation to the Third Party Online Services.
License Agreement

130
Back up:
• You should ensure you conduct regular backups of your data. You are responsible for determining the most appropriate back-up strategy for your data to meet yours or your business’ needs. Except under the Consumer Guarantees, Reckon on behalf of itself and/or any of its distributors and associates, does not assume any liability for loss of data.
• The Services include Data Storage Space for you to back-up your data created using the Services (“Your Back-Up Data”). Except as required by the Consumer Guarantees, you are solely responsible for the set up and use of the Data Storage Space included in the Services.
Data storage Space:
• Your Subscription Fee includes Data Storage Space up to the relevant Data Storage Limit for your day to day transaction data and for Your Back-Up Data.
• If you need to increase the amount of Data Storage Space for either your day to day transactional data or Your Back-Up Data during your Subscription Period, you may be required to pay the Additional Data Storage Space Fee as set out on the Website at the relevant time, for the additional space. If your Subscription for the Services is cancelled or terminated for any reason you will no longer have access to your Data Storage Space.
Offline access for PC only.
• A corresponding current version of an Accounts Enterprise licence is required for each user to be able to copy the data file created with the Services and work offline, and charges may apply. Please refer to the terms and conditions of the licence for Accounts Enterprise desktop. The Accounts Hosted online data files may not always be compatible with the corresponding Accounts Enterprise desktop software.
• Accounts Hosted subsribers only:

131
One Accounts Enterprise licence is provided per customer with purchase of first current Accounts Hosted Premium licence by the customer, regardless of number of users. Additional licences need to be purchased for multi user sites of Accounts Hosted Premium. If you wish to use Accounts Enterprise Desktop only, then you may do so for the remaining period of your Accounts Hosted licence.
• Time zone for reports and udpates:
All transactions and reports will be recorded in the following relevant time zone to your geographical area:
Australia - AEST or AEDST
New Zealand - NZT or NZDT
• Communication:
Most communication from Reckon to you will be by email. If Reckon needs to contact you quickly, Reckon may communicate to you via SMS. You must opt in to this service to receive service status updates via SMS.
• Use of Services is not provision of tax, accounting or professional advice:
• The information contained in these Services may contain features designed to assist you in complying with the requirements of relevant legislation.
• In providing you with information which may relate to relevant legislation, Reckon is not engaged in rendering legal, accounting or other professional services and that nothing in the Services constitutes taxation, financial, wealth management, superannuation or other professional advice. Legal, accounting or other relevant professional advice should be obtained before taking any action in reliance on these Services.
• While relevant reports produced using the Services will be compliant with legal requirements at time of release, as these requirements may change from time to time, you should confirm compliance with your professional adviser.

132
• The help contained in these Services are not a substitute for obtaining the appropriate independent professional advice. If legal advice or other expert assistance is required, you should seek the service of the appropriate competent professional.
Disclaimer:
• To the maximum extent permitted by any law, including the Consumer Guarantees, neither Reckon or any provider of Third Party Services (“TPS Providers”), including but not limited to any Third Party Online Services including any bank, will be responsible for any data submitted, entered or created using the Services or any Third Party Services (for example, including but not limited to bank data feeds), delays, non-performance, failure to perform, processing errors or any other matter or thing which may be required from any TPS Providers, such as an authority or approval, or any agreement with Reckon or any TPS Providers, as the case may be. You are responsible for the accuracy of all data entered; all output created by you relying on the data entered; and where relevant, that any data or document lodged is accurate, timely and is compliant with all relevant laws and regulations, including keeping the required documentation and records needed to be kept to meet regulatory requirements in relation to the information or material lodged and any other data retention or compliance requirements. Nor will the liability of Reckon, or any TPS Providers, including but not limited to any bank (whether jointly, severally or jointly and severally) include or extend to any special or consequential loss or damage suffered by you, except where required by the Consumer Guarantees.
• Limitation of implied terms:
In relation to goods or services not ordinarily acquired for personal, domestic or household use, Reckon’s (and its distributors’) liability for breach of any guarantees, implied conditions or warranties that cannot be excluded is limited, to the extent permitted by law and at the option of Reckon, to repair the goods, or the cost of repairing the goods, to replacing or re-supplying the goods or services or their equivalent again or the payment of the cost

133
of having the goods or services or their equivalent replaced or supplied again. You acknowledge that this clause, and any reliance on it by Reckon, is fair and reasonable.
• Reckon’s Contact details:
Business address: Level 12, 65 Berry Street, North Sydney, NSW 2060
Contact number: 1300 784 253
Contact email: [email protected].

134
1� LICENCE
(a) Evaluation licence: If Reckon has given you the right to trial the Services upon payment of the Evaluation Fee as set out on the pricing page of the Website, your rights to use the Services are solely as set out in clause 12.
(b) Licence to use: Reckon grants you a personal, non-exclusive, non-transferable, limited licence to use the Services on the terms of this Licence for the period determined in accordance with clause 10.
(c) No transfer of copyright: The Services are licensed not sold, despite any reference to “purchase” or “sale” in this Licence or in any invoice or purchase order for the supply of the Services. Reckon reserves all rights not expressly granted to you. Reckon Limited is the owner of copyright in the Services and retains ownership of the copyright and all other intellectual property rights in the Services and is protected by copyright law and international copyright treaty.
2� USE OF THE SERVICES
(a) Single use licence: If you have purchased a Single User Licence it only allows one user of the Services.
(b) Multiple user licences: If you have purchased a Multiple User Licence (“your Account”), you and other simultaneous users who are authorised by you, each have their own login and password to access your Account.
(c) Data Storage Space:
(i) The Services include Data Storage Space for:
(A) Your day to day transactions; and
License Agreement
135
(B) Your Back-Up Data. You are solely responsible for the set up and use of the Data Storage Space for Your Back-Up Data.
(ii) Your Subscription Fee includes Data Storage Space up to the relevant Data Storage Limit for your day to day transactions and Your Back-Up Data.
(iii) If your Subscription for the Services is cancelled or terminated for any reason you will no longer have access to your Data Storage Space.
(d) Access to the Service
(i) All access to the Services is solely verified by user Login and password;
(ii) You are entirely responsible for maintaining the confidentiality of all your access details (eg user name and password) and every user on your Account;
(iii) You are responsible for any and all activities that occur under your Account by any person or persons;
(iv) You are responsible for the accuracy of all information and authorisations provided to Reckon or any third party service providers, relating to the Services or access to any of the Third Party Online Services, for example bank data feeds;
(v) You agree to notify Reckon immediately of any unauthorised use of your Account or any other breach of security;
(vi) Reckon will not be liable for any loss that you may incur as a result of unauthorised use of your Account by any person or persons;
(vii) You may be held responsible for losses incurred by Reckon or any third party due to any unauthorised use of your Account by any person or persons;
(viii) Access to your Account may be restricted by user login and passwords; and

136
(ix) You are entirely responsible for the access rights that are granted to any person or other users under your Account.
(e) Data: Your data includes the information contained in the files that you or your other users create, upload, download and access using the Services for yourself or on the behalf of others. You own the data, or are responsible for the data on behalf of third parties, and you are solely responsible for the content of the data.
(f) BankData: You must have a current subscription to Reckon BankData to have access to bank data feeds. Your access to the bank data feeds are subject to your bank’s terms and conditions and their acceptance of your application to supply the bank data feeds. This Licence will entitle you to the number of bank data feed import transactions for you which you have subscribed and paid. The Reckon Bank Data licence is transferable between the Services and the Reckon desktop products as specified on the Website, which may be updated from time to time. You must purchase a separate licence if you want to import bank data feeds bank feeds into other Reckon products, such as Reckon One.
(g) Internet access: You acknowledge and agree:
(i) Use of the Services requires internet access;
(ii) Speed of internet access will vary and may be affected by factors beyond the control of Reckon;
(iii) Any access to the internet involves security risks and new threats to internet security are continually evolving; and
(iv) You accept responsibility for maintaining your own security regarding access to the internet and protection of your data.
(h) No unlawful or prohibited use: It is a condition of your use of the Services, that you will not yourself, or allow others:
(i) To use the Services for unlawful purposes or any purpose prohibited by the terms of this Licence;
License Agreement
137
(ii) To use the Services in any manner that could damage, disable, overburden or impair any Reckon server, or the networks connected to Reckon’s server or otherwise interfere with any other person’s use and enjoyment of the Services;
(iii) To gain unauthorised access to any Services or other accounts, computer systems or networks connected to the Reckon server or Services, through hacking, password mining or any other means;
(iv) To obtain or attempt to obtain any materials or information through any means not intentionally made available through the Services;
(v) To knowingly or recklessly post, link to, install or transmit, or permit third party users to post, link to or to transmit:
(A) Any material that is abusive, threatening, harmful, malicious, defamatory, obscene, pornographic, profane or otherwise unlawful;
(B) Any material containing a virus or other hostile computer program;
(C) To post, link to or transmit any material that constitutes or encourages a criminal offence, gives rise to civil liability or infringes the intellectual property rights of any third parties.
(vi) To knowingly or recklessly transmit, or permit third party users to transmit unsolicited emails in breach of Australian or New Zealand law
(i) Time zone for Accounts Hosted reports and updates: You agree that all transactions and reports will be recorded in the following relevant time zone to your geographical area:
Australia - AEST or AEDST
New Zealand - NZT or NZDT
(j) Communication: Most communication from Reckon to you is by email. It is your responsibility to ensure that Reckon is provided with all your current contact details, including your email address and that you receive

138
and check your emails regularly. Reckon will not be liable to you for any loss that you may incur as a result of not providing us with your current details or not receiving such communication from Reckon. Reckon may also contact you if required urgently via SMS. You must choose to opt into this service via the website before you will receive SMS updates.
(k) Offline access for PC only. The corresponding current version of an Accounts Enterprise is required for each user to be able to copy the data file created with the Services and work offline, and charges may apply. Please refer to the terms and conditions of the licence for Accounts Enterprise. The Accounts Hosted online data files may not always be compatible with the corresponding Accounts Enterprise software.
(l) Accounts Hosted subscribers only: One Accounts Enterprise licence is provided per customer with purchase of first current Accounts Hosted licence by the customer, regardless of number of users. Additional licences need to be purchased for multi user sites of Accounts Hosted. If you wish to use Accounts Enterprise Desktop only, then you may do so for the remaining period of your Accounts Hosted licence.
(m) General restrictions: You must not:
(i) use or rely upon the Services for any purpose or in any manner for which the Services is not warranted;
(ii) copy, reproduce, translate, adapt, vary, merge or modify or create any derivative work based on the Services;
(iii) reverse engineer, decompile, disassemble, reconfigure or otherwise attempt to discover the source code of the Services; or
License Agreement

139
(iv) sell, market, network, transfer, lease, license, sub-license, rent, lend or otherwise dispose of or distribute the Services or use the Services to provide any Internet based services, including a bureau or hosting service.
3� SECURITY OF YOUR ACCOUNT AND DATA
(a) Security of your data: Reckon will use reasonable precautions to prevent the unauthorised disclosure of your data and will not decrypt your data. We will not, however, be responsible or incur any liability for any matters, including without limitation, any unauthorised access to your data, including by third parties to whom you have intentionally or inadvertently given shared access. In the event that Reckon is served with a subpoena or is otherwise lawfully compelled to provide access to your data, we will, subject to it being lawful, notify you of that fact.
(b) Internet access: Any access to the internet involves security risks and new threats to internet security are continually evolving. Information stored on our servers or the servers of third parties that Reckon use, may be vulnerable to attack and cannot be guaranteed to be secure. In addition, submissions made via email are not protected by encryption and may be vulnerable to interception during transmission.
(c) Back up: Although Reckon does regular back-ups on its overall infrastructure you should also ensure you conduct regular backups of your data. You are responsible for determining the most appropriate back-up strategy and conducting your own back-up of your data to meet yours or your business’ needs. Except as required by the Consumer Guarantees, You are solely responsible for the set up and use of the Data Storage Space or Your Back-Up Data.
(d) Data retention requirements: You should confirm your data retention requirements with your professional adviser for tax and compliance purposes. Except under the Consumer Guarantees, Reckon on behalf of itself and/or any of its distributors and associates, does not assume any liability for loss of data.

140
License Agreement
4� SERVICES ACTIVATION AND VERIFICATION
(a) Manner of verification: Reckon verifies authorised use of your Account solely on basis of the username and password. Therefore, it is critical that you maintain and protect confidentiality of all access details to your Account.
(b) Charges for reactivation: Reckon may charge you a fee for technical support if it needs to reset your password.
(c) Consequences of non-renewal and failure to verify details: If a subscription is not renewed, Services will be discontinued and you will not have access to the Services. However, an electronic copy of your version of data (as at the termination date) if that was stored or backed up by us, will be made available for you to download for your subsequent reference. Thereafter your data will be destroyed 30 days after the expiry of your subscription. You remain solely responsible for complying with all applicable accounting, tax and other laws, especially regarding document retention.
(d) Statutory declaration: In certain circumstances to authorise, reactivate or confirm the Authorised Users, Reckon may require you to provide it with a Statutory Declaration stating the reasons for re-activation or confirming the Authorised Users in a form required by Reckon.
5� DATA COLLECTION AND PRIVACY
(a) Data collection: You acknowledge and agree that Reckon collects information from you when registering, activating and validating the Services. Additional information may also be collected in relation to your use of the Services including your use of technical support in relation to the Services. The information collected may include personal information. Where you disclose personal information to us about other people, or other data you have created, used or collected from or about your customers or other third parties using the Services (“Other Personal Information”), by way of example, details of other authorised users, employees’

141
superannuation details, client accounts or tax details, you warrant that you have obtained consent to disclose the Other Personal Information to us to be handled, stored and disclosed in accordance with this Agreement and our Privacy Policy.
(b) Privacy: Reckon handles all personal information in accordance with the Privacy Act 1988 (Cth) and the applicable Privacy Principles as set out in our Privacy Policy. Please refer to Reckon’s Privacy Policy on our Website www.reckon.com, for details on:
(i) why, when and how we collect, use, store and disclose your personal information; and
(ii) how you can contact us if you want to access or correct personal information: and/or
(iii) make a complaint.
(c) Disclosure of your information: You agree to allow Reckon to use and disclose any personal details provided to, or collected by Reckon in connection with this Licence in accordance with Reckon’s then current privacy policy displayed on Reckon’s Website. You acknowledge that we may be required to allow access to your data or Confidential Information, by law or government agency, including the New Zealand IRD (which will be made available to them free of charge), for which we will not be liable in any way. We will give you as much notice as reasonably possible if we are required to allow such access and only give access to such information as is required.
(d) Use of the Services: By activating and using the Services:
(i) you agree to allow Reckon to collect, use and disclose any personal information provided to, or collected by, Reckon in connection with this Licence in accordance with Reckon’s then current privacy policy displayed on Reckon’s Website; and
(ii) you acknowledge that information you disclose to Reckon in accordance with this Agreement and the Privacy Policy, may also include Other Personal Information you hold about other people, and you agree that:

142
License Agreement
(A) you comply with the Privacy Laws in relation to any Other Personal Information including its disclosure to Reckon and its use by Reckon in accordance with this Agreement and its Privacy Policy; and
(A) you are responsible and liable for any such use of Other Personal Information by Reckon and will indemnify Reckon for any complaint, loss or damage relating to Reckon’s use of Other Personal Information disclosed by you to Reckon.
6� TECHNICAL SUPPORT
(a) Period when technical support is available: Reckon will provide technical support for the Services only (and for the avoidance of doubt this does not include support for third party hardware, software services, Third Party Online Services, which remains the responsibility of the relevant third party), at the times detailed below, during the period for which you have paid the relevant Subscription Fee. Our technical support consultants are not available to you to provide general accounting advice or to train you (it is assumed that you are already reasonably familiar with the Services) or to resolve any networking or interface computing or local IT problems that you may have. You agree that the determination of the nature of your query for these purposes may be made by our technical support consultants.
(b) You are also entitled to extended hours of technical support. Currently the hours are Monday to Friday, 8.30am to 7:00pm (AEST).
(c) You acknowledge that Reckon cannot guarantee that you will not experience some delay in having one of our technical support consultants answer your query. You will appreciate that as call volumes fluctuate so too will our response time.
(d) We also reserve the right at any time to change the hours of operation of technical support for the Services.
(e) What is included as part of technical support: Reckon will provide technical support in accordance with its then current technical support policy, which may include:

143
(i) as contemplated by clause 4, the technical support required to reactivate the Services (for example, when you verify your licence details or renew a subscription);
(ii) provision of telephone help desk support services;
(iii) access to technical information about the Services contained on Reckon’s website; and
(f) Fees: You may be required to pay charges for all other technical support, including technical support to reactivate your Services (including when you wish to reinstall the Services), in accordance with the then current technical support policy.
7� THIRD PARTY ONLINE SERVICES
(a) Interaction with Online Services: The Services may contain access to, or features that interface with, third party online services (“Third Party Online Services”). Examples of Third Party Online Services that may be applicable to the Services are EFTPOS, SBR-enabled services, an online share price download facility, bank data feeds a statement download facility, bill and other payment services, a superannuation choice facility, online backup facility, payroll services and a debt recovery facility, which may or may not be provided at an additional charge on a subscription basis measured for one year from the date of registration.
(b) Terms for Third Party Online Services: Third Party Online Services are only available for the Subscription Period. Charges may apply for the use of Third Party Online Services (in addition to the cost of Internet access levied by your ISP). Reckon may terminate access to the Third Party Online Services if payment of the charges relating to the Third Party Online Services are not paid. Where Third Party Online Services are available, separate terms and conditions with the provider of the Third Party Online Services may apply. You are responsible for all information and authorisations provided to access and use any such Third Party Online Services and for any data, form or other output relying on the use of the Third Party Online Services and/or the Services. In some cases Reckon may be the provider. You should check with the relevant third party provider as to the terms and conditions of use. Except as may be required by the Consumer

144
License Agreement
Guarantees, access to Third Party Online Services may be withdrawn by Reckon at any time. Reckon will not be liable for the withdrawal of access to any Third Party Online Services. Where access is to be withdrawn, Reckon may choose to notify you in advance provided that you have supplied Reckon with a valid and up to date email address.
(c) In some cases you may download other third party applications, for example Google Desktop supplied by Google Inc. In such cases your agreement to be bound by the terms of this Licence will also bind you to the terms of use or other similar agreements required by such third parties for use of their products
8� LIMITED WARRANTY
This clause 8 is subject to the consumer guarantees regime as set out in Schedule 2 to the Competition and Consumer Act 2010 (Cth) (also referred to as the Australian Consumer Law), and the Consumer Guarantees Act 1993 (NZ), as amended from time to time, or other similar legislation of a state or territory of Australia or NZ respectively. (“Consumer Guarantees”). In Australia, our goods come with guarantees that cannot be excluded under the Australian Consumer Law.
You are entitled to a replacement or refund for a major failure and compensation for any other reasonably foreseeable loss or damage. You are also entitled to have the goods repaired or replaced if the goods fail to be of acceptable quality and the failure does not amount to a major failure. In New Zealand, these guarantees cannot be modified nor excluded by any contract, except in those circumstances contemplated by section 43(2) of the New Zealand Consumer Guarantees Act.
(a) Software provided on an ‘as is’ basis: Except as required by the Consumer Guarantees, Reckon provides the Services to you on an “as is” basis and without any representations by Reckon or any of its authorised distributors and associates regarding the use, performance or results of the use, of the Services.

145
(b) No guarantee that Services will be error free or that its use will be uninterrupted: While Reckon has endeavoured to make sure that the Services works substantially as per the specifications published by Reckon from time to time, except as required by the Consumer Guarantees, Reckon does not guarantee or make any warranty that:
(i) the Services will work on all computer hardware platforms or configurations; or
(ii) the Services will be error free; or
(iii) that its use will be uninterrupted.
(c) Internet access, telecommunications networks, firewalls and security: Except as required by the Consumer Guarantees, Reckon does not guarantee, the uninterrupted availability of the Website or applications hosted by the Website by Reckon’s servers (or the servers of third parties which Reckon may engage to provide the whole or part of the Services) or connections to its online activation server as these may be dependent upon third party networks and security measures over which Reckon has no control.
9� LIABILITY
(a) Certain rights cannot be excluded: Certain laws, including the Consumer Guarantees, may imply certain guarantees, conditions and warranties into this Licence or impose certain guarantees, conditions and warranties by law and give you certain rights and remedies that cannot be excluded or modified. This clause 9, and the limited warranties provided in clause 8, do not exclude or modify any of those rights if to do so would contravene that law or make any part of this Licence void.
(b) Exclusion of warranties: Except as required by the Consumer Guarantees, Reckon excludes all guarantees, conditions, warranties and rights that may be implied into this Licence or imposed by law. If conditions, warranties or other rights for your benefit are implied in this Licence or otherwise conferred by law and it is

146
License Agreement
not lawful to exclude, restrict or modify them, then those guarantees, conditions, warranties and other rights will (but only to the extent required by law) apply to this Licence.
(c) Limitation of implied terms: In relation to goods or services not ordinarily acquired for personal, domestic or household use, Reckon’s (and its distributors’) liability for breach of any guarantees, implied conditions or warranties that cannot be excluded is limited, to the extent permitted by law and at the option of Reckon, to repair of the goods, or the cost of repairing the goods, to replacing or re-supplying the goods or services or their equivalent again or the payment of the cost of having the goods or services or their equivalent replaced or supplied again. You acknowledge that this clause, and any reliance on it by Reckon, is fair and reasonable.
(d) General exclusion and limitation: Other than as set out in clauses 9(b) and 9(c), and as required by the Consumer Guarantees:
(i) Reckon (and its authorised distributors) will not be liable to you or any other person for any direct or indirect loss, damages, liability, costs or expenses suffered by you or any other person relating to the performance or non-performance of the Services, including but not limited to the availability of the Services, availability of the website or applications hosted by the website, loss of data, or any breach of this Licence or the supply of the Services or in connection with, but not limited to, the Third Party Online Services, the TPS Providers, use of tax tables, use of third party hardware (for example but not limited to Postec services) or provision of technical support (whether by telephone or remote access or other means); and
(ii) Reckon’s maximum liability for damages arising in connection with this Licence or the supply of the Services is limited to the amount paid by you for the Services for the year in which any such claim is formally made by you.
(e) Your liability to Reckon: You agree that Reckon (and its authorised distributors) will not be liable, other than as required by the Consumer Guarantees or as expressly set out in this Licence, and that you will indemnify

147
Reckon (and its authorised distributors) from any liability, loss, damage, costs or expenses which Reckon (or its authorised distributors) may suffer or incur as a result of your use of the Services (including any claims made against Reckon (or its authorised distributors) by third parties.
(f) Use of Services is not provision of tax, accounting or other professional advice: The information contained in the Services may contain features designed to assist you in complying with the requirements of the relevant legislation at the time of the release of the Services, which includes for example, but not limited to, superannuation guarantee requirements, tax tables, rates for contributions or deductions calculated using the Services. These compliance requirements may change from time to time. You agree it is your obligation to ensure the details, calculations, reports and any other data or documents produced using the Services, are correct and compliant when created or used by you. Legal, accounting or other relevant professional advice should be obtained before taking any action in reliance on the Services or what is produced by you using the Services. The Services are also not financial product advice. You acknowledge that Reckon is not engaged in rendering legal, accounting or other professional services and nothing in the Services constitutes taxation, financial, wealth management, superannuation or other professional advice in relation to these matters. The help contained in the Services is not a substitute for obtaining the appropriate independent professional advice. If legal advice or other expert assistance is required, you should seek the service of the appropriate competent professional.
(g) Reckon has no responsibility for recommendations: Except as required by the Consumer Guarantees, Reckon, its employees, agents, contractors and the authors disclaim any and all liability and responsibility to any person, whether a user of these Services or not, in respect of anything (including, without limitation, any error in or omission from these Services), and of the consequences of any actions taken or omitted to be taken in reliance, whether wholly or partially, upon all or any part of the content, recommendations or help, contained in these Services.

148
License Agreement
(h) Corruption of Data and on-line access: Except as required by the Consumer Guarantees, Reckon and its authorised distributors disclaim all liability for any corruption of data, inability to access data, loss of data, breach of privacy, or downtime as a result of or arising from the use of the Services or any online link available between the Services and another server including without limitation in connection with Third Party Online Services.
(i) Third Party Online services: Except as required by the Consumer Guarantees, Reckon makes no warranty or representation in connection with the Third Party Online Services, or third party hardware (for example but not limited to Postec services) the responsibility for which rests with the relevant provider of such Third Party Online Services or such hardware.
(j) Third Party On-line service Providers (“TPS Providers”): Except as required by the Consumer Guarantees, neither Reckon or any TPS Providers, including but not limited to any bank, will be responsible for any data submitted, entered or created using the Services or any Third Party Services (for example, including but not limited to bank data feeds), delays, non-performance, failure to perform, processing errors or any other matter or thing which may be required from any TPS Providers, such as an authority or approval, or any agreement with Reckon or any TPS Providers, as the case may be. You are responsible for the accuracy of all data entered; all output created by you relying on the data entered; and where relevant, that any data or document lodged is accurate, timely and is compliant with all relevant laws and regulations, including keeping the required documentation and records needed to be kept to meet regulatory requirements in relation to the information or material lodged and any other data retention or compliance requirements. Nor will the liability of Reckon, or any TPS Providers, including but not limited to any bank (whether jointly, severally or jointly and severally) include or extend to any special or consequential loss or damage suffered by you.
10� TERM AND TERMINATION OF LICENCE
149
(a) Licence Term: Unless this Licence is terminated earlier in accordance with its terms, you have the right to use the Services in accordance with this Licence upon payment of the Subscription Fee in accordance with clause 11.
(b) Termination by Reckon for breach: Reckon may terminate this Licence if you are in breach of its terms, including but not limited to non-payment of the Subscription Fee by the due date, or your use of the Services is not done in good faith as reasonably determined by Reckon; or you or your business become insolvent or your business goes into liquidation or becomes subject to any insolvency event or arrangement in any jurisdiction; or as otherwise set out in this Licence, or as otherwise set out in this Licence.
(c) Early termination
(i) If you wish to terminate your Licence early, you must do so by giving Reckon no less than one calendar month notice to that effect. Any refund of Subscription Fees is subject to clause 11 (e).
(ii) You acknowledge that there is no refund of Subscription Fees for early termination or cancellation of the Subscription of the Services for the relevant period in which the Subscription was cancelled, terminated or changed,
(iii) Subject to clause (c)(i), You will have the option at termination, to request an equivalent number of Accounts Enterprise licences to enable you to work offline for the remainder of the term of the original Licence.
(d) Effect of Termination: Upon termination, Services will be discontinued and you will not have access to the Services. We will make available for your download an electronic copy of your version of data (as at the termination date) if that was stored or backed up by us, for your subsequent reference. Thereafter your data will be destroyed after 30 days from the expiry of your subscription.

150
License Agreement
(e) Things you must do on termination: Upon termination, it is your sole responsibility to ensure the removal of all data from Reckon’s servers. NO data will be recoverable 30 days after the termination is effective.
(f) Survival: Clauses 2, 3, 7, 8, 9 and this clause 10 will survive the termination of this Licence. Termination of this Licence will not prejudice any right which Reckon may have, or but for the termination may have had, against you for a breach of this Licence.
11� SUBSCRIPTION TERMS
(a) Reckon Website Facility: All transactions relating to your Subscription, are to be conducted by way of the Reckon Website Facility.
(b) No extension of Licence term: Your right and entitlement to use the Services concludes at the end of the term of the Licence subject to payment of a Subscription Fee in accordance with clause 11(e) and is not linked to the dates of release, registration or provision by Reckon of any upgrades and/or updates.
(c) This Licence prevails: If you have purchased these Services to upgrade any other Accounts or Reckon Software, this Licence shall supersede any previous licence agreement.
(d) No obligation on Reckon to upgrade: Upgrades and/or updates will be developed and included in the Services at Reckon’s sole discretion, and Reckon does not warrant or represent that it will develop or release any upgrades and/or updates during the term of the Subscription Period or Licence.
(e) Payment: All payments are in advance and calculated according to the Subscription Fees as set out on the Website, at the time of the relevant purchase or renewal.

151
(i) You will be required to pay the Subscription Fees for the initial 12 months Subscription Period before being given access to the Services. The Subscription Fee is non-refundable. After the initial Subscription Period you may renew your Subscription in accordance with sub-clause (d) (iii) below).
(ii) This Subscription will automatically terminate upon expiry of the Subscription Period unless it is renewed and you will not have access to the Services in accordance with clause 10. To clarify, if after the initial Subscription Period, payment is made by advance payment monthly Subscription Fees and these monthly payments are not made by the due date, the Licence will automatically terminate and you will no longer have access to the Services, for clarity this includes the Data Storage Space, regardless of whether you have paid an Additional Data Storage Space Fee. If you renew and have paid upfront annual fees for the full 12 month period, that fee is non-refundable.
(iii) The Subscription can be automatically renewed upon payment of the Subscription Fee on or before the termination of the expiring Subscription Period for the Services. You will be required to pay the Subscription Fee for either an annual Subscription with an upfront payment of the then current annual Subscription Fee; or as a monthly subscription and pay the applicable monthly Subscription Fee in advance on the first business day of each month. The monthly Subscription Fee may vary subject to 30 days notice to you. You authorise Reckon to direct debit your monthly Subscription Fee from the bank account nominated by you, until such time as this Licence is terminated pursuant to this Agreement. You may withdraw or change your authorisation for payment by way of the Reckon Website Facility with respect to an advance payment or future renewals of the Services.
(iv) All payment becoming due and payable by you shall be subject to the Goods and Services Tax (“GST”) at the applicable rate in either Australia or New Zealand depending on your geographic location.
(v) You will be liable for any penalty charges incurred by Reckon by reason of the dishonour or reversal of any payments made by you.
(vi) All payments remain payable whether or not you use the Services while the subscription remains active

152
(vii) If you do not pay the subscription fee as required, this Licence will be terminated in accordance with clause 10 and you will no longer have access to the Services.
12� TRIAL USE OF THE SERVICES
If you have elected to access the Services as a trial and upon payment of the Evaluation Fee, the terms in this clause 12 also apply to your use of the Services:
(a) Licence: Your licence to use the Services:
(i) permits you to evaluate the Service’s functionality and suitability for your requirements;
(ii) is subject to the provisions of clauses 2, 3, 4, 7, 8 and 9;
(iii) is for 30 Days (Evaluation Period);
(iv) all payments for the Services are non-refundable, even in the event of cancellation, suspension or termination.
(b) Duration: You acknowledge that your licence to use the Services will only apply for the Evaluation Period. At the end of the Evaluation Period:
(i) you must not and will not be able to continue to access the Services, including any data that you have entered during the Evaluation Period; and
(ii) if you wish to use the Services you must pay the Subscription Fee.
(c) Entitlements: You may be required to pay for any technical support that you may require in relation to your use of the Services during the Evaluation Period, in accordance with Reckon’s then current charges.
(d) Liability: You acknowledge that subject to clauses 9(b) and 9(c), and other than as required by the Consumer Guarantees, Reckon excludes all liability to you for any loss, including loss of data, damage, liability, costs or expenses

153
suffered by you relating to the performance or non-performance of the Services during the Evaluation Period or any breach of this clause 12.
13� GENERAL
(a) Accounts Enterprise: The current version of Accounts Enterprise Desktop software also known as “Accounts Enterprise” or “Enterprise”.
(b) Applicable law: This Licence is governed by the laws of the State of New South Wales, Australia and by agreeing to be bound by the terms of this Agreement you irrevocably and unconditionally submit to the jurisdiction of the courts of that State
(c) Confidential Information all information of, or used by a party relating to that party’s transactions, operations and affairs or that of their clients; (b) all other information treated by the party as confidential; (c) all information the receiving party knows, or reasonably ought to know is confidential; (d) all copies (whether or not in tangible form) of the information, notes, reports and other records based on, incorporating or derived from information referred to in paragraphs (a) to (d); and (e) including the terms of this Agreement as amended; that is not public knowledge, or required to be disclosed under law, including ASX Listing Rules or Government Agency or otherwise within the knowledge of the other party (otherwise than as a result of a breach of a confidentiality obligation of that party);
(d) Consumer Guarantees: Are the consumer guarantees regime as set out in Schedule 2 to the Competition and Consumer Act 2010 (Cth) (also referred to as the Australian Consumer Law), or the Consumer Guarantees Act 1993 (NZ), as amended from time to time, or other similar legislation of a state or territory of Australia or NZ respectively.
(e) Data at Termination means the electronic copy of your data which may be returned to you on termination in accordance with the terms of this Licence. The Data at Termination would be the last version of data

154
stored or backed up by us on your behalf and comprises (a) your day to day transaction data; and (b),the last version of Your Back-Up Data.
(f) Data Storage Space-means the storage space offered by us as part of the Services up to the Data Storage Limit for the day to day transactions and for Your Back-Up Data, if any.
(g) Entire Agreement: This Licence contains the entire agreement between Reckon and you in relation to its subject matter and supersedes any prior agreements and understandings, whether written or oral.
(h) Evaluation Fee: The fee set out on the pricing page of the Website at the relevant time to obtain an Evaluation Licence to use the Services on trial.
(i) Headings: Clause headings are for ease of reference only and do not affect the meaning of this Licence.
(j) Privacy Laws: Privacy Act 1988 (Cth) and the Australian Privacy Principles (“the Privacy Principles”), as amended from time to time.
(k) Reckon Website or Website: means Reckon’s company websites www.reckononline.com.au or www.reckononline.co.nz
(l) Reckon Website facility or Website facility: means the facility accessed via the Website, through which all transactions and details relating to the Services are conducted, including purchase, renewal and cancellation Subscriptions.
(m) Subscription Fee: The fee set out on the pricing page of the Website at the relevant time for use of the Services and is paid in advance for the relevant Subscription Period. The annual Subscription Fee is paid in advance of the relevant 12 month period. The monthly Subscription Fee can vary with 30 days’ notice to you and is paid monthly in advance.

155
(n) Subscription Period: The period for which you have paid the Subscription Fee in accordance with clause 11(d), for example, for a 12 month period or monthly.
(o) Termination of licence: Upon termination of your licence you will not have access to the Services and your data will be destroyed within 30 days from the expiry of your subscription in accordance with clause 10.
(p) Third Party Applications and Technology: When using the Services, you may access third party applications and technology. The terms of the third party’s Licence will apply to your use of all such third party applications and technology.
(q) Variation: To the extent permitted by law, Reckon may vary any of the terms and conditions of this Licence upon providing you with thirty (30) days notice in writing and a copy of the replacement terms and conditions. No new terms will come into force until the commencement of your renewed Subscription Period. Reckon will display any new terms and conditions on the Website and you should check the website regularly.
(r) Waiver: Any failure to enforce any rights under this Licence by Reckon is not to be taken as a waiver of those rights.
(s) Your Back-Up Data – means the data created by using the Services which you choose to back-up and store using the Data Storage Space included as part of the Services.
(t) Reckon’s Contact details:
business address: Level 12, 65 Berry Street, North Sydney, NSW 2060
contact number: 1800 RECKON (Toll-free 1800 732 566)
contact email: [email protected]
website: www.reckon.com
Reckon, Reckon logo, Reckon Accounts, R logos, Reckon Online and Reckon Online logo are trademarks of Reckon Limited. Accounts Hosted software © 2014, Intuit Inc. All rights reserved.

156