Amazon ECR - User Guide · Amazon ECR User Guide Components of Amazon ECR What Is Amazon Elastic...
69
Amazon ECR User Guide API Version 2015-09-21
Transcript of Amazon ECR - User Guide · Amazon ECR User Guide Components of Amazon ECR What Is Amazon Elastic...
Amazon ECRUser Guide
API Version 2015-09-21
Amazon ECR User Guide
Amazon ECR: User GuideCopyright © 2018 Amazon Web Services, Inc. and/or its affiliates. All rights reserved.
Amazon's trademarks and trade dress may not be used in connection with any product or service that is not Amazon's, in any mannerthat is likely to cause confusion among customers, or in any manner that disparages or discredits Amazon. All other trademarks notowned by Amazon are the property of their respective owners, who may or may not be affiliated with, connected to, or sponsored byAmazon.
Amazon ECR User Guide
Table of ContentsWhat Is Amazon Elastic Container Registry? ... . . . . . . . . . . . . . . . . . . . . . . . . . . . . . . . . . . . . . . . . . . . . . . . . . . . . . . . . . . . . . . . . . . . . . . . . . . . . . . . . . . . . . . . 1
Components of Amazon ECR .... . . . . . . . . . . . . . . . . . . . . . . . . . . . . . . . . . . . . . . . . . . . . . . . . . . . . . . . . . . . . . . . . . . . . . . . . . . . . . . . . . . . . . . . . . . . . . . . . . . . 1How to Get Started with Amazon ECR .... . . . . . . . . . . . . . . . . . . . . . . . . . . . . . . . . . . . . . . . . . . . . . . . . . . . . . . . . . . . . . . . . . . . . . . . . . . . . . . . . . . . . . . 1
Setting Up .... . . . . . . . . . . . . . . . . . . . . . . . . . . . . . . . . . . . . . . . . . . . . . . . . . . . . . . . . . . . . . . . . . . . . . . . . . . . . . . . . . . . . . . . . . . . . . . . . . . . . . . . . . . . . . . . . . . . . . . . . . . . . . . . . . . . . 2Sign Up for AWS .... . . . . . . . . . . . . . . . . . . . . . . . . . . . . . . . . . . . . . . . . . . . . . . . . . . . . . . . . . . . . . . . . . . . . . . . . . . . . . . . . . . . . . . . . . . . . . . . . . . . . . . . . . . . . . . . . . . . . 2Create an IAM User .... . . . . . . . . . . . . . . . . . . . . . . . . . . . . . . . . . . . . . . . . . . . . . . . . . . . . . . . . . . . . . . . . . . . . . . . . . . . . . . . . . . . . . . . . . . . . . . . . . . . . . . . . . . . . . . . . 2Install the AWS CLI ... . . . . . . . . . . . . . . . . . . . . . . . . . . . . . . . . . . . . . . . . . . . . . . . . . . . . . . . . . . . . . . . . . . . . . . . . . . . . . . . . . . . . . . . . . . . . . . . . . . . . . . . . . . . . . . . . . 4Install Docker .... . . . . . . . . . . . . . . . . . . . . . . . . . . . . . . . . . . . . . . . . . . . . . . . . . . . . . . . . . . . . . . . . . . . . . . . . . . . . . . . . . . . . . . . . . . . . . . . . . . . . . . . . . . . . . . . . . . . . . . . . 4
Docker Basics for Amazon ECR .... . . . . . . . . . . . . . . . . . . . . . . . . . . . . . . . . . . . . . . . . . . . . . . . . . . . . . . . . . . . . . . . . . . . . . . . . . . . . . . . . . . . . . . . . . . . . . . . . . . . . . . . . . 5Installing Docker .... . . . . . . . . . . . . . . . . . . . . . . . . . . . . . . . . . . . . . . . . . . . . . . . . . . . . . . . . . . . . . . . . . . . . . . . . . . . . . . . . . . . . . . . . . . . . . . . . . . . . . . . . . . . . . . . . . . . . 5Create a Docker Image .... . . . . . . . . . . . . . . . . . . . . . . . . . . . . . . . . . . . . . . . . . . . . . . . . . . . . . . . . . . . . . . . . . . . . . . . . . . . . . . . . . . . . . . . . . . . . . . . . . . . . . . . . . . . 6(Optional) Push your image to Amazon Elastic Container Registry .... . . . . . . . . . . . . . . . . . . . . . . . . . . . . . . . . . . . . . . . . . . . . . . . . 7Next Steps .... . . . . . . . . . . . . . . . . . . . . . . . . . . . . . . . . . . . . . . . . . . . . . . . . . . . . . . . . . . . . . . . . . . . . . . . . . . . . . . . . . . . . . . . . . . . . . . . . . . . . . . . . . . . . . . . . . . . . . . . . . . . . 8
Getting Started .... . . . . . . . . . . . . . . . . . . . . . . . . . . . . . . . . . . . . . . . . . . . . . . . . . . . . . . . . . . . . . . . . . . . . . . . . . . . . . . . . . . . . . . . . . . . . . . . . . . . . . . . . . . . . . . . . . . . . . . . . . . . . 10Registries ... . . . . . . . . . . . . . . . . . . . . . . . . . . . . . . . . . . . . . . . . . . . . . . . . . . . . . . . . . . . . . . . . . . . . . . . . . . . . . . . . . . . . . . . . . . . . . . . . . . . . . . . . . . . . . . . . . . . . . . . . . . . . . . . . . . . . . . 12
Registry Concepts .... . . . . . . . . . . . . . . . . . . . . . . . . . . . . . . . . . . . . . . . . . . . . . . . . . . . . . . . . . . . . . . . . . . . . . . . . . . . . . . . . . . . . . . . . . . . . . . . . . . . . . . . . . . . . . . . . . 12Registry Authentication .... . . . . . . . . . . . . . . . . . . . . . . . . . . . . . . . . . . . . . . . . . . . . . . . . . . . . . . . . . . . . . . . . . . . . . . . . . . . . . . . . . . . . . . . . . . . . . . . . . . . . . . . . . 12HTTP API Authentication .... . . . . . . . . . . . . . . . . . . . . . . . . . . . . . . . . . . . . . . . . . . . . . . . . . . . . . . . . . . . . . . . . . . . . . . . . . . . . . . . . . . . . . . . . . . . . . . . . . . . . . . . 13
Repositories ... . . . . . . . . . . . . . . . . . . . . . . . . . . . . . . . . . . . . . . . . . . . . . . . . . . . . . . . . . . . . . . . . . . . . . . . . . . . . . . . . . . . . . . . . . . . . . . . . . . . . . . . . . . . . . . . . . . . . . . . . . . . . . . . . . . 15Repository Concepts .... . . . . . . . . . . . . . . . . . . . . . . . . . . . . . . . . . . . . . . . . . . . . . . . . . . . . . . . . . . . . . . . . . . . . . . . . . . . . . . . . . . . . . . . . . . . . . . . . . . . . . . . . . . . . . 15Creating a Repository .... . . . . . . . . . . . . . . . . . . . . . . . . . . . . . . . . . . . . . . . . . . . . . . . . . . . . . . . . . . . . . . . . . . . . . . . . . . . . . . . . . . . . . . . . . . . . . . . . . . . . . . . . . . . 15Viewing Repository Information .... . . . . . . . . . . . . . . . . . . . . . . . . . . . . . . . . . . . . . . . . . . . . . . . . . . . . . . . . . . . . . . . . . . . . . . . . . . . . . . . . . . . . . . . . . . . . . 16Deleting a Repository .... . . . . . . . . . . . . . . . . . . . . . . . . . . . . . . . . . . . . . . . . . . . . . . . . . . . . . . . . . . . . . . . . . . . . . . . . . . . . . . . . . . . . . . . . . . . . . . . . . . . . . . . . . . . 17Repository Policies ... . . . . . . . . . . . . . . . . . . . . . . . . . . . . . . . . . . . . . . . . . . . . . . . . . . . . . . . . . . . . . . . . . . . . . . . . . . . . . . . . . . . . . . . . . . . . . . . . . . . . . . . . . . . . . . . . 18
Setting a Repository Policy Statement .... . . . . . . . . . . . . . . . . . . . . . . . . . . . . . . . . . . . . . . . . . . . . . . . . . . . . . . . . . . . . . . . . . . . . . . . . . . . . 18Deleting a Repository Policy Statement .... . . . . . . . . . . . . . . . . . . . . . . . . . . . . . . . . . . . . . . . . . . . . . . . . . . . . . . . . . . . . . . . . . . . . . . . . . . 19Repository Policy Examples .... . . . . . . . . . . . . . . . . . . . . . . . . . . . . . . . . . . . . . . . . . . . . . . . . . . . . . . . . . . . . . . . . . . . . . . . . . . . . . . . . . . . . . . . . . . . 19
Images .... . . . . . . . . . . . . . . . . . . . . . . . . . . . . . . . . . . . . . . . . . . . . . . . . . . . . . . . . . . . . . . . . . . . . . . . . . . . . . . . . . . . . . . . . . . . . . . . . . . . . . . . . . . . . . . . . . . . . . . . . . . . . . . . . . . . . . . . . 23Pushing an Image .... . . . . . . . . . . . . . . . . . . . . . . . . . . . . . . . . . . . . . . . . . . . . . . . . . . . . . . . . . . . . . . . . . . . . . . . . . . . . . . . . . . . . . . . . . . . . . . . . . . . . . . . . . . . . . . . . 23Retagging an Image with the AWS CLI ... . . . . . . . . . . . . . . . . . . . . . . . . . . . . . . . . . . . . . . . . . . . . . . . . . . . . . . . . . . . . . . . . . . . . . . . . . . . . . . . . . . . . . 24Retagging an Image with the AWS Tools for Windows PowerShell ... . . . . . . . . . . . . . . . . . . . . . . . . . . . . . . . . . . . . . . . . . . . . . . . 25Pulling an Image .... . . . . . . . . . . . . . . . . . . . . . . . . . . . . . . . . . . . . . . . . . . . . . . . . . . . . . . . . . . . . . . . . . . . . . . . . . . . . . . . . . . . . . . . . . . . . . . . . . . . . . . . . . . . . . . . . . . 26Container Image Manifest Formats .... . . . . . . . . . . . . . . . . . . . . . . . . . . . . . . . . . . . . . . . . . . . . . . . . . . . . . . . . . . . . . . . . . . . . . . . . . . . . . . . . . . . . . . . . . 26
Amazon ECR Image Manifest Conversion .... . . . . . . . . . . . . . . . . . . . . . . . . . . . . . . . . . . . . . . . . . . . . . . . . . . . . . . . . . . . . . . . . . . . . . . . . . 27Using Amazon ECR Images with Amazon ECS .... . . . . . . . . . . . . . . . . . . . . . . . . . . . . . . . . . . . . . . . . . . . . . . . . . . . . . . . . . . . . . . . . . . . . . . . . . . 27Deleting an Image .... . . . . . . . . . . . . . . . . . . . . . . . . . . . . . . . . . . . . . . . . . . . . . . . . . . . . . . . . . . . . . . . . . . . . . . . . . . . . . . . . . . . . . . . . . . . . . . . . . . . . . . . . . . . . . . . . 28Amazon Linux Container Image .... . . . . . . . . . . . . . . . . . . . . . . . . . . . . . . . . . . . . . . . . . . . . . . . . . . . . . . . . . . . . . . . . . . . . . . . . . . . . . . . . . . . . . . . . . . . . . . 29Lifecycle Policies ... . . . . . . . . . . . . . . . . . . . . . . . . . . . . . . . . . . . . . . . . . . . . . . . . . . . . . . . . . . . . . . . . . . . . . . . . . . . . . . . . . . . . . . . . . . . . . . . . . . . . . . . . . . . . . . . . . . . 30
Lifecycle Policy Template .... . . . . . . . . . . . . . . . . . . . . . . . . . . . . . . . . . . . . . . . . . . . . . . . . . . . . . . . . . . . . . . . . . . . . . . . . . . . . . . . . . . . . . . . . . . . . . . 31Lifecycle Policy Parameters ... . . . . . . . . . . . . . . . . . . . . . . . . . . . . . . . . . . . . . . . . . . . . . . . . . . . . . . . . . . . . . . . . . . . . . . . . . . . . . . . . . . . . . . . . . . . . . 31Lifecycle Policy Evaluation Rules .... . . . . . . . . . . . . . . . . . . . . . . . . . . . . . . . . . . . . . . . . . . . . . . . . . . . . . . . . . . . . . . . . . . . . . . . . . . . . . . . . . . . . 33Creating a Lifecycle Policy Preview .... . . . . . . . . . . . . . . . . . . . . . . . . . . . . . . . . . . . . . . . . . . . . . . . . . . . . . . . . . . . . . . . . . . . . . . . . . . . . . . . . . 33Creating a Lifecycle Policy .... . . . . . . . . . . . . . . . . . . . . . . . . . . . . . . . . . . . . . . . . . . . . . . . . . . . . . . . . . . . . . . . . . . . . . . . . . . . . . . . . . . . . . . . . . . . . . 34Examples of Lifecycle Policies ... . . . . . . . . . . . . . . . . . . . . . . . . . . . . . . . . . . . . . . . . . . . . . . . . . . . . . . . . . . . . . . . . . . . . . . . . . . . . . . . . . . . . . . . . . 35
IAM Policies and Roles .... . . . . . . . . . . . . . . . . . . . . . . . . . . . . . . . . . . . . . . . . . . . . . . . . . . . . . . . . . . . . . . . . . . . . . . . . . . . . . . . . . . . . . . . . . . . . . . . . . . . . . . . . . . . . . . . . . . 42Policy Structure .... . . . . . . . . . . . . . . . . . . . . . . . . . . . . . . . . . . . . . . . . . . . . . . . . . . . . . . . . . . . . . . . . . . . . . . . . . . . . . . . . . . . . . . . . . . . . . . . . . . . . . . . . . . . . . . . . . . . . 42
Policy Syntax .... . . . . . . . . . . . . . . . . . . . . . . . . . . . . . . . . . . . . . . . . . . . . . . . . . . . . . . . . . . . . . . . . . . . . . . . . . . . . . . . . . . . . . . . . . . . . . . . . . . . . . . . . . . . . . . . 42Actions for Amazon ECR .... . . . . . . . . . . . . . . . . . . . . . . . . . . . . . . . . . . . . . . . . . . . . . . . . . . . . . . . . . . . . . . . . . . . . . . . . . . . . . . . . . . . . . . . . . . . . . . . . 43Amazon Resource Names for Amazon ECR .... . . . . . . . . . . . . . . . . . . . . . . . . . . . . . . . . . . . . . . . . . . . . . . . . . . . . . . . . . . . . . . . . . . . . . . . 43Condition Keys for Amazon ECR .... . . . . . . . . . . . . . . . . . . . . . . . . . . . . . . . . . . . . . . . . . . . . . . . . . . . . . . . . . . . . . . . . . . . . . . . . . . . . . . . . . . . . . 45Testing Permissions .... . . . . . . . . . . . . . . . . . . . . . . . . . . . . . . . . . . . . . . . . . . . . . . . . . . . . . . . . . . . . . . . . . . . . . . . . . . . . . . . . . . . . . . . . . . . . . . . . . . . . . . 45
Amazon ECR Managed Policies ... . . . . . . . . . . . . . . . . . . . . . . . . . . . . . . . . . . . . . . . . . . . . . . . . . . . . . . . . . . . . . . . . . . . . . . . . . . . . . . . . . . . . . . . . . . . . . . . . 46AmazonEC2ContainerRegistryFullAccess .... . . . . . . . . . . . . . . . . . . . . . . . . . . . . . . . . . . . . . . . . . . . . . . . . . . . . . . . . . . . . . . . . . . . . . . . . . . 46AmazonEC2ContainerRegistryPowerUser .... . . . . . . . . . . . . . . . . . . . . . . . . . . . . . . . . . . . . . . . . . . . . . . . . . . . . . . . . . . . . . . . . . . . . . . . . . 46
API Version 2015-09-21iii
Amazon ECR User Guide
AmazonEC2ContainerRegistryReadOnly .... . . . . . . . . . . . . . . . . . . . . . . . . . . . . . . . . . . . . . . . . . . . . . . . . . . . . . . . . . . . . . . . . . . . . . . . . . . . 47Supported Resource-Level Permissions .... . . . . . . . . . . . . . . . . . . . . . . . . . . . . . . . . . . . . . . . . . . . . . . . . . . . . . . . . . . . . . . . . . . . . . . . . . . . . . . . . . . . . 47Creating IAM Policies ... . . . . . . . . . . . . . . . . . . . . . . . . . . . . . . . . . . . . . . . . . . . . . . . . . . . . . . . . . . . . . . . . . . . . . . . . . . . . . . . . . . . . . . . . . . . . . . . . . . . . . . . . . . . . . 49
Using the AWS CLI ... . . . . . . . . . . . . . . . . . . . . . . . . . . . . . . . . . . . . . . . . . . . . . . . . . . . . . . . . . . . . . . . . . . . . . . . . . . . . . . . . . . . . . . . . . . . . . . . . . . . . . . . . . . . . . . . . . . . . . . . . 50Step 1: Authenticate Docker to your Default Registry .... . . . . . . . . . . . . . . . . . . . . . . . . . . . . . . . . . . . . . . . . . . . . . . . . . . . . . . . . . . . . . . . . 50Step 2: Get a Docker Image .... . . . . . . . . . . . . . . . . . . . . . . . . . . . . . . . . . . . . . . . . . . . . . . . . . . . . . . . . . . . . . . . . . . . . . . . . . . . . . . . . . . . . . . . . . . . . . . . . . . . 51Step 3: Create a Repository .... . . . . . . . . . . . . . . . . . . . . . . . . . . . . . . . . . . . . . . . . . . . . . . . . . . . . . . . . . . . . . . . . . . . . . . . . . . . . . . . . . . . . . . . . . . . . . . . . . . . 51Step 4: Push an Image to Amazon ECR .... . . . . . . . . . . . . . . . . . . . . . . . . . . . . . . . . . . . . . . . . . . . . . . . . . . . . . . . . . . . . . . . . . . . . . . . . . . . . . . . . . . . 52Step 5: Pull an Image from Amazon ECR .... . . . . . . . . . . . . . . . . . . . . . . . . . . . . . . . . . . . . . . . . . . . . . . . . . . . . . . . . . . . . . . . . . . . . . . . . . . . . . . . . . 52Step 6: Delete an Image .... . . . . . . . . . . . . . . . . . . . . . . . . . . . . . . . . . . . . . . . . . . . . . . . . . . . . . . . . . . . . . . . . . . . . . . . . . . . . . . . . . . . . . . . . . . . . . . . . . . . . . . . 53Step 7: Delete a Repository .... . . . . . . . . . . . . . . . . . . . . . . . . . . . . . . . . . . . . . . . . . . . . . . . . . . . . . . . . . . . . . . . . . . . . . . . . . . . . . . . . . . . . . . . . . . . . . . . . . . . 53
Service Limits ... . . . . . . . . . . . . . . . . . . . . . . . . . . . . . . . . . . . . . . . . . . . . . . . . . . . . . . . . . . . . . . . . . . . . . . . . . . . . . . . . . . . . . . . . . . . . . . . . . . . . . . . . . . . . . . . . . . . . . . . . . . . . . . . 54Logging Amazon ECR API Calls with AWS CloudTrail .. . . . . . . . . . . . . . . . . . . . . . . . . . . . . . . . . . . . . . . . . . . . . . . . . . . . . . . . . . . . . . . . . . . . . . . . . . . . 55
Amazon ECR Information in CloudTrail .. . . . . . . . . . . . . . . . . . . . . . . . . . . . . . . . . . . . . . . . . . . . . . . . . . . . . . . . . . . . . . . . . . . . . . . . . . . . . . . . . . . . . . . 55Understanding Amazon ECR Log File Entries ... . . . . . . . . . . . . . . . . . . . . . . . . . . . . . . . . . . . . . . . . . . . . . . . . . . . . . . . . . . . . . . . . . . . . . . . . . . . . . 56
Troubleshooting .... . . . . . . . . . . . . . . . . . . . . . . . . . . . . . . . . . . . . . . . . . . . . . . . . . . . . . . . . . . . . . . . . . . . . . . . . . . . . . . . . . . . . . . . . . . . . . . . . . . . . . . . . . . . . . . . . . . . . . . . . . . . 58Enabling Docker Debug Output .... . . . . . . . . . . . . . . . . . . . . . . . . . . . . . . . . . . . . . . . . . . . . . . . . . . . . . . . . . . . . . . . . . . . . . . . . . . . . . . . . . . . . . . . . . . . . . . 58Enabling AWS CloudTrail .. . . . . . . . . . . . . . . . . . . . . . . . . . . . . . . . . . . . . . . . . . . . . . . . . . . . . . . . . . . . . . . . . . . . . . . . . . . . . . . . . . . . . . . . . . . . . . . . . . . . . . . . . . 58Optimizing Performance for Amazon ECR .... . . . . . . . . . . . . . . . . . . . . . . . . . . . . . . . . . . . . . . . . . . . . . . . . . . . . . . . . . . . . . . . . . . . . . . . . . . . . . . . . 58Troubleshooting Errors with Docker Commands When Using Amazon ECR .... . . . . . . . . . . . . . . . . . . . . . . . . . . . . . . . . . . . . 59
Error: "Filesystem Verification Failed" or "404: Image Not Found" When Pulling an Image Froman Amazon ECR Repository .... . . . . . . . . . . . . . . . . . . . . . . . . . . . . . . . . . . . . . . . . . . . . . . . . . . . . . . . . . . . . . . . . . . . . . . . . . . . . . . . . . . . . . . . . . . . . 60Error: "Filesystem Layer Verification Failed" When Pulling Images from Amazon ECR .... . . . . . . . . . . . . . . 60HTTP 403 Errors or "no basic auth credentials" Error When Pushing to Repository .... . . . . . . . . . . . . . . . . . 61
Troubleshooting Amazon ECR Error Messages .... . . . . . . . . . . . . . . . . . . . . . . . . . . . . . . . . . . . . . . . . . . . . . . . . . . . . . . . . . . . . . . . . . . . . . . . . . . 62Error: "Error Response from Daemon: Invalid Registry Endpoint" When Running aws ecr get-login .... . . . . . . . . . . . . . . . . . . . . . . . . . . . . . . . . . . . . . . . . . . . . . . . . . . . . . . . . . . . . . . . . . . . . . . . . . . . . . . . . . . . . . . . . . . . . . . . . . . . . . . . . . . . . . . . . . . . . . . . . . . . 62HTTP 429: Too Many Requests or ThrottleException .... . . . . . . . . . . . . . . . . . . . . . . . . . . . . . . . . . . . . . . . . . . . . . . . . . . . . . . . . . 62HTTP 403: "User [arn] is not authorized to perform [operation]" ... . . . . . . . . . . . . . . . . . . . . . . . . . . . . . . . . . . . . . . . . . . 63HTTP 404: "Repository Does Not Exist" Error ... . . . . . . . . . . . . . . . . . . . . . . . . . . . . . . . . . . . . . . . . . . . . . . . . . . . . . . . . . . . . . . . . . . . . 63
Document History .... . . . . . . . . . . . . . . . . . . . . . . . . . . . . . . . . . . . . . . . . . . . . . . . . . . . . . . . . . . . . . . . . . . . . . . . . . . . . . . . . . . . . . . . . . . . . . . . . . . . . . . . . . . . . . . . . . . . . . . . . 64AWS Glossary .... . . . . . . . . . . . . . . . . . . . . . . . . . . . . . . . . . . . . . . . . . . . . . . . . . . . . . . . . . . . . . . . . . . . . . . . . . . . . . . . . . . . . . . . . . . . . . . . . . . . . . . . . . . . . . . . . . . . . . . . . . . . . . . 65
API Version 2015-09-21iv
Amazon ECR User GuideComponents of Amazon ECR
What Is Amazon Elastic ContainerRegistry?
Amazon Elastic Container Registry (Amazon ECR) is a managed AWS Docker registry service that issecure, scalable, and reliable. Amazon ECR supports private Docker repositories with resource-basedpermissions using AWS IAM so that specific users or Amazon EC2 instances can access repositories andimages. Developers can use the Docker CLI to push, pull, and manage images.
Components of Amazon ECRAmazon ECR contains the following components:
Registry
An Amazon ECR registry is provided to each AWS account; you can create image repositories in yourregistry and store images in them. For more information, see Amazon ECR Registries (p. 12).
Authorization token
Your Docker client needs to authenticate to Amazon ECR registries as an AWS user before it can pushand pull images. The AWS CLI get-login command provides you with authentication credentials topass to Docker. For more information, see Registry Authentication (p. 12).
Repository
An Amazon ECR image repository contains your Docker images. For more information, see AmazonECR Repositories (p. 15).
Repository policy
You can control access to your repositories and the images within them with repository policies. Formore information, see Amazon ECR Repository Policies (p. 18).
Image
You can push and pull Docker images to your repositories. You can use these images locally on yourdevelopment system, or you can use them in Amazon ECS task definitions. For more information, seeUsing Amazon ECR Images with Amazon ECS (p. 27).
How to Get Started with Amazon ECRTo use Amazon ECR, you need to be set up to install the AWS Command Line Interface and Docker.For more information, see Setting Up with Amazon ECR (p. 2) and Docker Basics for AmazonECR (p. 5).
After you are set up, you are ready to complete the Getting Started with Amazon ECR (p. 10) tutorial.
API Version 2015-09-211
Amazon ECR User GuideSign Up for AWS
Setting Up with Amazon ECRIf you've already signed up for Amazon Web Services (AWS) and have been using Amazon ElasticContainer Service (Amazon ECS), you are close to being able to use Amazon ECR. The set up process forthe two services is very similar, as Amazon ECR is an extension to Amazon ECS. To use the AWS CLI withAmazon ECR , you must use a version of the AWS CLI that supports the latest Amazon ECR features. Ifyou do not see support for an Amazon ECR feature in the AWS CLI, you should upgrade to the latestversion. For more information, see http://aws.amazon.com/cli/.
Complete the following tasks to get set up for Amazon ECR. If you have already completed any of thesesteps, you may skip them and move on to installing the custom AWS CLI.
1. Sign Up for AWS (p. 2)
2. Create an IAM User (p. 2)
3. Install the AWS CLI (p. 4)
Sign Up for AWSWhen you sign up for AWS, your AWS account is automatically signed up for all services, includingAmazon ECR. You are charged only for the services that you use.
If you have an AWS account already, skip to the next task. If you don't have an AWS account, use thefollowing procedure to create one.
To create an AWS account
1. Open https://aws.amazon.com/, and then choose Create an AWS Account.
NoteThis might be unavailable in your browser if you previously signed into the AWSManagement Console. In that case, choose Sign in to a different account, and then chooseCreate a new AWS account.
2. Follow the online instructions.
Part of the sign-up procedure involves receiving a phone call and entering a PIN using the phonekeypad.
Note your AWS account number, because you'll need it for the next task.
Create an IAM UserServices in AWS, such as Amazon ECR, require that you provide credentials when you access them, sothat the service can determine whether you have permission to access its resources. The console requiresyour password. You can create access keys for your AWS account to access the command line interfaceor API. However, we don't recommend that you access AWS using the credentials for your AWS account;we recommend that you use AWS Identity and Access Management (IAM) instead. Create an IAM user,
API Version 2015-09-212
Amazon ECR User GuideCreate an IAM User
and then add the user to an IAM group with administrative permissions or grant this user administrativepermissions. You can then access AWS using a special URL and the credentials for the IAM user.
If you signed up for AWS but have not created an IAM user for yourself, you can create one using the IAMconsole.
To create an IAM user for yourself and add the user to an Administrators group
1. Use your AWS account email address and password to sign in as the AWS account root user to theIAM console at https://console.aws.amazon.com/iam/.
NoteWe strongly recommend that you adhere to the best practice of using the AdministratorIAM user below and securely lock away the root user credentials. Sign in as the root useronly to perform a few account and service management tasks.
2. In the navigation pane of the console, choose Users, and then choose Add user.3. For User name, type Administrator.4. Select the check box next to AWS Management Console access, select Custom password, and then
type the new user's password in the text box. You can optionally select Require password reset toforce the user to create a new password the next time the user signs in.
5. Choose Next: Permissions.6. On the Set permissions page, choose Add user to group.7. Choose Create group.8. In the Create group dialog box, for Group name type Administrators.9. For Filter policies, select the check box for AWS managed - job function.10. In the policy list, select the check box for AdministratorAccess. Then choose Create group.11. Back in the list of groups, select the check box for your new group. Choose Refresh if necessary to
see the group in the list.12. Choose Next: Review to see the list of group memberships to be added to the new user. When you
are ready to proceed, choose Create user.
You can use this same process to create more groups and users, and to give your users access to yourAWS account resources. To learn about using policies to restrict users' permissions to specific AWSresources, go to Access Management and Example Policies.
To sign in as this new IAM user, sign out of the AWS console, then use the following URL, whereyour_aws_account_id is your AWS account number without the hyphens (for example, if your AWSaccount number is 1234-5678-9012, your AWS account ID is 123456789012):
https://your_aws_account_id.signin.aws.amazon.com/console/
Enter the IAM user name and password that you just created. When you're signed in, the navigation bardisplays "your_user_name @ your_aws_account_id".
If you don't want the URL for your sign-in page to contain your AWS account ID, you can create anaccount alias. From the IAM dashboard, choose Create Account Alias and enter an alias, such as yourcompany name. To sign in after you create an account alias, use the following URL:
https://your_account_alias.signin.aws.amazon.com/console/
To verify the sign-in link for IAM users for your account, open the IAM console and check under IAMusers sign-in link on the dashboard.
For more information about IAM, see the AWS Identity and Access Management User Guide.
API Version 2015-09-213
Amazon ECR User GuideInstall the AWS CLI
Install the AWS CLIYou can use the AWS command line tools to issue commands at your system's command line to performAmazon ECS and AWS tasks; this can be faster and more convenient than using the console. Thecommand line tools are also useful if you want to build scripts that perform AWS tasks.
To use the AWS CLI with Amazon ECR, install the latest AWS CLI version (Amazon ECR functionality isavailable in the AWS CLI starting with version 1.9.15). You can check your AWS CLI version with the aws--version command. For information about installing the AWS CLI or upgrading it to the latest version,see Installing the AWS Command Line Interface in the AWS Command Line Interface User Guide.
Install DockerTo use the Docker CLI with Amazon ECR, you must first install Docker on your system. For informationabout installing Docker and getting familiar with the tools, see Docker Basics for Amazon ECR (p. 5).
API Version 2015-09-214
Amazon ECR User GuideInstalling Docker
Docker Basics for Amazon ECRDocker is a technology that allows you to build, run, test, and deploy distributed applications that arebased on Linux containers. Amazon ECR is a managed AWS Docker registry service. Customers can usethe familiar Docker CLI to push, pull, and manage images. For Amazon ECR product details, featuredcustomer case studies, and FAQs, see the Amazon Elastic Container Registry product detail pages.
The documentation in this guide assumes that readers possess a basic understanding of what Docker isand how it works. For more information about Docker, see What is Docker? and the Docker overview.
Topics• Installing Docker (p. 5)• Create a Docker Image (p. 6)• (Optional) Push your image to Amazon Elastic Container Registry (p. 7)• Next Steps (p. 8)
Installing DockerNoteIf you already have Docker installed, skip to Create a Docker Image (p. 6).
Docker is available on many different operating systems, including most modern Linux distributions, likeUbuntu, and even Mac OSX and Windows. For more information about how to install Docker on yourparticular operating system, go to the Docker installation guide.
You don't even need a local development system to use Docker. If you are using Amazon EC2 already, youcan launch an Amazon Linux instance and install Docker to get started.
To install Docker on an Amazon Linux instance
1. Launch an instance with the Amazon Linux AMI. For more information, see Launching an Instance inthe Amazon EC2 User Guide for Linux Instances.
2. Connect to your instance. For more information, see Connect to Your Linux Instance in the AmazonEC2 User Guide for Linux Instances.
3. Update the installed packages and package cache on your instance.
sudo yum update -y
4. Install the most recent Docker Community Edition package.
sudo yum install -y docker
5. Start the Docker service.
sudo service docker start
6. Add the ec2-user to the docker group so you can execute Docker commands without using sudo.
sudo usermod -a -G docker ec2-user
7. Log out and log back in again to pick up the new docker group permissions. You can accomplishthis by closing your current SSH terminal window and reconnecting to your instance in a new one.Your new SSH session will have the appropriate docker group permissions.
API Version 2015-09-215
Amazon ECR User GuideCreate a Docker Image
8. Verify that the ec2-user can run Docker commands without sudo.
docker info
NoteIn some cases, you may need to reboot your instance to provide permissions for the ec2-user to access the Docker daemon. Try rebooting your instance if you see the followingerror:
Cannot connect to the Docker daemon. Is the docker daemon running on this host?
Create a Docker ImageIn this section, you create a Docker image of a simple web application, and test it on your local systemor EC2 instance, and then push the image to a container registry (such as Amazon ECR or Docker Hub) soyou can use it in an ECS task definition.
To create a Docker image of a simple web application
1. Create a file called Dockerfile. A Dockerfile is a manifest that describes the base image to usefor your Docker image and what you want installed and running on it. For more information aboutDockerfiles, go to the Dockerfile Reference.
touch Dockerfile
2. Edit the Dockerfile you just created and add the following content.
FROM ubuntu:12.04
# Install dependenciesRUN apt-get update -yRUN apt-get install -y apache2
# Install apache and write hello world messageRUN echo "Hello World!" > /var/www/index.html
# Configure apacheRUN a2enmod rewriteRUN chown -R www-data:www-data /var/wwwENV APACHE_RUN_USER www-dataENV APACHE_RUN_GROUP www-dataENV APACHE_LOG_DIR /var/log/apache2
EXPOSE 80
CMD ["/usr/sbin/apache2", "-D", "FOREGROUND"]
This Dockerfile uses the Ubuntu 12.04 image. The RUN instructions update the package caches,install some software packages for the web server, and then write the "Hello World!" content to theweb server's document root. The EXPOSE instruction exposes port 80 on the container, and the CMDinstruction starts the web server.
3. Build the Docker image from your Dockerfile.
NoteSome versions of Docker may require the full path to your Dockerfile in the followingcommand, instead of the relative path shown below.
API Version 2015-09-216
Amazon ECR User Guide(Optional) Push your image to
Amazon Elastic Container Registry
docker build -t hello-world .
4. Run docker images to verify that the image was created correctly.
docker images --filter reference=hello-world
Output:
REPOSITORY TAG IMAGE ID CREATED SIZEhello-world latest e9ffedc8c286 4 minutes ago 258MB
5. Run the newly built image. The -p 80:80 option maps the exposed port 80 on the container toport 80 on the host system. For more information about docker run, go to the Docker run reference.
docker run -p 80:80 hello-world
NoteOutput from the Apache web server is displayed in the terminal window. You can ignorethe "Could not reliably determine the server's fully qualified domainname" message.
6. Open a browser and point to the server that is running Docker and hosting your container.
• If you are using an EC2 instance, this is the Public DNS value for the server, which is the sameaddress you use to connect to the instance with SSH. Make sure that the security group for yourinstance allows inbound traffic on port 80.
• If you are running Docker locally, point your browser to http://localhost/.• If you are using docker-machine on a Windows or Mac computer, find the IP address of the
VirtualBox VM that is hosting Docker with the docker-machine ip command, substitutingmachine-name with the name of the docker machine you are using.
docker-machine ip machine-name
You should see a web page with your "Hello World!" statement.7. Stop the Docker container by typing Ctrl + c.
(Optional) Push your image to Amazon ElasticContainer Registry
Amazon ECR is a managed AWS Docker registry service. Customers can use the familiar Docker CLI topush, pull, and manage images. For Amazon ECR product details, featured customer case studies, andFAQs, see the Amazon Elastic Container Registry product detail pages.
NoteThis section requires the AWS CLI. If you do not have the AWS CLI installed on your system, seeInstalling the AWS Command Line Interface in the AWS Command Line Interface User Guide.
To tag your image and push it to Amazon ECR
1. Create an Amazon ECR repository to store your hello-world image. Note the repositoryUri inthe output.
API Version 2015-09-217
Amazon ECR User GuideNext Steps
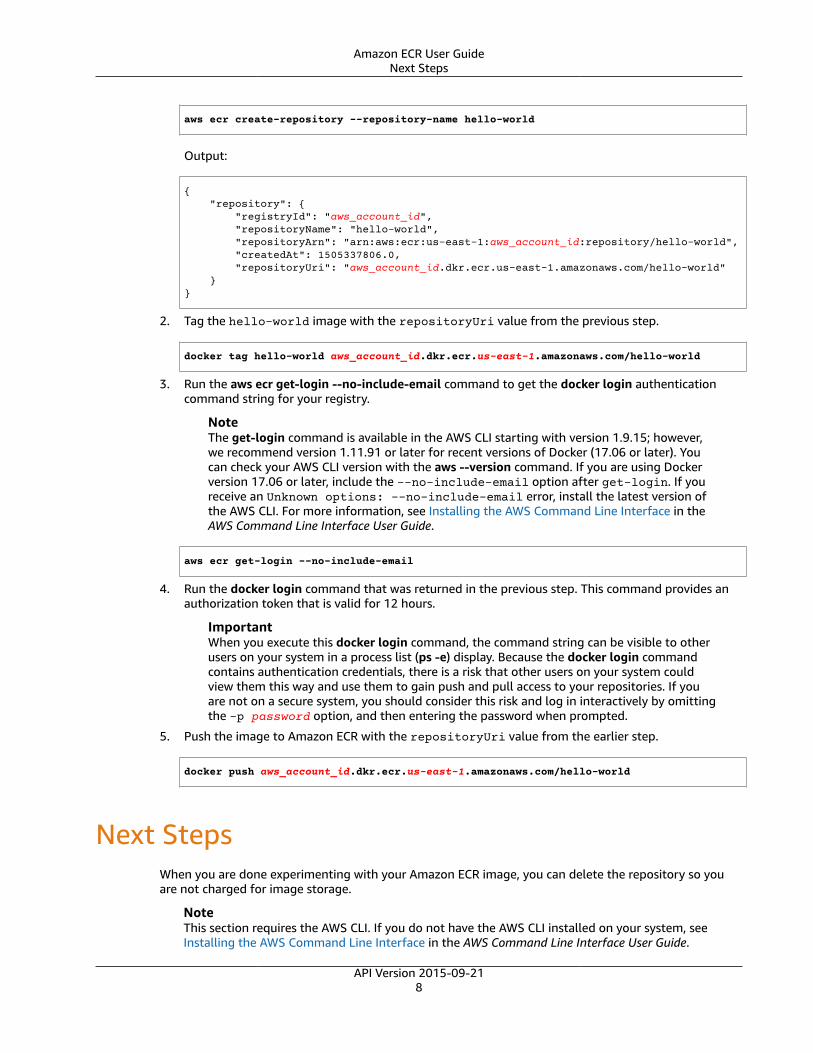
aws ecr create-repository --repository-name hello-world
Output:
{ "repository": { "registryId": "aws_account_id", "repositoryName": "hello-world", "repositoryArn": "arn:aws:ecr:us-east-1:aws_account_id:repository/hello-world", "createdAt": 1505337806.0, "repositoryUri": "aws_account_id.dkr.ecr.us-east-1.amazonaws.com/hello-world" }}
2. Tag the hello-world image with the repositoryUri value from the previous step.
docker tag hello-world aws_account_id.dkr.ecr.us-east-1.amazonaws.com/hello-world
3. Run the aws ecr get-login --no-include-email command to get the docker login authenticationcommand string for your registry.
NoteThe get-login command is available in the AWS CLI starting with version 1.9.15; however,we recommend version 1.11.91 or later for recent versions of Docker (17.06 or later). Youcan check your AWS CLI version with the aws --version command. If you are using Dockerversion 17.06 or later, include the --no-include-email option after get-login. If youreceive an Unknown options: --no-include-email error, install the latest version ofthe AWS CLI. For more information, see Installing the AWS Command Line Interface in theAWS Command Line Interface User Guide.
aws ecr get-login --no-include-email
4. Run the docker login command that was returned in the previous step. This command provides anauthorization token that is valid for 12 hours.
ImportantWhen you execute this docker login command, the command string can be visible to otherusers on your system in a process list (ps -e) display. Because the docker login commandcontains authentication credentials, there is a risk that other users on your system couldview them this way and use them to gain push and pull access to your repositories. If youare not on a secure system, you should consider this risk and log in interactively by omittingthe -p password option, and then entering the password when prompted.
5. Push the image to Amazon ECR with the repositoryUri value from the earlier step.
docker push aws_account_id.dkr.ecr.us-east-1.amazonaws.com/hello-world
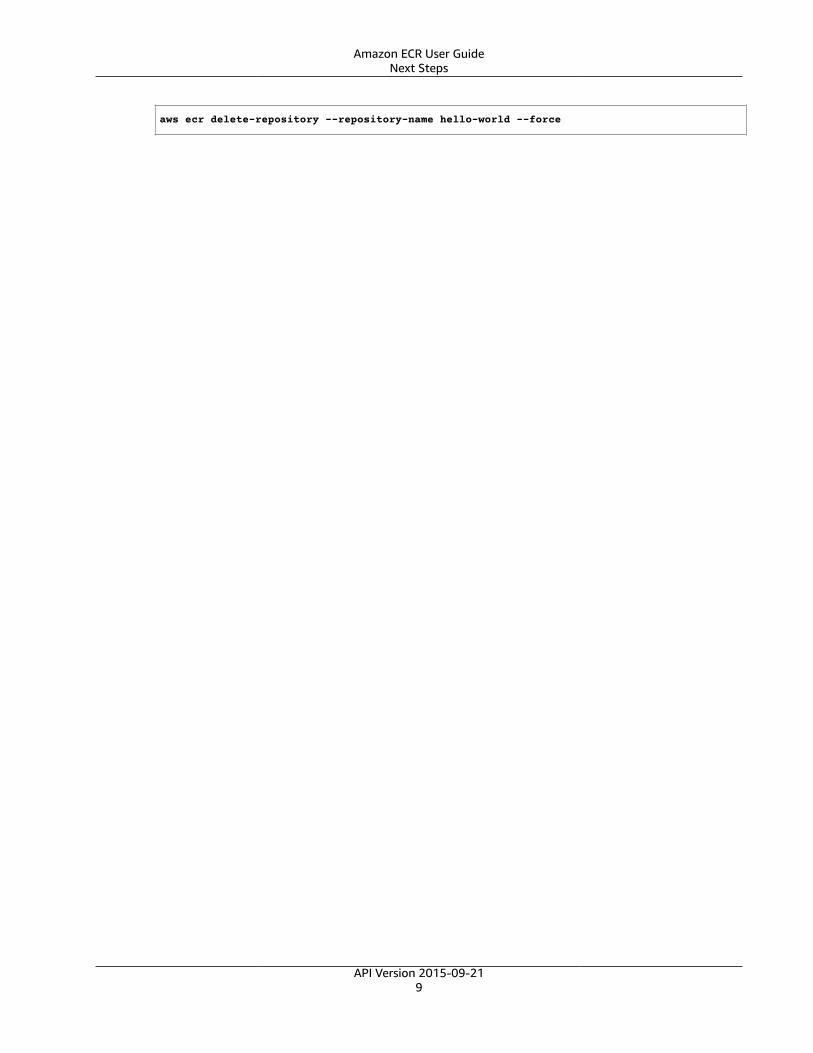
Next StepsWhen you are done experimenting with your Amazon ECR image, you can delete the repository so youare not charged for image storage.
NoteThis section requires the AWS CLI. If you do not have the AWS CLI installed on your system, seeInstalling the AWS Command Line Interface in the AWS Command Line Interface User Guide.
API Version 2015-09-218
Amazon ECR User GuideNext Steps
aws ecr delete-repository --repository-name hello-world --force
API Version 2015-09-219
Amazon ECR User Guide
Getting Started with Amazon ECRGet started with Amazon Elastic Container Registry (Amazon ECR) by creating a repository in the AmazonECS console. The Amazon ECR first run wizard guides you through the process to get started withAmazon ECR.
ImportantBefore you begin, be sure that you've completed the steps in Setting Up with Amazon ECR (p. 2).
Configure repository
A repository is where you store Docker images in Amazon ECR. Every time you push or pull an imagefrom Amazon ECR, you specify the registry and repository location to tell Docker where to push theimage to or where to pull it from.
1. Open the Amazon ECS console repositories page at https://console.aws.amazon.com/ecs/home#/repositories.
2. For Repository name, enter a unique name for your repository and choose Next step.
Build, tag, and push Docker image
In this section of the wizard, you use the Docker CLI to tag an existing local image (that you have builtfrom a Dockerfile or pulled from another registry, such as Docker Hub) and then push the tagged imageto your Amazon ECR registry.
1. Retrieve the docker login command that you can use to authenticate your Docker client to yourregistry by pasting the aws ecr get-login command from the console into a terminal window.
NoteThe get-login command is available in the AWS CLI starting with version 1.9.15; however,we recommend version 1.11.91 or later for recent versions of Docker (17.06 or later). Youcan check your AWS CLI version with the aws --version command. If you are using Dockerversion 17.06 or later, include the --no-include-email option after get-login. If youreceive an Unknown options: --no-include-email error, install the latest version ofthe AWS CLI. For more information, see Installing the AWS Command Line Interface in theAWS Command Line Interface User Guide.
2. Run the docker login command that was returned in the previous step. This command provides anauthorization token that is valid for 12 hours.
ImportantWhen you execute this docker login command, the command string can be visible to otherusers on your system in a process list (ps -e) display. Because the docker login commandcontains authentication credentials, there is a risk that other users on your system couldview them this way and use them to gain push and pull access to your repositories. If youare not on a secure system, you should consider this risk and log in interactively by omittingthe -p password option, and then entering the password when prompted.
3. (Optional) If you have a Dockerfile for the image to push, build the image and tag it for your newrepository by pasting the docker build command from the console into a terminal window. Makesure you are in the same directory as your Dockerfile.
4. Tag the image for your ECR registry and your new repository by pasting the docker tag commandfrom the console into a terminal window. The console command assumes that your image was builtfrom a Dockerfile in the previous step; if you did not build your image from a Dockerfile, replacethe first instance of repository:latest with the image ID or image name of your local image topush.
API Version 2015-09-2110
Amazon ECR User Guide
5. Push the newly tagged image to your ECR repository by pasting the docker push command into aterminal window.
6. Choose Done.
API Version 2015-09-2111
Amazon ECR User GuideRegistry Concepts
Amazon ECR RegistriesYou can use Amazon ECR registries to host your images in a highly available and scalable architecture,allowing you to deploy containers reliably for your applications. You can use your registry to manageimage repositories and Docker images. Each AWS account is provided with a single (default) Amazon ECRregistry.
Registry Concepts• The URL for your default registry ishttps://aws_account_id.dkr.ecr.region.amazonaws.com.
• By default, you have read and write access to the repositories and images you create in your defaultregistry.
• You must authenticate your Docker client to a registry so that you can use the docker push anddocker pull commands to push and pull images to and from the repositories in that registry. For moreinformation, see Registry Authentication (p. 12).
• Repositories can be controlled with both IAM user access policies and repository policies.
Registry AuthenticationYou can use the AWS Management Console, the AWS CLI, or the AWS SDKs to create and managerepositories, and to perform some actions on images, such as listing or deleting them. These clients usestandard AWS authentication methods. Although technically you can use the Amazon ECR API to pushand pull images, you are much more likely to use Docker CLI (or a language-specific Docker library) forthese purposes.
Because the Docker CLI does not support the standard AWS authentication methods, you mustauthenticate your Docker client another way so that Amazon ECR knows who is requesting to push orpull an image. If you are using the Docker CLI, then use the docker login command to authenticate toan Amazon ECR registry with an authorization token that is provided by Amazon ECR and is valid for 12hours. The GetAuthorizationToken API operation provides a base64-encoded authorization token thatcontains a user name (AWS) and a password that you can decode and use in a docker login command.However, a much simpler get-login command (which retrieves the token, decodes it, and converts it to adocker login command for you) is available in the AWS CLI.
To authenticate Docker to an Amazon ECR registry with get-login
NoteThe get-login command is available in the AWS CLI starting with version 1.9.15; however, werecommend version 1.11.91 or later for recent versions of Docker (17.06 or later). You can checkyour AWS CLI version with the aws --version command.
1. Run the aws ecr get-login command. The example below is for the default registry associatedwith the account making the request. To access other account registries, use the --registry-idsaws_account_id option. For more information, see get-login in the AWS CLI Command Reference.
aws ecr get-login --no-include-email
Output:
API Version 2015-09-2112
Amazon ECR User GuideHTTP API Authentication
docker login -u AWS -p password https://aws_account_id.dkr.ecr.us-east-1.amazonaws.com
ImportantIf you receive an Unknown options: --no-include-email error, install the latestversion of the AWS CLI. For more information, see Installing the AWS Command LineInterface in the AWS Command Line Interface User Guide.
The resulting output is a docker login command that you use to authenticate your Docker client toyour Amazon ECR registry.
2. Copy and paste the docker login command into a terminal to authenticate your Docker CLI to theregistry. This command provides an authorization token that is valid for the specified registry for 12hours.
NoteIf you are using Windows PowerShell, copying and pasting long strings like this does notwork. Use the following command instead.
Invoke-Expression -Command (aws ecr get-login --no-include-email)
ImportantWhen you execute this docker login command, the command string can be visible to otherusers on your system in a process list (ps -e) display. Because the docker login commandcontains authentication credentials, there is a risk that other users on your system couldview them this way and use them to gain push and pull access to your repositories. If youare not on a secure system, you should consider this risk and log in interactively by omittingthe -p password option, and then entering the password when prompted.
HTTP API AuthenticationAmazon ECR supports the Docker Registry HTTP API. However, because Amazon ECR is a private registry,you must provide an authorization token with every HTTP request. You can add an HTTP authorizationheader using the -H option for curl and pass the authorization token provided by the get-authorization-token AWS CLI command.
To authenticate with the Amazon ECR HTTP API
1. Retrieve an authorization token with the AWS CLI and set it to an environment variable.
TOKEN=$(aws ecr get-authorization-token --output text --query authorizationData[].authorizationToken)
2. Pass the $TOKEN variable to the -H option of curl to authenticate to the API. For example, thefollowing command lists the image tags in an Amazon ECR repository. For more information, see theDocker Registry HTTP API reference documentation.
curl -i -H "Authorization: Basic $TOKEN" https://012345678910.dkr.ecr.us-east-1.amazonaws.com/v2/amazonlinux/tags/list
Output:
HTTP/1.1 200 OKContent-Type: text/plain; charset=utf-8
API Version 2015-09-2113
Amazon ECR User GuideHTTP API Authentication
Date: Thu, 04 Jan 2018 16:06:59 GMTDocker-Distribution-Api-Version: registry/2.0Content-Length: 50Connection: keep-alive
{"name":"amazonlinux","tags":["2017.09","latest"]}
API Version 2015-09-2114
Amazon ECR User GuideRepository Concepts
Amazon ECR RepositoriesAmazon ECR provides API operations to create, monitor, and delete repositories and set repositorypermissions that control who can access them. You can perform the same actions in the Repositoriessection of the Amazon ECS console. Amazon ECR also integrates with the Docker CLI allowing you topush and pull images from your development environments to your repositories.
Topics
• Repository Concepts (p. 15)
• Creating a Repository (p. 15)
• Viewing Repository Information (p. 16)
• Deleting a Repository (p. 17)
• Amazon ECR Repository Policies (p. 18)
Repository Concepts• By default, your account has read and write access to the repositories in your default registry
(aws_account_id.dkr.ecr.region.amazonaws.com). However, IAM users require permissionsto make calls to the Amazon ECR APIs and to push or pull images from your repositories. Amazon ECRprovides several managed policies to control user access at varying levels; for more information, seeAmazon ECR Managed Policies (p. 46).
• Repositories can be controlled with both IAM user access policies and repository policies. For moreinformation, see Amazon ECR Repository Policies (p. 18).
• Repository names can support namespaces, which you can use to group similar repositories. Forexample if there are several teams using the same registry, Team A could use the team-a namespacewhile Team B uses the team-b namespace. Each team could have their own image called web-app, but because they are each prefaced with the team namespace, the two images can be usedsimultaneously without interference. Team A's image would be called team-a/web-app, while TeamB's image would be called team-b/web-app.
Creating a RepositoryBefore you can push your Docker images to Amazon ECR, you need to create a repository to store themin. You can create Amazon ECR repositories with the AWS Management Console, or with the AWS CLI andAWS SDKs.
To create a repository
1. Open the Amazon ECS console at https://console.aws.amazon.com/ecs/.
2. From the navigation bar, choose the region to create your repository in.
3. In the navigation pane, choose Repositories.
4. On the Repositories page, choose Create repository.
5. For Repository name, enter a unique name for your repository and choose Next step.
API Version 2015-09-2115
Amazon ECR User GuideViewing Repository Information
6. (Optional) On the Build, tag, and push Docker image page, complete the following steps to pushan image to your new repository. If you do not want to push an image at this time, you can chooseDone to finish.
a. Retrieve the docker login command that you can use to authenticate your Docker client to yourregistry by pasting the aws ecr get-login command from the console into a terminal window.
NoteThe get-login command is available in the AWS CLI starting with version 1.9.15;however, we recommend version 1.11.91 or later for recent versions of Docker (17.06or later). You can check your AWS CLI version with the aws --version command. If youare using Docker version 17.06 or later, include the --no-include-email optionafter get-login. If you receive an Unknown options: --no-include-email error,install the latest version of the AWS CLI. For more information, see Installing the AWSCommand Line Interface in the AWS Command Line Interface User Guide.
b. Run the docker login command that was returned in the previous step. This command providesan authorization token that is valid for 12 hours.
ImportantWhen you execute this docker login command, the command string can be visible toother users on your system in a process list (ps -e) display. Because the docker logincommand contains authentication credentials, there is a risk that other users on yoursystem could view them this way and use them to gain push and pull access to yourrepositories. If you are not on a secure system, you should consider this risk and log ininteractively by omitting the -p password option, and then entering the passwordwhen prompted.
c. (Optional) If you have a Dockerfile for the image to push, build the image and tag it for yournew repository by pasting the docker build command from the console into a terminal window.Make sure you are in the same directory as your Dockerfile.
d. Tag the image for your ECR registry and your new repository by pasting the docker tagcommand from the console into a terminal window. The console command assumes that yourimage was built from a Dockerfile in the previous step; if you did not build your image from aDockerfile, replace the first instance of repository:latest with the image ID or image nameof your local image to push.
e. Push the newly tagged image to your ECR repository by pasting the docker push command intoa terminal window.
f. Choose Done.
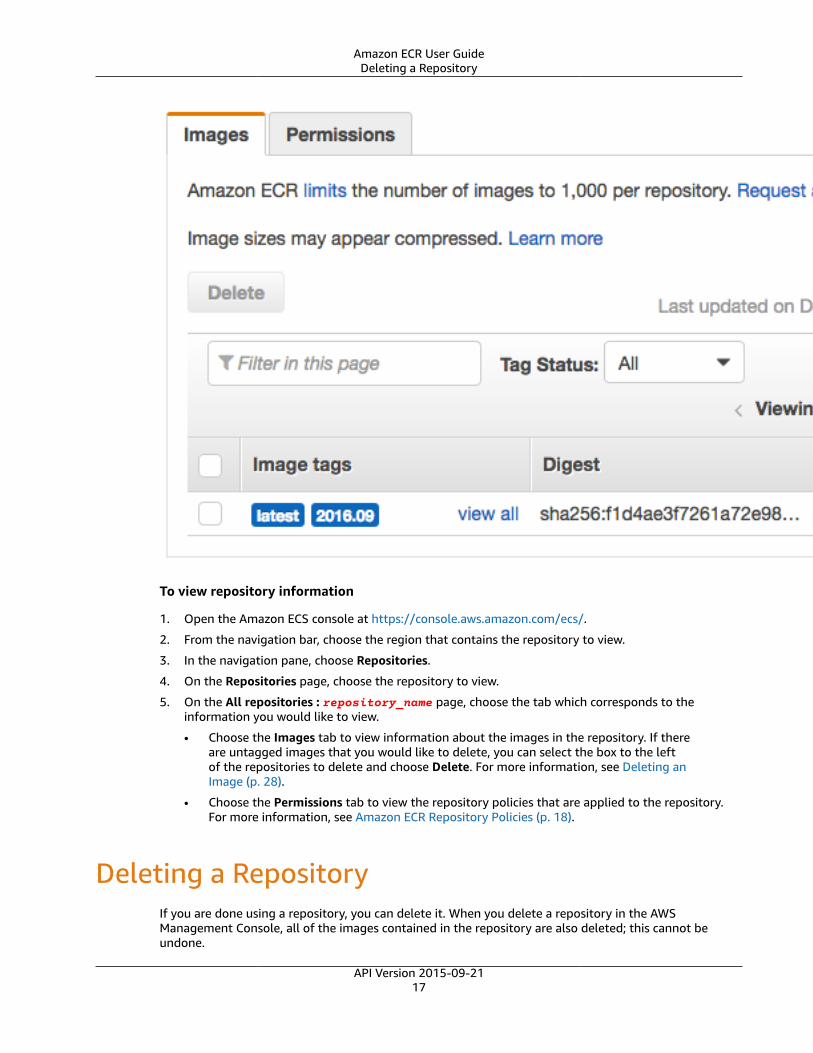
Viewing Repository InformationAfter you have created a repository, you can view its information in the AWS Management Console. Youcan see which images are stored in a repository, whether or not an image is tagged and what the tagsfor the image are, the SHA digest for the images, the size of the images in MiB, and when the image waspushed to the repository.
NoteBeginning with Docker version 1.9, the Docker client compresses image layers beforepushing them to a V2 Docker registry. The output of the docker images command shows theuncompressed image size, so it may return a larger image size than the image sizes shown in theAWS Management Console.
You can also view the repository policies that are applied to the repository.
API Version 2015-09-2116
Amazon ECR User GuideDeleting a Repository
To view repository information
1. Open the Amazon ECS console at https://console.aws.amazon.com/ecs/.
2. From the navigation bar, choose the region that contains the repository to view.
3. In the navigation pane, choose Repositories.
4. On the Repositories page, choose the repository to view.
5. On the All repositories : repository_name page, choose the tab which corresponds to theinformation you would like to view.
• Choose the Images tab to view information about the images in the repository. If thereare untagged images that you would like to delete, you can select the box to the leftof the repositories to delete and choose Delete. For more information, see Deleting anImage (p. 28).
• Choose the Permissions tab to view the repository policies that are applied to the repository.For more information, see Amazon ECR Repository Policies (p. 18).
Deleting a RepositoryIf you are done using a repository, you can delete it. When you delete a repository in the AWSManagement Console, all of the images contained in the repository are also deleted; this cannot beundone.
API Version 2015-09-2117
Amazon ECR User GuideRepository Policies
To delete a repository
1. Open the Amazon ECS console at https://console.aws.amazon.com/ecs/.2. From the navigation bar, choose the region that contains the repository to delete.3. In the navigation pane, choose Repositories.4. On the Repositories page, select the box to the left of the repositories to delete and choose Delete
repository.5. In the Delete repository window, verify that the selected repositories should be deleted and choose
Delete.
ImportantAny images in the selected repositories is also deleted.
Amazon ECR Repository PoliciesAmazon ECR uses resource-based permissions to control access. Resource-based permissions let youspecify who has access to a repository and what actions they can perform on it. By default, only therepository owner has access to a repository. You can apply a policy document that allows others to accessyour repository.
ImportantAmazon ECR users require permissions to call ecr:GetAuthorizationToken before theycan authenticate to a registry and push or pull any images from any Amazon ECR repository.Amazon ECR provides several managed policies to control user access at varying levels; for moreinformation, see Amazon ECR Managed Policies (p. 46).
Topics• Setting a Repository Policy Statement (p. 18)• Deleting a Repository Policy Statement (p. 19)• Amazon ECR Repository Policy Examples (p. 19)
Setting a Repository Policy StatementYou can create and set an access policy statement for your repositories in the AWS Management Consoleby following the steps below. You can create multiple policy statements per repository.
ImportantAmazon ECR users require permissions to call ecr:GetAuthorizationToken before theycan authenticate to a registry and push or pull any images from any Amazon ECR repository.Amazon ECR provides several managed policies to control user access at varying levels; for moreinformation, see Amazon ECR Managed Policies (p. 46).
To set a repository policy statement
1. Open the Amazon ECS console at https://console.aws.amazon.com/ecs/.2. From the navigation bar, choose the region that contains the repository to set a policy statement on.3. In the navigation pane, choose Repositories.4. On the Repositories page, choose the repository to set a policy statement on.5. On the All repositories: repository_name page, choose Permissions, Add.6. For Sid, enter a description for what your policy statement does.7. For Effect, choose whether the policy statement should allow access or deny it.8. For Principal, choose the scope of users to apply the policy statement to.
API Version 2015-09-2118
Amazon ECR User GuideDeleting a Repository Policy Statement
• You can apply the statement to all authenticated AWS users by selecting the Everybody checkbox.
• You can apply the statement to all users under specific AWS accounts by listing those accountnumbers (for example, 111122223333) in the AWS account number(s) field.
• You can apply the statement to roles or users under your AWS account by checking the roles orusers under the All IAM entities list and choosing >> Add to move them to the Selected IAMentities list.
NoteFor more complicated repository policies that are not currently supported in the AWSManagement Console, you can apply the policy with the set-repository-policy AWS CLIcommand.
9. For Action, choose the scope of the Amazon ECR API operations that the policy statement shouldapply to. You can choose individual API operations, or you can choose from the preset task-basedoptions.
• All actions sets the scope to all Amazon ECR API operations.
• Push/Pull actions sets the scope to Amazon ECR API operations required to push or pull images inthis repository with the Docker CLI.
• Pull only actions sets the scope to Amazon ECR API operations required only to pull images fromthis repository with the Docker CLI.
10. When you are finished, choose Save to set the policy.
ImportantAmazon ECR users require permissions to call ecr:GetAuthorizationToken before theycan authenticate to a registry and push or pull any images from any Amazon ECR repository.Amazon ECR provides several managed policies to control user access at varying levels; formore information, see Amazon ECR Managed Policies (p. 46).
Deleting a Repository Policy StatementIf you no longer want an existing repository policy statement to apply to a repository, you can delete it.
To delete a repository policy statement
1. Open the Amazon ECS console at https://console.aws.amazon.com/ecs/.
2. From the navigation bar, choose the region that contains the repository to delete a policy statementfrom.
3. In the navigation pane, choose Repositories.
4. On the Repositories page, choose the repository to delete a policy statement from.
5. On the All repositories : repository_name page, choose the Permissions tab.
6. In the Permission statements list, expand the policy statement to delete and choose Remove at thebottom of the expanded statement.
Amazon ECR Repository Policy ExamplesThe following examples show policy statements that you could use to control the permissions that usershave to Amazon ECR repositories.
ImportantAmazon ECR users require permissions to call ecr:GetAuthorizationToken before theycan authenticate to a registry and push or pull any images from any Amazon ECR repository.
API Version 2015-09-2119
Amazon ECR User GuideRepository Policy Examples
Amazon ECR provides several managed policies to control user access at varying levels; for moreinformation, see Amazon ECR Managed Policies (p. 46).
Topics• Example: Allow IAM Users Within Your Account (p. 20)• Example: Allow Other Accounts (p. 20)• Example: Deny All (p. 21)
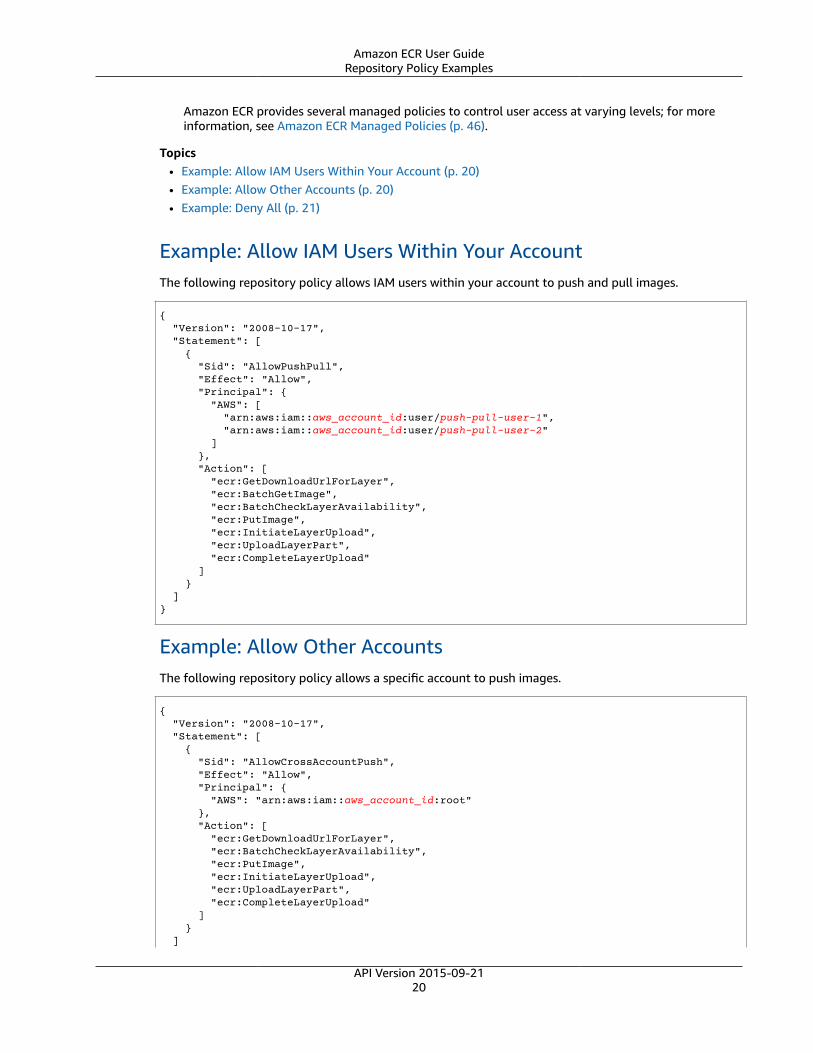
Example: Allow IAM Users Within Your AccountThe following repository policy allows IAM users within your account to push and pull images.
{ "Version": "2008-10-17", "Statement": [ { "Sid": "AllowPushPull", "Effect": "Allow", "Principal": { "AWS": [ "arn:aws:iam::aws_account_id:user/push-pull-user-1", "arn:aws:iam::aws_account_id:user/push-pull-user-2" ] }, "Action": [ "ecr:GetDownloadUrlForLayer", "ecr:BatchGetImage", "ecr:BatchCheckLayerAvailability", "ecr:PutImage", "ecr:InitiateLayerUpload", "ecr:UploadLayerPart", "ecr:CompleteLayerUpload" ] } ]}
Example: Allow Other AccountsThe following repository policy allows a specific account to push images.
{ "Version": "2008-10-17", "Statement": [ { "Sid": "AllowCrossAccountPush", "Effect": "Allow", "Principal": { "AWS": "arn:aws:iam::aws_account_id:root" }, "Action": [ "ecr:GetDownloadUrlForLayer", "ecr:BatchCheckLayerAvailability", "ecr:PutImage", "ecr:InitiateLayerUpload", "ecr:UploadLayerPart", "ecr:CompleteLayerUpload" ] } ]
API Version 2015-09-2120
Amazon ECR User GuideRepository Policy Examples
}
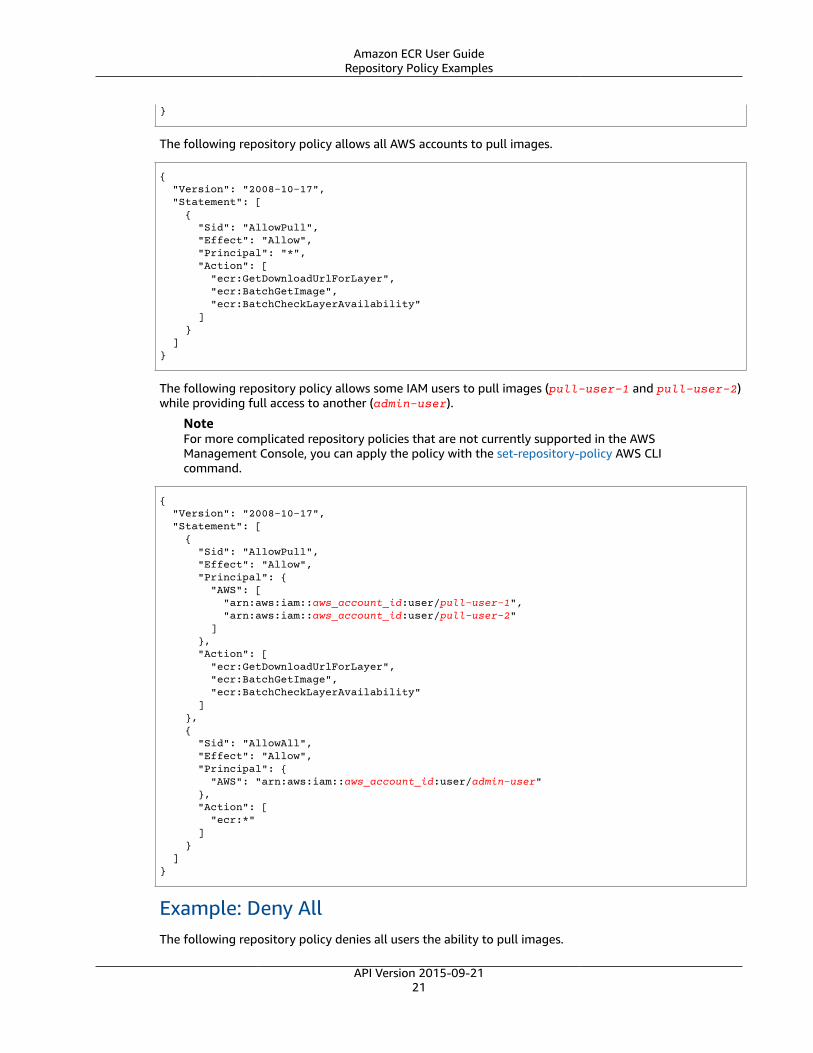
The following repository policy allows all AWS accounts to pull images.
{ "Version": "2008-10-17", "Statement": [ { "Sid": "AllowPull", "Effect": "Allow", "Principal": "*", "Action": [ "ecr:GetDownloadUrlForLayer", "ecr:BatchGetImage", "ecr:BatchCheckLayerAvailability" ] } ]}
The following repository policy allows some IAM users to pull images (pull-user-1 and pull-user-2)while providing full access to another (admin-user).
NoteFor more complicated repository policies that are not currently supported in the AWSManagement Console, you can apply the policy with the set-repository-policy AWS CLIcommand.
{ "Version": "2008-10-17", "Statement": [ { "Sid": "AllowPull", "Effect": "Allow", "Principal": { "AWS": [ "arn:aws:iam::aws_account_id:user/pull-user-1", "arn:aws:iam::aws_account_id:user/pull-user-2" ] }, "Action": [ "ecr:GetDownloadUrlForLayer", "ecr:BatchGetImage", "ecr:BatchCheckLayerAvailability" ] }, { "Sid": "AllowAll", "Effect": "Allow", "Principal": { "AWS": "arn:aws:iam::aws_account_id:user/admin-user" }, "Action": [ "ecr:*" ] } ]}
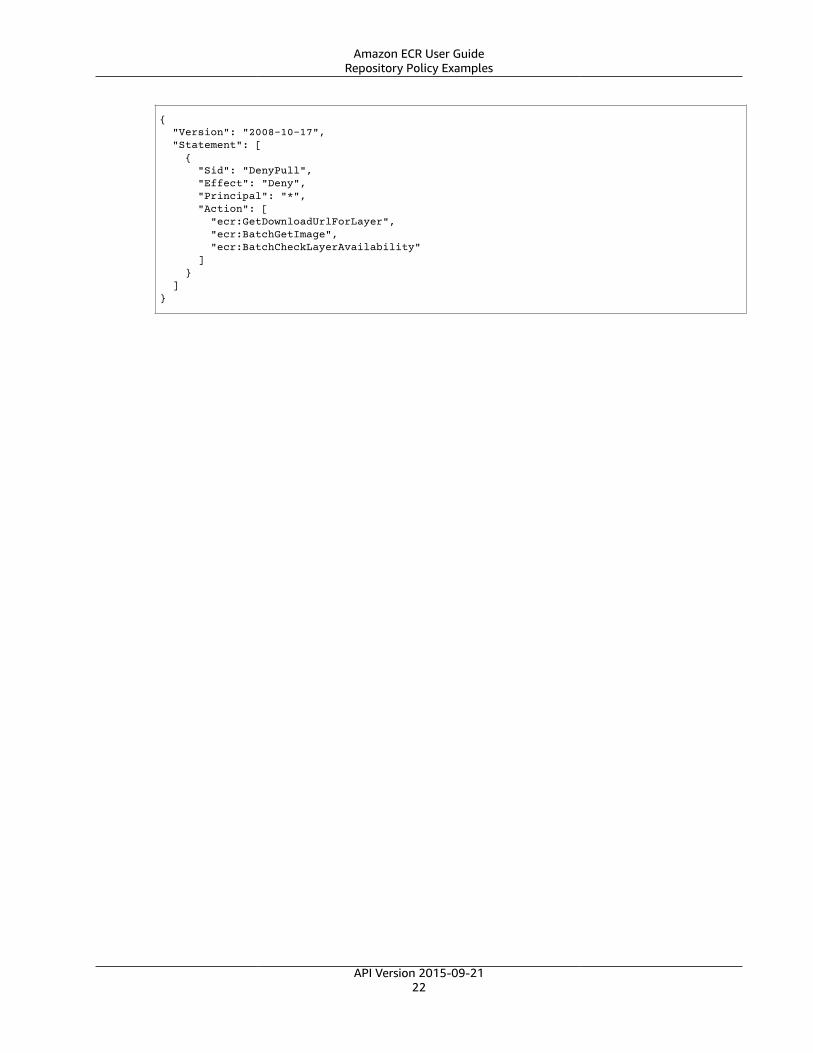
Example: Deny AllThe following repository policy denies all users the ability to pull images.
API Version 2015-09-2121
Amazon ECR User GuideRepository Policy Examples
{ "Version": "2008-10-17", "Statement": [ { "Sid": "DenyPull", "Effect": "Deny", "Principal": "*", "Action": [ "ecr:GetDownloadUrlForLayer", "ecr:BatchGetImage", "ecr:BatchCheckLayerAvailability" ] } ]}
API Version 2015-09-2122
Amazon ECR User GuidePushing an Image
ImagesAmazon ECR stores Docker images in image repositories. You can use the Docker CLI to push and pullimages from your repositories.
ImportantAmazon ECR users require permissions to call ecr:GetAuthorizationToken before theycan authenticate to a registry and push or pull any images from any Amazon ECR repository.Amazon ECR provides several managed policies to control user access at varying levels; for moreinformation, see Amazon ECR Managed Policies (p. 46).
Topics• Pushing an Image (p. 23)• Retagging an Image with the AWS CLI (p. 24)• Retagging an Image with the AWS Tools for Windows PowerShell (p. 25)• Pulling an Image (p. 26)• Container Image Manifest Formats (p. 26)• Using Amazon ECR Images with Amazon ECS (p. 27)• Deleting an Image (p. 28)• Amazon Linux Container Image (p. 29)• Amazon ECR Lifecycle Policies (p. 30)
Pushing an ImageIf you have a Docker image available in your development environment, you can push it to an AmazonECR repository with the docker push command.
ImportantAmazon ECR users require permissions to call ecr:GetAuthorizationToken before theycan authenticate to a registry and push or pull any images from any Amazon ECR repository.Amazon ECR provides several managed policies to control user access at varying levels; for moreinformation, see Amazon ECR Managed Policies (p. 46).
To push a Docker image to an Amazon ECR repository
1. Authenticate your Docker client to the Amazon ECR registry you intend to push your image to.Authentication tokens must be obtained for each registry used, and the tokens are valid for 12hours. For more information, see Registry Authentication (p. 12).
2. If your image repository does not exist in the registry you intend to push to yet, create it. For moreinformation, see Creating a Repository (p. 15).
3. Identify the image to push. Run the docker images command to list the images on your system.
docker images
You can identify an image with the repository:tag or the image ID in the resulting commandoutput.
4. Tag your image with the Amazon ECR registry, repository, and optional image tag name combinationto use. The registry format is aws_account_id.dkr.ecr.region.amazonaws.com. Therepository name should match the repository that you created for your image. If you omit the imagetag, we assume the tag is latest.
API Version 2015-09-2123
Amazon ECR User GuideRetagging an Image with the AWS CLI
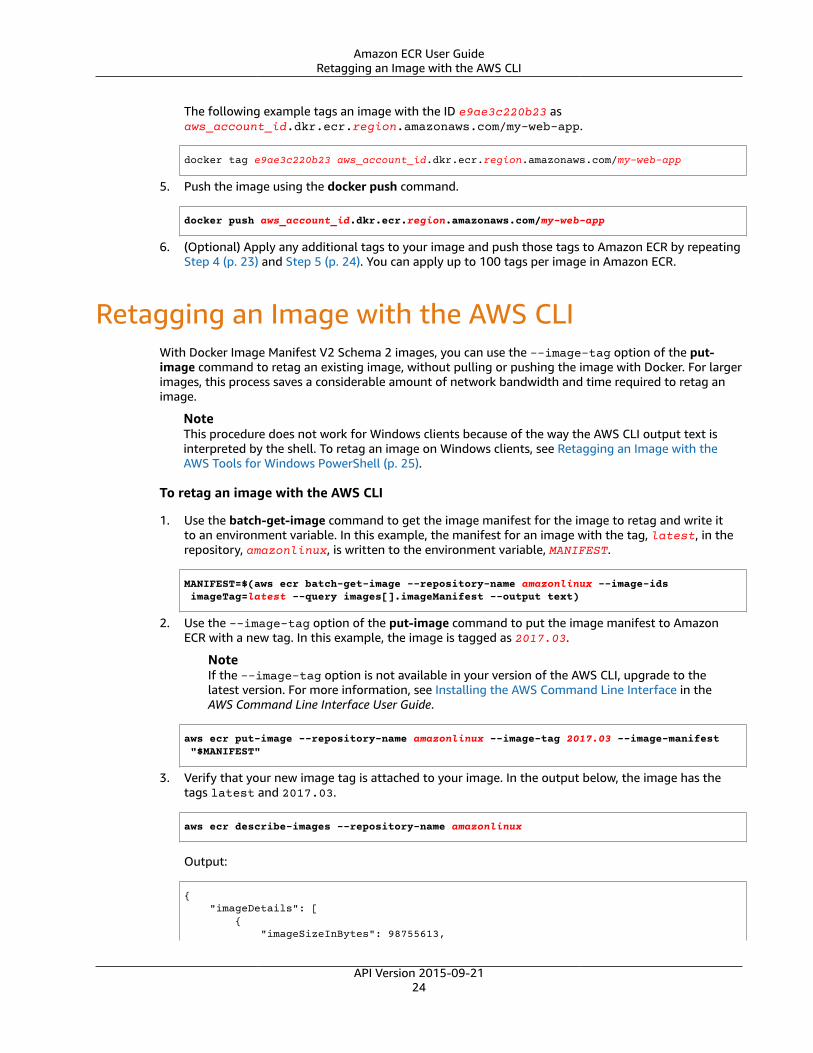
The following example tags an image with the ID e9ae3c220b23 asaws_account_id.dkr.ecr.region.amazonaws.com/my-web-app.
docker tag e9ae3c220b23 aws_account_id.dkr.ecr.region.amazonaws.com/my-web-app
5. Push the image using the docker push command.
docker push aws_account_id.dkr.ecr.region.amazonaws.com/my-web-app
6. (Optional) Apply any additional tags to your image and push those tags to Amazon ECR by repeatingStep 4 (p. 23) and Step 5 (p. 24). You can apply up to 100 tags per image in Amazon ECR.
Retagging an Image with the AWS CLIWith Docker Image Manifest V2 Schema 2 images, you can use the --image-tag option of the put-image command to retag an existing image, without pulling or pushing the image with Docker. For largerimages, this process saves a considerable amount of network bandwidth and time required to retag animage.
NoteThis procedure does not work for Windows clients because of the way the AWS CLI output text isinterpreted by the shell. To retag an image on Windows clients, see Retagging an Image with theAWS Tools for Windows PowerShell (p. 25).
To retag an image with the AWS CLI
1. Use the batch-get-image command to get the image manifest for the image to retag and write itto an environment variable. In this example, the manifest for an image with the tag, latest, in therepository, amazonlinux, is written to the environment variable, MANIFEST.
MANIFEST=$(aws ecr batch-get-image --repository-name amazonlinux --image-ids imageTag=latest --query images[].imageManifest --output text)
2. Use the --image-tag option of the put-image command to put the image manifest to AmazonECR with a new tag. In this example, the image is tagged as 2017.03.
NoteIf the --image-tag option is not available in your version of the AWS CLI, upgrade to thelatest version. For more information, see Installing the AWS Command Line Interface in theAWS Command Line Interface User Guide.
aws ecr put-image --repository-name amazonlinux --image-tag 2017.03 --image-manifest "$MANIFEST"
3. Verify that your new image tag is attached to your image. In the output below, the image has thetags latest and 2017.03.
aws ecr describe-images --repository-name amazonlinux
Output:
{ "imageDetails": [ { "imageSizeInBytes": 98755613,
API Version 2015-09-2124
Amazon ECR User GuideRetagging an Image with the AWS
Tools for Windows PowerShell
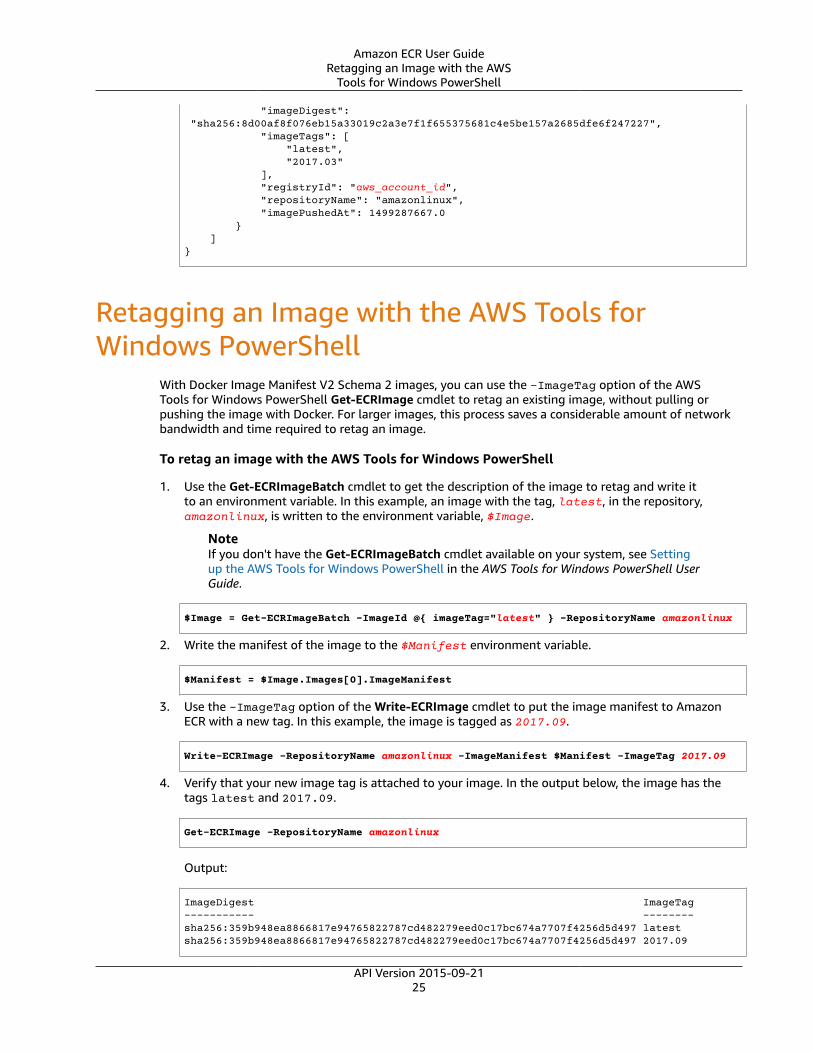
"imageDigest": "sha256:8d00af8f076eb15a33019c2a3e7f1f655375681c4e5be157a2685dfe6f247227", "imageTags": [ "latest", "2017.03" ], "registryId": "aws_account_id", "repositoryName": "amazonlinux", "imagePushedAt": 1499287667.0 } ]}
Retagging an Image with the AWS Tools forWindows PowerShell
With Docker Image Manifest V2 Schema 2 images, you can use the -ImageTag option of the AWSTools for Windows PowerShell Get-ECRImage cmdlet to retag an existing image, without pulling orpushing the image with Docker. For larger images, this process saves a considerable amount of networkbandwidth and time required to retag an image.
To retag an image with the AWS Tools for Windows PowerShell
1. Use the Get-ECRImageBatch cmdlet to get the description of the image to retag and write itto an environment variable. In this example, an image with the tag, latest, in the repository,amazonlinux, is written to the environment variable, $Image.
NoteIf you don't have the Get-ECRImageBatch cmdlet available on your system, see Settingup the AWS Tools for Windows PowerShell in the AWS Tools for Windows PowerShell UserGuide.
$Image = Get-ECRImageBatch -ImageId @{ imageTag="latest" } -RepositoryName amazonlinux
2. Write the manifest of the image to the $Manifest environment variable.
$Manifest = $Image.Images[0].ImageManifest
3. Use the -ImageTag option of the Write-ECRImage cmdlet to put the image manifest to AmazonECR with a new tag. In this example, the image is tagged as 2017.09.
Write-ECRImage -RepositoryName amazonlinux -ImageManifest $Manifest -ImageTag 2017.09
4. Verify that your new image tag is attached to your image. In the output below, the image has thetags latest and 2017.09.
Get-ECRImage -RepositoryName amazonlinux
Output:
ImageDigest ImageTag----------- --------sha256:359b948ea8866817e94765822787cd482279eed0c17bc674a7707f4256d5d497 latestsha256:359b948ea8866817e94765822787cd482279eed0c17bc674a7707f4256d5d497 2017.09
API Version 2015-09-2125
Amazon ECR User GuidePulling an Image
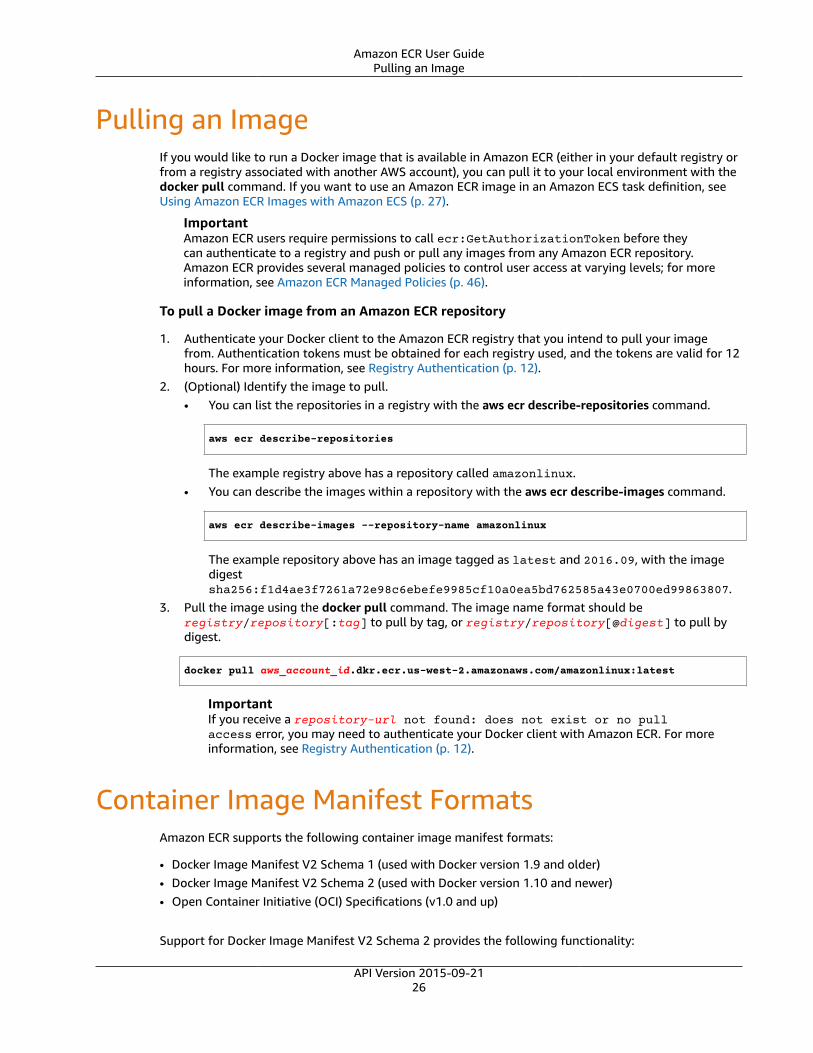
Pulling an ImageIf you would like to run a Docker image that is available in Amazon ECR (either in your default registry orfrom a registry associated with another AWS account), you can pull it to your local environment with thedocker pull command. If you want to use an Amazon ECR image in an Amazon ECS task definition, seeUsing Amazon ECR Images with Amazon ECS (p. 27).
ImportantAmazon ECR users require permissions to call ecr:GetAuthorizationToken before theycan authenticate to a registry and push or pull any images from any Amazon ECR repository.Amazon ECR provides several managed policies to control user access at varying levels; for moreinformation, see Amazon ECR Managed Policies (p. 46).
To pull a Docker image from an Amazon ECR repository
1. Authenticate your Docker client to the Amazon ECR registry that you intend to pull your imagefrom. Authentication tokens must be obtained for each registry used, and the tokens are valid for 12hours. For more information, see Registry Authentication (p. 12).
2. (Optional) Identify the image to pull.• You can list the repositories in a registry with the aws ecr describe-repositories command.
aws ecr describe-repositories
The example registry above has a repository called amazonlinux.• You can describe the images within a repository with the aws ecr describe-images command.
aws ecr describe-images --repository-name amazonlinux
The example repository above has an image tagged as latest and 2016.09, with the imagedigestsha256:f1d4ae3f7261a72e98c6ebefe9985cf10a0ea5bd762585a43e0700ed99863807.
3. Pull the image using the docker pull command. The image name format should beregistry/repository[:tag] to pull by tag, or registry/repository[@digest] to pull bydigest.
docker pull aws_account_id.dkr.ecr.us-west-2.amazonaws.com/amazonlinux:latest
ImportantIf you receive a repository-url not found: does not exist or no pullaccess error, you may need to authenticate your Docker client with Amazon ECR. For moreinformation, see Registry Authentication (p. 12).
Container Image Manifest FormatsAmazon ECR supports the following container image manifest formats:
• Docker Image Manifest V2 Schema 1 (used with Docker version 1.9 and older)• Docker Image Manifest V2 Schema 2 (used with Docker version 1.10 and newer)• Open Container Initiative (OCI) Specifications (v1.0 and up)
Support for Docker Image Manifest V2 Schema 2 provides the following functionality:
API Version 2015-09-2126
Amazon ECR User GuideAmazon ECR Image Manifest Conversion
• The ability to use multiple tags per image.
• Support for storing Windows container images. For more information, see Pushing Windows Images toAmazon ECR in the Amazon Elastic Container Service Developer Guide.
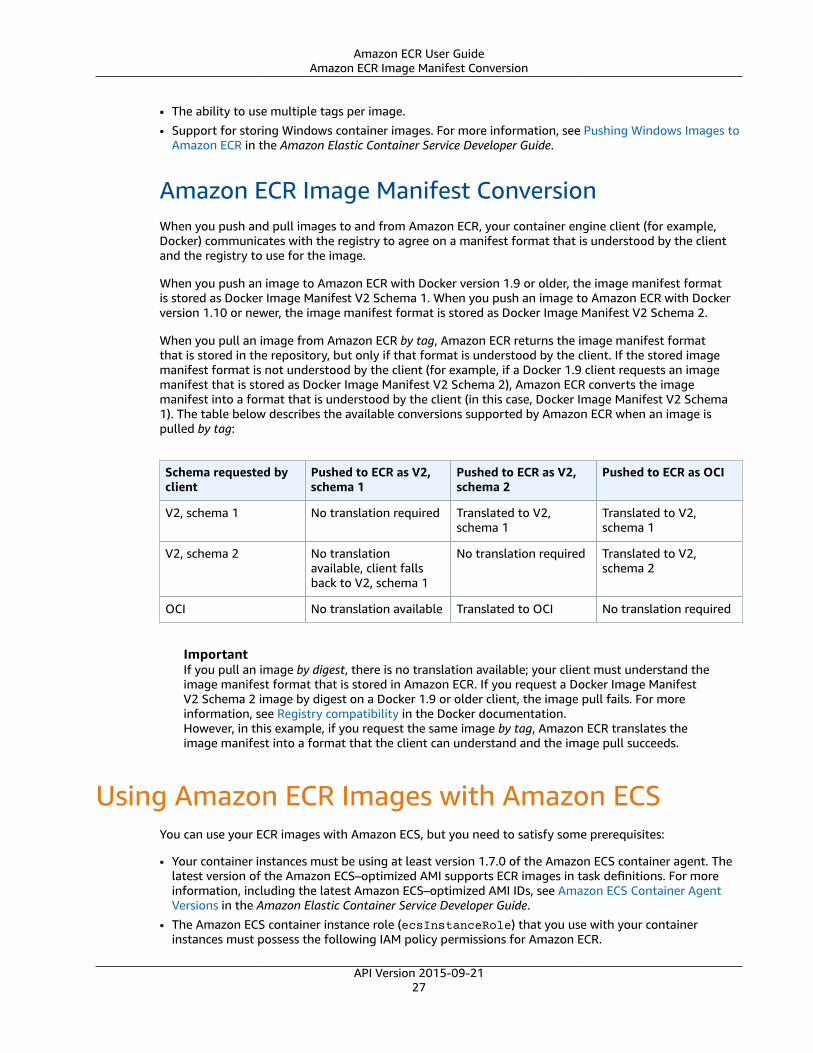
Amazon ECR Image Manifest ConversionWhen you push and pull images to and from Amazon ECR, your container engine client (for example,Docker) communicates with the registry to agree on a manifest format that is understood by the clientand the registry to use for the image.
When you push an image to Amazon ECR with Docker version 1.9 or older, the image manifest formatis stored as Docker Image Manifest V2 Schema 1. When you push an image to Amazon ECR with Dockerversion 1.10 or newer, the image manifest format is stored as Docker Image Manifest V2 Schema 2.
When you pull an image from Amazon ECR by tag, Amazon ECR returns the image manifest formatthat is stored in the repository, but only if that format is understood by the client. If the stored imagemanifest format is not understood by the client (for example, if a Docker 1.9 client requests an imagemanifest that is stored as Docker Image Manifest V2 Schema 2), Amazon ECR converts the imagemanifest into a format that is understood by the client (in this case, Docker Image Manifest V2 Schema1). The table below describes the available conversions supported by Amazon ECR when an image ispulled by tag:
Schema requested byclient
Pushed to ECR as V2,schema 1
Pushed to ECR as V2,schema 2
Pushed to ECR as OCI
V2, schema 1 No translation required Translated to V2,schema 1
Translated to V2,schema 1
V2, schema 2 No translationavailable, client fallsback to V2, schema 1
No translation required Translated to V2,schema 2
OCI No translation available Translated to OCI No translation required
ImportantIf you pull an image by digest, there is no translation available; your client must understand theimage manifest format that is stored in Amazon ECR. If you request a Docker Image ManifestV2 Schema 2 image by digest on a Docker 1.9 or older client, the image pull fails. For moreinformation, see Registry compatibility in the Docker documentation.However, in this example, if you request the same image by tag, Amazon ECR translates theimage manifest into a format that the client can understand and the image pull succeeds.
Using Amazon ECR Images with Amazon ECSYou can use your ECR images with Amazon ECS, but you need to satisfy some prerequisites:
• Your container instances must be using at least version 1.7.0 of the Amazon ECS container agent. Thelatest version of the Amazon ECS–optimized AMI supports ECR images in task definitions. For moreinformation, including the latest Amazon ECS–optimized AMI IDs, see Amazon ECS Container AgentVersions in the Amazon Elastic Container Service Developer Guide.
• The Amazon ECS container instance role (ecsInstanceRole) that you use with your containerinstances must possess the following IAM policy permissions for Amazon ECR.
API Version 2015-09-2127
Amazon ECR User GuideDeleting an Image
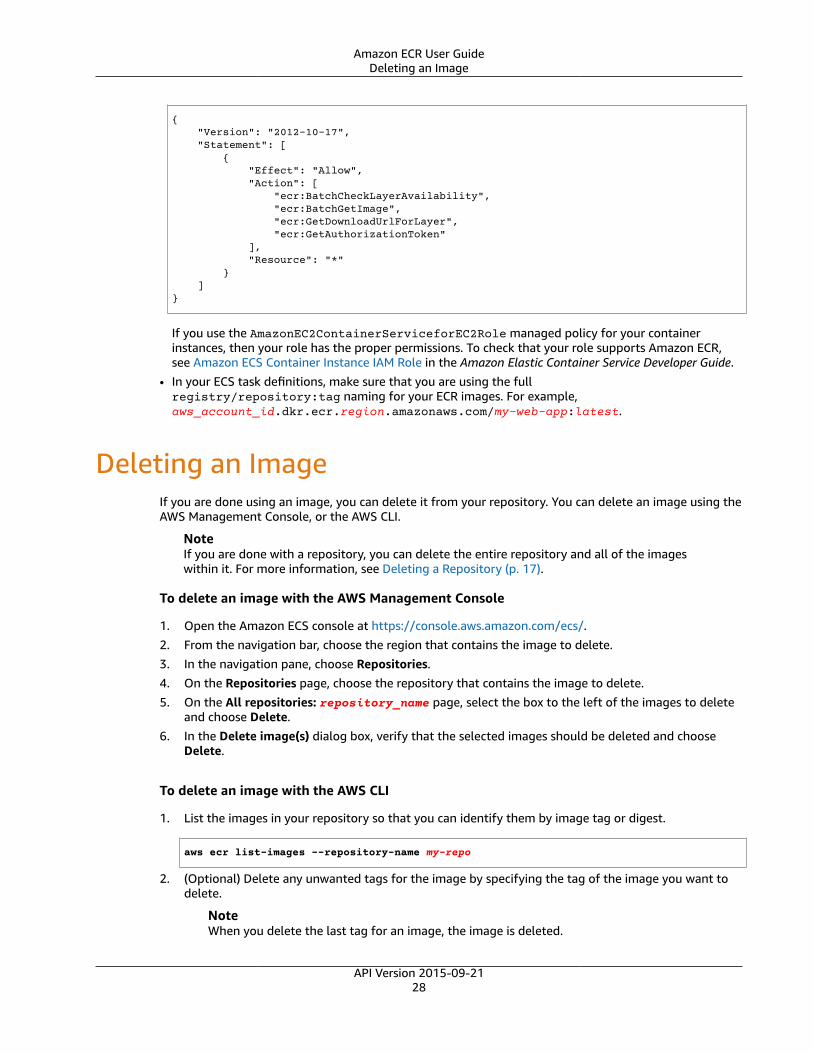
{ "Version": "2012-10-17", "Statement": [ { "Effect": "Allow", "Action": [ "ecr:BatchCheckLayerAvailability", "ecr:BatchGetImage", "ecr:GetDownloadUrlForLayer", "ecr:GetAuthorizationToken" ], "Resource": "*" } ]}
If you use the AmazonEC2ContainerServiceforEC2Role managed policy for your containerinstances, then your role has the proper permissions. To check that your role supports Amazon ECR,see Amazon ECS Container Instance IAM Role in the Amazon Elastic Container Service Developer Guide.
• In your ECS task definitions, make sure that you are using the fullregistry/repository:tag naming for your ECR images. For example,aws_account_id.dkr.ecr.region.amazonaws.com/my-web-app:latest.
Deleting an ImageIf you are done using an image, you can delete it from your repository. You can delete an image using theAWS Management Console, or the AWS CLI.
NoteIf you are done with a repository, you can delete the entire repository and all of the imageswithin it. For more information, see Deleting a Repository (p. 17).
To delete an image with the AWS Management Console
1. Open the Amazon ECS console at https://console.aws.amazon.com/ecs/.2. From the navigation bar, choose the region that contains the image to delete.3. In the navigation pane, choose Repositories.4. On the Repositories page, choose the repository that contains the image to delete.5. On the All repositories: repository_name page, select the box to the left of the images to delete
and choose Delete.6. In the Delete image(s) dialog box, verify that the selected images should be deleted and choose
Delete.
To delete an image with the AWS CLI
1. List the images in your repository so that you can identify them by image tag or digest.
aws ecr list-images --repository-name my-repo
2. (Optional) Delete any unwanted tags for the image by specifying the tag of the image you want todelete.
NoteWhen you delete the last tag for an image, the image is deleted.
API Version 2015-09-2128
Amazon ECR User GuideAmazon Linux Container Image
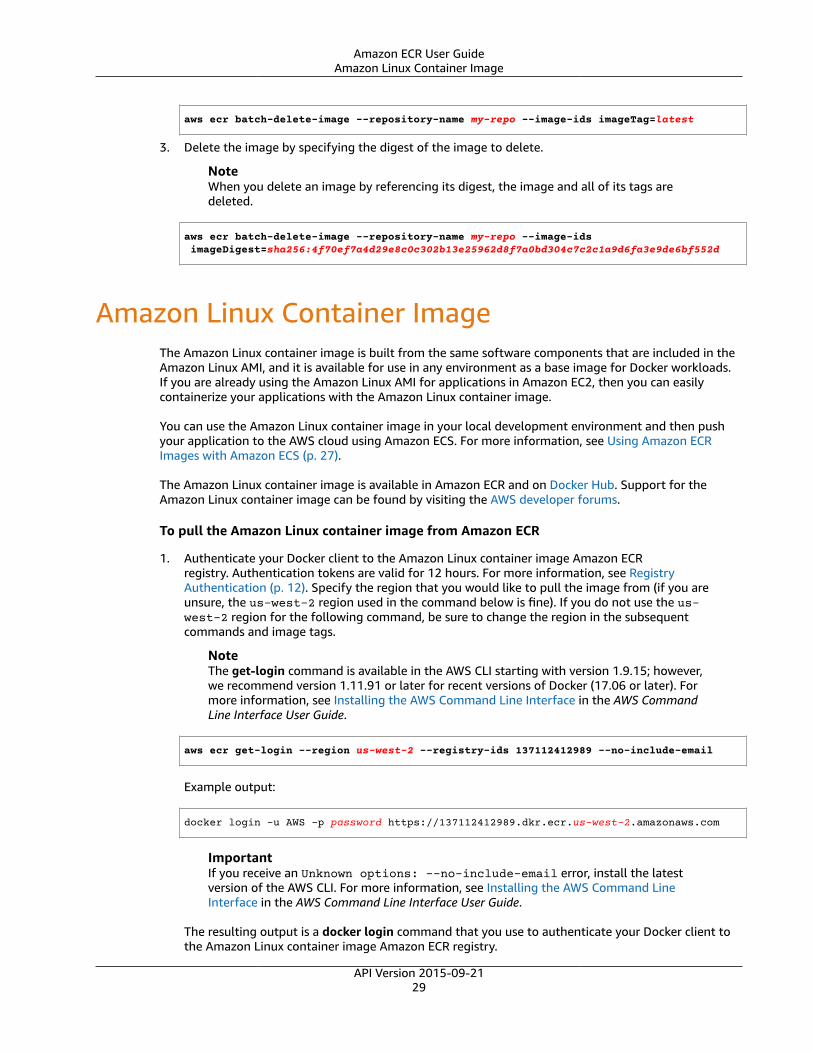
aws ecr batch-delete-image --repository-name my-repo --image-ids imageTag=latest
3. Delete the image by specifying the digest of the image to delete.
NoteWhen you delete an image by referencing its digest, the image and all of its tags aredeleted.
aws ecr batch-delete-image --repository-name my-repo --image-ids imageDigest=sha256:4f70ef7a4d29e8c0c302b13e25962d8f7a0bd304c7c2c1a9d6fa3e9de6bf552d
Amazon Linux Container ImageThe Amazon Linux container image is built from the same software components that are included in theAmazon Linux AMI, and it is available for use in any environment as a base image for Docker workloads.If you are already using the Amazon Linux AMI for applications in Amazon EC2, then you can easilycontainerize your applications with the Amazon Linux container image.
You can use the Amazon Linux container image in your local development environment and then pushyour application to the AWS cloud using Amazon ECS. For more information, see Using Amazon ECRImages with Amazon ECS (p. 27).
The Amazon Linux container image is available in Amazon ECR and on Docker Hub. Support for theAmazon Linux container image can be found by visiting the AWS developer forums.
To pull the Amazon Linux container image from Amazon ECR
1. Authenticate your Docker client to the Amazon Linux container image Amazon ECRregistry. Authentication tokens are valid for 12 hours. For more information, see RegistryAuthentication (p. 12). Specify the region that you would like to pull the image from (if you areunsure, the us-west-2 region used in the command below is fine). If you do not use the us-west-2 region for the following command, be sure to change the region in the subsequentcommands and image tags.
NoteThe get-login command is available in the AWS CLI starting with version 1.9.15; however,we recommend version 1.11.91 or later for recent versions of Docker (17.06 or later). Formore information, see Installing the AWS Command Line Interface in the AWS CommandLine Interface User Guide.
aws ecr get-login --region us-west-2 --registry-ids 137112412989 --no-include-email
Example output:
docker login -u AWS -p password https://137112412989.dkr.ecr.us-west-2.amazonaws.com
ImportantIf you receive an Unknown options: --no-include-email error, install the latestversion of the AWS CLI. For more information, see Installing the AWS Command LineInterface in the AWS Command Line Interface User Guide.
The resulting output is a docker login command that you use to authenticate your Docker client tothe Amazon Linux container image Amazon ECR registry.
API Version 2015-09-2129
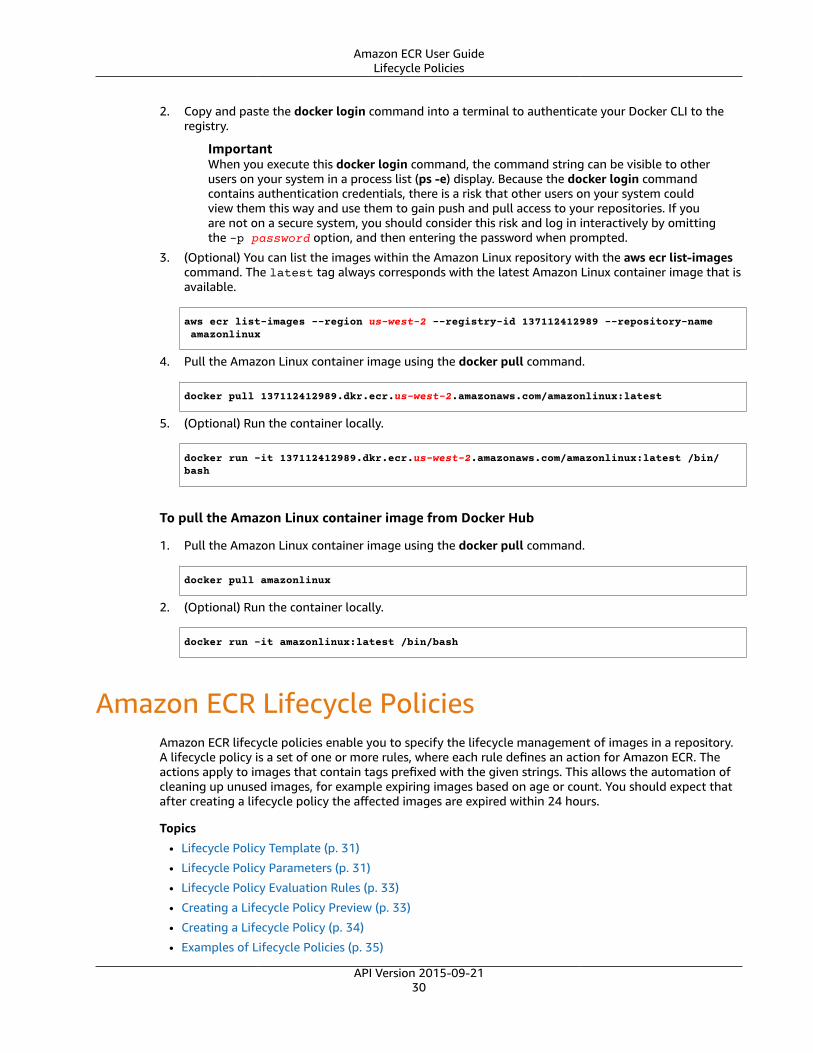
Amazon ECR User GuideLifecycle Policies
2. Copy and paste the docker login command into a terminal to authenticate your Docker CLI to theregistry.
ImportantWhen you execute this docker login command, the command string can be visible to otherusers on your system in a process list (ps -e) display. Because the docker login commandcontains authentication credentials, there is a risk that other users on your system couldview them this way and use them to gain push and pull access to your repositories. If youare not on a secure system, you should consider this risk and log in interactively by omittingthe -p password option, and then entering the password when prompted.
3. (Optional) You can list the images within the Amazon Linux repository with the aws ecr list-imagescommand. The latest tag always corresponds with the latest Amazon Linux container image that isavailable.
aws ecr list-images --region us-west-2 --registry-id 137112412989 --repository-name amazonlinux
4. Pull the Amazon Linux container image using the docker pull command.
docker pull 137112412989.dkr.ecr.us-west-2.amazonaws.com/amazonlinux:latest
5. (Optional) Run the container locally.
docker run -it 137112412989.dkr.ecr.us-west-2.amazonaws.com/amazonlinux:latest /bin/bash
To pull the Amazon Linux container image from Docker Hub
1. Pull the Amazon Linux container image using the docker pull command.
docker pull amazonlinux
2. (Optional) Run the container locally.
docker run -it amazonlinux:latest /bin/bash
Amazon ECR Lifecycle PoliciesAmazon ECR lifecycle policies enable you to specify the lifecycle management of images in a repository.A lifecycle policy is a set of one or more rules, where each rule defines an action for Amazon ECR. Theactions apply to images that contain tags prefixed with the given strings. This allows the automation ofcleaning up unused images, for example expiring images based on age or count. You should expect thatafter creating a lifecycle policy the affected images are expired within 24 hours.
Topics
• Lifecycle Policy Template (p. 31)
• Lifecycle Policy Parameters (p. 31)
• Lifecycle Policy Evaluation Rules (p. 33)
• Creating a Lifecycle Policy Preview (p. 33)
• Creating a Lifecycle Policy (p. 34)
• Examples of Lifecycle Policies (p. 35)
API Version 2015-09-2130
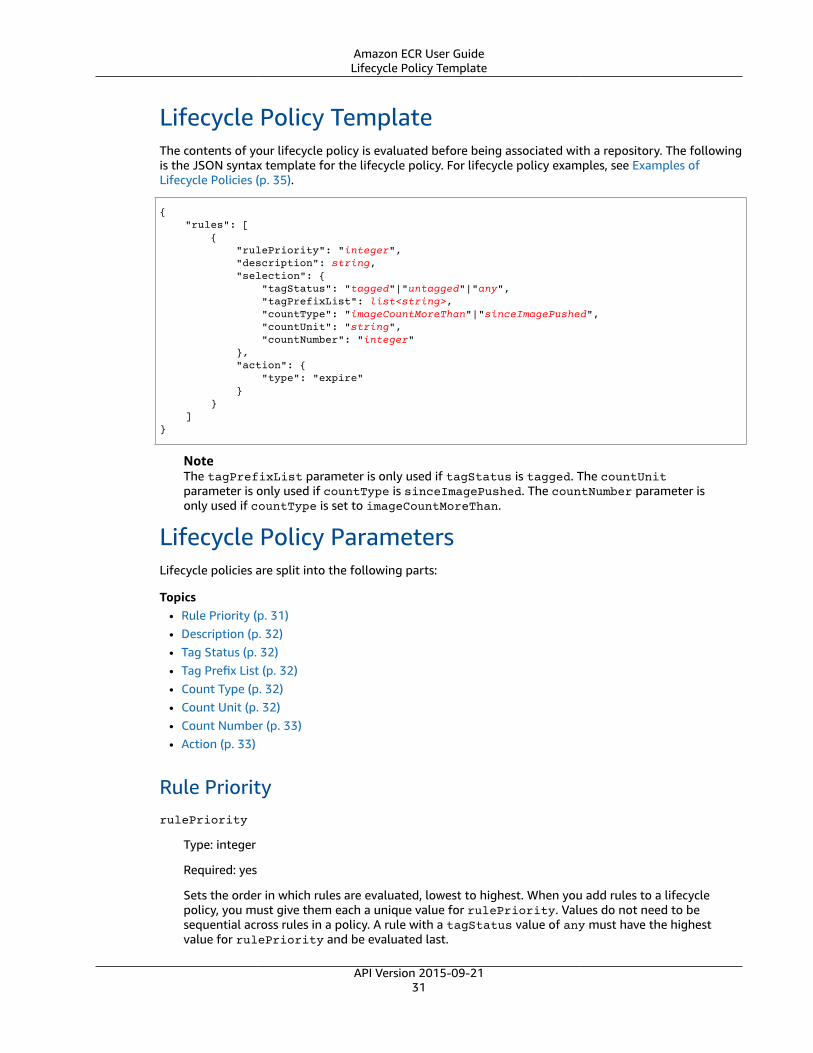
Amazon ECR User GuideLifecycle Policy Template
Lifecycle Policy TemplateThe contents of your lifecycle policy is evaluated before being associated with a repository. The followingis the JSON syntax template for the lifecycle policy. For lifecycle policy examples, see Examples ofLifecycle Policies (p. 35).
{ "rules": [ { "rulePriority": "integer", "description": string, "selection": { "tagStatus": "tagged"|"untagged"|"any", "tagPrefixList": list<string>, "countType": "imageCountMoreThan"|"sinceImagePushed", "countUnit": "string", "countNumber": "integer" }, "action": { "type": "expire" } } ]}
NoteThe tagPrefixList parameter is only used if tagStatus is tagged. The countUnitparameter is only used if countType is sinceImagePushed. The countNumber parameter isonly used if countType is set to imageCountMoreThan.
Lifecycle Policy ParametersLifecycle policies are split into the following parts:
Topics• Rule Priority (p. 31)• Description (p. 32)• Tag Status (p. 32)• Tag Prefix List (p. 32)• Count Type (p. 32)• Count Unit (p. 32)• Count Number (p. 33)• Action (p. 33)
Rule PriorityrulePriority
Type: integer
Required: yes
Sets the order in which rules are evaluated, lowest to highest. When you add rules to a lifecyclepolicy, you must give them each a unique value for rulePriority. Values do not need to besequential across rules in a policy. A rule with a tagStatus value of any must have the highestvalue for rulePriority and be evaluated last.
API Version 2015-09-2131

Amazon ECR User GuideLifecycle Policy Parameters
Descriptiondescription
Type: string
Required: no
(Optional) Describes the purpose of a rule within a lifecycle policy.
Tag StatustagStatus
Type: string
Required: yes
Determines whether the lifecycle policy rule that you are adding specifies a tag for an image.Acceptable options are tagged, untagged, or any. If you specify any, then all images have the ruleapplied to them. If you specify tagged, then you must also specify a tagPrefixList value. If youspecify untagged, then you must omit tagPrefixList.
Tag Prefix ListtagPrefixList
Type: list[string]
Required: yes, only if tagStatus is set to tagged
Only used if you specified "tagStatus": "tagged". You must specify a comma-separated list ofimage tag prefixes on which to take action with your lifecycle policy. For example, if your images aretagged as prod, prod1, prod2, and so on, you would use the tag prefix prod to specify all of them.If you specify multiple tags, only images with all specified tags are selected.
Count TypecountType
Type: string
Required: yes
Specify a count type to apply to the images. If countType is set to imageCountMoreThan, youalso specify countNumber to create a rule that sets a limit on the number of images that existin your repository. If countType is set to sinceImagePushed, you also specify countUnit andcountNumber to specify a time limit on the images that exist in your repository.
Count UnitcountUnit
Type: string
API Version 2015-09-2132
Amazon ECR User GuideLifecycle Policy Evaluation Rules
Required: yes, only if countType is set to sinceImagePushed
Specify a count unit of days to indicate that as the unit of time, in addition to countNumber, whichis the number of days.
Count NumbercountNumber
Type: integer
Required: yes
Specify a count number. If the countType used is imageCountMoreThan, then the value is themaximum number of images that you want to retain in your repository. If the countType used issinceImagePushed, then the value is the maximum age limit for your images.
Actiontype
Type: string
Required: yes
Specify an action type. The supported value is expire.
Lifecycle Policy Evaluation RulesThe lifecycle policy evaluator is responsible for parsing the plaintext JSON and applying it to the imagesin the specified repository. The following rules should be noted when creating a lifecycle policy:
• An image is expired by exactly one or zero rules.• An image that matches the tagging requirements of a rule cannot be expired by a rule with a lower
priority.• Rules can never mark images that are marked by higher priority rules, but can still identify them as if
they haven't been expired.• The set of rules must contain a unique set of tag prefixes.• Only one rule is allowed to select untagged images.• Expiration is always ordered by pushed_at_time, and always expires older images before newer ones.• When using the tagPrefixList, an image is successfully matched if all of the tags in thetagPrefixList value are matched against any of the image's tags.
• With countType = imageCountMoreThan, images are sorted from youngest to oldest based onpushed_at_time and then all images greater than the specified count are expired.
• With countType = sinceImagePushed, all images whose pushed_at_time is older than thespecified number of days based on countNumber are expired.
Creating a Lifecycle Policy PreviewA lifecycle policy preview allows you to see the impact of a lifecycle policy on an image repository beforeyou execute it. The following procedure shows you how to create a lifecycle policy preview.
API Version 2015-09-2133
Amazon ECR User GuideCreating a Lifecycle Policy
To create a lifecycle policy preview using the console
1. Open the Amazon ECS console at https://console.aws.amazon.com/ecs/.2. From the navigation bar, choose the Region that contains the repository on which to perform a
lifecycle policy preview.3. In the navigation pane, choose Repositories and select a repository.4. On the All repositories: repository_name page, choose Dry-Run Lifecycle Rules, Add.5. Enter the following details for your lifecycle policy rule:
a. For Rule Priority, type a number for the rule priority.b. For Rule Description, type a description for the lifecycle policy rule.c. For Image Status, choose Tagged, Untagged, or Any.d. If you specified Tagged for Image Status, then for Tag Prefix List, you can optionally specify a
list of image tags on which to take action with your lifecycle policy. If you specified Untagged,this field must be empty.
e. For Match criteria, choose values for Count Type, Count Number, and Count Unit (ifapplicable).
6. Choose Save.7. Create additional lifecycle policy rules by repeating steps 5–7.8. To run the lifecycle policy preview, choose Save and preview results.9. Under Preview Image Results, review the impact of your lifecycle policy preview.10. If you are satisfied with the preview results, choose Apply as lifecycle policy to create a lifecycle
policy with the specified rules.
NoteYou should expect that after creating a lifecycle policy, the affected images are expired within24 hours.
Creating a Lifecycle PolicyA lifecycle policy allows you to create a set of rules that expire unused repository images. The followingprocedure shows you how to create a lifecycle policy. You should expect that after creating a lifecyclepolicy, the affected images are expired within 24 hours.
To create a lifecycle policy using the AWS CLI
1. Obtain the ID of the repository for which to create the lifecycle policy:
aws ecr describe-repositories
2. Create a lifecycle policy:
aws ecr put-lifecycle-policy [--registry-id <string>] --repository-name <string> --policy-text <string>
To create a lifecycle policy using the console
1. Open the Amazon ECS console at https://console.aws.amazon.com/ecs/.2. From the navigation bar, choose the Region that contains the repository for which to create a
lifecycle policy.3. In the navigation pane, choose Repositories and select a repository.
API Version 2015-09-2134
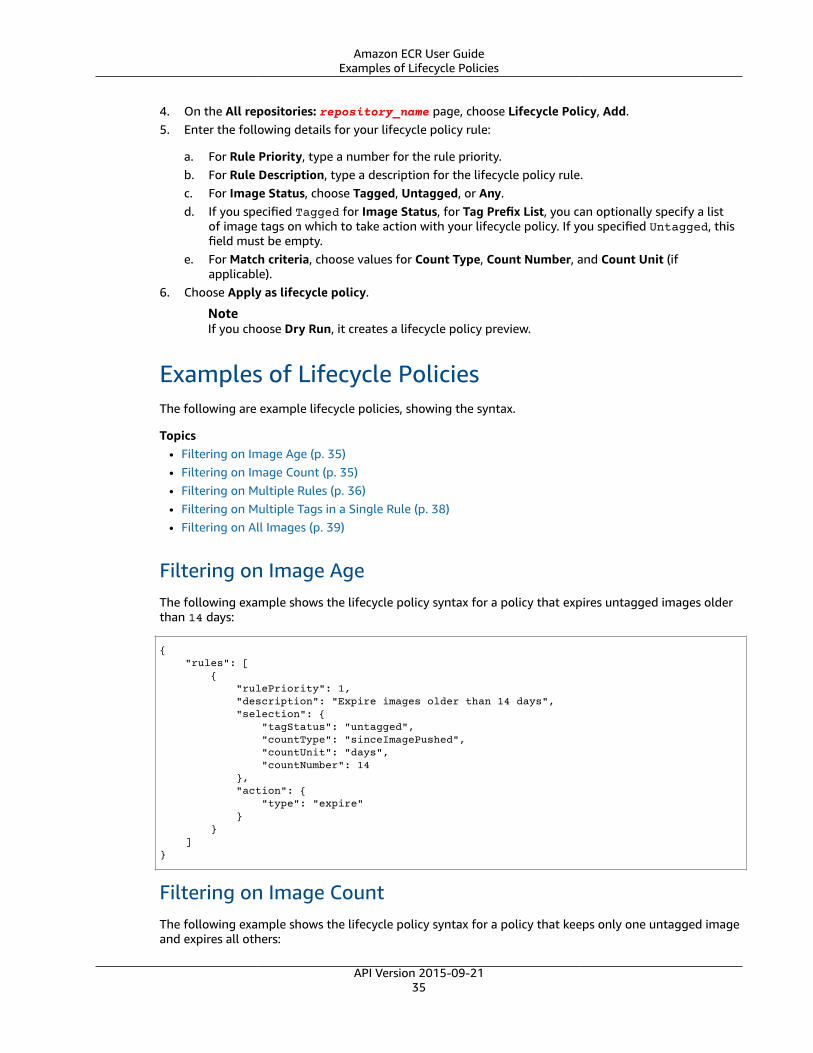
Amazon ECR User GuideExamples of Lifecycle Policies
4. On the All repositories: repository_name page, choose Lifecycle Policy, Add.5. Enter the following details for your lifecycle policy rule:
a. For Rule Priority, type a number for the rule priority.b. For Rule Description, type a description for the lifecycle policy rule.c. For Image Status, choose Tagged, Untagged, or Any.d. If you specified Tagged for Image Status, for Tag Prefix List, you can optionally specify a list
of image tags on which to take action with your lifecycle policy. If you specified Untagged, thisfield must be empty.
e. For Match criteria, choose values for Count Type, Count Number, and Count Unit (ifapplicable).
6. Choose Apply as lifecycle policy.
NoteIf you choose Dry Run, it creates a lifecycle policy preview.
Examples of Lifecycle PoliciesThe following are example lifecycle policies, showing the syntax.
Topics• Filtering on Image Age (p. 35)• Filtering on Image Count (p. 35)• Filtering on Multiple Rules (p. 36)• Filtering on Multiple Tags in a Single Rule (p. 38)• Filtering on All Images (p. 39)
Filtering on Image AgeThe following example shows the lifecycle policy syntax for a policy that expires untagged images olderthan 14 days:
{ "rules": [ { "rulePriority": 1, "description": "Expire images older than 14 days", "selection": { "tagStatus": "untagged", "countType": "sinceImagePushed", "countUnit": "days", "countNumber": 14 }, "action": { "type": "expire" } } ]}
Filtering on Image CountThe following example shows the lifecycle policy syntax for a policy that keeps only one untagged imageand expires all others:
API Version 2015-09-2135
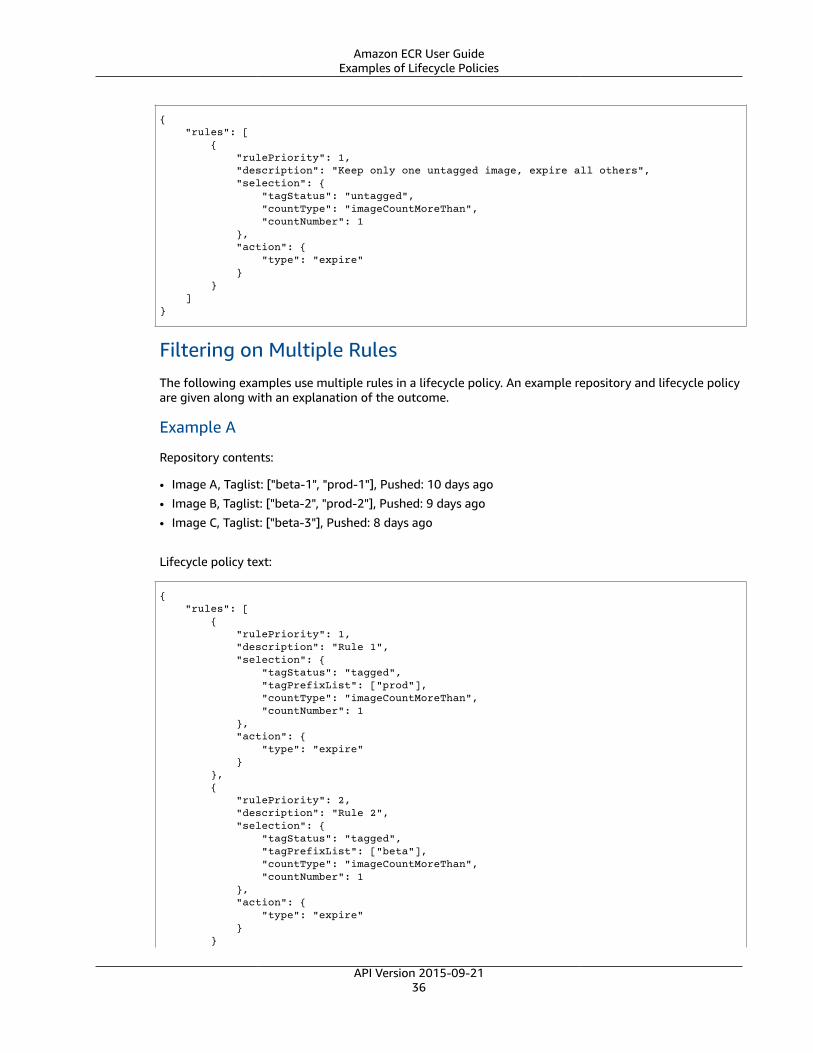
Amazon ECR User GuideExamples of Lifecycle Policies
{ "rules": [ { "rulePriority": 1, "description": "Keep only one untagged image, expire all others", "selection": { "tagStatus": "untagged", "countType": "imageCountMoreThan", "countNumber": 1 }, "action": { "type": "expire" } } ]}
Filtering on Multiple RulesThe following examples use multiple rules in a lifecycle policy. An example repository and lifecycle policyare given along with an explanation of the outcome.
Example A
Repository contents:
• Image A, Taglist: ["beta-1", "prod-1"], Pushed: 10 days ago• Image B, Taglist: ["beta-2", "prod-2"], Pushed: 9 days ago• Image C, Taglist: ["beta-3"], Pushed: 8 days ago
Lifecycle policy text:
{ "rules": [ { "rulePriority": 1, "description": "Rule 1", "selection": { "tagStatus": "tagged", "tagPrefixList": ["prod"], "countType": "imageCountMoreThan", "countNumber": 1 }, "action": { "type": "expire" } }, { "rulePriority": 2, "description": "Rule 2", "selection": { "tagStatus": "tagged", "tagPrefixList": ["beta"], "countType": "imageCountMoreThan", "countNumber": 1 }, "action": { "type": "expire" } }
API Version 2015-09-2136

Amazon ECR User GuideExamples of Lifecycle Policies
]}
The logic of this lifecycle policy would be:
• Rule 1 identifies images tagged with prefix prod. It should mark images, starting with the oldest, untilthere is one or fewer images remaining that match. It marks Image A for expiration.
• Rule 2 identifies images tagged with prefix beta. It should mark images, starting with the oldest, untilthere is one or fewer images remaining that match. It marks both Image A and Image B for expiration.However, Image A has already been seen by Rule 1 and if Image B were expired it would violate Rule 1and thus is skipped.
• Result: Image A is expired.
Example B
This is the same repository as the previous example but the rule priority order is changed to illustrate theoutcome.
Repository contents:
• Image A, Taglist: ["beta-1", "prod-1"], Pushed: 10 days ago• Image B, Taglist: ["beta-2", "prod-2"], Pushed: 9 days ago• Image C, Taglist: ["beta-3"], Pushed: 8 days ago
Lifecycle policy text:
{ "rules": [ { "rulePriority": 1, "description": "Rule 1", "selection": { "tagStatus": "tagged", "tagPrefixList": ["beta"], "countType": "imageCountMoreThan", "countNumber": 1 }, "action": { "type": "expire" } }, { "rulePriority": 2, "description": "Rule 2", "selection": { "tagStatus": "tagged", "tagPrefixList": ["prod"], "countType": "imageCountMoreThan", "countNumber": 1 }, "action": { "type": "expire" } } ]}
The logic of this lifecycle policy would be:
API Version 2015-09-2137
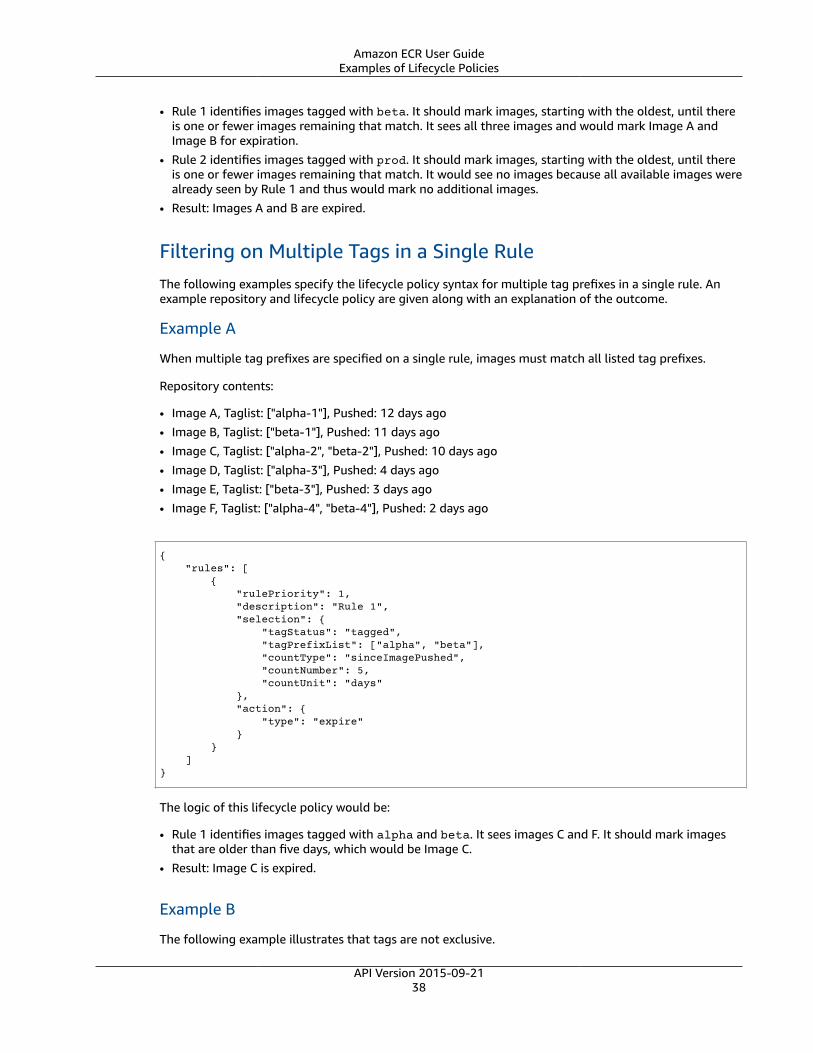
Amazon ECR User GuideExamples of Lifecycle Policies
• Rule 1 identifies images tagged with beta. It should mark images, starting with the oldest, until thereis one or fewer images remaining that match. It sees all three images and would mark Image A andImage B for expiration.
• Rule 2 identifies images tagged with prod. It should mark images, starting with the oldest, until thereis one or fewer images remaining that match. It would see no images because all available images werealready seen by Rule 1 and thus would mark no additional images.
• Result: Images A and B are expired.
Filtering on Multiple Tags in a Single RuleThe following examples specify the lifecycle policy syntax for multiple tag prefixes in a single rule. Anexample repository and lifecycle policy are given along with an explanation of the outcome.
Example A
When multiple tag prefixes are specified on a single rule, images must match all listed tag prefixes.
Repository contents:
• Image A, Taglist: ["alpha-1"], Pushed: 12 days ago• Image B, Taglist: ["beta-1"], Pushed: 11 days ago• Image C, Taglist: ["alpha-2", "beta-2"], Pushed: 10 days ago• Image D, Taglist: ["alpha-3"], Pushed: 4 days ago• Image E, Taglist: ["beta-3"], Pushed: 3 days ago• Image F, Taglist: ["alpha-4", "beta-4"], Pushed: 2 days ago
{ "rules": [ { "rulePriority": 1, "description": "Rule 1", "selection": { "tagStatus": "tagged", "tagPrefixList": ["alpha", "beta"], "countType": "sinceImagePushed", "countNumber": 5, "countUnit": "days" }, "action": { "type": "expire" } } ]}
The logic of this lifecycle policy would be:
• Rule 1 identifies images tagged with alpha and beta. It sees images C and F. It should mark imagesthat are older than five days, which would be Image C.
• Result: Image C is expired.
Example B
The following example illustrates that tags are not exclusive.
API Version 2015-09-2138
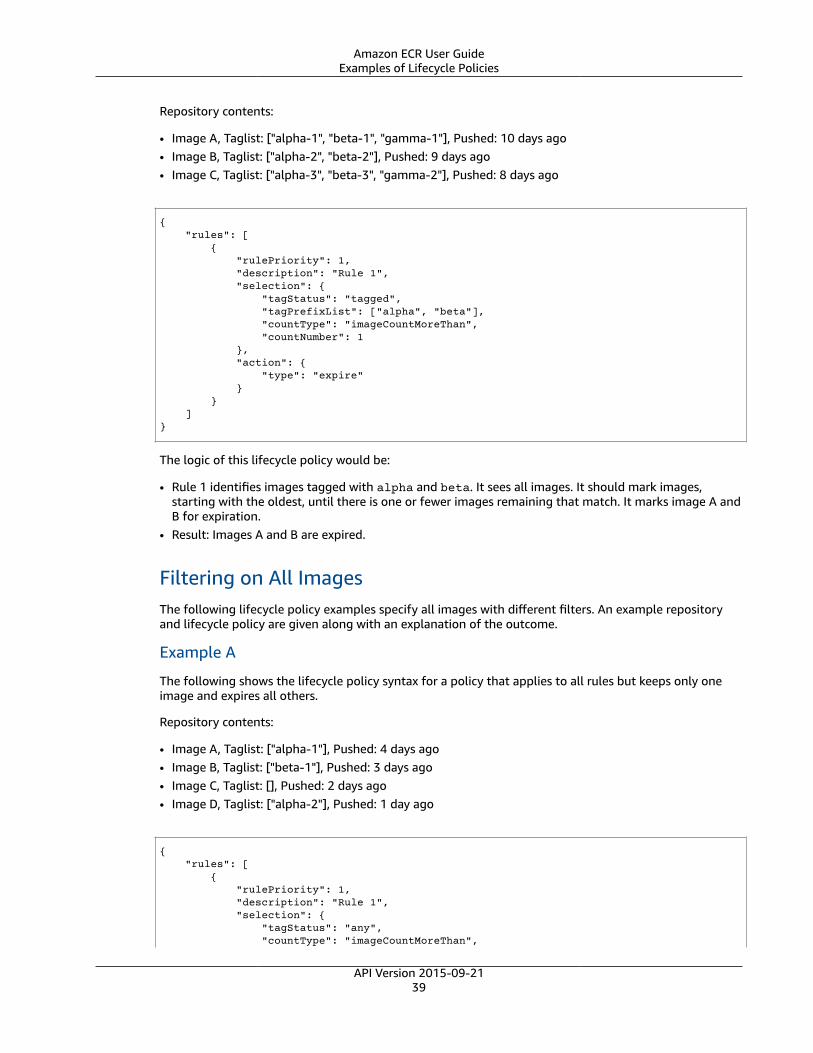
Amazon ECR User GuideExamples of Lifecycle Policies
Repository contents:
• Image A, Taglist: ["alpha-1", "beta-1", "gamma-1"], Pushed: 10 days ago• Image B, Taglist: ["alpha-2", "beta-2"], Pushed: 9 days ago• Image C, Taglist: ["alpha-3", "beta-3", "gamma-2"], Pushed: 8 days ago
{ "rules": [ { "rulePriority": 1, "description": "Rule 1", "selection": { "tagStatus": "tagged", "tagPrefixList": ["alpha", "beta"], "countType": "imageCountMoreThan", "countNumber": 1 }, "action": { "type": "expire" } } ]}
The logic of this lifecycle policy would be:
• Rule 1 identifies images tagged with alpha and beta. It sees all images. It should mark images,starting with the oldest, until there is one or fewer images remaining that match. It marks image A andB for expiration.
• Result: Images A and B are expired.
Filtering on All ImagesThe following lifecycle policy examples specify all images with different filters. An example repositoryand lifecycle policy are given along with an explanation of the outcome.
Example A
The following shows the lifecycle policy syntax for a policy that applies to all rules but keeps only oneimage and expires all others.
Repository contents:
• Image A, Taglist: ["alpha-1"], Pushed: 4 days ago• Image B, Taglist: ["beta-1"], Pushed: 3 days ago• Image C, Taglist: [], Pushed: 2 days ago• Image D, Taglist: ["alpha-2"], Pushed: 1 day ago
{ "rules": [ { "rulePriority": 1, "description": "Rule 1", "selection": { "tagStatus": "any", "countType": "imageCountMoreThan",
API Version 2015-09-2139
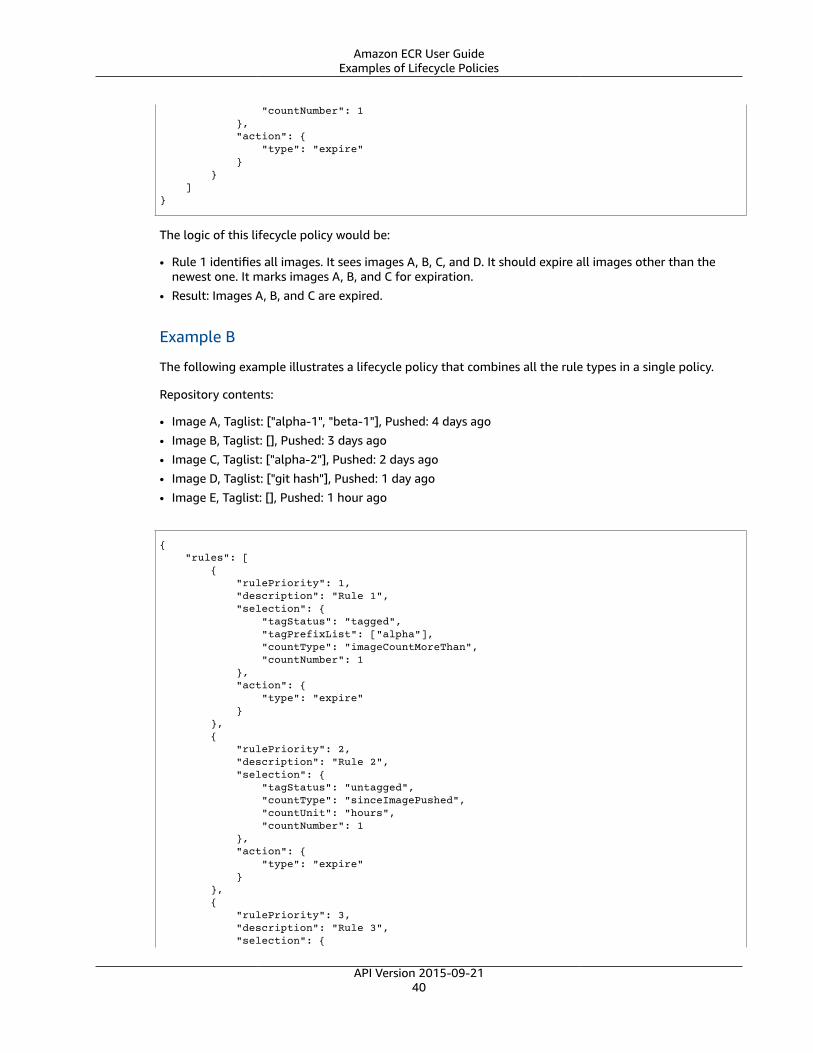
Amazon ECR User GuideExamples of Lifecycle Policies
"countNumber": 1 }, "action": { "type": "expire" } } ]}
The logic of this lifecycle policy would be:
• Rule 1 identifies all images. It sees images A, B, C, and D. It should expire all images other than thenewest one. It marks images A, B, and C for expiration.
• Result: Images A, B, and C are expired.
Example B
The following example illustrates a lifecycle policy that combines all the rule types in a single policy.
Repository contents:
• Image A, Taglist: ["alpha-1", "beta-1"], Pushed: 4 days ago• Image B, Taglist: [], Pushed: 3 days ago• Image C, Taglist: ["alpha-2"], Pushed: 2 days ago• Image D, Taglist: ["git hash"], Pushed: 1 day ago• Image E, Taglist: [], Pushed: 1 hour ago
{ "rules": [ { "rulePriority": 1, "description": "Rule 1", "selection": { "tagStatus": "tagged", "tagPrefixList": ["alpha"], "countType": "imageCountMoreThan", "countNumber": 1 }, "action": { "type": "expire" } }, { "rulePriority": 2, "description": "Rule 2", "selection": { "tagStatus": "untagged", "countType": "sinceImagePushed", "countUnit": "hours", "countNumber": 1 }, "action": { "type": "expire" } }, { "rulePriority": 3, "description": "Rule 3", "selection": {
API Version 2015-09-2140
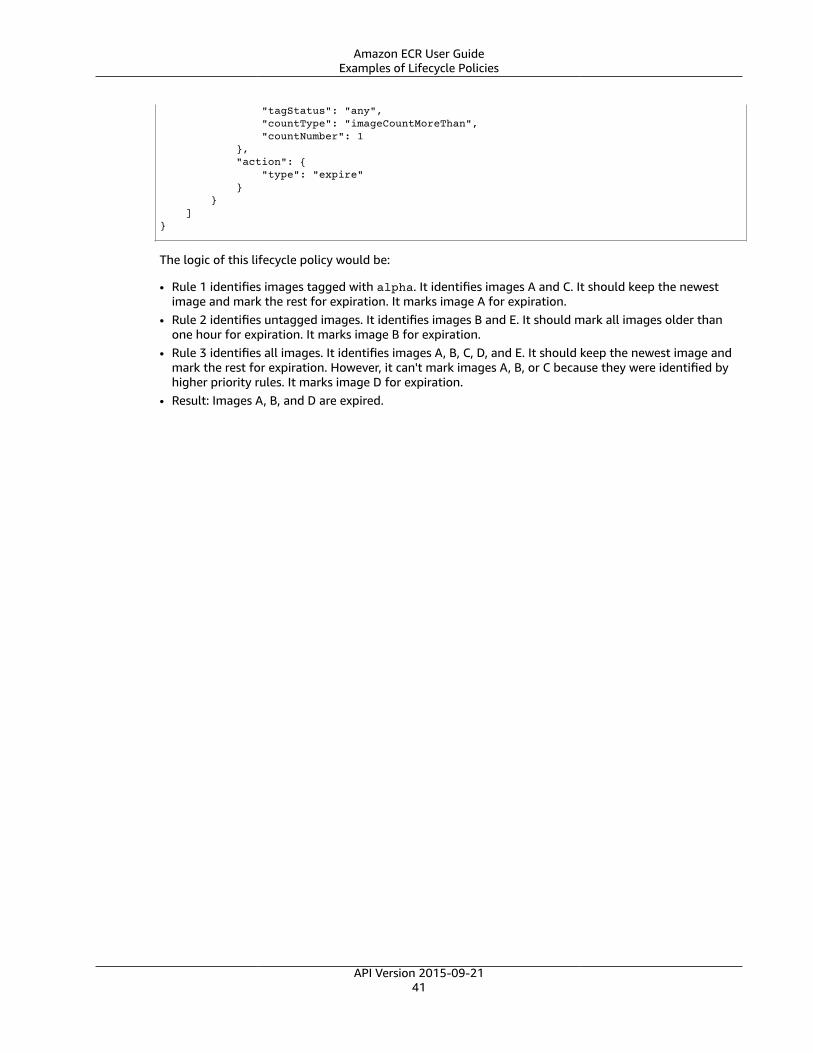
Amazon ECR User GuideExamples of Lifecycle Policies
"tagStatus": "any", "countType": "imageCountMoreThan", "countNumber": 1 }, "action": { "type": "expire" } } ]}
The logic of this lifecycle policy would be:
• Rule 1 identifies images tagged with alpha. It identifies images A and C. It should keep the newestimage and mark the rest for expiration. It marks image A for expiration.
• Rule 2 identifies untagged images. It identifies images B and E. It should mark all images older thanone hour for expiration. It marks image B for expiration.
• Rule 3 identifies all images. It identifies images A, B, C, D, and E. It should keep the newest image andmark the rest for expiration. However, it can't mark images A, B, or C because they were identified byhigher priority rules. It marks image D for expiration.
• Result: Images A, B, and D are expired.
API Version 2015-09-2141
Amazon ECR User GuidePolicy Structure
Amazon ECR IAM Policies and RolesBy default, IAM users don't have permission to create or modify Amazon ECR resources, or perform tasksusing the Amazon ECR API. (This means that they also can't do so using the Amazon ECR console orthe AWS CLI.) To allow IAM users to create or modify resources and perform tasks, you must create IAMpolicies that grant IAM users permission to use the specific resources and API operations they'll need, andthen attach those policies to the IAM users or groups that require those permissions.
When you attach a policy to a user or group of users, it allows or denies the users permission to performthe specified tasks on the specified resources. For more information, see Permissions and Policies andManaging IAM Policies in the IAM User Guide.
Likewise, Amazon ECS container instances make calls to the Amazon ECR APIs on your behalf (to pullDocker images that are used in Amazon ECS task definitions), so they need to authenticate with yourcredentials. This authentication is accomplished by creating an IAM role for your container instances andassociating that role with your container instances when you launch them. For more information, seeAmazon ECS Container Instance IAM Role in the Amazon Elastic Container Service Developer Guide. Formore information about IAM roles, see IAM Roles in the IAM User Guide.
Getting Started
An IAM policy must grant or deny permission to use one or more Amazon ECR operations. It must alsospecify the resources that can be used with the operation, which can be all resources, or in some cases,specific resources. The policy can also include conditions that you apply to the resource.
Amazon ECR partially supports resource-level permissions. This means that for some Amazon ECS APIoperations, you cannot specify which resource a user is allowed to work with for that operation; instead,you have to allow users to work with all resources for that operation.
Topics• Policy Structure (p. 42)• Amazon ECR Managed Policies (p. 46)• Supported Resource-Level Permissions for Amazon ECR API Actions (p. 47)• Creating Amazon ECR IAM Policies (p. 49)
Policy StructureThe following topics explain the structure of an IAM policy.
Topics• Policy Syntax (p. 42)• Actions for Amazon ECR (p. 43)• Amazon Resource Names for Amazon ECR (p. 43)• Condition Keys for Amazon ECR (p. 45)• Checking that Users Have the Required Permissions (p. 45)
Policy SyntaxAn IAM policy is a JSON document that consists of one or more statements. Each statement is structuredas follows:
{
API Version 2015-09-2142
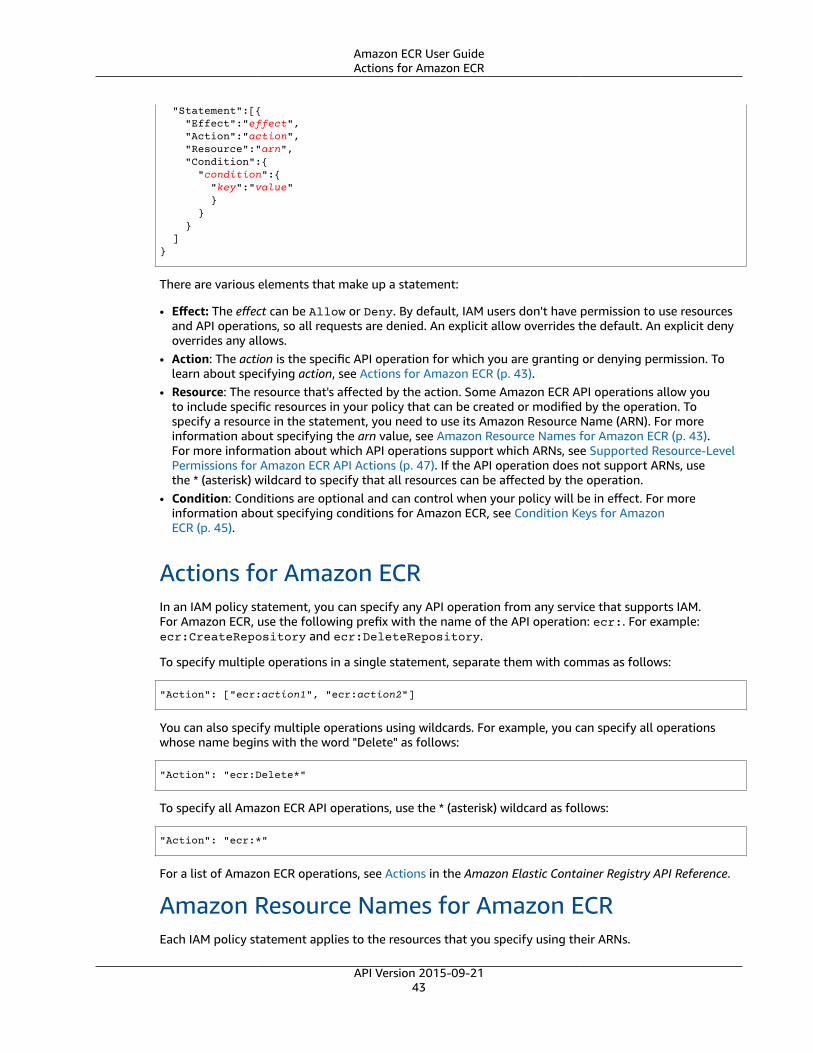
Amazon ECR User GuideActions for Amazon ECR
"Statement":[{ "Effect":"effect", "Action":"action", "Resource":"arn", "Condition":{ "condition":{ "key":"value" } } } ]}
There are various elements that make up a statement:
• Effect: The effect can be Allow or Deny. By default, IAM users don't have permission to use resourcesand API operations, so all requests are denied. An explicit allow overrides the default. An explicit denyoverrides any allows.
• Action: The action is the specific API operation for which you are granting or denying permission. Tolearn about specifying action, see Actions for Amazon ECR (p. 43).
• Resource: The resource that's affected by the action. Some Amazon ECR API operations allow youto include specific resources in your policy that can be created or modified by the operation. Tospecify a resource in the statement, you need to use its Amazon Resource Name (ARN). For moreinformation about specifying the arn value, see Amazon Resource Names for Amazon ECR (p. 43).For more information about which API operations support which ARNs, see Supported Resource-LevelPermissions for Amazon ECR API Actions (p. 47). If the API operation does not support ARNs, usethe * (asterisk) wildcard to specify that all resources can be affected by the operation.
• Condition: Conditions are optional and can control when your policy will be in effect. For moreinformation about specifying conditions for Amazon ECR, see Condition Keys for AmazonECR (p. 45).
Actions for Amazon ECRIn an IAM policy statement, you can specify any API operation from any service that supports IAM.For Amazon ECR, use the following prefix with the name of the API operation: ecr:. For example:ecr:CreateRepository and ecr:DeleteRepository.
To specify multiple operations in a single statement, separate them with commas as follows:
"Action": ["ecr:action1", "ecr:action2"]
You can also specify multiple operations using wildcards. For example, you can specify all operationswhose name begins with the word "Delete" as follows:
"Action": "ecr:Delete*"
To specify all Amazon ECR API operations, use the * (asterisk) wildcard as follows:
"Action": "ecr:*"
For a list of Amazon ECR operations, see Actions in the Amazon Elastic Container Registry API Reference.
Amazon Resource Names for Amazon ECREach IAM policy statement applies to the resources that you specify using their ARNs.
API Version 2015-09-2143
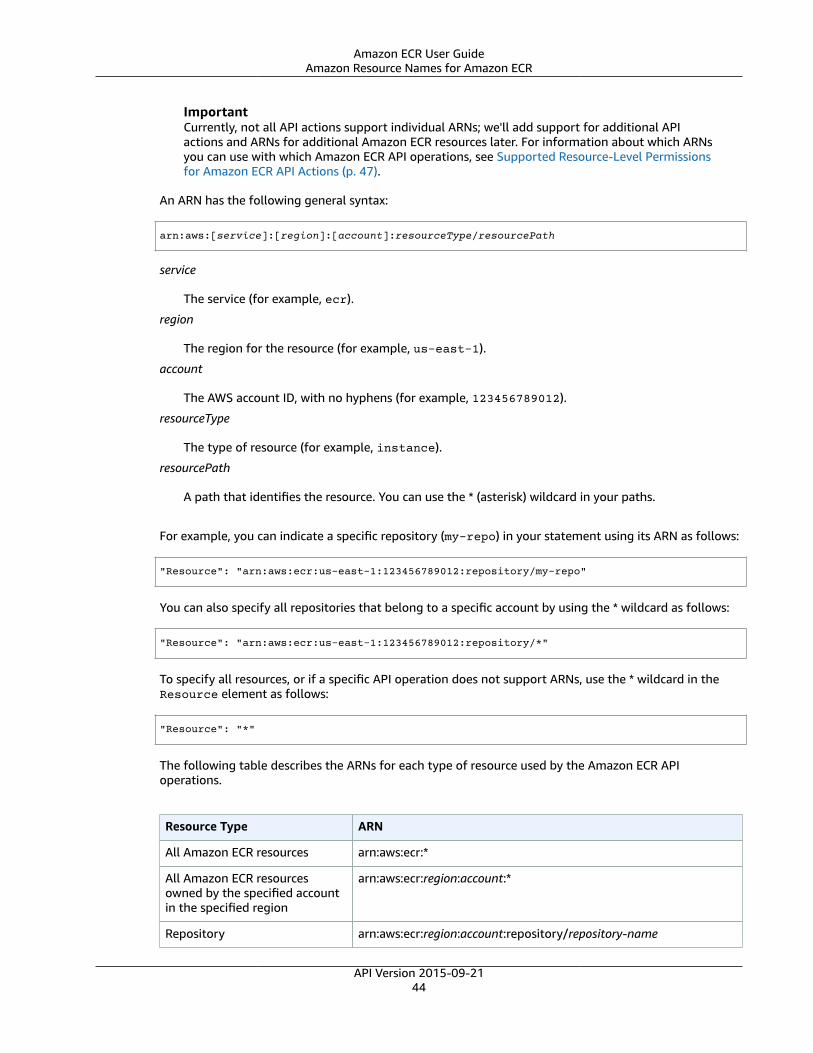
Amazon ECR User GuideAmazon Resource Names for Amazon ECR
ImportantCurrently, not all API actions support individual ARNs; we'll add support for additional APIactions and ARNs for additional Amazon ECR resources later. For information about which ARNsyou can use with which Amazon ECR API operations, see Supported Resource-Level Permissionsfor Amazon ECR API Actions (p. 47).
An ARN has the following general syntax:
arn:aws:[service]:[region]:[account]:resourceType/resourcePath
service
The service (for example, ecr).
region
The region for the resource (for example, us-east-1).
account
The AWS account ID, with no hyphens (for example, 123456789012).
resourceType
The type of resource (for example, instance).
resourcePath
A path that identifies the resource. You can use the * (asterisk) wildcard in your paths.
For example, you can indicate a specific repository (my-repo) in your statement using its ARN as follows:
"Resource": "arn:aws:ecr:us-east-1:123456789012:repository/my-repo"
You can also specify all repositories that belong to a specific account by using the * wildcard as follows:
"Resource": "arn:aws:ecr:us-east-1:123456789012:repository/*"
To specify all resources, or if a specific API operation does not support ARNs, use the * wildcard in theResource element as follows:
"Resource": "*"
The following table describes the ARNs for each type of resource used by the Amazon ECR APIoperations.
Resource Type ARN
All Amazon ECR resources arn:aws:ecr:*
All Amazon ECR resourcesowned by the specified accountin the specified region
arn:aws:ecr:region:account:*
Repository arn:aws:ecr:region:account:repository/repository-name
API Version 2015-09-2144
Amazon ECR User GuideCondition Keys for Amazon ECR
Many Amazon ECR API operations accept multiple resources. To specify multiple resources in a singlestatement, separate their ARNs with commas, as follows:
"Resource": ["arn1", "arn2"]
For more information, see Amazon Resource Names (ARN) and AWS Service Namespaces in the AmazonWeb Services General Reference.
Condition Keys for Amazon ECRIn a policy statement, you can optionally specify conditions that control when it is in effect. Eachcondition contains one or more key-value pairs. Condition keys are not case-sensitive. We've definedAWS-wide condition keys, plus additional service-specific condition keys.
If you specify multiple conditions, or multiple keys in a single condition, we evaluate them using alogical AND operation. If you specify a single condition with multiple values for one key, we evaluate thecondition using a logical OR operation. For permission to be granted, all conditions must be met.
You can also use placeholders when you specify conditions. For more information, see Policy Variables inthe IAM User Guide.
Amazon ECR implements the AWS-wide condition keys (see Available Keys),.
For example repository policy statements for Amazon ECR, see Amazon ECR Repository Policies (p. 18).
Checking that Users Have the Required PermissionsAfter you've created an IAM policy, we recommend that you check whether it grants users thepermissions to use the particular API operations and resources they need before you put the policy intoproduction.
First, create an IAM user for testing purposes, and then attach the IAM policy that you created to the testuser. Then, make a request as the test user. You can make test requests in the console or with the AWSCLI.
NoteYou can also test your policies with the IAM Policy Simulator. For more information about thepolicy simulator, see Working with the IAM Policy Simulator in the IAM User Guide.
If the action that you are testing creates or modifies a resource, you should make the request usingthe DryRun parameter (or run the AWS CLI command with the --dry-run option). In this case, thecall completes the authorization check, but does not complete the operation. For example, you cancheck whether the user can terminate a particular instance without actually terminating it. If thetest user has the required permissions, the request returns DryRunOperation; otherwise, it returnsUnauthorizedOperation.
If the policy doesn't grant the user the permissions that you expected, or is overly permissive, you canadjust the policy as needed and retest until you get the desired results.
ImportantIt can take several minutes for policy changes to propagate before they take effect. Therefore,we recommend that you allow five minutes to pass before you test your policy updates.
If an authorization check fails, the request returns an encoded message with diagnostic information. Youcan decode the message using the DecodeAuthorizationMessage action. For more information, seeDecodeAuthorizationMessage in the AWS Security Token Service API Reference, and decode-authorization-message in the AWS CLI Command Reference.
API Version 2015-09-2145
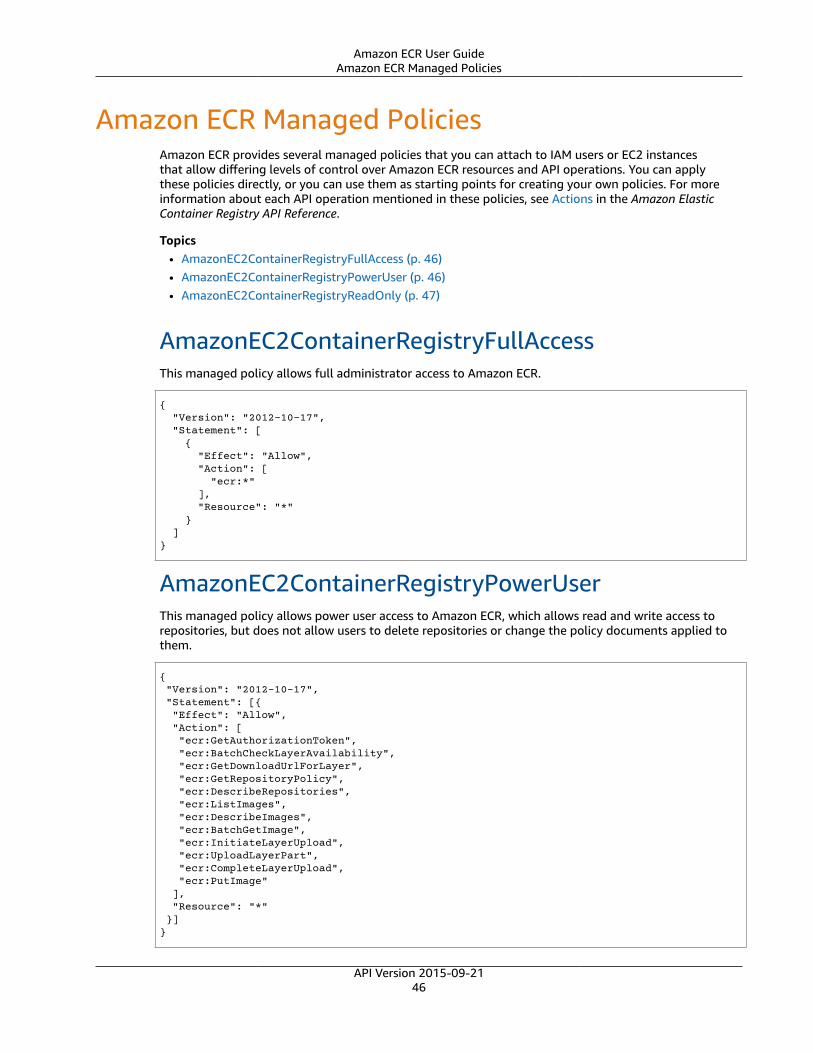
Amazon ECR User GuideAmazon ECR Managed Policies
Amazon ECR Managed PoliciesAmazon ECR provides several managed policies that you can attach to IAM users or EC2 instancesthat allow differing levels of control over Amazon ECR resources and API operations. You can applythese policies directly, or you can use them as starting points for creating your own policies. For moreinformation about each API operation mentioned in these policies, see Actions in the Amazon ElasticContainer Registry API Reference.
Topics• AmazonEC2ContainerRegistryFullAccess (p. 46)• AmazonEC2ContainerRegistryPowerUser (p. 46)• AmazonEC2ContainerRegistryReadOnly (p. 47)
AmazonEC2ContainerRegistryFullAccessThis managed policy allows full administrator access to Amazon ECR.
{ "Version": "2012-10-17", "Statement": [ { "Effect": "Allow", "Action": [ "ecr:*" ], "Resource": "*" } ]}
AmazonEC2ContainerRegistryPowerUserThis managed policy allows power user access to Amazon ECR, which allows read and write access torepositories, but does not allow users to delete repositories or change the policy documents applied tothem.
{ "Version": "2012-10-17", "Statement": [{ "Effect": "Allow", "Action": [ "ecr:GetAuthorizationToken", "ecr:BatchCheckLayerAvailability", "ecr:GetDownloadUrlForLayer", "ecr:GetRepositoryPolicy", "ecr:DescribeRepositories", "ecr:ListImages", "ecr:DescribeImages", "ecr:BatchGetImage", "ecr:InitiateLayerUpload", "ecr:UploadLayerPart", "ecr:CompleteLayerUpload", "ecr:PutImage" ], "Resource": "*" }]}
API Version 2015-09-2146

Amazon ECR User GuideAmazonEC2ContainerRegistryReadOnly
AmazonEC2ContainerRegistryReadOnlyThis managed policy allows read-only access to Amazon ECR, such as the ability to list repositories andthe images within the repositories, and also to pull images from Amazon ECR with the Docker CLI.
{ "Version": "2012-10-17", "Statement": [{ "Effect": "Allow", "Action": [ "ecr:GetAuthorizationToken", "ecr:BatchCheckLayerAvailability", "ecr:GetDownloadUrlForLayer", "ecr:GetRepositoryPolicy", "ecr:DescribeRepositories", "ecr:ListImages", "ecr:DescribeImages", "ecr:BatchGetImage" ], "Resource": "*" }]}
Supported Resource-Level Permissions for AmazonECR API Actions
Resource-level permissions refers to the ability to specify which resources users are allowed to performactions on. Amazon ECR has partial support for resource-level permissions. This means that for certainAmazon ECR operations, you can control when users are allowed to use those operations based onconditions that have to be fulfilled, or specific resources that users are allowed to use.
The following table describes the Amazon ECR API operations that currently support resource-levelpermissions, as well as the supported resources and resource ARNs for each.
For a list of Amazon ECR operations, see Actions in the Amazon Elastic Container Registry API Reference.
ImportantIf an Amazon ECR API operation is not listed in this table, then it does not support resource-levelpermissions. If an API operation does not support resource-level permissions, you can grantusers permission to use the operation, but you have to specify the * (asterisk) wildcard for theresource element of your policy statement.
API action Resource
BatchCheckLayerAvailability Repository
arn:aws:ecr:region:account:repository/my-repo
BatchDeleteImage Repository
arn:aws:ecr:region:account:repository/my-repo
BatchGetImage Repository
arn:aws:ecr:region:account:repository/my-repo
API Version 2015-09-2147
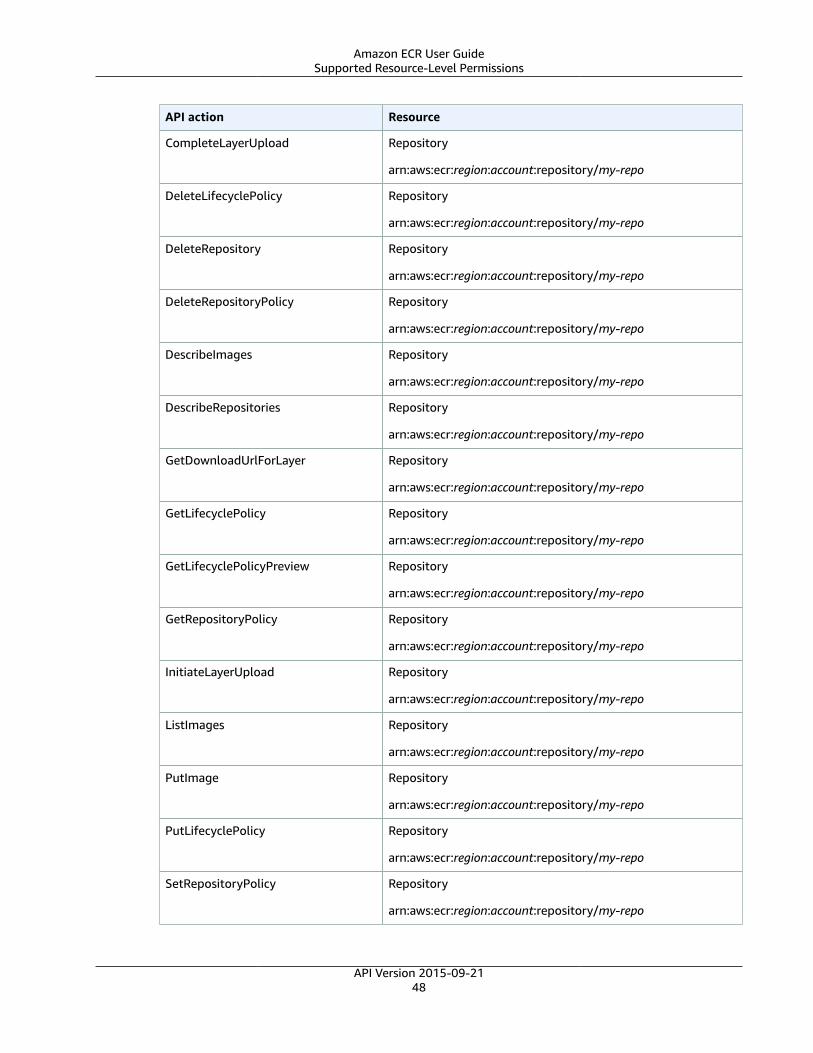
Amazon ECR User GuideSupported Resource-Level Permissions
API action Resource
CompleteLayerUpload Repository
arn:aws:ecr:region:account:repository/my-repo
DeleteLifecyclePolicy Repository
arn:aws:ecr:region:account:repository/my-repo
DeleteRepository Repository
arn:aws:ecr:region:account:repository/my-repo
DeleteRepositoryPolicy Repository
arn:aws:ecr:region:account:repository/my-repo
DescribeImages Repository
arn:aws:ecr:region:account:repository/my-repo
DescribeRepositories Repository
arn:aws:ecr:region:account:repository/my-repo
GetDownloadUrlForLayer Repository
arn:aws:ecr:region:account:repository/my-repo
GetLifecyclePolicy Repository
arn:aws:ecr:region:account:repository/my-repo
GetLifecyclePolicyPreview Repository
arn:aws:ecr:region:account:repository/my-repo
GetRepositoryPolicy Repository
arn:aws:ecr:region:account:repository/my-repo
InitiateLayerUpload Repository
arn:aws:ecr:region:account:repository/my-repo
ListImages Repository
arn:aws:ecr:region:account:repository/my-repo
PutImage Repository
arn:aws:ecr:region:account:repository/my-repo
PutLifecyclePolicy Repository
arn:aws:ecr:region:account:repository/my-repo
SetRepositoryPolicy Repository
arn:aws:ecr:region:account:repository/my-repo
API Version 2015-09-2148
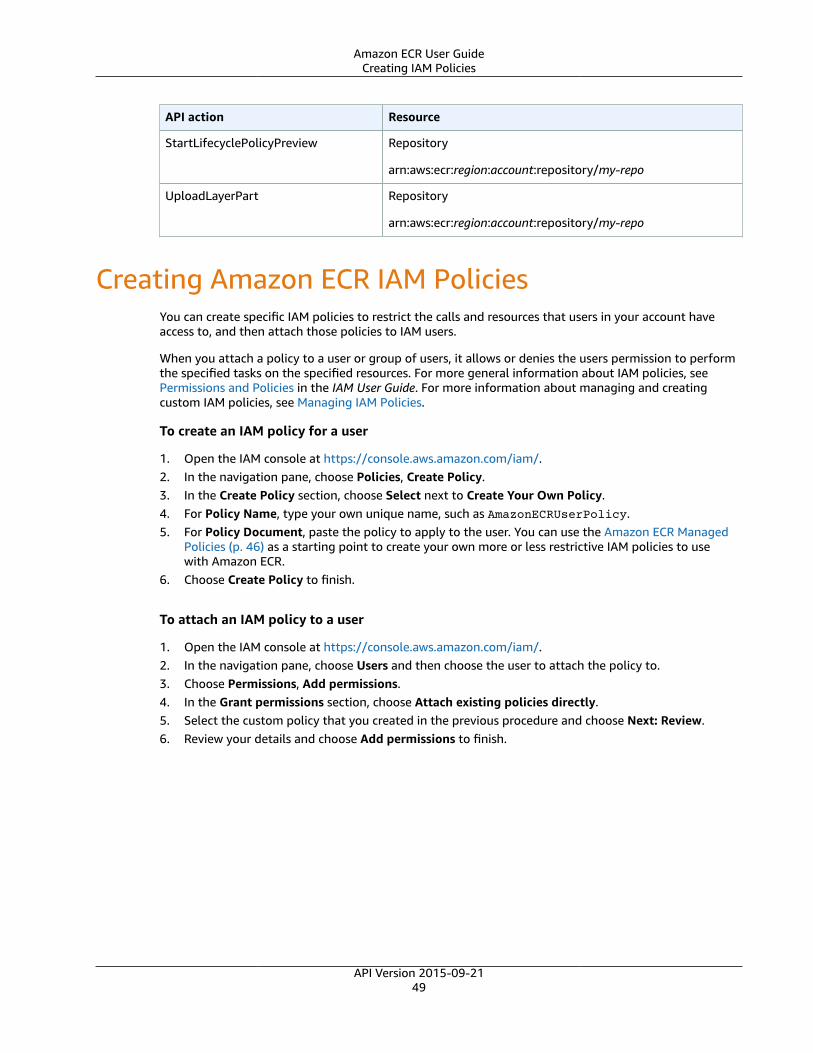
Amazon ECR User GuideCreating IAM Policies
API action Resource
StartLifecyclePolicyPreview Repository
arn:aws:ecr:region:account:repository/my-repo
UploadLayerPart Repository
arn:aws:ecr:region:account:repository/my-repo
Creating Amazon ECR IAM PoliciesYou can create specific IAM policies to restrict the calls and resources that users in your account haveaccess to, and then attach those policies to IAM users.
When you attach a policy to a user or group of users, it allows or denies the users permission to performthe specified tasks on the specified resources. For more general information about IAM policies, seePermissions and Policies in the IAM User Guide. For more information about managing and creatingcustom IAM policies, see Managing IAM Policies.
To create an IAM policy for a user
1. Open the IAM console at https://console.aws.amazon.com/iam/.2. In the navigation pane, choose Policies, Create Policy.3. In the Create Policy section, choose Select next to Create Your Own Policy.4. For Policy Name, type your own unique name, such as AmazonECRUserPolicy.5. For Policy Document, paste the policy to apply to the user. You can use the Amazon ECR Managed
Policies (p. 46) as a starting point to create your own more or less restrictive IAM policies to usewith Amazon ECR.
6. Choose Create Policy to finish.
To attach an IAM policy to a user
1. Open the IAM console at https://console.aws.amazon.com/iam/.2. In the navigation pane, choose Users and then choose the user to attach the policy to.3. Choose Permissions, Add permissions.4. In the Grant permissions section, choose Attach existing policies directly.5. Select the custom policy that you created in the previous procedure and choose Next: Review.6. Review your details and choose Add permissions to finish.
API Version 2015-09-2149
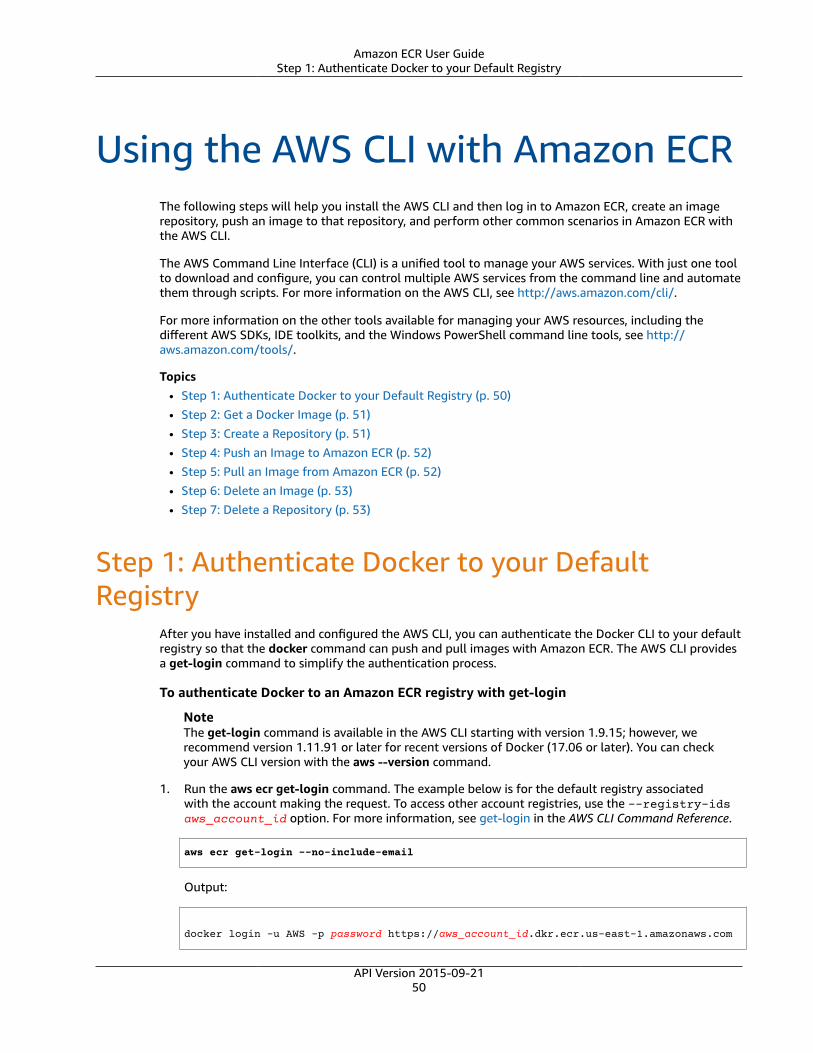
Amazon ECR User GuideStep 1: Authenticate Docker to your Default Registry
Using the AWS CLI with Amazon ECRThe following steps will help you install the AWS CLI and then log in to Amazon ECR, create an imagerepository, push an image to that repository, and perform other common scenarios in Amazon ECR withthe AWS CLI.
The AWS Command Line Interface (CLI) is a unified tool to manage your AWS services. With just one toolto download and configure, you can control multiple AWS services from the command line and automatethem through scripts. For more information on the AWS CLI, see http://aws.amazon.com/cli/.
For more information on the other tools available for managing your AWS resources, including thedifferent AWS SDKs, IDE toolkits, and the Windows PowerShell command line tools, see http://aws.amazon.com/tools/.
Topics• Step 1: Authenticate Docker to your Default Registry (p. 50)• Step 2: Get a Docker Image (p. 51)• Step 3: Create a Repository (p. 51)• Step 4: Push an Image to Amazon ECR (p. 52)• Step 5: Pull an Image from Amazon ECR (p. 52)• Step 6: Delete an Image (p. 53)• Step 7: Delete a Repository (p. 53)
Step 1: Authenticate Docker to your DefaultRegistry
After you have installed and configured the AWS CLI, you can authenticate the Docker CLI to your defaultregistry so that the docker command can push and pull images with Amazon ECR. The AWS CLI providesa get-login command to simplify the authentication process.
To authenticate Docker to an Amazon ECR registry with get-login
NoteThe get-login command is available in the AWS CLI starting with version 1.9.15; however, werecommend version 1.11.91 or later for recent versions of Docker (17.06 or later). You can checkyour AWS CLI version with the aws --version command.
1. Run the aws ecr get-login command. The example below is for the default registry associatedwith the account making the request. To access other account registries, use the --registry-idsaws_account_id option. For more information, see get-login in the AWS CLI Command Reference.
aws ecr get-login --no-include-email
Output:
docker login -u AWS -p password https://aws_account_id.dkr.ecr.us-east-1.amazonaws.com
API Version 2015-09-2150
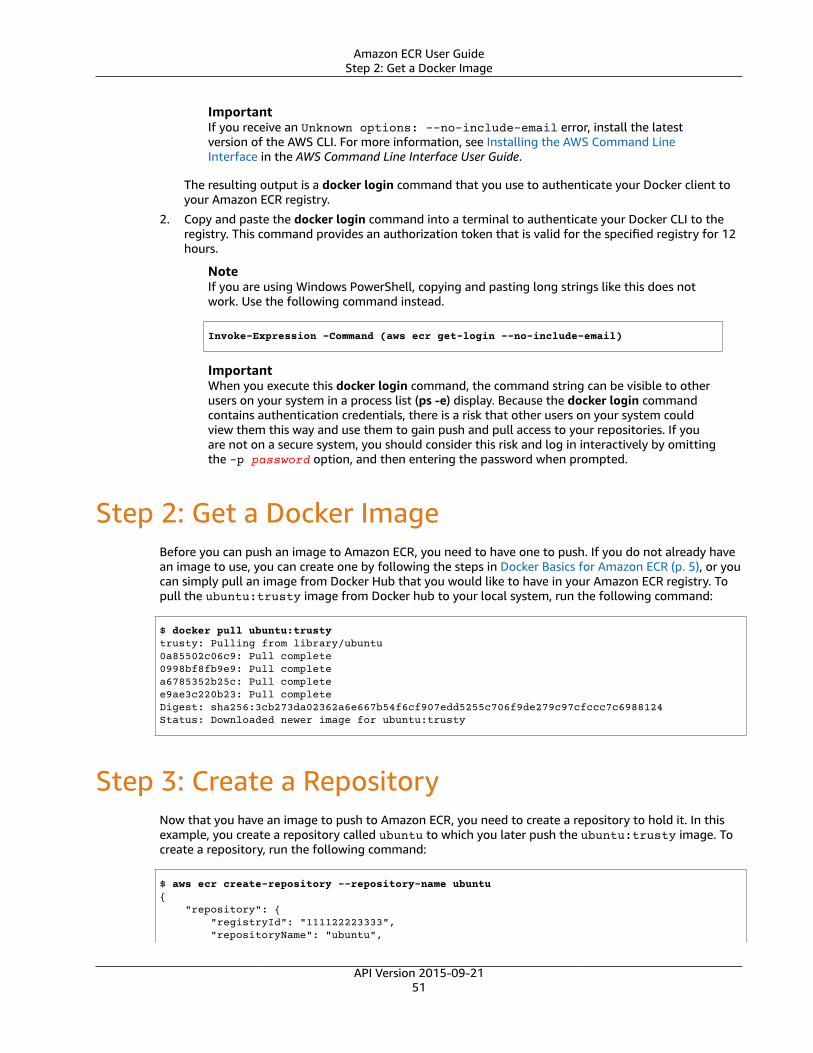
Amazon ECR User GuideStep 2: Get a Docker Image
ImportantIf you receive an Unknown options: --no-include-email error, install the latestversion of the AWS CLI. For more information, see Installing the AWS Command LineInterface in the AWS Command Line Interface User Guide.
The resulting output is a docker login command that you use to authenticate your Docker client toyour Amazon ECR registry.
2. Copy and paste the docker login command into a terminal to authenticate your Docker CLI to theregistry. This command provides an authorization token that is valid for the specified registry for 12hours.
NoteIf you are using Windows PowerShell, copying and pasting long strings like this does notwork. Use the following command instead.
Invoke-Expression -Command (aws ecr get-login --no-include-email)
ImportantWhen you execute this docker login command, the command string can be visible to otherusers on your system in a process list (ps -e) display. Because the docker login commandcontains authentication credentials, there is a risk that other users on your system couldview them this way and use them to gain push and pull access to your repositories. If youare not on a secure system, you should consider this risk and log in interactively by omittingthe -p password option, and then entering the password when prompted.
Step 2: Get a Docker ImageBefore you can push an image to Amazon ECR, you need to have one to push. If you do not already havean image to use, you can create one by following the steps in Docker Basics for Amazon ECR (p. 5), or youcan simply pull an image from Docker Hub that you would like to have in your Amazon ECR registry. Topull the ubuntu:trusty image from Docker hub to your local system, run the following command:
$ docker pull ubuntu:trustytrusty: Pulling from library/ubuntu0a85502c06c9: Pull complete0998bf8fb9e9: Pull completea6785352b25c: Pull completee9ae3c220b23: Pull completeDigest: sha256:3cb273da02362a6e667b54f6cf907edd5255c706f9de279c97cfccc7c6988124Status: Downloaded newer image for ubuntu:trusty
Step 3: Create a RepositoryNow that you have an image to push to Amazon ECR, you need to create a repository to hold it. In thisexample, you create a repository called ubuntu to which you later push the ubuntu:trusty image. Tocreate a repository, run the following command:
$ aws ecr create-repository --repository-name ubuntu{ "repository": { "registryId": "111122223333", "repositoryName": "ubuntu",
API Version 2015-09-2151
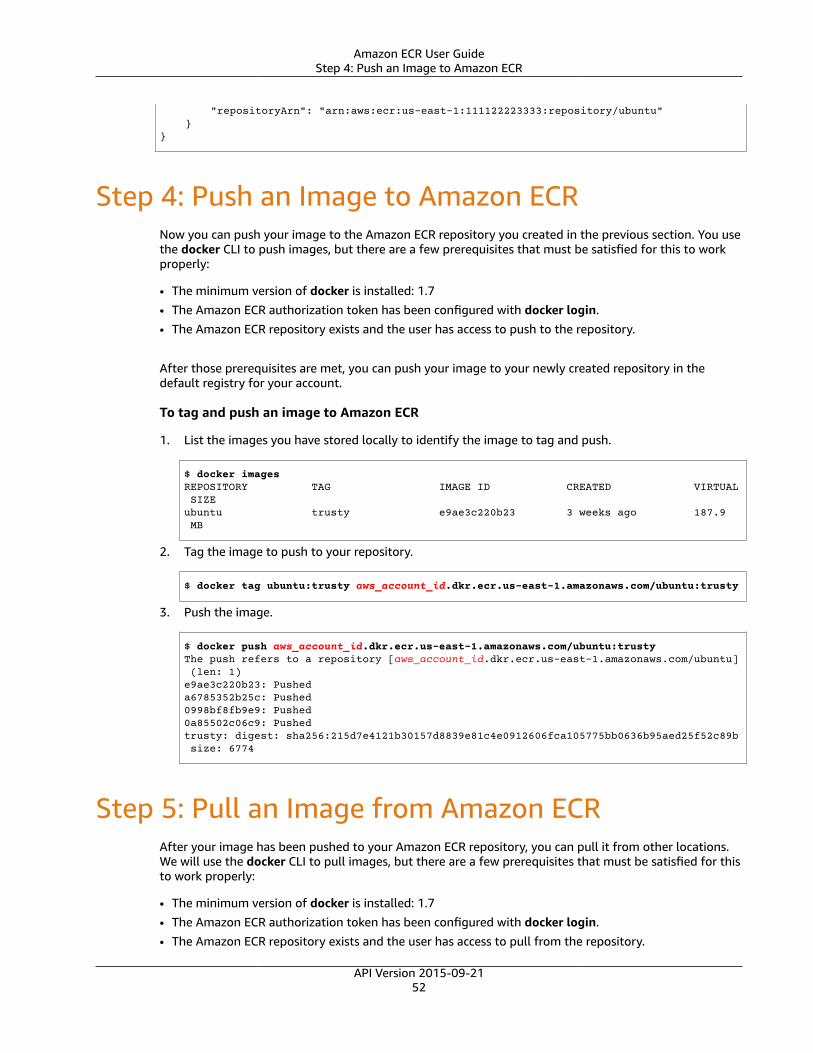
Amazon ECR User GuideStep 4: Push an Image to Amazon ECR
"repositoryArn": "arn:aws:ecr:us-east-1:111122223333:repository/ubuntu" }}
Step 4: Push an Image to Amazon ECRNow you can push your image to the Amazon ECR repository you created in the previous section. You usethe docker CLI to push images, but there are a few prerequisites that must be satisfied for this to workproperly:
• The minimum version of docker is installed: 1.7• The Amazon ECR authorization token has been configured with docker login.• The Amazon ECR repository exists and the user has access to push to the repository.
After those prerequisites are met, you can push your image to your newly created repository in thedefault registry for your account.
To tag and push an image to Amazon ECR
1. List the images you have stored locally to identify the image to tag and push.
$ docker imagesREPOSITORY TAG IMAGE ID CREATED VIRTUAL SIZEubuntu trusty e9ae3c220b23 3 weeks ago 187.9 MB
2. Tag the image to push to your repository.
$ docker tag ubuntu:trusty aws_account_id.dkr.ecr.us-east-1.amazonaws.com/ubuntu:trusty
3. Push the image.
$ docker push aws_account_id.dkr.ecr.us-east-1.amazonaws.com/ubuntu:trustyThe push refers to a repository [aws_account_id.dkr.ecr.us-east-1.amazonaws.com/ubuntu] (len: 1)e9ae3c220b23: Pusheda6785352b25c: Pushed0998bf8fb9e9: Pushed0a85502c06c9: Pushedtrusty: digest: sha256:215d7e4121b30157d8839e81c4e0912606fca105775bb0636b95aed25f52c89b size: 6774
Step 5: Pull an Image from Amazon ECRAfter your image has been pushed to your Amazon ECR repository, you can pull it from other locations.We will use the docker CLI to pull images, but there are a few prerequisites that must be satisfied for thisto work properly:
• The minimum version of docker is installed: 1.7• The Amazon ECR authorization token has been configured with docker login.• The Amazon ECR repository exists and the user has access to pull from the repository.
API Version 2015-09-2152
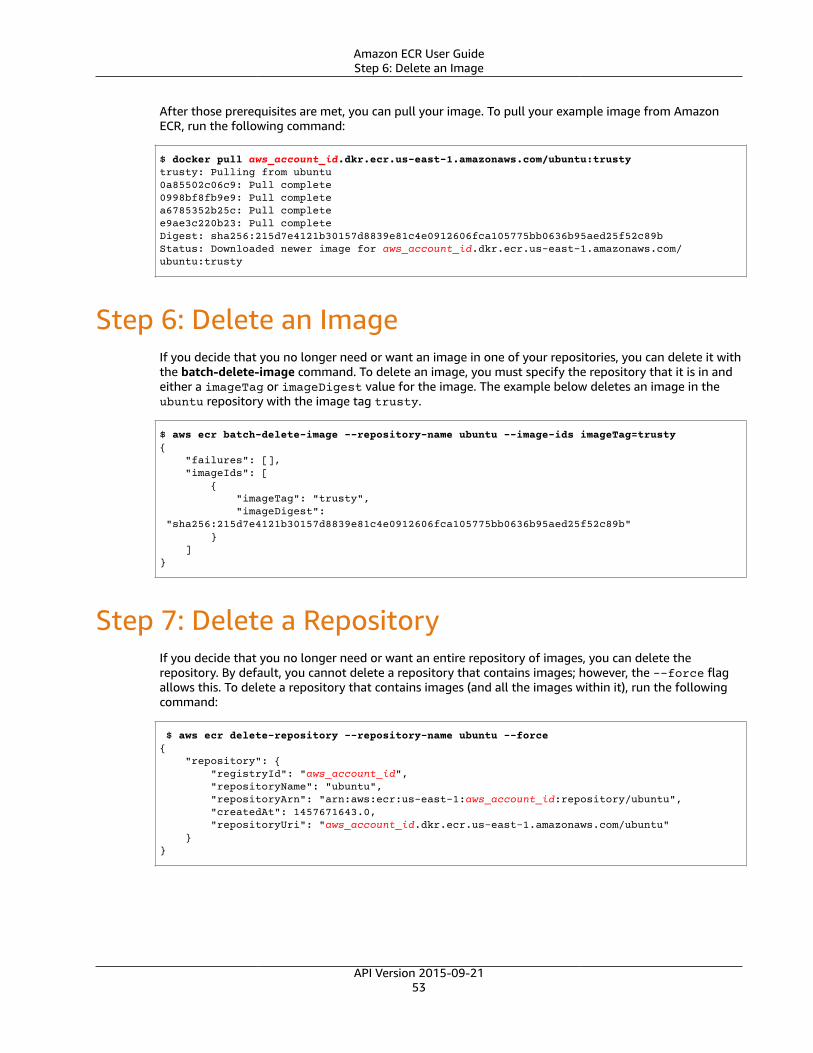
Amazon ECR User GuideStep 6: Delete an Image
After those prerequisites are met, you can pull your image. To pull your example image from AmazonECR, run the following command:
$ docker pull aws_account_id.dkr.ecr.us-east-1.amazonaws.com/ubuntu:trustytrusty: Pulling from ubuntu0a85502c06c9: Pull complete0998bf8fb9e9: Pull completea6785352b25c: Pull completee9ae3c220b23: Pull completeDigest: sha256:215d7e4121b30157d8839e81c4e0912606fca105775bb0636b95aed25f52c89bStatus: Downloaded newer image for aws_account_id.dkr.ecr.us-east-1.amazonaws.com/ubuntu:trusty
Step 6: Delete an ImageIf you decide that you no longer need or want an image in one of your repositories, you can delete it withthe batch-delete-image command. To delete an image, you must specify the repository that it is in andeither a imageTag or imageDigest value for the image. The example below deletes an image in theubuntu repository with the image tag trusty.
$ aws ecr batch-delete-image --repository-name ubuntu --image-ids imageTag=trusty{ "failures": [], "imageIds": [ { "imageTag": "trusty", "imageDigest": "sha256:215d7e4121b30157d8839e81c4e0912606fca105775bb0636b95aed25f52c89b" } ]}
Step 7: Delete a RepositoryIf you decide that you no longer need or want an entire repository of images, you can delete therepository. By default, you cannot delete a repository that contains images; however, the --force flagallows this. To delete a repository that contains images (and all the images within it), run the followingcommand:
$ aws ecr delete-repository --repository-name ubuntu --force{ "repository": { "registryId": "aws_account_id", "repositoryName": "ubuntu", "repositoryArn": "arn:aws:ecr:us-east-1:aws_account_id:repository/ubuntu", "createdAt": 1457671643.0, "repositoryUri": "aws_account_id.dkr.ecr.us-east-1.amazonaws.com/ubuntu" }}
API Version 2015-09-2153
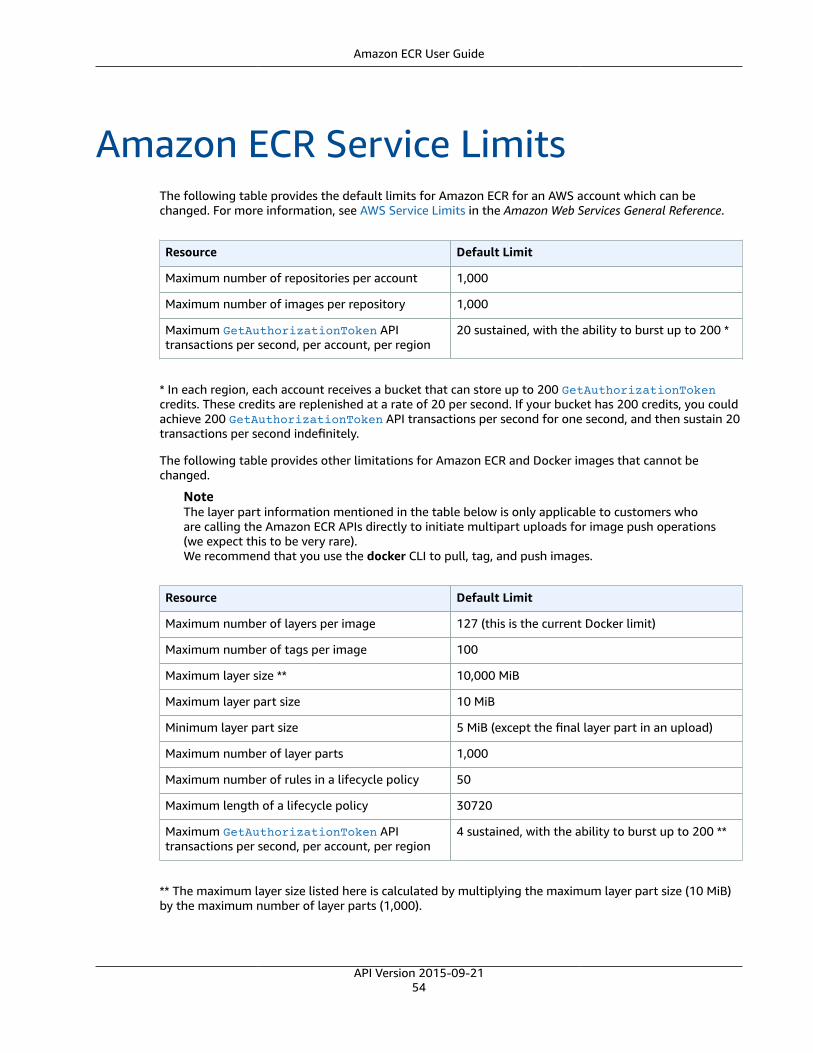
Amazon ECR User Guide
Amazon ECR Service LimitsThe following table provides the default limits for Amazon ECR for an AWS account which can bechanged. For more information, see AWS Service Limits in the Amazon Web Services General Reference.
Resource Default Limit
Maximum number of repositories per account 1,000
Maximum number of images per repository 1,000
Maximum GetAuthorizationToken APItransactions per second, per account, per region
20 sustained, with the ability to burst up to 200 *
* In each region, each account receives a bucket that can store up to 200 GetAuthorizationTokencredits. These credits are replenished at a rate of 20 per second. If your bucket has 200 credits, you couldachieve 200 GetAuthorizationToken API transactions per second for one second, and then sustain 20transactions per second indefinitely.
The following table provides other limitations for Amazon ECR and Docker images that cannot bechanged.
NoteThe layer part information mentioned in the table below is only applicable to customers whoare calling the Amazon ECR APIs directly to initiate multipart uploads for image push operations(we expect this to be very rare).We recommend that you use the docker CLI to pull, tag, and push images.
Resource Default Limit
Maximum number of layers per image 127 (this is the current Docker limit)
Maximum number of tags per image 100
Maximum layer size ** 10,000 MiB
Maximum layer part size 10 MiB
Minimum layer part size 5 MiB (except the final layer part in an upload)
Maximum number of layer parts 1,000
Maximum number of rules in a lifecycle policy 50
Maximum length of a lifecycle policy 30720
Maximum GetAuthorizationToken APItransactions per second, per account, per region
4 sustained, with the ability to burst up to 200 **
** The maximum layer size listed here is calculated by multiplying the maximum layer part size (10 MiB)by the maximum number of layer parts (1,000).
API Version 2015-09-2154
Amazon ECR User GuideAmazon ECR Information in CloudTrail
Logging Amazon ECR API Calls withAWS CloudTrail
Amazon ECR is integrated with AWS CloudTrail, a service that provides a record of actions taken by auser, role, or an AWS service in Amazon ECR. CloudTrail captures all API calls for Amazon ECR as events,including calls from the Amazon ECR console and from code calls to the Amazon ECR APIs. If you create atrail, you can enable continuous delivery of CloudTrail events to an Amazon S3 bucket, including eventsfor Amazon ECR. If you don't configure a trail, you can still view the most recent events in the CloudTrailconsole in Event history. Using the information collected by CloudTrail, you can determine the requestthat was made to Amazon ECR, the IP address from which the request was made, who made the request,when it was made, and additional details.
To learn more about CloudTrail, see the AWS CloudTrail User Guide.
Amazon ECR Information in CloudTrailCloudTrail is enabled on your AWS account when you create the account. When activity occurs in AmazonECR, that activity is recorded in a CloudTrail event along with other AWS service events in Event history.You can view, search, and download recent events in your AWS account. For more information, seeViewing Events with CloudTrail Event History.
For an ongoing record of events in your AWS account, including events for Amazon ECR, create a trail. Atrail enables CloudTrail to deliver log files to an Amazon S3 bucket. By default, when you create a trailin the console, the trail applies to all regions. The trail logs events from all regions in the AWS partitionand delivers the log files to the Amazon S3 bucket that you specify. Additionally, you can configureother AWS services to further analyze and act upon the event data collected in CloudTrail logs. For moreinformation, see:
• Overview for Creating a Trail
• CloudTrail Supported Services and Integrations
• Configuring Amazon SNS Notifications for CloudTrail
• Receiving CloudTrail Log Files from Multiple Regions and Receiving CloudTrail Log Files from MultipleAccounts
All Amazon ECR actions are logged by CloudTrail and are documented in the Amazon Elastic ContainerRegistry API Reference. For example, calls to the GetAuthorizationToken, CreateRepository andSetRepositoryPolicy sections generate entries in the CloudTrail log files.
Every event or log entry contains information about who generated the request. The identityinformation helps you determine the following:
• Whether the request was made with root or IAM user credentials.
• Whether the request was made with temporary security credentials for a role or federated user.
• Whether the request was made by another AWS service.
For more information, see the CloudTrail userIdentity Element.
API Version 2015-09-2155
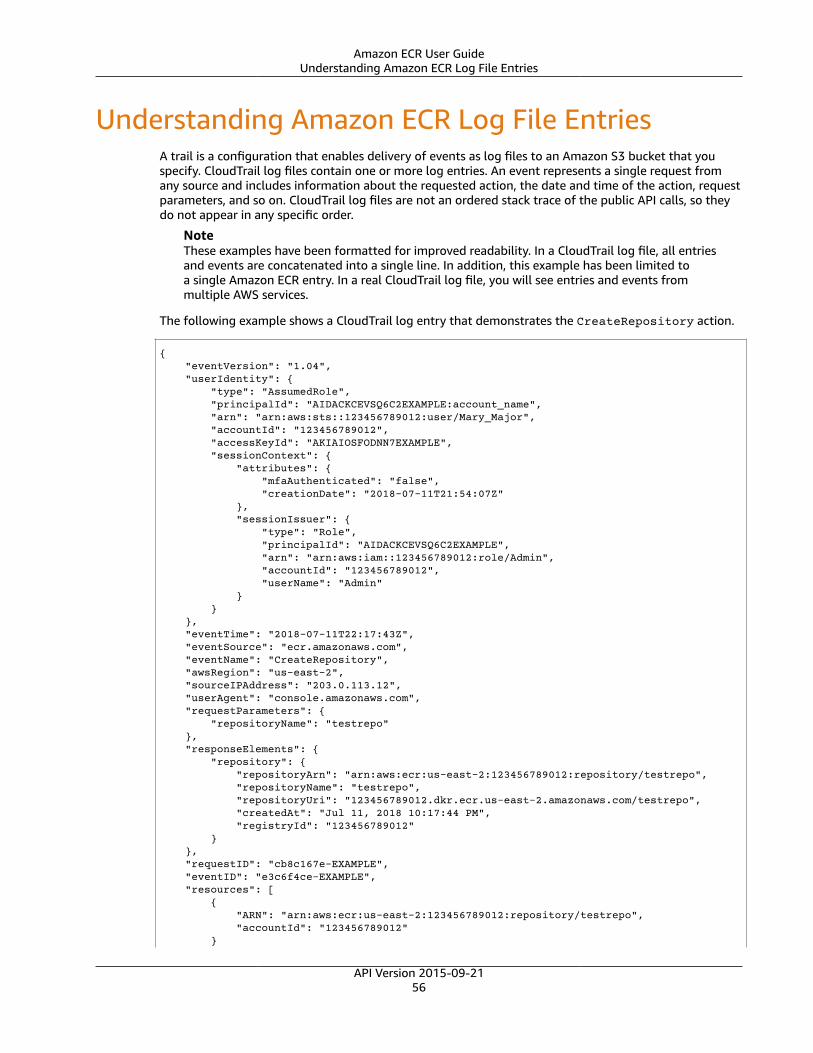
Amazon ECR User GuideUnderstanding Amazon ECR Log File Entries
Understanding Amazon ECR Log File EntriesA trail is a configuration that enables delivery of events as log files to an Amazon S3 bucket that youspecify. CloudTrail log files contain one or more log entries. An event represents a single request fromany source and includes information about the requested action, the date and time of the action, requestparameters, and so on. CloudTrail log files are not an ordered stack trace of the public API calls, so theydo not appear in any specific order.
NoteThese examples have been formatted for improved readability. In a CloudTrail log file, all entriesand events are concatenated into a single line. In addition, this example has been limited toa single Amazon ECR entry. In a real CloudTrail log file, you will see entries and events frommultiple AWS services.
The following example shows a CloudTrail log entry that demonstrates the CreateRepository action.
{ "eventVersion": "1.04", "userIdentity": { "type": "AssumedRole", "principalId": "AIDACKCEVSQ6C2EXAMPLE:account_name", "arn": "arn:aws:sts::123456789012:user/Mary_Major", "accountId": "123456789012", "accessKeyId": "AKIAIOSFODNN7EXAMPLE", "sessionContext": { "attributes": { "mfaAuthenticated": "false", "creationDate": "2018-07-11T21:54:07Z" }, "sessionIssuer": { "type": "Role", "principalId": "AIDACKCEVSQ6C2EXAMPLE", "arn": "arn:aws:iam::123456789012:role/Admin", "accountId": "123456789012", "userName": "Admin" } } }, "eventTime": "2018-07-11T22:17:43Z", "eventSource": "ecr.amazonaws.com", "eventName": "CreateRepository", "awsRegion": "us-east-2", "sourceIPAddress": "203.0.113.12", "userAgent": "console.amazonaws.com", "requestParameters": { "repositoryName": "testrepo" }, "responseElements": { "repository": { "repositoryArn": "arn:aws:ecr:us-east-2:123456789012:repository/testrepo", "repositoryName": "testrepo", "repositoryUri": "123456789012.dkr.ecr.us-east-2.amazonaws.com/testrepo", "createdAt": "Jul 11, 2018 10:17:44 PM", "registryId": "123456789012" } }, "requestID": "cb8c167e-EXAMPLE", "eventID": "e3c6f4ce-EXAMPLE", "resources": [ { "ARN": "arn:aws:ecr:us-east-2:123456789012:repository/testrepo", "accountId": "123456789012" }
API Version 2015-09-2156
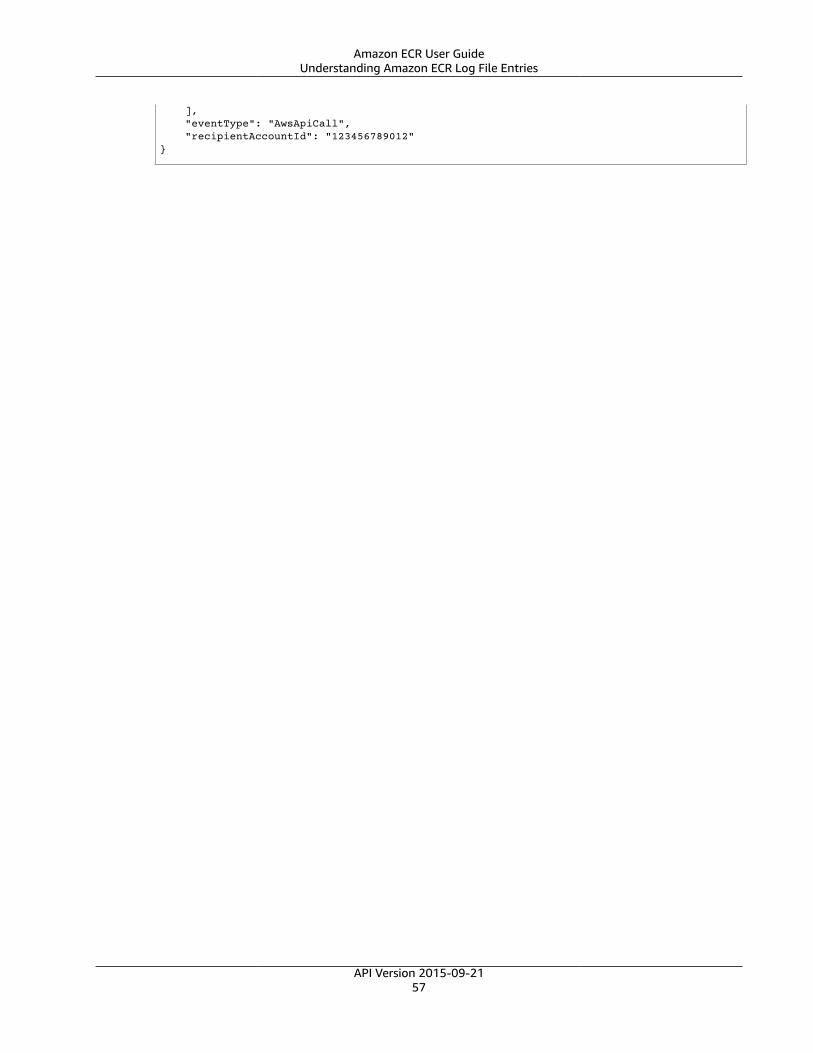
Amazon ECR User GuideUnderstanding Amazon ECR Log File Entries
], "eventType": "AwsApiCall", "recipientAccountId": "123456789012"}
API Version 2015-09-2157

Amazon ECR User GuideEnabling Docker Debug Output
Amazon ECR TroubleshootingThis chapter helps you find diagnostic information for Amazon ECR, and provides troubleshooting stepsfor common issues and error messages.
Topics
• Enabling Docker Debug Output (p. 58)
• Enabling AWS CloudTrail (p. 58)
• Optimizing Performance for Amazon ECR (p. 58)
• Troubleshooting Errors with Docker Commands When Using Amazon ECR (p. 59)
• Troubleshooting Amazon ECR Error Messages (p. 62)
Enabling Docker Debug OutputTo begin debugging any Docker-related issue, you should start by enabling Docker debugging outputon the Docker daemon running on your host instances. For more information about enabling Dockerdebugging if you are using images pulled from Amazon ECR on Amazon ECS container instances, seeEnabling Docker Debug Output in the Amazon Elastic Container Service Developer Guide.
Enabling AWS CloudTrailAdditional information about errors returned by Amazon ECR can be discovered by enabling AWSCloudTrail, which is a service that records AWS calls for your AWS account and delivers log files to anAmazon S3 bucket. By using information collected by CloudTrail, you can determine what requests weresuccessfully made to AWS services, who made the request, when it was made, and so on. To learn moreabout CloudTrail, including how to turn it on and find your log files, see the AWS CloudTrail User Guide.For more information on using CloudTrail with Amazon ECR, see Logging Amazon ECR API Calls withAWS CloudTrail (p. 55).
Optimizing Performance for Amazon ECRThe following section provides recommendations on settings and strategies that can be used to optimizeperformance when using Amazon ECR.
Use Docker 1.10 and above to take advantage of simultaneous layer uploads
Docker images are composed of layers, which are intermediate build stages of the image. Each linein a Dockerfile results in the creation of a new layer. When you use Docker 1.10 and above, Dockerdefaults to pushing as many layers as possible as simultaneous uploads to Amazon ECR, resulting infaster upload times.
Use a smaller base image
The default images available through Docker Hub may contain many dependencies that yourapplication doesn't require. Consider using a smaller image created and maintained by others in the
API Version 2015-09-2158
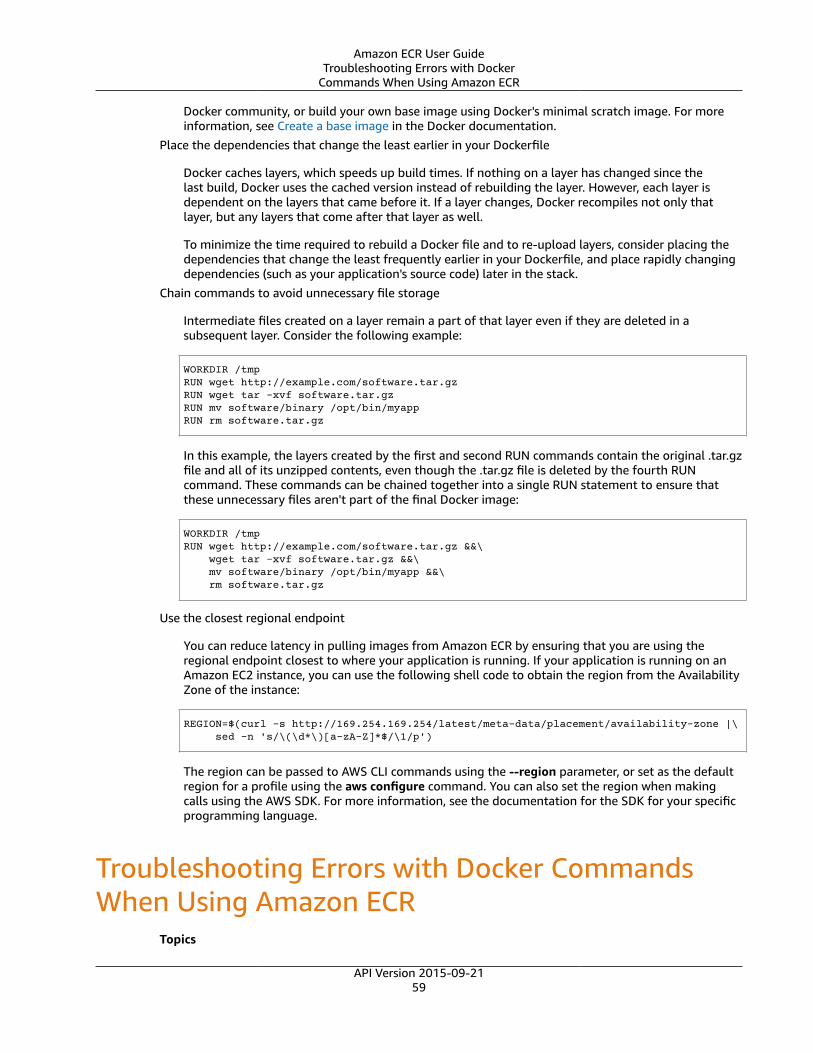
Amazon ECR User GuideTroubleshooting Errors with Docker
Commands When Using Amazon ECR
Docker community, or build your own base image using Docker's minimal scratch image. For moreinformation, see Create a base image in the Docker documentation.
Place the dependencies that change the least earlier in your Dockerfile
Docker caches layers, which speeds up build times. If nothing on a layer has changed since thelast build, Docker uses the cached version instead of rebuilding the layer. However, each layer isdependent on the layers that came before it. If a layer changes, Docker recompiles not only thatlayer, but any layers that come after that layer as well.
To minimize the time required to rebuild a Docker file and to re-upload layers, consider placing thedependencies that change the least frequently earlier in your Dockerfile, and place rapidly changingdependencies (such as your application's source code) later in the stack.
Chain commands to avoid unnecessary file storage
Intermediate files created on a layer remain a part of that layer even if they are deleted in asubsequent layer. Consider the following example:
WORKDIR /tmpRUN wget http://example.com/software.tar.gz RUN wget tar -xvf software.tar.gz RUN mv software/binary /opt/bin/myappRUN rm software.tar.gz
In this example, the layers created by the first and second RUN commands contain the original .tar.gzfile and all of its unzipped contents, even though the .tar.gz file is deleted by the fourth RUNcommand. These commands can be chained together into a single RUN statement to ensure thatthese unnecessary files aren't part of the final Docker image:
WORKDIR /tmpRUN wget http://example.com/software.tar.gz &&\ wget tar -xvf software.tar.gz &&\ mv software/binary /opt/bin/myapp &&\ rm software.tar.gz
Use the closest regional endpoint
You can reduce latency in pulling images from Amazon ECR by ensuring that you are using theregional endpoint closest to where your application is running. If your application is running on anAmazon EC2 instance, you can use the following shell code to obtain the region from the AvailabilityZone of the instance:
REGION=$(curl -s http://169.254.169.254/latest/meta-data/placement/availability-zone |\ sed -n 's/\(\d*\)[a-zA-Z]*$/\1/p')
The region can be passed to AWS CLI commands using the --region parameter, or set as the defaultregion for a profile using the aws configure command. You can also set the region when makingcalls using the AWS SDK. For more information, see the documentation for the SDK for your specificprogramming language.
Troubleshooting Errors with Docker CommandsWhen Using Amazon ECR
Topics
API Version 2015-09-2159
Amazon ECR User GuideError: "Filesystem Verification Failed" or
"404: Image Not Found" When Pulling anImage From an Amazon ECR Repository
• Error: "Filesystem Verification Failed" or "404: Image Not Found" When Pulling an Image From anAmazon ECR Repository (p. 60)
• Error: "Filesystem Layer Verification Failed" When Pulling Images from Amazon ECR (p. 60)• HTTP 403 Errors or "no basic auth credentials" Error When Pushing to Repository (p. 61)
In some cases, running a Docker command against Amazon ECR may result in an error message. Somecommon error messages and potential solutions are explained below.
Error: "Filesystem Verification Failed" or "404: ImageNot Found" When Pulling an Image From an AmazonECR RepositoryYou may receive the error Filesystem verification failed when using the docker pull commandto pull an image from an Amazon ECR repository with Docker 1.9 or above, or the error 404: Imagenot found when using Docker versions prior to 1.9.
Some possible reasons and their explanations are given below.
The local disk is full
If the local disk on which you're running the docker pull command is full, then the SHA-1 hash thatis calculated on the locally downloaded file may be different than the SHA-1 hash calculated byAmazon ECR. Check that your local disk has enough remaining free space to store the Docker imageyou are pulling. You can also delete old images to make room for new ones. Use the docker imagescommand to see a list of all locally downloaded Docker images, along with their sizes.
Client cannot connect to the remote repository due to network error
Calls to an Amazon ECR repository require a functioning connection to the Internet. Verify yournetwork settings, and verify that other tools and applications can access resources on the Internet.If you are running the docker pull command on an Amazon EC2 instance in a private subnet, verifythat your private subnet has a route to the Internet through a network address translation (NAT)server or through a managed NAT gateway.
Currently, calls to an Amazon ECR repository also require network access through your corporatefirewall to Amazon Simple Storage Service (Amazon S3). If your organization uses firewall softwareor a NAT device that white lists allowed service endpoints, ensure that the Amazon S3 serviceendpoints for your current region are included in the whitelist.
If you are using Docker behind an HTTP proxy, you can configure Docker with the appropriate proxysettings. For more information, see HTTP proxy in the Docker documentation.
Error: "Filesystem Layer Verification Failed" WhenPulling Images from Amazon ECRYou may receive the error image image-name not found when pulling images using the docker pullcommand. If you inspect the Docker logs, you may see an error like the following:
filesystem layer verification failed for digest sha256:2b96f...
This error indicates that one or more of the layers for your image has failed to download. Some possiblereasons and their explanations are given below.
API Version 2015-09-2160
Amazon ECR User GuideHTTP 403 Errors or "no basic auth credentials"
Error When Pushing to Repository
You are using an older version of Docker
This error can occur in a small percentage of cases when using a Docker version less than 1.10.Upgrade your Docker client to 1.10 or greater.
Your client has encountered a network or disk error
A full disk or a network issue may prevent one or more layers from downloading, as discussed earlierabout the Filesystem verification failed message,. Follow the recommendations above toensure that your filesystem is not full, and that you have enabled access to Amazon S3 from withinyour network.
HTTP 403 Errors or "no basic auth credentials" ErrorWhen Pushing to RepositoryThere are times when you may receive an HTTP 403 (Forbidden) error, or the error message no basicauth credentials from the docker push command, even if you have successfully authenticated toDocker using the aws ecr get-login command. The following are some known causes of this issue:
You have authenticated to a different region
Authentication requests are tied to specific regions, and cannot be used across regions. For example,if you obtain an authorization token from US West (Oregon), you cannot use it to authenticateagainst your repositories in US East (N. Virginia). To resolve the issue, ensure that you are using thesame region for both authentication and docker push command calls.
You have authenticated to push to a repository on the wrong AWS account
If you are using an IAM user from one AWS account, but you are attempting to push to a repositoryhosted in another account, you will need to explicitly specify the --registry-ids parameter whenyou call aws ecr get-login. Otherwise, you will by default get a Docker login command whichonly authorizes you to push to repositories on the same account that hosts your IAM user, not theaccount that hosts your repository. Always ensure that the repository URL in the response fromaws ecr get-login matches the repository URL that you are pushing to, including the account IDportion of the URL.
Your token has expired
The default token expiration period for tokens obtained using the GetAuthorizationTokenoperation is 12 hours. However, if you use a temporary security credential mechanism such as multi-factor authentication (MFA) or AWS Security Token Service to authenticate and receive your token,the expiration period of the Amazon ECR authorization token is equal to the duration of thesetemporary security credentials. For example, if you call the aws ecr get-login command by assuminga role, the authorization token expires within 15 minutes to 1 hour, depending on the settings youuse when calling the aws sts assume-role command.
Bug in wincred credential manager
Some versions of Docker for Windows use a credential manager called wincred, which does notproperly handle the Docker login command produced by aws ecr get-login (for more information,see https://github.com/docker/docker/issues/22910). You can run the Docker login commandthat is output, but when you try to push or pull images, those commands will fail. You can workaround this bug by removing the https:// scheme from the registry argument in the Docker logincommand that is output from aws ecr get-login. An example Docker login command without theHTTPS scheme is shown below.
docker login -u AWS -p <password> <aws_account_id>.dkr.ecr.<region>.amazonaws.com
API Version 2015-09-2161
Amazon ECR User GuideTroubleshooting Amazon ECR Error Messages
Troubleshooting Amazon ECR Error MessagesTopics
• Error: "Error Response from Daemon: Invalid Registry Endpoint" When Running aws ecr get-login (p. 62)
• HTTP 429: Too Many Requests or ThrottleException (p. 62)• HTTP 403: "User [arn] is not authorized to perform [operation]" (p. 63)• HTTP 404: "Repository Does Not Exist" Error (p. 63)
In some cases, an API call that you have triggered through the Amazon ECS console or the AWS CLI exitswith an error message. Some common error messages and potential solutions are explained below.
Error: "Error Response from Daemon: Invalid RegistryEndpoint" When Running aws ecr get-loginYou may see the following error when running the aws ecr get-login command to obtain the logincredentials for your Amazon ECR repository:
Error response from daemon: invalid registry endpoint https://xxxxxxxxxxxx.dkr.ecr.us-east-1.amazonaws.com/v0/: unable to ping registry endpoint https://xxxxxxxxxxxx.dkr.ecr.us-east-1.amazonaws.com/v0/v2 ping attempt failed with error: Get https://xxxxxxxxxxxx.dkr.ecr.us-east-1.amazonaws.com/v2/: dial tcp: lookup xxxxxxxxxxxx.dkr.ecr.us-east-1.amazonaws.com on 172.20.10.1:53: read udp 172.20.10.1:53: i/o timeout
This error can occur on MacOS X and Windows systems that are running Docker Toolbox, Docker forWindows, or Docker for Mac. It is often caused when other applications alter the routes through the localgateway (192.168.0.1) through which the virtual machine must call to access the Amazon ECR service.If this error occurs when using Docker Toolbox, then it can often be resolved by restarting the DockerMachine environment, or rebooting the local client operating system. If this does not resolve the issue,use the docker-machine ssh command to log in to your container instance, and perform a DNS lookupon an external host to verify that you see the same results as you see on your local host. If the resultsdiffer, consult the documentation for Docker Toolbox to ensure that your Docker Machine environment isconfigured properly.
HTTP 429: Too Many Requests or ThrottleExceptionYou may receive a 429: Too Many Requests error or a ThrottleException error from one or moreAmazon ECR commands or API calls. If you are using Docker tools in conjunction with Amazon ECR,then for Docker versions 1.12.0 and greater, you may see the error message TOOMANYREQUESTS: Rateexceeded. For versions of Docker below 1.12.0, you may see the error Unknown: Rate exceeded.
This indicates that you are calling a single endpoint in Amazon ECR repeatedly over a short interval, andthat your requests are getting throttled. Throttling occurs when calls to a single endpoint from a singleuser exceed a certain threshold over a period of time.
Various API operations in Amazon ECR have different throttles.
For example, the throttle for the GetAuthorizationToken action is 20 transaction per second (TPS),with up to a 200 TPS burst allowed. In each region, each account receives a bucket that can store up to200 GetAuthorizationToken credits. These credits are replenished at a rate of 20 per second. If your
API Version 2015-09-2162
Amazon ECR User GuideHTTP 403: "User [arn] is not
authorized to perform [operation]"
bucket has 200 credits, you could achieve 200 GetAuthorizationToken API transactions per secondfor one second, and then sustain 20 transactions per second indefinitely.
To handle throttling errors, implement a retry function with incremental backoff into your code. Formore information, see Error Retries and Exponential Backoff in AWS in the Amazon Web Services GeneralReference.
HTTP 403: "User [arn] is not authorized to perform[operation]"You may receive the following error when attempting to perform an action with Amazon ECR:
$ aws ecr get-login A client error (AccessDeniedException) occurred when calling the GetAuthorizationToken operation: User: arn:aws:iam::account-number:user/username is not authorized to perform: ecr:GetAuthorizationToken on resource: *
This indicates that your user does not have permissions granted to use Amazon ECR, or that thosepermissions are not set up correctly. In particular, if you are performing actions against an AmazonECR repository, verify that the user has been granted permissions to access that repository. For moreinformation about creating and verifying permissions for Amazon ECR, see Amazon ECR IAM Policies andRoles (p. 42).
HTTP 404: "Repository Does Not Exist" ErrorIf you specify a Docker Hub repository that does not currently exist, Docker Hub creates it automatically.With Amazon ECR, new repositories must be explicitly created before they can be used. This preventsnew repositories from being created accidentally (for example, due to typos), and it also ensures that anappropriate security access policy is explicitly assigned to any new repositories. For more informationabout creating repositories, see Amazon ECR Repositories (p. 15).
API Version 2015-09-2163
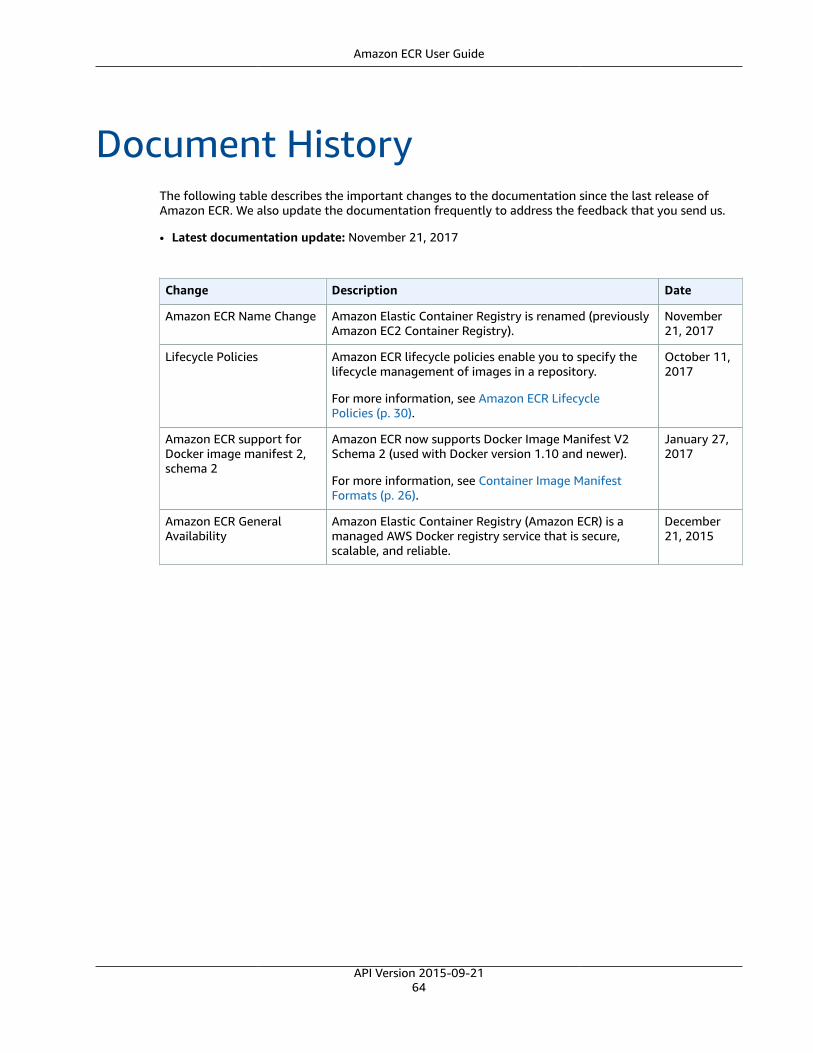
Amazon ECR User Guide
Document HistoryThe following table describes the important changes to the documentation since the last release ofAmazon ECR. We also update the documentation frequently to address the feedback that you send us.
• Latest documentation update: November 21, 2017
Change Description Date
Amazon ECR Name Change Amazon Elastic Container Registry is renamed (previouslyAmazon EC2 Container Registry).
November21, 2017
Lifecycle Policies Amazon ECR lifecycle policies enable you to specify thelifecycle management of images in a repository.
For more information, see Amazon ECR LifecyclePolicies (p. 30).
October 11,2017
Amazon ECR support forDocker image manifest 2,schema 2
Amazon ECR now supports Docker Image Manifest V2Schema 2 (used with Docker version 1.10 and newer).
For more information, see Container Image ManifestFormats (p. 26).
January 27,2017
Amazon ECR GeneralAvailability
Amazon Elastic Container Registry (Amazon ECR) is amanaged AWS Docker registry service that is secure,scalable, and reliable.
December21, 2015
API Version 2015-09-2164
Amazon ECR User Guide
AWS GlossaryFor the latest AWS terminology, see the AWS Glossary in the AWS General Reference.
API Version 2015-09-2165