Word 2013: Working with Graphics - Application …€¦ · Microsoft Office Word 2013 . Working...
30
Microsoft Office Word 2013 Working with Graphics Training, Outreach, Learning Technologies and Video Production University Information Technology Services
-
Upload
doankhuong -
Category
Documents
-
view
219 -
download
0
Transcript of Word 2013: Working with Graphics - Application …€¦ · Microsoft Office Word 2013 . Working...
Microsoft Office Word 2013 Working with Graphics
Training, Outreach, Learning Technologies and Video Production
University Information Technology Services
Copyright © 2014 KSU Department of University Information Technology Services
This document may be downloaded, printed, or copied for educational use without further permission of the
University Information Technology Services Department (UITS), provided the content is not modified and this
statement is not removed. Any use not stated above requires the written consent of the UITS Department.
The distribution of a copy of this document via the Internet or other electronic medium without the written
permission of the KSU - UITS Department is expressly prohibited.
Published by Kennesaw State University – UITS 2014
The publisher makes no warranties as to the accuracy of the material contained in this document and
therefore is not responsible for any damages or liabilities incurred from UITS use.

University Information Technology Services
Microsoft Office Word 2013
Working with Graphics
Table of Contents Introduction ............................................................................................................................................................ 4
Learning Objectives ................................................................................................................................................. 4
Working with Graphics ........................................................................................................................................... 5
Inserting Pictures ................................................................................................................................................ 5
Inserting Online Pictures ..................................................................................................................................... 6
Modifying Graphics with Picture Tools ............................................................................................................... 8
Adding Styles your Graphic ............................................................................................................................. 8
Re-sizing a Graphic .......................................................................................................................................... 9
Repositioning a Picture ................................................................................................................................. 11
Text Wrapping ............................................................................................................................................... 12
Inserting Shapes .................................................................................................................................................... 13
Modifying Shapes with Drawing Tools ............................................................................................................. 14
Re-sizing a Shape .......................................................................................................................................... 14
Re-shaping ..................................................................................................................................................... 15
Accessing the Drawing Tools – Format Tab ...................................................................................................... 15
Adding Styles to your Shapes ........................................................................................................................ 15
Applying Color to your Shape ....................................................................................................................... 16
Changing the Shape Outline ......................................................................................................................... 17
Switching Shapes .......................................................................................................................................... 17
Add Text to a Shape ...................................................................................................................................... 18
Inserting SmartArt ............................................................................................................................................. 18
Editing SmartArt Graphics ............................................................................................................................. 19
Inserting Charts ................................................................................................................................................. 20
Editing your Chart ......................................................................................................................................... 21
Inserting Screenshots ........................................................................................................................................ 22
To take a screenshot of an active window: .................................................................................................. 22
To take a screenshot of a section of your screen: ........................................................................................ 23
Inserting Video into your Document .................................................................................................................... 24
Text Boxes ............................................................................................................................................................. 26
Inserting a Text Box ........................................................................................................................................... 26
Drawing a Text Box ....................................................................................................................................... 28
Flowing Text between Text Boxes ................................................................................................................ 28
Additional Help ..................................................................................................................................................... 30
Revised 8/7/2014 Page 4 of 30
Introduction This booklet is the companion document to the Word 2013: Working with Graphics workshop. The
booklet will show users how to insert graphics and text boxes into a Word 2013 document using the
tools found on the Insert tab, and how to edit them.
Learning Objectives After completing the instructions in this booklet, you will be able to:
Insert graphics in the form of Pictures, Clipart, Shapes, Video, and Screenshots
Understand how to modify and format graphics
Understand how to modify and format shapes
Understand how to insert video into your document
Understand how Text Wrapping works
Understand how to insert text boxes and link them together
Insert text into shapes
Page 5 of 30
Working with Graphics The use of graphics will enhance your documents and allow you to provide the reader with additional
information in the form of a visual aid. The following section explains the various graphics features in
Word 2013.
Inserting Pictures
The following explains how to insert an existing picture saved to your computer into your Word
document.
1. Click the insert tab.
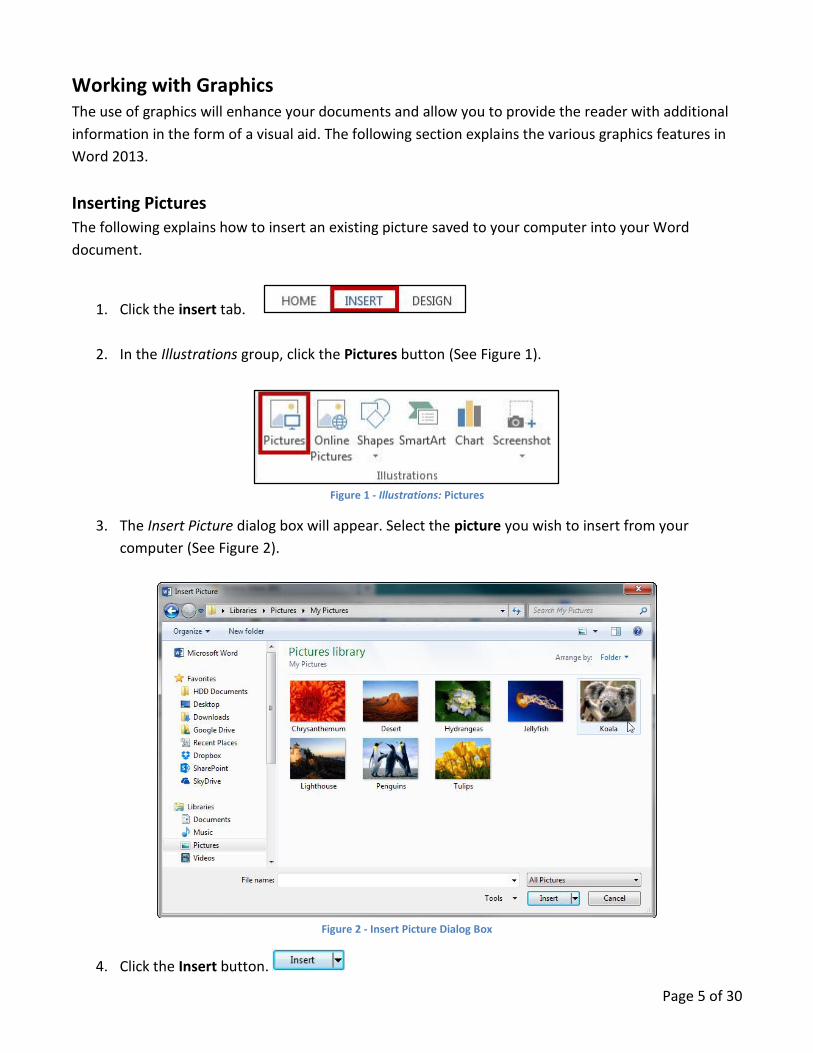
2. In the Illustrations group, click the Pictures button (See Figure 1).
Figure 1 - Illustrations: Pictures
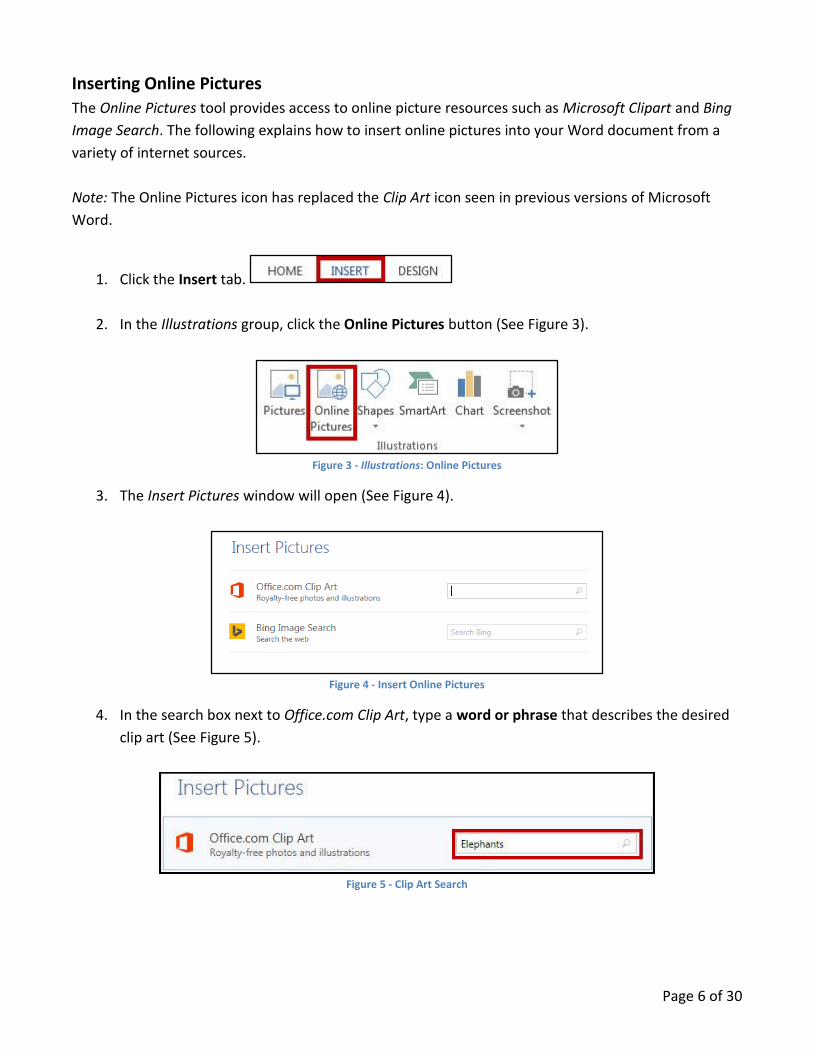
3. The Insert Picture dialog box will appear. Select the picture you wish to insert from your
computer (See Figure 2).
Figure 2 - Insert Picture Dialog Box
4. Click the Insert button.
Page 6 of 30
Inserting Online Pictures
The Online Pictures tool provides access to online picture resources such as Microsoft Clipart and Bing
Image Search. The following explains how to insert online pictures into your Word document from a
variety of internet sources.
Note: The Online Pictures icon has replaced the Clip Art icon seen in previous versions of Microsoft
Word.
1. Click the Insert tab.
2. In the Illustrations group, click the Online Pictures button (See Figure 3).
Figure 3 - Illustrations: Online Pictures
3. The Insert Pictures window will open (See Figure 4).
Figure 4 - Insert Online Pictures
4. In the search box next to Office.com Clip Art, type a word or phrase that describes the desired
clip art (See Figure 5).
Figure 5 - Clip Art Search
Page 7 of 30
5. Press Enter.
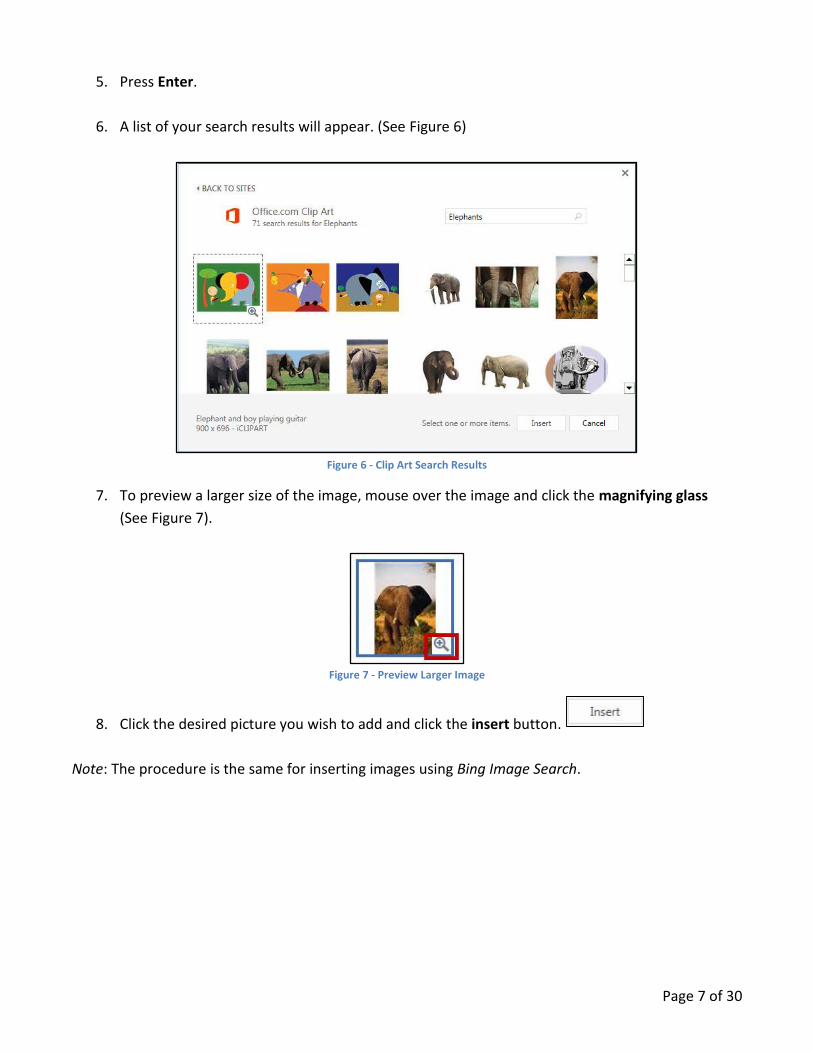
6. A list of your search results will appear. (See Figure 6)
Figure 6 - Clip Art Search Results
7. To preview a larger size of the image, mouse over the image and click the magnifying glass
(See Figure 7).
Figure 7 - Preview Larger Image
8. Click the desired picture you wish to add and click the insert button.
Note: The procedure is the same for inserting images using Bing Image Search.
Page 8 of 30
Modifying Graphics with Picture Tools
After inserting a picture or clip art, you can make changes to the size, brightness, shading, etc by
accessing the Picture Tools. The following explains how to access the Picture Tools:
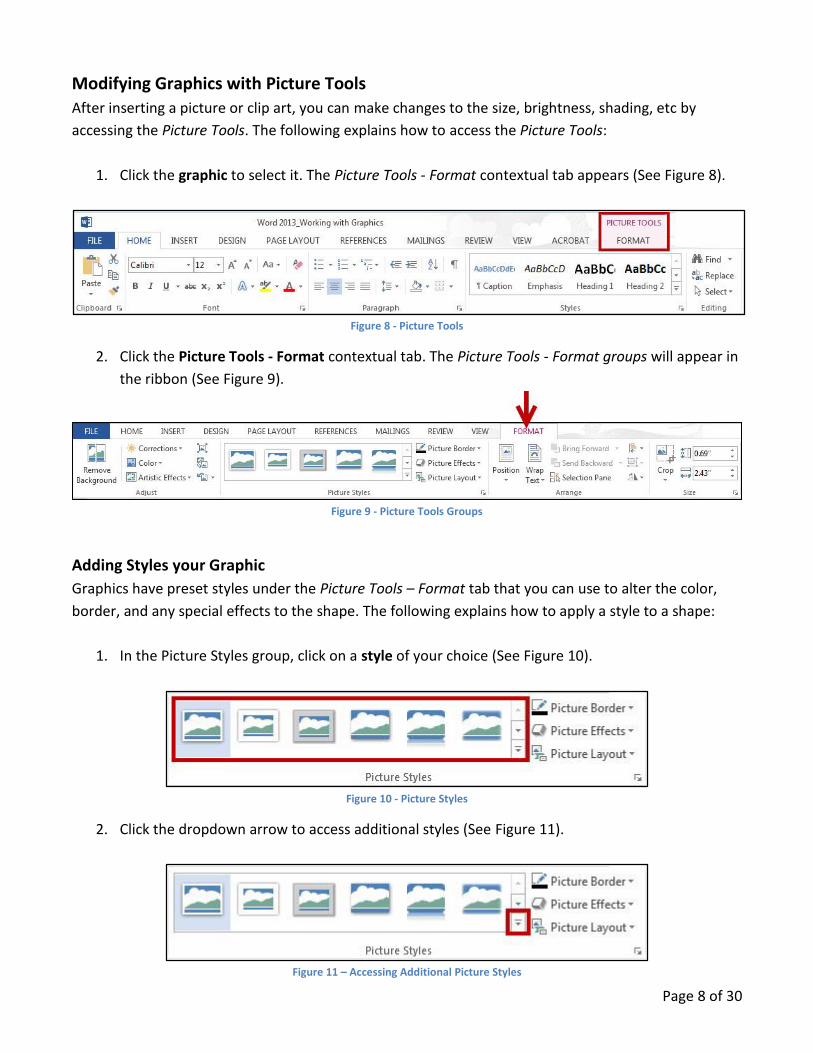
1. Click the graphic to select it. The Picture Tools - Format contextual tab appears (See Figure 8).
Figure 8 - Picture Tools
2. Click the Picture Tools - Format contextual tab. The Picture Tools - Format groups will appear in
the ribbon (See Figure 9).
Figure 9 - Picture Tools Groups
Adding Styles your Graphic
Graphics have preset styles under the Picture Tools – Format tab that you can use to alter the color,
border, and any special effects to the shape. The following explains how to apply a style to a shape:
1. In the Picture Styles group, click on a style of your choice (See Figure 10).
Figure 10 - Picture Styles
2. Click the dropdown arrow to access additional styles (See Figure 11).
Figure 11 – Accessing Additional Picture Styles
Page 9 of 30
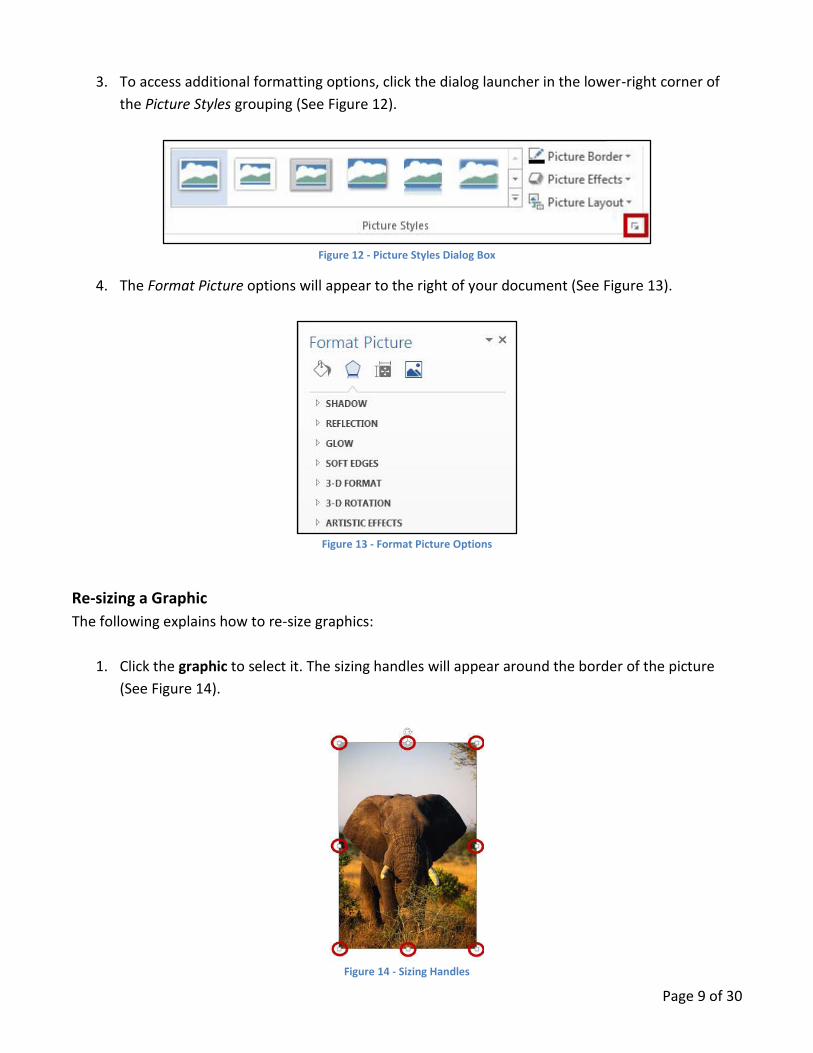
3. To access additional formatting options, click the dialog launcher in the lower-right corner of
the Picture Styles grouping (See Figure 12).
Figure 12 - Picture Styles Dialog Box
4. The Format Picture options will appear to the right of your document (See Figure 13).
Figure 13 - Format Picture Options
Re-sizing a Graphic
The following explains how to re-size graphics:
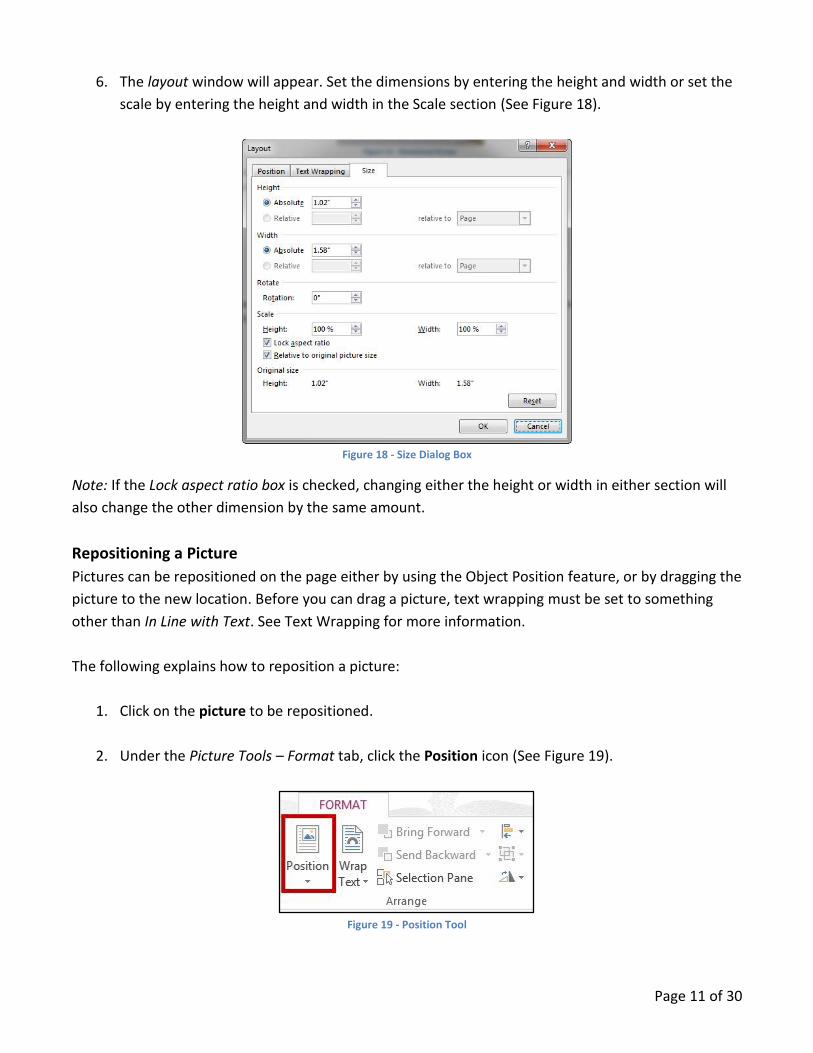
1. Click the graphic to select it. The sizing handles will appear around the border of the picture
(See Figure 14).
Figure 14 - Sizing Handles

Page 10 of 30
2. To resize the picture so the dimensions remain proportional, place your mouse over one of the
corner sizing handles, click, and drag. If you drag a side sizing handle you will change one
dimension only.
3. The curved arrow at the top of the picture allows you to rotate the picture (See Figure 15).
Figure 15 - Rotational Arrow
4. To resize the picture to a specific value, enter number for the height and width in the Size
grouping under Picture Tools – Format (See Figure 16).
Figure 16 - Size Grouping
5. You can also enter a specific size value by clicking the Size dialog box (See Figure 17).
Figure 17 - Size Dialog Box Launcher
Page 11 of 30
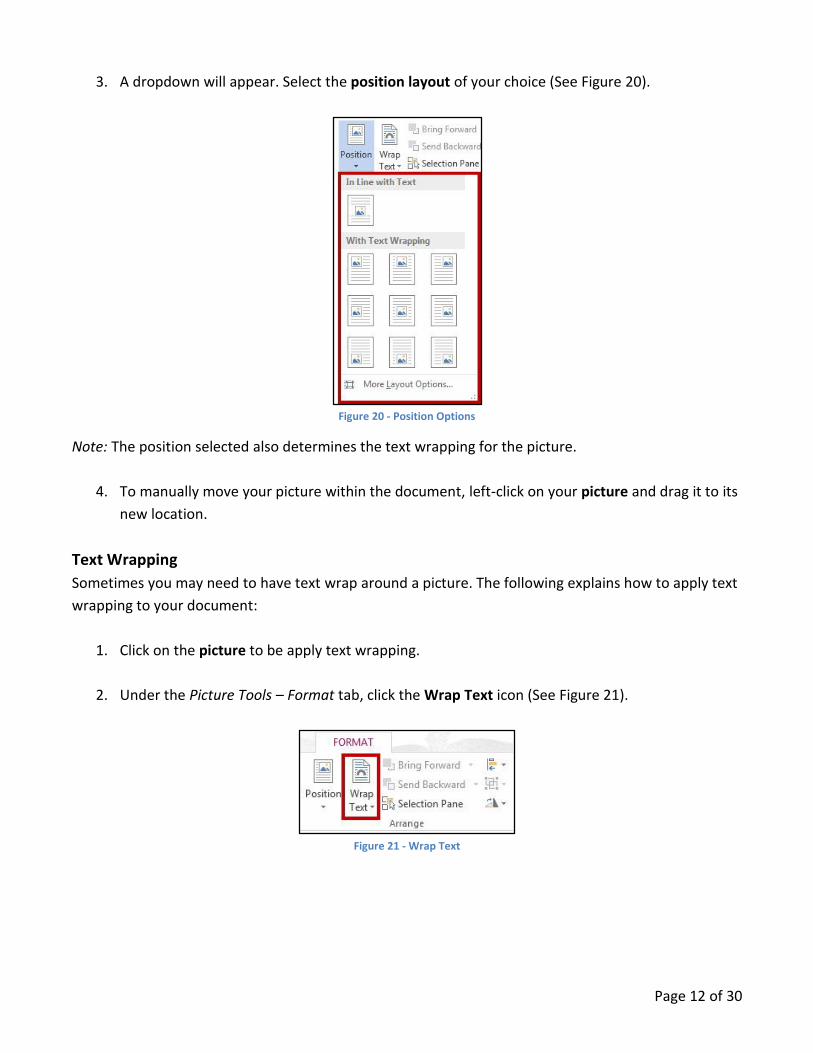
6. The layout window will appear. Set the dimensions by entering the height and width or set the
scale by entering the height and width in the Scale section (See Figure 18).
Figure 18 - Size Dialog Box
Note: If the Lock aspect ratio box is checked, changing either the height or width in either section will
also change the other dimension by the same amount.
Repositioning a Picture
Pictures can be repositioned on the page either by using the Object Position feature, or by dragging the
picture to the new location. Before you can drag a picture, text wrapping must be set to something
other than In Line with Text. See Text Wrapping for more information.
The following explains how to reposition a picture:
1. Click on the picture to be repositioned.
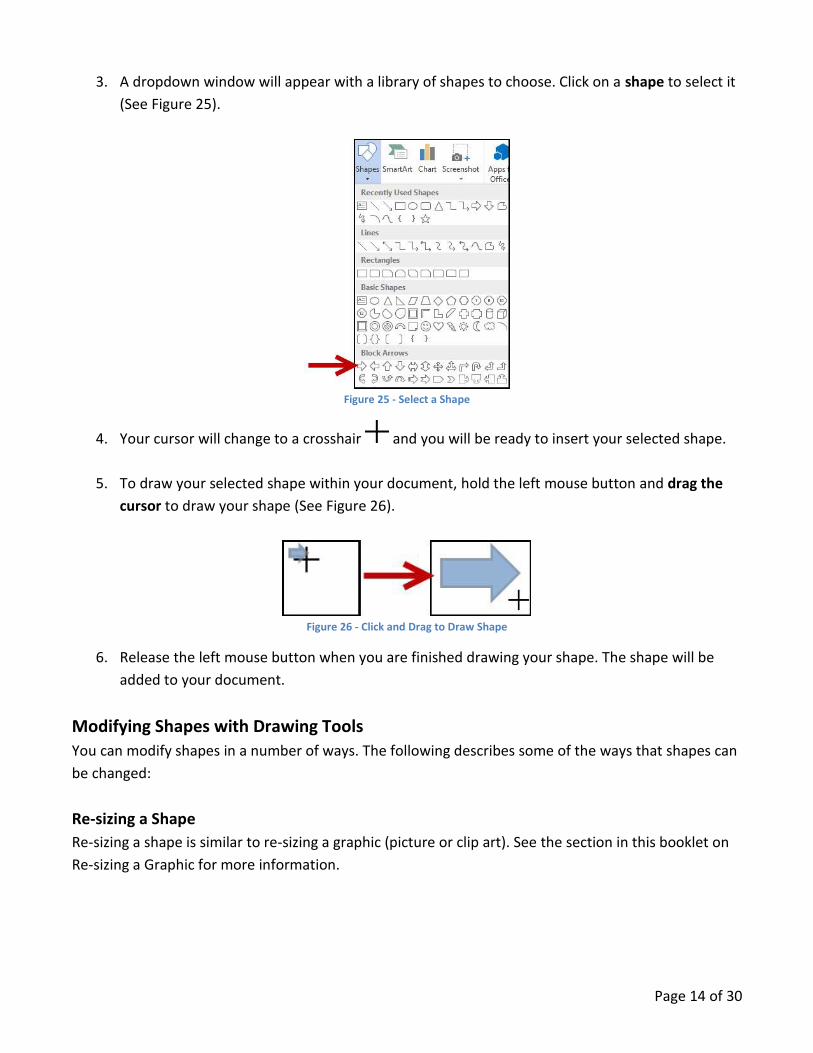
2. Under the Picture Tools – Format tab, click the Position icon (See Figure 19).
Figure 19 - Position Tool
Page 12 of 30
3. A dropdown will appear. Select the position layout of your choice (See Figure 20).
Figure 20 - Position Options
Note: The position selected also determines the text wrapping for the picture.
4. To manually move your picture within the document, left-click on your picture and drag it to its
new location.
Text Wrapping
Sometimes you may need to have text wrap around a picture. The following explains how to apply text
wrapping to your document:
1. Click on the picture to be apply text wrapping.
2. Under the Picture Tools – Format tab, click the Wrap Text icon (See Figure 21).
Figure 21 - Wrap Text

Page 13 of 30
3. A dropdown will appear. Select the type of text wrapping that you want to apply it to your
picture (See Figure 22).
Figure 22 – Text Wrapping Options
Note: You can also access the text wrapping options by clicking the layout button that appears when
clicking on a picture (See Figure 23).
Figure 23 - Layout Button
Inserting Shapes The following explains how to insert a variety of predefined shapes into your Word document.
1. Click the Insert tab.
2. In the Illustrations group, click on the Shapes button (See Figure 24).
Figure 24 – Illustrations: Shapes
Page 14 of 30
3. A dropdown window will appear with a library of shapes to choose. Click on a shape to select it
(See Figure 25).
Figure 25 - Select a Shape
4. Your cursor will change to a crosshair and you will be ready to insert your selected shape.
5. To draw your selected shape within your document, hold the left mouse button and drag the
cursor to draw your shape (See Figure 26).
Figure 26 - Click and Drag to Draw Shape
6. Release the left mouse button when you are finished drawing your shape. The shape will be
added to your document.
Modifying Shapes with Drawing Tools
You can modify shapes in a number of ways. The following describes some of the ways that shapes can
be changed:
Re-sizing a Shape
Re-sizing a shape is similar to re-sizing a graphic (picture or clip art). See the section in this booklet on
Re-sizing a Graphic for more information.

Page 15 of 30
Re-shaping
After clicking on a shape, the shaping handles will appear (along with the sizing handles) as yellow
squares. A two-dimensional shape can be altered by clicking and dragging the yellow squares to alter a
certain aspect of the shape (See Figure 27).
Figure 27 - Re-shaping a 2D Shape
Accessing the Drawing Tools – Format Tab
Shapes will have their own set of editing tools accessible by a context sensitive tab on the Ribbon. To
access this tab, click on a shape in your document and the Drawing Tools – Format tab will appear in
the Ribbon (See Figure 28).
Figure 28 - Drawing Tools - Format Tab
Adding Styles to your Shapes
Shapes have preset styles under the Drawing Tools – Format tab that you can use to alter the color,
border, and any special effects to the shape. The following explains how to apply a style to a shape:
1. In the Shape Styles group, click on a Style of your choice (See Figure 29).
Figure 29 - Shape Styles
Page 16 of 30
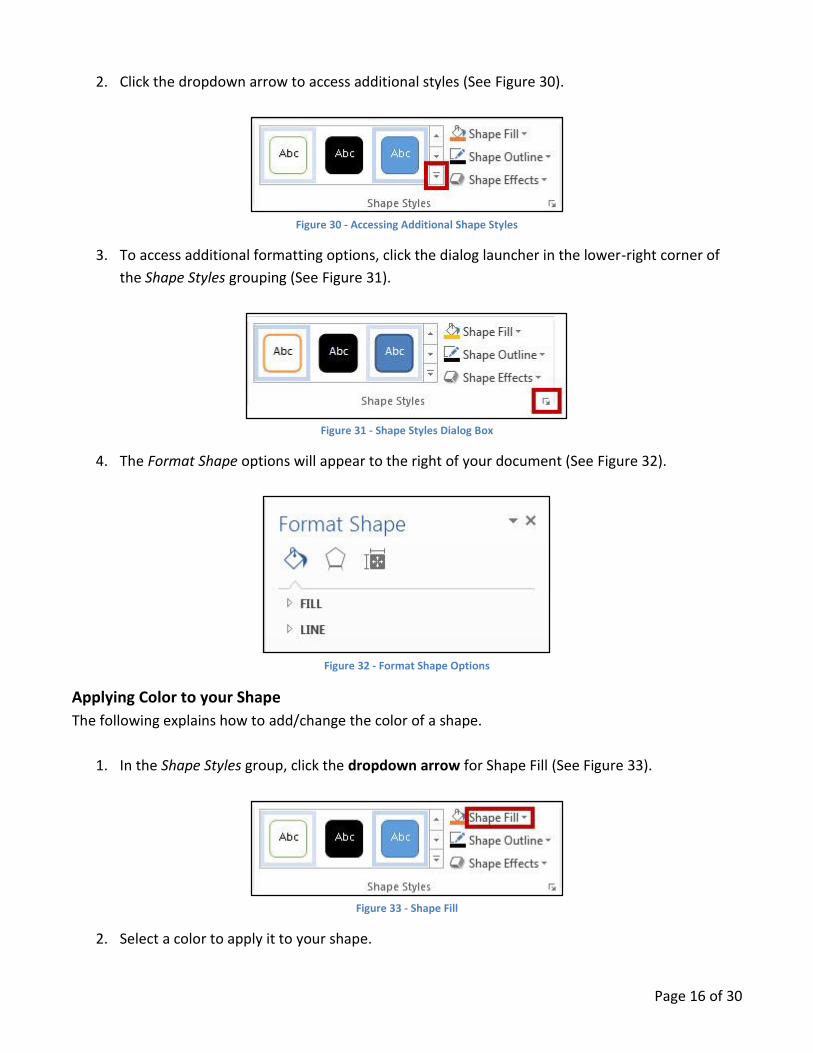
2. Click the dropdown arrow to access additional styles (See Figure 30).
Figure 30 - Accessing Additional Shape Styles
3. To access additional formatting options, click the dialog launcher in the lower-right corner of
the Shape Styles grouping (See Figure 31).
Figure 31 - Shape Styles Dialog Box
4. The Format Shape options will appear to the right of your document (See Figure 32).
Figure 32 - Format Shape Options
Applying Color to your Shape
The following explains how to add/change the color of a shape.
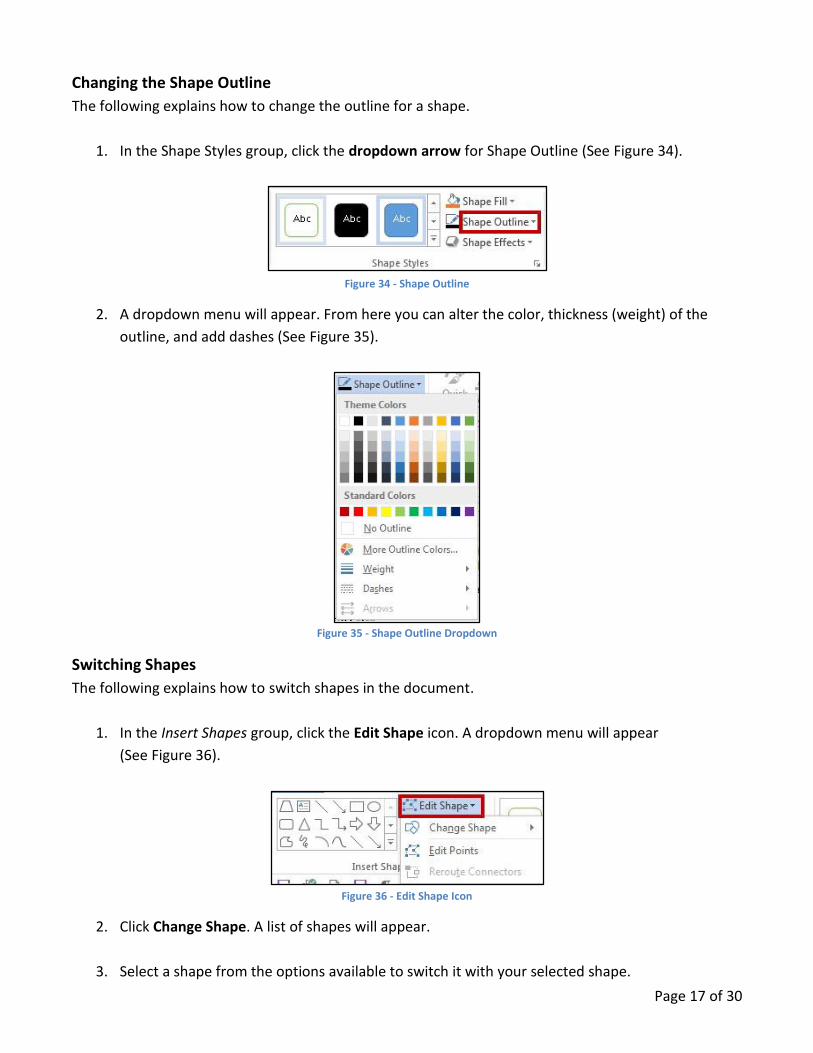
1. In the Shape Styles group, click the dropdown arrow for Shape Fill (See Figure 33).
Figure 33 - Shape Fill
2. Select a color to apply it to your shape.
Page 17 of 30
Changing the Shape Outline
The following explains how to change the outline for a shape.
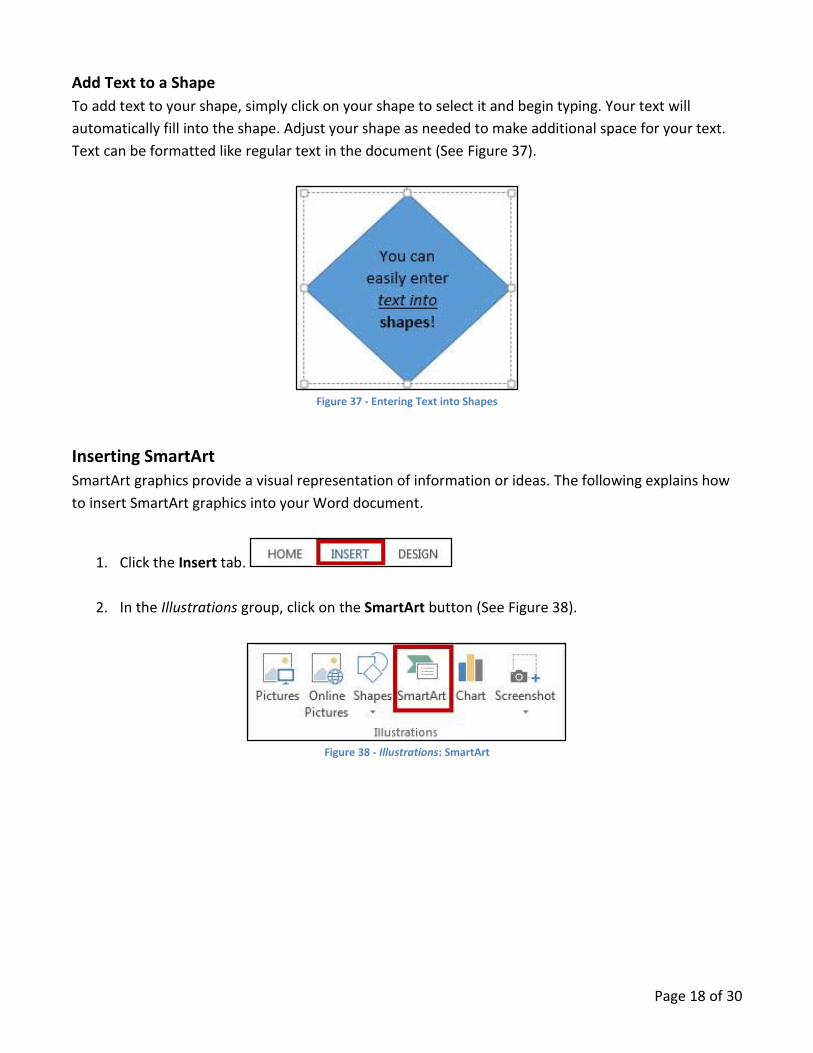
1. In the Shape Styles group, click the dropdown arrow for Shape Outline (See Figure 34).
Figure 34 - Shape Outline
2. A dropdown menu will appear. From here you can alter the color, thickness (weight) of the
outline, and add dashes (See Figure 35).
Figure 35 - Shape Outline Dropdown
Switching Shapes
The following explains how to switch shapes in the document.
1. In the Insert Shapes group, click the Edit Shape icon. A dropdown menu will appear
(See Figure 36).
Figure 36 - Edit Shape Icon
2. Click Change Shape. A list of shapes will appear.
3. Select a shape from the options available to switch it with your selected shape.
Page 18 of 30
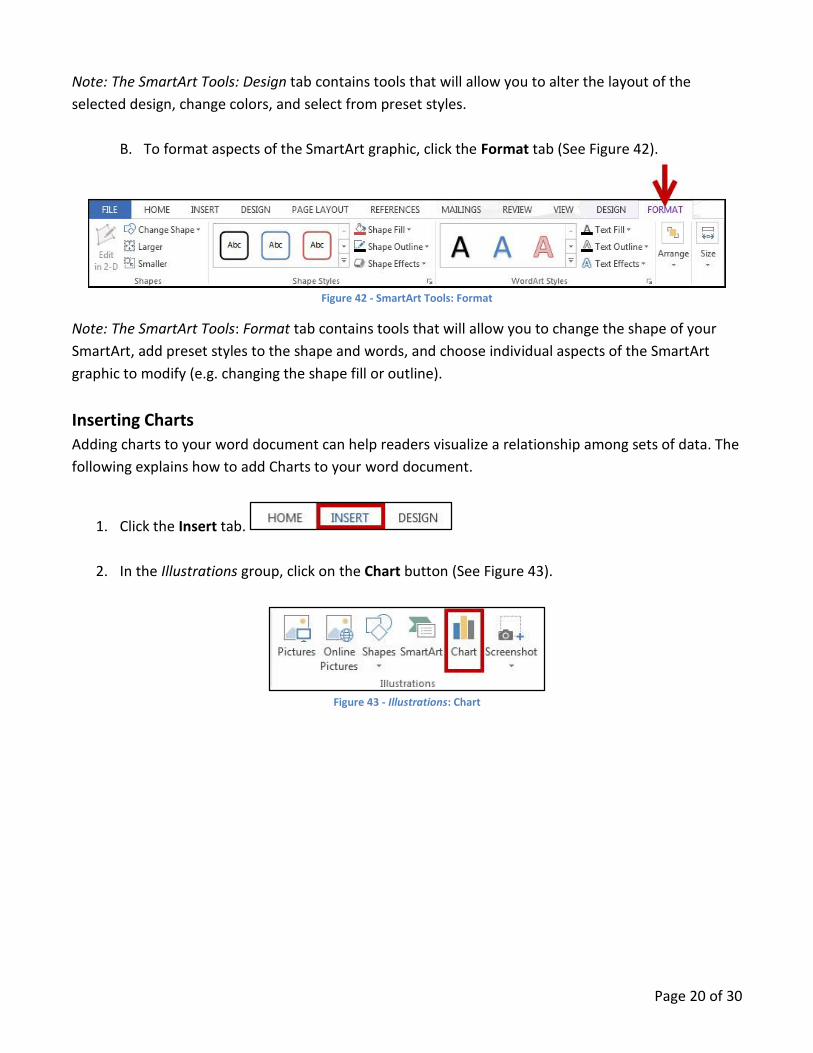
Add Text to a Shape
To add text to your shape, simply click on your shape to select it and begin typing. Your text will
automatically fill into the shape. Adjust your shape as needed to make additional space for your text.
Text can be formatted like regular text in the document (See Figure 37).
Figure 37 - Entering Text into Shapes
Inserting SmartArt
SmartArt graphics provide a visual representation of information or ideas. The following explains how
to insert SmartArt graphics into your Word document.
1. Click the Insert tab.
2. In the Illustrations group, click on the SmartArt button (See Figure 38).
Figure 38 - Illustrations: SmartArt

Page 19 of 30
3. The Choose a SmartArt Graphic window will open. Select a SmartArt graphic from the list
(See Figure 39).
Figure 39 - Choose a SmartArt Graphic
4. Click the OK button.
5. The selected SmartArt graphic will be inserted into your Word document.
Editing SmartArt Graphics
Once inserted into your Word document, your SmartArt can be edited and customized by accessing
the SmartArt Tools tab. The following explains how to access the Design and Format tabs:
1. Click on the image of your SmartArt graphic. The SmartArt Tools contextual tab will appear at
the top of the screen (See Figure 40).
Figure 40 - SmartArt Tools
A. To alter aspects of the SmartArt design, click the Design tab (See Figure 41).
Figure 41 - SmartArt Tools: Design
Page 20 of 30
Note: The SmartArt Tools: Design tab contains tools that will allow you to alter the layout of the
selected design, change colors, and select from preset styles.
B. To format aspects of the SmartArt graphic, click the Format tab (See Figure 42).
Figure 42 - SmartArt Tools: Format
Note: The SmartArt Tools: Format tab contains tools that will allow you to change the shape of your
SmartArt, add preset styles to the shape and words, and choose individual aspects of the SmartArt
graphic to modify (e.g. changing the shape fill or outline).
Inserting Charts
Adding charts to your word document can help readers visualize a relationship among sets of data. The
following explains how to add Charts to your word document.
1. Click the Insert tab.
2. In the Illustrations group, click on the Chart button (See Figure 43).
Figure 43 - Illustrations: Chart
Page 21 of 30
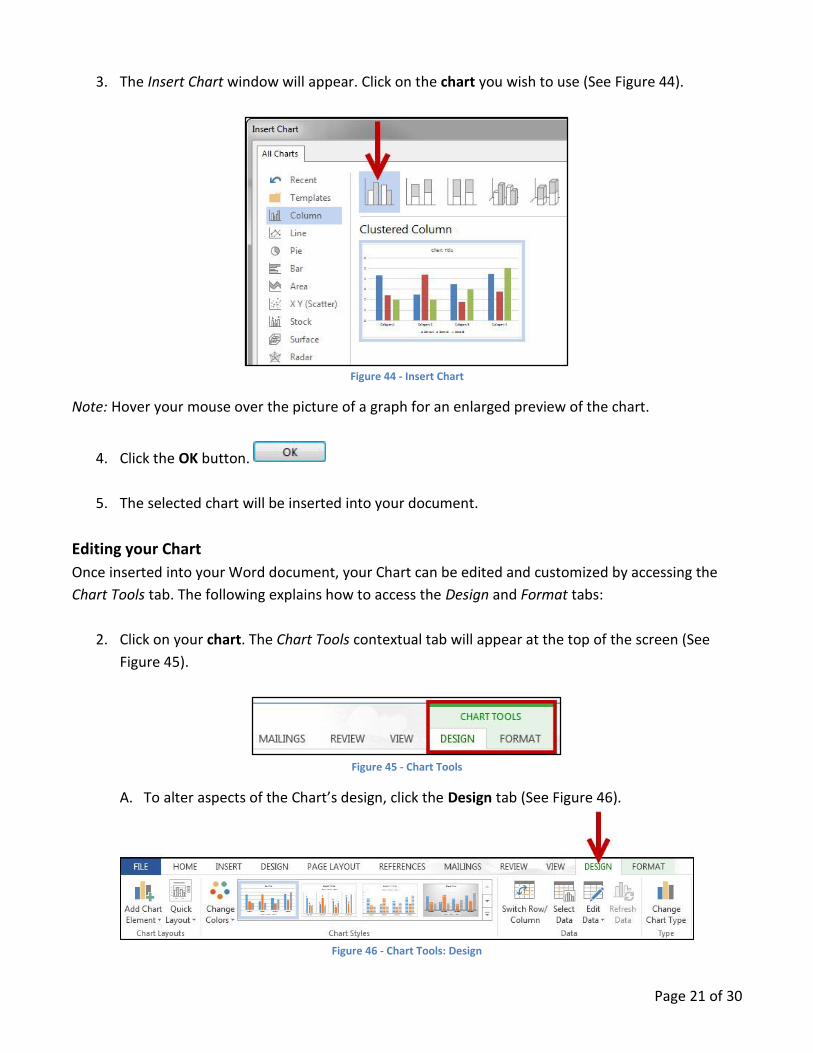
3. The Insert Chart window will appear. Click on the chart you wish to use (See Figure 44).
Figure 44 - Insert Chart
Note: Hover your mouse over the picture of a graph for an enlarged preview of the chart.
4. Click the OK button.
5. The selected chart will be inserted into your document.
Editing your Chart
Once inserted into your Word document, your Chart can be edited and customized by accessing the
Chart Tools tab. The following explains how to access the Design and Format tabs:
2. Click on your chart. The Chart Tools contextual tab will appear at the top of the screen (See
Figure 45).
Figure 45 - Chart Tools
A. To alter aspects of the Chart’s design, click the Design tab (See Figure 46).
Figure 46 - Chart Tools: Design

Page 22 of 30
Note: The Chart Tools – Design tab contains tools that will allow you to alter the layout of the selected
chart, change colors, select and edit your data, and select from preset styles.
B. To format aspects of the SmartArt graphic, click the Format tab (See Figure 47).
Figure 47 - Chart Tools - Format
Note: The Chart Tools – Format tab contains tools that will allow you to add preset styles to the shape
and words, arrange and position your chart within your document, and format specific areas of your
chart (e.g. axis, chart title, values, legend, etc.).
Inserting Screenshots
The screenshot feature in word will allow you to capture a designated window or area of your screen,
and insert it as a picture in your document. The following explains how to add screenshots to your
word document:
To take a screenshot of an active window:
1. Open the program or website you wish to take a screenshot of (make sure the window is not
minimized).
2. Click the Insert tab.
3. In the Illustrations group, click on the Screenshot button (See Figure 48).
Figure 48 - Illustrations: Screenshot

Page 23 of 30
4. A dropdown window will appear. Under Available Windows, you will see a thumbnail preview
of all open windows (In Figure 49, www.kennesaw.edu is shown).
Figure 49 - Screenshot: Available Windows
5. Click the thumbnail preview to insert the screenshot into your document.
To take a screenshot of a section of your screen:
1. Open the program or website you wish to take a screenshot of (make sure the window is not
minimized).
2. Click the Insert tab.
3. In the Illustrations group, click on the Screenshot button (See Figure 50).
Figure 50 - Illustrations: Screenshot
4. A dropdown window will appear. Click on Screen Clipping (See Figure 51).
Figure 51 - Screenshot: Screen Clipping
Page 24 of 30
5. Your screen will turn grey and a black crosshair will appear . Hold down the left mouse
button and drag the crosshair over the area of your screen you wish to capture.
6. Release the left mouse button when you are finished capturing. Your screenshot will
automatically be inserted into your document.
Inserting Video into your Document New to Word 2013 is the ability to insert online videos into your document. When inserted into your
document, the video will show a still image of the video. When clicked, the video will open in a
separate window and will play. When printing out your document, the video will look like a picture.
Note: To use this feature, you will need an internet connection. Videos will not play if the computer
accessing the document is not connected to the internet.
To add video to your document:
1. Click the Insert tab.
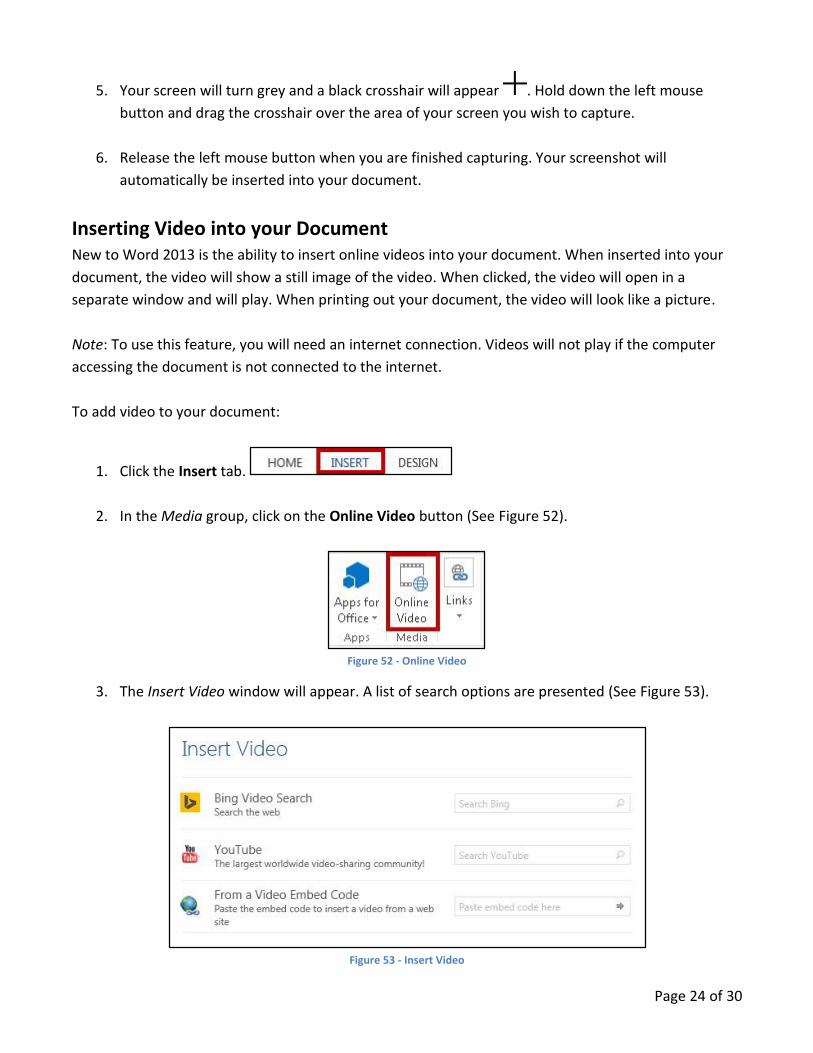
2. In the Media group, click on the Online Video button (See Figure 52).
Figure 52 - Online Video
3. The Insert Video window will appear. A list of search options are presented (See Figure 53).
Figure 53 - Insert Video

Page 25 of 30
4. In one of the search boxes, type a word or phrase that describes the desired video you wish to
search for (Figure 54 shows a YouTube search for Elephants).
Figure 54 - Insert Video: YouTube Search
5. Press Enter.
6. A list of your search results will appear (See Figure 55).
Figure 55 - Video Search Results
7. To preview the video, mouse over the image and click the magnifying glass (See Figure 56).
Figure 56 - Preview Video
8. Click the desired video you wish to add and click the insert button.
Page 26 of 30
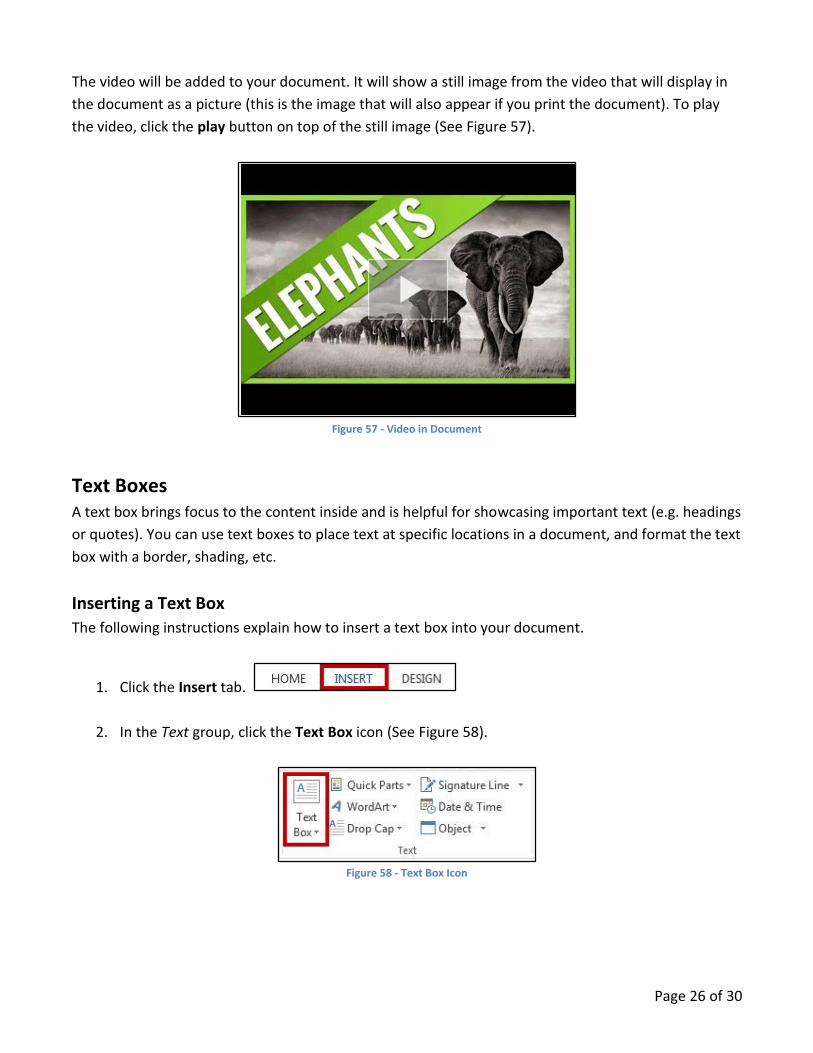
The video will be added to your document. It will show a still image from the video that will display in
the document as a picture (this is the image that will also appear if you print the document). To play
the video, click the play button on top of the still image (See Figure 57).
Figure 57 - Video in Document
Text Boxes A text box brings focus to the content inside and is helpful for showcasing important text (e.g. headings
or quotes). You can use text boxes to place text at specific locations in a document, and format the text
box with a border, shading, etc.
Inserting a Text Box
The following instructions explain how to insert a text box into your document.
1. Click the Insert tab.
2. In the Text group, click the Text Box icon (See Figure 58).
Figure 58 - Text Box Icon

Page 27 of 30
3. A list of pre-defined text boxes will appear. Click on a text box (See Figure 59).
Figure 59 - Text Box Gallery
4. The Text Box will be inserted into your document. Click on the Text Box and begin typing to add
your text.
5. To move the text box, select the text box, then drag the border of the text box the new location
(See Figure 60).
Figure 60 - Move a Text Box
6. You can re-size your text box the same way you re-size pictures. Refer to the section in this
booklet on Re-sizing a Graphic for more information.
Page 28 of 30
Drawing a Text Box
In addition to selecting a preset text box, you can also draw your own text box and insert it into your
document. The following explains how to draw a text box:
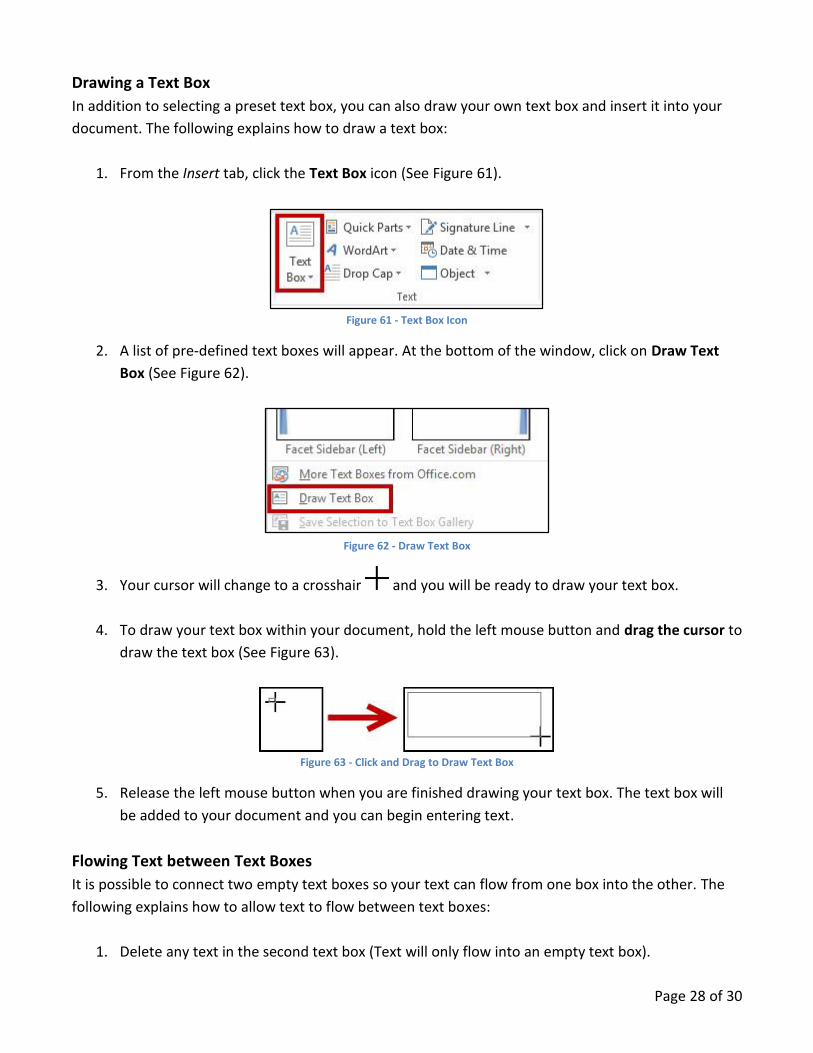
1. From the Insert tab, click the Text Box icon (See Figure 61).
Figure 61 - Text Box Icon
2. A list of pre-defined text boxes will appear. At the bottom of the window, click on Draw Text
Box (See Figure 62).
Figure 62 - Draw Text Box
3. Your cursor will change to a crosshair and you will be ready to draw your text box.
4. To draw your text box within your document, hold the left mouse button and drag the cursor to
draw the text box (See Figure 63).
Figure 63 - Click and Drag to Draw Text Box
5. Release the left mouse button when you are finished drawing your text box. The text box will
be added to your document and you can begin entering text.
Flowing Text between Text Boxes
It is possible to connect two empty text boxes so your text can flow from one box into the other. The
following explains how to allow text to flow between text boxes:
1. Delete any text in the second text box (Text will only flow into an empty text box).
Page 29 of 30
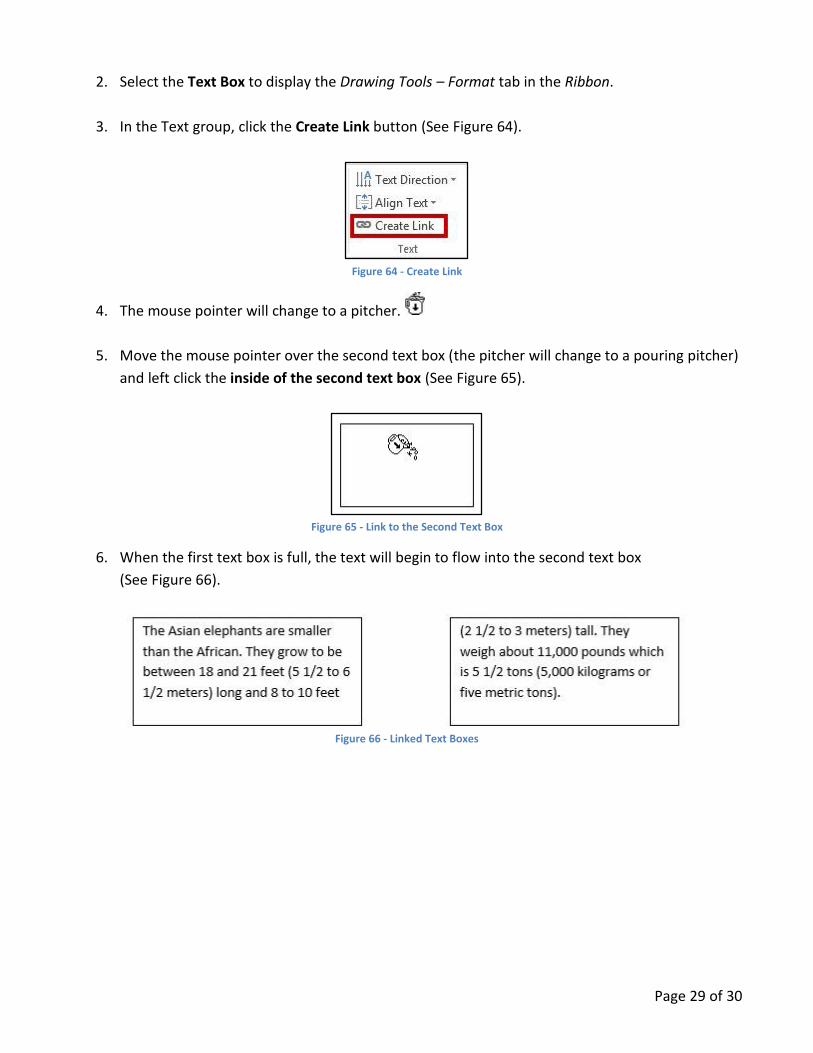
2. Select the Text Box to display the Drawing Tools – Format tab in the Ribbon.
3. In the Text group, click the Create Link button (See Figure 64).
Figure 64 - Create Link
4. The mouse pointer will change to a pitcher.
5. Move the mouse pointer over the second text box (the pitcher will change to a pouring pitcher)
and left click the inside of the second text box (See Figure 65).
Figure 65 - Link to the Second Text Box
6. When the first text box is full, the text will begin to flow into the second text box
(See Figure 66).
Figure 66 - Linked Text Boxes

Page 30 of 30
Additional Help For additional help or installation issues, please contact the KSU Service Desk (Faculty & Staff) or the
KSU Student Help Desk (Students).
KSU Service Desk for Faculty & Staff
Phone: 470-578-6999
Email: [email protected]
Website: http://uits.kennesaw.edu/faculty-staff/
KSU Student Help Desk
Phone: 470-578-3555
Email: [email protected]
Website: http://uits.kennesaw.edu/students/