TI Software Installation and Activation Guidebook
32
TI Software Installation and Activation Guidebook This guidebook applies to TI-Nspire™ software version 3.2. To obtain the latest version of the documentation, go to education.ti.com/guides.
Transcript of TI Software Installation and Activation Guidebook

TI Software Installationand Activation Guidebook
This guidebook applies to TI-Nspire™ software version 3.2. To obtain the latest version of the documentation, go to education.ti.com/guides.

ii
Important InformationExcept as otherwise expressly stated in the Licence that accompanies a program, Texas Instruments makes no warranty, either express or implied, including but not limited to any implied warranties of merchantability and fitness for a particular purpose, regarding any programs or book materials and makes such materials available solely on an "as-is" basis. In no event shall Texas Instruments be liable to anyone for special, collateral, incidental, or consequential damages in connection with or arising out of the purchase or use of these materials and the sole and exclusive liability of Texas Instruments, regardless of the form of action, shall not exceed the amount set forth in the licence for the program. Moreover, Texas Instruments shall not be liable for any claim of any kind whatsoever against the use of these materials by any other party.
LicencePlease see the complete licence installed in C:\Program Files\TI Education\<TI-Nspire™ Product Name>\license.
© 2006 - 2012 Texas Instruments Incorporated
Apple®, Mac®, OS X®, Microsoft® Windows®, Sentinel™, and Windows Vista® are trademarks of their respective owners.
Contents
iii
Important Information................................................................... ii
Getting Started ......................................................................1Before You Begin ........................................................................... 1Obtaining Licences ........................................................................ 1Obtaining the TI-Nspire™ Software ............................................. 2Obtaining the TI-Admin Software ................................................ 3Obtaining setup.ini Files ............................................................... 3Setting Environment Variables for Proxy Servers ........................ 4Using Deployment Tools ............................................................... 5
Installing the TI-Admin Software ..........................................7
Installing the TI-Nspire™ Software .......................................9Basic Method ................................................................................. 9Advanced Method ......................................................................... 9
Activating Licences ..............................................................11Activating Single and Volume Licences ...................................... 11Activating Multi-Activation Licences .......................................... 11Activating Concurrent and School-Managed Licences .............. 12
Appendix A: Licence Types and Terms ................................13Licence Types ............................................................................... 13Connectivity Requirements for Licence Types ............................ 15Licence Terms for Software Use .................................................. 16
Appendix B: Setup.ini File Options .....................................17
Appendix C: Service and Support ........................................25Texas Instruments Support and Service....................................... 25Service and Warranty Information.............................................. 25
Index......................................................................................27

iv
Getting Started 1
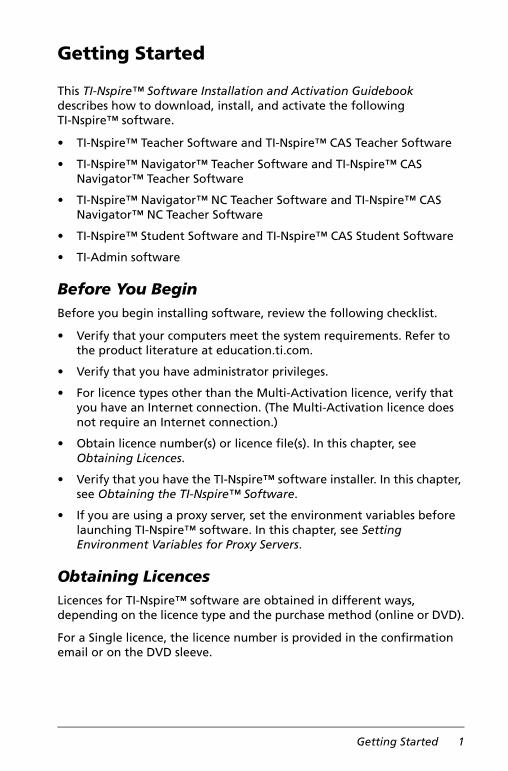
Getting Started
This TI-Nspire™ Software Installation and Activation Guidebook describes how to download, install, and activate the following TI-Nspire™ software.
• TI-Nspire™ Teacher Software and TI-Nspire™ CAS Teacher Software
• TI-Nspire™ Navigator™ Teacher Software and TI-Nspire™ CAS Navigator™ Teacher Software
• TI-Nspire™ Navigator™ NC Teacher Software and TI-Nspire™ CAS Navigator™ NC Teacher Software
• TI-Nspire™ Student Software and TI-Nspire™ CAS Student Software
• TI-Admin software
Before You Begin Before you begin installing software, review the following checklist.
• Verify that your computers meet the system requirements. Refer to the product literature at education.ti.com.
• Verify that you have administrator privileges.
• For licence types other than the Multi-Activation licence, verify that you have an Internet connection. (The Multi-Activation licence does not require an Internet connection.)
• Obtain licence number(s) or licence file(s). In this chapter, see Obtaining Licences.
• Verify that you have the TI-Nspire™ software installer. In this chapter, see Obtaining the TI-Nspire™ Software.
• If you are using a proxy server, set the environment variables before launching TI-Nspire™ software. In this chapter, see Setting Environment Variables for Proxy Servers.
Obtaining Licences Licences for TI-Nspire™ software are obtained in different ways, depending on the licence type and the purchase method (online or DVD).
For a Single licence, the licence number is provided in the confirmation email or on the DVD sleeve.

2 Getting Started
For Volume, Concurrent, Multi-Activation, and School-Managed licences, follow these steps to redeem the claim number needed to create licence numbers or licence files.
1. Log in to your Software Service Centre account at education.ti.com/go/softwarecenter.
2. Click Redeem Claim Number.
3. Type the claim number provided in your confirmation email and click Redeem.
The Licence Agreement web page is displayed.
4. Click Accept.
The Claim Number Redemption Successful web page is displayed.
5. Verify your order, including product name, licence type, and number of seats.
6. Click Manage Licence Numbers.
The Manage Licence Numbers web page is displayed.
7. Click New Licence Number, and then click Manage Licence.
The Allocate Activations web page is displayed.
8. For licences other than the Multi-Activation licence, type the number of seats that you want to allocate to the first licence number.
For example, if you have 30 seats total and want to allocate 10 seats to each of three licence numbers, type 10 for the first licence number.
9. Type a nickname, and click Save.
The Manage Licence Number web page is displayed with the licence number or with a download link to the licence file.
10. Repeat steps 8 and 9 until all seats are allocated.
Obtaining the TI-Nspire™ Software Use the information in this section to obtain your TI-Nspire™ software.
The following installers are available for the TI-Nspire™ software:
• Windows® .exe installers for basic installations
• Windows® .msi installers for advanced installations and use with deployment tools
Note: The .msi installer is intended for use with silent deployments. Dialogue boxes are provided in English only.

Getting Started 3
• Mac® .pkg installers for basic installations, advanced installations, and use with deployment tools
To obtain the TI-Nspire™ software, choose one of these options:
If your purchase included a DVD, you can find the installer in these folders:
• For the Windows® .exe and .msi installers, go to the \PC folder.
• For the Mac® .pkg installer, go to the /MAC folder.
If you purchased a Single licence online, go to the website provided in your confirmation email.
For other licences purchased online, log in to your Software Service Centre account at education.ti.com/go/softwarecenter.
a) In the menu on the left, click Product List.
b) Navigate to your software and click Download Software.
Obtaining the TI-Admin Software To obtain the TI-Admin software, follow these steps.
1. Open a web browser and log into your Software Service Centre account at education.ti.com/go/softwarecenter.
2. In the menu on the left, click Installation and download the current TI-Admin installer to a temporary folder on the licence-service computer.
Obtaining setup.ini Files Setup.ini files are used for advanced installations of Volume, Multi-Activation, Concurrent, and School-Managed licences.
To download the setup.ini file, follow these steps.
1. Open a web browser and log in to your Software Service Centre account at education.ti.com/go/softwarecenter.
2. In the menu on the left, click Installation.
3. Download the Windows® or Mac® setup.ini file and install it in a convenient folder on a computer.
Note: Be sure to download the specific Windows® or Mac® setup.ini file. The setup.ini file content may appear to be the same for Windows® and the Mac®, but the file structures, such as the end-of-line characters, are different. The files will not work correctly on the wrong OS.

4 Getting Started
Setting Environment Variables for Proxy Servers If you are using a proxy server, you must set the environment variables before you can use the TI-Nspire™ software.
The environment variables point to the proxy server and port so the licence can be activated.
Setting Environment Variables on Windows®To set the environment variables on Windows®, follow these steps.
Note: On Windows®, the HTTP proxy options in the setup.ini file cannot be used to set the environment variables.
1. Click Start > Control Panel > System.
(If you are using Windows® 7 or Windows Vista® and are navigating from the Control Panel main window, click System and Security > System.)
The System Properties dialogue box opens.
2. Click the Advanced Systems Settings tab.
3. Click Environment Variables.
The Environment Variables dialogue box opens.
4. In the System Variables area, click New.
The New System Variable dialogue box opens.
5. In the Variable name field, type TI.HttpsProxy.
6. In the Variable value field, type <proxy IP address or host>:<proxy port>.
7. Click OK to close open dialogue boxes and the Control Panel.
Setting Environment Variables on a Mac®Environment variables on a Mac® must be specified in the environment.plist file. If you install the software using the following setup.ini options, the installer sets the variables automatically:
• USE_HTTP_PROXY_PORT
• USE_HTTP_PROXY_SERVER
If you are not using the setup.ini file or if you are activating TI-Admin software or a Concurrent or School-Managed licence, you will need to set the environment variables manually on the computer where you are installing the software.

Getting Started 5
The variables must be specified using the following syntax:TI.HttpsProxy=<proxy IP address or host>:<proxy port>
For example:TI.HttpsProxy=www.proxyserver.com:8080
For more information on setting your environment variables in the environment.plist file, see the Apple® documentation.
Using Deployment Tools You can distribute the software to computers silently using different deployment tools. For instructions on using a deployment tool, see the tool’s documentation. Texas Instruments does not recommend specific products.
If you have problems deploying the TI-Nspire™ software, go to the Software Service Centre at education.ti.com/go/softwarecenter or contact TI-Cares at 1.800.TI.CARES or [email protected].

6 Getting Started

Installing the TI-Admin Software 7
Installing the TI-Admin Software
The TI-Admin software bundle includes the following utilities that must be installed on the licence-service computer for Concurrent and School-Managed licences:
• TI-Admin Activation Wizard
• Licence service
• WlmAdmin application (Windows®) or Sentinel® RMS Tools (Mac®)
To install the TI-Admin software, follow these steps.
1. Double-click the TI-Admin file (.exe for Windows® or .pkg for Mac®) to begin the installation procedure.
The Activation Wizard Welcome dialogue box opens.
2. To complete the installation, follow the instructions in the installer dialogue boxes.
The Activation Wizard is installed so that the licence-service computer can be activated.
For details about activating your licence service, see the Activating Concurrent and School-Managed Licences section in the Activating Licences chapter.

8 Installing the TI-Admin Software

Installing the TI-Nspire™ Software 9
Installing the TI-Nspire™ Software
To install the TI-Nspire™ software using the basic and advanced installation methods, follow the procedures in this chapter.
Before you begin any installation procedure, review the Getting Started chapter.
Basic Method To install the TI-Nspire™ software using the basic installation method, follow the steps in this section.
The basic method is performed manually for a Single licence or Volume licence on one computer only. If you are installing and activating the TI-Nspire™ software on multiple computers, each computer must be set up independently if you use a basic installation.
1. Close all programmes running on your computer.
2. Run the TI-Nspire™ installer.
The Installation Wizard Welcome dialogue box opens.
Note: On some systems, this dialogue box may take several seconds to be displayed.
3. To complete the installation, follow the instructions in the installer dialogue boxes.
When the installation is complete, the successful installation dialogue box opens.
4. Choose one of these options:
• If you want to launch the software immediately, click the appropriate product name, and then click Finish.
• To exit the wizard and launch the software later, click Continue without launching, and then click Finish.
Advanced Method The advanced installation method is an automated procedure. Although it is more involved, usually includes deployment and requires a setup.ini file, it saves time when you are installing the software on multiple computers.
If you are using a Concurrent or School-Managed licence, ensure that you have installed the TI-Admin software. For more information, see Installing the TI-Admin Software.

10 Installing the TI-Nspire™ Software
To install the TI-Nspire™ software, follow these steps.
1. Download and save the setup.ini file. For more information, see Obtaining setup.ini Files.
2. Using a nonformatting text editor such as Notepad on Windows® and TextEdit on a Mac®, open the setup.ini file. (Do not use an application, such as Microsoft® Word, that could reformat the text.)
3. Using the option descriptions and values provided in the setup.ini file, specify the values that apply for your installation.
Note: If you are using a Concurrent or School-Managed licence, your setup.ini file needs to contain the LICENSE_SERVER_1 option at minimum to ensure that the computers running TI-Nspire™ software are configured to access the licence service.
For additional information, see Appendix B: Setup.ini File Options.
4. Save the setup.ini file.
5. Deploy the software and setup.ini file using the platform or process of your choice, or you can run the installer and follow the prompts in the wizard.
• For Windows®, the setup.ini file must be located in the same folder as the TI-Nspire™ installer (.exe or .msi) file.
• For a Mac®, the setup.ini file must be located in the /tmp folder.
Activating Licences 11
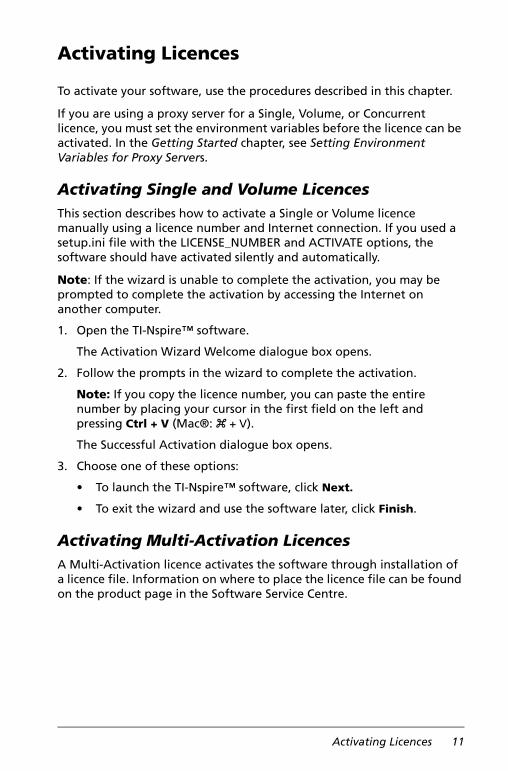
Activating Licences
To activate your software, use the procedures described in this chapter.
If you are using a proxy server for a Single, Volume, or Concurrent licence, you must set the environment variables before the licence can be activated. In the Getting Started chapter, see Setting Environment Variables for Proxy Servers.
Activating Single and Volume Licences This section describes how to activate a Single or Volume licence manually using a licence number and Internet connection. If you used a setup.ini file with the LICENSE_NUMBER and ACTIVATE options, the software should have activated silently and automatically.
Note: If the wizard is unable to complete the activation, you may be prompted to complete the activation by accessing the Internet on another computer.
1. Open the TI-Nspire™ software.
The Activation Wizard Welcome dialogue box opens.
2. Follow the prompts in the wizard to complete the activation.
Note: If you copy the licence number, you can paste the entire number by placing your cursor in the first field on the left and pressing Ctrl + V (Mac®: “ + V).
The Successful Activation dialogue box opens.
3. Choose one of these options:
• To launch the TI-Nspire™ software, click Next.
• To exit the wizard and use the software later, click Finish.
Activating Multi-Activation Licences A Multi-Activation licence activates the software through installation of a licence file. Information on where to place the licence file can be found on the product page in the Software Service Centre.

12 Activating Licences
Activating Concurrent and School-Managed Licences Use the information in this section to activate the licence service. When the service has been activated, seats are available for use on the computers running the TI-Nspire™ software.
Note: If the wizard is unable to complete the activation, you may be prompted to complete the activation by accessing the Internet on another computer.
1. Select Programs > TI Tools > TI Admin > Activate TI Software (Windows®) or go to /Applications and double-click TI-Admin (Mac®).
The Activation Wizard Welcome dialogue box opens.
2. Follow the prompts in the wizard to complete the activation.
Note: If you copy the licence number, you can paste the entire number by placing your cursor in the first field on the left and pressing Ctrl + V (Mac®: “ + V).
The Successful Activation dialogue box opens.
3. Choose one of these options:
• To install another licence, click Next.
• To close the wizard, click Finish.
• To manage seats:
– On Windows®, select the Launch WLMadmin check box on the Successful Activation dialogue box.
– On a Mac®, launch this command from the terminal: lsmon

Appendix A: Licence Types and Terms 13
Appendix A: Licence Types and Terms
The type of licence and the terms that you need depend on which TI-Nspire™ software you purchased, how many users (seats) you need, and the flexibility you need for multiple users.
The requirements for connectivity to the school network and the Internet vary, depending on activation and licence type.
Licence Types The following are types of the TI-Nspire™ software licences.
Single LicencesA Single licence is valid for the TI-Nspire™ software installed on a Single computer. It is activated when you begin using the software.
An Internet connection is required for activating the licence.
Volume LicencesA Volume licence is a multiuser licence that provides TI-Nspire™ software usage on a per-user and per-computer basis.
It is a single licence that manages a pool of seats, the number of which is specified at the time of purchase. The pool can be divided into multiple licence numbers, such as three numbers, each managing 10 seats, in a 30-seat Volume licence.
The TI-Nspire™ software is installed on each computer in the pool. The licence number stays with the computer by default and is activated when the TI-Nspire™ software is opened on that computer.
A connection to the Internet is required for activating the licence.
Concurrent LicencesA Concurrent licence is a single licence number that is installed on the licence-service computer that is running the TI-Admin software and is used to manage seat usage.
With a Concurrent licence, the TI-Nspire™ software can be installed on all school computers and used when a seat is available:
• When a user opens the software, the licence service checks out an unused seat to the user.
• When the user closes the software, the seat is returned to the pool.
This process applies up to the maximum number of seats that were specified at the time of purchase.

14 Appendix A: Licence Types and Terms
An Internet connection is required to install and activate the TI-Admin software on the licence-service computer. The computers running the TI-Nspire™ software must be connected through the school network to the licence-service computer to manage seats.
Multi-Activation LicencesA Multi-Activation Licence is a multiuser licence that provides TI-Nspire™ software usage on a per-user and per-computer basis.
The licence is delivered in a file, which is placed in a specified location on computers where the software is installed.
The file is used to activate the software, and users do not receive a licence number.
For computers using the TI-Nspire™ software, connections to the Internet and the school network are not required. Software can be installed through hard-disk imaging and other deployment methods.
For the Multi-Activation licence, the software on each computer must be activated periodically:
• The licence can be purchased as perpetual (renewed for a new time period at no additional cost), or it can be purchased as a nonrenewable subscription.
• The subscription renewal produces a new licence file that must be deployed to the computers running the TI-Nspire™ software.
School-Managed LicencesThe School-Managed licence is a multiuser licence that provides TI-Nspire™ software usage on a per-user (teacher or student) and per-computer basis.
The School-Managed licence is managed centrally and activated on the licence-service computer that is connected to the school network.
When a user opens the software, it can be run if these connectivity requirements are met:
• The computer is connected to the licence-service computer and seats are available.
• The computer is away from the network, but has connected successfully to the licence-service computer within the last 30 days.
An Internet connection is required to install and activate the TI-Admin software on the licence-service computer. The computers running the TI-Nspire™ software must be connected through the school network to the licence-service computer to manage seats.

Appendix A: Licence Types and Terms 15
Software can be installed on the computers running the TI-Nspire™ software through hard-disk imaging and other deployment methods.
For the School-Managed licence, the licence service is activated periodically:
• The licence can be purchased as perpetual (renewed for a new time period at no additional cost), or it can be purchased as a nonrenewable subscription.
• The subscription renews with a new licence number that must be activated to the licence-service computer.
Connectivity Requirements for Licence Types The following table summarizes connectivity requirements for the computer running the TI-Nspire™ software or the licence-management software.
Licence Type Internet Connectivity Required for Activation?
Off Network Usage?
How Long Off Network?
Single Yes Yes Full licence duration
Volume Yes Yes Full licence duration
Concurrent For licence service only
Limited manual
Borrow period (adjustable)
Multi-Activation No Yes Full licence duration
School-Managed For licence service only
Limited automatic
30 days from the last successful licence-service connection

16 Appendix A: Licence Types and Terms
Licence Terms for Software Use For licences, the terms for using the TI-Nspire™ software are specified:
• Subscription. A subscription is valid for a limited period of time. The time period can be a duration or defined with an end date.
• Perpetual Licence. A perpetual licence is valid for an unlimited period of time. Some licence types may require you to renew and reactivate on a regular basis.
• Trial Licence. A trial licence is valid for the evaluation period that is stated in the software. No licence number is required.

Appendix B: Setup.ini File Options 17
Appendix B: Setup.ini File Options
This appendix summarizes the setup.ini file options.
Note: Make sure that you download the latest setup.ini file that includes the current options.
Option LicenceType
Value
ACTIVATE Volume YES or NO (default = YES)
When set to YES, a silent activation attempt is scheduled immediately after installation and allows for up to two randomly scheduled reattempts if needed.
If set to NO, activation is not initiated until the TI-Nspire™ software is launched. This can be beneficial when using a subscription licence and the TI-Nspire™ software is deployed before the semester starts. This provides a way to ensure that the subscription period does not begin until the first time the software is launched.

18 Appendix B: Setup.ini File Options
ACTIVATION_TIME_LIMIT
Volume Time in seconds from 1 to 600 (default = 600)
When ACTIVATE is set to YES, the software chooses a random value between 1 and the specified value to wait before the activation attempt and between attempts. This prevents a large number of clients from attempting to communicate with the activation server at the same time.
The system tries automatically to activate up to three times.
ALLOW_AUTO_SW_UPDATE
All YES or NO (default = YES)
When set to YES, allows automatic updates to Texas Instruments software on computers running the TI-Nspire™ software. Computer(s) are notified of available software updates.
To receive notices, users must have Internet access, and port 80 must be open.
ALLOW_LICENSE_BORROW
Concurrent YES or NO (default = YES)
When set to YES, allows users to check out a seat and use the TI-Nspire™ software when the computer is remote and not connected to the licence-service computer.
Option LicenceType
Value
Appendix B: Setup.ini File Options 19
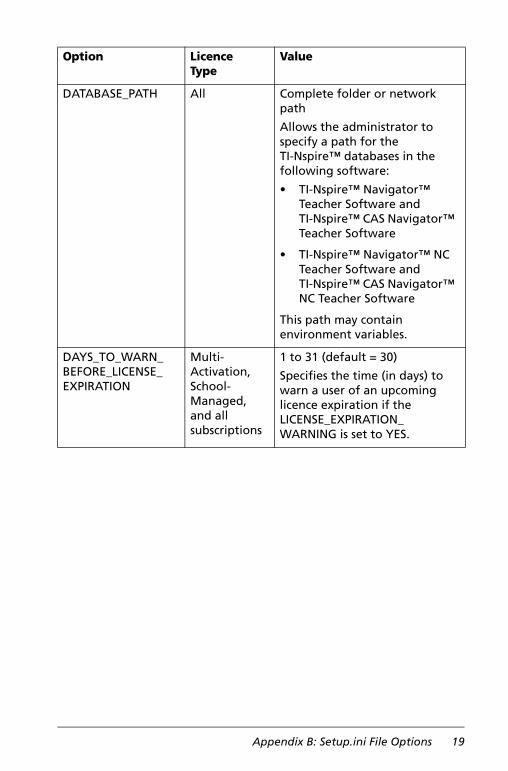
DATABASE_PATH All Complete folder or network path
Allows the administrator to specify a path for the TI-Nspire™ databases in the following software:
• TI-Nspire™ Navigator™ Teacher Software and TI-Nspire™ CAS Navigator™ Teacher Software
• TI-Nspire™ Navigator™ NC Teacher Software and TI-Nspire™ CAS Navigator™ NC Teacher Software
This path may contain environment variables.
DAYS_TO_WARN_BEFORE_LICENSE_EXPIRATION
Multi-Activation, School-Managed, and all subscriptions
1 to 31 (default = 30)
Specifies the time (in days) to warn a user of an upcoming licence expiration if the LICENSE_EXPIRATION_WARNING is set to YES.
Option LicenceType
Value

20 Appendix B: Setup.ini File Options
DEPLOYLOGDIR Volume Complete folder or network path
Creates an empty file immediately after activation. The file name indicates success or failure using the following format:<AppName>-<Success/Failure>-<Host name>-<Date>-<Time>.log
For example, if TI-Nspire™ CAS Teacher Software were installed successfully on the ClassDesktop01 computer on August 15, 2011, at 2:30 p.m., this entry would appear:TINspireCASTeacherEdition-Success-ClassDesktop01-20110815-1430.log
LICENSE_EXPIRATION_WARNING
All subscriptions
YES or NO (default = YES)
If set to YES, allows users to be warned when a licence is close to expiring.
This option applies only to subscription licences.
If you have a perpetual licence, this option is ignored.
LICENSE_NUMBER Volume 31-digit licence number
The licence number obtained when your claim number was redeemed at the Software Service Centre.
Type (or copy/paste) the number exactly as it is provided, including the dashes.
Option LicenceType
Value

Appendix B: Setup.ini File Options 21
LICENSE_NUMBER_2 Volume 31-digit licence number
This option is used only for the TI-Nspire™ CAS Teacher Software.
The licence number obtained when your claim number was redeemed at the Software Service Centre.
Type (or copy/paste) the number exactly as it is provided, including the dashes.
LICENSE_SERVER_1 Concurrent, School-Managed
Host name or IP address
Points the TI-Nspire™ software to the licence-service computer for licence checkout.
If you only have one licence server, set the value for LICENSE_SERVER_1 to the host name.
Note: The IP address must be IPv4.
LICENSE_SERVER_2
(optional)
Concurrent, School-Managed
Host name or IP address
If you specified a secondary licence-service computer, points the TI-Nspire™ software to it when the primary licence server is unavailable or cannot be reached.
If you only have one licence-service computer, set the value for LICENSE_SERVER_2 to the IP address.
If a second management computer is not required, leave this field blank.
Note: The IP address must be IPv4.
Option LicenceType
Value

22 Appendix B: Setup.ini File Options
LICENSE_SERVER_3
(optional)
Concurrent, School-Managed
Host name or IP address
If you specified a tertiary licence-service computer, points the TI-Nspire™ software to it if the primary and secondary licence-service computers are unavailable or cannot be reached.
If a third management computer is not configured, leave this field blank.
Note: The IP address must be IPv4.
Option LicenceType
Value

Appendix B: Setup.ini File Options 23
LOGDIR All The word Default, or the complete folder or network path (default = Default)
Specifies the folder where the log files are located.
Although using Default for the installation folder is recommended, you can change the folder location by typing a full path.
Example default locations:
• Windows® 7: C:\Users\username\AppData\Roaming\Texas Instruments\softwarename\logs
• Windows® XP: C:\Documents and Settings\username\Application Data\ Texas Instruments\softwarename\logs
• Mac® OS X®: /Users/username/Library/Preferences/Texas Instruments/softwarename/logs
MAX_DAYS_TO_BORROW_LICENSE
Concurrent 1 to 365 (default = 14)
When ALLOW_LICENSE_BORROW is enabled, specifies the maximum number of days that a licence number can be borrowed before it must be returned.
Option LicenceType
Value
24 Appendix B: Setup.ini File Options
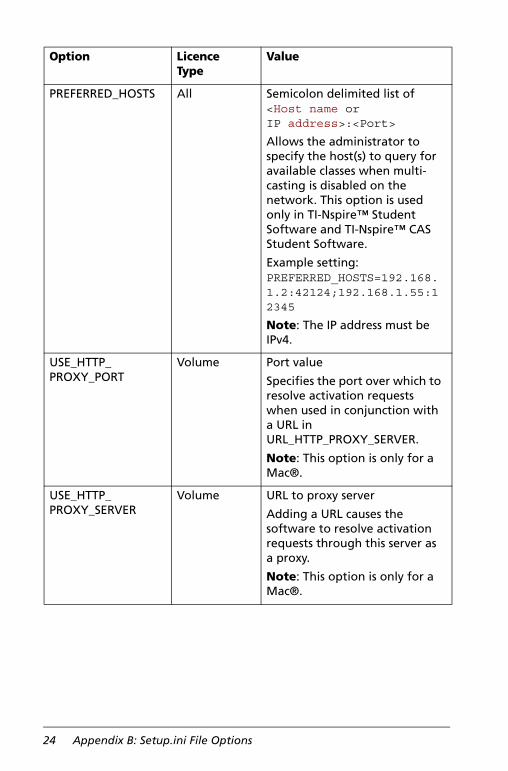
PREFERRED_HOSTS All Semicolon delimited list of <Host name or IP address>:<Port>
Allows the administrator to specify the host(s) to query for available classes when multi-casting is disabled on the network. This option is used only in TI-Nspire™ Student Software and TI-Nspire™ CAS Student Software.
Example setting: PREFERRED_HOSTS=192.168.1.2:42124;192.168.1.55:12345
Note: The IP address must be IPv4.
USE_HTTP_PROXY_PORT
Volume Port value
Specifies the port over which to resolve activation requests when used in conjunction with a URL in URL_HTTP_PROXY_SERVER.
Note: This option is only for a Mac®.
USE_HTTP_PROXY_SERVER
Volume URL to proxy server
Adding a URL causes the software to resolve activation requests through this server as a proxy.
Note: This option is only for a Mac®.
Option LicenceType
Value
Appendix C: Service and Support 25
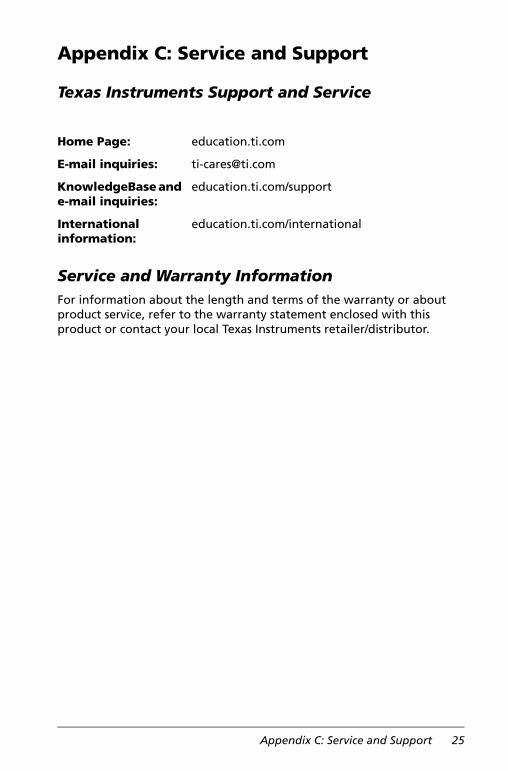
Appendix C: Service and Support
Texas Instruments Support and Service
Service and Warranty InformationFor information about the length and terms of the warranty or about product service, refer to the warranty statement enclosed with this product or contact your local Texas Instruments retailer/distributor.
Home Page: education.ti.com
E-mail inquiries: [email protected]
KnowledgeBase and e-mail inquiries:
education.ti.com/support
International information:
education.ti.com/international

26 Appendix C: Service and Support

Index
27
Aactivating licences 11Activation Wizard, activating
licences 11advanced installation method,
TINspire™ software 9
Bbasic installation method,
TI-Nspire™ software 9
CConcurrent licences, description and
connectivity 13
Ddeployment tools 5
Eenvironment variables, setting for
proxy servers 4
Iinstallation methods, TI-Nspire™
softwareinstallation methods 9
installingTI-Admin software 7TI-Nspire™ software 9
Llicences
activating 11Concurrent 13connectivity requirements 15Multi-Activation 14obtaining 1School-Managed 14Single 13terms for software use 16types and terms for use 13Volume 13
Mmethods of installation, TI-Nspire™
software 9Multi-Activation licences,
description and connectivity 14
Oobtaining
licences 1setup.ini files 3TI-Admin software 3TI-Nspire™ software 2
options, setup.ini files 17
Pperpetual licence terms 16proxy servers, setting environment
variables 4
Rrequirements
before you begin installing 1
SSchool-Managed licences,
description and connectivity 14setup.ini files
obtaining 3options 17
Single licences, description and connectivity 13
subscription licence terms 16
Tterms of licence software use 13TI-Admin software
installing 7obtaining 3
TI-Nspire™ softwareinstalling 9
TI-Nspire™ software
Index

28
installed and activated with this guidebook 1
obtaining 2tools, deploying software 5trial licence terms 16types of licences 13
VVolume licences, description and
connectivity 13