Teletype Studies - llllllll.co Studies Part1: NavigatingandMakingEdges Hello,world?...
49
Teletype Studies Part 1: Navigating and Making Edges Hello, world? Teletype starts up in LIVE mode. This is a basic interactive terminal where you can type in commands. Be sure the keyboard is plugged in. Try typing in: HELLO And then press ENTER. You’ll see UNKNOWN WORD: HELLO. Teletype doesn’t have great manners. Backspace the greeting and instead type simply 7 and hit enter. Teletype will acknowledge you’ve typed in the number 7, and clear the prompt for a new command. This is how LIVE mode works. You type commands and they are executed immediately. Live mode is indicated with the > character as the prompt. Edges await your command But really, now we will make something happen. TR A 1 Executing this command will turn ON output A. The LED will light up, and voltage will be applied to this jack. Here TR takes two parameters: the first (A) specifies the output number/letter (A-D) and the second (1 ) is the state: off (0) or on (1). To turn off output A: TR A 0 If we want to find out the current value of an output, simply leave off the last parameter: TR A 1
Transcript of Teletype Studies - llllllll.co Studies Part1: NavigatingandMakingEdges Hello,world?...

Teletype Studies
Part 1: Navigating and Making Edges
Hello, world?
Teletype starts up in LIVE mode. This is a basic interactive terminal where youcan type in commands. Be sure the keyboard is plugged in. Try typing in:
HELLO
And then press ENTER. You’ll see UNKNOWN WORD: HELLO. Teletypedoesn’t have great manners.
Backspace the greeting and instead type simply 7 and hit enter. Teletype willacknowledge you’ve typed in the number 7, and clear the prompt for a newcommand.
This is how LIVE mode works. You type commands and they are executedimmediately. Live mode is indicated with the > character as the prompt.
Edges await your command
But really, now we will make something happen.
TR A 1
Executing this command will turn ON output A. The LED will light up, andvoltage will be applied to this jack.
Here TR takes two parameters: the first (A) specifies the output number/letter(A-D) and the second (1 ) is the state: off (0) or on (1).
To turn off output A:
TR A 0
If we want to find out the current value of an output, simply leave off the lastparameter:
TR A
1

In the terminal the value will be displayed.
There are a few other ways to use the TR outputs. If you want to switch thestate of the output, use the following:
TR.TOG B
The TR output B will flip to on if previously off, or off if previously on.
THIS → Push the UP ARROW. Your last command will be recalled. Hit enterto execute it. Hit up several times to go through the command history. You canalso push down (after going up) to navigate through previous commands.
Bip-bip-bip
TR.PULSE A
Make a pulse. Try it. If TR output A is on when the pulse is executed, you’llget an inverted pulse.
How long is that pulse? Type:
TR.TIME A
Teletype will tell you. By default it is 100, which is in milliseconds. To changethis to 200ms:
TR.TIME A 200
Now try TR.PULSE A for longer pulses (remember to use UP ARROW forcommand recall).
OK when do we make music?
What makes these little commands interesting is the ability to string a bunch ofthem together into a SCRIPT assigned to a trigger input– as if some other partof your modular types furiously each time a pulse came in.
We switch between LIVE and EDIT mode by hitting TAB.
Upon switching to EDIT mode however, you’ll likely notice a bunch of textsuddenly on the screen– Teletype ships with the first SCENE loaded. Let’s takea quick detour to clear the scene.
Scene loading
Let’s get a blank scene as a starting point. Hit ESC to enter the SCENE page.
Scenes are listed along with their help texts. Use the brackets [ and ] to movethrough the available scenes. Hit ENTER to load the selected scene. In our
2

case, let’s load scene 9, which should be blank. Upon load you’ll be thrown backto LIVE mode.
Back to the script
Hit TAB to get into EDIT mode. You’ll see the prompt change to 1 indicatingthat you’re editing script 1.
• Each trigger input (1-8) has its own script.• A script is executed on the positive (low-to-high) edge of a trigger or gate.• Scripts can have up to 6 commands (lines).
The EDIT interface simply lets you edit the commands of the script. Type in:
TR.TOG A
Patch some sort of timer into trigger input 1. Now on each incoming triggersignal the trigger output A is being flipped.
After entering a command the edit line is moved down, so you can add anotherline. Go ahead and do that:
TR.TOG B
Now your script has two lines, and one input is making two outputs flip around.
Say you want to edit the first line of the script– simply use the UP ARROWto navigate up there. The command will be copied to the edit prompt. You canuse the DOWN ARROW similarly to navigate back to the bottom.
So far we’ve been modifying script 1. Use the brackets [ and ] to switch scripts.Hit ] to edit script 2:
TR.TOG BTR.TOG C
Now trigger input 2 will flip outputs B and C.
If you continue hitting the brackets you’ll stumble upon the M and I scripts–we’ll be describing those in future chapters.
Scissors and glue
Navigate back to TR.TOG C and hit ALT-C. This will copy the whole command.Hit ] to go to script 3, and then ALT-V to paste the command. You can alsouse ALT-X to cut.
You can copy/paste between LIVE and EDIT modes, so if you try somethingout in LIVE mode you can quickly UP then ALT-C to copy it prior to pastingit into a script by hitting TAB.
3

Sometimes you may want to insert a command at the current position ratherthan overwrite the existing command. Use SHIFT-ENTER to insert ratherthan overwrite the current command.
Save it for later
Teletype saves scenes to internal flash memory. Presently it can store up to 32scenes. The currently loaded scene will be automatically recalled on power-up,but you have to store it to memory first.
Hit ALT-ESC to get into SCENE (WRITE) mode. You should still be onblank scene 9– you can use the brackets [ and ] to switch where you’re writingto– careful not to overwrite existing scenes accidentally!
You can type a scene title into the top line, and “helper text” into the linesbelow. Typically it’s good to describe what the scene does, and we’ve found itbest to give “function descriptions” for the trigger input scripts. For example:
JUMPY EDGES
THINGS GO UP AND DOWN
1: TOGGLE A B2: TOGGLE B C
When you’re ready to save your scene, hit ALT-ENTER. It’s now in flash andwill run immediately on your next power-up.
EXAMPLE: JUMPY EDGES
This scene is featured in the banner video above.
The following scene uses all 8 trigger inputs to act on outputs A-D. Try patchingoutputs A-D as gates to various sound-altering inputs.
Inputs 1-4 flip two sequential outputs, and Input 5 will flip all outputs. Tryhaving input triggers 1-4 all patched, running at slightly different rates. You’llnotice patterns emerge.
Input 6 pulses all outputs. Inputs 7 and 8 change the pulse length. Given thepulse will invert the signal, try interjecting some pulses while scripts 1-5 arerunning for some variation.
4

5
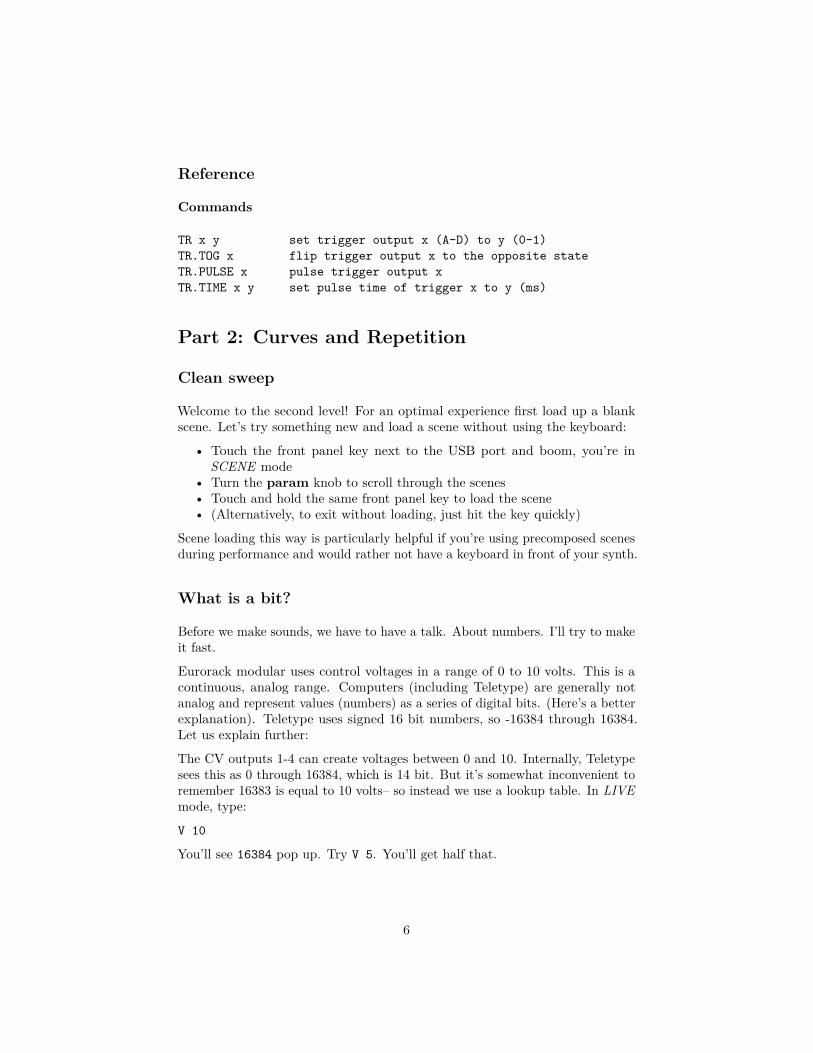
Reference
Commands
TR x y set trigger output x (A-D) to y (0-1)TR.TOG x flip trigger output x to the opposite stateTR.PULSE x pulse trigger output xTR.TIME x y set pulse time of trigger x to y (ms)
Part 2: Curves and Repetition
Clean sweep
Welcome to the second level! For an optimal experience first load up a blankscene. Let’s try something new and load a scene without using the keyboard:
• Touch the front panel key next to the USB port and boom, you’re inSCENE mode
• Turn the param knob to scroll through the scenes• Touch and hold the same front panel key to load the scene• (Alternatively, to exit without loading, just hit the key quickly)
Scene loading this way is particularly helpful if you’re using precomposed scenesduring performance and would rather not have a keyboard in front of your synth.
What is a bit?
Before we make sounds, we have to have a talk. About numbers. I’ll try to makeit fast.
Eurorack modular uses control voltages in a range of 0 to 10 volts. This is acontinuous, analog range. Computers (including Teletype) are generally notanalog and represent values (numbers) as a series of digital bits. (Here’s a betterexplanation). Teletype uses signed 16 bit numbers, so -16384 through 16384.Let us explain further:
The CV outputs 1-4 can create voltages between 0 and 10. Internally, Teletypesees this as 0 through 16384, which is 14 bit. But it’s somewhat inconvenient toremember 16383 is equal to 10 volts– so instead we use a lookup table. In LIVEmode, type:
V 10
You’ll see 16384 pop up. Try V 5. You’ll get half that.
6

Making volts
Let’s actually hear it. Plug output CV 1 into the frequency input of an oscillator,and patch that so it makes sound. We change the CV value with with the CVcommand:
CV 1 V 2
The first argument 1 is which CV output you’re changing. This can be 1-4.We’re then using the V command to look up the value of 2 volts. Effectively thisis the same as typing CV 1 3277.
Oscillators should track one octave per volt, so right now the oscillator shouldbe playing two octaves above wherever it is tuned. To return back to zero, type:
CV 1 0
We don’t really need to type V 0 because it’s the same as 0, but you can if youwant.
But you may want some value besides just octaves. (Though, if you are makingoctaves-only music, I want to hear it– please e-mail [email protected]). Teletypeonly understands whole numbers– you can’t use decimal points. We designed itthis way to keep it as simple as possible.
To get 2.5 volts, use the VV lookup:
VV 250
You’ll get 4096 (honestly it’s not really important what the value is). But whydid we type 250? VV takes a range of 0 to 1000, where 1000 can be thought ofas “10.00”. So 250 actually means 2.50. You always need to specify two decimalplaces, otherwise it’ll be a bug, so remember!
2.5v = VV 2501.25v = VV 1256.02v = VV 6020.22v = VV 225v = VV 500
Got it? Use V for single whole volts, and VV for fractional volts.
Get temperamental
You may have tried this:
CV 1 VV 250
That’s a half octave above the second octave, which just happens to be a tritone–a real note. But try:
CV 1 VV 11
7

And you’ll be in micro-tonal territory. Instead of dividing volts by 12 yourself,Teletype does it for you with the N lookup table.
CV 2 N 7
This command sets CV output 2 to 7 semitones up, in equal temperament tuning.(We’ll discuss custom tuning tables in a later study!)
Try changing that last value to hear some pretty clear tonal relationships:
CV 2 N 0CV 2 N 9CV 2 N 12CV 2 N 16
The N table works for values above 12, with a full range of 0 to 127.
Offset
In addition to setting a CV output directly with CV, we can change the finaloutput value with an offset:
CV.OFF 1 N 12
Here we’ve just set the CV.OFF for the first CV output to N 12 which is equivalentto V 1 or one octave. This is an offset added to all CV changes. So now:
CV 1 V 1
With the offset, CV output 1 now has two volts showing.
This mechanism is helpful if you have a steady sequence of values going to the CVcommand, but want to modulate the entire channel. Think of this as a master“tuning” knob on an old synth (but with much greater range). Get into EDITmode (hit TAB) and make a few scripts:
1:CV 1 N 0
2:CV 1 N 7
3:CV.OFF 1 0
4:CV.OFF 1 N 5
The first two scripts change the CV value, and the second two change the CVoffset.
8

THIS → Trigger a script from the keyboard by holding WIN (aka meta) andpressing 1-8 (for example, WIN-1 to trigger script 1.) This is great for tryingthings out while writing scripts without having to patch inputs into Teletype.
Try triggering scripts 1-4 in various ways. Yeah?
Bend and drift
Up until now all CV changes have been sharp– both the CV and CV.OFF commandschange the output immediately upon execution.
Each CV channel has a slew parameter which gives a transition time for valuechanges. Get into LIVE mode and type:
CV.SLEW 1 1000
This sets the slew time of the first CV channel to 1000, which is 1000 ms, or 1second. All future CV and CV.OFF commands will now smoothly transition totheir target over this interval. Slew times can be up to 32 seconds long.
Try triggering scripts 1-4 now.
In LIVE mode you’ll see the small diagonal line icon (in the top right) light upwhen a CV is actively slewing to a target.
Fly direct
You can interrupt a mid-slewing CV in two ways:
1. Set CV.SLEW to 0, then issue a new CV value; or,2. Use CV.SET
CV.SET stops the current transition and immediately sets the CV channel to thegiven value. This is useful in cases where you don’t want to change the CV.SLEWvalue.
CV.SET 1 N 10
This command will bypass slew and set CV output 1 to 10 semitones up. Trychanging script 2 to CV.SET– it’ll change the vibe.
Investigating and mirroring
CV, CV.SLEW, and CV.OFFSET can all be read as well as set. In LIVE mode youcan do this:
CV 1
9

Which will return the value of CV 1. This is going to be a straight number, so ifyou previously assigned CV 1 to N 9 you’ll get 1229, for example.
But we can also use CV 1 as a value to set other values! Say you want to set CV2 to the value of CV 1:
CV 2 CV 1
CV 1 is “read” and then assigned to CV 2. It’s important to note that CV.OFFis not taken into consideration here, so if one of the channels has an offset, theresulting voltage outputs will potentially be different. Of course, this may bethe desired effect.
You can similarly read CV.OFF and CV.SLEW to use in other assignments.
Repeat this: this this this this
You’ve probably stumbled upon the M script while in EDIT mode. This is theMetronome script. It is executed at a fixed interval. Get into EDIT mode andadd this to the M script.
TR.PULSE A
TR output A should be blinking at you, pretty fast. The metro time is determinedby the variable M. Get back into LIVE mode and type:
M
This will report the value of M which is the current metronome time, in ms. Itshould be 500, unless some other scene changed it for you prior to loading theblank scene. Let’s set it to 200ms.
M 200
That trigger output should be blinking faster. Notice that the M icon is lit upin LIVE mode. Let’s disable the metronome script:
M.ACT 0
Stopped. Now turn it back on:
M.ACT 1
We can give M a long time, up to 32 seconds. We can also hard-reset the countingof the metronome:
M.RESET
This will reset the count-down before the next execution of the M script.
Like the script 1-8 hot keys, you can manually execute the M script withWIN-M,even if the script is disabled with M.ACT.
10

The metronome script is exactly the same as the other scripts– it’s simplytriggered internally on a clock.
Happy, predictable startups
Scenes only store script and pattern data– the current state of variables (suchas M) and CV parameters are unchanged. On hardware startup these will beinitialized to 0, but when changing scenes whatever values were in memory willremain.
The Initialization script will help make scene startups predictable. Get intoEDIT mode and navigate to the I script. This is executed on scene recall. Youcan manually execute it from the keyboard with WIN-I.
Things that normally go in the I script are things like:
M 700CV.SLEW 1 500
Metro timing, CV slews, and other variables. Perhaps you want to start withparticular TR output values or CV levels. Put them here.
EXAMPLE: COPYCAT FLIPS
This scene is featured in the banner video above.
Use two oscillators– tune them to the same low note. Connect CV output 1 tothe frequency input of one oscillator, and CV output 2 to the frequency input ofthe other. Use TR output B as a gate for the second oscillator. Hook CV 4 upto something in the sound path that changes timbre, like a wave folder or filter.
Inputs 1-3 change the root note of CV 1. Inputs 4-5 change the offset of CV 1.Inputs 6-8 change the offset of CV 2 (octaves) and modulate CV 4.
The metro script is running constantly, triggering the pulse and “sampling” CV1, mirroring this to CV 2. It’s similar to a sample and hold. By modulatingthe “drone” root note of CV 1, you’ll have a following pulse stream with theother oscillator. As described above, modulating offsets doesn’t change this CVmirroring, so we get different chordal combinations and progressions.
The init script makes sure the pulse width and slew times are all set up.
In the video above I’m driving some inputs with a step sequencer (WhiteWhale) and others with A cyclic trigger generator (Meadowphysics). The first ismore regular, while the second has some randomness in the pattern. The twooverlapping paired with the configuration of the simple script create some nicemusical shifts.
11

Suggested explorations
• Change slew times dynamically with script triggering for interjection
12

Reference
Commands
V x lookup volt value x (0-10)VV x lookup precision volt value x (0-1000, for 0.00 to 10.00 volts)N x lookup note value x (0-127)CV x y set CV output x to yCV.OFF x y set CV offset x to yCV.SLEW x y set CV slew x to yCV.SET x y set CV x to y, bypass slew
M x set metro script clock time to xM.ACT x enable/disable metro script clock (0/1)M.RESET reset counter for metro script
Part 3: Playing With Numbers
How to talk COMPUTER
We’ve made it to part three without really explaining how commands work–I appreciate your blind trust. But now it is time to talk about syntax. Thissounds possibly boring but it’s the key to understanding the great potential ofthe system, allowing us to make interesting and sophisticated interactions.
Before we begin, load up a new blank scene. We’ve described doing this inpast studies (hint: hit ESC, navigate with ] until you find a blank scene, hitENTER).
Right to Left
In many ways Teletype is just a fancy calculator. Syntax follows prefix notation(aka Polish notation)– the operator is to the left of the operands. Get into LIVEmode and try this:
ADD 2 8
You’ll see the result printed: 10. Here the operator is ADD, the operands (akaarguments) being 2 and 8. ADD wants two arguments (values). And why did itprint? Teletype is designed to display the returned value, if one is returned.
ADD returns a value. Let’s use that fact to make a longer command:
ADD 2 ADD 4 8
13

What? It looks weird but it’ll feel better soon. Read right to left– find therightmost operator and give it arguments. Pulled apart, first we have
ADD 4 8
which equals 12. Let’s mentally substitute that value into the remaining com-mand:
ADD 2 (12)
which makes 14. Which should’ve been displayed as the result. Simple enough?Yeah! But things can get confusing:
ADD ADD 1 2 3
Yes, this works. Think of it like this:
ADD (ADD 1 2) 3
The rightmost operator uses the two closest arguments. Even this is legit:
ADD MUL 2 ADD 7 8 9
This decodes to ADD (MUL 2 (ADD 7 8)) 9 which is 39. Perhaps not the friendli-est command at first glance, but not a monster after a closer look.
Break it down, save it for later
You’d possibly rather make sounds than deciphering strange looking strings oftext. We can make commands easier to read by using variables.
X ADD 1 2
Instead of printing the value 3, X is now assigned 3. Type X alone on thecommand line and it’ll print its value.
KNOW THIS! → A variable (such as X) or parameter (such as CV 1) gets setif it is the leftmost WORD of a command. Otherwise the value is read andreturned.
Consider that complicated command we had earlier: ADD ADD 1 2 3
Here’s a more readable way:
X ADD 1 2ADD X 3
X is set to the result of ADD 1 2. Then X gets read and returns 3 in the secondline. The first line is effectively substituted into the second, breaking apart thecommand into multiple lines. Sometimes this is helpful– but you’ll also quicklyrun out of lines in a script. So there’s a balance to be found.
14

Real talk
• Operators accept arguments.• Operators typically return values.• An argument is a value, so you can feed the returned value of an operator
into another operator.• Variables can be assigned values, and read as arguments.• Parameters (CV, etc) can be read and used as arguments.
The takeaway: numbers are interchangeable. Once the flow of numbers makessense, you’ll be able to put commands together in different ways to achieve awide range of musical goals.
Elementary
Basic arithmetic operators are ADD, SUB, MUL, DIV, and MOD. These all take twoarguments.
Addition and multiplication are commutative– the order of the arguments don’tmatter: ADD 1 3 and ADD 3 1 are the same. But this is not the case for theothers:
• SUB 4 2 reads 4 - 2• DIV 8 4 reads 8 / 4• MOD 7 2 reads 7 % 2
Reversing the arguments will mess with your calculation. And what the heck ismod? It’ll give you the remainder after a division. So MOD 7 2 is 1.
Short term memory
Variables are good for much more than simplifying commands. They store valueswhich can then be manipulated in various ways.
Available variables: X, Y, Z, and T. T is typically used for time-based operationsbut can be used freely.
Variables can be both set and read in the same command. Consider this:
X 10X ADD X 1
First X gets set to 10. In the second line the ADD reads X and adds 1, returning11. So X gets set to 11. Push the up arrow to re-execute that last line. X iscounting up by 1 each time.
Variables are global– they keep their value across scripts. For example X can bechanged by script 1 and then read and further manipulated by script 2.
15

1:X 0
2:X ADD X 1
3:Y N MUL X 2CV 1 Y
Here script 1 resets X to 0. Script 2 increments X by 1. Script 3 assigns CVoutput 1 to the note X multiplied by 2, using Y as a temp variable to break upthe command (this could be easily combined, of course).
With various staggered triggering of these three scripts, you will likely find music!
More is more
You may feel that four variables just isn’t enough– c’mon, a four-note melody?(Enough for me most days.) Fortunately there is a whole different system forsaving tons of numbers: patterns. We’ll cover this in a very-near-future part ofthis series.
In the meantime, if you’re really desperate for more variables– A, B, C, and D canbe overwritten. By default these are initialized to 1-4 on startup.
As it happens, TR A it is exactly the same as TR 1. So if you overwrite A, besure to use TR 1 instead.
Save save save
Be warned that variables are not stored with scenes. You can load a new sceneand the variables will remain the same. If you want to have a scene recall withspecific variable values you’ll need to use the INIT script. For example:
I:X 8Y 22
Now we have some defined values for X and Y when the scene is loaded.
Lastly, variables aren’t saved when powering down. On power-up memory iscleared, but the INIT script is called on powerup which allows you to definestartup values.
16

Here at the post office
A long time ago at the post office in Castaic, CA: the postmaster asked the ladyahead of us “How fast do you want this to ship?” There was a lot of confusionand shrugging and finally “I don’t care.” To which the postmaster respondedresoundingly:
“Here at the post office we only deal in absolutes.”
Teletype is not the post office. (OK, weird transition, sorry.)
1:CV 1 N RAND 12
We’ve arrived at the moment you’ve been waiting for: random semitones stream-ing out your modular synth.
RAND 12 will return a random number between 0 and 12.
Operators can have different numbers of arguments. The arithmetic operatorsso far have had two. RAND takes just one. This is important to remember whenanalyzing (and building) commands. Of course, the command sheet will help!
Let’s make this immediately more musical by creating a whole tone scale:
CV 1 N MUL 2 RAND 12
Now we’re creating a random number between 0 and 12, and multiply it by two.Recall that N does a note lookup for sending to CV outputs.
And what about this:
CV 1 N MUL X RAND Y
Yeah? Now we can manipulate the range (Y) and interval (X) from some otherscript!
Somewhere in between
RRAND 4 8
A random value from 4 to 8 (inclusive) will be returned. RRAND (range random)takes two arguments.
Recall that a TR index can be set with 1-4 rather than A-D? So we can turn onTR A 1 with the identical command TR 1 1. But how about this:
TR RRAND 1 4 1TR RRAND 1 4 0
The first line turns ON a random trigger output. The second line turns OFF arandom trigger output. We can do the same with CV.
17

Infinite coins
TOSS
This operator has no arguments! It returns a 0 or 1, randomly.
TR RRAND 1 4 TOSS
This command sets a random TR output to a random state, on or off.
CV 2 N MUL 5 TOSS
Here we’re multiplying 5 by either zero or one, which gives us either zero or 5.
The musical qualities of stumbling
DRUNK
Appropriately, DRUNK isn’t quite normal. It’s a variable, but it changes by 1, 0,or -1 each time you read it. But you can also reset its position:
DRUNK 5
However, next time you read the value:
DRUNK
You may get 4, 5, or 6.
DRUNK does not have boundaries, so you may need to constrain it within a rangeto keep it useful:
CV 3 V MOD DRUNK 5
Here we’re creating single-volt steps between 0 and 4. You might get somethinglike this:
0 → 1 → 0 → 0 → 4 → 3 → 3 → 4 → 3 → 2 → 1 → 1 → 2
The MOD operator wraps the edges.
EXAMPLE: VIKING
This scene is featured in the banner video above.
Like the previous study, we’re using two oscillators with frequencies controlledby CV outputs 1 and 2. Remember to tune them to the same note prior toplugging in CV.
• Input 1 will randomly select a note for the first oscillator. TR out A willbe pulsed.
18

• Input 2 will choose between two notes for the second oscillator. I used thisas a low root note.
• Input 3 advances a drunk walk of single volts between 0 and 2.• Metro running at 1 second interval, randomly slewing CV output 4 between
random voltages 0 to 5.
Values are initialized on startup.
19

Suggested explorations
Get into LIVE mode and try changing some variables:
X 2
20

Y 12Z 12
X changes the note spread and Y the range for voice 1. Z the interval of the lowtone for voice 2.
Reference
Commands
ADD x y add x + ySUB x y subtract x - yMUL x y multiply x * yDIV x y divide x / yMOD x y modulus x % y (return remainder)
RAND x return random value from 0 and xRRAND x y return random value from x to yTOSS return a random value 0 or 1
X,Y,Z,T variablesA,B,C,D variables, initialized to 1-4 on startupDRUNK variable that changes by -1, 0, or 1 when readDRUNK x set DRUNK value to x
Part 4: Collect and Transform
One knob (feel all right)
By now you may suspect there are some rituals to be followed before the tele-knowledge will rain down. Yes, I mean load a blank scene. (Hit ESC, navigatewith ] until you find a blank scene, hit ENTER). Then get into LIVE mode.
Read the knob value. Type:
PARAM
Turn left and right and repeat the command (remember UP ARROW). You’llquickly discover that the range is 0-16384, the same as how 0-10v is represented.This is convenient in some cases, but requires conversion in others. Let’s startwith the convenient. Get into EDIT mode:
M:CV 1 PARAM
21
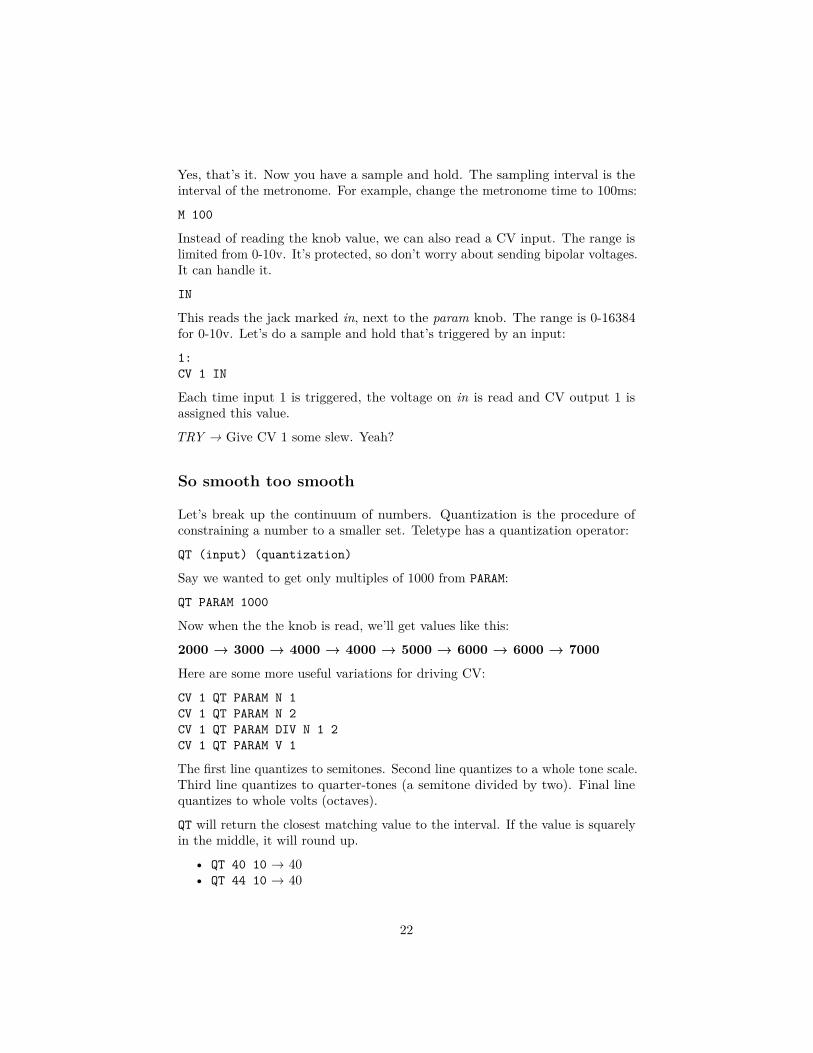
Yes, that’s it. Now you have a sample and hold. The sampling interval is theinterval of the metronome. For example, change the metronome time to 100ms:
M 100
Instead of reading the knob value, we can also read a CV input. The range islimited from 0-10v. It’s protected, so don’t worry about sending bipolar voltages.It can handle it.
IN
This reads the jack marked in, next to the param knob. The range is 0-16384for 0-10v. Let’s do a sample and hold that’s triggered by an input:
1:CV 1 IN
Each time input 1 is triggered, the voltage on in is read and CV output 1 isassigned this value.
TRY → Give CV 1 some slew. Yeah?
So smooth too smooth
Let’s break up the continuum of numbers. Quantization is the procedure ofconstraining a number to a smaller set. Teletype has a quantization operator:
QT (input) (quantization)
Say we wanted to get only multiples of 1000 from PARAM:
QT PARAM 1000
Now when the the knob is read, we’ll get values like this:
2000 → 3000 → 4000 → 4000 → 5000 → 6000 → 6000 → 7000
Here are some more useful variations for driving CV:
CV 1 QT PARAM N 1CV 1 QT PARAM N 2CV 1 QT PARAM DIV N 1 2CV 1 QT PARAM V 1
The first line quantizes to semitones. Second line quantizes to a whole tone scale.Third line quantizes to quarter-tones (a semitone divided by two). Final linequantizes to whole volts (octaves).
QT will return the closest matching value to the interval. If the value is squarelyin the middle, it will round up.
• QT 40 10 → 40• QT 44 10 → 40
22

• QT 47 10 → 50• QT 45 10 → 50
Shifting
Often we’ll want to shrink the range of values we’re using– this will come upcommonly when using the param knob. Of course we could simply divide:
DIV PARAM 256
The result is a new range of 0-64.
Another way to scale down a value is with bit shifting. A shift right divides bypowers of two:
• RSH PARAM 1 → 0-8192• RSH PARAM 5 → 0-512• RSH PARAM 10 → 0-16
The first argument is the value to be shifted, the second how many places toshift. Shifting by 10 is equivalent of dividing by the 10th power of 2 is equivalentto dividing by 1024.
Shifting left multiplies rather than divides:
• LSH 1 4 → 16
Consider this command:
CV 1 N LSH 1 X
We’re outputting CV notes that are shifted according to X. If a script is modu-lating X from 0 to 5, we’ll get exponential note values:
1 → 2 → 4 → 8 → 16 → 32
Setting boundaries
Sometimes you need to keep your numbers in line, to prevent them from wan-dering into unmusical territory. There are some authoritarian operators forthis:
LIM DRUNK 4 10
The result will be from 4 to 10 despite where DRUNK might end up. LIM issaturating, so in this case if DRUNK is 1, we’ll get 4.
LIM PARAM V 2 V 8
This will limit the param knob to 2-8 volts, creating “dead zones” at the topand bottom of the range.
23

If we’re only interested in creating an upper or lower limit and not both, we canuse MIN and MAX:
• MAX 2 8 → 8• MIN 2 8 → 2• MIN 8 2 → 2
MAX returns the greater of two arguments. MIN returns the lesser. It follows thatthe argument order doesn’t matter, ‘cause greater is greater, mate.
We can also limit without saturating at the edges: wrap around a range:
WRAP PARAM 200 500
A value within the range 200 to 500 will always be returned. When PARAM goesabove 500, it will wrap to 200 and keep climbing until it wraps again. (Aside:you could do this same thing with ADD 200 MOD PARAM 300.)
This will make a strange-feeling knob:
CV 1 WRAP PARAM 0 V 1
And this too:
X WRAP RSH PARAM 9 0 4CV 1 N LSH 1 X
TICK TICK TICK
Teletype has a readable internal timer. Read the timer in LIVE mode:
TIME
The timer counts in milliseconds. As it lives within the Teletype datatype range,it rolls over at 32 seconds, and starts counting up from -32. This is a little weird.To set/reset the time:
TIME 0
You can set TIME to any value, not simply zero.
The timer can be started and stopped:
TIME.ACT 0
TIME will now halt and no longer be incremented.
TIME.ACT 1
The timer is now re-enabled. With TIME.ACT you can implement a start/stopmechanism similar to a stop-watch.
While variable T can be used for generally, it’s helpful for code readability to useT when manipulating time-oriented numbers. For example:
24

1:T TIMETIME 0M T
This script measures the time interval between triggers to input 1, and thenassigns this interval to the metro script. Add trigger pulses to both script 1and the metro script for an interesting synchronized but not phase-correct pulsemachine.
With TIME, PARAM, and IN values you’ll often want to smooth them out a bit.You can do a two-stage fundamental “smoother” by simply averaging. We dohave an average operator:
AVG 3 6
This will return the average of 3 and 6, which is (3 + 6) / 2 = 4. So to create asimple smoother:
1:M AVG T TIMET TIMETIME 0
Now the metro time is getting assigned a smoothed value. T is the previously readTIME value, so the order of these commands is important to have the intendedeffect.
EXAMPLE: SLOW READER
This scene is featured in the banner video above.
A clock input has its time interval measured. This interval is smoothed withthe previous reading and then applied to the metronome script. Triggers aregenerated both for the metro and incoming clock. The effect is a sort of laggingsynchronization where the phase likely does not align, creating interestingrhythms when the incoming clock is modulated.
On each metronome pulse the CV in jack is sampled and assigned to CV output2. When the next clock to trigger input 1 arrives CV output 1 is also assignedthis value, creating a following motion in most situations.
In the video above Earthsea is generating a melody, serving as the CV input.White Whale is being heavily underutilized simply as a clock out.
• 1: Clock input• in: CV input
CV/TR output paired for voices 1 and 2. CV 4 outputs a smoothed drunk 0-5v,changed on the metro interval.
25

Reference
Commands
PARAM read param knobIN read input CV jack
QT x y quantize input x to nearest value y
RSH x y shift x by y bits to the rightLSH x y shift x by y bits to the left
LIM x y z limit x to range y to zMIN x y return lesser of x and yMAX x y return greater of x and y
WRAP x y z wrap input x to range y to z
TIME read time interval in millisecondsTIME x set current time
26

TIME.ACT x set timer active/inactive (1 or 0)
AVG x y average x and y
Part 5: Pattern Tracking
Making lists
There comes a point when you’ll want more numbers. Not just a few variables–you’ll need bags of numbers, heaps of numbers, rivers of numbers.
Teletype has patterns which normal programming languages call arrays. Youcan think of a pattern as a fixed-length list of numbers.
• Each pattern has 64 indexes (positions).• There are four patterns.• Patterns store the same data type as the rest of Teletype: -32384 to 32384.• Patterns are stored with the scene.
OK, why do we need heaps of numbers? There is no specific reason, but you cando quite a lot with such a list. The most obvious (and fun) is to make a sequenceof notes. Teletype makes sequencers interesting because you don’t need to followa strict design– you can decide how the steps are recorded, played, looped, etc.But you can use patterns for various other purposes– times, custom scales, etc–they’re just numbers. It’s up to us as composer-performer-programmers to comeup with a way to make numbers sound like music.
That last point of that earlier list is important. When you edit patterns andthen save the scene, everything about the pattern will be stored alongside thescene scripts. So if you compose a melody using a pattern, it will be there whenyou next load the scene.
P 3
This reads index 3 of a pattern. Which pattern? We specify the “working”pattern with:
P.N 0
Here we set the working pattern to 0. There are four patterns, so this value canbe 0-3. Let’s store the number 10 to index 0:
P 0 10
Notice that we’ve just passed two arguments to the P operator to do a write.We “read” with just one argument:
CV 1 N P 0
27

Here we read index 0 of the working pattern, look up the note value, and assignthat to CV output 1. You can check the working pattern by simply reading P.N.
If you want full random-access to pattern information and don’t want to have toworry about the working pattern, use:
PN 2 4 100PN 0 0
The first line writes 100 to pattern 2, index 4. The second line reads pattern 0,index 0.
Assistance for your list management
There are some operators that can do some smart tricks for you (well, “smart”for mid-last-century, but still cool). These operators do different things to theworking pattern:
P.N 0P.INS 0 5
Here we explicitly set our working pattern to 0, then insert the number 5 atindex 0. This different than simply writing the number 5 to index 0, as first allpattern data is shifted back. For example, if the pattern 0 is:
3, 4, 8, 0. . .
And then we P.INS 0 5 the pattern will become:
5, 3, 4, 8, 0. . .
We have a similar operator for removing a number, where the latter numbersare brought forward:
P.RM 1
This removes the number at index 1 (the number 3) which will result in:
5, 4, 8, 0. . .
Note that we do not need to constantly re-specify P.N 0 for the working pattern–we set it once and then it will be remembered.
P.INS and P.RM do another helpful function– keep track of the length of thepattern. A pattern can be up to 64 elements long, but often we’ll only want touse a fraction of this amount.
P.L reads and sets the length. Upon initialization each pattern has a length ofzero. Changing numbers with P or PN does not affect the length. P.INS howeverincreases the length by 1. P.RM subtracts 1 from the length.
Why do we care about the length? It’s a helpful way of keeping track of whatdata in the pattern is being used, and what is either blank or garbage. P.L gives
28

you a way to keep track of what we’re doing, and gives us some other ways toadd and remove numbers:
P.PUSH 11
This will put the number 11 at the end of the pattern, and increase length by 1.So if we were continuing on with the pattern above (assuming P.L is 4), we’dhave:
5, 4, 8, 0, 11. . .
The compliment to push is pop:
P.POP
This returns last element of the pattern and shortens the length by 1. So in thiscase, we’d get the number 11.
Read head antics
Using the working pattern and its length attribute we have a series of operatorsto facilitate creative reading:
P.I
This is the read head for the working pattern. Each pattern stores its own readposition independently. You can read and write this position:
P.I 2
This command moves the read head to index 2.
P.HERE
The number at the read head is returned. (In this case, index 2, which was thenumber 8 in our pattern above). We can also write the the read head position:
P.HERE 0
This would set the number at the read head to zero.
THIS → P.I is the index (position) of the read head, while P.HERE is the numberat the index.
P.NEXT
This adds 1 to the play head and returns the number at that position. So if wehad:
2, 5, 8, 1, 7. . .
P.L 5P.I 3CV 1 N P.NEXT
29

The length is 5 and play head set to 3. The last line advances the play head to4 and returns the number there, which would be 7 (we then convert it to a notevalue and send it to CV output 1).
What happens if we call P.NEXT again, but we’re at the end of the list?
P.WRAP determines if we wrap to the start/end: 1 = yes, 0 = no. Each patternhas its own wrap attribute. So if wrap is on, P.NEXT will move the read head tozero and the first number of the pattern will be returned. If wrap is off, the playhead will not advance, but you’ll still get the final number returned. To turn onwrap:
P.WRAP 1
We can also play backwards in the pattern with P.PREV. Like P.NEXT it willrespect the length and wrap of a pattern.
P.PREV
There are two other attributes for pattern playback– start and end. These areuseful for sub-looping inside the length of a pattern. They govern the behaviorof P.NEXT and P.PREV. Say for example:
2, 5, 8, 1, 7. . .
P.L 5P.WRAP 1P.START 1P.END 3
If we call P.PREV repetetively, we’ll get:
5 → 1 → 8 → 5 → 1 → 8 → 5 → 1 → 8 . . .
This is how we make weird sequencers. Complete, algorithmic control over all ofthe playback and data manipulation of big lists of numbers.
Show me something
There’s been a lot of imagining so far of what these lists look like. I havesomething to show you. Hit the tilde key, next to 1, under ESC.
Why hello, you’re now in TRACKER mode.
We could’ve called this spreadsheet mode, but back in the day we all agreed thatmusical spreadsheets would be called trackers. They are a fascinating way tocreate music– I grew up with Scream Tracker on an old DOS machine, thoughthe very-modern Renoise is alive and well.
Teletype’s tracker only slightly resembles these heavily-featured software packages,though. It excels (pun) at giving an interface for rapid viewing and editing ofpattern data.
30
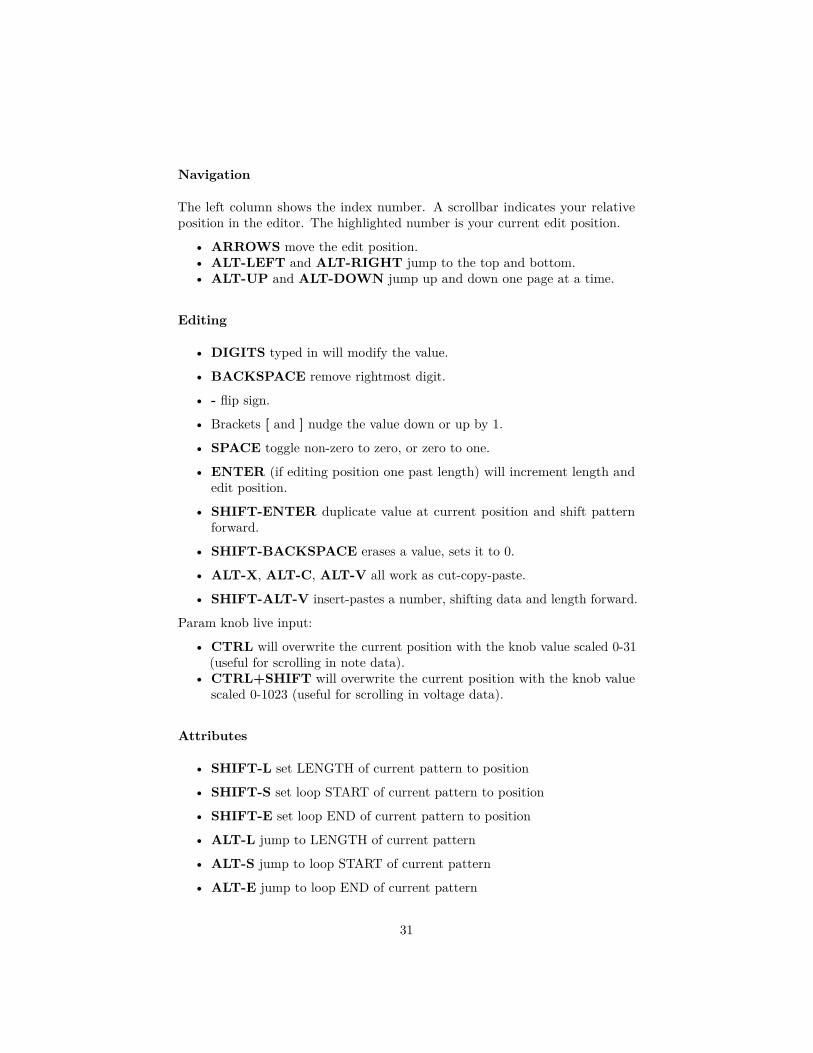
Navigation
The left column shows the index number. A scrollbar indicates your relativeposition in the editor. The highlighted number is your current edit position.
• ARROWS move the edit position.• ALT-LEFT and ALT-RIGHT jump to the top and bottom.• ALT-UP and ALT-DOWN jump up and down one page at a time.
Editing
• DIGITS typed in will modify the value.
• BACKSPACE remove rightmost digit.
• - flip sign.
• Brackets [ and ] nudge the value down or up by 1.
• SPACE toggle non-zero to zero, or zero to one.
• ENTER (if editing position one past length) will increment length andedit position.
• SHIFT-ENTER duplicate value at current position and shift patternforward.
• SHIFT-BACKSPACE erases a value, sets it to 0.
• ALT-X, ALT-C, ALT-V all work as cut-copy-paste.
• SHIFT-ALT-V insert-pastes a number, shifting data and length forward.
Param knob live input:
• CTRL will overwrite the current position with the knob value scaled 0-31(useful for scrolling in note data).
• CTRL+SHIFT will overwrite the current position with the knob valuescaled 0-1023 (useful for scrolling in voltage data).
Attributes
• SHIFT-L set LENGTH of current pattern to position
• SHIFT-S set loop START of current pattern to position
• SHIFT-E set loop END of current pattern to position
• ALT-L jump to LENGTH of current pattern
• ALT-S jump to loop START of current pattern
• ALT-E jump to loop END of current pattern
31

EXAMPLE: DOLPHIN AND SEAGULL
This scene is featured in the banner video above.
A single pattern is used as musical content. For the video we had this:
0, 4, 9, 10, 12, 15 19
The metronome speed is controlled by the param knob, recalculated each timethe metro script is executed. On each metro tick, we advance the pattern playhead and set CV output 1. Trigger output 1 is pulsed.
• CV out 1: frequency of oscillator 1• CV out 2: frequency of oscillator 2• CV out 4: output level of oscillator 2• Trigger out 1: output level of oscillator 1
CV 4 is initialized with a long slew.
If let run freely, the pattern will simply loop. Trigger inputs 1-4 for the followingactions:
1. Ramp up CV 4 (level) and assign CV 2 to the current value of CV 1. Thisis basically a sample and hold.
2. Ramp down CV 4 and flip the octave of CV 2 up. Also interrupt thepattern playback by interjecting a P.PREV. It has a musical stalling/repeateffect.
3. Randomize the loop end of pattern playback. Set the octave of CV 2 backto normal.
4. Directly edit the pattern data, toggling between major and minor (3 or 4)on the second step.
32

In the video Teletype is being driven by an unsynchronized White Whale. Thisway the script triggers phase with the playback speed of the pattern– the resultbeing the sample and hold between the two voices constantly shifts which tone isbeing copied to the second voice. The steps of sequence on the White Whale arein “choose” mode: one of several choices is made per step, so the action Teletypetakes is variable per looped WW bar, yet regular enough to stay musical.
33

Reference
Commands
P x read working pattern index xP x y write y to working pattern index xP.N read working patternP.N x set working pattern to x (0-3)PN x y read pattern x index yPN x y z write z to pattern x index y
P.INS x y insert y at index x of working pattern, increase lengthP.RM x remove element at index x of working pattern, reduce lengthP.L read working pattern lengthP.L x set working pattern length to xP.PUSH x add x to end of working pattern, increase lengthP.POP remove and return last element of working pattern, decrease length
P.I read working pattern index (read head)P.I x set index for working patternP.HERE read value at current index of working patternP.HERE x write x to current index of working patternP.NEXT advance index of working pattern and return valueP.PREV rewind index of working pattern and return value
P.WRAP x specify wrapping behavior for working pattern (1 = wrap, 0 = do not wrap)P.START x set loop start to x for working patternP.END x set loop end to x for working pattern
Part 6: Maybe Later Remembering
Tell the truth
And what is truth anyway? Fortunately Teletype (and pretty much all digitalsystems) have a reductive view on the matter:
• 0 → FALSE• EVERYTHING ELSE → TRUE
And why do we care about truth? Because sometimes we need to ask hardquestions. . . like, is variable X greater than 2?
GT X 2
Teletype will tell you. If X is greater than 2, the value 1 (TRUE) will be returned.Otherwise you’ll get 0 (FALSE).
34

Here’s a list of relational operators that can let you test a condition:
EQ x yNE x yGT x yLT x y
Represented are EQuals (x == y), Not Equals (x != y), Greater Than (x > y),and Less Than (x < y). All return true or false, represented as 1 or 0.
And what shall we compare? How about we check if CV input IN is greater than3V, and then output that as a gate on TR output A:
TR A GT IN V 3
There are some helper operators for comparing to zero:
EZ xNZ x
These are Equals Zero and Not Zero. Both take only one argument: the numberto be compared to zero.
There ends up being a neat trick for flipping a variable between 0 and 1:
X EZ X
Here, when X is 0, it will become 1. And conversely, if 1, will become 0. Havingthis in a script will create a toggle. For example, you could use a trigger inputto toggle the metronome:
M.ACT EZ M.ACT
The moment of decision
Now that we’re full of truths and falsehoods, let’s conditionally execute somecommands. Introducing a new word: PRE. It’s basically a short command thatcomes ahead of another command, separated by a : (colon). Here’s a simpleexample:
IF X : TR.TOG A
The PRE IF takes one argument which is evaluated as true or false. If true, theremaining command after the separator (:) will be executed. So, according toour understanding of truth:
• if X is 0, nothing happens• if X is anything but 0, TR output A gets toggled
We can expand the command within a PRE to become more complicated,however:
IF GT PARAM V 5 : CV 1 PARAM
35

Here knob input PARAM is read and compared to 5 volts. If greater, CV output 1is assigned to PARAM, basically limiting the lower bound of the knob-to-cv-outputassignment. (Note that this could more effectively be accomplished with CV 1LIM PARAM V 5 V 10.)
We like randomness, right?
IF TOSS : P.NEXT
Here we maybe (50/50 chance) advance the pattern sequence.
IF LT RAND 100 75 : P.NEXT
Here we have a 75% chance of advancing the sequence. Given this is the sortof thing some of us like to do a lot, we created a simplified PRE just forprobabilities:
PROB 75 : P.NEXT
This command is identical to the one above. The argument is a number from0-100, representing chance to execute.
Followup
Sometimes the inquiry must continue.
IF X : TR 1 0ELIF Y : TR 1 1ELSE : TR 1 TOSS
When an IF gets a false argument (and the command is bypassed) we havethe opportunity to match a new condition (with ELIF), or just have a fallbackcommand (with ELSE). Let’s trace this script given some assumed values of Xand Y:
• X = 0, Y = 0 → TR 1 TOSS• X = 0, Y = 1 → TR 1 1• X = 1, Y = 1 → TR 1 0
Note that in the last condition (where X is 1) it simply doesn’t matter whatvalue is in Y as the ELIF and ELSE will be skipped. Similarly, if an ELIF issuccessfully executed, the following ELSE will not be executed.
You can stack up several ELIF statements in a row:
IF EQ X 0 : CV 1 V RAND 5ELIF EQ X 1 : CV 1 0ELIF EQ X 2 : CV 1 V RAND 10ELIF EQ X 3 : CV 1 V 10ELSE : TR.TOG 1
36

This script checks the variable X against the values 0-3 and has a “default” actionif it isn’t within range.
Note that you might run into command length issues while doing conditionalstatements. You may need to break up the condition command. This commandis too long:
IF GT PARAM V 5 : CV 1 V RRAND 2 8
This is not:
X GT PARAM V 5IF X : CV 1 V RRAND 2 8
Later, dudes
For your scheduling needs, there is a PRE for postponing a command:
DEL 250 : TR.TOG 1
DEL takes one argument: delay time in milliseconds. The command above willtoggle TR output 1 after 250ms.
In LIVE mode the second icon (an upside-down U) will be lit up when there isa command in the DEL buffer. You can delay a command up to 16 seconds, and8 commands can fit into the buffer.
You can clear the delay buffer (canceling the pending commands) with a singleop:
DEL.CLR
A sort-of TODO list?
Teletype has a command stack which can lead to some musically interestingexploration. This might feel weird at first, but stick with us though it.
Say you want a command to execute later, not based on a time (where you’duse DEL) but rather by another command. We can achieve said desire thusly:
S : TR.TOG 1
Now the command TR.TOG 1 is on the stack– it has not been executed. Toexecute the command:
S.POP
This executes the most recently added command on the stack. Think of the stackas a pile of donuts– the most recently added is the one on top. S.POP executesand removes the top command. If you’re really hungry, though:
37

S.ALL
This executes the entire stack, which leaves it empty. Why is this interesting,though? Take the following two scripts:
1: S : CV 1 N RAND 10
2: S.ALLTR.PULSE A
Say script 2 was executing on a regular interval, and script 1 was somewhatrandom. Given we’re using the stack, musical events get time quantized to onlyhappen on the execution of script 2. This is a great method to achieve syncwhen desired.
The stack can hold 8 commands. If you try to add more, and the stack is full, thecommand will simply be thrown away. We can read the stack length (height):
S.L
This will return the number of commands waiting. We can also clear the stack:
S.CLR
Another interesting use of the stack is the “not sure what’ll come out” method:
1: S : TR.TOG A
2: S : CV 1 V RAND 5
3: S : TR.PULSE B
4: S.POP
If we’re triggering scripts 1-4 at irregular intervals, the stack will fill up withcommands while script 4 is executing and removing a single command at a time.
EXAMPLE: PROBABLE SALVATION
This scene is featured in the banner video above.
A metronome triggers a pulse and executes the stack. Trigger inputs 1 and 3 addcommands to the stack. All input scripts possibly modulate the tempo using aPROB PRE.
Script 2 conditionally changes CV output 4 based on the state of var X. X istoggled between 1 and 0 by script 3– creating some additional dynamic behaviorbetween the two scripts.
In the banner video, all inputs are driven by a WW sequence that has a fewtrigger-choice steps. TT is driving the frequency of an oscillator from CV out 1.
38

CV out 2 controls an overtone timbre of this oscillator. CV out 4 controls thelevel of an additional sub oscillator. Trigger out 1 is connected to an envelope tospike the oscillator’s level.
39

Reference
Commands
EQ x y x == yNE x y x != yGT x y x > yLT x y x < yEZ x x == 0NZ x x != 0
IF x : .. execute command if x is trueELIF x : .. execute command (else) if x is trueELSE : .. execute command after failed if
PROB x : .. probability to execute command, 0-100
DEL x : .. delay command by x millisecondsDEL.CLR clear in-process delays
S : .. add command to stackS.POP execute and remove most recently added commandS.ALL execute and remove all commands on stackS.CLR clear stackS.L read only, size of stack
Part 7: Incantations
Misfits
Teletype has a few bits that are somewhere between OPS and VARS. Theyperform functions, and they have memory.
O
O (the letter, not zero) resembles a normal variable. You can set it to a value.And then you can read it. But when you read it again, it will auto-increment.And each time you read it after that, it’ll increase by 1.
O 2OOO
Here we set O to 2. Then the following three reads are: 2 → 3 → 4.
40

Furthermore, there is Q which implements a queue, which is similar to a shiftregister.
Q 2
Puts the number 2 into the queue. At startup the queue is only 1 element long,so it’s exactly like a normal variable. However, let’s change the length of thequeue:
Q.N 2
Now when we read Q, we’ll be reading the value we assigned two stages ago.
Q.N 2Q 3Q 4Q
The final command Q returns 3. The length of the queue can be dynamicallychanged and the contents will be preserved. As a bonus feature, we can get theaverage of the elements in the queue:
Q.N 3Q 0Q 25Q 5Q.AVG
The result is 10. (0 + 25 + 5) / 3
This can be used as a smoother.
Q PARAMCV 1 Q.AVG
Try putting this in a metro script. Each time the script is executed the “history”is pushed along and the average is an overall smoothing of the input. Given ashort queue length Q.N 3 smoothing would be minor, or you can do extremesmoothing with Q.N 16. The queue can be up to 16 stages in length.
We do this all the time
Iteration is the repetition of a process. It sounds like this.
The PRE L (which somewhat mundanely stands for “loop”) allows you to executea single command many times, with access to a counter variable per execution.Ahhhh, what does that mean?
L 1 4 : P.PUSH 55
This is what happened:
41

P.PUSH 55P.PUSH 55P.PUSH 55P.PUSH 55
L takes two arguments before the separator: a starting number and an endingnumber. This dictates how many times the command will execute, so in the caseabove P.PUSH 55 happens four times: 1, 2, 3, 4. (Recall that P.PUSH adds avalue to the current pattern– so we just dumped a bunch of 55’s into a pattern.)
What makes L more useful is that we have access to the counter, using the specialvariable I. Check this out:
L 1 4 : CV I 0
Which effectively translates to:
CV 1 0CV 2 0CV 3 0CV 4 0
With this one fancy command we zeroed all CV outputs. How this works is thevariable I gets updated with the loop count on each iteration. This ends upbeing particularly helpful for INIT scripts setting up defaults:
I: L A B : TR.TIME I 20L 1 4 : CV.SLEW I MUL I 100
Recall that A-D are simply 1-4, so they work fine with a loop. And did you seethat last trick? I can be used for more than indexing– here it gets multiplied,effectively translating to:
CV.SLEW 1 100CV.SLEW 2 200CV.SLEW 3 300CV.SLEW 4 400
Note that you can also count backwards, for example:
L 4 1 : P.PUSH I
Which would push 4 → 3 → 2 → 1 onto the pattern.
Automaticity
I just learned that is really a word. Loops are additionally great for generatingpattern content.
L 1 64 : P.PUSH RAND 1000
42

Jump over to TRACKER mode and you’ll see a bunch of random numbers.Use CV 1 VV P.NEXT repeatedly and you’ll have a 0-10V wiggly-something. Ifyou want to re-randomize the pattern, you could re-execute the loop after firstsetting P.L 0 (this is because P.PUSH adds after the pattern length). But youcould also just overwrite everything directly this way:
L 0 63 : P I RAND 1000
Here we’re using the I as the pattern index.
Microtonalicity
That, my friend, is not a word. Microtonality can be achieved using patternsand is most easily achieved using loops.Some scales are easy to implement. Let’scheck them out quickly before going to patterns.
Quarter tone
CV 1 DIV N X 2
Given note X we’re simply dividing a semitone by two.
Eighth tone
CV 1 DIV N X 4
Basically the same as above. Extrapolate this to get even smaller semitonescales.
100 tones per octave
CV 1 VV X
Just a different way of thinking about volts.
5 tones per octave
CV 1 MUL X DIV V 1 5
We’re just doing some multiplying and dividing at this point.
The reason these all work is because they’re evenly spaced– the distance betweeneach pitch is the same.
RELATED ASIDE → One trick we can do with these sorts of scales is make aquantizer. First, let’s set our desired quantization to the variable X, in the casebelow a whole tone scale:
X N 2
And then process the IN jack and output it to CV 1:
CV 1 QT IN X
43

Try executing this script on a metro, or manually trigger it with new note-ons.And then change X while playing notes.
Tuning patterns
Let’s start with an equal temperament scale as a foundation for making our newscale.
L 1 64 : PN 0 I N I
Check the tracker view. We’ve basically copied the N note table to a pattern0. Recall that PN takes an extra argument to specify which pattern to read orwrite.
We can now treat pattern 0 as our note map, rather than N. For example withnote value X:
CV 1 PN 0 X
Now we can go into pattern 0 and retune the table. This works well in trackermode– use the bracket keys to change by small values.
Let’s now copy one entire pattern 0 to pattern 1:
L 1 64 : PN 1 I PN 0 I
This looks a little funny, but it works!
Now with two “scales” in our pattern bank, we can easily (with a script) togglebetween the two. Just use Y as a scale variable:
CV 1 PN Y X
We still have pattern 2 and 3 for actual note-sequence data. Let’s put somethingmusical in there:
P.N 3P.PUSH 5P.PUSH 0P.PUSH 4P.PUSH 0P.PUSH 2
And now we can use the “sequence” in pattern 3 to play the “scale” of pattern 0:
CV 1 PN 0 P.NEXT
P.NEXT will read the active pattern specified by P.N. These note numbers getpushed through our custom scale.
The takeaway point is that patterns can be used for a variety of tasks. Notesequences, scales, timings, etc. They’re just a bunch of numbers!
44

Hidden workings
Teletype has psychic powers to control other grid-based modules, namely WhiteWhale, Meadowphysics, and Earthsea. (Though actually this requires an extraribbon cable connected behind the modules).
With the II command you can remotely control parameters of the the trilogymodules. For example:
II WW.POS 5
With a White Whale connected, this command will cut to position 5 of thecurrently playing sequence. All II commands are simply a key (such as WW.POS)and a secondary argument. Here’s the full list:
White Whale
WW.PRESET recall presetWW.POS cut to positionWW.SYNC cut to position, hard sync clock (if clocked internally)WW.START set loop startWW.END set loop endWW.PMODE set play mode (0: normal, 1: reverse, 2: drunk, 3: rand)WW.PATTERN change patternWW.QPATTERN change pattern (queued) after current pattern endsWW.MUTE1 mute trigger 1 (0 = on, 1 = mute)WW.MUTE2 mute trigger 2 (0 = on, 1 = mute)WW.MUTE3 mute trigger 3 (0 = on, 1 = mute)WW.MUTE4 mute trigger 4 (0 = on, 1 = mute)WW.MUTEA mute cv A (0 = on, 1 = mute)WW.MUTEB mute cv B (0 = on, 1 = mute)
Meadowphysics
MP.PRESET recall presetMP.RESET reset positionsMP.SYNC reset positions & hard sync (if clocked internally)MP.MUTE mutes the output of a channel (1 - 8)MP.UNMUTE unmutes (enables) the output (1 - 8)MP.FREEZE freezes the advancement of a channel (1 - 8)MP.UNFREEZE unfreezes (enables) advancement of the channel (1 - 8)
Earthsea
ES.PRESET recall presetES.MODE set pattern clock mode (0 = normal, 1 = II clock)ES.CLOCK (if II clocked) next pattern eventES.RESET reset pattern to start (and start playing)ES.PATTERN set playing patternES.TRANS set transposition
45

ES.STOP stop pattern playbackES.TRIPLE recall triple shape (1-4)ES.MAGIC magic shape (1: halfspeed, 2: doublespeed, 3: linearize)
One highly requested feature was external clocking of the Earthsea. Here’s howit works:
• Record a pattern using the grid, as normal.• Send TT command II ES.MODE 1• Now the Earthsea is being clocked via TT.• Use II ES.CLOCK 1 to send a clock pulse, via a script, live, metro, etc.
Note that the Earthsea needs a clock event for both note-on and note-off, so youwill likely need to double your clock speed. Another possibility is to use a DELto always send two ES.CLOCK messages:
1: II ES.CLOCK 1DEL 100 : II ES.CLOCK 1
This method has a couple issues. First, note length is always 100. If you triggerscript 1 faster than 100ms, you’ll get a weird phase problem and the note on/offswill get unsync’d. There are various other ways of approaching this issue thatmay require slightly more logic.
Sudden change of direction
Lastly (yes, we’re at the end) you can load an entire scene from a command:
SCENE 4
This will load scene 4. You can check the current scene number simply by readingSCENE.
So, you can quite simply make a scene-advance script thusly:
SCENE ADD SCENE 1
This gets pretty close to the mythic patch-recallability feature much sought inmodular. Teletype won’t move the wires for you, however.
EXAMPLE: LABYRINTH
This scene is featured in the banner video above.
There are two completely separate processes running in this scene. The first is a5 step sequence which is gets dynamically written by various triggers:
• 1: Step forward in sequence, note on CV output 1• 2: Reset pattern to 5-semitone spaced scale• 3: Reset pattern to 7-semitone spaced scale
46

• 4: Module each step of pattern randomly by 0-2• 5: Transpose each step of the pattern up by 2 semitones
In the video, the White Whale (controlled by the grid) is driving this section.The clock out advances the sequence, and trigger steps on the grid trigger thepattern-modifying scripts. So this is a sort of meta-sequence which is oftenchanging, where curious emergent repetitions often arise.
The second section is an input smoother, which in the video controls a filtersweep. A simple footswitch output (full scale) is connected to the IN jack of theTeletype. The metro script reads this value into a Q buffer (which is set verylong by the init script), and then the Q.AVG is sent to CV output 2. We’vebasically scripted a rudimentary slope limiter in just a few lines of code.
47

48

Reference
Commands
O like a normal variable, but auto-increments on each readQ read or add value to shift registerQ.N read of set length of shift registerQ.AVG return average of contents of shift register
L a b : ... loop command with I assigned a to b per iteration
SCENE load stored scene
49