
Tapit 6 - Home | Trisys Inc. · Tapit 6 Call Accounting Software Manual Document #: T6CAM-180531...
26
Tapit 6 Call Accounting Software Manual
Transcript of Tapit 6 - Home | Trisys Inc. · Tapit 6 Call Accounting Software Manual Document #: T6CAM-180531...
Tapit 6 Call Accounting
Software Manual
Tapit 6 Call Accounting Software Manual
Document #: T6CAM-180531 Page | 1 Updated on 05/31/2018
Table of Contents DOCUMENT REVISION RECORD 2
RELATED DOCUMENTATION 2
TAPIT 6 CALL ACCOUNTING MANUAL 3
MINIMUM SYSTEM REQUIREMENTS 3
INSTALLATION 4
BEFORE INSTALLING TAPIT 6 4 Setting Up IIS and System Features 5
INSTALLING TAPIT 6 PREREQUISITES 7 INSTALLING TAPIT 6 12 REGISTRATION 25
Tapit 6 Call Accounting Software Manual
Document #: T6CAM-180531 Page | 2 Updated on 05/31/2018
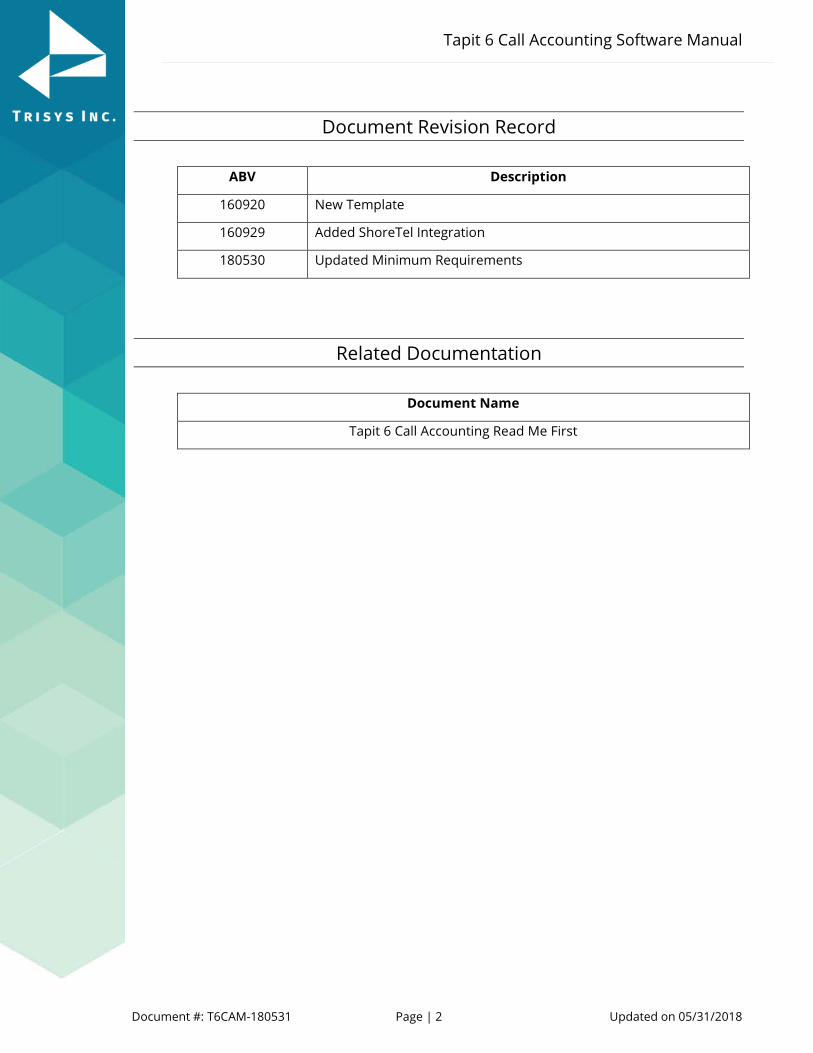
Document Revision Record
ABV Description
160920 New Template
160929 Added ShoreTel Integration
180530 Updated Minimum Requirements
Related Documentation
Document Name
Tapit 6 Call Accounting Read Me First
Tapit 6 Call Accounting Software Manual
Document #: T6CAM-180531 Page | 3 Updated on 05/31/2018
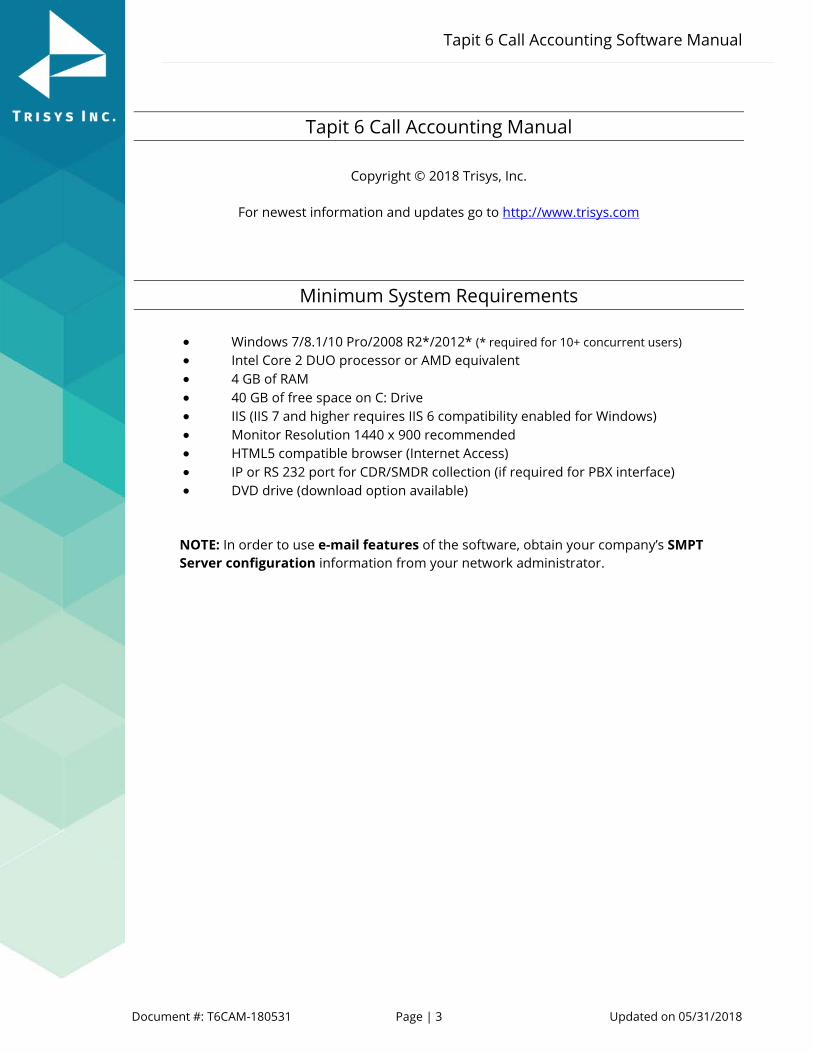
Tapit 6 Call Accounting Manual
Copyright © 2018 Trisys, Inc.
For newest information and updates go to http://www.trisys.com
Minimum System Requirements • Windows 7/8.1/10 Pro/2008 R2*/2012* (* required for 10+ concurrent users) • Intel Core 2 DUO processor or AMD equivalent • 4 GB of RAM • 40 GB of free space on C: Drive • IIS (IIS 7 and higher requires IIS 6 compatibility enabled for Windows) • Monitor Resolution 1440 x 900 recommended • HTML5 compatible browser (Internet Access) • IP or RS 232 port for CDR/SMDR collection (if required for PBX interface) • DVD drive (download option available)
NOTE: In order to use e-mail features of the software, obtain your company’s SMPT Server configuration information from your network administrator.
Tapit 6 Call Accounting Software Manual
Document #: T6CAM-180531 Page | 4 Updated on 05/31/2018
Installation
Before Installing Tapit 6
Before installation, please disable all anti-virus and other security (i.e. Firewalls, End-Point protection, etc.) software you may have running on your PC. This installation will require one or more system reboots.
Tapit 6 cannot be installed on Domain Controllers and we do not recommend installing it on any other servers already running resource-intensive applications.
The following components MUST be installed before Tapit 6 installation:
• Disable UAC (User Account Control) in Control Panel • Enable MS .NET Framework 3.5 (on Win 10 / Win 2012 OS) • Install IIS (On Win 2008/2012 assign Web Server role, also for all operating systems Web
Management Tools, IIS 6 Compatibility, ASP.NET, ASP.NET 4.5 and WebDAV Publishing must be enabled) The following components are going to be installed from Tapit 6 DVD or download:
• Adobe PDF Reader • SQL Server 2012 Express with Advanced Services (specifically configured for Tapit 6). You
must allow it to be installed from this DVD. • No other SQL Server software should be installed on the PC.
NOTE: When installing or using Tapit 6 you must right-click on any Tapit 6 related application shortcuts or components and select ‘Run as Administrator’ even if you are logged in as an Administrator.
Tapit 6 Call Accounting Software Manual
Document #: T6CAM-180531 Page | 5 Updated on 05/31/2018
Setting Up IIS and System Features
1. Open Control Panel. 2. Click on Programs and Features or Programs/Programs and Features. 3. Click on the Turn Windows features on or off link.
NOTE: In Windows 10, if User Account Control is not disabled, accept the warning to elevate privileges for the Windows Features dialog to appear.
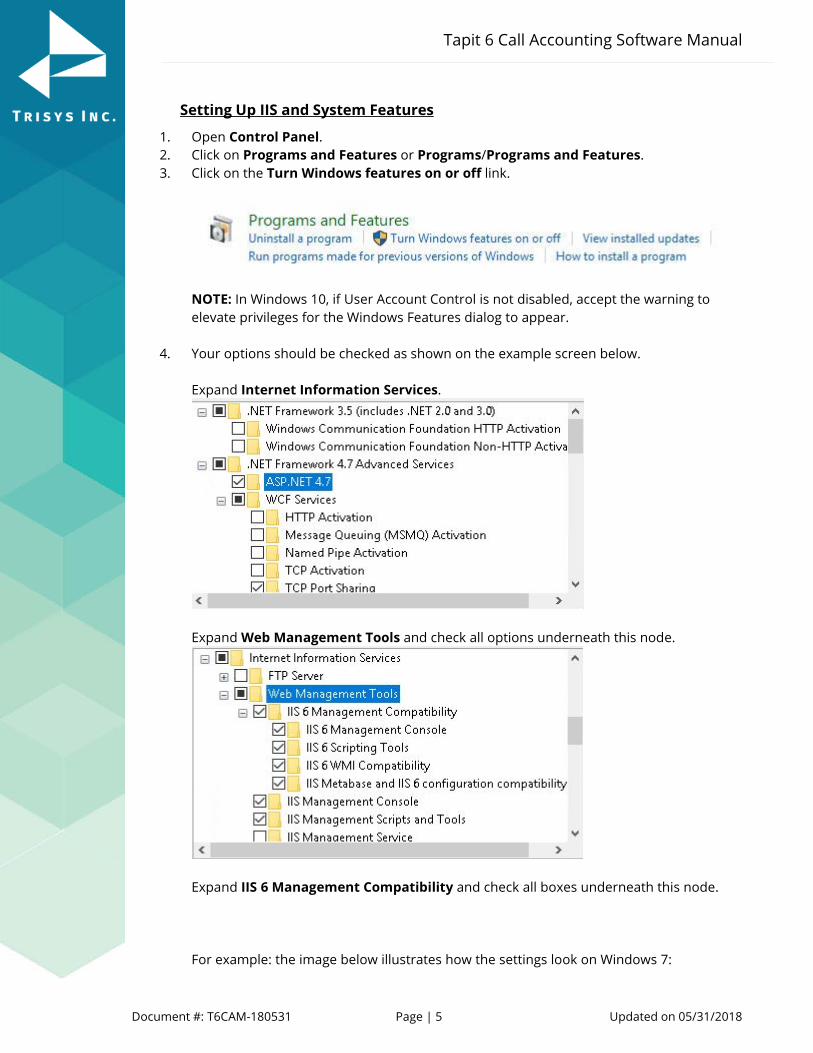
4. Your options should be checked as shown on the example screen below. Expand Internet Information Services.
Expand Web Management Tools and check all options underneath this node.
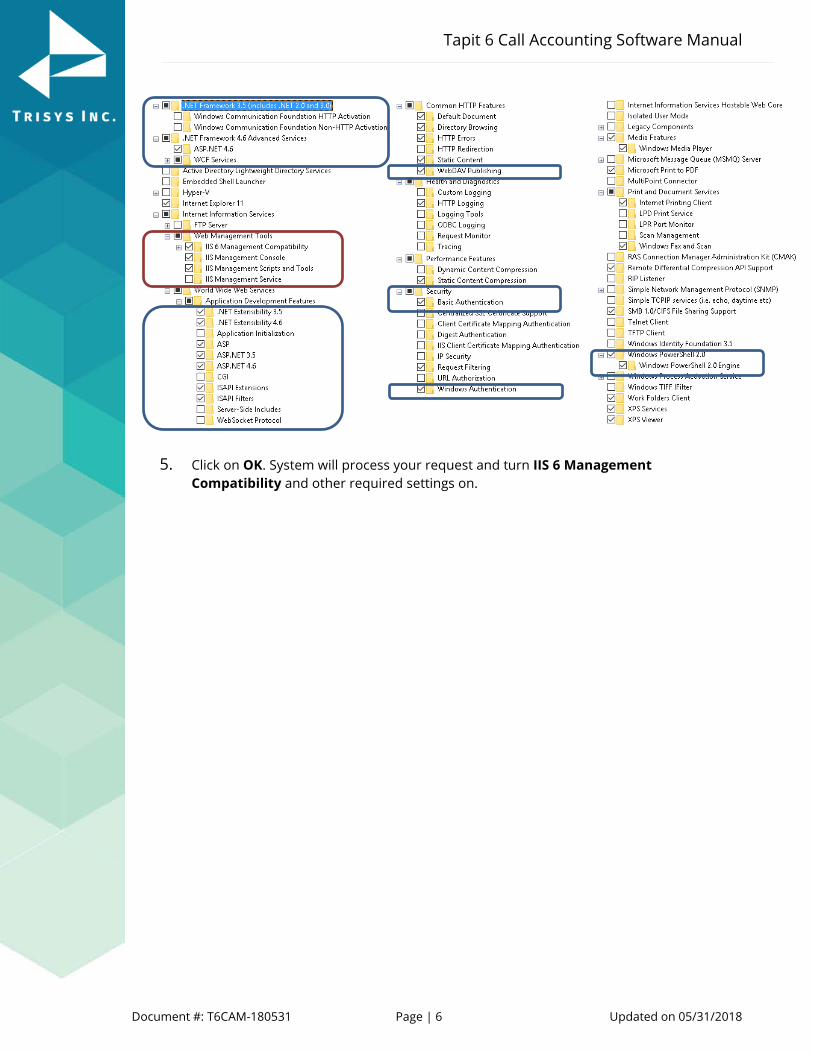
Expand IIS 6 Management Compatibility and check all boxes underneath this node. For example: the image below illustrates how the settings look on Windows 7:
Tapit 6 Call Accounting Software Manual
Document #: T6CAM-180531 Page | 6 Updated on 05/31/2018
5. Click on OK. System will process your request and turn IIS 6 Management Compatibility and other required settings on.
Tapit 6 Call Accounting Software Manual
Document #: T6CAM-180531 Page | 7 Updated on 05/31/2018
Installing Tapit 6 Prerequisites
NOTE: You have to have administrative privileges on this PC. When installing on Windows 10 or Windows 2012 please install this software ‘As Administrator’. When installing or using Tapit 6 you must right-click on any Tapit 6 related application shortcuts or components and select ‘Run as Administrator’ even if you are logged in as an Administrator.
IIS, MS .NET Framework 3.5 SP1, MS .NET Framework 4.62 or higher and current version of Windows PowerShell must be already installed on this PC.
Tapit 6 Prerequisites Installation will install SQL Server 2012 Express Advanced with Reporting Services on your PC.
1. When installing from a downloaded Tapit 6 DVD image,
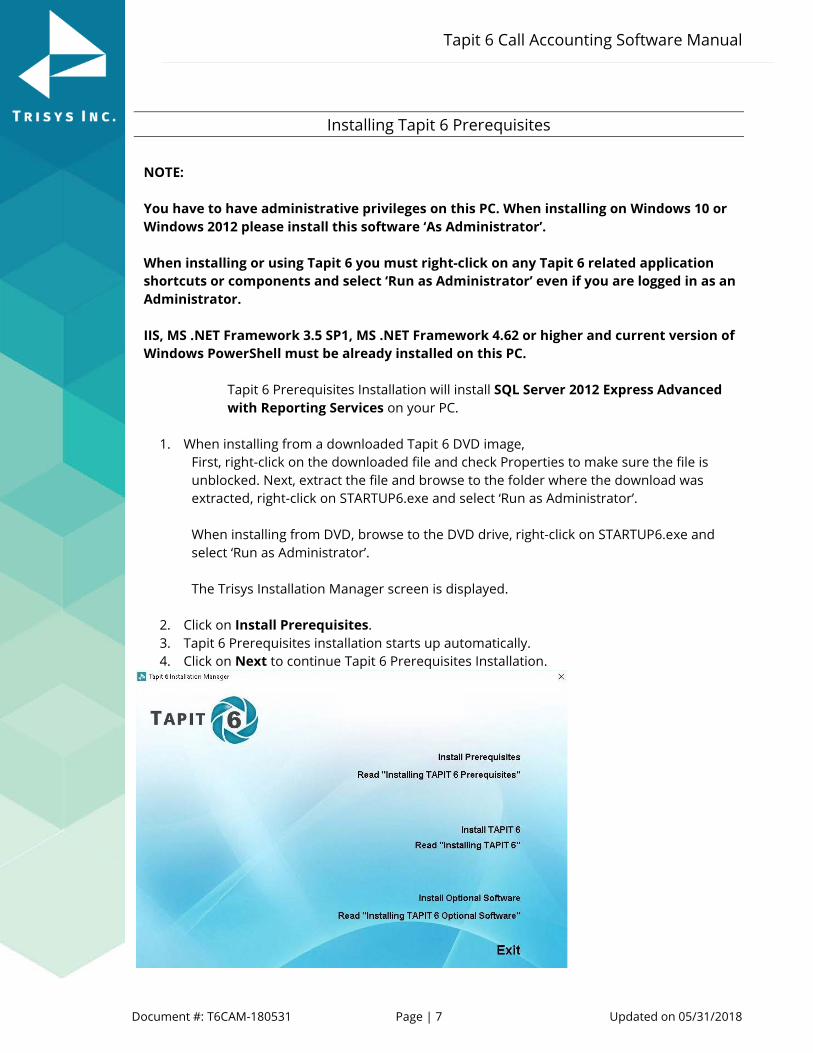
First, right-click on the downloaded file and check Properties to make sure the file is unblocked. Next, extract the file and browse to the folder where the download was extracted, right-click on STARTUP6.exe and select ‘Run as Administrator’. When installing from DVD, browse to the DVD drive, right-click on STARTUP6.exe and select ‘Run as Administrator’. The Trisys Installation Manager screen is displayed.
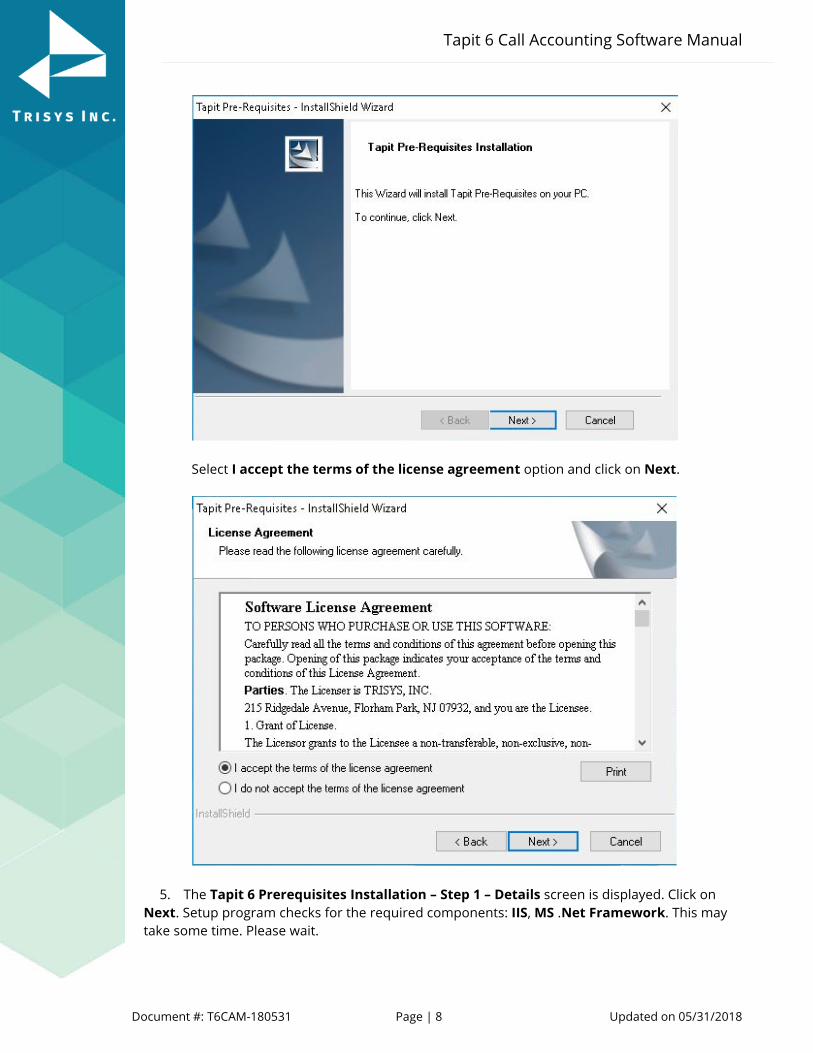
2. Click on Install Prerequisites. 3. Tapit 6 Prerequisites installation starts up automatically. 4. Click on Next to continue Tapit 6 Prerequisites Installation.
Tapit 6 Call Accounting Software Manual
Document #: T6CAM-180531 Page | 8 Updated on 05/31/2018
Select I accept the terms of the license agreement option and click on Next.
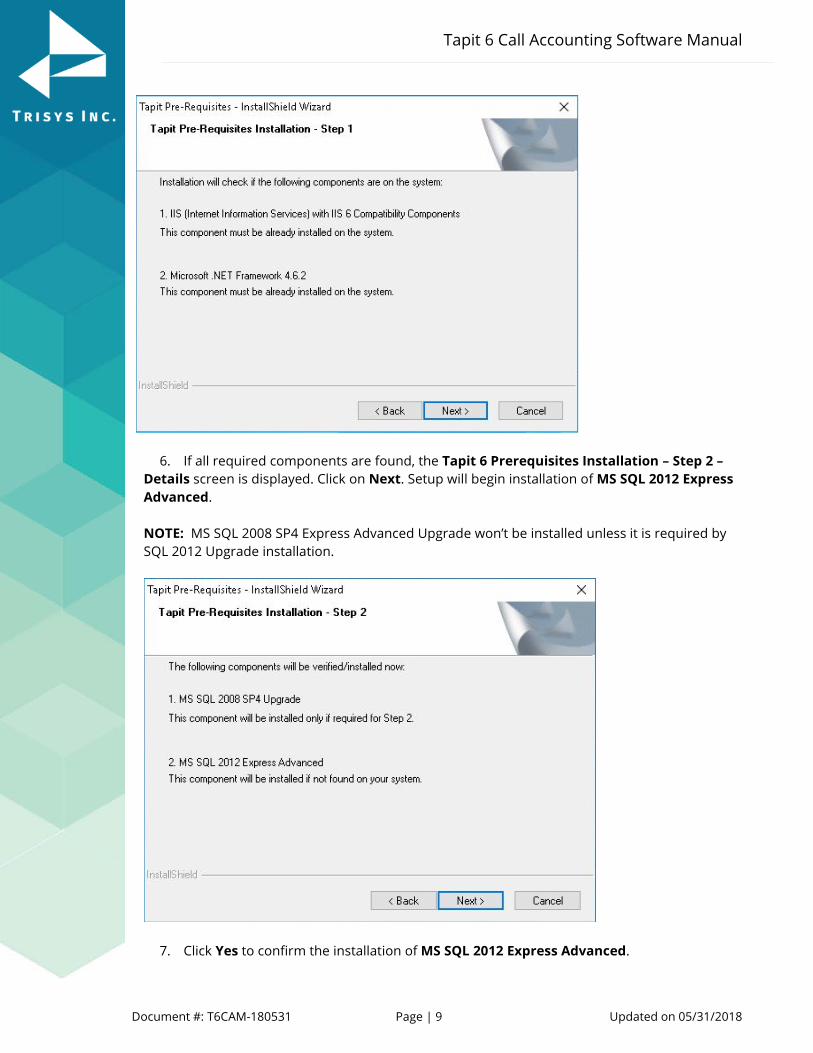
5. The Tapit 6 Prerequisites Installation – Step 1 – Details screen is displayed. Click on Next. Setup program checks for the required components: IIS, MS .Net Framework. This may take some time. Please wait.
Tapit 6 Call Accounting Software Manual
Document #: T6CAM-180531 Page | 9 Updated on 05/31/2018
6. If all required components are found, the Tapit 6 Prerequisites Installation – Step 2 – Details screen is displayed. Click on Next. Setup will begin installation of MS SQL 2012 Express Advanced. NOTE: MS SQL 2008 SP4 Express Advanced Upgrade won’t be installed unless it is required by SQL 2012 Upgrade installation.
7. Click Yes to confirm the installation of MS SQL 2012 Express Advanced.
Tapit 6 Call Accounting Software Manual
Document #: T6CAM-180531 Page | 10 Updated on 05/31/2018
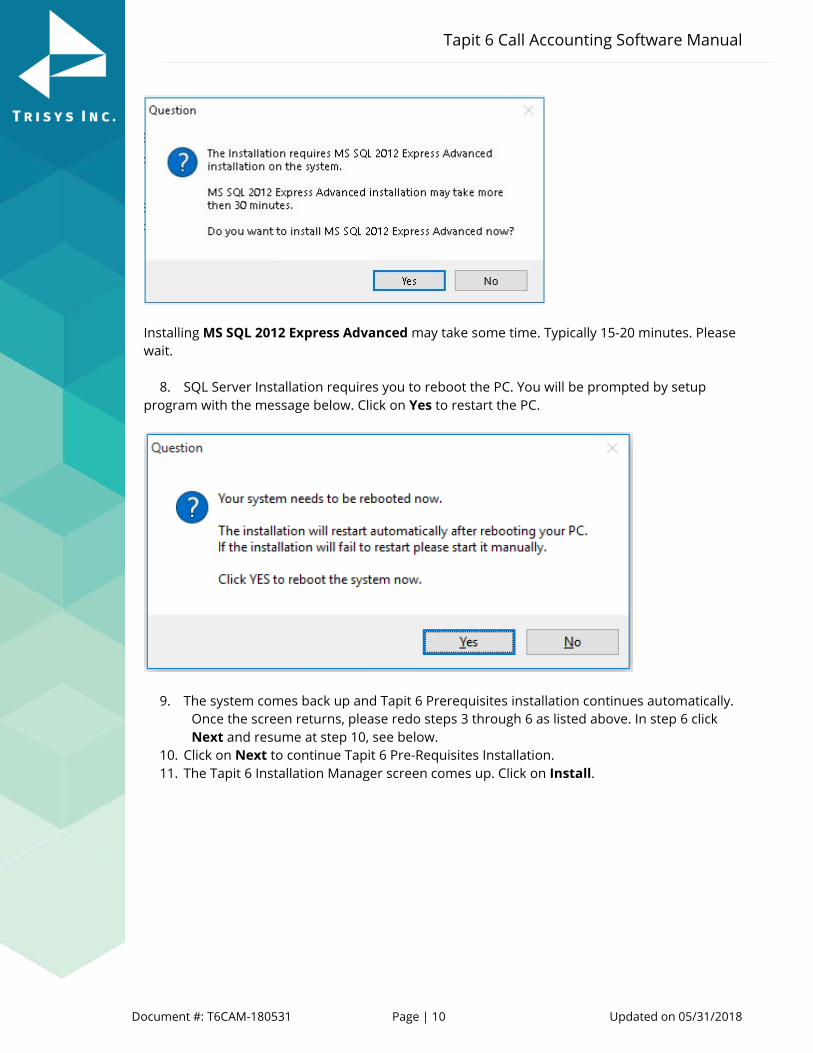
Installing MS SQL 2012 Express Advanced may take some time. Typically 15-20 minutes. Please wait.
8. SQL Server Installation requires you to reboot the PC. You will be prompted by setup
program with the message below. Click on Yes to restart the PC.
9. The system comes back up and Tapit 6 Prerequisites installation continues automatically. Once the screen returns, please redo steps 3 through 6 as listed above. In step 6 click Next and resume at step 10, see below.
10. Click on Next to continue Tapit 6 Pre-Requisites Installation. 11. The Tapit 6 Installation Manager screen comes up. Click on Install.
Tapit 6 Call Accounting Software Manual
Document #: T6CAM-180531 Page | 11 Updated on 05/31/2018
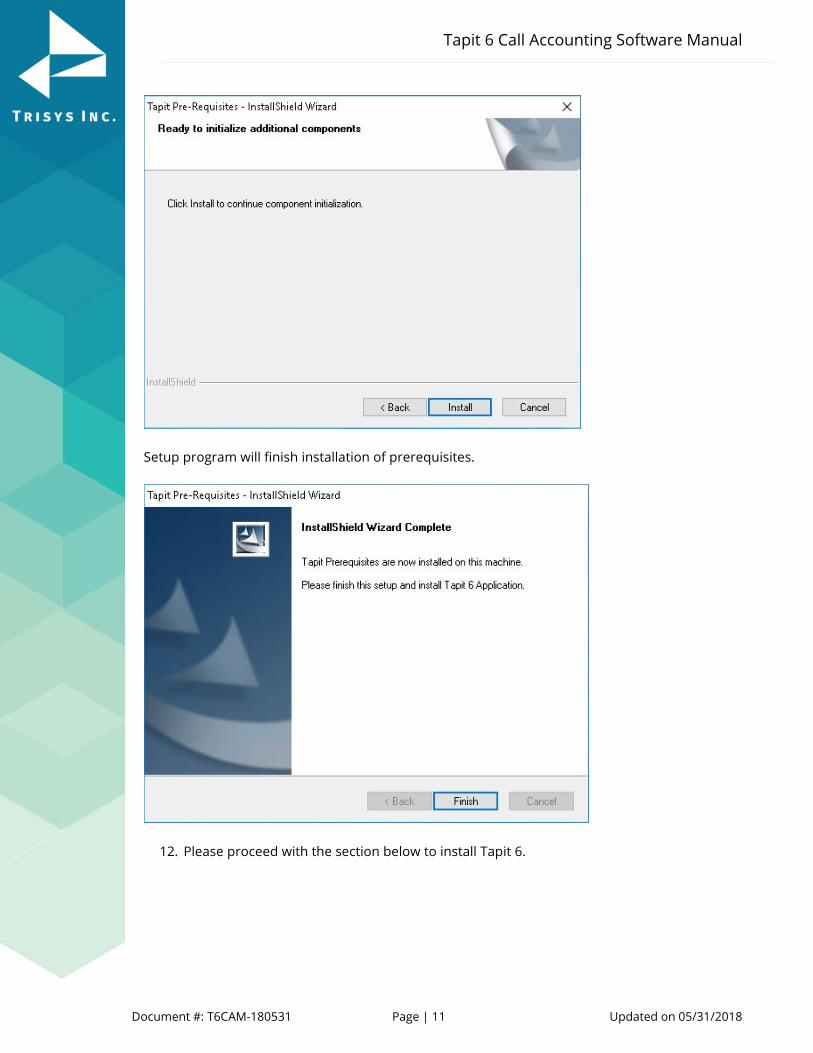
Setup program will finish installation of prerequisites.
12. Please proceed with the section below to install Tapit 6.
Tapit 6 Call Accounting Software Manual
Document #: T6CAM-180531 Page | 12 Updated on 05/31/2018
Installing Tapit 6 NOTE: You have to have administrative privileges on this PC. When installing on Windows 10 or Windows 2012 please install this software ‘As Administrator’. When installing or using Tapit 6 you must right-click on any Tapit 6 related application shortcuts or components and select ‘Run as Administrator’ even if you are logged in as an Administrator.
IIS, MS .NET Framework 3.5 SP1, MS .NET Framework 4.62 or higher and current version of Windows PowerShell must be already installed on this PC.
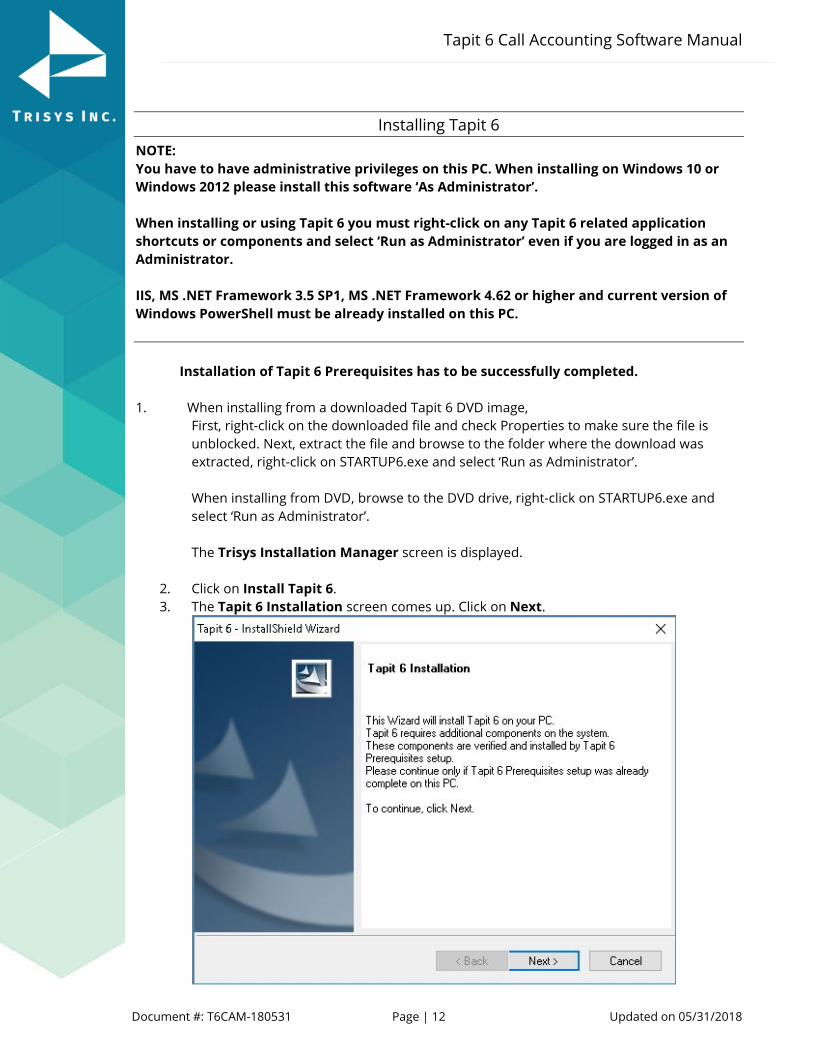
Installation of Tapit 6 Prerequisites has to be successfully completed.
1. When installing from a downloaded Tapit 6 DVD image, First, right-click on the downloaded file and check Properties to make sure the file is unblocked. Next, extract the file and browse to the folder where the download was extracted, right-click on STARTUP6.exe and select ‘Run as Administrator’.
When installing from DVD, browse to the DVD drive, right-click on STARTUP6.exe and select ‘Run as Administrator’. The Trisys Installation Manager screen is displayed.
2. Click on Install Tapit 6. 3. The Tapit 6 Installation screen comes up. Click on Next.
Tapit 6 Call Accounting Software Manual
Document #: T6CAM-180531 Page | 13 Updated on 05/31/2018
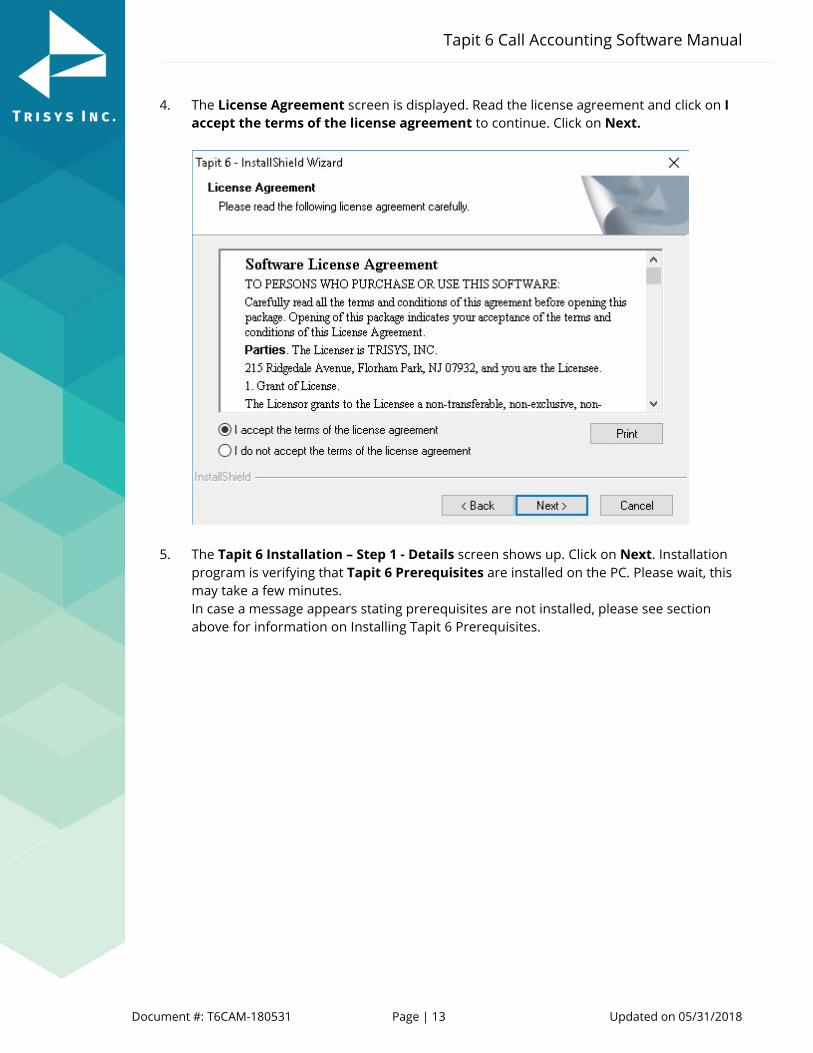
4. The License Agreement screen is displayed. Read the license agreement and click on I accept the terms of the license agreement to continue. Click on Next.
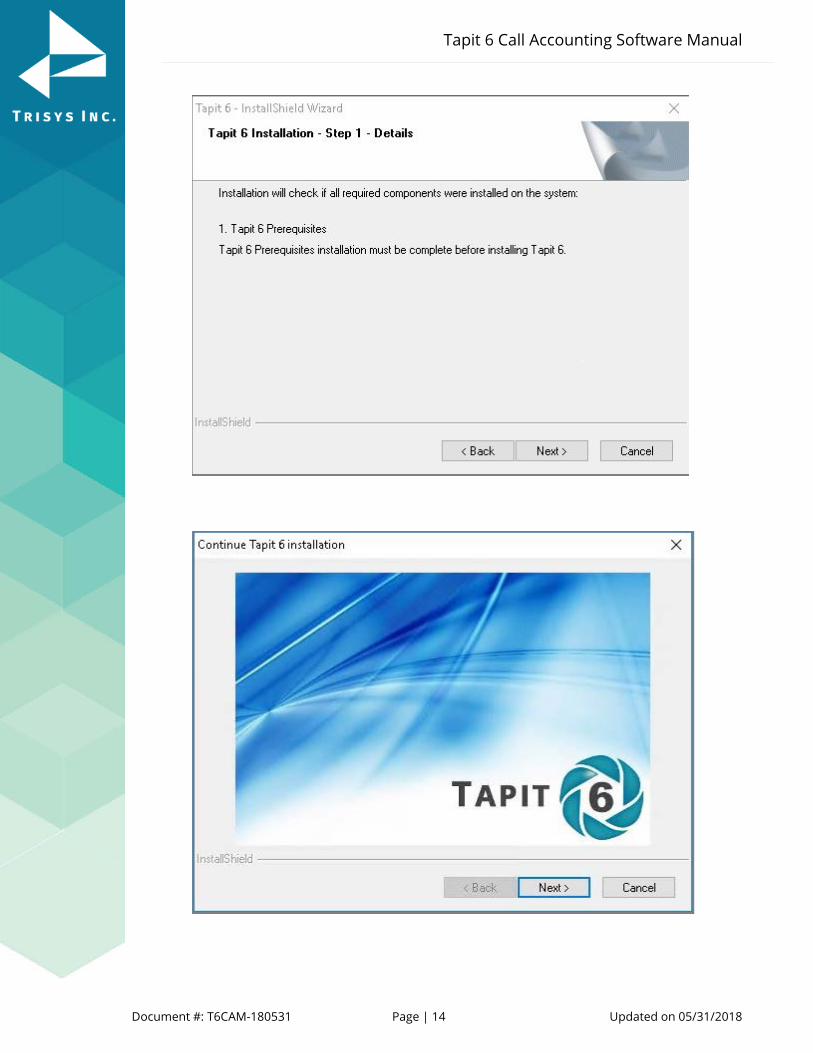
5. The Tapit 6 Installation – Step 1 - Details screen shows up. Click on Next. Installation program is verifying that Tapit 6 Prerequisites are installed on the PC. Please wait, this may take a few minutes. In case a message appears stating prerequisites are not installed, please see section above for information on Installing Tapit 6 Prerequisites.
Tapit 6 Call Accounting Software Manual
Document #: T6CAM-180531 Page | 14 Updated on 05/31/2018
Tapit 6 Call Accounting Software Manual
Document #: T6CAM-180531 Page | 15 Updated on 05/31/2018
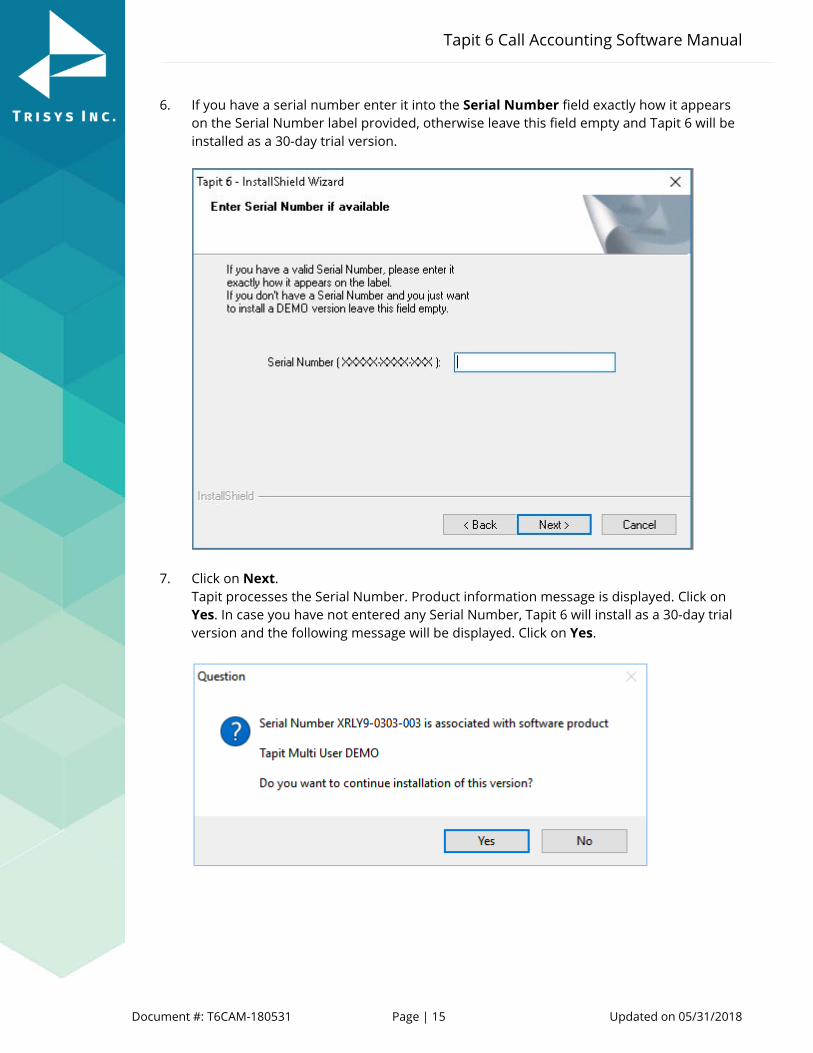
6. If you have a serial number enter it into the Serial Number field exactly how it appears on the Serial Number label provided, otherwise leave this field empty and Tapit 6 will be installed as a 30-day trial version.
7. Click on Next. Tapit processes the Serial Number. Product information message is displayed. Click on Yes. In case you have not entered any Serial Number, Tapit 6 will install as a 30-day trial version and the following message will be displayed. Click on Yes.
Tapit 6 Call Accounting Software Manual
Document #: T6CAM-180531 Page | 16 Updated on 05/31/2018
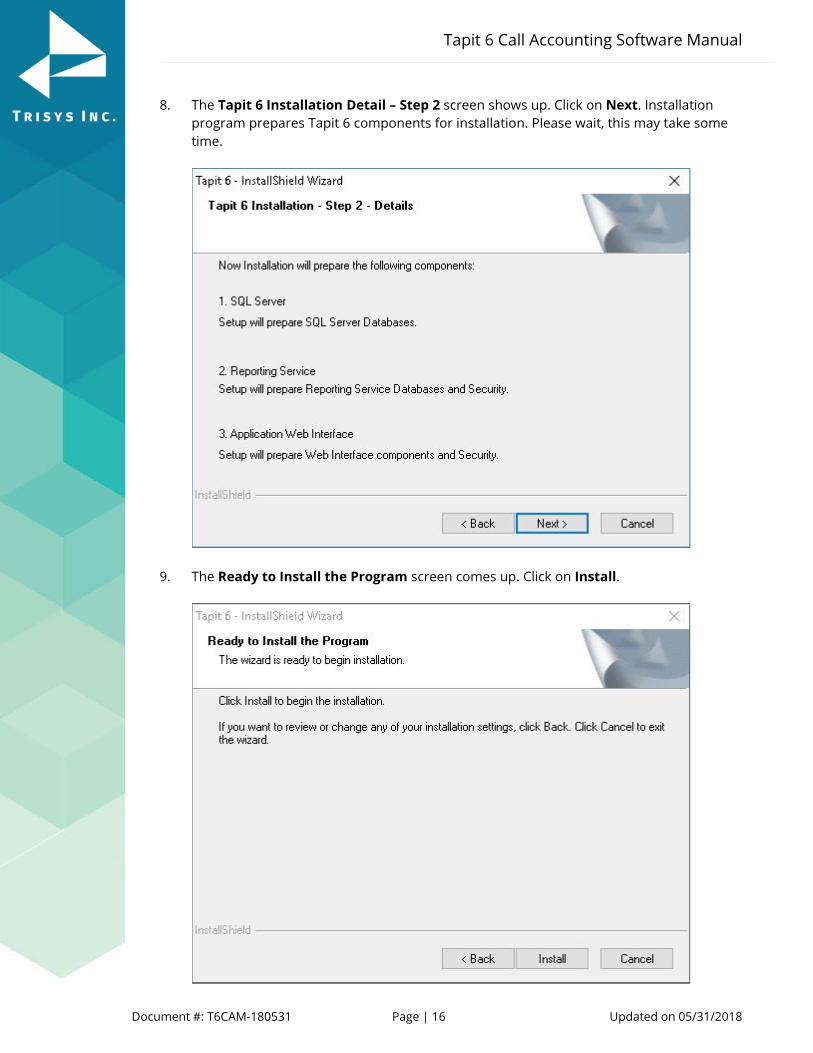
8. The Tapit 6 Installation Detail – Step 2 screen shows up. Click on Next. Installation program prepares Tapit 6 components for installation. Please wait, this may take some time.
9. The Ready to Install the Program screen comes up. Click on Install.
Tapit 6 Call Accounting Software Manual
Document #: T6CAM-180531 Page | 17 Updated on 05/31/2018
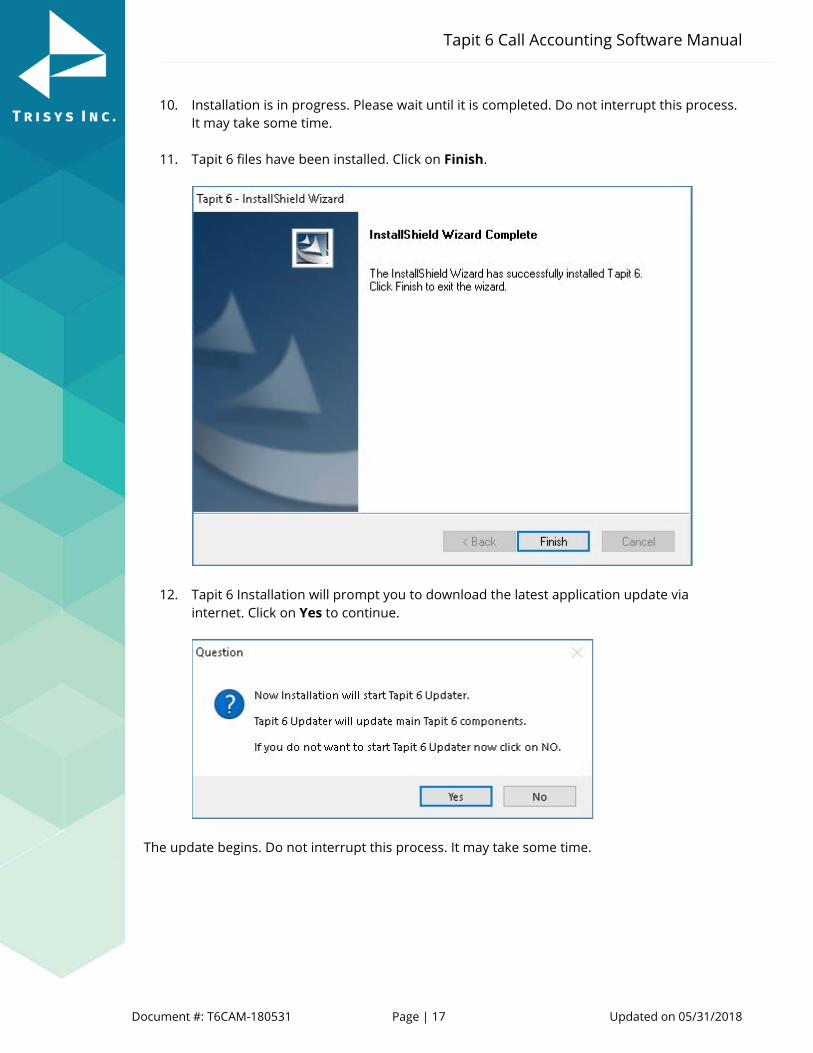
10. Installation is in progress. Please wait until it is completed. Do not interrupt this process. It may take some time.
11. Tapit 6 files have been installed. Click on Finish.
12. Tapit 6 Installation will prompt you to download the latest application update via internet. Click on Yes to continue.
The update begins. Do not interrupt this process. It may take some time.
Tapit 6 Call Accounting Software Manual
Document #: T6CAM-180531 Page | 18 Updated on 05/31/2018
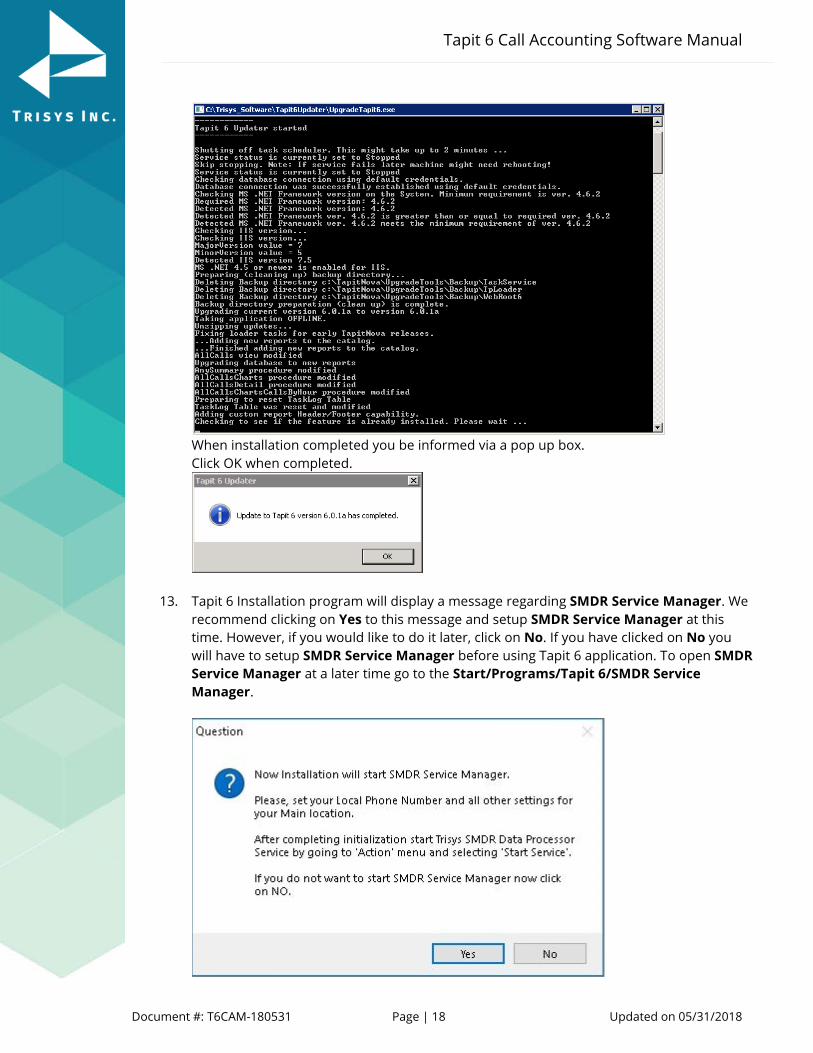
When installation completed you be informed via a pop up box. Click OK when completed.
13. Tapit 6 Installation program will display a message regarding SMDR Service Manager. We recommend clicking on Yes to this message and setup SMDR Service Manager at this time. However, if you would like to do it later, click on No. If you have clicked on No you will have to setup SMDR Service Manager before using Tapit 6 application. To open SMDR Service Manager at a later time go to the Start/Programs/Tapit 6/SMDR Service Manager.
Tapit 6 Call Accounting Software Manual
Document #: T6CAM-180531 Page | 19 Updated on 05/31/2018
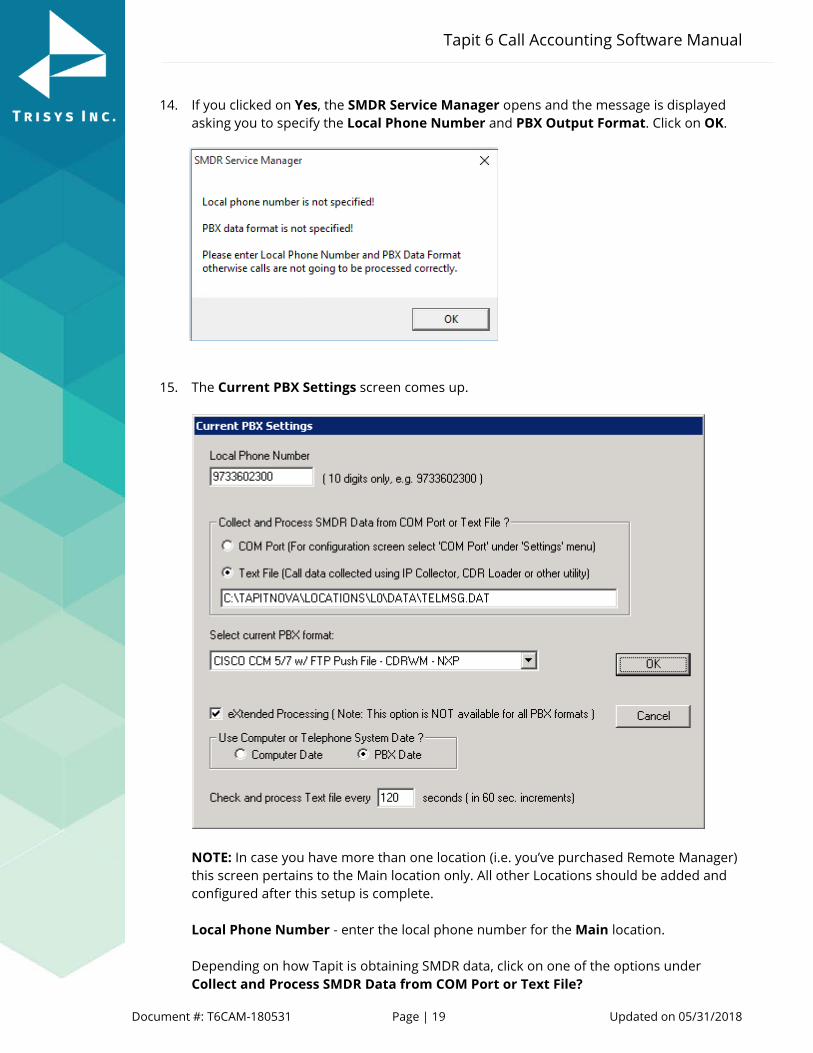
14. If you clicked on Yes, the SMDR Service Manager opens and the message is displayed asking you to specify the Local Phone Number and PBX Output Format. Click on OK.
15. The Current PBX Settings screen comes up.
NOTE: In case you have more than one location (i.e. you’ve purchased Remote Manager) this screen pertains to the Main location only. All other Locations should be added and configured after this setup is complete. Local Phone Number - enter the local phone number for the Main location.
Depending on how Tapit is obtaining SMDR data, click on one of the options under Collect and Process SMDR Data from COM Port or Text File?
Tapit 6 Call Accounting Software Manual
Document #: T6CAM-180531 Page | 20 Updated on 05/31/2018
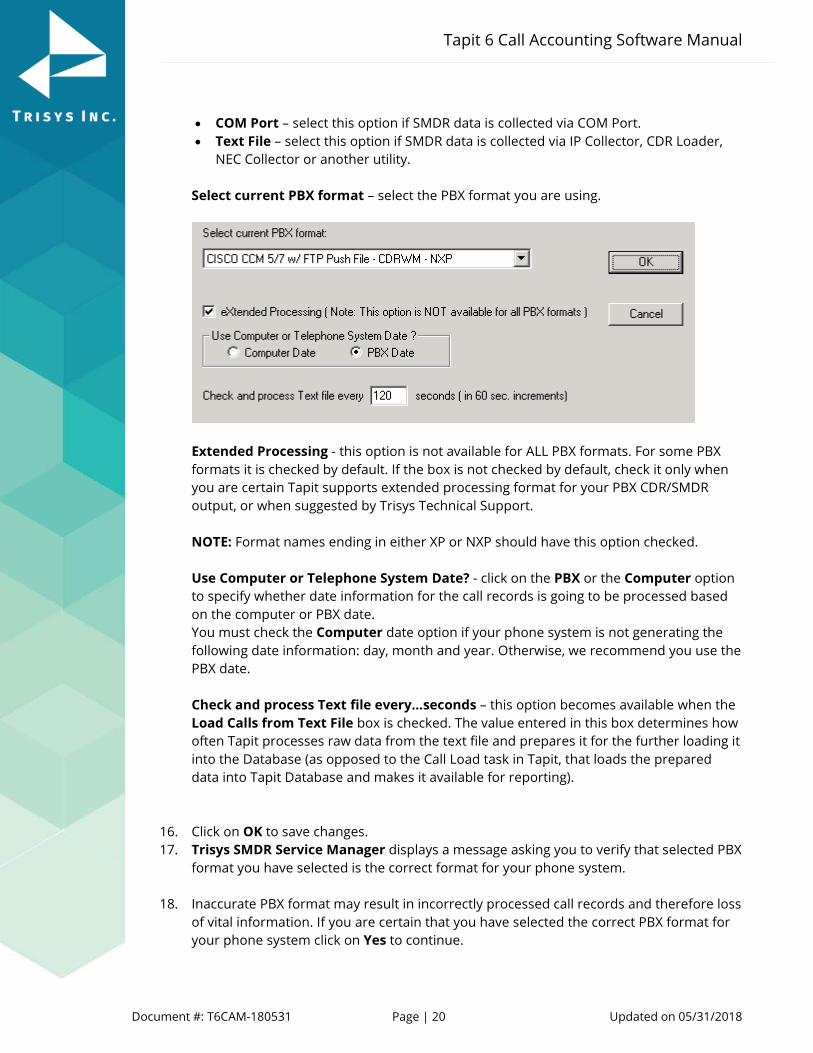
• COM Port – select this option if SMDR data is collected via COM Port. • Text File – select this option if SMDR data is collected via IP Collector, CDR Loader,
NEC Collector or another utility. Select current PBX format – select the PBX format you are using.
Extended Processing - this option is not available for ALL PBX formats. For some PBX formats it is checked by default. If the box is not checked by default, check it only when you are certain Tapit supports extended processing format for your PBX CDR/SMDR output, or when suggested by Trisys Technical Support. NOTE: Format names ending in either XP or NXP should have this option checked. Use Computer or Telephone System Date? - click on the PBX or the Computer option to specify whether date information for the call records is going to be processed based on the computer or PBX date. You must check the Computer date option if your phone system is not generating the following date information: day, month and year. Otherwise, we recommend you use the PBX date. Check and process Text file every…seconds – this option becomes available when the Load Calls from Text File box is checked. The value entered in this box determines how often Tapit processes raw data from the text file and prepares it for the further loading it into the Database (as opposed to the Call Load task in Tapit, that loads the prepared data into Tapit Database and makes it available for reporting).
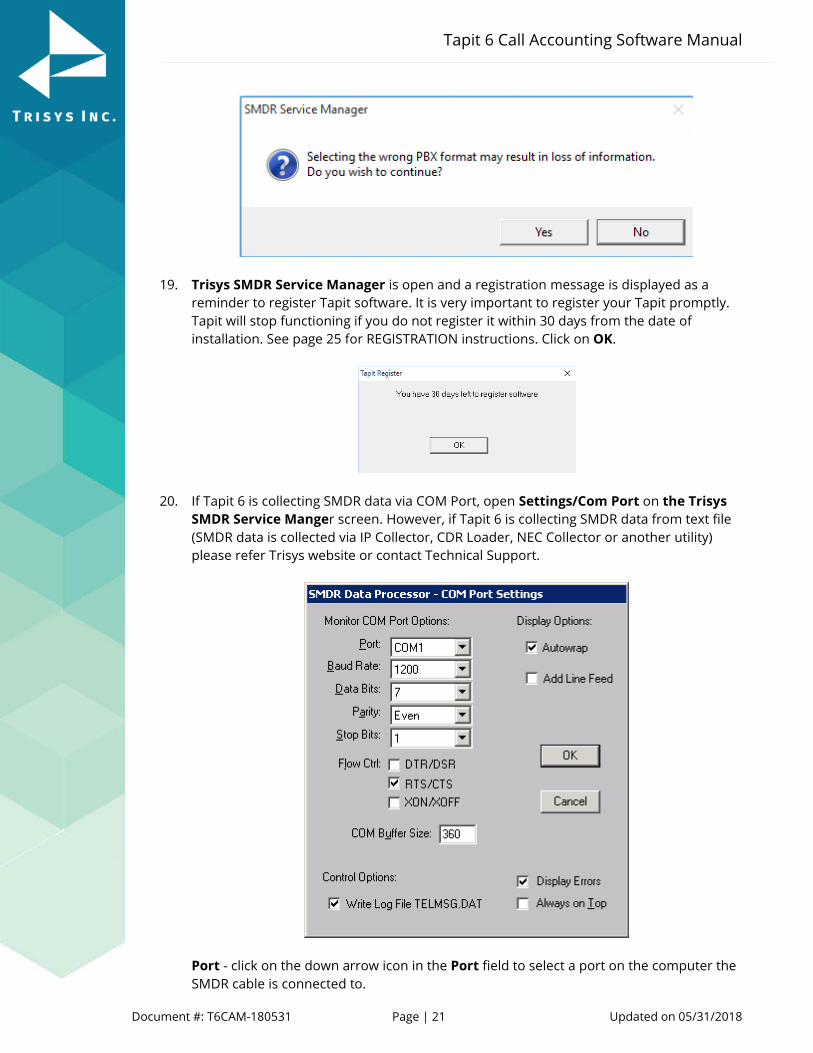
16. Click on OK to save changes. 17. Trisys SMDR Service Manager displays a message asking you to verify that selected PBX
format you have selected is the correct format for your phone system.
18. Inaccurate PBX format may result in incorrectly processed call records and therefore loss of vital information. If you are certain that you have selected the correct PBX format for your phone system click on Yes to continue.
Tapit 6 Call Accounting Software Manual
Document #: T6CAM-180531 Page | 21 Updated on 05/31/2018
19. Trisys SMDR Service Manager is open and a registration message is displayed as a reminder to register Tapit software. It is very important to register your Tapit promptly. Tapit will stop functioning if you do not register it within 30 days from the date of installation. See page 25 for REGISTRATION instructions. Click on OK.
20. If Tapit 6 is collecting SMDR data via COM Port, open Settings/Com Port on the Trisys SMDR Service Manger screen. However, if Tapit 6 is collecting SMDR data from text file (SMDR data is collected via IP Collector, CDR Loader, NEC Collector or another utility) please refer Trisys website or contact Technical Support.
Port - click on the down arrow icon in the Port field to select a port on the computer the SMDR cable is connected to.
Tapit 6 Call Accounting Software Manual
Document #: T6CAM-180531 Page | 22 Updated on 05/31/2018
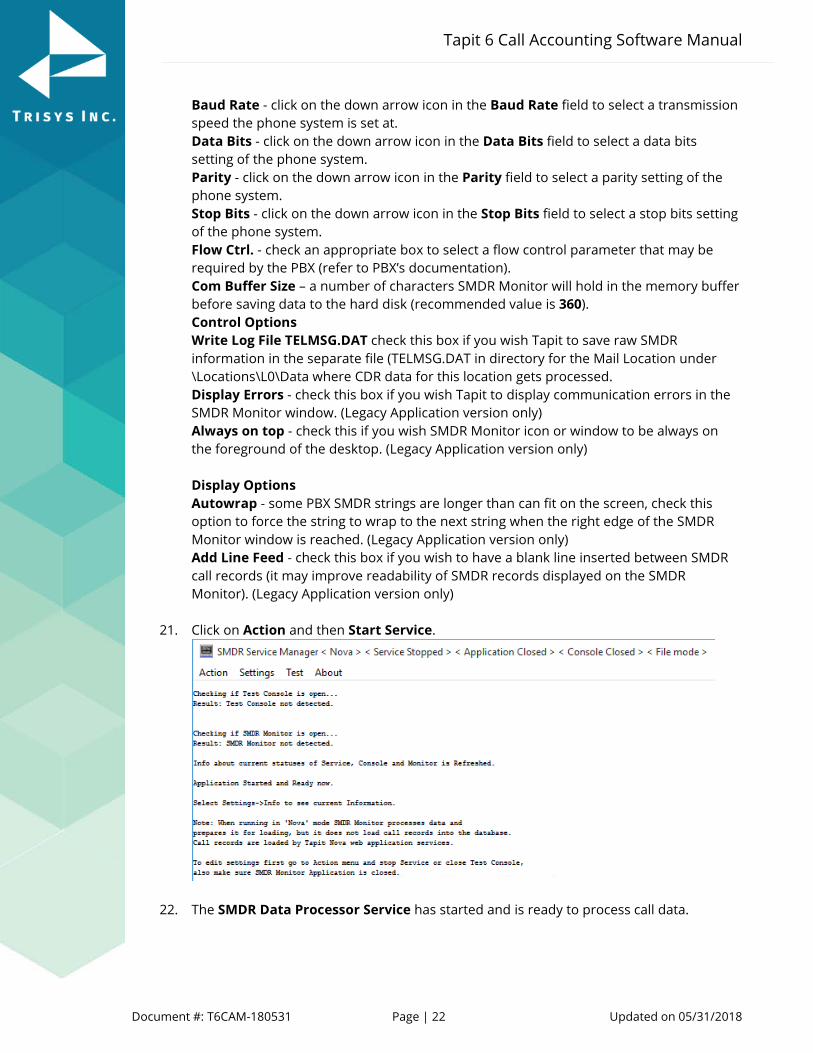
Baud Rate - click on the down arrow icon in the Baud Rate field to select a transmission speed the phone system is set at. Data Bits - click on the down arrow icon in the Data Bits field to select a data bits setting of the phone system. Parity - click on the down arrow icon in the Parity field to select a parity setting of the phone system. Stop Bits - click on the down arrow icon in the Stop Bits field to select a stop bits setting of the phone system. Flow Ctrl. - check an appropriate box to select a flow control parameter that may be required by the PBX (refer to PBX’s documentation). Com Buffer Size – a number of characters SMDR Monitor will hold in the memory buffer before saving data to the hard disk (recommended value is 360). Control Options Write Log File TELMSG.DAT check this box if you wish Tapit to save raw SMDR information in the separate file (TELMSG.DAT in directory for the Mail Location under \Locations\L0\Data where CDR data for this location gets processed. Display Errors - check this box if you wish Tapit to display communication errors in the SMDR Monitor window. (Legacy Application version only) Always on top - check this if you wish SMDR Monitor icon or window to be always on the foreground of the desktop. (Legacy Application version only)
Display Options Autowrap - some PBX SMDR strings are longer than can fit on the screen, check this option to force the string to wrap to the next string when the right edge of the SMDR Monitor window is reached. (Legacy Application version only) Add Line Feed - check this box if you wish to have a blank line inserted between SMDR call records (it may improve readability of SMDR records displayed on the SMDR Monitor). (Legacy Application version only)
21. Click on Action and then Start Service.
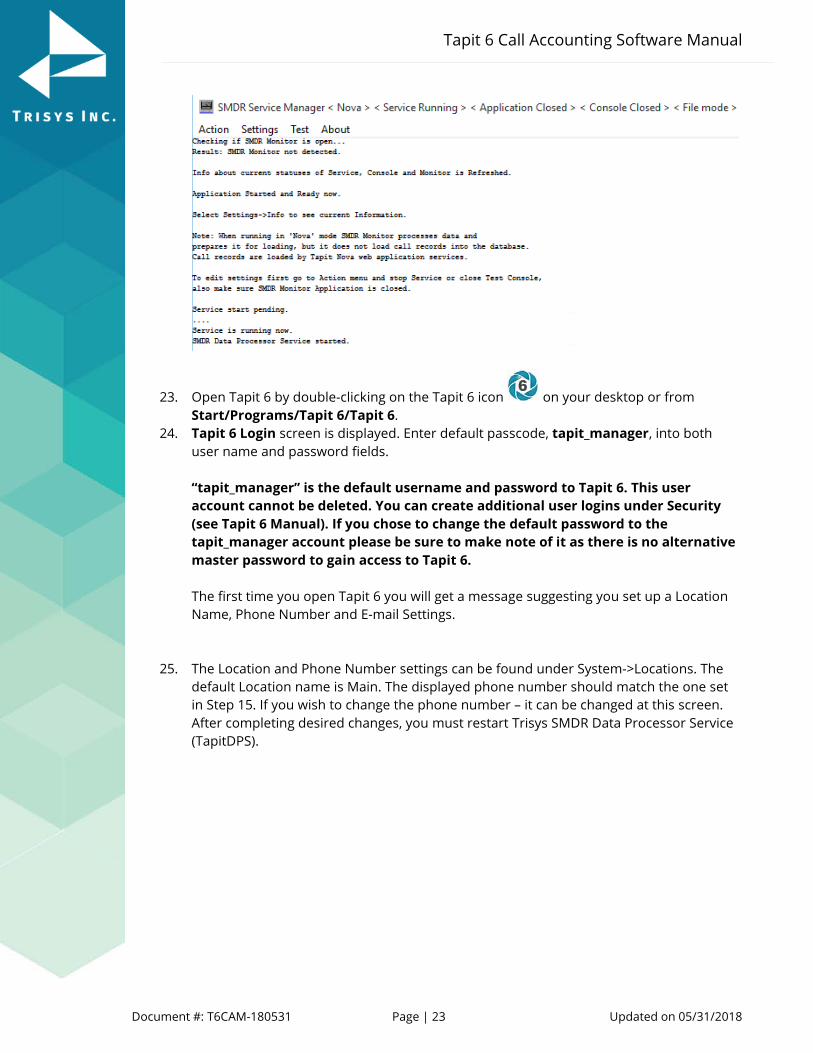
22. The SMDR Data Processor Service has started and is ready to process call data.
Tapit 6 Call Accounting Software Manual
Document #: T6CAM-180531 Page | 23 Updated on 05/31/2018
23. Open Tapit 6 by double-clicking on the Tapit 6 icon on your desktop or from Start/Programs/Tapit 6/Tapit 6.
24. Tapit 6 Login screen is displayed. Enter default passcode, tapit_manager, into both user name and password fields. “tapit_manager” is the default username and password to Tapit 6. This user account cannot be deleted. You can create additional user logins under Security (see Tapit 6 Manual). If you chose to change the default password to the tapit_manager account please be sure to make note of it as there is no alternative master password to gain access to Tapit 6. The first time you open Tapit 6 you will get a message suggesting you set up a Location Name, Phone Number and E-mail Settings.
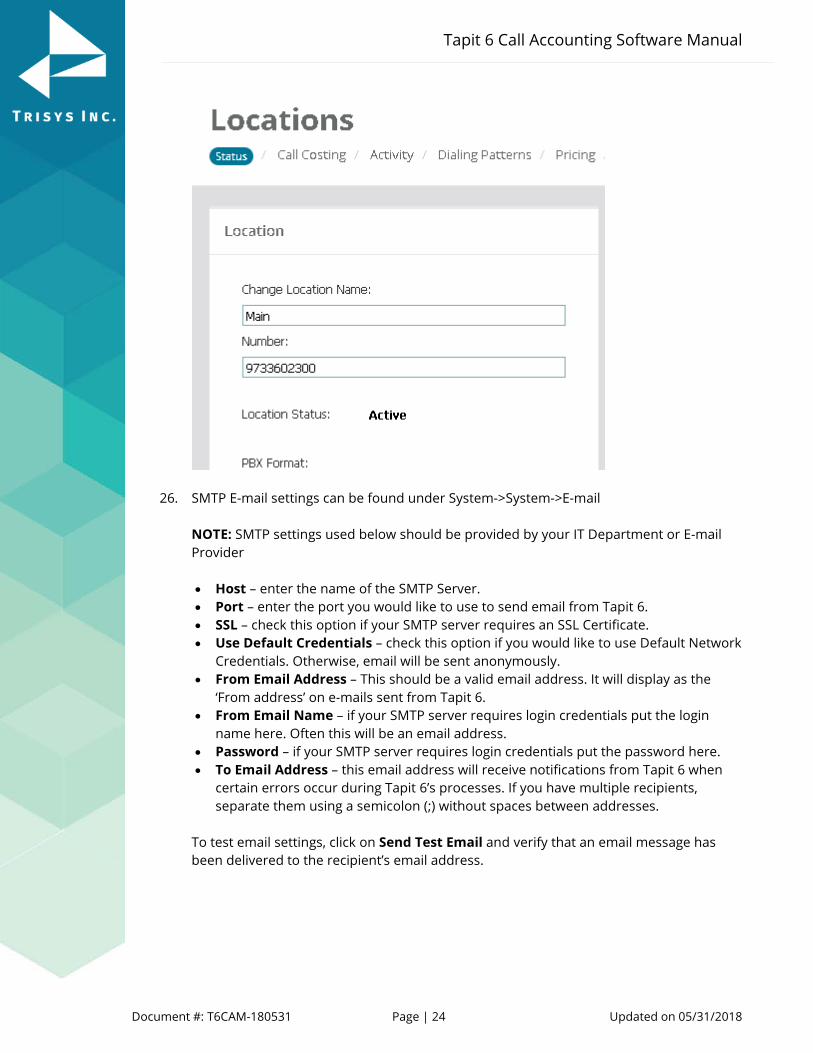
25. The Location and Phone Number settings can be found under System->Locations. The default Location name is Main. The displayed phone number should match the one set in Step 15. If you wish to change the phone number – it can be changed at this screen. After completing desired changes, you must restart Trisys SMDR Data Processor Service (TapitDPS).
Tapit 6 Call Accounting Software Manual
Document #: T6CAM-180531 Page | 24 Updated on 05/31/2018
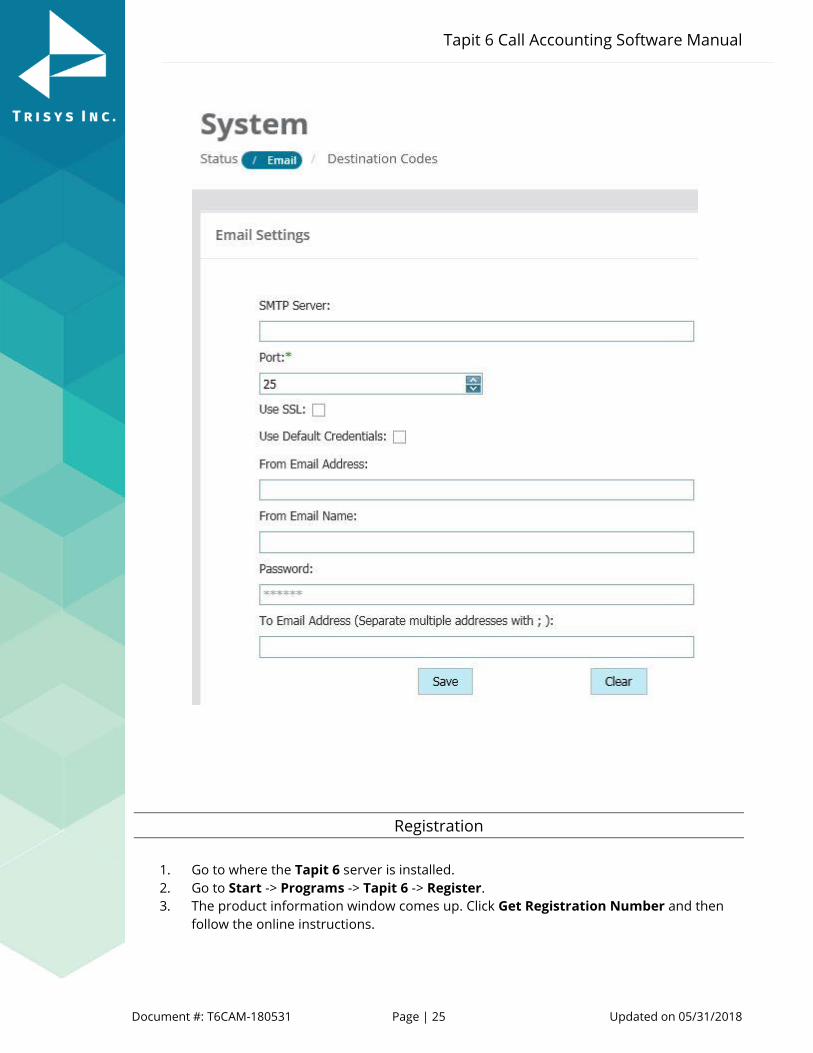
26. SMTP E-mail settings can be found under System->System->E-mail NOTE: SMTP settings used below should be provided by your IT Department or E-mail Provider • Host – enter the name of the SMTP Server. • Port – enter the port you would like to use to send email from Tapit 6. • SSL – check this option if your SMTP server requires an SSL Certificate. • Use Default Credentials – check this option if you would like to use Default Network
Credentials. Otherwise, email will be sent anonymously. • From Email Address – This should be a valid email address. It will display as the
‘From address’ on e-mails sent from Tapit 6. • From Email Name – if your SMTP server requires login credentials put the login
name here. Often this will be an email address. • Password – if your SMTP server requires login credentials put the password here. • To Email Address – this email address will receive notifications from Tapit 6 when
certain errors occur during Tapit 6’s processes. If you have multiple recipients, separate them using a semicolon (;) without spaces between addresses.
To test email settings, click on Send Test Email and verify that an email message has been delivered to the recipient’s email address.
Tapit 6 Call Accounting Software Manual
Document #: T6CAM-180531 Page | 25 Updated on 05/31/2018
Registration
1. Go to where the Tapit 6 server is installed. 2. Go to Start -> Programs -> Tapit 6 -> Register. 3. The product information window comes up. Click Get Registration Number and then
follow the online instructions.