Strona 1z 14cfs5.tistory.com/upload_control/download.blog?fhandle...InTouch as an ActiveX Container...
14
Tech Note 242 Creating ActiveX Controls for InTouch Using Microsoft Visual Basic All Tech Notes and KBCD documents and software are provided "as is" without warranty of any kind. See the Terms of Use for more information. Topic#: 001010 Created: December 6, 2001 This document will help users understand how to leverage ActiveX technology to create add-on controls to be used inside InTouch applications. Many programming tools can be used to create ActiveX controls, one of the most popular being Visual Basic (VB). It is asumed that you have a working knowledge of Visual Basic. The first part of this document presents some key concepts in ActiveX; the second section shows how to actually use VB to create a sample ActiveX control. ActiveX Controls - A Short Definition Inter-process/Inter-node communication and interaction between different software packages are the driving force behind Dynamic Data Exchange (DDE), Object Linking and Embedding (OLE), Component Object Model (COM, DCOM, COM+), and ActiveX, among other technologies. An ActiveX control is a COM object that supports a customizable, programmatic interface using the methods, events, and properties exposed. Because ActiveX Controls are not executable programs, they must be instantiated and used inside other applications called ActiveX containers. Examples of ActiveX containers include Internet Explorer, Microsoft Office, and windows in InTouch applications. ActiveX Controls Theory Interfaces: Properties, Methods, and Events ActiveX containers and ActiveX controls communicate via interfaces that the controls expose to the outside world. An interface can include a number of Properties, Methods, and Events. Properties define the behavior of the control. For example, Color, Font, Size, and Data Source Name can be properties exposed by a control. When ActiveX controls are used inside InTouch, Properties can be bound to tagnames in different ways, as will be shown later. Methods are functions exposed by the control that allow the container to trigger actions inside the control. To call a method, reference the name of the control, then the name of the function: MyControl3.Connect, YourControl1.CalAvg(1,2,3), #ThatControl7.Do Stuff(); (This last example shows the proper syntax inside InTouch scripts.) Events allow an ActiveX Control to signal to its container when an Event takes place inside the control. For example, Click, MouseMove, or DoneIt. Other concepts involving ActiveX controls include Identification, Encapsulation, Property Pages, Persistence, and Compatibility. These are briefly explained in the following paragraphs. GUIDs Introduction Note: This document is not intended to explain, in just a few pages, how ActiveX controls work, but rather to give an overview of ActiveX and how to create a simple control in VB. Please refer to the Microsoft VB documentation and MSDN for complete details. Part A - Theory of ActiveX Controls and InTouch ActiveX Container Strona 1 z 14
Transcript of Strona 1z 14cfs5.tistory.com/upload_control/download.blog?fhandle...InTouch as an ActiveX Container...
Tech Note 242 Creating ActiveX Controls for InTouch Using Microsoft Visual Basic
All Tech Notes and KBCD documents and software are provided "as is" without warranty of any kind. See the Terms of Use for more information.
Topic#: 001010 Created: December 6, 2001
This document will help users understand how to leverage ActiveX technology to create add-on controls to be used inside InTouch applications. Many programming tools can be used to create ActiveX controls, one of the most popular being Visual Basic (VB). It is asumed that you have a working knowledge of Visual Basic.
The first part of this document presents some key concepts in ActiveX; the second section shows how to actually use VB to create a sample ActiveX control.
ActiveX Controls - A Short Definition
Inter-process/Inter-node communication and interaction between different software packages are the driving force behind Dynamic Data Exchange (DDE), Object Linking and Embedding (OLE), Component Object Model (COM, DCOM, COM+), and ActiveX, among other technologies.
An ActiveX control is a COM object that supports a customizable, programmatic interface using the methods, events, and properties exposed. Because ActiveX Controls are not executable programs, they must be instantiated and used inside other applications called ActiveX containers. Examples of ActiveX containers include Internet Explorer, Microsoft Office, and windows in InTouch applications.
ActiveX Controls Theory
Interfaces: Properties, Methods, and Events
ActiveX containers and ActiveX controls communicate via interfaces that the controls expose to the outside world. An interface can include a number of Properties, Methods, and Events.
Properties define the behavior of the control. For example, Color, Font, Size, and Data Source Name can be properties exposed by a control. When ActiveX controls are used inside InTouch, Properties can be bound to tagnames in different ways, as will be shown later. Methods are functions exposed by the control that allow the container to trigger actions inside the control. To call a method, reference the name of the control, then the name of the function: MyControl3.Connect, YourControl1.CalAvg(1,2,3), #ThatControl7.Do Stuff(); (This last example shows the proper syntax inside InTouch scripts.) Events allow an ActiveX Control to signal to its container when an Event takes place inside the control. For example, Click, MouseMove, or DoneIt.
Other concepts involving ActiveX controls include Identification, Encapsulation, Property Pages, Persistence, and Compatibility. These are briefly explained in the following paragraphs.
GUIDs
Introduction
Note: This document is not intended to explain, in just a few pages, how ActiveX controls work, but rather to give an overview of ActiveX and how to create a simple control in VB. Please refer to the Microsoft VB documentation and MSDN for complete details.
Part A - Theory of ActiveX Controls and InTouch ActiveX Container
Strona 1 z 14
Components in Microsoft Windows, which include ActiveX controls, have a 128-bit unique identification known as the Globally Unique IDentifier (GUID). GUIDs are based on the Date, Time, and the PC where they are generated (the algorithms used to create the GUIDs were designed by the Open Software Foundation -OSF Distributed Computing Environment -DCE). GUIDs identify entries in the Windows registry, such as ActiveX controls, classes, Interfaces, and so on. For example, the GUID for the Calendar control included with MS Office XP is stored in the registry as:
HKEY_CLASSES_ROOT\CLSID\{8E27C92B-1264-101C-8A2F-040224009C02}
Encapsulation: Containment and Aggregation
ActiveX controls can have embedded ActiveX Controls. In that case, the outer control is called a Composite control and the inner controls are constituent controls.
Containment takes place when a control exists within another control. Aggregation (or delegation) is when the external control uses the constituent control's interface as its own.
It is transparent to the client (container) who does the actual job. The concept of encapsulation is presented in the practical section of this Tech Note.
Encapsulation is important because it allows the use of ActiveX controls inside InTouch when they expose properties other than the basic types that are supported in InTouch 7.x, i.e., Discrete, Integer, Real, and Message. The unsupported control can be used as a constituent control for another control that limits the properties to fore-mentioned types.
Property Pages
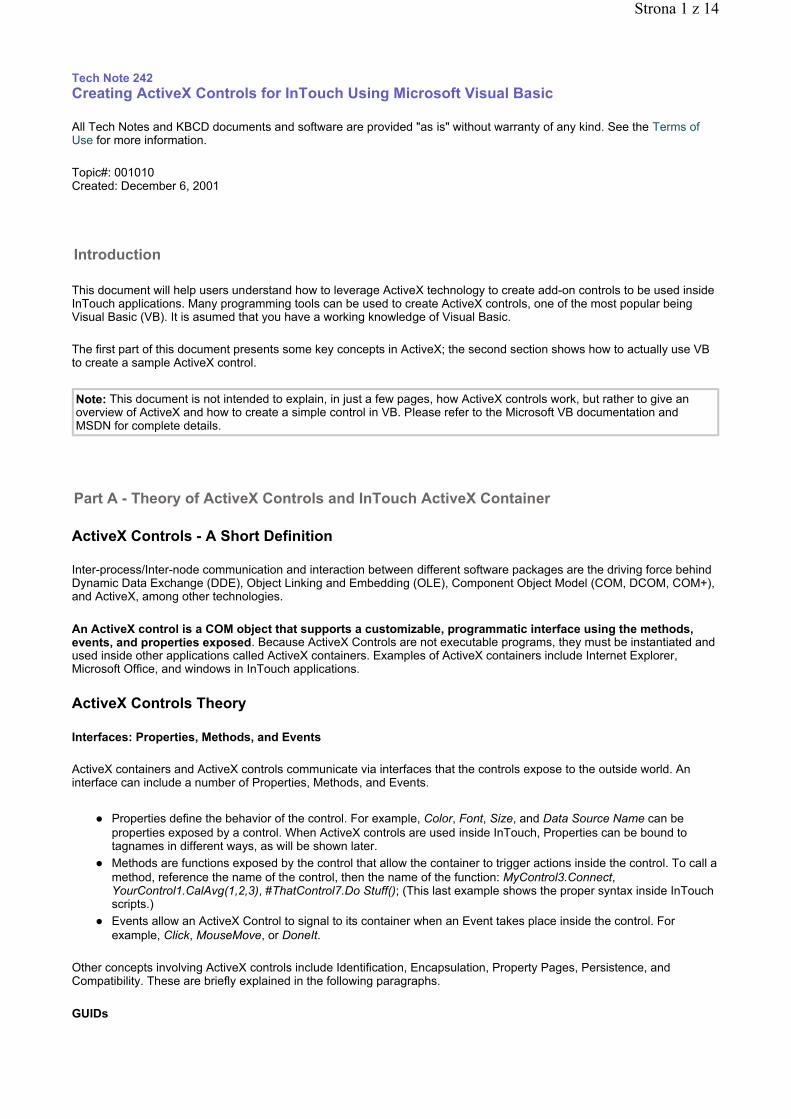
ActiveX controls and containers typically include windows or dialog boxes to view and set the properties; these windows are called Property Pages.
InTouch, an ActiveX container, has a tabbed dialog box that displays user-defined properties or container-defined properties; All controls inside InTouch have default properties that include ControlName, position (Left, Top, Width, Height), and Visible (in Runtime) as shown in Figure 1.
Visual Basic, another ActiveX container, includes Font, Color, and Picture as default properties.
Figure 1: Default Properties in the InTouch 7.x ActiveX Container
Persistence
Persistence allows components to save and later retrieve data. Most containers support IPersistPropertyBag, an intrinsic interface that greatly simplifies the process of reading and writing data for controls. ActiveX controls in Visual Basic include a number of methods, such as WriteProperties and ReadProperties to invoke the PropertyBag object.
For example, the following line saves "Wonderware" to the m_strCompany string property:
Strona 2 z 14
PropBag.WriteProperty ("Wonderware", mbytMyData)
Compatibilty
A compiled ActiveX control includes GUIDs for the control itself and for any object classes or interfaces that it implements. Containers use the class ID to request the control to create an object, and then query the object for the interface ID (IID); an error occurs if it is not found.
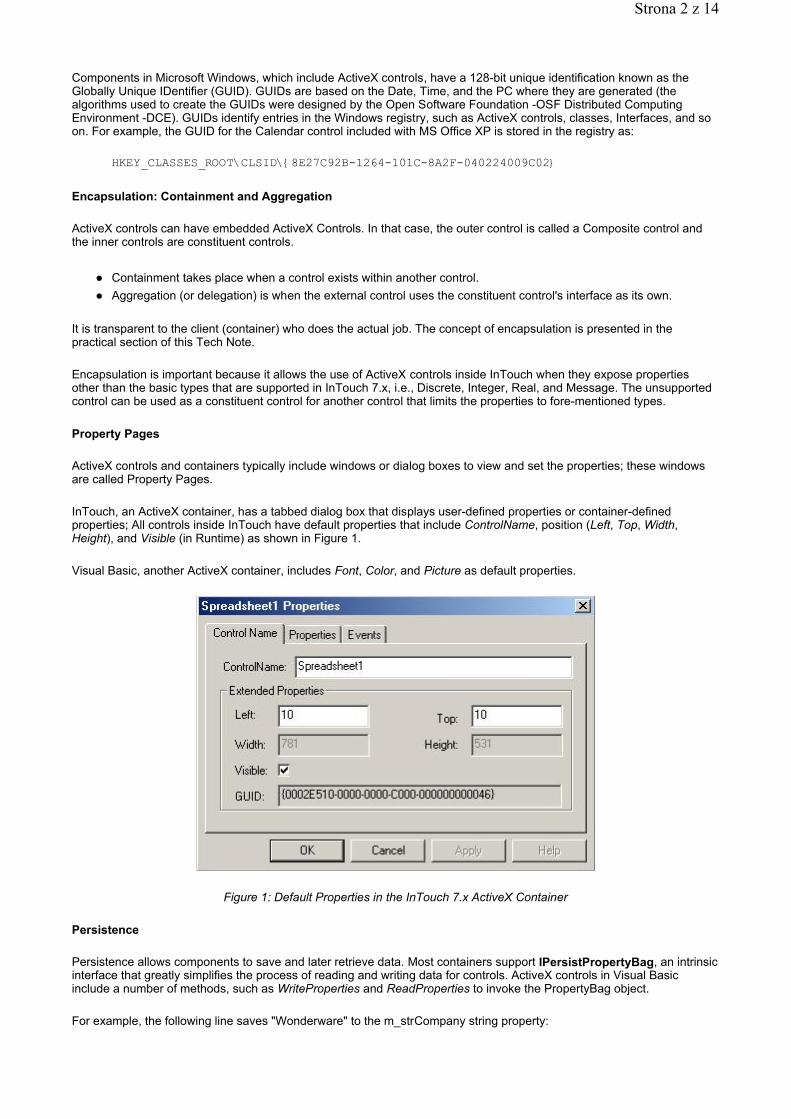
By default, Visual Basic sets the compatibility for ActiveX controls to Project Compatibility, which means new IDs are generated after each recompilation (see Figure 2). Once a control is released, it is recommended to switch from Project (or No Compatibility) to Binary Version Compatibility. Please refer to MSDN or the Visual Basic documentation for more details.
One Golden rule in COM is that you must never change an object's interface once it has been compiled and released because you could be breaking applications that use the object. Create new objects if necessary, and name them with a suffix that identifies subsequent releases: MyObject2, MyObject3, and so on.
Figure 2: Default Version Compatibility in VB ActiveX Control Projects
InTouch as an ActiveX Container
InTouch 7.x handles ActiveX controls as if they are wizards. Wiz.ini is a file in the InTouch directory that keeps track of what wizards have been installed in WindowMaker. Note the difference between registration of an ActiveX control in Microsoft Windows (via regsvr32) and installation. Registration makes any container capable of creating instances of a control; installation in WindowMaker allows the control to be configured. Here is an example of the Wiz.ini entries with 4 ActiveX controls installed:
[Group0001] Count=4 Name=ActiveX Controls Item0001=OCXGOT, 1 Item0002=OCXGOT, 2 Item0003=OCXGOT, 3 Item0004=OCXGOT, 4
Unlike with regular InTouch wizards, the entries in the Wiz.ini do not indicate by name which ActiveX control is which; that job is done in the Ocx.ini file. Ocx.ini indicates the name and GUID for the installed controls. For example:
[ActiveX Controls]
Strona 3 z 14
Count=4 Item0001={8BD21D60-EC42-11CE-9E0D-00AA006002F3},Microsoft Forms 2.0 ToggleButton Item0002={8BD21D10-EC42-11CE-9E0D-00AA006002F3},Microsoft Forms 2.0 TextBox Item0003={EAE50EB0-4A62-11CE-BED6-00AA00611080},Microsoft Forms 2.0 TabStrip Item0004={79176FB0-B7F2-11CE-97EF-00AA006D2776},Microsoft Forms 2.0 SpinButton
Wiz.ini and Ocx.ini are text files stored in the InTouch installation directory and apply to any InTouch application. In contrast, ITGUID.cfg and ITOcx.cfg are binary files that are application-specific. These files keep track of what ActiveX controls have been used (and how many times) in the application, so that unique names are guaranteed and a new name generated when creating a new instance of a control.
Limitations
Developers often compare InTouch ActiveX containers with other containers, such as Microsoft Internet Explorer or Visual Basic. It is very important to understand that not all containers include the same functionality, and InTouch has a number of limitations that must be observed when creating ActiveX controls for InTouch applications:
Supported Data Types
Once again, remember that InTouch does not support data types other than Discrete (boolean), Integer (32-bit numbers), Real (floating point IEEE notation with 32 bits), and Message (strings up to 131 characters). Unsupported data types include variant, pointers, arrays, structures, and parameterized properties.
If you are planning to use an ActiveX control that exposes properties, methods, and events that do not meet the requirements for InTouch data types, you need to create an ActiveX Control that encapsulates, or "wraps" the original ActiveX control and "massages" the unsupported property so that InTouch can use it. It is very easy to create properties and methods for a wrapper (external) control that are mapped to properties and methods in the constituent (internal) control.
The following is an example of a wrapper function to encapsulate an unsupported function that uses the Variant data type.
'Member variable defined as variant Dim m_Prop1 As Variant ... Public Function WrapperFunction() As String Dim MyVariant As Variant MyVariant = UnsupportedFunction(m_Prop1) WrapperFunction = MyVariant End Function
Public Function UnsupportedFunction(ByVal Arg1 As Variant) As Variant ' This function could do anything ' but in this case it just returns the argument UnsupportedFunction = Arg1 End Function
Limited Support for Automation (previously known as OLE Automation)
InTouch provides limited support for Automation objects (libraries) because this functionality was designed and tested to work with InTrackT objects only. Any other libraries and their properties must be tested and validated before deploying them in InTouch applications. The automation script functions are always installed with InTouch; there is no need install InTrack Runtime in order to use them. Please refer to the InTouch/InTrack documentation for details.
The following are some of the supported functions:
{ Object Instantiation } OLE_CreateObject(%MyObject,"MyObject.MyClass"); { Method Call } returncode = %MyObject.Method(parameter list); { Get Property } msgTag = %MyObject.StringProperty;
Strona 4 z 14
{ Set Property } %MyObject.StringProperty = msgTag; { Object Release } OLE_ReleaseObject(%MyObject); { Get Errors } Value = OLE_GetLastObjectError();
OLE functions can also be used against ActiveX controls. For example, The OLE_IsObjectValid(#Control_Name) function can be used to check the existence of a control. Also, OLE_ReleaseObject(#Control_Name) function can be used to make sure that a control releases resources when they are destroyed by closing the window on which they reside.
Properties Must be Bindable in Order to Enable Bi-directional Binding with InTouch Tags
This is not a limitation of InTouch but is documented here because it is a common problem. Developers create controls that expose properties that must be bound to InTouch tags, so that changes in Tags cause changes to the properties and vice versa. The control must support this bi-directional binding, not the container.
To make a property "data-bound," perform the following steps:
1. Open the VB6 ActiveX project in code view. 2. Next, click on Tools/Procedure Attributes and select the property of interest. 3. Finally, click on the Advanced button and check the box "Property is data bound."
Timing Issue Initializing Controls
There is a timing problem between the initialization of a tag and the creation of an ActiveX control. Due to this timing problem, it is impossible to guarantee that the initial value of the tagname will be the value of the associated property in the ActiveX control. To address this issue, Startup and Shutdown events have been added to all controls in the 7.1 release.
The solution is to create an association between the Startup event and an InTouch script. In this script, implement the logic that assigns the tagname's value to the property of the control.
For example:
#ThisControl.Property = SomeTag;
Once the event fires, the script will run and the property of the control and the tag value will be in sync. After doing this, the normal notifications occur between the property and the tag.
Controls Must Reside in InTouch Windows
All instances of ActiveX controls must exist inside InTouch windows. Any attempt to reference a method, property, or event for a control in a window that is not open at that time will result in an error. If it is necessary to keep the window open (loaded in memory) for a control to be referenced all the time, set the window coordinates outside the visible screen area and include the window in the Home Windows configuration.
Setting the Focus on Text Boxes
InTouch may not pass control to Text Boxes inside controls the same way that Internet Explorer or Visual Basic does. If in Runtime you click on a text box inside a control to enter a new value, you have to code your control to explicitly set the focus to the text box. The next example sets the focus on Text1 when the user clicks on it:
Private Sub Text1_Click() Text1.SetFocus End Sub
For more information on ActiveX controls with InTouch, please see the InTouch User's Guide, White Papers, Technical Notes, and Knowledge Base articles available in Wonderware's Web site.
Strona 5 z 14
The following are some references:
Tech Note 96: Using ActiveX Controls in InTouch 7.0 (7.x) Tech Note 117: Using the InTouch 7.0 (7.x) ActiveX Container Tech Note 156: ActiveX Support Basics for InTouch 7.0 (7.x) Service Pack 2 Tech Note 160: How to Fix a Corrupted or Missing ITOCX.CFG File in InTouch White paper: ActiveX Components and the Factory Suite
This section presents the necessary steps to create an ActiveX control that can be used with InTouch. A working knowledge of VB programming is assumed, and a brief explanation of each step is provided. Please refer to the VB and MSDN documentation for more details.
Project Definition
This example delivers an ActiveX control that lists files in a particular directory that can be specified during development or runtime. The control should include the following interface:
The following are the steps to be performed to create the control.
1. Start an ActiveX Control Project in VB. 2. Define the Project Name and Toolbox Icon. 3. Add the constituent control(s) and define the User Interface (UI). 4. Add additional code, classes, functions. 5. Create Properties and the code to make them Persistent. 6. Create Methods. 7. Create Events. 8. Make Properties Bindable if necessary. 9. Define the Control Initialization.
10. Create a handler for the Resize event. 11. Define the Property Pages. 12. Final Considerations: Error Handling, Testing, Packaging (Distribution).
The source code for the FileList control is included; feel free to modify it in any way that suits your requirements.
Click on this link to get a copy of the source code for FileList
Starting an ActiveX Control Project in VB
Part B - Hands-on: Creating an ActiveX Controls with Visual Basic 6
Properties
Path: The current path to a folder. Bi-directional binding to a message tag is required.
File: The file currently selected in the control. This property should be bindable to a message tag.
Filter: The current filter to display files (default value is *|*). Bi-directional binding to a message tag is required.
Other properties must be provided to set the Font, Foreground color (ForeColor), and Background color (BackColor).
MethodsRefresh: Refresh the list of files.
Count: Return the number of files under the current path that meets the specified filter.
Events The control will raise a Changed event flag when the file selected changes.
Note: Although these steps are far from covering all the steps necessary when creating elaborate projects, they should provide you with a good understanding of what it takes to use VB to build ActiveX controls.
Note: Wonderware Technical Support does not support the FileList control and it is provided AS IS.
Strona 6 z 14
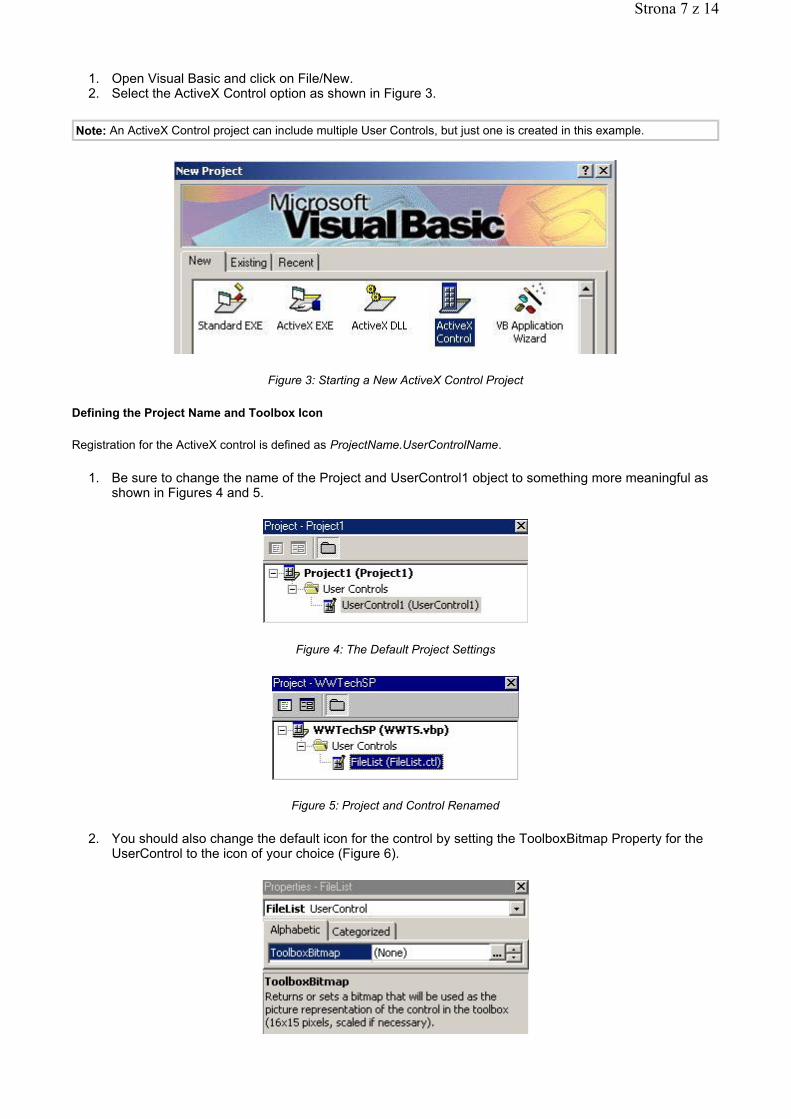
1. Open Visual Basic and click on File/New. 2. Select the ActiveX Control option as shown in Figure 3.
Figure 3: Starting a New ActiveX Control Project
Defining the Project Name and Toolbox Icon
Registration for the ActiveX control is defined as ProjectName.UserControlName.
1. Be sure to change the name of the Project and UserControl1 object to something more meaningful as shown in Figures 4 and 5.
Figure 4: The Default Project Settings
Figure 5: Project and Control Renamed
2. You should also change the default icon for the control by setting the ToolboxBitmap Property for the UserControl to the icon of your choice (Figure 6).
Note: An ActiveX Control project can include multiple User Controls, but just one is created in this example.
Strona 7 z 14
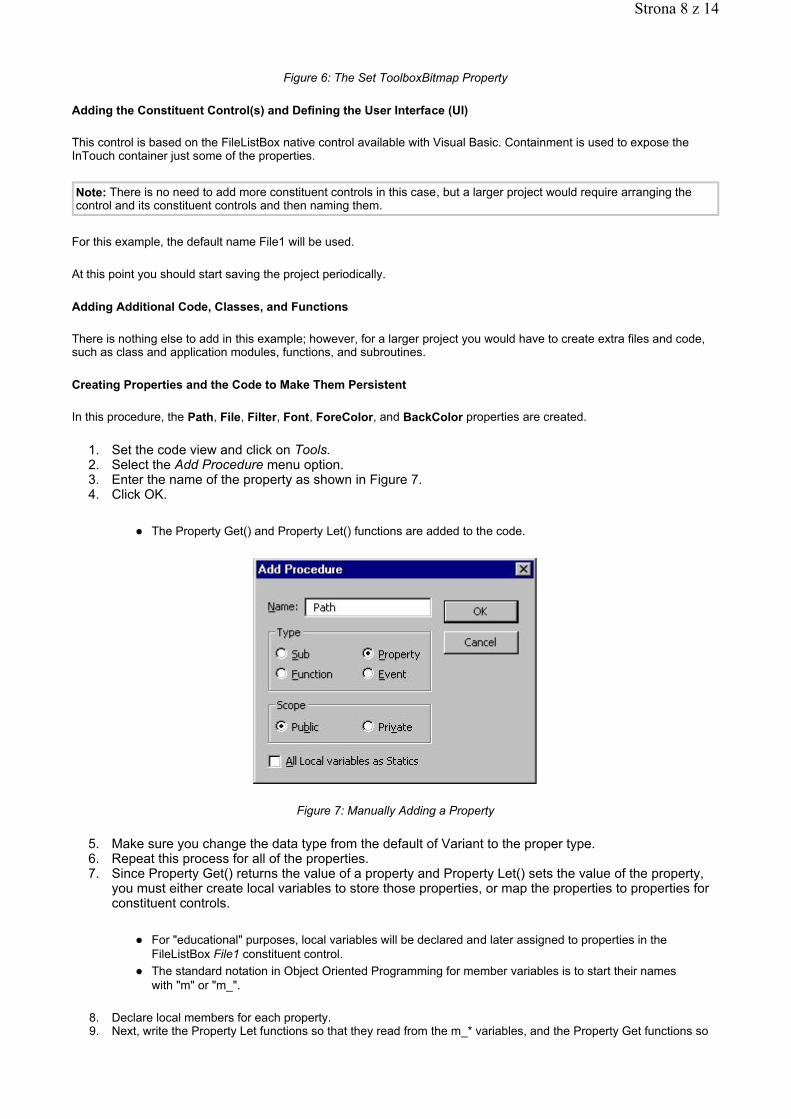
Figure 6: The Set ToolboxBitmap Property
Adding the Constituent Control(s) and Defining the User Interface (UI)
This control is based on the FileListBox native control available with Visual Basic. Containment is used to expose the InTouch container just some of the properties.
For this example, the default name File1 will be used.
At this point you should start saving the project periodically.
Adding Additional Code, Classes, and Functions
There is nothing else to add in this example; however, for a larger project you would have to create extra files and code, such as class and application modules, functions, and subroutines.
Creating Properties and the Code to Make Them Persistent
In this procedure, the Path, File, Filter, Font, ForeColor, and BackColor properties are created.
1. Set the code view and click on Tools. 2. Select the Add Procedure menu option. 3. Enter the name of the property as shown in Figure 7. 4. Click OK.
The Property Get() and Property Let() functions are added to the code.
Figure 7: Manually Adding a Property
5. Make sure you change the data type from the default of Variant to the proper type. 6. Repeat this process for all of the properties. 7. Since Property Get() returns the value of a property and Property Let() sets the value of the property,
you must either create local variables to store those properties, or map the properties to properties for constituent controls.
For "educational" purposes, local variables will be declared and later assigned to properties in the FileListBox File1 constituent control. The standard notation in Object Oriented Programming for member variables is to start their names with "m" or "m_".
8. Declare local members for each property. 9. Next, write the Property Let functions so that they read from the m_* variables, and the Property Get functions so
Note: There is no need to add more constituent controls in this case, but a larger project would require arranging the control and its constituent controls and then naming them.
Strona 8 z 14
that they write to the m_* variables.
The following is an example of the code for the Path property:
Dim m_Path As String ... Public Property Get Path() As String Path = m_Path End Property
Public Property Let Path(ByVal vNewValue As String) m_Path = vNewValue End Property
Persistence
Persistence allows properties to retain their values. VB uses the PropertyBag object to read/write property values. To make a property persistent, implement the PropertyChanged method in the Property Let procedure. For example: PropertyChanged "Path"
PropertyChanged signals a change in a property; the WriteProperties event will be fired to actually cause the PropertyBag object to write the property. For example:
Private Sub UserControl_WriteProperties(PropBag As PropertyBag) PropBag.WriteProperty "Path", m_Path End Sub
Similarly, the ReadProperties event is fired to read a property from the PropertyBag. For example:
Private Sub UserControl_ReadProperties(PropBag As PropertyBag) m_Path = PropBag.ReadProperty("Path") End Sub
In addition to the WriteProperties and ReadProperties, the UserControl object in VB has a method called InitProperties that allows you to set the initial value for the properties when the control is initialized. It is also recommended to define constants that hold the default value for each property.
The following is the code to add for the constant declaration and property initialization:
'Default Property Values: Const m_def_Path = "c:\" Const m_def_File = "" Const m_def_Filter = "*|*"
'Set Initial Property Values: Private Sub UserControl_InitProperties() m_Path = m_def_Path m_File = m_def_File m_Filter = m_def_Filter End Sub
At this point the defined properties have to be assigned to the FileList File1 constituent control. The File1 control has Path, FileName, and Pattern properties that will be used with m_Path, m_File, and m_Filter, respectively. It is not always necessary to create member variables to store the value of properties since they can be assigned (mapped) directly to properties in constituent controls.
The following is the necessary code to change the Path property for File1 when the m_Path variable changes; when the property is read from storage; or when the property is initialized (repeat this process properties in a similar fashion):
'Changes to m_Path Public Property Let Path(ByVal vNewValue As String) m_Path = vNewValue
Strona 9 z 14
File1.Path = m_Path 'this line updates File1.Path property PropertyChanged "Path" End Property
'Read property from storage Private Sub UserControl_ReadProperties(PropBag As PropertyBag) m_Path = PropBag.ReadProperty("Path") File1.Path = m_Path 'this line updates File1.Path property ... End Sub
'Set Initial Property Values: Private Sub UserControl_InitProperties() m_Path = m_def_Path File1.Path = m_File 'this line updates File1.Path property ... End Sub
If no member variables are declared, it is possible to map properties directly to the properties in a constituent control. For example:
'Changes to font Public Property Let Font(ByVal vNewValue As Font) File1.Font = vNewValue PropertyChanged "Font" End Property
'Read property from storage Private Sub UserControl_ReadProperties(PropBag As PropertyBag) File1.Font = PropBag.ReadProperty("Font") ... End Sub
'Set Initial Property Values: Private Sub UserControl_InitProperties() File1.Font = m_def_Font ... End Sub
The ActiveX Control Interface Wizard
Creating Properties can be a long, repetitive process; that is why Microsoft VB provides an ActiveX Interface Wizard that simplifies the process of creating Properties, Methods, and Events.
1. To load this wizard, click on the Add-Ins menu option, then select Add-In Manager. 2. To load a tool, just double-click on it (Figure 8).
Figure 8: VB 6 ActiveX Ctrl Interface Loaded
3. Once loaded, you can run the wizard by clicking on the Add-Ins menu option, then selecting the ActiveX Control Interface Wizard.
Creating Methods
Note: The use of the Microsoft ActiveX Interface Wizard is outside the scope of this Tech Note. However, the wizard is simple to use. You may either follow its instructions as you are using it, or obtain more information about its use from the Microsoft MSDN Web site.
Strona 10 z 14
Methods are quite simple; they are public functions that the container can execute. For example, the Refresh and Count methods in our control are just a subroutine and a function to call the Refresh method and ListCount property in the File1 control:
Public Sub Refresh() File1.Refresh End Sub Public Function Count() As Integer Count = File1.ListCount End Function
Creating Events
Events signal to the container that something has occurred inside the control. To create an event:
1. Declare the event. 2. Then create the subroutine that raises it.
For example, the Changed event is raised when a user clicks on the File1 object:
'Event Declarations: Event Changed() ... Private Sub File1_Click() m_File = File1.FileName PropertyChanged "File" RaiseEvent Changed End Sub
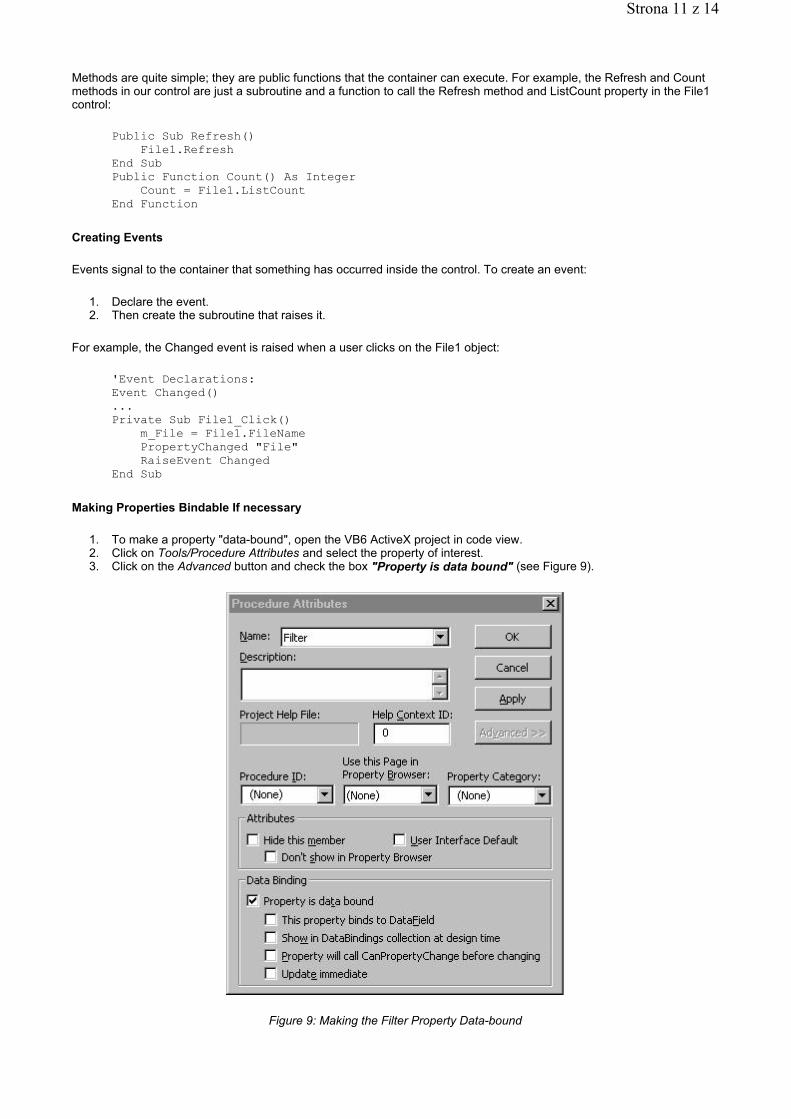
Making Properties Bindable If necessary
1. To make a property "data-bound", open the VB6 ActiveX project in code view. 2. Click on Tools/Procedure Attributes and select the property of interest. 3. Click on the Advanced button and check the box "Property is data bound" (see Figure 9).
Figure 9: Making the Filter Property Data-bound
Strona 11 z 14
Defining the Control Initialization
The control's Initialize event occurs when the application container creates an instance of the control. In this example there is no need to perform any further initialization because the InitProperties event already handled that. Please refer to the MSDN documentation for detailed information on the events that take place when a control is instantiated and/or destroyed.
Creating a Handler for the Resize Event
When the ActiveX control is resized in development, the Resize event is called and visible constituent controls can be resized accordingly at this point. It is up to the programmer to decide which controls will be resized or stay the same. For this example, the size of the FileList control and the UserControl is matched:
Private Sub UserControl_Resize() File1.Height = UserControl.Height File1.Width = UserControl.Width End Sub
It is also possible to use the ScaleWidth and ScaleHeight properties.
The Ambient Properties
Ambient properties provide the ability to have the control match some of the properties of the container. Containers can also signal to their controls that changes have occurred. The AmbientChanged event allows the controls to respond to that event. Unlike VB, the InTouch container does not support the AmbientChanged event, which can be used for an ActiveX control to match the font, color, and alignment of the form where it resides. For example:
Private Sub UserControl_AmbientChanged(PropertyName As String) UserControl.Font = Ambient.Font UserControl.BackColor = Ambient.BackColor UserControl.ForeColor = Ambient.ForeColor End Sub
What InTouch does support is the Ambient.UserMode, which determines if the control is running in runtime mode (UserMode = true). For example, you can use the UserMode to prevent users from writing to the File property:
Public Property Let File(ByVal vNewValue As String) If Ambient.UserMode Then MsgBox "File Property is read only" Else m_File = vNewValue File1.FileName = m_File PropertyChanged "File" End If End Property
Defining the Property Pages
Property Pages provide a professional, user-friendly way to set properties for a control. Additionally, there are complex properties that require more than a simple textbox to set them up. It is possible to create the property pages from scratch in VB, but there is a wizard that works fine in most cases or at least provides a good starting point. Load the wizard in the same fashion that the Interface wizard was loaded, and follow the instructions provided.
Property Pages is an object in VB that exposes a number of properties, methods, and events. Please refer to the VB and MSDN documentation for details, because use of Property Pages is beyond the scope of this document.
Other Considerations
Professional controls require good error handling, testing, and packaging (Distribution). Once again, please refer to the Microsoft documentation for details on these subjects.
Error Handling
VB 6 has built-in support, albeit limited, to handle exceptions. Error-trapping blocks start with the On Error statement. There are different courses of action in case an error is detected; an error handler can just display a message, attempt to
Strona 12 z 14
correct the situation, or resume execution after the line that caused the error.
It is very important to include error handlers when reading properties for the control. For example:
Private Sub UserControl_ReadProperties(PropBag As PropertyBag) On Error GoTo ErrRead m_Path = PropBag.ReadProperty("Path", m_def_Path) m_File = PropBag.ReadProperty("File", m_def_File) m_Filter = PropBag.ReadProperty("Filter", m_def_Filter) Set File1.Font = PropBag.ReadProperty("Font", Ambient.Font) File1.ForeColor = PropBag.ReadProperty("ForeColor") File1.BackColor = PropBag.ReadProperty("BackColor") File1.Path = m_Path File1.FileName = m_File File1.Pattern = m_Filter Exit Sub ErrRead: Select Case Err.Number Case 68 'Device Unavailable MsgBox m_Path & " Unavailable; setting path to " & m_def_Path m_Path = m_def_Path Case Else m_Filter = "*.*" ' Display unanticipated error message. Msg = "Unanticipated error " & Err.Number Msg = Msg & ": " & Err.Description MsgBox Msg, vbExclamation End Select Resume Next End Sub
Testing
Once compiled into an OCX file (VB takes care of the registration), the control can be used with any container. By default, running an ActiveX control launches Internet Explorer as the container, but it is recommended to use the ActiveX Control Test Container that ships with Visual Studio 6 or to create a VB Test Project.
To create a test project while the ActiveX control is being created, perform the following steps:
1. Click on the File menu option, then the Add Project option. 2. Select a standard executable project and add a form to it. 3. Within the form, create an instance of the control and write the necessary code to test the properties, methods,
and events. 4. The last step is to right-click on the test project and select the "Set as Start Up" option so that when the project
runs, the test form is launched instead of Internet Explorer (Figure 10).
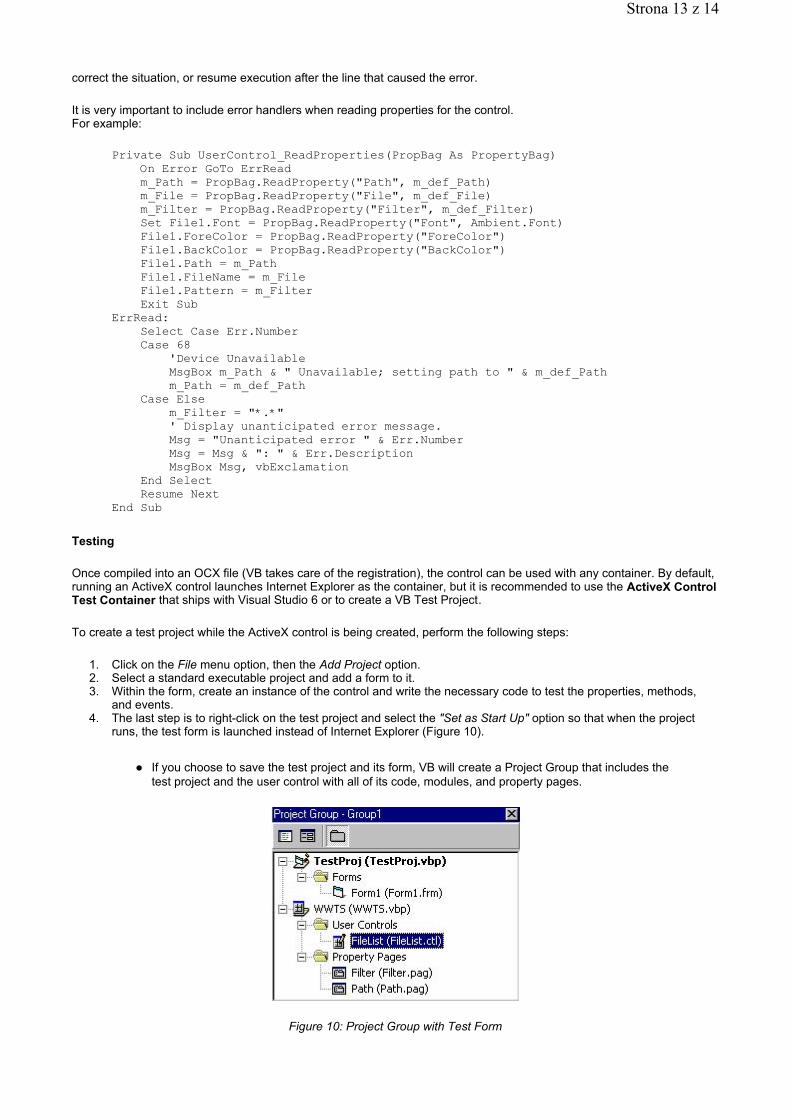
If you choose to save the test project and its form, VB will create a Project Group that includes the test project and the user control with all of its code, modules, and property pages.
Figure 10: Project Group with Test Form
Strona 13 z 14
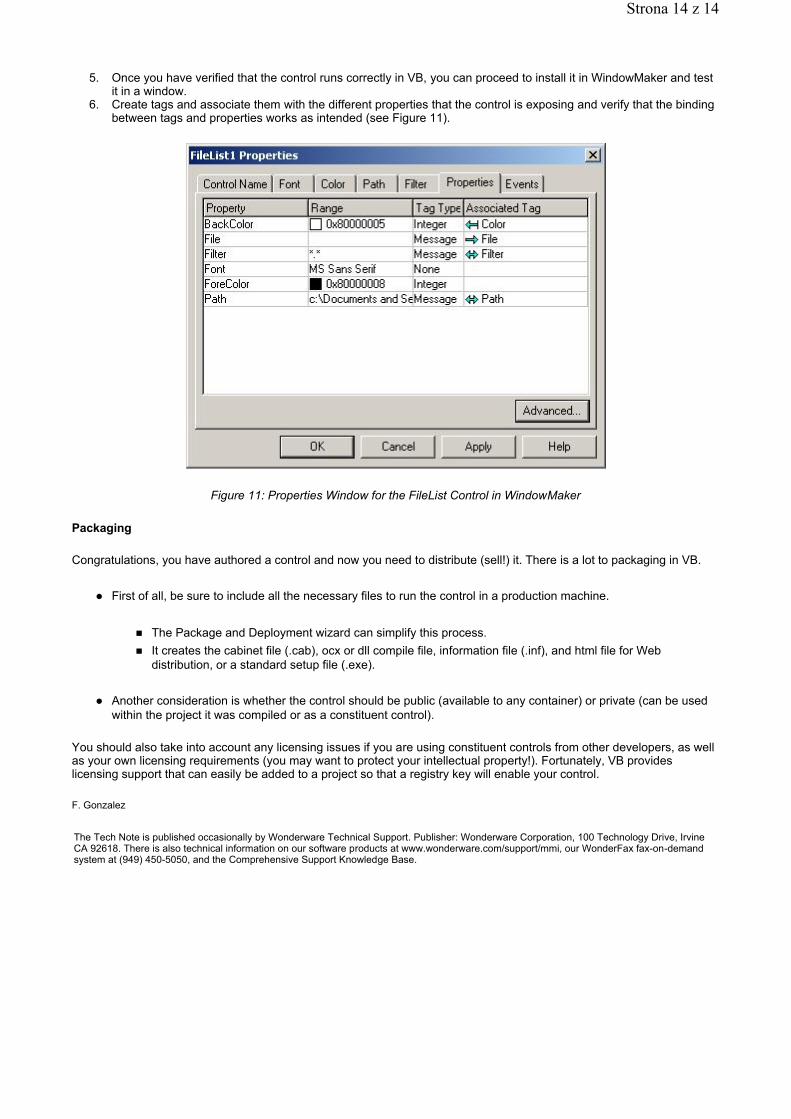
5. Once you have verified that the control runs correctly in VB, you can proceed to install it in WindowMaker and test it in a window.
6. Create tags and associate them with the different properties that the control is exposing and verify that the binding between tags and properties works as intended (see Figure 11).
Figure 11: Properties Window for the FileList Control in WindowMaker
Packaging
Congratulations, you have authored a control and now you need to distribute (sell!) it. There is a lot to packaging in VB.
First of all, be sure to include all the necessary files to run the control in a production machine.
The Package and Deployment wizard can simplify this process. It creates the cabinet file (.cab), ocx or dll compile file, information file (.inf), and html file for Web distribution, or a standard setup file (.exe).
Another consideration is whether the control should be public (available to any container) or private (can be used within the project it was compiled or as a constituent control).
You should also take into account any licensing issues if you are using constituent controls from other developers, as well as your own licensing requirements (you may want to protect your intellectual property!). Fortunately, VB provides licensing support that can easily be added to a project so that a registry key will enable your control.
F. Gonzalez
The Tech Note is published occasionally by Wonderware Technical Support. Publisher: Wonderware Corporation, 100 Technology Drive, Irvine CA 92618. There is also technical information on our software products at www.wonderware.com/support/mmi, our WonderFax fax-on-demand system at (949) 450-5050, and the Comprehensive Support Knowledge Base.
Strona 14 z 14