STATION USER GUIDE - textfiles.compdf.textfiles.com/manuals/TELECOM-F-R/Panasonic DBS Users...
87
STATION USER GUIDE Panasonic Panasonic Panasonic Panasonic ® Please read these instructions completely before using this unit. Section 755 Issued April 2000 Digital Business System 44-Series Key Telephones (Supports DBS, and 824)
Transcript of STATION USER GUIDE - textfiles.compdf.textfiles.com/manuals/TELECOM-F-R/Panasonic DBS Users...

STATIONUSERGUIDE
PanasonicPanasonicPanasonicPanasonic®®®®
Please read these instructions completely before using this unit.
Section 755Issued April 2000
Digital Business System44-Series Key Telephones
(Supports DBS, and 824)
The contents of this manual are subject to change without notice and do not constitute a commitment on the part of Panasonic Telecommunication Systems Company (PTSC). Every effort has been made to ensure the accuracy of this document. However, due to ongoing product improvements and revisions, Panasonic cannot guarantee the accuracy of printed material after the date of publication nor can it accept responsibility for errors or omissions. Panasonic will update and revise this document as needed.
The software and hardware described in this document may be used or copied only in accordance with the terms of the license pertaining to said software or hardware.
Reproduction, publication, or duplication of this manual, or any part thereof, in any manner, mechanically, electronically, or photographically, is prohibited without permission of the Panasonic Telecommunication Systems Company (PTSC).
© Copyright 2000 by Panasonic Telecommunication Systems Company.
All rights reserved.

Preface
PrefaceThe Station User Guide is for anyone who uses a Panasonic 44-Series digital telephone in conjunction with the Panasonic DBS. The DBS (Digital Business System) is a telephone system that provides you with a powerful set of features for handling calls.
This manual provides an overview of the following digital phones and offers detailed information about using the features provided by the DBS:
• VB-42210 - 16 key standard phone• VB-44211 - 16 key speakerphone• VB-44220 - 22 key standard phone• VB-44223 - 22 key small display speakerphone• VB-44225 - 22 key large display speakerphone• VB-44230 - 34 key standard phone• VB-44233 - 34 key small display speakerphone
Note: The following features of 44-Series Phones require DBS software version CPC-AII/B v. 8.0 or higher, CPC-S/M v. 2.0 or higher, or CPC-EX v. 1.0 or higher.
• Handset Mute• Off-hook Monitor• Soft keys on small-display phones• Directory and Variable Modes on small-display phones• Message key on large-display phones
How to Use This Manual
We recommend that you read the entire manual before using your digital phone, in order to get a clear idea of its capabilities.
What This Manual Contains
Issued April 2000 i
This manual contains the following chapters:
Chapter and Title Description
Chapter 1, “Understanding Your Phone”
Describes features of Panasonic digital telephones.
Chapter 2, “Setting Up Your Phone” Provides procedures for setting up tele-phone features such as display contrast.
Chapter 3, “Placing Outside Calls” Provides several procedures for making outside calls.

Preface
ii
Notation Used
This manual uses the following conventions:
• References to chapters and sections are enclosed in quotation marks, and include the title and page number, for example: “Assigning FF Keys” on page 25.
• References to information you are to dial is printed in boldface, mixed-case characters, for example: Dial 73*.
• References to the telephone keypad are printed using bold, uppercase characters, for example: Press HOLD.
For More Information
For more information about features available with Panasonic DBS systems and digital phones, contact your system administrator or DBS dealer, or refer to the Panasonic publication Feature Operation (Section 700).
Chapter 4, “Answering Calls” Provides several procedures for answer-ing calls.
Chapter 5, “Communicating Within Your Office”
Provides procedures for handling inter-nal calls.
Chapter 6, “Using Additional Features” Provides procedures for using advanced features.
Appendix A, “Dial Code List” Provides a list of dial codes used for programming FF keys.
Chapter and Title Description
Issued April 2000

Contents
Preface . . . . . . . . . . . . . . . . . . . . . . . . . . . . . . . . . . . . . . . . . . . . . . . . . . . . . . . . . . . . i
1. Understanding Your Phone. . . . . . . . . . . . . . . . . . . . . . . . . . 17
Non-Display Phones . . . . . . . . . . . . . . . . . . . . . . . . . . . . . . . . . . . . . . . . . . . . . . . . . 18Small-Display Phones. . . . . . . . . . . . . . . . . . . . . . . . . . . . . . . . . . . . . . . . . . . . . . . 110
Using the Soft Keys on a Small-Display Phone . . . . . . . . . . . . . . . . . . . . . . . . 112Using Variable Mode on a Small-Display Phone . . . . . . . . . . . . . . . . . . . . . . . 114
Large-Display Phones. . . . . . . . . . . . . . . . . . . . . . . . . . . . . . . . . . . . . . . . . . . . . . . 115Using the Soft Keys on a Large-Display Phone . . . . . . . . . . . . . . . . . . . . . . . . 117
Display Information . . . . . . . . . . . . . . . . . . . . . . . . . . . . . . . . . . . . . . . . . . . . . . . . 118
2. Setting Up Your Phone . . . . . . . . . . . . . . . . . . . . . . . . . . . . 223
Volume and Display Settings . . . . . . . . . . . . . . . . . . . . . . . . . . . . . . . . . . . . . . . . . 224Adjusting Sound Volumes . . . . . . . . . . . . . . . . . . . . . . . . . . . . . . . . . . . . . . . . . 224Adjusting the Ringing Volume . . . . . . . . . . . . . . . . . . . . . . . . . . . . . . . . . . . . . 224Adjusting the Display Contrast . . . . . . . . . . . . . . . . . . . . . . . . . . . . . . . . . . . . . 224
FF Keys. . . . . . . . . . . . . . . . . . . . . . . . . . . . . . . . . . . . . . . . . . . . . . . . . . . . . . . . . . 225Assigning FF Keys. . . . . . . . . . . . . . . . . . . . . . . . . . . . . . . . . . . . . . . . . . . . . . . 225Clearing an FF Key’s Programming . . . . . . . . . . . . . . . . . . . . . . . . . . . . . . . . . 226Checking FF Key Setup . . . . . . . . . . . . . . . . . . . . . . . . . . . . . . . . . . . . . . . . . . . 226
Setting Up Personal Speed Dialing. . . . . . . . . . . . . . . . . . . . . . . . . . . . . . . . . . . . . 226Assigning PSD Numbers to One-Touch or Soft Keys. . . . . . . . . . . . . . . . . . . . 228Checking PSD Numbers . . . . . . . . . . . . . . . . . . . . . . . . . . . . . . . . . . . . . . . . . . 229Clearing a PSD Number From a One-Touch or Soft Key . . . . . . . . . . . . . . . . . 230Assigning Names to PSD Numbers . . . . . . . . . . . . . . . . . . . . . . . . . . . . . . . . . . 230Clearing Out a Name Assigned To a PSD Key . . . . . . . . . . . . . . . . . . . . . . . . . 233
3. Placing Outside Calls . . . . . . . . . . . . . . . . . . . . . . . . . . . . . 335
Making Calls. . . . . . . . . . . . . . . . . . . . . . . . . . . . . . . . . . . . . . . . . . . . . . . . . . . . . . 336
Us
Re
Issued April 2000 3
Using an Outside Line Access Group . . . . . . . . . . . . . . . . . . . . . . . . . . . . . . . . 336Accessing an Outside Line with an FF Key. . . . . . . . . . . . . . . . . . . . . . . . . . . . 336Calling If the DBS is Behind a PBX . . . . . . . . . . . . . . . . . . . . . . . . . . . . . . . . . 336ing Speed Dialing . . . . . . . . . . . . . . . . . . . . . . . . . . . . . . . . . . . . . . . . . . . . . . . . 337Using Personal Speed Dialing . . . . . . . . . . . . . . . . . . . . . . . . . . . . . . . . . . . . . . 337Using System Speed Dialing . . . . . . . . . . . . . . . . . . . . . . . . . . . . . . . . . . . . . . . 337Chaining Speed Dial Numbers. . . . . . . . . . . . . . . . . . . . . . . . . . . . . . . . . . . . . . 340dialing Outside Numbers . . . . . . . . . . . . . . . . . . . . . . . . . . . . . . . . . . . . . . . . . . 341Redialing . . . . . . . . . . . . . . . . . . . . . . . . . . . . . . . . . . . . . . . . . . . . . . . . . . . . . . 341Auto-Redial . . . . . . . . . . . . . . . . . . . . . . . . . . . . . . . . . . . . . . . . . . . . . . . . . . . . 341

Contents
4
Auto-Repeat Dialing . . . . . . . . . . . . . . . . . . . . . . . . . . . . . . . . . . . . . . . . . . . . . 341Saving and Redialing a Number . . . . . . . . . . . . . . . . . . . . . . . . . . . . . . . . . . . . 341
4. Answering Calls . . . . . . . . . . . . . . . . . . . . . . . . . . . . . . . . . . 443
Picking Up Calls . . . . . . . . . . . . . . . . . . . . . . . . . . . . . . . . . . . . . . . . . . . . . . . . . . . 444Holding Calls . . . . . . . . . . . . . . . . . . . . . . . . . . . . . . . . . . . . . . . . . . . . . . . . . . . . . 444
Putting a Call on Hold . . . . . . . . . . . . . . . . . . . . . . . . . . . . . . . . . . . . . . . . . . . . 444Answering Two Calls. . . . . . . . . . . . . . . . . . . . . . . . . . . . . . . . . . . . . . . . . . . . . 445
Using Call Park. . . . . . . . . . . . . . . . . . . . . . . . . . . . . . . . . . . . . . . . . . . . . . . . . . . . 445Parking Calls from an Attendant Phone. . . . . . . . . . . . . . . . . . . . . . . . . . . . . . . 445Picking Up Calls Parked by the Attendant. . . . . . . . . . . . . . . . . . . . . . . . . . . . . 446Parking Calls from an Extension . . . . . . . . . . . . . . . . . . . . . . . . . . . . . . . . . . . . 446Picking Up Calls Parked by an Extension . . . . . . . . . . . . . . . . . . . . . . . . . . . . . 446
Transferring Calls . . . . . . . . . . . . . . . . . . . . . . . . . . . . . . . . . . . . . . . . . . . . . . . . . . 446Screened Transfers. . . . . . . . . . . . . . . . . . . . . . . . . . . . . . . . . . . . . . . . . . . . . . . 446Unscreened Transfers. . . . . . . . . . . . . . . . . . . . . . . . . . . . . . . . . . . . . . . . . . . . . 447
5. Communicating Within Your Office . . . . . . . . . . . . . . . . . . 549
Calling Other Extensions . . . . . . . . . . . . . . . . . . . . . . . . . . . . . . . . . . . . . . . . . . . . 550Making Internal Calls. . . . . . . . . . . . . . . . . . . . . . . . . . . . . . . . . . . . . . . . . . . . . 550Switching Between Tone and Voice Calling . . . . . . . . . . . . . . . . . . . . . . . . . . . 550
Paging . . . . . . . . . . . . . . . . . . . . . . . . . . . . . . . . . . . . . . . . . . . . . . . . . . . . . . . . . . . 550Calling Paging Groups 00-07. . . . . . . . . . . . . . . . . . . . . . . . . . . . . . . . . . . . . . . 550Answering a Page (Meet-Me Answer). . . . . . . . . . . . . . . . . . . . . . . . . . . . . . . . 551
Using Call Forwarding . . . . . . . . . . . . . . . . . . . . . . . . . . . . . . . . . . . . . . . . . . . . . . 551Setting Up Call Forwarding . . . . . . . . . . . . . . . . . . . . . . . . . . . . . . . . . . . . . . . . 551Cancelling Call Forwarding . . . . . . . . . . . . . . . . . . . . . . . . . . . . . . . . . . . . . . . . 553
Using Call Waiting . . . . . . . . . . . . . . . . . . . . . . . . . . . . . . . . . . . . . . . . . . . . . . . . . 553Setting Up Call Waiting. . . . . . . . . . . . . . . . . . . . . . . . . . . . . . . . . . . . . . . . . . . 553Answering Call Waiting. . . . . . . . . . . . . . . . . . . . . . . . . . . . . . . . . . . . . . . . . . . 554
Us
UsUs
An
Issued April 2000
Using Camp-on . . . . . . . . . . . . . . . . . . . . . . . . . . . . . . . . . . . . . . . . . . . . . . . . . 554ing Callback Messages . . . . . . . . . . . . . . . . . . . . . . . . . . . . . . . . . . . . . . . . . . . . 556Sending a Callback Message . . . . . . . . . . . . . . . . . . . . . . . . . . . . . . . . . . . . . . . 556Responding to Callback Messages. . . . . . . . . . . . . . . . . . . . . . . . . . . . . . . . . . . 556Scrolling Through Messages . . . . . . . . . . . . . . . . . . . . . . . . . . . . . . . . . . . . . . . 558ing Do-Not-Disturb . . . . . . . . . . . . . . . . . . . . . . . . . . . . . . . . . . . . . . . . . . . . . . 558ing Absence Messages . . . . . . . . . . . . . . . . . . . . . . . . . . . . . . . . . . . . . . . . . . . . 558Assigning the Absence Message . . . . . . . . . . . . . . . . . . . . . . . . . . . . . . . . . . . . 558Cancelling Absence Messages . . . . . . . . . . . . . . . . . . . . . . . . . . . . . . . . . . . . . . 559nouncing to Busy Extensions. . . . . . . . . . . . . . . . . . . . . . . . . . . . . . . . . . . . . . . 559

Contents
Making an Announcement . . . . . . . . . . . . . . . . . . . . . . . . . . . . . . . . . . . . . . . . . 559Answering an Announcement . . . . . . . . . . . . . . . . . . . . . . . . . . . . . . . . . . . . . . 560Transferring Calls with an Announcement . . . . . . . . . . . . . . . . . . . . . . . . . . . . 561
Breaking Into a Call . . . . . . . . . . . . . . . . . . . . . . . . . . . . . . . . . . . . . . . . . . . . . . . . 561
6. Using Additional Features. . . . . . . . . . . . . . . . . . . . . . . . . . 663
Using the Mute Key . . . . . . . . . . . . . . . . . . . . . . . . . . . . . . . . . . . . . . . . . . . . . . . . 664Using Off-Hook Monitor . . . . . . . . . . . . . . . . . . . . . . . . . . . . . . . . . . . . . . . . . . . . 664Locking Your Extension. . . . . . . . . . . . . . . . . . . . . . . . . . . . . . . . . . . . . . . . . . . . . 664Switching Between Pulse and Tone Calling. . . . . . . . . . . . . . . . . . . . . . . . . . . . . . 665Making Conference Calls . . . . . . . . . . . . . . . . . . . . . . . . . . . . . . . . . . . . . . . . . . . . 665
Adding an Outside Line . . . . . . . . . . . . . . . . . . . . . . . . . . . . . . . . . . . . . . . . . . . 665Adding an Extension to a Conference . . . . . . . . . . . . . . . . . . . . . . . . . . . . . . . . 665Dropping Out of a Conference Call . . . . . . . . . . . . . . . . . . . . . . . . . . . . . . . . . . 666
Using a Headset . . . . . . . . . . . . . . . . . . . . . . . . . . . . . . . . . . . . . . . . . . . . . . . . . . . 666Controlling Internal Dial Tone . . . . . . . . . . . . . . . . . . . . . . . . . . . . . . . . . . . . . . . . 666Controlling Background Music . . . . . . . . . . . . . . . . . . . . . . . . . . . . . . . . . . . . . . . 666Using the Reminder Alarm . . . . . . . . . . . . . . . . . . . . . . . . . . . . . . . . . . . . . . . . . . . 667
Non-Display and Small-Display Phones . . . . . . . . . . . . . . . . . . . . . . . . . . . . . . 667Large-Display Phones . . . . . . . . . . . . . . . . . . . . . . . . . . . . . . . . . . . . . . . . . . . . 667
Using Caller ID. . . . . . . . . . . . . . . . . . . . . . . . . . . . . . . . . . . . . . . . . . . . . . . . . . . . 667Caller ID Display . . . . . . . . . . . . . . . . . . . . . . . . . . . . . . . . . . . . . . . . . . . . . . . . 667Caller ID Call Log . . . . . . . . . . . . . . . . . . . . . . . . . . . . . . . . . . . . . . . . . . . . . . . 668
Using Voice Mail . . . . . . . . . . . . . . . . . . . . . . . . . . . . . . . . . . . . . . . . . . . . . . . . . . 671Using a Personal Speed Dial Number for Voice Mail Access. . . . . . . . . . . . . . 672Using an FF Key for Voice Mail Access . . . . . . . . . . . . . . . . . . . . . . . . . . . . . . 672Using the MSG Key for Voice Mail Access . . . . . . . . . . . . . . . . . . . . . . . . . . . 673Using an FF Key for Voice Mail Transfer . . . . . . . . . . . . . . . . . . . . . . . . . . . . . 673
Appendix A. Dial Code List . . . . . . . . . . . . . . . . . . . . . . . . . . . 775
Issued April 2000 5

Contents
6
Issued April 2000
1. Understanding Your Phone
DB
1. Understanding Your Phone
Becoming familiar with your Panasonic 44-Series digital phone will enable you to effectively use its call-handling features.
Note: Some features may not be available on your phone. For instance, the following features of 44-Series phones require DBS software version CPC-AII/B v. 8.0 or higher, CPC-S/M, v. 2.0 or higher, or CPC-EX v. 1.0 or higher.
• Handset Mute• Off-hook Monitor• Separate speaker volumes for internal vs. CO call• Soft keys on small-display phones• Directory and Variable Modes on small-display phones• Message key on large-display phones
For additional information, see your system administrator or DBS dealer.
This chapter covers the following topics:
Topic Page
Non-Display Phones 8
Small-Display Phones 10
Large-Display Phones 15
Display Information 18
S-32-755 Issued April 2000 7

1. Understanding Your Phone
8
Non-Display Phones
Non-display phones, such as the model shown in Figure 1, do not have an LCD display. Table 1 on page 9 describes the features that are typical of non-display phones.
Figure 1. Non-display 44-Series phone
1
DND/CFABC
JKL
TUV
G HI
PRS
DEF
M NO
W XY
M UTE
EXT
REDIAL
PROG
CO NF
M UTE
AUTO
DIGITAL BUSINESS SYSTEM
1
4
7
2
5
8
3
6
9
10
5
43
2
11
18
6
7
Issued April 2000 DBS-32-755
OPERON/OFF
FLASH
Speakerphone
VOLUM E HOLD
* 0
12
13
17
8
914
15 16

1. Understanding Your Phone
DB
Table 1. Non-display phone features
# Feature Description
1 Message Waiting Indica-tor
Indicates that you have a message.
2 PROG Key Used to program Flexible Function (FF) and one-touch keys and to adjust ringer volume. Depending on the setup of your system, may also be used to transfer calls.
3 CONF Key Used to establish conference calls, check FF key and one-touch features, and scroll through mes-sages.
4 One-Touch Keys Used to make outside calls or to access system fea-tures.
5 Flexible Function (FF) Keys
Used to access outside lines or to access system fea-tures.
6 DND/CF Indicator Indicates that Do-Not-Disturb, Call Forwarding, or Absence Message is set.
7 MUTE Indicator Indicates that your voice is muted - i.e., party on the other end cannot hear you. Lights solid when your hands-free microphone is muted and flashes when your handset is muted.
8 EXT Indicator Lights when you are on a call; flashes when you hold a call.
9 ON/OFF Indicator Lights when ON/OFF key has been pressed.
10 REDIAL Key Used to redial last number dialed.
11 MUTE Key Used to activate/deactivate MUTE function. When activated, the party on the other end cannot hear you. (See item 7, MUTE Indicator.)
12 AUTO Key Used to access speed dialing, enter account codes, or for message waiting answer/cancel.
13 ON/OFF Key Used to make a call without lifting the handset or to turn the speaker on and off.
14 FLASH Key Used to end an outside call and to restore outside dial tone without hanging up receiver.
15 VOLUME Key Used to adjust level of tones, background music,
1
1
1
S-32-755 Issued April 2000 9
ringing, receiver volume, and display contrast.
6 HOLD Key Used to hold calls, to retrieve held calls, and to com-plete FF key programming.
7 Microphone Used to talk with another party without using the handset.
8 Speaker Outputs tones and voice at your extension.

1. Understanding Your Phone
10
Small-Display Phones
Small-display phones, such as the model in Figure 2, have a display containing two lines of text. Table 2 on page 11 describes the features that are typical of small-display phones.
Note: Certain features of the small-display phone, such as items 3 -5 in Figure 2, require DBS software version CPC-AII/B v. 8.0 or higher, CPC-S/M v. 2.0 or higher, or CPC-EX v. 1.0 or higher.
Figure 2. Small-display 44-Series phone
1
ENDM ODE
DND/CFABC
JKLGHI
DEF
M NO M UTE
REDIAL
PROG
CO NF
M UTE
DIGITAL BUSINESS SYSTEM
1
4
2
5
3
6
14
9
87
6
5
43
2
15
22
08:24 Tue NOV 14
Sandy 173
10
11
Issued April 2000 DBS-32-755
TUV
OPER
PRS W XY EXTAUTO
O N/O FF
FLASH
Speakerphone
VOLUM E HOLD
7
*
8
0
916
17
21
12
1318
19 20

1. Understanding Your Phone
DB
Table 2. Small-display phone features
# Feature Description
1 Message Waiting Indica-tor
Indicates that you have a message.
2 Display Displays information about the phone’s status, menus, dialing directories, and text message infor-mation.
3 Mode Key Used to change display modes from default to speed dial or extension directory mode.
4 End Key Used to exit directory mode and return display to default mode.
5 Soft Keys Used to select System Speed Dial or Personal Speed Dial directory and also to speed dial a number or extension from within a directory.
6 PROG Key Used to program FF and one-touch keys and to adjust ringer volume. Depending on the setup of your system, may also be used to transfer calls.
7 CONF Key Used to establish conference calls, check FF key and one-touch features, and scroll through mes-sages.
8 One-Touch Keys Used to make outside calls or to access system fea-tures.
9 Flexible Function (FF) Keys
Used to access outside lines or to access system fea-tures.
10 DND/CF Indicator Indicates that Do-Not-Disturb, Call Forwarding, or Absence Message is set.
11 MUTE Indicator Indicates that your voice is muted - i.e., party on the other end cannot hear you. Lights solid when your hands-free microphone is muted and flashes when your handset is muted.
12 EXT Indicator Lights when you are on a call; flashes when you hold a call.
13 ON/OFF Indicator Lights when ON/OFF key has been pressed.
14 REDIAL Key Used to redial last number dialed.
15 MUTE Key Used to activate/deactivate MUTE function. When
1
1
1
1
2
S-32-755 Issued April 2000 11
activated, the party on the other end cannot hear you. (See item 11, MUTE Indicator.)
6 AUTO Key Used to access speed dialing, enter account codes, or for message waiting answer/cancel.
7 ON/OFF Key Used to make a call without lifting the handset or to turn the speaker on and off.
8 FLASH Key Used to end an outside call and to restore outside dial tone without hanging up receiver.
9 VOLUME Key Used to adjust level of tones, background music, ringing, receiver volume, and display contrast.
0 HOLD Key Used to hold calls, to retrieve held calls, and to com-plete FF key programming.

1. Understanding Your Phone
12
Using the Soft Keys on a Small-Display Phone
Note: This feature requires DBS software version CPC-AII/B v. 8.0 or higher, CPC-S/M v. 2.0 or higher, or CPC-EX v. 1.0 or higher.
The soft keys on the small-display phone allow you to change the software mode of the display from default (i.e., time and date) mode to directory mode. While in directory mode, you can view system and personal speed dial and extension directories, and also dial a speed dial number or extension by pressing the soft key next to the desired number.
Figure 3. Small-Display soft keys
Notes:
• The MODE key allows you to switch the display from default to directory mode. The END key allows you to return the display to default mode.
• You must be in directory mode to view speed dial and extension directories and to dial a speed dial number or extension using the soft
21 Microphone Used to talk with another party without using the handset.
22 Speaker Outputs tones and voice at your extension.
# Feature Description
ENDM ODE
08:24 Tue NOV 14
Sandy 173
soft keys
Issued April 2000 DBS-32-755
keys.
• Speed dial numbers must be programmed before they will appear in the personal speed dial directory. System speed dial numbers must be programmed by the system attendant or administrator, or the DBS dealer. For information on programming personal speed dial numbers, see Setting Up Personal Speed Dialing on page 26.

1. Understanding Your Phone
DB
Using Speed Dial Directories
1. Press the MODE key one time. “SSD” and “PSD” appear on the second line of the display.
2. Select System Speed Dial or Personal Speed Dial by pressing the soft key next to the desired item. The first two numbers in the directory appear on the second line of the display. To display the next two numbers in the directory, press the “#” key. To display the previous two numbers, press the “*” key.
Note: If a name has been assigned to a speed dial number, the name will be displayed instead of the speed dial number.
To jump to another letter in the directory, press the numeric key for it. For example, press the “6” key to jump to the M’s, N’s, and O’s. The M’s will appear first. Press “6” again to jump to the N’s, and again to jump to the O’s.
• For names beginning with Q or Z, use the 1 key.
3. To dial a speed dial number, press the soft key next to it.
Note: To exit the directory without dialing, press the END key.
Using the Extension Directory
1. Press the MODE key twice. “EXT” appears on the second line of the display.
2. Press the soft key next to “EXT”. The first two extensions in the directory appear on the second line of the display.
3. To display the next two extensions in the directory, press the “#” key. To display the previous two extensions, press the “*” key.
S-32-755 Issued April 2000 13
To jump to another letter in the directory, press the numeric key for it. For example, press the “6” key to jump to the M’s, N’s, and O’s. The M’s will appear first. Press “6” again to jump to the N’s, and again to jump to the O’s.
• For names beginning with Q or Z, use the 1 key.
4. To dial an extension, press the soft key next to it.
Note: To exit the directory without dialing, press the END key.

1. Understanding Your Phone
14
Using Variable Mode on a Small-Display Phone
Note: This feature requires DBS software version CPC-AII/B v. 8.0 or higher, CPC-S/M v. 2.0 or higher, or CPC-EX v. 1.0 or higher.
Variable Mode allows you to use the soft keys on your small-display phone to execute programmed system features when your phone is in the following call states:
• during an intercom call• during CO dial tone• during a trunk call• after dialing a busy extension
1. Activate Variable Mode by pressing ON/OFF *61 ON/OFF.
The 1st line of the display will read “Variable md ON” when you enter *61, then return to normal when you press the second ON/OFF.
To turn Variable Mode off again, press ON/OFF *61 ON/OFF.
2. During an intercom call, CO dial tone, trunk call, or after dialing a busy extension, the display will reflect the appropriate programmed features. While the feature is displayed, press the > or < soft key to execute the desired feature.
Figure 4. Example of a variable mode display after dialing a busy extension
ENDM ODE
Busy 351
Callback O HVA
Issued April 2000 DBS-32-755

1. Understanding Your Phone
DB
Large-Display Phones
Phones such as the model in Figure 5 are distinguished by their large displays. Table 3 on page 16 describes the features that are typical of large display phones.
Note: Certain features of the large-display phone, such as the Message key, require DBS software version CPC-AII/B v. 8.0 or higher, CPC-S/M v. 2.0 or higher, or CPC-EX v. 1.0 or higher.
Figure 5. Large-display 44-Series phone
DND/CFABC
JKLG HI
DEF
M NO M UTE
REDIAL
CONF M ENU PREV NEXT PROGM SG
M UTE
1
4
2
5
3
6
02:28 Thu NO V 14
PERSO NAL DIAL
SYSTEM DIAL
EXTENSION
FUNCTIO N
HELP
Langford S 173
10
11
12
15
16
987654
33
2
1
23
S-32-755 Issued April 2000 15
TUV
OPER
PRS W XY EXTAUTO
ON/OFF
FLASH
Speakerphone
VO LUM E HO LD
7
*
8
0
9 13
14
17
18
21
22
2019

1. Understanding Your Phone
16
Table 3. Large-display phone features
# Feature Description
1 Message Waiting Indica-tor
Indicates that you have a message.
2 Display Displays information about the phone’s status, menus, dialing directories, and text message infor-mation.
3 Soft Keys Used to make outside calls or to access call-handling features.
4 MSG Key Used for Auto-CallBack to a telephone which has left a text message or to access voice messages.
5 CONF Key Used to establish conference calls, check FF and one-touch key settings, and scroll through messages.
6 MENU Key Used to return to the Main Menu screen. The default Main Menu screen contains the following items:• PERSONAL DIAL• SYSTEM DIAL• EXTENSION• FUNCTION• HELP
7 PREV Key Used to return to the previous screen.
8 NEXT Key Used to advance to the next screen.
9 PROG Key Used to program FF and one-touch keys and to adjust ringer volume. Depending on the setup of your system, may also be used to transfer calls.
10 Flexible Function (FF) Keys
Used to access outside lines or to access system fea-tures.
11 DND/CF Indicator Indicates that Do-Not-Disturb, Call Forwarding, or Absence Message is set.
12 MUTE Indicator Indicates that your voice is muted - i.e., party on the other end cannot hear you. Lights solid when your hands-free microphone is muted and flashes when your handset is muted.
13 EXT Indicator Lights when you are on a call; flashes when you hold a call.
1
1
1
1
1
1
Issued April 2000 DBS-32-755
4 ON/OFF Indicator Lights when ON/OFF key has been pressed.
5 REDIAL Key Used to redial last number dialed.
6 MUTE Key Used to activate/deactivate MUTE function. When activated, the party on the other end cannot hear you. (See item 12, MUTE Indicator.)
7 AUTO Key Used to access speed dialing, enter account codes, or for message waiting answer/cancel.
8 ON/OFF Key Used to make a call without lifting the handset or to turn the speaker on and off.
9 FLASH Key Used to end an outside call and to restore outside dial tone without hanging up receiver.

1. Understanding Your Phone
DB
Using the Soft Keys on a Large-Display Phone
The ten small keys located alongside the display on a large-display phone are called “soft” keys because they allow you to change the software mode of the display. Instead of displaying the Main Menu, for instance, you can set your phone to display your Personal or System Speed Dial Directory, Extension Directory, or Function or Help Menus.
These items are described as follows:
To select one of the above items from the Main Menu, press the soft key next to the desired item.
20 VOLUME Key Used to adjust level of tones, background music, ringing, receiver volume, and display contrast.
21 HOLD Key Used to hold calls, to retrieve held calls, and to com-plete FF key programming.
22 Microphone Used to talk with another party without using the handset.
23 Speaker Outputs tones and voice at your extension.
Personal Dial Allows personal speed dial numbers to be programmed and dialed using the soft keys.
System Dial Allows system speed dial numbers to be viewed and dialed using the soft keys.
Extension Allows other extensions to be viewed and dialed using the soft keys.
Function Allows system functions such as Background Music, Do-Not-Disturb, Reminder Alarm, Absence Messages, Call Forwarding, Mute, and Station Lockout to be set.
Help Provides Help on setting phone functions.
# Feature Description
S-32-755 Issued April 2000 17
Notes:
• To display the Main Menu on a large-display phone, press the MENU key when the phone is in an idle state.
• Menus are programmable - the actual menu displayed depends on your system configuration.

1. Understanding Your Phone
18
Display Information
Both large and small displays indicate the status of the phone. Display information will vary depending on how the phone is programmed and its status. Several of the more common displays are illustrated below.
Figure 6. Idle condition (default display)
Small Display
Large Display
Figure 7. Messages received
Small Display
10:40 Wed MAR 17
Brandy 113User name Extension
10:40 Wed MAR 17
Brandy 113
PERSONAL DIAL
ExtensionUser name
SYSTEM DIALEXTENSIONFUNCTIONHELP
Nm
Issued April 2000 DBS-32-755
10:40 Wed MAR 17
3 Msg Carterumber of essages
Person thatleft the firstmessage

1. Understanding Your Phone
DB
Large Display
Figure 8. Reminder alarm
Small Display
Large Display
Fig
PERSONAL DIAL
10:40 Wed MAR 173 Msg Carter Person that
left the firstmessage
Number of messages
SYSTEM DIALEXTENSIONFUNCTIONHELP
10:40 Wed MAR 17
Alarm12:30PMAlarm time Alarm indicator
PERSONAL DIAL
10:40 Wed MAR 17
Alarm 12:30PM ((.))Alarm indicator
Alarm time
SYSTEM DIALEXTENSIONFUNCTIONHELP
Am
S-32-755 Issued April 2000 19
ure 9. Absence message
Small Display
10:40 Wed MAR 17
In Meetingbsenceessage

1. Understanding Your Phone
20
Large Display
Figure 10. Incoming outside call
Small Display
Large Display
Fig
PERSONAL DIAL
10:40 Wed MAR 17
In MeetingAbsencemessage
SYSTEM DIALEXTENSIONFUNCTIONHELP
Incoming #03Incoming outsidecall
Outside line numberBrandy 113
PERSONAL DIAL
Incoming #03 Outside line numberBrandy 113
Incoming outsidecall
SYSTEM DIALEXTENSIONFUNCTIONHELP
Oin
Issued April 2000 DBS-32-755
ure 11. Outside call in progress
Small Display
CO TALK
Brandy 113
0’15utside call progress
Callduration

1. Understanding Your Phone
DB
Large Display
Figure 12. Internal calling in use
Small Display
Large Display
PERSONAL DIAL
Brandy 113
CO TALK 0’15Outside callin progress
Callduration
SYSTEM DIALEXTENSIONFUNCTIONHELP
Talk
Brandy 113
GregIntercom callCalledparty
PERSONAL DIAL
Talk
Brandy 113
GregIntercom callCalledparty
SYSTEM DIALEXTENSIONFUNCTIONHELP
S-32-755 Issued April 2000 21

1. Understanding Your Phone
22
This page intentionally left blank.
Issued April 2000 DBS-32-755

D
2. Setting Up Your Phone
Use the procedures in this chapter to adjust the volume and display contrast of your digital phone, and to assign call handling features to FF (flexible function) keys.
This chapter covers the following topics:
Topic Page
Volume and Display Settings 24
FF Keys 25
Setting Up Personal Speed Dialing 26
BS-32-755 Issued April 2000 23

2. Setting Up Your Phone
24
Volume and Display Settings
Adjusting Sound Volumes
You can adjust the volume of the following while they are in use by pressing the VOL (s or t) key:
• Ringer
• Speaker
• Handset
Adjusting the Ringing Volume
When your phone is idle, you can adjust its ring volume using the following steps:
1. Press ON/OFF.
2. Press PROG.
3. Dial #9.
4. Press the VOL key.
The phone produces a tone.
5. Press the VOL keys to adjust the loudness of the tone.
6. Press ON/OFF.
Ad
Issued April 2000 DBS-32-755
justing the Display Contrast
1. When the phone is idle, press #.
2. Press the VOL keys to adjust the contrast of the display.
2. Setting Up Your Phone
DB
FF Keys
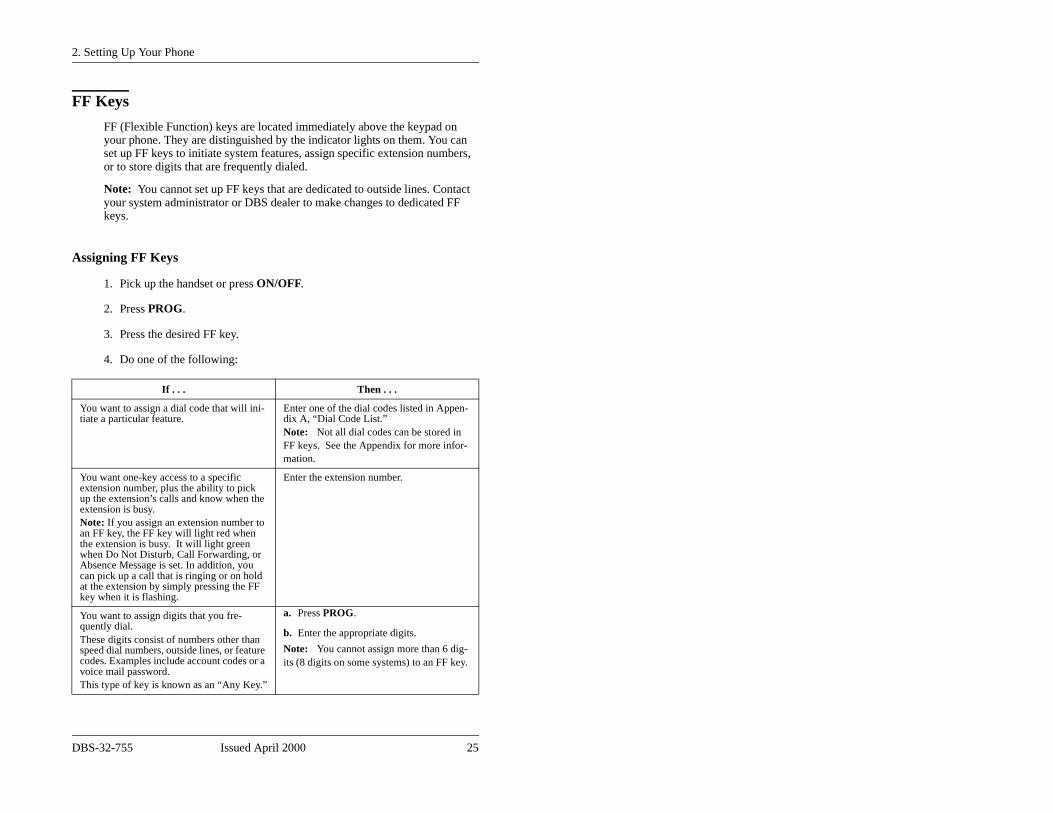
FF (Flexible Function) keys are located immediately above the keypad on your phone. They are distinguished by the indicator lights on them. You can set up FF keys to initiate system features, assign specific extension numbers, or to store digits that are frequently dialed.
Note: You cannot set up FF keys that are dedicated to outside lines. Contact your system administrator or DBS dealer to make changes to dedicated FF keys.
Assigning FF Keys
1. Pick up the handset or press ON/OFF.
2. Press PROG.
3. Press the desired FF key.
4. Do one of the following:
If . . . Then . . .
You want to assign a dial code that will ini-tiate a particular feature.
Enter one of the dial codes listed in Appen-dix A, “Dial Code List.”Note: Not all dial codes can be stored in FF keys. See the Appendix for more infor-mation.
You want one-key access to a specific extension number, plus the ability to pick up the extension’s calls and know when the extension is busy.Note: If you assign an extension number to an FF key, the FF key will light red when the extension is busy. It will light green when Do Not Disturb, Call Forwarding, or Acak
Enter the extension number.
YqTscvT
S-32-755 Issued April 2000 25
bsence Message is set. In addition, you an pick up a call that is ringing or on hold t the extension by simply pressing the FF ey when it is flashing.
ou want to assign digits that you fre-uently dial. hese digits consist of numbers other than peed dial numbers, outside lines, or feature odes. Examples include account codes or a oice mail password.his type of key is known as an “Any Key.”
a. Press PROG.
b. Enter the appropriate digits.
Note: You cannot assign more than 6 dig-its (8 digits on some systems) to an FF key.

2. Setting Up Your Phone
26
5. Press HOLD.
6. Replace the handset or press ON/OFF.
Notes:
• To use an FF key’s function, press the key.
• To change an FF key’s setup, use the procedures described above.
Clearing an FF Key’s Programming
1. Pick up the handset or press ON/OFF.
2. Press PROG.
3. Press the desired FF key.
4. Press HOLD.
5. Replace the handset or press ON/OFF.
Checking FF Key Setup
1. Pick up the handset or press ON/OFF.
2. Press CONF.
3. Press the FF key.
4. The assigned function appears on the display.
5. Replace the handset or press ON/OFF.
Se
Issued April 2000 DBS-32-755
Note: If the FF key is dedicated to an outside line, “CO Key ...” will appear on the display. These keys cannot be reassigned except by the system administrator or DBS dealer.
tting Up Personal Speed Dialing
Your telephone provides several ways to assign and use personal speed dialing. The most efficient way is to assign frequently called numbers to your phone’s one-touch or soft keys.

2. Setting Up Your Phone
DB
Note: Non-display and small-display phones have 10 one-touch keys, which are located alongside the PROG and CONF keys on non-display and small-display phones. Large-display phones have 10 “soft” keys instead of one-touch keys. Soft keys are located along each side of the display.
One-touch and soft keys are numbered as follows:
Figure 13. One-touch key numbering scheme - Small and Non-Display phones
Figure 14. Soft key numbering scheme - Large-Display phones
One-touch and soft keys are pre-programmed to correspond to specific PSD codes or bins. You store your personal speed dial numbers in these bins. When you press a one-touch or soft key containing a personal speed dial number, the PSD bin associated with that key is accessed and the speed dial number is dialed.
Note: All systems allow at least ten Personal Speed Dials (PSDs), with some systems allowing up to 40 PSDs. Your system administrator or DBS dealer
PROG
CONF
2 3
109876
541
3
10
9
8
7
6
5
4
2
1
02:28 Thu NO V 14Langford S 173
S-32-755 Issued April 2000 27
can tell you which type of system you have.
PSD bins are numbered from either 90 to 99 or 900 to 909 for ten PSD systems (depending on your system configuration). On 40 PSD systems, the PSD bins are numbered from 900 to 939.

2. Setting Up Your Phone
28
For example:
Note: The PSD bin for each one-touch or soft key appears on the display when the phone is in Personal Speed Dial mode. On large-display phones, either 5 or 10 bins are displayed at a time, depending on how your extension is programmed. You can display the next group of bins by pressing the “NEXT” key, or the previous group by pressing the “PREV” key.
On small-display phones, two bins are displayed at a time. Press the “#” key to display the next two bins and the “*” key to display the previous two bins.
Assigning PSD Numbers to One-Touch or Soft Keys
1. Pick up the handset or press ON/OFF.
Note: On a large-display phone, you will need to be in Personal Speed Dial mode before you can assign PSD numbers. If you are not sure you are in this mode, press the MENU key to display the Main Menu, then press the key to the left of PERSONAL DIAL on the Main Menu.
2. Press PROG.
3. Press the desired one-touch or soft key (or press AUTO, then enter the
One-touch or soft key . . .
Corresponds to personal speed dial bin . . .
10 PSD systems 40 PSD systems*
#1 90 or 900 900, 910, 920, and 930
#2 91 or 901 901, 911, 921, and 931
#3 92 or 902 902, 912, 922, and 932
etc.
*A maximum of ten PSD numbers can be assigned to the one-touch keys on a small-display or non-display phone.
Issued April 2000 DBS-32-755
desired PSD bin number). The PSD bin for that key appears on the display (e.g., “Enter PSD 901”). You may want to write down the bin number for the key - you will need this information to assign a name to the key.
4. Enter the phone number you want to be speed-dialed from that key (maximum length = 16 characters).

2. Setting Up Your Phone
DB
Note: You can insert the following characters into the number:
5. Press HOLD.
6. Replace the handset or press ON/OFF.
Checking PSD Numbers
1. Pick up the handset or press ON/OFF.
2. Press CONF.
3. Press the desired one-touch or soft key.
To insert a . . . Press . . .
Outside line access code a. CONF
b. Dial the access code (9 or 1-6).
Notes:• Each PSD should begin with an outside line
access code.• If your outside line access code is 81 - 86,
use only the last digit (1-6).
Pause REDIAL
Flash FLASH
Hyphen (-) (Appears when the num-ber is dialed or checked, but not during program-ming.)
FF6 (flexible function key 6)
* *
# #
S-32-755 Issued April 2000 29
The speed dial number appears on the first line of the display. If no speed dial number has been assigned to the key, the first line will read “Not Entered”.
The PSD bin for that key appears on the second line of the display (for example, “90”, “905”, etc.), along with any name that has been assigned to the PSD number.
4. Replace the handset or press ON/OFF.

2. Setting Up Your Phone
30
Clearing a PSD Number From a One-Touch or Soft Key
1. Pick up the handset or press ON/OFF.
2. Press PROG.
3. Press the desired one-touch or soft key.
4. Press HOLD.
5. Replace the handset or press ON/OFF.
Assigning Names to PSD Numbers
After assigning a PSD Number to a one-touch or soft key, you can assign a name such as “Home”, etc., to the key. PSD names are displayed when you are in the Personal Speed Dial mode.
Note: You will need to know the PSD bin number for the key in order to assign a name to it. To check the bin number for a key, see “Checking PSD Numbers”, above.
1. Pick up the handset or press ON/OFF.
2. Press PROG.
3. Dial #1.
4. Press AUTO.
5. Enter the PSD bin number for the key you want to assign a name to (Example: 91, 903, etc.).
6. Press AUTO as many times as necessary to clear out the default name. (The AUTO key can also be used to backspace if an error is made while programming PSD and SSD names.)
Issued April 2000 DBS-32-755
7. Enter the first character of the name you want to assign to the key. Use the information in Table 4 as a guide.
Note: To enter numbers into a name, press CONF. To resume entering letters, press CONF again.
8. Press FLASH to move to the next character in the name.
9. Repeat steps 7-8 for each character in the name until the entire name is entered. (If you make a mistake, you can backspace by pressing AUTO.)

2. Setting Up Your Phone
DB
10. When the name is complete, press FLASH.
11. Press HOLD.
Note: To enter more names, repeat steps 4-10.
S-32-755 Issued April 2000 31

2. Setting Up Your Phone
32
Table 4. Speed dial alphabet entry
To enter:Press this
key:This many
times: To enter:Press this
key:This many
times:
A 2 1 a 2 4
B 2 2 b 2 5
C 2 3 c 2 6
D 3 1 d 3 4
E 3 2 e 3 5
F 3 3 f 3 6
G 4 1 g 4 4
H 4 2 h 4 5
I 4 3 i 4 6
J 5 1 j 5 4
K 5 2 k 5 5
L 5 3 l 5 6
M 6 1 m 6 4
N 6 2 n 6 5
O 6 3 o 6 6
P 7 1 p 7 4
Q 1 2 q 1 5
R 7 2 r 7 5
S 7 3 s 7 6
T 8 1 t 8 4
U 8 2 u 8 5
V 8 3 v 8 6
W 9 1 w 9 4
X 9 2 x 9 5
Y 9 3 y 9 6
Z 1 3 z 1 6
.
*
?
/
s
Issued April 2000 DBS-32-755
0 1, 3, 4, or 6 : 0 2 or 5
* 1 or 4 - * 2 or 5
* 3 or 6 # # 1 or 4
# 2 or 5 ! # 3 or 6
pace 1 1 or 4

2. Setting Up Your Phone
DB
Clearing Out a Name Assigned To a PSD Key
Note: You will need to know the PSD bin number for the key in order to clear out an assigned name. To check the bin number for a key, see “Checking PSD Numbers” on page 29.
1. Pick up the handset or press ON/OFF.
2. Press PROG.
3. Dial #1.
4. Press AUTO.
5. Enter the PSD bin number for the key you want to clear (Example: 91, 903, etc.).
6. Press AUTO as many times as necessary to clear out the name.
Note: It is strongly recommended that you assign the PSD bin number as a name for the key at this point so that it will appear on the display for future use. The bin number should be entered in the following format: “-PSDxx (or xxx)” where xx or xxx = the actual bin number. Example: “-PSD901”. Use the information in steps 7-10 under “Assigning Names to PSD Numbers” on page 30 as a guide.
7. Press HOLD.
8. Press ON/OFF.
Note: If using a large-display phone, press MENU, then the key to the left of PERSONAL DIAL to have the change reflected on the display.
S-32-755 Issued April 2000 33

2. Setting Up Your Phone
34
This page intentionally left blank.
Issued April 2000 DBS-32-755

DB
3. Placing Outside Calls
3. Placing Outside Calls
Your digital phone, in conjunction with the DBS, provides several ways for you to place outside calls.
This chapter covers the following topics:
Topic Page
Making Calls 36
Using Speed Dialing 37
Redialing Outside Numbers 41
S-32-755 35 Issued April 2000 35

3. Placing Outside Calls
36
Making Calls
Using an Outside Line Access Group
You can dial 9, 81, 82, 83, 84, 85, or 86 to access an outside line. Each of these codes gives you access to a group of outside lines. The DBS automatically picks an outside line from the group for you.
Note: This feature requires system programming or a specific DBS configuration, and therefore may not be available from your phone. For information, see your system administrator or DBS dealer.
1. Pick up the handset or press ON/OFF.
2. Dial an access code for an outside line access group (9, 81-86) and the telephone number.
Notes:
• If all outside lines in the group are busy, you will hear a busy tone.
• If the system is set up for LCR (least-cost-routing) dialing, the LCR function is activated when you dial 9. LCR automatically routes your call to the least expensive outside line.
Accessing an Outside Line with an FF Key
1. Pick up the handset or press ON/OFF.
2. Press an FF key that is dedicated to an outside line or to a group of outside lines.
3. Dial the desired number.
Ca
Issued April 2000 DBS-32-755
lling If the DBS is Behind a PBX
1. Pick up the handset or press ON/OFF.
2. Access an outside line.
3. Dial the PBX access code (see your system administrator or dealer for the code).
4. When you hear the outside line dial tone, dial the telephone number.

DB
3. Placing Outside Calls
Having an Open Line Call You Back
If all outside lines are busy, you can have the DBS notify you when an outside line is available.
1. Pick up the handset or press ON/OFF.
2. Attempt to access an outside line.
3. When you hear the busy tone, press 2.
4. Press ON/OFF again.
When the outside line is available, your phone rings and the FF key for the outside line flashes.
5. Pick up the handset or press ON/OFF.
6. Dial the phone number.
Using Speed Dialing
Using Personal Speed Dialing
You can assign Personal Speed Dial (PSD) numbers to the one-touch keys on a non-display or small-display phone, or to the soft keys on a large-display phone. Once the PSD numbers have been assigned, you can quickly dial them by simply pressing the appropriate key. For information on assigning Personal Speed Dial numbers, See “Setting Up Personal Speed Dialing” on page 26..
Dialing a PSD Number
1. Pick up the handset or press ON/OFF.
Us
S-32-755 37 Issued April 2000 37
2. If necessary, access an outside line.
3. Press the desired one-touch or soft key.
ing System Speed Dialing
System Speed Dial (SSD) numbers are numbers that are frequently called by many different individuals at your location, such as a branch or corporate office, a package delivery service, or a travel agent. SSD numbers must be

3. Placing Outside Calls
38
programmed from the attendant’s phone. Once programmed, they are available for everyone to use.
A maximum of 90, 200, or 500 SSD numbers are allowed, depending on the system. SSD numbers are assigned to speed dial bins as follows:
You dial SSD numbers by entering the appropriate bin number. On small-display and large-display phones, you can also use soft keys to dial a system speed dial number in the SSD directory.
Dialing an SSD Number by Entering the SSD Bin Number
1. Pick up the handset or press ON/OFF.
2. If necessary, access an outside line.
3. Press AUTO.
4. Dial the appropriate SSD bin number.
Dialing an SSD Number Using the Soft Keys on a Small Display Phone
Note: Soft key functionality on the 44-Series small-display phone requires DBS software version CPC-AII/B v. 8.0 or higher, CPC-S/M v. 2.0 or higher, or CPC-EX v. 1.0 or higher.
1. Press the MODE key one time. “SSD” and “PSD” appears on the second line of the display.
Maximum SSD Numbers Speed Dial Bins
90 00-89
200 000-199
500 000-499
Issued April 2000 DBS-32-755
2. Press the soft key next to SSD. The first two SSD entries appear on the second line of the display. To display the next two entries, press the “#” key. To display the previous two entries, press the “*” key.
To jump to another letter in the directory, press the numeric key for it. For example, press the “6” key to jump to the M’s, N’s and O’s. The M’s will appear first. Press “6” again to jump to the N’s, and again to jump to the O’s.
• For names beginning with Q or Z, use the 1 key.

DB
3. Placing Outside Calls
3. Pick up the handset or press ON/OFF.
4. If necessary, access an outside line.
5. Press the soft key next to the desired SSD number to initiate dialing.
Dialing an SSD Number Using the Soft Keys on a Large Display Phone
1. From the Main Menu, press the key to the left of “System Dial.” The System Speed Dial directory will be displayed. This is an alphabetical directory.
2. Press the appropriate key on the SSD Directory. Either 5 or 10 system speed dial names will be displayed, depending on how your system is programmed. To scroll forward in the name directory, press the NEXT key. To scroll backwards in the directory, press the PREV key.
3. Pick up the handset or press ON/OFF.
4. If necessary, access an outside line.
5. Press the soft key next to the desired SSD entry to initiate dialing.
Checking SSD Numbers
To check an SSD number on a small-display or large-display phone, press the soft key next to the entry in the SSD directory.
Checking SSD Numbers by Entering the SSD Bin Number
1. Pick up the handset or press ON/OFF.
2. Press CONF.
S-32-755 39 Issued April 2000 39
3. Press AUTO.
4. Dial the appropriate SSD bin. The SSD number appears on the display.

3. Placing Outside Calls
40
Checking SSD Numbers Using the Soft Keys
1. Scroll through the System Speed Dial directory until the desired SSD name is displayed.
2. Pick up the handset or press ON/OFF.
3. Press CONF.
4. Press the soft key next to the SSD entry. The SSD number appears on the display.
Chaining Speed Dial Numbers
To handle phone numbers longer than 16 characters, you can chain SSD codes to a PSD code. When you dial the PSD code, the system will dial each SSD number contained in the chain.
• Systems using DBS software version CPC-EX v. 1.0 or higher also allow you to chain SSD codes to each other, and to chain PSD codes to each other. (You cannot, however, chain PSD codes to an SSD code.)
• A maximum of 16 characters, including other speed dial codes, can be entered into a speed dial code.
Note: Before chaining, enter the parts of the phone number into one-touch or soft keys, or into speed dial bins. For example, program the first part into one-touch key #1, the second part into one-touch key #2, etc.
Complete the following steps to chain speed dial numbers:
1. Pick up the handset or press ON/OFF.
Issued April 2000 DBS-32-755
2. Press PROG, AUTO.
3. Enter the speed dial code (or press the one-touch key if using a PSD number) you are chaining the other codes to.
4. Press AUTO and enter the speed dial code containing the first part of the number to be dialed.
5. Repeat step 4 for each remaining speed dial code to be contained in the chain.
6. Press HOLD.

DB
3. Placing Outside Calls
Redialing Outside Numbers
Redialing
1. Pick up the handset or press ON/OFF.
2. Access an outside line.
3. Press REDIAL.
The phone dials the last outside number dialed.
Auto-Redial
Some systems allow the last number dialed (either outside or inside call) to be redialed simply by pressing the REDIAL key.
1. When your phone is idle or receiving dial tone, press REDIAL.
Auto-Repeat Dialing
With some systems, if the outside number is busy, pressing the REDIAL key will repeatedly redial the number until answered or the number of retries reaches a set limit.
1. After receiving busy tone when dialing an outside number, press the REDIAL key before disconnecting.
To cancel Auto-Repeat Dialing
Replace the handset or press ON/OFF.
Sa
Sa
S-32-755 41 Issued April 2000 41
ving and Redialing a Number
You can save an outside number for redialing. A saved number can be redialed even if it is not the last number dialed.
ving a Number
1. Dial the desired phone number.
2. Press AUTO twice.

3. Placing Outside Calls
42
3. Press *.
4. Replace the handset or press ON/OFF.
Redialing a Saved Number
1. Access an outside line.
2. Press AUTO.
3. Press *.
Issued April 2000 DBS-32-755

DB
4. Answering Calls
Calls can reach your digital phone from several different sources, and can be handled in a variety of ways.
This chapter covers the following topics:
Topic Page
Picking Up Calls 44
Holding Calls 44
Using Call Park 45
Transferring Calls 46
S-32-755 Issued April 2000 43

4. Answering Calls
44
Picking Up Calls
To answer various types of calls, use the following procedures.
1. Pick up the handset or press ON/OFF.
2. Do one of the following:
*The DBS allows extensions to be grouped into paging groups. When you issue a page, you can specify the paging group, so that your announcement is heard only on the phones that are members of that group. Paging groups often include people whose work is related. (See “Paging” on page 50.)
** Some offices have after-hours calls ring on a central bell (often called a “universal night answer” device) or over a paging system using an external speaker. Dialing “78” allows you to answer these after-hours calls.
Holding Calls
Pu
To answer . . . Do the following . . .
A call ringing at someone else’s phone
Press the flashing FF key.
An extension in your paging group*
Dial 70.Note: Calls are answered in the following prior-ity order:• Page call• Internal call • Outside line.
An extension outside your paging group*
a. Dial 79.
b. Dial the number of the ringing extension.
After-hours calls ringing over a paging speaker or night answer device **
a. Pick up the handset or press ON/OFF.
b. Dial 78.
Issued April 2000 DBS-32-755
tting a Call on Hold
Press HOLD during a call.
If the call is on an outside line, retrieve the call by pressing the appropriate line key. (The line key will be flashing green.)
If the call is an extension, retrieve it by pressing HOLD a second time, or by pressing the flashing FF key.

4. Answering Calls
DB
Answering Two Calls
1. Press HOLD to put the first call on hold.
2. Press the green flashing FF key for the second call.
3. Press HOLD to put the second call on hold.
4. Press the green flashing FF key to return to the first call.
Notes:
• If you do not pick up a held call in a certain period of time, you will hear a tone indicating that the call is still waiting.
• The EXT indicator flashes when you hold an internal call or an outside line that is not assigned to an FF key.
Using Call Park
Use Call Park to send an outside call to someone you cannot locate. You can park the call and page the intended recipient of the call. Then the intended recipient can pick up the call.
Note that attendants park calls somewhat differently than other extensions. Attendants can park calls on any of 10 “park numbers.” With extensions, calls are parked on the user’s extension number.
Note: If a parked call is not answered within a certain time, the call returns to the extension that parked it.
Parking Calls from an Attendant Phone
1. Press HOLD during an outside call.
S-32-755 Issued April 2000 45
2. Dial 75.
3. Dial the system park number (00-09).
4. Replace the handset or press ON/OFF.
5. If necessary, page the intended recipient of the call.

4. Answering Calls
46
Picking Up Calls Parked by the Attendant
1. Pick up the handset or press ON/OFF.
2. Dial 76.
3. Dial the appropriate system park number (00-09).
Parking Calls from an Extension
1. Press HOLD during an outside call.
2. Dial 75.
3. Replace the handset or press ON/OFF.
Picking Up Calls Parked by an Extension
1. Pick up the handset or press ON/OFF.
2. Dial 76.
3. Dial the extension number of the person that parked the call.
Transferring Calls
Note: If a transferred call is not answered within a specified time, the call rings again at the extension that transferred it.
Screened Transfers
In a screened transfer, you announce the call before transferring it. This
Issued April 2000 DBS-32-755
allows you to give the recipient information about the call.
1. During a call, press HOLD.
2. Dial the extension number to which the call will be transferred.
3. When the recipient answers, announce the call.
4. Do one of the following (ask your dealer or system administrator which is appropriate):
• Replace the handset or press ON/OFF

4. Answering Calls
DB
• Press PROG and then replace the handset or press ON/OFF.
Unscreened Transfers
Note: This feature requires system programming or a specific DBS configuration, and may not be available. For information, see your system administrator or DBS dealer.
In an unscreened transfer, you do not announce the call to the person receiving the transfer. The call simply rings at the phone to which it is transferred.
1. During a call, press HOLD.
2. Dial the extension number to which the call will be transferred.
3. Do one of the following (ask your dealer or system administrator which is appropriate):
• Replace the handset or press ON/OFF, or
• Press PROG and then replace the handset or press ON/OFF.
S-32-755 Issued April 2000 47

4. Answering Calls
48
This page intentionally left blank.
Issued April 2000 DBS-32-755

DB
5. Communicating Within Your Office
The DBS provides a variety of features for handling calls within your office.
This chapter covers the following topics:
Topic Page
Calling Other Extensions 50
Paging 50
Using Call Forwarding 51
Using Call Waiting 53
Using Callback Messages 56
Using Do-Not-Disturb 58
Using Absence Messages 58
Announcing to Busy Extensions 59
Breaking Into a Call 61
S-32-755 Issued April 2000 49

5. Communicating Within Your Office
50
Calling Other Extensions
Making Internal Calls
1. Pick up the handset or press ON/OFF.
2. Dial the desired extension, or dial 0 for the operator.
Switching Between Tone and Voice Calling
A voice call to another extension performs like an intercom call in that it is connected immediately, without making the called extension ring. (If desired, the called party can reply without lifting the handset.) Tone calling sends ringing to the called extension.
The default calling mode is determined by system programming. To switch between tone and voice, press l after dialing the extension number.
Paging
Note: This feature requires system programming or a specific DBS configuration, and may not be available. For information, see your system administrator or DBS dealer.
Calling Paging Groups 00-07
The DBS allows extensions to be organized into paging groups. When you issue a page, you specify the paging group, so that your announcement is heard only on the phones that are members of that group. Paging groups often include people whose work is related.
1. Pick up the handset or press ON/OFF.
Issued April 2000 DBS-32-755
2. Press # and the page group number (00-07).
3. Make your announcement.

5. Communicating Within Your Office
DB
4. Do one of the following:
Answering a Page (Meet-Me Answer)
You can answer a page from any extension using the Meet-Me Answer feature.
1. Pick up the handset or press ON/OFF.
2. Dial 77 to speak to the paging party.
Using Call Forwarding
Calls can be automatically forwarded to another number when you are not at your phone.
Setting Up Call Forwarding
1. Pick up the handset or press ON/OFF.
2. Dial one of the following combinations:
If . . . Then . .
You want to end the page Replace the handset or press ON/OFF.Note: To avoid an abrupt “hang-up” sound, press FLASH before replacing the handset.
You want to get a response from some-one answering the page at an extension
Do not hang up; wait for the paged party to answer.
A
Cor
C
S-32-755 Issued April 2000 51
To forward . . . Dial . . . Then . . .
ll calls 720 Dial the extension number that you want to forward to.
alls when your phone is busy does not answer
721 Dial the extension number that you want to forward to.
alls when your phone is busy 722 Dial the extension number that you want to forward to.

5. Communicating Within Your Office
52
3. Replace the handset or press ON/OFF.
Calls to an outside lineNote: To forward to an outside number, you must first assign the outside number (including a trunk access code, such as 9 or 81-86) to a personal or sys-tem speed dial. 1
723or720, 721,722, or 724 2
Press AUTO and dial the appropriate speed dial number. Note: When forwarding with 723, you can only forward internal calls to an outside number. You cannot forward outside calls to an outside number.
Calls when your phone does not answer
724 Dial the extension number that you want to forward to.
1. Some systems will not allow “9” trunk access code with call forwarding when least cost routing is active.
2. Some systems only allow the use of 723 to call forward outside. Other systems call forward outside for all types including 720 (All), 721 (Busy/Don’t Answer), 722 (Busy), and 724 (Don’t Answer). Check with your dealer for more information on your system.
To forward . . . Dial . . . Then . . .
Issued April 2000 DBS-32-755

5. Communicating Within Your Office
DB
Cancelling Call Forwarding
1. Pick up the handset or press ON/OFF.
2. Dial 72.
3. Replace the handset or press ON/OFF.
Using Call Waiting
Call waiting allows you to send a tone and an optional text message to a busy extension.
Note: This feature requires system programming or a specific DBS configuration, and may not be available. For information, see your system administrator or DBS dealer.
Setting Up Call Waiting
1. Pick up the handset or press ON/OFF.
2. Dial the extension number.
3. When you hear a busy tone, press 3.
4. If you want to send a text message with call waiting (optional), press one of the following:
• 5 = Visitor Here
• 6 = Need Help
• 7 = Important
S-32-755 Issued April 2000 53
• 8 = Urgent
• 9 = Emergency
5. To wait for the called extension to answer, remain on the phone. To “camp-on” to the extension, hang up. When the extension becomes free, it will automatically call your number.
Notes:
• If call waiting is accepted, the busy tone changes to a ringing tone.

5. Communicating Within Your Office
54
• You cannot send a call waiting message to an extension that has an Absence Message or Do-Not-Disturb registered.
Answering Call Waiting
1. Do one of the following:
2. Do one of the following:
Notes:
• The Talkback key is an FF key that has been assigned to the Talkback function. The Talkback function is typically used in situations where the extension user must handle more than one call.
Us
If . . . Then . . .
You want to answer the call Press the Talkback key.The current call is put on hold.
You want to reply with a text message Press CONF.
If . . . Then . . .
You answered and want to handle both calls at once
Press the Talkback key to toggle between the two calls.
You answered and want to handle the calls separately
Finish the second call and terminate it. You are returned to the original call.
You want to reply with a text messageNote: Text messages are only avail-able to other extensions with displays.
Dial one of the following digits:1 = Take A Message2 = Please Hold3 = Will Call Back4 = Transfer5 = Unavailable
Issued April 2000 DBS-32-755
• If a Talkback key is not set up, you must end the call in progress before answering the waiting call.
• Your original conversation is not interrupted by sending a text message.
ing Camp-on
Note: This feature requires system programming or a specific DBS configuration, and may not be available. For information, see your system administrator or DBS dealer.

5. Communicating Within Your Office
DB
The camp-on feature alerts you when a busy extension is free.
1. Pick up the handset or press ON/OFF.
2. Dial the extension number.
3. When you hear a busy tone, press 3.
4. When you hear a ringing tone, replace the handset or press ON/OFF.
Your extension rings when the busy extension becomes free.
S-32-755 Issued April 2000 55

5. Communicating Within Your Office
56
Using Callback Messages
Your phone’s message indicator lamp flashes when a message has been received. This can be either a callback message from another extension or, if your system uses voice mail, a voice message.
The display also indicates that a message has been received. For a callback message, the display reflects the extension that sent the message. For a voice message, the display reflects that a new message has been received.
If multiple messages have been received, the display reflects the number of messages and indicates the origin of the first message (i.e., the extension number or voice mail).
Sending a Callback Message
1. Pick up the handset or press ON/OFF.
2. Dial the extension number.
3. Press 2.
4. Press ON/OFF or hang up.
Note: No more than four messages can be sent to an extension. If you do not hear a dial tone after dialing 2, the message cannot be accepted.
Responding to Callback Messages
1. Pick up the handset or press ON/OFF.
2. Press AUTO.
3. Do one of the following:
Issued April 2000 DBS-32-755
Note 1: Multiple messages are accessed in the order in which they are received.
If . . . Then . . .
You want to answer the message wait-ing request
Press REDIAL. You will be connected to the extension that left the message.
You want to cancel the message waiting request
Press FLASH.

5. Communicating Within Your Office
DB
Note 2: On the large-display phone, you can also use the MSG key to respond to callback messages (requires DBS software version CPC-AII/B v. 8.0 or higher, CPC-S/M, v. 2.0 or higher, or CPC-EX v. 1.0 or higher).
S-32-755 Issued April 2000 57

5. Communicating Within Your Office
58
Scrolling Through Messages
1. Pick up the handset or press ON/OFF.
2. Press CONF twice to view the next message.
3. Press # to scroll through messages.
4. Press ON/OFF.
Using Do-Not-Disturb
Use DND (Do-Not-Disturb) to temporarily stop calls from coming to your extension.
Note: If your phone is set for permanent call forwarding on No Answer or Busy/No Answer (such as to voice mail), only calls from other extensions will be blocked. External (CO) calls will still ring through to your extension before being forwarded to voice mail. Permanent call forwarding is determined through system programming.
1. Pick up the handset or press ON/OFF.
2. Dial 73 to toggle DND on and off.
3. Press ON/OFF.
Using Absence Messages
Assigning the Absence Message
Absence messages appear on the display of any internal caller who calls your extension.
Issued April 2000 DBS-32-755
1. Pick up the handset or press ON/OFF.
2. Dial 71.
3. Dial the message number (0-9).
4. If desired, enter the date or time of your return, using MM/DD or HH/MM (24-hour) format. This will appear on the display of a calling extension, along with the selected absence message.
5. Press ON/OFF.
5. Communicating Within Your Office
DB
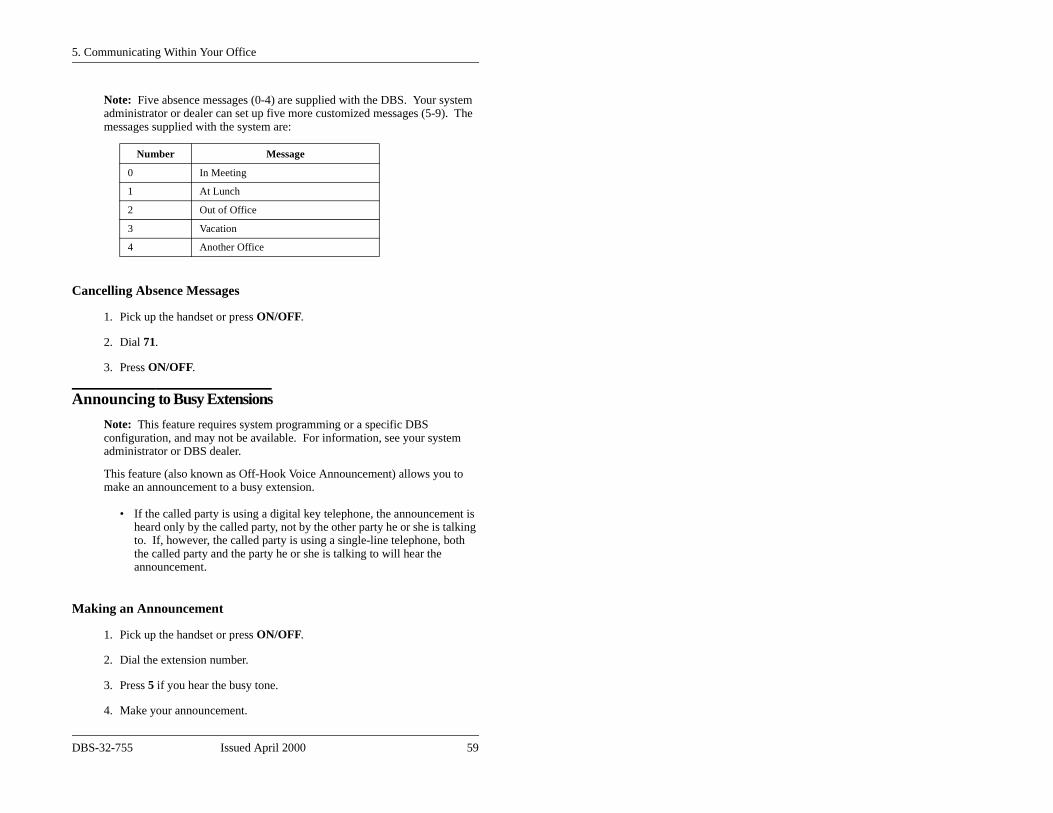
Note: Five absence messages (0-4) are supplied with the DBS. Your system administrator or dealer can set up five more customized messages (5-9). The messages supplied with the system are:
Cancelling Absence Messages
1. Pick up the handset or press ON/OFF.
2. Dial 71.
3. Press ON/OFF.
Announcing to Busy Extensions
Note: This feature requires system programming or a specific DBS configuration, and may not be available. For information, see your system administrator or DBS dealer.
This feature (also known as Off-Hook Voice Announcement) allows you to make an announcement to a busy extension.
• If the called party is using a digital key telephone, the announcement is heard only by the called party, not by the other party he or she is talking to. If, however, the called party is using a single-line telephone, both the called party and the party he or she is talking to will hear the
M
Number Message
0 In Meeting
1 At Lunch
2 Out of Office
3 Vacation
4 Another Office
S-32-755 Issued April 2000 59
announcement.
aking an Announcement
1. Pick up the handset or press ON/OFF.
2. Dial the extension number.
3. Press 5 if you hear the busy tone.
4. Make your announcement.

5. Communicating Within Your Office
60
Your voice is heard on the extension, not on the other line.
Answering an Announcement
To answer an announcement, you may use the Talkback* key to speak to the announcing party or you may send a text message.
*The Talkback key is an FF key that has been assigned to the Talkback function. The Talkback function is typically used in situations where the extension user must handle more than one call. The Talkback key must be set up by the system administrator or dealer.
To Speak to the Announcing Party
1. Press the Talkback* key.
2. Speak with the announcing party.
3. Press the Talkback* key to return to the original call.
*The Talkback key is an FF key that has been assigned to the Talkback function. The Talkback function is typically used in situations where the extension user must handle more than one call. The Talkback key must be set up by the system administrator or dealer.
To Answer with Text
1. While remaining on the line with the original party, press CONF.
2. Dial the digits 1 to 5 to send a text reply to the party that has just called.
Dialed Digit Text Message
1 Take A Message
Issued April 2000 DBS-32-755
Notes:
• Your original conversation is not interrupted by sending a text message.
2 Please Hold
3 Will Call Back
4 Transfer
5 Unavailable

5. Communicating Within Your Office
DB
• Text messages can only be sent to callers within your facility.
• The caller must have a display phone to receive the text message.
• Text messages can be changed by your DBS administrator or dealer.
Transferring Calls with an Announcement
Note: This feature requires system programming or a specific DBS configuration, and may not be available. For information, see your system administrator or DBS dealer.
1. Press HOLD.
2. Dial the extension number.
3. When you hear a busy tone, press 5.
4. When you are connected to the called party, press ON/OFF.
Breaking Into a Call
Note: This feature requires system programming or a specific DBS configuration, and may not be available. For information, see your system administrator or DBS dealer.
This feature allows you to interrupt a busy extension in your paging group.
1. Pick up the handset or press ON/OFF.
S-32-755 Issued April 2000 61
2. Dial the extension number.
3. When you hear the busy tone, press 4.
Note: When you break into a call, both parties on the other end will be able to hear you.

5. Communicating Within Your Office
62
This page intentionally left blank.
Issued April 2000 DBS-32-755

DB
6. Using Additional Features
The DBS provides a variety of features you can use in your daily work.
This chapter covers the following topics:
Topic Page
Using the Mute Key 64
Using Off-Hook Monitor 64
Locking Your Extension 64
Switching Between Pulse and Tone Calling 65
Making Conference Calls 65
Using a Headset 66
Controlling Internal Dial Tone 66
Controlling Background Music 66
Using the Reminder Alarm 67
Using Caller ID 67
Using Voice Mail 71
S-32-755 Issued April 2000 63

6. Using Additional Features
64
Using the Mute Key
You can use the MUTE key on your phone to mute the handset or microphone so that the party on the other end cannot hear you. The Mute indicator flashes when using handset mute, and lights steadily when the microphone is muted.
1. Pick up the handset or press ON/OFF.
2. Dial the desired number.
3. Press MUTE to mute your conversation. Press MUTE again to turn the mute function off.
Note: Handset Mute requires DBS software version CPC-AII/B v. 8.0 or higher, CPC-S/M v. 2.0 or higher, or CPC-EX v. 1.0 or higher.
Using Off-Hook Monitor
Note: This feature requires DBS software version CPC-AII/B v. 8.0 or higher, CPC-S/M v. 2.0 or higher, or CPC-EX v. 1.0 or higher.
Off-Hook Monitor allows you to play a called or calling party’s voice through the speaker on your phone, even if you are using the handset. This allows a third party to hear both sides of a conversation.
To use Off-Hook Monitor, press the ON/OFF key while using the handset during a conversation. The other party’s voice will be played through both the handset and the speaker. To turn off Off-Hook Monitor, press the ON/OFF key again.
Note: Off-Hook Monitor does not activate your phone’s microphone. The party at the other end will hear only audio transmitted through your handset.
Locking Your Extension
Issued April 2000 DBS-32-755
Use this feature to restrict unauthorized access to your phone. When your phone is “locked,” it cannot be used to make outside calls. It can, however, be used to make internal calls. Lockout codes must be programmed by your system administrator or DBS dealer.
1. Pick up the handset or press ON/OFF.
2. Dial 74.
3. Dial the 4-digit lockout code.

6. Using Additional Features
DB
If your extension is locked, this step unlocks it. If your extension is unlocked, this step locks it.
4. Press ON/OFF.
Note: On a large-display phone, you can lock your extension by pressing the Lockout soft key while in the Function Menu, dialing the 4-digit lockout code, then pressing ON/OFF. Repeat this procedure to unlock your extension.
Switching Between Pulse and Tone Calling
Pulse calling dials by sending out a certain number of pulses for each digit (as with old-fashioned rotary phones). With tone calling, your phone dials by sending a distinctive tone for each digit.
1. Pick up the handset or press ON/OFF.
2. Dial the desired number.
3. Press * or # to switch from pulse to tone calling, or vice versa.
Making Conference Calls
You may use your digital phone to create conference calls that include up to four parties.
Adding an Outside Line
1. To put your call on hold, press HOLD or the outside line key you are using.
2. Access another outside line.
3. Dial the number of the party to be included in the conference.
Ad
S-32-755 Issued April 2000 65
4. Press CONF after the call is answered.
ding an Extension to a Conference
1. Press HOLD.
2. Dial the number of the extension you wish to add.
3. Press CONF after the extension answers.

6. Using Additional Features
66
Dropping Out of a Conference Call
To drop out of a conference call, hang up or press FLASH or ON/OFF.
Using a Headset
When headset mode is turned on, you can use a headset attached to your phone. When headset mode is turned off, the headset is inoperative.
1. Pick up the handset or press ON/OFF.
2. Dial #51.
If headset mode is already on, these steps turn it off; if headset mode is off, these steps turn it on.
3. Replace the handset or press ON/OFF.
Controlling Internal Dial Tone
Internal dial tone is the tone you hear when you are dialing extensions within your office. If you want to, you can turn the internal dial tone off, so that you do not hear it.
1. Pick up the handset or press ON/OFF.
2. Dial #50.
If intercom dial tone is already on, these steps turn it off; if intercom dial tone is off, these steps turn it on.
3. Replace the handset or press ON/OFF.
Controlling Background Music
Issued April 2000 DBS-32-755
If your system is set up with a music source, you can play music over the speaker of your phone.
1. Pick up the handset or press ON/OFF.
2. Dial #53.
If background music is already playing through your speaker, these steps turn it off; if background music is off, these steps turn it on.
Note: On a large-display phone, you can turn background music on or off by simply pressing the BGM soft key while in the Function Menu.

6. Using Additional Features
DB
Using the Reminder Alarm
You can program your phone to alert you at a designated time with an audible tone. To turn the tone off when it sounds, press ON/OFF.
Non-Display and Small-Display Phones
1. Pick up the handset or press ON/OFF.
2. Do one of the following:
3. Press ON/OFF.
Large-Display Phones
1. From the Function Menu, press the Reminder soft key.
2. To set the alarm, enter the time using 12-hour format (HH:MM), followed by 1 for a.m. or 2 for p.m.
Skip this step to cancel a Reminder Alarm.
3. Press ON/OFF.
Using Caller ID
Ca
If . . . Then . . .
You want to set the alarm a. Dial #4.
b. Enter the time using 12-hour format (HH:MM), followed by 1 for a.m. or 2 for p.m.
You want to cancel the alarm Dial #4.
S-32-755 Issued April 2000 67
When the Caller ID (CID) feature is activated, your display telephone can display CID information as incoming calls ring at your extension. You have access to previous call information via the Caller ID Call Log feature.
ller ID Display
The Caller ID display shows the Caller ID number and/or name, depending on the Caller ID format used.

6. Using Additional Features
68
Whenever a Caller ID call rings your phone, the following information appears on the phone display.
Figure 15. Example of a Caller ID display.
Once Caller ID information is received, it can be transmitted along with the call to another phone through call transfer, call forwarding, etc.
Caller ID Call Log
Note: This feature requires system programming or a specific DBS configuration, and may not be available. For information, see your system administrator or DBS dealer.
The Call Log keeps a record of Caller ID calls that ring your phone. An FF key can be assigned to flash when there is a new entry in the log. When you press the key to access the log, the LED turns off.
Call Log Information
Each Call Log entry includes the following call information:
• Calling number
• Calling name (if provided)
• Time and date
Ca
ABC COMPANY
404-555-5512 First line: calling number (7 or 10 digits)
Second line: calling name (up to 15 characters)(Optional, depending on Caller ID format)
Issued April 2000 DBS-32-755
• How the call was answered
• How the call was routed.
ll Log Format
The most recent entries are stored first in the Call Log. When you view the log by pressing the Call Log key, you can scroll forward or backward through the entire contents of the log using the * and # keys. The log format varies between the Small-Display Phones and the Large Display Phone.

6. Using Additional Features
DB
Call Log Format for Small-Display Phones
To view the call log, press the Call Log key. To view the next call in the log, press the # key. To view the previous call in the log, press the * key.
In addition to viewing the calling number information by pressing the Call Log Key, you can view the detailed information on each entry by pressing the CONF key.
Example:
1. Press the Call Log key. The following displays.
Figure 16. Call Log format for small-display phone--calling number and name
2. To display the next level of information, press the CONF key.
Figure 17. Call log format for small-display phone--time and date
3. To display the next level of information, press the CONF key.
Figure 18. Call log format for small-display phone--answer information
404-555-1212 Calling number
Calling name Bill Smith
First Levelof Call LogInformation
10:30 WED JUNE 22 Time, day and date
Calling number
Second Levelof Call LogInformation 404-555-1212
ThofIn
S-32-755 Issued April 2000 69
4. To display the next level of information, press the CONF key.
ANS-J. Jones 103 How the call was handled
Calling Number
ird Level Call Logformation 404-555-1212

6. Using Additional Features
70
Figure 19. Call log format for small-display phone--routing information
5. To return to the first level of call information, press the CONF key.
Other call log entries can be viewed by pressing the * or # key. A “<“ appears beside the oldest entry in the log.
6. Exit the Call Log display by pressing the ON/OFF key.
Call Log Format for the Large-Display Phone
If you have a large-display phone, you can view all four levels of the Call Log on one screen.
Example:
Press the Call Log key. The following display appears:
Figure 20. Call log format for large-display phone--calling number
DIRECT How the call was routed
Calling number
Fourth Levelof Call LogInformation 404-555-1212
Number of last entry viewed through 404-555-0001
ABC COMPANY
Number of selected entry
Number of second log entry
404-555-0001
404-555-8888
4
4
4
top displayName of last entry viewed throughtop display
Issued April 2000 DBS-32-755
A “<“ may appear to the right side of one of the entries. This indicates the oldest entry in the log.
Number of third log entry
Number of fourth log entry
Number of fifth log entry
04-555-9999
04-555-6666
04-555-7777

6. Using Additional Features
DB
Press the soft key next to the desired entry to view the details of a particular call.
Figure 21. Call Log format for large-display phone--detailed call information
Press any soft key to return to the calling number listing format as shown in Figure 20.
Other Call Log entries can be viewed by pressing the * or # keys. If these keys are pressed while viewing detailed information, the detailed information is displayed for the newly selected log entry.
Exit the Call Log display by pressing the ON/OFF key.
Using Voice Mail
Note: This feature requires system programming or a specific DBS
Number of last entry viewed through 404-555-0001
ABC COMPANY Name of last entry viewed through top
Number
Name
Time, day and date
Whether the call was answered
How the call was routed
404-555-0001
ABC COMPANY
12:38 WED MAY 28
CFWD 130
ANSWER
top display
display
S-32-755 Issued April 2000 71
configuration, and may not be available. For information, see your system administrator or DBS dealer.
There are several ways your phone can be used with a voice mail system.
• You can assign a Personal Speed Dial number to provide access to your voice mailbox.
• You can assign an FF key to provide access to your voice mailbox.
• On a large-display phone, you can use the MSG key to access your voice mailbox.

6. Using Additional Features
72
• You can assign an FF key for transferring callers to another extension’s voice mail.
Using a Personal Speed Dial Number for Voice Mail Access
To assign a PSD number for voice mail access, use the procedures under “Assigning PSD Numbers to One-Touch or Soft Keys” on page 28. (For step 4, enter the voice mail extension number.)
To retrieve a voice mail message, press the one-touch or soft key assigned to voice mail.
Using an FF Key for Voice Mail Access
You can assign an FF key as a Voice Mail Access Key. The indicator light on the key will flash when you have a voice message. To access your voice mail, simply press the key.
Assigning a Voice Mail Access Key
1. Pick up the handset or press ON/OFF.
2. Press PROG.
3. Press the FF key you want to assign.
4. Press CONF.
5. Press AUTO.
6. Enter the voice mail extension number and a password (if necessary.) Some Panasonic Voice Mail systems may require a # at the end.
For example, if your voice mail number is 500 and you are not using a
Issued April 2000 DBS-32-755
password, you would make the following entry:
ON/OFF PROG FF key CONF AUTO 500
Note: The length of the voice mail number, including the voice mail extension number, password, and # cannot exceed 6 digits (8 digits on some systems).
7. Press HOLD.

6. Using Additional Features
DB
Using a Voice Mail Access Key
When the VM key flashes, press it to connect to your mailbox.
Using the MSG Key for Voice Mail Access
You can use the MSG key on the large-display phone (VB-44225) to retrieve a voice message.
Note: MSG key functionality requires DBS software version CPC-AII/B v. 8.0 or higher, CPC-S/M, v. 2.0 or higher, or CPC-EX v. 1.0 or higher).
1. When the MSG indicator flashes, press the MSG key. If the message is a voice message, you will be automatically connected to your voice mailbox.
2. Enter your voice mail access code (if not programmed into the MSG key).
Note: You can program your voice mail access code into the MSG key by pressing PROG, MSG, [5-digit access code], HOLD.
Using an FF Key for Voice Mail Transfer
You can assign an FF key as a Voice Mail Transfer Key. This allows you to transfer a caller to another individual’s voice mailbox.
Assigning a Voice Mail Transfer Key
1. Pick up the handset or press ON/OFF.
2. Press PROG.
3. Press the FF key you want to assign.
4. Press CONF.
S-32-755 Issued April 2000 73
5. Press AUTO twice.
6. Enter the voice mail extension number and any special numbers that are required by the voice mail.
For example, if the voice mail number is 500 and the voice mail requires an asterisk (*) at the end of the number, enter the following digits:
ON/OFF PROG FF key CONF AUTO AUTO 500 *

6. Using Additional Features
74
Note: The length of the voice mail number and the special codes cannot exceed 6 digits (8 digits on some systems).
7. Press HOLD.
Using a Voice Mail Transfer Key
1. When a call arrives and the caller wishes to leave a voice message for another individual, press the voice mail transfer key.
The system automatically puts the incoming call on hold.
2. Dial the extension number of the desired individual.
3. Press RELEASE, ON/OFF, or PROG to complete the transfer to the voice mailbox.
Issued April 2000 DBS-32-755

DB
Appendix A. Dial Code List
This appendix contains a summary of the most commonly used dial codes. You can use many of these codes to program functions into FF keys.
Note: Some of these functions may not be available in the version of the DBS you have. For information, contact your system administrator or DBS dealer.
The following table lists the dial codes. The “FF Key” column indicates whether, the code can be programmed into an FF key.
S-32-755 Issued April 2000 75

76
Table 5. Dial Code Table
Function Dial CodeFF
Key
Absence Message Set 71 Yes
Specific message: message number (0-9) + time/date (0000-9999)
No
Absence Message Cancel 71 Yes
Account CodesUnverified Account CodesVerified Account Codes
#7 or AUTO + # Yes
#11 Yes
Alarm Set/Cancel #4 Yes
Specific time: hour (01-12); minutes (00-59); a.m. or p.m. (1=a.m., 2=p.m.)
No
Analog Adapter Ring Toggle *71 Yes
Answer Key Assignment *1 Yes
“Any Key” AssignmentNote: “Any Key” Assignment allows you to assign any digits other than extension numbers or feature codes. Examples include a voice mail pass-word or account codes.
PROG + desired digits(a maximum of 6 or 8 digits may be assigned, depending on your system configuration.)
Yes
Attendant Call 0 Yes
Background Music Set/Cancel #53 Yes
Busy Override 4Note: You can assign this feature as an “Any Key.” See “Any Key Assign-ment”, above.
Yes
Caller ID Call Log *6 Yes
Call Forward - All Calls 720 + extension number Yes
C
C
C
C
C
C
Issued April 2000 DBS-32-755
all Forward - Busy/No Answer 721 + extension number Yes
all Forward - Busy 722 + extension number Yes
all Forward - To Outside Line 723 + AUTO + (00-99) Yes
all Forward - No Answer 724 + extension number Yes
all Forward Cancel 72 Yes
all Park 75 Yes

DB
Call Waiting 3Note: You can assign this feature as an “Any Key.” See “Any Key Assign-ment” on page 76.
Yes
Conference CONF No
Dial Tone On/Off #50 Yes
DND Set/Cancel 73 Yes
Direct Pick-Up 79 + extension number Yes
Extension Call Extension number Yes
Extension Park Pick-up 76 + extension number No
Flash FLASH No
Group Pick-up 70 Yes
Headset Mode On/Off #51 Yes
Hold HOLD No
Intercom Key Assignment #8 Yes
Least Cost Routing Access 9 Yes
Meet-Me Answer 77 Yes
Message Waiting Set 2Note: You can assign this feature as an “Any Key.” See “Any Key Assign-ment” on page 76.
Yes
Message Waiting Answer AUTO - REDIAL Yes
Message Waiting Cancel AUTO - FLASH Yes
Mute Key Assignment *# Yes
Night Answer Device (UNA) Pick-up 78 Yes
N
O
O(T
O
Function Dial CodeFF
Key
S-32-755 Issued April 2000 77
ight Mode On/Off #52 (attendant only) Yes
ffhook Voice Announce 5Note: You can assign this feature as an “Any Key.” See “Any Key Assign-ment” on page 76.
Yes
ffhook Voice Announce Answer alkback)
*3 (must be stored in an FF key) Yes
utside Line Queuing 2Note: You can assign this feature as an “Any Key.” See “Any Key Assign-ment” on page 76.
Yes

78
Page Call #00 - #07 Yes
Personal Speed Dial AUTO (90-99 or 900-909)) Yes
Pooled Trunk Access 9 or 81-86 No
Privacy Release CONF No
Redial REDIAL No
Release Key Assignment *2 Yes
Station Lockout Off/On 74 + 4-digit lockout code (optional) Yes
System Speed Dial AUTO + (00-89 or 000-199) Yes
Save Dial Access AUTO + * Yes
Save Dial Registration AUTO + AUTO + * Yes
Tone/Voice Switch 1Note: You can assign this feature as an “Any Key.” See “Any Key Assign-ment” on page 76.
Yes
Transfer PROG No
Variable Mode *61 Yes
Function Dial CodeFF
Key
Issued April 2000 DBS-32-755

DBS-32-755
AAbsence messages
cancelling .................................... 59setting up .................................... 58using ........................................... 58
Access groups, outside line ............. 36Adjusting
display contrast ........................... 24ring volume ................................. 24sound volumes ............................ 24
Announcement to busy extensionanswering .................................... 60making ........................................ 59transferring calls with ................. 61
Answeringannouncement
to busy extension ..... 60call .............................................. 43call waiting ................................. 54callback message ........................ 56off-hook voice announcement .... 60page from any extension ............. 51
Any key assignment ........................ 76Assigning
names to PSD bins ...................... 30PSD numbers to
one-touch/soft keys . 28PSD numbers to PSD bins .......... 28voice mai voice mai
Automatic reAuto-RedialAuto-RepeatBBackground Breaking intBusy overridCCall forward
cancelling .................................... 53setting up ..................................... 51using ............................................ 51
Call waiting ..................................... 53Callback messages ........................... 56
cancelling .................................... 56scrolling through ......................... 58using the MSG key ..................... 58
Caller ID ..........................................67Calling page zones 00-07 ................ 50Calls
answering .................................... 43DBS behind PBX ........................36holding ........................................ 44making ........................................ 36outside, placing ........................... 35parking ........................................ 45picking up ................................... 44to attendant ................................. 50to extensions ...............................50transferring .................................. 46
Camp-on callback ............................ 54Cancelling
absence message ......................... 59call forwarding ............................ 53callback message ........................56
Chaining SSD or PSD numbers ....... 40Checking
,
Index
Issued April 2000 79
l access key ................. 72l transfer key ............... 73dial, using ................... 41 ..................................... 41 Dialing ....................... 41
music ........................... 66o an outside call ........... 61e, using ........................ 61
ing
PSD numbers ........................29 37SSD numbers .............................. 39
Communicating within your office . 49Conference calls .............................. 65Controlling
background music ....................... 66internal dial tone ......................... 66
DDial code list .................................... 75Direct outside line key ..................... 36Directories

80
Index
Extension .................................... 13Speed dial ................................... 13
Displaycontrast adjustment ..................... 24information ................................. 18large ............................................ 15small ........................................... 10
DND ................................................ 58Do-not-disturb ................................. 58EExtension directory ......................... 13Extensions, calling .......................... 50FFF key
as voice mail access key ............. 72as voice mail transfer key ........... 73direct outside line ....................... 36feature codes ............................... 75
Forwardingcancelling .................................... 53setting up .................................... 51using ........................................... 51
HHeadset, using ................................. 66Holding calls ................................... 44IIn-office communications ............... 49Internal
callingattendant ................................. 50extension ................................ 50
calls, handling ............................. 50
IntLLaLoMMeMeMe
Modesextension ..................................... 13speed dial .................................... 13variable ....................................... 14
Monitor, off-hook ............................ 64MSG key ..........................................58Mute key ..........................................64OOff-hook monitor ............................ 64Off-hook transfer
screened ...................................... 46unscreened .................................. 47
Off-hook voice announcementanswering .................................... 60making ........................................ 59transferring calls with ................. 61
One-touch keys ................................ 26On-hook transfer
screened ...................................... 46unscreened .................................. 47
Outside callbreaking into ...............................61
Outside callsplacing ........................................ 35
Outside line access groups .............. 36Outside line callback
setting ..........................................37Outside line key, direct ....................36PPaging .............................................. 50
answering from any extension .... 51calling page zones 00-07 ............ 50
Issued April 2000 DBS-32-755
communications .......................... 49tone/voice switching ................... 50ernal dial tone .............................. 66
rge display phone ........................ 15cking your extension ................... 64
et-Me Answer ............................. 51ssage key .................................... 58ssage waiting .............................. 56
Parkingcalls ............................................. 45
PBX ................................................. 36Personal speed dialing
assigningnames to PSD bins ................. 30PSD numbers
to bins ................................ 28to one-touch keys .............. 28
chaining numbers ........................40

Index
DB
checking PSD numbers ........ 29, 37for voice mail access ...................72setting up .....................................26
Picking up calls ................................44Pulse vs. tone dialing .......................65RRedial
Auto ............................................41Auto-Repeat ................................41
Redialingnumbers .......................................41saved number ..............................42saving a number ..........................41
Reminder alarm ...............................67Ring volume, adjusting ....................24SSaved number, redialing ..................42Saving
and redialing a number ...............41number ........................................41
Screenedoff-hook transfer .........................46on-hook transfer ..........................46transfers .......................................46
Scrolling through messages .............58Sending a callback message ............56Setting up
absence messages ........................58call forwarding ............................51call waiting ..................................53outside line callback ...................37personal speed dialing .................26
Sm
SoSpSp
SSD ..................................................37Station lockout .................................64Switching
between tone and voice calling ...50System speed dialing
chaining numbers ........................40checking SSD numbers ...............39dialing a SSD number .................38using ............................................37
TTelephone
display information .....................18large display ................................15parts .............................................17setting up .....................................23small-display ...............................10
Tone calling .....................................50Tone vs. pulse dialing ......................65Transferring
calls .............................................46screened ......................................46unscreened ..................................47with announcement to
busy extension .........61with off-hook voice announce ....61
UUnderstanding your phone ...............17Unscreened
off-hook transfer .........................47on-hook transfer ..........................47transfers .......................................47
V
S-32-755 Issued April 2000 81
telephone .....................................23all display phone ........................10extension mode ...........................13speed dial mode ..........................13variable mode ..............................14ft keys ..........................................26eed dial directory .........................13eed dialingPersonal ................................ 26, 37System .........................................37
Variable mode ..................................14Voice calling ....................................50Voice mail ........................................71
accessing via FF key (VM access key) ......72
accessing via MSG key ...............73accessing via PSD number ..........72transfer key .................................73
Volumehandset ........................................24

82
Index
receiver ....................................... 24ringer ........................................... 24speaker ........................................ 24
Issued April 2000 DBS-32-755

Index
DBS-32-755 Issued April 2000 83

84 Issued April 2000 DBS-32-755
Index
NOTES

PanasonicPanasonicPanasonicPanasonic®
Telecommunication Systems CompanyBusiness Telephone Systems DivisionTwo Panasonic WaySecaucus, NJ 07094Part Number: 555X00701©Copyright 2000