Portrait Flow Guidelines - Lifetouch · •Go to Organize > Libraries and click on Portrait Library...
4
• Go to Organize > Libraries and click on Portrait Library • Click on a sort name to view the portraits • Click the Edit All button to edit the portraits Step 1 Review and Proof Portrait Information • Correct any misspelled names • Indicate if the picture should be used in the book by checking the “Use Portrait Image” box • Repeat this process until you have reviewed the entire sort • To copy a portrait to another sort, click on the portrait and hold the control key down while dragging the portrait to another sort • To move a portrait to another sort, click on the portrait and drag it to its new sort Portrait Flow Guidelines
Transcript of Portrait Flow Guidelines - Lifetouch · •Go to Organize > Libraries and click on Portrait Library...
• Go to Organize > Libraries and click on Portrait Library
• Click on a sort name to view the portraits
• Click the Edit All button to edit the portraits
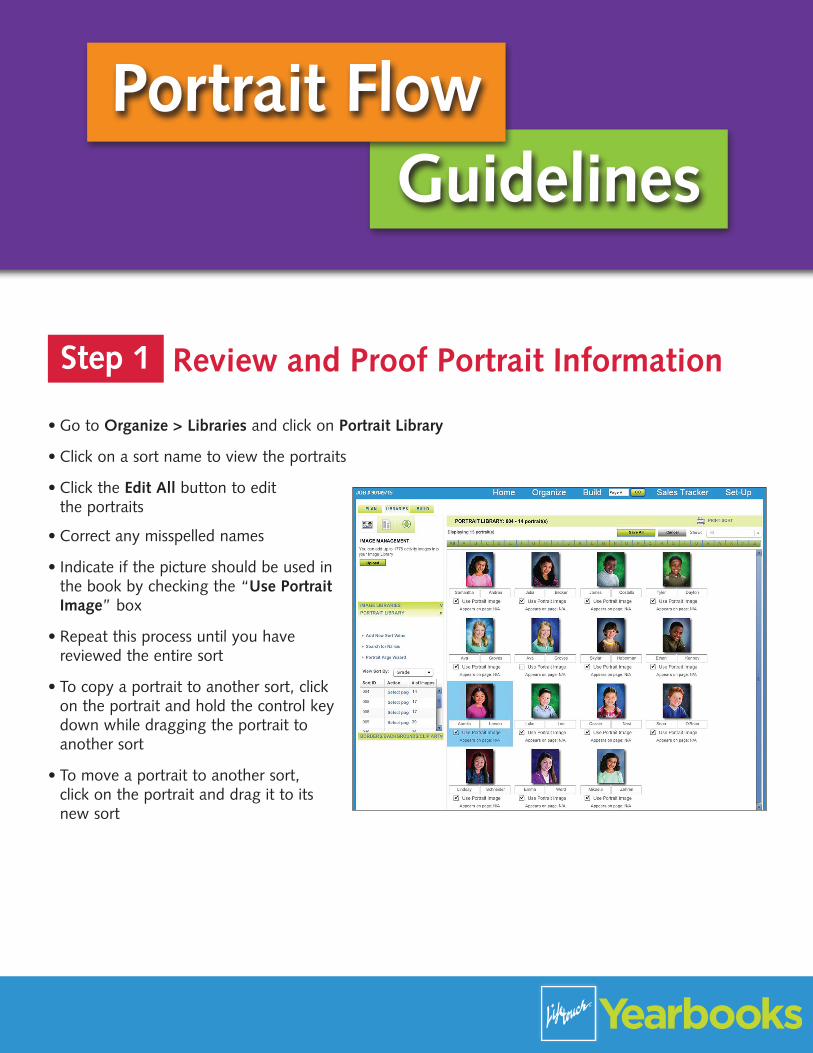
Step 1 Review and Proof Portrait Information
• Correct any misspelled names
• Indicate if the picture should be used in the book by checking the “Use Portrait Image” box
• Repeat this process until you have reviewed the entire sort
• To copy a portrait to another sort, click on the portrait and hold the control key down while dragging the portrait to another sort
• To move a portrait to another sort, click on the portrait and drag it to its new sort
Portrait Flow Guidelines

Page 2
**RECOMMENDED PROCESS**
OPTION 1: Use Build Tab
1. Select a page for a particular sort
2. Open the Template Control Palette on the left hand navigation
3. Search for a portrait template and drag it to your page
4. Use the sort drop-down menu at the bottom of the screen to indicate which sort value you would like assigned to the page
5. Repeat this process for all portrait pages
6. Click the “Save & Flow” button to see how many portraits in a sort still need to be assigned to a page
Once you have assigned enough pages for a sort, you can flow the sort.
Step 2 Flow Portrait Pages
2
Portrait Flow Guidelines
Page 3
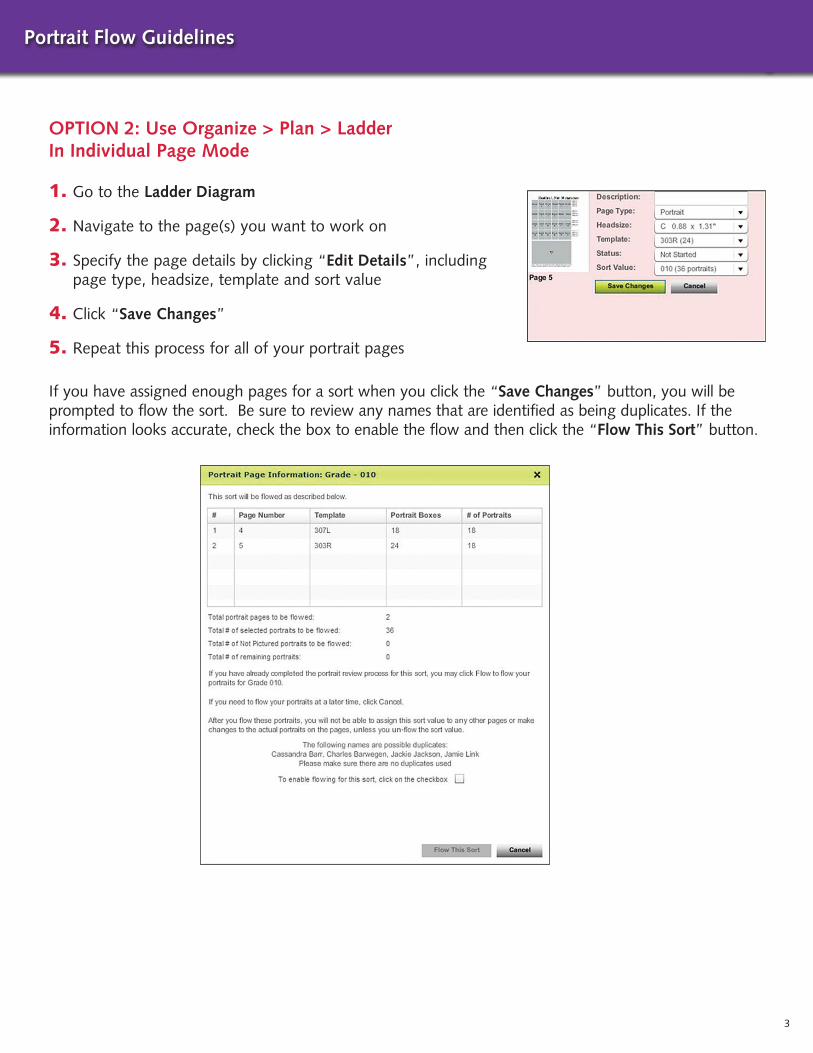
OPTION 2: Use Organize > Plan > Ladder In Individual Page Mode
1. Go to the Ladder Diagram
2. Navigate to the page(s) you want to work on
3. Specify the page details by clicking “Edit Details”, including page type, headsize, template and sort value
4. Click “Save Changes”
5. Repeat this process for all of your portrait pages
If you have assigned enough pages for a sort when you click the “Save Changes” button, you will be prompted to flow the sort. Be sure to review any names that are identified as being duplicates. If the information looks accurate, check the box to enable the flow and then click the “Flow This Sort” button.
3
Portrait Flow Guidelines
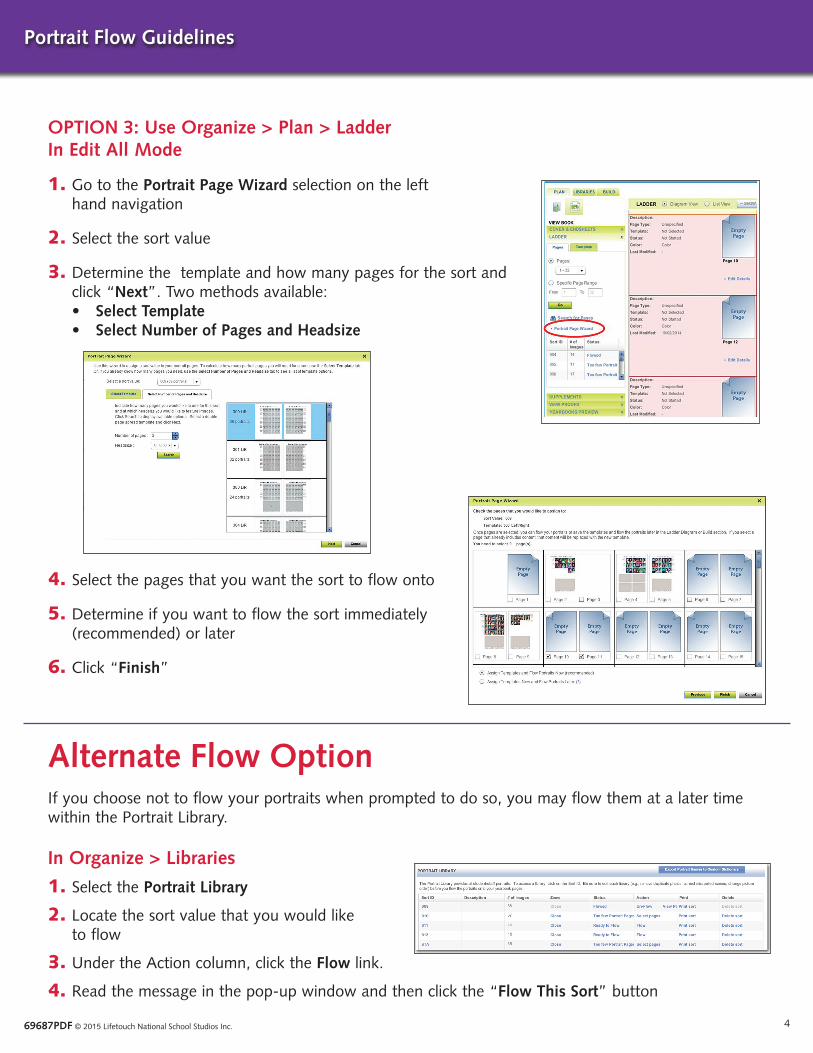
If you choose not to flow your portraits when prompted to do so, you may flow them at a later time within the Portrait Library.
In Organize > Libraries
1. Select the Portrait Library
2. Locate the sort value that you would like to flow
3. Under the Action column, click the Flow link.
4. Read the message in the pop-up window and then click the “Flow This Sort” button
4
OPTION 3: Use Organize > Plan > Ladder In Edit All Mode
1. Go to the Portrait Page Wizard selection on the left hand navigation
2. Select the sort value
3. Determine the template and how many pages for the sort and click “Next”. Two methods available:
• Select Template • Select Number of Pages and Headsize
4. Select the pages that you want the sort to flow onto
5. Determine if you want to flow the sort immediately (recommended) or later
6. Click “Finish”
Alternate Flow Option
69687PDF © 2015 Lifetouch National School Studios Inc.
Portrait Flow Guidelines