Pesticide Retailer Course TRAINER MANUAL - CropLife … · · 2016-07-26This pesticide retailer...
282
Pesticide Retailer Course TRAINER MANUAL
Transcript of Pesticide Retailer Course TRAINER MANUAL - CropLife … · · 2016-07-26This pesticide retailer...

i
Pesticide Retailer CourseTRAINER MANUAL

ii

1
This pesticide retailer course has been prepared by CropLife International. It consists of 19 sessions that can be given altogether in seven days or, spread over a longer time as needed:
ContentsIntroduction .............................................................................................................................................. 3
Session 1: Basics of good customer service ............................................................................. 9
Session 2: Crop and Pest Management ....................................................................................23
Session 3: Integrated Pest Management (IPM)......................................................................35
Session 4: Pesticide Classification ..............................................................................................55
Session 5: Pesticide Formulations ..............................................................................................67
Session 6: The Product Label .......................................................................................................83
Session 7: The Environment ......................................................................................................... 101
Session 8: Risk, Harmful Effects, and First Aid ..................................................................... 113
Session 9: Personal Protective Equipment (PPE) ................................................................ 131
Session 10: Hand Sprayers ............................................................................................................. 143
Session 11: Pesticide Application (Theory) ............................................................................ 163
Session 12: Pesticide Mixing and Application (Practical) .................................................. 179
Session 13: Transport and Disposal of Pesticides ................................................................. 193
Session 14: Spill Clean-Up .............................................................................................................208
Session 15: Laws and Regulations ...............................................................................................217
Session 16: Pesticide Shop / Warehouse Location and Construction ......................... 228
Session 17: Counterfeit Pesticide Products ........................................................................... 245
Session 18: Purchasing, Stock Control, and Shop Organisation ..................................... 261
Session 19: Course evaluation ......................................................................................................275
REMEMBER - GOOD PREPARATION WILL TAKE YOU MORE THAN HALF WAY TO ACHIEVING A SUCCESSFUL COURSE.

2

3
INTRODUCTION

4

5
Objectives of the CourseThe overall objectives of the training course are:
• To provide the essential knowledge required by pesticide retailers. This consists of the basic principles and concepts of storing, handling, selling, and using pesticides, and of dealing with farmers, rather than detailed technical knowledge of individual pests and pesticides.
• To enable pesticide retailers to provide appropriate advice to farmers on crop and pest management, and pesticide use and safety.
• To structure, and to make the links within, the existing knowledge of individual pesticide retailers.
• To make pesticide retailers think about their current practices and how these can be improved.
• To provide retailers with the tools to help them give a better service to their customers.
• In summary, to make retailers examine their current practices and to persuade them to provide better service to farmer customers in terms of the quality of both the products sold and of the advice on their use given to farmers.
Trainers should always keep these course objectives in mind during training sessions, andensure that all topics are adequately covered. In particular, trainers should emphasize theconcept of “Good Service = Good Business” in all training activities.
Trainers should also note the objectives given at the beginning of each Session plan andensure that the activity is carried out so as to achieve these objectives.
Course Duration and LocationThe full course takes 7 days (at 4 training hours per day). Many participants may find it difficult to attend for this length of time. In this case, the course can be spread over a longer period of time, such as one or two sessions in a morning, afternoon or evening over several weeks. This will need to be decided based on the needs of the participants prior to the course. If this schedule is followed, the introductory activity of each session will be important as a reminder of the results and conclusions of the previous session.
A suitable venue should be selected for the course. The facilities available at the venue will partly depend on how the course is to be held in terms of timing of the sessions. More facilities in terms of refreshments, and perhaps accommodation, will be needed if the full course is to be held in one instance.
Training MethodThe training method is participatory, and the role of the facilitator is to create the conditions within the sessions that assist this type of learning. For the course to be effective it is essential that the facilitator has the necessary participatory training skills and experience.
Since the training is participatory, not more than 30 farmers should attend each session, otherwise applying effective adult learning methodology will prove difficult.
Facilitator and session activities are specified during each session plan. This is deliberate, and does not question the skills or experience of the facilitator. Activities are specified in this way so as to take course participants step-by-step through course topics. Facilitators are free to adjust activities to a certain extent depending on their knowledge and experience, and of local circumstances.

6
Introduction
The training room should be laid out either with individual participant chairs or tables in a U-shape, or with 3-4 tables in a semi-circle around the main flipchart, with 4-5 participants per table. The room should be large enough for participant groups to work separately and without disturbing each other in group activities; otherwise an additional room will be needed.
Course Participant EvaluationThe facilitator can apply the assessment questions at the end of each session to assess their knowledge after receiving the training. Alternatively, the facilitator can leave these questions at the very end of the course. In this case, it is recommended to apply a pre-course evaluation to measure the participant knowledge prior the course that consists of at least 25 questions selected from the assessment questions given in each sessions. These same 25 questions should be given to the participants as a post-course evaluation so the facilitator can see how the participant knowledge has change.
Preparation of Training Notes, Visual Aids and Training EquipmentElectricity supplies may be unreliable in many areas, a data projector may not be available, or it may not be possible to darken the room sufficiently. For these reasons, this training course deliberately does not rely on PowerPoint presentations, rather it uses flipcharts and similar equipment.
All session printed materials should be prepared and duplicated well before each session.Participants should be given a notebook, pen, and file cover. On the assumption that participants will attend all sessions, these materials should be provided in Session 1 only.Even so, spare notebooks and pens should be available at each session for those participants who forget to bring them.
Flipcharts should be prepared of the objectives of each session, to be used in the session introduction and referred to at the end of the session. Also, where presentations are made it is useful to pre-prepare flipcharts with the main points that can be referred to during the presentation.
Some sessions require additional training equipment, such as pesticide containers, gloves, or bottles of water. There is a check-list at the end of this Introduction, and also specific requirements in each session introduction. The Trainer should note where such equipment is needed in the course, and decide what they need to obtain and from where.
A display of relevant booklets and other material, e.g. pesticide labels and information leaflets, and pest and beneficial insect identification charts may also be made available; these can be browsed by participants at coffee and lunch breaks.
In addition to any pesticide labels and information leaflets that are displayed during the course, certain pesticides, pesticide products, or companies are mentioned or indicated during the course. These are for example purposes only, and are not a recommendation for the particular pesticide or product.

7
Activity TimesThe times given for each activity of a session are indicative, and are given to help the Facilitators when planning and running the session. However, they are not fixed, and it may be found that with a more knowledgeable group of participants some of the activities may be completed in less than the indicated time. Conversely, on occasion more time must be allowed in order for participants to thoroughly cover the topic.
Trainer NotesTrainer notes are provided at various places in the Trainers Manual. These are to provide additional assistance and direction for the running of the relevant activity.
Sample questions are provided in many Session activities. These are suggestions or indicative questions only, and are intended to guide the trainer in the type of questions to ask so as to stimulate discussion and ensure that all aspects of the topic are covered and discussed. Other questions may be required to achieve this – the trainer must facilitate the discussion and ask these additional questions.
Fact SheetsThe Fact Sheets for each session contain the essential information from each session. They are intended both as reminder notes for participants, and for the Trainer to use as a checklist during an activity to ensure that all the topics are adequately covered.
Sufficient numbers of all Fact Sheets for participants must be printed or photocopied prior to the start of the course.
Participant DetailsParticipant details need to be kept both as a record of attendance, and also for possible future contacts. Projects may have their own Forms to record such information. In case they do not, a generic Attendance Form is included at the end of this Introduction. This form also allows for adding participant scores from the end of session assessment.
TRAINERS MUST NOT MAKE ANY FORM OF RECOMMENDATION FOR A PARTICULAR PESTICIDE,
PESTICIDE PRODUCT, OR COMPANY.

8
Introduction
Checklist of Training Materials Required1. Trainers Manual
2. Flipchart stands x 4-6
3. Flipcharts x 200 sheets
4. Marker pens x 24 assorted red, green, blue, black – chisel tipped
5. Masking tape x 1 roll
6. Cards 100 approx 25 x 12cm, assorted colours
7. Glue stick x 1
8. Block notes x No. participants
9. Pens / Pencils x No. participants
10. File covers x No. participants
11. Selection of pesticide containers/different types of formulations of each hazard classification. Ensure that these are from genuine products.
12. Selection of labels of each hazard classification. Ensure that these are from genuine products.
13. Selection of pesticide data sheets/technical leaflets
14. Rubber gloves and other personal protective equipment (PPE)
15. Soap/water
16. Examples of different types of hand sprayers
17. Examples of different types of nozzles
18. Selection of illustrations of major insect pests, beneficial insects, diseases, weeds
19. Pest management leaflets/booklets/recommendations
20. Any other suitable leaflets/booklets/recommendations available, eg from pesticide companies

9
SESSION 1:BASICS OF GOOD CUSTOMER SERVICE

10

11
Lesson Plan
Materials needed: R Flipchart stands.R Flipchart paper.R Markers (4 colours).R Notebooks, pens, and file covers for participants.R Coloured cards.R Glue stick or blue tack.R Masking tape.
Time needed: 100 minutes
Intended audience: Pesticide Retailers
Preparation: R Flipchart with the session title “Dealing With Farmers”, and the Session Objectives.
R Print off sufficient Retailer Self-Assessment FormsR Print off sufficient Attendance Record sheets.R Print off sufficient Assessment question sheets.R Print off sufficient Fact Sheets for participants.R Organise venue and seating arrangements.
Attendance RecordAs participants arrive, ask them to enter their name and other information on the Attendance Record. There is also a column on the form to enter their marks from the Assessment Questions at the end of the training session.

12
Att
en
dan
ce R
eco
rd
Tra
inin
g S
ess
ion
:
Date
:
Nam
eO
rgan
isati
on
Lo
cati
on
Te
lep
ho
ne
Nu
mb
er
Ass
ess
me
nt
Mark

13
Set up / Introduction 5 minutes
Time Activity
Trainer Note:This first session lays the foundation for the whole retailer course. The underlying objective all sessions and activities is for retailers to think and reflect on their current situation and practices, what needs to be improved, and how to make these improvements. The trainer must always ensure that participants are given encouragement and time to make these reflections.
Attention: Welcome the retailers to this first session of the course.Ask:How many of the retailers have been in business for more than 15 years? 10 years? 5 years? Less than 5 years?Say that between them the retailers have extensive experience, knowledge and skills. This training course will structure and build on these factors.
Title: Refer to the Title Flipchart and tell participants that this training session will cover Dealing with Farmers.
Credibility: Tell participants your experience in dealing with farmers, particularly with providing advice and inputs.
Objectives: Refer to the Title Flipchart with the Lesson Objectives.By the end of the session, participants will be able to:• Describe the issues and problems that retailers most frequently
experience in the sale and handling of pesticides, and when dealing with customers (including the problems most often raised by farmers in connection with pesticides and application equipment).
• State clearly why good service to farmers is good for business, and what the key elements of good service entail.
Benefits: Providing good service to customers will improve the retailer’s customer base and business.
Direction: • Activities begin with an introduction of the participants and to the course.
• This is followed by a working group discussion to discover the expectations of the participants from the training course. This first activity sets the tone for all sessions, in that training is participatory and interactive.
• A second working group task is designed to get retailers thinking about the real issues and problems they and their customers face in the handling, sale and use of pesticides.
• During the plenary discussion following group reports, the trainer adds values and principles of good service to customers not already raised in the reports or discussion.
• These values and principles of good service, and the message that they “equal” good business, will be a foundation of the course, and will be referred back to repeatedly throughout course sessions.
14
Session 1: Dealing With Farmers
DeliveryExplanation, Demonstration, Exercise, and Guidance:
Time Activity
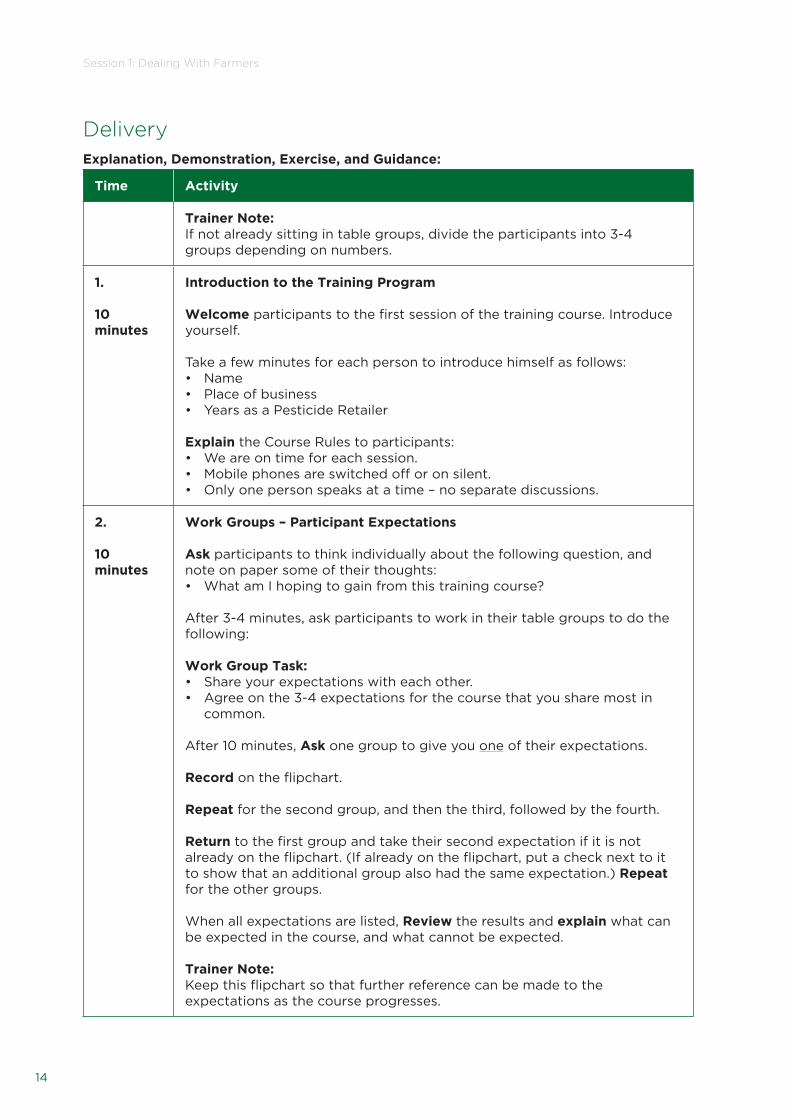
Trainer Note:If not already sitting in table groups, divide the participants into 3-4 groups depending on numbers.
1.
10 minutes
Introduction to the Training Program
Welcome participants to the first session of the training course. Introduce yourself.
Take a few minutes for each person to introduce himself as follows:• Name• Place of business• Years as a Pesticide Retailer
Explain the Course Rules to participants:• We are on time for each session.• Mobile phones are switched off or on silent.• Only one person speaks at a time – no separate discussions.
2.
10 minutes
Work Groups – Participant Expectations
Ask participants to think individually about the following question, and note on paper some of their thoughts:• What am I hoping to gain from this training course?
After 3-4 minutes, ask participants to work in their table groups to do the following:
Work Group Task:• Share your expectations with each other.• Agree on the 3-4 expectations for the course that you share most in
common.
After 10 minutes, Ask one group to give you one of their expectations.
Record on the flipchart.
Repeat for the second group, and then the third, followed by the fourth. Return to the first group and take their second expectation if it is not already on the flipchart. (If already on the flipchart, put a check next to it to show that an additional group also had the same expectation.) Repeat for the other groups.
When all expectations are listed, Review the results and explain what can be expected in the course, and what cannot be expected.
Trainer Note: Keep this flipchart so that further reference can be made to the expectations as the course progresses.

15
3.
20 minutes
Work Groups – Problems Affecting Retailers and their Farmer Customers in the Safe Handling, Sale and Effective Use of Pesticides
Refer back to the introduction to the session and acknowledge the considerable amount of first-hand experience that all the participants bring to the course, and say how important it is that we should all benefit from the sharing of this experience.
Ask them to get up and sit at different tables so that they have a chance to interact with more of the participants in the course. Give work groups the following task:
Work Group Task• Agree as a group on the 3-4 most important problems that they face as
retailers in handling and selling pesticides, and in providing advice to farmers.
• Agree as a group on the 3-4 most common problems raised by farmers in the selection, handling and use of pesticides.
• Select one person to report to the full group.
Say that they have 20 minutes.
4.
20 minutes
Work Group Reports – Problems Affecting Retailers and their Farmer Customers in the Safe Handling, Sale and Effective Use of Pesticides
Explain that we will hear from each group on their responses to the first task before moving on to the second task.
Starting with the first task, ask a table to give you one of their problems as retailers.
Record on the flipchart.
Repeat for the second group, and then the third, followed by the fourth. Return to the first group and take their second expectation if it is not already on the flipchart. (If already on the flipchart, put a check next to it to show that an additional group also had the same expectation.) Repeat for the other groups.
Then repeat the same procedure with the second task for problems of farmers.
Throughout these group reports, ensure that all the points made are clearly understood by all participants.
Indicate those problems that will be examined and addressed during the course, and those that are outside the scope of the course.
Trainer Note: Keep this flipchart so that further reference can be made to the problems as the course progresses. The first opportunity will be in Session 2, Activity 1.

16
Session 1: Dealing With Farmers
5.
20 minute
Discussion / Presentation – Good Service = Good Business
Ask:• Do any participants have a favourite restaurant?• Why is this restaurant their favourite, what encourages them to go there
on a regular basis and not to another restaurant?
List participant responses on the flipchart.
Summarise by saying that a good restaurant attracts and keeps customers through:• Good service to customers• A friendly atmosphere• Knowledge of the food being prepared, and ability to provide advice on
dishes• Attractive and clean surroundings• Good food• Value for money
Ask:– How do these responses relate to their pesticide shop and attracting
farmer customers?
Present Good Service = Good Business from the Fact Sheet, and then ask for participant comments on these points.
Present The Elements of Good Service and The Elements of Bad Service from the Fact Sheet, and again ask for participant comments.
Say:The retailer has choices:• To maximize profits by selling as much pesticide product as possible to
each farmer regardless of the need or suitability of a pesticide product for that farmer.
• Or to adhere to principles of good service and good advice to farmer customers, and expect that these principles in the long run will result in a competitive and successful business through building trust with farmers and expanding the customer base.
Ask:• How should the retailer think about these choices?
Trainer Note:Keep the restaurant flipchart and refer back to it continually during the course to emphasise the factors which attract customers to a business.

17
Finish
Time Activity
Summary:
1 minute
Include as major messages:– Participant expectations– The major problems faced by retailers– Good Service = Good Business
Questions:
1 minute
Ask if everyone understands or if there are any additional questions. Answer these provided they are relevant.
Ask if the session objectives were met
Evaluation:
12 minutes
Hand out the Assessment Sheet and ask participants to complete two of the questions.
Collect the Assessment Sheet for later marking and entering the marks on the Attendance Record.
Next step:
1 minute
Say that in this session we learned about Good Service = Good business. In future sessions, we will discuss and learn various ways of ensuring that we are providing good service to customers.
Hand out the Elements of Good Service: Retailer Self-Assessment Form.
Say that as a first step, participants should think about the current situation of their shop and customer service and should complete the Elements of Good Service: Retailer Self-Assessment Form when they have returned to their shops.
Explain that they will not need to show anyone the scores they give themselves, but we will discuss their results in general at the beginning of the next session.
Hand out the Fact Sheet to participants.

18
Session 1: Dealing With Farmers
The Elements of Good Service
Retailer Self-Assessment Form
With regard to your pesticide shop, decide on an overall rating for each question. Identify examples that support each rating. Be objective. Giving a rating of “excellent” when it should be “need to improve” does not provide true self-assessment.
1. A well-lit, clean, tidy shop, with products and posters attractively displayed. Poor Need to Average Good Excellent Improve 1 ------------------ 2 ------------------ 3 ------------------ 4 ------------------ 5
Examples for Rating
2. Treating the farmer as a friend.
Poor Need to Average Good Excellent Improve 1 ------------------ 2 ------------------ 3 ------------------ 4 ------------------ 5
Examples for Rating
3. Knowledge of the farmers’ problems, and appropriate solutions.
Poor Need to Average Good Excellent Improve 1 ------------------ 2 ------------------ 3 ------------------ 4 ------------------ 5
Examples for Rating

19
4. The ability to ask questions to identify the problem.
Poor Need to Average Good Excellent Improve 1 ------------------ 2 ------------------ 3 ------------------ 4 ------------------ 5
Examples for Rating
5. Good quality, practical advice which is easily understood and remembered by the farmer.
Poor Need to Average Good Excellent Improve 1 ------------------ 2 ------------------ 3 ------------------ 4 ------------------ 5
Examples for Rating
6. Constant availability of good quality products at reasonable prices.
Poor Need to Average Good Excellent Improve 1 ------------------ 2 ------------------ 3 ------------------ 4 ------------------ 5
Examples for Rating
7. Honesty in all dealings with the farmer.
Poor Need to Average Good Excellent Improve 1 ------------------ 2 ------------------ 3 ------------------ 4 ------------------ 5
Examples for Rating

20
Session 1: Dealing With Farmers
Assessment Questions
Name: …………………………………………………… Date: ……………………… Mark:
Answer TWO (2) only of the following questions.You may write your answers on this question sheet or tell your trainer the answers. All questions are the same value (5 marks).
Question 1: Give two reasons why farmers often distrust pesticide retailers.
...........................................................................................................................................................................................
...........................................................................................................................................................................................
...........................................................................................................................................................................................
Question 2: Give two reasons why farmers will choose a particular pesticide retailer.
...........................................................................................................................................................................................
...........................................................................................................................................................................................
...........................................................................................................................................................................................
Question 3: Give three of the elements of good service.
...........................................................................................................................................................................................
...........................................................................................................................................................................................
...........................................................................................................................................................................................
Question 4: Give three of the elements of bad service.
...........................................................................................................................................................................................
...........................................................................................................................................................................................
...........................................................................................................................................................................................

21
FACT SHEET
Good Service = Good Business
• The retailer relies on customers (farmers) for the success of his shop. The more customers that the retailer can attract, the more the shop will prosper.
• Farmers are often suspicious of private pesticide retailers. They consider that:
• Pesticides from retailers are of poor quality and expensive• Retailers provide no or poor advice on the selection and use of pesticides• The retailer just wants to take their money.
• Customers look for service when they come to a shop – if they receive good service, they will use that shop rather than another shop.
• Farmers will choose a retailer where:
• Pesticides are of good quality and reasonably priced• Good advice on the selection and use of pesticides is provided• The farmer is treated as a valued friend.
• Once farmers discover such a retailer, they will use that retailer rather than competitors that do not provide such good service, and they will tell their friends.
The Elements of Good Service
• A well-lit, clean, and tidy shop, with products and posters attractively displayed.
• Treating the farmer as a friend and establishing trust.
• Knowledge of the farmers’ problems, and being able to provide appropriate solutions.
• The ability to ask questions and to listen to the farmer so as to identify the problem.
• Up-to-date knowledge of the latest products, recommendations, and all agronomic practices.
• Knowledge of the effect of agronomic practices on pest levels.
• Good quality, practical advice, including the economics of pesticide use, which is easily understood and remembered by the farmer.
• Constant availability of genuine, good quality products at reasonable prices, with prices clearly marked.
• Honesty and establishing trust in all dealings with the farmer.

22
Session 1: Dealing With Farmers
The Elements of Bad Service
• A dark, dirty, cluttered shop, with products badly displayed.
• Leaking or damaged product containers, or with no labels.
• Treating the farmer as ignorant, and as someone to just take money from.
• Providing no advice or help to the farmer in the selection of an appropriate solution or product for his problem.
• Selling any pesticide, regardless of its suitability or the problem, because the farmer asks for the cheapest product, or because the retailer makes the most profit on that product.
• Selling counterfeit, illegal, poor quality, out-of-date, or adulterated pesticides.
• Dishonesty.

23
SESSION 2:CROP AND PEST MANAGEMENT

24
Session 2: Crop and Pest Management

25
Lesson Plan
Materials needed: R Flipchart stands.R Flipchart paper.R Markers (4 colours).R Notebooks, pens and file covers for participants who have
forgotten to bring them.R Coloured cards.R Glue stick or blue tack.R Masking tape.
Time needed: 100 minutes
Intended audience: Pesticide Retailers
Preparation: R Flipchart with the session title “Crop and Pest Management”, and the Session Objectives.
R Flipchart: Pests, Diseases and Weeds from Fact Sheet.R Flipchart: Crop Management and Yield Potential from Fact
Sheet.R Flipchart: Main Agronomic Factors for a Healthy Crop from
Fact Sheet.R Flipchart: Methods of Pest Management from Fact Sheet.R Print off sufficient Attendance Record sheets.R Print off sufficient Assessment Question sheets.R Print off sufficient Fact Sheets for participants.R Organise venue and seating arrangements.
Attendance RecordAs participants arrive, ask them to enter their name and other information on the Attendance Record. There is also a column on the form to enter their marks from the Assessment Questions at the end of the training session.

26
Session 2: Crop and Pest Management
Set up / Introduction 5 minutes
Time Activity
Attention: Welcome the retailers to the session.
Ask:• Who completed the Elements of Good Service: Retailer Self-
Assessment Form?• Can anyone say where they identified they could do better?• What actions are needed to achieve these improvements?
Take responses from 2-3 participants.
Say that retailers should continually assess their business and the level of service they provide to customers. There is room for improvement.
Title: Refer to the Title Flipchart and tell participants that this training session will cover Crop and Pest Management.
Credibility: Give an example from the Fact Sheet of how crop management an affect pest levels.
Objectives: Refer to the Title Flipchart with the Lesson Objectives.
By the end of the session, participants will be able to:• State why retailers need to know about both crop management and
pest management.• Understand the relationships between crop management and pest
management.• Define what are pests, insect pests, diseases, and weeds.• Describe the different categories and methods of pest management.
Benefits: Knowing about the relationship between crop management and pest management enables retailers to give better advice to farmers.
Direction: • Activities begin with a short presentation on why retailers need to know about crop management, and how it is linked to good business.
• This is followed by a full group brainstorming on common pest problems in the locality.
• A nother full group brainstorming which identifies the major elements of crop management then leads into a workgroup session which
examines the effects of crop management on pest levels. • The session concludes with a presentation which explains the
different categories and methods of pest management, and links these to crop management.

27
DeliveryExplanation, Demonstration, Exercise, and Guidance:
Time Activity
1.
10 minutes
Presentation--Why Retailers Need to Know About Crop Management
Refer to the questions about farmers in the Retailer Self-Assessment Form.
Say that we will now look in more detail at the sort of advice that will be most helpful to farmers.
Present Why Retailers Need to Know About Crop Management from the Fact Sheet.
Compare the points in the Fact Sheet to the flipchart of responses from Session 1, Activity 3-4, Problems Affecting Retailers and their Farmer Customers in the Safe Handling, Sale, and Effective Use of Pesticides.
Explain that later in this session we will start to examine all these other measures.
Ask:• How will it improve your business if a farmer comes to your shop to buy
a pesticide, and you advise him on crop management and non-pesticide control methods instead?
2.
10 minutes
Brainstorming – Pests, Diseases, and Weeds
Say that before we look at the different methods of pest management, we need to understand exactly what we mean by an insect pest, disease or weed, as this will help us to understand the various types of control methods.
Ask participants to brainstorm all the pests that affect humans, animals or crops in their part of the country.
Record their responses on the flipchart.
Trainer Note: To simplify reviewing the responses, list them in the various pest categories of Pests, Diseases and Weeds in the Fact Sheet, although without using a heading. Put all the insect pests into one column, weeds into another, etc as the responses come from participants. Then put in the headings afterwards, when reviewing the responses.
Say that we now can step back and review this list
Explain that it is useful for this course and our work together that we all have a common, and correct, understanding of how we define and describe insect pests, weeds, and diseases. These are the definitions that form the basis of our next sessions.
Present one by one the points on Pests, Diseases and Weeds in the Fact Sheet, referring to the brainstormed list on the flipchart, correcting, deleting and adding as appropriate.

28
Session 2: Crop and Pest Management
3.
15 minutes
Brainstorming—Elements of Crop Management
Explain that we will now spend some time looking at crop management and pest management, and how one can affect the other.
Say that we will start by looking at the elements of crop management.
Present Crop Management and Yield Potential from the Fact Sheet.
Ask:• What are major agronomic operations, practices, and activities of crop
management that are required to produce a healthy crop with a high yield potential?
List participant responses on the flipchart, using Main Agronomic Factors for a Healthy Crop from the Fact Sheet as a checklist.
4.
15 minutes
Work Groups – Effects of Crop Management on Pest Levels
Say that now we have identified the major elements of crop management, we will look at how these can affect pest levels.
Work Group Task:• Identify how the elements of crop management identified in the
previous activity could affect pest levels.• For example, how could variations in plant spacing and density affect
insect pest, disease, or weed levels.
5.
20 minutes
Work Group Reports – Effects of Crop Management on Pest Levels
After the groups have completed the task, ask each group to report.
Summarise the reports using The Effects of Crop Management on Pest Levels from the Fact Sheet as a checklist of main headings.
Trainer Note:Do not go into detail from the Fact Sheet, cover only the main headings.
Say that details of the effects of crop management on pest levels, with examples, are in the Fact Sheet they will receive at the end of the session. Participants should study this in their own time.
6.
10 minutes
Presentation – Methods of Pest Management
Explain, using Methods of Pest Management, from the Fact Sheet, that for simplicity these practices are grouped under various headings.
Emphasise that if you give the sort of information and advice that we have discussed today, then the farmer will trust you and know that you are doing your best to help him.

29
Finish
Time Activity
Summary:
1 minute
Include as major messages:• Why retailers need to know about crop management• The broad definition of a pest• The major types of pests• Pest management only protects the crop, it does not increase yield
potential• The main elements of growing a healthy crop• The different categories and methods of pest management
Questions:
1 minute
Ask if everyone understands or if there are any additional questions. Answer these provided they are relevant.
Ask if the session objectives were met
Evaluation:
12 minutes
Hand out the Assessment Sheet and ask participants to complete two of the questions.
Collect the Assessment Sheet for later marking and entering the marks on the Attendance Record.
Next step:
1 minute
Say that in this session we learned about the effects of crop management on pest levels. In the next session, we will investigate this further.
Hand out the Fact Sheet to participants.

30
Session 2: Crop and Pest Management
Assessment Questions
Name: …………………………………………………… Date: ……………………… Mark:
Answer TWO (2) only of the following questions.You may write your answers on this question sheet or tell your trainer the answers. All questions are the same value (5 marks).
Question 1: Give two types of advice that farmers will welcome.
...........................................................................................................................................................................................
...........................................................................................................................................................................................
...........................................................................................................................................................................................
Question 2: What is the broad definition of a pest.
...........................................................................................................................................................................................
...........................................................................................................................................................................................
...........................................................................................................................................................................................
Question 3: Give four of the factors for growing a healthy crop.
...........................................................................................................................................................................................
...........................................................................................................................................................................................
...........................................................................................................................................................................................
Question 4: Give three examples of cultural control that affect pest levels.
...........................................................................................................................................................................................
...........................................................................................................................................................................................
...........................................................................................................................................................................................

31
FACT SHEETWhy Retailers Need to Know about Crop Management
• Farmers will welcome advice that helps them to:• Minimise pesticide use• Apply pesticides correctly• Minimise the costs of pest management\• Minimise the costs of crop production• Increase crop yields• Increase income from crop production
• If you give this sort of advice, then the farmer will trust you and know that you are doing your best to help him. This will attract him, and his friends, to your shop.
• Pest management is part of crop management. Each affects the other, and neither can be considered on its own.
• In order to provide helpful advice to farmers, retailers need to know about all methods of pest and crop management, and how pesticides fit into the overall management programme.
• Pesticides were once seen as the only answer to most pest problems, but pesticides are just one of many control measures that are available, and must be used carefully so as to fit in with these other measures.
Pest, Diseases and WeedsA pest is any organism that:• Competes with humans, domestic animals or desirable plants for food or water.• Injures humans, animals, desirable plants, structures or possessions.• Spreads disease to humans, animals or plants.• Annoys humans or animals.
A PEST CAN BE BROADLY DEFINED AS:ANY ORGANISM WHICH ADVERSELY AFFECTS MAN,
HIS CROPS, HIS LIVESTOCK, OR ANYTHING HE CONSIDERS TO BE OF VALUE
The types of pests include:• Insects (aphids, beetles, caterpillars, ants, mosquitoes, cockroaches, etc).• Insect-like organisms (mites, spiders, ticks).• Weeds (any plant growing where it is not wanted)• Microbial organisms that cause disease (bacteria, fungi, nematodes, viruses).• Molluscs (slugs, snails)• Vertebrates (birds, rats)

32
Session 2: Crop and Pest Management
Crop Management and Yield Potential• The genetic makeup of the seed determines the potential yield of a crop.
• Pest management, good or bad, has no effect on this potential.
• The final yield is determined by the yield potential of the seed, and how well crop and pest management are implemented.
PEST MANAGEMENT DOES NOT INCREASE THE YIELD POTENTIAL OF A CROP.
IT ONLY PROTECTS THE CROP AGAINST LOSS OR DAMAGE.
• The primary objective of crop production is to use good seed and good crop management to grow a healthy crop with maximum yield potential.
• A strong, healthy crop is more able to withstand the effects of pest attack.
Understanding how a crop grows and develops, and its place in the cropping system, is thus essential for successful pest management.
Main Agronomic Factors for a Healthy cropGrowing a strong, healthy crop is affected by:• Quality of site and soil texture• Crop rotation• Land preparation• Seed quality• Time of planting• Plant spacing and density• Weeding• Timing and amount of fertiliser• Timing and amount of irrigation
And for some crops also:• Transplanting• Thinning• Pruning• Ridging• Trellising
The Effects of Crop Management on Pest LevelsQuality of site and soil textureStony sites, areas with shallow soils or poor soil texture should be avoided, as these are often associated with a hard pan, which restricts root development. Soils with poor drainage should also be avoided.
Crop rotationCrop rotations and the previous crop(s) can affect the growth of the current crop. Crop rotations help to minimise the build-up of soil pests and pathogens, such as nematodes, weeds, diseases such as Fusarium, and root rots such as Phytopthora and Pythium.

33
Land PreparationAppropriate preparation of a good seedbed is important to assist seeds to germinate and seedlings to grow quickly. Good land preparation also breaks any hard pans and opens up the soil, allowing roots to penetrate fully to obtain water and nutrients. Improved soil tilth and drainage can reduce nematode levels. Tillage can destroy the pupae and overwintering stages of many insect pests. However, the advantages of tillage should be weighed against other advantages gained through no-till agriculture (build-up of organic matter, water retention, soil conservation, lower labour etc).
Seed / Root Stock QualityThe seed / root stock is the basis of the crop. Good seed produces healthy plants with high yield potential and high produce quality. Clean, certified seed or root stock is free of both diseases and weed seeds.
Time of plantingPlanting at the correct time promotes healthy plant growth and avoids periods of attack by major pests. For example early planting of cotton to avoid late season bollworm attack.
Plant spacing and densityPlants sown too close together are weaker and more susceptible to pest attack. Too close spacing also provides suitable micro-climate conditions within the crop for the build-up of pests and diseases, such as aphids and whitefly in cotton, blight in tomatoes, downy mildew in cucumbers, and aphids, mites, blight, mildew, and scab in apple.
WeedingWeeds compete with the crop for sunlight, water and nutrients. Slow growing seedlings, such as cotton, compete poorly with weeds, and the plants are weak and stunted. Weed seeds can contaminate the crop produce, as in wheat. Weeds can attract pests, such as fruitworm in tomato. Tall weeds in orchards can attract rodents, but a low cover of grass or weeds between trees avoids the dusty conditions which promotes red spider mite.
Timing and amount of fertiliserWrongly timed or excess fertiliser can promote vegetative and dense plant growth which encourages insect pests such as aphids and whitefly, and diseases such as mildews and blights.
Timing and amount of irrigationSimilarly to fertiliser, wrongly timed or excess irrigation can promote vegetative plant growth which encourages pests and diseases such as aphids and whitefly in cotton, blight in tomatoes, and spider mite, aphids, and blight in apple.
Other FactorsTransplantingEnsure seed beds are disease, insect pest, and nematode free to avoid transferring these pests to the field.
Thinning of seedlingsWhen seedlings are not thinned or thinned too late, the plants are weaker and more susceptible to pest attack.
Pruning of tree and vine cropsAllows more air and light, and lowers humidity so that diseases (eg blight, mildew, scab) and insect pests (eg aphid) are discouraged.
Removal of Infested Plants / BranchesInfested plants and branches provide sources of disease infestation. Remove and burn all such plants and branches to control the spread of diseases.

34
Session 2: Crop and Pest Management
Post Harvest SanitationCrop residues left in the field can provide food and shelter for over-wintering pests (eg pink bollworm, cotton stainer, codling moth) and diseases (eg blight, mildew).
GeneralThe main direct problems caused to pest management by poor crop management are vegetative, tall, or dense growth.
A vegetative or dense crop has a climate inside it which promotes the development of pests such as aphid, jassid and whitefly, and diseases such as blight and mildews. In addition, spraying is less effective as spray penetration and coverage of all the plant surfaces is poor, and it is difficult for the spray operator to walk through the crop.
There is thus the double effect of encouraging pests while reducing the effectiveness of pesticide control measures. Pests are much more difficult to control effectively in a dense crop.
Methods of Pest ManagementCultural ControlPractices which optimise crop growth, or produce unfavourable conditions for insect pests, diseases, weeds• Crop rotation• Time of planting• Thinning of seedlings• Timing and amount of fertiliser• Timing and amount of irrigation• Plant spacing and density• Pruning of tree and vine crops• Trap crops
Sanitation• Practices which remove or prevent access to food and shelter• Using certified, clean seed• Ploughing-in of crop residues• Collection and burning of crop residues
Mechanical Control• Involves use of machines or other tools• Soil cultivation and tillage• Traps
Resistant Crop Varieties• Have in-built resistance or tolerance to attack by certain pests
Biological Control• The use of natural enemies of pests – predators, parasites and diseases
Chemical Control• The use of pesticides, which kill pests or control their activity

35
SESSION 3:INTEGRATED PEST MANAGEMENT (IPM)

36

37
Lesson Plan
Materials needed: R Flipchart stands.R Flipchart paper.R Markers (4 colours).R Notebooks, pens, and file covers for participants who have
forgotten to bring them.R Coloured cards.R Glue stick or blue tack.R Masking tape.
Time needed: 100 minutes
Intended audience: Pesticide Retailers
Preparation: R Flipchart with the session title “Integrated Pest Management (IPM)”, and the Session Objectives.
R Flipchart: Pest Control, Pest Management, and Integrated Pest Management (IPM) from the Fact Sheet.
R Flipchart: Components of IPM - The IPM Circle from the Fact Sheet.
R Print off sufficient Attendance Record sheets.R Print off sufficient Assessment question sheets.R Print off sufficient Fact Sheets for participants.R Organise venue and seating arrangements.
Attendance RecordAs participants arrive, ask them to enter their name and other information on the Attendance Record. There is also a column on the form to enter their marks from the Assessment Questions at the end of the training session.

38
Session 3: Integrated Pest Management (IPM)
Set up/Introduction 5 minutes
Time Activity
Attention: Welcome the retailers to the session.
Ask:• Who has heard of Integrated Pest Management or IPM? Put up your
hands if you have.• Can anyone explain what is meant by Integrated Pest Management or
IPM?
Take answers from several participants.
Title: Refer to the Title Flipchart and tell participants that this training session will cover Integrated Pest Management (IPM).
Say that in this session we will be looking at what is meant by IPM in practice.
Credibility: Give participants a local example where following an IPM programme has been beneficial to farmers.
Objectives: Refer to the Title Flipchart with the Lesson Objectives.
By the end of the session, participants will be able to:• Explain the differences between pest control, pest management, and
Integrated Pest Management (IPM).• Describe alternative non-chemical pest management practices that
could be used in certain local crops as part of an overall crop/pest management (IPM) programme.
• Explain the principles of the economics of pest management.• Ask questions in a structured manner so as to identify a farmer
problem and to provide appropriate advice.
Benefits: Say that IPM is a rational approach to pest management that is being increasingly encouraged by both governments and private sectors, and so pesticide retailers also need to understand and promote IPM.
Direction: • Following an examination of the differences between pest control, pest management, and IPM, this session takes the relationship between crop and pest management a stage further in a work group activity which identifies non-pesticide practices that local farmers use to control pests.
• This leads into presentations on the IPM Circle and the Economics of Pest Management.
• The final activity is a ‘What If’ exercise which gives participants the opportunity to think about and practice asking questions of farmers to identify a problem and to give appropriate advice.

39
DeliveryExplanation, Demonstration, Exercise, and Guidance:
Time Activity
1.
10 minutes
Discussion – Pest Control, Pest Management and Integrated Pest Management
Ask:• Can anyone explain the differences between Pest Control, Pest
Management, and Integrated Pest Management (IPM).
Take answers from several participants.
Summarise the answers, using Pest Control, Pest Management, and Integrated Pest Management (IPM) from the Fact Sheet as a checklist.
If there are no answers, present the contents of the Fact Sheet section.
2.
30 minutes
Work Groups – Local Methods of Non-Pesticide Pest Control
Remind participants of Activity 4-5 of the previous session – Effects of Crop Management on Pest Levels.
Say that we will now look at some of these crop management elements in practice.
Ask participants for examples of the most common local crops (e.g., cotton, apple, date palm, tomatoes).
Assign one crop to each work group, and give the following task.
Work Group Task:• For the crop assigned to your table, identify any non-pesticide practices
that local farmers use to manage pest levels.• They have 10 minutes for the task.
When groups have completed the task, ask each one to report in turn.
Say that these practices show that farmers are already practicing IPM. In fact, farmers have been practicing IPM for hundreds of years, before the introduction of pesticides.
Emphasise that pesticides should only be used when necessary, and only when non-pesticide methods have not been sufficient to provide adequate control.
Trainer Note: Typical examples of non-pesticide practices for several crops are given in Non-Pesticide Methods of Pest Management in the Fact Sheet.
Explain that these are examples from around the world, and not all practices are appropriate in all situations.

40
Session 3: Integrated Pest Management (IPM)
3.
10 minutes
Presentation – Components of IPM - The IPM Circle
Show the flipchart with the IPM Circle.
Explain: • That all the components together make up an IPM strategy in a crop.• Not all components will be in every IPM strategy.• External Factors are those largely outside the control of the farmer.
For example, weather (temperature, rainfall, humidity, wind), quality of irrigation water, quarantine and other government regulations.
Emphasise that pesticides are only one component or tool of many that are available to a farmer.
4.
10 minutes
Presentation – Economic Principles of Pest Management
Say that many of the non-pesticide methods of pest management we have discussed have no, or little, extra cost to the farmer. However, when pesticides are used as one of the IPM tools, they can have a high cost.
Present Economic Principles of Pest Management from the Fact Sheet.
Ask:Can you describe an example of when farmers have wasted their money, and reduced their profit, with unnecessary or inefficient or pesticide use?
5.
20 minutes
“What if” Situations – Giving Practical Advice to Farmers
Trainer Note:• The situations below are intended to reinforce the concept of good
service = good business among participants.• The situations are somewhat artificial, but are intended to illustrate the
principles of diagnosing problems in a logical manner, in dealing with farmers, and for participants to put these principles into practice.
• The situations are not intended for participants to show their detailed technical knowledge.
• It may also be necessary to think of other “What If” situations if the following do not suit local crops and conditions. If this is necessary, then the new situations should concentrate on illustrating principles rather than technical details
Present the following “What if” situation to participants:
“What if” Situation
What if a farmer comes into the shop to ask how to control pests in tomatoes. • What questions would you ask the farmer? • What advice would you give the farmer?
Give participants 2-3 minutes to think of the questions they would ask and the advice they might give the farmer.
First ask different participants what questions they would ask the farmer.

41
Then ask what the appropriate advice might be given to the farmer.
Take a response from one participant, then ask if anyone would approach the problem differently, or give different advice.
Trainer Note: In the above situation, appropriate questions and advice would include:Has the tomato crop already been planted?
If no:• Give advice on seed variety, land preparation, plant spacing, fertilizer,
irrigation, etc., and what pests to expect and suitable methods of control.
If yes:• What pest(s) are present? (If the farmer doesn’t know the name, ask for
a description of the pest.) • Has he brought a sample of the pest or disease?• How many of each type of pest has the farmer seen?• What growth stage are the pest(s) in?• What growth stage are the tomatoes in?• What damage does the farmer see the pest(s) inflicting?• What, if any, steps has the farmer already taken?
Then present a second “What if” situation.
“What if” Situation
What if a farmer comes into the shop to ask that you come to see his cotton field, which is infested with aphids. You go to the field.
• What will you look for? • On the basis of what you find, what advice would you give the
farmer?Take responses from several people, allowing some debate for each question. Then give your own advice.
Trainer Note: In the above situation it is best that the dealer• Looks for:
• Confirms that the problem is aphids.• The level of aphid infestation, and how much of the field is affected.• Damage to the plants.
• Gives advice to farmer:• If aphid numbers are low, and beneficial insects are present, then
watch and wait for 3-4 days to see if the beneficial insects reduce the aphid numbers.

42
Session 3: Integrated Pest Management (IPM)
Repeat for the final “what if” situation.
“What if” Situation
What if a farmer comes into the shop to ask for help with his mango orchard. He has brought in leaves from one tree to show you.
• What would you do?
Take a response from one participant, then ask if anyone would approach the problem differently, or give different advice.
Trainer Note:
In the above situation it is best that the dealer take steps that would include:• Determine whether insects or disease have damaged the leaves.• Ask if only 1 or 2 trees have been affected, or most trees in the orchard.• Ask if the infestation is over the whole tree or if only parts of the tree
are affected.• If only 1 or 2 trees are affected, advise the farmer to spot spray the
affected trees with a suitable pesticide, not the whole orchard.
Ask:What are the lessons from this activity with regard to: • Dealing with farmers?• IPM?
Take responses from several participants.

43
Finish
Time Activity
Summary:
1 minute
Include as major messages:• Pest control, Pest management, and Integrated Pest Management
(IPM)• Local non-pesticide pest management practices• The IPM Circle• The economics of pest management• The lessons learnt from the “What If” activity with regard to
dealing with farmers.
Questions:
1 minute
Ask if everyone understands or if there are any additional questions. Answer these provided they are relevant.
Ask if the session objectives were met
Evaluation:
12 minutes
Hand out the Assessment Sheet and ask participants to complete two of the questions.
Collect the Assessment Sheet for later marking and entering the marks on the Attendance Record.
Next step:
1 minute
Say that in these last two sessions we have learned about how crop management practices can affect pest levels, and also about IPM. With this knowledge, participants can offer advice that will benefit their customers and so improve their business.
Hand out the Fact Sheet to participants.

44
Session 3: Integrated Pest Management (IPM)
Assessment Questions
Name: …………………………………………………… Date: ……………………… Mark:
Answer TWO (2) only of the following questions.You may write your answers on this question sheet or tell your trainer the answers.All questions are the same value (5 marks).
Question 1: Explain what is meant by IPM.
...........................................................................................................................................................................................
...........................................................................................................................................................................................
...........................................................................................................................................................................................
Question 2: What is meant by external factors in the components of IPM? Give one example.
...........................................................................................................................................................................................
...........................................................................................................................................................................................
...........................................................................................................................................................................................
Question 3: How is profit from crop production calculated?
...........................................................................................................................................................................................
...........................................................................................................................................................................................
...........................................................................................................................................................................................
Question 4: Before selling a pesticide or giving advice to a farmer, the retailer must do what?
...........................................................................................................................................................................................
...........................................................................................................................................................................................
...........................................................................................................................................................................................

45
FACT SHEETPest Control, Pest Management and Integrated Pest Management
• Pest control: Corrective measure, pesticides or other methods are used when pests are already or are likely to become a problem, often attempts to reduce population to lowest possible level.
• Pest management: Includes preventative methods as well; manages populations so that they are below damaging levels.
• Integrated pest management: Uses all available pest management techniques in an overall crop / pest management programme which considers all the potential pests. Pesticides are applied only when absolutely necessary, and an important part of IPM is determining if and when pesticides are actually needed.
Examples of Cultural, Mechanical, and Sanitation Methods of Pest Management
These examples are from around the world. Not all practices will be appropriate for all situations, but the list gives an indication of possible practices that can be tried.
All Crops Practices and Management of:
Implement optimum crop management practices to produce healthy and strong plants, which are more resistant/tolerant to insects, diseases and weeds.
Tomatoes
Tolerant varieties Nematodes, Fusarium wilt, Verticillium wilt, virus diseases, Early blight, Late blight, Sclerotina, Bacterial canker, Blossom end rot, Fruit cracking.
Crop rotation Do not grow tomatoes on the same land for at least 3 years. Rotate with wheat, barley, maize, rice, chillies.Nematodes, Fusarium wilt, Verticillium wilt, Early blight, Sclerotinia
Rotation with cereal crops Nematodes
Rotation with rice Sclerotinia
Avoid infested fields Orobanche, Striga
Use certified seed Disease free, weed seed free
Seedbed sterilisation / solarisation
Nematodes, all bacterial and fungal diseases
Establish seedbeds in light soil
Seedling wilt
Ensure seedbeds are free of nematodes and diseases to avoid transplanting infected plants into the field
All nematodes and diseases

46
Session 3: Integrated Pest Management (IPM)
Ensure good seedbed ventilation
All bacterial and fungal diseases
Avoid excessive seedbed irrigation
Seedling wilt, Damping off, Root rot
Fallow before planting Keep field free of weeds or cover crops for at least 10 days (3 weeks is best) before planting to minimise Cutworm.
Deep ploughing of field Orabanche, Cutworm
Avoid close plant spacing, which reduces ventilation and increases humidity
Plants growing too close together give an environment which encourages diseases and insects.All bacterial and fungal diseases, aphids, whitefly
Avoid damaging plants when transplanting
All diseases
Immediately gapfill cut seedlings after transplanting
Cutworm
Heavy irrigation / flooding of field prior to sowing
Nematodes, Cutworm, Sclerotinia
Avoid insufficient or irregular irrigation
Fruit cracking, Blossom end rot
Avoid excessive irrigation Orabanche, Phytophthera root rot (late blight), Sclerotinia
Ensure balanced fertilisation Diseases and insect pests
Nitrogen Excess encourages Blossom end rot, Blight, Powdery mildew, Aphids, Whitefly (which transmit virus diseases, cause delay in maturity and reduced yield).
Potassium Correct rate increases tolerance to diseases, essential for fruit formation
Sterilise manure / compost Orabanche, other weeds, Nematodes, fungal and bacterial diseases.
Increase organic matter of soil Nematodes
Control weeds Virus diseases, Fruit worm
Plough crop residues under, as soon as harvesting completed
Late blight
Remove and burn crop residues
All diseases
Clean all equipment and feet before leaving field to avoid spreading pests and diseases
Nematodes, Verticillium wilt, Fusarium wilt, many diseases

47
Haricot / Faba Beans
Tolerant varieties Orobanche.
Crop rotation Root rots, Orabanche
Late planting Avoids infestation by Aphids (and Necrotic Yellows) from other legumes.
Irrigation Avoid excess humidity in the soil and in the plant’s direct environment to reduce risk of disease such as root rot.
Ensure balanced fertiliser Excess nitrogen makes plants more susceptible to diseases (Chocolate Spot) and insects (aphids = indirectly virus diseases).Correct rate of K increases tolerance to diseases.
Roguing Reduces number of virus infected plants, and so spread of virus. Can also be applied to Orobanche if infestation is low.
Weeding Removes potential hosts of aphids and virus.
Vegetables general
Site selection Use land without a history of disease or weed pressure.
Crop rotation 3 year crop rotation best for vegetables.At least one cereal crop before cultivating the same vegetable crop, or fallow for several months.Nematodes, diseases
Use certified seed Disease free, weed seed free
Seedlings Produce in greenhouse or tunnel to avoid insect infestations.
Tunnels / plastic sheets Ventilate to reduce humidity and incidence of disease and insect pests.
Ensure balanced fertiliser Excess nitrogen makes plants susceptible to pests and diseases.Correct rate of potassium increases tolerance to diseases, and essential for fruit formation.
Fallow before planting Keep field free of weeds or cover crops for at least 10 days (3 weeks is best) before planting to minimise cutworm.
Ensure balanced irrigation Diseases
Remove and burn infested plants
All diseases
Remove and burn crop residues
All diseases

48
Session 3: Integrated Pest Management (IPM)
Clean all equipment and feet before leaving field to avoid spreading pests and diseases
Nematodes, Verticillium wilt, Fusarium wilt, many diseases, Red spider mite
Clean and disinfect all equipment at the end of the season
Avoids carry-over, spreading, to the following season. Verticillium wilt, Fusarium wilt, many diseases
Cotton
Rotation with cereals. Fusarium wilt, Bacterial blight, seedling diseases.
Rotation with soyabean Bacterial blight, Root knot nematode.
Adjacent crops Avoid growing cotton close to wheat, melon, cucumber, pumpkins, onion.Aphid, Thrips, Whitefly
Land preparation Kills and exposes pests such as Cutworm, BollwormFine seedbed allows plants to germinate and grow strongly, increasing tolerance to pest attack.
Resistant varieties Jassid, Mites, Bollworm, Aphid, Whitefly, Bacterial blight, Fusarium wilt
Certified, acid delinted seed Bacterial blight free, weed seed free
Fallow before planting Keep field free of weeds or cover crops for at least 10 days (3 weeks is best) before planting to minimise cutworm.
Early planting Avoids late season Bollworm, Pink bollworm, Aphid, Whitefly.
Short season varieties Pink bollworm, Bollworm, Aphid, Whitefly
Avoid planting seed too deeply
Seedling diseases (Damping off, Root rot, etc)
Avoid planting into cold, wet, soil
Seedling diseases (Damping off, Root rot, etc)
Avoid too close plant spacing Close spacing makes plants weak, and gives an environment which encourages Aphids, Whitefly, Bollworms.
Early thinning Allows plants to grow strongly, increasing tolerance to pest attack.
Ensure balanced fertiliser Excess Nitrogen makes plants attractive or susceptible to Aphid, Jassid, Whitefly, Bollworm, and encourages Fusarium wilt.
Ensure balanced irrigation Excess irrigation encourages Aphid, Whitefly, Bollworm
Weeding Seedlings are very susceptible to weed competition.Weeds in the crop encourage Aphid, Whitefly, Spider mite.

49
Avoid plant stress (water, fertiliser, weeds)
Spider mites and other sucking pests
Remove and burn crop residues
Pink bollworm, Cotton stainer, Stem weevil, Whitefly, all diseases
Plough after harvest Bollworm
Rice
Certified seed No weed seeds
Resistant varieties Brown plant hopper, Rice leaf roller
Early maturing varieties Brown plant hopper, Rice gall midge
Early planting Rice leaf roller
Avoid damaging plants when transplanting
Bacterial blight
Avoid excess nitrogen Bacterial blight, Rice blast, Rice leaf roller
Avoid pesticide use Brown plant hopper (and other hoppers)
Weeding Rice gall midge
Weed free bunds Rice bug
Land preparation and flooding after harvest
Stem borer
Mango
Pruning After harvest. Enhances aeration within the tree, reducing risk and spread of disease.
Removal of malformed flowers
Reduces spread of flower malformation.
Others As for Citrus.
Apple
Improve soil tilth and drainage Nematodes
Do not plant apple orchards within 2km of cedar trees
Cedar apple rust
Do not plant apple with pear Fire blight
Resistant varieties Woolly apple aphid, apple scab, cedar apple rust, fire blight, Powdery mildew
Certified, virus-free seedlings Apple leaf spot virus, Apple mosaic virus

50
Session 3: Integrated Pest Management (IPM)
Avoid close spacing of trees when establishing orchard, so as to ensure adequate ventilation and light
Aphids, Mites, Apple scab, Branch wilt, Fire blight, Powdery mildew
Ensure balanced irrigation Red spider mite, Nematodes, Branch wilt
Avoid over-irrigation Fire blight
Balanced fertilisation Nematodes
Avoid over-fertilisation with nitrogen
Aphids, Fire blight
Open tree to improve ventilation
Pruning in late winter, early spring. Aphids, Apple scab, Powdery mildew
Remove infested, dead, diseased wood, cankers, mummified fruits
Stemborer, Woolly apple aphid, Apple scab, Fire blight, Powdery mildew
Summer pruning of water sprouts
Green apple aphid
Avoid excessive pruning Fire blight
Ensure area around base of trunk is free of grass and weeds
Rodents, Stemborer
Keep grass and weeds between trees cut short
Rodents
Remove and bury/burn all fallen fruit
Codling moth, Rodents, Apple scab
Remove and burn/compost fallen leaves at the end of the season
Codling moth, Apple scab
Avoid dusty conditions Keep low cover of grass and weeds between trees.Red spider mite
Citrus
Certified planting material Disease and virus free.
Circle trunk with soil Avoids infection and spread of Phytophthora.
Ensure balanced fertiliser Diseases and insect pests
Ensure balanced irrigation Diseases and pests
Pruning to enhance aeration and reduce humidity
All diseases, many insect pests. Navels and mandarins should be pruned immediately after harvest in January to induce early spring flush that avoids leaf miner attack.

51
Collect and bury dropped fruit
Mediterranean fruit fly.
Date Palm
Ensure planting material and enclosing soil is disease free
Bayoud (Fusarium)(This is the means of transmission of the disease to new areas, and adequate quarantine measures are absolutely essential)
Resistant Varieties Old world mite, Bayoud (Fusarium), Black rot, Inflorescence rot, Graphiola leaf spot
Well-spaced trees to increase ventilation and reduce humidity.
Approx 120 trees/ha, 9-10m between trees in both directions.Dubas bug, Fruit stalk borer, Green scale, White scale, Inflorescence rot, Graphiola leaf spot, Fruit rot
Ensure balanced irrigation Fig moth, Fruit stalk borer, Green scale, Lesser date moth, Palm stem borer, Black rot, Inflorescence rot
Avoid excessive irrigation Dubas bug,
Avoid use of surface irrigation Bayoud (Fusarium)
Ensure good drainage Fig moth, Lesser date moth, Black rot, Inflorescence rot
Ensure balanced fertilisation Fig moth, Fruit stalk borer, Green scale, Lesser date moth, Palm stem borer, Black rot, Inflorescence rot
Prune dead, old leaves to lower level of fruit bunches to reduce humidity
Dubas bug, Fruit stalk borer, Green scale, White scale, Inflorescence rot, Graphiola leaf spot, Fruit rot
Keep plantation free of weeds Fig moth, Lesser date moth, termites
Remove and burn/bury all old and fallen fruits, old bunches, spathes, dry leaves, dead trunks, fronds.
Dubas bug, Fig moth, Fruit stalk borer, Lesser date moth, Palm stem borer, Black rot, Inflorescence rot, Graphiola leaf spot
Remove and burn/bury infected material
Green scale, Red scale, White scale, Black rot, inflorescence rot, Graphiola leaf spot
Do not use pollen from infected trees
Inflorescence rot
Protect date bunches with nets, shade cloth or paper bags.
Greater date moth, Lesser date moth, Oriental wasp. (Reduction in pesticide use against these pests by bunch protection also enhances natural control of Date palm scale, Green scale, Mealy bug, Red scale).Fruit rot
Fruit thinning Fruit rot
Light Traps Fruit stalk borer, Palm stem borer

52
Session 3: Integrated Pest Management (IPM)
Components of IPM – The IPM Circle
Mechanical
Cultural
Biological
Sanitation
Chemical
Application
ExternalFactors
Economicsand Decision
making
IPM

53
Economic Principles of Pest Management• Pesticides are not the only means of pest management. Other methods should be used
first to promote a healthy crop and to minimize pest infestations.
• Pesticides are inputs in crop production and cost the farmer money. The more he spends on inputs, including pesticides, the less profit he makes.
• Profit = Value of harvested crop Less Cost of production and harvesting Less Cost of transport and marketing
• Inputs (pesticides) thus need to be used effectively and economically.
• Example: A crop needs water, but irrigation every day does not increase yields. Similarly, spraying every day, or more often than necessary, will not increase yields.
• Pesticides should only be used when pests reach a level where the value of the crop that will be lost is greater than the cost of the pesticide application.
• The use of a pesticide in this case will give a RETURN on the farmer’s investment in applying a pesticide.
• If pests are at a low level, the value of the crop that will be lost is less than the cost of the pesticide application.
• The use of a pesticide in this case will mean that the farmer LOSES money by applying a pesticide.

54

55
SESSION 4:PESTICIDE CLASSIFICATION

56

57
Lesson Plan
Materials needed: R Flipchart stands.
R Flipchart paper.
R Markers (4 colours).
R Notebooks, pens, and file covers for participants who have forgotten to bring them.
R Coloured cards.
R Glue stick or blue tack.
R Masking tape.
Time needed: 85 minutes
Intended audience: Pesticide Retailers
Preparation: R Flipchart with the session title “Pesticide Classification”, and the Session Objectives.
R Examples of different local pesticide labels or containers with labels.
R Print off sufficient Attendance Record sheets.
R Print off sufficient Assessment question sheets.
R Print off sufficient Fact Sheets for participants.
R Organise venue and seating arrangements.
Attendance RecordAs participants arrive, ask them to enter their name and other information on the Attendance Record. There is also a column on the form to enter their marks from the Assessment Questions at the end of the training session.

58
Session 4: Pesticide Classification
Set up / Introduction 5 minutes
Time Activity
Attention: Welcome the retailers to the session.
Ask:• When you buy a new tyre for your car or truck, what information do
you have to provide to the seller to make sure you get the right tyre?
Take answers from several participants.
Summarise the answers – the correct tyre depends on cross ply or radial, tyre size, tubed or tubeless, and tread pattern.
Say that tyres are classified by these different characteristics. Some classifications are simple, such as cross ply or radial, others have many different types within the classification, such as tyre size. But to obtain the correct tyre for the vehicle, the right characteristics must be specified.
Pesticides are the same, they are classified according to different characteristics, and to obtain the best result from the use of a pesticide, the correct classification and characteristics must be selected.
Title: Refer to the Title Flipchart and tell participants that this training session will cover Pesticide Classification.
Credibility: Tell participants your experience of using a pesticide with the wrong classification and characteristics, and the results.
Objectives: Refer to the Title Flipchart with the Lesson Objectives.
• By the end of the session, participants will be able to:
• Explain the different types of pesticide names.
• Describe the different ways in which pesticides are classified.
• Provide advice to farmer customers on the selection of an appropriate product for a particular pest situation.
Benefits: Best results from the use of a pesticide depend on the selection of a pesticide with the correct classification characteristics for the pest and situation.
Direction: • The session begins with a work group activity on the different types of pesticide names.
• Two interactive discussion and presentation activities then examine the different ways in which pesticides are classified
• The session ends with a work group activity selection of the most appropriate pesticide for a pest situation based on pesticide classification characteristics.

59
DeliveryExplanation, Demonstration, Exercise, and Guidance:
Time Activity
1.
10 minutes
Work Groups – Pesticide Names
Divide participants into 3-4 groups depending on numbers.
Distribute a different sample pesticide label or container to each group.
Work Group Task:Identify from the supplied label:• The Product Name of the pesticide• The Common or Chemical Name of the pesticide• The Active Ingredient of the pesticide
Say groups have 5 minutes for the task.
Ask each group for their answers and write the responses on the flipchart.
Ask: It could be confusing for a pesticide to have different names. Why do pesticides have these different names?
Take several answers, and then summarise using Pesticide Names from the Fact Sheet as a checklist.
2.
15 minutes
Interactive Discussion – Classification of Pesticides (1)
Remind participants of the broad definition of “pest” from Session 1:• Any organism which adversely affects man, his crops, his livestock, or
anything he considers to be of value.
Similarly, a pesticide can be simply defined as:• Any substance which is used to prevent or reduce loss or damage
caused by pests, either by directly killing the pest, or by inhibiting its growth, or by repelling it.
Ask:What are examples of the most common products used by farmers in the country, and what are they used to control?
List the answers on the flipchart.
Trainer Note:Write the product answers in columns of the same type of pest that the product controls, such as insects, weeds, diseases, etc, so that the headings can be added when there are no more answers.
Ask:From this list, what headings can we give to each of the columns to describe the pests these products control?
Write the pest type above each column, and also write the pesticide type above each column – insecticide, herbicide, fungicide, etc using Type of Pest Controlled from the Fact Sheet as a checklist, adding additional types as necessary
Say that this is one way in which pesticides are classified – according to the type of pest against which they are used, for example insecticides, fungicides, herbicides.

60
Session 4: Pesticide Classification
3.
20 minutes
Interactive Discussion / Presentation – Classification of Pesticides (2)
Ask:• In what other ways do you think pesticides might be classified?
Lead responses to the answers, and write the answers on the flipchart:• Chemical Group• Toxicity• Mode of Action
Present Chemical Group, Toxicity and Mode of Action from the Fact Sheet.
Say that we will be looking at toxicity again in future sessions on safety and the pesticide label.
4.
25 minutes
Work Groups – Pesticide Selection
Work Group Task:• How does knowing about the different types of classification help in
handling and using pesticides most effectively?• Why might you select a particular pesticide for a pest on the basis of
one or more of the different types of classification?
Allow 10 minutes for the activity.
Ask each group to report in turn.
Ask how will this knowledge help in providing advice to farmers.

61
Finish
Time Activity
Summary:
1 minute
Include as major messages:• The different pesticide names.• Ways of classifying pesticides.• How knowing how pesticides are classified can help in selecting the
best product(s) for a pest situation.
Questions:
1 minute
Ask if everyone understands or if there are any additional questions. Answer these provided they are relevant.
Ask if the session objectives were met
Evaluation:
12 minutes
Hand out the Assessment Sheet and ask participants to complete two of the questions.
Collect the Assessment Sheet for later marking and entering the marks on the Attendance Record.
Next step:
1 minute
Say that in this session we learned about pesticide selection. With this knowledge, participants can provide better advice to farmers.
In a future session we will look at toxicity again with regard to safe use of pesticides.
Hand out the Fact Sheet to participants.

62
Session 4: Pesticide Classification
Assessment Questions
Name: …………………………………………………… Date: ……………………… Mark:
Answer TWO (2) only of the following questions.You may write your answers on this question sheet or tell your trainer the answers. All questions are the same value (5vV marks).
Question 1: What is a pesticide chemical or common name?
...........................................................................................................................................................................................
...........................................................................................................................................................................................
...........................................................................................................................................................................................
Question 2: What type of pests are controlled by a) herbicides, b) acaricides?
...........................................................................................................................................................................................
...........................................................................................................................................................................................
...........................................................................................................................................................................................
Question 3: What is the difference between inorganic and organic pesticides?
...........................................................................................................................................................................................
...........................................................................................................................................................................................
...........................................................................................................................................................................................
Question 4: In what situation are fumigants used?
...........................................................................................................................................................................................
...........................................................................................................................................................................................
...........................................................................................................................................................................................

63
FACT SHEET
PESTICIDE NAMES
• Active ingredient Only a certain component of a pesticide product has pesticidal activity. This component is called the active ingredient.
• Chemical name Each active ingredient is given a chemical name that describes the actual chemical composition. This name is often long and complicated. It may appear on the label in brackets.
• Common name Each active ingredient is also given an internationally recognised common name that is much easier to use and remember than the chemical name. A specific common name always refers to the same active ingredient, regardless of the manufacturer of the product. Common names are always given on the label.
• Product name Manufacturers give their own name to their products containing a particular active ingredient. It is the product name which appears in large print on the label.
Examples of pesticide names, including example product names, are:Chemical Name: alpha-cyano-3-phenoxybenzyl-3-(2-chloro-3,3,3-trifluoroprop-1-enyl)-
2,2-dimethylcyclopropanecarboxylateCommon Name: Lambda CyhalothrinProduct Name: Demand, Icon, Karate, Reeva, Sentry
Chemical Name: N-(phosphonomethyl)glycineCommon Name: GlyphosateProduct Name: Azural, Brake, Clinic, Glyphos, Glyphogan, Glyphosate, Glyphotox,
Noweed, Roundup, Solado, Spraymate, Sting, Stirrup
PESTICIDE CLASSIFICATION
Type of Pest Controlled• Insecticides against Insects.• Fungicides against Fungi.• Herbicides against Weeds.• Acaricides against Mites.• Rodenticides against Rats, mice, and other rodents.• Molluscicides against Snails.• Nematicides against Nematodes.
CHEMICAL GROUP
The chemical group to which the pesticide belongs.
InsecticidesInorganic:Do not contain carbon. Commonly based on arsenic, copper, mercury, sulphur, tin or zinc. Many of these compounds are now banned or have severely limited uses.An example still in use is sulphur.

64
Session 4: Pesticide Classification
Organic: Contain carbon. Some are derived directly from plants and other living material, but most have been developed by man. These are the most common pesticides.
Organophosphate:Organic pesticides. Examples are Chlorpyrifos and Dimethoate.
Carbamate:Organic pesticides. Examples are Carbaryl.
Pyrethroid:Organic pesticides, related to pyrethrum (plant extract) but developed by man.Examples are Deltamethrin and Lambda-Cyhalothrin.
Biological/Microbial Contain bacteria, fungi, protozoa or viruses, such as Bacillus thuringiensis and Abamectin
BotanicalObtained from plant extracts, such as rotenone, neem, and pyrethrum
HerbicidesHerbicides have many different chemical groups, among the most common of which are triazines, substituted ureas and sulfonylureas
FungicidesAs with herbicides, fungicides have many different chemical groups. Common groups are inorganic and dithiocarbamates.• Inorganic. Examples are wettable sulphur.• Dithiocarbamates. Examples are Thiram
TOXICITY
A measure of how poisonous a pesticide is to man. High toxicity to man does not necessarily mean that the pesticide is highly toxic to the pest. Formulations are usually less toxic than the pure active ingredient.
The following WHO classification of toxicity is most commonly used, although there are others such as national systems:• Class Ia: “Extremely Hazardous” • Class Ib: “Highly Hazardous” • Class II: “Moderately Hazardous” • Class III: “Slightly Hazardous” • [no class] “Unlikely to Cause Hazard in Normal Use”
The toxicity warning on the pesticide label refers to the formulation, not the active ingredient

65
MODE OF ACTION
Describes the method by which the pesticide acts on the pest.
Contact: The target pest is only killed when it comes into direct contact with the pesticide. For a given volume of spray, the more drops per square centimeter of surface, the better the effectiveness of the pesticide. Most insecticides are contact pesticides, and are most effective against insect pests which move about a lot.
Stomach: A pesticide that must be eaten by the insect pest to kill it. Most contact pesticides are also stomach poisons for insect pests. These pesticides are more effective against pests which move around a lot.
Systemic: A pesticide that is absorbed and moved within a plant, and kills the pest when it feeds on the plant. Movement is mainly from the upper to lower leaf surface, and upwards within the plant. There is very little movement down the plant, so overall plant coverage is essential for pests in the lower parts of the crop. Absorption of the pesticide by the plant is reduced if the plants are under stress. Systemic insecticides are most effective against insect pests which do not move very much, and suck plant juices. Most herbicides are also systemic.
Fumigant: A pesticide in vapour or gas form in the air which the pest breathes in. These pesticides can only be used in enclosed spaces, such as greenhouses and warehouses.
PESTICIDE SELECTION
The obvious example of incorrect selection of a pesticide is selecting a fungicide to control an insect pest – this will have no effect at all on the insect pest.
Selecting a pesticide with the wrong characteristics for a particular pest situation can result in poor or no results.
For example, applying a contact pesticide against aphids, which are protected under leaves and do not move around a great deal. However, if a contact pesticide is the only one available, with this knowledge of mode of action the pesticide application can be adjusted to ensure good underleaf coverage, resulting in better control.
Continual use against a pest of products with the same active ingredient or from the same chemical group can result in the pest developing resistance to the pesticide. Alternatives from different chemical groups must be used in rotation to avoid this.
If more than one pesticide active ingredient is available for a particular pest situation, selecting the one with the lowest toxicity is safest for the user, for other people, and for the environment.

66

67
SESSION 5:PESTICIDE FORMULATIONS

68

69
Lesson Plan
Materials needed: R Flipchart stands.R Flipchart paper.R Markers (4 colours).R Notebooks, pens, and file covers for participants who have
forgotten to bring them.R Coloured cards.R Glue stick or blue tack.R Masking tape.
Time needed: 100 minutes
Intended audience: Pesticide Retailers
Preparation: R Flipchart with the session title “Dealing With Farmers”, and the Session Objectives.
R Examples of different local pesticide labels or containers with labels.
R Print off sufficient Attendance Record sheets.R Print off sufficient Assessment question sheets.R Print off sufficient Fact Sheets for participants.R Organise venue and seating arrangements.
Attendance RecordAs participants arrive, ask them to enter their name and other information on the Attendance Record. There is also a column on the form to enter their marks from the Assessment Questions at the end of the training session.

70
Session 5: Pesticide Formulations
Set up / Introduction 5 minutes
Time Activity
Attention: Welcome the retailers to the session.
Ask:What ingredients are used to make a cake?
Take responses from the participants.
Say that these ingredients all have a part to play in making a cake. The main ingredients are flour for bulk, sugar for sweetness, eggs or water to bind the ingredients together, chocolate or other additives for flavour, and so on.
In the same way, a pesticide product in a container contains many ingredients. The product is called a pesticide formulation.
Title: Refer to the Title Flipchart and tell participants that this training session will cover Pesticide Formulations.
Credibility: Tell participants your experience in selecting a pesticide product on its formulation characteristics.
Objectives: Refer to the Title Flipchart with the Lesson Objectives.
By the end of the session, participants will be able to:• Identify from the product label the type of formulation and
concentration of active ingredient.• State the different components of a pesticide product formulation.• Explain the advantages and disadvantages of each type of
formulation.• Describe the problems associated with sub-standard formulations.
Benefits: Knowing how pesticides are formulated, and the properties of different formulation types, helps in selecting a pesticide product for a particular pest situation.
Direction: • Activities begin with a short work group activity to identify the formulation type and the active ingredient content of a product, followed by a trainer presentation on the components of a formulation.
• Following a quick brainstorm on other types of formulations, the work groups discuss the advantages and disadvantages of different formulation types.
• The session ends with an interactive discussion on the problems associated with sub-standard pesticides.

71
DeliveryExplanation, Demonstration, Exercise, and Guidance:
Time Activity
1.
10 minutes
Work Groups – Pesticide Formulations
Remind participants of the opening activity on the ingredients in a cake.
Say that pesticide products are a mixture of the active ingredient and other substances known as inert ingredients which have no pesticidal effect. This mixture is known as the formulation and allows the active ingredient to be more conveniently handled and stored, and to be more effective in its action.
Divide participants into 3-4 groups depending on numbers.
Distribute the sample pesticide labels or containers to each group.
Work Group Task:• Identify the formulation type from the label.• What is the concentration of the pesticide active ingredient in the
formulation?
Allow groups 2-3 minutes to look at the labels
Ask each group to report, ensuring that they have correctly identified the formulation type and concentration of active ingredient.
Present Formulation Components from the Fact Sheet.
2.
5 minutes
Brainstorming – Common Types of Formulations
Say that in the last activity we identified some types of formulations.
Ask if anyone knows of other types of formulations.
Write answers on the flipchart. Use Common Types of Formulations from the Fact Sheet as a checklist.

72
Session 5: Pesticide Formulations
3.
40 minutes
Work Groups – Advantages and Disadvantages of Different Types of Formulations
Give each group one formulation from the list on the flipchart, for example:• Emulsifiable Concentrate• Wettable Powder• Flowable• Dust• Granule• Bait• Fumigant
Work Group Task:• The type of formulation given to your group has advantages and
disadvantages for storage, mixing, application and safety. Agree as a group on all these advantages and disadvantages.
Allow 15 minutes for discussions.
Ask one group to give their answers. Ask the other groups if they agree or have any other advantages or disadvantages to add.
Repeat for each group. Use Advantages and Disadvantages of Formulation Types, from the Fact Sheet to cover any points missed by the participants.
Ask:• From what we have learnt about formulations, what types of
formulations are most suitable for farmer use?• What types of formulations would be best in an IPM programme?• What types of formulations are most commonly used by local farmers?
Are these the most suitable? • Would a different type of formulation of the same active ingredient be
more suitable for farmers? Are such alternatives available?
Trainer Note: There is no ‘correct’ answer to these questions. The most suitable formulation will depend on a range of factors including the availability of alternative products, the farmer’s situation of crop and pest, his knowledge and experience, the destination of the produce, etc.The intention of the questions is to make participants think about, and to re-enforce, their knowledge of pesticide classification and the properties of different formulations.

73
4.
10 minutes
Interactive Discussion – Problems Associated with Sub-Standard Formulations
Say that counterfeit and fraudulent pesticides products are becoming more of a problem in many countries. The formulations of these products are often sub-standard.
Ask:• What do you think are problems that could be associated with sub-
standard formulations?
Write answers on the flipchart, using Problems of Sub-Standard Formulations from the Fact Sheet as a checklist.
Emphasise that for effective pest management and safety in use, only high quality formulations from reputable manufacturers should be sold and used.
Say that we will look at counterfeit and fraudulent products in more detail in another session.
5.
15 minutes
Role Play – Advice to Farmers on Pesticide Selection
Role Play setup:One participant plays the role of a ‘farmer’ who wants a pesticide to control whitefly in tomatoes (or a similar local pest / crop combination). He has seen another famer using a very cheap pesticide, and wants something similar.A second participant plays the role of a ‘pesticide retailer’. He needs to persuade the farmer not to buy the cheapest product, which is probably counterfeit, but to purchase a more expensive, but genuine, product with appropriate mode of action and formulation characteristics
Ask for two volunteers to play the roles of the ‘farmer’ and the ‘pesticide retailer’.
Let the two participants proceed with the role play.
When they have finished, ask the ‘farmer’:• Was he persuaded to purchase the more expensive product?• How and why was he persuaded?
Ask the other participants:• What did they think of the arguments of the ‘retailer’?• Would they have done anything differently?• If so, What?
Summarise by saying that:• Providing appropriate advice to farmers is an essential part of good
service. • In a previous ‘What If’ activity we advised the farmer in some situations
that a pesticide was not necessary at that time. • In this activity we have advised use of a pesticide that is genuine and
appropriate, and will control the pest in question.

74
Session 5: Pesticide Formulations
Finish
Time Activity
Summary:
1 minute
Include as major messages:• Information about the formulation on the product label.• That different formulation types have different advantages and
disadvantages.• The problems associated with counterfeit and fraudulent products.
Questions:
1 minute
Ask if everyone understands or if there are any additional questions. Answer these provided they are relevant.
Ask if the session objectives were met
Evaluation:
12 minutes
Hand out the Assessment Sheet and ask participants to complete two of the questions.
Collect the Assessment Sheet for later marking and entering the marks on the Attendance Record.
Next step:
1 minute
Say that in the last session we looked at selecting a product based on the classification of the pesticide that it contained. In this session we added to that, and can now include type of formulation in the pesticide / product selection criteria.
In the next sessions we will look at the pesticide label in more detail, and the information it contains about the pesticide.
Hand out the Fact Sheet to participants.

75
Assessment Questions
Name: …………………………………………………… Date: ……………………… Mark:
Answer TWO (2) only of the following questions.You may write your answers on this question sheet or tell your trainer the answers. All questions are the same value (5 marks).
Question 1: Give three types of inert ingredients in a formulation.
...........................................................................................................................................................................................
...........................................................................................................................................................................................
...........................................................................................................................................................................................
Question 2: Give three advantages of an emulsifiable concentrate formulation.
...........................................................................................................................................................................................
...........................................................................................................................................................................................
...........................................................................................................................................................................................
Question 3: Give three disadvantages of wettable powder formulations.
...........................................................................................................................................................................................
...........................................................................................................................................................................................
...........................................................................................................................................................................................
Question 4: Give three problems associated with sub-standard formulations.
...........................................................................................................................................................................................
...........................................................................................................................................................................................
...........................................................................................................................................................................................

76
Session 5: Pesticide Formulations
FACT SHEET
FORMULATION COMPONENTS
Active ingredient The component with pesticidal effectInert ingredients Components which have no pesticidal effect
Solvents Liquid formulations. The active ingredient is dissolved in the solvent.
Carriers Dry formulations. The active ingredient is mixed with or absorbed onto the carrier.
Emulsifiers Help emulsifiable concentrates mix better with water.
Wetting agents Help wettable powders mix better with water, and help formulations spread on water repellent surfaces.
Stickers Help the spray mix stick to surfaces.
Spreaders Help the spray mix spread evenly over treated surfaces.
Not all formulations will contain all the different types of inert ingredients.
COMMON TYPES OF FORMULATIONS Emulsifiable Concentrate (EC)• Liquid formulations where the active ingredient is dissolved in a petroleum solvent. • The formulation is diluted with water to form an emulsion for application. • Usually contain 25 to 75 percent of active ingredient. • ECs are among the most common pesticide formulations.
Wettable Powder (WP)• Dry formulations of fine, insoluble powders. The active ingredient is combined with an
inert carrier such as clay or talc, together with wetting and/or dispersing agents. • The formulation is diluted with water to form a suspension for application.• Usually contain more than 50 percent active ingredient. • WPs are among the most common pesticide formulations.
Flowable (F or FL)• Used for active ingredients that are not soluble in the more common solvents.• Active ingredients are mixed on a carrier, such as clay, and formulated with a liquid to
form a thick, paste-like suspension.• The formulation is diluted with water to form a suspension for application. • Combine the benefits of both ECs and WPs.
Dust (D)• Finely ground, dry mixtures in which the active ingredient is combined with an inert
carrier, such as talc, chalk or clay. • Applied without any further dilution.• Usually contain 1 to 10 percent of active ingredient. • They are not commonly used in agriculture, because of the problems of drift.
Granule (G)• Granule formulations are similar to dusts, except that the particles are larger and heavier. • The active ingredient may be coated on the outside or absorbed into the particles.

77
• Applied without any further dilution.• Usually contain 1 to 15 percent of active ingredient. • Most commonly used for soil application to control weeds, nematodes and soil living
insects.
Bait (B)• An active ingredient mixed with food or other attractant material.• The bait may be sold pre-mixed, or the pesticide and bait material mixed by the user.• Pests are killed by eating the pesticide contained in the bait, either in a single dose, or
over time. • The concentration of active material is low, usually less than 5 percent. • Commonly used in indoor situations, but may be used in agriculture.
Fumigant (F)• Pesticides that form poisonous gases. • May be a liquid under high pressure that changes to a gas when released, or a volatile
liquid, or a solid that releases a gas under high humidity.• Used for structural pest control, food and grain storage, soil sterilization, and
greenhouses.
Definitions:
Soluble A substance that will dissolve in a solvent to form a solution.For example, sugar is soluble in water or tea.
Emulsion A mixture or two liquids in which particles of one liquid are suspended evenly throughout the other.For example, the butter fat in milk.
Suspension Fine particles of a solid suspended in a liquid.For example, the mud in a river.
PROBLEMS OF SUB-STANDARD FORMULATIONS
• In an increasing number of countries it is common for some of the formulations on the market to be counterfeit, fraudulent, and sub-standard, with low quality ingredients and low quality manufacturing processes.
• Problems associated with sub-standard formulations include:• Poor quality active ingredient which has reduced effectiveness.• A lower concentration of active ingredient than indicated on the label.• No active ingredient in the product.• Excessive, often highly toxic, by-products of the active ingredient manufacturing
process in the formulation.• Rapid break down of the formulation in the container during storage. In tropical
countries, this is made worse by the high temperatures prevailing for much of the year.• Separation out of the spray mix of emulsifiable concentrate formulations• Settling out of the spray mix of powder formulations.• Damage or total loss of crops by the product not being effective or being phytotoxic.
FOR EFFECTIVE PEST MANAGEMENT AND FOR SAFETY IN USE, ONLY HIGH QUALITY FORMULATIONS FROM REPUTABLE MANUFACTURERS SHOULD BE USED.

78
Session 5: Pesticide Formulations
Advantages and Disadvantages of Different Types of Formulations
Emulsifiable Concentrate (EC)
• Advantages• Easy to handle, transport and store• Can be used with most types of
application equipment• Little agitation needed in spray tank,
does not settle out• Not abrasive to nozzles and pumps• Do not block filters or nozzles
• Disadvantages• Usually high concentration in the
formulation• Mixers need more protective clothing
than applicators• Easy to over- or under-dose due to
mixing and calibration errors• May cause phytotoxicity to crops• Easily absorbed through the skin• Solvents may attack rubber, plastic,
hoses, gaskets etc• Flammable
Wettable Powder (WP)
• Advantages• Easy to handle, transport and store• Can be used with most types of
application equipment• Easily measured and mixed• Usually less phytotoxic than ECs• Absorbed less readily through the skin
than ECs
• Disadvantages• Mixers need more protective clothing
than applicators• Require constant agitation in the spray
tank, or they quickly settle out• Abrasive to nozzles and pumps• Can clog filters and nozzles• Risk of inhaling powder during mixing• Inert carriers may leave a deposit on
crops, which has to be removed before marketing
Flowable (F or FL)
• Advantages• Easy to handle, transport and store• Can be used with most types of
application equipment• Easily measured and mixed• Usually less phytotoxic than ECs• Absorbed less readily through the skin
than ECs
• Disadvantages• Mixers need more protective clothing
than applicators• Container must be shaken before use to
remix formulation • Require moderate agitation in the spray
tank, or they settle out• May be abrasive to nozzles and pumps• May clog filters and nozzles• Inert carriers may leave a deposit on
crops, which has to be removed before marketing
Dust (D)
• Advantages• Ready to use, no mixing needed• Require only simple application
equipment• Effective in hard-to-reach indoor areas
• Disadvantages• Easily drift off target in outdoor
application• Do not stick to target surfaces, easily
removed by wind• Can be difficult to obtain even
distribution over target area • May irritate eyes, nose, throat and skin

79
Granule (G)
Advantages• Ready to use, no mixing needed• Slow release of pesticide gives
extended protection• Low risk of drift• Little hazard in use to applicator• Require only simple application
equipment
Disadvantages• Do not stick to foliage or other non-
level surfaces• May need to be incorporated in soil• Can be difficult to obtain even
distribution over the target area• Slow release of pesticide results in long
persistence• May be hazardous to non-target
animals such as chickens and other birds who mistake granules for food grain
Bait (B)
Advantages• May be ready to use• Little pesticide needed – bait applied
only where pests are present and pests are attracted to the pesticide
Disadvantages• Can be attractive to non-target
organisms (domestic animals, children etc)
• Pests may prefer other food or crop to the bait
Fumigant (F)
Advantages• Toxic to a wide range of pests.• Can penetrate cracks, wood, soil and
grain.• Single treatment will usually kill most
pests in the treated area
Disadvantages• Target site must be covered and airtight
to prevent the gas from escaping.• Highly toxic to humans and all other
living organisms.• Need specialized protective clothing,
including respirators.• Need specialized application
equipment

80
Session 5: Pesticide Formulations
Majo
r P
est
icid
e F
orm
ula
tio
n T
yp
es
– S
olid
s
Ph
ysi
cal
Sta
teH
ow
A
pp
lie
dF
orm
ula
tio
n
Typ
eD
ilu
en
tP
rob
lem
s, H
azard
s
So
lid
Un
dilu
ted
Du
stN
on
e•
Dri
fts
easi
ly•
Do
no
t st
ick t
o t
arg
et
surf
aces
• D
iffi
cu
lt t
o o
bta
in e
ven
dis
trib
uti
on
• R
isk o
f in
hala
tio
n
Du
st w
hen
h
an
dlin
g
co
ncen
trate
Op
era
tor
exp
ose
d
to c
on
cen
trate
Gra
nu
leN
on
e•
Do
no
t st
ick t
o leaves
or
oth
er
no
n-
level ta
rget
surf
aces
• M
ay n
eed
to
be in
co
rpo
rate
d in
so
il•
Dif
ficu
lt t
o o
bta
in e
ven
dis
trib
uti
on
• S
low
rele
ase
, lo
ng
pers
iste
nce
• M
ay b
e d
an
gero
us
to n
on
-targ
et
org
an
ism
s
Dilu
ted
Wett
ab
le
Po
wd
er
Wate
r•
Mix
er
need
s m
ore
pro
tecti
on
th
an
o
pera
tor
• N
eed
s co
nst
an
t ag
itati
on
• A
bra
sive t
o n
ozzle
s an
d p
um
ps
• C
an
clo
g fi
lters
an
d n
ozzle
s
Bait
Bra
n,
gra
in•
Can
be a
ttra
cti
ve t
o n
on
-targ
et
org
an
ism
s (f
oo
d)

81
Majo
r P
est
icid
e F
orm
ula
tio
n T
yp
es
- L
iqu
ids
Ph
ysi
cal
Sta
teH
ow
A
pp
lie
dF
orm
ula
tio
n
Typ
eD
ilu
en
tP
rob
lem
s, H
azard
s
Liq
uid
Dilu
ted
Em
uls
ifiab
le
Co
ncen
trate
Wate
r
• M
ixer
need
s m
ore
pro
tecti
on
th
an
ap
plic
ato
r•
Easy
to
un
der-
or
over-
do
se•
May c
au
se p
hyto
toxic
ity
• E
asi
ly a
bso
rbed
th
rou
gh
skin
• M
ay a
ttack r
ub
ber, p
last
ic, h
ose
s,
gask
ets
• F
lam
mab
leM
ixer
exp
ose
d t
o
co
ncen
trate
Sp
lash
es
ad
here
to
clo
thes
an
d s
kin
Flo
wab
le•
Co
nta
iner
mu
st b
e s
haken
befo
re u
se•
Need
s m
od
era
te a
git
ati
on
in
sp
ray
tan
k•
May b
e a
bra
sive t
o n
ozzle
s an
d
pu
mp
s•
May c
log
filt
ers
an
d n
ozzle
s
Se
e a
lso
: C
rop
Lif
e In
tern
ati
on
al G
uid
elin
es
for
the S
afe
an
d E
ffecti
ve U
se o
f C
rop
Pro
tecti
on
Pro
du
cts
htt
p://c
rop
life.o
rg/?
s=g
uid
elin
es

82
Session 5: Pesticide Formulations

83
SESSION 6:THE PRODUCT LABEL

84
Session 6: The Product Label

85
Lesson Plan
Materials needed: R Flipchart stands.R Flipchart paper.R Markers (4 colours).R Notebooks, pens, and file covers for participants who have
forgotten to bring them.R Coloured cards.R Glue stick or blue tack.R Masking tape.
Time needed: 95 minutes
Intended audience: Pesticide Retailers
Preparation: R Flipchart with the session title “Dealing With Farmers”, and the Session Objectives.
R Examples of different local pesticide labels or containers with labels.
R Flipchart with diagram representation of a local label, or the example label given at the end of the session plan.
R Flipchart with Hazard Warning Symbols, or printed copies, from the end of the session plan.
R Printed copies of Visual 1 from the end of the session plan (10-12 copies).
R Print off sufficient Attendance Record sheets.R Print off sufficient Assessment question sheets.R Print off sufficient Fact Sheets for participants.R Organise venue and seating arrangements.
Attendance RecordAs participants arrive, ask them to enter their name and other information on the Attend-ance Record. There is also a column on the form to enter their marks from the Assessment Questions at the end of the training session.

86
Session 6: The Product Label
Set up / Introduction 5 minutes
Time Activity
Attention: Welcome the retailers to the session.
Ask:Where is the one place where you can immediately and easily find all the necessary information about a pesticide product?
Say that the pesticide product label contains all the essential information about safe handling and use of a pesticide product
Title: Refer to the Title Flipchart and tell participants that this training session will cover The Pesticide Label.
Credibility: Tell participants an experience of not reading the label and so using a product incorrectly.
Objectives: Refer to the Title Flipchart with the Lesson Objectives.
By the end of the session, participants will be able to:• Describe the types of information given on a pesticide label, and how
to find this information on the label.• Explain the toxicity classification of the product indicated by the
colour band on the label.• Explain how to read the colour band.• State clearly the meanings of the symbols and pictograms on the
colour band.
Benefits: Knowing where to find all the necessary information regarding a pesticide product will enable participants to give appropriate and practical advice to farmers.
Direction: • The session begins with a work group activity on the information that should be on a product label.
• An interactive discussion, followed by a short presentation, introduces the product toxicity classifications indicated by the colour band.
• The session ends with a presentation and interactive discussion on pictograms.

87
DeliveryExplanation, Demonstration, Exercise, and Guidance:
Time Activity
1.
30 minutes
Work Groups - What Information Should Be On the Label?
Say that participants have experience of selling pesticide products and advising farmers. We will now look at what information they as retailers think should be on a label.
Work Group Task:• Agree as a group on the information that you think should be presented
on the label of a pesticide container.
Allow 15 minutes for this activity.
Ask each table to report.
Write the responses on the flipchart. Put a tick against the information if more than one group gives the same response. Use Information That Should Be on a Pesticide Label from the Fact Sheet as a checklist.
Show the flipchart with the diagram representation of a local label, or the example label, and indicate the information.
Explain that labels can have one, two, or three panels, but all should contain the necessary information.
Emphasise that the information regarding pests and crops for which the product is registered is a legal requirement of use in most countries, and the product must not be used on crops or pests other than those given on the label.
2.
15 minutes
Work Groups – Information on the Label
Distribute the sample labels to work groups.
Say each information type in turn, and ask the groups to identify the information on the label.
Walk round the groups to ensure that they have correctly identified the information.

88
Session 6: The Product Label
3.
10 minutes
Interactive Discussion / Presentation – Colour Band and Hazard Symbols
Say that there is a part of the label we have not yet discussed. What is it?
Say that the colour band gives information both on the toxicity of the product formulation, and on safety advice and warnings for the product, as pictures, or pictograms.
Remind participants that in Lesson 4 on Pesticide Classification, toxicity was one of the ways in which pesticides are classified, and that there were five toxicity classes.
Say that commonly there are four different colours for the band, red, yellow, green, and blue. Write these colours on the flipchart.
Ask:• What do participants think that the different colours indicate with
regard to the toxicity classes?
Take responses from participants, and when correct write the toxicity category against the colour.
Say that as well as the colour indication of the toxicity class, there is also a hazard warning symbol in the centre of the band.
Show the hazard warning flipchart, or distribute the printed hazard warnings, and explain for each symbol the hazard classification, the hazard statement, and the colour of the band on which it is found.
4.
5 minutes
Presentation – Pictograms
Distribute 2-3 copies of Visual 1 to each group.
Explain that the pictograms on the band are divided into different areas.• In the centre of the band is the hazard symbol and hazard statement.• To the left and right of the centre are two boxes containing pictograms.• The box on the left refers to mixing, as shown by the Activity pictogram
of a gloved hand pouring out a pesticide. To the left of the activity pictogram are Advice pictograms indicating the protective clothing to be worn during mixing.
• The box on the right refers to application, as shown by the Activity pictogram of a person spraying. To the right of the activity pictogram are Advice pictograms indicating the protective clothing to be worn during application.
• To the left and right of the boxes, at the ends of the band are Storage and Warning pictograms.
5.
10 minutes
Interactive Discussion - Pictograms
Take each example colour band in turn, and ask:• What protective clothing should be worn during mixing• What protective clothing should be worn during application• What is the meaning of the pictogram on the right of the band• What is the meaning of the pictogram(s) on the left of the band
Say that these pictograms are the most common, although there are others, which are given in the Fact Sheet

89
6.5 minutes
As a final session statement emphasise that:• The label contains all the necessary information about a product –
Type of formulation, usage recommendations, safety advice, date of manufacture and expiry, manufacturer, registration number, and so on.
• It is essential to READ THE LABEL whenever a pesticide is handled. • This is so even if the handler or user is experienced, both as a reminder
and also as the information may have changed since the product was last used.
Finish
Time Activity
Summary:
1 minute
Include as major messages:• The pesticide label contains all the necessary information about a
pesticide product.• The toxicity classifications indicated by the colour band• How to read the pictograms on the colour band.
Questions:
1 minute
Ask if everyone understands or if there are any additional questions. Answer these provided they are relevant.
Ask if the session objectives were met
Evaluation:
12 minutes
Hand out the Assessment Sheet and ask participants to complete two of the questions.
Collect the Assessment Sheet for later marking and entering the marks on the Attendance Record.
Next step:
1 minute
Say that in this session we learned about the pesticide label, the information it contains, and how to read the colour band and pictograms.
As part of their improved service to farmers, when customers purchase a pesticide participants should read the label and point out the information.
Hand out the Fact Sheet to participants.

90
Session 6: The Product Label
Example Label
ERASE SCDirections for UseMix 12ml per 10 litres of water.Apply when young plants show shothole damage. Apply to maize funnel.Repeat after 14 days
Suspension Concentrate
Cyfluthrin . . . . . . . . . .125g/l(pyrethroid)
Precautions• Handle with care• Wear rubber gloves
when mixing and handling
• Avoid spray drift• Prevent contamination
of food and water• Dangerous to fish• Wash with soap and
water after use or accidental contact
• Keep out of the reach of children
Pre-Harvest IntervalMaize can be eaten 14 days after last treatment
For the control of stalkborer (Busseola
fusca) on maize
Symptoms of Poisoning• Salivation• Skin irritation
Imported and Distributed by:KillPest LtdPO Box 1111Harbour RoadMombasa, Kenya
First Aid• Remove patient from
source of poisoning• Keep patient calm, and
warm and comfortable
1 litre
Advice to Physician• Treat symptomatically• No known antidote
Man: 8/2013Exp: 8/2015Lot: C1854
Reg: 711160/2010
Caution

91
Colour Band / Label Hazard WarningsThe WHO system is followed in many countries, although some countries have their own system.
WHO Class (1) Label
Hazard statement Symbol Band Colour (2)
Ia Extremely Hazardous
Very Toxic Red
Ib Highly Hazardous Toxic Red
II Moderately Hazardous
Harmful Yellow
III Slightly Hazardous Caution None Blue
Products unlikely to present a hazard in normal use
Caution None Green
(1) The hazard warning on the label refers to the formulation, not the active ingredient.
(2) This is the most commonly used colour scheme, but may differ in some countries.

92
Session 6: The Product Label
Visual 1
Class Ia Product
Very Toxic
Class II Product
Harmful
Class III Product
Caution
Unclassified Product

93
Visual 2Pesticide Labels A2 1113_Layout 1 10/02/2014 10:32 Page 1
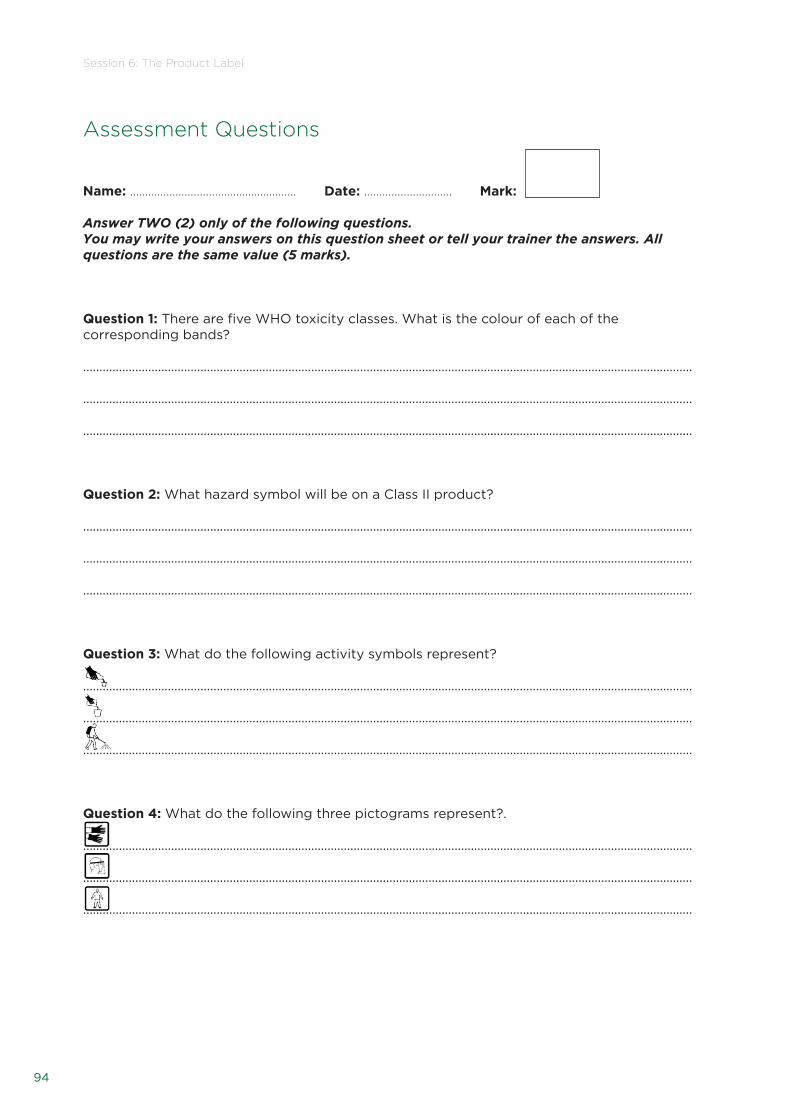
94
Session 6: The Product Label
Assessment Questions
Name: ………………........……………………….. Date: ………........………… Mark:
Answer TWO (2) only of the following questions.You may write your answers on this question sheet or tell your trainer the answers. All questions are the same value (5 marks).
Question 1: There are five WHO toxicity classes. What is the colour of each of the corresponding bands?
...........................................................................................................................................................................................
...........................................................................................................................................................................................
...........................................................................................................................................................................................
Question 2: What hazard symbol will be on a Class II product?
...........................................................................................................................................................................................
...........................................................................................................................................................................................
...........................................................................................................................................................................................
Question 3: What do the following activity symbols represent?
...........................................................................................................................................................................................
...........................................................................................................................................................................................
...........................................................................................................................................................................................
Question 4: What do the following three pictograms represent?.
...........................................................................................................................................................................................
...........................................................................................................................................................................................
...........................................................................................................................................................................................

95
FACT SHEETInformation That Should Be On a Pesticide Label• Product name of the pesticide.• Name of the active ingredient(s) in the product.• Percentage concentration of active ingredient in the product.• Percentage concentration of inert materials in the product.• Toxicity of the product.• Crops and pests for which the product is registered for use.• Dose or application rates to use.• Pre-harvest interval.• Safety precautions to follow when mixing and applying.• First aid measures, advice to doctors, and antidotes.• Date of manufacture, batch number, and expiry date.• Product registration number from the pesticide registration authority in the country• Name of the manufacturer or importer and contact details.• Weight or volume of the container contents.
Toxicity A measure of how poisonous a pesticide is to man. High toxicity to man does not necessarily mean that the pesticide is highly toxic to the pest. Formulations are usually less toxic than the pure active ingredient.
The following WHO classification of toxicity is most commonly used, although there are others such as national systems:Class Ia: “Extremely Hazardous” Class Ib: “Highly Hazardous” Class II: “Moderately Hazardous” Class III: “Slightly Hazardous” [no class] “Unlikely to Cause Hazard in Normal Use”
The toxicity warning on the pesticide label refers to the formulation, not the active ingredient

96
Session 6: The Product Label
Hazard WarningsThe WHO system is followed in many countries, although some countries have their own system.
WHO Class (1) Label
Hazard statement Symbol Band Colour (2)
Ia Extremely Hazardous
Very Toxic Red
Ib Highly Hazardous Toxic Red
II Moderately Hazardous
Harmful Yellow
III Slightly Hazardous Caution None Blue
Products unlikely to present a hazard in normal use
Caution None Green
(1) The hazard warning on the label refers to the formulation, not the active ingredient.
(2) This is the most commonly used colour scheme, but may differ in some countries.

97
PictogramsStorage
Keep locked away and out of reach of children Activity
Handling Handling dry Application liquid concentrate concentrate Advice
Wear gloves Wear boots Wear eye Wear face protection shield
Wear mask Wear Wear Wear respirator overalls Apron
Wash after use Warning
Dangerous to Dangerous to fish animals and water

98
Session 6: The Product Label
Examples of Label LayoutsOne Panel Layout:

99
Two Panel Layout: Handout 4.5-2
Three Panel Layout:

100
Session 6: The Product Label
Examples of Colour Bands and Pictograms
Class Ia Product
Very Toxic
Class II Product
Harmful
Class III Product
Caution
Unclassified Product
See also: CropLife International Guidelines for the Safe and Effective Use of Crop Protection Productshttp://croplife.org/?s=guidelines

101
SESSION 7: THE ENVIRONMENT

102

103
Lesson Plan
Materials needed: R Flipchart stands.R Flipchart paper.R Markers (4 colours).R Notebooks, pens, and file covers for participants who have
forgotten to bring them.R Coloured cards.R Glue stick or blue tack.R Masking tape.
Time needed: 95 minutes
Intended audience: Pesticide Retailers
Preparation: R Flipchart with the session title “The Environment”, and the Session Objectives.
R Print off sufficient Attendance Record sheets.R Print off sufficient Assessment question sheets.R Print off sufficient Fact Sheets for participants.R Organise venue and seating arrangements.
Attendance RecordAs participants arrive, ask them to enter their name and other information on the Attendance Record. There is also a column on the form to enter their marks from the Assessment Questions at the end of the training session.

104
Session 7: The Environment
Set up / Introduction 5 minutes
Time Activity
Attention: Welcome the retailers to the session.
Ask:• What is the environment? What makes up the environment?
Write answers on the flipchart.
Say we will come back to these responses later.
Title: Refer to the Title Flipchart and tell participants that this training session will cover The Environment.
Credibility: Tell participants an example of environmental protection or pollution.
Objectives: Refer to the Title Flipchart with the Lesson Objectives.
By the end of the session, participants will be able to:• Define what is meant by the environment.• Identify sensitive areas in the environment.• Describe how pesticides enter and move through the environment.• Explain the problems of pesticide contamination of the environment,
and how to avoid or minimise these effects.• Define what is meant by pre-harvest interval and explain its
importance.
Benefits: The environment is essential for our existence and survival. Everyone has a responsibility to protect the environment from all sources of contamination.
Direction: • Activities begin with an interactive discussion on what makes up the environment, sensitive areas, and how pesticides enter and move through the environment.
• A work group task then investigates the problems associated with pesticide contamination of the environment, and how to avoid or mimimise these problems.
• A final interactive discussion looks at pesticide residues and the pre-harvest interval.
105
DeliveryExplanation, Demonstration, Exercise, and Guidance:
Time Activity
1.
20 minutes
Interactive Discussion – The Environment, Sensitive Areas, and Pesticide Movement in the Environment
Refer to the flipchart from the Attention activity.
Say that all the responses are more or less correct.
Emphasise:• The environment is everything around us – soil, water, air, plants,
animals, farms, buildings, etc.• We depend on the environment for our existence. We cannot live if the
soil, water, or air is polluted.• As sellers and users of pesticides, we have a responsibility to ensure
that pesticides are used responsibly and safely, and to minimise environmental contamination.
Ask:• What would be especially sensitive areas of the environment where we
would not want pesticide contamination?
Write responses on the flipchart, using Sensitive Areas from the Fact Sheet as a checklist.
Ask:• How would pesticides enter the environment? What would be the
potential sources of pesticides entering the environment?
Write responses on the flipchart, using Sources of Contamination from the Fact Sheet as a checklist.
Say that some sources are unavoidable, emphasise that every pesticide application contaminates the environment. Other sources are avoidable, or can be minimised.
Say that pesticides can move through the environment from one place to another.
Ask:• How do pesticides move through the environment from one place to
another?
Write responses on the flipchart, using Pesticide Movement in the Environment from the Fact Sheet as a checklist.

106
Session 7: The Environment
2.
40 minutes
Work Groups – Consequences of Contamination
Say that as pesticide retailers, participants should advise farmer customers on how to avoid or minimise pesticide contamination of the environment, and provide the famer with the reasons why they should do this.
Work Group Task:• List the possible problems and consequences of pesticide
contamination of the environment.• List possible ways of avoiding or minimising these problems and
consequences.• Write responses on a flipchart.
After 20 minutes, ask each group to present their results
Review and summarise the group flipcharts, using Problems of Pesticide Contamination of the Environment and Avoiding or Minimising Pesticide Contamination of the Environment as checklists.
3.
15 minutes
Interactive Discussion - Pesticide Residues and Pre-Harvest Intervals
Remind participants of the last session on the pesticide product label.
Say:• Every pesticide application leaves a residue on the crop.• The label should indicate the pre-harvest interval for the product.
Trainer Note:Use Pesticide Residues and Pre-Harvest Intervals from the Fact Sheet as a checklist for responses to the following questions.
Ask:• What is meant by the pre-harvest interval?
Take responses until the correct one is given.
Ask:• Why is a pre-harvest interval necessary?
Write responses on the flipchart.
Ask:• What factors are used to determine the pre-harvest interval?
Write responses on the flipchart.
Review responses to all the questions, and emphasise the importance of following the use recommendations on the pesticide label and adhering to the pre-harvest interval.

107
Finish
Time Activity
Summary:
1 minute
Include as major messages:• What the environment includes and how we are dependent on the
environment for our existence.• Sensitive areas• Sources and problems of pesticide contamination of the
environment• Ways to avoid or minimise pesticide contamination of the
environment• Pesticide residues and the pre-harvest interval
Questions:
1 minute
Ask if everyone understands or if there are any additional questions. Answer these provided they are relevant.
Ask if the session objectives were met
Evaluation:
12 minutes
Hand out the Assessment Sheet and ask participants to complete two of the questions.
Collect the Assessment Sheet for later marking and entering the marks on the Attendance Record.
Next step:
1 minute
Say that as pesticide retailers they have an important responsibility to ensure that pesticide contamination of the environment is minimised, and that they should advise farmers as to why this is important and how to avoid or minimise contamination.
Hand out the Fact Sheet to participants.

108
Session 7: The Environment
Assessment Questions
Name: …………………………………………………… Date: ……………………… Mark:
Answer TWO (2) only of the following questions.You may write your answers on this question sheet or tell your trainer the answers. All questions are the same value (5 marks).
Question 1: Give three sensitive areas of the environment.
...........................................................................................................................................................................................
...........................................................................................................................................................................................
...........................................................................................................................................................................................
Question 2: Give three avoidable sources of pesticide contamination of the environment.
...........................................................................................................................................................................................
...........................................................................................................................................................................................
...........................................................................................................................................................................................
Question 3: Give three ways of avoiding or minimizing pesticide contamination of the environment.
...........................................................................................................................................................................................
...........................................................................................................................................................................................
...........................................................................................................................................................................................
Question 4: What is meant by the pre-harvest interval?
...........................................................................................................................................................................................
...........................................................................................................................................................................................
...........................................................................................................................................................................................

109
FACT SHEET
THE ENVIRONMENT
The environment includes everything around us:• “Natural” elements such as soil, water, and air.• Plants, animals, indoors/outdoors, houses, gardens, offices, everywhere.
We are dependent on the environment for our existence and survival
Pesticide retailers, as handlers and sellers of pesticides, have a responsibility to ensure that environmental contamination by pesticides is avoided or minimised as much as possible. Retailers should advise their customers on the importance of avoiding or minimising pesticide contamination and how to do this.
SENSITIVE AREAS
Sensitive areas are those which are especially susceptible to contamination by pesticides.
Outdoors:• Areas near open/surface water.• Where ground water is near the surface.• Near schools, playgrounds, hospitals, and places where food is sold or prepared.• Where honey-bees are active.• Near gardens, food or feed crops.
Indoors:• All areas where people - especially children, pregnant women, elderly, and the sick - live,
work or are cared for.• Places where food is processed, stored, prepared or eaten.• Places where domestic animals are kept, live or eat.
SOURCES OF CONTAMINATION
Unavoidable:• Pesticide use at the site of application - even a correct application puts pesticide into the
environment
MINIMISE PESTICIDE USE TO MINIMISE ENVIRONMENTAL CONTAMINATION
Avoidable:• Unnecessary spray applications• Mixing a higher pesticide rate than recommend• Run off to ground from excess spray volume• Spray drift• Washing water - personal, equipment, clothing• Spills during transport, storage and mixing• Improper disposal of containers and excess spray mix

110
Session 7: The Environment
PESTICIDE MOVEMENT IN THE ENVIRONMENT
• Volatilisation from treated surfaces• Drift during application• Washing from treated surfaces to the ground/soil by:
• Rain• Dew• Overhead irrigation
• Incorporated into the soil with crop residues• Removal from field as residues on crop surfaces:
• Harvested produce (vegetables, fruit, etc)• Fodder for animals• Fuel
• Removal from the field on contaminated equipment:• Spraying and mixing equipment• Clothing• Containers
• Carried across and out of the field in irrigation water• Leaching through the soil into ground water
PROBLEMS OF PESTICIDE CONTAMINATION OF THE ENVIRONMENT
• Pesticide residues on food and fodder eaten by humans and animals• Damage to adjacent crops from spray drift.• Contamination of water sources:
• Effect on humans drinking or using the water• Effects on fish and other aquatic organisms, including plants
• Effects on wildlife.• Effects on beneficial organisms:
• Bees• Natural enemies of pests• Soil micro-organisms
AVOIDING OR MINIMISING PESTICIDE CONTAMINATION OF THE ENVIRONMENT
To avoid or minimise pesticide contamination of the environment, all pesticide handling and use activities must follow recommended practices. • Before handling or using any pesticide – READ THE LABEL • Handling• Transport• Storage• Application • Disposal
Safe implementation of these activities is covered in detail in other sessions of the Retailer Training Course.

111
PESTICIDE RESIDUES AND PRE-HARVEST INTERVALS
• Every pesticide application leaves a pesticide residue on the crop.• In many countries there is a Maximum Residue Limit (MRL) for each pesticide / food crop
combination. This specifies the maximum level of a pesticide residue that can be found on that food crop at harvesting in order to protect consumers. Crop produce for export will also have to comply with MRLs.
• The rate of pesticide residue decrease after application is affected by many factors, including the type of pesticide and formulation, crop growth, the effect of UV light, rain, and temperature.
• The Pre-Harvest Interval (PHI) is the time interval (usually in days) between the last application of the pesticide and harvesting of the crop.
• The PHI is determined from research trials to ensure that, when applied following the manufacturer’s usage recommendations given on the label, the MRL is not exceeded at harvest.
See also: CropLife International Guidelines for the Safe and Effective Use of Crop Protection Productshttp://croplife.org/?s=guidelines

112
Session 7: The Environment

113
SESSION 8: RISK, HARMFUL EFFECTS,
AND FIRST AID

114

115
Lesson Plan
Materials needed: R Flipchart stands.R Flipchart paper.R Markers (4 colours).R Notebooks, pens, and file covers for participants who have
forgotten to bring them.R Coloured cards.R Glue stick or blue tack.R Masking tape.
Time needed: 120 minutes
Intended audience: Pesticide Retailers
Preparation: R Flipchart with the session title “Risk, Harmful Effects, and First Aid”, and the Session Objectives.
R Food and drink (eg bread, biscuits, tea), a bottle of water, a clean pesticide container for Role Play 1.
R Bottle of water, some pesticide measuring equipment, a clean pesticide container for Role Play 2.
R Print off sufficient Attendance Record sheets.R Print off sufficient Assessment question sheets.R Print off sufficient Fact Sheets for participants.R Organise venue and seating arrangements.
Attendance RecordAs participants arrive, ask them to enter their name and other information on the Attendance Record. There is also a column on the form to enter their marks from the Assessment Questions at the end of the training session.

116
Session 8: Risk, Harmful Effects, and First Aid
Set up / Introduction 5 minutes
Time Activity
Attention: Welcome the retailers to the session.
Ask:• What are examples of tools that are commonly used every day and
which are potentially dangerous if not used properly, for example a knife?
Take several responses.
Say all these tools are in common everyday use, and can cause injury if not used properly.
Reasons for causing injury or damage would include:• Misuse• Lack of knowledge about the potential dangers• Not taking the correct precautions in use• Carelessness
Say that pesticides are also tools which have the potential to cause injury or damage, but this can be avoided if they are used properly and with the correct precautions.
Title: Refer to the Title Flipchart and tell participants that this training session will cover Risk, Harmful Effects, and First Aid.
Credibility: Tell participants about a situation where a pesticide caused injury or damage due to misuse.
Objectives: Refer to the Title Flipchart with the Lesson Objectives.
By the end of the session, participants will be able to:• Explain the relationship between hazard, exposure, and risk.• Describe the routes of pesticide entry into the body, and common
causes of exposure to pesticides.• Describe the initial symptoms of pesticide poisoning.• Provide initial first aid to a person affected by pesticide poisoning
Benefits: Knowing the risks of pesticide handling and use, and the common ways in which exposure occurs, helps to avoid the potential adverse effects of pesticides. Knowledge of basic first aid in case of pesticide poisoning can save a life.
Direction: • The session begins with an interactive discussion on hazard, exposure, and risk.
• The routes of pesticide entry into the body are then brainstormed followed by a presentation on the potential harmful effects of pesticides.
• Work groups investigate three questions on preventing pesticide entry into the body, signs of poisoning, and first aid.
• The session ends with role plays about first aid in two poisoning situations.

117
DeliveryExplanation, Demonstration, Exercise, and Guidance:
Time Activity
1.
10 minutes
Interactive Discussion – Hazard, Exposure and Risk
Remind participants that with all potentially dangerous tools, provided safety precautions are understood and followed, injury or damage is kept to a minimum. In other words, prevention is better than cure.
Write the following on the flipchart:
Risk = Hazard x Exposure
Ask:• What is meant by this equation?• What do we mean by:
• Hazard• Exposure• Risk
Take responses, and write the correct answer against each of the terms, using Hazard, Exposure and Risk from the Fact Sheet as a checklist.
Use sunlight as an example. Say:• Sunlight can be dangerous and burn the skin if there is too much
exposure.• In the winter, when sunlight intensity is weak, it takes a long exposure to
burn the skin.• In the summer, when sunlight intensity is strong, a short exposure can
burn the skin.
Ask:How does this equation help us to minimise the potential risk when handling or using a pesticide?
Emphasise:• We cannot change the hazard of a pesticide, so• The primary consideration is to avoid exposure, and so
Reduce the risk

118
Session 8: Risk, Harmful Effects, and First Aid
2.
10 minutes
Brainstorming – Routes of Entry of Pesticides Into the Body
Ask:• What are the main routes through which pesticides can enter the body?
Take responses and write the routes on the flipchart as main column headings.
Ask:• What would be common reasons for pesticides to enter the body
through these routes?
Take responses and write the reasons under the three headings, using Routes of Entry Into the Body from the Fact Sheet as a checklist.
When there are no more responses, use Common Causes of Pesticide Exposure as a checklist to fill any gaps.
Emphasise:• The most common route of exposure is dermal (through the skin).• The primary safety consideration is to avoid exposure.
3.
5 minutes
Presentation – Harmful Effects
Say that in the first activity we said that pesticides had inherent hazards, and will now look at these adverse effects in more detail.
Present the contents of Harmful Effects from the Fact Sheet.

119
4.
45 minutes
Work Groups – Prevention of Entry, Signs of Poisoning, and First Aid
Divide participants into four groups.
Refer to the flipchart with the routes of entry of pesticides into the body, and allocate one route to each work group.• Table 1: Skin• Table 2: Oral• Table 3: Inhalation• Table 4: Eyes
Work Group Task: Agree as a group on responses to the following questions:What are the best ways to prevent pesticides from entering the body through the route assigned to your table?What symptoms might you see if pesticides enter by this route?What is the best treatment if pesticides enter by this route?
Allow 20 minutes for the activity
Say we will take responses for questions 1 and 2 at this point, we will cover question 3 later.
Ask each group to report in turn on questions both questions 1 and 2, asking the other groups after each presentation what they would change or add.
Use General Symptoms of Acute Pesticide Poisoning as a checklist during the group reports.
When all groups have reported, emphasise:• Avoiding or reducing exposure lessens the potential risks of handling
and using pesticides.• AThe most common route of exposure is through the skin.• AThe greatest danger is when handling the concentrate, so the use of
protective clothing is extremely important for this activity.• APesticide can be swallowed by smoking, drinking or eating during
application, or by blowing out blocked nozzles.

120
Session 8: Risk, Harmful Effects, and First Aid
5.
30 minutes
Role Play – Basic First Aid
Say that we will now get responses for question 3 of the previous activity.
Ask:• Which group would like to go first?
When one group has volunteered, ask their presenter to step outside the room for a few minutes.
Explain to the remaining participants rather than a simple flipchart presentation, we are going to ‘present’ practically through a Role Play.
Emphasise:• The role plays are intended to put their group-prepared responses into
practice – without warning, as would happen in real life. • If their first aid skills turn out to be in need of improvement, this is part
of the self-evaluation and learning process.
Ask for two volunteers to play the roles of a poisoning victim and his friend in the first role play.
Role Play 1:• The two volunteers should set themselves up as ‘farmers’ having a break
from spraying, and eating and drinking. • One ‘farmer’ should pretend to be suffering from poisoning (nausea,
dizziness, confused, etc). • The other ‘farmer’ should be ready to answer questions and help the
group presenter administer first aid.
Ask the group presenter to come into the training room so that he is immediately presented with the poisoning situation.
• The unaffected ‘farmer’ should say to the presenter that there is something wrong with his friend, but he does not know the reason. Ask for the presenter’s help.
The presenter should then take over and administer first aid to the affected ‘farmer’.
Role Play Debrief:Ask the other participants:• Did the volunteer analyse the situation correctly?• Did he take the correct first aid actions?• Would they have done anything differently?
Ask for another group presenter to volunteer for Role Play 2, and again ask them to leave the room.

121
Ask for another two volunteer ‘farmers’ from the other participants.
Role Play 2:• The two volunteers should set themselves up as ‘farmers’ who are
mixing a pesticide ready for spraying. • One ‘farmer’ should pretend to be suffering from pesticide splashed in
the eye (burning eye, dizziness, confused, etc). • The other ‘farmer’ should be ready to answer questions and help the
presenter administer first aid.
Ask the presenter to come into the training room so that he is immediately presented with the poisoning situation.
• The unaffected ‘farmer’ should say that his friend has splashed pesticide in his eye, and to ask for the presenter’s help.
The presenter should then take over and administer first aid to the affected ‘farmer’.
Role Play Debrief:Ask the other participants:• Did the presenter analyse the situation correctly?• Did he take the correct first aid actions?• Would they have done anything differently?
Emphasise:• First Aid is the immediate treatment of an affected person before
seeking medical attention.• Follow the label instruction on First Aid treatment if these are available.• The First Action is to remove the person from the source of exposure
by removing pesticide from the skin, removing contaminated clothing, or getting the person to fresh air. While doing this, be careful not to contaminate yourself.

122
Session 8: Risk, Harmful Effects, and First Aid
Finish
Time Activity
Summary:
1 minute
Include as major messages:• Risk = Hazard x Exposure• The primary safety consideration is to reduce exposure and so reduce
risk• Routes of entry into the body• Common causes of exposure• First Aid is the immediate treatment of an affected person before
seeking medical attention
Questions:
1 minute
Ask if everyone understands or if there are any additional questions. Answer these provided they are relevant.
Ask if the session objectives were met
Evaluation:
12 minutes
Hand out the Assessment Sheet and ask participants to complete two of the questions.
Collect the Assessment Sheet for later marking and entering the marks on the Attendance Record.
Next step:
1 minute
Say that in this session we learned how avoid or minimise the potential risk of pesticides, and how to administer basic first aid to an affected person. If possible, participants should attend a proper first aid course.
Hand out the Fact Sheet to participants.

123
Visual 1
It is easier to prevent poisoning than to treat it, soalways read the label safety instructions. In case ofany incident, these are the steps you should follow:
www.croplife.org
REMEMBER, AFTER TAKING THESE FIRST AID STEPS,SEEK MEDICAL HELP AS QUICKLY AS POSSIBLE ANDBRING THE PRODUCT LABEL WITH YOU.
SKINIf pesticides get incontact with yourskin, remove anycontaminatedclothing and washthe skin withabundant soapand water.
INHALATIONIf you accidentallybreathe inpesticides, find aventilated placewhere you are ableto get some freshair. Loosen yourshirt and belt. Ifbreathing stops,artificial respirationmust be performedusing properequipment.
MOUTHIf you accidentallyswallow pesticides,you must seekmedical help asquickly as possible.Do not drinkanything. Keepcalm andcomfortable asmuch as you canand do not inducevomiting.
EYESIf pesticides get incontact with youreyes, wash with agentle stream ofcool clean water forat least 15 minutes.Wash each eyeindividually, frominside out, toprevent crosscontamination.

124
Session 8: Risk, Harmful Effects, and First Aid
Assessment Questions
Name: …………………………………………………… Date: ……………………… Mark:
Answer TWO (2) only of the following questions.You may write your answers on this question sheet or tell your trainer the answers. All questions are the same value (5 marks).
Question 1: How do you avoid or minimise the risk from handling or using a pesticide?
...........................................................................................................................................................................................
...........................................................................................................................................................................................
...........................................................................................................................................................................................
Question 2: What are the routes by which pesticides enter the body?
...........................................................................................................................................................................................
...........................................................................................................................................................................................
...........................................................................................................................................................................................
Question 3: Give three common ways of exposure to pesticides.
...........................................................................................................................................................................................
...........................................................................................................................................................................................
...........................................................................................................................................................................................
Question 4: What are the initial symptoms of pesticide poisoning?
...........................................................................................................................................................................................
...........................................................................................................................................................................................
...........................................................................................................................................................................................

125
FACT SHEETHAZARD, EXPOSURE AND RISK
Hazard is the inherent property of substance to cause adverse effects.
Exposure is the amount of time a person is in contact with the substance, or how much they get on their body.
Risk is the probability of adverse effects from using the substance, and is the combination of Hazard and Exposure.
Risk = Hazard x Exposure
Every time a pesticide is handled or used, there is an associated Risk
The Hazard of a pesticide cannot be changed – it is inherent.
Risk reduction = Exposure reduction
For example, sunlight can be dangerous and burn the skin if there is too much exposure. To avoid burning the skin, exposure to sunlight should be avoided or minimised. In the winter, when sunlight intensity is weak, it takes a long exposure to burn the skin. In the summer, when sunlight intensity is strong, a short exposure can burn the skin.
THE PRIMARY SAFETY CONSIDERATION WHEN USING A PESTICIDE IS TO REDUCE EXPOSURE AND SO REDUCE THE RISK
PESTICIDE ROUTES OF ENTRY INTO THE BODY
Dermal: Through the skin or the eyes.
Oral: Swallowed through the mouth.
Inhalation: Breathed into the lungs.

126
Session 8: Risk, Harmful Effects, and First Aid
Common Causes of Pesticide Exposure:
Dermal Eyes Inhalation Oral
Not washing hands after handling pesticides or containers
Rubbing eyes or forehead with contaminated gloves or hands
Handling pesticides in confined or poorly ventilated areas
Not washing hands before eating, drinking or smoking
Splashing or spilling pesticide on the skin
Splashing pesticide in the eyes
Handling dusts or powders
Splashing pesticide into the mouth
Wearing contaminated clothing
Pouring dry formulations without wearing goggles
Using an inadequate or poorly fitting respirator
Storing pesticide in drink bottles
Being exposed to pesticide drift
Being exposed to pesticide drift
Being exposed to pesticide drift
Accidentally applying pesticide to food
Applying pesticides in windy weather
Applying pesticides in windy weather
Applying pesticides in windy weather
Leaking sprayers
Touching treated plants, livestock or soil
THE PRIMARY SAFETY CONSIDERATION IS TO AVOID EXPOSURE
COMMON WAYS OF EXPOSURE TO PESTICIDES
• Not washing after handling pesticides• Smoking, eating or drinking during handling and use of pesticides• Splashing of liquid formulation or spray mix• Rubbing eyes with contaminated gloves or hands• Contaminated clothing• Drift during spraying• Spraying in windy weather• Inhalation of dusts• Handling pesticides in poorly ventilated areas• Touching treated plants, livestock or soil• Decanting pesticides into soft drink, water bottles, etc

127
Harmful Effects
Acute Occur immediately after exposure, within minutes or hours.
– Poisoning symptoms.– Physical effects:
– Mouth, throat, stomach burnt.– Lungs burnt.– Eyes burnt.– Skin blistered, cracked.
Delayed or Chronic
Take time to appear, may be years after exposure.Usually caused by repeated exposure, but may be due to single exposure.
– Cancer.– Damage to internal organs.
Allergic Affect some people, but not all.Usually require repeated exposure before they appear.
– Asthma (difficulty in breathing).– Skin irritation (rashes, blisters, sores).– Eye irritation (itching, watering)– Nose irritation (sneezing)
Physical Acute effects due to the physical action of the pesticide on the body
– Itching, stinging– Burning– Rash– Redness– Blistering
General Symptoms of Acute Pesticide PoisoningMany of the symptoms of acute pesticide poisoning are similar to illnesses, such as flu or food poisoning.
Anyone who has been handling pesticides and develops suspicious symptoms should see a doctor, taking the pesticide container with them.
Depending on the pesticide and amount of exposure, only some of the symptoms may appear, and individual symptoms may appear at different times after the exposure.
Initial Symptoms: Nausea, vomiting Headache, dizziness General weakness or tiredness Tightness in the chest
Later Symptoms: Excessive sweating, salivation Vomiting, diarrhoea Stomach cramps Muscle twitches, cramps, aches Blurred vision Confusion Fits or unconsciousness

128
Session 8: Risk, Harmful Effects, and First Aid
Basic First AidFirst Aid is the initial treatment of an affected person, before seeking proper medical attention.
FOLLOW THE PRODUCT LABEL INSTRUCTIONS ON FIRST AID IF AVAILABLE
The First Action is to remove the person from the source of exposure by removing pesticide from the skin, removing contaminated clothing, or getting the person to fresh air. While doing this, be careful not to contaminate yourself.
Pesticide on the Skin (follow label instructions if available)• Drench skin and clothing with plenty of water.• Remove contaminated clothing.• Wash hair and skin with soap and water. If available, a shower is the best way to
thoroughly wash and rinse the whole body.• Dry the victim, and wrap in a blanket or any clean clothing. Do not allow the victim to
become chilled or overheated.• If the skin is burned, or otherwise injured, cover immediately with a loose, clean, dry, soft
cloth or bandage.• Do not apply ointments, greases or powders to burns or injured skin.
Pesticide in the Eye (follow label instructions if available)• Wash the eye(s) quickly but gently.• Hold the eyelid open and wash with a gentle drip of water flowing across the eye rather
than directly onto it. If a tap is not available, a tea pot, or similar, can be used.• Rinse for 10 minutes or more.• Do not use chemicals in the rinse water.
Pesticide Inhaled (follow label instructions if available)• Get the victim to fresh air immediately.• Warn other people in the area of the danger.• Loosen tight clothing that would restrict breathing.
Pesticide Swallowed (follow label instructions if available)• Repeatedly rinse mouth with plenty of water.• Do not induce vomiting if you can get the victim to a doctor within one hour.• Never induce vomiting if the victim is unconscious or having convulsions• Never induce vomiting if the victim has swallowed a corrosive poison, as it will burn the
throat and mouth as severely coming up as it did going down. It may also get into the lungs and cause burning there. Similarly, never induce vomiting if an emulsifiable or oil solution has been swallowed, as these can cause death if inhaled during vomiting.
Take the affected person to a doctor as quickly as possible, taking the pesticide container or label.
See also: CropLife International: Guidelines for Emergency Measures in Cases of CPP PoisoningCropLife International Guidelines for the Safe and Effective Use of Crop Protection Productshttp://croplife.org/?s=guidelines

129
SOURCES OF INFORMATION / ADVICE ON PESTICIDE POISONING:
• The pesticide label
• The pesticide manufacturing / importing company (contact information on the label)
• Local emergency phone numbers – doctors, hospitals, etc
• Pesticide poisoning diagnostic tool (to identify pesticide from poisoning symptoms): http://www.pesticideinfo.org/Search_Poisoning.jsp#Identify
• WHO training manuals on pesticide poisoning (intended for medical staff): http://www.who.int/ipcs/poisons/training_manual/en/index.html
• Specific medical treatment for individual pesticides (extremely detailed, of use only by medical staff): http://www.inchem.org/pages/pims.html

130
Session 8: Risk, Harmful Effects, and First Aid

131
SESSION 9:PERSONAL PROTECTIVE
EQUIPMENT (PPE)

132

133
Lesson Plan
Materials needed: R Flipchart stands.R Flipchart paper.R Markers (4 colours).R Notebooks, pens, and file covers for participants who have
forgotten to bring them.R Coloured cards.R Glue stick or blue tack.R Masking tape.
Time needed: 80 minutes
Intended audience:
Pesticide Retailers
Preparation: R Flipchart with the session title “Personal Protective Equipment (PPE)”, and the Session Objectives.
R Examples of all types of PPE – gloves, boots, overalls, hat, dust mask, goggles, face shield, respirator, apron.
R Pesticide containers or labels with recommendations for the PPE to be worn, or showing a colour band with pictograms.
R Print off sufficient Attendance Record sheets.R Print off sufficient Assessment question sheets.R Print off sufficient Fact Sheets for participants.R Organise venue and seating arrangements.
Attendance RecordAs participants arrive, ask them to enter their name and other information on the Attendance Record. There is also a column on the form to enter their marks from the Assessment Questions at the end of the training session.
134
Session 9: Personal Protective Equipment (PPE)
Set up / Introduction 5 minutes
Time Activity
Trainer Note:Before the start of the session, lay out on a table the PPE and the pesticide containers or labels.
Attention: Welcome the retailers to the session.
Ask:• Why should handlers and users of pesticides wear protective
clothing?
Take several responses.
Summarise by saying that function of protective clothing is to keep pesticides away from the body, and is an essential precaution to take when handling or using pesticides.
Remind participants of the Session 8 on Risk, Harmful Effects, and First Aid where we agreed that the primary consideration is to avoid exposure to pesticides and so reduce the risk.
Emphasise that protective clothing does not itself prevent exposure. It can reduce exposure on the skin, through the mouth, and breathing into the lungs, but should be considered as a secondary precaution to the primary consideration of avoiding exposure in the first place, such as not spraying in windy conditions or with a leaking sprayer.
Title: Refer to the Title Flipchart and tell participants that this training session will cover Personal Protective Equipment, which is another term for protective clothing.
Credibility: Give an example of good use of PPE, or ask participants if they know of anyone who did not wear PPE and suffered from the adverse effects of a pesticide.
Objectives: Refer to the Title Flipchart with the Lesson Objectives.
By the end of the session, participants will be able to:• State clearly why PPE should be worn when handling or using
pesticides.• Describe the appropriate PPE to wear for a given pesticide activity.• Explain the potential hazards associated with wearing PPE, and how
to avoid these hazards.• Take proper care of PPE.
Benefits: Knowing the benefits and hazards of wearing PPE, what PPE to wear for an activity, and how to care for the equipment, enables users to protect themselves and reduce exposure to pesticides.
Direction: • A fishbowl activity begins the session with all participants examining PPE on show, before an interactive discussion about the appropriate PPE to wear for a pesticide activity.
• Another interactive discussion examines the possible hazards associated with PPE.
• Additional discussions look at how to wear and care for PPE, and alternatives that could be used if approved PPE is not available.

135
DeliveryExplanation, Demonstration, Exercise, and Guidance:
Time Activity
1.
15 minutes
Fishbowl – Appropriate PPE for an Activity
Ask participants to get up, stand round the table, and to examine the PPE and decide what it is and how it is worn.
Allow 5 minutes for participants to look at and discuss the PPE.
Ask:Which of these items of PPE are appropriate to the activity of: • Handling• Mixing• Application
Take responses for each activity.
Ask: Who looked at the pesticide containers or labels to find out what PPE to wear for each activity with that product?
Summarise:• The PPE to wear for an activity is given on the product label.• Handling pesticide concentrate requires more, or different, PPE than
when handling dilute product, such as mixing compared to application, or wearing a face shield rather than a dust mask when mixing liquid pesticides.
• Handling or applying a more toxic product requires more, or different, PPE than when handling or applying a less toxic product.
• If label information is not available, the absolute minimum PPE to wear in all situations is overalls, boots, and gloves.
2.
10 minutes
Interactive Discussion – Hazards from Wearing PPE
Say that we noted in the opening activity that although it is essential that PPE is worn, does not itself directly prevent exposure, such as when spraying with a leaking sprayer.
In addition, there can be hazards associated with wearing PPE.
Ask:• What could be the hazards associated with wearing PPE?• What would cause these hazards?
Write responses on the flipchart.
Emphasise:• PPE should be considered a secondary precaution, after the primary
consideration of avoiding exposure in the first place.• PPE only protects if the pesticide remains on the outside. • Torn, damaged, or broken PPE must not be worn, as pesticide can enter
and be trapped next to the skin.• Dirty or contaminated PPE must not be worn, as pesticide is trapped
next to the skin.• PPE must be replaced if torn, damaged, or broken.• PPE must be washed after use:

136
Session 9: Personal Protective Equipment (PPE)
3.
15 minutes
Interactive Discussion – Wearing PPE
Ask for a volunteer to put on some PPE:• Overalls• Gloves• Boots• Goggles• Hat
Ask the remaining participants to observe how the volunteer puts on the PPE.• When the volunteer has put on all the PPE, ask participants:• In what order was the PPE put on?• Is the PPE worn correctly?
If not, what is wrong, how should it be worn?
Emphasise:• Check for any torn, damaged, or broken items.• Overalls on first• Boots and any other equipment• Overall trousers over boots to prevent entry of pesticide• Gloves last• Gloves outside overall sleeves to protect sleeves from pesticide
Ask:• How should the PPE be taken off?
Emphasise:• Wash gloves, but do not remove them• Remove goggles, boots, and any other equipment• Finally remove gloves and overalls• Avoid the bare skin coming into contact with contaminated surfaces of
the PPE.• Wash hands and face.
Ask the volunteer to remove the PPE in the correct order.
4.
10 minutes
Interactive Discussion - Care of Protective Clothing
Hold up each item of PPE in turn, and ask participants how the item should be cared for and washed.
Take responses using Care of PPE from the Fact Sheet as a checklist.
5.
10 minutes
Interactive Discussion – Alternatives to Approved PPE
Say that approved PPE is not always available.
Ask:• What could be used as alternatives to approved PPE?
Take responses using Alternatives to Approved PPE from the Fact Sheet as a checklist.
Emphasise:• These alternatives give only limited protection• They should not be used if approved PPE is available

137
Finish
Time Activity
Summary:
1 minute
Include as major messages:• Wearing appropriate PPE is essential when handling or using
pesticides, but is a secondary precaution after the primary consideration of avoiding exposure in the first place.
• The pesticide container label specifies the appropriate PPE to wear for different activities
• PPE only protects if the pesticide remains on the outside.• PPE alternatives give only limited protection, and should only be worn
if approved PPE is not available.
Questions:
1 minute
Ask if everyone understands or if there are any additional questions. Answer these provided they are relevant.
Ask if the session objectives were met
Evaluation:
12 minutes
Hand out the Assessment Sheet and ask participants to complete two of the questions.
Collect the Assessment Sheet for later marking and entering the marks on the Attendance Record.
Next step:
1 minute
Ask participants to advice customers on the appropriate PPE to wear when using the product by showing the relevant information on the container label.
Hand out the Fact Sheet to participants.

138
Session 9: Personal Protective Equipment (PPE)
Visual 1
SHIRT
GLOVES
PANTS
BOOTS
WHEN HANDLING
PESTICIDES ALWAYSWEAR
• Wear a hat for protection from the sun or when spraying tall crops
• Wear a mask for measuring and mixing dry formulations (dusts, powders, granules)
• All users should follow national regulations
WHEN HANDLING PESTICIDES ALWAYS FOLLOW THESE RULES
• Read and understand the label • Be careful• Exercise good personal hygiene• Maintain sprayers in good working order• Wear the correct Personal Protective Equipment
www.croplife.org
SHIRT PANTS
SHIRT PANTS BOOTS GLOVES APRONEYE
PROTECTOR
SHIRT PANTS BOOTS GLOVES
WHEN MEASURING AND MIXING PESTICIDES ALWAYS WEAR
BE SMART, BE SAFEWEAR THE CORRECT PERSONAL PROTECTIVE EQUIPMENT
WHEN SPRAYING PESTICIDES ALWAYS WEAR
WHEN WASHING/CLEANING THE SPRAYER AFTER SPRAYING
GLOVESBOOTS APRON
WASH PERSONAL PROTECTIVE EQUIPMENT AFTER USE
EYEPROTECTOR
SHIR
TSHIR
ES
W
S HA
W
G G G G ES ES E S DE
W
S N
AW
AAAA
SYYYSYSAAAYSAYSWWLLLWLW
GLOVES
GLOVES
ANTSP
ANTS
BOOTS
.croplife.orgwww
.croplife.org
SHIRT
GLOVES
PANTS
BOOTS
WHEN HANDLING
PESTICIDES ALWAYSWEAR
• Wear a hat for protection from the sun or when spraying tall crops
• Wear a mask for measuring and mixing dry formulations (dusts, powders, granules)
• All users should follow national regulations
WHEN HANDLING PESTICIDES ALWAYS FOLLOW THESE RULES
• Read and understand the label • Be careful• Exercise good personal hygiene• Maintain sprayers in good working order• Wear the correct Personal Protective Equipment
www.croplife.org
SHIRT PANTS
SHIRT PANTS BOOTS GLOVES APRONEYE
PROTECTOR
SHIRT PANTS BOOTS GLOVES
WHEN MEASURING AND MIXING PESTICIDES ALWAYS WEAR
BE SMART, BE SAFEWEAR THE CORRECT PERSONAL PROTECTIVE EQUIPMENT
WHEN SPRAYING PESTICIDES ALWAYS WEAR
WHEN WASHING/CLEANING THE SPRAYER AFTER SPRAYING
GLOVESBOOTS APRON
WASH PERSONAL PROTECTIVE EQUIPMENT AFTER USE
EYEPROTECTOR
SHIR
TSHIR
ES
W
S HA
W
G G G G ES ES E S E
W
S N
AW
AAAA
SYYYSYSAAAYSAYSWWLLLWLW
GLOVES
GLOVES
ANTSP
ANTS
BOOTS
.croplife.orgwww
.croplife.org

139
Assessment Questions
Name: …………………………………………………… Date: ……………………… Mark:
Answer TWO (2) only of the following questions.You may write your answers on this question sheet or tell your trainer the answers. All questions are the same value (5 marks).
Question 1: What is the function of PPE?
...........................................................................................................................................................................................
...........................................................................................................................................................................................
...........................................................................................................................................................................................
Question 2: Where do you find information on what PPE to wear for a particular activity?
...........................................................................................................................................................................................
...........................................................................................................................................................................................
...........................................................................................................................................................................................
Question 3: At what stage of putting on PPE are gloves put on and how?
...........................................................................................................................................................................................
...........................................................................................................................................................................................
...........................................................................................................................................................................................
Question 4: What is the first step of removing PPE?
...........................................................................................................................................................................................
...........................................................................................................................................................................................
...........................................................................................................................................................................................

140
Session 9: Personal Protective Equipment (PPE)
FACT SHEETPERSONAL PROTECTIVE EQUIPMENT (PPE)
Personal Protective Equipment (PPE) is another term for protective clothing.
• PPE are devices worn to keep pesticides away from the body and minimise exposure.
• PPE should be regarded as a secondary precaution, after the primary consideration of avoiding exposure in the first place, such as not causing splashes when mixing or not spraying with a leaking sprayer.
• PPE only protects if the pesticide remains on the outside.
• Torn, damaged, or broken PPE must not be worn, as pesticide can enter and be trapped next to the skin.
• Dirty or contaminated PPE must not be worn, as pesticide is trapped next to the skin.
• Do not touch any exposed part of the body (most commonly the face) with contaminated gloves during work, or removal of the PPE.
• The minimum amount to wear for an activity is given on the label.
• In the absence of label recommendations:• The minimum to wear for all activities is overalls, boots, and gloves.• For mixing, a dust mask should be worn for dry formulations, and goggles or a face
shield for liquid formulations. For toxic products, an apron should also be worn in addition to the minimum.
• For application, goggles and a face mask should be worn in addition to the minimum.
PPE FOR PROTECTION FOR DIFFERENT PARTS OF THE BODY
Body Protection• Overalls, collar fastened.• Cotton or canvas hat, preferably with wide brim.• Apron made of rubber or PVC for use when mixing toxic liquid concentrates.
Hand and Foot Protection• Rubber gloves and boots when handling concentrates.• Gloves and boots should be unlined. Fabric lining can trap pesticide and is impossible to
clean.• Trousers outside boots, not tucked inside.• Gloves outside overall sleeves.
Eye and Face Protection• Safety glasses or goggles when there is a risk of dusts or mists, such as mixing dry
formulations, and when spraying.• Face shields when there is a risk of splashing, such as mixing liquid formulations.
Inhalation Protection• Dust or mist masks that cover the nose and mouth when there is a risk of dusts or mists.• Dust and mist masks must be disposed after use.• Respirators (face piece with filter canisters attached) usually only needed for specialised
operations, or when mixing and applying more toxic products.
All protective clothing must be washed or cleaned after use.

141
PUTTING ON AND TAKING OFF PPE
Putting On• Check for any torn, damaged or broken items, which must not be worn.• Overalls on first• Boots and any other equipment• Overall trousers over boots to prevent entry of pesticide• Gloves last• Gloves outside overall sleeves to protect sleeves from pesticide
Taking Off• Wash gloves, but do not remove them• Remove goggles, boots, and any other equipment• Finally remove gloves and overalls• Avoid the bare skin coming into contact with contaminated surfaces of the PPE• Store PPE separately from other clothing
ALTERNATIVES TO PROPER PROTECTIVE CLOTHING
Specially made protective clothing is not always available, or is expensive. Other approaches which have been used include:
Body Protection• Long sleeved shirt and trousers.• Shirt collar fastened, sleeves down, cuffs buttoned.• Baseball hat.
Hand and Foot Protection• Strong plastic bag on each hand.• For spraying operations only, canvas shoes.
Eye and Face Protection• Sunglasses or glasses (only give minimal protection).
Inhalation Protection• For spraying operations only, a cloth tied over the nose and mouth.
THESE ALTERNATIVES GIVE ONLY LIMITED PROTECTION. THEY SHOULD ONLY BE USED IF PROPER PROTECTIVE
CLOTHING IS NOT AVAILABLE

142
Session 9: Personal Protective Equipment (PPE)
Care of Protective Clothing
All items Inspect after use for damage.
Cotton items (overalls, hat, shirt, trousers, etc)
Wash after use with soap and water.Wash and dry PPE separately from all clothing.
Gloves, Boots, Aprons Gloves: Wash the outsides before removing other items of PPE.Wash inside and outside with soap and water.Wash and dry PPE separately from other clothing.
Goggles, Face Shields Wash after use with soap and water.Wash and dry PPE separately from all clothing.
Dust, Mist Masks Dispose of safely after use.These masks should not be re-used.
Respirators Clean according to the manufacturer’s instructions.Replace canisters according to manufacturer’s instructions.
See also CropLife International: Guidelines for Personal Protection when Using CPPs in Hot Climates http://croplife.org/?s=guidelines

143
SESSION 10:HAND SPRAYERS

144

145
Lesson Plan
Materials needed: R Flipchart stands.
R Flipchart paper.
R Markers (4 colours).
R Notebooks, pens, and file covers for participants who have forgotten to bring them.
R Coloured cards.
R Glue stick or blue tack.
R Masking tape.
Time needed: 105 minutes
Intended audience: Pesticide Retailers
Preparation: R Flipchart with the session title “Hand Sprayers” and the Session Objectives.
R Examples of different types of hand sprayers in local use, eg compression, knapsack, mistblower, ULV, foot pump, wheelbarrow, etc.
R If possible, sufficient manual knapsack sprayers of the same type for one between each 3-4 participants.
R Printed copies of Visual 1, Sprayer Components Diagram.
R Print off sufficient Attendance Record sheets.
R Print off sufficient Assessment question sheets.
R Print off sufficient Fact Sheets for participants.
R Organise venue and seating arrangements.
R An outside area for testing sprayers after reassembly.
Attendance RecordAs participants arrive, ask them to enter their name and other information on the Attendance Record. There is also a column on the form to enter their marks from the Assessment Questions at the end of the training session.

146
Session 10: Hand Sprayers
Set up / Introduction 5 minutes
Time Activity
Attention: Welcome the retailers to the session.
Ask:• How many participants sell sprayers as well as pesticides?• Do you think you know enough about the different types, how they
work, and the situation where each type is most suitable?
Take several responses.
Title: Refer to the Title Flipchart and tell participants that this training session will cover Hand Sprayers.
Credibility: Give an example of personal experience seeing the wrong type of sprayer being used in a situation, for example a compression sprayer in wheat or cotton.
Objectives: Refer to the Title Flipchart with the Lesson Objectives.
By the end of the session, participants will be able to:• Explain to a customer the most suitable type of sprayer to use for
their situation.• Describe the major components of a sprayer and their function.• Disassemble a sprayer into the component parts and reassemble.
Benefits: Sprayers are tools, and to be able to use the correct type for a specific situation, and knowing how they work, will ensure that pesticide applications are effective.
Direction: • The session begins with an interactive discussion comparing different sprayer types.
• The trainer then demonstrates the different sprayer components and their function.
• A practical activity on sprayer disassembly and reassembly is undertaken either by small groups if sufficient sprayers are available, or by a fishbowl activity if only one sprayer is available.
• The session concludes with an interactive discussion on common sprayer faults.

147
DeliveryExplanation, Demonstration, Exercise, and Guidance:
Time Activity
1.
25 minutes
Interactive Discussion - Comparison of Different Sprayer Types
Ask:• What are the most common types of hand sprayers used by farmers in
this area?
Write the answers as headings on separate flip charts.
Write Advantages and Disadvantages under the heading
Show the a sprayer type from the example sprayers and ask:What are the advantages of this type of sprayer?What are disadvantages?
Write the responses on the relevant sprayer flipchart under the two headings.
Repeat for the other types of sprayer.
Summarise the results, using Advantages and Disadvantages of Different Sprayer Types from the Fact Sheet as a checklist to fill in any gaps.
Ask:• What criteria should a farmer use when deciding to buy a sprayer?• What points should he look for?
Trainer Note:There is no ‘correct’ answer to this question – it depends on the farmer’s situation and resources. The objective of the question is for participants to reflect on the different criteria to consider when buying (or selling) a sprayer.
2.
15 minutes
Demonstration – Sprayer Components and Function
Explain that when we use a tool, it always helps to know how it works, and the functions of the different parts.
We will look at a manual knapsack sprayer as this is one of the most common types used by farmers. Other types of sprayers have similar components and functions, although they may work in different ways to a manual knapsack sprayer.
Distribute Visual 1, Sprayer Components Diagram, to participants.
Using a manual knapsack sprayer, point out and explain the function of the main sprayer components, using Sprayer Components and Function from the Fact Sheet as a checklist.
Ask participants to write the names of the components against the indicator lines on the handout diagram as you describe them.

148
Session 10: Hand Sprayers
3.
30 minutes
Small Groups / Fishbowl – Sprayer Disassembly and Assembly
Trainer Note:If there are sufficient manual knapsack sprayers available, follow the small groups activity. If there is only one knapsack sprayer, follow the fishbowl activity.
Say that as sellers of sprayers, participants need to be able to give advice to customers on how to take a sprayer apart and reassemble for repair and maintenance.
Small Groups:
Divide participants into groups of 3-4 and provide each group with a manual knapsack sprayer.
Explain that their task is to disassemble the sprayer into the major components, and then re-assemble. During this, they should be careful not to:• Break any parts• Lose any small parts, such as washers• Cross any screw threads
Emphasise that:• The sprayers come apart very easily• If they are having difficulty in removing any part, then they are doing it
incorrectly• They should proceed slowly with disassembly, and note how the parts
are fitted together
Work Group Task:• Disassemble the sprayer into the major components.• Lay out these components on the table. These separate components
should be:• Tank• Carrying straps• Pump and pressure chamber• Pump lever• Hose• The parts of the trigger valve• Lance• The parts of the nozzle
• Re-assemble the sprayer.• The straps should be adjusted so that the sprayer sits firmly and
comfortably high on the back of the operator.
Walk round the groups to provide any necessary help, and ensure that they do not break or lose any parts, or cross any screw threads.

149
When all groups have finished re-assembling their sprayers, take them outside, ask them to put 2-3 litres of water in the tank and to spray this water.
Check if there are any leaks from joints or the nozzle.
Fishbowl:
Ask all participants to come and stand around the table.
Say that we are going to disassemble a manual knapsack sprayer into the component parts, and then reassemble the sprayer.
Ask for a volunteer to start disassembling the sprayer and lay the parts out on the table.
Ask the other participants which component to take apart first.
Ask the volunteer to take the component apart. If the volunteer is unsure of how to proceed, the other participants can give advice. If necessary, the trainer should provide guidance.
Ask for volunteers in turn for the next step of disassembly.
Repeat until all parts of the sprayer are laid out on the table.
Ask for volunteers in turn to put the sprayer back together.
Repeat until the sprayer is reassembled.
Put 2-3 litres of water in the tank, and spray this water to ensure there are no leaks from joints or the nozzle.

150
Session 10: Hand Sprayers
4.
15 minutes
Interactive Discussion – Sprayer Faults
If there were any leaks after participants had re-assembled the sprayer(s) in the last activity, explain that leaks are one of the most common sprayer faults.
Ask:• What do you think are other common faults that can occur with
sprayers?
Write responses on the flipchart, and point out the locations on an example sprayer.
Use the headings from Common Sprayer Faults and Repair from the Fact Sheet as a check list to fill in any gaps.
Review the responses, and emphasise that the most common faults are leaks from the nozzle or joints, and blockages of the nozzle or filters.
Say that the Fact Sheet has a section on repair of the common sprayer faults we have identified.
Ask:• As a result of our discussions, what do you think are the two most
important things for farmers to do to prevent faults and breakdowns?
Trainer Note: Use clean water for spraying, and thoroughly clean the sprayer and parts after each use. These aspects will be covered in a later session.
Say that the Fact Sheet has additional information which we have not covered in this session on a Checklist for a Good Quality Sprayer, and which participants should study
Emphasise that sprayers vary widely in quality, many do not have the majority of the characteristics in the Fact Sheet, and that the cheapest sprayers of each type should generally be avoided.

151
Finish
Time Activity
Summary:
1 minute
Include as major messages:• Each type of sprayer has advantages and disadvantages, and
selection of a sprayer type must be based on the use situation.• The function of the major components of a sprayer
Questions:
1 minute
Ask if everyone understands or if there are any additional questions. Answer these provided they are relevant.
Ask if the session objectives were met
Evaluation:
12 minutes
Hand out the Assessment Sheet and ask participants to complete two of the questions.
Collect the Assessment Sheet for later marking and entering the marks on the Attendance Record.
Next step:
1 minute
Say that in this session we learned about the different types of sprayer, their components, and their different functions. Participants can now give appropriate advice to customers on sprayer purchase for the customer’s situation, and how to take a sprayer apart and reassemble.
Participants should also study the Checklist for a Good Quality Sprayer in the Fact Sheet.
Hand out the Fact Sheet to participants.

152
Session 10: Hand Sprayers
Main Sprayer Components Diagram

153
Visual 1

154
Session 10: Hand Sprayers
Assessment Questions
Name: …………………........…………………….. Date: …………........……… Mark:
Answer TWO (2) only of the following questions.You may write your answers on this question sheet or tell your trainer the answers. All questions are the same value (5 marks).
Question 1: Describe two disadvantages of a compression sprayer.
...........................................................................................................................................................................................
...........................................................................................................................................................................................
...........................................................................................................................................................................................
Question 2: Describe two advantages of a manual knapsack sprayer.
...........................................................................................................................................................................................
...........................................................................................................................................................................................
...........................................................................................................................................................................................
Question 3: What is the function of the pressure chamber in a sprayer?
...........................................................................................................................................................................................
...........................................................................................................................................................................................
...........................................................................................................................................................................................
Question 4: Where should the three filters be located in a manually operated sprayer?
...........................................................................................................................................................................................
...........................................................................................................................................................................................
...........................................................................................................................................................................................

155
FACT SHEETComparison of Sprayer Types
Advantages Disadvantages
Pressure (Compression) Sprayer
Cheap purchase cost Pressure rapidly drops, with reduction in output and increase in droplet size
Can be used for insecticides, fungicides, herbicides
Requires frequent stopping and re-pumping to maintain pressure
Variable coverage of plants and field
Very low work rate (ha / day)
Manual Knapsack Sprayer
Cheap to moderate purchase cost Cheaper versions are prone to breakdowns and leaks, and have a short working life
Relatively low volume of water Not suitable for use in orchards unless extension fitted to lance
Good coverage of plants and field Moderate work rate (ha / day)
Low operating costs
Can be used for insecticides, fungicides, herbicides
Foot Pump / Rocker Sprayer
Moderate price Requires two operators
High pressure Only suitable for orchards
Long spray throw Usually supplied with variable nozzle
High volume output Risk of drift from long spray throw
Low operating costs Moderate work rate (ha / day)
Orchards are often inaccessible to other types of powerful sprayer
Not suitable for application of herbicides

156
Session 10: Hand Sprayers
Wheelbarrow Sprayer
Can be fitted with a boom and several nozzles
Moderate to high cost
Can be fitted with hand lance(s) for taller crops
Spray pressure depends on land wheel rotation
Larger tank capacity than other hand sprayers
Booms can only be used on low crops
Can be used for insecticides, fungicides, herbicides
Hand lance use requires 2-3 operators
Moderate to high work rate (ha / day) Difficulty of moving down the row with taller crops due to width of wheelbarrow
Difficult to push on soft soil
Motorised Knapsack Mistblower
Low volume of water High purchase cost
Good coverage of plants and field Understanding of drift spraying technique essential for obtaining good coverage
High work rate (ha / day) High operating costs (fuel, oil)
Requires high levels of maintenance
Higher risk of spray drift
Not suitable for use in tall crops or orchards unless spray pump fitted
Not suitable for application of herbicides
ULV Sprayer
Cheap to moderate purchase cost Moderate operating costs (batteries)
No water needed (or very little) Hazards associated with application of concentrated formulation / spray mix
Good coverage of plants and field Understanding of drift spraying technique essential for obtaining good coverage
High work rate (ha / day) Higher risk of spray drift
Application of herbicides requires special ULV sprayer with lower disc speed
Cannot be used in orchards

157
Main Sprayer Components and Function

158
Session 10: Hand Sprayers
TANK• The tank is the reservoir to hold the spray mix. It may be from 10 to 20 litres capacity.• The tank lid is the opening for filling the sprayer. It must have a breather vent to allow air
to enter the tank during spraying.
PUMP• The pump pressurises the spray mix. The most common type is a piston pump.• The pump is operated by a pump lever.• On one stroke of the lever spray liquid is drawn into the pump, on the reverse stroke the
liquid is forced out of the pump into the pressure chamber.• The pressure chamber contains air which is then compressed as liquid is pumped in, and
which helps to even out pressure fluctuations at the nozzle caused by the operation of the pump lever.
LANCE• The hose provides a flexible connection between the pressure chamber and the lance. • The trigger valve provides positive on-off control of the flow of spray mix.• The lance is rigid, about 50cm long, and ensures that the nozzle is held away from the
operator.• The lance should have an angle at the end so that the nozzle can be directed in different
directions• The nozzle breaks the spray mix up into droplets. Different nozzles are used for different
types of pesticides
FILTERS• Filters remove debris which may block the pump valves or nozzle.• Filters should be located in the tank opening, the trigger valve, and nozzle.• Filters should be coarse, medium, and fine from the tank opening to the nozzle.
Checklist for a Good Quality Sprayer
GENERAL• Robustly constructed from strong, durable materials.• Constructed so that the bottom of the tank is not in direct contact with the ground when
the sprayer is stood upright. • Sprayer when stood upright and full should be stable on slopes up to 1 in 10.• Integral carrying handle.• No special tools required for maintenance or repair
SPRAY TANK• 16-20 litre tank capacity.• UV stabilised / resistant polypropylene tank. • Semi-transparent with volume markings. • No sharp corners.• Able to withstand a drop of 1m without damage or leaking.• Large tank fill opening with strainer recessed deeply in opening.• Tank lid and strainer operable with gloved hands• Spray mix agitation system within tank.
CARRYING STRAPS• Carrying straps at least 5cm wide, or with shoulder pads of at least 5cm width.• Straps and pads non-absorptive and UV resistant. • Pads should remain fixed in place on straps during use. • Straps of adjustable length. • Quick release catches – operable when sprayer is full.

159
PUMP• Piston or diaphragm pump• Capable of both left and right handed lever operation• Pressure regulation system from 1 to 3 bar
HOSE AND LANCE• Hose non-flattening when bent unsupported through 180 degrees with 5cm radius. • Hose length sufficient to allow free movement and positioning of lance for spraying.• Lance at least 0.5m long. • Lance with elbow to allow spraying downwards or sideways. • Positive on/off trigger mechanism.• In-line filters above both trigger mechanism and nozzle
NOZZLES• Sprayer supplied with both hollow cone, and flat fan or deflector nozzles.• Nozzle flow rates at different pressures should be specified. • Adjustable nozzles are not acceptable.
OTHER• Supplied with spare washers / gaskets.• Instruction manual in local language giving details of assembly, use, maintenance, nozzle
flow rates, and safety as a minimum.

160
Session 10: Hand Sprayers
Common Sprayer Faults and Repair
Leaks
Cause Repair
Worn or damaged seals • Check seals and seatings at point of leak.• Replace worn or damaged parts. • Some joins rely only on surface to surface contact for
the seal and there is no washer. • Check that there is no dirt or scratches on the faces of
the join. • Clean or replace as necessary.
Joins incorrectly assembled • Check at point of leak to ensure that all parts are present and assembled correctly.
Crossed threads • Check that the screw threads are not crossed
No Spray
Cause Repair
Nozzle or filter blocked • Resistance will be felt on the pump lever when the cut-off valve is open.
• Remove nozzle, check for blockage and clean if necessary.
• Remove filters at nozzle and cut-off valve, check for blockage and clean if necessary.
Dirty or worn pump • Check that the pump valves are not dirty, sticking, worn or damaged.
• Clean or replace as necessary.
Entry holes to pump blocked
• Check that the holes where liquid passes from the tank to pump are not blocked.
• Clean as necessary.
Nozzle swirl plate fitted wrongly
• On some hollow cone nozzles, if the swirl plate is fitted wrongly it blocks off the nozzle.
• Check and reverse the swirl plate if necessary.
No Pressure
Cause Repair
Leak from pressure chamber
• Operate the pump lever several times and then look inside the tank to see if air bubbles are appearing on the liquid surface or if spray liquid is coming out of the chamber.
• If so, check the pressure chamber gasket and the pressure chamber body for damage.
• Replace if necessary.
Worn or dirty pump • Check that the pump valves are not dirty, sticking, worn or damaged.
• Clean or replace as necessary.

161
Entry holes to pump blocked
• Check that the holes where liquid passes from the tank to pump are not blocked.
• Clean if necessary.
Piston pump - worn piston washer
• Check that the piston seal is not worn or damaged, and that there are no deep scratches on the piston cylinder wall.
• Replace as necessary.• If this is the cause of no pressure, liquid will be rapidly
leaking from the pump.
Breather hole blocked • Check that the breather hole in the filler cap of the tank is not blocked, as this will prevent the entry of air and cause a vacuum in the tank.
Pressure Drops Quickly
Cause Repair
Leak from pressure chamber
• Operate the pump lever several times and then look inside the tank to see if air bubbles are appearing on the liquid surface, or if spray liquid is coming out of the pressure chamber.
• If so, check the pressure chamber gasket and the pressure chamber body for damage.
• Replace as necessary.
Not enough air in pressure chamber
• Repeated fillings of the tank before it is empty can reduce the volume of air in the pressure chamber.
• Drain the sprayer completely, and operate the pump lever several times to replace the air in the pressure chamber.
Liquid Emerges from Nozzle as Jet Instead of Spray
Cause Repair
Swirl plate missing • Hollow cone nozzles only.• Replace swirl plate
Nozzle excessively worn • Fan nozzles - liquid tends to emerge as jet.• Replace nozzle.• Hollow cone nozzles - spray droplets noticeably
increase in size.• Replace nozzle.
See Also: CropLife International Guidelines for the Safe and Effective Use of Crop Protection Productshttp://croplife.org/?s=guidelines

162
Session 10: Hand Sprayers

163
SESSION 11:PESTICIDE APPLICATION (THEORY)

164

165
Lesson Plan
Materials needed: R Flipchart stands.
R Flipchart paper.
R Markers (4 colours).
R Notebooks, pens, and file covers for participants who have forgotten to bring them.
R Coloured cards.
R Glue stick or blue tack.
R Masking tape.
Time needed: 95 minutes (100 minutes including activity 5)
Intended audience: Pesticide Retailers
Preparation: R Flipchart with the session title “Spray Application (Theory)” and the Session Objectives.
R Flipchart with Importance of Pesticide Application / Spraying from the Fact Sheet.
R Flipchart with blank table Advantages and Disadvantages of Large and Small Droplets.
R Sufficient printed copies of Visual 1, Droplet Sizes, for all participants
R Several examples of each nozzle type – flat fan, even flat fan, full cone, hollow cone, deflector/flood.
R Print off sufficient Attendance Record sheets.
R Print off sufficient Assessment question sheets.
R Print off sufficient Fact Sheets for participants.
R Organise venue and seating arrangements.
Attendance RecordAs participants arrive, ask them to enter their name and other information on the Attendance Record. There is also a column on the form to enter their marks from the Assessment Questions at the end of the training session.

166
Session 11: Pesticide Application (Theory)
Set up / Introduction 5 minutes
Time Activity
Attention: Welcome the retailers to the session.
Ask:• How many participants give advice on pesticide application or
spraying, or are directly involved in spraying?• If participants do not undertake these activities, ask what is the
reason: is it because they do not have enough knowledge?
Take several responses.
Say that in this session we will discuss the theory of spray application. In the following session we will look at spray mixing and application in practical activities
Title: Refer to the Title Flipchart and tell participants that this training session will cover
Credibility: Give an example of when a pesticide did not work properly because of incorrect application.
Objectives: Refer to the Title Flipchart with the Lesson Objectives.
By the end of the session, participants will be able to:• State clearly the importance of application / spraying when using a
pesticide to prevent crop damage.• Explain the relationship between plant coverage, droplet size, and
spray volume.• Describe the common types of nozzles and their characteristics.Explain the factors which affect droplet size.
Benefits: One of the common reasons for the failure of a pesticide is poor application. Knowing the theory of pesticide application will enable participants to give appropriate advice to farmers, and when applying a pesticide themselves, ensure that the application is effective.
Direction: • The session opens with a trainer presentation, which leads into an interactive discussion about the function of a sprayer.
• Another interactive discussion examines the relationship between plant coverage, droplet size, and spray volume.
• Work groups next examine the advantages and disadvantages of large and small droplets.
• Additional discussions look at different nozzle types and their characteristics, and the factors which affect droplet size.

167
DeliveryExplanation, Demonstration, Exercise, and Guidance:
Time Activity
1.
15 minutes
Presentation / Interactive Discussion – Function of a Sprayer in Pesticide Application
Present the flipchart Importance of Pesticide Application / Spraying.
Ask the following three questions in turn, writing responses to each question on the flipchart:• What are we really trying to do when we apply a pesticide to a crop?• What is the target we are trying to reach when we apply a pesticide?• What basic function does a sprayer perform in helping us to achieve
these objectives?
Use Function of a Sprayer in Pesticide Application from the Fact Sheet as a checklist.
Conclude the activity by presenting the Function of a Sprayer in Pesticide Application from the Fact Sheet.
Emphasise:That pesticides cost the farmer money. They must be applied effectively to give a return on his investment.
2.
15 minutes
Interactive Discussion - Plant Coverage, Droplet Size and Spray Volume
Ask the following questions one by one:• Is it better to use large or small amounts of water when spraying?• Why?• Can we apply the same amount of pesticide to a crop in a smaller
volume of water?• Why would we want to use a smaller volume of water?• How could we use a smaller volume of water?
Take responses to each question in turn, using Plant Coverage, Droplet Size and Spray Volume from the Fact Sheet as a checklist.
When appropriate, distribute Visual 1, Droplet Sizes, to illustrate the effect on droplet numbers of halving droplet size with the same volume of water.
Emphasise:• It is best to use the smallest amount of water possible as this reduces
the labour and effort required for water collection and spraying. • Obtaining adequate coverage with a small amount of water requires
consideration of appropriate droplet size.• Other factors also need to be considered with regard to appropriate
droplet size for an application, which we will examine during the session.

168
Session 11: Pesticide Application (Theory)
3.
20 minutes
Work Groups – Advantages and Disadvantages of Large and Small Droplets
Divide participants into 3-4 groups depending on numbers.
Put up the flipchart with the blank table Advantages and Disadvantages of Large and Small Droplets.
Work Group Task:Discuss among the group answers to the following questions:• What are the advantages of large droplets?• What are the disadvantages of large droplets?• What are the advantages of small droplets?• What are the disadvantages of small droplets?• Jot answers down.
Take an answer for the first question from the first group and write the response in the table on the flipchart. Repeat for each group in turn until there are no more responses.
Repeat for each question on turn.
Review the results, using Advantages and Disadvantages of Large and Small Droplets, from the Fact Sheet to fill in any gaps.
Trainer Note:Refer back to Session 4 on Pesticide Classification to link droplet sizes and plant coverage with the Mode of Action of pesticides. For example, aphids feeding on under-leaf surfaces require good under leaf coverage with a contact pesticide, which is provided by smaller droplets.
Ask:• Is it important to use a large or small droplet size for the application of
a herbicide? Why• An insecticide? Why?
4.
15 minutes
Interactive Discussion – Nozzles
Distribute the examples of the first nozzle type (eg hollow cone) to each group and ask participants to examine them.
Ask:• What type of nozzle is this?• What are its characteristics?
Write responses on the flipchart until there are no further answers, and then add any missing points using Nozzles from the Fact Sheet as a checklist.
Repeat for the other nozzle types.
Trainer Note:Ensure all the example nozzles are returned at the end of the activity.

169
5.
5 minutes
Interactive Discussion – Other Nozzle Types
Trainer Note:Include the following activity only if appropriate to sprayers used locally.
Say that the nozzles we have discussed are known as hydraulic nozzles as they use the energy of the liquid to produce droplets.
Ask:• Are there other common types of nozzles?
Write responses on the flipchart.
Ask:• What are the characteristics of these other nozzles?
Write responses on the flipchart against the nozzle type, using Other Nozzle Types from the Fact Sheet as a checklist.
6.
10 minutes
Interactive Discussion – Factors Affecting Droplet Size
Say that in the previous activities we have seen the importance of using an appropriate droplet size for a pesticide application.
Ask:• What do you think are the factors which affect the size of droplets
produced by a nozzle?
Write responses on the flipchart, using Factors Affecting Droplet Size from the Fact Sheet as a checklist.

170
Session 11: Pesticide Application (Theory)
Finish
Time Activity
Summary:
1 minute
Include as major messages:• The importance of good spray application for a pesticide to be
effective.• The relationship between plant coverage, droplet size and volume
of water.• Smaller droplets are used for insecticides and fungicides, larger
droplets are used for herbicides.• Different types of nozzles produce droplets in different ways, and
have different droplet sizes.• Droplet size is also affected by the size of the nozzle orifice and
spray pressure.
Questions:
1 minute
Ask if everyone understands or if there are any additional questions. Answer these provided they are relevant.
Ask if the session objectives were met
Evaluation:
12 minutes
Hand out the Assessment Sheet and ask participants to complete two of the questions.
Collect the Assessment Sheet for later marking and entering the marks on the Attendance Record.
Next step:
1 minute
Say that in this session we learned the theory of pesticide application / spraying, which is essential as the effectiveness of a pesticide depends on the quality of the application. In the next session we will put this theory into practice.
Hand out the Fact Sheet to participants.

171
Advantages and Disadvantages of Large and Small Droplets
Large Droplets Small Droplets
Advantages Disadvantages Advantages Disadvantages

172
Session 11: Pesticide Application (Theory)
Visual 1
Droplet Sizes
1 micron (µ) = 1/1,000mm, or 400µ = 0.4mm. A human hair is 100µ in diameter.

173
Assessment Questions
Name: …………………………………………………… Date: ……………………… Mark:
Answer TWO (2) only of the following questions.You may write your answers on this question sheet or tell your trainer the answers. All questions are the same value (5 marks).
Question 1: What is the basic function of a sprayer in pesticide application?
...........................................................................................................................................................................................
...........................................................................................................................................................................................
...........................................................................................................................................................................................
Question 2: Give two advantages of small droplets.
...........................................................................................................................................................................................
...........................................................................................................................................................................................
...........................................................................................................................................................................................
Question 3: What are the three factors which affect droplet size?
...........................................................................................................................................................................................
...........................................................................................................................................................................................
...........................................................................................................................................................................................
Question 4: For what type of pesticide is a flat fan nozzle used for application?
...........................................................................................................................................................................................
...........................................................................................................................................................................................
...........................................................................................................................................................................................

174
Session 11: Pesticide Application (Theory)
FACT SHEETTHE IMPORTANCE OF PESTICIDE APPLICATION / SPRAYING
• Pesticides are applied to protect the crop from economic damage or loss.
• There are four main reasons for a pesticide failing to work properly, of which two are concerned with application:• Wrong pesticide dose rate, of which one cause is poor spraying.• Incorrect application / spraying
• Pesticide application / spraying is often neglected when considering pest management.• If the pesticide is not applied in the right amount in the right place, its effectiveness in
protecting the crop from loss or damage is reduced.• The farmer loses thus loses money in two ways - from crop loss or damage due to
poor pest control, and from cost of the pesticide.• To compensate for poor levels of control, a repeat spray is often made, which is also
poorly applied, and costs even more money. • Over the season, the losses add up, and can cost the farmer a considerable amount.
• Correct pesticide application / spraying is thus essential for a pesticide to work correctly, protect the crop from loss or damage, and ensure that the farmer makes the best profit from pesticide use.
THE FUNCTION OF A SPRAYER IN PESTICIDE APPLICATION
• The ultimate target of the pesticide is the pest, with an intermediate target of the surface of the plants.
• The function of the sprayer is to break the spray mix up into droplets to be deposited on the plant surfaces so as to give adequate and even coverage.
For a Pesticide to Have the Best Effect:• There must be even coverage of the pesticide droplets over both individual plants and
the whole field.• If the pesticide is not applied evenly, there will be areas of over- and under-dosing,
which are ineffective and increase losses and costs.• Particularly with underleaf pests (aphids, whitefly, some diseases, etc) there must be
good coverage of the lower leaf surface for contact pesticides to be effective.• If the target area is limited, for example aphids only in certain parts of the field or
application to young seedlings, then spot- and band-spraying can save pesticide, water, and time.
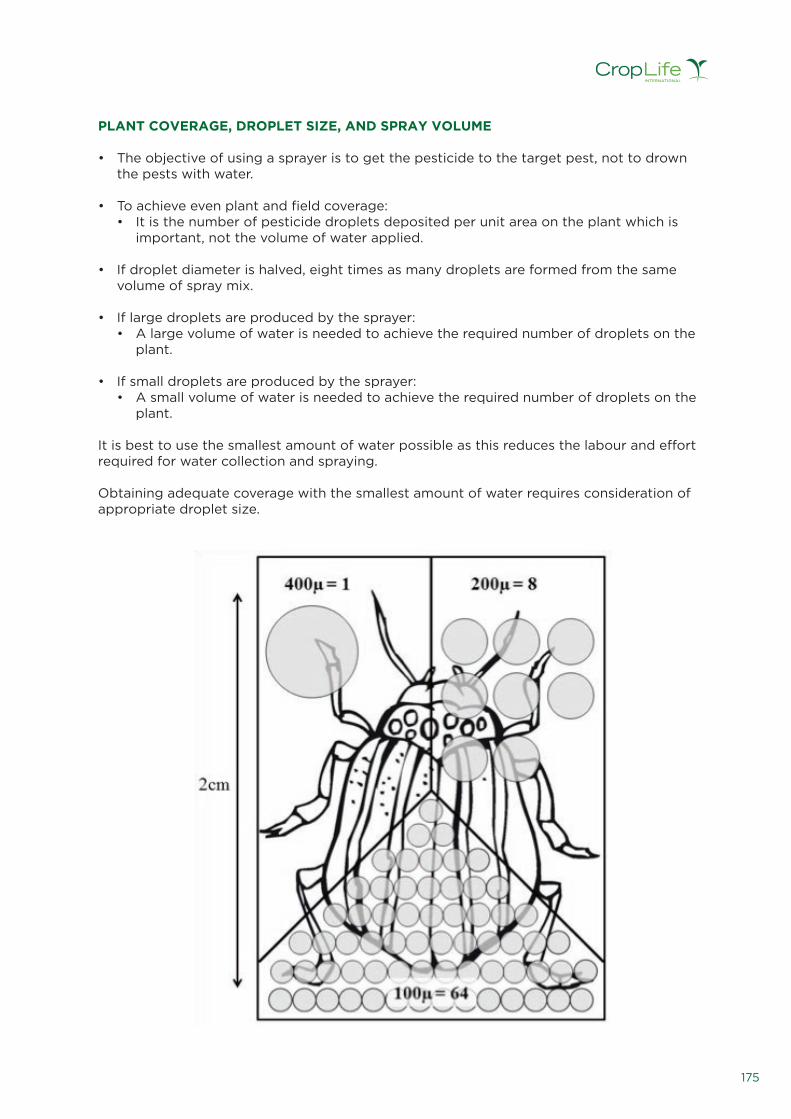
175
PLANT COVERAGE, DROPLET SIZE, AND SPRAY VOLUME
• The objective of using a sprayer is to get the pesticide to the target pest, not to drown the pests with water.
• To achieve even plant and field coverage:• It is the number of pesticide droplets deposited per unit area on the plant which is
important, not the volume of water applied.
• If droplet diameter is halved, eight times as many droplets are formed from the same volume of spray mix.
• If large droplets are produced by the sprayer:• A large volume of water is needed to achieve the required number of droplets on the
plant.
• If small droplets are produced by the sprayer:• A small volume of water is needed to achieve the required number of droplets on the
plant.
It is best to use the smallest amount of water possible as this reduces the labour and effort required for water collection and spraying.
Obtaining adequate coverage with the smallest amount of water requires consideration of appropriate droplet size.

176
Session 11: Pesticide Application (Theory)
Advantages and Disadvantages of Large and Small Droplets
Large Droplets Small Droplets
Advantages Disadvantages Advantages Disadvantages
Less liable to drift More liable to drift
Less likely to evaporate before hitting plant surface
More likely to evaporate before hitting plant surface
Poor coverage of lower leaves and under-leaf surfaces
Better coverage of lower leaves and under-leaf surfaces
More liable to uneven field coverage
More even field coverag
Need larger volume of water
Need smaller volume of water
Risk of run-off from plant surfaces
No run-off from plant surfaces
• The smaller a droplet, the higher is the risk of drift outside the target area.• Large droplets are used for the application of herbicides so as to minimise drift.• Small droplets are used for the application of insecticides, acaricides, and fungicides to
optimise crop penetration and underleaf coverage.
FACTORS AFFECTING DROPLET SIZE
Droplet size is affected by the nozzle type, the size of the nozzle orifice and the pressure of the spray liquid.• Different nozzle types (see below) produce different droplet sizes.• For hydraulic nozzles, a small nozzle orifice produces small droplets, a large nozzle orifice
produces large droplets.• For hydraulic nozzles, high pressure of the spray liquid produces small droplets, low
pressure produces large droplets.

177
Hydraulic NozzlesHydraulic nozzles are fitted to most sprayers, and rely on the energy given to the spray liquid by the pump to break the liquid into droplets. Hydraulic nozzles produce a relatively wide range of droplet sizes for a given nozzle type, size, and pressure.
Full Cone /Hollow Cone
• Produce a cone shaped spray. With a cone nozzle, the full area of the cone has spray droplets, with a hollow cone nozzle the droplets are only on the outside of the cone.
• Full cone nozzles are usually fitted only to air-blast sprayers or tractor boom sprayers, hollow cone nozzles are used with hand operated equipment.
• Droplet size tends to be small, and there is a risk of spray drift.
• Used at higher pressures than flat fan or deflector nozzles.• Most commonly used for application of insecticides,
acaricides and fungicides.
Flat Fan /Even Spray Flat Fan
• Produce a fan shaped spray.• Droplet size tends to be large, with a low risk of spray drift.• Flat fan nozzles deposit most spray directly under the nozzle
tip, so are used on tractor mounted boom sprayers, where several nozzles can overlap, producing an even spray pattern.
• “Even spray” flat fan nozzles produce an even deposit of spray across the fan, and are thus suitable for single nozzle hand operated equipment.
• Most commonly used for the application of herbicides.• May reduce the effectiveness of insecticide, acaricide and
fungicide application.
Deflector • Also known as “flooding” or “anvil” nozzles.• Droplet size tends to be large, with a low risk of spray drift.• Give a relatively even deposit of spray across the fan.• Most commonly used for the application of herbicides.• May reduce the effectiveness of insecticide, acaricide and
fungicide application.
Adjustable hollow cone nozzles should not be used as the output and droplet size cannot be adequately controlled.

178
Session 11: Pesticide Application (Theory)
Other Nozzle Types
Centrifugal • Also referred to as spinning discs, or rotary atomisers, or Controlled Droplet Application (CDA).
• Produce droplets from the edge of a toothed, spinning disc.• Produce a narrow range of droplet sizes.• The faster the disc spins, the smaller the droplet size.• Used for Low Volume and Ultra Low Volume application.• Different sprayers are required for insecticides and fungicides,
and for herbicides.
Air Shear • Fitted to motorised knapsack mistblowers.• Produce droplets from high speed wind passing over an
orifice / tube feeding spray liquid into the air blast.• Produce small droplet sizes, with a risk of spray drift.• Flow rate of the spray liquid is determined by an in--line
restrictor between the spray tank and ‘nozzle’ orifice
See also: CropLife International Guidelines for the Safe and Effective Use of Crop Protection Productshttp://croplife.org/?s=guidelines

179
SESSION 12:PESTICIDE MIXING AND APPLICATION
(PRACTICAL)

180

181
Lesson Plan
Materials needed: R Flipchart stands.
R Flipchart paper.
R Markers (4 colours).
R Notebooks, pens, and file covers for participants who have forgotten to bring them.
R Coloured cards.
R Glue stick or blue tack.
R Masking tape.
Time needed: 125 minutes
Intended audience: Pesticide Retailers
Preparation: R Flipchart with the session title “Pesticide Mixing and Application Practical”, and the Session Objectives.
R If possible, sufficient manual knapsack sprayers of the same type for one between each 3-4 participants.
R Graduated cylinders, syringes, electronic scales for measuring.
R Appropriate measures for farmers – cut down plastic bottles, graduated specimen containers – sufficient for the number of sprayers available plus for mixing/creaming dry formulations
R Milk powder and milk as substitutes for powder and liquid pesticide formulations.
R A supply of water for spraying.
R Buckets for water.
R An outside area adjacent to the training venue for practical activities.
R Print off sufficient Attendance Record sheets.
R Print off sufficient Assessment question sheets.
R Print off sufficient Fact Sheets for participants.
R Organise venue and seating arrangements.
Attendance RecordAs participants arrive, ask them to enter their name and other information on the Attendance Record. There is also a column on the form to enter their marks from the Assessment Questions at the end of the training session.

182
Session 12: Pesticide Mixing and Application (Practical)
Set up / Introduction 5 minutes
Time Activity
Trainer Note:For the practical activities of this session, an open area adjacent to the training classroom will be needed. The area should have a bare, flat area of concrete or hard earth for ‘herbicide’ application, and also some plants that can be sprayed with ‘insecticides’ and ‘fungicides’.
Attention: Welcome the retailers to the session.
Remind participants of the previous session on Pesticide Application (Theory).
Ask:• Why is application / spraying so essential to the effectiveness of a
pesticide?
Take several responses.
Say that in the last session we looked at the theory of spray application, in this session we will put that theory into practice.
Title: Refer to the Title Flipchart and tell participants that this training session will cover Pesticide Mixing and Application (Practical).
Credibility: Give an example of when a pesticide did not work properly because of incorrect application.
Objectives: Refer to the Title Flipchart with the Lesson Objectives.
By the end of the session, participants will be able to:• Explain how to avoid, and how to clean, nozzle and filter blockages.• Safely measure and mix liquid and dry pesticide formulations ready
for spraying.• Safely apply herbicides, and insecticides and fungicides.• Safely dispose of excess spray mix.• Describe the procedure for cleaning a sprayer after use.
Benefits: One of the common reasons for the failure of a pesticide is poor application. Knowing the theory of pesticide application will enable participants to give appropriate advice to farmers, and when applying a pesticide themselves, ensure that the application is safe and effective.
Direction: • An interactive discussion on avoiding and cleaning nozzle and filter blockages begins the session.
• The trainer then demonstrates appropriate measures for use by farmers.
• The practical sessions take place outside, where the trainer demonstrates how to mix and apply liquid and powder formulations, following which small participant groups practice mixing and spraying.
• The concluding outside activities are a trainer demonstration and group work on disposal of excess spray mix and cleaning the sprayer.

183
DeliveryExplanation, Demonstration, Exercise, and Guidance:
Time Activity
1.
15 minutes
Interactive Discussion – Blockages and Sprayer Cleaning
Say that before we go outside and practice mixing and spraying, we need to know how to remove a nozzle or filter blockage, and how to clean the sprayer after use.
Ask in turn:• What are the best ways to avoid nozzle or filter blockages?• How should we clean a nozzle or filter blockage during spraying?
Write responses on the flipchart, using Nozzle and Filter Blockages and Blockages During Spraying as checklists for each question, and adding to responses as necessary.
Say that the other way to prevent blockages is to thoroughly clean the sprayer after use. This not only prevents blockages, but also ensures that the sprayer is maintained properly.
Present the contents of Cleaning After Spraying from the Fact Sheet.
Say that participants will put Cleaning After Spraying into practice later in the session.
2.
5 minutes
Demonstration - Measures
Demonstrate to participants the equipment commonly assumed to be necessary for measuring:• Graduated / Measuring cylinders for liquids• Syringes for liquids• Electronic scale for powders
Explain that:• These are not suitable or will not be available for farmers. • However, pesticide retailers should have such equipment in their shop
so that they can prepare appropriate measures for farmers from other items as part of their customer service.
Demonstrate measures appropriate for farmers, such as:• Cut down water bottles.• Graduated specimen containers.
Emphasise that these measures should be washed out into the spray tank after each use, and kept safely locked up with the pesticide containers when not in use.
Trainer Note:Move outside to the open area for the next activities.

184
Session 12: Pesticide Mixing and Application (Practical)
3.
30 minutes
Fishbowl / Demonstration - Spraying Practical: Mixing and Application
Explain that we are using milk powder and milk as substitutes for powder and liquid pesticide formulations.
Say we are going to mix up 10 litres of spray mix, with a mixing rate of 3g of powder formulation per litre of water, and 1ml of liquid formulation per litre of water.
Demonstrate to the participants how to mix both powder and liquid pesticide formulations for spraying, using Mixing and Procedures for Measuring Out and Mixing Liquid Formulations and Wettable Powders from the Fact Sheet as references.
Emphasise that the first activity when mixing a pesticide is to read the label.
Emphasise also that:• Mixing is the most hazardous activity when handling pesticides as
they are in their most concentrated form.• Appropriate PPE must be worn.• The precautions that must be taken to AVOID exposure to pesticides
during mixing and spraying,
Using Spraying from the Fact Sheet for reference:• Fit a flat fan nozzle to the sprayer and demonstrate how to spray a
herbicide on the flat part of the area.• Point out the swath width of the nozzle on the ground, and how to
slightly overlap the swaths on the return path.• Change the nozzle to a hollow cone and demonstrate how to spray an
insecticide / fungicide on the plants in the area.• Point out how to use the bend in the lance to ensure good plant
coverage, particularly under the leaves.
Ask if participants have any questions.
Say that participants are now going to mix and apply ‘pesticides’ themselves in their small groups.

185
4.
40 minutes
Group Work - Spraying Practical: Mixing and Application
Divide participants into groups depending on the number of sprayers available.
Provide each small group with a knapsack sprayer.
Give each small group a powder or liquid ‘pesticide’ formulation and appropriate measuring equipment.
Say that first we will first spray a herbicide, and then an insecticide / fungicide.
Each small group task is to:• Prepare 10 litres of spray mix, either using a powder or liquid
formulation.• Mixing rates are 3g of powder formulation per litre of water, and 1ml of
liquid formulation per litre of water.• Fit a flat fan nozzle to the spray lance.• Spray the ‘herbicide’ on the flat area.• Each group member should take a turn at spraying.• Change the nozzle to a hollow cone.• Spray the ‘insecticide / fungicide’• Each group member should take a turn at spraying.
Walk round each small group during all stages of the activity to ensure that they are mixing and spraying correctly.
5.
15 minutes
Demonstration / Group Work - Disposal and CleaningAfter all participants have had an opportunity to spray both a herbicide and an insecticide / fungicide, say that we now need to dispose of any excess spray mix left in the sprayer.
Demonstrate how to spray the excess on the crop, walking faster than usual so as to spread the excess over as large an area as possible.
Ask the participants to do the same with their excess spray mix.
After all excess spray mixed has been disposed, ask participants to clean their sprayers.
Remind participants of the After Spraying cleaning procedure we discussed earlier in the session.
Walk round the small groups to ensure that the correct cleaning procedure is followed.
After all the sprayers have been cleaned, ensure that participants wash themselves.
Trainer Note:Return to the classroom for the finishing activities.

186
Session 12: Pesticide Mixing and Application (Practical)
Finish
Time Activity
Summary:
1 minute
Include as major messages:• Avoiding nozzle and filter blockages, and how to clean blockages.• Mixing liquid and powder formulations for spraying.• Triple rinsing of empty pesticide containers• The differences between spraying a herbicide and spraying an
insecticide or fungicide• Cleaning of the sprayer after use.
Ask if everyone understands or if there are any additional questions. Answer these provided they are relevant.
Ask if the session objectives were met
Hand out the Assessment Sheet and ask participants to complete two of the questions.
Collect the Assessment Sheet for later marking and entering the marks on the Attendance Record.
Next step:
1 minute
Say that in this session we have put our theoretical knowledge from the previous session into practice. Participants can now give farmers practical information on spray application so as to ensure that a pesticide treatment is effective.
Hand out the Fact Sheet to participants.

187
Assessment Questions
Name: …………………………………………………… Date: ……………………… Mark:
Answer TWO (2) only of the following questions.You may write your answers on this question sheet or tell your trainer the answers. All questions are the same value (5 marks).
Question 1: How can nozzle and filter blockages be avoided?
...........................................................................................................................................................................................
...........................................................................................................................................................................................
...........................................................................................................................................................................................
Question 2: How should you dispose of excess spray mix?
...........................................................................................................................................................................................
...........................................................................................................................................................................................
...........................................................................................................................................................................................
Question 3: What is the first action to take when mixing a pesticide?
...........................................................................................................................................................................................
...........................................................................................................................................................................................
...........................................................................................................................................................................................
Question 4: Give three ways of avoiding exposure to pesticides during mixing and spraying.
...........................................................................................................................................................................................
...........................................................................................................................................................................................
...........................................................................................................................................................................................

188
Session 12: Pesticide Mixing and Application (Practical)
FACT SHEET
NOZZLE AND FILTER BLOCKAGES
Nozzle and filter blockages are one of the commonest sprayer breakdowns. They can be avoided by:• Only using clean water.
• Dirty water not only blocks filters and nozzles, but also causes nozzle wear.• If necessary, filter water before using, or allow to stand for several hours before using
to allow particles to settle out.• Thoroughly cleaning the sprayer after use to remove any pesticide deposits.
BLOCKAGES DURING SPRAYING
Blockages Commonly caused by:• Use of dirty water, • Use of wettable powders, • Inadequate cleaning of the sprayer, filters, and nozzle after use
Nozzle blockage
Often caused by grooves in swirl plate becoming blocked, not the orifice.• Wash in clean water.• Give a sharp tap, with the groove downwards.• Use a piece of stiff grass to remove the blockage.• NEVER put the nozzle to the mouth and blow.• NEVER clean with hard objects such as wire or a nail.
Filter blockage
• Wash in clean water.• If necessary, leave to soak overnight in water.• Use a piece of stiff grass to remove the blockage.• NEVER put the filter to the mouth and blow.• NEVER clean with hard objects such as wire or a nail.
CLEANING AFTER SPRAYING
• Any remaining insecticide should be sprayed onto the crop. Excess insecticide must NEVER be dumped in or near rivers, canals or ponds.
• Remove and dismantle the nozzle and clean in fresh water.• Wash out the sprayer thoroughly with clean water, and pump clean water through the
lance. It is better to use several washings of a small amount of water than filling the tank only once with a large amount. Spray the washings in the crop area, and ensure that the tank is empty afterwards.
• Open the trigger valve to release the air pressure in the pressure chamber,• Spray mixture must not be left in the tank as the solvents used in emulsifiable
concentrate formulations can affect rubber and leather parts, while wettable powders can settle out and cause blockages.
• Wipe down the outside of the sprayer to remove any pesticide deposits.• Replace the nozzle.• Store the sprayer out of direct sunlight, which can cause the plastic parts to become
brittle or to warp. The sprayer should also be stored where it is protected from rats, which can chew the plastic parts.

189
MIXING
“MIXING” IN THIS CONTEXT MEANS THE PREPARATION OF A PESTICIDE FORMULATION FOR APPLICATION, SUCH AS
WHEN A PESTICIDE IS “MIXED” WITH WATER READY FOR SPRAYING.
IT DOES NOT MEAN THE MIXING OF TWO PESTICIDE FORMULATIONS TOGETHER. THIS PRACTICE IS NOT RECOMMENDED BECAUSE OF POTENTIAL ADVERSE
EFFECTS, AND SHOULD BE AVOIDED.
• Mixing is the most hazardous operation – pesticides are handled in their most concentrated form. Personal and environmental precautions are needed.• Mixing should never be done without reference to the label or Government
recommendations.• PPE is needed.
• Gloves, face shield / dust mask , overalls, boots, apron• Opening containers
• Do not rip plastic/paper bags• Mix on level surface• Close container or replace cap immediately the pesticide has been poured out
AVOID PESTICIDE EXPOSURE BY:
• Mixing is the most hazardous operation as pesticides are handled in their most concentrated form
• Avoiding splashes and dust clouds when mixing• Not using leaking sprayers• Point nozzle downwind when spraying• Keep nozzle below waist height• Not spraying in windy conditions• Not walking through the sprayed area• Common contamination during spraying is on the hands from leaking trigger assemblies
MEASURES
Graduated cylinders, syringes, electronic scales, and similar equipment are often assumed to be essential for measuring out pesticides when mixing. Pesticide retailers should have this type of measuring equipment, which is not that expensive – even electronic scales are relatively cheap. However, these measures are often not available to farmers, so alternatives need to be used.
Pesticide retailers should identify any measures used by local farmers, and determine the quantities of liquid and powders these hold using their own measuring equipment. Advice can then be provided to farmers on the correct amount of pesticide to put in the local measure for their sprayer capacity.
If no such local measures exist, they will have to be improvised. For example, an old plastic bottle can be cut to a suitable size and the correct level marked, or medical graduated specimen containers can be held in stock and sold to farmers.
Providing this type of support to farmers will improve the reputation of the retailer among customers, and so enhance Good Service = Good Business.

190
Session 12: Pesticide Mixing and Application (Practical)
PROCEDURES FOR MEASURING OUT AND MIXING
Measuring out and Mixing Liquid Formulations• Read the label.• Put on the necessary protective clothing.• Half fill sprayer tank with water (through tank filter)• Measure out the required quantity of liquid concentrate for one tank-full using a
graduated measure or calibrated local measure. • Replace the cap on the container immediately after pouring out the required quantity.• Keeping face and body well back, pour the concentrate into tank. Wash out the
measuring container (and the pesticide bottle if it is empty) three times with water and add the washings to the sprayer tank.
• Replace the tank lid, and shake the sprayer.• Fill the tank up to the required level with water (through tank filter).• Replace the tank lid, and shake the sprayer.
Measuring out and Mixing Wettable Powders• Read the label.• Put on the necessary protective clothing.• Half fill sprayer tank with water (through tank filter).• Rotate package two or three times to loosen contents and ensure that the product is free
flowing.• Measure out the required quantity of wettable powder for one tank-full using a measure
of known capacity. • Cream this with a small quantity of water in a small container, and empty this into the
sprayer through the tank filter. Wash out the container three times with water, and add the washings to the sprayer tank.
• If the pesticide bag is empty, carefully shake out into the spray tank.• Replace the tank lid, and shake the sprayer.• Fill the tank up to the required level with water (through the tank filter).• Replace the tank lid, and shake the sprayer.
SPRAYING
• Check the wind direction – Start spraying from the downwind side of the field, working upwind with each successive swath as to avoid walking through the sprayed area.
• As far as possible, walk / spray at right angles to the wind direction.• With the trigger valve closed, operate the pump lever several times to pressurize the
sprayer.• Maintain a constant steady speed of walking and pumping.• Hold the nozzle a constant distance away from the target.• Hold the spray lance / nozzle steady relative to the target, do not wave it backwards and
forwards.• Hold / point the nozzle downwind.
Herbicides:• Hold the nozzle over the ground / weeds, and pointing down.• The nozzle should held be approximately 50cm above the ground / weeds so as to allow
the droplets to spread to the full swath.

191
Insecticides• Hold the nozzle pointing upwards or sideways into the crop (use the elbow in the lance
or nozzle body).• (With many crops, the leaves form an ‘umbrella’, and when sprayed from above the
pesticide is deposited on the top outer leaves with poor penetration into the crop).• The nozzle should be held away from the foliage so as to allow distance for the spray
cloud to expand.• If the nozzle is held too close to the foliage, the spray is deposited in a restricted area
(causing over-dosing), and the spray cloud cannot form and adequately penetrate the crop (causing under-dosing).
See also: CropLife International Guidelines for the Safe and Effective Use of Crop Protection Productshttp://croplife.org/?s=guidelines

192
Session 12: Pesticide Mixing and Application (Practical)

193
SESSION 13: TRANSPORT AND DISPOSAL
OF PESTICIDES

194

195
Lesson Plan
Materials needed: R Flipchart stands.
R Flipchart paper.
R Markers (4 colours).
R Notebooks, pens, and file covers for participants who have forgotten to bring them.
R Coloured cards.
R Glue stick or blue tack.
R Masking tape.
Time needed: 90 minutes
Intended audience: Pesticide Retailers
Preparation: R Flipchart with the session title “Transport and Disposal of Pesticides”, and the Session Objectives.
R Empty clear water bottle containing a small amount of milk.
R Full bottle of water, and an empty container large enough to hold the milk and water.
R Print off sufficient Attendance Record sheets.
R Print off sufficient Assessment question sheets.
R Print off sufficient Fact Sheets for participants.
R Organise venue and seating arrangements.
Attendance RecordAs participants arrive, ask them to enter their name and other information on the Attendance Record. There is also a column on the form to enter their marks from the Assessment Questions at the end of the training session.

196
Session 13: Transport and Disposal of Pesticides
Set up / Introduction 5 minutes
Time Activity
Attention: Welcome the retailers to the session.
Ask:• Who has seen empty pesticide containers lying in fields?• Is this the correct way to dispose of containers?
Say that in this session we will look at both safe transport of pesticides and at safe disposal of pesticide containers.
Title: Refer to the Title Flipchart and tell participants that this training session will cover Transport and Disposal of Pesticides.
Credibility: Give an example of dangerous transport of pesticides or dangerous disposal of pesticide containers..
Objectives: Refer to the Title Flipchart with the Lesson Objectives.
By the end of the session, participants will be able to:• State clearly the Do and Do Not points to remember when
transporting, loading and unloading pesticides.• Describe the procedure to follow when Triple Rinsing empty liquid
pesticide containers.• Explain how to prepare pesticide containers for disposal, and the
preferred and alternative methods of disposal.
Benefits: Pesticide containers can be easily damaged if not transported correctly, and improper disposal of containers risks the health of people in the community and contaminates the environment.
Direction: • The session begins with a work group activity on transport, loading and unloading of pesticides.
• The Triple Rinsing procedure for empty liquid containers is then demonstrated in a fishbowl, followed by a short interactive discussion on preparation of powder pesticide containers for disposal.
• A concluding work group activity looks at procedures for the disposal of empty pesticide containers and other pesticide waste.

197
DeliveryExplanation, Demonstration, Exercise, and Guidance:
Time Activity
1.
30 minutes
Work Groups – Transport of Pesticides
Divide participants into 4 groups depending on numbers.
Say we are going to look at safe transport of pesticides.
Allocate the first three points in the Work Group task to groups 1 and 2, and the other three points to groups 3 and 4.
Work Group Task:What are the Do’s and the Do Not’s when transporting pesticides with regard to:
Groups 1 and 2:• The type of transport used• Passengers• Other goods on the vehicle
Groups 3 and 4:• Loading• Unloading• Emergency equipment
Allow 20 minutes for the activity.
Write Do and Do Not as headings on the flipchart.
Ask groups 1 and 2 in turn for a Do or Do Not with regard to the type of transport used.
Write the answers on the flipchart until there are no further responses.
Fill in any gaps using Transport, and Loading and Unloading of Pesticides from the Fact Sheet as a checklist.
Repeat for the other two points
Repeat for groups 3 and 4 with the last three points.

198
Session 13: Transport and Disposal of Pesticides
2.
10 minutes
Fishbowl Demonstration – Cleaning of Liquid Pesticide Containers: Triple Rinsing
Ask participants to come and stand round the table. Ensure that everyone can see.
Show the water bottle with the milk, and say we are in the field spraying a crop that this is an almost empty pesticide container. The milk is the ‘pesticide’.
Pour the milk into the empty container, until only drops come out of the bottle.
Hold up the empty bottle so that participants can see it, and ask if there is any ‘pesticide’ left in the bottle.
Say that there is always is little pesticide left, and all the empty containers seen in the field and elsewhere still contain pesticide, which is a risk to humans and the environment.
Demonstrate the Triple Rinsing procedure:• Fill the empty ‘pesticide’ container one quarter full of water, replace
the bottle cap, shake, and empty the washings into the container.• Explain that we are putting the washings into the spray tank, NOT
pouring the washings onto the ground, or into a stream or river.• Repeat the rinsing twice more.
Pass the empty bottle around the participants, and ask if there is any pesticide in the bottle now.
Say that the Triple Rinsing technique removes almost all the pesticide from a container. The washings should be poured into the spray tank.
Say that after Triple Rinsing, the container should be destroyed by puncturing and crushing to ensure it cannot be used for another purpose.
Emphasise that empty pesticide containers, even if they have been cleaned, must never be used for other purposes.
Ask participant to return to their seats / tables.

199
3.
5 minutes
Interactive Discussion – Cleaning of Powder Pesticide Containers
Say that triple rinsing is for cleaning containers which held liquid pesticide.
Ask• How do we clean a container which held a powder pesticide?
Take several responses, using Cleaning of Empty Pesticide Containers, Powder Formulations, from the Fact Sheet as a checklist.
Say that after emptying the container, it should be destroyed by puncturing and tearing to ensure it cannot be used for another purpose.
Emphasise that precautions should be taken to avoid exposure to the dust left in the container when destroying.
Emphasise that empty pesticide containers, even if they have been cleaned, must never be used for other purposes.

200
Session 13: Transport and Disposal of Pesticides
4.
25 minutes
Work Groups – Safe Disposal of Empty Containers
Ask:• What materials are liquid pesticide containers made of?• What materials are powder pesticide containers made of?
Write responses on the flipchart.
Give each group one of the following container type groups to discuss.
Work Group Task:What would be the steps to take to safely dispose of your container type, either:• Metal and plastic containers• Cardboard and paper containers
Allow 10 minutes for the task.
Ask a group to present their results for metal and plastic containers.
Ask the second metal and plastic container group for their comments and additions.
Use Disposal of Clean Empty Pesticide Containers from the Fact Sheet as a checklist.
Repeat for cardboard and plastic containers.
Say that more detailed information on burning and burying of clean empty containers, and other pesticide waste, is given in the Fact Sheet.
Emphasise:• Many countries have now banned on-farm burning and burying.• Participants must comply with local regulations on disposal of empty
pesticide containers and other pesticide waste, either when they undertake this activity or advise customers.
• The preferred method of disposal is through a licensed contractor or incinerator.
• If burying is permitted in the country, a dedicated disposal pit must be used. Details are in the Fact Sheet.
• If burning is permitted in the country, a proper incinerator must be used, not a bonfire. Details are in the Fact Sheet.

201
Finish
Time Activity
Summary:
1 minute
Include as major messages:• Do and Do Not points when transporting pesticides• The Triple Rinsing procedure for cleaning empty liquid pesticide
containers• Following local regulations for safe disposal of empty pesticide
containers and other pesticide waste
Questions:
1 minute
Ask if everyone understands or if there are any additional questions. Answer these provided they are relevant.
Ask if the session objectives were met
Evaluation:
12 minutes
Hand out the Assessment Sheet and ask participants to complete two of the questions.
Collect the Assessment Sheet for later marking and entering the marks on the Attendance Record.
Next step:
1 minute
Say that in this session we learned about transporting pesticides, and disposal of empty containers. Participants should advise their customers on these aspects as part of their customer service.
Hand out the Fact Sheet to participants.

202
Session 13: Transport and Disposal of Pesticides
Visual 1
Container management
Plastic containersRinsableRecyclable
Metal containersRinsableRecyclable
Treated seed and seedtreatment containers
Non-rinsableIncineration
Foil/flexible packagingNon-rinsableIncineration
All empty triple rinsed containers, as well as non-rinsable containers, should be returned to an authorized collection point where they will be disposed of in an environmentally
sound manner.
Containers SHOULD NEVER be re-used or disposed of through indiscriminate dumping,open air incineration of any kind or incineration in unauthorized facilities.
FOLLOW THESE RECOMMENDATIONS TOENSURE THE PROPER DISPOSAL OF EMPTY
PESTICIDE CONTAINERS
Helping Farmers Growwww.croplife.org

203
Assessment Questions
Name: …………………………………………………… Date: ……………………… Mark:
Answer TWO (2) only of the following questions.You may write your answers on this question sheet or tell your trainer the answers. All questions are the same value (5 marks).
Question 1: Give two Do and two Do Not points when transporting pesticides.
...........................................................................................................................................................................................
...........................................................................................................................................................................................
...........................................................................................................................................................................................
Question 2: Describe the Triple Rinse procedure for cleaning empty liquid pesticide containers.
...........................................................................................................................................................................................
...........................................................................................................................................................................................
...........................................................................................................................................................................................
Question 3: What is the preferred method of disposal of empty pesticide containers?
...........................................................................................................................................................................................
...........................................................................................................................................................................................
...........................................................................................................................................................................................
Question 4: Describe how metal and plastic containers should be prepared for disposal.
...........................................................................................................................................................................................
...........................................................................................................................................................................................
...........................................................................................................................................................................................

204
Session 13: Transport and Disposal of Pesticides
FACT SHEET
TRANSPORT, AND LOADING AND UNLOADING OF PESTICIDES
Do• A pick-up or truck is the preferred vehicle type.• Transport pesticides only in intact, undamaged containers with readable labels.• Check the containers for leaks or loose bungs.• Wear protective clothing when loading and unloading - strong gloves, boots, and overalls.• Carry a list / manifest of the pesticides on the vehicle.• Carry a fire extinguisher, a shovel, spill clean-up equipment, soap and water.• Have emergency telephone numbers – the pesticide manufacturer / distributor / local
agent, local hospital and doctor, police.• Load the containers carefully.• Tie the containers down, and cover from sun and rain.• Unload carefully. If drums are heavy, roll them down planks to the ground.
Do Not• Have nails in the load bed which can puncture containers.• Throw or slide the pesticide containers onto the load bed when loading.• Throw, slide, or drop the pesticide containers when unloading.• Carry pesticides in the driver’s cab or passenger compartment.• Carry pesticides with children or animals.• Carry pesticides with foodstuffs, clothing, animal feed, etc.• Carry pesticides inside buses, taxis, etc.
CLEANING OF EMPTY PESTICIDE CONTAINERS
Liquid Formulations - Triple Rinsing
Empty liquid pesticide containers should be Triple Rinsed before disposal to remove pesticide residues.• Drain the container into the spray tank until the flow has slowed to a drip.• Fill the container a quarter full with water.• Replace the container cap and shake well.• Empty the container into the spray tank until the flow has slowed to a drip.• Repeat the rinsing procedure two more times.• Puncture the container so that it cannot be re-used and dispose it safely
Powder Formulations
Empty powder pesticide containers should be carefully shaken into the spray tank until no more powder comes out, and then safely burnt.

205
DISPOSAL OF CLEAN EMPTY PESTICIDE CONTAINERS
Liquid pesticide containers usually are made from metal and plastic, while powder pesticide containers usually are made from cardboard and paper. These require different steps in disposal.
Many countries are now banning on-farm burying or burning of used pesticide containers. Any local legal regulations for the disposal of empty containers must be followed, and on-farm disposal used only if permitted in the country.
The preferred method of disposal of empty pesticide containers and other pesticide waste is through a licenced contractor or incinerator.
Metal and Plastic Containers.
• Prepare the container for disposal by triple rinsing and then destroying through puncturing and crushing so that it cannot be used for other purposes.
• NEVER use empty pesticide containers for another purpose.• Keep in a large, closed container, and locked in the pesticide store until time for disposal.• If these exist in the country, dispose through licenced hazardous waste disposal
contractors, licenced landfill sites, or licenced incinerators for containers that can be burnt.
• If permitted in the country, burn plastic containers in an incinerator and bury the ashes, or bury the containers in a special disposal pit.
Cardboard and Paper Containers
• Prepare the container for disposal by destroying through puncturing or tearing so that it cannot be used for other purposes.
• NEVER use empty pesticide containers for another purpose.• Keep in a large, closed container, and locked in the pesticide store until time for disposal.• If these exist in the country, dispose through licenced hazardous waste disposal
contractors, licenced landfill sites, or licenced incinerators for containers that can be burnt.
• If permitted in the country, burn the containers in an incinerator and bury the ashes, or bury the containers in a special disposal pit.
Burning
Only burn empty pesticide containers if permitted in the country.
Destruction of the pesticide remaining in a container requires a hot fire. A normal bonfire is not sufficient, as the temperature is only 300-500oC. A proper incinerator should be used, which provides a temperature of 800-950oC.
An incinerator can be made from a 210 litre oil drum, with the top removed, a removable grid placed about 20cm above the base of the drum to allow ash to fall through, a row of equally spaced 5cm holes around the drum at the same height as the grid, and a second row of holes about 45cm above the base.
• The incinerator should be on a level, hard standing (preferably concrete), away from water sources, domestic houses, and animals.
• Use the incinerator only in calm wind conditions, not in windy weather.• Start a fire on the grid, and when burning well, add the pesticide containers.• When working properly, the incinerator should produce light coloured smoke• Avoid over-filling the incinerator• Avoid poking the fire.

206
Session 13: Transport and Disposal of Pesticides
• When burning properly, the incinerator will be very hot. Care must be taken when placing containers in the incinerator.
• Avoid the smoke, approach the incinerator from upwind.• Do not leave the incinerator burning unattended.• When the fire has cooled, empty the ashes and bury.
Burying
Only bury empty pesticide containers and other pesticide waste if permitted in the country.
A disposal pit should be specially constructed for the purpose. Several farmers can co-operate in building and using the pit, but each placement of empty containers in the pit should be a group activity with all farmers bringing their empty containers for burial.
• The site should have room for several disposal pits, so that a new one can be dug at the site when an old one is full.
• The pit should be sited at least 250m away from water sources used for drinking (such as a well), and not in an area liable to flooding.
• Areas to be avoided are those with sandy soils, and / or a high water table, as residues are easily leached into ground water.
• The pit should be 2-3m wide and at least 1.5m deep. The soil dug out should be used to make a bund around the pit so as to prevent flooding and washing pesticide waste out of the pit.
• The pit should be lined with clay to reduce seepage into the surrounding soil. A layer of lime can also be added to assist in de-activation of the pesticide residues.
• A strong fence must be erected around the pit to prevent unauthorised entry of humans and animals.
• Signs should be erected ‘Danger. Toxic Waste. No Unauthorised Entry’.• Clean, punctured and crushed empty containers, and other pesticide waste, should
be added in layers not more than 15cm deep. Lime can also be added to assist in de-activation of the pesticide residues. The pesticide waste should then be covered with a layer of soil about 15cm deep.
• When within 50cm of ground level, the pit should be filled in with soil, and bushes which are not grazed by animals planted on top.
• Records should be kept of the date and the pesticide name and container size.
See also: CropLife International Guidelines for the Safe Transport of Crop Protection ProductsCropLife International Guidelines for the Safe and Effective Use of Crop Protection Productshttp://croplife.org/?s=guidelines

207
SESSION 14:SPILL CLEAN-UP

208

209
Lesson Plan
Materials needed: R Flipchart stands.
R Flipchart paper.
R Markers (4 colours).
R Notebooks, pens, and file covers for participants who have forgotten to bring them.
R Coloured cards.
R Glue stick or blue tack.
R Masking tape.
Time needed: 90 minutes
Intended audience: Pesticide Retailers
Preparation: R Flipchart with the session title “Spill Clean-Up”, and the Session Objectives.
R Full set of spill clean-up equipment, refer to Fact Sheet for details.
R Cards with the names of the spill clean-up equipment.
R Full set of PPE from which items can be selected.
R Empty clean 5 litre pesticide container with a small hole in the bottom, just large enough for water to slowly leak out.
R Small paper bag of flour.
R Print off sufficient Attendance Record sheets.
R Print off sufficient Assessment question sheets.
R Print off sufficient Fact Sheets for participants.
R Organise venue and seating arrangements.
Attendance RecordAs participants arrive, ask them to enter their name and other information on the Attendance Record. There is also a column on the form to enter their marks from the Assessment Questions at the end of the training session.

210
Session 14: Spill Clean-Up
Set up / Introduction 5 minutes
Time Activity
Trainer Note:The hole in the bottom of the empty clean container should be just large enough for water to slowly leak out.Fill the empty 5 litre pesticide container with water just before the start of the lesson.Place the container on the floor to one side of the training room, so that it forms a puddle of leaked ‘pesticide’ on the floor.Place the PPE on a table, and the spill clean-up equipment on the opposite side of the room to the leaking pesticide container.The training room should have a hard floor that can be cleaned, not carpet or other material, as water and flour will be spilt onto the floor to represent pesticide spills.
Attention: Welcome the retailers to the session.Point out the leaking pesticide container with a puddle of ‘pesticide’.
Say we have a leaking pesticide container in our shop or store.
Ask:• Who knows how to safely clean up this leaking pesticide container
and the pesticide spill?
Take several responses – do not allow participants to go into detail at this stage.
Say that in this session we will learn how to safely deal with leaking containers and pesticide spills.
Title: Refer to the Title Flipchart and tell participants that this training session will cover Spill Clean-Up.
Credibility: Give an example of a pesticide spill and the consequences.
Objectives: Refer to the Title Flipchart with the Lesson Objectives.By the end of the session, participants will be able to:• State the appropriate PPE to wear when cleaning up a pesticide spill.• Describe the equipment and how it is used to clean up a pesticide spill.• Safely clean up a pesticide spill• Explain the precautions to take in different situations to avoid
pesticide spills.
Benefits: Say that despite all our precautions, accidental pesticide spills will still occur. These pose a risk to humans and the environment, and as sellers of pesticides participants need to know how to deal with a spill, and be able to advise their customers on the procedures to clean-up a spill.
Direction: • The session begins with an interactive discussion of the appropriate PPE to wear when cleaning up a pesticide spill.
• Participant pairs then explain the functions of different items of spill clean-up equipment, with the trainer adding as necessary.
• Following a short presentation of the steps to follow in spill clean-up, the participants then demonstrate to themselves how to clean up a liquid and a dry spill.
• The session concludes with a work group activity on avoiding spills.

211
DeliveryExplanation, Demonstration, Exercise, and Guidance:
Time Activity
1.
5 minutes
Interactive Discussion – Appropriate PPE for a Pesticide Clean-Up
Point out the PPE on the table.
Ask:• What PPE should be worn when cleaning-up this pesticide spill in our
shop or store?
Take responses from participants.
Say that the product should always be treated as hazardous. The appropriate PPE is the same as for when mixing that product, as the pesticide is in a concentrated form.
If it is possible, Read The Label. Otherwise as minimum wear overalls, gloves, boots, and a face shield for liquids or dust mask for powders.
The same principles apply for cleaning up a dilute pesticide spill – the same PPE should be worn as for application.
2.
15 minutes
Participant Pairs – Spill Clean-Up Equipment
Divide participants into pairs.
Give each pair one of the cards with the name of an item of spill clean-up equipment.
Ask each pair in turn to go to the spill-clean up equipment, identify the item on their card, and explain what the item is used for.
Add to each explanation as necessary, using Spill Clean-Up Equipment from the Fact Sheet as a checklist.
Say that this equipment must be kept in the shop or store in case of a spill. Obtaining the equipment after a spill has occurred is too late.
3.
5 minutes
Presentation – The Steps to Take When Dealing With a Spill
Say that to clean up a spill, steps need to be taken in the correct order.
Present the contents of The Steps to Take When Dealing With a Spill from the Fact Sheet.

212
Session 14: Spill Clean-Up
4.
10 minutes
Demonstration – Clean-Up of a Liquid Spill
Say that with the information from the last three activities, we are now ready to practice cleaning up a pesticide spill.
Ask for a volunteer to clear up the liquid pesticide spill from the leaking container.
Ask the other participants to give the volunteer instructions on the steps and actions to take to clean up the spill.
Half way through the procedure, ask another volunteer to take over and continue.
Ensure that the correct steps are taken in the correct order.
5.
10 minutes
Demonstration – Clean-Up of a Dry Spill
Tear a hole in the paper bag containing flour, and drop the bag on the floor so that flour comes out.
Say that we now have a spill of a dry pesticide formulation.
Ask for a volunteer to clear up the dry pesticide spill from the leaking container.
Ask the other participants to give the volunteer instructions on the steps and actions to take to clean up the spill.
Half way through the procedure, ask another volunteer to take over and continue.
Ensure that the correct steps are taken in the correct order.
6.
25 minutes
Work Groups – Avoiding Spills
Say that although we now know how to clean up a spill, we should avoid spills in the first place.
Divide participants into three groups. Give each group one of the following tasks.
Work Group Task:How can we avoid pesticide spills:• When transporting pesticides• In pesticide shops and stores• In the field
Allow 10 minutes for the activity.
Ask each group to present their results in turn.
Allow the other groups to comment or add.
Use Avoiding Spills in the Fact Sheet as a checklist.

213
Finish
Time Activity
Summary:
1 minute
Include as major messages:• Appropriate PPE• Spill clean-up equipment• The steps in spill clean-up• Avoiding spills
Ask if everyone understands or if there are any additional questions. Answer these provided they are relevant.
Ask if the session objectives were met
Hand out the Assessment Sheet and ask participants to complete two of the questions.
Collect the Assessment Sheet for later marking and entering the marks on the Attendance Record.
Next step:
1 minute
Say that in this session we learned about spill clean-up. Participants should go back to their shops and ensure that suitable equipment is available in case of a spill.
Hand out the Fact Sheet to participants.

214
Session 14: Spill Clean-Up
Assessment Questions
Name: …………………………………………………… Date: ……………………… Mark:
Answer TWO (2) only of the following questions.You may write your answers on this question sheet or tell your trainer the answers. All questions are the same value (5 marks).
Question 1: What is the appropriate PPE to wear when cleaning up a pesticide spill?
...........................................................................................................................................................................................
...........................................................................................................................................................................................
...........................................................................................................................................................................................
Question 2: Give six items of spill clean-up equipment which should be in the shop or store.
...........................................................................................................................................................................................
...........................................................................................................................................................................................
...........................................................................................................................................................................................
Question 3: Describe all the steps to take when cleaning up a liquid spill.
...........................................................................................................................................................................................
...........................................................................................................................................................................................
...........................................................................................................................................................................................
Question 4: Give three ways of avoiding spills in pesticide shops and stores.
...........................................................................................................................................................................................
...........................................................................................................................................................................................
...........................................................................................................................................................................................

215
FACT SHEET
PERSONAL PROTECTIVE EQUIPMENT
• Treat all spills as hazardous. PPE must be worn during clean-up operations.• If possible, read the label to identify the PPE to wear. If spills are not specifically given on
the label, use the same PPE as for mixing.• In the absence of label information, as a minimum wear overalls, gloves, boots, and face
shield for liquids or dust mask for powders.
SPILL CLEAN-UP EQUIPMENT
• Bucket of absorbent material, such as clay, sand, or sawdust.• To surround, brush over, and absorb the pesticide spill.
• Additional bucket of sand, or sand bags, to make a dam.• To make a dam around the spill and contain it so it does not spread further
• Stiff broom• To mix the absorbent material into the spill, and brush it up.
• Flat shovel.• To pick up the mixture of absorbent material and pesticide.
• Bucket• To hold water for washing the contaminated area
• Soap• To clean the contaminated area
• Cloth• To wash and wipe the contaminated area.
• Empty containers, or strong plastic bags• To hold the sweepings.
• Large, empty, open topped drum(s).• To hold leaking pesticide containers.
• Empty clean pesticide containers.• Into which to decant a leaking container. The new container must be labelled
afterwards with the contents.
THE STEPS TO TAKE WHEN DEALING WITH A SPILL
• Put on appropriate protective clothing.• Keep others away from the spill area.
• Stop the source of the spill.• Turn the container so that the point of leak is above the content level.• Replace / tighten the cap if the leak is from that source.• Place the ruptured or damaged container in a larger, open top container, or strong
plastic bag.• Confine a large liquid spill with a dam of sand or other absorbent material• Stop a dry pesticide from blowing away by covering with damp sand. • Liquid spills:
• Cover the spill with absorbent material, sweep up the absorbent material, and place in a drum or strong plastic bag.
• Dry spills: • If it is windy, stop a dry spill from blowing away by covering with damp sand.• Sweep up the spill, place in a drum or strong plastic bag.
• Wash down the affected area with soap and water.• Do not use too much water, or spread the contamination over a larger area.
• Soak up water with absorbent material, and place in drum or bag.• Wash all equipment and yourself.• Dispose of the drum or plastic bag according to local hazardous waste regulations.

216
Session 14: Spill Clean-Up
AVOIDING SPILLS
In Transport • Ensure there are no exposed nails or other sharp objects in the load bed or pallets.• Do not load leaking or damaged containers.• Do not throw, slide, or drop containers when loading and unloading.• Do not place heavy drums on top of cardboard containers.• Containers of liquids should be stowed with the opening uppermost.• Secure containers so they do not move about during transit.• Protect containers from sunlight and rain.• Drive carefully.
In Shops and Stores• Do not accept delivery of damaged or leaking containers.• Ensure shelves and other storage areas do not have exposed nails or other sharp objects.• Ensure shelves are sufficiently strong to hold containers.• Use a First In – First Out system of stock control.• Check containers regularly for damage or leaks.• Handle all containers carefully, do not drop.• Ensure that only shop staff have access to the pesticide area – customers may drop or
knock containers off shelves.
In the Field• Keep pesticide containers in a box to protect them from being knocked over.• Keep bystanders and animals away from the mixing area – they may knock containers
over.• Pour liquids and dusts carefully during mixing.• Replace caps and close containers after pouring.• Place containers on a flat surface when not in the box.
See also:CropLife International Guidelines for the Safe and Effective Use of Crop Protection Products.CropLife International Guidelines for the Safe Transport of Crop Protection Products.CropLife International Guidelines for the Safe Warehousing of Crop Protection Productshttp://croplife.org/?s=guidelines

217
SESSION 15:LAWS AND REGULATIONS

218

219
Lesson Plan
Materials needed: R Flipchart stands.
R Flipchart paper.
R Markers (4 colours).
R Notebooks, pens, and file covers for participants who have forgotten to bring them.
R Coloured cards.
R Glue stick or blue tack.
R Masking tape.
Time needed: 90 minutes
Intended audience: Pesticide Retailers
Preparation: R Flipchart with the session title “Laws and Regulations”, and the Session Objectives.
R Flipchart with contents of ‘Private’ Rules and Regulations from the Fact Sheet.
R Print off sufficient Attendance Record sheets.
R Print off sufficient Assessment question sheets.
R Print off sufficient Fact Sheets for participants.
R Organise venue and seating arrangements.
Attendance RecordAs participants arrive, ask them to enter their name and other information on the Attendance Record. There is also a column on the form to enter their marks from the Assessment Questions at the end of the training session.

220
Session 15: Laws and Regulations
Set up / Introduction 5 minutes
Time Activity
Attention: Welcome the retailers to the session.
Say that in this country we drive on the left / right, and there is a government Law to enforce this.
Ask:• What would happen if there was no law, and everyone drove on which
side they liked?
Take several responses.
Title: Refer to the Title Flipchart and tell participants that this training session will cover Laws and Regulations.
Credibility: Give a local example of breaking the law with detrimental results to a person or society as a whole – for example mixing maize flour with wheat to make cheap, poor quality bread, but sold at the full price.
Objectives: Refer to the Title Flipchart with the Lesson Objectives.
By the end of the session, participants will be able to:• Explain clearly why pesticide laws and regulations are needed.• Describe the aspects which pesticide laws and regulations include.• Explain why retailers should follow the laws and regulations.• Explain to farmers the importance of complying with the laws and
regulations, both in regard to safety and in regard to meeting market requirements for produce.
Benefits: When all persons involved with pesticides know, understand, and follow the laws and regulations, then pesticides are manufactured, transported, stored, sold, used, and disposed safely and effectively. Persons involved with pesticides are also protected from dishonest people.
Direction: • An interactive discussion on the need for laws and regulations in society begins the session.
• Work groups then investigate why pesticide laws and regulations are needed, and what aspects are included in the laws and regulations.
• The final session activity starts with a presentation on ‘private’ laws and regulations, which is followed by an interactive discussion on the role of retailers and how retailers can help farmers meet the rules and regulations.

221
DeliveryExplanation, Demonstration, Exercise, and Guidance:
Time Activity
1.
10 minutes
Interactive Discussion – Why Do We Need Laws and Regulations?
Trainer Note:During this and the following procedures, try to get the participants to think about Laws and Regulations as mechanisms that are intended to benefit society, rather than as restrictions on their activities.
Remind participants of introduction and the example of driving on the left / right of the road which is enforced by government regulation.
Ask:• Why do we need such laws and regulations that tell us what to do?
Write responses on the flipchart
Add as necessary from Why Laws and Regulations are Needed from the Fact Sheet.
2.
45 minutes
Work Groups – Why Pesticide Laws and Regulations are Needed
Explain that now we have a general background on why laws and regulations are needed, we will discuss the legal and regulatory frameworks of pesticides.
Work Group Task: On separate flipcharts, record the group responses to the following questions:
Question 1• What do you consider would be the most important reasons for having
pesticide laws and regulations?
Question 2• Indicate some specific aspects that you think should be included in
pesticide laws and regulations.
Allow 20 minutes for the activity.

222
Session 15: Laws and Regulations
Responses to Question 1:
Ask each table group in turn to provide their answers to Question 1.
After each additional group presents their response, Ask what did this group add that was different?
After all groups have presented their answers to Question 1,
Emphasize:• Pesticides are hazardous products, which need to be regulated to
ensure safe manufacture, transport, storage and use, and to minimise risks to handlers, users, bystanders, consumers of agricultural products, and the environment.
• Laws and regulations also ensure the quality of pesticides.• Laws and regulations provide the framework for these activities.
Responses to Question 2:
Ask table groups in turn for one aspect that they think should be included in pesticide laws and regulations.
Repeat again for all groups until there are no more responses.
Complete any missing aspects using Why Pesticide Laws and Regulations are Needed from the Fact Sheet as a checklist.
Ask:• On the basis of what we have discussed, do fair and effective pesticide
laws and regulations benefit or obstruct a pesticide retailer?
Take several responses.
Emphasise that fair and effective pesticide laws and regulations:• Ensure equal opportunities for all retailers.• Protect retailers from dishonest pesticide manufacturers, importers,
and wholesalers.• Protect sincere retailers from dishonest retailers.• Ensure products are correctly labelled, with all the necessary
information on the label.• Can provide training and learning opportunities for retailers.

223
3.
15 minutes
Presentation / Interactive Discussion - ‘Private’ Rules and Regulations
Put up and present the contents of the ‘Private’ Rules and Regulations flipchart.
Ask:• How can pesticide retailers help farmers meet these rules and
regulations?
Write responses on the flipchart, using The Role of Pesticide Retailers in Helping Farmers Meet Local and Export Requirements from the Fact Sheet as a checklist.
Emphasise again:• Farmers will need to meet these requirements, and possibly be
GlobalGAP certified, if they wish to supply these supermarket chains.• Pesticide retailers can help the farmers by supplying only appropriate
high quality pesticides and providing suitable advice on their use

224
Session 15: Laws and Regulations
Finish
Time Activity
Summary:
1 minute
Include as major messages:• Why laws and regulations are needed• The benefits of laws and regulations for retailers• How retailers can help farmers comply with the laws and regulations
Questions:
1 minute
Ask if everyone understands or if there are any additional questions. Answer these provided they are relevant.
Ask if the session objectives were met
Evaluation:
12 minutes
Hand out the Assessment Sheet and ask participants to complete two of the questions.
Collect the Assessment Sheet for later marking and entering the marks on the Attendance Record.
Next step:
1 minute
Say that in this session we learned about laws and regulations, and why we need laws and regulations for the benefit and safety of society. Retailers have an important role to play in stocking and selling only registered products, and advising farmers on the correct use of these products.
Hand out the Fact Sheet to participants.

225
Assessment Questions
Name: …………………………………………………… Date: ……………………… Mark:
Answer TWO (2) only of the following questions.You may write your answers on this question sheet or tell your trainer the answers. All questions are the same value (5 marks).
Question 1: Give three reasons why laws and regulations are needed.
...........................................................................................................................................................................................
...........................................................................................................................................................................................
...........................................................................................................................................................................................
Question 2: Give four aspects which might be included in pesticide laws and regulations.
...........................................................................................................................................................................................
...........................................................................................................................................................................................
...........................................................................................................................................................................................
Question 3: Give three benefits to retailers of the laws and regulations.
...........................................................................................................................................................................................
...........................................................................................................................................................................................
...........................................................................................................................................................................................
Question 4: Give three ways in which retailers can help farmers in respect of the laws and regulations.
...........................................................................................................................................................................................
...........................................................................................................................................................................................
...........................................................................................................................................................................................

226
Session 15: Laws and Regulations
FACT SHEET
WHY LAWS AND REGULATIONS ARE NEEDED
• Laws are the framework for all people living in a community. • Laws set the rules and boundaries for the community, what is and what is not allowed or
tolerated in the community.• Without laws and regulations, we could simply do as we please, with little regard for
others. • Laws protect every person’s freedom and rights under the law. • Laws help provide for our general safety. • Laws protect property. • Laws ensure our rights as citizens against abuses by other people, by organizations, and
by the government itself. • Laws provide a remedy when someone takes unfair advantage of another person. • Laws can be a deterrent for those who would violate the rights of others. • Laws allow a person to know the consequences of their behavior before they act. • Laws enable people to be punished when they commit certain acts. • Laws can exist at local, state/province, national, and international levels.
We do not always like these laws and regulations, since they often mean that someone is telling us what to do, or keeping us from doing what we want to do. However, to ensure that we live in a safe and peaceful society, we must have rules to follow.
WHY PESTICIDE LAWS AND REGULATIONS ARE NEEDED
• Pesticides are dangerous chemicals. Laws and regulations are needed to ensure safe manufacture, packaging, transport, storage, sales, and use, and to protect handlers, users, consumers, water sources, domestic animals, wildlife, and the environment.
• The quality of pesticides available on the market must be ensured.• Laws and regulations provide the frameworks for these aspects.
Pesticide Laws and Regulations include, among other aspects:• International trade in pesticides• Roles and responsibilities of national regulating authorities• Requirements for manufacturing and storage facilities, and licensing procedures for such
premises• Requirements for the registration of a pesticide• Requirements for container labelling and materials• Control of pesticides imported and sold based on the above criteria• Transport of pesticides• Disposal of pesticides• Use recommendations for crops and pests for each pesticide• Training, certification and licensing of pesticide retailers• Requirements for pesticide retail premises and licensing procedures• Training, certification and/ licensing of handlers, applicators, and users• Establishment of pesticide Maximum Residue Levels (MRLs) on produce• Record keeping for manufacture, transport, sale, use, and disposal• Control of pesticide advertising and effectiveness claims• Offences and penalties for breaking the laws and regulations

227
International Laws and Agreements may be legally binding on signatory countries. Examples are:• Rotterdam Convention – Prior Informed Consent Procedure for Certain Hazardous
Chemicals and Pesticides in International Trade (PIC) – Legally binding.• Stockholm Convention – Persistent Organic Pollutants (POP) – Legally binding.• General Agreement on Tariffs and Trade (GATT) – Legally binding.• International Code of Conduct on the Distribution and Use of Pesticides (FAO) – Not
legally binding, but supported by all FAO member country governments, the pesticide industry, and consumer organisations.
‘PRIVATE’ RULES AND REGULATIONS
• All the major supermarket chains in Europe, the Americas, the Arabian Gulf, and Asia, have their own requirements for produce quality.
• These are even stricter than national regulations with regard to pesticide residues.• This is because of consumer concerns in those countries about pesticide residues on
food.• They also usually require producers to be certified under such programmes as GlobalGAP.• GlobalGAP is a pre-farmgate standard, covering all aspects of production, from inputs
such as seed or animal feed, together with all the production activities until the produce leaves the farm.
• GlobalGAP requires extensive documentation to be completed during the production process.
• Local producers will need to meet these requirements if they wish to export and supply these overseas markets and supermarket chains.
• Use of pesticides which are not acceptable in the importing country, or if MRLs are exceeded, will result in the consignment being rejected at the cost of the supplier.
• Rejection of a consignment adversely affects the image of the exporting country, the exporters, and the farmers.
BENEFITS TO RETAILERS OF LAWS AND REGULATIONS
• They ensure equal opportunities for all retailers.• They protect retailers from dishonest manufacturers, importers, and wholesalers.• They protect sincere retailers from dishonest retailers.• They ensure products are correctly labelled, with all the necessary information on the
label.• They can include opportunities for training and learning.
THE ROLE OF PESTICIDE RETAILERS IN HELPING FARMERS MEET LOCAL AND EXPORT REQUIREMENTS
Together with suppliers of seeds and fertilisers, farmers, buyers of the produce, processors, distributors, and exporters, pesticide retailers are part of the chain from seed to local consumption or export of agricultural produce. Like all of the other stakeholders, pesticide retailers can make or break this chain.

228
Session 15: Laws and Regulations
PESTICIDE RETAILERS CAN FULFIL THEIR PART OF THE CHAIN, AND HELP FARMERS MEET LOCAL AND EXPORT REQUIREMENTS FOR PESTICIDE RESIDUES AND MRLS BY:
• Knowing and understanding the laws, regulations and agreements concerning pesticides that apply in the country.
• Supplying only appropriate, high quality, registered pesticides.• Providing suitable advice on the use of these pesticides, including:
• The crop-pest combinations for which a pesticide is registered.• The dosage and application rates and methods for these crops and pests.• The correct post-harvest interval for the crop and pesticide.
• Not selling counterfeit or other sub-standard products.• This will ensure that the farmers’ produce meets the required market standards, and can
be sold, and possibly exported at a higher price.

229
SESSION 16: PESTICIDE SHOP / WAREHOUSE LOCATION AND CONSTRUCTION

230

231
Lesson Plan
Materials needed: R Flipchart stands.
R Flipchart paper.
R Markers (4 colours).
R Notebooks, pens, and file covers for participants who have forgotten to bring them.
R Coloured cards.
R Glue stick or blue tack.
R Masking tape.
Time needed: 95 minutes
Intended audience: Pesticide Retailers
Preparation: R Flipchart with the session title “Pesticide Shop / Warehouse Location and Construction”, and the Session Objectives.
R Flipchart with diagram of a town with river, lake, houses, etc (see diagram at end of Lesson Plan).
R 2 Cards labelled ‘Pesticide Shop’.
R 2 Cards labelled ‘Pesticide Warehouse’.
R Print off sufficient copies of the example shop and warehouse layouts from the Fact Sheet. Not the ventilation example.
R Print off sufficient Attendance Record sheets.
R Print off sufficient Assessment question sheets.
R Print off sufficient Fact Sheets for participants.
R Organise venue and seating arrangements.
Attendance RecordAs participants arrive, ask them to enter their name and other information on the Attendance Record. There is also a column on the form to enter their marks from the Assessment Questions at the end of the training session.

232
Session 16: Pesticide Shop / Warehouse Location and Construction
Set up / Introduction 5 minutes
Time Activity
Attention: Welcome the retailers to the session.
Remind participants of the session on The Environment and the Sensitive Areas activity of that session.
Ask:• What were the areas identified during the session that were
particularly sensitive to contamination by pesticides?
Take several responses.
Say that during that session we were largely considering contamination from pesticide application to crops. However, pesticide shops and warehouses are also potential sources of contamination, so we need to consider how to avoid contamination from these sources.
As sellers of pesticides, participants bring pesticides into the community, and so have a responsibility with their shop (and warehouse if they have one) to avoid potential adverse effects from this activity as a result of location or construction of the shop.
Title: Refer to the Title Flipchart and tell participants that this training session will cover Pesticide Shop and Warehouse Location and Construction.
Credibility: Say that in many countries the location and construction of pesticide shops and warehouses is strictly regulated.
Objectives: Refer to the Title Flipchart with the Lesson Objectives.
By the end of the session, participants will be able to:• State clearly where pesticide shops and warehouses should and
should not be located.• Describe the basic principles of pesticide shop and warehouse
construction and layout.
Benefits: Correct location and construction of pesticide shops and warehouses minimises the possible adverse effects to the community of a pesticide spill, fire, or other accident.
Direction: • A work group activity begins the session with participants deciding on the location of a new pesticide shop and a new pesticide warehouse in a town.
• Another work group activity then examines the basic principles of pesticide shop and pesticide warehouse construction and layout.
• The session concludes with a trainer presentation of example layouts for small pesticide shops and a pesticide warehouse.

233
DeliveryExplanation, Demonstration, Exercise, and Guidance:
Time Activity
1.
25 minutes
Work Groups - Pesticide Shop and Warehouse Location
Say that we will refer to pesticide shops and pesticide warehouses during the session. For simplicity:• Shops are places in which moderate quantities of pesticides are stored
to be sold to users. • Warehouses are places where pesticides are stored in larger quantities
for later distribution.
The basic principles are the same for both, but there are some differences in location and construction.
Put up the flipchart with the diagram of the town. Explain the various parts of the town – the lake and river, houses, shops, fish factory, hospital, etc.
Divide participants into four groups, and give each group one of the cards labelled Pesticide Shop or Pesticide Warehouse.
Say that each group is a pesticide retailer who is going to build a new shop or warehouse in the town.
Work Group Task:• Discuss the best location for your new shop or warehouse.• Note down the reasons for your decision.
Allow 5 minutes for discussion
Ask each group in turn to stick its card at their location in the town, and to explain why they have selected that location.
Ask the other groups if they agree or disagree, and why.
Guide the discussions, using Pesticide Shop and Warehouse Location from the Fact Sheet as a checklist.
Ask:• Which of these principles of location are difficult to implement in
practice?• Why?• How can these difficulties be overcome?

234
Session 16: Pesticide Shop / Warehouse Location and Construction
2.
40 minutes
Work Groups – Shop and Warehouse Construction
Say that now we have decided on the location for our shop and warehouse, we are now going to build it.
Keep the same groups for the shop and warehouse.
Work Group Task:Decide on the basic construction and layout principles for your shop or warehouse with regard to:• Walls and roof• Internal surfaces of walls and floors• Shelving• Lighting• Ventilation• Security• Hygiene
Allow 20 minutes for the activity
Ask the first shop group to present their results, followed by the second group.
Write responses on the flipchart.
After both shop groups have presented, add as necessary using Pesticide Shop and Warehouse Construction and Layout from the Fact Sheet as a checklist.
Repeat the activity with the two warehouse groups

235
3.
10 minutes
Presentation – Example Shop and Warehouse Layouts
Distribute the example shop and warehouse layout diagrams from the Fact Sheet. Not the ventilation example as there is a question on ventilation in the Assessment Questions.
Say that there are two examples of possible layouts for a small shop.• One shop layout has a ‘closed’ frontage – for example a glass window,
with a door for entry.• The other shop layout has an ‘open’ frontage – where the front of the
shop is completely open, and closed at the end of the day with a metal shutter.
Point out:• The separation by the counter of customers from the pesticide display
and staff area.• The small store at the rear of the shop for keeping additional stock.• The washbasin.• The ventilation through the front of the shop, roof vent, window, or air
brick.• The wall area for the display of posters – pest and disease identification,
products, government advice, etc.• For larger shops, the same principles will apply.
Say there are also two examples of layouts for a pesticide warehouse.
Point out:• The bunds, ramps and sump to contain spills, wash water, and fire-
fighting water.• The separation of administration and washing facilities from the storage
area.• The area within the warehouse boundary for loading and unloading.

236
Session 16: Pesticide Shop / Warehouse Location and Construction
Finish
Time Activity
Summary:
1 minute
Include as major messages:• Areas to avoid with pesticide shop and warehouse location• Principles of construction and layout of pesticide shops and
warehouses, particularly separation of customers from the display area, cleaning, ventilation, and hygiene
Questions:
1 minute
Ask if everyone understands or if there are any additional questions. Answer these provided they are relevant.
Ask if the session objectives were met
Evaluation:
12 minutes
Hand out the Assessment Sheet and ask participants to complete two of the questions.
Collect the Assessment Sheet for later marking and entering the marks on the Attendance Record.
Next step:
1 minute
Say that in this session we learned the location, construction and layout of pesticide shops and warehouses. Participants should return to their premises and look at them with regard to what they have learned today. In particular, what needs to be improved, and how will they do it?
Hand out the Fact Sheet to participants.

237
Shops
School
Houses
Houses
Houses
Houses
Fish
Factory
Bus
Station
Taxi
Rank
Hospital
Industria
l area
School

238
Session 16: Pesticide Shop / Warehouse Location and Construction
Assessment Questions
Name: …………………………………………………… Date: ……………………… Mark:
Answer TWO (2) only of the following questions.You may write your answers on this question sheet or tell your trainer the answers. All questions are the same value (5 marks).
Question 1: Give three locations where pesticide shops should not be located.
...........................................................................................................................................................................................
...........................................................................................................................................................................................
...........................................................................................................................................................................................
Question 2: Why are plain brick, mud, or earth walls and floors not acceptable in a pesticide shop or warehouse?
...........................................................................................................................................................................................
...........................................................................................................................................................................................
...........................................................................................................................................................................................
Question 3: How is adequate ventilation ensured in the shop or warehouse?
...........................................................................................................................................................................................
...........................................................................................................................................................................................
...........................................................................................................................................................................................
Question 4: What materials should be used for the shelves in a shop or warehouse and why?
...........................................................................................................................................................................................
...........................................................................................................................................................................................
...........................................................................................................................................................................................

239
FACT SHEET
PESTICIDE SHOP AND WAREHOUSE LOCATION
Pesticide shops and warehouses both store pesticides, which are a potential contamination risk to the local area and community from spills, fires, and other accidents. Shops and warehouses must thus be located so as to minimise these risks.
Pesticide shops should be located away from:Shops selling any form of food, clothing and other materials, or animal feed. • Pharmacies.• Schools.• Hospitals.• Open air markets.• Recreational areas, such as playgrounds.• Water sources, open water, or where there is a high water table or possible flooding
Pesticide warehouses, in addition should be located:• In an industrial area, where few people visit.• Away from other warehouses which stock any form of human or animal feed,• Away from other warehouses which stock fuel, fertilizer, and other combustible goods.
PESTICIDE SHOP AND WAREHOUSE CONSTRUCTION AND LAYOUT
The following are the basic, general principles for the construction of any pesticide shop or warehouse.
General• The walls, roof, and shelving should be of non-combustible material. Fire is one of the
biggest hazards of pesticide storage.• The inside walls and floor should be of non-permeable material (concrete or tiles),
smooth, and without cracks, so that they can be easily cleaned. Brick, mud, or earth walls and floors are not acceptable as they absorb pesticide and cannot be cleaned properly.
• Shelves should be robust and of non-permeable material (metal or plastic), and without cracks, so that they can be easily cleaned. Wooden shelves absorb pesticide spills and cannot be cleaned properly.
• There must be adequate lighting, either natural or artificial, so that container labels can be read.
• The premises must be secure so as to prevent unauthorized entry – locks on all doors and gates, bars on windows.
Shops• There must be adequate ventilation, preferably opposing doors or windows, air bricks, or
roof vents.• Customers should be separated from the pesticide display and sales area by a counter.• Ideally, there should be an area separate to the main part of the shop for storing stock
not on display.• If physically separated from the shop, the store must meet all the necessary requirements
for storing pesticides.• Stock for sale should not be kept in the window, or where it is exposed to sunlight. If this
is not possible, there should be a sun-shade over the front of the shop.• Washing facilities must be available for staff and customers. A washbasin, water, soap and
clean towel as a minimum.

240
Session 16: Pesticide Shop / Warehouse Location and Construction
Warehouses and Bulk Stores• The roof should be of light-weight material that will collapse in the event of a fire, so as to
allow firefighters access to the interior from above.• There must be adequate clearance (10m or more) on at least two sides of the building to
allow access for firefighting vehicles and personnel.• Delivery vehicles must have good access, with a dedicated area for the vehicles to unload
and load.• Adequate ventilation is essential. There should be at least one of: the following: opposing
doors, opposing windows, roof vents, and upper and lower wall vents.• Washing facilities must be available, preferably with a shower area, separate from the
storage area.• Office and administration facilities should be separate from the storage area.• Containment bunds and ramps, drains, and a sump should be provided to contain fire-
fighting water, spills, and washings. These should not drain to public waterways or sewers.

241
Example Layout for a Small Shop with a Closed Frontage

242
Session 16: Pesticide Shop / Warehouse Location and Construction
Example Layout for a Small Shop with an Open Frontage

243
Example Layouts of a Pesticide Warehouse

244
Session 16: Pesticide Shop / Warehouse Location and Construction
Shop and Warehouse Ventilation
Sunshade Over Shop Frontage
See also:CropLife International Guidelines for the Safe Warehousing of Crop Protection Products.CropLife International Guidelines for the Safe Formulation and Packing of Crop Protection Products.http://croplife.org/?s=guidelines

245
SESSION 17:COUNTERFEIT PESTICIDE PRODUCTS

246

247
Lesson Plan
Materials needed: R Flipchart stands.
R Flipchart paper.
R Markers (4 colours).
R Notebooks, pens, and file covers for participants who have forgotten to bring them.
R Coloured cards.
R Glue stick or blue tack.
R Masking tape.
Time needed: 100 minutes
Intended audience: Pesticide Retailers
Preparation: R Flipchart with the session title “Counterfeit and Fraudulent Pesticide Products”, and the Session Objectives.
R Examples of different genuine pesticide products.
R Examples of different counterfeit pesticide products.
R Print off sufficient Attendance Record sheets.
R Print off sufficient Assessment question sheets.
R Print off sufficient Fact Sheets for participants.
R Organise venue and seating arrangements.
Attendance RecordAs participants arrive, ask them to enter their name and other information on the Attendance Record. There is also a column on the form to enter their marks from the Assessment Questions at the end of the training session.

248
Session 17: Counterfeit Pesticide Products
Set up / Introduction 5 minutes
Time Activity
Trainer Notes:• The opening activity refers to counterfeit DVDs. This example may not
be suitable in all countries, and a local equivalent will need to be used. However, the principles of the question / answer session are the same for all counterfeit products.
• Activity 3, Recognising Counterfeit Pesticide Products, requires examples of counterfeit products. These may not be readily available, so an alternative activity is provided for this situation.
Attention: Welcome the retailers to the session.
Say that both expensive and cheap DVDs are available in the market.
Ask:• What are the differences between the expensive and cheap DVDs?
Take several responses.
Possible answers are:• There is a difference in the packaging between the expensive and
cheap DVDs.• The cheap DVDs often do not play properly, or not play at all.• The cheap DVDs are counterfeit copies of the expensive originals.• The cheap DVDs are sold by unlicensed and dishonest market traders.
Say that the same applies to pesticide products – counterfeit products exist, which are sold cheaply by dishonest dealers and traders.
Title: Refer to the Title Flipchart and tell participants that this training session will cover Counterfeit and Fraudulent Pesticide Products.
Credibility: Say that in Kenya coffee crops destined for export were treated with a counterfeit pesticide product. The product was ineffective, the crop was destroyed, and farmers lost their livelihood. The ingredients in the product were simply calcium carbonate or magnesium carbonate.This is one example of many where counterfeit products have had severe effects on farmers and the agricultural industry.
Objectives: Refer to the Title Flipchart with the Lesson Objectives.
By the end of the session, participants will be able to:• Define what is meant by a counterfeit pesticide.• Describe the consequences of counterfeit pesticide products to
farmers, consumers, the environment, pesticide retailers, and the pesticide industry.
• Identify a counterfeit pesticide product by looking at the container and label.
Benefits: Counterfeit pesticide products have severe consequences to humans, the environment, and the economy of the country. Knowing about these consequences will enable retailers to advise their customers of the dangers associated with the use of these products.

249
Direction: • The session begins with an interactive discussion to define what is meant by a counterfeit pesticide.
• Work groups then investigate the consequences of counterfeit products in a range of sectors.
• Two alternatives are provided for the third activity, depending on whether or not examples of counterfeit pesticide products are available. If they are available, then a work group activity evaluates how to recognise counterfeit products. If not available, a role play achieves the same objective.
• A final short interactive discussion identifies the types of person that purchases a counterfeit product.
DeliveryExplanation, Demonstration, Exercise, and Guidance:
Time Activity
1.
15 minutes
Interactive Discussion – What Exactly Do We Mean by Counterfeit Pesticide Products?
Say that for our discussions in this session, we need to know exactly what is meant when we describe a pesticide product as counterfeit.
Ask:• What exactly do we mean when we describe a pesticide product as
counterfeit? • In other words, how can we define a counterfeit pesticide product?
Write responses on the flipchart.
Guide the discussion using Definition of Counterfeit Pesticides from the Fact Sheet as a reference.
Explain the time and costs of agro-chemical companies from Development of a Completely New Pesticide Active Ingredient in the Fact Sheet
Ask:• Are all cheap pesticide products counterfeit?
Take several responses, and then explain that not all cheap products are counterfeit.Generic products are those pesticides which are no longer under patent, and are manufactured by several or many genuine manufacturers. Because of this they are generally cheaper than products still under patent.

250
Session 17: Counterfeit Pesticide Products
2.
30 minutes
Work Groups – Consequences of Counterfeit Pesticide Products
Say that in the introduction activity we said that counterfeit DVDs often did not play properly, or not play at all.
Divide participants into four groups. Allocate to each group one of the sectors below.
Work Group Task:What do you think are the consequences of counterfeit products for your sector?• Farmers• Consumers and the Environment• Pesticide retailers• The pesticide industry• Write the group responses on a flipchart.
Allow 10 minutes for the activity
Ask each group to report in turn.
After each group has reported, ask the other participants if they have any comments or anything to add.
Add as necessary using Consequences of Counterfeit Pesticide Products from the Fact Sheet as a checklist.
3.
30 minutes
Work Groups – Recognising Counterfeit Pesticide Products
Trainer Note:For this activity, the example pesticides should be randomly distributed among the groups. Allow 4-5 minutes for them to examine them and note their conclusions. The examples should then be passed around the groups in turn until all groups have examined all examples.
Distribute the example genuine and counterfeit pesticide products among the groups.
Work Group Task:• Decide which of the pesticide products is genuine and which is
counterfeit.• Note down the reasons for your decision.• Do not tell the other groups your decision or reasons.
Allow 4-5 minutes, and then ask the groups to pass the pesticides onto the next group. They must not tell the next group their decisions on the products.
Repeat until all groups have examined all the example pesticides.
Show one of the pesticide products and write the name on the flipchart.Ask each group in turn if they thought the product was genuine or counterfeit.
Write responses on the flipchart against the name of the product.
Ask each group in turn for one reason for their decision. If correct, write the reason on the flipchart.

251
Repeat for all the example pesticides, both genuine and counterfeit.When all products have been discussed, add as necessary using Recognising Counterfeit Pesticide Products from the Fact Sheet as a checklist.
3b. Alternative Activity 3
Role Play – Recognising Counterfeit Pesticide Products
Trainer Note:Follow this activity if no counterfeit pesticide products are available.
Role Play set-up:The trainer plays the role of a representative of a reputable local manufacturer, importer or distributor, or a government representative dealing with pesticides.
Ask a participant to play the role of a retailer who is not sure if his pesticide product is genuine or counterfeit.
Give the volunteer a pesticide container.The volunteer should come to the representative’s office and ask if the product is genuine or not, and how he can tell the difference.
Ensure that all the other participants can clearly see the role play. If necessary, they should all come and stand round the two persons in the role play.The trainer should go through the points in Recognising Counterfeit Pesticide Products from the Fact Sheet, showing the ‘retailer’ each point in turn on the container, and ensuring that the other participants can see.
4.
5 minutes
Interactive Discussion – Who Buys Counterfeit Pesticide Products?
Ask:• What type of person buys counterfeit pesticide products?
Take several responses.
Summarise by saying there are two types of person:• Those that buy the counterfeit product thinking that it is genuine.• Those that know the product is counterfeit, but think that they are
getting a bargain as it is cheap.
Emphasise that although counterfeit products may be cheap, the costs involved in their use – crop loss or damage, health hazards, loss of markets for produce, etc – are extremely high.Participants should strongly pass on this message to their farmer customers.

252
Session 17: Counterfeit Pesticide Products
Finish
Time Activity
Summary:
1 minute
Include as major messages:• The investment of time and money that reputable agro-chemical
companies put into the development of a new pesticide active ingredient
• The definition of counterfeit products• The serious consequences of counterfeit pesticides• The essential differences when recognising counterfeit products
Questions:
1 minute
Ask if everyone understands or if there are any additional questions. Answer these provided they are relevant.
Ask if the session objectives were met
Evaluation:
12 minutes
Hand out the Assessment Sheet and ask participants to complete two of the questions.
Collect the Assessment Sheet for later marking and entering the marks on the Attendance Record.
Next step:
1 minute
Say that in this session we learned about counterfeit products, what they are, the serious consequences of their use, and how to recognise them. Of direct concern to participants as sellers of pesticides is the sometimes catastrophic effect on farmers who use counterfeit products.
What would be the effect on their business if they sold a counterfeit product which completely failed to work and their customer farmers lost their livelihood?
Participants can enhance their service to farmers by not selling counterfeit products, and by advising farmers against their use and how to recognise them.
Hand out the Fact Sheet to participants.

253
Visual 1
Counterfeit and illegal pesticides are often mislabeled and not registered for sale or use. They can pose a risk to human health and the environment,
and can lead to severe damages or even a total loss of the crop.
ORIGINAL PESTICIDES
4 Protect yields due to effective pest control.
4 Allow a sustainable production of high quality produce.
4 Enable farmers to freely trade their produce.
4 Pose no unacceptable risks when applied according to the label instructions.
9 TIPS FOR RECOGNIZING COUNTERFEIT AND ILLEGAL PESTICIDES
DO NOT PURCHASE OR USE COUNTERFEIT OR ILLEGAL PESTICIDES. BE ATTENTIVE AND ALERT. SAFEGUARD YOUR CROPS, PROTECT HUMAN HEALTH AND THE ENVIRONMENT.
REPORT ANY COUNTERFEIT AND ILLEGAL PESTICIDES TO YOUR LOCAL CROP PROTECTION ASSOCIATION OR TO THE RELEVANT AUTHORITIES.
Counterfeit and illegal pesticides
Helping Farmers Growwww.croplife.org
Counterfeitand Illegalpesticide
Manufactured: Oct 2015Expiry: Oct 2020
The cap of the container is different from the original.
The container is not properly sealed.
The seller refuses to provide a proper invoice for the purchase.
The product is offered by a non-authorized dealer, on the street or sold directly from a truck.
The shape of the container is different from the original.
The holograms do not exist or are different from the original
The logo/trademark on the container or label looks different from the original.
The price of the product is significant lower compared to the original.
The label is not written in the local language and/or shows mistakes in grammar or spelling.
COUNTERFEIT AND ILLEGAL PESTICIDES
8 Pose a significant risk to human health and the environment.
8 Can result in trade bans for the produce.
8 Damage the reputation and image of the farmers.
8 Can lead to a full destruction of the crop.

254
Session 17: Counterfeit Pesticide Products
Assessment Questions
Name: …………………………………………………… Date: ……………………… Mark:
Answer TWO (2) only of the following questions.You may write your answers on this question sheet or tell your trainer the answers. All questions are the same value (5 marks).
Question 1: Describe what is meant by a counterfeit pesticide.
...........................................................................................................................................................................................
...........................................................................................................................................................................................
...........................................................................................................................................................................................
Question 2: Give three consequences of counterfeit pesticides to farmers.
...........................................................................................................................................................................................
...........................................................................................................................................................................................
...........................................................................................................................................................................................
Question 3: Give three consequences of counterfeit pesticides to pesticide retailers and the pesticide industry.
...........................................................................................................................................................................................
...........................................................................................................................................................................................
...........................................................................................................................................................................................
Question 4: Give four ways of recognising a counterfeit pesticide product.
...........................................................................................................................................................................................
...........................................................................................................................................................................................
...........................................................................................................................................................................................

255
FACT SHEET
DEVELOPMENT OF A COMPLETELY NEW PESTICIDE ACTIVE INGREDIENT
Every pesticide active ingredient on the market was originally developed by a reputable agro-chemical company. This development involves:
• Synthesis of thousands of new chemicals with possible insecticidal activity• Initial testing for the level and range of insecticidal activity in the laboratory.• Toxicological and environmental testing in the laboratory.• Formulation chemistry.• Establishment of a pilot plant to produce sufficient product for field trials.• Efficacy, toxicology, and environmental field trials.• Registration of the new pesticide active ingredient/product in different countries.
Tens of thousands of possible new chemicals start the process for each single active ingredient finally registered and sold on the market. The whole process takes about 10 years and costs about 250 million US dollars for each new pesticide. Much of the testing involves toxicological, environmental, and safety effects.
Genuine products have thus been extensively and thoroughly laboratory and field tested so that the company can provide accurate recommendations for use of the product, while the toxicological, safety, and environmental aspects are intensively tested. Submission of this information is also a requirement by national pesticide registration authorities for the pesticide to be registered for use in the country.
Agro-chemical companies thus invest a huge amount of money and time in the development of a new pesticide active ingredient. To enable them to recover this investment, the pesticide will be patented, which usually lasts 20 years including the development period. During this time the company has exclusive rights to the active ingredient.
Once the patent has expired, other companies can manufacture and sell the active ingredient. These pesticides are known as generics. Companies producing generic pesticide products do not have the high development costs involved with a completely new active ingredient, and so generic products are generally cheaper.
Genuine products from reputable companies, both under patent and generic, are produced under a strictly controlled manufacturing process, which ensures high quality of the active ingredient, with minimal unwanted by-products of the process, and with high quality formulations.
DEFINITION OF COUNTERFEIT PESTICIDES:
CropLife International agrees with the World Health Organization’s definition of counterfeit medicines and adopts a similar definition with reference to counterfeit pesticides, with additions specific to pesticide industry:
1. Counterfeit pesticides are ones which are deliberately and fraudulently mislabeled with respect to identity and/or source, or are not authorized for sale or use by relevant national authorities, or are lacking the manufacturer’s name and address.
2. Counterfeit pesticides can apply to both branded and generic products.3. Counterfeit pesticides may include products with the correct ingredients, or with the
wrong ingredients, without active ingredient, with correct quantity of active ingredients, or with fake packaging.

256
Session 17: Counterfeit Pesticide Products
Counterfeit pesticide products are often manufactured with inferior facilities and inferior quality control. The product is often sub-standard, with poor quality active ingredient, with additional, often highly toxic, by-products of the manufacturing process, and a poor quality formulation.
A point to note is that not all cheap products are counterfeit. As noted above in Development of a Completely New Pesticide Active Ingredient, generic products are pesticides which are no longer under patent, and are manufactured by several or many genuine manufacturers. Because of this they are generally cheaper than products still under patent. Even so, they can still be counterfeited.
All counterfeit products are illegal in many ways. They infringe property rights, they are fraudulent, they have not been officially registered in any country, they may have been smuggled, no taxes have been paid on them, and they are a risk to health.
CONSEQUENCES OF COUNTERFEIT PESTICIDE PRODUCTS
Since counterfeit products are often sub-standard, and do not have the correct amount of active ingredient, the wrong or no active ingredient, and/or toxic by-products, they pose extensive risks.
Farmers• Loss or damage to the crop due to poor effect on pests.• Loss or damage to the crop due to adverse physical effects of the product.• Loss of income from both crop loss or from damage, and from the cost of purchasing
and applying the product.• If the crop loss is complete, then the farmer’s livelihood is destroyed.• Buyers of export crops may refuse to deal with farmers, farmer’s marketing
organisations, or produce from the country due to illegal residues.• Risks to health from the unknown toxic effects of the product.
Consumers• Risks to health from the unknown toxic effects of the product residues on the food
consumed.
Environment• Environmental contamination of soil and water from the unknown toxic effects of the
product.• Subsequent consequences of this environmental contamination to all wildlife,
domestic animals, and humans.
Pesticide Retailers• Loss of business due to lack of trust from customers as a result of selling products that
do not effectively control pests.• Closure of the business, fines, or a prison sentence due to breaking the law of the
country.
The Pesticide Industry• Loss of sales to counterfeit products discourages agro-chemical companies from
identification, testing, and marketing of completely new pesticide active ingredients.• Loss of sales to counterfeit products removes incentives to manufacture genuine
products.• Unfair competition from counterfeit products discourages local entrepreneurs from
investing in local genuine manufacturing and formulation facilities.

257
RECOGNISING COUNTERFEIT PESTICIDE PRODUCTS
There are two main types of counterfeit pesticides:• Those that mimic the genuine product as much as possible in that the container and
label look exactly the same as the genuine product.• Those that use the company name, company logo, product name, or some other form
of mislabelling or misbranding so as to appear to be from that company or to contain an implied active ingredient.
The first can be extremely difficult to recognise as counterfeit, while the second is much easier. Points to check for both types are:
Container• May be of thinner or poorer quality materials, or a slightly different colour to the
genuine product.• The closure cap may be different.• Any markings on the container from the container manufacture process may be
different.• The type face of any direct stamping or printing on the container, such as the batch
number or expiry date, may be different.
Label• May be very simple and badly stuck onto the container.• The grammar and spelling of the label language may be poor.• An extended shelf life may be quoted (the difference between the manufacturing and
expiry date, or period until the expiry date). Most genuine products have a quoted shelf life of 2-3 years, counterfeit products may give an expiry date of up to 5 years.
• The label may use the company name, company logo, or product name of a genuine product, but the label is completely different in design or the information provided.
• The label must contain information on the product registration number from the national registration authority, the manufacturer, importer or distributor and their contact details, the date of expiry, and directions for use. All, most, or some of this information may be missing.
• Information on directions for use, safety, and first aid may be poor or missing.• An excessive number of pictograms may be on the label for the toxicity of the claimed
product.• The pictograms may be badly laid out – Incorrect order and distribution, and
misaligned.• There may be pictures of pests and diseases which are claimed to be controlled. Most
registration authorities do not allow this. In addition, space on the label is limited, and pictures take up space which should be devoted to essential information on the product.
Many of the above points require comparison with, or knowledge of, a genuine product. Retailers should ensure that they are aware of the appearance of genuine product containers and labels.
If a retailer is unsure whether a pesticide product is genuine or counterfeit, the product should be checked with a representative of the local manufacturer, importer, or distributor, the pesticide registration authority, or a pesticide specialist from the department of agriculture or other relevant government department.

258
Session 17: Counterfeit Pesticide Products
Examples of Counterfeit Pesticide Products
• Product name is actually an active ingredient, while the indicated active ingredient is the registered product name of a reputable company.
• Pictures of crops and pests.• No pictograms.
• Cheap cardboard packaging.• Pictures of crops.• Use of the registered product name of a reputable
company.• Use of the logo of the same reputable company. A
container such as this would never be marketed by such a company.

259
• Poor English grammar and spelling.• Active ingredient is not specified.• No registration number from the national pesticide
registration authority.• No contact details for the manufacturer.• No use details for crops and diseases for which the
product is registered.• No pictograms.• Use of the registered product name of a reputable
company.• Use of the logo of a reputable company. A
container such as this would never be marketed by such a company.
• Two on the left are counterfeit, one on the right is genuine.
• Different label design and layout to genuine product.
• Pictures of crops and pests.• Pictograms not in correct groups or order.
• Containers are cheap plastic. One is similar to a soft drink bottle.
• Label on left has many pictures, but no essential information.
• Label on right has little essential information.• All labels poorly stuck to container.
See also: CropLife International Guidelines for the Safe and Effective Use of Crop Protection Productshttp://croplife.org/?s=guidelines

260
Session 17: Counterfeit Pesticide Products

261
SESSION 18: PURCHASING, STOCK CONTROL, AND
SHOP ORGANISATION

262

263
Lesson Plan
Materials needed: R Flipchart stands.
R Flipchart paper.
R Markers (4 colours).
R Notebooks, pens, and file covers for participants who have forgotten to bring them.
R Coloured cards.
R Glue stick or blue tack.
R Masking tape.
Time needed: 100 minutes
Intended audience: Pesticide Retailers
Preparation: R Flipchart with the session title “Purchasing, Stock Control, and Shop Organisation”, and the Session Objectives.
R 3 Flipcharts marked out as shop ‘shelves’ (see example at end of lesson plan).
R Coloured cards cut into container shapes (see examples at end of lesson plan).• 24 x KillPest 35% EC (to represent a liquid pesticide). • 18 cards with this year’s expiry date, 6 with next year’s
expiry date.• 24 x PestGone 50% WP (to represent a powder pesticide) • 18 cards with this year’s expiry date, 6 with next year’s
expiry date.• 24 x NoWeed 40% EC (to represent a herbicide) • 18 cards with this year’s expiry date, 6 with next year’s
expiry date.• 24 x Vegetable Seed (to represent packages of seed)• There should be more cards than ‘space’ on shelves, so
that containers will have to be placed on top of each other.
R Print off sufficient Attendance Record sheets.
R Print off sufficient Assessment question sheets.
R Print off sufficient Fact Sheets for participants.
R Organise venue and seating arrangements.
Attendance RecordAs participants arrive, ask them to enter their name and other information on the Attendance Record. There is also a column on the form to enter their marks from the Assessment Questions at the end of the training session.

264
Session 18: Purchasing, Stock Control, and Shop Organisation
Set up / Introduction 5 minutes
Time Activity
Attention: Welcome the retailers to the session.
Ask:What happens if the local bakery makes too much bread one day?
Take several responses.
Ask:• Can the bakery sell the bread the next day? The next week?
Take several responses.
Say that the bakery knows how much bread is sold on average each day, and so makes just that amount.
It is the same for pesticide retailers. Pesticide purchases should be not too much, nor too little, which requires planning according to anticipated sales.
Title: Refer to the Title Flipchart and tell participants that this training session will cover Purchasing, Stock Control, and Shop Organisation.
Credibility: Give an example of a retailer who has purchased too little stock and so had to turn customers away, or has purchased too much stock and so has a large excess at the end of the season.
Objectives: Refer to the Title Flipchart with the Lesson Objectives.
By the end of the session, participants will be able to:• State clearly the principles for purchasing pesticides in terms of
the types and amounts to purchase, and when to place orders with suppliers.
• Demonstrate the correct organisation in the shop and on shelves of different pesticide types and other inputs.
• Explain the importance of keeping records, the information to be recorded, and the information that records can provide.
Benefits: Pesticide stock is money. When retailers manage their stock purchases and sales effectively, the best use is made of the money invested, and money is not tied up in unsold stock.
Direction: • The session begins with a workgroup activity on pesticide purchasing, using a picnic as an illustrative example.
• A second workgroup activity examines the organisation in the shop and on shelves of different pesticide types and other stock.
• A final interactive discussion looks at the importance of keeping records.

265
DeliveryExplanation, Demonstration, Exercise, and Guidance:
Time Activity
1.
35 minutes
Work Groups – Pesticide Purchasing
Divide participants into 3-4 work groups depending on numbers.
Work Group Task:Imagine as a group that you are going on a picnic next week with your families.• What foods and drinks will you need take with you?• Will hot food be needed? What sorts?• How much of each type of food and drink will be needed for all those on
the picnic?• Write your ‘shopping list’ of food and drink on a flipchart.
Allow 15 minutes for the activity.
Ask each group to present their shopping lists.
Trainer Note:Do not spend too long on the following questions. The objective should be to bring out the principles given in Pesticide Purchasing from the Fact Sheet.
After all groups have presented, ask all groups:• How did you decide which types of food and drink were needed?• How did the group find out what type of food and drink each group
member liked?• How did you decide what quantities of each type of food and drink were
needed?• Did you take into consideration food and drink you already had in the
house when deciding how much more to buy for the picnic?• How do you avoid taking too much or too little food and drink?• Do you buy everything on the morning of the picnic, or do you buy
some items in advance?
Note the answers on a flipchart.
Say that the same principles apply when ordering pesticides for their shops.• You need to know what the other people like and how much they are
likely to eat or drink. For farmers it is the same, you need to know your customers, what pesticides they will use, and how much of each type.
• You need to know when to buy different items. For pesticides and other inputs, different ones are needed at different times of the year, and need to be ordered in plenty of time before they are needed by the farmer.
• You do not want to buy too much or too little of anything. You need to know what will be needed and how much, and to take current stock into account when ordering.

266
Session 18: Purchasing, Stock Control, and Shop Organisation
Emphasise the points in Quality Products from the Fact Sheet:• Purchase only from reputable manufacturers, importers and distributors.• Be aware of, and do not buy counterfeit products.
2.
35 minutes
Work Groups – Shop Organisation
Divide participants into 3 groups for this activity.
Give each group a flipchart ‘shop’ with empty shelves.
Explain that the pesticides they have ordered from their supplier are about to be delivered.
Distribute to each group:• 8 x KillPest 35% EC (to represent a liquid pesticide), 6 cards with this
year’s expiry date, 2 cards with next year’s expiry date.• 8 x PestGone 50% WP (to represent a powder pesticide), 6 cards with
this year’s expiry date, 2 cards with next year’s expiry date.• 8 x NoWeed 40% EC (to represent a herbicide), 6 cards with this year’s
expiry date, 2 cards with next year’s expiry date.• 8 x Vegetable Seed (to represent packages of seed)• Blue tack or double sided tape to stick the containers onto the shelves.
Work Group Task:• Each group should stock their ‘shop’ with pesticides and the other
products by sticking the cards onto the ‘shelves’.
After 15 minutes, ask all groups to put up their ‘shop’ at the front of the classroom.
Allow participants 4-5 minutes to look at the organisation of the other ‘shops’.Ask:• Has anyone any comments to make on how the shops / shelves have
been stocked?• What is good about the ‘shop’ organisation? What could be improved?• What to do with the stock that does not fit on the shelves?• How should the different expiry dates be stocked?
After participants have made their comments, explain:• Pesticides should be separated from all other products.• Powders should be above liquids• Herbicides should be on the lowest shelves• The reasons for the organization of pesticides and formulations in this way.• Excess stock should be kept in a separate store if possible.• Products with the shortest time to expiry should be at the front of
shelves, longest time to expiry in the separate storage area - The First In - First Out principle so that the oldest stock is sold first, before the expiry date.
Take one ‘shop’ and rearrange the products on the shelves as necessary to meet the above criteria, and using Stock Management and Shop Organisation from the Fact Sheet as checklists.

267
3.
10 minutes
Interactive Discussion – Keeping Records
Say that some of the points from the first activity were that • We need to know what pesticide farmers will need and how much, • We do not want to order too much or too little, and that • We needed to take current stocks into account when ordering.
Ask:• Apart from knowing our customers, in what other way can we get this
information?
Guide participants to the response Keeping Records.
Ask:• What information can records give us?• What records should be kept?
Write appropriate responses on the flipchart, using Keeping Records from the Fact Sheet as a checklist.
Say also that keeping records of pesticide purchases and sales is a legal requirement in some countries.
Finish
Time Activity
Summary:
1 minute
Include as major messages:• How to estimate the amount of stock to purchase.• Taking existing stock into consideration when ordering new stocks.• Shop organization, particularly the separation of pesticides from
other inputs, and the separation of different pesticide types.• That keeping records can provide helpful information on sales and the
amounts of pesticides to order.
Questions:
1 minute
Ask if everyone understands or if there are any additional questions. Answer these provided they are relevant.
Ask if the session objectives were met
Evaluation:
12 minutes
Hand out the Assessment Sheet and ask participants to complete two of the questions.
Collect the Assessment Sheet for later marking and entering the marks on the Attendance Record.

268
Session 18: Purchasing, Stock Control, and Shop Organisation
Next step: Say this is the last training session. During all sessions participants have learnt about:• Crop and pest management• The different types and formulations of pesticides, and how pesticides
work• The product label• The environment• Safety• Hand sprayers, pesticide mixing, and spray application• Pesticide transport, disposal, and spill clean-up• Laws and regulations• Shop and warehouse location and construction• Counterfeit pesticides• And this last session, Purchasing, Stock Control, Shop Organisation
This knowledge will enable participants to give better service to their customers in terms of both of the quality of the products stocked and of the quality of the advice given to customers.
As a result, customers will trust the retailer, use him as their supplier of preference for pesticides and other inputs, and tell their friends to use him as well.
Good Service = Good Business.
Hand out the Fact Sheet to participants.
Thank all participants for their participation in the activities of the course and for passing on their own knowledge and experience to others.

269
Example Flipchart Layout of Shop Shelves

270
Session 18: Purchasing, Stock Control, and Shop Organisation
Example Container Shapes and Labels
Liquid Insecticide Powder Pesticide Herbicide Seed

271
Assessment Questions
Name: ………………………........……………….. Date: ……………........…… Mark:
Answer TWO (2) only of the following questions.You may write your answers on this question sheet or tell your trainer the answers. All questions are the same value (5 marks).
Question 1: Give two ways of estimating the quantity of pesticides to purchase.
...........................................................................................................................................................................................
...........................................................................................................................................................................................
...........................................................................................................................................................................................
Question 2: How many years supply of pesticide should be purchased at one time, and why?
...........................................................................................................................................................................................
...........................................................................................................................................................................................
...........................................................................................................................................................................................
Question 3: What does ‘First In – First Out’ mean?
...........................................................................................................................................................................................
...........................................................................................................................................................................................
...........................................................................................................................................................................................
Question 4: Which pesticides should be kept on the top shelves, the middle shelves, and the bottom shelves............................................................................................................................................................................................
...........................................................................................................................................................................................
...........................................................................................................................................................................................

272
Session 18: Purchasing, Stock Control, and Shop Organisation
FACT SHEET
PESTICIDE PURCHASINGOrdering accurate quantities of pesticides is essential for a profitable business. Pesticides purchased in too large amounts or at the wrong time of the year are money tied up in the stock, money which could be used for something else
Know Your Customers:• Know what crops they grow, what pesticides they use, and how much of each pesticide
they need.• This will obviously vary from year to year, but good contact with customers provides
valuable information on their varying requirements.
Time of Purchasing• Different pesticides are needed at different times of the year, as crops are planted at
different times, and pests attack at different times of the year.• There is a delay between placing an order and arrival at the shop. This lead time needs to
be taken into consideration when purchasing.• Lead times may vary during the year in some countries. For example, delivery may take
longer during the rainy season when roads may be in poor condition.• An input ordering calendar is useful when different inputs need to be ordered at different
times.
Amount to Purchase• Base purchase orders on estimated amounts for each product for the season, less the
amount of the product currently in stock from the previous year.• Only buy one year’s requirements.• Do not purchase more than one year’s requirements because of offers of discounts for
bulk purchase. These may appear to save money, but can be costly due to unsold stock at the end of the season, and the risk of holding stock past the expiry date.
• Check the expiry date when stock is delivered. Products with less than one year to the expiry date should not be accepted.
Quality Products• Purchase products only from reputable manufacturers, importers, and distributors.• Be aware of counterfeit products and how to recognise them.• Do not purchase counterfeit products – they are often not effective, can be hazardous,
and will affect the reputation of the retailer with customers.
STOCK CONTROL
Accurate stock control is essential to avoid both shortfalls and excesses in stock levels, both of which cost money, and to avoid the possibility of stock being held past the expiry date.
Keeping Records:• Records are vital to purchasing accurate amounts of stock.• Records should be kept separately for each product by pack size:
• Name of product• Date of purchase• Amount purchased• Pack size• Name of supplier• Expiry date• Dates and amounts of each sale• Details of purchaser• Balance of product remaining in stock.

273
• Records show how much of each type of stock sold during a year, and so provide a basis for the estimate of future requirements.
• Records show how much stock is left unsold from the last season. This should be deducted from the purchase estimate for the next season.
Stock ManagementExpired stock is a problem in many parts of the world. Good purchasing and stock management procedures can avoid this problem.• Stock should be sold on a First In – First Out basis. In other words, stock received first is
sold first, before newer stock is sold.• Newer stock should be kept in the pesticide storage area of the shop or in a separate
facility, if this is available, with older stock ready for sale on the display shelves.• If no pesticide storage area is available, new stock should be at the back of shelves, with
older stock at the front of shelves.
SHOP ORGANISATION
• Good shop organisation promotes safety, minimises the risks associated with pesticide storage, avoids one product type being contaminated by another, helps to make stock management easier, and improves the attractiveness of the shop to customers.
• The main risks involved with pesticide storage are fire and environmental contamination.• Pesticides must be stored separately. They must never be kept in the same area as food,
drink or medicines for human or animal consumption. They must also not be kept in the same area as any material that may become contaminated (seed, fertiliser, clothing etc).
• Pesticides must be stored out of direct sunlight, temperature extremes, water and moisture.
• If stored on shelves, dry pesticides should be placed above liquid pesticides (in case of leakage of liquid and contamination of the lower containers).
• Herbicides should be on the lowest shelves (in case of leakage of herbicide and contamination of the lower containers).
• Containers should be inspected regularly to ensure that there are no leakages.• Shelves should not be over-stocked.• Materials for cleaning up spills must be available (sawdust, sand, bucket, broom, shovel,
gloves, face mask, drum / strong plastic bag for sweepings).• Fire fighting equipment must be available (fire extinguishers (foam or dry powder),
buckets of sand etc).• Washing facilities must be provided (basin, water, soap, towel).• There should be no smoking, eating or drinking in the pesticide area.• There should be no unauthorised access to the sales or storage area.• Warning notices (No Smoking; and Danger – Pesticides) should be displayed.• An area of wall should be devoted to informational posters, brochures, and other
literature – government advice, pest and disease recognition, safety, etc.
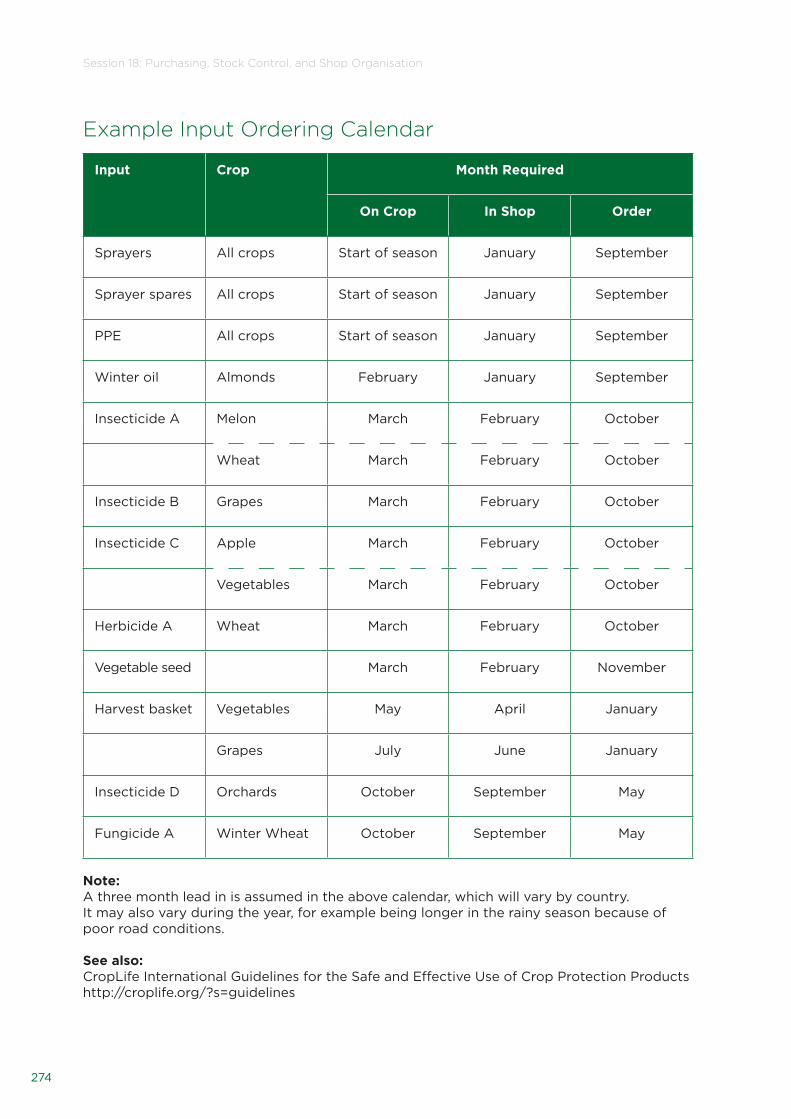
274
Session 18: Purchasing, Stock Control, and Shop Organisation
Example Input Ordering Calendar
Input Crop Month Required
On Crop In Shop Order
Sprayers All crops Start of season January September
Sprayer spares All crops Start of season January September
PPE All crops Start of season January September
Winter oil Almonds February January September
Insecticide A Melon March February October
Wheat March February October
Insecticide B Grapes March February October
Insecticide C Apple March February October
Vegetables March February October
Herbicide A Wheat March February October
Vegetable seed March February November
Harvest basket Vegetables May April January
Grapes July June January
Insecticide D Orchards October September May
Fungicide A Winter Wheat October September May
Note:A three month lead in is assumed in the above calendar, which will vary by country.It may also vary during the year, for example being longer in the rainy season because of poor road conditions.
See also: CropLife International Guidelines for the Safe and Effective Use of Crop Protection Productshttp://croplife.org/?s=guidelines

19. COURSE EVALUATION

276
20. Post-course Evaluation

277
Introduction to the SessionWelcome participants to the final Session of the course.
Present the session objectives, and give a brief overview of the procedures.
Course Summary
OBJECTIVES OF THE PROCEDURE:
• To summarise the main course messages for participants.
Review the Overall Goals of the training course from Session 1 and provide a course summary with lessons learned from each of the sessions.
Ask the participants:• Have these Overall Goals of the training course been met?
Participant Course Evaluation and NetworkingDistribute the compiled list of participant contact details. Ask participants to check that their details are correct.
Distribute the Participant Course Evaluation.
Say that participants can now have a short break while you mark the papers. Ask them to complete the Participant course evaluation during this break. Ask one of the participants to collect the completed questionnaires while you are marking the post-course papers.
Encourage them to establish longer term relationships and contacts during this period (if they have not already done so) as these could be valuable in the future, particularly if participants are from both the public and private sectors.
Course ClosureOfficially close the course.
Again thank participants for their contributions, and the public or private sector representative if they are present.

278
20. Post-course Evaluation
Participant Course Evaluation
Excellent Good Average Poor Very Poor
Training method
Course contents
Course structure
Training venue
Trainer skills
Trainer knowledge
Food
Accommodation
Did the course meet your expectations?
Has the course been of benefit to you?
What did you like best about the course?
What did you like least about the course?
How could the coursebe improved?
Any other comments

279

280
CropLife International aisbl326 AVENUE LOUISE, BOX 351050 BRUSSELSBELGIUM
TEL +32 2 542 04 10FAX +32 2 542 04 [email protected]
WWW.CROPLIFE.ORG
Date of publication: February 2016
Helping Farmers Grow
CropLife International is the voice of the global plant science
industry. It champions the role of agricultural innovations
in crop protection and plant biotechnology in supporting
and advancing sustainable agriculture; helping farmers feed
a growing population while looking after the planet; and
progressing rural communities. The world needs farmers, and
farmers need plant science. CropLife International is proud to
be at the heart of helping farmers grow.