Module 3_ Managing Users and Service Accounts
96
07/06/13 Module 3: Managing Users and Service Accounts https ://ski llpi pe.c ou r seware-marketpl a ce . com/reader/Pri nt /be 1aba 64 -6bb e-4f f5-82e 5- 4d 7e 5b 9d 8ee0?C ha pt erNumber=5&Fo ntSize=3&Fo ntTy pe=s egoe 1/ 96 Module 3: Managing Users and Service Accounts Contents: Lesson 1: Create and Administer User Accounts Lab A: C reate and Administer User Accounts Lesson 2: C onfigure User Object Attributes Lab B: Configur e User Object Attributes Lesson 3: Automate User Account Creation Lab C: A utomate User Account Creation Lesson 4: C reate and Configure Managed Service Accounts Lab D: Create and Configure Managed Servic e Acc ounts Module Overview
-
Upload
jorge-samano-aranda -
Category
Documents
-
view
87 -
download
0
Transcript of Module 3_ Managing Users and Service Accounts

7/15/2019 Module 3_ Managing Users and Service Accounts
http://slidepdf.com/reader/full/module-3-managing-users-and-service-accounts 1/96
07/06/13 Module 3: Managing Users and Service Accounts
https://skillp ipe.courseware -marketplace .com/reader/Print/be1aba64-6bbe-4ff5-82e5-4d7e5b9d8ee0?Chapte rNumber=5&FontSize=3&FontType=segoe 1/96
Module 3: Managing Users and Service Accounts
Contents:
Lesson 1: Create and Administer User Accounts
Lab A: Create and Administer User Accounts
Lesson 2: Configure User Object Attributes
Lab B: Configure User Object Attributes
Lesson 3: Automate User Account Creation
Lab C: Automate User Account Creation
Lesson 4: Create and Configure Managed Service Accounts
Lab D: Create and Configure Managed Service Accounts
Module Overview
7/15/2019 Module 3_ Managing Users and Service Accounts
http://slidepdf.com/reader/full/module-3-managing-users-and-service-accounts 2/96
07/06/13 Module 3: Managing Users and Service Accounts
https://skillp ipe.courseware -marketplace .com/reader/Print/be1aba64-6bbe-4ff5-82e5-4d7e5b9d8ee0?Chapte rNumber=5&FontSize=3&FontType=segoe 2/96
In this module, you will learn to create and support user accounts. User accounts
stored in Active
Directory® Domain Services (AD DS) are the fundamental components of identity.
Because of their importance, knowledge of user accounts and the tasks related tosupporting them are critical aspects in administering the accounts successfully in a

7/15/2019 Module 3_ Managing Users and Service Accounts
http://slidepdf.com/reader/full/module-3-managing-users-and-service-accounts 3/96
07/06/13 Module 3: Managing Users and Service Accounts
https://skillp ipe.courseware -marketplace .com/reader/Print/be1aba64-6bbe-4ff5-82e5-4d7e5b9d8ee0?Chapte rNumber=5&FontSize=3&FontType=segoe 3/96
Windows® enterprise.
Managing an enterprise network brings with it a unique set of challenges related to
user management.
Employees are hired, moved, married, and divorced, and many eventually leave the
organization. At times, employees forget their passwords or lock out their accounts by
logging on incorrectly.
Administrators must respond to all these events, and your ability to work effectively
with user accounts
can make a big difference in your overall productivity. This module begins with a
discussion of options for creating user accounts by using the Active Directory Users
and Computers snap-in and Windows
PowerShell®. This module also introduces several options for automating the creation
of users.
Of course, creating a user is only the first step in the life cycle of a user in a domain.
After creating the
user, you must configure attributes that define both the properties of the security
principal (the “account”) and properties that define and manage the user. You must

7/15/2019 Module 3_ Managing Users and Service Accounts
http://slidepdf.com/reader/full/module-3-managing-users-and-service-accounts 4/96
07/06/13 Module 3: Managing Users and Service Accounts
https://skillp ipe.courseware -marketplace .com/reader/Print/be1aba64-6bbe-4ff5-82e5-4d7e5b9d8ee0?Chapte rNumber=5&FontSize=3&FontType=segoe 4/96
also know how and when to administer the account—to perform password resets and
to unlock the account, for example. You must be able to move
the user between organizational units (OUs), and eventually, deprovision the account
by disabling or
deleting it. This module will cover the procedures used to support a user object
through its life cycle—procedures you can perform by using both the Windows
interface and the command-line or automation tools.
Objectives
After completing this module, you will be able to:
• Create and administer user accounts.
• Configure the account-related properties of a user object.
• Automate the creation of user accounts.
• Create and administer managed service accounts.
Lesson 1: Create and Administer User Accounts
7/15/2019 Module 3_ Managing Users and Service Accounts
http://slidepdf.com/reader/full/module-3-managing-users-and-service-accounts 5/96
07/06/13 Module 3: Managing Users and Service Accounts
https://skillp ipe.courseware -marketplace .com/reader/Print/be1aba64-6bbe-4ff5-82e5-4d7e5b9d8ee0?Chapte rNumber=5&FontSize=3&FontType=segoe 5/96
A user account is the cornerstone of identity and access (IDA) in AD DS. Consistent,
efficient, and secure processes regarding the administration of user accounts are
therefore the cornerstone of enterprise security management.
Objectives
After completing this lesson, you will be able to:
• Create and configure the account-related properties of a user object.
• Identify the purpose and requirements of user account attributes.
• Perform common administrative tasks to support user accounts, including password

7/15/2019 Module 3_ Managing Users and Service Accounts
http://slidepdf.com/reader/full/module-3-managing-users-and-service-accounts 6/96
07/06/13 Module 3: Managing Users and Service Accounts
https://skillp ipe.courseware -marketplace .com/reader/Print/be1aba64-6bbe-4ff5-82e5-4d7e5b9d8ee0?Chapte rNumber=5&FontSize=3&FontType=segoe 6/96
reset and account unlock.
• Enable and disable user accounts.
• Delete, move, and rename user accounts.
User Account
User objects are often referred to as user accounts. However, when you look closely,
what you think of as an “account” (the user name, password, and perhaps the
security identifier (SID)) is just a subset of attributes of a user object. Active Directory
user objects include numerous attributes that are either only indirectly related to the

7/15/2019 Module 3_ Managing Users and Service Accounts
http://slidepdf.com/reader/full/module-3-managing-users-and-service-accounts 7/96
07/06/13 Module 3: Managing Users and Service Accounts
https://skillp ipe.courseware -marketplace .com/reader/Print/be1aba64-6bbe-4ff5-82e5-4d7e5b9d8ee0?Chapte rNumber=5&FontSize=3&FontType=segoe 7/96
account (such as the profile path property), or are attributes of the human being
whom the account represents (such as the email address, phone number, and
manager properties).
User accounts—the actual “account” attributes of the user object—enable
authentication, which is the logon process during which the identity of the user is
validated by comparing the user’s logon name and password. Then, after the user
logs on, the account SID is compared with permissions on resources that the user
attempts to access.
Note Module 1 described the logon process, the generation of the securitytoken that
includes the user’s SID, and the mechanism through which permissions in an access
control
list (ACL) are compared to the SIDs in the token to determine the level of access to a
resource.
A user account can be created and stored in Active Directory. A domain user account
enables logon to any computer in the domain, and access to resources throughout
the domain. Of course, both sets of activities are subject to the logon rights,

7/15/2019 Module 3_ Managing Users and Service Accounts
http://slidepdf.com/reader/full/module-3-managing-users-and-service-accounts 8/96
07/06/13 Module 3: Managing Users and Service Accounts
https://skillp ipe.courseware -marketplace .com/reader/Print/be1aba64-6bbe-4ff5-82e5-4d7e5b9d8ee0?Chapte rNumber=5&FontSize=3&FontType=segoe 8/96
privileges, and permissions assigned to the account.
Although Active Directory accounts are the focus of this course, accounts can also be
stored in the local security accounts manager (SAM) database, enabling local logon
and access to local resources. Local user accounts are, for the most part, beyond the
scope of this course.
Create Users with Windows PowerShell
Use the Active Directory Module for Windows PowerShell to create objects in Active
Directory. The New-ADUser command creates a user object and accepts parameters
that specify properties of the user. The following command shows the basic

7/15/2019 Module 3_ Managing Users and Service Accounts
http://slidepdf.com/reader/full/module-3-managing-users-and-service-accounts 9/96
07/06/13 Module 3: Managing Users and Service Accounts
https://skillp ipe.courseware -marketplace .com/reader/Print/be1aba64-6bbe-4ff5-82e5-4d7e5b9d8ee0?Chapte rNumber=5&FontSize=3&FontType=segoe 9/96
parameters required to create a user account.
New-ADUser –Name <string> –SamAccountName <pre-Windows 2000
logon name> -AccountPassword (Read-Host –AsSecurestring
“AccountPassword”) –Enabled $true –ChangePasswordAtLogon
$true
The -AccountPassword parameter specifies the password. If it is set to
Read-Host –AsSecurestring “AccountPassword”, you are prompted for a userpassword.
The -ChangePasswordAtLogon parameter specifies that the user must change the
password at next logon.
New-ADUser accepts a number of parameters that specify properties of the userobject.
The following command creates a user with some of the more important fields
populated.
New-ADUser –Name “Amy Strande” –SamAccountName "AmyS” -

7/15/2019 Module 3_ Managing Users and Service Accounts
http://slidepdf.com/reader/full/module-3-managing-users-and-service-accounts 10/96
07/06/13 Module 3: Managing Users and Service Accounts
https://skillp ipe.courseware -marketplace .com/reader/Print/be1aba64-6bbe-4ff5-82e5-4d7e5b9d8ee0?Chapte rNumber=5&FontSize=3&FontType=segoe 10/96
GivenName “Amy” –Surname “Strande” –DisplayName “Amy
Strande” –AccountPassword (ConvertTo-SecureString –
AsPlainText “Pa$$w0rd” –Force) –Enabled $true –Path ‘OU=IT,
DC=Contoso, DC=Com’ -Description "Vice President, IT" –
ChangePasswordAtLogon $true
Most parameter names are self-explanatory: -EmailAddress , -ProfilePath , and -
Company , for example. Type Get-Help New-ADuser -detailed or search the
Windows Server® 2008 Help And Support Center for comprehensive documentation
of the New-ADUser parameters.
Demonstration: Create a User Object

7/15/2019 Module 3_ Managing Users and Service Accounts
http://slidepdf.com/reader/full/module-3-managing-users-and-service-accounts 11/96
07/06/13 Module 3: Managing Users and Service Accounts
https://skillp ipe.courseware -marketplace .com/reader/Print/be1aba64-6bbe-4ff5-82e5-4d7e5b9d8ee0?Chapte rNumber=5&FontSize=3&FontType=segoe 11/96
A user object, often referred to as a user account , includes the user name and
password, which serve as the logon credentials for a user. A user object also includes
several other attributes that describe and manage the user.
You can use either the Active Directory Users or Computers console, or ActiveDirectory Administrative Center to create a user object.
To create a user object by using Active Directory Users or Computers, perform the
following steps:
1. Right-click the OU or container in which you want to create the user, point to

7/15/2019 Module 3_ Managing Users and Service Accounts
http://slidepdf.com/reader/full/module-3-managing-users-and-service-accounts 12/96
07/06/13 Module 3: Managing Users and Service Accounts
https://skillp ipe.courseware -marketplace .com/reader/Print/be1aba64-6bbe-4ff5-82e5-4d7e5b9d8ee0?Chapte rNumber=5&FontSize=3&FontType=segoe 12/96
New, and then click User.
2. In the First name box, type the user’s first name.
3. In the Initials box, type the user’s middle initial(s).
Note that this property is, in fact, meant for the initials of a user’s middle
name, not the
initials of the user’s first and last name.
4. In the Last name box, type the user’s last name.
5. The Full name field is populated automatically. Make modifications to it if
necessary.
The Full name field is used to create several attributes of a user object, most
notably, the common name (CN) and display name properties. The CN of a user
is the name displayed in the details pane of the snap-in. It must be uniquewithin the container or OU. Therefore, if you are creating a user object for a
person with the same name as an existing user in the same OU or container, you
will need to enter a unique name in the Full name field.
6. In the User logon name box, type the name that the user will log on with, and
from the drop-down list, select the UPN Suffix that will be appended to the
user logon name following the @ symbol.

7/15/2019 Module 3_ Managing Users and Service Accounts
http://slidepdf.com/reader/full/module-3-managing-users-and-service-accounts 13/96
07/06/13 Module 3: Managing Users and Service Accounts
https://skillp ipe.courseware -marketplace .com/reader/Print/be1aba64-6bbe-4ff5-82e5-4d7e5b9d8ee0?Chapte rNumber=5&FontSize=3&FontType=segoe 13/96
User names in Active Directory can contain some special characters (including
periods, hyphens, and apostrophes), which let you generate accurate user names
such as O’Hare and Smith-Bates. However, certain applications may have other
restrictions, so we recommend that you use only standard letters and numerals
until you have fully tested the applications in your enterprise for compatibility
with special characters in logon names.
The list of available UPN suffixes can be managed by using the Active Directory
Domains and Trusts snap-in. Right-click the root of the snap-in, Active
Directory Domains and Trusts, click Properties, and use the UPN Suffixes
tab to add or remove suffixes. The DNS name of your Active Directory domain
will always be available as a suffix and cannot be removed.
7. In the User logon name (pre-Windows 2000) box, enter the pre-Windows
2000 logon name, often called the "downlevel" logon name. In the Active
Directory database, the name for this attribute is sAMAccountName.
8. Click Next.
9. Enter an initial password for the user in the Password and Confirm password
boxes.
10. Select User must change password at next logon.
We recommend that you always select this option so that the user can create a
new password unknown to the IT staff. Appropriate support staff can always

7/15/2019 Module 3_ Managing Users and Service Accounts
http://slidepdf.com/reader/full/module-3-managing-users-and-service-accounts 14/96
07/06/13 Module 3: Managing Users and Service Accounts
https://skillp ipe.courseware -marketplace .com/reader/Print/be1aba64-6bbe-4ff5-82e5-4d7e5b9d8ee0?Chapte rNumber=5&FontSize=3&FontType=segoe 14/96
reset the user’s password at a future date if they need to log on as the user or
access the user’s resources. But only users should know their passwords on a
day-to-day basis.
11. Click Next.
12. Review the summary and then click Finish.
The New Object – User interface allows you to configure a limited number of
account-related properties, such as name and password settings. However, a user
object in Active Directory supports dozens of additional properties. These can be
configured after the object has been created.
1. Right-click the user object you created, and then click Properties.
2. Configure user properties.
3. Click OK .
Name Attributes

7/15/2019 Module 3_ Managing Users and Service Accounts
http://slidepdf.com/reader/full/module-3-managing-users-and-service-accounts 15/96
07/06/13 Module 3: Managing Users and Service Accounts
https://skillp ipe.courseware -marketplace .com/reader/Print/be1aba64-6bbe-4ff5-82e5-4d7e5b9d8ee0?Chapte rNumber=5&FontSize=3&FontType=segoe 15/96
There are several attributes related to the name of a user object and an account. It is
important to understand the distinctions between them.
• A user’s User logon name (pre-Windows 2000) is, behind the scenes, the
sAMAccountName attribute. It is also sometimes called the samid. It must beunique for the entire domain.
• The User logon name is the userPrincipalName (UPN) attribute. The UPN consists
of a logon name and a UPN suffix which is, by default, the DNS name of the
domain in which you create the object. The UPN must be unique for the entire
forest. Email addresses, which must be unique for the whole world, certainly meet
that requirement. Consider using email addresses as UPNs. If your Active Directory

7/15/2019 Module 3_ Managing Users and Service Accounts
http://slidepdf.com/reader/full/module-3-managing-users-and-service-accounts 16/96
07/06/13 Module 3: Managing Users and Service Accounts
https://skillp ipe.courseware -marketplace .com/reader/Print/be1aba64-6bbe-4ff5-82e5-4d7e5b9d8ee0?Chapte rNumber=5&FontSize=3&FontType=segoe 16/96
domain name is not the same as your email domain name, you must add the email
domain name as an available UPN suffix. To do this, open the Active Directory
Domains and Trusts snap-in, right-click the root of the snap-in, and then click
Properties.
• The Name of a user, which is shown in the first column in the details pane of the Active Directory Users and Computers snap-in. This name is also presented as Full
Name in some interfaces, including the New Object–User dialog box. It must be
unique in the OU. The Name field is actually the common name (CN), stored as
the cn attribute. The cn must be unique in the OU because it is the first element of
the distinguished name (DN), the distinguishedName attribute, which must be
unique within the forest.
• The display name is the displayName attribute that appears in the Microsoft®
Exchange global address list (GAL). It can be easier to locate users in the GAL if
they are sorted by last name. Therefore, you can create a naming convention for
your organization that specifies that the displayName attribute takes the LastName,
FirstName syntax. There is no requirement for uniqueness of the displayName
attribute, although it is certainly easier to locate users in the GAL if each has a
unique display name.
Question: What do you do in your organization to ensure the uniqueness of
name
attributes, and what naming conventions do you use?

7/15/2019 Module 3_ Managing Users and Service Accounts
http://slidepdf.com/reader/full/module-3-managing-users-and-service-accounts 17/96
07/06/13 Module 3: Managing Users and Service Accounts
https://skillp ipe.courseware -marketplace .com/reader/Print/be1aba64-6bbe-4ff5-82e5-4d7e5b9d8ee0?Chapte rNumber=5&FontSize=3&FontType=segoe 17/96
Account Attributes
On the Account tab of a user’s Properties dialog box, you can find the attributes
that are directly related to the fact that a user is a security principal, meaning that it is
an identity to which permissions and rights can be assigned.
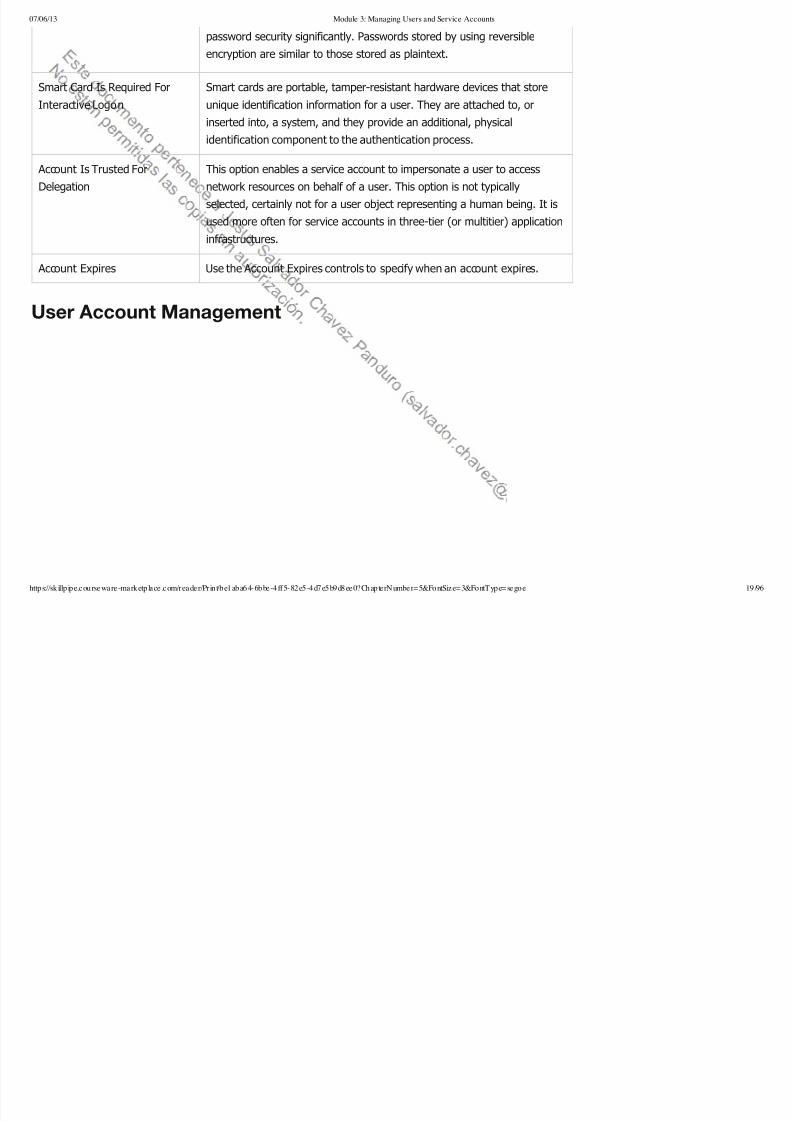
The following table summarizes the account attributes.
Property Description
Logon Hours Click Logon Hours to configure the hours during which a user is allowed
to log on to the network.

7/15/2019 Module 3_ Managing Users and Service Accounts
http://slidepdf.com/reader/full/module-3-managing-users-and-service-accounts 18/96
07/06/13 Module 3: Managing Users and Service Accounts
https://skillp ipe.courseware -marketplace .com/reader/Print/be1aba64-6bbe-4ff5-82e5-4d7e5b9d8ee0?Chapte rNumber=5&FontSize=3&FontType=segoe 18/96
Log On To Click Log On To if you want to limit the workstations to which the user
can log on. This is called Computer Restrictions in other parts of the user
interface and corresponds to the userWorkstations attribute. You must
have NetBIOS over TCP/IP enabled to use this feature, because it uses the
computer name rather than the Media Access Control (MAC) address of its
network card to restrict logon.
User Must Change Password At
Next Logon
Select this check box if you want the user to change the password you
have entered the first time he or she logs on. You cannot select this
option if you have selected Password Never Expires. Selecting this option
will automatically clear the mutually exclusive User Cannot Change
Password option.
User Cannot Change Password Select this check box if you have more than one person using the same
domain user account (such as Guest) or to maintain control over user
account passwords. This option is commonly used to manage service
account passwords. You cannot select this option if you have selected
User Must Change Password At Next Logon.
Password Never Expires Select this check box if you never want the password to expire. This
option will automatically clear the User Must Change Password At Next
Logon setting, because the two are mutually exclusive. This option is
commonly used to manage service account passwords.
Account Is Disabled Select this check box to disable the user —account—for example, when
creating an object for a newly hired employee who does not yet need
access to the network.
Store Password Using
Reversible Encryption
This option, which stores the password in Active Directory without using
its powerful, nonreversible encryption hashing algorithm, exists to
support applications that require knowledge of the user password. If it is
not absolutely required, do not enable this option because it weakens
7/15/2019 Module 3_ Managing Users and Service Accounts
http://slidepdf.com/reader/full/module-3-managing-users-and-service-accounts 19/96
07/06/13 Module 3: Managing Users and Service Accounts
https://skillp ipe.courseware -marketplace .com/reader/Print/be1aba64-6bbe-4ff5-82e5-4d7e5b9d8ee0?Chapte rNumber=5&FontSize=3&FontType=segoe 19/96
password security significantly. Passwords stored by using reversible
encryption are similar to those stored as plaintext.
Smart Card Is Required For
Interactive Logo n
Smart cards are portable, tamper-resistant hardware devices that store
unique identification information for a user. They are attached to, or
inserted into, a system, and they provide an additional, physical
identification component to the authentication process.
Account Is Trusted For
Delegation
This option enables a service account to impersonate a user to access
network resources on behalf of a user. This option is not typically
selected, certainly not for a user object representing a human being. It is
used more often for service accounts in three-tier (or multitier) application
infrastructures.
Account Expires Use the Account Expires controls to specify when an account expires.
User Account Management

7/15/2019 Module 3_ Managing Users and Service Accounts
http://slidepdf.com/reader/full/module-3-managing-users-and-service-accounts 20/96
07/06/13 Module 3: Managing Users and Service Accounts
https://skillp ipe.courseware -marketplace .com/reader/Print/be1aba64-6bbe-4ff5-82e5-4d7e5b9d8ee0?Chapte rNumber=5&FontSize=3&FontType=segoe 20/96
After you have created a user account, there are a number of tasks that you perform
that are considered “Account Management” tasks. These tasks may include the
following:
• Renaming a user account
• Resetting a user password
• Unlocking a user account
• Disabling or enabling a user account
• Moving a user account

7/15/2019 Module 3_ Managing Users and Service Accounts
http://slidepdf.com/reader/full/module-3-managing-users-and-service-accounts 21/96
07/06/13 Module 3: Managing Users and Service Accounts
https://skillp ipe.courseware -marketplace .com/reader/Print/be1aba64-6bbe-4ff5-82e5-4d7e5b9d8ee0?Chapte rNumber=5&FontSize=3&FontType=segoe 21/96
• Deleting a user account
Renaming a User Account
When a user account needs to be renamed, there can be one or more attributes youmust change.
To rename a user in the Active Directory Users and Computers snap-in, perform the
following steps:
1. Right-click the user, and then click Rename.
2. Type the new common name (CN) for the user, and press Enter.
The Rename User dialog box appears and prompts you to enter additional
name attributes.
3. Type the Full name (which corresponds to the cn and name attributes)
4. Type the First name and Last name.
5. Type the Display name.
6. Type the User logon name and User logon name (pre-Windows 2000).
If the user forgets his or her password and attempts to log on, he or she will receive
7/15/2019 Module 3_ Managing Users and Service Accounts
http://slidepdf.com/reader/full/module-3-managing-users-and-service-accounts 22/96
07/06/13 Module 3: Managing Users and Service Accounts
https://skillp ipe.courseware -marketplace .com/reader/Print/be1aba64-6bbe-4ff5-82e5-4d7e5b9d8ee0?Chapte rNumber=5&FontSize=3&FontType=segoe 22/96
a logon message. Before the user can log on successfully, you will have to reset the
password. You do not need to know the user’s old password to do so.
To reset a user's password in the Active Directory Users and Computers snap-in:
1. Right-click the user object, and then click Reset Password.
The Reset Password dialog box appears.
2. Enter the new password in both the New Password and Confirm Password
boxes.
It is a best practice to assign a temporary, unique, strong password for the user.
3. Select the User Must Change Password At Next Logon check box.
It is a best practice to force the user to change the password at the next logon,
so that the user creates a password known only by the user.
4. Click OK .
5. Communicate the temporary password to the user in a secure manner.
You can also use the Set-ADAccountPassword PowerShell command to reset a
user’s password. For example, the following command will reset Amy Strande’s
password.

7/15/2019 Module 3_ Managing Users and Service Accounts
http://slidepdf.com/reader/full/module-3-managing-users-and-service-accounts 23/96
07/06/13 Module 3: Managing Users and Service Accounts
https://skillp ipe.courseware -marketplace .com/reader/Print/be1aba64-6bbe-4ff5-82e5-4d7e5b9d8ee0?Chapte rNumber=5&FontSize=3&FontType=segoe 23/96
Set-ADAccountPassword –identity ‘cn=amy strand, ou=IT,
dc=contoso, dc=com’ –Reset – NewPassword (ConvertTo-
SecureString –AsPlainText “Pa$$w0rd2” –Force)
Unlocking a User Account
An Active Directory domain supports account lockout policies. A lockout policy is
designed to prevent an intruder from attempting to penetrate the enterprise network
by logging on repeatedly with various passwords until he or she finds a correct
password. When a user attempts to log on with an incorrect password, a logon failure
is generated. When too many logon failures occur within a specified period of time,
defined by the lockout policy, the account is locked out. The next time the user
attempts to log on, a notification clearly states the account lockout.
Note You will learn to configure account lockout policies in Module 10.
Your lockout policy can define a period of time after which a lockout account is
automatically unlocked. But when a user is trying to log on and discovers that he or
she is locked out, it is likely he or she will contact the help desk for support.
To unlock a user account in the Active Directory Users and Computers snap-in,
perform the following steps:
7/15/2019 Module 3_ Managing Users and Service Accounts
http://slidepdf.com/reader/full/module-3-managing-users-and-service-accounts 24/96
07/06/13 Module 3: Managing Users and Service Accounts
https://skillp ipe.courseware -marketplace .com/reader/Print/be1aba64-6bbe-4ff5-82e5-4d7e5b9d8ee0?Chapte rNumber=5&FontSize=3&FontType=segoe 24/96
1. Right-click the user object, and then click Properties.
2. Click the Account tab.
3. Select the Unlock Account check box.
Windows Server 2008 also provides the option to unlock a user’s account when you
choose the Reset Password command.
To unlock a user account while resetting the user's password, perform the following
step:
• In the Reset Password dialog box, select the Unlock the user’s account check
box.
This method is particularly handy when a user’s account is locked out because the
user did, in fact, forget the password. You can now assign a new password, specify
that the user must change the password at next logon, and unlock the user’s account
in one dialog box.
Watch for drives mapped with alternate credentials: A common cause of account
lockout is a drive mapped with alternate credentials. If the password is changed, and
the Windows client attempts repeatedly to connect to the drive, that account will be
07/06/13 M d l 3 M i U d S i A

7/15/2019 Module 3_ Managing Users and Service Accounts
http://slidepdf.com/reader/full/module-3-managing-users-and-service-accounts 25/96
07/06/13 Module 3: Managing Users and Service Accounts
https://skillp ipe.courseware -marketplace .com/reader/Print/be1aba64-6bbe-4ff5-82e5-4d7e5b9d8ee0?Chapte rNumber=5&FontSize=3&FontType=segoe 25/96
locked out.
To unlock a user account by using Windows PowerShell, you can use the following
command.
Unlock-ADAccount –identity ‘cn=amy strand, ou=IT,
dc=contoso, dc=com’
Disabling and Enabling User Accounts
User accounts are security principals that can be given access to network resources.
Each user is a member of Domain Users and of the Authenticated Users special
identity. By default, each user account has at least read access to the information
stored in Active Directory. Therefore, it is important not to leave user accounts open.
That means you should configure password policies and auditing—both discussed in
other modules--and procedures to ensure that accounts are being used appropriately.
If a user account is provisioned before it is needed, or if an employee will be absent
for an extended period of time, disable the account.
To disable an account in the Active Directory Users and Computers snap-in:
• Right-click a user and then click Disable Account.
07/06/13 M d l 3 M i U d S i A t

7/15/2019 Module 3_ Managing Users and Service Accounts
http://slidepdf.com/reader/full/module-3-managing-users-and-service-accounts 26/96
07/06/13 Module 3: Managing Users and Service Accounts
https://skillp ipe.courseware -marketplace .com/reader/Print/be1aba64-6bbe-4ff5-82e5-4d7e5b9d8ee0?Chapte rNumber=5&FontSize=3&FontType=segoe 26/96
If an account is already disabled, the Enable Account command will appear when you
right-click the user.
To disable or enable a user account with Windows PowerShell, use the following
cmdlets.
• Enable-ADAccount –identity <name>
• Disable-ADAccount –identity <name>
Moving a User Account
To move a user object in the Active Directory Users and Computers snap-in, perform
the following steps:
1. Right-click the user, and then click Move.
2. Click the folder to which you want to move the user account, and then click OK .
Alternatively, you can drag the user object to the destination OU.
Deleting a User Account
When an account is no longer necessary, you can delete it from your directory.
07/06/13 Module 3: Managing Users and Service Accounts
7/15/2019 Module 3_ Managing Users and Service Accounts
http://slidepdf.com/reader/full/module-3-managing-users-and-service-accounts 27/96
07/06/13 Module 3: Managing Users and Service Accounts
https://skillp ipe.courseware -marketplace .com/reader/Print/be1aba64-6bbe-4ff5-82e5-4d7e5b9d8ee0?Chapte rNumber=5&FontSize=3&FontType=segoe 27/96
To delete a user account in Active Directory Users and Computers, perform the
following steps:
1. Select the user and press Delete; or right-click the user, and then click Delete.
You are prompted to confirm your choice because of the significant implicationsof deleting a security principal.
2. Confirm the prompt.
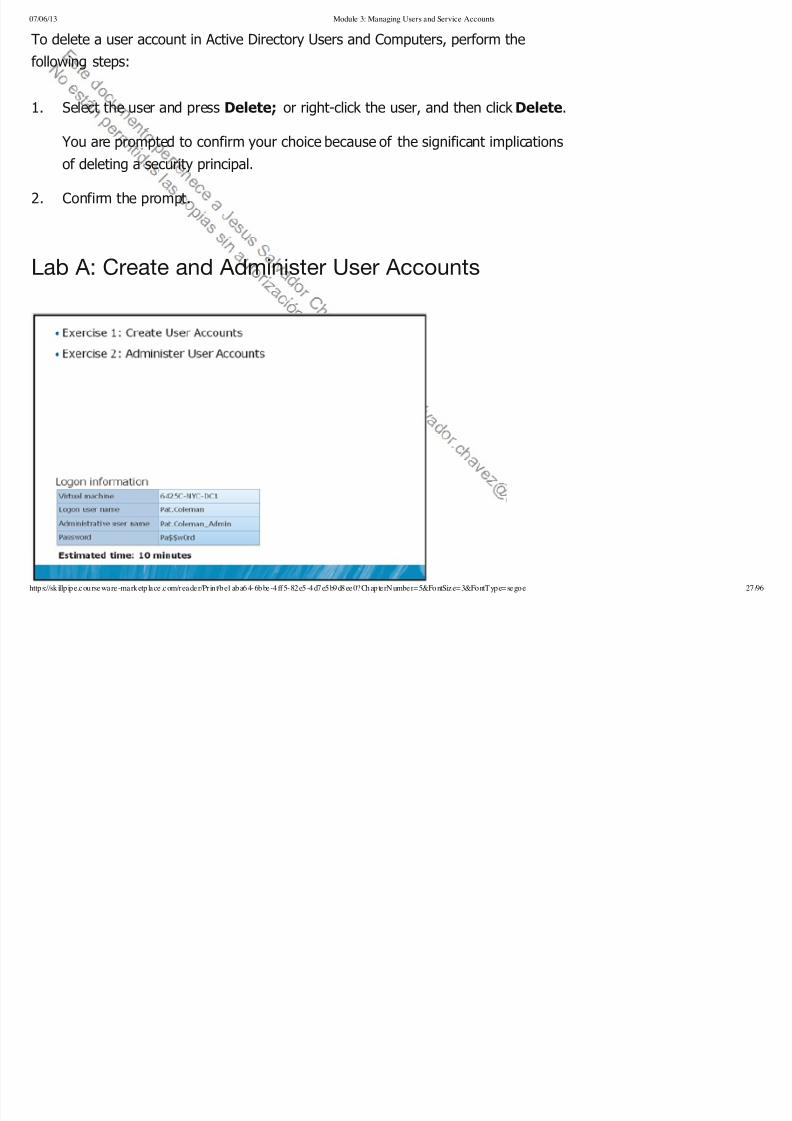
Lab A: Create and Administer User Accounts
07/06/13 Module 3: Managing Users and Service Accounts

7/15/2019 Module 3_ Managing Users and Service Accounts
http://slidepdf.com/reader/full/module-3-managing-users-and-service-accounts 28/96
07/06/13 Module 3: Managing Users and Service Accounts
https://skillp ipe.courseware -marketplace .com/reader/Print/be1aba64-6bbe-4ff5-82e5-4d7e5b9d8ee0?Chapte rNumber=5&FontSize=3&FontType=segoe 28/96
Lab Setup
For this lab, you will use the available virtual machine environment. Before you begin
the lab, you must complete the following steps:
1. On the host computer, click Start, point to Administrative Tools, and thenclick Hyper-V Manager.
2. In Hyper-V™ Manager, click 6425C-NYC-DC1, and in the Actions pane, click
Start.
3. In the Actions pane, click Connect. Wait until the virtual machine starts.
4. Log on by using the following credentials:
• User name: Pat.Coleman
• Password: Pa$$w0rd
• Domain: Contoso
5. Open Windows Explorer and then browse to D:\Labfiles\Lab03a.
6. Run Lab03a_Setup.bat with administrative credentials. Use the account
Pat.Coleman_Admin with the password Pa$$w0rd.
7. The lab setup script runs. When it is complete, press any key to continue.
8. Close the Windows Explorer window, Lab03a.
07/06/13 Module 3: Managing Users and Service Accounts

7/15/2019 Module 3_ Managing Users and Service Accounts
http://slidepdf.com/reader/full/module-3-managing-users-and-service-accounts 29/96
07/06/13 Module 3: Managing Users and Service Accounts
https://skillp ipe.courseware -marketplace .com/reader/Print/be1aba64-6bbe-4ff5-82e5-4d7e5b9d8ee0?Chapte rNumber=5&FontSize=3&FontType=segoe 29/96
Lab Scenario
You are the administrator of Contoso, Ltd., an online university for adult education.
Two new employees have been hired: Chris Mayo and Amy Strande. You must create
accounts for these users. After some time, Chris Mayo leaves the organization, and
his account must be administered according to the company policy for user accountlife-cycle management.
Exercise 1: Create User Accounts
In this exercise, you will create user accounts with both the Active
Directory Users and Computers snap-in and Windows PowerShell.
The main tasks for this exercise are as follows:
1. Create a user account with Active Directory Users and Computers.
2. Create a user account with Windows PowerShell.
Task 1: Create a user account with Active Directory Users and Computers.
1. Run Active Directory Users and Computers with administrative credentials.
Use the account, Pat.Coleman_Admin, with the password, Pa$$w0rd.
07/06/13 Module 3: Managing Users and Service Accounts

7/15/2019 Module 3_ Managing Users and Service Accounts
http://slidepdf.com/reader/full/module-3-managing-users-and-service-accounts 30/96
07/06/13 Module 3: Managing Users and Service Accounts
https://skillp ipe.courseware -marketplace .com/reader/Print/be1aba64-6bbe-4ff5-82e5-4d7e5b9d8ee0?Chapte rNumber=5&FontSize=3&FontType=segoe 30/96
2. Create a user account for Chris Mayo in the Employees OU.
• First Name: Chris
• Last Name: Mayo
• User Logon Name: Chris.Mayo
• User Logon Name (Pre-Windows 2000): Chris.Mayo
• Password: Pa$$w0rd
• Specify that the user must change the password at the next logon
Task 2: Create a user account with Windows PowerShell.
1. Run the Active Directory Module for Windows PowerShell with
administrative credentials. Use the account, Pat.Coleman_Admin, with the
password, Pa$$w0rd.
2. At the PS prompt, create a user account for Amy Strande in the Employees OU.
• SamAccountName: Amy.Strande
• First Name: Amy
• Last Name: Strande
07/06/13 Module 3: Managing Users and Service Accounts

7/15/2019 Module 3_ Managing Users and Service Accounts
http://slidepdf.com/reader/full/module-3-managing-users-and-service-accounts 31/96
07/06/13 Module 3: Managing Users and Service Accounts
https://skillp ipe.courseware -marketplace .com/reader/Print/be1aba64-6bbe-4ff5-82e5-4d7e5b9d8ee0?Chapte rNumber=5&FontSize=3&FontType=segoe 31/96
• User Principal Name: [email protected]
• Display Name: Strande, Amy
• Description: Research Assistant
3. In Active Directory Users and Computers, open the properties of the useraccount you just created and confirm that the attributes were set correctly.
Results: In this exercise, you created user accounts named, Chris Mayo and Amy
Strande, in the Employees OU.
Exercise 2: Administer User Accounts
In this exercise, you will perform common tasks that support user accounts
through their life cycle in Active Directory.
The main tasks for this exercise are as follows:
1. Administer a user account.
2. Administer the life cycle of a user account.
07/06/13 Module 3: Managing Users and Service Accounts

7/15/2019 Module 3_ Managing Users and Service Accounts
http://slidepdf.com/reader/full/module-3-managing-users-and-service-accounts 32/96
g g
https://skillp ipe.courseware -marketplace .com/reader/Print/be1aba64-6bbe-4ff5-82e5-4d7e5b9d8ee0?Chapte rNumber=5&FontSize=3&FontType=segoe 32/96
Task 1: Administer a user account.
The user account for Amy Strande is currently disabled because no password was
specified by using the PowerShell command.
1. What parameter should you have used with PowerShell to specify a password?
2. In Active Directory Users and Computers, reset the password for Amy
Strande to Pa$$w0rd, and specify that she must change the password at the
next logon.
3. In Active Directory Users and Computers, enable Amy Strande's useraccount.
4. Which commands can you use in Windows PowerShell to reset the password,
specify that the password must be changed at the next logon, and enable the
account?
Task 2: Administer the life cycle of a user account.
The Contoso, Ltd. policy for the life cycle management of a user account states the
following:
07/06/13 Module 3: Managing Users and Service Accounts
7/15/2019 Module 3_ Managing Users and Service Accounts
http://slidepdf.com/reader/full/module-3-managing-users-and-service-accounts 33/96
g g
https://skillp ipe.courseware -marketplace .com/reader/Print/be1aba64-6bbe-4ff5-82e5-4d7e5b9d8ee0?Chapte rNumber=5&FontSize=3&FontType=segoe 33/96
• When a user leaves the organization for any reason, including leave of absence, the
user's account must be disabled immediately and moved to the Disabled Accounts
OU.
• Sixty days after the termination of a user, the user's account must be deleted.
1. Chris Mayo has left Contoso, Ltd. Disable his account and move it to the
Disabled Accounts OU.
13. It has been 60 days since you disabled Chris Mayo and company procedures
specify that after 60 days, a disabled user account must be deleted. Delete the
user account for Chris Mayo.
14. Log off from NYC-DC1.
Results: In this exercise, you enabled Amy Strande's account and deleted Chris
Mayo's account.
Note Do not shut down the virtual machine after you finish this lab because
the settings
you have configured here will be used in Lab B.
07/06/13 Module 3: Managing Users and Service Accounts

7/15/2019 Module 3_ Managing Users and Service Accounts
http://slidepdf.com/reader/full/module-3-managing-users-and-service-accounts 34/96
https://skillp ipe.courseware -marketplace .com/reader/Print/be1aba64-6bbe-4ff5-82e5-4d7e5b9d8ee0?Chapte rNumber=5&FontSize=3&FontType=segoe 34/96
Lab Review Questions
Question: In this lab, which attribute can be modified to prompt for the
password when you
are creating a user account with Windows PowerShell?
Question: What happens when you create a user account that has a password
that does not
meet the requirements of the domain?
Lesson 2: Configure User Object Attributes
07/06/13 Module 3: Managing Users and Service Accounts

7/15/2019 Module 3_ Managing Users and Service Accounts
http://slidepdf.com/reader/full/module-3-managing-users-and-service-accounts 35/96
https://skillp ipe.courseware -marketplace .com/reader/Print/be1aba64-6bbe-4ff5-82e5-4d7e5b9d8ee0?Chapte rNumber=5&FontSize=3&FontType=segoe 35/96
A user object in Active Directory is far more than just a handful of properties related
to the user's security identity, or account. A user object includes attributes that
describe the individual and his or her relationship with the organization, and the
contact information and configuration of the user's experience on his or her
computer. In this lesson, you will explore many of the more useful attributes of userobjects, and you will learn how to administer these attributes for one or more users.
Objectives
After completing this lesson, you will be able to:
• View and modify hidden attributes of user objects.
07/06/13 Module 3: Managing Users and Service Accounts

7/15/2019 Module 3_ Managing Users and Service Accounts
http://slidepdf.com/reader/full/module-3-managing-users-and-service-accounts 36/96
https://skillp ipe.courseware -marketplace .com/reader/Print/be1aba64-6bbe-4ff5-82e5-4d7e5b9d8ee0?Chapte rNumber=5&FontSize=3&FontType=segoe 36/96
• Identify the purpose and requirements of user object attributes.
• Modify the attributes of multiple users, simultaneously.
• Manage user attributes from Windows PowerShell.
• Create users from user account templates.
A Tour of User Attributes
When you create a user with the New Object – User Wizard of the Active Directory
Users and Computers snap-in, you are prompted for some common properties,
07/06/13 Module 3: Managing Users and Service Accounts

7/15/2019 Module 3_ Managing Users and Service Accounts
http://slidepdf.com/reader/full/module-3-managing-users-and-service-accounts 37/96
https://skillp ipe.courseware -marketplace .com/reader/Print/be1aba64-6bbe-4ff5-82e5-4d7e5b9d8ee0?Chapte rNumber=5&FontSize=3&FontType=segoe 37/96
including logon names, passwords, and the user’s first name and last name. A user
object in Active Directory, however, supports dozens of additional properties that you
can configure at any time with the Active Directory Users and Computers snap-in.
To read and modify the attributes of a user object, right-click the user, and then click
Properties.
The attributes of a user object fall into several broad categories that appear on tabs
of the dialog box.
07/06/13 Module 3: Managing Users and Service Accounts

7/15/2019 Module 3_ Managing Users and Service Accounts
http://slidepdf.com/reader/full/module-3-managing-users-and-service-accounts 38/96
https://skillp ipe.courseware -marketplace .com/reader/Print/be1aba64-6bbe-4ff5-82e5-4d7e5b9d8ee0?Chapte rNumber=5&FontSize=3&FontType=segoe 38/96
• Account attributes: The Account tab. These properties include logon names,
passwords, and account flags. Many of these attributes can be configured when
you create a new user with the Active Directory Users and Computers snap-in. The
Account Properties section details the account attributes.
• Personal information: The General, Address, Telephones, andOrganization tabs. The General tab contains the name properties that are
configured when you create a user object, along with the basic description and
contact information. The Address and Telephones tabs provide detailed contact
information. The Telephones tab is also where Microsoft chose to put the Notes
field, which corresponds to the info attribute and is a very useful general-purpose
text field that is underused by many enterprises. The Organization tab shows the
job title, department, company, and organizational relationships.
• User configuration management: The Profile tab. Here, you can configure
the user’s profile path, logon script, and home folder.
• Group membership: The Member Of tab. You can add the user to, and remove
the user from, groups and change the user’s primary group. Group memberships
and the primary group will be discussed in another module.
• Remote Desktop Services: The Remote Desktop Services Profile,
Environment, Remote control, Sessions, and Personal Virtual Desktop
tabs. These tabs enable you to configure and manage the user’s experience when
the user is connected to a Remote Desktop Services session.
• Remote access: The Dial-in tab. You can enable and configure remote access
07/06/13 Module 3: Managing Users and Service Accounts
7/15/2019 Module 3_ Managing Users and Service Accounts
http://slidepdf.com/reader/full/module-3-managing-users-and-service-accounts 39/96
https://skillp ipe.courseware -marketplace .com/reader/Print/be1aba64-6bbe-4ff5-82e5-4d7e5b9d8ee0?Chapte rNumber=5&FontSize=3&FontType=segoe 39/96
permission for a user on the Dial-in tab.
• Applications: The COM+ tab. This tab enables you to assign the user to an
Active Directory COM+ partition set. This feature facilitates the management of
distributed applications.
View All Attributes
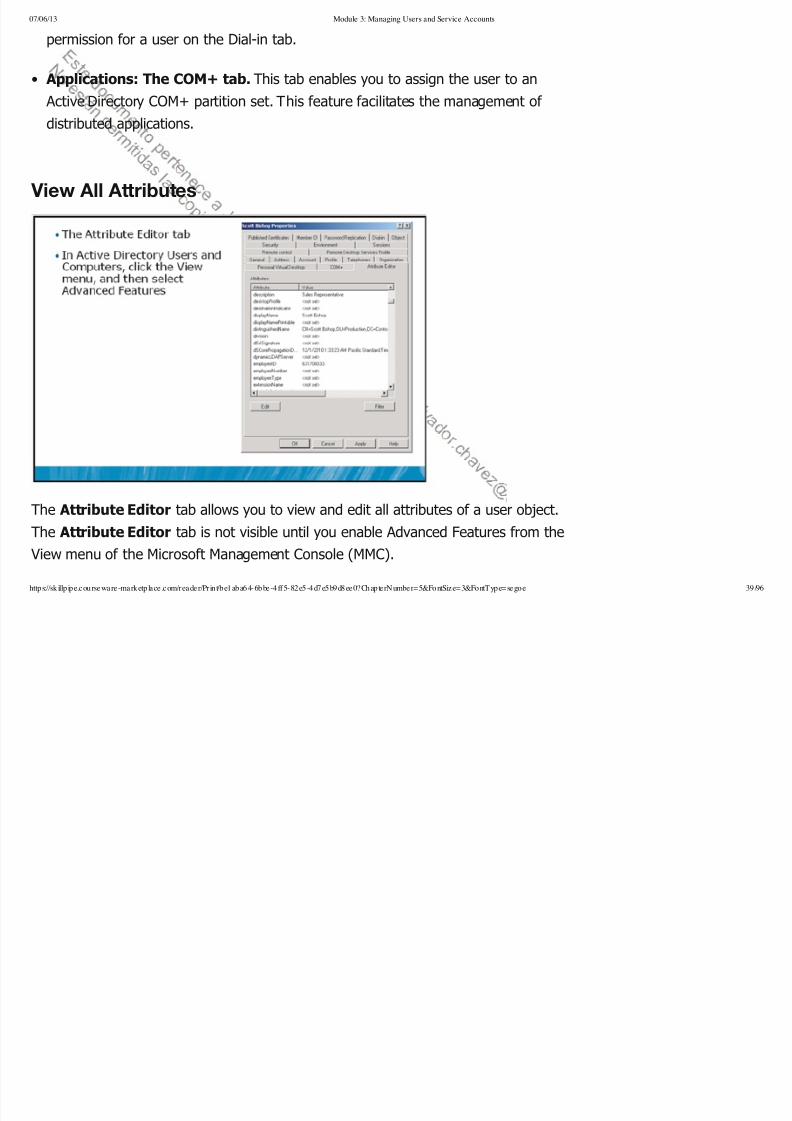
The Attribute Editor tab allows you to view and edit all attributes of a user object.
The Attribute Editor tab is not visible until you enable Advanced Features from the
View menu of the Microsoft Management Console (MMC).
07/06/13 Module 3: Managing Users and Service Accounts

7/15/2019 Module 3_ Managing Users and Service Accounts
http://slidepdf.com/reader/full/module-3-managing-users-and-service-accounts 40/96
https://skillp ipe.courseware -marketplace .com/reader/Print/be1aba64-6bbe-4ff5-82e5-4d7e5b9d8ee0?Chapte rNumber=5&FontSize=3&FontType=segoe 40/96
The Attribute Editor displays all the system attributes of the selected object. The
Filter button enables you to choose to see even more attributes, including backlinks
and constructed attributes.
Backlinks are attributes that result from references to the object from other objects.
The easiest way to understand backlinks is to look at an example: the memberOf
attribute. When a user is added to a group, it is the group’s member attribute that is
changed: The distinguished name of the user is added to this multivalued attribute.
Therefore, the member attribute of a group is called a forward link attribute. A user’s
memberOf attribute is updated automatically by Active Directory when the user is
referred to by a group’s member attribute. You do not ever write directly to the user’s
memberOf attribute—it is dynamically maintained by Active Directory.
A constructed attribute is one of the results from a calculation performed by Active
Directory. An example is the tokenGroups attribute. This attribute is a list of the
security identifiers (SIDs) of all the groups to which the user belongs, including
nested groups. To determine the value of tokenGroups, Active Directory must
calculate the effective membership of the user, which takes a few processor cycles.Therefore, the attribute is not stored as part of the user object or dynamically
maintained. Instead, it is calculated when needed. Because of the processing required
to produce constructed attributes, the Attribute Editor tab does not display them by
default. They also cannot be used in Lightweight Directory Access Protocol (LDAP)
queries.
07/06/13 Module 3: Managing Users and Service Accounts
7/15/2019 Module 3_ Managing Users and Service Accounts
http://slidepdf.com/reader/full/module-3-managing-users-and-service-accounts 41/96
https://skillp ipe.courseware -marketplace .com/reader/Print/be1aba64-6bbe-4ff5-82e5-4d7e5b9d8ee0?Chapte rNumber=5&FontSize=3&FontType=segoe 41/96
Question: Are you using any of the hidden attributes in your organization? If
so, how do you read and modify those attributes?
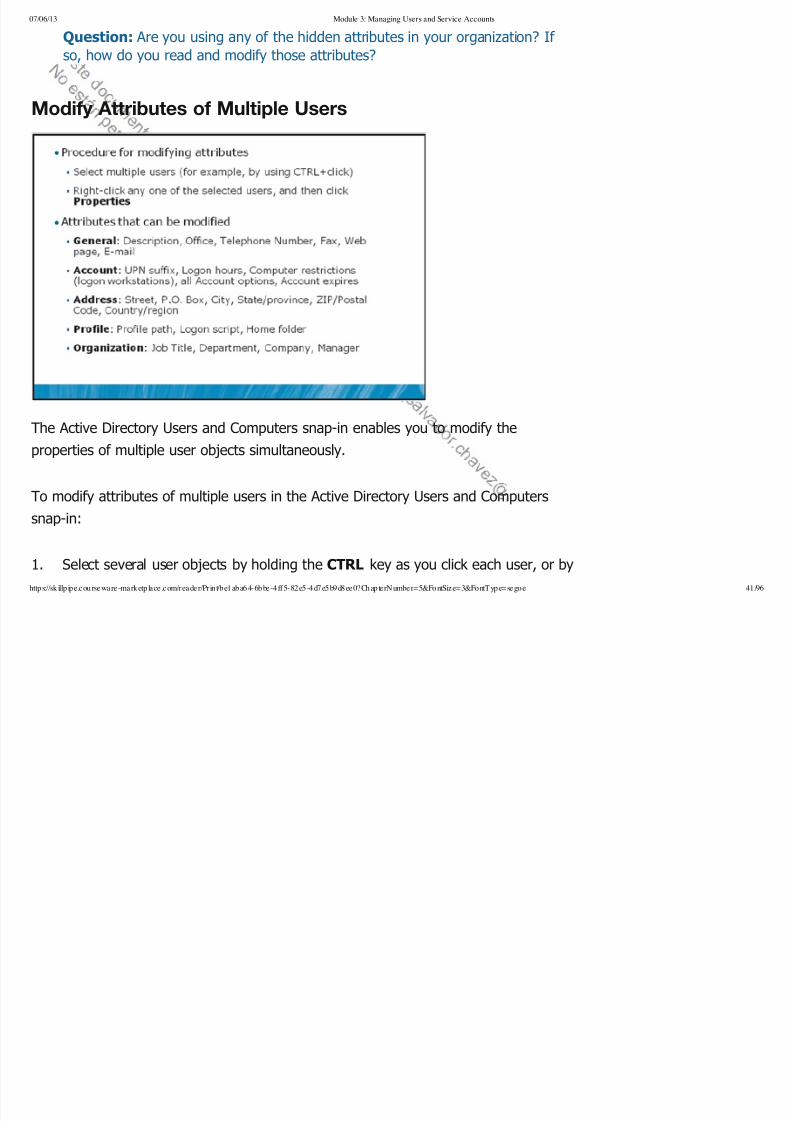
Modify Attributes of Multiple Users
The Active Directory Users and Computers snap-in enables you to modify the
properties of multiple user objects simultaneously.
To modify attributes of multiple users in the Active Directory Users and Computers
snap-in:
1. Select several user objects by holding the CTRL key as you click each user, or by
07/06/13 Module 3: Managing Users and Service Accounts
7/15/2019 Module 3_ Managing Users and Service Accounts
http://slidepdf.com/reader/full/module-3-managing-users-and-service-accounts 42/96
https://skillp ipe.courseware -marketplace .com/reader/Print/be1aba64-6bbe-4ff5-82e5-4d7e5b9d8ee0?Chapte rNumber=5&FontSize=3&FontType=segoe 42/96
using any other multiselection technique.
Be certain that you select only objects of one class, such as users.
2. After you have multiselected the objects, right-click any one of them, and then
click Properties.
When you have multiselected the user objects, a subset of properties is available for
modification:
• General: Description, Office, Telephone Number, Fax, Web page, and E-mail
• Account: UPN suffix, Logon hours, Computer restrictions (logon workstations), all
Account options, and Account expires
• Address: Street, P.O. Box, City, State/province, ZIP/Postal Code, and
Country/region
• Profile: Profile path, Logon script, and Home folder
• Organization: Job Title, Department, Company, and Manager
Modify User Attributes by Using Windows PowerShell
07/06/13 Module 3: Managing Users and Service Accounts

7/15/2019 Module 3_ Managing Users and Service Accounts
http://slidepdf.com/reader/full/module-3-managing-users-and-service-accounts 43/96
https://skillp ipe.courseware -marketplace .com/reader/Print/be1aba64-6bbe-4ff5-82e5-4d7e5b9d8ee0?Chapte rNumber=5&FontSize=3&FontType=segoe 43/96
The Get-ADUser and the Set-ADuser cmdlets can both be used to modify one or
more user objects.
For example, you can use the Get-ADUser cmdlet to specify an existing user (or
multiple users) and then pipe the results to the Set-ADuser cmdlet to modifyattributes. The syntax is shown as follows.
Get-ADUser UserName | Set-ADUser [-parameter value…]
The UserName placeholder specifies the distinguished name of the user that will be
07/06/13 Module 3: Managing Users and Service Accounts

7/15/2019 Module 3_ Managing Users and Service Accounts
http://slidepdf.com/reader/full/module-3-managing-users-and-service-accounts 44/96
https://skillp ipe.courseware -marketplace .com/reader/Print/be1aba64-6bbe-4ff5-82e5-4d7e5b9d8ee0?Chapte rNumber=5&FontSize=3&FontType=segoe 44/96
modified. The Set-ADUser parameters indicate the attributes to change and the new
values. For example, the following command changes the office attribute of Tony
Krijnen.
Get-ADUser Tony.Krijnen | Set-ADUser –office "Stockholm"
Modifying attributes for Several Users at Once
You can use the Get-ADUser cmdlet to view several users, based upon specific
criteria. To perform this task, you need to provide a filter parameter as follows.
Get-ADUser –Filter ‘Name –like “*”’ –SearchBase
“OU=Production, DC=Contoso, DC=Com”
This command displays all users (indicated as an asterisk *) in the Production OU.
You can then pipe this information to the Set-ADUser cmdlet to modify the
attributes as follows.
Get-ADUser –Filter ‘Name –like “*”’ –SearchBase
“OU=Production, DC=Contoso, DC=Com”|Set- ADuser –Department
07/06/13 Module 3: Managing Users and Service Accounts
7/15/2019 Module 3_ Managing Users and Service Accounts
http://slidepdf.com/reader/full/module-3-managing-users-and-service-accounts 45/96
https://skillp ipe.courseware -marketplace .com/reader/Print/be1aba64-6bbe-4ff5-82e5-4d7e5b9d8ee0?Chapte rNumber=5&FontSize=3&FontType=segoe 45/96
“Production” –Company “Contoso, Ltd”
This command modifies the department and company attributes for all users located
in the Production OU.
For a list of parameters that you can set by using the Set-ADuser cmdlet, refer to
the additional reading links in the student companion content.
Demonstration: Create a User Template
Users in a domain often share many similar properties. For example, all sales
07/06/13 Module 3: Managing Users and Service Accounts

7/15/2019 Module 3_ Managing Users and Service Accounts
http://slidepdf.com/reader/full/module-3-managing-users-and-service-accounts 46/96
https://skillp ipe.courseware -marketplace .com/reader/Print/be1aba64-6bbe-4ff5-82e5-4d7e5b9d8ee0?Chapte rNumber=5&FontSize=3&FontType=segoe 46/96
representatives can belong to the same security groups, log on to the network during
similar hours, and have home folders and roaming profiles stored on the same server.
When you create a new user, you can simply copy an existing user account, rather
than create a blank account and populate each property.
Since the days of Windows NT 4.0, Windows has supported the concept of user
account templates. A user account template is a generic user account prepopulated
with common properties. For example, you can create a template account for sales
representatives, which is preconfigured with group memberships, logon hours, a
home folder, and roaming profile path.
To create a user account template, perform the following steps:
1. Create a user account and prepopulate appropriate attributes.
Tip Use a naming standard that makes templates easy to find. For
example, set the full
name to begin with an underscore (_), as in _Sales User. The underscore will
cause all
templates to appear at the top of the list of users in an OU.
2. Disable the template user account.
07/06/13 Module 3: Managing Users and Service Accounts

7/15/2019 Module 3_ Managing Users and Service Accounts
http://slidepdf.com/reader/full/module-3-managing-users-and-service-accounts 47/96
https://skillp ipe.courseware -marketplace .com/reader/Print/be1aba64-6bbe-4ff5-82e5-4d7e5b9d8ee0?Chapte rNumber=5&FontSize=3&FontType=segoe 47/96
The template account itself should not be used to log on to the network, so
ensure that you disable the account.
To create a user based on the template, perform the following steps:
1. Right-click the template user account, and then click Copy.
The Copy Object – User Wizard appears.
2. In the First name box, type the user's first name.
3. In the Last name box, type the user's last name.
4. Modify the Full name value if necessary.
5. In the User logon name box, type the user logon name, and then select the
appropriate user principal name (UPN) suffix in the drop-down list.
6. In the User logon name (pre-Windows 2000) box, type the user's pre-
Windows 2000 user name.
7. Click Next.
8. In the Password box and the Confirm password box, type the user's
password.
9. Select the appropriate password options.
07/06/13 Module 3: Managing Users and Service Accounts
10 If th t f hi h th t i d di bl d

7/15/2019 Module 3_ Managing Users and Service Accounts
http://slidepdf.com/reader/full/module-3-managing-users-and-service-accounts 48/96
https://skillp ipe.courseware -marketplace .com/reader/Print/be1aba64-6bbe-4ff5-82e5-4d7e5b9d8ee0?Chapte rNumber=5&FontSize=3&FontType=segoe 48/96
10. If the user account from which the new user account was copied was disabled,
clear Account is disabled to enable the new account.
Create Users with Templates
It is important to realize that not all attributes are copied. The following list
summarizes the attributes that are copied. It is not useful to configure any other
attributes in the template, because they will not be copied.
• General tab. No properties are copied from the General tab.
07/06/13 Module 3: Managing Users and Service Accounts
Add t b P O b it t t i ZIP t l d d t

7/15/2019 Module 3_ Managing Users and Service Accounts
http://slidepdf.com/reader/full/module-3-managing-users-and-service-accounts 49/96
https://skillp ipe.courseware -marketplace .com/reader/Print/be1aba64-6bbe-4ff5-82e5-4d7e5b9d8ee0?Chapte rNumber=5&FontSize=3&FontType=segoe 49/96
• Address tab. P.O. box, city, state or province, ZIP or postal code, and country or
region are copied. Note that the street address itself is not copied.
• Account tab. Logon hours, logon workstations, account options, and account
expiration are copied.
• Profile tab. Profile path, logon script, home drive, and home folder path are
copied.
• Organization tab. Department, company, and manager are copied.
• Member Of tab. Group membership and primary group are copied.
Note There are other attributes that are copied that are not even visible in
the user
Properties dialog box. These attributes include assistant, division, and employee
type.
Question: What other methods do you use to create new user accounts with
common attributes?
Lab B: Configure User Object Attributes
07/06/13 Module 3: Managing Users and Service Accounts

7/15/2019 Module 3_ Managing Users and Service Accounts
http://slidepdf.com/reader/full/module-3-managing-users-and-service-accounts 50/96
https://skillp ipe.courseware -marketplace .com/reader/Print/be1aba64-6bbe-4ff5-82e5-4d7e5b9d8ee0?Chapte rNumber=5&FontSize=3&FontType=segoe 50/96
Lab Setup
For this lab, you will use the available virtual machine environment. Before you begin
the lab, you must complete the following steps:
1. On the host computer, click Start, point to Administrative Tools, and then
click Hyper-V Manager.
2. In Hyper-V® Manager, click 6425C-NYC-DC1, and in the Actions pane, click
Start.
3. In the Actions pane, click Connect. Wait until the virtual machine starts.
07/06/13 Module 3: Managing Users and Service Accounts
4 Log on by using the following credentials:

7/15/2019 Module 3_ Managing Users and Service Accounts
http://slidepdf.com/reader/full/module-3-managing-users-and-service-accounts 51/96
https://skillp ipe.courseware -marketplace .com/reader/Print/be1aba64-6bbe-4ff5-82e5-4d7e5b9d8ee0?Chapte rNumber=5&FontSize=3&FontType=segoe 51/96
4. Log on by using the following credentials:
• User name: Pat.Coleman
• Password: Pa$$w0rd
• Domain: Contoso
5. Open Windows Explorer and then browse to D:\Labfiles\Lab03b.
6. Run Lab03b_Setup.bat with administrative credentials. Use the account
Pat.Coleman_Admin with the password Pa$$w0rd.
7. The lab setup script runs. When it is complete, press any key to continue.
8. Close the Windows Explorer window, Lab03b.
Lab Scenario
You are the administrator of Contoso, Ltd., an online university for adult education.
Changes in the Sales department require you to modify the attributes of Sales users. Additionally, you decide to make it easier to create new accounts for sales people by
preparing a user account template.
Exercise 1: Examine User Object Attributes
07/06/13 Module 3: Managing Users and Service Accounts
In this exercise you will examine the attributes of a user object
7/15/2019 Module 3_ Managing Users and Service Accounts
http://slidepdf.com/reader/full/module-3-managing-users-and-service-accounts 52/96
https://skillp ipe.courseware -marketplace .com/reader/Print/be1aba64-6bbe-4ff5-82e5-4d7e5b9d8ee0?Chapte rNumber=5&FontSize=3&FontType=segoe 52/96
In this exercise, you will examine the attributes of a user object.
The main tasks for this exercise are as follows:
1. Explore the properties of an Active Directory user object.
2. Explore all attributes of an Active Directory user object.
3. Analyze the naming and display of user object attributes.
Task 1: Explore the properties of an Active Directory user object.
1. Run Active Directory Users and Computers with administrative credentials.
Use the account, Pat.Coleman_Admin, with the password, Pa$$w0rd.
2. Open the properties of Tony Krijnen in the Employees OU.
3. In this sample contoso.com domain, attributes have been configured on the
General, Address, Account and Organization tabs. Examine each of thesetabs, and then close the Properties dialog box.
Task 2: Explore all attributes of an Active Directory user object.
1. Enable the Advanced Features view of the Active Directory Users and
07/06/13 Module 3: Managing Users and Service Accounts
Computers snap in

7/15/2019 Module 3_ Managing Users and Service Accounts
http://slidepdf.com/reader/full/module-3-managing-users-and-service-accounts 53/96
https://skillp ipe.courseware -marketplace .com/reader/Print/be1aba64-6bbe-4ff5-82e5-4d7e5b9d8ee0?Chapte rNumber=5&FontSize=3&FontType=segoe 53/96
Computers snap-in.
2. Examine the Attribute Editor tab of Tony Krijnen's Properties dialog box.
Task 3: Analyze the naming and display of user object attributes.
• For each of the following attributes in the Tony Krijnen Properties dialog box,
identify the corresponding attribute name on the Attribute Editor tab.
Properties
dialog boxtab
Property
name
Attribute name as shown on the
Attribute Editor tab
General First name
General Last name
General Display name
General Description
General Office
General Telephone number
General E-mail
Address Street
Address City
07/06/13 Module 3: Managing Users and Service Accounts

7/15/2019 Module 3_ Managing Users and Service Accounts
http://slidepdf.com/reader/full/module-3-managing-users-and-service-accounts 54/96
https://skillp ipe.courseware -marketplace .com/reader/Print/be1aba64-6bbe-4ff5-82e5-4d7e5b9d8ee0?Chapte rNumber=5&FontSize=3&FontType=segoe 54/96
Address ZIP/Postal Code
Address Country
Organization Job Title
Organization Department
Organization Company
Questions:1. Use the Attribute Editor tab to answer the following questions.
• Does the employeeID attribute, shown on the Attribute Editor tab,show up on a normal tab of the Properties dialog box? If so, which
one? What about carLicense?
• What is the distinguished name (DN) of Tony Krijnen's object?
• What is Tony's UPN? On which other tab does the attribute appear, and
how is it labeled and displayed?
2. Why might the sn attribute be named sn?
3. What is the use of the c attribute?
Results: In this exercise, you examined user object attributes.
07/06/13 Module 3: Managing Users and Service Accounts
Exercise 2: Manage User Object Attributes

7/15/2019 Module 3_ Managing Users and Service Accounts
http://slidepdf.com/reader/full/module-3-managing-users-and-service-accounts 55/96
https://skillp ipe.courseware -marketplace .com/reader/Print/be1aba64-6bbe-4ff5-82e5-4d7e5b9d8ee0?Chapte rNumber=5&FontSize=3&FontType=segoe 55/96
Exercise 2: Manage User Object Attributes
In this exercise, you will manage the attributes of user objects.
The main tasks for this exercise are as follows:
1. Modify the attributes of multiple user objects.
2. Manage user attributes from the command prompt.
Task 1: Modify the attributes of multiple user objects.
A special Marketing task force has been established by Ariane Berthier, the Vice
President of Marketing. Members of the task force are being relocated to
Headquarters and will report directly to Ariane.
1. Select the following users in the Employees OU: Adam Barr, Adrian Lannin,
Ajay Manchepalli, Ajay Solanki, Allan Guinot, Anav Silverman, and
András Tóth.
2. Configure the following properties for the users:
• Office: Headquarters.
07/06/13 Module 3: Managing Users and Service Accounts
• Description: Marketing Task Force
7/15/2019 Module 3_ Managing Users and Service Accounts
http://slidepdf.com/reader/full/module-3-managing-users-and-service-accounts 56/96
https://skillp ipe.courseware -marketplace .com/reader/Print/be1aba64-6bbe-4ff5-82e5-4d7e5b9d8ee0?Chapte rNumber=5&FontSize=3&FontType=segoe 56/96
• Description: Marketing Task Force.
• Manager: Ariane Berthier.
3. After changing the attributes, open the properties of Adam Barr and examine the
attributes you just changed.
4. The Manager attribute is a linked attribute. The other side of the link is the
Direct Reports attribute. Open the properties of Ariane Berthier and examine
the Direct Reports.
Task 2: Manage user attributes by using Windows PowerShell.
1. Open the Active Directory Module for Windows PowerShell with
administrative credentials. Use the account, Pat.Coleman_Admin, with the
password, Pa$$w0rd.
2. Use Windows PowerShell to list the e-mail addresses and description of all users
in the Marketing Task Force.
Tip Users in the Marketing Task Force share a common Description
property.
3. Use Windows PowerShell to configure all Marketing Task Force members to have
07/06/13 Module 3: Managing Users and Service Accounts
a home drive mapped to U: and a home directory mapped to \\NYC-

7/15/2019 Module 3_ Managing Users and Service Accounts
http://slidepdf.com/reader/full/module-3-managing-users-and-service-accounts 57/96
https://skillp ipe.courseware -marketplace .com/reader/Print/be1aba64-6bbe-4ff5-82e5-4d7e5b9d8ee0?Chapte rNumber=5&FontSize=3&FontType=segoe 57/96
a home drive mapped to U: and a home directory mapped to \\NYC
DC1\Taskforceusers\%UserName%.
4. In Active Directory Users and Computers, confirm that the changes you
made were applied correctly by examining the properties of Adam Barr.
Results: In this exercise, you managed user objects by using Active Directory
Users and Computers and Windows PowerShell.
Exercise 3: Create Users from a Template
In this exercise, you will create a user account template and then generate
a new user account based on that template.
The main tasks for this exercise are as follows:
1. Create a user account template for Sales.
2. Create a new user account based on a template.
Task 1: Create a user account template for Sales.
07/06/13 Module 3: Managing Users and Service Accounts
• In the Employees OU create a template account for new sales people with the

7/15/2019 Module 3_ Managing Users and Service Accounts
http://slidepdf.com/reader/full/module-3-managing-users-and-service-accounts 58/96
https://skillp ipe.courseware -marketplace .com/reader/Print/be1aba64-6bbe-4ff5-82e5-4d7e5b9d8ee0?Chapte rNumber=5&FontSize=3&FontType=segoe 58/96
• In the Employees OU, create a template account for new sales people with the
following properties:
• First Name and Last Name: blank
• Full Name: _Sales User (note the underscore at the beginning of the name)
• User Logon Name: Template.Sales
• Password: Pa$$w0rd
• User must change password at next logon
• Account is disabled
• Member of: Sales
• Department: Sales
• Company: Contoso, Ltd.
• Manager: Anibal Sousa
• Account Expires: Last day of the current year
Task 2: Create a new user account based on a template.
• In the Employees OU, create an account for a new sales person, based on the
07/06/13 Module 3: Managing Users and Service Accounts
Sales User template. The account should have the following properties:

7/15/2019 Module 3_ Managing Users and Service Accounts
http://slidepdf.com/reader/full/module-3-managing-users-and-service-accounts 59/96
https://skillp ipe.courseware -marketplace .com/reader/Print/be1aba64-6bbe-4ff5-82e5-4d7e5b9d8ee0?Chapte rNumber=5&FontSize=3&FontType=segoe 59/96
_Sales User template. The account should have the following properties:
• First Name: Rob
• Last Name: Young
• User logon name: Rob.Young
• Password: Pa$$w0rd
• Account is enabled
Results: In this exercise, you created a user account named, Rob Young, in theEmployees OU. The account has all the attributes you configured for the _Sales
User template.
Lab Review Questions
Question: What methods have you learned for modifying attributes of new and
existing
users?
Lesson 3: Automate User Account Creation
07/06/13 Module 3: Managing Users and Service Accounts
7/15/2019 Module 3_ Managing Users and Service Accounts
http://slidepdf.com/reader/full/module-3-managing-users-and-service-accounts 60/96
https://skillp ipe.courseware -marketplace .com/reader/Print/be1aba64-6bbe-4ff5-82e5-4d7e5b9d8ee0?Chapte rNumber=5&FontSize=3&FontType=segoe 60/96
Although the procedures discussed in Lessons 1 and 2 can be applied to create a
small number of users, you will need more advanced techniques to automate the
creation of user accounts when a large number of users must be added to the
domain. In this lesson, you will learn several of these techniques.
Objectives
After completing this lesson, you will be able to:
• Export user attributes with CSVDE.
• Import users with CSVDE.
07/06/13 Module 3: Managing Users and Service Accounts
• Import users with LDIFDE.

7/15/2019 Module 3_ Managing Users and Service Accounts
http://slidepdf.com/reader/full/module-3-managing-users-and-service-accounts 61/96
https://skillp ipe.courseware -marketplace .com/reader/Print/be1aba64-6bbe-4ff5-82e5-4d7e5b9d8ee0?Chapte rNumber=5&FontSize=3&FontType=segoe 61/96
Import users with LDIFDE.
• Import users with Windows PowerShell.
Export Users with CSVDE
CSVDE is a command-line tool that exports or imports Active Directory objects to or
from a comma-delimited text file (also known as a comma-separated value text file,
or .csv file). Comma-delimited files can be created, modified, and opened with familiar
tools such as Notepad and Microsoft Office Excel®.
07/06/13 Module 3: Managing Users and Service Accounts
The following is the basic syntax of the CSVDE command for export.
7/15/2019 Module 3_ Managing Users and Service Accounts
http://slidepdf.com/reader/full/module-3-managing-users-and-service-accounts 62/96
https://skillp ipe.courseware -marketplace .com/reader/Print/be1aba64-6bbe-4ff5-82e5-4d7e5b9d8ee0?Chapte rNumber=5&FontSize=3&FontType=segoe 62/96
g y p
csvde -f filename
However, this command will export all objects in your Active Directory domain. You
will want to limit the scope of the export, which you can do with the following four
parameters:
• -d RootDN . Specifies the distinguished name of the container from which the
export will begin. The default is the domain itself.
• -p SearchScope . Specifies the scope of the search relative to the container specified
by -d .
SearchScope can be either base (this object only), onelevel (objects within this
container), or subtree (this container and all subcontainers). The default is subtree .
• -r Filter . Filters the objects returned within the scope configured by -d and -p . Filteris an LDAP query syntax. You will work with a filter in the lab for this lesson. The
LDAP query syntax is beyond the scope of this course. For more information, see
http://go.microsoft.com/fwlink/?LinkId=168752.
• -l ListOfAttributes . Specifies the attributes that will be exported. Use the LDAP
name for each attribute, separated by a comma, as in
07/06/13 Module 3: Managing Users and Service Accounts
-l DN,objectClass,sAMAccountName,sn,givenName,userPrincipalName
7/15/2019 Module 3_ Managing Users and Service Accounts
http://slidepdf.com/reader/full/module-3-managing-users-and-service-accounts 63/96
https://skillp ipe.courseware -marketplace .com/reader/Print/be1aba64-6bbe-4ff5-82e5-4d7e5b9d8ee0?Chapte rNumber=5&FontSize=3&FontType=segoe 63/96
, j , , ,g , p
The output of a CSVDE export lists the LDAP attribute names on the first line. Each
object follows, one per line, and must contain exactly the attributes listed on the first
line, as illustrated in the following example.
DN,objectClass,sn,givenName,sAMAccountName,userPrincipalName
"CN=David Jones,OU=Employees,OU=User
Accounts,DC=contoso,DC=com",user,Jones,David,david.jones,[email protected]
"CN=Lisa Andrews,OU=Employees,OU=User
Accounts,DC=contoso,DC=com",user,Andrews,Lisa,lisa.andrews,[email protected]
Import Users with CSVDE
07/06/13 Module 3: Managing Users and Service Accounts

7/15/2019 Module 3_ Managing Users and Service Accounts
http://slidepdf.com/reader/full/module-3-managing-users-and-service-accounts 64/96
https://skillp ipe.courseware -marketplace .com/reader/Print/be1aba64-6bbe-4ff5-82e5-4d7e5b9d8ee0?Chapte rNumber=5&FontSize=3&FontType=segoe 64/96
CSVDE can also create user accounts by importing a .csv file. If you have user
information in existing Office Excel or Microsoft Office Access® databases, you will
find that CSVDE is a powerful way to take advantage of that information to automate
user account creation.
The following is the basic syntax of the CSVDE command for import.
csvde -i -f filename -k
The -i parameter specifies import mode; without it, the default mode of CSVDE is
07/06/13 Module 3: Managing Users and Service Accounts
export. The -f parameter identifies the file name to import from or export to. The -k

7/15/2019 Module 3_ Managing Users and Service Accounts
http://slidepdf.com/reader/full/module-3-managing-users-and-service-accounts 65/96
https://skillp ipe.courseware -marketplace .com/reader/Print/be1aba64-6bbe-4ff5-82e5-4d7e5b9d8ee0?Chapte rNumber=5&FontSize=3&FontType=segoe 65/96
parameter is useful during import operations because it instructs CSVDE to ignore
errors, including Object Already Exists
The import file itself is a comma-delimited text file (.csv or .txt) in which the first line
defines the imported attributes by their LDAP attribute names. Each object follows,
one per line, and must contain exactly the attributes listed on the first line, for
example, a sample file will be as follows.
DN,objectClass,sn,givenName,sAMAccountName,userPrincipalName
"CN=David Jones,OU=Employees,OU=User
Accounts,DC=contoso,DC=com",user,Jones,David,david.jones,[email protected]
"CN=Lisa Andrews,OU=Employees,OU=User
Accounts,DC=contoso,DC=com",user,Andrews,Lisa,lisa.andrews,[email protected]
This file, when imported by the CSVDE command, will create a user object for Lisa
Andrews in the Employees OU. The user logon names, last name and first name, are
configured by the file. You cannot use the CSVDE to import passwords, and without a
password, the user account will be disabled initially. After you have reset the
password, you can enable the object.
For more information about CSVDE, including details regarding its parameters and
usage to export directory objects, type csvde /? or search the Windows Server 2008
07/06/13 Module 3: Managing Users and Service Accounts
Help and Support Center.

7/15/2019 Module 3_ Managing Users and Service Accounts
http://slidepdf.com/reader/full/module-3-managing-users-and-service-accounts 66/96
https://skillp ipe.courseware -marketplace .com/reader/Print/be1aba64-6bbe-4ff5-82e5-4d7e5b9d8ee0?Chapte rNumber=5&FontSize=3&FontType=segoe 66/96
Import Users with LDIFDE
You can also use LDIFDE.exe to import or export Active Directory objects, including
users. LDIF is a draft Internet standard for file format that can be used to perform
batch operations against directories that conform to the LDAP standards. LDIF
supports both import and export operations, and batch operations that modify
objects in the directory. The LDIFDE command implements these batch operations by
using LDIF files.
The LDIF file format consists of a block of lines that together constitute a single
07/06/13 Module 3: Managing Users and Service Accounts
operation. Multiple operations in a single file are separated by a blank line. Each line,

7/15/2019 Module 3_ Managing Users and Service Accounts
http://slidepdf.com/reader/full/module-3-managing-users-and-service-accounts 67/96
https://skillp ipe.courseware -marketplace .com/reader/Print/be1aba64-6bbe-4ff5-82e5-4d7e5b9d8ee0?Chapte rNumber=5&FontSize=3&FontType=segoe 67/96
comprising an operation, consists of an attribute name followed by a colon and the
value of the attribute. For example, suppose you wanted to import user objects for
two sales representatives named Bonnie Kearney and Bobby Moore. The contents of
the LDIF file would look similar to the following example.
dn: CN=Bonnie Kearney,OU=Employees,OU=User
Accounts,DC=contoso,DC=com changetype: add objectClass: top
objectClass: person objectClass: organizationalPerson
objectClass: user cn: Bonnie Kearney sn: Kearney title:
Operations description: Operations (London) givenName:
Bonnie displayName: Kearney, Bonnie company: Contoso, Ltd.
sAMAccountName: bonnie.kearney userPrincipalName:
[email protected] mail: [email protected]
dn: CN=Bobby Moore,OU=Employees,OU=User
Accounts,DC=contoso,DC=com changetype: add objectClass: top
objectClass: person objectClass: organizationalPerson
objectClass: user cn: Bobby Moore sn: Moore title: Legal
description: Legal (New York) givenName: Bobby displayName:
Moore, Bobby company: Contoso, Ltd. sAMAccountName:
bobby.moore userPrincipalName: [email protected]
mail: [email protected]
07/06/13 Module 3: Managing Users and Service Accounts
Each operation begins with the DN attribute of the object that is the target of the

7/15/2019 Module 3_ Managing Users and Service Accounts
http://slidepdf.com/reader/full/module-3-managing-users-and-service-accounts 68/96
https://skillp ipe.courseware -marketplace .com/reader/Print/be1aba64-6bbe-4ff5-82e5-4d7e5b9d8ee0?Chapte rNumber=5&FontSize=3&FontType=segoe 68/96
operation. The next line, changeType, specifies the type of operation: add, modify,
or delete.
As you can see, the LDIF file format is not as intuitive or familiar as the comma-
separated text format. However, because the LDIF format is also a standard, many
directory services and databases can export LDIF files.
After creating or obtaining an LDIF file, you can perform the operations specified by
the file, by using the LDIFDE command. From a command prompt, type ldifde /? for
usage information. The two most important switches for the LDIFDE command are:
• -i. Turns on import mode. Without this parameter, LDIFDE exports information.
• -f filename . The file from which to import, or to which to export.
For example, the following command will import objects from the file named
Newusers.ldf.
ldifde –i –f newusers.ldf
The command accepts a variety of modifications by using parameters. The most
07/06/13 Module 3: Managing Users and Service Accounts
useful parameters are summarized in the following table.

7/15/2019 Module 3_ Managing Users and Service Accounts
http://slidepdf.com/reader/full/module-3-managing-users-and-service-accounts 69/96
https://skillp ipe.courseware -marketplace .com/reader/Print/be1aba64-6bbe-4ff5-82e5-4d7e5b9d8ee0?Chapte rNumber=5&FontSize=3&FontType=segoe 69/96
Command Usage
General parameters
-i Import mode (Default is export mode)
-f filename Import or export filename
-s servername The domain controller to bind to for the query
-c FromDN ToDN Convert occurrences of FromDN to ToDN . For example, this is useful when importing
objects from another domain.
-v Turn on verbose mode
-j path Log file location
-? Help
Export-specific parameters
-d RootDN The root of the LDAP search. The default is the root of the domain.
-r Filter LDAP search filter. The default is (objectClass=*), meaning all objects.
-p SearchScope The scope, or depth, of the search. Can be subtree (the container and all child
containers), base (the immediate child objects of the container only), or onelevel (the
container and its immediate child containers).
-l list Comma-separated list of attributes to include in export for resulting objects. Useful
if you want to export a limited number of attributes.
07/06/13 Module 3: Managing Users and Service Accounts
-o list List of attributes (comma-separated) to omit from export for resulting objects. Useful
if t t t ll b t f tt ib t
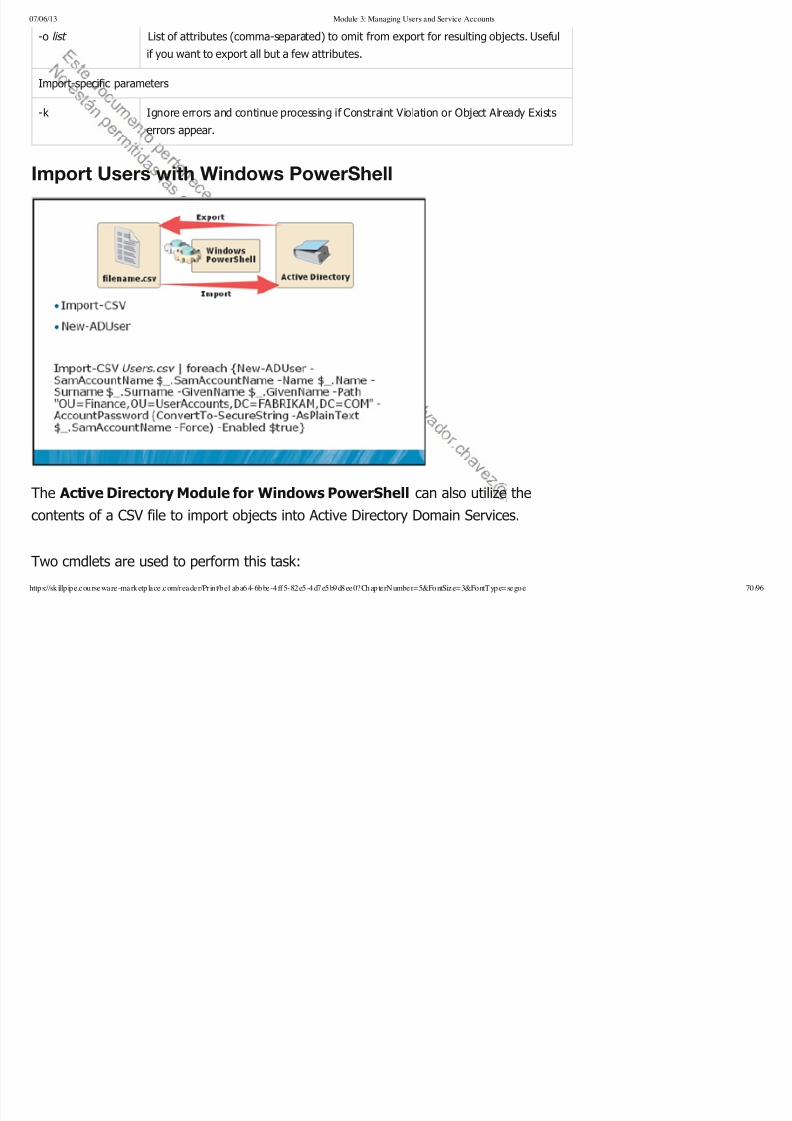
7/15/2019 Module 3_ Managing Users and Service Accounts
http://slidepdf.com/reader/full/module-3-managing-users-and-service-accounts 70/96
https://skillp ipe.courseware -marketplace .com/reader/Print/be1aba64-6bbe-4ff5-82e5-4d7e5b9d8ee0?Chapte rNumber=5&FontSize=3&FontType=segoe 70/96
if you want to export all but a few attributes.
Import-specific parameters
-k Ignore errors and continue processing if Constraint Violation or Object Already Exists
errors appear.
Import Users with Windows PowerShell
The Active Directory Module for Windows PowerShell can also utilize the
contents of a CSV file to import objects into Active Directory Domain Services.
Two cmdlets are used to perform this task:
07/06/13 Module 3: Managing Users and Service Accounts
• Import-CSV . This cmdlet creates objects from CSV files that can then be piped

7/15/2019 Module 3_ Managing Users and Service Accounts
http://slidepdf.com/reader/full/module-3-managing-users-and-service-accounts 71/96
https://skillp ipe.courseware -marketplace .com/reader/Print/be1aba64-6bbe-4ff5-82e5-4d7e5b9d8ee0?Chapte rNumber=5&FontSize=3&FontType=segoe 71/96
into other PowerShell cmdlets.
• New-ADUser . This cmdlet is used to create the objects that have been imported
from the Import-CSV cmdlet.
The following example shows how to use these two cmdlets to create a large number
of users with specific attributes in AD DS.
Import-CSV Users.csv | foreach New-ADUser -SamAccountName
$_.SamAccountName -Name $_.Name -Surname $_.Surname -
GivenName $_.GivenName -Path
"OU=Finance,OU=UserAccounts,DC=FABRIKAM,DC=COM" -
AccountPassword (ConvertTo-SecureString -AsPlainText
$_.SamAccountName -Force) -Enabled $true
In the example, the Users.csv file is imported by using the Import-CSV cmdlet. Each
entry within the Users.csv file is then passed to the New-ADUser cmdlet. Attributes
are listed and are provided by the matching attribute values in the CSV file.
Lab C: Automate User Account Creation
07/06/13 Module 3: Managing Users and Service Accounts

7/15/2019 Module 3_ Managing Users and Service Accounts
http://slidepdf.com/reader/full/module-3-managing-users-and-service-accounts 72/96
https://skillp ipe.courseware -marketplace .com/reader/Print/be1aba64-6bbe-4ff5-82e5-4d7e5b9d8ee0?Chapte rNumber=5&FontSize=3&FontType=segoe 72/96
Lab Setup
For this lab, you will use the available virtual machine environment. Before you begin
the lab, you must complete the following steps:
1. On the host computer, click Start, point to Administrative Tools, and thenclick Hyper-V Manager.
2. In Hyper-V™ Manager, click 6425C-NYC-DC1, and in the Actions pane, click
Start.
3. In the Actions pane, click Connect. Wait until the virtual machine starts.
07/06/13 Module 3: Managing Users and Service Accounts
4. Log on by using the following credentials:

7/15/2019 Module 3_ Managing Users and Service Accounts
http://slidepdf.com/reader/full/module-3-managing-users-and-service-accounts 73/96
https://skillp ipe.courseware -marketplace .com/reader/Print/be1aba64-6bbe-4ff5-82e5-4d7e5b9d8ee0?Chapte rNumber=5&FontSize=3&FontType=segoe 73/96
• User name: Pat.Coleman
• Password: Pa$$w0rd
• Domain: Contoso
5. Open Windows Explorer and then browse to D:\Labfiles\Lab03c.
6. Run Lab03c_Setup.bat with administrative credentials. Use the account
Pat.Coleman_Admin with the password Pa$$w0rd.
7. The lab setup script runs. When it is complete, press any key to continue.
8. Close the Windows Explorer window, Lab03c.
Lab Scenario
You are the administrator of Contoso, Ltd., an online university for adult education.
You are hiring several new employees. The Human Resources department hasprovided you with extracts from their database, in both comma-delimited text format
and in LDIF format. You want to import those data files to create user accounts for
the new hires.
Exercise 1: Export and Import Users with CSVDE
07/06/13 Module 3: Managing Users and Service Accounts
In this exercise, you will use the CSVDE command to export user attributes

7/15/2019 Module 3_ Managing Users and Service Accounts
http://slidepdf.com/reader/full/module-3-managing-users-and-service-accounts 74/96
https://skillp ipe.courseware -marketplace .com/reader/Print/be1aba64-6bbe-4ff5-82e5-4d7e5b9d8ee0?Chapte rNumber=5&FontSize=3&FontType=segoe 74/96
and to create new user accounts from a comma-delimited text file.
The main tasks for this exercise are as follows:
1. Export users with CSVDE.
2. Import users with CSVDE.
Task 1: Export users with CSVDE.
1.Open the Command Prompt with administrative credentials. Use the account,
Pat.Coleman_Admin, with the password, Pa$$w0rd.
2.Type the following command, and then press Enter.
csvde -f D:\LABFILES\LAB03C\UsersNamedApril.csv -r "
(name=April*)" -l
DN,objectClass,sAMAccountName,sn,givenName,userPrincipalName
3.Open D:\LABFILES\LAB03C\UsersNamedApril.csv in Notepad.
4.Examine the file, and then close it.
07/06/13 Module 3: Managing Users and Service Accounts
Task 2: Import users with CSVDE.

7/15/2019 Module 3_ Managing Users and Service Accounts
http://slidepdf.com/reader/full/module-3-managing-users-and-service-accounts 75/96
https://skillp ipe.courseware -marketplace .com/reader/Print/be1aba64-6bbe-4ff5-82e5-4d7e5b9d8ee0?Chapte rNumber=5&FontSize=3&FontType=segoe 75/96
p
1. Open D:\LABFILES\LAB03C\NewUsers.csv with Notepad. Examine the
information about the users listed in the file.
2. In the command prompt, type the following command and then press Enter.
csvde -i -f D:\Labfiles\LAB03C\NewUsers.csv -k
The two users are imported.
3. Run Active Directory Users and Computers with administrative credentials.
Use the account, Pat.Coleman_Admin, with the password, Pa$$w0rd.
Confirm that the users were created successfully.
• If you have had the Active Directory Users and Computers snap-in open
during this exercise, you might have to refresh your view to see the newly
created accounts.
4. Examine the accounts to confirm that first name, last name, user principal name,
and pre-Windows 2000 logon name are populated according to the instructions
in NewUsers.csv.
07/06/13 Module 3: Managing Users and Service Accounts
5. Reset the passwords of the two accounts to Pa$$w0rd.
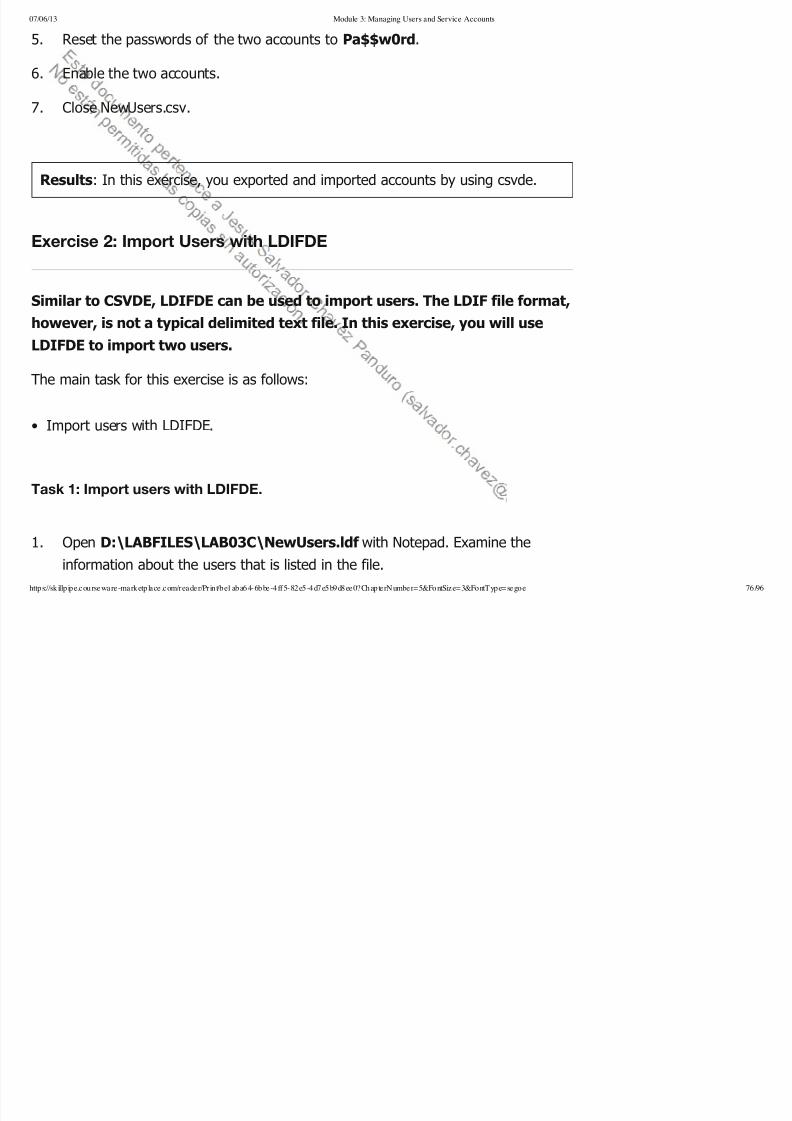
7/15/2019 Module 3_ Managing Users and Service Accounts
http://slidepdf.com/reader/full/module-3-managing-users-and-service-accounts 76/96
https://skillp ipe.courseware -marketplace .com/reader/Print/be1aba64-6bbe-4ff5-82e5-4d7e5b9d8ee0?Chapte rNumber=5&FontSize=3&FontType=segoe 76/96
6. Enable the two accounts.
7. Close NewUsers.csv.
Results: In this exercise, you exported and imported accounts by using csvde.
Exercise 2: Import Users with LDIFDE
Similar to CSVDE, LDIFDE can be used to import users. The LDIF file format,
however, is not a typical delimited text file. In this exercise, you will use
LDIFDE to import two users.
The main task for this exercise is as follows:
• Import users with LDIFDE.
Task 1: Import users with LDIFDE.
1. Open D:\LABFILES\LAB03C\NewUsers.ldf with Notepad. Examine the
information about the users that is listed in the file.
07/06/13 Module 3: Managing Users and Service Accounts
2. Type the following command, and then press Enter.

7/15/2019 Module 3_ Managing Users and Service Accounts
http://slidepdf.com/reader/full/module-3-managing-users-and-service-accounts 77/96
https://skillp ipe.courseware -marketplace .com/reader/Print/be1aba64-6bbe-4ff5-82e5-4d7e5b9d8ee0?Chapte rNumber=5&FontSize=3&FontType=segoe 77/96
ldifde -i -f D:\Labfiles\LAB03C\NewUsers.ldf -k
The two users are imported.
3. In Active Directory Users and Computers, confirm that the users were
created successfully.
• If you have had the Active Directory Users and Computers snap-in open
during this exercise, you might have to refresh your view to see the newly
created accounts.
4. Examine the accounts to confirm that user properties are populated according to
the instructions in NewUsers.ldf.
5. Reset the passwords of the two accounts to Pa$$w0rd.
6. Enable the two accounts.
7. Close NewUsers.ldf.
07/06/13 Module 3: Managing Users and Service Accounts
Results: In this exercise, you imported the accounts for Bobby Moore, and Bonnie

7/15/2019 Module 3_ Managing Users and Service Accounts
http://slidepdf.com/reader/full/module-3-managing-users-and-service-accounts 78/96
https://skillp ipe.courseware -marketplace .com/reader/Print/be1aba64-6bbe-4ff5-82e5-4d7e5b9d8ee0?Chapte rNumber=5&FontSize=3&FontType=segoe 78/96
Kearney.
Exercise 3: Import Users by Using Windows PowerShell
The main task for this exercise is as follows:
• Import users with PowerShell.
Task 1: Import users with PowerShell.
1. Open Active Directory Users and Computers and under contoso.com create a
new organizational unit named Import Users. If prompted for credentials, use
Contoso\Administrator with the password of Pa$$w0rd. Close Active
Directory Users and Computers when you are finished
2. Open D:\LABFILES\LAB03C\ImportUsers.ps1 with Notepad. Examine the
contents of the file.
3. Next to $impfile, change “path and filename to csv” to
“D:\LABFILES\LAB03C\ImportUsers.csv” and then save the file.
4. Open the Active Directory Module for Windows PowerShell with administrative
07/06/13 Module 3: Managing Users and Service Accounts
credentials. Use CONTOSO\administrator with the password of Pa$$w0rd.

7/15/2019 Module 3_ Managing Users and Service Accounts
http://slidepdf.com/reader/full/module-3-managing-users-and-service-accounts 79/96
https://skillp ipe.courseware -marketplace .com/reader/Print/be1aba64-6bbe-4ff5-82e5-4d7e5b9d8ee0?Chapte rNumber=5&FontSize=3&FontType=segoe 79/96
5. Type the following commands, and then press Enter after each command. When
prompted to change the execution policy press enter to accept the default option
of “Y”.
Set-ExecutionPolicy remotesigned
D:\labfiles\Lab03c\importusers.ps1
6. At the password prompt, type Pa$$w0rd.
7. Open Active Directory Users and Computers and verify that the user accountshave been imported into the Import Users OU.
Results: In this exercise, you imported user accounts by using PowerShell.
Lab Review Question
Question: What scenarios lend themselves to importing users with CSVDE and
LDIFDE?
Lesson 4: Create and Configure Managed Service
07/06/13 Module 3: Managing Users and Service Accounts
Accounts

7/15/2019 Module 3_ Managing Users and Service Accounts
http://slidepdf.com/reader/full/module-3-managing-users-and-service-accounts 80/96
https://skillp ipe.courseware -marketplace .com/reader/Print/be1aba64-6bbe-4ff5-82e5-4d7e5b9d8ee0?Chapte rNumber=5&FontSize=3&FontType=segoe 80/96
Note The content in this lesson only applies to Windows Server 2008 R2.
One common issue that most organizations face is how to securely manage accounts
used for network services. Many applications use services that require an account for
service startup and authentication. Just like normal user accounts, service accounts
also need to be managed effectively to ensure security and reliability.
Objectives
07/06/13 Module 3: Managing Users and Service Accounts
After completing this lesson, you will be able to:

7/15/2019 Module 3_ Managing Users and Service Accounts
http://slidepdf.com/reader/full/module-3-managing-users-and-service-accounts 81/96
https://skillp ipe.courseware -marketplace .com/reader/Print/be1aba64-6bbe-4ff5-82e5-4d7e5b9d8ee0?Chapte rNumber=5&FontSize=3&FontType=segoe 81/96
• Describe the challenges of using standard user accounts for services.
• Describe what a managed service account is.
• Configure and administer managed service accounts.
Challenges of Using Standard User Accounts for Services
Many applications such as Microsoft SQL® Server or Microsoft Exchange Server
contain services that are installed on the server that hosts the application. These
07/06/13 Module 3: Managing Users and Service Accounts
services typically run at server startup or are triggered by other events. Services often
run in the background and do not require any user interaction

7/15/2019 Module 3_ Managing Users and Service Accounts
http://slidepdf.com/reader/full/module-3-managing-users-and-service-accounts 82/96
https://skillp ipe.courseware -marketplace .com/reader/Print/be1aba64-6bbe-4ff5-82e5-4d7e5b9d8ee0?Chapte rNumber=5&FontSize=3&FontType=segoe 82/96
run in the background and do not require any user interaction.
For a service to start up and authenticate, a service account is used. A service account
may be an account that is local to the computer, such as the built-in Local Service,
Network Service, or Local System accounts. A service account may also be configuredto use a domain-based account located in AD DS.
To help centralize administration, many organizations choose to use a domain-based
account to run application services. This does provide some benefit over using a local
account; however, there are a number of associated challenges, such as the following:
• Extra administration effort to securely manage the service account password. This
includes tasks such as changing the password and resolving situations that cause
an account lockout. Service accounts are also typically configured to have
passwords do not expire, which may go against the security policy of your
organization.
• Difficult to determine where a domain-based account is being used as a service
account. A standard user account may be used for multiple services on various
servers throughout the environment. A simple task such as changing the password
may cause authentication issues for some applications. It is important to know
where and how a standard user account is being used when it is associated with an
application service.
07/06/13 Module 3: Managing Users and Service Accounts
• Extra administration effort to manage the service principal name (SPN). Using a
standard user account may require manual administration of the service principal

7/15/2019 Module 3_ Managing Users and Service Accounts
http://slidepdf.com/reader/full/module-3-managing-users-and-service-accounts 83/96
https://skillp ipe.courseware -marketplace .com/reader/Print/be1aba64-6bbe-4ff5-82e5-4d7e5b9d8ee0?Chapte rNumber=5&FontSize=3&FontType=segoe 83/96
standard user account may require manual administration of the service principal
name (SPN). If the logon account of the service changes, the computer name is
changed, or if a DNS host name property is modified, the SPN registrations may
need to be manually modified to reflect the change. A misconfigured SPN causes
authentication problems with the application service.
To meet these challenges, Windows Server 2008 R2 and Windows 7 introduces a new
object called a managed service account (also called virtual service accounts in
Windows 7). The following topics provide information on the requirements and use of
managed service accounts in Windows Server 2008 R2.
What Is a Managed Service Account?
07/06/13 Module 3: Managing Users and Service Accounts
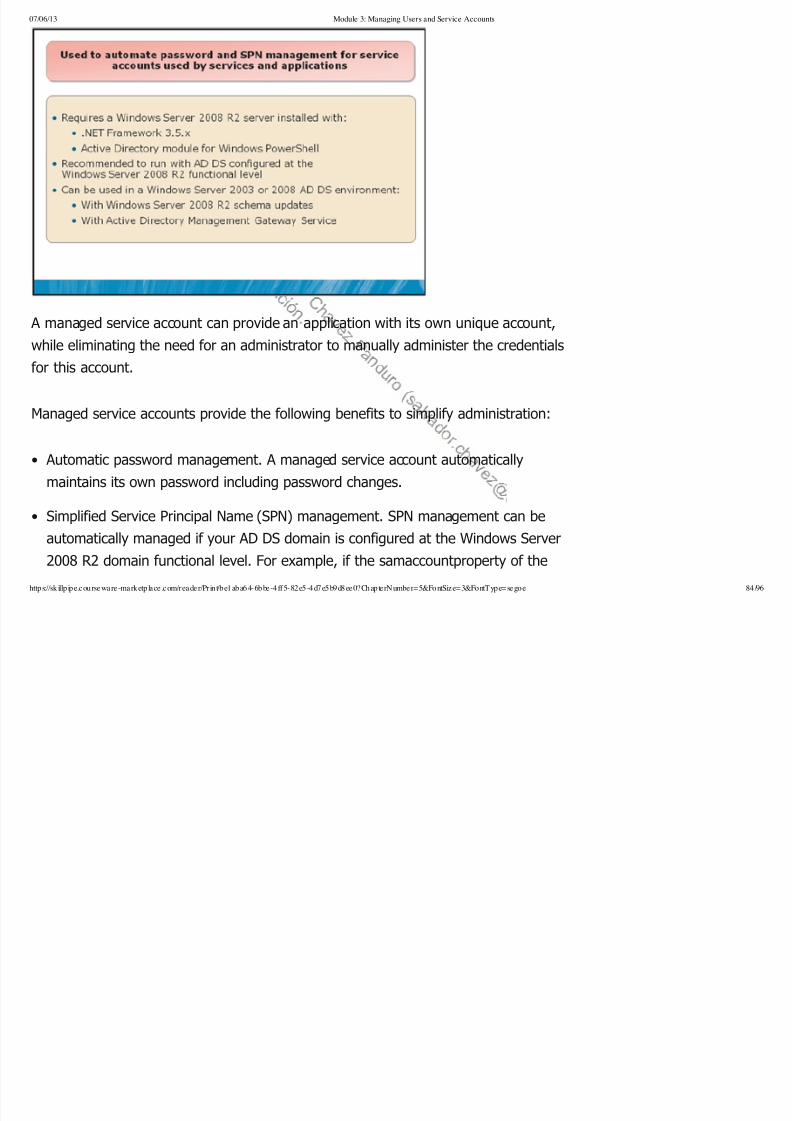
7/15/2019 Module 3_ Managing Users and Service Accounts
http://slidepdf.com/reader/full/module-3-managing-users-and-service-accounts 84/96
https://skillp ipe.courseware -marketplace .com/reader/Print/be1aba64-6bbe-4ff5-82e5-4d7e5b9d8ee0?Chapte rNumber=5&FontSize=3&FontType=segoe 84/96
A managed service account can provide an application with its own unique account,
while eliminating the need for an administrator to manually administer the credentials
for this account.
Managed service accounts provide the following benefits to simplify administration:
• Automatic password management. A managed service account automatically
maintains its own password including password changes.
• Simplified Service Principal Name (SPN) management. SPN management can be
automatically managed if your AD DS domain is configured at the Windows Server
2008 R2 domain functional level. For example, if the samaccountproperty of the
07/06/13 Module 3: Managing Users and Service Accounts
computer is changed, or if the DNS host name property is modified, the managed
service account SPN will automatically be changed from the old name to the new

7/15/2019 Module 3_ Managing Users and Service Accounts
http://slidepdf.com/reader/full/module-3-managing-users-and-service-accounts 85/96
https://skillp ipe.courseware -marketplace .com/reader/Print/be1aba64-6bbe-4ff5-82e5-4d7e5b9d8ee0?Chapte rNumber=5&FontSize=3&FontType=segoe 85/96
service account SPN will automatically be changed from the old name to the new
name for all managed service accounts on the computer.
Requirements for Using Managed Service Accounts
To use a managed service account, the server that runs the service or application
must be running Windows Server 2008 R2. You also must ensure that the .NET
Framework 3.5.x, and the Active Directory Module for Windows PowerShell are both
installed on the server.
Note A managed service account cannot be shared between multiple
computers or be
used in server clusters where the service is replicated between nodes.
To simplify and provide full automatic password and SPN management, werecommend that the AD DS domain be at the Windows Server 2008 R2 functional
level. However, if you have a domain controller running Windows Server 2008 or
Windows Server 2003, you can update the Active Directory schema to Windows
Server 2008 R2, to support this feature. The only disadvantage is that the domain
administrator must manually configure SPN data for the managed service accounts.
07/06/13 Module 3: Managing Users and Service Accounts
To update the schema in Windows Server 2008, Windows Server 2003, or mixed-
mode environments you must perform the following tasks:

7/15/2019 Module 3_ Managing Users and Service Accounts
http://slidepdf.com/reader/full/module-3-managing-users-and-service-accounts 86/96
https://skillp ipe.courseware -marketplace .com/reader/Print/be1aba64-6bbe-4ff5-82e5-4d7e5b9d8ee0?Chapte rNumber=5&FontSize=3&FontType=segoe 86/96
mode environments, you must perform the following tasks:
1. Run adprep/forestprep at the forest level and run adprep/domainprep at
the domain level.
2. Deploy a domain controller running Windows Server 2008 R2, Windows Server
2008 with the Active Directory Management Gateway Service, or Windows Server
2003 with the Active Directory Management Gateway Service.
Note The Active Directory Management Gateway Service allows
administrators with
domain controllers running Windows Server 2003 or Windows Server 2008 to
use Windows PowerShell cmdlets to manage managed service accounts.
Configure and Administer Managed Service Accounts
07/06/13 Module 3: Managing Users and Service Accounts

7/15/2019 Module 3_ Managing Users and Service Accounts
http://slidepdf.com/reader/full/module-3-managing-users-and-service-accounts 87/96
https://skillp ipe.courseware -marketplace .com/reader/Print/be1aba64-6bbe-4ff5-82e5-4d7e5b9d8ee0?Chapte rNumber=5&FontSize=3&FontType=segoe 87/96
After the domain and server prerequisites have been set, you can use the following
process to create a managed service account:
1. On the domain controller, use the Active Directory Module for Windows
PowerShell to create a new managed service account. The following command
can be used as an example of the base command.
New-ADServiceAccount [-SAMAccountName <String>] [-Path
<String>]
2. Install the managed service account on the server that contains the service or
07/06/13 Module 3: Managing Users and Service Accounts
application. The following command is run on the local server.
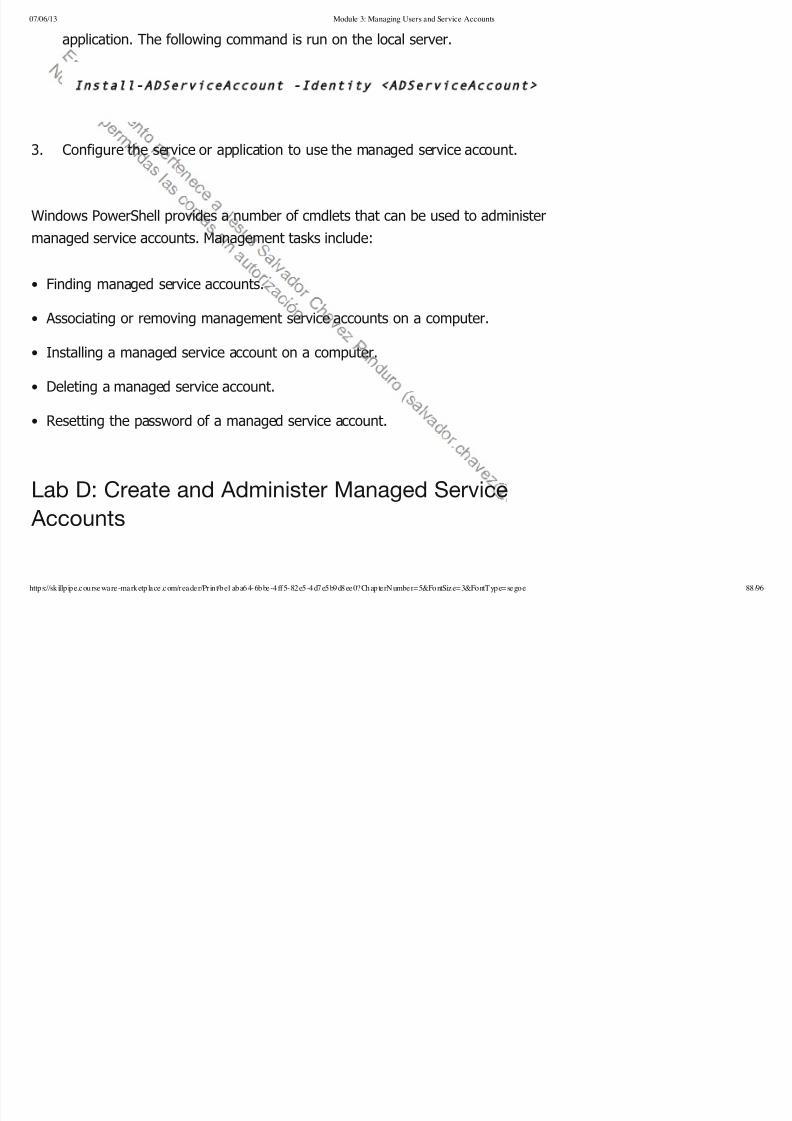
7/15/2019 Module 3_ Managing Users and Service Accounts
http://slidepdf.com/reader/full/module-3-managing-users-and-service-accounts 88/96
https://skillp ipe.courseware -marketplace .com/reader/Print/be1aba64-6bbe-4ff5-82e5-4d7e5b9d8ee0?Chapte rNumber=5&FontSize=3&FontType=segoe 88/96
Install-ADServiceAccount -Identity <ADServiceAccount>
3. Configure the service or application to use the managed service account.
Windows PowerShell provides a number of cmdlets that can be used to administer
managed service accounts. Management tasks include:
• Finding managed service accounts.
• Associating or removing management service accounts on a computer.
• Installing a managed service account on a computer.
• Deleting a managed service account.
• Resetting the password of a managed service account.
Lab D: Create and Administer Managed Service
Accounts
07/06/13 Module 3: Managing Users and Service Accounts
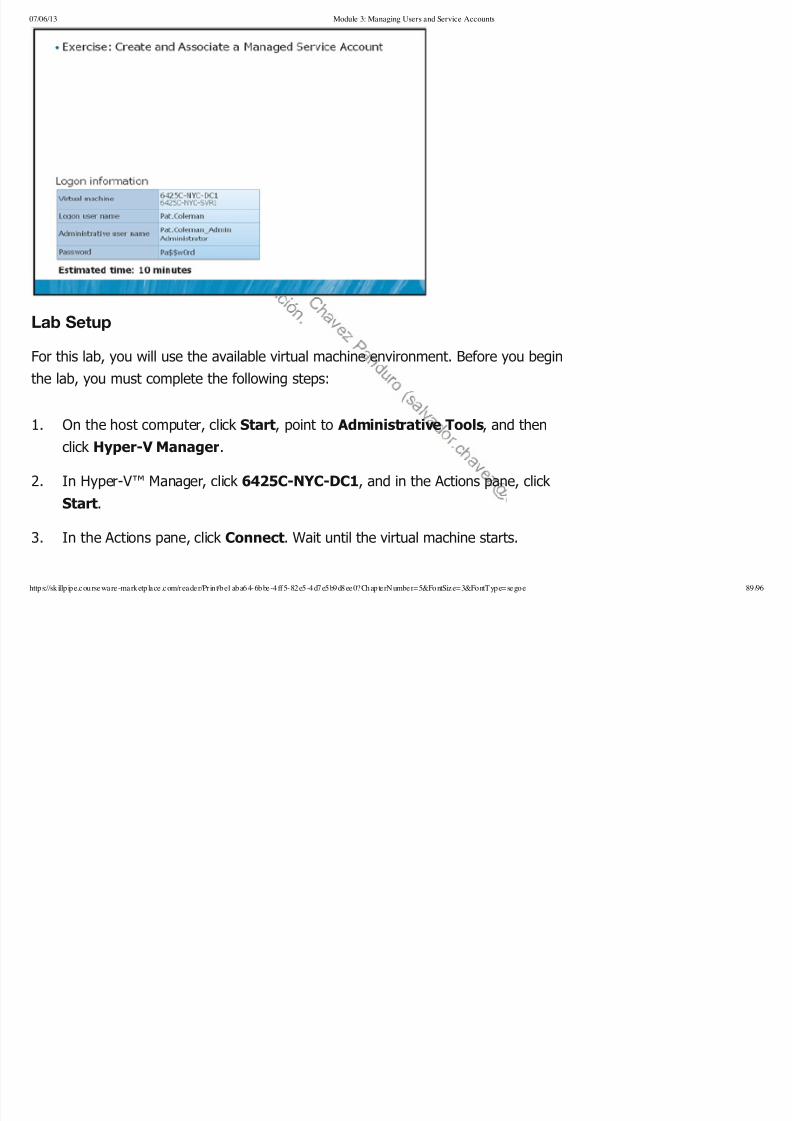
7/15/2019 Module 3_ Managing Users and Service Accounts
http://slidepdf.com/reader/full/module-3-managing-users-and-service-accounts 89/96
https://skillp ipe.courseware -marketplace .com/reader/Print/be1aba64-6bbe-4ff5-82e5-4d7e5b9d8ee0?Chapte rNumber=5&FontSize=3&FontType=segoe 89/96
Lab Setup
For this lab, you will use the available virtual machine environment. Before you begin
the lab, you must complete the following steps:
1. On the host computer, click Start, point to Administrative Tools, and thenclick Hyper-V Manager.
2. In Hyper-V™ Manager, click 6425C-NYC-DC1, and in the Actions pane, click
Start.
3. In the Actions pane, click Connect. Wait until the virtual machine starts.
07/06/13 Module 3: Managing Users and Service Accounts
4. Log on by using the following credentials:
7/15/2019 Module 3_ Managing Users and Service Accounts
http://slidepdf.com/reader/full/module-3-managing-users-and-service-accounts 90/96
https://skillp ipe.courseware -marketplace .com/reader/Print/be1aba64-6bbe-4ff5-82e5-4d7e5b9d8ee0?Chapte rNumber=5&FontSize=3&FontType=segoe 90/96
• User name: Administrator
• Password: Pa$$w0rd
• Domain: Contoso
5. Start 6425C-NYC-SVR1. Do not log on until directed to do so.
Lab Scenario
You are a network administrator for Contoso, Ltd. You have been asked to implement
a managed service account for an application that will be installed on NYC-SVR1. For
this project, you must complete the following tasks:
1. Create a managed service account called, App1_SVR1, and assign it to NYC-
SVR1.
2. Install the App1_SRV1 service account on NYC-SVR1.
Exercise: Create and Associate a Managed Service Account
You have been asked to create a managed service account called,
App1_SVR1, to be used by an application located on NYC-SVR1.
07/06/13 Module 3: Managing Users and Service Accounts
The main tasks for this exercise are as follows:
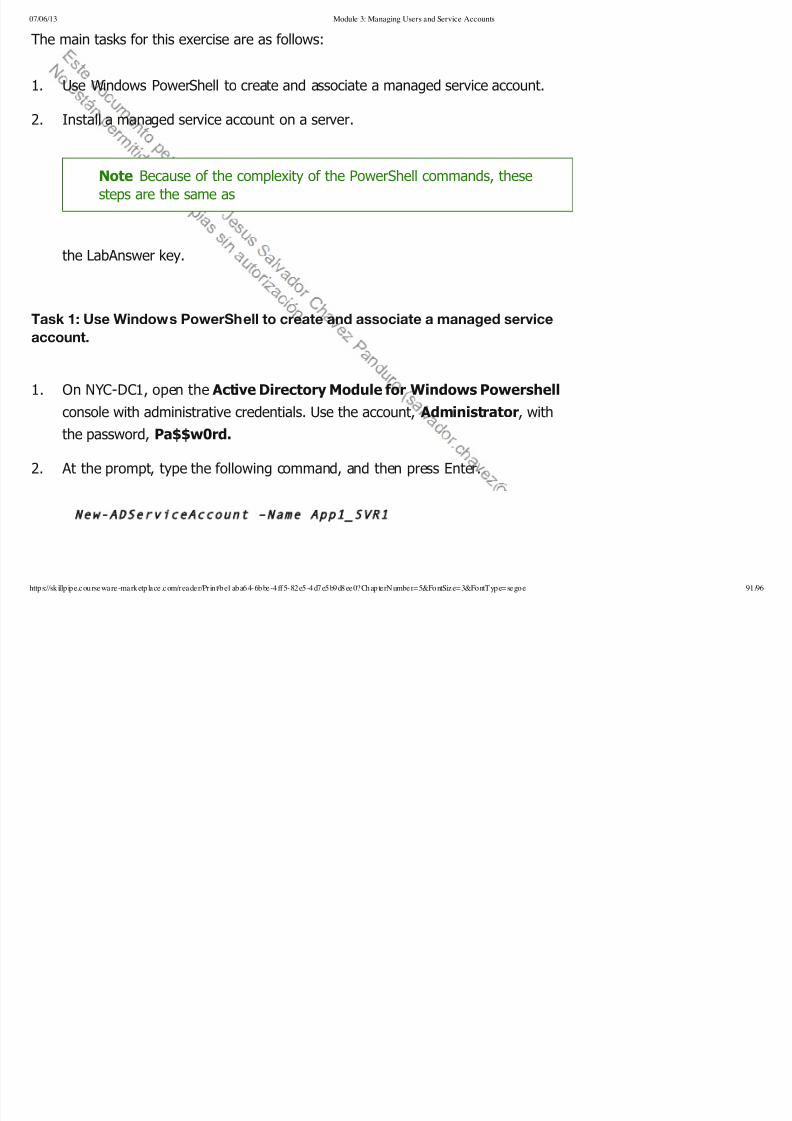
7/15/2019 Module 3_ Managing Users and Service Accounts
http://slidepdf.com/reader/full/module-3-managing-users-and-service-accounts 91/96
https://skillp ipe.courseware -marketplace .com/reader/Print/be1aba64-6bbe-4ff5-82e5-4d7e5b9d8ee0?Chapte rNumber=5&FontSize=3&FontType=segoe 91/96
1. Use Windows PowerShell to create and associate a managed service account.
2. Install a managed service account on a server.
Note Because of the complexity of the PowerShell commands, these
steps are the same as
the LabAnswer key.
Task 1: Use Windows PowerShell to create and associate a managed service
account.
1. On NYC-DC1, open the Active Directory Module for Windows Powershell
console with administrative credentials. Use the account, Administrator, with
the password, Pa$$w0rd.
2. At the prompt, type the following command, and then press Enter.
New-ADServiceAccount –Name App1_SVR1
07/06/13 Module 3: Managing Users and Service Accounts
3. At the prompt, type the following command, and then press Enter.

7/15/2019 Module 3_ Managing Users and Service Accounts
http://slidepdf.com/reader/full/module-3-managing-users-and-service-accounts 92/96
https://skillp ipe.courseware -marketplace .com/reader/Print/be1aba64-6bbe-4ff5-82e5-4d7e5b9d8ee0?Chapte rNumber=5&FontSize=3&FontType=segoe 92/96
Add-ADComputerServiceAccount –identity NYC-SVR1 –
ServiceAccount App1_SVR1
4. At the prompt, type the following command, and then press Enter.
Get-ADServiceAccount -Filter 'Name -like "*"' | FT
Name,HostComputers –A
5. Verify that the App1_SVR1 service account is associated with NYC-SVR1.
6. Close all open windows on NYC-DC1.
Task 2: Install a managed service account on a server.
1. Switch to the NYC-SVR1 virtual machine.
2. Log on to NYC-SVR1 as Contoso\Administrator, with the password,
Pa$$w0rd.
3. Open Server Manager and install the Active Directory Module for Windows
PowerShell. This is found under the Remote Server Installation Tools node.
07/06/13 Module 3: Managing Users and Service Accounts
4. Click Start, point to Administrative Tools, and then click Active Directory
M d l f Wi d P Sh ll Th Ad i i t t A ti Di t

7/15/2019 Module 3_ Managing Users and Service Accounts
http://slidepdf.com/reader/full/module-3-managing-users-and-service-accounts 93/96
https://skillp ipe.courseware -marketplace .com/reader/Print/be1aba64-6bbe-4ff5-82e5-4d7e5b9d8ee0?Chapte rNumber=5&FontSize=3&FontType=segoe 93/96
Module for Windows PowerShell. The Administrator: Active Directory
Module for Windows Powershell console opens.
5. At the prompt, type the following command, and then press Enter.
Install-ADServiceAccount -Identity App1_SVR1
6. Click Start, point to Administrative Tools, and then click Services.
7. In the Services console, right-click Disk Defragmenter, and then click
Properties.
Note The Disk Defragmenter service is just used as an example for this
lab. In a production environment, you would use the actual service that
should be assigned the managed service account.
8. In the Disk Defragmenter Properties dialog box, click the Log On tab.
9. On the Log On tab, click This account, and then type
Contoso\App1_SVR1$.
10. Clear the password for both the Password and Confirm password boxes.
Click OK .
07/06/13 Module 3: Managing Users and Service Accounts
11. Click OK at all prompts.
7/15/2019 Module 3_ Managing Users and Service Accounts
http://slidepdf.com/reader/full/module-3-managing-users-and-service-accounts 94/96
https://skillp ipe.courseware -marketplace .com/reader/Print/be1aba64-6bbe-4ff5-82e5-4d7e5b9d8ee0?Chapte rNumber=5&FontSize=3&FontType=segoe 94/96
12. Close the Services console.
13. Close all open windows on NYC-SVR1.
Results: In this exercise, you created and installed a managed service account.
To prepare for the next lab
When you finish the lab, revert the virtual machines to their initial state. To do this,
complete the following steps:
1. On the host computer, start Hyper-V Manager.
2. Right-click 6425C-NYC-DC1 in the Virtual Machines list, and then click
Revert.
3. In the Revert Virtual Machine dialog box, click Revert.
4. Repeat these steps for 6425C-NYC-SVR1.
07/06/13 Module 3: Managing Users and Service Accounts
Module Review and Takeaways

7/15/2019 Module 3_ Managing Users and Service Accounts
http://slidepdf.com/reader/full/module-3-managing-users-and-service-accounts 95/96
https://skillp ipe.courseware -marketplace .com/reader/Print/be1aba64-6bbe-4ff5-82e5-4d7e5b9d8ee0?Chapte rNumber=5&FontSize=3&FontType=segoe 95/96
Review Questions
1. Which administration tool should you use to create and manage user accountswithin your organization?
2. Which user account attributes will be important to use within your network
environment?
07/06/13 Module 3: Managing Users and Service Accounts
Windows Server 2008 R2 Features Introduced in this Module

7/15/2019 Module 3_ Managing Users and Service Accounts
http://slidepdf.com/reader/full/module-3-managing-users-and-service-accounts 96/96
Windows Server 2008
R2 feature
Description
Active Directory Module for
Windows P owerShell
Used to run Active Directory cmdlets for administering various AD
DS tasks
Managed Service Accounts Used to automate password and SPN management for service
accounts used by applications and services