Learn How to Think with - FEMhubfemhub.com/docs/karel_en.pdf · P. Solin Learn How to Think with...
85
Transcript of Learn How to Think with - FEMhubfemhub.com/docs/karel_en.pdf · P. Solin Learn How to Think with...


Learn How to Think withKarel the Robot


Learn How to Think withKarel the Robot
Pavel Solin
Last changes October 4, 2015

About the Author
Dr. Pavel Solin is Professor of Applied and Computational Mathematics at the Uni-versity of Nevada, Reno. He has been programming computers for 25 years, usingcomputing to solve major projects for U.S. Departments of Energy and Defense, anddirecting several major open source software projects. He is the author of six mono-graphs and many research articles in international journals. Besides this, Dr. Solin en-joys working with K-12 teachers and students. For more information, visit Dr. Solin’shome page http://nclab.com/pavel/.
Acknowledgment
We would like to thank many teachers and instructors for providing feedback that ishelping us to improve the textbook, the self-paced Karel course, and the Karel lan-guage itself.
Graphics Design:
TR-Design http://tr-design.cz
Copyright:
Copyright 2011-2016 NCLab. All Rights Reserved.

Preface
Computer programming is fun. Telling a machine what to do and watch it actuallyperform the task is amazing. Interacting with the computer will teach you how to thinkand how to solve problems. These are the two most important skills in computer pro-gramming. Programming is all about breaking complex problems into simpler ones,and solving them, which is very useful in real life as well.
Now, why lose time with an educational programming language if you could learnright away with a real programming language such as C++ or Java? Indeed, theselanguages are much more powerful than Karel the Robot. But they are not visual, havecomplicated syntax, and you will end up doing boring math problems in no time. Incontrast to that, Karel the Robot is visual, has very simple syntax that allows you tofocus on the programming logic that you need to learn in the first place, and it doesnot contain complicated math (really - there is no arithmetics in Karel since math andprogramming are two very different things).
Karel the Robot was created at the Stanford University by R.E. Pattis who also wrotethe original textbook Karel the Robot: A Gentle Introduction to the Art of Programming inthe 1980s. His Karel was aimed at university-level students and the syntax was influ-enced by Pascal, a major programming language of that era. We updated the languagewhile preserving Pattis’ original ideas. Our implementation is more oriented towardsK-12 students.
The syntax and programming style of our Karel is similar to Python, a major pro-gramming language of modern engineering, science, and business applications. Afteryou get used to computational thinking with Karel, learning any new programminglanguage will be much easier for you. NCLab has a follow-up Turtle programmingcourse where you will draw beautiful patterns and even export them for 3D printing.The Turtle has full Python syntax, which you will learn effortlessly in a fun and visualenvironment. Last, NCLab also has a full Python programming course which exposesyou to the reality of problem solving with a powerful programming language. Takingboth Karel and Turtle before Python is strongly recommended. For now, have fun withKarel and make sure that you complete at least Karel 1 and Karel 2 (70 game levels).
Have fun and good luck!
Pavel Solin


Table of Contents
1 Earn Black Belt in Computer Programming! . . . . . . . . . . . . . . . . . . . . . . . . . . . . . . . . 11.1 White Belt . . . . . . . . . . . . . . . . . . . . . . . . . . . . . . . . . . . . . . . . . . . . . . . . . . . . . . . . . . . 11.2 Yellow Belt . . . . . . . . . . . . . . . . . . . . . . . . . . . . . . . . . . . . . . . . . . . . . . . . . . . . . . . . . . 21.3 Purple Belt . . . . . . . . . . . . . . . . . . . . . . . . . . . . . . . . . . . . . . . . . . . . . . . . . . . . . . . . . . 51.4 Black Belt . . . . . . . . . . . . . . . . . . . . . . . . . . . . . . . . . . . . . . . . . . . . . . . . . . . . . . . . . . . . 61.5 Extras and Bonuses . . . . . . . . . . . . . . . . . . . . . . . . . . . . . . . . . . . . . . . . . . . . . . . . . . . 7
2 Introduction . . . . . . . . . . . . . . . . . . . . . . . . . . . . . . . . . . . . . . . . . . . . . . . . . . . . . . . . . . . . . 82.1 Objectives . . . . . . . . . . . . . . . . . . . . . . . . . . . . . . . . . . . . . . . . . . . . . . . . . . . . . . . . . . . 82.2 Brief history . . . . . . . . . . . . . . . . . . . . . . . . . . . . . . . . . . . . . . . . . . . . . . . . . . . . . . . . . 82.3 Who is Karel? . . . . . . . . . . . . . . . . . . . . . . . . . . . . . . . . . . . . . . . . . . . . . . . . . . . . . . . . 102.4 What will you learn in this course? . . . . . . . . . . . . . . . . . . . . . . . . . . . . . . . . . . . . 102.5 Is Karel a toy language? . . . . . . . . . . . . . . . . . . . . . . . . . . . . . . . . . . . . . . . . . . . . . . 112.6 How does Karel differ from other programming languages? . . . . . . . . . . . . . 11
3 Launching Karel . . . . . . . . . . . . . . . . . . . . . . . . . . . . . . . . . . . . . . . . . . . . . . . . . . . . . . . . . 123.1 Objectives . . . . . . . . . . . . . . . . . . . . . . . . . . . . . . . . . . . . . . . . . . . . . . . . . . . . . . . . . . . 123.2 Main menu . . . . . . . . . . . . . . . . . . . . . . . . . . . . . . . . . . . . . . . . . . . . . . . . . . . . . . . . . . 123.3 Karel modes . . . . . . . . . . . . . . . . . . . . . . . . . . . . . . . . . . . . . . . . . . . . . . . . . . . . . . . . . 13
4 First Steps . . . . . . . . . . . . . . . . . . . . . . . . . . . . . . . . . . . . . . . . . . . . . . . . . . . . . . . . . . . . . . . 144.1 Objectives . . . . . . . . . . . . . . . . . . . . . . . . . . . . . . . . . . . . . . . . . . . . . . . . . . . . . . . . . . . 144.2 Compass . . . . . . . . . . . . . . . . . . . . . . . . . . . . . . . . . . . . . . . . . . . . . . . . . . . . . . . . . . . . 144.3 Control buttons . . . . . . . . . . . . . . . . . . . . . . . . . . . . . . . . . . . . . . . . . . . . . . . . . . . . . . 144.4 Error messages . . . . . . . . . . . . . . . . . . . . . . . . . . . . . . . . . . . . . . . . . . . . . . . . . . . . . . . 154.5 Robot’s view . . . . . . . . . . . . . . . . . . . . . . . . . . . . . . . . . . . . . . . . . . . . . . . . . . . . . . . . . 15
5 Programming . . . . . . . . . . . . . . . . . . . . . . . . . . . . . . . . . . . . . . . . . . . . . . . . . . . . . . . . . . . . 165.1 Objectives . . . . . . . . . . . . . . . . . . . . . . . . . . . . . . . . . . . . . . . . . . . . . . . . . . . . . . . . . . . 165.2 Typing commands . . . . . . . . . . . . . . . . . . . . . . . . . . . . . . . . . . . . . . . . . . . . . . . . . . . 165.3 Algorithm . . . . . . . . . . . . . . . . . . . . . . . . . . . . . . . . . . . . . . . . . . . . . . . . . . . . . . . . . . . 165.4 Program . . . . . . . . . . . . . . . . . . . . . . . . . . . . . . . . . . . . . . . . . . . . . . . . . . . . . . . . . . . . . 175.5 Logical and syntax errors . . . . . . . . . . . . . . . . . . . . . . . . . . . . . . . . . . . . . . . . . . . . . 18
6 Counting Loop . . . . . . . . . . . . . . . . . . . . . . . . . . . . . . . . . . . . . . . . . . . . . . . . . . . . . . . . . . . 196.1 Objectives . . . . . . . . . . . . . . . . . . . . . . . . . . . . . . . . . . . . . . . . . . . . . . . . . . . . . . . . . . . 196.2 Elegant way to walk . . . . . . . . . . . . . . . . . . . . . . . . . . . . . . . . . . . . . . . . . . . . . . . . . . 196.3 Body of loop . . . . . . . . . . . . . . . . . . . . . . . . . . . . . . . . . . . . . . . . . . . . . . . . . . . . . . . . . 206.4 Mistakes in indentation . . . . . . . . . . . . . . . . . . . . . . . . . . . . . . . . . . . . . . . . . . . . . . . 216.5 Nested loops . . . . . . . . . . . . . . . . . . . . . . . . . . . . . . . . . . . . . . . . . . . . . . . . . . . . . . . . 22

6.6 Walking around four blocks . . . . . . . . . . . . . . . . . . . . . . . . . . . . . . . . . . . . . . . . . . . 237 Working with Code and HTML Cells . . . . . . . . . . . . . . . . . . . . . . . . . . . . . . . . . . . . . . 25
7.1 Objectives . . . . . . . . . . . . . . . . . . . . . . . . . . . . . . . . . . . . . . . . . . . . . . . . . . . . . . . . . . . 257.2 Code cells . . . . . . . . . . . . . . . . . . . . . . . . . . . . . . . . . . . . . . . . . . . . . . . . . . . . . . . . . . . 257.3 HTML cells . . . . . . . . . . . . . . . . . . . . . . . . . . . . . . . . . . . . . . . . . . . . . . . . . . . . . . . . . . 26
8 Conditions . . . . . . . . . . . . . . . . . . . . . . . . . . . . . . . . . . . . . . . . . . . . . . . . . . . . . . . . . . . . . . 288.1 Objectives . . . . . . . . . . . . . . . . . . . . . . . . . . . . . . . . . . . . . . . . . . . . . . . . . . . . . . . . . . . 288.2 The wall sensor . . . . . . . . . . . . . . . . . . . . . . . . . . . . . . . . . . . . . . . . . . . . . . . . . . . . . 288.3 The keyword not . . . . . . . . . . . . . . . . . . . . . . . . . . . . . . . . . . . . . . . . . . . . . . . . . . . . 298.4 The gem sensor . . . . . . . . . . . . . . . . . . . . . . . . . . . . . . . . . . . . . . . . . . . . . . . . . . . . . . 298.5 The tray sensor . . . . . . . . . . . . . . . . . . . . . . . . . . . . . . . . . . . . . . . . . . . . . . . . . . . . . 308.6 Repairing pavement . . . . . . . . . . . . . . . . . . . . . . . . . . . . . . . . . . . . . . . . . . . . . . . . . . 318.7 Making the robot face any direction . . . . . . . . . . . . . . . . . . . . . . . . . . . . . . . . . . . 34
9 Conditional Loop . . . . . . . . . . . . . . . . . . . . . . . . . . . . . . . . . . . . . . . . . . . . . . . . . . . . . . . . 359.1 Objectives . . . . . . . . . . . . . . . . . . . . . . . . . . . . . . . . . . . . . . . . . . . . . . . . . . . . . . . . . . . 359.2 Finding a lost gem . . . . . . . . . . . . . . . . . . . . . . . . . . . . . . . . . . . . . . . . . . . . . . . . . . . 359.3 Writing programs in steps . . . . . . . . . . . . . . . . . . . . . . . . . . . . . . . . . . . . . . . . . . . . 369.4 Rock climbing . . . . . . . . . . . . . . . . . . . . . . . . . . . . . . . . . . . . . . . . . . . . . . . . . . . . . . . 36
10 Custom Commands . . . . . . . . . . . . . . . . . . . . . . . . . . . . . . . . . . . . . . . . . . . . . . . . . . . . . . 3810.1 Objectives . . . . . . . . . . . . . . . . . . . . . . . . . . . . . . . . . . . . . . . . . . . . . . . . . . . . . . . . . . . 3810.2 Defining new commands . . . . . . . . . . . . . . . . . . . . . . . . . . . . . . . . . . . . . . . . . . . . . 3810.3 Arcade game . . . . . . . . . . . . . . . . . . . . . . . . . . . . . . . . . . . . . . . . . . . . . . . . . . . . . . . . 38
11 Variables . . . . . . . . . . . . . . . . . . . . . . . . . . . . . . . . . . . . . . . . . . . . . . . . . . . . . . . . . . . . . . . . 4211.1 Objectives . . . . . . . . . . . . . . . . . . . . . . . . . . . . . . . . . . . . . . . . . . . . . . . . . . . . . . . . . . 4211.2 Karel grows up . . . . . . . . . . . . . . . . . . . . . . . . . . . . . . . . . . . . . . . . . . . . . . . . . . . . . 4211.3 Purpose of variables . . . . . . . . . . . . . . . . . . . . . . . . . . . . . . . . . . . . . . . . . . . . . . . . . 4211.4 Types of variables . . . . . . . . . . . . . . . . . . . . . . . . . . . . . . . . . . . . . . . . . . . . . . . . . . . 4211.5 Using the GPS device and the print command . . . . . . . . . . . . . . . . . . . . . . . 4311.6 Defining custom functions . . . . . . . . . . . . . . . . . . . . . . . . . . . . . . . . . . . . . . . . . . . 4511.7 Measuring the length of a wall . . . . . . . . . . . . . . . . . . . . . . . . . . . . . . . . . . . . . . . 4611.8 Creating and initializing numerical variables . . . . . . . . . . . . . . . . . . . . . . . . . . 4711.9 Changing values of numerical variables . . . . . . . . . . . . . . . . . . . . . . . . . . . . . . . 4811.10 Using functions inc() and dec() . . . . . . . . . . . . . . . . . . . . . . . . . . . . . . . . . . . 4811.11 Comparison operations . . . . . . . . . . . . . . . . . . . . . . . . . . . . . . . . . . . . . . . . . . . . . . 4811.12 Text strings . . . . . . . . . . . . . . . . . . . . . . . . . . . . . . . . . . . . . . . . . . . . . . . . . . . . . . . . . 4911.13 Local and global variables . . . . . . . . . . . . . . . . . . . . . . . . . . . . . . . . . . . . . . . . . . . 50
12 Lists . . . . . . . . . . . . . . . . . . . . . . . . . . . . . . . . . . . . . . . . . . . . . . . . . . . . . . . . . . . . . . . . . . . . 5212.1 Objectives . . . . . . . . . . . . . . . . . . . . . . . . . . . . . . . . . . . . . . . . . . . . . . . . . . . . . . . . . . 5212.2 Compatibility with Python . . . . . . . . . . . . . . . . . . . . . . . . . . . . . . . . . . . . . . . . . . . 52

12.3 Creating a list . . . . . . . . . . . . . . . . . . . . . . . . . . . . . . . . . . . . . . . . . . . . . . . . . . . . . . . 5212.4 Accessing list items by their indices . . . . . . . . . . . . . . . . . . . . . . . . . . . . . . . . . . 5312.5 Appending items to a list . . . . . . . . . . . . . . . . . . . . . . . . . . . . . . . . . . . . . . . . . . . . 5412.6 Removing items via the pop() function . . . . . . . . . . . . . . . . . . . . . . . . . . . . . . 5412.7 Deleting items via the del command . . . . . . . . . . . . . . . . . . . . . . . . . . . . . . . . . 5512.8 Length of a list . . . . . . . . . . . . . . . . . . . . . . . . . . . . . . . . . . . . . . . . . . . . . . . . . . . . . . 5512.9 Parsing lists . . . . . . . . . . . . . . . . . . . . . . . . . . . . . . . . . . . . . . . . . . . . . . . . . . . . . . . . 5612.10 Recording robot’s path . . . . . . . . . . . . . . . . . . . . . . . . . . . . . . . . . . . . . . . . . . . . . . 5612.11 Replaying robot’s path from a list . . . . . . . . . . . . . . . . . . . . . . . . . . . . . . . . . . . . 5812.12 Recording positions of gems . . . . . . . . . . . . . . . . . . . . . . . . . . . . . . . . . . . . . . . . . 6012.13 Remark on lists containing lists . . . . . . . . . . . . . . . . . . . . . . . . . . . . . . . . . . . . . . 62
13 Tour of Logic . . . . . . . . . . . . . . . . . . . . . . . . . . . . . . . . . . . . . . . . . . . . . . . . . . . . . . . . . . . . 6313.1 Objectives . . . . . . . . . . . . . . . . . . . . . . . . . . . . . . . . . . . . . . . . . . . . . . . . . . . . . . . . . . 6313.2 Simple logical expressions . . . . . . . . . . . . . . . . . . . . . . . . . . . . . . . . . . . . . . . . . . . 6313.3 More complex logical expressions . . . . . . . . . . . . . . . . . . . . . . . . . . . . . . . . . . . . 6313.4 Truth tables . . . . . . . . . . . . . . . . . . . . . . . . . . . . . . . . . . . . . . . . . . . . . . . . . . . . . . . . . 64
14 Randomness . . . . . . . . . . . . . . . . . . . . . . . . . . . . . . . . . . . . . . . . . . . . . . . . . . . . . . . . . . . . . 6614.1 Objectives . . . . . . . . . . . . . . . . . . . . . . . . . . . . . . . . . . . . . . . . . . . . . . . . . . . . . . . . . . 6614.2 Using random moves to search entire maze . . . . . . . . . . . . . . . . . . . . . . . . . . . 66
15 Recursion . . . . . . . . . . . . . . . . . . . . . . . . . . . . . . . . . . . . . . . . . . . . . . . . . . . . . . . . . . . . . . . 6715.1 Objectives . . . . . . . . . . . . . . . . . . . . . . . . . . . . . . . . . . . . . . . . . . . . . . . . . . . . . . . . . . 6715.2 How it works . . . . . . . . . . . . . . . . . . . . . . . . . . . . . . . . . . . . . . . . . . . . . . . . . . . . . . . 6715.3 The base case . . . . . . . . . . . . . . . . . . . . . . . . . . . . . . . . . . . . . . . . . . . . . . . . . . . . . . . 7015.4 Diamond staircase revisited . . . . . . . . . . . . . . . . . . . . . . . . . . . . . . . . . . . . . . . . . . 7015.5 Mutually recursive commands . . . . . . . . . . . . . . . . . . . . . . . . . . . . . . . . . . . . . . . 71
16 Appendix - Overview of Functionality by Mode . . . . . . . . . . . . . . . . . . . . . . . . . . . . 7316.1 First Steps (Section 4) . . . . . . . . . . . . . . . . . . . . . . . . . . . . . . . . . . . . . . . . . . . . . . . . 7316.2 Programming Mode (Sections 5 – 15) . . . . . . . . . . . . . . . . . . . . . . . . . . . . . . . . . 73
17 What next? . . . . . . . . . . . . . . . . . . . . . . . . . . . . . . . . . . . . . . . . . . . . . . . . . . . . . . . . . . . . . . 74


P. Solin Learn How to Think with Karel the Robot
1 Earn Black Belt in Computer Programming!
The best way to learn with Karel is to go through the self-paced and self-graded Karelprogramming course in NCLab, using this textbook as a reference. Karel (shown in Fig.1) is a determined robot who embarks on a quest to find his missing friend.
Fig. 1: Karel the Robot.
The course comes with many examples and tutorial videos that ensure that every stu-dent can progress at his or her own pace. Lesson plans and student journals are avail-able. The instructor does not have to be an expert in computer programming by anymeans. The course has over 70 engaging game levels that ensure an exciting and ful-filling learning experience for all students.
Recommended minimum age of students is 10 years because of keyboarding skills,and there is no upper age limit. In fact, many teachers use the Karel course to learncomputational thinking skills themselves, and adult learners in general enjoy the courseas much as do K-12 students.
A great complementary activity to solving game levels in the self-paced course iscreating your own mazes and games, and publishing them on the web for your friendsto play. The lesson plans contain more details, and tutorial videos are available onNCLab’s home page.
1.1 White Belt
Every student begins his or her journey with solving seven levels in manual mode,earning the White Belt. These levels are designed to make the students familiar with
1

P. Solin Learn How to Think with Karel the Robot
the five basic commands Go, Right, Left, Get, and Put for the robot, with the fourdirections on the compass, with various game goals and limitations, as well as withthe relative right and left (as seen from the point of view of the robot). Fig. 2 showsa sample level Goldmine from this section. Here, Karel’s task is to collect three goldnuggets and return to his home square, using at most 20 steps. Students guide therobot by clicking on buttons.
Fig. 2: Sample level Goldmine in the White Belt section.
1.2 Yellow Belt
The Yellow Belt section has four Degrees, each one requiring the students to completeseven game levels (28 levels total). In Degree 1, students type elementary commandsinstead of clicking on buttons. Fig. 3 shows a sample level Phone where Karel needs tomove the phone on the mark and enter his home square.
2

P. Solin Learn How to Think with Karel the Robot
Fig. 3: Sample level Phone in Yellow Belt 1.
In Degree 2, students learn how to use the repeat loop. Fig. 4 shows a level Forgottenwhere Karel needs to pick up four books and put them in the bags, using at most 10lines of code.
Fig. 4: Sample level Forgotten in Yellow Belt 2.
3

P. Solin Learn How to Think with Karel the Robot
In Degree 3, students learn about if-else conditions. Fig. 5 shows a sample level Stormwhere Karel needs to pick up a medkit, and return home by following a trace of coinsand gears.
Fig. 5: Sample level Storm in Yellow Belt 3.
In the last Degree 4, students learn about the while loop. Fig. 6 shows a sample levelTunnel where Karel must collect all keys and reach his home square.
Fig. 6: Sample level Tunnel in Yellow Belt 4.
4

P. Solin Learn How to Think with Karel the Robot
1.3 Purple Belt
The Purple Belt section has 21 game levels that are split into three Degrees. In Degree1, students learn about custom commands. Fig. 7 shows a sample level Water whereKarel must collect all water bottles in order to survive in the desert.
Fig. 7: Sample level Water in Purple Belt 1.
In Degree 2 students learn about variables. Fig. 8 shows a sample level Pipeline whereKarel must count all missing pieces in the pipeline.
Fig. 8: Sample level Pipeline in Purple Belt 2.
5

P. Solin Learn How to Think with Karel the Robot
In the last Degree 3 students learn about Python lists. Fig. 9 shows a sample level Rugswhere Karel needs to move all rugs from one house to another, remembering their ex-act positions.
Fig. 9: Sample level Rugs in Purple Belt 3.
1.4 Black Belt
The Black Belt has 14 levels that are split into two Degrees. In Degree 1 students learnabout recursion. Fig. 10 shows a sample level Bakery where Karel needs to eat all pieswithout using loops.
Fig. 10: Sample level Bakery in Black Belt 1.
6
P. Solin Learn How to Think with Karel the Robot
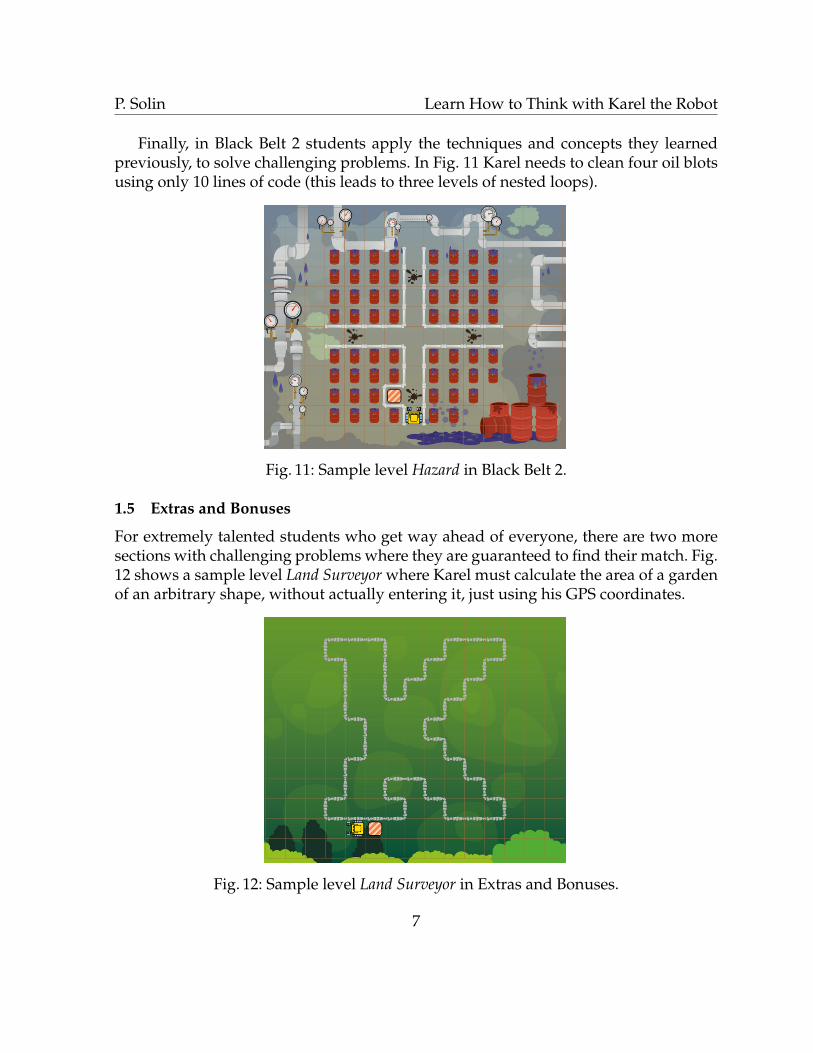
Finally, in Black Belt 2 students apply the techniques and concepts they learnedpreviously, to solve challenging problems. In Fig. 11 Karel needs to clean four oil blotsusing only 10 lines of code (this leads to three levels of nested loops).
Fig. 11: Sample level Hazard in Black Belt 2.
1.5 Extras and Bonuses
For extremely talented students who get way ahead of everyone, there are two moresections with challenging problems where they are guaranteed to find their match. Fig.12 shows a sample level Land Surveyor where Karel must calculate the area of a gardenof an arbitrary shape, without actually entering it, just using his GPS coordinates.
Fig. 12: Sample level Land Surveyor in Extras and Bonuses.
7

P. Solin Learn How to Think with Karel the Robot
2 Introduction
2.1 Objectives
– Learn basic facts about the Karel language and its history.– Learn how Karel differs from other programming languages.– Learn what skills this course will give you.
2.2 Brief history
The educational programming language Karel the Robot was introduced by Richard E.Pattis in his book Karel The Robot: A Gentle Introduction to the Art of Programming in 1981.Pattis first used the language in his courses at Stanford University, and nowadays Karelis used at countless schools in the world. The language is named after Karel Capek, aCzech writer who invented the word "robot" in his 1921 science fiction play R.U.R.(Rossum’s Universal Robots). Various implementations of the language that can bedownloaded from the web are shown in Fig. 13.
Fig. 13: Various implementations.
The original Karel language was strongly influenced by Pascal, a popular language ofthe 1980s. Since Pascal is no longer being used today, we refreshed the language andadjusted its syntax to be close to Python, a modern high-level dynamic programminglanguage. Our changes made the language much easier to use. For illustration, com-pare the original Karel program
8

P. Solin Learn How to Think with Karel the Robot
BEGINNING-OF-PROGRAM
DEFINE turnright ASBEGIN
turnleftturnleftturnleft
END
BEGINNING-OF-EXECUTIONITERATE 3 TIMESBEGIN
turnrightmove
ENDturnoff
END-OF-EXECUTION
END-OF-PROGRAM
with its exact NCLab’s Karel equivalent
def turnrightrepeat 3
left
repeat 3turnrightgo
In fact, NCLab’s Karel has a built-in command right for the right turn, so the aboveprogram can be written using just three lines:
repeat 3rightgo
The command right was not part of the original Karel language – it was added af-ter a very careful consideration. The main reason for adding it was that it made Karel
9
P. Solin Learn How to Think with Karel the Robot
more pleasant to watch as he moves through the maze. Without this command, anyright turn took three left turns, and as a result, Karel resembled a raging tornado. Ofcourse, orthodox Karel fans can still define and use their own rightturn command.We made a few additional changes to the language in order to make it more accessibleto kids – beepers were replaced with gems, Karel has a home in the maze, and there isa new object tray that makes it clear where the robot should put gems. Longer com-mands were replaced with shorter ones, such as leftturn with left, move with go,pickbeeper with get, and putbeeper with put. Karel’s syntax is virtually identi-cal to Python, with the exception of colons in conditions, loops, and new commands –they were left out since our youngest programmers had difficulty typing them.
2.3 Who is Karel?
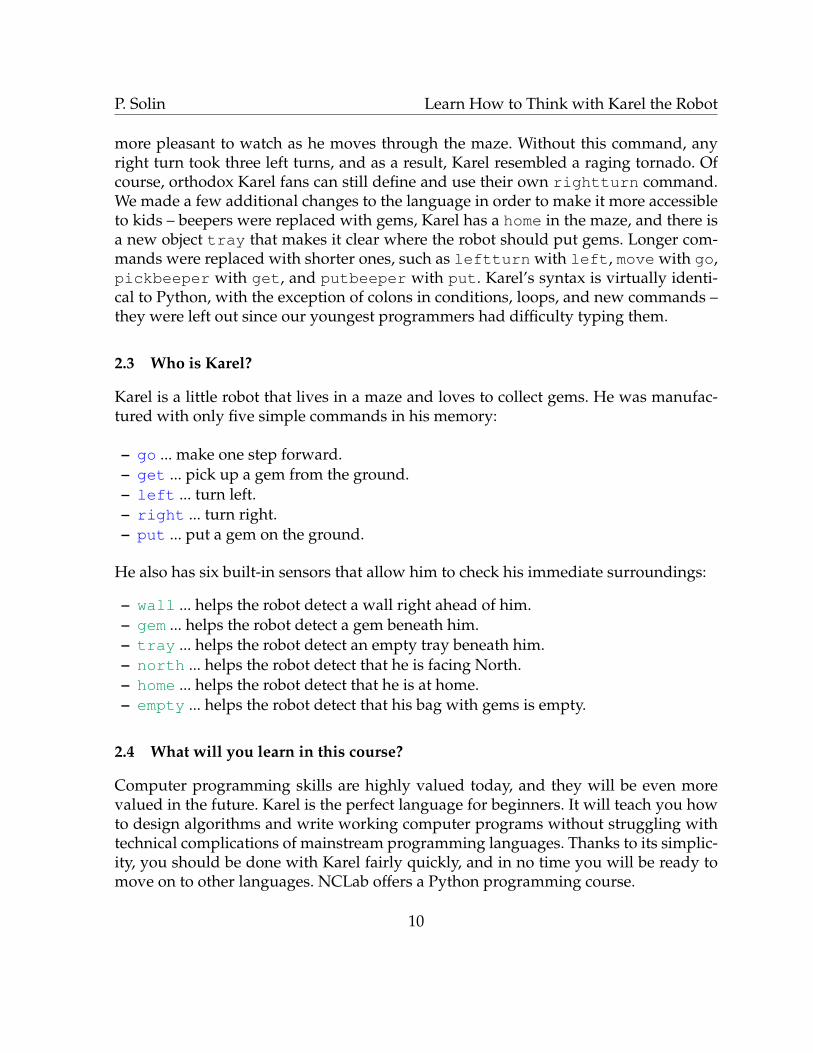
Karel is a little robot that lives in a maze and loves to collect gems. He was manufac-tured with only five simple commands in his memory:
– go ... make one step forward.– get ... pick up a gem from the ground.– left ... turn left.– right ... turn right.– put ... put a gem on the ground.
He also has six built-in sensors that allow him to check his immediate surroundings:
– wall ... helps the robot detect a wall right ahead of him.– gem ... helps the robot detect a gem beneath him.– tray ... helps the robot detect an empty tray beneath him.– north ... helps the robot detect that he is facing North.– home ... helps the robot detect that he is at home.– empty ... helps the robot detect that his bag with gems is empty.
2.4 What will you learn in this course?
Computer programming skills are highly valued today, and they will be even morevalued in the future. Karel is the perfect language for beginners. It will teach you howto design algorithms and write working computer programs without struggling withtechnical complications of mainstream programming languages. Thanks to its simplic-ity, you should be done with Karel fairly quickly, and in no time you will be ready tomove on to other languages. NCLab offers a Python programming course.
10

P. Solin Learn How to Think with Karel the Robot
2.5 Is Karel a toy language?
Absolutely not! Despite its playful appearance, Karel features all key concepts of mod-ern procedural programming. Technically speaking, it is a complete Turing machine.As a matter of fact, the complexity of algorithms that you will encounter in this text-book ranges from very simple to very hard.
2.6 How does Karel differ from other programming languages?
The biggest conceptual difference between Karel and mainstream procedural program-ming languages such as Python, C, C++, Java or Fortran is that the robot does not knowmath. This is because Math is not needed to understand how to design great algorithmsand to translate them into efficient computer programs.
11

P. Solin Learn How to Think with Karel the Robot
3 Launching Karel
3.1 Objectives
– Learn to launch Karel and work with the graphical application.– Learn that Karel has several modes and how they differ.
The simplest way to launch Karel is to double click on the Programming icon on Desk-top and select Karel in the menu. This will launch the module in Programming Modewith a demo program, as shown in Fig. 14.
Fig. 14: The Karel module launches with a demo program.
From Programming Mode, one can switch to First Steps, Designer, and Games. Thesemodes will be discussed in more detail in Paragraph 3.3.
3.2 Main menu
The application window contains the main menu on top, work area on the left, mazeon the right, and status bar on the bottom. The menus are fairly intuitive, so let usexplain just a few selected functions. In the File menu:
– Under Learning materials you will find this textbook, interactive exercises, and in-structors have access to solution programs.
– New will create a new Karel file.– Open will open an existing Karel file.
12

P. Solin Learn How to Think with Karel the Robot
– Save in NCLab will save your file in your NCLab account.– Publish to the web will create a static HTML link for your project.
The Maze menu facilitates operation with mazes, including creating a new randomone, duplicating an existing maze, restoring maze to its saved version, and save andremove maze. The Edit menu enables operation with code cells and HTML cells (to bediscussed in Section 7). In Settings one can change Karel’s speed, adjust sound prefer-ences, etc.
The green and red buttons are used to run and stop programs, respectively, andthe two buttons next to them on the right can be used to increase and decrease fontsize. The triplet of icons on far right are the operations counter, step counter, and gemcounter.
3.3 Karel modes
The module operates in four modes:
– In First Steps, Karel is controlled using the mouse. Watch out and do not crash!– In Programming Mode, the robot is controlled using written commands.– Designer allows users to create custom mazes.– Game Mode allows users to create and share games.
13

P. Solin Learn How to Think with Karel the Robot
4 First Steps
4.1 Objectives
– Review directions on the compass.– Learn to guide the robot by clicking on buttons.– Learn about error messages.– Learn to work with left and right from the robot’s point of view.– Learn to plan your actions ahead of time.
4.2 Compass
Fig. 15 shows the four directions on the compass: North, South, West, and East.
Fig. 15: Four directions on the compass.
4.3 Control buttons
After launching Karel, switch to First Steps. The following five buttons will appear inthe left panel:
Fig. 16: Karel’s buttons in First Steps (robot facing East).
14

P. Solin Learn How to Think with Karel the Robot
Pressing left will turn the robot 90 degrees to the left, pressing right will turn him90 degrees to the right. These two buttons never can cause an error, but the others can.
4.4 Error messages
Pressing go will advance the robot one step forward. If he crashes into a wall, he willthrow an error message:
Fig. 17: Error messages appear in the bottom-left corner.
Upon pressing put, the robot will reach into his bag and put a gem on the ground. Ifhis bag is empty, he will throw an error message as well. An indicator showing howmany gems are in the bag can be found in the upper right corner of the window. Last,pressing get makes the robot pick up a gem from the ground. If there is no gem tocollect, he will throw an error message.
4.5 Robot’s view
When the robot turns, the arrows on the buttons adjust automatically to reflect his viewof things. This is illustrated in Fig. 18.
Fig. 18: Karel’s buttons in First Steps (robot facing West).
15

P. Solin Learn How to Think with Karel the Robot
5 Programming
5.1 Objectives
– Write your first computer program.– Learn the difference between algorithm and program.– Learn the difference between logical and syntax errors.– Learn that debugging is an indivisible part of computer programming.
5.2 Typing commands
Commands are entered into a code cell that is located in the left panel. In ProgrammingMode, we can use the commands left, right, go, get, put, repeat, and manymore. One or more commands form a computer program or computer code. There are twosimple rules to remember:
1. Always type one command per line.2. Indentation matters - every command starts at the beginning of line.
Following these rules will make your code clean and well readable.
5.3 Algorithm
Karel always follows your commands exactly. No exceptions. If the robot does some-thing wrong, such as crashing into a wall, then most likely it was not his mistake butyours. Your algorithm was wrong.
Algorithm is a sequence of logical steps that leads to the solution of the given task.
Algorithms are written using common human language. Consider a maze shown inFig. 19. Karel’s task is to pick up the gem and return to his home square.
Fig. 19: Collect the gem and get home!
16

P. Solin Learn How to Think with Karel the Robot
This task can be solved using the following algorithm:
Make two steps forwardCollect the gemTurn aroundMake three steps forward
In the next paragraph, we will convert this algorithm into a computer program.
5.4 Program
Translating an algorithm to a particular programming languageyields a computer program.
In our case this is the Karel language of course. One possible program correspondingto the above algoritm is:
gogogetleftleftgogogo
Often there is more than one way to translate an algorithm to a computer program. Forexample, the above algorithm can be also translated to
gogorightgetrightgogogo
17

P. Solin Learn How to Think with Karel the Robot
5.5 Logical and syntax errors
Mistakes in algorithms are called logical errors.
Let’s return to the setting shown in Fig. 19 and consider the algorithm
Make three steps forwardCollect the gemTurn aroundMake three steps forward
This makes the robot crash! We made a mistake in the planning – a logical error.
Mistakes in programs, such as misspelling a command, writing "1O" instead of "10",or forgetting indentation are called syntax errors.
Find three syntax errors in the following program!
gogogotr1ghtnightgogogo
Mistakes or either kind are called bugs and the procedure of eliminating them is calleddebugging. Depending on how careful we were while preparing our algorithm andwriting the program, debugging takes either a short time or a long time. It does nothappen often that a program works correctly right away.
Of logical and syntax errors, the former are harder to find. Therefore, always makesure to design a good algorithm and to think it through, before you start coding.
When our program contains a syntax error, the robot outputs an error message and doesnothing. When the algorithm contains a logical error, then various things may hap-pen: The robot may execute the program without fulfilling the goals. Or, he may dosomething that will trigger and error message and stop program execution.
18

P. Solin Learn How to Think with Karel the Robot
6 Counting Loop
6.1 Objectives
– Learn to make the robot repeat something a given number of times.– Learn what body of loop means and that indentation matters.
Counting loops are present in all procedural programming languages and they allowus to repeat some command, or a sequence of commands, a given number of times.
In Karel, counting loops are written using the command repeat. Some other lan-guages use different commands, but the idea is always the same.
6.2 Elegant way to walk
Look at the following maze where Karel needs to collect a gem and return to his homesquare.
Fig. 20: Repeating an action a given number of times.
Of course we could type
gogogogogogogogogogogetleftleft
19

P. Solin Learn How to Think with Karel the Robot
gogogogogogogogogogogo
But such program would not get you hired as a computer programmer! Namely, thesame goal can be accomplished much more elegantly, by telling Karel to repeat thego command 10 times, get the gem, turn back, and repeat the go command another11 times:
repeat 10go
getrepeat 2
leftrepeat 11
go
That’s it! Are you wondering why some commands are indented? We will explain thisright now.
6.3 Body of loop
Commands to be repeated are called the body of the loop. In Karel, the body of theloop is defined by indentation. This is the same as in Python. Some other languages
use other ways, for example C/C++ use curly braces.
In the above program, each loop’s body is formed by a single command, but if therewere more of them, all of them would be indented. In Karel, you can choose between a2-indent and a 4-indent. The former yields more compact code with not-so-long lines,but the latter is easier to read.
20

P. Solin Learn How to Think with Karel the Robot
6.4 Mistakes in indentation
A mistake in indentation can change the body of a loop, and consequently the entireprogram may end up doing something unexpected. For illustration, assume the mazeshown in Fig. 21. Karel’s task is to walk around the block and stop in the upper leftcorner, facing South.
Fig. 21: Karel walks around the block.
This can be done using the following four lines of code:
repeat 3gogoleft
The robot’s position after executing the program is shown in Fig. 22.
Fig. 22: Karel’s position after executing the program.
Now let’s unindent the last command as if by mistake:
21
P. Solin Learn How to Think with Karel the Robot
repeat 3gogo
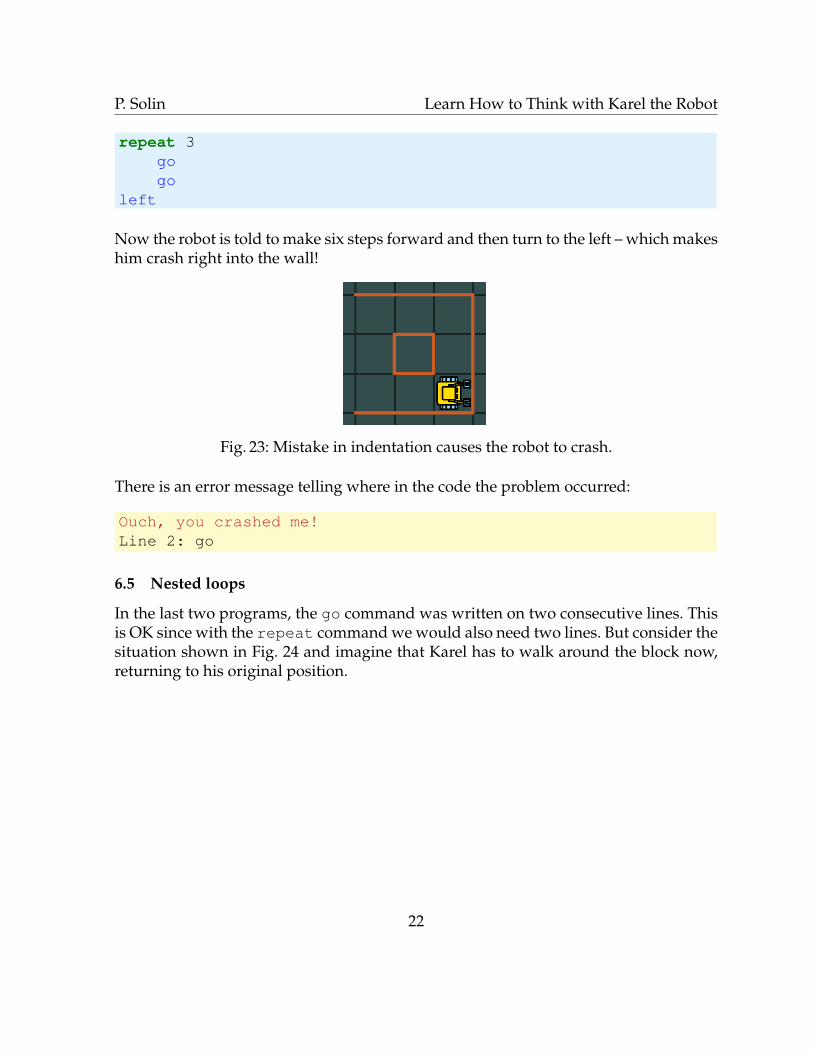
left
Now the robot is told to make six steps forward and then turn to the left – which makeshim crash right into the wall!
Fig. 23: Mistake in indentation causes the robot to crash.
There is an error message telling where in the code the problem occurred:
Ouch, you crashed me!Line 2: go
6.5 Nested loops
In the last two programs, the go command was written on two consecutive lines. Thisis OK since with the repeat command we would also need two lines. But consider thesituation shown in Fig. 24 and imagine that Karel has to walk around the block now,returning to his original position.
22

P. Solin Learn How to Think with Karel the Robot
Fig. 24: Walk around a larger block.
Writing the go command inside the repeat loop on five consecutive lines would notbe OK – the code would be much longer than necessary. The following code does thejob elegantly:
repeat 4repeat 5
goleft
When a loop is used within another loop’s body, we say that the loops are nested.Notice that the same indentation scheme applies to each of the two loops.
6.6 Walking around four blocks
Let’s look at one last example: Karel stands at the intersection of two streets that sep-arate four blocks, as shown in Fig. 25. His task is to walk around the first block untilhe reaches the intersection, walk around the second block until he reaches the intersec-tion, and so on, until he is finished with all four blocks.
23

P. Solin Learn How to Think with Karel the Robot
Fig. 25: Standing on an intersection.
This can be done using the following program:
repeat 4repeat 4
repeat 5go
leftright
Take your time to build this maze and run the program, it is worth the time!
24

P. Solin Learn How to Think with Karel the Robot
7 Working with Code and HTML Cells
7.1 Objectives
– Learn how to add and use new code cells and HTML cells.– Learn how to change the order of cells.– Learn how to run all code cells at once, and how to run them individually.– Learn how to clear, collapse, remove and merge cells.
7.2 Code cells
So far we have worked with a single code cell, but having multiple code cells can beuseful when we want to run different parts of our program separately. While the greenarrow button in the main menu runs all code cells (one after another), each code cellalso has its own green arrow button beneath it, that runs just that cell and nothing else.
It is also possible to insert descriptive HTML cells between code cells. Fig. 26 showsa sample code cell including its bottom menubar.
Fig. 26: Sample code cell.
Left to right, the icons under the code cell have the following meaning:
– Run the program in this particular code cell.– Stop the code cell (this icon becomes active when the program is running).– Move the cell under the one below it (changes the order of cells in the worksheet).– Move the cell above the one above it (changes the order of cells in the worksheet).– Duplicate the cell (new code cell with the same contents is created).– Clear the cell (erase all contents).– Add empty code cell under the cell.– Add empty HTML cell under the cell.– Remove the cell.– Collapse the cell.
25

P. Solin Learn How to Think with Karel the Robot
7.3 HTML cells
HTML cells use a WYSIWYG text and HTML editor to add descriptions and illustra-tions to the worksheet. Fig. 27 shows a sample HTML cell.
Fig. 27: Sample HTML cell.
This cell has two menus. The top one is related to text editing and inclusion of images,the bottom one is analogous to the menu of code cells. Let us begin with the top menu:Left to right, the buttons and icons have the following meaning:
– Select text font.– Make selected text boldface.– Make selected text italics.– Underline selected text.– Increase font size for selected text.– Decrease font size for selected text.– Choose foreground text color– Choose background text color– Align text left– Center text– Align text right– Add a hyperlink.– Create enumerated list.– Create bullet list.– Edit source HTML code. This is also how images can be added via external links.
The bottom menu, left to right:
– Save the HTML cell.
26

P. Solin Learn How to Think with Karel the Robot
– Edit the HTML cell.– Move the cell under the one below it (changes the order of cells in the worksheet).– Move the cell above the one above it (changes the order of cells in the worksheet).– Duplicate the cell (new HTML cell with the same contents is created).– Clear the cell (erase all contents).– Add empty code cell under the cell.– Add empty HTML cell under the cell.– Remove the cell.– Collapse the cell.
Additional operations with cells such as their merging can be done via the Edit menu.
27

P. Solin Learn How to Think with Karel the Robot
8 Conditions
8.1 Objectives– Understand the role of conditions in programming.– Learn to use Karel’s sensors in conjunction with conditions to help the robot check
his surroundings and react accordingly.
Conditions are present in every programming language. Their purpose is to make de-cisions while the program is running, and handle various unexpected situations. InKarel’s case, conditions will usually be related to checking his surroundings via thesensors wall, gem, tray, empty, north and home.
8.2 The wall sensor
The wall sensor helps the robot determine whether or not there is a wall right in frontof him. The usage of this sensor can be illustrated using a simple program "Carefulstep": If there is wall in front of you, turn back, else make one step forward. Note theuser comment following the hash symbol #. Comments are not part of the program -in other words, the program below has five lines:
# Program "Careful step".if wall
repeat 2left
elsego
Imagine that Karel stands in front of a gem as shown in Fig. 28.
Fig. 28: Karel’s initial position.
Now let us run the program three times by clicking three times on the green arrowbutton. Here is a sequence of Karel’s positions after each evaluation:
28

P. Solin Learn How to Think with Karel the Robot
Fig. 29: Left to right – Karel’s positions after executing the program "Careful step" one,two, and three times.
8.3 The keyword not
Karel can utilize the keyword not (negation) in conditions. For illustration, the lastprogram can be rewritten as follows, without changing its function:
# Program "Careful step".if not wall
goelse
repeat 2left
8.4 The gem sensor
The gem sensor allows Karel to detect a gem on the ground beneath him. The gem mustlie in the same square – the robot cannot see what is one or more steps ahead. Considerthe situation shown in Fig. 28 again:
Fig. 30: Karel’s initial position, same as before.
29
P. Solin Learn How to Think with Karel the Robot
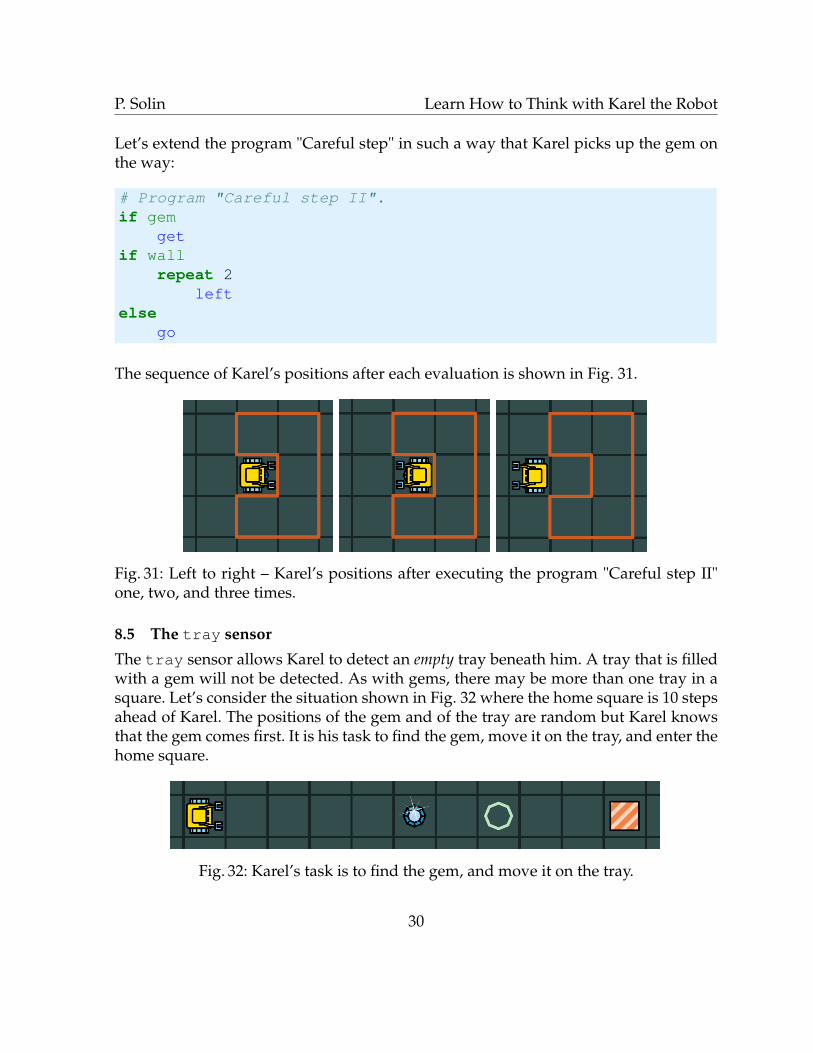
Let’s extend the program "Careful step" in such a way that Karel picks up the gem onthe way:
# Program "Careful step II".if gem
getif wall
repeat 2left
elsego
The sequence of Karel’s positions after each evaluation is shown in Fig. 31.
Fig. 31: Left to right – Karel’s positions after executing the program "Careful step II"one, two, and three times.
8.5 The tray sensor
The tray sensor allows Karel to detect an empty tray beneath him. A tray that is filledwith a gem will not be detected. As with gems, there may be more than one tray in asquare. Let’s consider the situation shown in Fig. 32 where the home square is 10 stepsahead of Karel. The positions of the gem and of the tray are random but Karel knowsthat the gem comes first. It is his task to find the gem, move it on the tray, and enter thehome square.
Fig. 32: Karel’s task is to find the gem, and move it on the tray.
30

P. Solin Learn How to Think with Karel the Robot
The program looks as follows:
repeat 10goif gem
getif tray
put
8.6 Repairing pavement
The empty sensor allows the robot to check whether his bag is empty, or, in the combi-nation with the keyword not, whether his bag contains at least one gem. Imagine thatKarel’s block has four houses with pavements around them, as shown in Fig. 33. Afterthe winter the pavements are damaged and some tiles (gems) are missing. Karel has anunknown number of tiles in his bag. Write a program for him to repair the pavements.Your program should not throw an error if Karel runs out of gems!
Fig. 33: Karel is repairing pavement.
31

P. Solin Learn How to Think with Karel the Robot
We can use the program from Subsection 6.6 as the basis for our new program. Firstlet’s adjust the numbers of repetitions in the loops to match the current layout of themaze. In fact just the deepest one needs to be changed from five to four since the newblocks are only three units long. The other two loops remain unchanged since eachsquare has still four edges and there are four squares as before. So the new program is:
repeat 4repeat 4
repeat 4go
leftright
This will work, but Karel will not be doing any repairs, just walk all pavements andreturn to his initial position. To repair the pavement, we need to insert an additionalcondition in front of each go command:
repeat 4repeat 4
repeat 4if not gem
putgo
leftright
Is this program OK? Not yet! If the number of gems in Karel’s bag is less than the num-ber of missing tiles in the pavement, the program will stop with an error message. So,we need to check the empty sensor before each put command. The final program hasthe form:
32

P. Solin Learn How to Think with Karel the Robot
repeat 4repeat 4
repeat 4if not gem
if not emptyput
goleft
right
Good job! Fig. 34 shows the pavement after the program is execured. Before runningthe program, we inserted 15 gems into Karel’s bag in Designer.
Fig. 34: After running the program, the pavement is repaired!
Try to return to the maze from Fig. 33 and run this program with just 10 gems in therobot’s bag! What is supposed to happen?
33

P. Solin Learn How to Think with Karel the Robot
8.7 Making the robot face any direction
This sensor can be used not only to check if the robot faces North, but also to make himface any given direction. For this, we always must make him face North first, becausethis is the only direction he can verify. Let’s write a program that makes the robot faceSouth no matter which direction he is currently facing!
Fig. 35: Karel faces a random direction.
The program uses the fact that in any situation, at most three left turns are enough tomake the robot face North:
# First turn North:repeat 3
if not northleft
# Then turn South:repeat 2
left
34

P. Solin Learn How to Think with Karel the Robot
9 Conditional Loop
9.1 Objectives
– Learn to repeat a command or a sequence of commands until some goal is achieved,not knowing in advance how many repetitions will be needed.
The conditional loop (while loop) is present in all procedural programming languages.It allows us to repeat some action without knowing in advance how many repetitionswill be needed. This can be the case, for example, when Karel needs to walk straight tothe nearest wall. He cannot measure the distance to a wall that is farther ahead, so thistask cannot be accomplished using the repeat loop.
9.2 Finding a lost gem
To demonstrate the usage of the while loop, consider the situation shown in Fig. 36where Karel stands at a random position in a maze without walls. Last time he walkedthe perimeter of the maze, Karel lost a gem somewhere. He does not know where thegem is - he only knows that it lies somewhere at the outer wall. Let us write a programfor the robot to find and collect his lost gem!
Fig. 36: There is only one gem, located somewhere at the exterior wall.
This can be done using five lines of code:
35

P. Solin Learn How to Think with Karel the Robot
while not gemwhile not wall
goleft
get
9.3 Writing programs in steps
Is it difficult to write a program like the one above? Not at all! But it is important tobuild it in several steps, rather than trying to write it all at once. That’s how even themost experienced computer programmers do it. As Step 1, write a loop that brings therobot to the outer wall. Clearly, this needs to be done as that’s where the gem is. And,we also turn the robot left (could be right), because facing the wall would not get usanywhere:
while not wallgo
left
Looking at this loop, we realize that it also can be used to bring the robot to the nextcorner, where he will turn left again. This is great, because he can just repeat this loopuntil he finds the gem! Hence as Step 2, we include an outer loop:
while not gemwhile not wall
goleft
As the last Step 3, Karel needs to collect the gem that he found. Hence we arrive at theoriginal program from above:
while not gemwhile not wall
goleft
get
9.4 Rock climbing
This time Karel stands in front of a high cliff:
36

P. Solin Learn How to Think with Karel the Robot
Fig. 37: Karel is climbing rocks.
He knows that there is a gem up there, and wants it, but he does not know how highthe cliff is, or the exact position of the gem. Let’s help the robot climb the cliff andcollect the gem!
This can be done using seven lines of code:
while wallleftgoright
while not gemgo
get
As an exercises, extend this program by a second part where Karel gets back down tohis initial position!
37

P. Solin Learn How to Think with Karel the Robot
10 Custom Commands
10.1 Objectives
– Learn to split complex tasks into smaller ones.– Learn to use custom commands as it makes programs simpler.
When writing a new program, it is a good idea to check whether it contains simplertasks that can be solved first. If so, solve them, and create a custom commands (sub-programs) for them. Then, suddenly, the original task does not appear that difficultanymore! We will give an example after showing how new commands are defined:
10.2 Defining new commands
New commands are defined using the reserved word def. For example, in a programwhere the robot needs to turn back in various situations, it is a good idea to define anew command turnback:
def turnbackrepeat 2
left
Note that the body of a new command needs to be indented analogously to the bodyof loops and conditions.In another program, the robot may need to frequently collect all gems that lie on theground beneath him. For that we can define a new command getall:
def getallwhile gem
get
The newly defined commands can be used as any other commands in our programs.
10.3 Arcade game
This time Karel needs to go through several floors of an arcade game shown in Fig.38, collect all gems, and enter his home square which is located at the East end of thetop floor. There is only one opening between each two floors. Initially, the robot standssomewhere in the first floor. This example is available under Examples in Learningresources for Karel.
38

P. Solin Learn How to Think with Karel the Robot
Fig. 38: Karel is playing an arcade game.
Clearly, this problem is more complex than anything we solved before. So, let us firstlook for smaller tasks that the robot will be doing in each floor. For sure, he will need toturn around from time to time, so let’s start with introducing the turnback command:
# New command to turn back:def turnback
repeat 2left
Since the robot does not know the exact positions of gems, he will always need tosweep the entire floor. Let’s introduce a new command for this. We will assume thatthe robot stands at the West end of the floor, facing East:
# Sweep one floor from left to right.# Assumes that robot stands at the# West end, facing East:def sweep
while not wallwhile gem
getgo# Do not forget gems in the last square:while gem
get
39

P. Solin Learn How to Think with Karel the Robot
Next we need a new command that will move the robot to the West end of the floorand make him face East, as required by the command sweep. Let us call this new com-mand gowest
# Reach West end of the current floor# and turn around to face East:def gowest
# Turn West:while not north
leftleft# Go to West end:while not wall
go# Turn around:turnback
Almost there! The last new command we need is to get to the next floor. Let us call itmoveup:
# Find the opening and move one# floor up. Assumes that robot is# at the East end of a floor,# facing East:def moveup
if not home# Face North:left# Find opening:while wall
leftgoright
# Pass through opening:go
In the last step we put together the previously defined commands gowest, sweep andmoveup to define a new command arcade:
40

P. Solin Learn How to Think with Karel the Robot
# Main procedure:def arcade
while not homegowestsweepmoveup
The main program includes just the command arcade:
# Main program:arcade
Fig. 39 shows the arcade after the program has finished:
Fig. 39: Arcade after our program has finished.
41

P. Solin Learn How to Think with Karel the Robot
11 Variables
11.1 Objectives
– Learn the purpose of variables in computer programming.– Learn to work with numerical and logical variables and text strings.– Learn to define and use functions that return values.– Learn the difference between global and local variables.
11.2 Karel grows up
Karel grew up and left the home of his parents to experience life on his own. Therefore,the robot’s home square usually will not be present in the maze. There are additionalchanges that reflect Karel’s growing up – there is a GPS device that he can use to de-termine his position in the maze, he can print messages, work with variables and lists,employ functions that return values, use complex logical operations, make random de-cisions, and more. A compact overview of all programming functionality can be foundin Section 16.
11.3 Purpose of variables
In programming, variables are used to store useful information for later use. To givea few examples, this information can be a number, word, sentence, or a logical value(True or False). Variables can be rather complex - we will encounter lists where mul-tiple values can be stored, such as the robot’s path, positions of gems in the maze, etc.
11.4 Types of variables
All of us use variables in our lives. One of the first ones is our own name.
Text strings
Say that your name is "Melissa". When you were about two years old, you saved yourown name in your memory. Using computer language, you defined a new variablemy_name as follows:
my_name = "Melissa"
The variable my_name stores a text string (string of characters).
42

P. Solin Learn How to Think with Karel the Robot
Numbers
Later in life we learn about various important numbers such as
seconds_per_minute = 60
or minutes_per_hour whose value is 60 as well, hours_per_day whose value is24, and so on. But we also use variables whose values change, such as days_per_year,number_of_my_pets, etc. In Karel, we will only use integers (not general real num-bers) as the purpose of the language is not to do math.
Logical variables
Logical variables can only store two possible values, either True or False. We usemany of them in our lives:
I_have_a_dog = TrueI_own_a_car = False
Of course, for someone else these variables will have different values. Logical variablesand operations will be discussed in more detail in Section 13.
11.5 Using the GPS device and the print command
Karel can retrieve his coordinates at any time via the commands gpsx and gpsy. Healso has a new ability to output text messages via the print command. The usage ofthese commands can be illustrated using a short program where Karel determines hiscoordinates in the maze and prints them:
print "Horizontal position:", gpsxprint "Vertical position:", gpsy
For the maze shown below,the above program will have the following output:
Horizontal position: 0Vertical position: 0
The maze width (in west-east direction) is 15 tiles, and its height (in south-north direc-tion) is 12 tiles. If Karel stands in the north-east corner as shown in Fig. 41,
43

P. Solin Learn How to Think with Karel the Robot
Fig. 40: South-west corner of the maze has GPS coordinates [0, 0].
Fig. 41: North-east corner of the maze has GPS coordinates [14, 11].
then the output of the program is
Horizontal position: 14Vertical position: 11
Move Karel to other parts of the maze and run the program again, to make yourselffamiliar with how the GPS device works!
44

P. Solin Learn How to Think with Karel the Robot
The print command can be used to display more complicated sentences where textand variables are separated by commas:
print "My GPS coordinates are", gpsx, "and", gpsy
Which, for the above maze, produces the output:
My GPS coordinates are 14 and 11
11.6 Defining custom functions
We can use the keyword return in the body of a command to return a value. Suchcommands are called functions. They are also defined using the keyword def. For ex-ample, with the following function countsteps the robot will walk straight towardsthe closest wall and return the number of steps he needed to reach it:
def countstepsn = 0while not wall
goinc(n)
return n
Notice couple of things here:
– The variable n was created and initialized by 0 using n = 0. In Karel, we do nothave to state the type of a variable in advance – the interpreter will figure it outfrom the type of value that is first assigned to it.
– The inc() function increases the value of an integer variable by one. There is alsoa function dec(), not used in the above program, that decreases the value of aninteger variable by one. More about these two functions will be said in Paragraph11.10.
The function can then be used as follows:
num = countstepsprint "I reached wall in", num, "steps!"
Here, we create a new variable num and initialize it using the integer value that isreturned by the function countsteps. The result is then printed. For the situation
45

P. Solin Learn How to Think with Karel the Robot
shown in Fig. 41, the output is
I reached wall in 11 steps!
11.7 Measuring the length of a wall
Here, Karel’s task is to measure and print the length of an arbitrary wall. The wall hasa beginning and an end, does not contain loops, the robot faces the first wall segment,and the wall continues to the robot’s left as shown in Fig. 42:
Fig. 42: Measuring the length of an arbitrary wall.
This task can be solved using the following function measurewall that has 13 lines:
46

P. Solin Learn How to Think with Karel the Robot
# Function to measure the length# of an arbitrary wall:def measurewall
l = 0while wallinc(l)leftif not wall
gorightif not wallgorightif not wall
return l
# Call the function:print "Length of wall is", measurewall
Running the program with the maze from Fig. 42, we obtain:
Length of wall is: 53
This example is available in Learning resources to the Karel module. Change the walland see if the program still works correctly!
11.8 Creating and initializing numerical variables
In Karel, numerical variables can be created and initialized in several different ways:
1. By setting them to an integer number. For example, a new variable a is created andset to zero as follows:
a = 0
2. By setting them to gpsx. New variable posx is created and set to gpsx by typing
posx = gpsx
47

P. Solin Learn How to Think with Karel the Robot
3. By setting them to gpsy. New variable posy is created and set to gpsy via
posy = gpsy
4. Initialize them with an existing value. If there already is an integer variable var1,then a new variable var2 can be created as follows:
var2 = var1
5. Initialize them with value returned by an existing function. Using the functioncountsteps from the previous paragraph, we can type:
num = countsteps
11.9 Changing values of numerical variables
The value of a numerical variable can be updated at any time by redefining it via oneof the five options described in the previous paragraph.
11.10 Using functions inc() and dec()
Karel does not know mathematical symbols ’+’ and ’-’. But for counting purposes, hecan increase and decrease the value of an integer variable by one using the functionsinc() and dec(), respectively. He can also increase and decrease the value of a vari-able by more than one via inc(n, num) and dec(n, num), where n is the name ofthe variable and num is an integer number.
11.11 Comparison operations
Integer numbers and numerical variables can be compared using the standard op-erators >, <, >=, <=, ==, !=, <>. In this order, they read "greater than", "lessthan", "greater than or equal to", "less than or equal to", "equal to", "not equal to" and"not equal to" (the last two operations have the same meaning). The result of each suchoperation is a logical value True or False, and it can be either used in a condition orconditional loop, or assigned to a variable. For example,
a = 1b = 5print a < b
48

P. Solin Learn How to Think with Karel the Robot
yields the output
True
The code
a = 1b = 5c = a > bprint c
yields
False
The code
a = 0while a <= 5
print ainc(a)
yields
012345
11.12 Text strings
Text string variables are created and initialized analogously to the numerical ones:
robots_name = "Karel"
49

P. Solin Learn How to Think with Karel the Robot
They can be printed as usual. The code
print "Robot’s name is", robots_name
yields
Robot’s name is Karel
A text string variable can be used to initialize a new one. Let’s say that someone wantsto rename the robot to "Carlos" (which is the Spanish version of "Karel"), and store hisoriginal name in the variable robots_name_orig. This is done as follows:
robots_name_orig = robots_namerobots_name = "Carlos"
11.13 Local and global variables
A variable that is created within a function is local to that function, meaning that it canbe used in the function only. If we attempt to use it outside of that function, an er-ror is thrown. The following code creates a local variable a within a function calledmyfunction:
def myfunctiona = 1return
myfunctionprint a
When run, the code throws an error message:
Unknown variable/procedure "a"
On the other hand, variables created within the main program are global. Global vari-ables can be used in functions. For illustration, let us adjust the above program to:
50

P. Solin Learn How to Think with Karel the Robot
def myfunctionprint "b =", breturn
b = 5
myfunction
The output of this program is:
b = 5
One should use local variables whenever possible, as this keeps the code safe andwell organized. Use of global variables should be kept at a minimum.
51

P. Solin Learn How to Think with Karel the Robot
12 Lists
12.1 Objectives
– Understand the concept of a list.– Learn basic operations with lists.– Learn to work with indices.
Lists are useful data structures that can be used to store multiple integer values, GPScoordinates, logical values, and/or text strings at the same time. Values of differenttypes can be combined and lists can even contain other lists. For example, a list canstore the robot’s path, positions of all gems in the maze, positions and shapes of obsta-cles that the robot encounters, and much more. Objects in a list are ordered and theycan be added to the end of a list, accessed by their index, and deleted from any positionof the list.
12.2 Compatibility with Python
Karel lists are a “subset” of lists in the Python programming language. In other words,everything that you learn here will work in Python, but Python provides additionalfunctionality for lists which is not present in Karel.
12.3 Creating a list
We use square brackets when creating lists. An empty list U is created as follows:
U = []
Lists can be also created non-empty:
V = [1, 2, 3, 4, 5]
We can use variables when creating a list:
c = 100W = [0, 50, c]print W
The output of this code is
52
P. Solin Learn How to Think with Karel the Robot
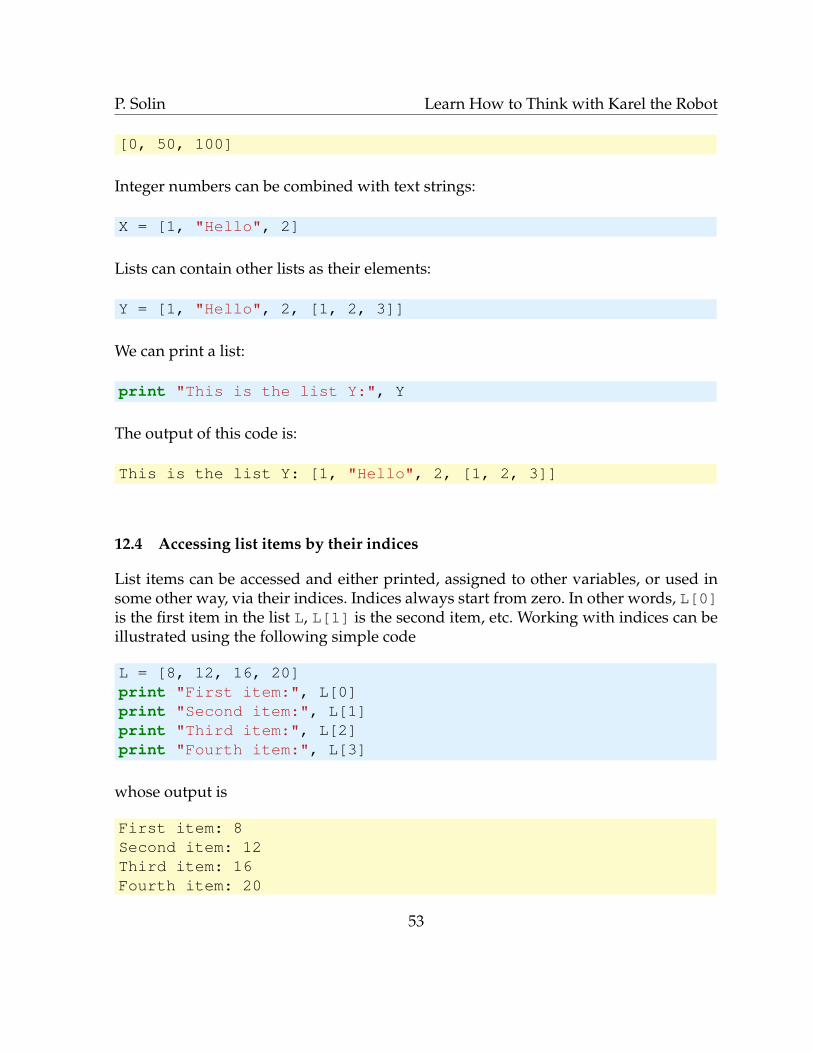
[0, 50, 100]
Integer numbers can be combined with text strings:
X = [1, "Hello", 2]
Lists can contain other lists as their elements:
Y = [1, "Hello", 2, [1, 2, 3]]
We can print a list:
print "This is the list Y:", Y
The output of this code is:
This is the list Y: [1, "Hello", 2, [1, 2, 3]]
12.4 Accessing list items by their indices
List items can be accessed and either printed, assigned to other variables, or used insome other way, via their indices. Indices always start from zero. In other words, L[0]is the first item in the list L, L[1] is the second item, etc. Working with indices can beillustrated using the following simple code
L = [8, 12, 16, 20]print "First item:", L[0]print "Second item:", L[1]print "Third item:", L[2]print "Fourth item:", L[3]
whose output is
First item: 8Second item: 12Third item: 16Fourth item: 20
53

P. Solin Learn How to Think with Karel the Robot
12.5 Appending items to a list
An arbitrary object obj (integer, text string, logical value, another list, etc.) can be ap-pended to the end of an existing list using the append() function. For a list L thiswould be
L.append(obj)
For illustration, the code
K = [1, 11]K.append(21)print K
has the output
[1, 11, 21]
12.6 Removing items via the pop() function
The ith item (where indices start from zero) can be deleted from a list L and assignedto a variable x via
x = L.pop(i)
For illustration, let us create a list X containing three text strings "Monday", "Tuesday"and "Wednesday", and then delete the second item:
X = ["Monday", "Tuesday", "Wednesday"]day = X.pop(1)print dayprint X
The output of this code is
Tuesday[’Monday’, ’Wednesday’]
54

P. Solin Learn How to Think with Karel the Robot
If the pop() function is used without an index, it removes and returns the last objectof the list:
day = X.pop()print dayprint X
Output:
Wednesday[’Monday’]
12.7 Deleting items via the del command
The purpose of the del command is similar to the pop() function except that thedeleted object is destroyed (it cannot be assigned to a variable). The ith item can bedeleted from a list L via
del L[i]
For illustration, the output of the code
L = ["Monday", "Tuesday", "Wednesday"]del L[0]print Ldel L[0]print L
is
[’Tuesday’, ’Wednesday’][’Wednesday’]
12.8 Length of a list
The function len(X) returns the length of the list X. For illustration, the code
55

P. Solin Learn How to Think with Karel the Robot
M = ["John", "Josh", "Jim", "Jane"]n = len(M)print "Length of the list is", n
has the output
Length of the list is 4
12.9 Parsing lists
In Karel, lists can be parsed via the for command that is the same as the correspond-ing command in Python. For illustration, the following code defines a list M consistingof four numbers 1, 2, 3, 4 and prints each of them, increased by two:
M = [1, 3, 5, 7]for n in M
print inc(n, 2)
The output is:
3579
12.10 Recording robot’s path
Let us take the function measurewall from Subsection 11.7 and adjust it in such away that the robot’s path is recorded in a list and returned. The new function will becalled recordpath:
56

P. Solin Learn How to Think with Karel the Robot
# Function to record robot’s path:def recordpath
L = [[gpsx, gpsy]]while wallleftif not wall
goL.append([gpsx, gpsy])rightif not wallgoL.append([gpsx, gpsy])rightif not wall
return L
# Record the path and print it:print recordpath
This time we will use a shorter wall so that the resulting list is not too long:
Fig. 43: Recording robot’s path.
Running the program with the maze from Fig. 43 yields:
57

P. Solin Learn How to Think with Karel the Robot
[[5, 4], [5, 5], [5, 6], [5, 7], [5, 8], [5, 9], [6, 9],[7, 9], [8, 9], [9, 9], [9, 8], [9, 7], [8, 7], [7, 7],[8, 7], [9, 7], [9, 6], [9, 5], [8, 5], [7, 5], [8, 5],[9, 5], [9, 4], [9, 3], [8, 3], [7, 3], [6, 3], [6, 4]]
This is just as it should be – recall that the coordinates start with [0, 0] which is thebottom-left corner square.
12.11 Replaying robot’s path from a list
Now we will teach Karel to move according to a path that is stored as a list of GPS coor-dinates. More precisely, the path will be given in terms of [gpsx, gpsy] pairs storedin a list L. As a first step, we need to implement four functions that will turn the robotto face North, East, South and West. We also implement a procedure gotopositionthat moves the robot from any initial position to a position NEWX, NEWY:
# Turn North:def turnnorth
while not northleft
# Turn East:def turneast
turnnorthright
# Turn South:def turnsouth
turneastright
# Turn West:def turnwest
turnnorthleft
58

P. Solin Learn How to Think with Karel the Robot
# Move from the current position to# a new position [NEWX, NEWY]:def gotoposition
# Horizontal direction first:posx = gpsxif posx < NEWX
turneastrepeat dec(NEWX, posx)
goelse
turnwestrepeat dec(posx, NEWX)
go# Vertical direction:posy = gpsyif posy < NEWY
turnnorthrepeat dec(NEWY, posy)
goelse
turnsouthrepeat dec(posy, NEWY)
go
As you can see, we are not assuming that the new position is adjacent to the currentone – this makes the procedure gotoposition more generally usable. The last step iseasy, we just need to parse the list L, and make the robot go to every new position:
# Parse list L, always go to the# next position:def playlist
n = len(L)i = 0repeat n
newpair = L[i]NEWX = newpair[0]NEWY = newpair[1]gotopositioninc(i)
59

P. Solin Learn How to Think with Karel the Robot
The variable newpair is there because Karel does not allow double indices. What re-mains to be done now is to just run the program with a sample list L:
# Sample list L:L = [[3, 10], [5, 5], [10, 10], [1, 1]]# We need these two global variables:NEWX = gpsxNEWY = gpsy# Go!playlist
The reader can notice usage of global variables NEWX, NEWY and L here. This is not thebest programming practice but the Karel language does not allow functions to acceptparameters, so it needs to be done this way for the moment. We plan to implementpassing parameters into functions soon.
12.12 Recording positions of gems
Gems are distributed randomly along the maze perimeter. The squares may containmore than one gem. The robot should walk the maze perimeter and record the posi-tions and counts of all gems into a list. Each list entry should have the form [gpsx,gpsy, number]. At the end, the robot should print the list.
Fig. 44: Gems are distributed randomly along maze perimeter.
60
P. Solin Learn How to Think with Karel the Robot
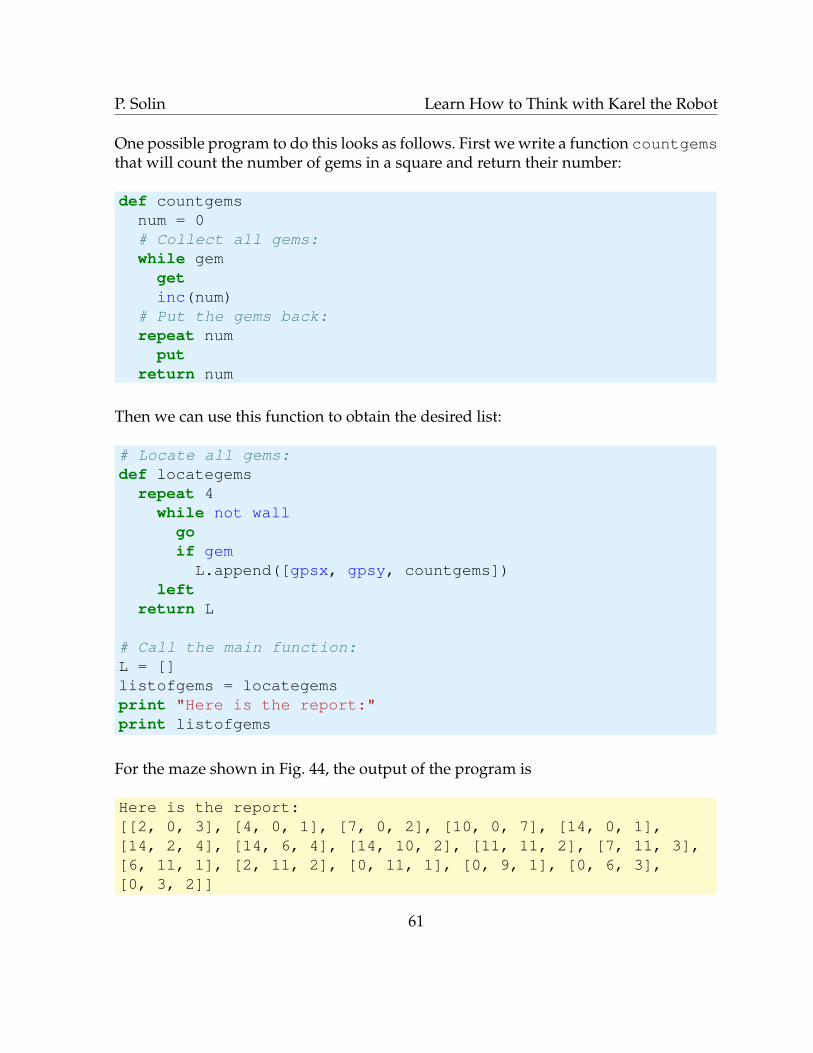
One possible program to do this looks as follows. First we write a function countgemsthat will count the number of gems in a square and return their number:
def countgemsnum = 0# Collect all gems:while gemgetinc(num)
# Put the gems back:repeat num
putreturn num
Then we can use this function to obtain the desired list:
# Locate all gems:def locategems
repeat 4while not wall
goif gemL.append([gpsx, gpsy, countgems])
leftreturn L
# Call the main function:L = []listofgems = locategemsprint "Here is the report:"print listofgems
For the maze shown in Fig. 44, the output of the program is
Here is the report:[[2, 0, 3], [4, 0, 1], [7, 0, 2], [10, 0, 7], [14, 0, 1],[14, 2, 4], [14, 6, 4], [14, 10, 2], [11, 11, 2], [7, 11, 3],[6, 11, 1], [2, 11, 2], [0, 11, 1], [0, 9, 1], [0, 6, 3],[0, 3, 2]]
61
P. Solin Learn How to Think with Karel the Robot
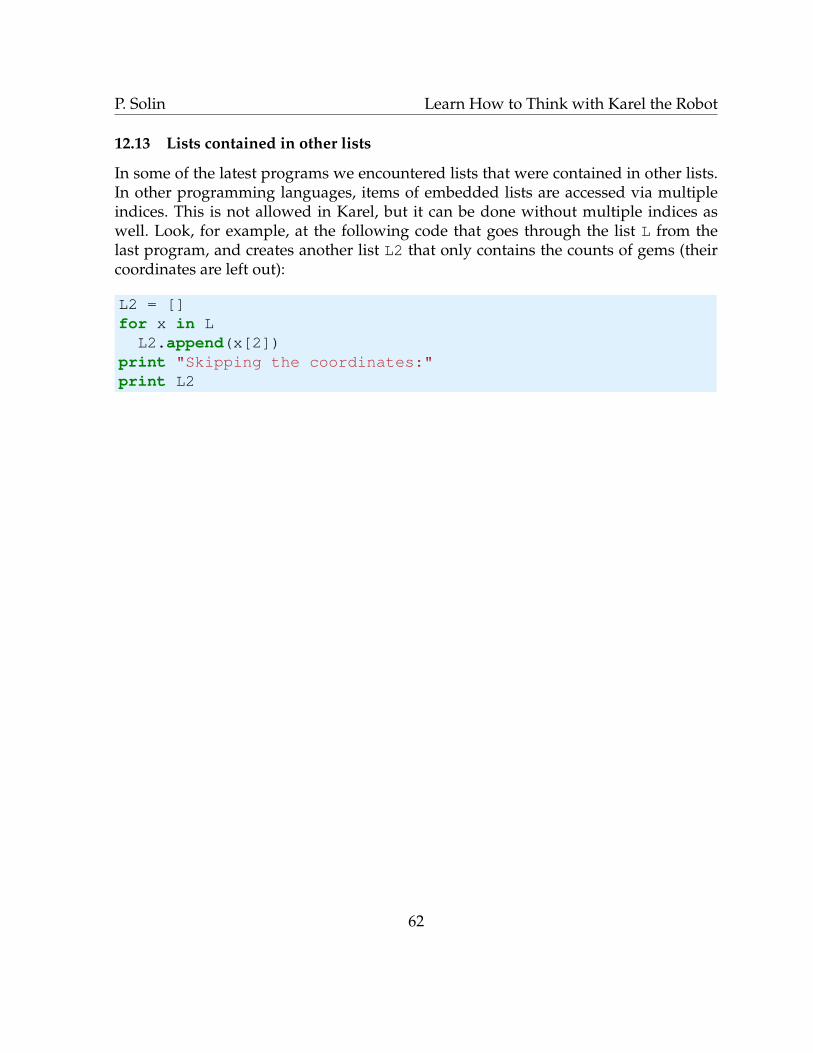
12.13 Lists contained in other lists
In some of the latest programs we encountered lists that were contained in other lists.In other programming languages, items of embedded lists are accessed via multipleindices. This is not allowed in Karel, but it can be done without multiple indices aswell. Look, for example, at the following code that goes through the list L from thelast program, and creates another list L2 that only contains the counts of gems (theircoordinates are left out):
L2 = []for x in LL2.append(x[2])
print "Skipping the coordinates:"print L2
62

P. Solin Learn How to Think with Karel the Robot
13 Tour of Logic
13.1 Objectives
– Review elementary logic.– Practice working with logical expressions.– Learn about truth tables.
13.2 Simple logical expressions
As we already know, logical expressions are expressions that are either True or False.We say that True or False is their value. Here are some real-life examples, try toanswer them with True or False:
– "I am 12 years old."– "My dad is a teacher."– "My school is a STEM Academy."
And here are some Karel examples:
– wall ... True if the robot is facing a wall, False otherwise.– gem ... True if a gem is beneath the robot, False otherwise.– tray ... True if a tray is beneath the robot, False otherwise.– north ... True if the robot is facing North, False otherwise.– home ... True if the robot is home, False otherwise.– empty ... True if the robot’s bag is empty, False otherwise.
13.3 Complex logical expressions
In programming as well as in real life we often deal with logical expressions that aremore complex. Often we use two or more simple logical expressions in one sentence,and moreover we combine them with logical operations and, or or not.
For example, the sentence "I will go skiing on Saturday if weather is good and ifMichael joins me." includes three simple logical expressions. Let’s call them for brevity
A = "I will go skiing on Saturday."B = "The weather is good."C = "Michael joins me."
There is a logical operation and between the expressions B, C. The original sentencecan be written briefly as
63

P. Solin Learn How to Think with Karel the Robot
if B and C then A
We love this kind of brevity in programming because it makes the code short. Let’ssay that we can predict the future and we know that the weather will be good and thatMichael will go as well. Then we can translate the above condition into computer code.We also print the resulting value of A at the end:
# Let’s say that weather will be good# and Michael will join you:B = TrueC = True# This is how you decide:if B and C
A = Trueelse
A = False# Print the result:if A
print "I will go ski on Sunday."else
print "I will not go ski on Sunday."
Output:
I will go ski on Sunday.
13.4 Truth tables
Each of these three logical operations comes with its own truth table that summarizesits results for different values of operands. The truth table for the logical and is:
A B A and B
True True TrueTrue False FalseFalse True FalseFalse False False
The truth table for logical or is:
64
P. Solin Learn How to Think with Karel the Robot
A B A or B
True True TrueTrue False TrueFalse True TrueFalse False False
The truth table for logical not is:
A not A
True FalseFalse True
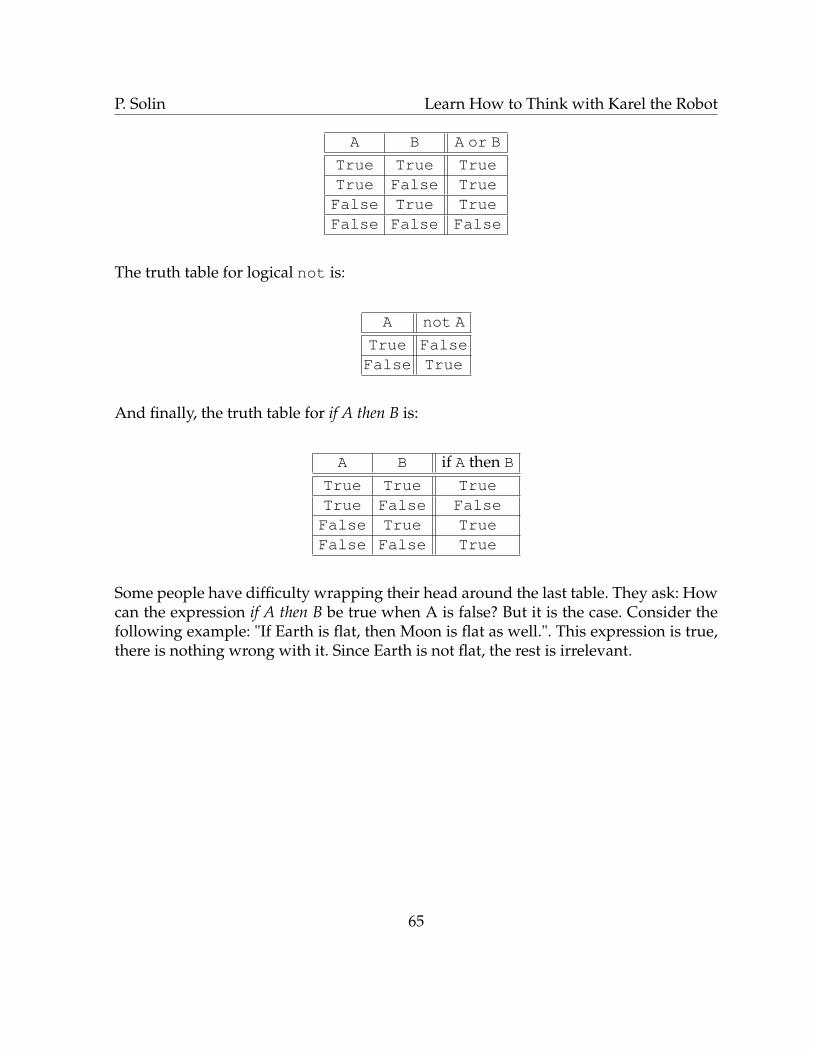
And finally, the truth table for if A then B is:
A B if A then B
True True TrueTrue False FalseFalse True TrueFalse False True
Some people have difficulty wrapping their head around the last table. They ask: Howcan the expression if A then B be true when A is false? But it is the case. Consider thefollowing example: "If Earth is flat, then Moon is flat as well.". This expression is true,there is nothing wrong with it. Since Earth is not flat, the rest is irrelevant.
65

P. Solin Learn How to Think with Karel the Robot
14 Randomness
14.1 Objectives
– Learn how to make random decisions using the rand command.– Learn to simulate random processes.
Karel can make random decisions via the command rand that returns with equal prob-ability either True or False. Typical usage of this command is
if randdo_something
elsedo_something_else
14.2 Using random moves to search entire maze
As a first example, here is a nice short program that makes Karel walk randomlythrough the maze and look for gems:
# This is a simple way to# create an infinite loop:while True
# Make a random number of steps forward:while rand
if not wallgo
if gemget
# Turn either right or left:if rand
rightelse
left
After some time (it may take a while) the robot reaches all reachable gems and collectsthem! The program is in fact an infinite loop, so you will have to eventually stop it viathe red button.
66

P. Solin Learn How to Think with Karel the Robot
15 Recursion
15.1 Objectives
– Understand what recursion is and when it can be useful.– Learn to write good recursive algorithms.
By a recursive algorithm we mean an algorithm that makes a call to itself. How doesit sound? In our life we use recursion all the time. For example, when we descend astaircase, our algorithm is:
Descend_staircaseDescend_one_stepIf this_was_not_the_last_step
Descend_staircase
Recursion is not applicable to all types of problems, but it can be very helpful, espe-cially when:
– The problem can be reduced to the same one, just smaller in size.– The same algorithm can be applied to solve the smaller problem.
In the program, this means that some command calls itself, either directly or throughother commands.
15.2 How it works
Consider the following program:
def reach_wallif not wall
goreach_wall
reach_wall
Initial position of the robot is shown in Fig. 45:When the command reach_wall is first called, the robot stands three steps awayfrom the wall and thus the if not wall condition passes. Then the command gofollows and the robot’s position changes as shown in Fig. 46.Next the robot executes the reach_wall command that follows the go command. Agood way to understand what happens is to imagine that the command is replaced
67

P. Solin Learn How to Think with Karel the Robot
Fig. 45: Robot’s initial position.
Fig. 46: Robot’s position after making the first step forward.
with its own body. So the corresponding code would look as follows:
if not wallgoif not wall
goreach_wall
Since the robot is two steps away from the wall, the second if not wall conditionpasses and he makes a second step forward. His new position is shown in Fig. 47.
Fig. 47: Robot’s position after making the second step forward.
Next the robot executes the third reach_wall command. Again we can imagine thatthe command is replaced with its own body. The corresponding code would look asfollows:
68

P. Solin Learn How to Think with Karel the Robot
if not wallgoif not wall
goif not wall
goreach_wall
Since the robot is one step away from the wall, the third if not wall conditionpasses and he makes a third step forward. His new position is shown in Fig. 48.
Fig. 48: Robot’s position after making the third step forward.
Now the robot stands in front of the wall. The reach_wall command is executed onemore time, so we can imagine that its body is pasted into the code one last time:
if not wallgoif not wall
goif not wall
goif not wall
goreach_wall
However, now the if not wall condition does not pass, which means that the pro-gram is finished.
Of course, in this example it would have been much easier to use a while loop butthat was not the point. We will encounter situations where recursive algorithms aremuch easier to write than non-recursive ones.
69

P. Solin Learn How to Think with Karel the Robot
15.3 The base case
In the last example, to prevent infinite recursion, we used an if statement. The elsestatement can be omitted which means "else do nothing". In recursive algorithms, wealways need an if or if-else statement of some sort, where one branch makes a re-cursive call while the other one does not. The branch without a recursive call is calledthe base case. A bad example of a recursive command without a base case would be
def turn_foreverleftturn_forever
turn_forever
This program is an infinite recursion that needs to be stopped using the red stop button.
15.4 Diamond staircase revisited
Recall the Staircase example from Section 10:
Fig. 49: The Staircase problem.
The goal is to climb the stairs, collect all gems, and enter the home square. Here is arecursive program to do this:
70

P. Solin Learn How to Think with Karel the Robot
def climb_stairsif not home
leftgorightgoif gem
getclimb_stairs
climb_stairs
If an algorithm comes in both a recursive and a non-recursive version, then the follow-ing should be taken into account:
– The recursive version will be slightly slower than a non-recursive one. The reasonis the overhead related to creating a new instance of the recursive command andcalling it.
– The recursive version will also require more memory – when a recursive commandis called 1000 times, then it actually exists in 1000 copies in the memory. Hence,recursion is not recommended with very large numbers of repetitions.
Recursive algorithms are used mainly where non-recursive ones are cumbersome todesign. For example, much code written for traversing tree-like data structures is re-cursive. Also certain sorting algorithms are more naturally written in recursive form.We will discuss these subjects in more detail later.
15.5 Mutually recursive commands
Recursion can have interesting forms. For example, there can be a pair of commandsthat call themselves mutually, such as the commands odd and even in the followingexample (that also solves the Staircase problem). Note the presence of base case in bothrecursive commands:
71

P. Solin Learn How to Think with Karel the Robot
def climb_stepleftgorightgoget
def oddif not home
climb_stepeven
def evenif not home
climb_stepodd
odd
72

P. Solin Learn How to Think with Karel the Robot
16 Appendix - Overview of Functionality by Mode
16.1 First Steps (Section 4)
In First Steps, Karel can be guided by clicking on buttons:
– go ... make one step forward.– left ... turn left.– right ... turn right.– put ... put a gem on the ground.– get ... pick up a gem from the ground.
16.2 Programming Mode (Sections 5 – 15)
In Programming Mode, Karel has the following functionality:
– go ... make one step forward.– left ... turn left.– right ... turn right.– put ... put a gem on the ground.– get ... pick up a gem from the ground.– repeat ... counting loop (repeat an action a given number of times).– if - else ... condition.– while ... conditional loop (repeat an action while a condition is satisfied).– def ... define a new command.– wall ... sensor that checks if the robot faces a wall.– gem ... sensor that checks if there is a gem beneath the robot.– tray ... sensor that checks if there is a tray beneath the robot.– empty ... sensor that checks if the robot’s bag with gems is empty.– home ... sensor that checks if the robot is in the home square.– north ... sensor that checks if the robot faces North.– print ... print strings and variables.– gpsx ... GPS coordinate in the horizontal direction.– gpsy ... GPS coordinate in the vertical direction.– a = 0 ... create a new variable a and initialize it with zero.
For additional ways to initialize variables see Subsection 11.8.– inc(a) ... increases the value of variable a by one.– inc(a, value) ... increases the value of variable a by value.– dec(a) ... decreases the value of variable a by one.– dec(a, value) ... decreases the value of variable a by value.– rand ... random command (returns randomly True or False).
73

P. Solin Learn How to Think with Karel the Robot
– return ... returns a value, to be used in functions.– and ... binary logical and.– or ... binary logical or.– not ... unary logical not.– L[] ... create an empty list L.– len(L) ... length of list L.– L[i] ... object at position i in list L. Note: L[0] is the first item in the list.– L.append(x) ... appends x to the end of list L.– x = L.pop() ... removes the last item of list L and assigns it to x.– del L[i] ... removes from list L object at position i.– for x in L ... Python way to parse lists.– Numerical and logical (Boolean) variables.– Complex logical expressions.– Functions that return values.– Lists.– Recursion.
17 What next?
Congratulations, you made it through Karel the Robot! We hope that you enjoyed thecourse. If you can think of any way to improve the application Karel the Robot or thistextbook, we would like to hear from you. If you have an interesting new game or ex-ercise for Karel, please let us know as well.
You are now ready to learn a next programming language! We would recommendPython which is a modern dynamic programming language that is used in many ap-plications in business, science, engineering, and other areas. NCLab provides a Pythoncourse.
In any case, our team wishes you good luck, and keep us in your favorite bookmarks!
Your Authors
74