halckemy.s3. · Web viewVLC live streaming Pi Camera It is working on any Wi-Fi network....
9
VLC live streaming Pi Camera It is working on any Wi-Fi network. Hardware Required: Raspberry Pi Raspberry Pi Camera Module v2 Wi-Fi connection Download VLC Player on Raspberry pi, then on your phone or laptop Follow the steps below: 1. Enable Camera and SSH option on your Pi: go to Preferences > Raspberry Pi Configuration, and make sure Pi is connected to Wi- Fi.
-
Upload
truongcong -
Category
Documents
-
view
215 -
download
1
Transcript of halckemy.s3. · Web viewVLC live streaming Pi Camera It is working on any Wi-Fi network....

VLC live streaming Pi Camera
It is working on any Wi-Fi network.
Hardware Required:
Raspberry Pi Raspberry Pi Camera Module v2 Wi-Fi connection Download VLC Player on Raspberry pi, then on your phone or laptop
Follow the steps below:
1. Enable Camera and SSH option on your Pi: go to Preferences > Raspberry Pi Configuration, and make sure Pi is connected to Wi-Fi.
Link for how to connect your camera to Raspberry Pi:https://www.raspberrypi.org/learning/getting-started-with-picamera/worksheet/

2. Install VLC Player to Raspberry Pi: run “sudo apt-get install vlc” in terminal
3. First, Find your Raspberry Pi IP address: on your wireless router or in pi terminal by command: ifconfigIn wlano copy or write down the IP address (white line: inet addr)
You need your Raspberry pi, IP address for wireless network setting.

Setup wireless router:
Login to your wireless router
You can also find your raspberry Pi IP address, in wireless router list
4. Now go to WAN on your router:
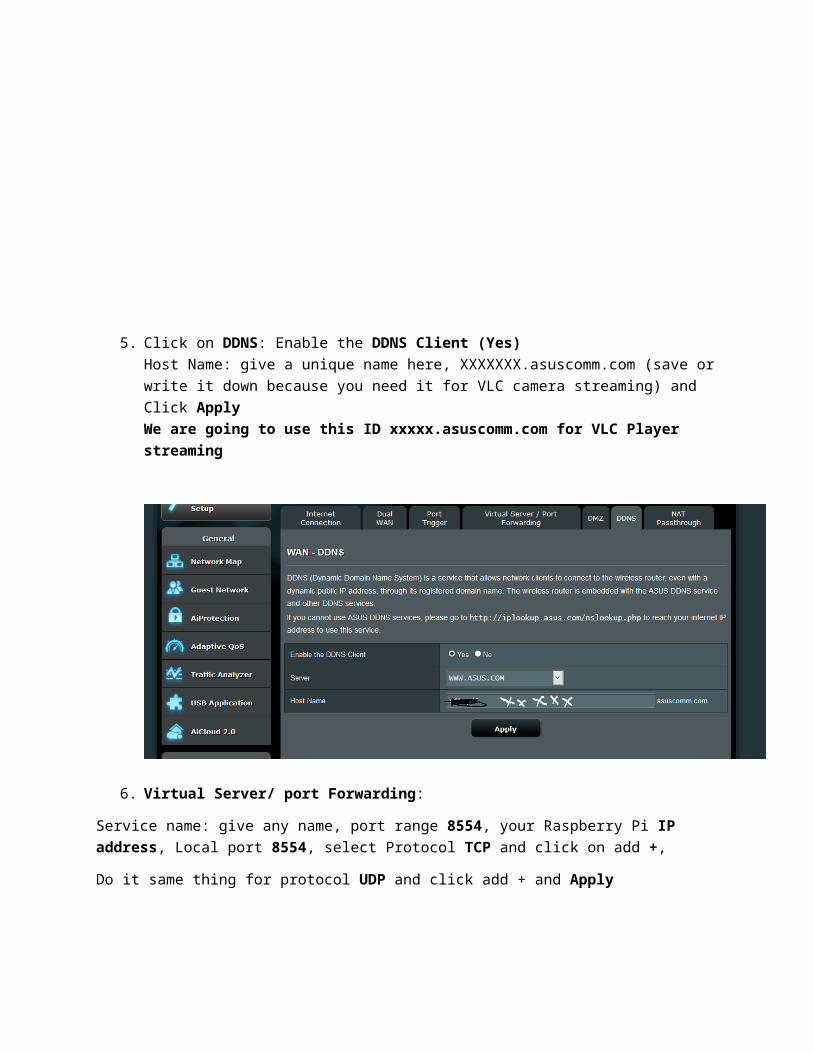
5. Click on DDNS: Enable the DDNS Client (Yes)Host Name: give a unique name here, XXXXXXX.asuscomm.com (save or write it down because you need it for VLC camera streaming) and Click ApplyWe are going to use this ID xxxxx.asuscomm.com for VLC Player streaming
6. Virtual Server/ port Forwarding:
Service name: give any name, port range 8554, your Raspberry Pi IP address, Local port 8554, select Protocol TCP and click on add +,
Do it same thing for protocol UDP and click add + and Apply

7. Set the Port Trigger:In Description add your Pi IP address, 8554, TCP, 8554, TCP and click add +, and apply (In picture below)
Done with Wireless Router setup
Now go back to Raspberry PI, go to Terminal to run a code:
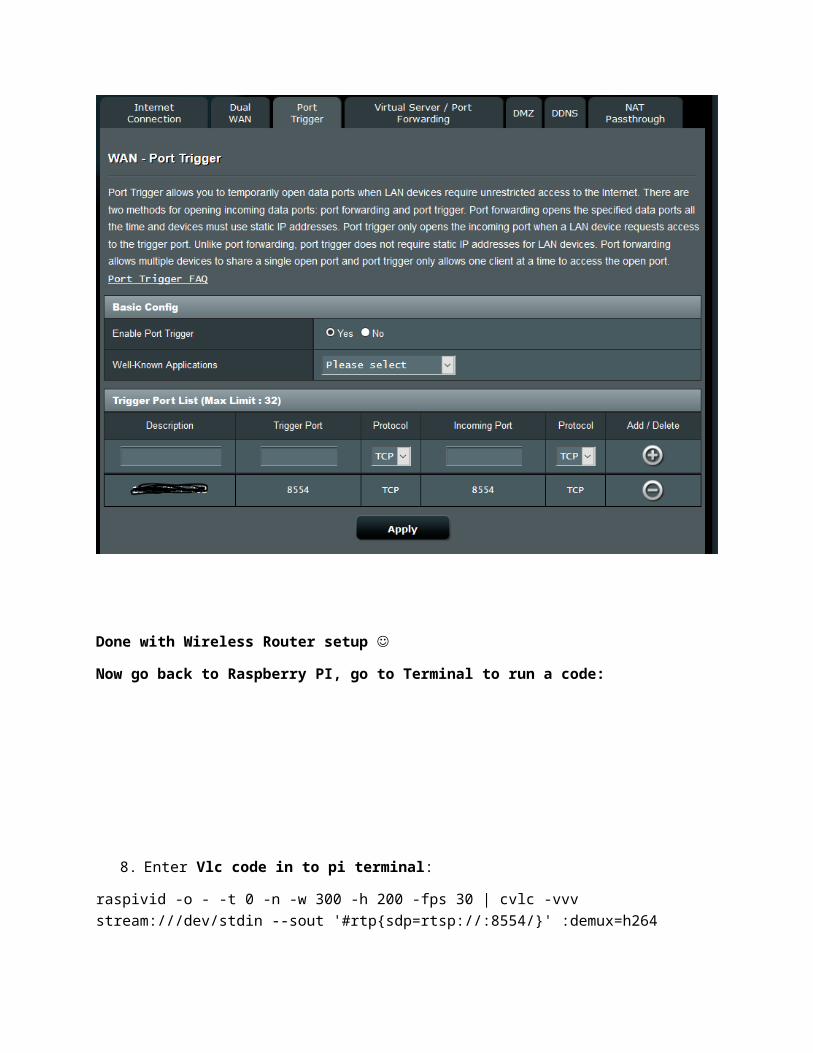
8. Enter Vlc code in to pi terminal:
raspivid -o - -t 0 -n -w 300 -h 200 -fps 30 | cvlc -vvv stream:///dev/stdin --sout '#rtp{sdp=rtsp://:8554/}' :demux=h264
You can change the w h, and fps and Enter
In step 11 you will see how, Pi terminal will look after code start running.

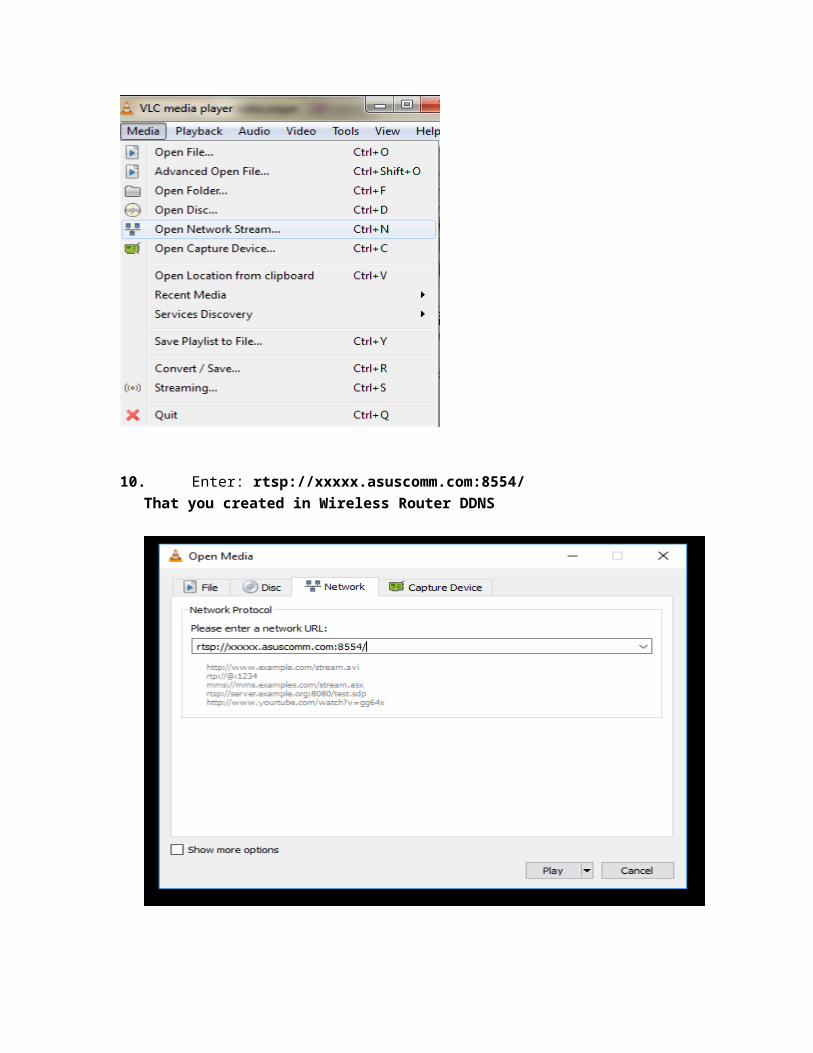
9. Open VLC Player to connect the network: Media > Open Network Stream
10. Enter: rtsp://xxxxx.asuscomm.com:8554/ That you created in Wireless Router DDNS
11. It’s working: This is how it will look when you run the code in terminal. If you close the terminal than live streaming will stop. So just enter the code and minimize the terminal tap.
You can use Putty to run the code, but I notice that When I close the putty it also stop the live camera streaming. Use the xxxxx.asuscomm.com for live stream on any Wi-Fi network and your phone have to be connect with any Wi-Fi. When you connect just wait a little because of delay for few second. I think it will only let one device to live stream at the same time. Currently working on how to live stream on mobile network. Currently it’s not working on mobile data. I am trying my best to make it easier for everyone. Thank you
For reference: VLC installation and code http://www.raspberry-projects.com/pi/pi-hardware/raspberry-pi-camera/streaming-video-using-vlc-player