
Google Slide Tutorial · Google Slide Tutorial Be sure to read till the very end as this includes...
13
Google Slide Tutorial Be sure to read till the very end as this includes important information about your assignment submission at the end. Go to your Google Drive (with your school login) and select Google Apps icon and select Slides.
Transcript of Google Slide Tutorial · Google Slide Tutorial Be sure to read till the very end as this includes...

Google Slide Tutorial
Be sure to read till the very end as this includes important information about your assignment
submission at the end.
Go to your Google Drive (with your school login) and select Google Apps icon and select Slides.

Select Blank.

Before we start, let’s get rid of the clutters. You can select them and simply hit “delete.”

Select Insert Image icon and place a photo (one of your 10 photos from the previous
assignment).

Select Cropping icon and Format Options and Size & Rotation and place “4” and “3” as width
and height.

Adjust the image to the 4 inches x 3 inches frame to get the best result that accord with the Rule
of Thirds and/or the Principle of Unequal spacing. You can increase or decrease the size of the
original photo, but you should use only the corners; otherwise, the image will not maintain the
original portion (i.e. distorted).

When you are happy with the result, press “Enter.” Then select Position and enter the
parameters seen below to place the photo at the center.
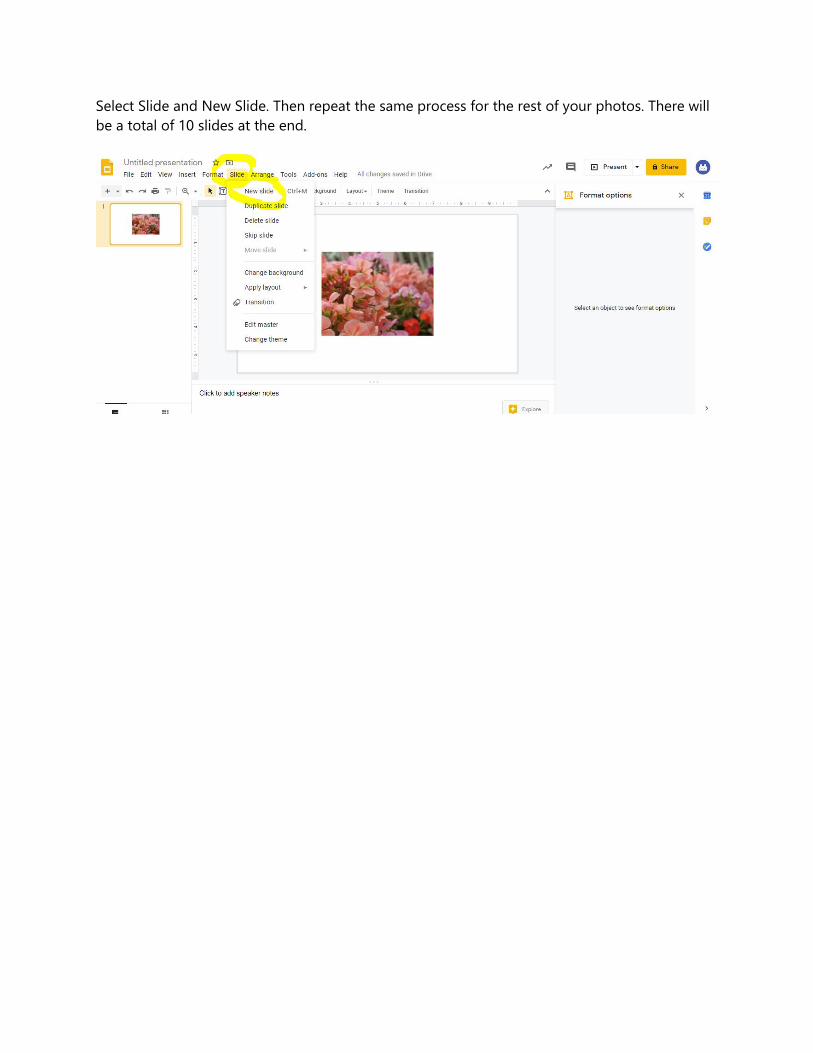
Select Slide and New Slide. Then repeat the same process for the rest of your photos. There will
be a total of 10 slides at the end.

When you are done, save it by selecting File – Make a copy – Entire presentation.

Name it “Assignment 17” and in your My Drive, make a folder named “Media Arts – YOUR
NAME” if you haven’t already and save it there.

Finally, go to your Media Arts folder and select Share.

Be sure “Can organize, add, & edit” is checked, and select Send. Incidentally, in this folder, you
should make another folder named “Assignment 16” and place your 10 photos there.