Go2Group synapseRT - Installation Guide
30
Go2Group synapseRT Complete. View. 2009.05 v1.0B www.Go2Group.com
Transcript of Go2Group synapseRT - Installation Guide

Go2Group synapseRT
Complete. View.
2009.05
v1.0B
www.Go2Group.com

Table of Contents
Go2Group synapseRT 3
Go2Group synapseRT, Overview 4
Go2Group synapseRT, Requirements 5
Go2Group synapseRT, Editions 5
Go2Group synapseRT, Usage 6
Go2Group synapseRT Requirement-based Testing Methodology 6
Define Releases 7
Create Requirements 8
Test Cases 9
Defect Tracking 12
synapseRT Dashboard 13
Go2Group synapseRT, Installation 15
Windows Installation 15
Linux, Unix Installation 22
Go2Group synapseRT, Configuration 24
Go2Group synapseRT, Uninstall 27
Windows Uninstall 27
Linux, Unix Uninstall 27
Go2Group synapseRT, Tips and Troubleshooting 28
Frequently Asked Questions 28
Go2Group synapseRT, Support 29
About Go2Group 30
2
www.Go2Group.com

Go2Group synapseRT
Go2Group's synapseRT displays requirements based on projects and releases, providing a comprehensive view into your entire development environment.
What is it? Go2Group synapseRT is installed just like any another JIRA plugin. In this case, synapseRT provides a dashboard within JIRA to track requirements against specific releases. In addition synapseRT displays charts related to specific requirements due dates across projects.
How does it work? The user simply clicks on the SYNAPSE link in the JIRA menu bar to bring up the synapseRT dashboard. From here, selecting a project and release from the dropdown menus, then clicking the Query button displays the requirements data in a dashboard.
Additional functionality includes drilling down on specific requirements / issues by clicking a requirement in the matrix. The information from that requirement / issue can be displayed by clicking on the defect link.
3
www.Go2Group.com

Go2Group synapseRT, Overview
Go2Group's synapseRT displays requirements based on projects and releases, providing a comprehensive view into your entire development environment. synapseRT provides a dashboard within JIRA to track requirements against specific releases. In addition, synapseRT displays charts related to specific requirements’ due dates across projects.
Actors - All members of the Support, Development, and QA teams
• Support personnel using JIRA
• Development personnel using JIRA
• QA personnel using JIRA (or a third-party test management system)
• Project Managers
Products Involved
• Atlassian JIRA
• Go2Group synapseRT
• Third-party test management system (coming soon!)
Questions Being Answered
• What test case is associated with a requirement?
• What defect is associated with a test case?
• What is the requirement burndown chart?
• How many defects are related to the requirement?
• What is the relational matrix between requirements and test cases?
Use Case Example
• Project Manager (PM) defines a new version for project release.
• PM creates requirements associated to the version.
• PM estimates the effort amount.
• PM/Quality Assurance (QA) creates test suites and test cases for each requirement.
• QA create issues when the tests fail.
• PM can monitor the project in the synapaseRT dashboard.
4
www.Go2Group.com
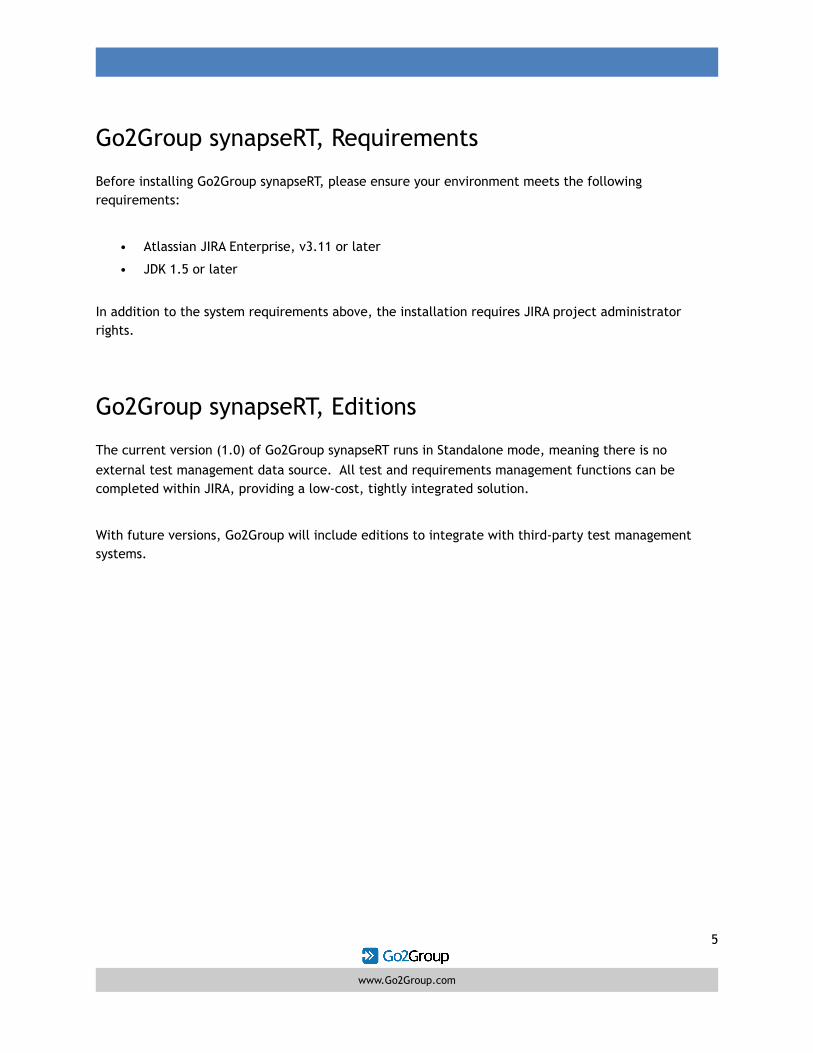
Go2Group synapseRT, Requirements
Before installing Go2Group synapseRT, please ensure your environment meets the following requirements:
• Atlassian JIRA Enterprise, v3.11 or later
• JDK 1.5 or later
In addition to the system requirements above, the installation requires JIRA project administrator rights.
Go2Group synapseRT, Editions
The current version (1.0) of Go2Group synapseRT runs in Standalone mode, meaning there is no external test management data source. All test and requirements management functions can be completed within JIRA, providing a low-cost, tightly integrated solution.
With future versions, Go2Group will include editions to integrate with third-party test management systems.
5
www.Go2Group.com

Go2Group synapseRT, Usage
Once installed and configured, Go2Group synapseRT provides instant collaboration between test and development teams, all without having to leave JIRA. In addition, if the help desk team is utilizing JIRA as customer support system, JIRA becomes a robust test, development, and customer support management system, without the need of additional integration, seat licenses, or product training.
Go2Group synapseRT Requirement-based Testing Methodology
Go2Group synapseRT follows the requirement-based testing methodology, as depicted in the image below:
Testing Methodology
Define Releases
Requirement
Test Cases
Defect Tracking
6
www.Go2Group.com

Define Releases
In this usage example, we will follow the requirement-based testing scenario by first defining the releases within JIRA. To do so, we will use JIRA’s Version component, as shown in the image below.
7
www.Go2Group.com

Create Requirements
Next, we’ll create the requirement using JIRA’s familiar Create New Issue screen, as shown below.
Next, select a defined release for this requirement, as shown below.
Next, include an estimate for the duration of the work until completed, as shown in the image below.
As the work is being performed against the requirement, be sure to log the appropriate time spent, as shown in the image below.
8
www.Go2Group.com

Test Cases
To define the test cases against specific requirements, we’ll create the test cases using familiar JIRA actions. From within the created requirement, a test case can be created by clicking the Create Test Case link, as shown in the image below.
Next, associate the test case with a specific requirement, test suite, and release version, as shown in the images below.
9
www.Go2Group.com

Once the test case has been created, the custom fields will be populated within the JIRA ticket, as shown in the image below.
10
www.Go2Group.com

Test Suite Management
The Test Suite tab within the JIRA ticket window allows the user to review which test cases are applied to which requirements, as shown in the image below.
To create a new test suite, click on the link “Create New Test Suite”, enter the new test suite name, then click the Add button, as shown in the image below.
To edit a Test Suite name, use the Update button, as shown in the image below.
11
www.Go2Group.com

Defect Tracking
To create an associated defect to track against a test case, use the Create Bug link from within the Test Case screen, as shown in the image below.
Complete the required fields, then specify the associated Requirement and Test Case for this defect, as shown in the images below.
Click the Create button to complete the association.
12
www.Go2Group.com

synapseRT Dashboard
The synapseRT dashboard allows users to review requirement-related information in a matrix. In addition, users can drill down further by clicking on requirements, hovering over statuses, and by clicking on specific test cases.
The synapseRT dashboard can be found by clicking the SYNAPSE link in the menu bar at the top of the JIRA screen, as shown in the image below.
To define which project and release version to display, simply use the Project and Release drop-down menus, then click the Query button, as shown in the image below.
13
www.Go2Group.com

The resulting screen displays the requirements and test cases matrix, as shown in the image below.
Each section of the matrix display is described below.
Matrix Section Image Matrix Section Description
synapseRT dashboard menu link
Project / Release query
Associated release requirements
Associated release test cases
Associated requirement defects
Associated Requirement
Burndown and Test Case Coverage
charts
14
www.Go2Group.com

Go2Group synapseRT, Installation
The following installation steps assume has completed the following:
• A local copy of the Go2Group synapseRT installation file has been downloaded from the Go2Group Support Site (support.Go2Group.com).
• A license key has been requested / received from Go2Group.
• The installer has the appropriate privileges to the JIRA.
• Coordination with the appropriate administrators to obtain support and recycle the servers.
Windows Installation
The steps below display the installation process on a Windows machine.
Step 1 - Begin the Go2Group synapseRT Installation
Go2Group synapseRT Installer - Welcome Message
15
www.Go2Group.com

Step 2 - Ensure Your Environment Meets Go2Group synapseRT Requirements
Go2Group synapseRT Installer - Requirements Confirmation
16
www.Go2Group.com

Step 3 - Review and agree to the Go2Group EULA before continuing
Go2Group synapseRT - License Agreement
17
www.Go2Group.com

Step 4 - Select the location of your JIRA installation
Go2Group synapseRT - Choose JIRA Home Directory
18
www.Go2Group.com
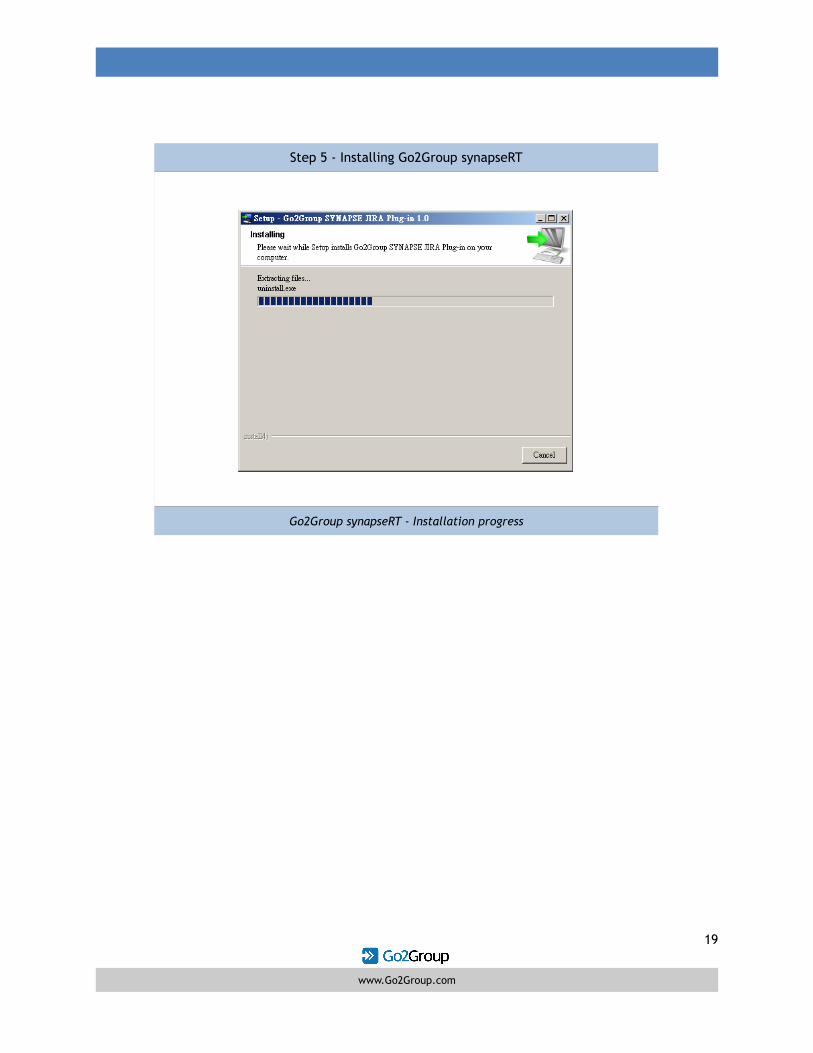
Step 5 - Installing Go2Group synapseRT
Go2Group synapseRT - Installation progress
19
www.Go2Group.com

Step 6 - Installation confirmation, and next steps
Go2Group synapseRT - Installation Next Steps
20
www.Go2Group.com

Step 7 - Installation complete!
Go2Group synapseRT - Installation Complete
21
www.Go2Group.com

Linux, Unix Installation
The steps below display the installation process on a Linux or Unix machine.
Go2Group provides two different installation files for Linux and Unix deployments. Steps for both of these files are provided below.
SYNAPSE_JIRA_PLUGIN_LINUX_1_0.RPM
Launch a console session and change the directory to the location of the RPM file, as shown in the image below.
Before proceeding, check for a previous installation of synapseRT, as shown in the image below.
If a previous installation of synapseRT is found, please remove it before continuing. Refer to the image below for instructions on removing the previously installed version.
To begin installing Go2Group synapseRT, the “--prefix” argument must be used to identify the location of the JIRA server installed location. In addition, the command will be appended with “/atlassian-jira”. An example is provided in the image below.
Once complete, please restart your JIRA server.
22
www.Go2Group.com

SYNAPSE_JIRA_PLUGIN_LINUX_1_0.TAR.GZ
Launch a console session and change the directory to the location of the TAR.GZ file, as shown in the image below.
Next, use the TAR command to extract the required files from SYNAPSE_JIRA_Plug-in_unix_1_0.TAR.GZ.
It’s important that you use the “-C” argument to identify where is your JIRA server installed folder is located. An example is provided in the image below.
Once complete, please restart your JIRA server.
23
www.Go2Group.com

Go2Group synapseRT, Configuration
Go2Group synapseRT is configured within JIRA. From the Administration panel, scroll down to the System section and click the synapseRT link. The following configuration steps assumes the user has proper administrative rights within JIRA.
Navigate to the Administration panel:
Click the synapseRT configuration link:
24
www.Go2Group.com

Once in the synapseRT configuration module, there are a few fields that need to be filled in:
Configuration Field Notes
Requirement* Select Issue Type for Requirements
Test Case* Select Issue Type for Test Cases
License Key Add License Key provided by Go2Group
* To create a New Issue Type for Requirements and Test Cases, select the New... option, then enter the Issue Type in the text box below the picker.
Once configured, clicking the Save button will:
• Create three (3) custom fields
• Requirement, Test Case, Test Suite
• Create two Issue Types
• Requirement, Test Case
Please note - These custom fields are set as visible across all projects by default. Modify the visibility according to your policies and needs.
25
www.Go2Group.com

The following image shows the three new custom fields created during the configuration process:
The following image shows the two new Issue Types created during the configuration process:
26
www.Go2Group.com

Go2Group synapseRT, Uninstall
Removing Go2Group synapseRT is similar to removing other Atlassian JIRA plugins. The uninstallation steps are listed below. If you do uninstall Go2Group synapseRT, we’d enjoy hearing from you. Please contact us at:
877-442-4996
Windows Uninstall
To uninstall Go2Group synapseRT from your Windows environment, simply navigate to the Go2Group synapseRT application folder at:
Start | All Programs | Go2Group synapseRT JIRA Plugin
Select the Go2Group synapseRT JIRA Plugin Uninstaller option.
Linux, Unix Uninstall
If the RPM file was used to install Go2Group synapseRT, please remove the Go2Group synapseRT component by using the RMP -e command, as shown below.
The next steps apply to both the RPM and TAR.GZ file installations.
First, change to the folder of your JIRA installation directory, such as:
/opt/atlassian-jira-enterprise-3.13.3-standalone/atlassian-jira/
Next, remove the following JAR files found in the WEB-INF/lib folder using the RM command.
27
www.Go2Group.com

Go2Group synapseRT, Tips and Troubleshooting
Go2Group provides support for its entire line of products by telephone, email, and a product-specific customer support ticket system:
• By telephone: +1 877 442 4669
• By email: [email protected]
• By ticket: jira.Go2Group.com
A customer account is required to access the support site above. Please contact Go2Group for your login credentials.
For support with JIRA, please contact your Atlassian representative.
Frequently Asked Questions
Q: How can I make all of synapseRT’s Log messages going into another file.
A: You can add the following lines in log4j.properties, please find someone who is familiar with log4j to help you.
log4j.appender.R=org.apache.log4j.RollingFileAppender log4j.appender.R.File=c:/jira/log/JIRA-SYN-Plug-In.log log4j.appender.R.MaxFileSize=10MB log4j.appender.R.MaxBackupIndex=10 log4j.appender.R.layout=org.apache.log4j.PatternLayout log4j.appender.R.layout.ConversionPattern=%d %t %p [%c{4}] %m%n
log4j.category.com.go2group = DEBUG, console, filelog, R log4j.additivity.com.go2group = false
c:/jira/log/JIRA-SYN -Plug-In.log is where you want the log. Please note the in the "log4j.category.com.go2group = DEBUG, console, filelog, R" , DEBUG is the bug level. This line maybe you already have it. Just add ",R" in the line.
Restart JIRA. Try to see if you can see all the synapseRT log into another log file.
28
www.Go2Group.com

Go2Group synapseRT, Support
Go2Group provides support for its entire line of products by telephone, email, and a product-specific customer support ticket system:
• By telephone: +1 877 442 4669
• By email: [email protected]
• By ticket: jira.Go2Group.com
A customer account is required to access the support site above. Please contact Go2Group for your login credentials.
For support with JIRA, please contact your Atlassian representative.
To help resolve your issue quickly, please provide the following logs from Go2Group synapseRT:
• atlassian-jira.log (<JIRA_HOME>/atlassian-jira/WEB-INF/classe/log4j.properties).
• Please change log level by adding "log4j.category.com.go2group=DEBUG, console, filelog" and “log4j.additivity.com.go2group = false“ in log4j.properties.
• Restart JIRA and run some test cases.
• You can find log4j.properties in <JIRA_HOME>/atlassian-jira/WEB-INF/classes
29
www.Go2Group.com
About Go2Group
The Go To Group, Inc. (Go2Group) provides its clients with world-class Software Production Line Automation (SPLA) services and products, constructed from integrated suites of systems, such as Source Code Management, Configuration Management, Release Engineering, Build & Workflow Management, Defect Tracking, and Test Automation Systems.
From consultation and implementation to training and support, Go2Group has helped firms improve their software production processes with our best deployment practice packages, finding the right services and solutions for disparate software environments. Our experience lies with untangling complex environments consisting of configuration/requirements/build/workflow management, defect tracking, and test automation systems. With offices around the world, we are able to support our clients around the clock.
Go2Group was founded in 2001 and is located in Bel Air, MD.
Go2Group is an official Atlassian partner, providing support and services for Atlassian’s full line of development and collaboration products.
Go2Group is an official SugarCRM partner.
Go2Group is an official Salesforce partner.
Go2Group, Inc.
www.Go2Group.com
877-442-4669
30
www.Go2Group.com