ES · informaciÓn y advertencias de seguridad montaje y desmontaje de las ruedas desplegado y...
92
ES
Transcript of ES · informaciÓn y advertencias de seguridad montaje y desmontaje de las ruedas desplegado y...
ES

ES

3
ESPAÑOLENGLISH
FRANÇAISDEUTSCHITALIANO
PORTUGUÊSPOLSKIČESKY
1222324252627282

ES4
FIGURES

5
1 2
3
PULL
4

6
5a
PULL
5b
6a
7b
PULL
6b
7a

7
8a
8b
PULL
PULL
PULL
PULL
9a
9b
PULL
9c
CLICK

8
CLICK
11a 11b 11c
PULL
PULL
10

9
PULL
PULL
PULL
PULL
12a
PULL
PULL
12c
12b
CHECK
11e
11d

10
PULL
PULL
14a
14b
PULL
14c13

11
17
15a
15b
PULL
16a 16b
16c

ES
ES
12
INSTRUCCIONES

13ES
ÍNDICE
INFORMACIÓN Y ADVERTENCIAS DE SEGURIDAD MONTAJE Y DESMONTAJE DE LAS RUEDAS DESPLEGADO Y PLEGADO USO DEL FRENO DEL ESTACIONAMIENTO BLOQUEO DE LAS RUEDAS DELANTERAS SISTEMA PRO-FIX MONTAJE Y DESMONTAJE DE LA HAMACA CINTURÓN DE SEGURIDAD USO PARA MENORES DE 6 MESES AJUSTE DEL MANILLAR AJUSTE DEL REPOSAPIÉS AJUSTE DEL ÁNGULO DEL RESPALDO USO DEL PROTECTOR DE SEGURIDAD EMPLEO DE LA CAPOTA PROTECTOR DE LLUVIA MANTENIMIENTO INFORMACIÓN SOBRE LA GARANTÍA
A.B.C.D.E.F.G.H.I.J.K.L.M.N.O.P.Q.
1415151616171718181818191919202020
INSTRUCCIONES

ES14
A. INFORMACIÓN Y ADVERTENCIAS DE SEGURIDAD
InstruccionesIMPORTANTE : Leer detenidamente y mantenerlas para futuras consultas. ADVERTENCIAS: - No dejar nunca al niño desatendido. - Asegurarse de que todos los dispositivos de cierre están engra-nados antes del uso.
- Para evitar lesiones, asegúrese de que el niño se mantiene aleja-do durante el desplegado y el plegado de este producto.
- No permita que el niño juegue con este producto. - Usar siempre el sistema de retención. - Comprobar que los dispositivos de sujeción del capazo, del asiento o de la silla de coche están correctamente engranados antes del uso.
- Este producto no es adecuado para correr o patinar. - Esta silla es adecuada para niños a partir del nacimiento y hasta 15 kg.
- Nunca permita que el niño se ponga de pie en el reposapiés o estribo.
RESTRICCIONES DE USO: - Se recomienda el uso en la posición más reclinada desde naci-miento hasta los 6 meses.
- Active siempre el freno de la silla antes de colocar o retirar los ni-ños de la silla.
- Cualquier carga fijada al manillar y/o a la parte trasera del res-paldo y/o a los laterales de la silla afecta a la estabilidad de ésta.
- Esta silla ha sido diseñada para un único niño, no utilizarlo con más niños a la vez.
- No deben utilizarse accesorios no aprobados por JANÉ. - Solo deben utilizarse los repuestos suministrados o recomenda-dos por JANÉ.
- Para los portabebés usados con un chasis, esta silla no reempla-za una cuna o cama. Si el niño necesita dormir, debería colocar-se en un capazo, una cuna o una cama adecuados.
- La masa máxima permitida de la cestilla portaobjetos nunca pue-de superar lo indicado en la cestilla (4 kg).
- Este producto no es resistente al agua salada.

15ES
B. MONTAJE Y DESMONTAJE DE LAS RUEDAS
Para montar las ruedas traseras, mantenga presionado el botón central e inserte el eje de la rueda en el eje del chasis hasta que note que encaja firmemente. 1
Para retirar las ruedas traseras, mantenga presionado el botón central y saque la rueda del chasis. 1
Para montarlas las ruedas delanteras, mantenga pulsado el bo-tón de bloqueo frontal, encaje la rueda delantera en el eje y em-puje hacia arriba. Suelte el botón de bloqueo frontal. Debe notar que encaja firmemente. 2
Para retirar las ruedas delanteras, pulse el botón de bloqueo frontal y extraiga la rueda delantera tirando de ella hacia aba-jo. 2
ATENCIÓN: Esta acción no debe realizarse nunca con el bebé dentro de la hamaca.
ATENCIÓN: Extraiga periódicamente las ruedas del chasis y quite la suciedad o la arena del eje de la rueda. No sumerja en agua los cojinetes de la rueda. Use un cepillo y un paño húmedo para limpiar la suciedad de las ruedas.
C. DESPLEGADO Y PLEGADO
Desplegado:
Para abrir su KAWAI colóquelo sobre una superficie plana con el manillar hacia arriba y libere la cinta de transporte. 3
Levante la silla por el manillar para que se abra por completo hasta escuchar que encaja. 4
ATENCIÓN: Antes de usar su silla KAWAI, asegúrese de que todos los mecanismos de fijación y bloqueo estén correctamente encajados y cerrados.
Ajuste el manillar a la altura deseada liberando y ajustando después las levas de bloqueo. 12a-12b
Plegado:
Antes de plegar su silla KAWAI, bloquee el freno de esta-cionamiento 7 a, quite cualquier objeto de la cestilla que pueda obstruir el cierre de la silla, libere el bloqueo de la dirección de las ruedas delanteras 8 y extraiga el acce-sorio JANÉ (hamaca, TRANSPORTER, KOOS, MICRO, MATRIX o NEST).
!
!
!

16 ES
D. USO DEL FRENO DE ESTACIONAMIENTO
FRENAR: Presionar la palanca con el pie hacia abajo para activar el freno de estacionamiento de su silla. 7 a
DESFRENAR: Empujar con el pie la palanca hacia arriba, para desactivar el freno de estacionamiento. 7 b4
ADVERTENCIA: Una vez accionado el freno asegúrese de que el cochecito ha quedado correctamente frenado. Pue-de ser necesario rodar ligeramente el cochecito para que el freno engrane de manera óptima.
E. BLOQUEO DE LAS RUEDAS DELANTERAS
Su cochecito dispone de ruedas delanteras giratorias direcciona-les, con la posibilidad de bloquear la dirección.
Para bloquearlas, presione el seguro del botón ubicado encima de cada portaruedas delantero. 8 a
Para desbloquear las ruedas delanteras, tire el botón hacia arri-ba. 8 b
Para facilitar el manejo y conseguir unas dimensiones de plegado pequeñas, es posible retirar la hamaca . 10
Abra las levas del manillar y deslícelo hacia abajo.12a-12b-12c
Gire el tirador derecho 5 a y tire a la vez de los gatillos laterales levantando el manillar para facilitar el desbloqueo. 5 b
Levante el cochecito por el asa situada en el tubo central del cha-sis hasta que la silla se pliegue por completo 6 a- 6 b y fíjela con la cinta de transporte situada en el manillar. 3 b
Para que ocupe el menor espacio posible, la hamaca de su KAWAI debe montarse en el sentido de la marcha sobre el chasis 9 b y la capota debe estar completamente replegada 16c. Siga los mis-mos pasos anteriores.
ADVERTENCIA: Es imprescindible asegurarse que el niño se mantiene alejado de la silla durante las acciones de plegado y desplegado. La aparición de puntos de corte y compresión y atrapamientos son inevitables durante estas operaciones.
!
!

ES 17
ATENCIÓN: Mantener el eje giratorio limpio de polvo para conseguir un giro suave y duradero.
F. SISTEMA PRO-FIX
El chasis de su cochecito incluye el sistema PRO-FIX, prepara-do para montar los accesorios JANÉ disponibles en el mercado (TRANSPORTER, KOOS, MICRO, MATRIX o NEST), equipados con los adaptadores PRO-FIX adecuados para el modelo KAWAI.
El sistema PRO-FIX le facilitará el acople y la extracción de estos accesorios al chasis, de un modo rápido, fácil y seguro, quedando éstos anclados al chasis. Para ello siga detenidamente las ins-trucciones de estos accesorios.
ADVERTENCIA: Antes de su uso, compruebe siempre que el bloqueo de estos componentes se ha realizado perfecta-mente tirando de ellos hacia arriba.
G. MONTAJE Y DESMONTAJE DE LA HAMACA
Con el sistema PRO-FIX puede fijar la hamaca mirando hacia usted (sentido contra marcha) 9 a cuando el niño es más pequeño o ha-cia delante (sentido de la marcha) a medida que el niño crezca. 9 b
Para ello, coloque el asiento desde arriba en los alojamientos PRO-FIX que hay en el chasis hasta escuchar un “CLICK”. 9 c
ADVERTENCIA: El freno de estacionamiento debe accionar-se durante el montaje y desmontaje de la hamaca.
ADVERTENCIA: Asegúrese que la hamaca ha quedado bien sujeta al chasis tirando ligeramente de ella hacia arriba.
ADVERTENCIA: Nunca retire la hamaca del chasis KAWAI mientras haya un niño sentado dentro.
Para retirar la hamaca del chasis, presione simultáneamente las palancas de desbloqueo situadas a ambos lados de la hamaca y tire de ésta hacia arriba. 10
ADVERTENCIA: Utilice los cinturones de seguridad siempre que el niño vaya sentado o tumbado en la hamaca.
!
!
!
!
!
!
18 ES
H. CINTURÓN DE SEGURIDAD
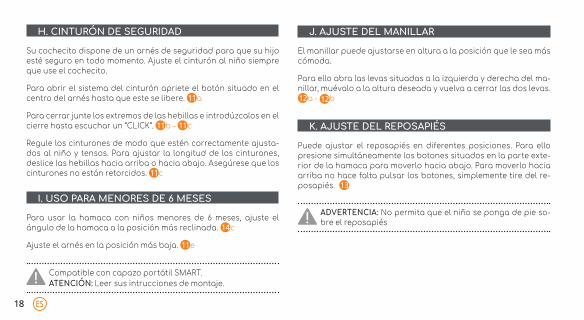
Su cochecito dispone de un arnés de seguridad para que su hijo esté seguro en todo momento. Ajuste el cinturón al niño siempre que use el cochecito.
Para abrir el sistema del cinturón apriete el botón situado en el centro del arnés hasta que este se libere. 11a
Para cerrar junte los extremos de las hebillas e introdúzcalos en el cierre hasta escuchar un “CLICK”. 11b – 11c
Regule los cinturones de modo que estén correctamente ajusta-dos al niño y tensos. Para ajustar la longitud de los cinturones, deslice las hebillas hacia arriba o hacia abajo. Asegúrese que los cinturones no están retorcidos. 11c
I. USO PARA MENORES DE 6 MESES
Para usar la hamaca con niños menores de 6 meses, ajuste el ángulo de la hamaca a la posición más reclinada. 14c
Ajuste el arnés en la posición más baja. 11e
Compatible con capazo portátil SMART......................................ATENCIÓN: Leer sus intrucciones de montaje.
J. AJUSTE DEL MANILLAR
El manillar puede ajustarse en altura a la posición que le sea más cómoda.
Para ello abra las levas situadas a la izquierda y derecha del ma-nillar, muévalo a la altura deseada y vuelva a cerrar las dos levas. 12a - 12b
K. AJUSTE DEL REPOSAPIÉS
Puede ajustar el reposapiés en diferentes posiciones. Para ello presione simultáneamente los botones situados en la parte exte-rior de la hamaca para moverlo hacia abajo. Para moverlo hacia arriba no hace falta pulsar los botones, simplemente tire del re-posapiés. 13
ADVERTENCIA: No permita que el niño se ponga de pie so-bre el reposapiés!
!
19ES
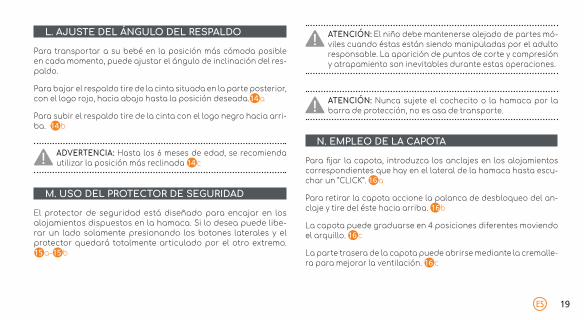
L. AJUSTE DEL ÁNGULO DEL RESPALDO
Para transportar a su bebé en la posición más cómoda posible en cada momento, puede ajustar el ángulo de inclinación del res-paldo.
Para bajar el respaldo tire de la cinta situada en la parte posterior, con el logo rojo, hacia abajo hasta la posición deseada.14 a
Para subir el respaldo tire de la cinta con el logo negro hacia arri-ba. 14 b
ADVERTENCIA: Hasta los 6 meses de edad, se recomienda utilizar la posición más reclinada 14 c
M. USO DEL PROTECTOR DE SEGURIDAD
El protector de seguridad está diseñado para encajar en los alojamientos dispuestos en la hamaca. Si lo desea puede libe-rar un lado solamente presionando los botones laterales y el protector quedará totalmente articulado por el otro extremo. 15 a-15 b
ATENCIÓN: El niño debe mantenerse alejado de partes mó-viles cuando éstas están siendo manipuladas por el adulto responsable. La aparición de puntos de corte y compresión y atrapamiento son inevitables durante estas operaciones.
ATENCIÓN: Nunca sujete el cochecito o la hamaca por la barra de protección, no es asa de transporte.
N. EMPLEO DE LA CAPOTA
Para fijar la capota, introduzca los anclajes en los alojamientos correspondientes que hay en el lateral de la hamaca hasta escu-char un “CLICK”. 16 a
Para retirar la capota accione la palanca de desbloqueo del an-claje y tire del éste hacia arriba. 16b
La capota puede graduarse en 4 posiciones diferentes moviendo el arquillo. 16 c
La parte trasera de la capota puede abrirse mediante la cremalle-ra para mejorar la ventilación. 16 c
!
!
!
20 ES
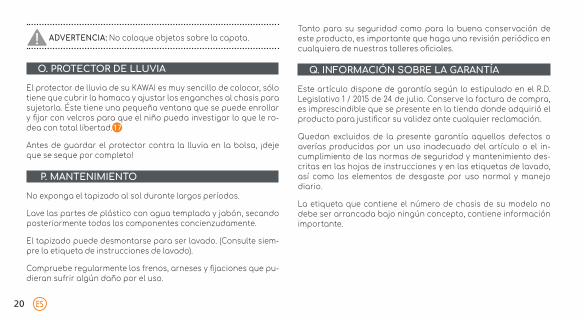
ADVERTENCIA: No coloque objetos sobre la capota.
O. PROTECTOR DE LLUVIA
El protector de lluvia de su KAWAI es muy sencillo de colocar, sólo tiene que cubrir la hamaca y ajustar los enganches al chasis para sujetarla. Éste tiene una pequeña ventana que se puede enrollar y fijar con velcros para que el niño pueda investigar lo que le ro-dea con total libertad.17
Antes de guardar el protector contra la lluvia en la bolsa, ¡deje que se seque por completo!
P. MANTENIMIENTO
No exponga el tapizado al sol durante largos períodos.
Lave las partes de plástico con agua templada y jabón, secando posteriormente todos los componentes concienzudamente.
El tapizado puede desmontarse para ser lavado. (Consulte siem-pre la etiqueta de instrucciones de lavado).
Compruebe regularmente los frenos, arneses y fijaciones que pu-dieran sufrir algún daño por el uso.
!Tanto para su seguridad como para la buena conservación de este producto, es importante que haga una revisión periódica en cualquiera de nuestros talleres oficiales.
Q. INFORMACIÓN SOBRE LA GARANTÍA
Este artículo dispone de garantía según lo estipulado en el R.D. Legislativo 1 / 2015 de 24 de julio. Conserve la factura de compra, es imprescindible que se presente en la tienda donde adquirió el producto para justificar su validez ante cualquier reclamación.
Quedan excluidos de la presente garantía aquellos defectos o averías producidas por un uso inadecuado del artículo o el in-cumplimiento de las normas de seguridad y mantenimiento des-critas en las hojas de instrucciones y en las etiquetas de lavado, así como los elementos de desgaste por uso normal y manejo diario.
La etiqueta que contiene el número de chasis de su modelo no debe ser arrancada bajo ningún concepto, contiene información importante.

21ES
ATENCIÓN: Para obtener la máxima seguridad y atención sobre su nuevo JANÉ, es muy importante que registre su nuevo producto en nuestra página web www.janeworld.com. El registro le permitirá informarse, si es necesario, de la evolución y mantenimiento de su producto. También, siem-pre que lo desee, le podremos informar de nuevos modelos o noticias que consideremos pueden ser de su interés.
!

EN22
EN
22
INSTRUCTIONS

23EN
TABLE OF CONTENTS
INFORMATION AND SAFETY WARNINGS FITTING AND REMOVING THE WHEELSUNFOLDING AND FOLDINGUSING THE PARKING BRAKELOCKING THE FRONT WHEELSPRO-FIX SYSTEMFITTING AND REMOVING THE SEATSEAT BELTUSE FOR CHILDREN UNDER 6 MONTHSADJUSTING THE HANDLEBARADJUSTING THE FOOTRESTADJUSTING THE ANGLE OF THE BACKRESTUSING THE SAFETY ARMRESTUSING THE HOODRAIN COVERMAINTENANCEINFORMATION ABOUT THE GUARANTEE
A.B.C.D.E.F.G.H.I.J.K.L.M.N.O.P.Q.
2425252626272728282828282929293030
INSTRUCTIONS

EN2424
A. INFORMATION AND SAFETY WARNINGS InstructionsIMPORTANT: Read carefully and keep them for future reference.
WARNINGS: - Never leave the child unattended. - Make sure that all the locking devices are engaged before using the product.
- To avoid injury, make sure that the child is kept at a safe distance during the unfolding and folding operations.
- Do not let the child play with this product. - Always use the restraint system. - Check that the fastening devices for the hood, the seat or the car seat are correctly engaged before using the product.
- This product is not suitable for running or skating. - This pushchair is suitable for children from birth and up to a weight of 15 kg.
- Never let the child stand up on the footrest or the footboard.
USAGE RESTRICTIONS: - The most reclined position is recommended from birth up to 6 months.
- Always put the brake on when getting children in or out of the pushchair.
- Any load attached to the handlebar and/or back of the back-rest and/or the sides of the pushchair will affect its stability.
- This pushchair has been designed to carry one child at a time, do not use it to carry more than one child.
- Do not use accessories that have not been approved by JANÉ. - Only use replacement parts supplied or recommended by JANÉ.
- For baby carriers used with a chassis, this pushchair is not a substitute for a cot or a bed. If the child needs to sleep, you should put him in a suitable carrycot, cot or bed.
- Do not exceed the maximum weight indicated on the basket (4 kg).
- This product is not salt water resistant.

25EN
B. FITTING AND REMOVING THE WHEELS
To fit the rear wheels, keep the central button pressed while insert-ing the wheel axle into the axle of the chassis until you feel it slot securely into place. 1
To remove the rear wheels, keep the central button pressed and take the wheel off the chassis. 1
To fit the front wheels, keep the front locking button pressed, slot the front wheel onto the axle and push upwards. Release the front locking button. You should feel it slot firmly into place. 2
To remove the front wheels, press the front locking button and take the front wheel off by pulling it downwards. 2
WARNING: This action should never be carried out while the baby is in the pushchair.
WARNING: You should take the wheels off the chassis from time to time and remove any dirt or sand from the wheel axle. Do not immerse the wheel bearings in water. Use a brush and a damp cloth to clean the dirt off the wheels.
C. UNFOLDING AND FOLDING
UNFOLDING
To open your KAWAI place it on a flat surface with the handlebar facing upwards and unfasten the carry strap. 3
Lift the pushchair by the handlebar until it is fully unfolded and you hear it lock into place. 4
WARNING: Before using your KAWAI pushchair, make sure that all the fastening and locking mechanisms are correctly engaged and secure.
Adjust the handlebar to the required height by releasing the lock-ing levers and then fastening them again. 12 a-12 b
FOLDING
Before folding your KAWAI pushchair, put the parking brake on 7 a, take anything out of the basket that could prevent the push-
chair from closing properly, release the steering lock on the front wheels 8 and remove any of the JANÉ accessories (TRANSPORTER, KOOS, MICRO, MATRIX or NEST seat).
!
!
!

EN26
It is possible to remove the seat if you want to fold the pushchair up smaller and make it easier to manoeuvre 10 .
Unfasten the handlebar levers and slide it downwards. 12 a-12 b-12 c
Turn the right handle 5 a and pull both side catches lifting the handlebar upwards to make it easier to unlock. 5 b
Lift the pushchair by the handle on the central tube of the chassis until the pushchair is fully folded 6 a- 6 b and then secure it with the carry strap found on the handlebar. 3 b
For it to fold up as small as possible, the seat of your KAWAI should be fitted in the forward facing position on the chassis 9 b and the hood should be fully folded 16 c. Follow the same steps as before.
WARNING: You must make sure that the child is kept at a safe distance during the folding and unfolding operations. Sharp points and areas where fingers could get trapped are inevitable during these operations.
D. USING THE PARKING BRAKE
BRAKE: Press the lever downwards with your foot to put the park-ing brake on your pushchair. 7 a
RELEASING THE BRAKE: Use your foot to press the lever upwards, to take the parking brake off. 7 a
WARNING: When the brake is on make sure that the push-chair has braked correctly. It may be necessary to push the pushchair slightly for the brake to be fully activated.
E. LOCKING THE FRONT WHEELS
Your pushchair is fitted with front swivel wheels that can be locked if you prefer.
To lock them, press the button catch found above each front wheel set. 8 a
To unlock the front wheels, pull the button upwards. 8 b
WARNING: Keep the swivel axle free from dust to ensure a smooth, long-lasting swivel action.
!
!
!

27EN
F. PRO-FIX SYSTEM
The chassis of your pushchair includes the PRO-FIX system, ready for you to attach the JANÉ accessories available on the market (TRANSPORTER, KOOS, MICRO, MATRIX or NEST ), fitted with the PRO-FIX connectors suitable for the KAWAI model.
The PRO-FIX system makes it easy to attach and remove these ac-cessories to and from the chassis, with a quick, simple and safe operation, that anchors them securely to the chassis. To do this follow the instructions for each accessory carefully.
WARNING: Before using this product, always make sure that the locking devices of the accessories are correctly en-gaged by pulling the accessory upwards
G. FITTING AND REMOVING THE SEAT
With the PRO-FIX system the seat can be fitted facing you (rear facing position) 9 a when the child is very small or facing out-wards (forward facing position) as the child grows. 9 b
To do this, connect the seat from above and fit it onto the PRO-FIX connectors on the chassis, until you hear it CLICK into place. 9 c
WARNING: Put the parking brake on when fitting or removing the seat.
WARNING: Make sure that the seat is securely anchored to the chassis by gently pulling it upwards.
WARNING: Never take the seat off the KAWAI chassis while the child is still sitting in it.
To take the seat off the chassis, simultaneously press the unlock-ing levers found on both sides of the seat and pull it upwards. 10
WARNING: Use the seat belts whenever the child is sitting or lying in the seat.
!
!
!
!
!

EN28
H. SEAT BELT
Your pushchair has a safety harness to keep your child safe at all times. Fit the belt onto the child whenever he is using the pus-hchair.
To unfasten the belt system, press the button in the middle of the harness until the straps come open. 11 a
To fasten the straps bring the ends of the buckles together and insert them into the fastener until you hear them click locked. 11 b-11 c
Adjust the belts so that they fit the child correctly with the right tension. To adjust the length of the belts, slide the buckles up or down. Make sure that the belts are not twisted.11 d
I. USE FOR CHILDREN UNDER 6 MONTHS
To use the seat with children under 6 months old, adjust the angle of the seat to its most reclined position. 14 c
Adjust the harness to its lowest position. 11 e
Compatible with the SMART portable carrycot.........................ATTENTION: Read the assembly instructions.
J. ADJUSTING THE HANDLEBAR
The handlebar can be adjusted to the required height.
To do this, unlock the levers found on the left and the right of the handlebar, adjust it to the required height, and then fasten the two levers again. 12 a-12 b
K. ADJUSTING THE FOOTREST
The footrest can be adjusted to different positions. To do this, si-multaneously press the buttons found on the outside of the seat to move it downwards. To move it upwards you don’t need to press the buttons, simply pull the footrest up. 13
WARNING: Do not let the child stand up on the footrest.
L. ADJUSTING THE ANGLE OF THE BACKREST
So your baby can travel in the most comfortable position at all times, you can adjust the angle of the backrest.
To lower the backrest pull the strap found on the back, with the red logo, downwards to the required position. 14 a
!
!

29EN
To raise the backrest pull the strap with the black logo upwards. 14 b
WARNING: It is recommendable to use the most reclined po-sition until the child is 6 months old 14 c.
M. USING THE SAFETY ARMREST
The safety armrest is designed to slot into casing on the seat. If you want you can release just one side of the armrest by simply pressing the side buttons and the armrest will be fully hinged by the other side. 15 a-15 b
WARNING: The child should be kept away from the mobile parts when the responsible adult is handling these. The appearance of cutting, compression and pinch points are inevitable during these operations.
WARNING: Never hold the pram or the hammock by the pro-tection bar, it is not a carrying handle.
!
!
!
N. USING THE HOOD
To attach the hood, insert the connectors into the corresponding casing on the sides of the seat until you hear the hood click into place. 16 a
To take the hood off, release the locking lever and pull it upwards. 16 b
The hood can be set to 4 different positions by moving the top arch. 16 c
The rear part of the hood can be opened via the zip for better ventilation. 16 c
WARNING: Do not place objects on top of the hood.
O. RAIN COVER
The rain cover of your KAWAI is very easy to fit, simply cover the hammock and fit the hooks onto the chassis to secure it. The rain cover has a small window which can be rolled up and held with Velcro so the child is free to investigate his surroundings. 17
Make sure the rain cover is completely dry before putting it away in the bag!
!

EN30
P. MAINTENANCE
Do not expose the cover to sunlight for long periods.
Wash the plastic parts with warm water and soap and carefully dry all the components after.
The upholstery can be taken off for washing. (Always check the care label for the washing instructions).
Regularly check the brakes, harnesses and fastening elements that may suffer wear and tear through use.
For your safety and the good conservation of this product, it is important to bring it to one of our official workshops for regular inspections.
Q. INFORMATION ABOUT THE GUARANTEE
This product comes with a guarantee in compliance with Royal Legislative Decree 1 / 2015 of 24 July. Keep your purchase receipt, you will need to show it in the shop where you bought the product to prove the guarantee is valid if you have any complaints.
This guarantee excludes any defects or breakages caused by in-appropriate use of the article or inobservance of the safety and maintenance rules listed in the instruction pages and on the care
labels, as well as faults caused by wear and tear through normal use and daily handling.
The label displaying the chassis number of the model should nev-er be taken off, it contains important information.

31EN
NOTICE: For maximum safety and care for your new JANÉ item, it is very important that you register your new product on our website www.janeworld.com. This registration means we can inform you, if necessary, of the evolution and main-tenance of your product. Additionally, if you would like, we can also inform you about new models or news that we think may be useful for you.
!

FR32
FR
32
NOTICE

33FR
TABLE DES MATIÈRES
INFORMATION ET CONSEILS DE SÉCURITÉ MONTAGE ET DÉMONTAGE DES ROUESDÉPLIAGE ET PLIAGEUTILISATION DU FREIN DE STATIONNEMENTBLOCAGE DES ROUES AVANTSYSTÈME PRO-FIXMONTAGE ET DÉMONTAGE DU HAMACHARNAIS DE SÉCURITÉUTILISATION POUR ENFANTS DE MOINS DE 6 MOISRÉGLAGE DU GUIDONRÉGLAGE DU REPOSE-PIEDINCLINAISON DU DOSSIERUTILISATION DE L’ARCEAU DE SÉCURITÉ UTILISATION DE LA CAPOTE HABILLAGE DE PLUIEMAINTENANCEINFORMATIONS RELATIVES À LA GARANTIE
A.B.C.D.E.F.G.H.I.J.K.L.M.N.O.P.Q.
3435353636373738383838383939394040
NOTICE
FR3434
A. INFORMATION ET CONSEILS DE SÉCURITÉ
InstructionsIMPORTANT : Lire attentivement et conserver pour s’y reporter ultérieu-rement.MISES EN GARDE : - Ne laissez jamais un enfant sans surveillance. - Assurez-vous que tous les dispositifs de verrouillage sont bien enclenchés avant toute utilisation.
- Pour éviter tout risque de blessures, assurez-vous que l’enfant ne se trouve pas à proximité de la poussette lors du pliage et du dépliage du produit.
- Ne laissez pas votre enfant jouer avec ce produit. - Utilisez toujours le système de retenue pour enfant. - Vérifiez si les dispositifs de fixation de la nacelle, de l’assise ou du siège auto sont bien enclenchés avant toute utilisation.
- Ce produit n’est pas adapté pour faire du jogging ou du roller. - Cette poussette peut être utilisée dès la naissance et jusqu’à 15 kg. - Ne laissez jamais votre enfant se mettre debout sur le repose-pied.
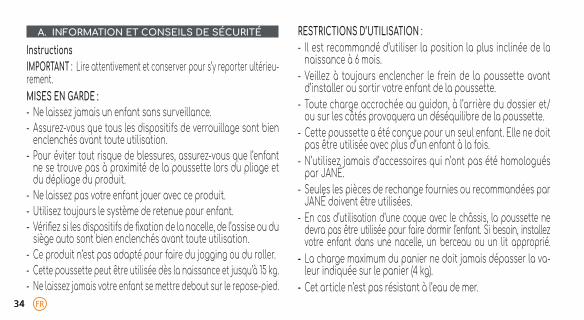
RESTRICTIONS D’UTILISATION : - Il est recommandé d’utiliser la position la plus inclinée de la naissance à 6 mois.
- Veillez à toujours enclencher le frein de la poussette avant d’installer ou sortir votre enfant de la poussette.
- Toute charge accrochée au guidon, à l’arrière du dossier et/ou sur les côtés provoquera un déséquilibre de la poussette.
- Cette poussette a été conçue pour un seul enfant. Elle ne doit pas être utilisée avec plus d’un enfant à la fois.
- N’utilisez jamais d’accessoires qui n’ont pas été homologués par JANÉ.
- Seules les pièces de rechange fournies ou recommandées par JANÉ doivent être utilisées.
- En cas d’utilisation d’une coque avec le châssis, la poussette ne devra pas être utilisée pour faire dormir l’enfant. Si besoin, installez votre enfant dans une nacelle, un berceau ou un lit approprié.
- La charge maximum du panier ne doit jamais dépasser la va-leur indiquée sur le panier (4 kg).
- Cet article n’est pas résistant à l’eau de mer.

35FR
B. MONTAGE ET DÉMONTAGE DES ROUES
Pour monter les roues arrière, appuyez sur le bouton central puis introduisez l’axe de la roue dans l’axe du châssis jusqu’à ce qu’elle s’emboîte correctement. 1
Pour retirer les roues arrière, appuyez sur le bouton central puis retirez la roue du châssis. 1
Pour monter les roues avant, appuyez sur le bouton de blocage avant puis introduisez la roue avant dans l’axe en poussant vers le haut. Lâchez le bouton de blocage avant. Vérifiez si la roue est bien emboîtée. 2
Pour retirer les roues avant, appuyez sur le bouton de blocage avant puis retirez la roue avant en tirant vers le bas. 2
ATTENTION: cette opération ne doit jamais être effectuée avec le bébé assis dans la poussette.
ATTENTION: Retirez régulièrement les roues afin de nettoyer la saleté ou le sable accumulé dans l’axe de la roue. Il ne faut pas faire tremper les roulements de la roue dans l’eau. Utili-sez une brosse et un chiffon humide pour nettoyer les roues.
C. PLIAGE ET DÉPLIAGE
DÉPLIAGE
Pour ouvrir votre KAWAI, posez-la par terre à plat, le guidon vers le haut. Détachez la sangle de transport. 3
Relevez la poussette à l’aide du guidon pour la déplier complète-ment et entendre qu’elle s’emboîte correctement. 4
ATTENTION: avant d’utiliser votre poussette KAWAI, veillez à ce que tous les mécanismes de fixation et de blocage soient correctement enclenchés et verrouillés.
Réglez le guidon à la hauteur souhaitée en libérant et réglant en-suite les pattes de blocage. 12 a-12 b
PLIAGE
Avant de plier votre poussette KAWAI, bloquez le frein de station-nement 7 a, retirez tous les objets du panier pouvant gêner le pliage de la poussette, libérez le dispositif de blocage des roues avant 8 et retirez l’accessoire JANÉ (hamac, TRANSPORTER, KOOS, MICRO, MATRIX ou NEST).
!
!
!

FR36
D. UTILISATION DU FREIN DE STATIONNEMENT
FREINER: Appuyer avec le pied pour activer le frein de stationne-ment de votre poussette. 7 a
LIBÉRER LE FREIN : pousser le levier vers le haut à l’aide du pied afin de débloquer le frein de stationnement. 7 b
AVERTISSEMENT: Une fois le frein activé vérifiez que la poussette est correctement stoppée. Il peut être nécessaire de roder légèrement la poussette afin de pouvoir enclen-cher le frein de façon optimale.
E. BLOCAGE DES ROUES AVANT
Votre poussette dispose de roues avant pivotantes directionne-lles avec la possibilité de bloquer la direction.
Pour bloquer les roues, appuyez sur la sécurité du bouton situé sur chaque support de roue avant. 8 a
Pour débloquer les roues avant, tirez le bouton vers le haut. 8 b
ATTENTION: veillez à ce que l’axe pivotant reste propre pour obtenir une rotation douce et durable.
!
Afin de faciliter la manipulation et obtenir des dimensions rédui-tes de pliage, le hamac peut être retiré. 10
Ouvrez les pattes du guidon et faites-le glisser vers le bas. 12 a-12 b-12 c
Tournez la partie droite 5 a tout en tournant les pattes latérales en levant le guidon pour faciliter le déblocage. 5 b
Relevez la poussette par l’anse située sur le tube central du châs-sis jusqu’à ce que la poussette se plie complètement. 6 a- 6 b puis attachez-la à l’aide de la sangle de transport qui se trouve sur le guidon. 3 b
Le hamac de votre KAWAI sera moins encombrant s’il est monté dans le sens de la marche sur le châssis 9 b, la capote complète-ment repliée 16 c. Suivez les indications précédentes.
MISE EN GARDE: il est indispensable que l’enfant soit tenu éloigné de la poussette lors du pliage et du dé-pliage. L’apparition de points de coupure, de pression et de pincements sont inévitables lors de ces opéra-tions.
!
!

37FR
F. SYSTÈME PRO-FIX
Le châssis de votre poussette est muni du système PRO-FIX, en vue de monter les accessoires JANÉ disponibles sur le marché (TRANSPORTER, KOOS, MICRO, MATRIX ou NEST), munis d’adapta-teurs PRO-FIX appropriés pour le modèle KAWAI.
Grâce au système PRO-FIX, vous pourrez effectuer l’assemblage et l’extraction de ces accessoires du châssis de manière rapide, facile et sûre, ces derniers étant fixés au châssis. Veuillez suivre attentivement les instructions de ces accessoires.
MISE EN GARDE: avant toute utilisation, vérifiez toujours le blocage de ces éléments en y tirant dessus.
G. MONTAGE ET DÉMONTAGE DU HAMAC
Grâce au système PRO-FIX, vous pouvez installer le hamac dos à la route, tourné vers vous 9 a s’il s’agit d’un enfant en bas âge ou face à la route, tourné vers l’avant au fur et à mesure que l’enfant grandit. 9 b
Pour ce faire, posez l’assise par le haut dans les logements PRO-FIX qui se trouvent sur le châssis jusqu’à ce que vous entendiez un clic. 9 c
MISE EN GARDE: le frein de stationnement doit être enclen-ché pendant le montage et le démontage du hamac.
MISE EN GARDE: vérifiez si le hamac est bien fixé au châssis en y tirant légèrement dessus.
MISE EN GARDE: ne retirez jamais le hamac du châssis KAWAI si l’enfant est assis dedans.
Pour retirer le hamac du châssis, appuyez simultanément sur les pattes de déblocage de chaque côté du hamac et tirez le hamac vers le haut. 10
MISE EN GARDE: utilisez les harnais de sécurité lorsque l’enfant est assis ou allongé dans le hamac.
!
!
!
!
!

FR38
H. HARNAIS DE SÉCURITÉ
Votre poussette dispose d’un harnais pour que votre enfant soit toujours en sécurité. Ajustez toujours la ceinture au corps de l’enfant lorsque vous utilisez la poussette.
Pour ouvrir le harnais, appuyez sur le bouton situé au centre du harnais jusqu’à ce qu’il se détache. 11 a
Pour fermer le harnais, joignez les extrémités des boucles et les introduire dans l’élément de verrouillage jusqu’à ce que vous en-tendiez un clic. 11 b-11 c
Réglez les ceintures pour qu’elles soient correctement ajustées et tendues sur le corps de l’enfant. Vérifiez que les sangles ne sont pas entortillées. 11 d
I. UTILISATION POUR ENFANTS DE MOINS DE 6 MOIS
Pour utiliser le hamac avec des enfants de moins de 6 mois, réglez l’inclinaison du hamac sur la position la plus inclinée. 14 c
Réglez le harnais sur la position la plus basse. 11 e
J. RÉGLAGE DU GUIDONLe guidon peut être réglé en hauteur sur la position de votre choix.Il suffit de lever les pattes situées de chaque côté du guidon, de ré-gler la hauteur du guidon et de refermer les deux pattes.12 a-12 b
K. RÈGLAGE DU REPOSE-PIED Le repose-pied peut être réglé sur différentes positions. Pour ce faire, appuyez simultanément sur les boutons situés dans la par-tie extérieure du hamac pour l’incliner vers le bas. Pour l’incliner vers le haut, il n’est pas nécessaire d’appuyer sur les boutons, il suffit simplement d’y tirer dessus. 13
MISE EN GARDE: évitez que l’enfant ne se mette debout sur le repose-pied.
L. RÉGLAGE DE L’INCLINAISON DU DOSSIER Afin de toujours transporter votre bébé dans la meilleure position, vous pouvez régler l’inclinaison du dossier. Pour baisser le dossier, tirez la sangle de la partie postérieure mu-nie d’un logo rouge vers le bas jusqu’à la position souhaitée. 14 aPour relever le dossier, tirez sur la sangle munie d’un logo noir vers le haut. 14 b
!
! Compatible avec une nacelle SMART...........................................ATTENTION: Lire les notices de montage.

39FR
MISE EN GARDE : jusqu’à 6 mois, il est recommandé d’utiliser la position la plus inclinée possible.14 c.
M. UTILISATION DE L’ARCEAU DE SÉCURITÉ
L’arceau de sécurité a été conçu pour s’emboîter dans les loge-ments prévus du hamac. Si vous le souhaitez, vous pouvez libérer un côté en appuyant sur les boutons latéraux afin d’articuler com-plètement l’arceau à l’autre extrémité. 15 a-15 b
AVERTISSEMENT: L’enfant doit se tenir éloigné des parties mobiles lorsque celles-ci sont manipulées par un adulte res-ponsable. Il y a des risques de coupures, de compression, de se trouver coincé qui sont inévitables lors de ces opérations.
ATTENTION : Ne jamais prendre la poussette ou le hamac par l’arceau de sécurité. Ce n’est pas une poignée de trans-port.
N. UTILISATION DE LA CAPOTE
Pour installer la capote, introduisez les fixations dans les loge-
ments de chaque côté du hamac jusqu’à ce que vous entendiez un clic. 16 a
Pour retirer la capote, actionnez la patte de déblocage de la fixa-tion et tirez vers le haut. 16 b
La capote peut être réglée sur 4 positions différentes à l’aide de l’arceau. 16 c
La partie arrière peut être ouverte au moyen de la fermeture éclair pour une meilleure aération. 16 c
MISE EN GARDE: ne posez pas d’objets sur la capote.
O. HABILLAGE DE PLUIE
L’habillage de pluie de votre KAWAI est très facile à installer, il vous suffit de recouvrir le hamac et d’ajuster les crochets sur le châs-sis pour le fixer. Ce dernier possède une petite fenêtre qui peut s’enrouler et être maintenue par des velcros afin que l’enfant puis-se voir en toute liberté tout ce qui l’entoure. 17
Avant de ranger l’habillage de pluie dans la housse, laissez-le sé-cher complètement !
!
!
!
!

FR40
P. MAINTENANCE
Ne pas exposer le revêtement au soleil pendant de longues pé-riodes.
Laver les parties en plastique avec de l’eau tiède et du savon, en séchant ensuite tous les composants consciencieusement.
Avant de ranger l’habillage de pluie dans la housse, laissez-le sé-cher complètement !
La housse peut être démontée pour être lavée. (Consultez tou-jours l’étiquette de lavage).
Vérifiez régulièrement les freins, harnais et fixations pouvant s’abîmer à l’usage.
Pour votre sécurité comme pour la bonne conservation de ce pro-duit, il est très important que vous effectuiez un contrôle pério-dique dans un de nos ateliers.
Q. INFORMATIONS RELATIVES À LA GARANTIE
Cet article dispose de garantie conformément aux indications du D.R. Législatif 1 / 2015 du 24 juillet. Veuillez conserver la facture. Vous devrez la présenter comme preuve d’achat au magasin où vous avez acheté le produit en vue de toute réclamation.
Sont exclues de la présente garantie les défectuosités et les pannes dues à une utilisation inadéquate du produit, ou liés à un manquement aux normes de sécurité ou d’entretien décrites dans les pages d’instructions et sur les étiquettes de lavage, de même que les éléments usés par une utilisation normale et journalière.
L’étiquette qui contient le numéro du châssis de votre modèle, ne doit être arrachée sous aucun prétexte, elle contient des info ma-tions très importantes.

41FR
ATTENTION: Afin de bénéficier d’une sécurité optimale et d’un meilleur service, il est essentiel que vous enregistriez votre nouveau JANÉ sur notre site www.janeworld.com. L’enregistrement vous permettra de vous informer, si né-cessaire, sur l’évolution et l’entretien de votre produit. De même, si vous le souhaitez, nous pourrons vous informer sur les nouveaux modèles et les informations pouvant vous intéresser.
!

DE42
DE
42
ANWEISUNGEN

43DE
INHALTSVERZEICHNIS
INFORMATIONEN UND SICHERHEITSHINWEISE MONTAGE UND DEMONTAGE DER RÄDER AUF- UND ZUSAMMENKLAPPENVERWENDUNG DER FESTSTELLBREMSEFESTSTELLEN DER VORDERRÄDER PRO-FIX-SYSTEMEIN- UND AUSBAU DES SITZEINHANGSSICHERHEITSGURTVERWENDUNG FÜR KINDER UNTER 6 MONATENLENKEREINSTELLUNGVERSTELLUNG DER FUSSSTÜTZEWINKELVERSTELLUNG DER RÜCKENLEHNEGEBRAUCH DES SCHUTZBÜGELSVERWENDUNG DER HAUBEREGENSCHUTZPFLEGEINFORMATIONEN ZUR GARANTIE
A.B.C.D.E.F.G.H.I.J.K.L.M.N.O.P.Q.
4445454646474748484848484949495050
ANWEISUNGEN
DE4444
A. INFORMATIONEN UND SICHERHEITSHINWEISE
Bedienungsanleitung:WICHTIG : Sorgfältig lesen und für zukünftige nachfragen aufbewahren.HINWEISE: - Lassen Sie Ihr Kind nie unbeaufsichtigt. - Stellen Sie sicher, dass alle Schließvorrichtungen vor dem Gebrauch eingerastet sind.
- Vergewissern Sie sich, dass Ihr Kind beim Aufklappen und Zusam-menklappen des Wagens außer Reichweite ist, um Verletzungen zu vermeiden.
- Lassen Sie Ihr Kind nicht mit dem Wagen spielen. - Verwenden Sie immer das Rückhaltesystem. - Überprüfen Sie, ob alle Befestigungsvorrichtungen der Babyschale, des Sitzes oder des Kinderautositzes vor dem Gebrauch richtig ein-gerastet sind.
- Dieses Produkt ist nicht zum Joggen oder Skaten geeignet. - Dieser Kinderwagen ist für Kinder ab Geburt und bis 15 kg geeignet. - Erlauben Sie nie, dass sich Ihr Kind auf die Fußstütze oder den Bügel stellt.
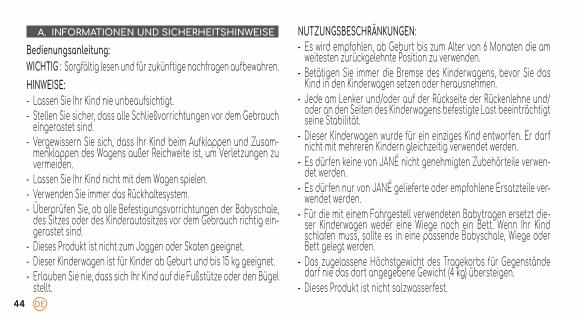
NUTZUNGSBESCHRÄNKUNGEN: - Es wird empfohlen, ab Geburt bis zum Alter von 6 Monaten die am weitesten zurückgelehnte Position zu verwenden.
- Betätigen Sie immer die Bremse des Kinderwagens, bevor Sie das Kind in den Kinderwagen setzen oder herausnehmen.
- Jede am Lenker und/oder auf der Rückseite der Rückenlehne und/oder an den Seiten des Kinderwagens befestigte Last beeinträchtigt seine Stabilität.
- Dieser Kinderwagen wurde für ein einziges Kind entworfen. Er darf nicht mit mehreren Kindern gleichzeitig verwendet werden.
- Es dürfen keine von JANÉ nicht genehmigten Zubehörteile verwen-det werden.
- Es dürfen nur von JANÉ gelieferte oder empfohlene Ersatzteile ver-wendet werden.
- Für die mit einem Fahrgestell verwendeten Babytragen ersetzt die-ser Kinderwagen weder eine Wiege noch ein Bett. Wenn Ihr Kind schlafen muss, sollte es in eine passende Babyschale, Wiege oder Bett gelegt werden.
- Das zugelassene Höchstgewicht des Tragekorbs für Gegenstände darf nie das dort angegebene Gewicht (4 kg) übersteigen.
- Dieses Produkt ist nicht salzwasserfest.

45DE
B. MONTAGE UND DEMONTAGE DER RÄDER
Für die Montage der Räder halten Sie den Knopf in der Mitte des Rades gedrückt und führen die Radachse in die Achse des Fahr-gestells ein, bis Sie merken, dass sie fest eingerastet ist. 1
Zum Entfernen der Hinterräder halten Sie den Knopf in der Mitte gedrückt und ziehen das Rad vom Fahrgestell ab. 1
Für die Montage der Vorderräder halten Sie den vorderen Verriegelungsknopf gedrückt, rasten das Vorderrad in die Achse ein und schieben es nach oben. Lösen Sie den vor-deren Verriegelungsknopf. Sie müssen sein festes Einrasten feststellen. 2
Zum Entfernen der Vorderräder drücken Sie auf den vorderen Verriegelungsknopf und entfernen das Vorderrad durch Ziehen nach unten. 2
ACHTUNG: Dieser Vorgang darf nie mit dem Baby im Sitzein-hang ausgeführt werden.
ACHTUNG: Ziehen Sie regelmäßig die Räder vom Fahrgestell ab und entfernen Sie den Schmutz oder Sand von der Rad-achse. Tauchen Sie die Radlager nie in Wasser. Verwenden
Sie eine Bürste und ein feuchtes Tuch, um die Räder vom Schmutz zu reinigen.
C. AUF- UND ZUSAMMENKLAPPEN
AUFKLAPPEN
Zum Öffnen Ihres KAWAI stellen Sie ihn auf eine ebene Fläche mit dem Lenker nach oben und lösen das Transportband. 3
Ziehen Sie den Kinderwagen am Lenker hoch, damit er vollständig geöffnet wird, bis Sie das Einrasten hören. 4
ACHTUNG: Stellen Sie vor Gebrauch Ihres KAWAI Kinderwa-gens sicher, dass alle Befestigungs- und Verriegelungsvor-richtungen richtig eingerastet und geschlossen sind.
Stellen Sie den Lenker auf die gewünschte Höhe ein, indem Sie da-nach die Blockierhebel lösen und einstellen. 12a - 12b
ZUSAMMENKLAPPEN
Stellen Sie vor dem Zusammenklappen Ihres KAWAI Kinderwagens die Feststellbremse fest 7 a, entfernen Sie jeden Gegenstand, der das Schließen des Kinderwagens behindern könnte, aus dem Ein-
!
!
!

DE46
man sich schneiden, verstauchen und einklemmen könnte, ist während dieser Vorgänge unvermeidlich.
D. VERWENDUNG DER FESTSTELLBREMSEBREMSEN: Drücken Sie den Hebel mit dem Fuß nach unten, um die Feststellbremse Ihres Kinderwagens zu aktivieren. 7 aBREMSE LÖSEN: Schieben Sie den Hebel mit dem Fuß nach oben, um die Feststellbremse zu lösen. 7 b
ANMERKUNG: Nachdem die Bremse betätigt wurde, über-prüfen, dass der Wagen korrekt gebremst ist. Es könnte er-forderlich sein, den Wagen leicht zu drehen, damit die Brem-se optimal greift.
E. FESTSTELLEN DER VORDERRÄDER
Ihr Buggy verfügt über dreh- und lenkbare Vorderräder mit Lenk-arretierung.
Drücken Sie auf die sich auf jedem Vorderradhalter befindende Knopfsicherung, um sie festzustellen. 8 a
Zum Lösen der Vorderräder ziehen Sie den Knopf nach oben. 8 b
!
kaufsnetz, lösen Sie die Lenkarretierung der Vorderräder 8 und entfernen Sie das JANÉ Zubehör (Sitzeinhang, TRANSPORTER, KOOS, MICRO, MATRIX oder NEST).
Für eine einfachere Handhabung und ein noch kleineres Faltmaß kann der Sitzeinhang entfernt werden 10 .
Öffnen Sie die Blockierhebel des Lenkers und schieben Sie ihn nach unten. 12a- 12b- 12c
Drehen Sie den rechten Griff 5 a und ziehen Sie gleichzeitig an beiden seitlichen Schnappern durch Hochziehen des Lenkers, um die Entriegelung zu erleichtern. 5 b
Heben Sie den Buggy an dem sich auf dem Mittelrohr des Fahr-gestells befindenden Griff hoch, bis der Kinderwagen komplett zu-sammengeklappt ist 6 a- 6 b und befestigen Sie ihn mit dem sich am Lenker befindenden Transportband. 3 b
Damit er so wenig Platz wie möglich einnimmt, müssen der Sitzein-hang des KAWAI auf dem Fahrgestell in Fahrtrichtung angebracht 9 b und die Haube komplett zusammengefaltet werden 16c. Be-
folgen Sie die gleichen vorherigen Schritte.
HINWEIS: Es ist unerlässlich sich zu vergewissern, dass sich das Kind vom Kinderwagen während des Zusammen- und Aufklappens entfernt hält. Das Auftauchen von Punkten, wo
!

47DE
ACHTUNG: Halten Sie die Drehachse immer frei von Staub, um ein sanfte und konstante Drehung zu erreichen.
F. PRO-FIX-SYSTEM
Das Fahrgestell Ihres Buggys enthält das PRO-FIX-SYSTEM, das für den Einbau von auf dem Markt erhältlichen Jané Zubehörteilen (TRANSPORTER, KOOS, MICRO, MATRIX oder NEST) vorbereitet ist, die mit für das Modell KAWAI passenden PRO-FIX-Adaptern aus-gestattet sind.
Das PRO-FIX System erleichtert Ihnen die schnelle, leichte und sichere Verankerung und Entnahme dieser Zubehörteile in das Fahrgestell. Die Zubehörteile bleiben im Fahrgestell verankert. Folgen Sie dazu bitte aufmerksam den Anweisungen dieser Zu-behörteile.
HINWEIS: Überprüfen Sie immer vor ihrem Gebrauch, dass die Arretierung dieser Teile perfekt durchgeführt wurde, in-dem Sie sie nach oben ziehen.
G. EIN- UND AUSBAU DES SITZEINHANGS
Mit dem PRO-FIX-System können Sie den Sitzeinhang in Richtung
!
!
zu Ihnen (entgegen der Fahrtrichtung), 9 a wenn Ihr Kind kleiner ist oder mit Blick nach vorne (in Fahrtrichtung) befestigen, in dem Maße wie Ihr Kind wächst. 9 bDafür bringen Sie den Sitz von oben in den sich im Fahrgestell be-findenden PRO-FIX-Aussparungen an, bis Sie ein Klicken hören. 9 c
HINWEIS: Die Feststellbremse muss während des Ein- und Ausbaus des Sitzeinhangs betätigt werden.
HINWEIS: Stellen Sich sicher, dass der Sitzeinhang richtig an das Fahrgestell befestigt wurde, indem Sie ihn leicht nach oben ziehen.
HINWEIS: Entfernen Sie nie den Sitzeinhang aus dem KAWAI Fahrgestell, während Ihr Kind in ihm sitzt.
Um den Sitzeinhang aus dem Fahrgestell zu entfernen, drücken Sie gleichzeitig auf die sich an beiden Seiten des Sitzeinhangs be-findenden Lösehebel und ziehen ihn nach oben. 10
HINWEIS: Verwenden Sie immer die Sicherheitsgurte, wenn sich Ihr Kind im Sitzeinhang in der Sitz- oder Liegeposition befindet.
!
!
!
!

DE48
H. SICHERHEITSGURT
Ihr Buggy verfügt über einen Sicherheitsgurt, damit Ihr Kind jeder-zeit sicher sitzt. Passen Sie den Gurt dem Kind an, wenn Sie den Buggy verwenden.
Zum Öffnen des Gurtsystems drücken Sie auf den sich in der Mitte des Hosenträgergurtes befindenden Knopf, bis dieser sich löst. 11 a
Zum Schließen verbinden Sie die Schnallenenden und führen Sie in das Gurtschloss ein, bis Sie ein Klicken hören. 11 b- 11 c
Stellen Sie die Gurte so ein, dass sie richtig auf Ihr Kind eingestellt und gespannt sind. Zum Einstellen der Gurtlänge schieben Sie die Schnallen nach oben oder unten. Stellen Sie sicher, dass die Gurte nicht verdreht sind. 11 d
I. VERWENDUNG FÜR KINDER UNTER 6 MONATEN
Um den Sitzeinhang für Kinder unter 6 Monaten zu verwenden, stellen Sie den Winkel des Sitzeinhangs auf die am stärksten ge-neigte Position ein. 14a
Stellen Sie den Hosenträgergurt auf die niedrigste Position ein. 11 e
J. LENKEREINSTELLUNG
Der Lenker ist höhenverstellbar und kann auf die für Sie bequems-te Position eingestellt werden.
Dafür öffnen Sie die sich links und rechts am Lenker befindenden Blockierhebel, ziehen ihn auf die gewünschte Höhe und schließen die beiden Hebel erneut. 12a- 12b
K. VERSTELLUNG DER FUSSSTÜTZESie können die Fußstütze auf verschiedene Positionen einstellen. Dafür drücken Sie gleichzeitig auf die sich an der Außenseite des Sitzeinhangs befindenden Knöpfe, um sie nach unten zu schieben. Um sie nach oben zu schieben, müssen Sie nicht auf die Knöpfe drücken, sondern ziehen einfach an der Fußstütze. 13
HINWEIS: Lassen Sie nicht zu, dass sich Ihr Kind mit seinen Füßen auf die Fußstütze stellt.
L. WINKELVERSTELLUNG DER RÜCKENLEHNE
Um Ihr Baby jederzeit in der bequemsten Position zu transportie-ren, können Sie den Neigungswinkel der Rückenlehne verstellen.
!
! Mit der tragbaren Babyschale SMART kompatibel...................ACHTUNG: Lesen Sie die jeweilige Montageanleitung.

49DE
Zum Senken der Rückenlehne ziehen Sie das Band mit dem roten Logo auf der Rückseite nach unten bis zur gewünschten Position. 14a
Zum Hochziehen der Rückenlehne ziehen Sie das Band mit dem schwarzen Logo auf der Rückseite nach oben. 14b
HINWEIS: Bis zum Alter von 6 Monaten wird die Verwendung der am weitesten zurückgelehnten Position empfohlen 14c.
M. GEBRAUCH DES SCHUTZBÜGELSDer Schutzbügel wurde zum Einrasten in die im Sitzeinhang plat-zierten Aussparungen entworfen. Wenn Sie es wünschen, können Sie eine Seite nur durch Drücken der seitlichen Knöpfe lösen und der Bügel bleibt vollständig mit dem anderen Ende verbunden. 15a- 15b
ANMERKUNG: Das Kind muss von den beweglichen Teilen entfernt gehalten werden, wenn diese von einem verant-wortlichen Erwachsenen gehandhabt werden. Das Auftre-ten von Schnitt-, Druck und Quetschstellen und ist bei die-sen Operationen unumgänglich.
!
!
ACHTUNG: Halten Sie den Buggy oder den Sitzeinhang nie am Schutzbügel fest, da er kein Tragegriff ist.
N. VERWENDUNG DER HAUBE
Zur Befestigung der Haube führen Sie die Verankerungen in die entsprechenden Aussparungen an der Seite des Sitzeinhangs ein, bis Sie ein Klicken hören. 16a
Zum Entfernen der Haube betätigen Sie den Lösehebel der Ver-ankerung und ziehen diesen nach oben. 16b
Die Haube kann durch Bewegung des kleinen Bügels in 4 verschie-dene Positionen eingestellt werden. 16c
Die Rückseite der Haube kann durch den Reißverschluss zur Ver-besserung der Lüftung geöffnet werden. 16c
HINWEIS: Legen Sie keine Gegenstände auf die Haube.
O. REGENSCHUTZ
Der Regenschutz Ihres KAWAI ist sehr leicht anzubringen. Sie müs-sen nur die Hängematte abdecken und die Verschlüsse dem Fahr-gestell anpassen, um ihn zu befestigen.
!
!

DE50
Er besitzt ein kleines Fenster, das aufgerollt und mit Klettbändern befestigt werden kann, damit das Kind völlig frei seine Umgebung erkunden kann. 17
Der Bezug kann zum Waschen abgenommen werden. (Schauen Sie immer in der Waschanleitung nach).
P. PFLEGE
Polstereinlage nicht übermäßig lange einer direkten Sonnenein-strahlung aussetzen.
Plastikteile mit lauwarmem Wasser und Seife reinigen. Anschlie-ßend alle Bauteile sorgfältig trocknen.
Der Bezug kann zum Waschen abgenommen werden. (Schauen Sie immer in der Waschanleitung nach).
Überprüfen Sie regelmäßig die Bremsen, die Hosenträgergurte und die Befestigungen, die aufgrund der Benutzung Schäden er-leiden können.
Sowohl zu Ihrer Sicherheit als auch zur guten Konservierung des Produktes ist es wichtig, eine regelmäßige Überprüfung in einer unserer offiziellen Werkstätten vornehmen zu lassen.
Q. INFORMATIONEN ZUR GARANTIE
Dieser Artikel verfügt über eine Garantie gemäß den Bestimmun-gen der königlichen Gesetzesverordnung 1 / 2015 vom 24. Juli. Be-wahren Sie den Kaufbeleg auf, denn er muss in dem Laden, wo das Produkt gekauft wurde, bei jeder Reklamation vorgelegt werden, um ihre Gültigkeit zu beweisen.
Jene Mängel oder Schäden, die durch unsachgemäßen Gebrauch des Artikels oder Nichteinhaltung der in der Bedienungsanleitung und auf den Pflegeetiketten beschriebenen Sicherheits- und Wa tungsvorschriften verursacht wurden, sind von der vorliegenden Garantie ausgeschlossen, ebenso wie die Verschleißteile durch normalen Gebrauch und täglichen Umgang.
Das Etikett, das die Fahrgestellnummer Ihres Modells enthält, darf unter keinen Umständen abgerissen werden, denn es enthält wichtige Informationen.

51DE
ACHTUNG: Um maximale Sicherheit und Betreuung für Ihren neuen JANÉ zu erreichen, ist es sehr wichtig, dass Sie Ihr neues Produkt auf unserer Website www.janeworld.com re-gistrieren es finden, ausfüllen. Die Registrierung wird Ihnen ermöglichen, falls notwendig, sich über die Entwicklung und Pflege Ihres Produktes zu informieren. Ebenso können wir Sie, wenn Sie es wünschen, über die neuesten Modelle oder Nachrichten, die unserer Ansicht nach für Sie von Interesse sind, informieren.
!

IT52
IT
52
ISTRUZIONI

53IT
INDICE
INFORMAZIONI E AVVERTENZE DI SICUREZZAMONTAGGIO E SMONTAGGIO DELLE RUOTEAPERTURA E CHIUSURAUSO DEL FRENO DI STAZIONAMENTOBLOCCO DELLE RUOTE ANTERIORISISTEMA PRO-FIXMONTAGGIO E SMONTAGGIO DELLA SEDUTACINTURA DI SICUREZZAUSO PER BAMBINI DI ETÀ INFERIORE A 6 MESIREGOLAZIONE DEL MANUBRIOREGOLAZIONE DEL POGGIAPIEDIREGOLAZIONE DELL’ANGOLO DELLO SCHIENALEUSO DEL PROTETTORE DI SICUREZZAUSO DELLA CAPOTTINACAPOTTINA PARAPIOGGIAMANUTENZIONEINFORMAZIONI SULLA GARANZIA
A.B.C.D.E.F.G.H.I.J.K.L.M.N.O.P.Q.
5455555656575757585858585959596060
ISTRUZIONI

IT54
A. INFORMAZIONI E AVVERTENZE DI SICUREZZAIstruzioniIMPORTANTE : Leggere attentamente le presenti istruzioni e con-servarle per consultazioni future.AVVERTENZE: - Non lasciare mai il bambino privo di vigilanza. - Assicurarsi che tutti i dispositivi di chiusura siano inseriti prima dell’uso.
- Per evitare lesioni, assicurarsi che il bambino sia distante durante l’apertura e la chiusura del prodotto.
- Evitare che il bambino giochi con questo prodotto. - Usare sempre il sistema di trattenuta. - Verificare che i dispositivi di trattenuta del portabebè, del pas-seggino o del seggiolino auto siano correttamente inseriti prima dell’uso.
- Questo prodotto non è adatto per correre o pattinare. - Questo passeggino è adatto a bambini dalla nascita fino a 15 kg. - Non permettere mai al bambino di mettersi in piedi sul poggiapiedi.
RESTRIZIONI D’USO: - Si raccomanda l’uso nella posizione più reclinata dalla nascita fino ai 6 mesi.
- Attivare sempre il freno del passeggino prima di mettere o riti-rare il bambino dal passeggino.
- Qualunque carico fissato al manubrio e/o alla parte posterio-re dello schienale e/o ai lati del passeggino ne compromette la stabilità.
- Questo passeggino è stato progettato per un solo bambino; non utilizzarlo per più di un bambino alla volta.
- Non utilizzare accessori non approvati da JANÉ. - Utilizzare solo pezzi di ricambio forniti o raccomandati da JANÉ.
- Per i portabebè usati con un telaio: questo passeggino non so-stituisce una culla o un lettino. Se il bambino ha bisogno di dor-mire, utilizzare un portabebè, una culla o un lettino adeguati.
- Il peso massimo consentito per il cestino non deve superare quello indicato sul cestino stesso (4 kg).
- Questo prodotto non è resistente all’acqua salata.

55IT
B. MONTAGGIO E SMONTAGGIO DELLE RUOTE
Per montare le ruote posteriori, tenere premuto il pulsante cen-trale e inserire l’asse della ruota nell’asse del telaio finché non si incastra in modo saldo. 1
Per rimuovere le ruote posteriori, tenere premuto il pulsante cen-trale ed estrarre la ruota dal telaio. 1
Per montare le ruote anteriori, tenere premuto il pulsante di bloc-co frontale, inserire la ruota anteriore nell’asse e premere verso l’alto. Rilasciare il pulsante di blocco frontale. Assicurarsi che si incastri in modo saldo. 2
Per rimuovere le ruote anteriori, premere il pulsante di blocco frontale ed estrarre la ruota anteriore tirandola verso il basso. 2
ATTENZIONE: questa operazione non deve mai essere effettuata con il bambino seduto sul prodotto.
ATTENZIONE: Estrarre periodicamente le ruote dal telaio e togliere la sporcizia o la sabbia dall’asse della ruota. Non immergere in acqua i cuscinetti delle ruote. Usare uno spa-zzolino e un panno umido per pulire la sporcizia delle ruote.
C. APERTURA E CHIUSURA
APERTURA
Per aprire il KAWAI posizionarlo su una superficie piana con il ma-nubrio verso l’alto e sganciare la cinghia di trasporto. 3
Sollevare il passeggino per il manubrio in modo che si apra com-pletamente fino a sentire il bloccaggio. 4
ATTENZIONE: prima di usare il passeggino KAWAI, assicu-rarsi che tutti i meccanismi di fissaggio e blocco siano co-rrettamente inseriti e chiusi.
Regolare il manubrio all’altezza desiderata liberando e poi rego-lando le leve di blocco. 12a- 12b
CHIUSURA
Prima di chiudere il passeggino KAWAI, bloccare il freno di stazio-namento 7 a, togliere dal cestino qualunque oggetto che possa ostruire la chiusura del passeggino, liberare il blocco di direzio-ne delle ruote anteriori 8 ed estrarre l’accessorio JANÉ (seduta, TRANSPORTER, KOOS, MICRO, MATRIX o NEST).
Per facilitare i movimenti e ottenere una dimensione di chiusura ridotta, è possibile rimuovere la seduta 10 .
!
!
!

IT56
Aprire le leve del manubrio e spostarlo verso il basso. 12a- 12b-12c
Girare la leva destra 5 a e tirare contemporaneamente i pulsanti laterali sollevando il manubrio per facilitarne lo sblocco. 5 b
Sollevare il passeggino tramite la maniglia che si trova sul tubo centrale del telaio, fino a che il passeggino non si chiude comple-tamente 6 a- 6 b e fissarlo con la cinghia di trasporto che si trova sul manubrio. 3 b
Affinché il KAWAI occupi lo spazio più ridotto possibile, la seduta deve essere montata sul telaio rivolta verso il senso di marcia 9 b e la capottina deve essere completamente ripiegata 16c. Seguire gli stessi passaggi elencanti in precedenza.
AVVERTENZA: è fondamentale assicurarsi che il bambino sia lontano dal passeggino durante le azioni di apertura e chiusura. La comparsa di punti di taglio, compressione e intrappolamento è inevitabile durante queste operazioni.
D. USO DEL FRENO DI STAZIONAMENTO
ATTIVARE IL FRENO: spingere la leva verso il basso con il piede per attivare il freno di stazionamento del passeggino. 7 a
TOGLIERE IL FRENO: con il piede spingere la leva verso l’alto per disattivare il freno di stazionamento. 7 b
ATTENZIONE: Una volta azionato il freno assicurarsi che il passeggino sia rimasto frenato correttamente. Potrebbe es-sere necessario ruotare leggermente il passeggino affinché il freno ingrani in maniera ottima.
E. BLOCCO DELLE RUOTE ANTERIORI Il passeggino dispone di ruote anteriori piroettanti e direzionabili, con la possibilità di bloccare la direzione.
Per bloccarle, premere la sicura del pulsante che si trova sopra ciascun portaruote anteriore. 8 a
Per sbloccare le ruote anteriori, tirare il pulsante verso l’alto. 8 b
ATTENZIONE: mantenere l’asse piroettante libero dalla pol-vere perché rimanga scorrevole e duri a lungo.
!
!
!

57IT
F. SISTEMA PRO-FIX
Il telaio del passeggino comprende il sistema PRO-FIX, adatto per montare gli accessori di JANÉ disponibili sul mercato (TRANSPOR-TER, KOOS, MICRO, MATRIX o NEST), dotati di adattatori PRO-FIX adeguati al modello KAWAI.
Il sistema PRO-FIX facilita l’agganciamento e l’estrazione di questi accessori sul telaio, in modo rapido, facile e sicuro. Per farlo, se-guire attentamente le istruzioni di ciascun accessorio.
AVVERTENZA: prima dell’uso, verificare sempre che i com-ponenti siano bloccati alla perfezione tirandoli verso l’alto.
G. MONTAGGIO E SMONTAGGIO DELLA SEDUTA
Con il sistema PRO-FIX è possibile fissare la seduta rivolta verso l’accompagnatore (senso contrario alla marcia) 9 a quando il bambino è più piccolo, oppure in avanti (senso di marcia) mano a mano che il bambino cresce. 9 b
Per farlo, posizionare la seduta dall’alto negli alloggiamenti PRO-FIX che si trovano sul telaio fino a sentire un “CLIC”. 9 c
AVVERTENZA: il freno di stazionamento deve essere inserito durante il montaggio e lo smontaggio della seduta.
AVVERTENZA: assicurarsi che la seduta sia ben fissata al telaio tirandola leggermente verso l’alto.
AVVERTENZA: non rimuovere mai la seduta dal telaio KAWAI quando c’è un bambino seduto sopra.
Per rimuovere la seduta dal telaio, premere contemporaneamente le leve di sblocco che si trovano su entrambi i lati della seduta e tirarli verso l’alto. 10
AVVERTENZA: utilizzare le cinture di sicurezza ogni volta che il bambino è seduto o disteso sulla seduta.
H. CINTURA DI SICUREZZA
Il passeggino è dotato di un’imbragatura di sicurezza in modo che il bambino sia sicuro in ogni momento. Allacciare le cinture al bambino ogni volta che si usa il passeggino.
!
!
!
!
!

IT58
Per aprire l’imbragatura premere il pulsante che si trova al centro dell’imbragatura stessa fino a che non si apre. 11 a
Per chiuderla unire le estremità della fibbia e introdurle nella chiu-sura fino a sentire un “CLIC”. 11 b- 11 c
Regolare le cinture in modo che siano ben aderenti al bambino e tese.
Per regolare la lunghezza delle cinture spostare la fibbia verso l’alto o verso il basso. Assicurarsi che le cinture non siano attor-cigliate. 11 d
I. USO PER BAMBINI DI ETÀ INFERIORE A 6 MESI
Per usare la seduta con bambini di età inferiore a 6 mesi, regolare l’angolo della seduta nella posizione più reclinata. 14c
Regolare l’imbragatura nella posizione più bassa. 11 e
J. REGOLAZIONE DEL MANUBRIO
Il manubrio si può regolare in altezza nella posizione che risulta più comoda.
Per farlo aprire le leve che si trovano a sinistra e a destra del manubrio, portarlo all’altezza desiderata e richiudere le due leve. 12a- 12b
K. REGOLAZIONE DEL POGGIAPIEDI
È possibile regolare il poggiapiedi in diverse posizioni. Per farlo, premere contemporaneamente i pulsanti che si trovano nella par-te esterna della seduta per spostarlo verso il basso. Per spostar-lo verso l’alto non è necessario premere i pulsanti; basta tirare il poggiapiedi. 13
AVVERTENZA: impedire al bambino di mettersi in piedi sul poggiapiedi.
L. REGOLAZIONE DELL’ANGOLO DELLO SCHIENALE
Per trasportare il bambino nella posizione più comoda possibile a seconda delle circostanze, è possibile regolare l’angolo di recli-nazione dello schienale.
Per abbassare lo schienale tirare verso il basso la cinghia che si trova nella parte posteriore, con il logo rosso, fino alla posizione desiderata. 14a
Per sollevare lo schienale tirare la cinghia con il logo nero verso l’alto. 14b
!
! Compatibile con il portabebè portatile SMART........................ATTENZIONE: Leggere le istruzioni di montaggio.
59IT
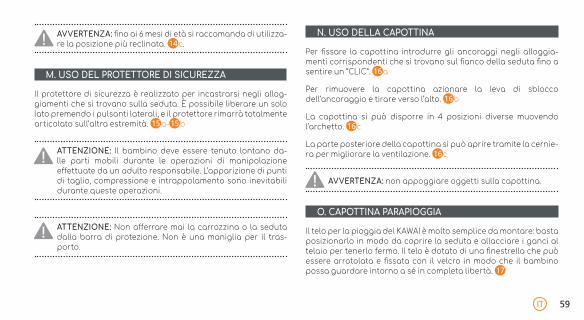
AVVERTENZA: fino ai 6 mesi di età si raccomanda di utilizza-re la posizione più reclinata. 14c.
M. USO DEL PROTETTORE DI SICUREZZA
Il protettore di sicurezza è realizzato per incastrarsi negli allog-giamenti che si trovano sulla seduta. È possibile liberare un solo lato premendo i pulsanti laterali, e il protettore rimarrà totalmente articolato sull’altra estremità. 15a- 15b
ATTENZIONE: Il bambino deve essere tenuto lontano da-lle parti mobili durante le operazioni di manipolazione effettuate da un adulto responsabile. L’apparizione di punti di taglio, compressione e intrappolamento sono inevitabili durante queste operazioni.
ATTENZIONE: Non afferrare mai la carrozzina o la seduta dalla barra di protezione. Non è una maniglia per il tras-porto.
N. USO DELLA CAPOTTINA
Per fissare la capottina introdurre gli ancoraggi negli alloggia-menti corrispondenti che si trovano sul fianco della seduta fino a sentire un “CLIC”. 16a
Per rimuovere la capottina azionare la leva di sblocco dell’ancoraggio e tirare verso l’alto. 16b
La capottina si può disporre in 4 posizioni diverse muovendo l’archetto. 16c
La parte posteriore della capottina si può aprire tramite la cernie-ra per migliorare la ventilazione. 16c
AVVERTENZA: non appoggiare oggetti sulla capottina.
O. CAPOTTINA PARAPIOGGIA
Il telo per la pioggia del KAWAI è molto semplice da montare: basta posizionarlo in modo da coprire la seduta e allacciare i ganci al telaio per tenerlo fermo. Il telo è dotato di una finestrella che può essere arrotolata e fissata con il velcro in modo che il bambino possa guardare intorno a sé in completa libertà. 17
!
!
!
!

IT60
Prima di riporre la capottina parapioggia nella borsa, lasciarla asciugare completamente!
P. MANUTENZIONE
Non esporre il rivestimento ai raggi solari per lunghi intervalli.
Lavare le parti di plastica con acqua insaponata, poi asciugare scrupolosamente tutti i componenti.
Il rivestimento si può smontare per lavarlo (consultare sempre l’e-tichetta con le istruzioni di lavaggio).
Controllare regolarmente i freni, le cinture e le chiusure che pos-sano subire un deterioramento dovuto all’uso.
È importante sottoporre il prodotto a una revisione periodica in uno qualunque dei nostri centri ufficiali, sia per la sua sicurezza che per la buona conservazione del prodotto stesso.
Q. INFORMAZIONI SULLA GARANZIA
Questo articolo dispone di garanzia secondo quanto stipulato nel R.D. Legislativo 1 / 2015 dl 24 luglio. Conservare lo scontrino d’acquisto. È imprescindibile presentarlo presso il negozio in cui è stato acquistato il prodotto come prova d’acquisto in caso di reclamo.
Sono esclusi dalla presente garanzia i difetti o le avarie dovuti a un uso non adeguato del prodotto o al mancato compimento delle norme di sicurezza e manutenzione descritte nei libretti di istruzioni e sulle etichette per il lavaggio. Lo stesso vale per i dan-ni dovuti all’usura in caso di utilizzo prolungato.
L’etichetta che contiene il numero di telaio del modello non deve essere rimossa in nessun caso, dato che contiene informazioni importanti.

61IT
ATTENZIONE: Per ottenere la massima sicurezza e assis-tenza riguardo il suo nuovo JANÉ, è importante registrare il prodotto sul nostro sito web www.janeworld.com. La regis-trazione le consentirà di essere informato, se è necessario, riguardo l’evoluzione e la manutenzione del suo prodotto. Inoltre, sempre se lo desidera, la potremo informare sui nuo-vi modelli o altre novità che riteniamo di suo interesse.
!

PT62
PT
62
INSTRUÇÕES

63PT
INDICE
INFORMAÇÃO E ADVERTÊNCIAS DE SEGURANÇA MONTAGEM E DESMONTAGEM DAS RODASDESDOBRAMENTO E DOBRAGEMUSO DO TRAVÃO DE ESTACIONAMENTOBLOQUEIO DAS RODAS DIANTEIRASSISTEMA PRO-FIXMONTAGEM E DESMONTAGEM DA ESPREGUIÇADEIRACINTO DE SEGURANÇAUSO PARA MENORES DE 6 MESESAJUSTE DO GUIADORAJUSTE DO APOIO PARA OS PÉSAJUSTE DO ÂNGULO DO ENCOSTOUSO DO PROTETOR DE SEGURANÇAUTILIZAÇÃO DA CAPOTAPROTETOR DE CHUVAMANUTENÇÃOINFORMAÇÃO SOBRE A GARANTIA
A.B.C.D.E.F.G.H.I.J.K.L.M.N.O.P.Q.
6465656666676768686868686869697070
INSTRUÇÕES

PT6464
A. INFORMAÇÃO E ADVERTÊNCIAS DE SEGURANÇA
InstruçõesIMPORTANTE : Ler atentamente e guardar para futuras consultas. ADVERTÊNCIAS: - Nunca deixe a criança desatendida. - Assegure-se de que todos os dispositivos de fecho estão engre-nados antes de usar.
- Para evitar lesões, assegure-se de que a criança se mantém afastada durante a desdobramento e dobragem deste produto.
- Não permita que a criança brinque com este produto. - Use sempre o sistema de retenção. - Comprove se os dispositivos de sujeição da alcofa, deo assento ou da cadeira do carro estão corretamente engrenados antes de usar.
- Este producto no es adecuado para correr o patinar. - Esta cadeira é adequada para crianças a partir do nascimento e até 15 kg.
- Nunca permita que a criança se ponha de pé no apoio para os pés ou estribo.
RESTRIÇÕES DE USO: - Recomenda-se o uso na posição mais reclinada a partir do nas-cimento e até aos 6 meses.
- Ative sempre o travão da cadeira antes de colocar ou retirar as crianças da cadeira.
- Qualquer carga fixada ao guiador e/ou à parte traseira do en-costo e/ou aos lados da cadeira afeta a estabilidade desta.
- Esta cadeira foi desenhada para uma só criança e não deve ser utilizada por mais crianças de cada vez.
- Não devem ser utilizados acessórios não aprovados pela JANÉ. - Apenas devem ser utilizados os substitutos fornecidos ou reco-mendados pela JANÉ.
- Para os porta-bebés usados com um chassis, esta cadeira não substitui um berço ou cama. Se a criança necessitar de dormir, deve ser colocada numa alcofa, num berço ou numa cama ade-quados.
- A massa máxima permitida da cesta porta-objetos nunca pode superar o indicado na cesta (4 kg).
- Este produto não é resistente à água salgada.

65PT
B. MONTAGEM E DESMONTAGEM DAS RODAS
Para montar as rodas traseiras, mantenha pressionado o botão central e insira o eixo da roda no eixo do chassis até que note que encaixou firmemente. 1
Para retirar as rodas traseiras, mantenha pressionado o botão central e retire a roda do chassis. 1
Para montar as rodas dianteiras, mantenha pressionado o botão de bloqueio frontal, encaixe a roda dianteira no eixo e empurre para cima. Solte o botão de bloqueio frontal. Deve notar que en-caixa firmemente. 2
Para retirar as rodas dianteiras, pressione o botão de bloqueio frontal e extraia a roda dianteira puxando-a para baixo. 2
ATENÇÃO: Esta ação nunca deve ser realizada com o bebé dentro da espreguiçadeira.
ATENÇÃO: Extraia periodicamente as rodas do chassis e retire a sujidade ou a areia do eixo da roda. Não mergulhe os rolamentos da roda na água. Use uma escova e um pano húmido para limpar a sujidade das rodas.
C. DOBRAGEM E DESDOBRAGEM
DESDOBRAGEM
Para abrir a sua KAWAI coloque-a sobre uma superfície plana com o guiador para cima e solte a fita de transporte. 3
Levante a cadeira pelo guiador para que se abra por completo até escutar que encaixa. 4
ATENÇÃO: Antes de usar a sua cadeira KAWAI, assegure-se de que todos os mecanismos de fixação e bloqueio estão corretamente encaixados e fechados.
Ajuste o guiador à altura desejada soltando e ajustando depois os cames de bloqueio. 12a- 12b
DOBRAGEM
Antes de dobrar a sua cadeira KAWAI, bloqueie o travão de es-tacionamento 7 a, retire qualquer objeto da cesta que possa obstruir o fecho da cadeira, solte o bloqueio da direção das ro-das dianteiras 8 e extraia o acessório JANÉ (espreguiçadeira, TRANSPORTER, KOOS, MICRO, MATRIX ou NEST).
Para facilitar o manuseamento e conseguir umas dimensões de
!
!
!

PT66
dobragem pequenas, é possível retirar a espreguiçadeira 10 .
Abra os cames do guiador e deslize-o para baixo. 12a- 12b- 12c
Gire o puxador direito 5 a e puxe os gatilhos laterais levantando o guiador para facilitar o desbloqueio. 5 b
Levante o carrinho pela asa situada no tubo central do chassis até que a cadeira fique completamente dobrada 6 a – 6 b e fixe-a com a fita de transporte situada no guiador. 3 b
Para que ocupe o menor espaço possível, a espreguiçadeira da sua KAWAI deve ser montada no sentido da marcha sobre o chas-sis 9 b e a capota deve ficar completamente recolhida 16c. Siga os mesmos passos anteriores.
ADVERTÊNCIA: É imprescindível assegurar-se de que a criança se mantém afastada da cadeira durante as ações de dobragem e desdobragem. A aparição de pontos de corte e compressão e entalamentos são inevitáveis durante estas operações.
D. USO DO TRAVÃO DE ESTACIONAMENTO
TRAVAR: Pressionar a alavanca com o pé para baixo para ativar o travão de estacionamento da cadeira. 7 a
TOGLIERE IL FRENO: con il piede spingere la leva verso l’alto per disattivare il freno di stazionamento. 7 b
ADVERTÊNCIA: Uma vez accionado o travão, certifique-se que o carrinho ficou correctamente travado. Pode ser ne-cessário fazer rodar ligeiramente o carrinho para que o tra-vão engrene de forma óptima.
E. BLOQUEIO DAS RODAS DIANTEIRAS
O seu carrinho dispõe de rodas dianteiras giratórias direcionais, com a possibilidade de bloquear a direção.
Para bloqueá-las, pressione a segurança do botão situado em cima de cada porta-rodas dianteiro. 8 a
Para desbloquear as rodas dianteiras, puxe o botão para cima. 8 b
ATENÇÃO: Mantenha o eixo giratório limpo de pó, para con-seguir
!
!
!

67PT
F. SISTEMA PRO-FIX
O chassis do seu carrinho inclui o sistema PRO-FIX, preparado para montar os acessórios JANÉ disponíveis no mercado (TRANS-PORTER, KOOS, MICRO, MATRIX ou NEST), equipados com os adaptadores PRO-FIX adequados para o modelo KAWAI.
O sistema PRO-FIX facilitará o acoplamento e a extração destes acessórios ao/do chassis, de um modo rápido, fácil e seguro, fi-cando estes fixados ao chassis. Para isso, siga pormenorizada-mente as instruções destes acessórios.
ADVERTÊNCIA: Antes de usar, comprove sempre que o bloqueio destes componentes foi perfeitamente efetuado, puxando-os para cima.
G. MONTAGEM E DESMONTAGEM DA ESPREGUIÇADEIRA
Com o sistema PRO-FIX, pode fixar a espreguiçadeira na sua direção (sentido contramarcha) 9 a quando a criança é mais pequena, ou para a frente (sentido da marcha) à medida que a criança cresça. 9 b
Para isso, coloque o assento desde cima nos alojamentos PRO-FIX
que existem no chassis até escutar um “CLIQUE”. 9 c
ADVERTÊNCIA: O travão de estacionamento deve ser acio-nado durante a montagem e desmontagem da espreguiça-deira.
ADVERTÊNCIA: Assegure-se que a espreguiçadeira ficou bem segura ao chassis, puxando-a ligeiramente para cima.
ADVERTÊNCIA: Nunca retire a espreguiçadeira do chassis KAWAI enquanto estaja uma criança sentada dentro.
Para retirar a espreguiçadeira do chassis, pressione simultanea-mente as alavancas de desbloqueio situadas em ambos os lados da espreguiçadeira e puxe-a para cima. 10
ADVERTÊNCIA: Utilize os cintos de segurança sempre que a criança vá sentada ou deitada na espreguiçadeira.
!
!
!
!
!

PT68
H. CINTO DE SEGURANÇA
O seu carrinho dispõe de um arnês de segurança para que o seu filho esteja sempre seguro. Ajuste o cinto de segurança à criança sempre que usar o carrinho.
Para abrir o sistema do cinto aperte o botão situado no centro do arnês até que este se solte. 11 a
Para fechar, junte as extremidades das fivelas e introduza-as no fecho até escutar um “CLIQUE”. 11 b- 11 c
Regule os cintos de segurança de modo a que fiquem corretamen-te ajustados à criança e com tensão. Para ajustar o comprimento dos cintos, deslize as fivelas para cima ou para baixo. Assegure-se que os cinturões não estejam retorcidos. 11 d
I. USO PARA MENORES DE 6 MESES
Para usar a espreguiçadeira com crianças menores de 6 meses, ajus-te o ângulo da espreguiçadeira para a posição mais reclinada. 14c
Ajuste o arnês na posição mais baixa. 11 e
J. AJUSTE DO GUIADORO guiador pode ser ajustado em altura até à posição mais có-moda para si.
Para isso, abra os cames situadas à esquerda e direita do guia-dor, mova-o até à altura desejada e volte a fechar os dois cames. 12a- 12b
K. AJUSTE DO APOIO PARA OS PÉSPode ajustar o apoio para os pés em diferentes posições. Para isso, pressione simultaneamente os botões situados na parte ex-terior da espreguiçadeira para movê-la para baixo. Para movê-la para cima não faz falta pressionar os botões, simplesmente puxe o apoio para os pés. 13
ADVERTÊNCIA: Não permita que a criança se ponha de pé sobre o apoio para os pés.
L. AJUSTE DO ÂNGULO DO ENCOSTOPara transportar o seu bebé na posição mais cómoda possível em cada momento, pode ajustar o ângulo de inclinação do encosto.
Para baixar o encosto, puxe a fita situada na parte posterior, com o símbolo vermelho, para baixo até à posição desejada. 14a
!
! Compatível com a alcofa portátil SMART....................................ATENÇÃO: Ler as suas instruções de montagem.

69PT
Para subir o encosto. Puxe a fita com o símbolo negro para cima. 14b
ADVERTÊNCIA: Até aos 6 meses de idade, recomenda-se uti-lizar a posição mais reclinada. 14c.
M. USO DO PROTETOR DE SEGURANÇA
O protetor de segurança foi desenhado para encaixar nos alo-jamentos dispostos na espreguiçadeira. Se assim o desejar, pode soltar apenas um lado pressionando os botões laterais e o protetor ficará totalmente articulado pela outra extremidade. 15a- 15b
ADVERTÊNCIA: A criança deve manter-se afastada das partes móveis quando estas estiverem a ser manipuladas pelo adulto responsável. A aparição de pontos de corte e compressão e entalamentos é inevitável durante estas ope-rações.
ATENÇÃO: Nunca segure o carrinho ou a rede pela barra de proteção, pois não é uma asa de transporte.
N. UTILIZAÇÃO DA CAPOTA
Para fixar a capota, introduza os fixadores nos alojamentos co-rrespondentes que existem nos lados da espreguiçadeira até es-cutar um “CLICK”. 16a
Para retirar a capota, ative a alavanca de desbloqueio do fixador e puxe este para cima. 16b
A capota pode ficar em 4 posições diferentes, bastando para isso mover o arquilho. 16c
A parte traseira da capota pode abrir-se com o fecho zip, de modo a melhorar a ventilação. 16c
ADVERTÊNCIA: Não coloque objetos sobre a capota.
O. PROTETOR DE CHUVA
O protector de chuva do seu KAWAI é muito simples de colocar, bastando cobrir a cadeira e ajustar os engates ao chassis para o fixar.
Este tem uma pequena janela que se pode enrolar e fixar com velcros para que a criança possa ver o que a rodeia com total liberdade. 17
!
!
!
!

PT70
Deixe secar completamente antes de guardar o protetor contra a chuva na bolsa.
P. MANUTENÇÃO
Não deixe o forro exposto ao sol durante períodos prolongados.
Lave as partes em plástico com água tépida e sabão e seque bem todos os componentes.
O estofado pode ser desmontado para ser lavado. (Consulte sem-pre a etiqueta de instruções de lavagem).
Verifique regularmente os travões, arneses e fixações que possam sofrer algum dano pelo uso.
Tanto para sua segurança como para a boa conservação destes produto, é importante que faça uma revisão periódica em qual-quer uma das nossas oficinas oficiais.
Q. INFORMAÇÃO SOBRE GARANTIA
Este artigo tem garantia conforme estipulado no R.D. Legislativo 1/2015 de 24 de julho. Conserve a fatura de compra, é imprescin-dível que seja apresentada na loja onde adquiriu o produto para justificar a sua validade perante qualquer reclamação.
Ficam excluídos da presente garantia os defeitos ou avarias pro-duzidas pelo uso inadequado do artigo ou pelo incumprimento das normas de segurança e manutenção descritas nas folhas de instruções e nas etiquetas de lavagem, assim como os elementos de desgaste por uso normal e manuseamento diário.
A etiqueta que contém o número de chassis do seu modelo, não deve ser removida sob nenhum pretexto pois contém informação importante.

71PT
ATENÇÃO: Para obter a máxima segurança e atenção so-bre o seu novo JANÉ, é muito importante que registe o seu novo produto no nosso site www.janeworld.com. O registo permite informar-se, se necessário, sobre a evolução e ma-nutenção do seu produto. Também, sempre que pretenda, podemos enviarlhe informação sobre os novos modelos ou noticias que consideremos possam ser do seu interesse.
!

PL72
PL
72
INSTRUKCJE

73PL
SPIS TREŚCI
INFORMACJE DOTYCZĄCE BEZPIECZEŃSTWA I OSTRZEŻENIA MONTAŻ I DEMONTAŻ KÓŁROZKŁADANIE I SKŁADANIEKORZYSTANIE Z HAMULCA POSTOJOWEGOBLOKOWANIE PRZEDNICH KÓŁSYSTEM PRO-FIX MONTAŻ I DEMONTAŻ SIEDZISKASZELKI BEZPIECZEŃSTWAKORZYSTANIE PRZEZ DZIECI W WIEKU PONIŻEJ 6 MIESIĘCYREGULACJA RĄCZKIREGULACJA PODNÓŻKAREGULACJA NACHYLENIA OPARCIAKORZYSTANIE Z PAŁĄKA BEZPIECZEŃSTWAMONTAŻ DASZKAOSŁONA PRZECIWDESZCZOWAUTRZYMANIEINFORMACJE DOTYCZĄCE GWARANCJI
A.B.C.D.E.F.G.H.I.J.K.L.M.N.O.P.Q.
INSTRUKCJE
7475757676777778787878787979798080

PL7474
A. INFORMACJE DOTYCZĄCE BEZPIECZEŃSTWA I OSTRZEŻENIA
InstrukcjeWAŻNE : Zapoznać się uważnie z treścią instrukcji i zachować w celu późniejszych konsultacji. OSTRZEŻENIA: - Dziecka nigdy nie należy pozostawiać bez nadzoru - Przed użyciem należy się upewnić, czy wszystkie mechanizmy blokujące zostały prawidłowo zamknięte.
- Podczas składania i rozkładania wózka dziecko powinno znajdo-wać się w bezpiecznej odległości.
- Niniejszy produkt nie jest zabawką. - Zawsze używać systemu mocującego. - Przed użyciem należy się upewnić, czy wszystkie mechanizmy mocujące gondolę, siedzisko lub fotelik samochodowy zostały prawidłowo zapięte.
- Niniejszy produkt nie jest przeznaczony do biegania lub jazdy na rolkach.
- Ten wózek jest przeznaczony dla dzieci od momentu narodzin do wagi 15 kg.
- Nie dopuszczać, aby dziecko stawało na podnóżku lub stopniu.
OGRANICZENIA UŻYCIA: - Zaleca się używanie w najbardziej odchylonej pozycji w przypad-ku dzieci od urodzenia do ukończenia 6 miesiąca życia.
- Należy włączyć hamulec przed umieszczeniem dziecka w wózku lub jego wyciągnięciem.
- Ciężary zawieszone na rączce i/lub z tyłu oparcia i/lub z boku wózka wpływają na jego stabilność.
- Ten wózek jest przeznaczony tylko dla jednego dziecka. Nie powi-nien być stosowany przez więcej niż jedno dziecko jednocześnie.
- Nie stosować akcesoriów niezatwierdzonych przez JANÉ. - Należy korzystać wyłącznie z części zamiennych dostarczonych lub zalecanych przez JANÉ.
- W przypadku fotelików samochodowych stosowanych wraz ze stela-żem ten wózek nie zastępuje łóżeczka lub łóżka. Jeżeli dziecko chce spać, należy ułożyć je w odpowiedniej gondoli, łóżeczku lub łóżku.
- Maksymalny dozwolony ciężar kosza na przedmioty nie może przekraczać ciężaru wskazanego na koszu (4 kg).
- Produkt nie jest odporny na słoną wodę.

75PL
B. MONTAŻ I DEMONTAŻ KÓŁ
W celu zamontowania kół tylnych, należy przytrzymać przycisk środkowy i włożyć oś koła w oś podwozia do momentu pewnego zamocowania. 1
W celu wyjęcia kół tylnych, należy przytrzymać przycisk środkowy i wyciągnąć koło z podwozia. 1
W celu zamontowania kół przednich, należy przytrzymać przycisk blokady przedniej, wsunąć koło przednie w oś oraz pchnąć do góry. Zwolnić przycisk blokady przedniej. Należy upewnić się, że koło zostało pewnie zamocowane. 2
W celu wyjęcia kół przednich, należy nacisnąć przycisk blokady przedniej i wyciągnąć koło przednie pociągając je w dół. 2
UWAGA: Nigdy nie należy wyciągać kół, podczas gdy dziec-ko znajduje się w wózku.
UWAGA: Należy regularnie wyciągać koła z nadwozia oraz usuwać z osi kół zabrudzenia lub piasek. Łożysk kół nie na-leży zanurzać w wodzie. W celu usunięcia zabrudzeń z kół, należy używać szczotki lub wilgotnej szmatki.
C. ROZKŁADANIE I SKŁADANIEROZKŁADANIE Aby otworzyć wózek KAWAI należy umieścić go na płaskiej po-wierzchni z rączką skierowaną do góry oraz zdjąć pasek trans-portowy. 3
Podnieść wózek pociągając za rączkę aż do całkowitego otwarcia i do momentu aż zabrzmi charakterystyczny dźwięk zatrzaśnięcia. 4
UWAGA: Przed użyciem wózka KAWAI należy się upewnić, że-wszystkie mechanizmy zamocowań i blokady są prawidło-wozatrzaśnięte i zamknięte..
Ustawić rączkę na pożądanej wysokości zwalniając, a następnie zamykając klamry blokujące. 12a- 12b
SKŁADANIE
Przed złożeniem wózka KAWAI, należy uruchomić hamulec posto-jowy 7 a, usunąć z kosza wszelkie przedmioty, które mogą utrud-niać złożenie wózka, zwolnić blokadę kierunku kół przednich 8 i wyciągnąć akcesorium JANÉ (siedzisko, TRANSPORTER, KOOS, MICRO, MATRIX lub NEST).
Siedzisko można zdjąć, aby ułatwić przenoszenie i zmniejszyć wy-miary wózka po złożeniu 10 .
!
!
!

PL76
Należy zwolnić klamry blokujące znajdujące się na rączce i przesunąć ją w dół. 12a- 12b- 12c
Należy przekręcić prawe pokrętło 5 a oraz pociągnąć jednocześnie uchwyty boczne i podnieść rączkę, aby umożliwić zwolnienie blokady.
Należy podnieść wózek używając paska umieszczonego na środkowej rurce podwozia aż do całkowitego złożenia wózka 6 a-6 b i następnie zablokować go używając paska transportowego
umieszczonego na rączce. 3 b
W celu zapewnienia, że siedzisko wózka KAWAI zajmuje jak najm-niej miejsca należy zamontować je na podwoziu w kierunku zgo-dnym z ruchem 9 b oraz całkowicie złożyć daszek 16c. Należy postępować zgodnie z instrukcjami podanymi powyżej.
UWAGA: Podczas składania i rozkładania wózka dziecko musi znajdować się w bezpiecznej odległości. Pojawie-nie się miejsc powodujących przecięcia, ściśnięcia oraz przytrzaśnięcia jest nieuniknione podczas wyżej wspom-nianych czynności.
D. KORZYSTANIE Z HAMULCA POSTOJOWEGO HAMOWANIE: Wcisnąć pedał nogą w dół, aby włączyć hamulec postojowy wózka. 7 a
WYŁĄCZANIE HAMULCA: Unieść nogą płytkę w górę, aby wyłączyć hamulec postojowy. 7 b
UWAGA: Po wciśnięciu hamulca należy upewnić się, czy wó-zek został prawidłowo zahamowany. Możliwe, że konieczne będzie lekkie potoczenie wózka po to, by hamulec optymal-nie zaskoczył
E. BLOKADA PRZEDNICH KÓŁ Wózek jest wyposażony w obrotowe przednie koła z możliwości blokady kierunku.
Aby zablokować koła należy przycisnąć przycisk znajdujący się na każdym wsporniku kół przednich. 8 a
Aby odblokować koła przednie, należy pociągnąć przycisk w górę. 8 b
UWAGA: Należy dbać o czystość obrotowej osi, aby zapewnić trwały i płynny obrót.
!
!
!

77PL
F. SYSTEM PRO-FIX
Podwozie wózka jest wyposażone w system PRO-FIX umożliwiający instalację dostępnych na rynku akcesoriów JANÉ (TRANSPORTER, KOOS, MICRO, MATRIX lub NEST ) wyposażonych w zaczepy PRO--FIX kompatybilne z modelem KAWAI.
System PRO-FIX umożliwia montaż powyższych akcesoriów na podwoziu oraz ich demontaż w szybki, prosty i bezpieczny sposób korzystając z zamontowanych na stałe na podwoziu zaczepów. Należy ściśle stosować się do instrukcji poszczególnych akceso-riów.
UWAGA: Przed użyciem, należy zawsze sprawdzić czy kom-ponenty zostały pewnie zamocowane pociągając za nie w górę.
G. MONTAŻ I DEMONTAŻ SIEDZISKA
Korzystając z systemu PRO-FIX, siedzisko można zamontować z dzieckiem skierowanym w stronę rodzica (kierunek przeciwny do ruchu) 9 a, zwłaszcza w przypadku mniejszych dzieci lub z dziec-kiem skierowanym do przodu (kierunek zgodny z ruchem), w przy-padku starszych dzieci. 9 b
W tym celu należy umieścić siedzisko obniżając je na zaczepy PRO-FIX znajdujące się na podwoziu do momentu, aż zabrzmi „KLIKNIĘCIE”. 9 c
UWAGA: Podczas montażu i demontażu siedziska należy uruchomić hamulec postojowy.
UWAGA: Należy się upewnić, że siedzisko zostało pewnie za-mocowane na podwoziu pociągając za nie w górę.
UWAGA: Nigdy nie wolno zdejmować siedziska z podwozia KAWAI, podczas gdy znajduje się w nim dziecko.
W celu usunięcia siedziska z podwozia należy jednocześnie na-cisnąć uchwyty zwalniające blokadę znajdujące się po obu stro-nach siedziska i pociągnąć siedzisko w górę. 10
UWAGA: Zawsze należy zapinać szelki bezpieczeństwa, pod-czas gdy dziecko siedzi lub leży w siedzisku.
!
!
!
!
!

PL78
H. SZELKI BEZPIECZEŃSTWA Wózek został wyposażony w szelki bezpieczeństwa zapewniające ochronę dziecka przez cały czas. Zawsze należy przypiąć dziecko paskami podczas używania wózka.W celu otwarcia szelek należy nacisnąć przycisk znajdujący się w środkowej części szelek do momentu ich zwolnienia. 11 aW celu zamknięcia należy złączyć końcówki klamr i wsunąć je do zapięcia do momentu aż zabrzmi „KLIKNIĘCIE”. 11 b- 11 c Wyregulować paski tak, by były właściwie dopasowane do ciała dziecka i dobrze napięte. Aby wyregulować długość pasków, przesunąć sprzączki w górę lub w dół. Upewnić się, by paski nie były poskręcane. 11 d
I. KORZYSTANIE W PRZYPADKU DZIECI W WIEKU PONIŻEJ 6 MIESIĘCY
Aby dzieci w wieku poniżej 6 miesiąca życia mogły korzystać z siedziska, należy ustawić je w najbardziej odchylonej pozycji. 14c
Umieścić szelki w najniższej pozycji. 11 e
J. REGULACJA RĄCZKI
Wysokość rączki można regulować, aby wybrać najbardziej wygo-dne położenie.
W tym celu należy zwolnić klamry znajdujące się z prawej i lewej strony rączki oraz przesunąć ją na pożądaną wysokość, a następnie zamknąć klamry. 12a - 12b
K. REGULACJA PODNÓŻKA
Położenie podnóżka można regulować. W tym celu należy jednocześnie nacisnąć przyciski znajdujące się na zewnętrznej części siedziska, co umożliwi przesunięcie podnóżka w dół. Aby podnieść podnóżek nie trzeba naciskać przycisków wystarczy pociągnąć podnóżek w górę. 13
UWAGA: Nie dopuszczać, aby dziecko stawało na podnóżku.
L. REGULACJA NACHYLENIA OPARCIA
Kąt nachylenia oparcia wózka można regulować zapewniając, że dziecko zawsze znajduje się w jak najbardziej wygodnej pozycji.
Aby obniżyć oparcie należy pociągnąć w dół pasek z czerwonym logo
!
! Kompatybilny z przenośnym nosidełkiem SMART......................UWAGA: Należy zapoznać się ze stosowną instrukcją montażu.

79PL
znajdujący się w tylnej części wózka do pożądanej pozycji. 14a
Aby podnieść oparcie należy pociągnąć w górę pasek z czarnym logo. 14b
UWAGA: Do czasu aż dziecko ukończy 6 miesiąc życia zaleca się korzystanie z najbardziej odchylonej pozycji 14c.
M. KORZYSTANIE Z PAŁĄKA
Pałąk bezpieczeństwa jest zaprojektowany tak, aby można go było zamocować w otworach znajdujących się na siedzisku. Istnie-je możliwość odłączenia pałąka tylko z jednej strony naciskając przyciski boczne. Pałąk będzie zamocowany wyłączenie po dru-giej stronie. 15a- 15b
UWAGA: Dziecko powinno przebywać daleko od ruchomych części, kiedy posługuję się nimi odpowiedzialna osoba dorosła. Pojawienie się miejsc przecięcia, ściśnięcia oraz przytrzaśnięć jest nieuniknione podczas w/w czynności.
UWAGA: Nigdy nie należy chwytać wózka lub siedziska za barierkę – to nie jest uchwyt do przenoszenia.
W celu zamocowania daszka, należy wsunąć zaczepy w od-powiednie otwory znajdujące się po bokach siedziska aż zabrzmi „KLIKNIĘCIE”. 16a
W celu usunięcia daszka należy nacisnąć klamrę blokującą zacze-pu i pociągnąć daszek w górę. 16b
Daszek można ustawiać w 4 różnych pozycjach przesuwając łuk daszku. 16c
Tylną część daszku można otworzyć odpinając zamek, aby polepszyć wentylację. 16c
UWAGA: Na daszku nie wolno umieszczać żadnych przed-miotów
O. OSŁONA PRZECIWDESZCZOWA
Zakładanie osłony przeciwdeszczowej na wózek KAWAI jest bar-
!
!
!
!

PL80
dzo proste. Wystarczy przykryć nią siedzisko i przymocować za-czepy do podwozia wózka. W osłonie przeciwdeszczowej znajduje się małe okienko, które można otworzyć, podwinąć i zamocować przy pomocy rzepów, aby dziecko miało możliwość oglądania oto-czenia. 17
Przed włożeniem osłony przeciwdeszczowej do torby, należy się upewnić, że jest całkowicie sucha.
P. UTRZYMANIE
Tapicerki nie należy wystawiać na zbyt długie działanie promieni słonecznych.
Wszystkie plastikowe części należy myć letnią wodą z neutralnym mydłem, po czym dokładnie wysuszyć.
Tapicerkę można zdjąć w celu wyprania. (Zawsze należy zapoznać się z instrukcjami dotyczącymi prania umieszczonymi na etykie-cie).
Aby wyprać tapicerkę, można ją ściągnąć. Regularnie sprawdzać hamulce, zamocowania i paski, które mogą zostać uszkodzone podczas używania.
W celu zapewnienia bezpieczeństwa i utrzymania produktu w od-powiednim stanie, należy go poddawać okresowym przeglądom w dowolnym warsztacie JANÉ.
Q. INFORMACJE DOTYCZĄCE GWARANCJI
Ten produkt objęty jest gwarancją zgodnie z postanowieniami (hiszpańskiego) Legislacyjnego Dekretu Królewskiego / 24 lipca 2015 r. Zachować dowód zakupu. W przypadku reklamacji jest konieczne okazanie dowodu zakupu w sklepie, gdzie zakupiono wózek.
Gwarancja nie obejmuje wad lub uszkodzeń powstałych w wyniku nieodpowiedniego użytkowania artykułu lub niestosowania się do zasad bezpieczeństwa i konserwacji, opisanych w niniejszej instrukcji obsługi oraz na etykietach dotyczących prania. Gwa-rancja nie obejmuje również części podlegających normalnemu zużyciu, związanemu z codzienną eksploatacją.
Pod żadnym pozorem nie należy odrywać tabliczki z numerem podwozia modelu, ponieważ zawiera ona ważne informacje.

81PL
UWAGA: Aby zapewnić bezpieczeństwa korzystania z pro-duktu i skorzystać z usług obsługi klienta JANÉ, należy zarejestrować nowy produkt na stronie internetowej www.janeworld.com. Po rejestracji będą Państwo mogli śledzić nowości związane z Państwa produktem oraz, w razie ko-nieczności, zapoznać się z instrukcją jego konserwacji. Ponadto, za Państwa zgodą, będziemy mogli informować Państwa o nowych modelach i innych nowościach, które mo-głyby Państwa zainteresować.
!

CS82
CS
82
NÁVOD K OBSLUZE

83CS
OBSAHDŮLEŽITÉ BEZPEČNOSTNÍ INFORMACE MONTÁŽ A DEMONTÁŽ KOLEČEKSLOŽENÍ A ROZLOŽENÍPOUŽÍVÁNÍ PARKOVACÍ BRZDYZABLOKOVÁNÍ PŘEDNÍCH KOLEČEKSYSTÉM PRO-FIXMONTÁŽ A DEMONTÁŽ LEHÁTKABEZPEČNOSTNÍ PÁSPOUŽITÍ PRO DĚTI MLADŠÍ 6 MĚSÍCŮSEŘÍZENÍ ŘIDÍTEKSEŘÍZENÍ OPĚRKY NOHOUSEŘÍZENÍ ÚHLU OPĚRADLAPOUŽITÍ BEZPEČNOSTNÍHO CHRÁNIČEPOUŽITÍ KORBYCHRÁNIČ PROTI DEŠTIÚDRŽBAINFORMACE OHLEDNĚ ZÁRUKY
A.B.C.D.E.F.G.H.I.J.K.L.M.N.O.P.Q.
NÁVOD K OBSLUZE
8485858686868787888888888889898990

CS8484
A. DŮLEŽITÉ BEZPEČNOSTNÍ INFORMACE
Návod k obsluzeDŮLEŽITÉ : Pečlivě si přečtěte a uschovejte pro budoucí konzultace.UPOZORNĚNÍ: - Nenechávejte nikdy dítě bez dozoru. - Ujistěte se, že všechna zavírání jsou před použitím dobře zasazená.
- Abychom předešli zraněním, ujistěte se, že dítě je při rozklá-dání a skládání produktu v bezpečné vzdálenosti.
- Nedovolte dítěti, aby si s tímto výrobkem hrálo. - Používejte vždy systém zadržení. - Zkontrolujte, zda zařízení na uchycení korbičky nebo se-dačky jsou před použitím správně zasazená.
- Tento výrobek není vhodný na běhání nebo jízdu na koleč-kových bruslích.
- Tato sedačka je vhodná pro děti od narození do 15 kg. - Nikdy nedovolte, aby se dítě postavilo na opěrku nebo třmen.
OMEZENÍ POUŽITÍ: - Doporučujeme používat v co nejskloněnější poloze od na-rození do 6 měsíců.
- Aktivujte vždy brzdu kočárku předtím, než ji umístíte na ří-dítka nebo vyndáte dítě ze sedačky.
- Jakákoliv zátěž umístěná na řídítka a/nebo na zadní část opěr-ky a/nebo postranní části kočárku ovlivňuje jeho stabilitu.
- Tento kočárek je určen pro jedno dítě, nedávejte do něj více dětí.
- Není možné používat doplňky neschválené JANÉ. - Používejte pouze náhradní díly dodané nebo doporučené JANÉ. - U nosítek s podvozkem tato korbička nenahrazuje kolébku nebo postýlku. Pokud dítě potřebuje spát, je třeba jej umístit do hlu-bokého kočárku, kolébky nebo postýlky určené k tomuto účelu.
- Maximální nosnost košíku nesmí nikdy překročit hmotnost uvedenou na košíku (4 kg).
- Tento výrobek není odolný vůči slané vodě.

85CS
B. MONTÁŽ A DEMONTÁŽ KOLEČEK
Pro montáž zadních koleček ponechte stisknuté střední tlačítko a vlož-te nápravu kola do nápravy podvozku tak, aby vše pevně zaklaplo. 1
Pro odstranění zadních koleček ponechte stisknuté střední tlačít-ko a odstraňte kolečko z podvozku. 1
Pro montáž předních kol nechte stisknuté tlačítko čelního zablo-kování, zasaďte přední kolo do nápravy a zatlačte směrem naho-ru. Povolte tlačítko čelního zablokování. Musíte si všimnout, zda všechno pevně zapadlo. 2
Pro odstranění předních kol stiskněte tlačítko čelního zablokování a vysaďte přední kolo tak, že je vytáhnete směrem dolů. 2
POZOR! Tuto činnost nikdy neprovádějte s miminkem v lehátku.
POZOR! Pravidelně sundávejte kolečka podvozku a odstra-ňujte špínu nebo písek z nápravy kola. Ložiska kola nepo-nářejte do vody. Použijte kartáček a vlhký hadr na očištění špíny z kol.
C. ROZLOŽENÍ
ROZLOŽENÝ
Pro rozložení kočárku KAWAI stačí jej umístit na plochou podlahu, řidítka směrem nahoru a povolte přepravní pás. 3
Zvedněte sedací část pomocí řidítek, aby se kočárek plně rozevřel. Musíte slyšet zaklapnutí. 4
POZOR! Než budete používat kočárek KAWAI, ujistěte se, že všechny upevňovací a blokovací mechanismy jsou správně zacvaknuté a zamčené.
Seřiďte řidítka do požadované výšky, uvolněte a seřiďte poté blo-kační vačky. 12a- 12b
SLOŽENÍ
Než budete skládat kočárek KAWAI, zatáhněte parkovací brzdu 7 a, odstraňte veškeré předměty z košíku tak, aby nic nebránilo
složení kočárku, uvolněte blokaci řízení předních koleček 8 a od-straňte příslušenství JANÉ (lehátko, TRANSPORTER, KOOS, MICRO, MATRIX nebo NEST).
Pro usnadnění manévrování a složení na minimální velikost je možné lehátko odstranit 10 .
!
!
!

CS86
!
!Povolte vačky řidítek a stáhněte je dolů. 12a- 12b- 12c
Otočte pravý úchop 5 a a zatáhněte souběžně za postranní spouštěče, zvedněte řidítka, usnadníte tak odblokování. 5 b
Zvedněte kočárek za ucho umístěné na střední trubce podvozku tak, aby se sedací část plně složila 6 a- 6 b a zafixujte ji přeprav-ním pásem umístěným na řidítkách. 3 b
Aby lehátko kočárku KAWAI zabíralo co nejméně místa, je třeba jej namontovat po směru jízdy na podvozek 9 b a korba musí být plně složená 16c. Postupujte stejně jako výše.
UPOZORNĚNÍ! Je nezbytné ujistit se, že při skládání a roz-kládání se dítě nenachází v blízkosti kočárku. Během těchto operací se zcela jistě objeví řezy, stlačení nebo zachycení.
D. POUŽÍVÁNÍ PARKOVACÍ BRZDY
ZABRŽDĚNÍ: parkovací brzdu kočárku uvedete do chodu sešlápnutím brzdové páčky směrem dolů. 7 a
ODBRŽDĚNÍ: Parkovací brzda se uvolňuje nadzvednutím odjišťovacího tlačítka nohou směrem nahoru. 7 b
UPOZORNĚNÍ: Po sešlápnutí brzdy se ujistěte, zda je kočárek řád-ně zabrzděn. Lehce kočárkem popojeďte, čímž jej zcela zabrzdíte.
E. ZABLOKOVÁNÍ PŘEDNÍCH KOLEČEK
Váš kočárek je vybaven předními otočnými směrovými kolečky s mož-ností zablokovat řízení.
Pro jejich zablokování stiskněte pojistku tlačítka umístěného na každém předním nosiči kol. 8 a
Pro odblokování předních kol zatáhněte tlačítko směrem nahoru. 8 b
POZOR! Udržujte otočnou nápravu bez prachu, aby došlo k jemnému a dlouhodobému otočení.
F. SYSTÉM PRO-FIX
Podvozek kočárku je vybaven systémem PRO-FIX, připraveným na montáž příslušenství JANÉ, jež je k dostání na trhu (TRANSPORTER, KOOS, MICRO, MATRIX nebo NEST ), vše je vybaveno adaptéry PRO--FIX vhodnými pro model KAWAI.
!

87CS
Systém PRO-FIX vám usnadní sestavení a odstranění těchto doplňků z podvozku. Odstranění proběhne rychle, snadno a bezpečně, doplňky zůstanou zaklíněny do podvozku. Řiďte se pečlivě instrukcemi doplňků.
UPOZORNĚNÍ! Před použitím vždy zkontrolujte, že blokace těchto komponentů byla perfektně provedena vytažením směrem nahoru.
G. MONTÁŽ A DEMONTÁŽ LEHÁTKA
Pomocí systému PRO-FIX můžete umístit lehátko směrem k vám (proti směru jízdy) 9 a, v době, kdy je dítě malé, nebo směrem dopředu (po směru jízdy) postupně, jak dítě roste. 9 b
Proto umístěte sedátko seshora do prostoru PRO-FIX, který je na podvo-zku. Musíte slyšet „KLIK“. 9 c
UPOZORNĚNÍ! Parkovací brzdu je třeba aktivovat během montáže a demontáže lehátka.
UPOZORNĚNÍ! Ujistěte se, že lehátko dobře drží na podvo-zku, lehce jím zatáhněte směrem nahoru.
UPOZORNĚNÍ! Nikdy neodstraňujte lehátko z podvozku KAWAI ve chvíli, kdy dítě sedí uvnitř.
Pro odstranění lehátka z podvozku, stiskněte zároveň páky pro od-blokování umístěné po obou stranách lůžka a zatáhněte směrem na-horu. 10b
UPOZORNĚNÍ! Použijte bezpečnostní pásy pokaždé, když dítě sedí nebo leží na lehátku.
H. BEZPEČNOSTNÍ PÁS
Váš kočárek je vybaven bezpečnostními pásy, s jejichž pomocí bude dítě neustále zajištěno. Připoutejte dítě pásem pokaždé, když je posa-díte do kočárku.
Pro rozepnutí pásového systému stiskněte tlačítko umístěné ve středu postroje, dokud se neuvolní. 11 a
Pro zavření spojte konce přezek a vložte je do zavírání tak, abyste slyšeli „KLIK“. 11 b- 11 c
Seřiďte pásy, aby přilnuly k tělu dítěte a byly náležitě vypnuty. Nastavení délky pásů provádějte posunutím přezek nahoru a dolů. Ujistěte se, zda pásy nejsou překroucené. 11 d
!
!
!
!
!

CS88
I. POUŽITÍ PRO DĚTI MLADŠÍ 6 MĚSÍCŮv
Pro použití lehátka u dětí mladších 6 měsíců seřiďte úhel lehátka na ne-jvíce skloněnou pozici. 14c
Seřiďte výstroj na nejnižší pozici. 11 e
J. SEŘIĎTE ŘIDÍTKA
Řidítka je možné seřídit výškově do co nejpříjemnější pozice.
Proto povolte vačky umístěné vlevo a vpravo na řidítkách, pohněte směrem do výšky a znovu zapojte vačky. 12a- 12b
K. SEŘIĎTE OPĚRKY NOHOU
Opěrky nohou můžete seřídit na různé pozice. Stiskněte současně tlačítka umístěná na vnější části lehátka a posuňte je směrem dolů. Pro posun směrem nahoru není třeba mačkat tlačítka, stačí zatáhnout za opěrku nohou. 13
UPOZORNĚNÍ! Nedovolte, aby si dítě na opěrku stoupalo.
L. SEŘÍZENÍ ÚHLU OPĚRADLA
Pro převoz dítěte v co nejpohodlnější poloze za každých okolností můžete seřídit úhel sklonu opěradla.
Pro sklopení opěradla zatáhněte za popruh umístěný v zadní části, s červeným logem, směrem dolů do požadované pozice. 14a
Pro narovnání opěradla zatáhněte za popruh s černým logem směrem nahoru. 14b
UPOZORNĚNÍ! Do 6 měsíců věku se doporučuje používat co nejsklopenější pozici 14c.
M. POUŽITÍ BEZPEČNOSTNÍHO CHRÁNIČE
Bezpečnostní chránič je vytvořen tak, aby zapadlo do přihrádek umístěných na lehátku. Pokud chcete, je možné uvolnit jednu stra-nu pouhým stisknutím postranních tlačítek. Chránič tak bude zcela členěný z druhé strany. 15a- 15b
!
!
!
Kompatibilní s přenosnou korbičkou SMART..............................POZOR: Přečtěte si montážní instrukce.

89CS
! UPOZORNĚNÍ: Pouze způsobilé dospělé osoby smějí mani-pulovat s pohyblivými částmi, které přitom musí být mimo dosah dítěte. Během těchto úkonů hrozí nebezpečí pořezání, stlačení, zachycení.
UPOZORNĚNÍ: Nikdy nepřidržujte kočárek nebo sezení za ochrannou hrazdičku či přenosné madlo.
N. POUŽITÍ KORBY
Pro upevnění korby vložte klíny do odpovídajících lůžek, která jsou umístěna postranně lehátka a počkejte, až uslyšíte „KLIK“. 16a
Pro odstranění korby použijte páku na odblokování klínění a zatáhněte ji směrem nahoru. 16b
Korbu je možné nastavit do 4 různých pozic tak, že budete hýbat s obloukem. 16c
Zadní část korby má otevírání na zip pro lepší ventilaci. 16c
UPOZORNĚNÍ! Nepokládejte na kapotu předměty.
!
!
O. CHRÁNIČ PROTI DEŠTI
Pláštěnku k Vašemu kočárku KAWAI lze velmi snadno nasadit, musíte pouze překrýt sedačku a připevnit úchytky k podvozku. Pláštěnka má malé okénko, které lze srolovat a připevnit suchým zipem tak, aby dítě mohlo volně pozorovat okolí. 17
Než uložite slídu proti dešti do tašky, nechte ji plně vyschnout!
P. ÚDRŽBA
Potah nevystavujte dlouhodobě účinkům přímého slunečního záření. Umělohmotné díly omývejte vlažnou vodou s mýdlem a potom je důkladně osušte.
Potah lze sejmout a vyprat.
Čalounění lze sundat a vyprat. (Vždy se podívejte na štítek ohledně praní).
Kontrolujte pravidelně brzdy, pásy a upevňovací díly, zda se následkem používání nepoškodily.
Z hlediska bezpečnosti a dobrého stavu vašeho výrobku je důležité, abyste prováděli jeho pravidelnou kontrolu v síti našich servisních středisek.

CS90
Q. INFORMACE O ZÁRUCE
N atento výrobek se vztahuje záruka v souladu s Legislativním K.V. 1 / 2015 z 24. července. Uschovejte si fakturu, je nutné ji předložit v ob-chodě, kde jste produkt koupili, abyste prokázali platnost záruky při jakékoliv reklamaci.
Záruka se nevztahuje na vady a poškození způsobené nesprávným použitím nebo nedodržením bezpečnostních předpisů či pokynů k údržbě uvedených v návodu k použití a na štítkách s pokyny k praní ani na díly opotřebené běžným každodenní použitím.
Štítek, na kterém je vyznačeno číslo podvozku vašeho modelu, se nesmí v žádném případě odstraňovat, protože obsahuje důležité in-formace.
POZOR: Abyste zajistili maximální bezpečnost a péči o nový kočá-rek JANÉ, je velmi důležité zaregistrovat nový výrobek na našem webu www.janeworld.com. Evidence vám umožní se v případě potřeby informovat o vývoji a údržbě vašeho výrobku. A bude-te-li mít zájem, můžeme vás také informovat o nových modelech a sdělovat novinky, které budeme pokládat za předmět vašeho zájmu.
!

91

JANÉ, S.A. - Pol. Industrial Riera de CaldesC/Mercaders, 34 - 08184 Palau Solità i Plegamans (BARCELONA) SPAIN
Telf. +34 93 703 18 00 - Fax: +34 93 703 18 04email: [email protected]
www.janeworld.com IM-2096,02