Chapter Complement 3 - Oracle Fusion Middleware and SOA ... · PDF fileOracle 11g SOA Suite...
35
Oracle 11g SOA Suite Handbook:Chapter 3 - Chapter Complement CC3-1 Part I - Introducing SOA, St Matthews and the Oracle SOA Suite Chapter Complement 3 - Oracle Fusion Middleware and SOA Suite 11g Note: the steps that describe the installation and configuration of the SOA Suite 11g, OSB 11g and BPM 11g have been included in a separate document that will be updated as later releases become available. This document can be found through the book's wiki at http://wiki.oracle.com/page/Oracle+11g+SOA+Suite+Handbook, on the page for Chapter 3. (1)Getting started with SOA Suite 11g This book is by no means intended to be only theoretical. Yes, we will tell a story and hopefully explain a great deal about the SOA Suite by showing examples and describing the concepts behind and workings of the service engines, underlying standards and technologies and supporting tools. However, you - and your fingers - will only start to learn for real once you start practicing what we preach. So now is the time to get into gear. Time to get yourself a fully operational SOA Suite 11g that will allow you to start develop, deploy and run composite service applications and start to appreciate what it is really like to create a service oriented applications.
-
Upload
dinhkhuong -
Category
Documents
-
view
217 -
download
1
Transcript of Chapter Complement 3 - Oracle Fusion Middleware and SOA ... · PDF fileOracle 11g SOA Suite...
Oracle 11g SOA Suite Handbook:Chapter 3 - Chapter Complement
CC3-1
Part I - Introducing SOA, St Matthews and the Oracle SOA Suite
Chapter Complement 3 - Oracle Fusion Middleware and SOA Suite 11g
Note: the steps that describe the installation and configuration of the SOA Suite 11g,
OSB 11g and BPM 11g have been included in a separate document that will be updated as later
releases become available. This document can be found through the book's wiki at
http://wiki.oracle.com/page/Oracle+11g+SOA+Suite+Handbook, on the page for Chapter 3.
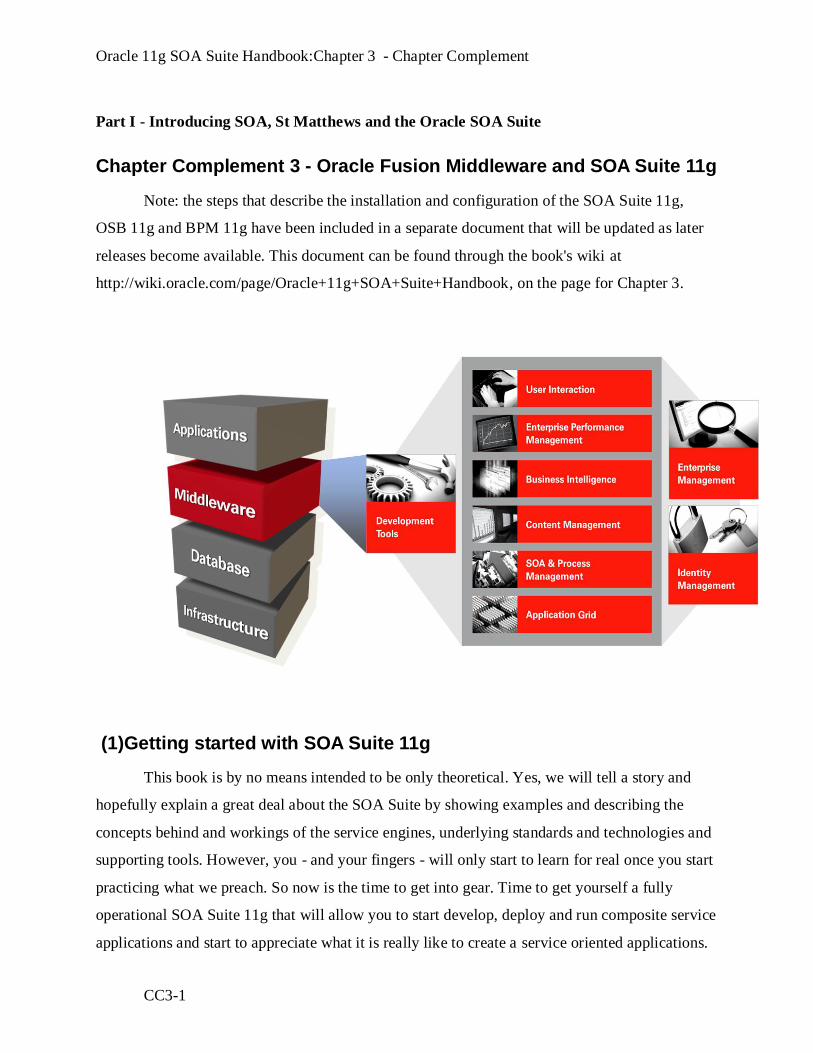
(1)Getting started with SOA Suite 11g
This book is by no means intended to be only theoretical. Yes, we will tell a story and
hopefully explain a great deal about the SOA Suite by showing examples and describing the
concepts behind and workings of the service engines, underlying standards and technologies and
supporting tools. However, you - and your fingers - will only start to learn for real once you start
practicing what we preach. So now is the time to get into gear. Time to get yourself a fully
operational SOA Suite 11g that will allow you to start develop, deploy and run composite service
applications and start to appreciate what it is really like to create a service oriented applications.

Oracle 11g SOA Suite Handbook:Chapter 3 - Chapter Complement
CC3-2
Installation
The installation is explained and demonstrated in a lot of detailed instructions and
screenshots in the on line document on the book's wiki, on the page for Chapter 3:
http://wiki.oracle.com/page/Chapter+3+-+Introduction+of+Oracle+SOA+Suite+11g.
Post installation Configuration steps
To deploy SOA applications directly onto the SOA Suite we need to configure an
Application Server Connection in JDeveloper, to the WebLogic Server soa domain.
To create this connection start JDeveloper. Go to the Resource Palette. Click on the New
icon, select New Connection and pick the Application Server connection type from the list.
Enter FMW11g_SOASuite11g_local as the name for the new Application Server
connection and select WebLogic 10.3 as the connection type.
Oracle 11g SOA Suite Handbook:Chapter 3 - Chapter Complement
CC3-3
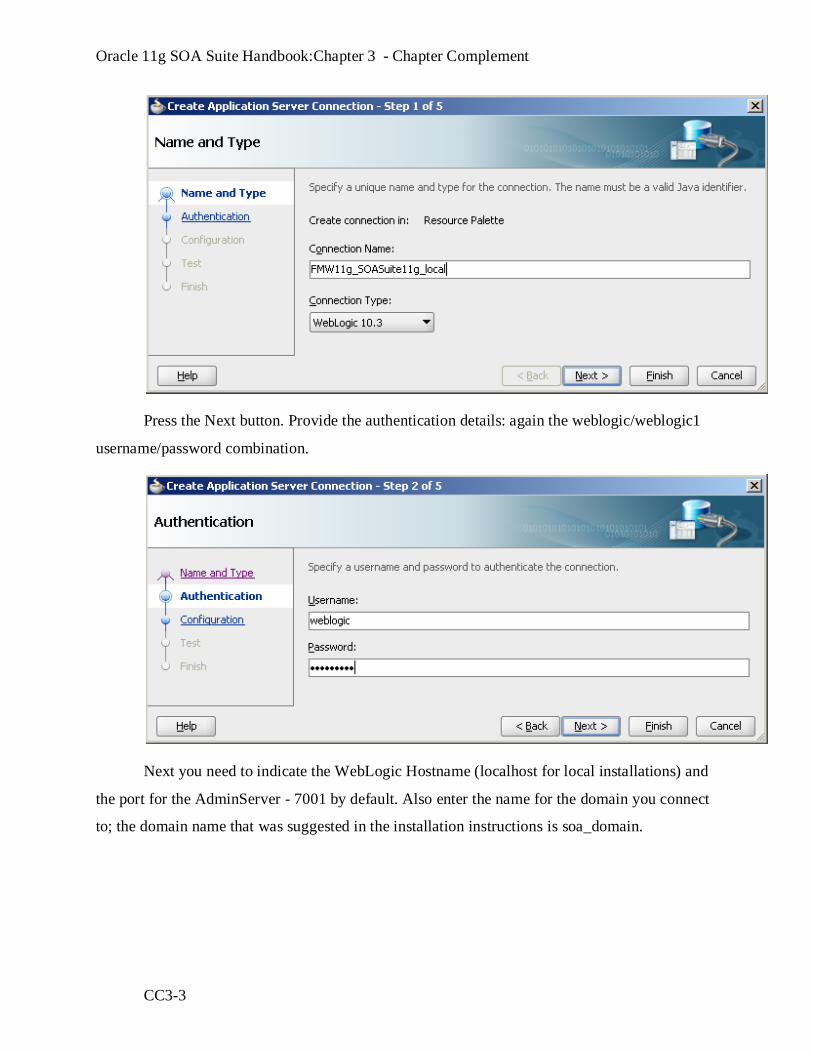
Press the Next button. Provide the authentication details: again the weblogic/weblogic1
username/password combination.
Next you need to indicate the WebLogic Hostname (localhost for local installations) and
the port for the AdminServer - 7001 by default. Also enter the name for the domain you connect
to; the domain name that was suggested in the installation instructions is soa_domain.

Oracle 11g SOA Suite Handbook:Chapter 3 - Chapter Complement
CC3-4
Press the Next button again. When you test the connection, you should receive a number
of success messages, one for each of the different ways of connecting to the domain.
The summary page is next:

Oracle 11g SOA Suite Handbook:Chapter 3 - Chapter Complement
CC3-5
Press the Finish button to close the Create Connection dialog. The new connection is now
available on the Resource Palette.
The connection provides insight in the SOA contents of the application server's
soa_domain, which is the soa_server1 managed server and inside it the default partition.
Create and Run the “HelloWorld” of Service Composite Applications
This section will walk you through the creation, deployment and test run with SOA Suite
11g of the world‟s most basic SOA composite application. At the end of this section - after
maybe ten minutes worth of work - you will have your first application running in the SOA
Suite. The steps are:

Oracle 11g SOA Suite Handbook:Chapter 3 - Chapter Complement
CC3-6
1. Fire up the engines: first, start the database that hosts the Meta Data Repository and
then the WebLogic Servers in the SOA domain (AdminServer and the managed soa_server1)
using the command line scripts:
locate the startWebLogic.cmd script (Linux: startWebLogic.sh) in the
MIDDLEWARE_HOME \user_projects\domains\soa_domain directory. Run this script from the
command line or terminal.
E:\Oracle\Middleware\user_projects\domains\soa_domain\startWebLogic.cmd
When the AdminServer is running, we should start the SOA Server. Go to the directory
MIDDLEWARE_HOME \user_projects\domains\soa_domain\bin that was created by the SOA
Suite configuration wizard. Open a command window and enter the following command to
execute:
startManagedWebLogic.cmd soa_server1
(on Linux use the script startManagedWebLogic.sh) from the command line or terminal.
2. Start JDeveloper (choose Default Role if you are prompted to select a role)
3. Select New from File menu.

Oracle 11g SOA Suite Handbook:Chapter 3 - Chapter Complement
CC3-7
From the New Gallery that is presented next, select the SOA Application item in the
Applications Category (under the General node).

Oracle 11g SOA Suite Handbook:Chapter 3 - Chapter Complement
CC3-8
Press the OK button to continue.
You will be prompted to provide a name for the application - enter
HelloWorldSOAComposite. Leave the Application Package Prefix field empty and press the
Next button.

Oracle 11g SOA Suite Handbook:Chapter 3 - Chapter Complement
CC3-9
On the next page enter HelloWorld as the name of the project, and press Next again.

Oracle 11g SOA Suite Handbook:Chapter 3 - Chapter Complement
CC3-10
JDeveloper then asks you what type of composite application this will be; pick
„Composite with BPEL‟ on the Configure SOA settings step.

Oracle 11g SOA Suite Handbook:Chapter 3 - Chapter Complement
CC3-11
Press Finish to have the application, project and service composite created.
Oracle 11g SOA Suite Handbook:Chapter 3 - Chapter Complement
CC3-12
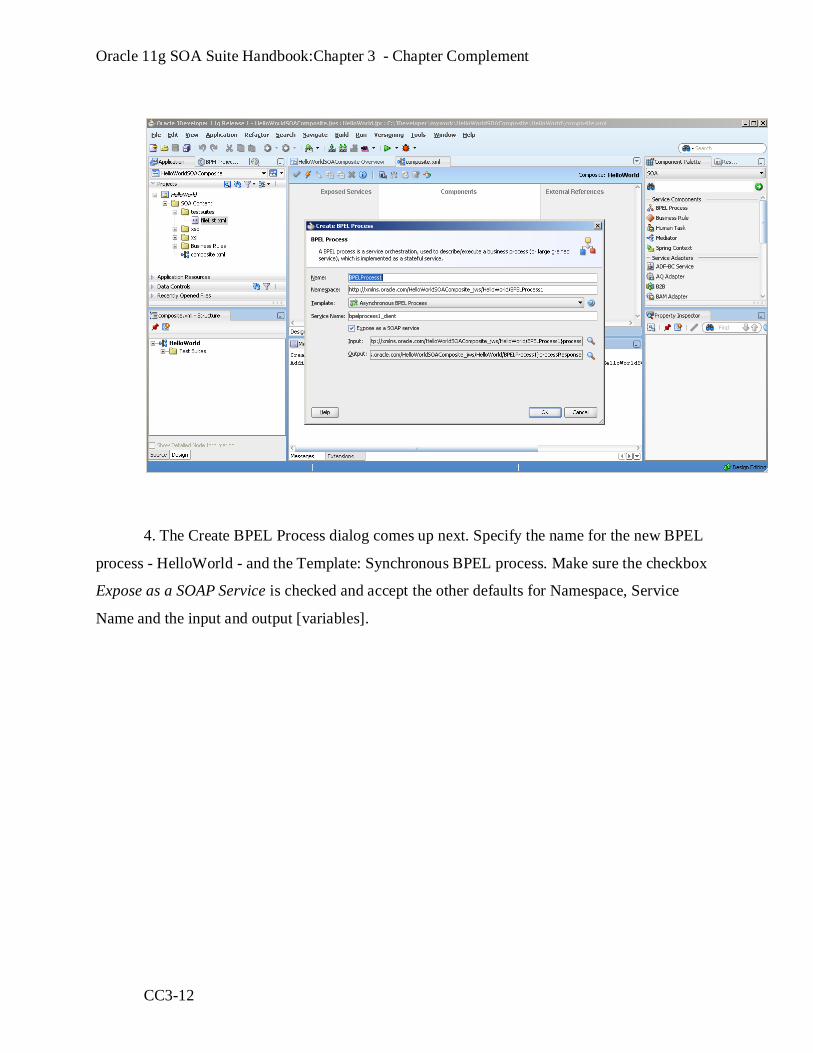
4. The Create BPEL Process dialog comes up next. Specify the name for the new BPEL
process - HelloWorld - and the Template: Synchronous BPEL process. Make sure the checkbox
Expose as a SOAP Service is checked and accept the other defaults for Namespace, Service
Name and the input and output [variables].

Oracle 11g SOA Suite Handbook:Chapter 3 - Chapter Complement
CC3-13
Press OK.

Oracle 11g SOA Suite Handbook:Chapter 3 - Chapter Complement
CC3-14
5. The BPEL editor opens up. You will see the basic structure of the BPEL process with a
receive and a reply activity, by default configured to receive a single string and return a single
string. You need to add one activity to set the value of that string result: drag an Assign activity
from the Component palette
and drop it between the receive and reply activities that are already in the process.

Oracle 11g SOA Suite Handbook:Chapter 3 - Chapter Complement
CC3-15
Double click the assign activity, to open the editor.

Oracle 11g SOA Suite Handbook:Chapter 3 - Chapter Complement
CC3-16
Select the second tab, labeled Copy Operation if it is not already selected. Click the green
plus icon and select the Copy Operation from the drop down list.

Oracle 11g SOA Suite Handbook:Chapter 3 - Chapter Complement
CC3-17
On the right (or To) side of the window, expand the outputVariable node, the payload
child node and its client:processResponse node and select the client:result node. That is the target
of the copy operation.

Oracle 11g SOA Suite Handbook:Chapter 3 - Chapter Complement
CC3-18
On the left (or From) side of the window, choose Expression in the dropdown list.

Oracle 11g SOA Suite Handbook:Chapter 3 - Chapter Complement
CC3-19
Click on the calculator icon, to open the XPath expression editor.

Oracle 11g SOA Suite Handbook:Chapter 3 - Chapter Complement
CC3-20
Type the following text in the expression box:
Concat(‘Hello dear’,)
Position the cursor between the comma and the closing parenthesis. Expand the
inputVariable in the BPEL Variables tree, all the way down until you can select the node
client:input. Select that node.
Click on the “Insert Into Expression” button to add [an expression to extract] the value of
the input variable to the expression.

Oracle 11g SOA Suite Handbook:Chapter 3 - Chapter Complement
CC3-21
Click on the OK button to close the expression editor.

Oracle 11g SOA Suite Handbook:Chapter 3 - Chapter Complement
CC3-22
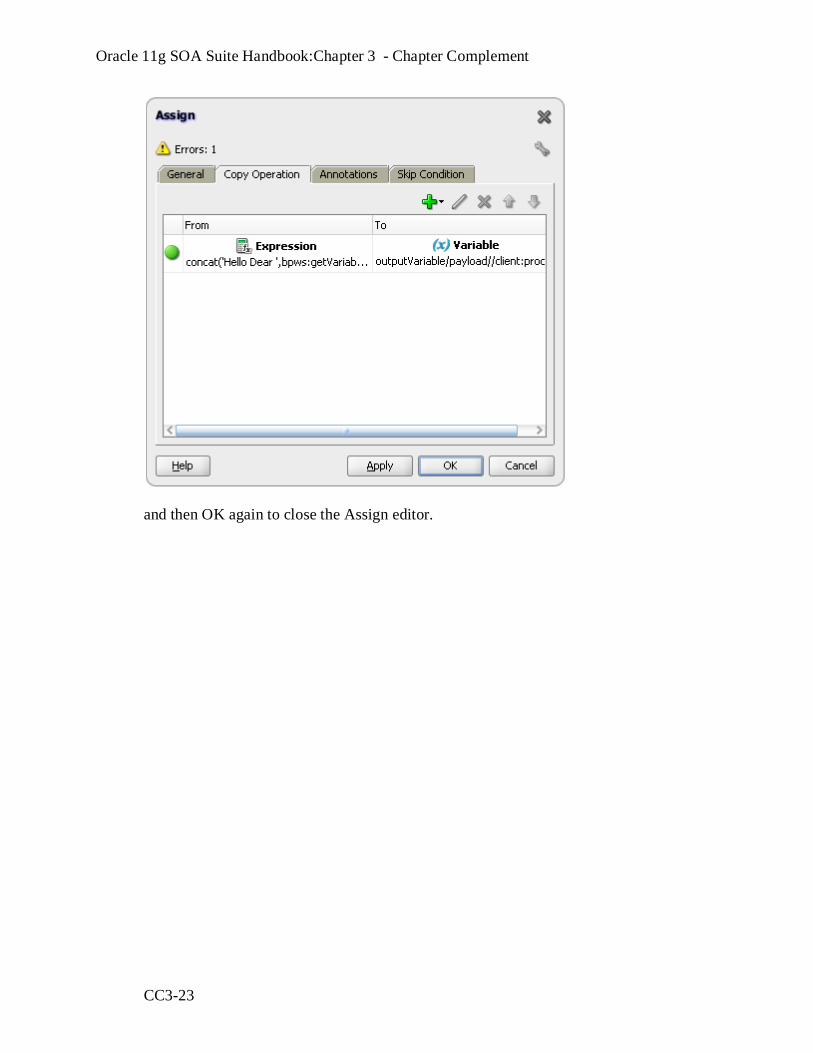
Click again on OK to close the Create Copy operation dialog
Oracle 11g SOA Suite Handbook:Chapter 3 - Chapter Complement
CC3-23
and then OK again to close the Assign editor.

Oracle 11g SOA Suite Handbook:Chapter 3 - Chapter Complement
CC3-24
You have now created a valid BPEL process. One that receives a request message that
contains a single string and returns a message that will contain the concatenation of “Hello dear”
with that same input string. It‟s not much, but it constitutes a real BPEL process inside the
HelloWorldSOAComposite application.
6. To test run this application, we need to deploy it first. Right-click on the HelloWorld
project. From the context menu, select “Deploy” and its nested option “HelloWorld”.

Oracle 11g SOA Suite Handbook:Chapter 3 - Chapter Complement
CC3-25
The Deployment wizard appears – a multi step dialog. In the first step, elect to Deploy to
Application Server (instead of SAR file).

Oracle 11g SOA Suite Handbook:Chapter 3 - Chapter Complement
CC3-26
Click Next. Accept all default settings in the second step

Oracle 11g SOA Suite Handbook:Chapter 3 - Chapter Complement
CC3-27
and press Next. On the third page: select the SOASuite11g_local connection to the
WebLogic Server with the soa_domain.

Oracle 11g SOA Suite Handbook:Chapter 3 - Chapter Complement
CC3-28
Press Next. On the next page, select soa_server1 as the target server for deployment.

Oracle 11g SOA Suite Handbook:Chapter 3 - Chapter Complement
CC3-29
Press Next and the Summary page appears. Now you can press Finish.

Oracle 11g SOA Suite Handbook:Chapter 3 - Chapter Complement
CC3-30
The SOA Composite Application is built, resulting in a SAR (Service Archive) file.

Oracle 11g SOA Suite Handbook:Chapter 3 - Chapter Complement
CC3-31
Then it gets deployed to the application server: the SAR file is now handed to the
soa_server1 in the SOA Domain on the WebLogic Server. The message “Deployment Finished”
should appear in the Deployment sub-tab of the console window after several seconds up to one
minute.
7. With the deployment done, we could access the composite application‟s web service
interface from tools such as the HttpAnalyzer inside JDeveloper or soapUI (an open source tool
frequently used for testing web services). We can also open the Enterprise Manager to first
inspect the deployed composite application and then test it.
Open the Enterprise Manager (http://localhost:7001/em).

Oracle 11g SOA Suite Handbook:Chapter 3 - Chapter Complement
CC3-32
Expand the node SOA node and its child, the soa-infra node, under the root node
Farm_soa_domain. The node for the HelloWorld composite application should be listed under
the default partition node. Select that composite application node.
The right side of the page is refreshed to present the details for this composite
application.
Click on the Test button to call the service exposed by this composite application.

Oracle 11g SOA Suite Handbook:Chapter 3 - Chapter Complement
CC3-33
Enter a value for the input field –for example your own first name - and press the button
labeled Test WebService. The Web Service exposed by the HelloWorld application is invoked.
This will create a new instance of the composite application. After a few seconds, the result from
the service should be displayed, something to the effect of „Hello dear Lucas‟.
When you click on the node for the HelloWorld application, you will see the new
instance listed.

Oracle 11g SOA Suite Handbook:Chapter 3 - Chapter Complement
CC3-34
You can drill down on this instance to find out more about the components in the instance
that have executed, how long they took to complete for example, and all trace details for activity
inside those components - such as the activities in the BPEL process. You need to click on the
instance ID itself to see more information (not just on the row where the instance information is
shown).
The detailed audit trail for the BPEL process instance appears:

Oracle 11g SOA Suite Handbook:Chapter 3 - Chapter Complement
CC3-35