Building a Paper Mache Skeleton! From: Mache_Skeletons/?ALLSTEPS.
9
Building a Paper Mache Skeleton! From: http://www.instructables.com/id/P aper_Mache_Skeletons/?ALLSTEPS
-
Upload
malcolm-harper -
Category
Documents
-
view
218 -
download
1
Transcript of Building a Paper Mache Skeleton! From: Mache_Skeletons/?ALLSTEPS.

Building a Paper Mache
Skeleton!From:
http://www.instructables.com/id/Paper_Mache_Skeletons/?ALLSTEPS

Building a Skeleton

Step 1: Materials• This is what you need to
begin-about 50 or so sheets of newspaper.You'll also need some duct tape, scotch tape, paper mache glue (I use a flour and water mixture. It's cheap and strong, but won't be weatherproof until you seal it), and paint (I used a can of light brown spray paint for the base, and some dark brown acrylic for details).

Step 2: Making Bones• Roll up 2-3 layers of
newspaper corner to corner for a bone. The tighter the better. Use a piece of scotch tape to secure them. You'll need about 22 rolls for a full skeleton.
Fold the arm tubes and leg tubes in half. Then, using your own limbs as reference, fold over the extra paper on the thin side and tape it down.

Step 3: More Bones• The ribcage is a little trickier. If you search
around for some reference shots, you'll see that a real ribcage has a rather egg-like shape from the front (also note that I didn't get it quite right on this one). Out ribs are loops of those newspaper tubes we made earlier (use your own chest to approximate the size). Make somewhere around 6-10 of them. Tape the ribs to another tube that will act as the spine (in some of my more recent skeletons, I have used a piece of 3/4" pvc pipe for a spine, as it is much stronger and can even be bent into a slight "S" shape with a heat gun (as a real spine would appear). However you form it, beef up the base of the spine with some more tubes. How long should you make it? Use yourself as reference.Those circular squiggly things are for the pelvis. There are more accurate ways to form it, however, since most people won't know the difference, this will suffice.

Step 4: Knobby Bits• Crumple up some ½
sheets of newspaper for the knobby bits on the ends of the bones and tape them on tightly.
Then, cut a piece of cardboard for that thing in the middle of the ribs. Tape it to all of the ribs, front and back. If you want, you can also fashion some triangular-shaped shoulder blades from cardboard.

Step 5: Paper Mache• Tear up a ton of
newspaper into strips and dip them in your paper mache glue. Once again, I use a mixture of flour and water (there's no exact ratio that I'm aware of, just mix it so that it's a little on the thick side). Give the whole thing a coat or two and set it outside to dry.
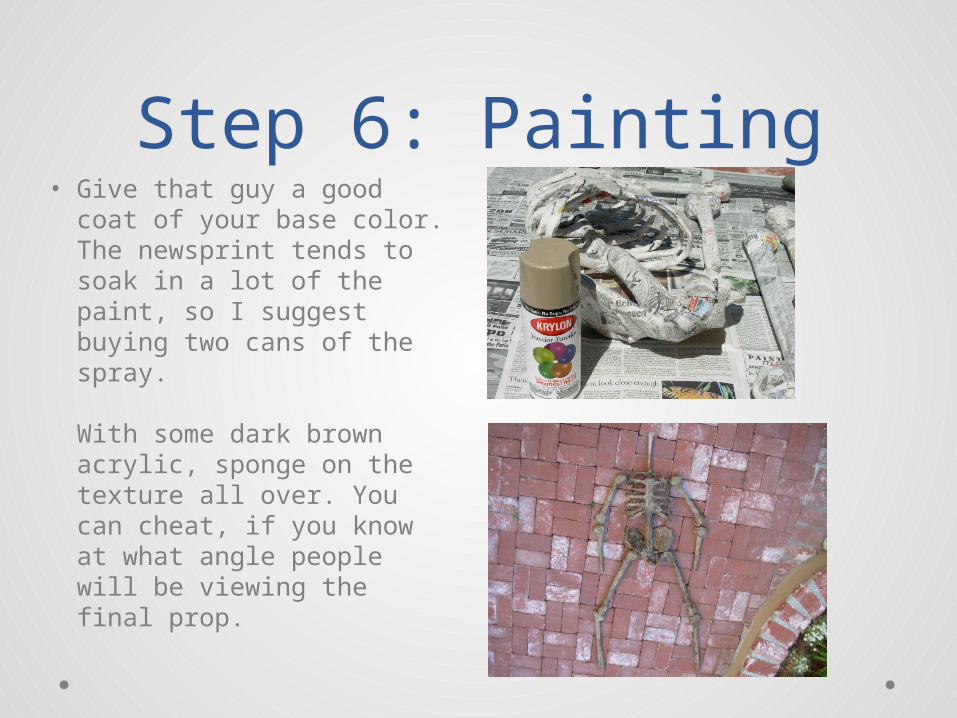
Step 6: Painting• Give that guy a good
coat of your base color. The newsprint tends to soak in a lot of the paint, so I suggest buying two cans of the spray.
With some dark brown acrylic, sponge on the texture all over. You can cheat, if you know at what angle people will be viewing the final prop.

Step 7: Finished Product
• At this point, you're probably wondering what we're going to do about the skull. My advice: just buy one of those four dollar foam skulls and hot glue it on. It's just not worth your time to try to make a realistic skull from scratch. Of course, you can always embellish it.
You'll also want some way to keep those bones together. I drill a small hole into the end of each one and glue a piece of wire in, connecting the two bones together.