


Languages
Pages
Legal


GARP 0317
2012
Using ArcGIS Online A tutorial on how to use ArcGIS Online to create useful maps!
Create By: Ashley Eaton
W E S T F I E L D S T A T E U N I V E R S I T Y
2 | P a g e
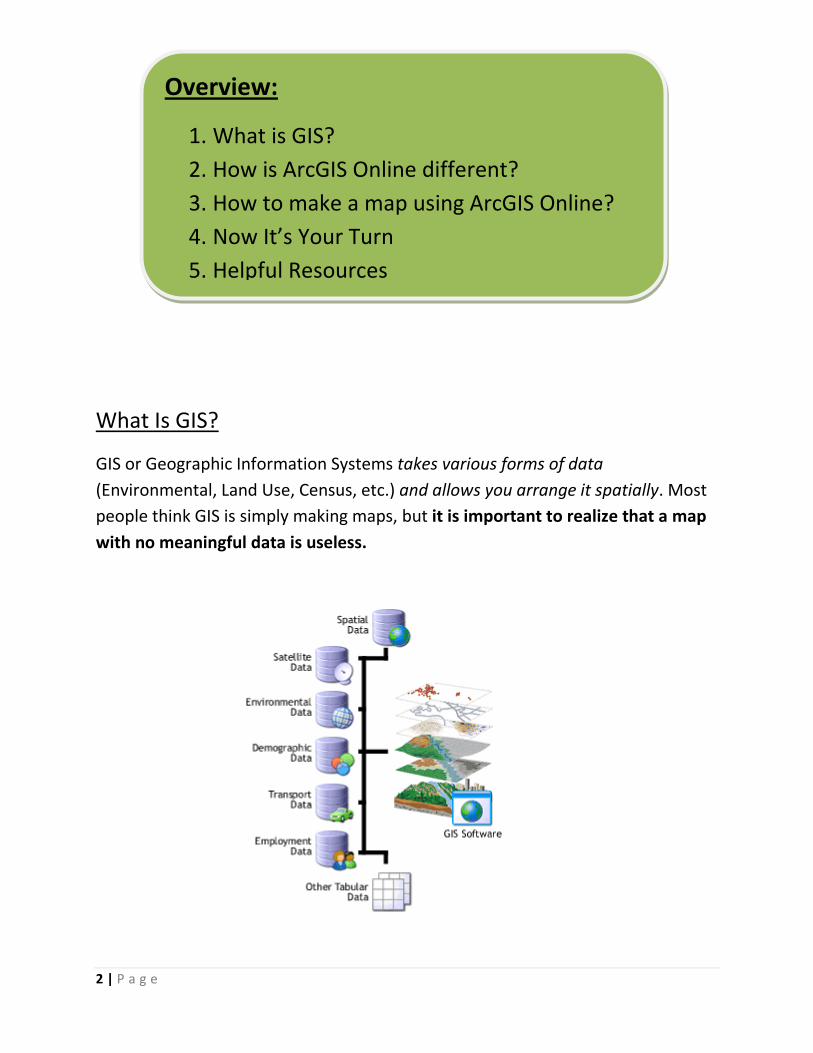
What Is GIS?
GIS or Geographic Information Systems takes various forms of data
(Environmental, Land Use, Census, etc.) and allows you arrange it spatially. Most
people think GIS is simply making maps, but it is important to realize that a map
with no meaningful data is useless.
Overview:
1. What is GIS?
2. How is ArcGIS Online different?
3. How to make a map using ArcGIS Online?
4. Now It’s Your Turn
5. Helpful Resources

3 | P a g e
2. How is ArcGIS Online Different?
With most GIS, you are required to use ESRI’s software to view maps that
people have made. This software is extensive, expensive, and also tedious to learn
to use. By using ArcGIS Online, anyone with access to the internet can view your
map! Creating maps on ArcGIS Online is also a lot easier to learn. ArcGIS Online
limits you in how much you can manipulate your data, but does have a few neat
tools which allow you to visually compare your data. Most of these tools are
dashboard applications, which can be discussed in a later tutorial!

4 | P a g e
3. How to Make a Map Using ArcGIS Online…
Now that you know a little bit about GIS and using it online, let’s look into
how exactly that process is done.
Step 1: Create an ArcGIS Online Account.
This can be done by going to www.arcgis.com
Image 1: How to register for an Esri Global Account or Personal Account

5 | P a g e
Step 2: The Basics
Once you have signed into your ArcGIS Online account, you will be brought
to a page that looks like this:
Image 2: The log-in page for your ArcGIS Online Account
At this page, you want to click on the Map button located on the header bar. This
is shown above circled in red. Then you will be brought to a blank map that looks
like this:
Image 3: A blank map in ArcGIS Online

6 | P a g e
The left column on the website highlights the basics of creating a map. The image
below shows a close up of what the column says:
Image 4: A breakdown of the simple steps to make a map!

7 | P a g e
For the purpose of this tutorial, we are going to map the various places you
may have ever been on vacation! So before we can create a map, I need to you to
sit down and think about where you have been and what types of things you want
to share about that trip.
I think it would be helpful to show:
Where you have been…
When you traveled there…
A picture of your favorite thing from the trip
A link to the places’ website
Can you think of anything else that might be useful to have?
Next think of the places you would like to map. I, for example, would map the
following locations:
Germany
Austria
Switzerland
Italy
Greece
Washington, DC
Florida
Virginia Take a few minutes to jot down the information you believe you will need for your map!
8 | P a g e
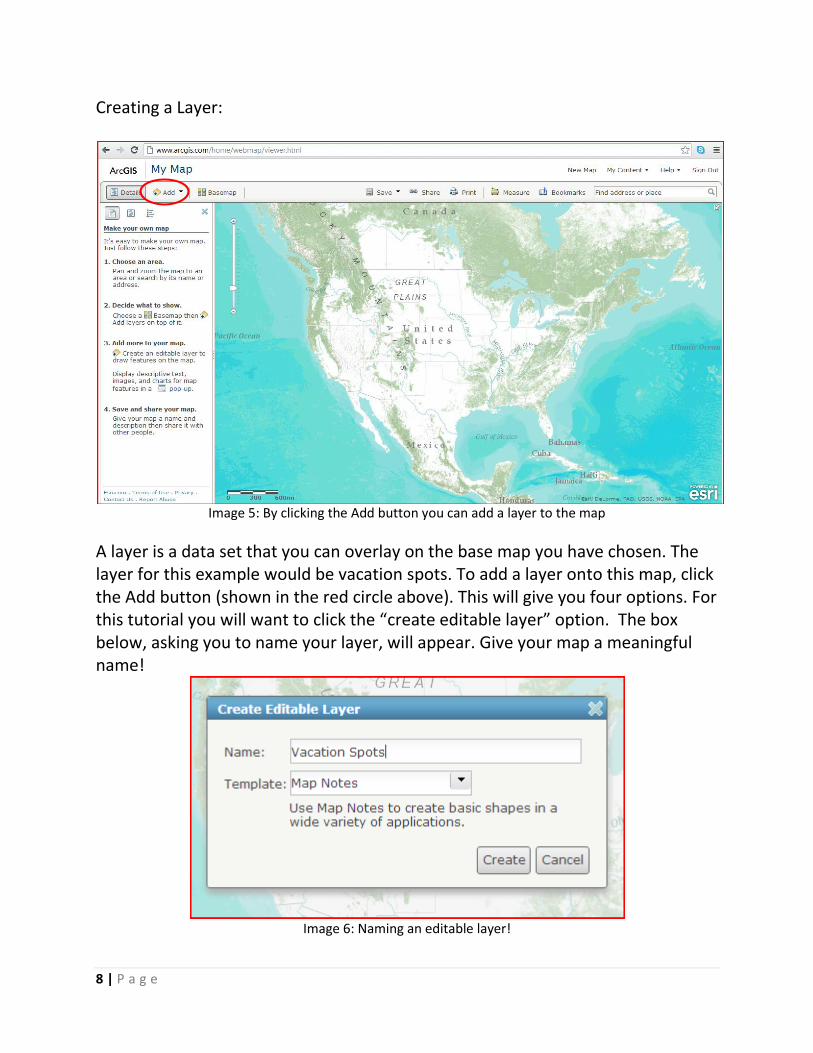
Creating a Layer:
Image 5: By clicking the Add button you can add a layer to the map
A layer is a data set that you can overlay on the base map you have chosen. The layer for this example would be vacation spots. To add a layer onto this map, click the Add button (shown in the red circle above). This will give you four options. For this tutorial you will want to click the “create editable layer” option. The box below, asking you to name your layer, will appear. Give your map a meaningful name!
Image 6: Naming an editable layer!

9 | P a g e
Image 7: Adding a place within the layer.
Using the pins on the map, you drag and drop one to the location you would like to feature. In this map I chose Washington, DC. When you drop the pin, a pop-up box will appear. You need to fill in the information. To have a picture of your vacation spot appear in the pop-up, you can add an image URL. If you are using Google Chrome to create your map, simply click on the image you want to use and hit Copy Image URL. Pasting it into the “Image URL” section of this box will allow a picture to appear. If you know of a website that would be helpful for people to view you can put it in the “Image Link URL” section of the box. This will make it so that when people click on the image in your map, they are brought to the website in a new tab. When you have added all of the information you need for the one location, you should hit the close button.
Repeat this same step for all of the locations you would like to include. Remember to save frequently. You know how the internet can be and it’d be a shame to lose your project!

10 | P a g e
When you are done editing the layer on your map, you can hit the edit button on top to stop editing! When you click on your pins, they should look something like this:
Image 8: What your pop-ups should look like on a map
Now all that is left to do at this point is save and share your map! Click the save button at the top the screen and select Save As. A box will pop up and in the box you should add information such as a title, summary and helpful tags that identify the tops of your map. This will save your map and make it available to you in the “My Content” section of your ArcGIS Online account.
Image 9: The save map box. Fill this in with all the information you need.
11 | P a g e
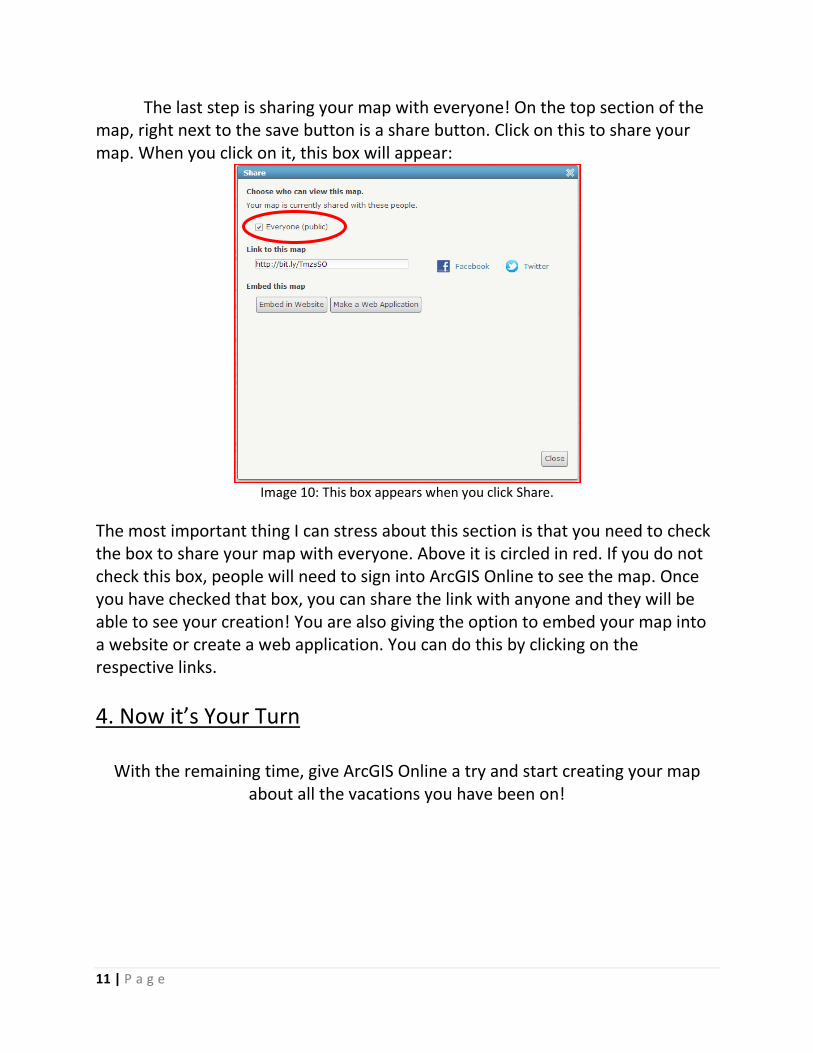
The last step is sharing your map with everyone! On the top section of the map, right next to the save button is a share button. Click on this to share your map. When you click on it, this box will appear:
Image 10: This box appears when you click Share.
The most important thing I can stress about this section is that you need to check the box to share your map with everyone. Above it is circled in red. If you do not check this box, people will need to sign into ArcGIS Online to see the map. Once you have checked that box, you can share the link with anyone and they will be able to see your creation! You are also giving the option to embed your map into a website or create a web application. You can do this by clicking on the respective links.
4. Now it’s Your Turn
With the remaining time, give ArcGIS Online a try and start creating your map about all the vacations you have been on!

12 | P a g e
5. Helpful Resources Below are some helpful resources, in case you reach some snags along the way! Video: Online ArcGIS- Custom Map Tutorial
http://www.youtube.com/watch?v=7cRKBC8fURs
Video Tutorials: http://help.arcgis.com/en/arcgisonline/help/index.html#/Videos/010q00000003000000/
ArcGIS Online Help: http://resources.arcgis.com/en/help/arcgisonline/
Top Related