


![INSTALL GUIDE COL-AL(RS)-GM8-[ADS-ALCA]-EN · 7/20/2020 · patent no. us 8,856,780 ca 2759622 vehicle list - 1 of 2 make model year install type features data immobilizer bypass](https://static.fdocuments.in/doc/165x107/5f8192640a68ec76ef407d8b/install-guide-col-alrs-gm8-ads-alca-en-7202020-patent-no-us-8856780.jpg)


Languages
Pages
Legal


Copyright©2016-2017,AstroDevices.Allrightsreserved. 1
LosmandyGM8,G-11&AZ8:EncodersInstallation
Pleaseunpackallpartsfromtheencoderkit.Makesurethatyourkitcontainsthefollowingparts:
Encoderresolution:311296stepsCurrentconsumption:25mAeachThisinstructionbookletshowstheinstallationprocedureforoneencoder.Theinstallationprocedureforthesecondencoderisidentical.Toolsrequired:
- Allenkey(supplied)- Philipsheadscrewdriver(notsupplied)
Donotsubjectencoderdiskstomagneticfieldsasitmayaffectthemagnetizationofthemagneticmulti-polerings.
Copyright©2016-2017,AstroDevices.Allrightsreserved.2
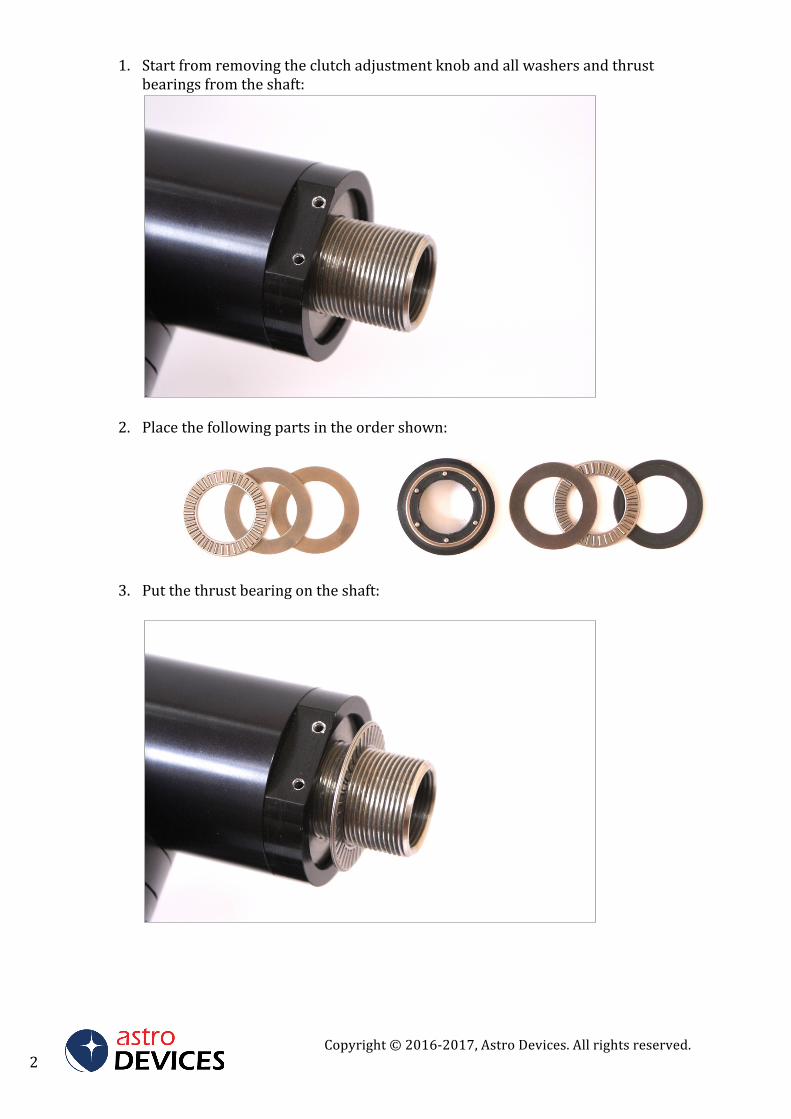
1. Startfromremovingtheclutchadjustmentknobandallwashersandthrustbearingsfromtheshaft:
2. Placethefollowingpartsintheordershown:
3. Putthethrustbearingontheshaft:
Copyright©2016-2017,AstroDevices.Allrightsreserved. 3
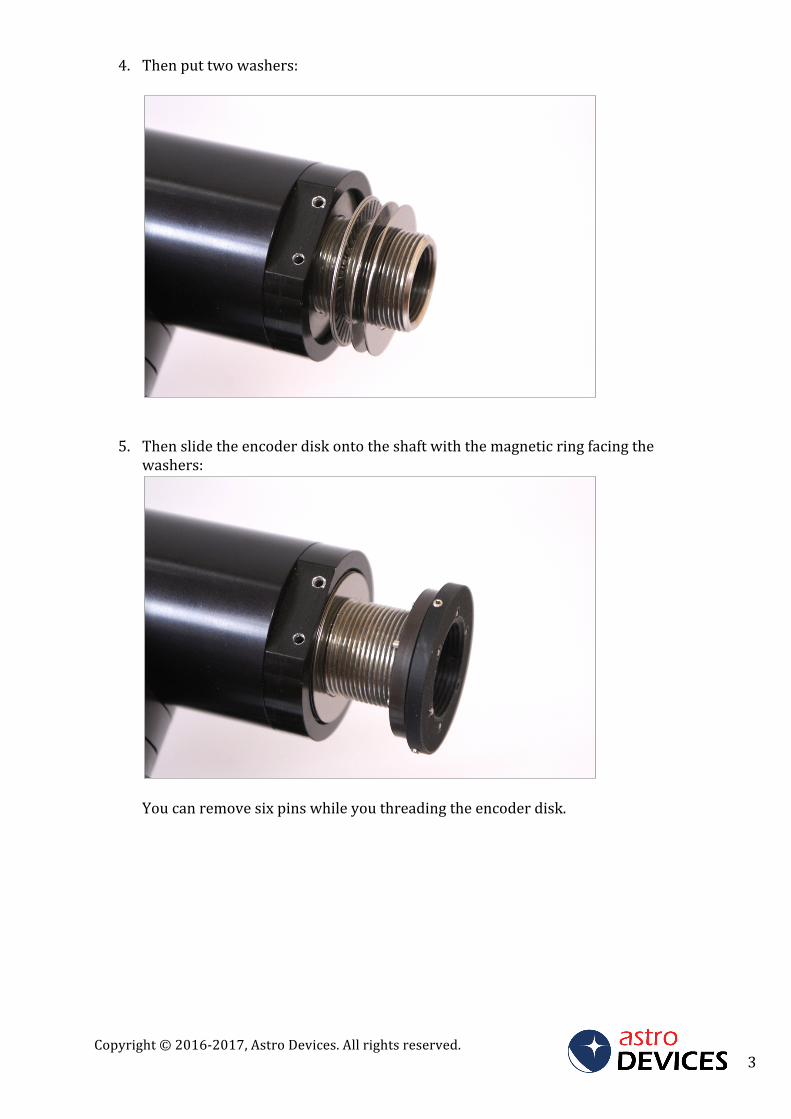
4. Thenputtwowashers:
5. Thenslidetheencoderdiskontotheshaftwiththemagneticringfacingthewashers:
Youcanremovesixpinswhileyouthreadingtheencoderdisk.
Copyright©2016-2017,AstroDevices.Allrightsreserved.4
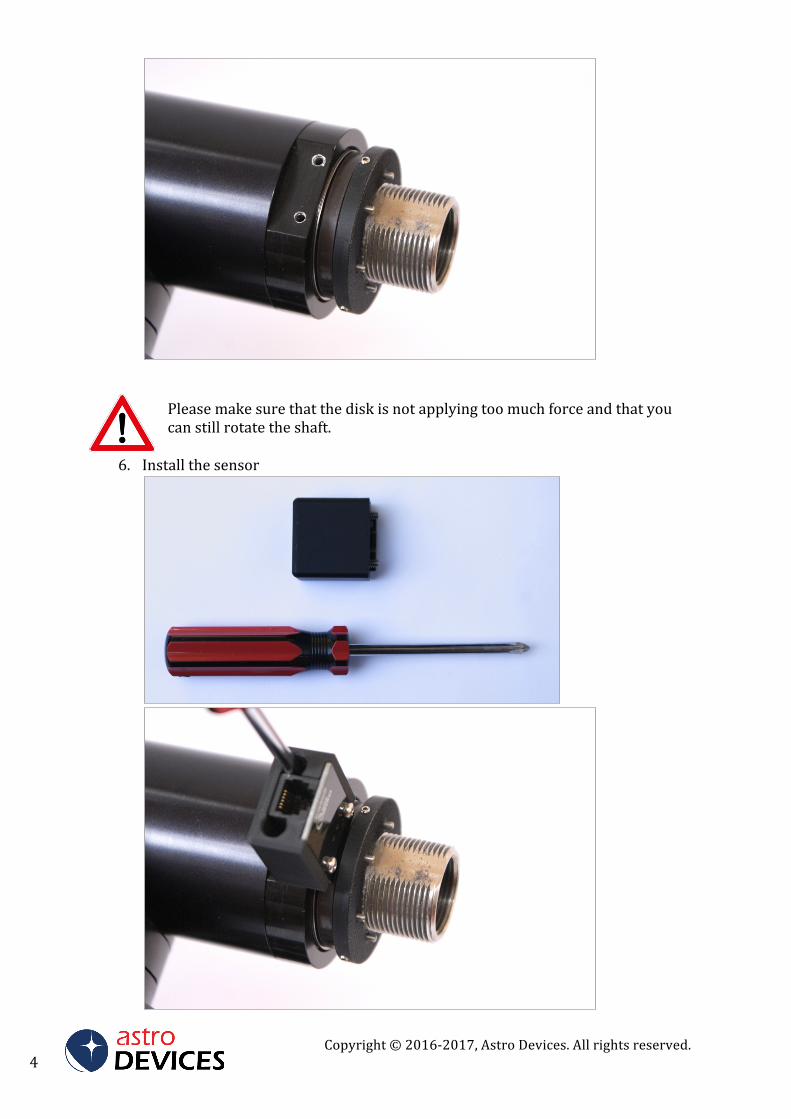
Pleasemakesurethatthediskisnotapplyingtoomuchforceandthatyoucanstillrotatetheshaft.
6. Installthesensor
Copyright©2016-2017,AstroDevices.Allrightsreserved. 5
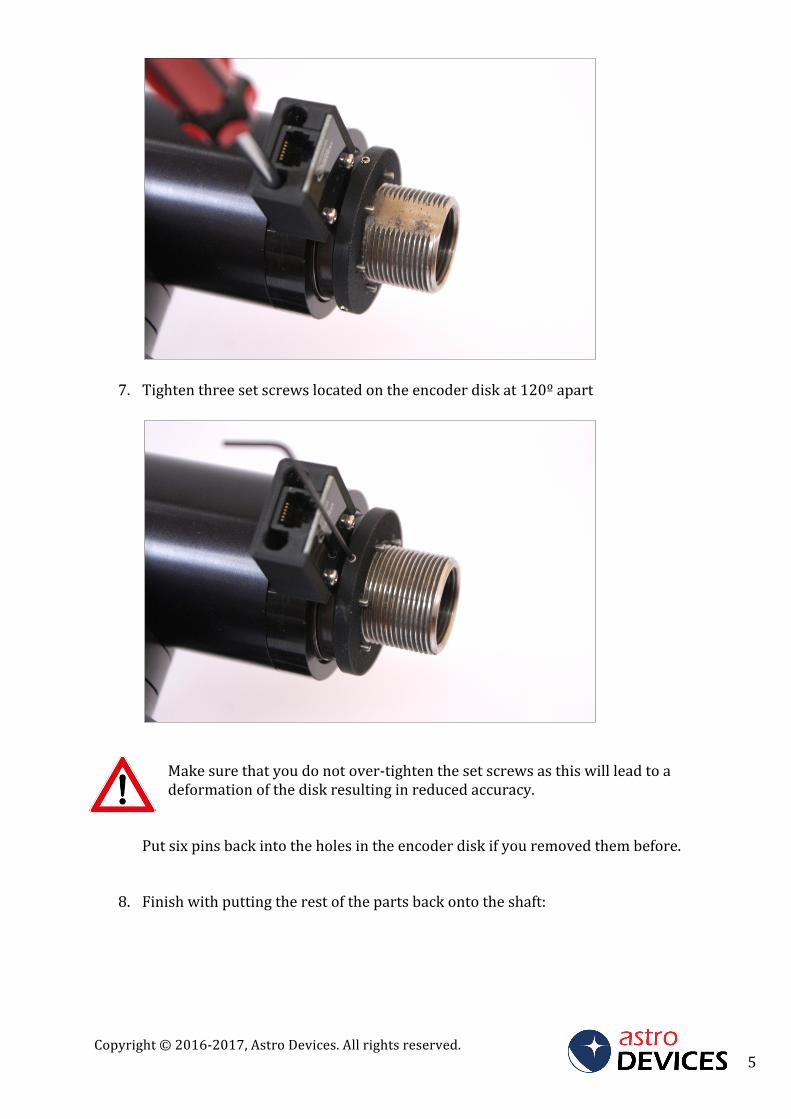
7. Tightenthreesetscrewslocatedontheencoderdiskat120ºapart
Makesurethatyoudonotover-tightenthesetscrewsasthiswillleadtoadeformationofthediskresultinginreducedaccuracy.
Putsixpinsbackintotheholesintheencoderdiskifyouremovedthembefore.
8. Finishwithputtingtherestofthepartsbackontotheshaft:
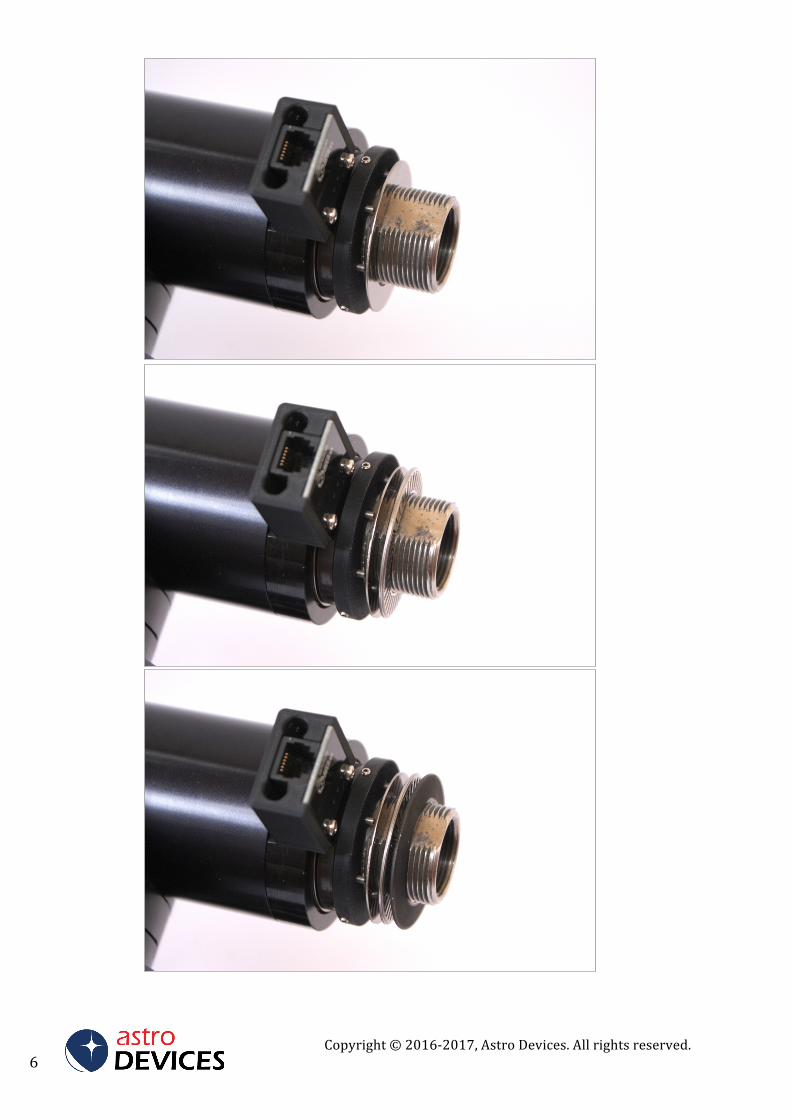
Copyright©2016-2017,AstroDevices.Allrightsreserved.6

Copyright©2016-2017,AstroDevices.Allrightsreserved. 7
9. Tightentheclutch
10. Repeatthesameinstallationprocedureforthesecondencoder.11. InserttheencodercableandconnectittotheDSCunit.12. Done.
Top Related