XLS FingerPrint Reader - MITC Software · 2018-07-30 · XLS Fingerprint Reader Contents...
26
XLS Fingerprint Reader Contents Introduction o Import Options o What’s New? MITC Settings o Import Rules o Time and Attendance Control File Settings - Data Terminals - Auto Importing - Poll Intervals - Company Information Folder o Assign Jobs PINs to Clock-ins and outs - Default/ Global Options o Finger.log file Enroll Procedures o Recommended Enrollment Procedures o Enrolling Employees on the XLS Fingerprint Reader o Enrolling a House Supervisor as an Admin on the XLS Fingerprint Reader
Transcript of XLS FingerPrint Reader - MITC Software · 2018-07-30 · XLS Fingerprint Reader Contents...
XLS Fingerprint Reader
Contents
Introduction
o Import Options
o What’s New?
MITC Settings
o Import Rules
o Time and Attendance Control File Settings
- Data Terminals
- Auto Importing
- Poll Intervals
- Company Information Folder
o Assign Jobs PINs to Clock-ins and outs
- Default/ Global Options
o Finger.log file
Enroll Procedures
o Recommended Enrollment Procedures
o Enrolling Employees on the XLS Fingerprint Reader
o Enrolling a House Supervisor as an Admin on the XLS Fingerprint Reader

Introduction
Uses onboard FLASH memory to store the Employee Fingerprints and the In/Out punches.
Polling software reads the In/Out punches and records it to a data file.
Data file deleted after MITC imports the In/Out records from the MITC XLS Fingerprint Scanner data file
Each employee needs to register at one of the MITC XLS Fingerprint Scanners on the system
o Polling software reads the fingerprints from each scanner and distributes them to each registered
scanner on the system
Each MITC XLS Fingerprint Scanner’s IP address must be assigned through a menu option in the polling
software
Polling software is available in an Ethernet configuration only
o USB and Serial (RS232) not supported by the polling software
Optional to add each Scanner to the MITC database using the MITC \ Time and Attendance \ Job PIN \
Call Control \ Machine Number
Import Options
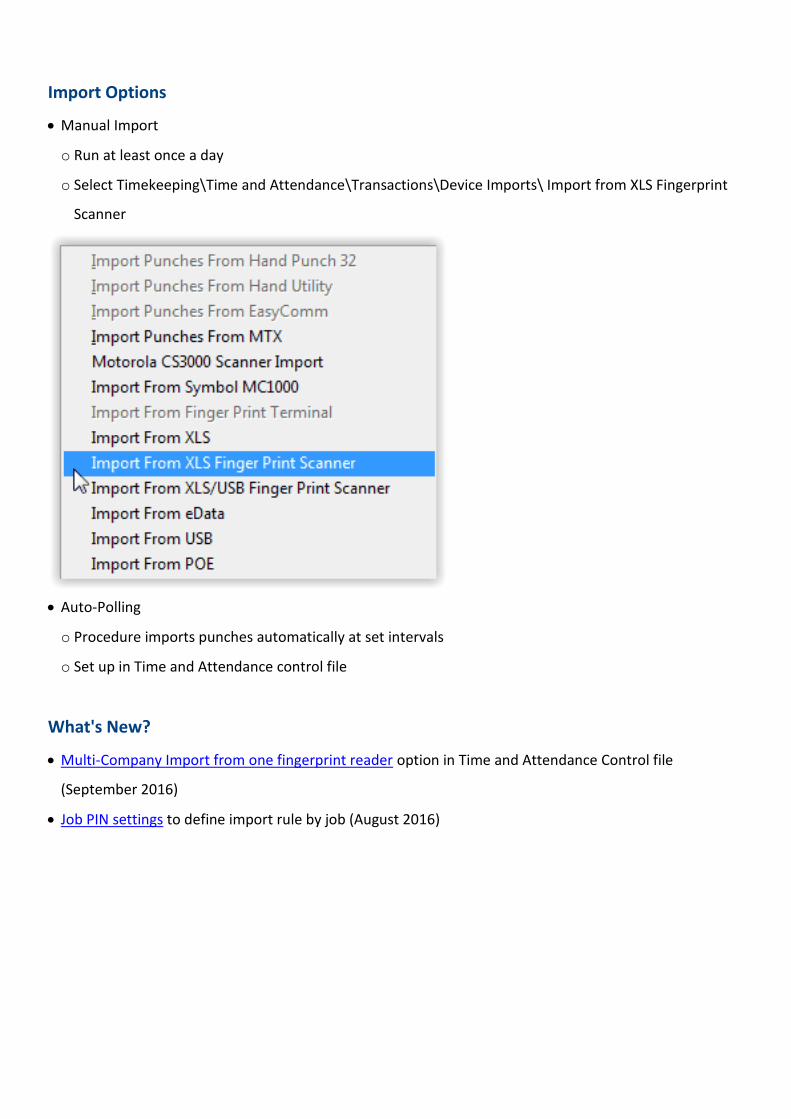
Manual Import
o Run at least once a day
o Select Timekeeping\Time and Attendance\Transactions\Device Imports\ Import from XLS Fingerprint
Scanner
Auto-Polling
o Procedure imports punches automatically at set intervals
o Set up in Time and Attendance control file
What's New?
Multi-Company Import from one fingerprint reader option in Time and Attendance Control file
(September 2016)
Job PIN settings to define import rule by job (August 2016)

MITC Settings
Import Rules Job PIN entered by employee overrides all other options unless “Use Work Codes as Activity Code”
unchecked
o Use if employees costed to multiple jobs from the same terminal
If Work Code = 0, Job PIN determined by Time and Attendance\Files\Control File\Time Data Terminals
settings
o Provides flexibility for an Employee to use their “home” terminal without entering a Job PIN and to
override their home job when using another terminal at another location
o If “Use Employee Home Job for Job PIN checked, uses Time and Attendance\Employee PINs\Job PIN to
assign Job PIN to record
If Job PIN is empty, obtains Job PIN associated with Reader Machine Number in Time and Attendance
If manual USB import used, and no Job PIN assigned to employee and no Job PIN associated with
Reader Machine Number, MITC assigns Employee’s Home Job
If Work Code = 0 AND “Use Employee Home Job for Job PIN” unchecked, uses Time and Attendance\
Employee PINs\ Job PIN to assign Job PIN to record
o If corresponding Job PIN not found, uses Reader Machine Number to find corresponding Job PIN
If MITC is unable to assign a Job PIN to a record, an error occurs and the record is ignored

Time and Attendance Control File Settings
Timer activation supported
Check MITC \ Time and Attendance \ Control File \ Time Data Terminals \ Import Punches From XLS to
set up
If Use Employee Home Job for Job PIN is checked, uses MITC \ Employee PINS \ Job PIN to assign Job
PIN to record
If use Machine Number To Get Job Code is checked, enter Clock Number in corresponding Job PIN
See Import Rules for more information on combining these options and other defaults
Data Terminals
Time of Day to Import Punches: 03:00
Maximum Hours Per Shift: 1-48 hours
o If “Ignore in/out punches for Attendance” checked and there is a missed clock-out, automatically
switches to clock-in when time exceeds maximum hours
o Enter 12 if “Ignore in/out punches for Attendance” unchecked
Days to check: Enter 5
Use Employee Home Job for Job PIN: uses Time and Attendance\Employee PINs\Job PIN to assign Job
PIN to record

o If Job PIN is empty, obtains Job PIN associated with Reader Machine Number in Time and
Attendance
Ignore In/Out Punches for Attendance: If checked, automatically assigns the clock-in/out
o If no missing clock-out, alternates clock-in and clock-out
o If an employee has a missed clock-out, automatically switches to clock-in when time clocked-in
exceeds maximum hours
o Note: If employee has missing clock-in, the next punch will always be a clock-in regardless of time
passed unless manager enters clock-in before employee attempts to clock out
Retry Import if XLS File in use every NN mins: If polling utility is running during auto-import
procedure, MITC attempts to import again every NN minutes until successful
Import NN files: Option to import up to 4 different finger.log files to import punches from more
terminals in less time
o Each file must have specific name
Imports additional files with different names "-1", "-2", "-3", "-4"
Auto Importing
Import Punches from XLS: If checked, auto imports punches from XLS once a day or every 15 minutes
Use Work Codes as Activity Code Only: If checked, assigns work codes entered as the activity code
o Use last 3 digits as Activity Code: If checked, employee enters job pin and activity code on terminal
up to 10 digits (Up to 6 digit job pin + 3 digit activity code)
o MITC assigns last 3 digits entered as the activity code
XLS - Use Employee Activity Code as default: Assigns activity code from Employee PINs\Timekeeping
Options\Activity Code to clock-in/out
USB - Use Employee Activity Code as default: Assigns activity code from Employee PINs\Timekeeping
Options\Activity Code to clock-in/out
Poll Intervals
Import from XLS every 15 minute minutes on the quarter hour: If checked, auto-imports every 15
minutes
o If unchecked, auto-imports once a day
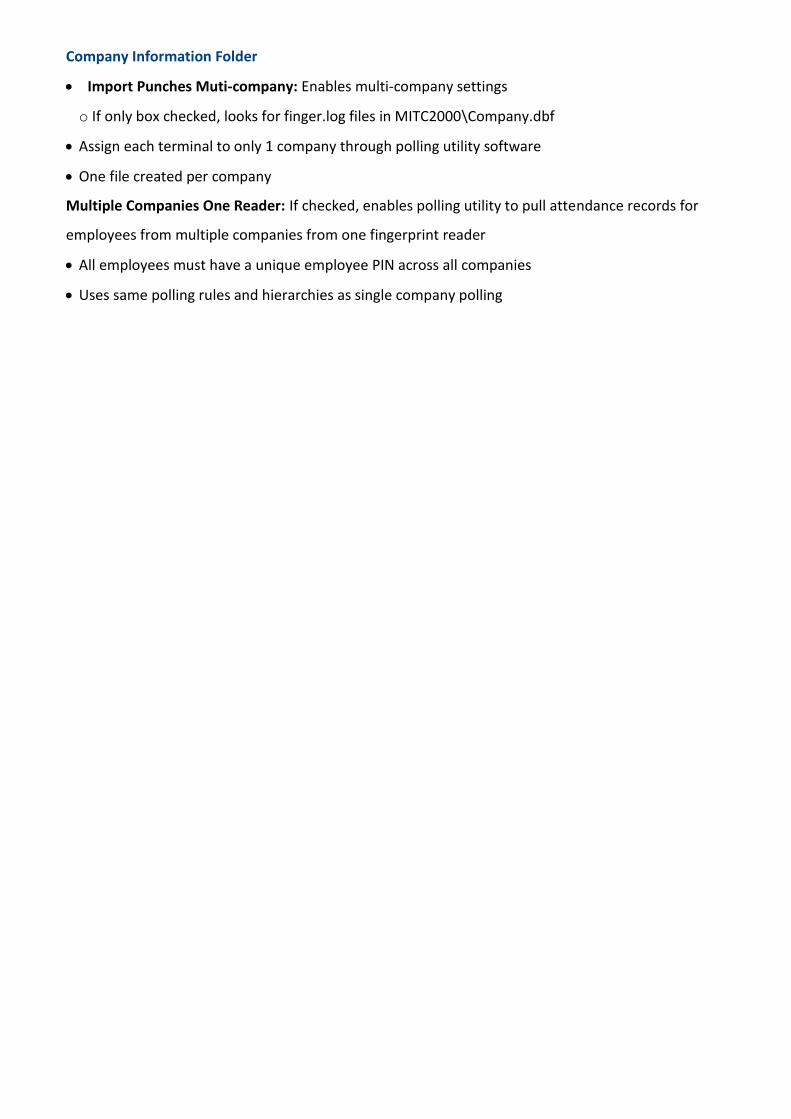
Company Information Folder
Import Punches Muti-company: Enables multi-company settings
o If only box checked, looks for finger.log files in MITC2000\Company.dbf
Assign each terminal to only 1 company through polling utility software
One file created per company
Multiple Companies One Reader: If checked, enables polling utility to pull attendance records for
employees from multiple companies from one fingerprint reader
All employees must have a unique employee PIN across all companies
Uses same polling rules and hierarchies as single company polling

Assign Job PINs to Clock-ins and outs Job PIN Determination
Use to set specific import rules by job regardless of what is entered on fingerprint reader
Use with:
o XLS import from Fingerprint Scanner
o XLS import from USB
Use Machine Number to Get Job Code: If checked, import uses the reader machine number to
determine job
Use Employee PIN/Default Job PIN for Job PIN: If checked, import uses employee's default Job PIN to
determine job
Use Default/Global Options: If checked, import uses normal global options for XLS readers

Default/Global Options
3 methods to assign Job PIN to clock-ins/outs
Order Job PIN assigned
1. Employee entered Job PIN
2. Job PIN assigned to employee
3. Terminal assigned to Job PIN
Employee enters Job PIN
Scan finger
Enter Job PIN (Work Code)
Press "OK"

Use Job PIN assigned to employee o Default if no work code or reader machine number
o Assign a Job PIN to each employee in "Employee PINs"
All employees who Clock-In/Clock-Out using a XLS MITC Fingerprint Scanner must register at a Scanner
using the same Employee PIN as in MITC
Matching Employee PIN must be used to “register” that Employee’s fingerprints otherwise
mismatched punches will occur
New hires can be registered at a central location and their finger prints distributed to multiple
Scanners
Use Employee PINS \ Job PIN to assign the Job to the Employee. Use this option when employees who
share a Terminal are costed to different Jobs but the Job is always the same for each Employees
If an Employee Import is in use as part of Payroll Integration, it will be useful to incorporate the home
Job PIN, if possible, in the Employee Import
Employee must NOT be marked "Inactive"

Use Clock Number assigned to Job PIN
Default if no work code assigned to Job PIN and POE machine
Enter "Reader Machine Number" in Job PINS\ Time Data Terminals (XLS Fingerprint Scanner number)
Job PIN must NOT be marked Inactive Job for record to be imported

FINGER.LOG File Finger.log is created by the polling and communication software and is located in MITC2000\Work
Imports punches into TT_Calls database
Validates Job PIN and Employee PIN. If not valid, that record(s) will be ignored. Error message
“Missing Job PIN or Missing Employee PIN Press Ok” displayed
Finger.log file is renamed with a time and date stamp
o Example: 20152008-134846_finger.log
If the import procedure is not 100% successful (an error message is displayed), finger.log is renamed
YYYYMMDD finger.log
An error log is created, even if there are no errors
o Example: FNG_XLS_Import Errors on 2015-08-21.134938.log
SAMPLE FINGER.LOG
1, 0, 0, 1000, 0, 15, 54, 3, 21, 2011
1, 0, 1, 1000, 0, 15, 54, 3, 21, 2011
1, 0, 0, 1000, 0, 15, 55, 3, 21, 2011
1, 0, 1, 1000, 0, 15, 55, 3, 21, 2011
1, 0, 0, 1000, 300, 15, 38, 3, 22, 2011
1, 0, 1, 1000, 300, 15, 38, 3, 22, 2011
1, 0, 0, 1000, 300, 15, 39, 3, 22, 2011
1, 0, 0, 1000, 300, 10, 31, 3, 23, 2011
1, 0, 1, 1000, 300, 10, 31, 3, 23, 2011

Enrollment Procedures
Recommended Enrollment Procedures It is best practice to select one location to house a master clock where all employee enrollments and
changes will take place
o Master clock typically located at a main office
o Multiple master clocks can be set up if necessary
Verify Employee PINs are correct in MITC
Enroll employees with one fingerprint from each hand
o Two fingerprints provides a back up for employees
o Using more than two fingerprints can cause reader to run out of space (holds 2200 fingerprints)
If reader does not recognize any fingerprints for an employee, try lowering match threshold
o If still doesn't work enroll employee using a password or consider using Web Clock
Enrolling Employees on the XLS Fingerprint Reader 1. Press "Menu" button
2. Use arrows to select "User Manage" and press "OK"

3. Use arrows to select "Enroll User" and press "OK"
4. New Enroll press "OK" to add a new user
5. New Enroll PIN: Enter PIN number for user (needs to match Employee PIN in MITC) and press "OK"

5. The three different options when enrolling an employee
To enroll a fingerprint only use arrows to select "Enroll FP" and press "OK"
To enroll a password only use arrows to select "Enroll Pwd" and press "OK"

To enroll and fingerprint and a password use arrows to select "FP and Pwd" and press "OK"
5. Follow prompts to enroll fingerprint and/or password
To enroll a fingerprint
o Follow prompts to scan finger 3 different times

To enroll a password
o Type in a password (1-5 characters) and press "OK"
o Retype password
o Press "ESC" to cancel or press "OK" to save

9. Press "ESC" to go to the Main Menu
10. Enroll a backup print for the supervisor click on the "Menu" button and have the supervisor
confirm by clicking "OK"
11. Go through steps 3-5. For Step 6, instead of clicking "OK" to enroll a new user, click "ESC"
12. Enter the PIN number for the supervisor and follow the prompts to scan the backup finger three
times as before

13. Press "ESC" to cancel or "OK" to save
14. Press "ESC" to Main Menu
Enrolling a House Supervisor as an Admin on the XLS Fingerprint Reader
1. Press "Menu" button
2. Use arrows to select "User Manage" and press "OK"
3. Use arrows to select "Enroll Admin" and press "OK"

4. The three different options when enrolling an admin
To enroll a fingerprint only use arrows to select "Enroll FP" and press "OK"
To enroll a password only use arrows to select "Enroll Pwd" and press "OK"

To enroll and fingerprint and a password use arrows to select "FP and Pwd" and press "OK"
5. Admin Accredit use down arrow to select "Supervisor" and click "OK"

6. New Enroll press "OK" to add a new user
7. New Enroll PIN: Enter PIN number for user (needs to match Employee PIN in MITC) and press "OK"

8. Follow directions to enroll fingerprint/ password
To enroll a fingerprint
o Follow prompts to scan finger 3 different times
To enroll a password
Type in a password (1-5 characters) and press "OK"
o Retype password

o Press "ESC" to cancel or press "OK" to save
9. Press "ESC" to go to the Main Menu
10. Enroll a backup print for the supervisor click on the "Menu" button and have the supervisor
confirm by clicking "OK"
11. Go through steps 1-3. For Step 4, instead of clicking "OK" to enroll a new user, click "ESC"

12. Enter the PIN number for the supervisor and follow the prompts to scan the backup finger three
times as before
13. Press "ESC" to cancel or "OK" to save
14. Press "ESC" to Main Menu

Clock In/Out on XLS
To clock in, press “Up Arrow” first. Then place your finger into the scanner.
To clock out, press “Down Arrow” first. Then place your finger into the scanner.
Fingerprint Scanning Best Practices Lay finger flat on scanning prism so the whole 'pad' is touching the surface
Hold finger there until system beeps
If system says,"Please try again," verify finger is dry and clean and try again
If system continues to say,"Please try again," try other enrolled finger
NOTE: If In/Out is not selected prior to placing your finger into the scanner, the Fingerprint Scanner will default
to the In/Out value used by the prior person punching In/Out
For instance if an Employee Clocks-out and the next Employee using the Fingerprint Scanner wants to
Clock-In but forgets to Press “in”, the Fingerprint Reader will default to the current setting.
Use MyMITC for the Web to review punches and submit requests for a change in the event that a punch
is done incorrectly.
If MyMITC for the Web is not available, contact your Supervisor or Payroll Department.