Welcome to this tutorial on the Make a Payment option in Uplink
14
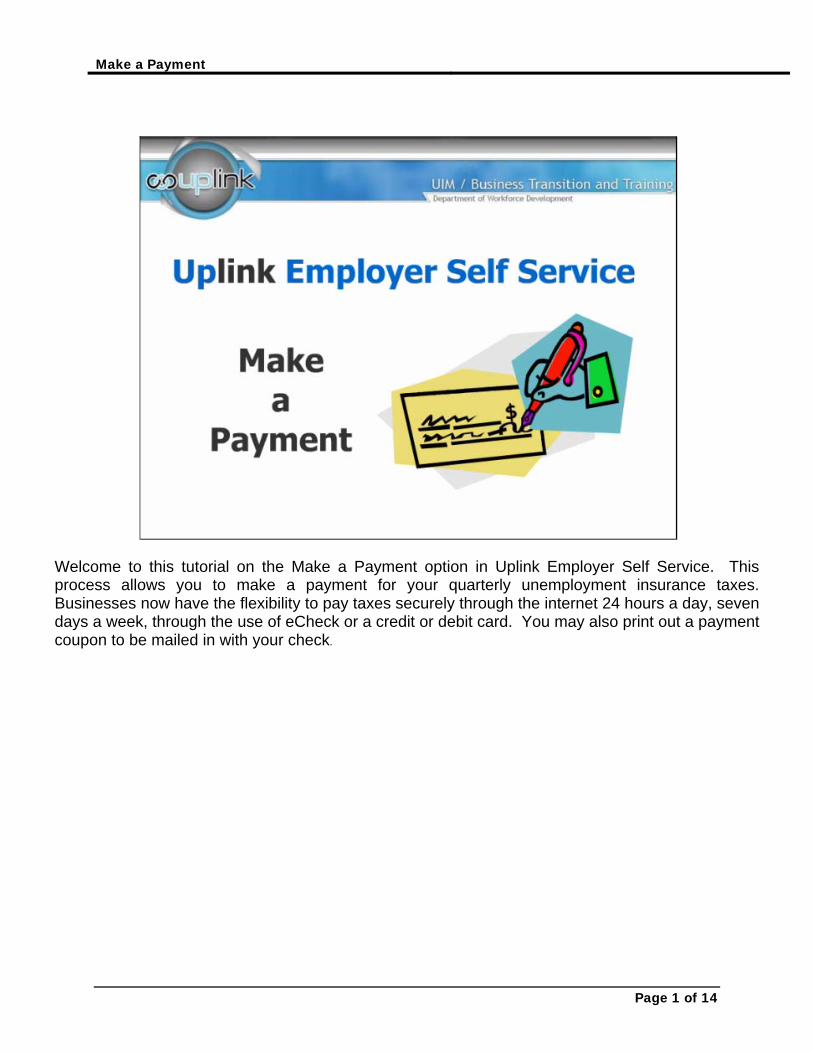
Make a Payment Page 1 of 14 Welcome to this tutorial on the Make a Payment option in Uplink Employer Self Service. This process allows you to make a payment for your quarterly unemployment insurance taxes. Businesses now have the flexibility to pay taxes securely through the internet 24 hours a day, seven days a week, through the use of eCheck or a credit or debit card. You may also print out a payment coupon to be mailed in with your check.
Transcript of Welcome to this tutorial on the Make a Payment option in Uplink
Make a Payment
Page 1 of 14
Welcome to this tutorial on the Make a Payment option in Uplink Employer Self Service. This process allows you to make a payment for your quarterly unemployment insurance taxes. Businesses now have the flexibility to pay taxes securely through the internet 24 hours a day, seven days a week, through the use of eCheck or a credit or debit card. You may also print out a payment coupon to be mailed in with your check.
Make a Payment
Page 2 of 14
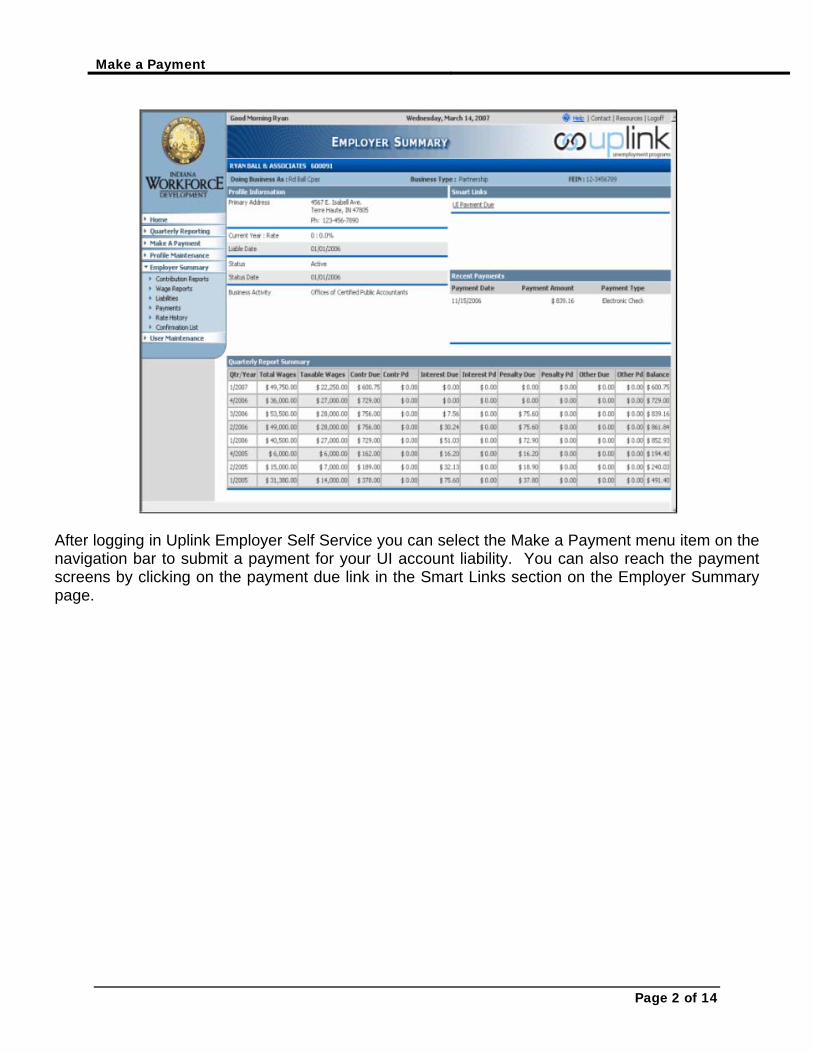
After logging in Uplink Employer Self Service you can select the Make a Payment menu item on the navigation bar to submit a payment for your UI account liability. You can also reach the payment screens by clicking on the payment due link in the Smart Links section on the Employer Summary page.
Make a Payment
Page 3 of 14
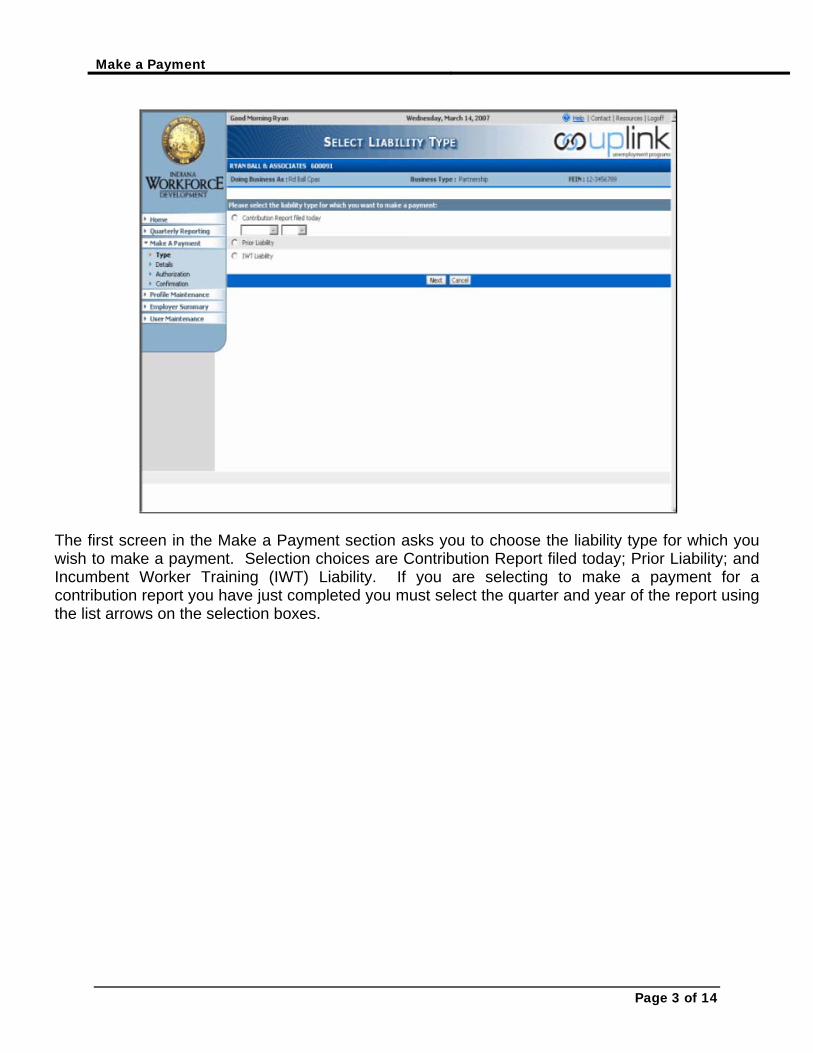
The first screen in the Make a Payment section asks you to choose the liability type for which you wish to make a payment. Selection choices are Contribution Report filed today; Prior Liability; and Incumbent Worker Training (IWT) Liability. If you are selecting to make a payment for a contribution report you have just completed you must select the quarter and year of the report using the list arrows on the selection boxes.

Make a Payment
Page 4 of 14
This screen provides you with payment details and shows you the total amount currently due. You can select to pay using eCheck, payment voucher, or credit card. This screen is populated with information from the Contribution Report Details screen. A summary of the total taxable wages, the tax rate as of a specific date, the amount of contribution now due, and any interest or penalty amounts due is shown on the screen. The total is what you currently owe and will be the amount of the payment made. This information is currently found on your UC-1 report. You are asked to use the list arrow to select how you wish to pay and then click ‘Next’ to advance to the next screen or ‘Cancel’ to clear your entries.
Make a Payment
Page 5 of 14
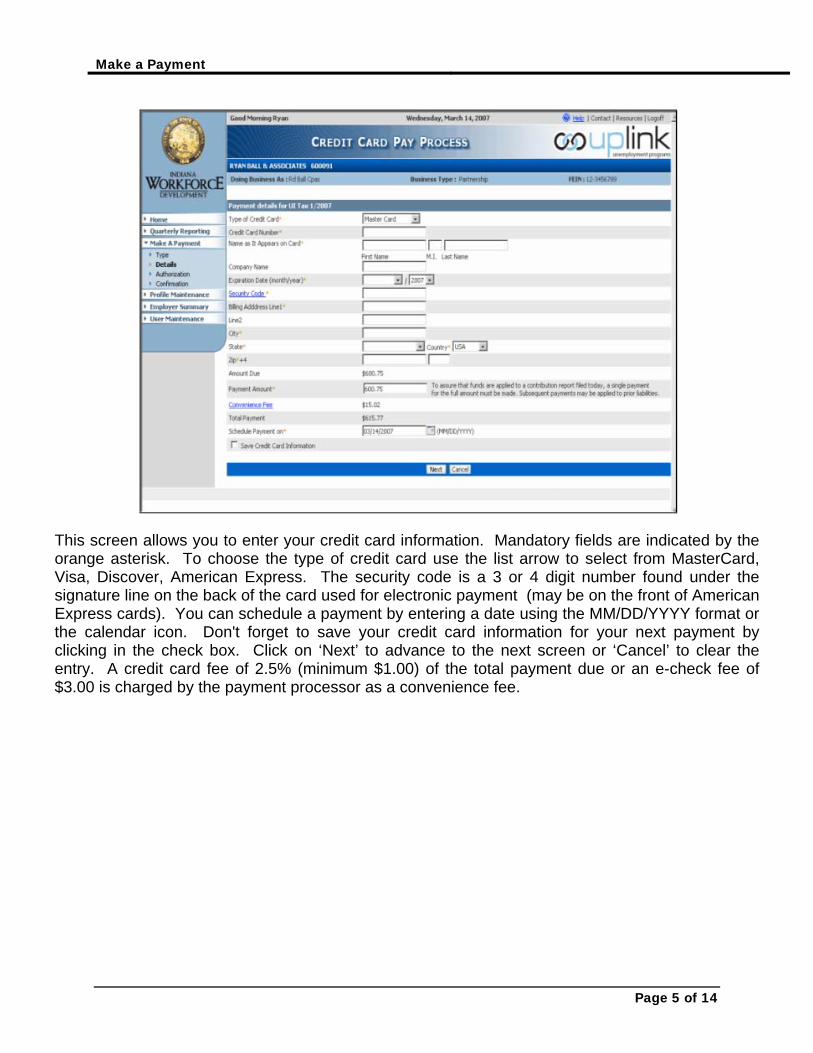
This screen allows you to enter your credit card information. Mandatory fields are indicated by the orange asterisk. To choose the type of credit card use the list arrow to select from MasterCard, Visa, Discover, American Express. The security code is a 3 or 4 digit number found under the signature line on the back of the card used for electronic payment (may be on the front of American Express cards). You can schedule a payment by entering a date using the MM/DD/YYYY format or the calendar icon. Don't forget to save your credit card information for your next payment by clicking in the check box. Click on ‘Next’ to advance to the next screen or ‘Cancel’ to clear the entry. A credit card fee of 2.5% (minimum $1.00) of the total payment due or an e-check fee of $3.00 is charged by the payment processor as a convenience fee.
Make a Payment
Page 6 of 14
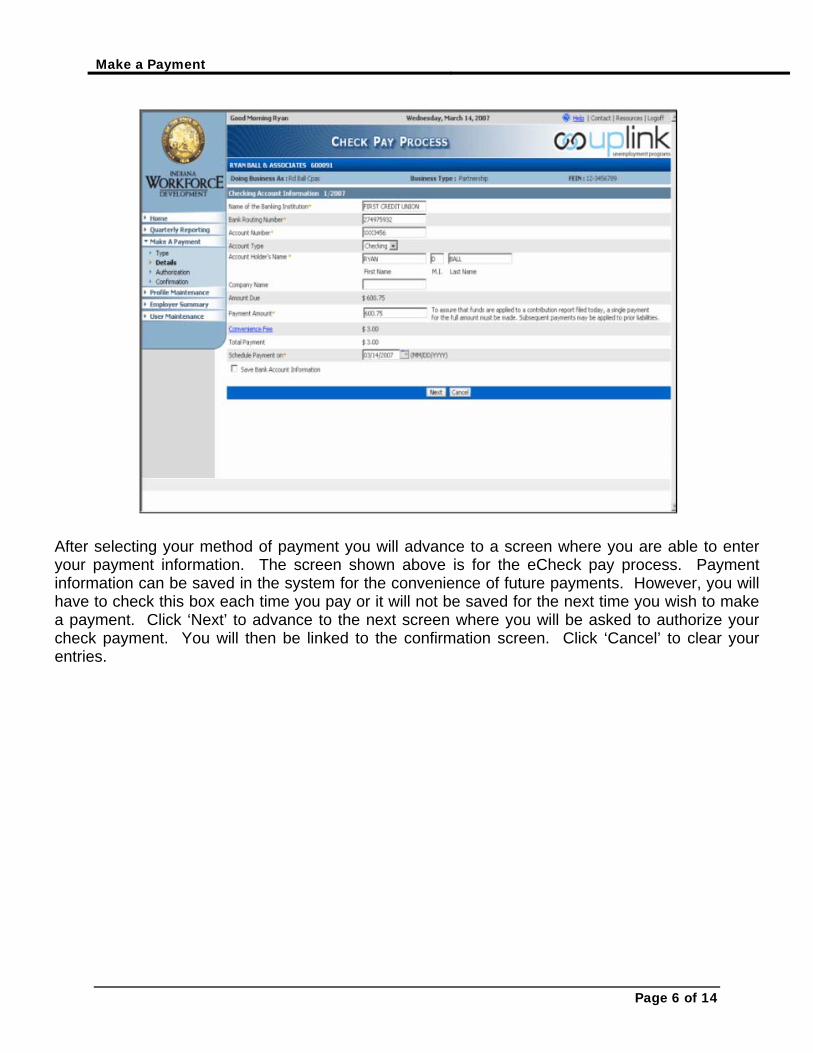
After selecting your method of payment you will advance to a screen where you are able to enter your payment information. The screen shown above is for the eCheck pay process. Payment information can be saved in the system for the convenience of future payments. However, you will have to check this box each time you pay or it will not be saved for the next time you wish to make a payment. Click ‘Next’ to advance to the next screen where you will be asked to authorize your check payment. You will then be linked to the confirmation screen. Click ‘Cancel’ to clear your entries.
Make a Payment
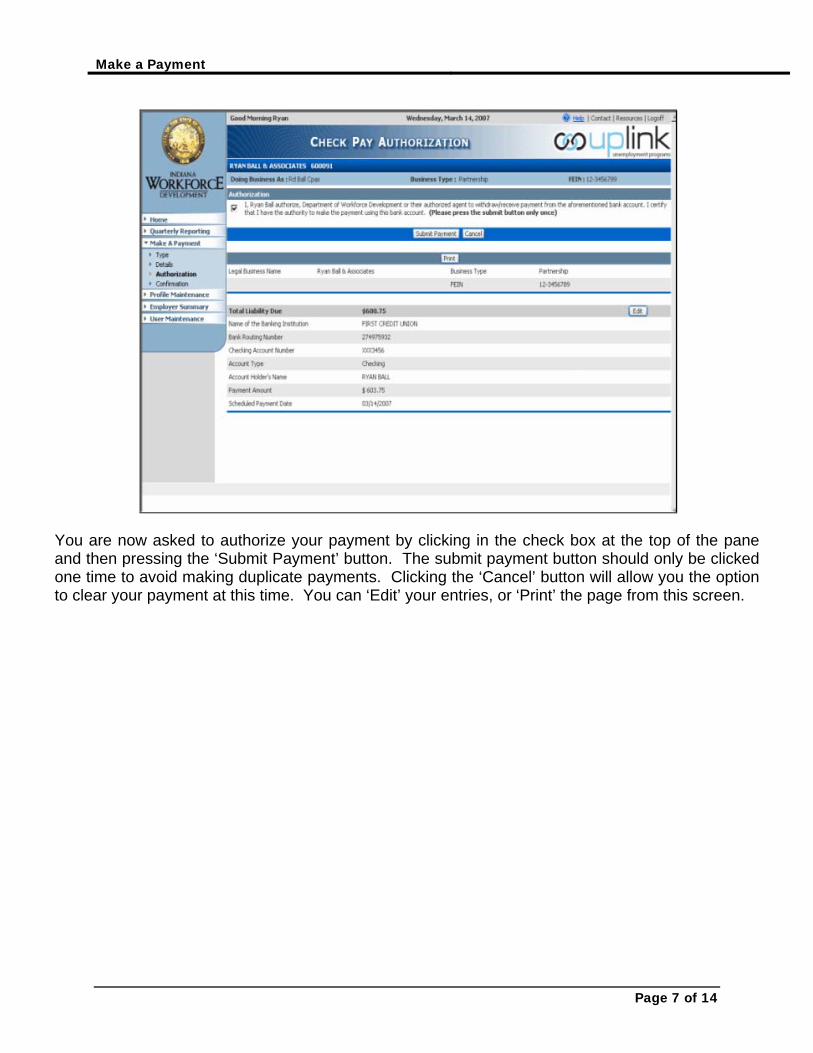
Page 7 of 14
You are now asked to authorize your payment by clicking in the check box at the top of the pane and then pressing the ‘Submit Payment’ button. The submit payment button should only be clicked one time to avoid making duplicate payments. Clicking the ‘Cancel’ button will allow you the option to clear your payment at this time. You can ‘Edit’ your entries, or ‘Print’ the page from this screen.
Make a Payment
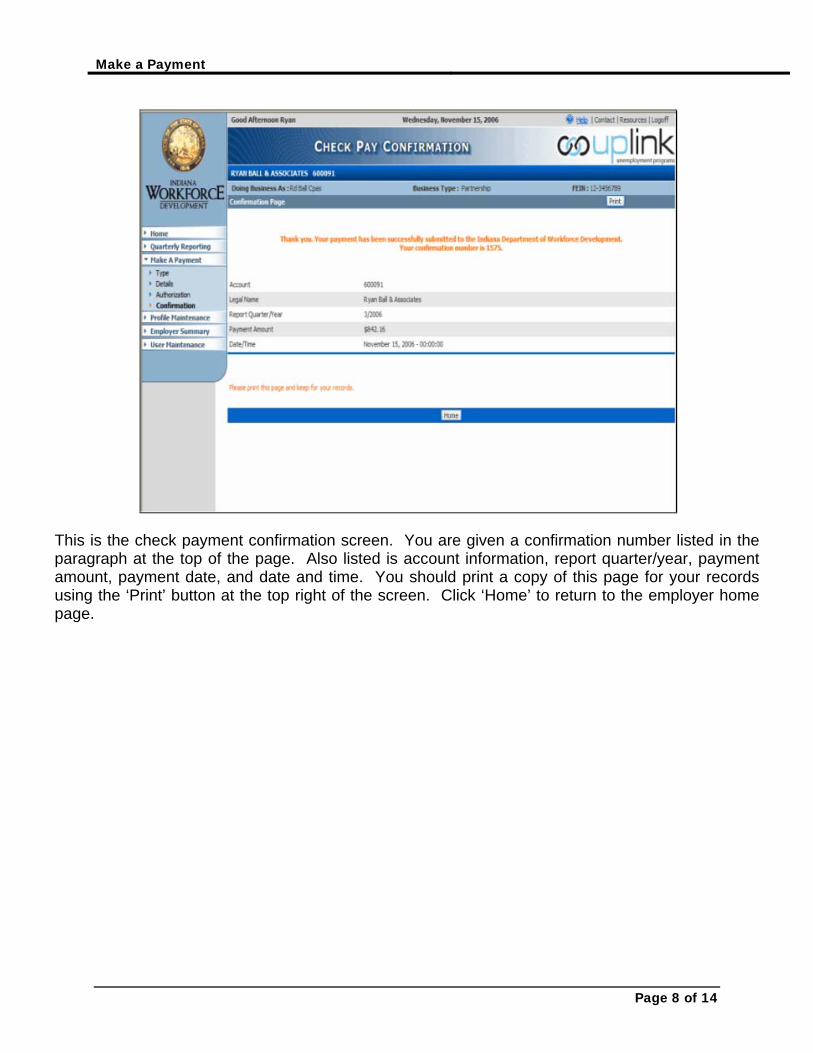
Page 8 of 14
This is the check payment confirmation screen. You are given a confirmation number listed in the paragraph at the top of the page. Also listed is account information, report quarter/year, payment amount, payment date, and date and time. You should print a copy of this page for your records using the ‘Print’ button at the top right of the screen. Click ‘Home’ to return to the employer home page.

Make a Payment
Page 9 of 14
This is the screen you will use if you choose to make a payment on your account using the payment coupon option. You will be able to fill in the payment amount in the box, print off the payment coupon, and mail it in with your check. The ‘Print Coupon’ button at the bottom of the screen will allow you access to the following pop-up screen. You must print your coupon before leaving this page.
Make a Payment
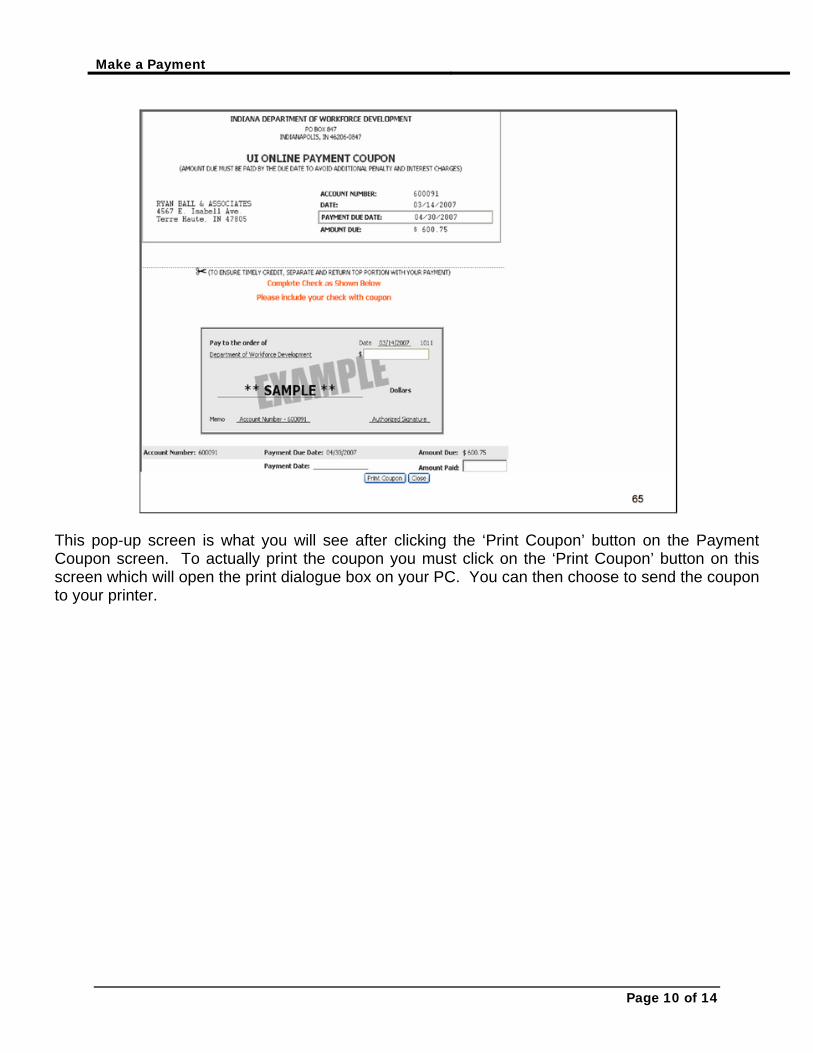
Page 10 of 14
This pop-up screen is what you will see after clicking the ‘Print Coupon’ button on the Payment Coupon screen. To actually print the coupon you must click on the ‘Print Coupon’ button on this screen which will open the print dialogue box on your PC. You can then choose to send the coupon to your printer.
Make a Payment
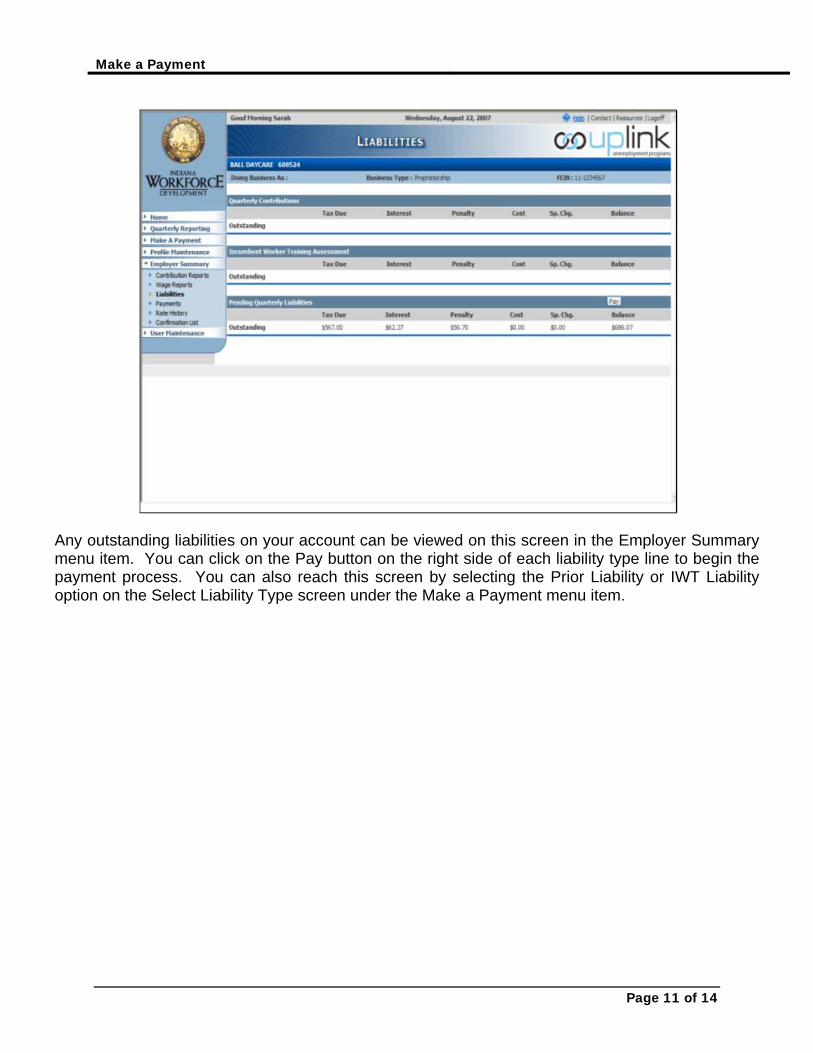
Page 11 of 14
Any outstanding liabilities on your account can be viewed on this screen in the Employer Summary menu item. You can click on the Pay button on the right side of each liability type line to begin the payment process. You can also reach this screen by selecting the Prior Liability or IWT Liability option on the Select Liability Type screen under the Make a Payment menu item.
Make a Payment
Page 12 of 14
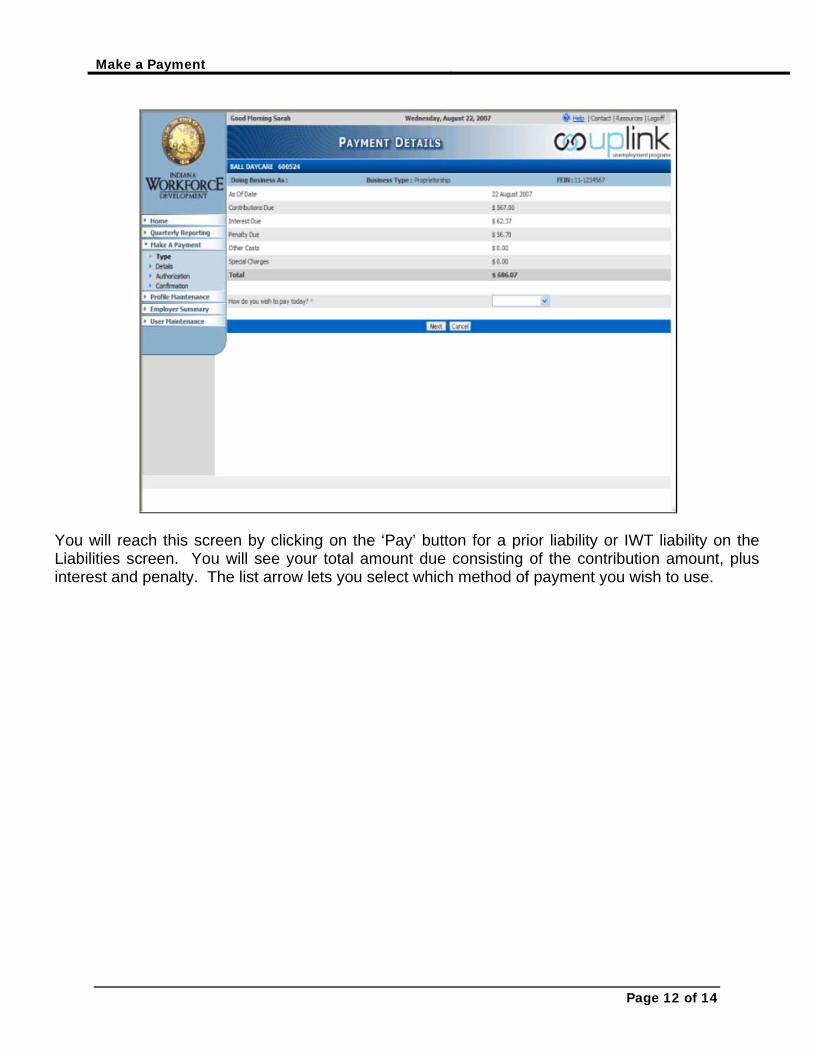
You will reach this screen by clicking on the ‘Pay’ button for a prior liability or IWT liability on the Liabilities screen. You will see your total amount due consisting of the contribution amount, plus interest and penalty. The list arrow lets you select which method of payment you wish to use.
Make a Payment
Page 13 of 14
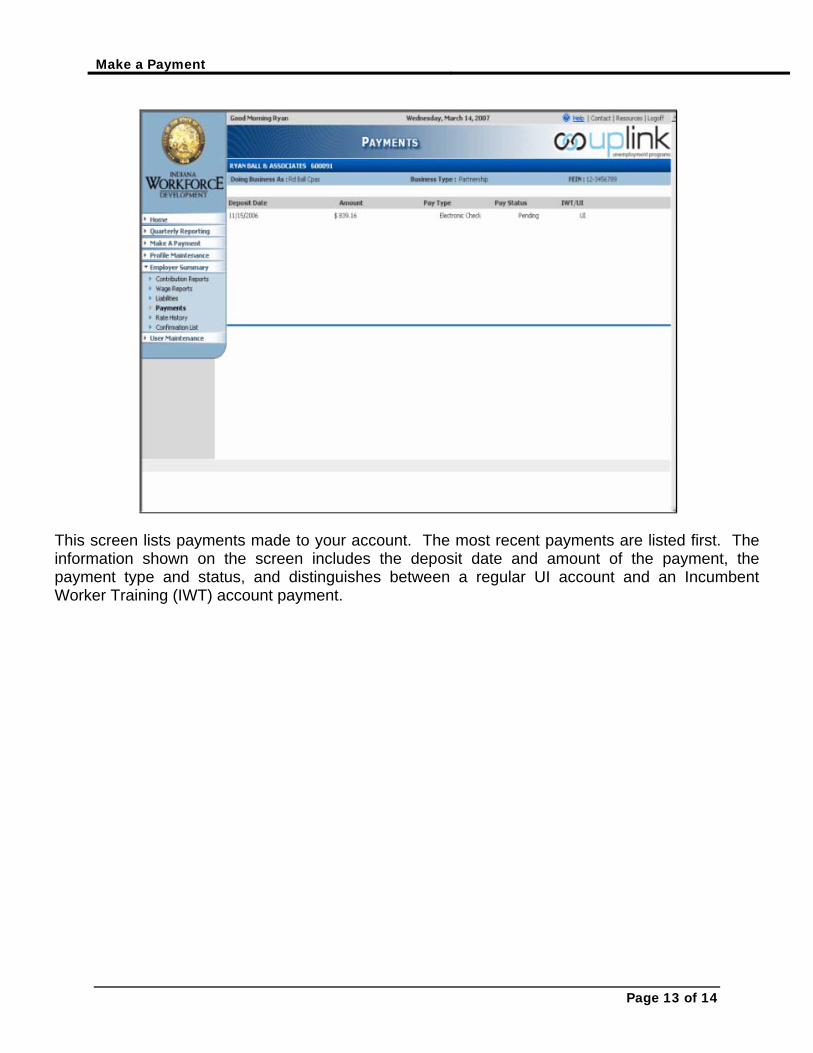
This screen lists payments made to your account. The most recent payments are listed first. The information shown on the screen includes the deposit date and amount of the payment, the payment type and status, and distinguishes between a regular UI account and an Incumbent Worker Training (IWT) account payment.
Make a Payment
Page 14 of 14
~ Uplink ESS ~
For additional information
contact our DWD Call Center
at 1-800- 437-9136
Thank you for viewing this tutorial on Making a Payment using Uplink Employer Self Service. If you have any questions please contact the Department of Workforce Development Call Center at 1-800-437-9136.