Welcome to my Knitting Designs. · through stitches left on knitting needle, pull together tightly...
9
I have been creating knitting patterns for many years for my own benefit and finally decided to write them down for sale. I occasionally share free patterns on my website and have included some of these within the book for handy keeping. I would say they're suitable for someone with intermediate skill, although a beginner may be able to do just as well with a little more time and patience. Have fun creating these collectable characters for your family and friends. You can find my creations online under the name Liana Marcel which was my business name for a number of years. I am now an author by the name L.T.Marshall. WWW.LTMarshall.Blog COPYRIGHT © 2017 L.T. MARSHALL NEW EDITION COPYRIGHT © 2020 L.T. MARSHALL PUBLISHED BY PICT PUBLISHING Part of the 'One Creative Family' Brand. ALL RIGHTS RESERVED. NO PART OF THIS BOOK MAY BE REPRODUCED OR TRANSMITTED IN ANY FORM OR BY ANY MEANS, ELECTRONIC OR MECHANICAL, INCLUDING PHOTOCOPYING, RE CORDING, OR BY ANY INFORMATION STORAGE AND RETRIEVAL SYSTEM, WITHOUT THE AUTHOR’S PERMISSION. COVER COPYRIGHT © PICT PUBLISHING/L.T. MARSHALL Welcome to my Knitting Designs. L.T. Marshall
Transcript of Welcome to my Knitting Designs. · through stitches left on knitting needle, pull together tightly...

I have been creating knitting patterns for many years for myown benefit and finally decided to write them down for sale.
I occasionally share free patterns on my website and haveincluded some of these within the book for handy keeping.I would say they're suitable for someone with intermediateskill, although a beginner may be able to do just as well with
a little more time and patience.Have fun creating these collectable characters for your
family and friends.You can find my creations online under the name Liana
Marcel which was my business name for a number of years.I am now an author by the name L.T.Marshall.
WWW.LTMarshall.Blog
COPYRIGHT © 2017 L.T. MARSHALL
NEW EDITION COPYRIGHT © 2020 L.T. MARSHALLPUBLISHED BY PICT PUBLISHING
Part of the 'One Creative Family' Brand.
ALL RIGHTS RESERVED. NO PART OF THIS BOOK MAY BE
REPRODUCED OR TRANSMITTED IN ANY FORM OR BY ANYMEANS,
ELECTRONIC OR MECHANICAL, INCLUDING PHOTOCOPYING, RECORDING, OR BY ANY INFORMATION STORAGE AND
RETRIEVAL SYSTEM, WITHOUT THE AUTHOR’S PERMISSION.COVER COPYRIGHT © PICT PUBLISHING/L.T. MARSHALL
Welcome to my Knitting Designs.
L.T. Marshall

Safety guidelines
The items in these patterns are not suitable for babies andvery young children due to possible choking hazards.
Knitting yarnsDouble knitting in various colours, as stated in the
instructions.
AbbreviationsP - Purl. P1 - Purl one. Pwise - Purl Wise.
K - Knit. K1 - Knit one. Kwise - Knit Wise Sts - stitches,
K2 tog - Knit 2 Together. P2 tog - Purl 2 Together.Inc 1 - Increase 1 stitch. Y.Fwd - Yarn forward around needle.
St-st - Stocking Stitch (start with K row unless otherwisestated). G-st - Garter stitch,
B+T tightly - Break off yarn leaving a long end and thread itthrough stitches left on knitting needle, pull together tightly
then fasten off.
Additional instructions For some of the detailing you will need to be able to make a
chain stitch.
Welcome to my Knitting Designs.

ValentinesBear
For This Project - You need. Knitting yarns.Your chosen colour for the bear. We used Cream, Fawn, Baby Pink and Raspberry pink for this pattern Additional materials. Black embroidery thread or toy eyesPink sharpie marker if you wan to blush cheeksToy Stuffing – medium bag.3 x 8mm red heart buttons2 x 4mm toy eyes in black Tools. No.10 needles.Wool needle.Sewing needle.Scissors.BBQ Skewers. 2
ValentinesBear
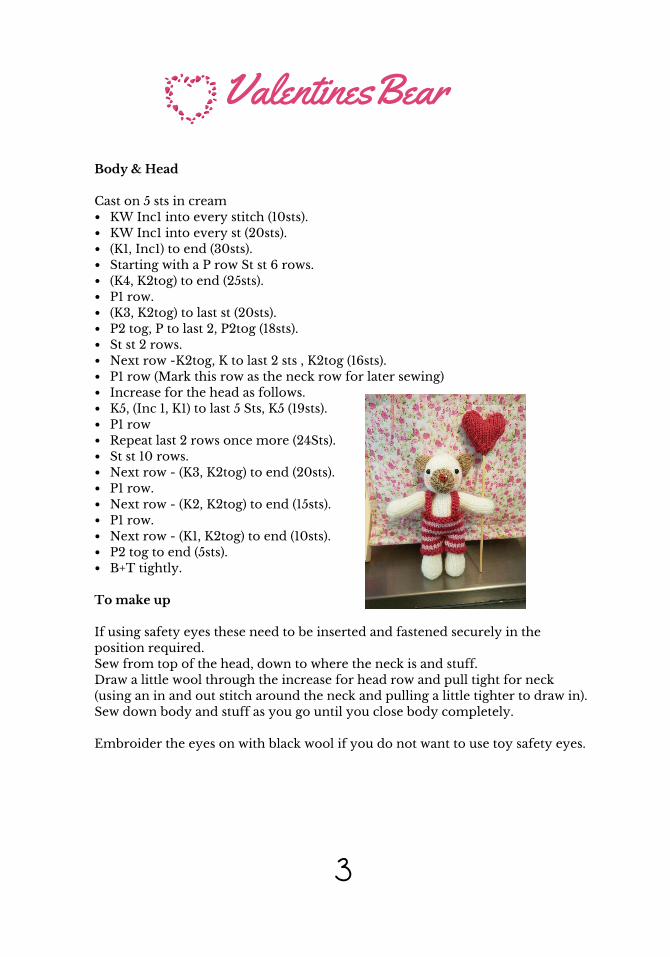
KW Inc1 into every stitch (10sts).KW Inc1 into every st (20sts).(K1, Inc1) to end (30sts).Starting with a P row St st 6 rows.(K4, K2tog) to end (25sts).P1 row.(K3, K2tog) to last st (20sts).P2 tog, P to last 2, P2tog (18sts).St st 2 rows.Next row -K2tog, K to last 2 sts , K2tog (16sts).P1 row (Mark this row as the neck row for later sewing)Increase for the head as follows. K5, (Inc 1, K1) to last 5 Sts, K5 (19sts).P1 row Repeat last 2 rows once more (24Sts).St st 10 rows.Next row - (K3, K2tog) to end (20sts).P1 row.Next row - (K2, K2tog) to end (15sts).P1 row.Next row - (K1, K2tog) to end (10sts).P2 tog to end (5sts).B+T tightly.
Body & Head Cast on 5 sts in cream
To make up If using safety eyes these need to be inserted and fastened securely in theposition required.Sew from top of the head, down to where the neck is and stuff. Draw a little wool through the increase for head row and pull tight for neck(using an in and out stitch around the neck and pulling a little tighter to draw in).Sew down body and stuff as you go until you close body completely. Embroider the eyes on with black wool if you do not want to use toy safety eyes.
3

ValentinesBear
(Inc K wise into every stitch (8sts).P1 row.(K1, inc1) to end (12sts).P1 row.(K3, inc1) to end (15sts).P1 row.St st 2 rows.Next row - (K5, K2tog) x2, K1 (13sts)P1 row.Next row - (K4, K2tog) x2, K1 (11sts)P1 row.St st 10 rows.(K2tog) to end. (6sts)(P2tog) to end. (3sts)B+T tightly.
Legs (make 2) Start at sole of foot - Cast on 4 Sts
To make up Sew from B+T down bottom of the leg , stuff as you go.Continue sewing the sole of the foot to cast on edge. Using an in and outstitch gather the cast on stitches and pull tight to close. This should createa flat sole. Pass the needle through the middle of the sole up through thestuffing in the leg and out at the top. Pull slightly to make a small indent inthe sole. Fasten securely.
4

ValentinesBear
Arms (make 2) Start with the hand - Cast on 4 StsInc K wise into every stitch (8sts).P1 row.K1 (K1, inc1) to st, K1 (11sts).P1 row.(K3, inc1) to last 3 sts, K3 (13sts).P1 row.Start with K row, St st 2 rows.Next row - K5, K2tog, K6 (12sts).P1 row.Next row - (K4, K2tog) twice (10sts).P1 row.St st 8 rows.(K2tog) to end.B+T tightly. To make up Sew from B+T down bottom of the arm and stuff as you goContinue sewing the hand down to cast on edge. Using an in and out stitchgather the cast on stitches and pull tight to close. Leave the hand 'domed',do not flatten like the sole of the foot. You can position and sew the arms and legs to the bear's body in anyposition you prefer, either sitting or standing.
5

ValentinesBear
K 1 row.(P2, P2tog) to end (12sts).K1 row.(P1, P2 tog) to last 2 sts, P2 (8sts).(K2tog) to end (4 sts).B+T tightly
Cast on 7 sts in fawnKw inc 1 into each (14 sts)Stst 3 rows(K2tog) to end (7sts)P1, (P2tog) to end (4sts)B+T
Muzzle Cast on 16 sts in fawn
To make up Sew from B+T end to cast on edge to make a domed muzzle an stuff. Attach tobear's face. Using black yarn/thread embroider a nose and mouth or use toy eyesif required. Blush bears cheeks with pink sharpie marker Ears (make 2 )
To make up. Draw up tight and sew edge seams together. Move seam to middle back andflatten piece out. Sew base closed and then stitch to bear as pictured.
6

ValentinesBear
The shorts Starting with one legNo.10 needles and Raspberry pinkCast on 16stsK 2 rowsJoin Baby pinkStst 2 rows starting PSt St 2 rows RaspberryLeave this leg on a spare needle and make a 2nd the exact same way. Put both legs on needles with wrong sides facingP across both legs in Baby pinkSt st 9 rows(Continue stripe pattern)P 1 row raspberryP 1 rowCast off KW. Straps (make 2 ) In RaspberryCast on 20 stsCast off These are sewn from the front as pictured, crossed over at the back andsewn to the waist band. We used 8mm Dark red heart buttons to finish the dungarees and amatching heart as the bears nose.
7
ValentinesBear
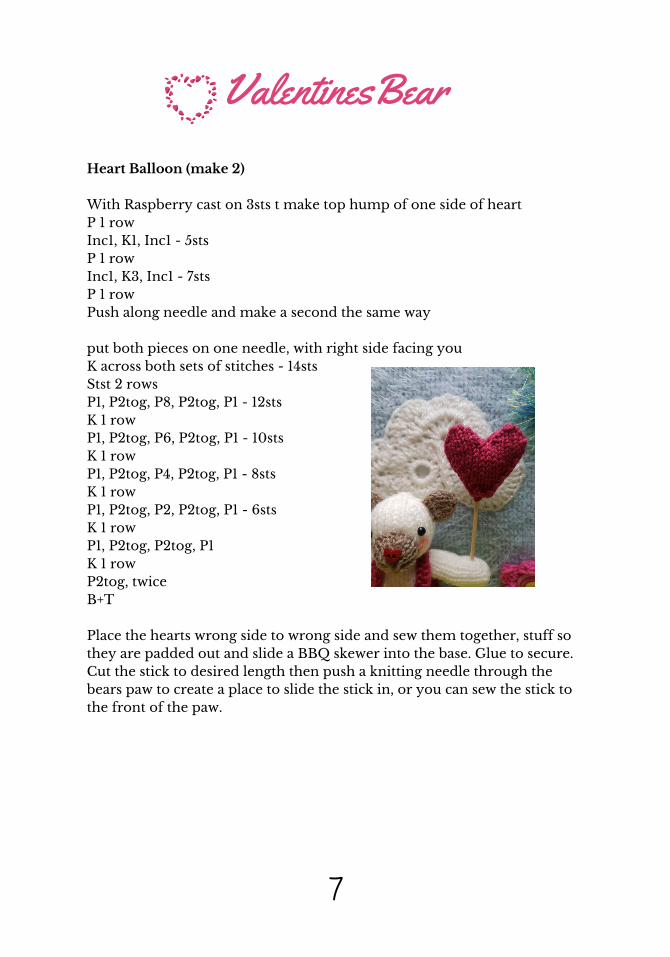
Heart Balloon (make 2) With Raspberry cast on 3sts t make top hump of one side of heartP 1 rowInc1, K1, Inc1 - 5stsP 1 rowInc1, K3, Inc1 - 7stsP 1 rowPush along needle and make a second the same way put both pieces on one needle, with right side facing youK across both sets of stitches - 14stsStst 2 rowsP1, P2tog, P8, P2tog, P1 - 12stsK 1 rowP1, P2tog, P6, P2tog, P1 - 10stsK 1 rowP1, P2tog, P4, P2tog, P1 - 8stsK 1 rowP1, P2tog, P2, P2tog, P1 - 6stsK 1 rowP1, P2tog, P2tog, P1K 1 rowP2tog, twiceB+T Place the hearts wrong side to wrong side and sew them together, stuff sothey are padded out and slide a BBQ skewer into the base. Glue to secure. Cut the stick to desired length then push a knitting needle through thebears paw to create a place to slide the stick in, or you can sew the stick tothe front of the paw.
7