
STITCH ANATOMY RIB STITCH PATTERNS - The Knitting … Stitch Patterns.pdfof knit and purl stitches....
7
9 Like other articles in the Stitch Anatomy Series, this lesson discusses the stitch patterns in detail, warns of potential problems in working them, and provides tips for improving their appearance. For those interested, the included patterns outline the steps involved in designing with the stitch patterns and other ways to customize the cowls. We'll focus on rib patterns that go beyond the basics and suggest ways to incorporate these decorative rib stitches to add interest to garments and accessories. Although Brioche and fisherman ribs result in rib patterns, they are considered separate categories of knitting and will not be included here. For an extensive discussion of Brioche stitch see Trudianne Temple’s article in the Nov 2014-Jan 2015 issue of Cast On. What is Ribbing? The most basic kinds of ribbings are composed of knit and purl stitches worked alternately and lined up vertically. This vertical arrangement is very elastic due to the tendency of the columns of knit stitches to protrude and those of purl stitches to recede, naturally drawing the fabric together. Working the ribbing on needles that are smaller than the project needles adds to this elasticity. Most ribbings lie flat, making them ideal for edges on all sorts of knitted items. We are all familiar with the most common rib patterns of k1p1, often called Single Rib, and k2p2, called Double Rib. continued on page 10 RIB STITCH PATTERNS BY JANET BOCHIN AND SHARON LEVERING STITCH ANATOMY SPIRAL MOCK CABLE COWL TKGA.com Copyright 2015 The Knitting Guild Association. Cast On content is for readers’ personal use and may not be shared or reproduced without permission from the editors. BACK TO CONTENTS
Transcript of STITCH ANATOMY RIB STITCH PATTERNS - The Knitting … Stitch Patterns.pdfof knit and purl stitches....

9
Like other articles in the Stitch Anatomy Series, this lesson discusses the stitch patterns in detail, warns of potential problems in working them, and provides tips for improving their appearance. For those interested, the included patterns outline the steps involved in designing with the stitch patterns and other ways to customize the cowls.
We'll focus on rib patterns that go beyond the basics and suggest ways to incorporate these decorative rib stitches to add interest to garments and accessories. Although Brioche and fisherman ribs result in rib patterns, they are considered separate categories of knitting and will not be included here. For an extensive discussion of Brioche stitch see Trudianne Temple’s article in the Nov 2014-Jan 2015 issueof Cast On.
What is Ribbing?The most basic kinds of ribbings are composed of knit and purl stitches worked alternately and lined up vertically. This vertical arrangement is very elastic due to the tendency of the columns of knit stitches to protrude and those of purl stitches to recede, naturally drawing the fabric together. Working the ribbing on needles that are smaller than the project needles adds to this elasticity. Most ribbings lie flat, making them ideal for edges on all sorts of knitted items.
We are all familiar with the most common rib patterns of k1p1, often called Single Rib, and k2p2, called Double Rib.
continued on page 10
RIB STITCHPATTERNSBY JANET BOCHIN AND SHARON LEVERING
STITCH ANATOMY
SPIRAL MOCK
CABLE COWL
''TKGA.com
Copyright 2015 The Knitting Guild Association. Cast On content is for readers’ personal use and may not be shared or reproduced without permission from the editors.
BACK TOCONTENTS
10
continued from page 9
These are also written as 1x1 or 2x2 rib, respectively, and are called even, or regular, rib patterns because they have an equal number of knit and purl stitches. These can also be 3x3, 4x4, etc. The fewer stitches in this knit/purl combination, the more stretchy the resulting fabric. So a 1x1 rib pattern will pull in more than a 2x2 rib pattern, and a 4x4 rib pattern will not pull in much at all. This is important since sometimes a less stretchy rib is desirable, such as a border on a jacket or blanket or an allover pattern. However, while at first a 2x2 rib will appear tighter than a 1x1 rib, over time and with wear the softer rib will relax and lose some of its elasticity. Uneven, or irregular, rib patterns usually have a single knit stitch alternating with 2 or more purl stitches, as in 1x2, 1x3, 1x4, and so on, but other combinations may also be seen, such as 2x3, 2x4, etc. Similarly, the fewer purl stitches, the more stretchy the fabric. Both even and uneven rib patterns are reversible, with the even patterns looking identical on both sides and the uneven types appearing quite different on the reverse side. Either side of uneven rib patterns may be considered the right side with a significant difference. If the single knit stitch side is used as the right side, the “rib” will stand out from the purl stitches, whereas if the single knit stitch is on the wrong side, this same “rib” will now be a purl stitch and recede into the (now) predominant knit stitches.
Ribbing stitch patterns do not need to be simply knits and purls; they can consist of broken ribs, cables or crossed stitches, yarnovers or eyelets, slipped stitches, twisted stitches, or any combination of these.
Horizontal stripes of color or vertical stripes of corrugated ribbing are also appropriate ribbing choices, as are diagonal patterns. Keep in mind that some, especially broken ribs or diagonal patterns, will be less elastic than others. Many are reversible with similar or different yet still attractive patterns on the wrong side, making them appropriate for scarves and cowls.
Uses for RibbingRibbings are most commonly used as borders on garments because they provide a firm foundation and support, do not curl, help maintain shape, and add to better and longer wear. When used as borders, most ribbings are intended to draw in a little more than the rest of the garment, so they are usually worked on smaller needles and with fewer stitches than the body of the garment. Increases are often worked on the last row of ribbing before starting the main pattern stitch. The deeper the
ribbing, the more it will pull in, so waistbands of sweaters as well as cuffs of sleeves, gloves, and mittens are best if they are at least 2.5" deep. Of course, for smaller sizes and children’s garments this will be less. Ribbing stitch borders are also used on neckbands and collars, button bands and lower edges of hats. In those areas, however, they do not need to be as deep, as they are not intended to draw in as much.
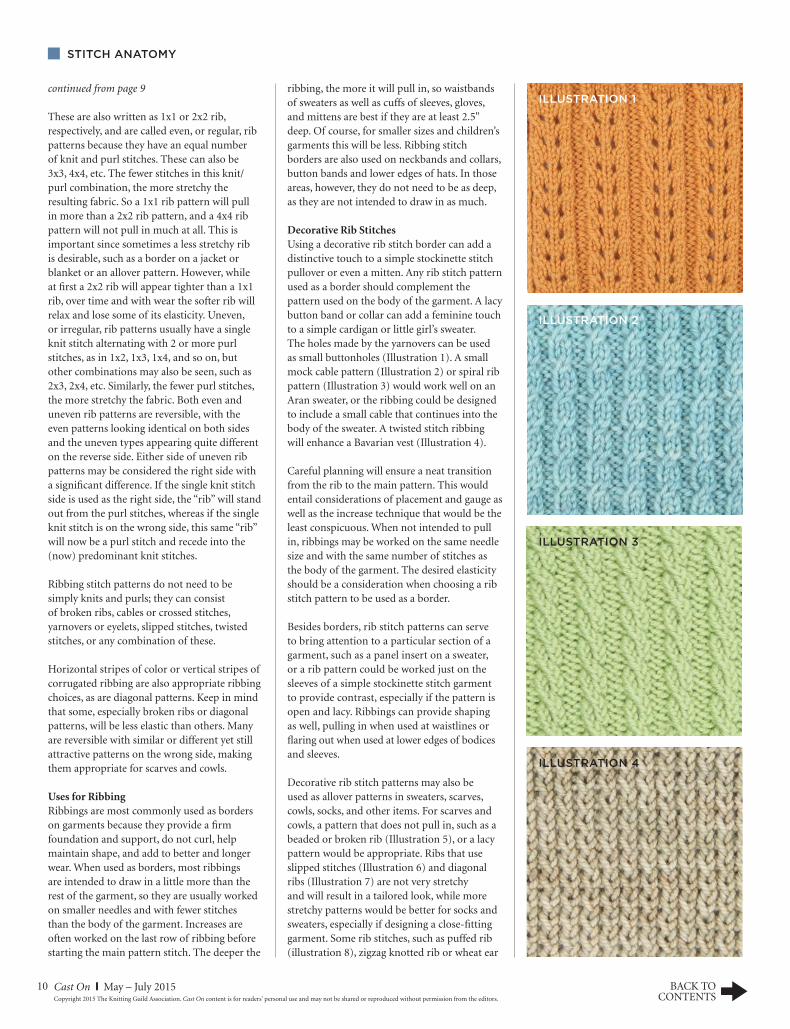
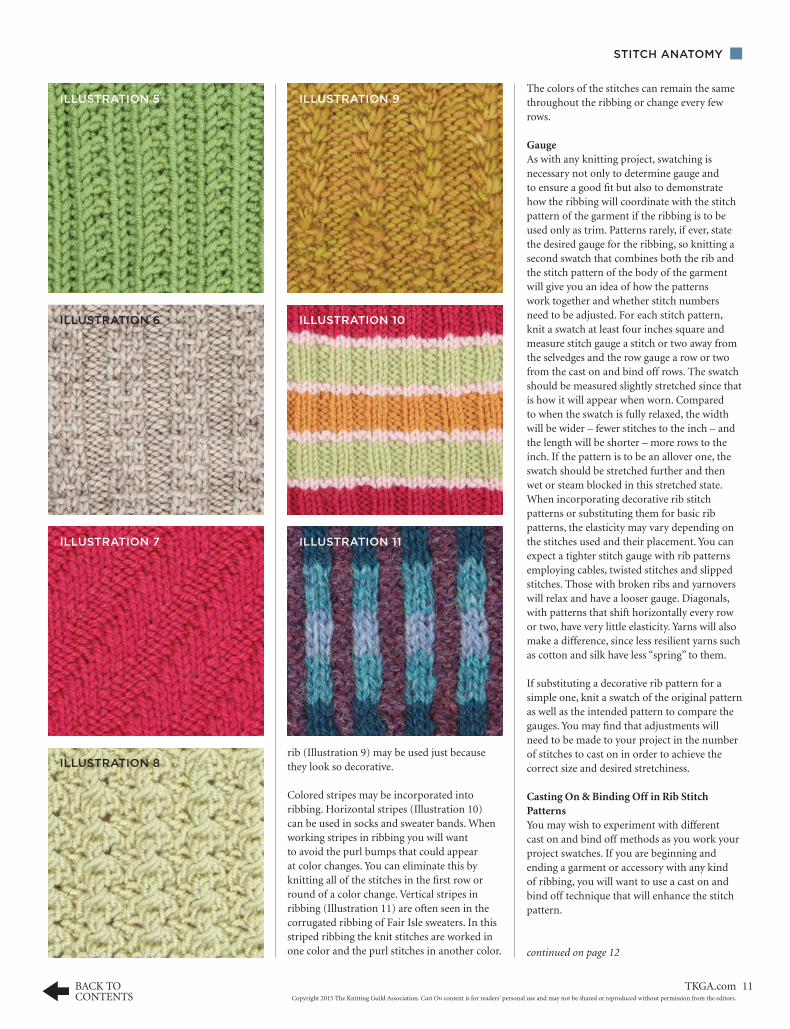
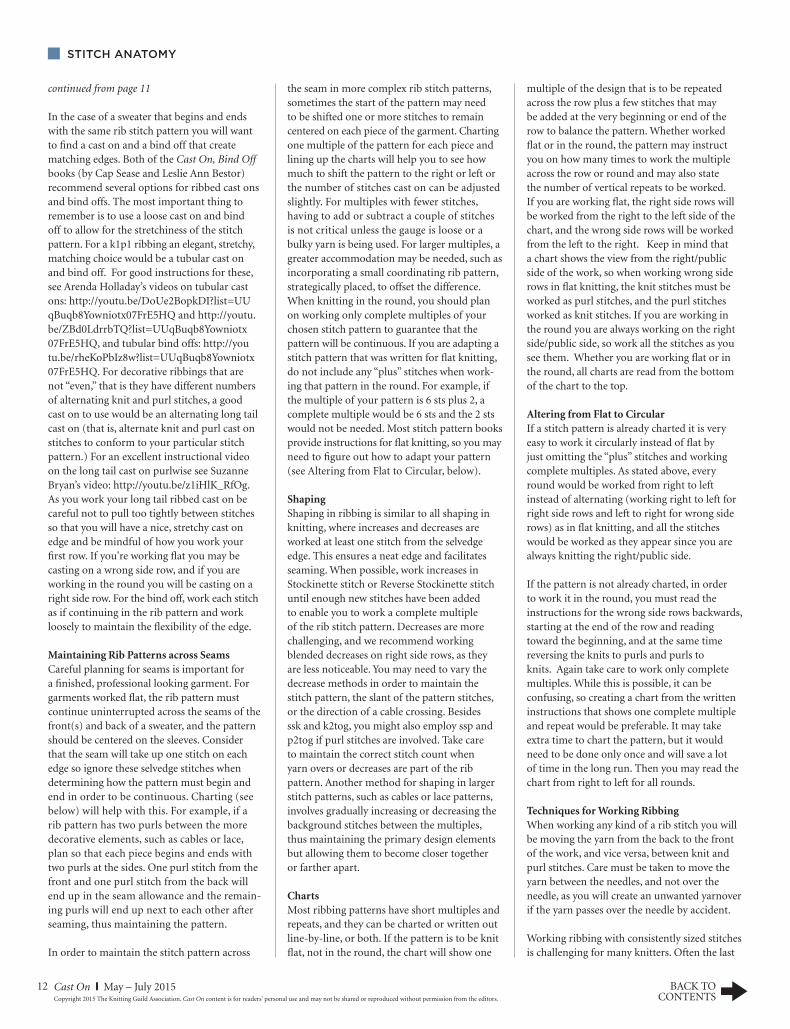
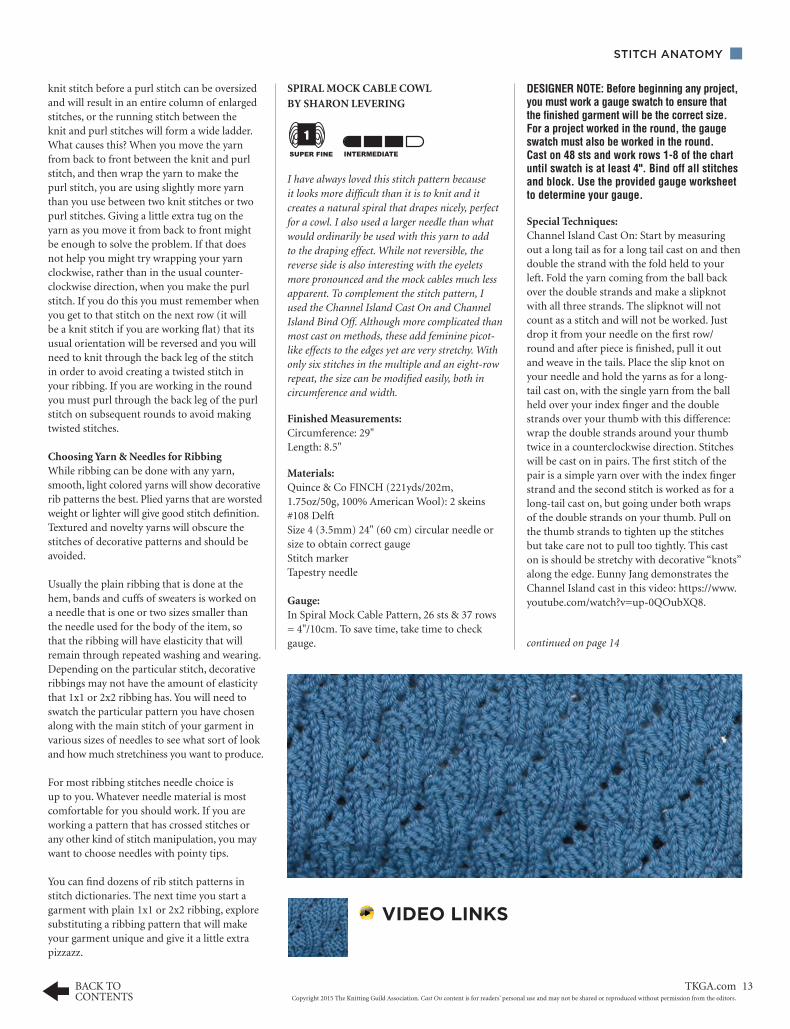
Decorative Rib StitchesUsing a decorative rib stitch border can add a distinctive touch to a simple stockinette stitch pullover or even a mitten. Any rib stitch pattern used as a border should complement the pattern used on the body of the garment. A lacy button band or collar can add a feminine touch to a simple cardigan or little girl’s sweater. The holes made by the yarnovers can be used as small buttonholes (Illustration 1). A small mock cable pattern (Illustration 2) or spiral rib pattern (Illustration 3) would work well on an Aran sweater, or the ribbing could be designed to include a small cable that continues into the body of the sweater. A twisted stitch ribbing will enhance a Bavarian vest (Illustration 4).
Careful planning will ensure a neat transition from the rib to the main pattern. This would entail considerations of placement and gauge as well as the increase technique that would be the least conspicuous. When not intended to pull in, ribbings may be worked on the same needle size and with the same number of stitches as the body of the garment. The desired elasticity should be a consideration when choosing a rib stitch pattern to be used as a border.
Besides borders, rib stitch patterns can serve to bring attention to a particular section of a garment, such as a panel insert on a sweater, or a rib pattern could be worked just on the sleeves of a simple stockinette stitch garment to provide contrast, especially if the pattern is open and lacy. Ribbings can provide shaping as well, pulling in when used at waistlines or flaring out when used at lower edges of bodices and sleeves.
Decorative rib stitch patterns may also be used as allover patterns in sweaters, scarves, cowls, socks, and other items. For scarves and cowls, a pattern that does not pull in, such as a beaded or broken rib (Illustration 5), or a lacy pattern would be appropriate. Ribs that use slipped stitches (Illustration 6) and diagonal ribs (Illustration 7) are not very stretchy and will result in a tailored look, while more stretchy patterns would be better for socks and sweaters, especially if designing a close-fitting garment. Some rib stitches, such as puffed rib (illustration 8), zigzag knotted rib or wheat ear
STITCH ANATOMY
ILLUSTRATION 1
ILLUSTRATION 2
ILLUSTRATION 3
ILLUSTRATION 4
Cast On I May – July 2015Copyright 2015 The Knitting Guild Association. Cast On content is for readers’ personal use and may not be shared or reproduced without permission from the editors.
BACK TOCONTENTS
11
rib (Illustration 9) may be used just because they look so decorative.
Colored stripes may be incorporated into ribbing. Horizontal stripes (Illustration 10) can be used in socks and sweater bands. When working stripes in ribbing you will want to avoid the purl bumps that could appear at color changes. You can eliminate this by knitting all of the stitches in the first row or round of a color change. Vertical stripes in ribbing (Illustration 11) are often seen in the corrugated ribbing of Fair Isle sweaters. In this striped ribbing the knit stitches are worked in one color and the purl stitches in another color.
The colors of the stitches can remain the same throughout the ribbing or change every few rows.
GaugeAs with any knitting project, swatching is necessary not only to determine gauge and to ensure a good fit but also to demonstrate how the ribbing will coordinate with the stitch pattern of the garment if the ribbing is to be used only as trim. Patterns rarely, if ever, state the desired gauge for the ribbing, so knitting a second swatch that combines both the rib and the stitch pattern of the body of the garment will give you an idea of how the patterns work together and whether stitch numbers need to be adjusted. For each stitch pattern, knit a swatch at least four inches square and measure stitch gauge a stitch or two away from the selvedges and the row gauge a row or two from the cast on and bind off rows. The swatch should be measured slightly stretched since that is how it will appear when worn. Compared to when the swatch is fully relaxed, the width will be wider – fewer stitches to the inch – and the length will be shorter – more rows to the inch. If the pattern is to be an allover one, the swatch should be stretched further and then wet or steam blocked in this stretched state. When incorporating decorative rib stitch patterns or substituting them for basic rib patterns, the elasticity may vary depending on the stitches used and their placement. You can expect a tighter stitch gauge with rib patterns employing cables, twisted stitches and slipped stitches. Those with broken ribs and yarnovers will relax and have a looser gauge. Diagonals, with patterns that shift horizontally every row or two, have very little elasticity. Yarns will also make a difference, since less resilient yarns such as cotton and silk have less “spring” to them.
If substituting a decorative rib pattern for a simple one, knit a swatch of the original pattern as well as the intended pattern to compare the gauges. You may find that adjustments will need to be made to your project in the number of stitches to cast on in order to achieve the correct size and desired stretchiness.
Casting On & Binding Off in Rib Stitch PatternsYou may wish to experiment with different cast on and bind off methods as you work your project swatches. If you are beginning and ending a garment or accessory with any kind of ribbing, you will want to use a cast on and bind off technique that will enhance the stitch pattern.
continued on page 12
STITCH ANATOMY
ILLUSTRATION 5
ILLUSTRATION 6
ILLUSTRATION 7
ILLUSTRATION 8
ILLUSTRATION 9
ILLUSTRATION 10
ILLUSTRATION 11
TKGA.comCopyright 2015 The Knitting Guild Association. Cast On content is for readers’ personal use and may not be shared or reproduced without permission from the editors.
BACK TOCONTENTS
12
continued from page 11
In the case of a sweater that begins and ends with the same rib stitch pattern you will want to find a cast on and a bind off that create matching edges. Both of the Cast On, Bind Off books (by Cap Sease and Leslie Ann Bestor) recommend several options for ribbed cast ons and bind offs. The most important thing to remember is to use a loose cast on and bind off to allow for the stretchiness of the stitch pattern. For a k1p1 ribbing an elegant, stretchy, matching choice would be a tubular cast on and bind off. For good instructions for these, see Arenda Holladay’s videos on tubular cast ons: http://youtu.be/DoUe2BopkDI?list=UUqBuqb8Yowniotx07FrE5HQ and http://youtu.be/ZBd0LdrrbTQ?list=UUqBuqb8Yowniotx07FrE5HQ, and tubular bind offs: http://youtu.be/rheKoPbIz8w?list=UUqBuqb8Yowniotx07FrE5HQ. For decorative ribbings that are not “even,” that is they have different numbers of alternating knit and purl stitches, a good cast on to use would be an alternating long tail cast on (that is, alternate knit and purl cast on stitches to conform to your particular stitch pattern.) For an excellent instructional video on the long tail cast on purlwise see Suzanne Bryan’s video: http://youtu.be/z1iHlK_RfOg.As you work your long tail ribbed cast on be careful not to pull too tightly between stitches so that you will have a nice, stretchy cast on edge and be mindful of how you work your first row. If you're working flat you may be casting on a wrong side row, and if you are working in the round you will be casting on a right side row. For the bind off, work each stitch as if continuing in the rib pattern and work loosely to maintain the flexibility of the edge.
Maintaining Rib Patterns across SeamsCareful planning for seams is important for a finished, professional looking garment. For garments worked flat, the rib pattern must continue uninterrupted across the seams of the front(s) and back of a sweater, and the pattern should be centered on the sleeves. Consider that the seam will take up one stitch on each edge so ignore these selvedge stitches when determining how the pattern must begin and end in order to be continuous. Charting (see below) will help with this. For example, if a rib pattern has two purls between the more decorative elements, such as cables or lace, plan so that each piece begins and ends with two purls at the sides. One purl stitch from the front and one purl stitch from the back will end up in the seam allowance and the remain- ing purls will end up next to each other after seaming, thus maintaining the pattern.
In order to maintain the stitch pattern across
the seam in more complex rib stitch patterns, sometimes the start of the pattern may need to be shifted one or more stitches to remain centered on each piece of the garment. Charting one multiple of the pattern for each piece and lining up the charts will help you to see how much to shift the pattern to the right or left or the number of stitches cast on can be adjusted slightly. For multiples with fewer stitches, having to add or subtract a couple of stitches is not critical unless the gauge is loose or a bulky yarn is being used. For larger multiples, a greater accommodation may be needed, such as incorporating a small coordinating rib pattern, strategically placed, to offset the difference.When knitting in the round, you should plan on working only complete multiples of your chosen stitch pattern to guarantee that the pattern will be continuous. If you are adapting a stitch pattern that was written for flat knitting, do not include any “plus” stitches when work-ing that pattern in the round. For example, if the multiple of your pattern is 6 sts plus 2, a complete multiple would be 6 sts and the 2 sts would not be needed. Most stitch pattern books provide instructions for flat knitting, so you may need to figure out how to adapt your pattern (see Altering from Flat to Circular, below).
ShapingShaping in ribbing is similar to all shaping in knitting, where increases and decreases are worked at least one stitch from the selvedge edge. This ensures a neat edge and facilitates seaming. When possible, work increases in Stockinette stitch or Reverse Stockinette stitch until enough new stitches have been added to enable you to work a complete multiple of the rib stitch pattern. Decreases are more challenging, and we recommend working blended decreases on right side rows, as they are less noticeable. You may need to vary the decrease methods in order to maintain the stitch pattern, the slant of the pattern stitches, or the direction of a cable crossing. Besides ssk and k2tog, you might also employ ssp and p2tog if purl stitches are involved. Take care to maintain the correct stitch count when yarn overs or decreases are part of the rib pattern. Another method for shaping in larger stitch patterns, such as cables or lace patterns, involves gradually increasing or decreasing the background stitches between the multiples, thus maintaining the primary design elements but allowing them to become closer together or farther apart.
ChartsMost ribbing patterns have short multiples and repeats, and they can be charted or written out line-by-line, or both. If the pattern is to be knit flat, not in the round, the chart will show one
multiple of the design that is to be repeated across the row plus a few stitches that may be added at the very beginning or end of the row to balance the pattern. Whether worked flat or in the round, the pattern may instruct you on how many times to work the multiple across the row or round and may also state the number of vertical repeats to be worked. If you are working flat, the right side rows will be worked from the right to the left side of the chart, and the wrong side rows will be worked from the left to the right. Keep in mind that a chart shows the view from the right/public side of the work, so when working wrong side rows in flat knitting, the knit stitches must be worked as purl stitches, and the purl stitches worked as knit stitches. If you are working in the round you are always working on the right side/public side, so work all the stitches as you see them. Whether you are working flat or in the round, all charts are read from the bottom of the chart to the top.
Altering from Flat to CircularIf a stitch pattern is already charted it is very easy to work it circularly instead of flat by just omitting the “plus” stitches and working complete multiples. As stated above, every round would be worked from right to left instead of alternating (working right to left for right side rows and left to right for wrong side rows) as in flat knitting, and all the stitches would be worked as they appear since you are always knitting the right/public side.
If the pattern is not already charted, in order to work it in the round, you must read the instructions for the wrong side rows backwards, starting at the end of the row and reading toward the beginning, and at the same time reversing the knits to purls and purls to knits. Again take care to work only complete multiples. While this is possible, it can be confusing, so creating a chart from the written instructions that shows one complete multiple and repeat would be preferable. It may take extra time to chart the pattern, but it would need to be done only once and will save a lot of time in the long run. Then you may read the chart from right to left for all rounds.
Techniques for Working RibbingWhen working any kind of a rib stitch you will be moving the yarn from the back to the front of the work, and vice versa, between knit and purl stitches. Care must be taken to move the yarn between the needles, and not over the needle, as you will create an unwanted yarnover if the yarn passes over the needle by accident.
Working ribbing with consistently sized stitches is challenging for many knitters. Often the last
STITCH ANATOMY
Cast On I May – July 2015Copyright 2015 The Knitting Guild Association. Cast On content is for readers’ personal use and may not be shared or reproduced without permission from the editors.
BACK TOCONTENTS
13
knit stitch before a purl stitch can be oversized and will result in an entire column of enlarged stitches, or the running stitch between the knit and purl stitches will form a wide ladder. What causes this? When you move the yarn from back to front between the knit and purl stitch, and then wrap the yarn to make the purl stitch, you are using slightly more yarn than you use between two knit stitches or two purl stitches. Giving a little extra tug on the yarn as you move it from back to front might be enough to solve the problem. If that does not help you might try wrapping your yarn clockwise, rather than in the usual counter-clockwise direction, when you make the purl stitch. If you do this you must remember when you get to that stitch on the next row (it will be a knit stitch if you are working flat) that its usual orientation will be reversed and you will need to knit through the back leg of the stitch in order to avoid creating a twisted stitch in your ribbing. If you are working in the round you must purl through the back leg of the purl stitch on subsequent rounds to avoid making twisted stitches.
Choosing Yarn & Needles for RibbingWhile ribbing can be done with any yarn, smooth, light colored yarns will show decorative rib patterns the best. Plied yarns that are worsted weight or lighter will give good stitch definition. Textured and novelty yarns will obscure the stitches of decorative patterns and should be avoided.
Usually the plain ribbing that is done at the hem, bands and cuffs of sweaters is worked on a needle that is one or two sizes smaller than the needle used for the body of the item, so that the ribbing will have elasticity that will remain through repeated washing and wearing. Depending on the particular stitch, decorative ribbings may not have the amount of elasticity that 1x1 or 2x2 ribbing has. You will need to swatch the particular pattern you have chosen along with the main stitch of your garment in various sizes of needles to see what sort of look and how much stretchiness you want to produce.
For most ribbing stitches needle choice is up to you. Whatever needle material is most comfortable for you should work. If you are working a pattern that has crossed stitches or any other kind of stitch manipulation, you may want to choose needles with pointy tips.
You can find dozens of rib stitch patterns in stitch dictionaries. The next time you start a garment with plain 1x1 or 2x2 ribbing, explore substituting a ribbing pattern that will make your garment unique and give it a little extra pizzazz.
SPIRAL MOCK CABLE COWL
BY SHARON LEVERING
I have always loved this stitch pattern because it looks more difficult than it is to knit and it creates a natural spiral that drapes nicely, perfect for a cowl. I also used a larger needle than what would ordinarily be used with this yarn to add to the draping effect. While not reversible, the reverse side is also interesting with the eyelets more pronounced and the mock cables much less apparent. To complement the stitch pattern, I used the Channel Island Cast On and Channel Island Bind Off. Although more complicated than most cast on methods, these add feminine picot-like effects to the edges yet are very stretchy. With only six stitches in the multiple and an eight-row repeat, the size can be modified easily, both in circumference and width.
Finished Measurements:Circumference: 29"Length: 8.5"
Materials:Quince & Co FINCH (221yds/202m, 1.75oz/50g, 100% American Wool): 2 skeins #108 DelftSize 4 (3.5mm) 24" (60 cm) circular needle or size to obtain correct gaugeStitch markerTapestry needle
Gauge:In Spiral Mock Cable Pattern, 26 sts & 37 rows = 4"/10cm. To save time, take time to check gauge.
DESIGNER NOTE: Before beginning any project, you must work a gauge swatch to ensure that the finished garment will be the correct size. For a project worked in the round, the gauge swatch must also be worked in the round. Cast on 48 sts and work rows 1-8 of the chart until swatch is at least 4". Bind off all stitches and block. Use the provided gauge worksheet to determine your gauge.
Special Techniques:Channel Island Cast On: Start by measuring out a long tail as for a long tail cast on and then double the strand with the fold held to your left. Fold the yarn coming from the ball back over the double strands and make a slipknot with all three strands. The slipknot will not count as a stitch and will not be worked. Just drop it from your needle on the first row/round and after piece is finished, pull it out and weave in the tails. Place the slip knot on your needle and hold the yarns as for a long-tail cast on, with the single yarn from the ball held over your index finger and the double strands over your thumb with this difference: wrap the double strands around your thumb twice in a counterclockwise direction. Stitches will be cast on in pairs. The first stitch of the pair is a simple yarn over with the index finger strand and the second stitch is worked as for a long-tail cast on, but going under both wraps of the double strands on your thumb. Pull on the thumb strands to tighten up the stitches but take care not to pull too tightly. This cast on is should be stretchy with decorative “knots” along the edge. Eunny Jang demonstrates the Channel Island cast in this video: https://www.youtube.com/watch?v=up-0QOubXQ8.
continued on page 14
STITCH ANATOMY
VIDEO LINKS
TKGA.comCopyright 2015 The Knitting Guild Association. Cast On content is for readers’ personal use and may not be shared or reproduced without permission from the editors.
BACK TOCONTENTS
14
continued from page 13
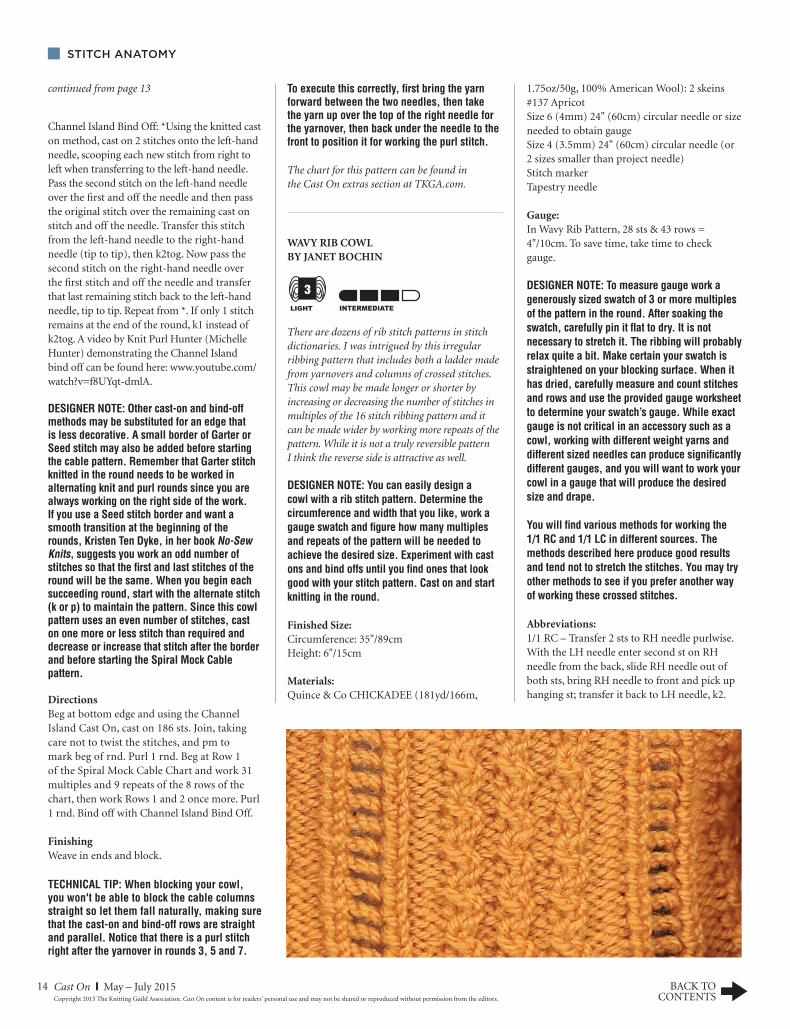
Channel Island Bind Off: *Using the knitted cast on method, cast on 2 stitches onto the left-hand needle, scooping each new stitch from right to left when transferring to the left-hand needle. Pass the second stitch on the left-hand needle over the first and off the needle and then pass the original stitch over the remaining cast on stitch and off the needle. Transfer this stitch from the left-hand needle to the right-hand needle (tip to tip), then k2tog. Now pass the second stitch on the right-hand needle over the first stitch and off the needle and transfer that last remaining stitch back to the left-hand needle, tip to tip. Repeat from *. If only 1 stitch remains at the end of the round, k1 instead of k2tog. A video by Knit Purl Hunter (Michelle Hunter) demonstrating the Channel Island bind off can be found here: www.youtube.com/watch?v=f8UYqt-dmlA.
DESIGNER NOTE: Other cast-on and bind-off methods may be substituted for an edge that is less decorative. A small border of Garter or Seed stitch may also be added before starting the cable pattern. Remember that Garter stitch knitted in the round needs to be worked in alternating knit and purl rounds since you are always working on the right side of the work. If you use a Seed stitch border and want a smooth transition at the beginning of the rounds, Kristen Ten Dyke, in her book No-Sew Knits, suggests you work an odd number of stitches so that the first and last stitches of the round will be the same. When you begin each succeeding round, start with the alternate stitch (k or p) to maintain the pattern. Since this cowl pattern uses an even number of stitches, cast on one more or less stitch than required and decrease or increase that stitch after the border and before starting the Spiral Mock Cable pattern.
DirectionsBeg at bottom edge and using the Channel Island Cast On, cast on 186 sts. Join, taking care not to twist the stitches, and pm to mark beg of rnd. Purl 1 rnd. Beg at Row 1 of the Spiral Mock Cable Chart and work 31 multiples and 9 repeats of the 8 rows of the chart, then work Rows 1 and 2 once more. Purl 1 rnd. Bind off with Channel Island Bind Off.
FinishingWeave in ends and block.
TECHNICAL TIP: When blocking your cowl, you won't be able to block the cable columns straight so let them fall naturally, making sure that the cast-on and bind-off rows are straight and parallel. Notice that there is a purl stitch right after the yarnover in rounds 3, 5 and 7.
To execute this correctly, first bring the yarn forward between the two needles, then take the yarn up over the top of the right needle for the yarnover, then back under the needle to the front to position it for working the purl stitch.
The chart for this pattern can be found in the Cast On extras section at TKGA.com.
WAVY RIB COWL BY JANET BOCHIN
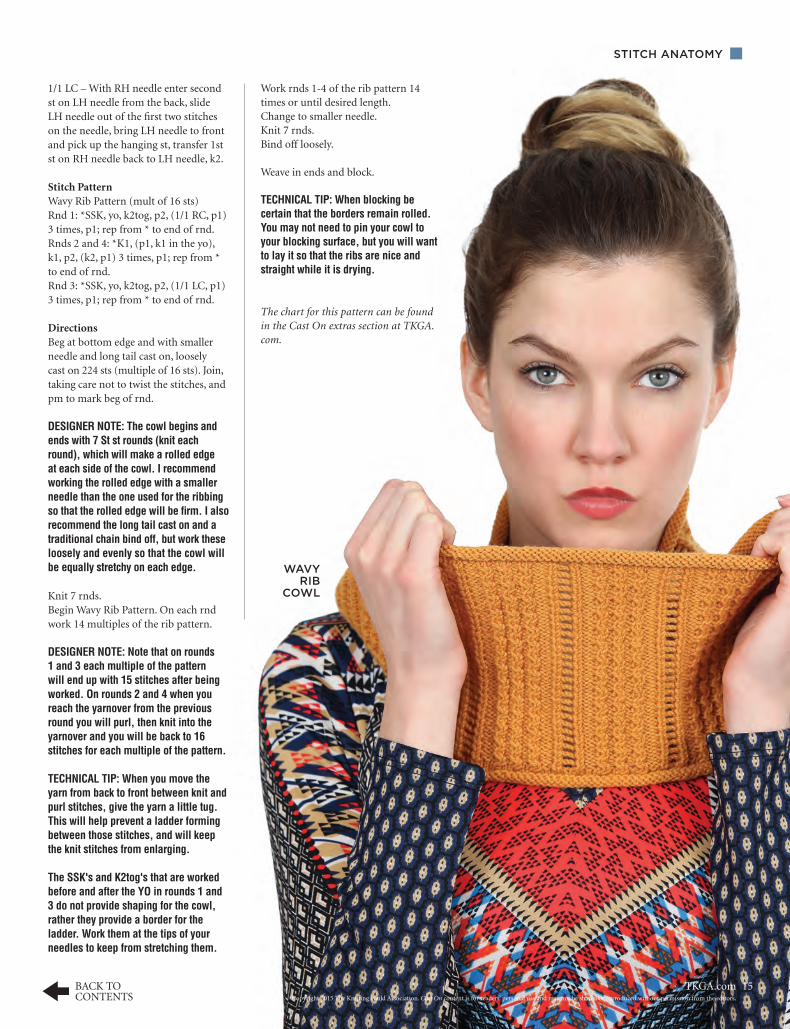
There are dozens of rib stitch patterns in stitch dictionaries. I was intrigued by this irregular ribbing pattern that includes both a ladder made from yarnovers and columns of crossed stitches. This cowl may be made longer or shorter by increasing or decreasing the number of stitches in multiples of the 16 stitch ribbing pattern and it can be made wider by working more repeats of the pattern. While it is not a truly reversible pattern I think the reverse side is attractive as well.
DESIGNER NOTE: You can easily design a cowl with a rib stitch pattern. Determine the circumference and width that you like, work a gauge swatch and figure how many multiples and repeats of the pattern will be needed to achieve the desired size. Experiment with cast ons and bind offs until you find ones that look good with your stitch pattern. Cast on and start knitting in the round.
Finished Size:Circumference: 35"/89cm Height: 6"/15cm
Materials: Quince & Co CHICKADEE (181yd/166m,
1.75oz/50g, 100% American Wool): 2 skeins #137 ApricotSize 6 (4mm) 24" (60cm) circular needle or size needed to obtain gaugeSize 4 (3.5mm) 24" (60cm) circular needle (or 2 sizes smaller than project needle)Stitch markerTapestry needle
Gauge:In Wavy Rib Pattern, 28 sts & 43 rows = 4"/10cm. To save time, take time to check gauge.
DESIGNER NOTE: To measure gauge work a generously sized swatch of 3 or more multiples of the pattern in the round. After soaking the swatch, carefully pin it flat to dry. It is not necessary to stretch it. The ribbing will probably relax quite a bit. Make certain your swatch is straightened on your blocking surface. When it has dried, carefully measure and count stitches and rows and use the provided gauge worksheet to determine your swatch’s gauge. While exact gauge is not critical in an accessory such as a cowl, working with different weight yarns and different sized needles can produce significantly different gauges, and you will want to work your cowl in a gauge that will produce the desired size and drape.
You will find various methods for working the 1/1 RC and 1/1 LC in different sources. The methods described here produce good results and tend not to stretch the stitches. You may try other methods to see if you prefer another way of working these crossed stitches.
Abbreviations:1/1 RC – Transfer 2 sts to RH needle purlwise. With the LH needle enter second st on RH needle from the back, slide RH needle out of both sts, bring RH needle to front and pick up hanging st; transfer it back to LH needle, k2.
STITCH ANATOMY
Cast On I May – July 2015Copyright 2015 The Knitting Guild Association. Cast On content is for readers’ personal use and may not be shared or reproduced without permission from the editors.
BACK TOCONTENTS
15
STITCH ANATOMY
Work rnds 1-4 of the rib pattern 14 times or until desired length.Change to smaller needle.Knit 7 rnds.Bind off loosely. Weave in ends and block.
TECHNICAL TIP: When blocking be certain that the borders remain rolled. You may not need to pin your cowl to your blocking surface, but you will want to lay it so that the ribs are nice and straight while it is drying.
The chart for this pattern can be found in the Cast On extras section at TKGA.com.
1/1 LC – With RH needle enter second st on LH needle from the back, slide LH needle out of the first two stitches on the needle, bring LH needle to front and pick up the hanging st, transfer 1st st on RH needle back to LH needle, k2.
Stitch PatternWavy Rib Pattern (mult of 16 sts)Rnd 1: *SSK, yo, k2tog, p2, (1/1 RC, p1) 3 times, p1; rep from * to end of rnd.Rnds 2 and 4: *K1, (p1, k1 in the yo), k1, p2, (k2, p1) 3 times, p1; rep from * to end of rnd.Rnd 3: *SSK, yo, k2tog, p2, (1/1 LC, p1) 3 times, p1; rep from * to end of rnd.
DirectionsBeg at bottom edge and with smaller needle and long tail cast on, loosely cast on 224 sts (multiple of 16 sts). Join, taking care not to twist the stitches, and pm to mark beg of rnd.
DESIGNER NOTE: The cowl begins and ends with 7 St st rounds (knit each round), which will make a rolled edge at each side of the cowl. I recommend working the rolled edge with a smaller needle than the one used for the ribbing so that the rolled edge will be firm. I also recommend the long tail cast on and a traditional chain bind off, but work these loosely and evenly so that the cowl will be equally stretchy on each edge.
Knit 7 rnds.Begin Wavy Rib Pattern. On each rnd work 14 multiples of the rib pattern.
DESIGNER NOTE: Note that on rounds 1 and 3 each multiple of the pattern will end up with 15 stitches after being worked. On rounds 2 and 4 when you reach the yarnover from the previous round you will purl, then knit into the yarnover and you will be back to 16 stitches for each multiple of the pattern.
TECHNICAL TIP: When you move the yarn from back to front between knit and purl stitches, give the yarn a little tug. This will help prevent a ladder forming between those stitches, and will keep the knit stitches from enlarging.
The SSK's and K2tog's that are worked before and after the YO in rounds 1 and 3 do not provide shaping for the cowl, rather they provide a border for the ladder. Work them at the tips of your needles to keep from stretching them.
WAVYRIB
COWL
TKGA.comCopyright 2015 The Knitting Guild Association. Cast On content is for readers’ personal use and may not be shared or reproduced without permission from the editors.
BACK TOCONTENTS


![400 Knitting Stitches Great Stitch Patterns[Team Nanban][TPB]](https://static.fdocuments.in/doc/165x107/544d158eb1af9fee168b48a5/400-knitting-stitches-great-stitch-patternsteam-nanbantpb.jpg)