Visual Basic for Excel 2003 - TalkTalk Business Basic using Excel.pdf · workbook that you are...
36
Visual Basic for Excel 2003 Practical workbook Work through all the examples Aims and Learning Objectives By the end of these notes, you will know the basics of programming using Visual Basic for Excel. You will also be able to: • record macros; • write small subroutines and functions to automate some of the processes in your spreadsheets; • use those functions within workbooks; • use Excel workbook functions within Visual Basic; • use Procedures; • display message boxes and obtain input from the user; • begin to apply error trapping to your procedures. viscalc
-
Upload
trankhuong -
Category
Documents
-
view
216 -
download
4
Transcript of Visual Basic for Excel 2003 - TalkTalk Business Basic using Excel.pdf · workbook that you are...

Visual Basic for Excel 2003
Practical workbook
Work through all the examples
Aims and Learning Objectives
By the end of these notes, you will know the basics of programming using Visual Basic for Excel. You will also be able to:
• record macros;
• write small subroutines and functions to automate some of the processes in your spreadsheets;
• use those functions within workbooks;
• use Excel workbook functions within Visual Basic;
• use Procedures;
• display message boxes and obtain input from the user;
• begin to apply error trapping to your procedures.
viscalc

.
Document Information
Format conventions The following format conventions are used in this document:
Computer input that you type is shown in a bold Courier font
http://194.81.113.53
Computer output, menu names and options, buttons, URLs are shown in a Courier font
Save, Go to, Refresh
Text that you must replace is shown in italics Enter your username Computer keys that you must press are in a bold Courier font and enclosed in angle brackets
<Enter>, <n>, <N>, </>
Notes are displayed in a shaded area for example, instructions for users of other software versions
Example text like this
Keyboard shortcuts The following keyboard shortcuts may be of use whilst using these notes:
<Alt><F11> To open the Visual Basic Editor (VBE) or switch between the VBE and your workbook.
<F1> Use within the VBE window to obtain help on VB functions, objects and properties. Click within the word you require help with (do not select the word) and press <F1>.
<F9> Toggle breakpoints – position your cursor on a macro statement within the Visual Basic editor and press <F9> to set a breakpoint. When the macro is run, processing is suspended at the breakpoint(s) to allow you to inspect variable values and see what is going on.
<Ctrl><Shift><F9> To clear all breakpoints. <F2> Use within the VBE window to display the Object Browser window.
Related documentation The following local documents are available from the Web:
Other books are available:
Writing Excel Macros, Steven Roman, (Excel 97 and 2000) O'Reilly http://www.oreilly.com/
Excel 97 Programming for Windows for Dummies, John Walkenbach
Excel 2000 Programming for Dummies, John Walkenbach
Excel 2002 Power Programming with VBA, John Walkenbach (Wiley and sons)

Contents
Format conventions
Keyboard shortcuts
Related documentation
Task 1 Virus protection .................................................................................1
Task 2 Recording a macro.............................................................................2
Task 3 Relative reference macros.................................................................3
Task 4 Editing a recorded macro .................................................................5
Task 5 Simple loop structures.......................................................................7
Task 6 Debugging a macro............................................................................9
Task 7 Using a Range variable....................................................................10
Task 8 Creating a function..........................................................................11
Task 9 Rearrange macro .............................................................................12
Task 10 Yes/No inputs ...................................................................................14
Task 11 Error trapping and GoTo ...............................................................15
Task 12 MsgBox: Text & numerical values.................................................16
Task 13 Applying formats using macros......................................................17
Task 14 Text functions...................................................................................19
Task 15 Worksheet functions in VB.............................................................21
Task 16 InputBox...........................................................................................22 Appendix A Programming structures.............................................................. A-1 Appendix B Visual Basic objects .......................................................................B-1 Appendix C Declaration and scope of variables.............................................. C-1

Introduction
Excel is the University's recommended spreadsheet product for Windows on PCs. This document is intended for the more experienced user of Excel who wishes to make use of Visual Basic for Applications (VBA).
This document does not intend to teach VBA or even the concepts of object-oriented programming. Instead the examples in this document have been devised to show various aspects of Visual Basic for Excel. John Walkenbach's book in the "...for Dummies" series (see Related Information) gives a good explanation of these.
When attending courses in the training rooms in the Computer Centre the working files and solutions referred to in this document are located in the directory. If you are working on your own system, you need to download the file: copy it to a folder on your hard disk and run it before starting these notes.
In many cases there is continuation from one example to the next. If you wish to skip a particular exercise you will need to load the solution file to the previous example. When working through the examples you may also like to try modifying them in order to make them applicable to your own uses of Excel.
Prerequisites
It is essential that you have grasped the concepts of names and conditional functions, covered in Some experience of structured programming will be an advantage.
Acronyms
VB Visual Basic
VBA Visual Basic for Applications
VBE Visual Basic Editor
Visual Basic for Excel 2003
Visual Basic for Excel 2003 1
Task 1 Virus protection Objectives To enable/disable Excel’s macro virus protection.
Method You will use commands available on the Tools menu, dependant on the version of Excel.
Comments There are many problems with viruses that attach malicious executable files to applications. These are macros that are designed to cause damage and are built using all the flexibility and power that a Visual Basic Application offers the genuine programmer. Excel 97 and later versions have options to warn you if a spreadsheet or workbook that you are about to open contains macros. The solution files used for this practical document and the files you will create when working through these notes will contain macros that you will wish to run. You will therefore need to enable macros when opening them. However, it is not a habit you should get into - always consider each file on an individual basis and only enable macros if you believe them to be genuine. Incidentally, a poorly written macro could also cause unintended damage, so always check your own macros carefully before distributing them amongst colleagues/research groups.
1.1 Excel 97: From the Tools menu select Options.
Select the General tab and ensure that Macro virus protection is selected.
Click on OK.
1.2 Excel 2003: From the Tools menu, select Macro / Security.
Using the Security Level tab, read the available options and select Medium.
Click on OK.
Note With this option enabled you are prompted to take action if a spreadsheet contains macros. You can choose to open the workbook with the macros enabled, disabled or to not open the workbook at all. If you disable the macros, you will be unable to run any macros or recalculate custom functions. You can still examine and edit the macros. When you click Save on the File menu, the macros are saved. You can then close the workbook and open it again with macros enabled if you want to run the macros.
Enabling the Macro virus protection only offers a warning to the existence of a macro. It does not scan the workbook for known prank macros. Additional virus protection software is available for this purpose.

Visual Basic for Excel 2003
Visual Basic for Excel 2003 2
Task 2 Recording a macro Objectives To record a simple macro to perform a repetitive task automatically.
Method You will use the Record New Macro command to create a macro that you will use to insert a formatted heading in new workbooks.
Comments Although using macros may seem difficult at first, recording and playing back macros in Excel is really very easy.
2.1 Using a new (blank) workbook, select cell A1.
2.2 From the Tools menu, click on Macro and Record New Macro.
2.3 In the Macro Name box enter the macro name Company_name.
Assign a Shortcut key by selecting the Ctrl+ box and pressing <n>.
Under Store macro in, select This Workbook.
Edit Description as required and click on OK.
2.4 Select cell A1 and type HW University
Select A1 and format it as Times New Roman, size 24, Bold and Italic.
2.5 Stop recording the macro (click on the Stop icon on the Stop Recording toolbar).
Note If the Stop Recording toolbar is not available, you could display it using the View/Toolbars/Stop Recording. However, this would then be inserted into your macro and the toolbar displayed every time the macro is run. Use the alternative method instead:
From the Tools menu, select Macro and Stop Recording.
If you fail to stop recording the macro at this stage, you will create an infinite loop of record and playback.
2.6 Select Sheet2 and cell A1.
Note If you do not have a Sheet2; from the Insert menu, select Worksheet.
2.7 From the Tools menu, select Macro and Macros.
Select Company_name, click on Run and watch the result.
2.8 Select Sheet3 and click in cell A1.
Run the macro again, this time by pressing <Ctrl>+<n>.
2.9 Insert a new Worksheet and click in a cell other than cell A1.
Run the macro again and observe where the title heading and formatting are inserted.
2.10 Do not close the current workbook.

Visual Basic for Excel 2003
Visual Basic for Excel 2003 3
Task 3 Relative reference macros Objectives To record a simple macro to perform a repetitive task automatically, relative to the
macro’s starting point.
Method You will use the Relative reference toolbar command.
3.1 Create a new (blank) workbook.
3.2 Select A1. From the Tools menu, select Macro and Record New Macro.
3.3 In the Macro Name box enter the macro name Months.
Assign a shortcut key by selecting the Ctrl+ box and pressing <m>.
Again, store the macro in This Workbook.
Choose OK.
3.4 Click on the Relative reference icon (on the Stop Recording toolbar) to record your macro relative to its starting position. When this icon has a sunken aspect then Relative address mode is set.
Note In any session VBE “remembers” various settings such as these between “visits” so check the setting is the desired one before starting recording more macros. It is recommended that you specify the Relative Reference option so that your macro turns out correctly no matter what cell you start in, relative to your starting position. If this option is not selected, Excel uses absolute cell references. This means that the macro always starts in the same cell reference as in the previous task.
Note If the Stop Recording toolbar does not appear, first stop your macro from recording: -> From the Tools menu, select Macro, Stop Recording. Add the Stop Recording toolbar to the list of available options: -> From the View menu, select Toolbars, Customize. -> Select Stop Recording from the list of available toolbars and click on Close. You will now need to start recording your macro again from task 3.2.
3.5 Type January then copy (auto-fill) this across the row to cell L1, to get January:December.
Change the format of the cells; for example, font, size, bold, etc.
Format these cells so that they are vertically aligned (orientation 90 degrees).
Select the columns A:L and AutoFit the column selection to make them best-fit.
3.6 Click in cell A2 and Stop recording the macro (as in task 2.5).
3.7 Select Sheet2 and click in any cell other than A1.
Run the macro (<Ctrl>+<m>) and watch the result. Do not close the workbook.
Note These macros have been saved in the relevant workbooks. When the workbook is closed, any macros available within it will no longer be available to open workbooks. If you then want to create macros available for use in all your workbooks you will need to store them in the Personal Macro Workbook. To do this, select Personal Macro Workbook from the Store macro in the dropdown box of the Record Macro dialog box (in task 3.3).

Visual Basic for Excel 2003
Visual Basic for Excel 2003 4
If you want to make any changes to the macro (as in the next task) you will first need to unhide personal.xls. From the Window menu, select Unhide and with Personal.xls highlighted, click on OK.
When you quit Excel you will be asked if you wish to save the changes made to the personal macro workbook. If you click on Yes, the file personal.xls is opened as a hidden workbook.
Personal.xls is stored in the folder (for a default installation of Windows NT): c:\winnt\profiles\username\Application Data\Microsoft\Excel\XLStart OR: (for a default installation of Windows 2000): C:\Documents and Settings\username\Application Data\Microsoft\Excel\XLSTART.
The personal.xls workbook is opened next time you start Excel and is not available to other users.

Visual Basic for Excel 2003
Task 4 Editing a recorded macro Objectives To introduce the Visual Basic Editor (VBE).
Method You will use the VBE to view the macro created in the previous task.
Comments Quite complicated macros can be written simply by recording tasks as you have done above. However, Excel converts these tasks to a programming language called Visual Basic. More advanced macros can be written in this language.
4.1 From the Tools menu, select Macro and Macros.
Select Months and click on Edit.
4.2 The Microsoft VBE appears similar to figure 1.
The left-hand pane shows what projects (i.e. workbooks) are being used and lists the items (Sheets and Modules) in a particular project. In general the macros you create are stored in a module. Double-clicking on this pane allows navigation between modules in the same or different workbook.
The right-hand pane contains the contents of the current module you are working on.
Your macro is listed in the module window as a subroutine (Sub).
Figure 1 - Visual Basic editor (months macro)
4.3 Take a look at the programming used for your Months macro.
4.4 You may also like to look at the Company_name macro created in task 2 to see how the relative references make a difference. Using the left-hand pane, navigate to VBA Project (Book1)/Modules/Module1 (replacing Book1 with the name of your workbook).
4.5 Return to the Months module and, if you wish, make a small change (such as the font size). Make sure that you modify the last occurrence of .Size= in the macro. In some cases, such as the simple macros recorded so far, it may be quicker to delete and re-record the macro than edit the code.
4.6 From the File menu, select Close and Return to Microsoft Excel. If you made any changes to the code, run your macro again.
4.7 Close any open Excel workbooks, discarding changes.
Visual Basic for Excel 2003 5
Note This example shows how some objects are referenced in VBA and illustrates the WITH … END WITH programming structure. Appendices A and B define other programming structures, common programming terms, and give more information about Visual Basic objects. Now would be a good time to take a brief look at these notes.

Visual Basic for Excel 2003
Visual Basic for Excel 2003 6
Lines that are just text comments and not Visual Basic commands are preceded with a single quotation mark.
If you forget to assign a shortcut key (such as <Ctrl>+<m>) to a macro at the time of recording, you can assign one later by returning to the workbook and, from the Tools menu, selecting Macro/Macros and the Options button.

Visual Basic for Excel 2003
Visual Basic for Excel 2003 7
Task 5 Simple loop structures Objectives To write a macro to enter values into a workbook using a simple loop structure.
Method You will use the VBE.
Comments This task uses a single, self-contained subroutine and there is no need to explicitly declare any variables used. See the note at the end of this task for a caution on using variables in this manner.
5.1 Create a new (blank) workbook.
5.2 From the Tools menu, select Macro / Visual Basic Editor (or press <Alt>+<F11>).
5.3 From the Insert menu, select Module.
A new (empty) module appears in the right-hand pane of the VBE (if Option Explicit is entered at the top of your module, highlight and delete it). This module will contain your Visual Basic code.
5.4 From the Insert menu, select Procedure.
5.5 In the name box, type myloop and click on OK.
5.6 In Excel spreadsheets we refer to cells by their column letters and row numbers (for example, A1). In a Visual Basic procedure we use cells(1,1) or cells(1,"A") to refer to cells, as demonstrated in the following example.
Enter the code (in bold below): Public Sub myloop() Row = 1 For Number = 1 To 100 Cells(Row, "A") = Number Row = Row + 1 Next Number End Sub
In this example the column used is fixed (A). The first number is entered in column A, row 1 and increased by 1 until all the numbers (up to 100) have been entered.
5.7 From the Run menu, select Run Sub/UserForm (or press <F5>).
If you had more than one procedure (or form) you would be asked to select the one you wish to run.
5.8 Switch back to the worksheet to see the results (<Alt>+<F11>).
Note Terminology - your recorded macro has been saved as a subroutine within a module in your workbook.
Indentation is used in the program loop above. This makes it easier to follow the various structures within procedures. See Appendix A for a definition of common programming terms and examples of other ways of getting code to be repeated.
This example makes use of variables that we choose to call Row and Number. They contain temporary values that are changed as the macro is run. We have not specified what kind of values are to be stored in these variables. As programming beginners this is probably the best course of action. Visual Basic treats these variables as of type Variant and is very tolerant of the kind of information that can be stored in

Visual Basic for Excel 2003
Visual Basic for Excel 2003 8
them. Sometimes this tolerance can lead to undesirable errors. See Appendix C for information on how you can specify variables more precisely.

Visual Basic for Excel 2003
Task 6 Debugging a macro Objectives To introduce the Visual Basic debugger.
Method You will enter a mistake in the macro created in the previous task and use the debugging tools to correct your programming.
Comments Some mistakes in coding a program will cause Visual Basic to give an error message. Clicking on <Debug> will enter the VBE, highlighting the error.
6.1 Using the macro created in the previous task, switch to the VBE (press <Alt>+<F11>).
6.2 Alter the line Cells(Row, "A") = Number to:
Cells(Roww, "A") = Number
6.3 Re-run the macro; a runtime error message dialog box is displayed.
Click on Debug.
You should now be in the Visual Basic run-time debug mode with the line causing the problem highlighted.
6.4 Position the mouse cursor over a variable, for example Number. Note that the current value for the variable is displayed.
Figure 2 - run-time error message box
6.5 Position the cursor over the misspelt variable, Roww. The text Roww = Empty is displayed.
6.6 Correct the mistake (remove the extra w).
6.7 From the Visual Basic Run menu, select either:
Continue to resume processing the macro, OR:
Reset and then switch to the worksheet before re-running the macro.
Note When editing a Visual Basic macro you can position the cursor on a macro statement and set (or unset) breakpoints (from the Debug menu, select Toggle Breakpoint or press <F9>). When the macro is next run, execution will stop before the statement and enter into the debug mode. You can then inspect variables and see what is going on. To restart the macro, from the Run menu, select Continue. To clear all breakpoints, from the Debug menu, select Clear All breakpoints (or press <Ctrl>+<Shift>+<F9>).
Visual Basic for Excel 2003 9
Visual Basic for Excel 2003
Visual Basic for Excel 2003 10
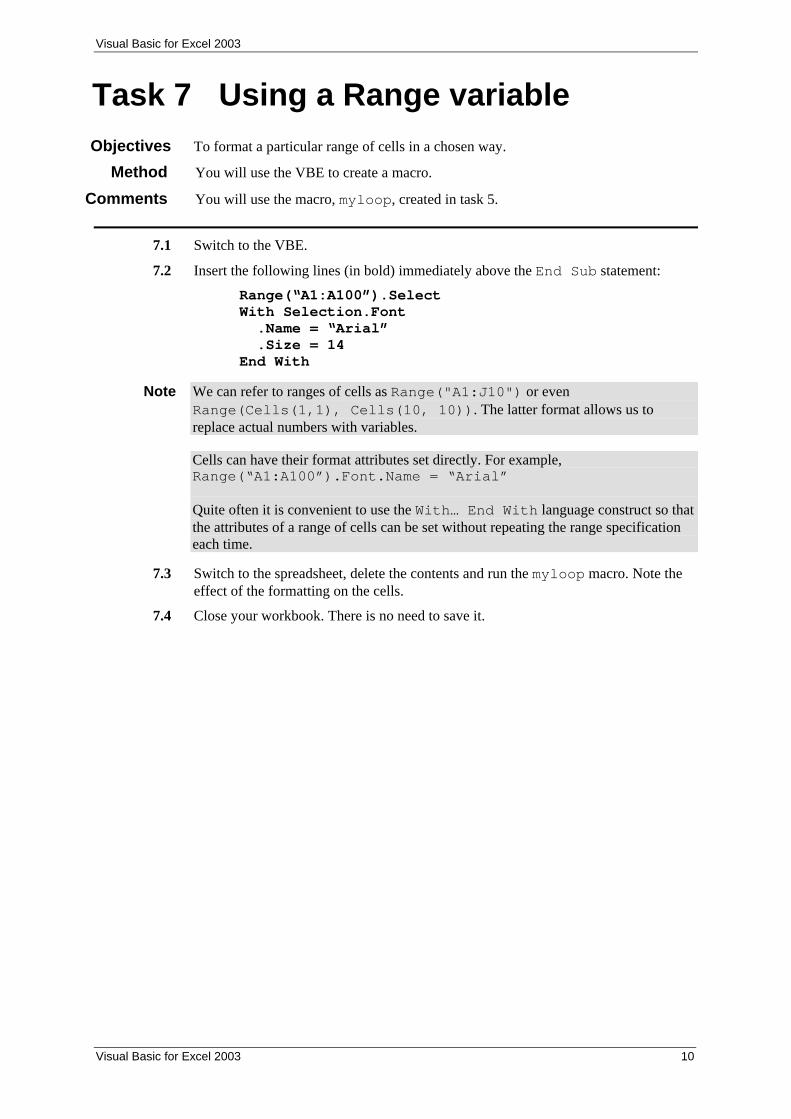
Task 7 Using a Range variable Objectives To format a particular range of cells in a chosen way.
Method You will use the VBE to create a macro.
Comments You will use the macro, myloop, created in task 5.
7.1 Switch to the VBE.
7.2 Insert the following lines (in bold) immediately above the End Sub statement:
Range(“A1:A100”).Select With Selection.Font .Name = “Arial” .Size = 14 End With
Note We can refer to ranges of cells as Range("A1:J10") or even Range(Cells(1,1), Cells(10, 10)). The latter format allows us to replace actual numbers with variables.
Cells can have their format attributes set directly. For example, Range(“A1:A100”).Font.Name = “Arial”
Quite often it is convenient to use the With… End With language construct so that the attributes of a range of cells can be set without repeating the range specification each time.
7.3 Switch to the spreadsheet, delete the contents and run the myloop macro. Note the effect of the formatting on the cells.
7.4 Close your workbook. There is no need to save it.

Visual Basic for Excel 2003
Visual Basic for Excel 2003 11
Task 8 Creating a function Objectives To demonstrate how user-defined functions can be easily created and used.
Method You will use the Insert menu commands in the VBE.
Comments Excel has a large number of functions available, but there are times when it is necessary to create a user-defined function to perform a particular calculation. These functions cannot be created using the macro record and playback actions within Excel, but must be entered into the VBE.
8.1 Create a new workbook.
8.2 Open the VBE (use <Alt><F11> as a shortcut).
8.3 From the Insert menu, select Module.
8.4 From the Insert menu, select Procedure.
In the Add Procedure dialog box, enter the name times100 and from the Type section, select Function (Public should already be selected from the Scope section).
Click on OK.
Note A user-defined function is used in the same way as an Excel function. It has a name (in this case, times100) and a number of arguments (in some cases, zero). We will define a function that takes one numeric argument, multiplies it by 100 and returns the result.
8.5 Place the cursor between the brackets on the first line.
8.6 Enter a variable name for the argument; for example, n.
8.7 Move the cursor to the empty line of the function and enter the command times100 = n * 100.
Your function should be similar to the one below: Public Function times100(n) times100 = n * 100 End Function
8.8 Switch to the worksheet, select cell A1 and enter a value.
8.9 In cell B1, enter the function =times100(A1).
Note Functions and subroutines created in VBA are not case-sensitive.
8.10 Try changing the value in cell A1 and note the result.
8.11 Close and Save this workbook; you will need the function in a later task.

Visual Basic for Excel 2003
Task 9 Rearrange macro Objectives To create an application to rearrange student marks for processing.
Method You will use Excel’s VBE to write a short VB program.
Comments Try typing the subroutine in lower case and notice how the editor formats your commands. This task assumes a working knowledge of cell and range names (covered in document exl00-t3).
9.1 Open the file Exam1.xls (in Computer rooms, this is in the web http://194.81.113.53/sbc/AccountIT.asp). The worksheet contains some subject results for fictional students (figure 3).
Figure 3 - Exam1.xls (fictional table of results)
This task will rotate those results (figure 4) in order to make use of other features within Excel such as Subtotals and PivotTables.
Figure 4 - sample of rotated data
9.2 Highlight the range A1:G13 and define a range name, area.
Click in cell I1 and define a name, areaoutstart.
9.3 Switch to the VBE and insert a new module.
Insert a new procedure (subroutine) named rearrange.
Visual Basic for Excel 2003 12

Visual Basic for Excel 2003
Visual Basic for Excel 2003 13
9.4 Enter the following code (in bold):
Note Take a few moments reading through the code to get an idea of the structure and what might be happening.
Public Sub rearrange() Set ar = Range("area") Set arout = Range("areaoutstart")
ncols = ar.Columns.Count nrows = ar.Rows.Count
aroutr = 2 countblankcells = 0
arout.Cells(1, 1) = "Name" arout.Cells(1, 2) = "Subject" arout.Cells(1, 3) = "Mark"
For r = 2 To nrows For c = 2 To ncols If Not IsEmpty(ar.Cells(r, c)) Then arout.Cells(aroutr, 1) = ar.Cells(r, 1) arout.Cells(aroutr, 2) = ar.Cells(1, c) arout.Cells(aroutr, 3) = ar.Cells(r, c) aroutr = aroutr + 1 Else countblankcells = countblankcells + 1 End If Next c Next r
End Sub
Note The variable countblankcells is used to calculate the number of blank cells encountered when running the macro. The total number will be displayed at the end of the macro (see task 12).
The variables ar and arout are ranges and must be initialised using the Set command.
By qualifying Cells with a range variable, for example, ar.cells(1,1) we now reference cells within that range rather than the cells within the whole worksheet.
9.5 Switch back to the worksheet (click on the icon in the Status bar or use <Alt><F11>).
9.6 Save your workbook.
9.7 From the Tools menu, select Macro/Macros and with the rearrange macro selected, click on Run.

Visual Basic for Excel 2003
Visual Basic for Excel 2003 14
Task 10 Yes/No inputs Objectives To display a message box requesting input from the user of the macro and use that
input to determine what actions your macro will take.
Method You will use the Msgbox function.
Comments If you have not successfully completed the previous task, you will need to open the solution file vbexam_a.xls before starting.
10.1 Switch to the VBE.
10.2 At the top of your macro module (immediately below the line Public Sub rearrange()), insert a new line and add the line macroname = “rearrange”.
This name will be used for message display in the dialog boxes created below.
10.3 Insert a new row between nrows = ar.Rows.count and aroutr = 2.
Type the following code (shown in bold): nrows = ar.Rows.Count
arout.Range(Cells(1, 1), Cells(1, 3)).Select Msg = "This macro may overwrite cells starting at range shown." Reply = MsgBox(Msg & vbCr & _ "Do you want to continue?", vbYesNo, macroname) If Reply <> vbYes Then MsgBox "Macro abandoned", vbOKOnly, macroname Exit Sub ' quit the macro End If
aroutr = 2
Note As you type functions, for example MsgBox, you will notice that the editor displays the parameters required by that function. Appropriate dropdown boxes also provide shortcuts as you type your procedures.
The ampersand character & is used to string together text strings and text variables whilst the underscore character _ allows you to continue a single line command on the following line for display purposes. Blank spaces are ignored. Indentation in an application is used to make the program easier to read and debug.
The standard constant vbCr is used to insert a carriage return into your dialog box.
The standard constant vbYes is returned if the Yes button is clicked in reply to the message.
The operator <> is used to denote “not equal to”.
10.4 Switch back to the worksheet and save your workbook.
10.5 Highlight and delete the results of the previous task and from the Tools menu, select Macro/Macros and with the rearrange macro selected, click on Run.
Test your macro using both No and Yes inputs to your dialog box.
10.6 Take a few moments to read the comments (preceded by a single apostrophe) in the solution file vbexam_b.xls.

Visual Basic for Excel 2003
Visual Basic for Excel 2003 15
Task 11 Error trapping and GoTo Objectives To introduce some error trapping.
Method You will introduce an On Error GoTo structure to display an error message of your choosing and exit the subroutine.
Comments The rearrange macro created in the previous tasks requires that two range areas be defined before the macro is run. If these ranges are not defined, Excel will generate an error and the macro will fail. By checking for this error, you can display a sensible message and exit the macro cleanly.
11.1 Using the macro created in the previous task switch to the VBE.
11.2 Immediately beneath the line macroname = “rearrange”, insert and new line and type: On Error GoTo errmsg
If the ranges area and areaoutstart have not been defined in your spreadsheet, the macro will jump to a point labelled errmsg (defined below in task 11.4).
11.3 Beneath the lines set ar… and set arout… add the command On Error GoTo 0. This section of code should now resemble:
On Error GoTo errmsg Set ar = Range("area") Set arout = Range("areaoutstart") On Error GoTo 0
Any errors encountered from this point on in your macro will display the normal system errors rather than the one you specify in the errmsg section.
11.4 Scroll to the end of the macro and add an errmsg section immediately above the last (End Sub) line:
errmsg: MsgBox "Bad input/output range.", vbOKOnly
End Sub
11.5 Immediately above the errmsg: line, add a new line Exit Sub to ensure that this error message is only reached from the GoTo command entered in task 11.2.
11.6 Switch to the spreadsheet and save your workbook.
11.7 Delete your previous output and check that the macro runs without error.
Try deleting one or both of the range names (from the Insert menu, select Name / Define) and test the macro again.
Note You may also wish to check that the selected input range ar is sufficiently big and that the output range areaoutstart is not within the input range, area. Your macro should then exit after displaying a dialog box.
11.8 Close and reopen your workbook without saving any changes.

Visual Basic for Excel 2003
Visual Basic for Excel 2003 16
Task 12 MsgBox: Text & numerical values
Objectives To calculate the number of lines output by the rearrange macro and output the result in a dialog box together with the total number of blank cells encountered (if any).
Method You will use the Str function.
Comments The variables aroutr and countblankcells introduced in task 9 contain the values required for this exercise.
12.1 If you have not completed the previous tasks, first complete up to task 11.
12.2 Switch to the VBE and scroll to the foot of your macro.
12.3 Between the lines Next r and Exit Sub, add the following code:
If aroutr > 1 Then arout.Cells(aroutr - 1, 3).Select MsgBox "This macro has output " & _ Str(aroutr - 2) & " lines." & vbCr & _ "It found " & Str(countblankcells) & _ " blank cells.", vbOKOnly, macroname Else MsgBox "No lines output!", vbYesNo, macroname End If
12.4 From the File menu (still within the VBE), select Close and Return to Microsoft Excel.
12.5 Save your workbook and test the macro.
12.6 Close any open workbooks. There is no need to save changes.

Visual Basic for Excel 2003
Visual Basic for Excel 2003 17
Task 13 Applying formats using macros
Objectives To produce a small Visual Basic Application (VBA) that checks the current formatting of cells within a worksheet and removes the percentage sign if a particular format has been used.
Method You will use the Cells.NumberFormat object and IsNumeric and IsBlank Visual Basic functions.
Comments This task assumes that you have successfully completed task 8.
13.1 Open the file created in task 8 (Creating a function) and press <Alt>+<F11> to switch to the VBE.
Insert a new Procedure, named RemoveSign (type = Sub, Scope = Public).
13.2 We first need to select the last cell in use within the active worksheet. Enter the following code into your procedure: ActiveSheet.Cells.SpecialCells(xlLastCell).Select ir = ActiveCell.Row ic = ActiveCell.Column For row = 1 To ir For column = 1 To ic If IsNumeric(Cells(row, column)) And Not _ IsEmpty(Cells(row, column)) Then in_no = Cells(row, column) If Cells(row, column).NumberFormat = "0.00%" Then Cells(row, column) = times100(in_no) Cells(row, column).NumberFormat = "General" End If End If Next column Next row
Note Working through this code from top to bottom:
The last cell in the worksheet is located and the variables ir and ic are set to the row and column position values of that cell.
The For Row… and For Column… structures ensure that the procedure loops through each row and column used in the worksheet.
The first If… End If structure checks to see if the current cell is not empty and that its value is numerical. If these conditions are not met, the procedure moves to the next column/row. If the conditions are met, the variable in_no is set to the value of the current cell and the next If…End If statement looks to see if the current value is formatted as a percentage with 2 decimal places. If it is, the value is multiplied by 100 (using the function created in task 8) and a general format applied.
13.3 Switch to the worksheet view, save your file and enter some values in your worksheet (ensuring you have one or more numeric values formatted as percentages with 2 decimal places).

Visual Basic for Excel 2003
Visual Basic for Excel 2003 18
13.4 Test your VBA (vbformat.xls contains a working solution with some sample values to test it on).
13.5 The second If…End If statement in the above code could be extended to deal with Percentage formats with different numbers of decimal places.
13.6 Close any open workbooks.

Visual Basic for Excel 2003
Visual Basic for Excel 2003 19
Task 14 Text functions Objectives To create a function to reverse text strings and use this function to extract a surname
from a text string containing a full name.
Method You will use a combination of worksheet functions and your own function.
Comments The application assumes that the surname is the last word in a string. You may wish to extend this task to take into consideration surnames such as in “Daphne du Maurier” or “van der …”.
14.1 Start a new workbook.
14.2 In cell A1, enter the text Name.
Enter the names Mr A B Brown, Pat Smith, Dr White and A B C Evergreen in cells A2, A3, A4, A5 respectively.
Resize column A to fit the text entered.
14.3 In cell E1, enter the text Surname.
14.4 Open the VBE.
14.5 Create the function rev as below:
Public Function rev(t) rev = "" ct = Len(t) For i = ct To 1 Step –1 rev = rev & Mid(t, i, 1) Next i End Function
Note StrReverse was introduced as an Excel Visual Basic function with the release of Excel 2000. If you are using Excel 2000, try the simpler method below:
Public Function rev(t) rev = StrReverse(t) End Function
14.6 Return to the worksheet and select B2.
Enter the formula =rev(A2) to calculate the reverse of the string in cell A2.
Resize column B if necessary.
14.7 In cell C2, enter the formula =FIND(" ",B2) to find the location of the first space character in the text string in cell B2.
As B2 now contains the reverse of the original text string, this locates the location of the last space character in the original string.
14.8 In cell D2, enter the formula =LEFT(B2,C2-1).
This takes the left hand side of the reversed string up to, but not including, the space character. In other words, the surname part of the original text string reversed.
Note If there are no spaces in the original name, then the formula in column C will produce an error. In this case additional steps can be taken to deal with this scenario.
14.9 In cell E2, enter the formula =rev(D2) to reverse the string and return the surname as required.

Visual Basic for Excel 2003
Visual Basic for Excel 2003 20
14.10 Copy the formulae in the range B2:E2 into rows 3 to 5.
14.11 Select columns B:D and from the Format menu, select Column/Hide.
This function could be extended to include the actions performed by columns B to E. The next task demonstrates this.

Visual Basic for Excel 2003
Visual Basic for Excel 2003 21
Task 15 Worksheet functions in VB Objectives To extract the surname from a text string containing a name.
Method You will use the VBE.
Comments This task reuses the text entered in the previous task but not the function rev nor the formulae.
15.1 If you completed the previous task, unhide columns B:D and delete the formulae in the range B2:E5.
Otherwise enter the text as described in tasks 14.1 to 14.3 above.
15.2 Switch to the VBE.
15.3 Create the following VB function: Function getSurname(t) backText = rev(t) spaceLoc = Application.WorksheetFunction. _ Find(" ", backText) backSurname = Left(backText, spaceLoc - 1) getSurname = rev(backSurname) End Function
15.4 Switch to the worksheet and click in cell B2.
Enter the formula =getSurname(A2).
15.5 Copy (drag & fill) this formula into the range B3:B5.
Application.WorksheetFunction can be used before any Excel Worksheet function, provided there is not also a Visual Basic function with the same name. As you type your code, type Application.WorksheetFunction. and examine the list of options displayed in the dropdown box.
There is a Visual Basic function called InStr that does the same job as the Excel Find function and would be more efficient to use. This task simply demonstrates the use of an Excel worksheet function within a Visual Basic macro.

Visual Basic for Excel 2003
Visual Basic for Excel 2003 22
Task 16 InputBox Objectives To obtain and use input from the user.
Method You will use the InputBox function in Visual Basic.
Comments You must first have successfully completed task 15.
16.1 With the worksheet created in task 15 open, switch to the VBE.
16.2 From the Insert menu, select Procedure.
16.3 Type the name Surname and click on OK.
16.4 Complete the procedure as shown in bold: Public Sub Surname()
myString = InputBox("What is the full name?")
Msg = "The surname is "
MsgBox Msg & getSurname(myString), vbOKOnly
End Sub
16.5 Run the procedure (press <F5> or from the Visual Basic Run menu, select Run Sub/UserForm).
16.6 When prompted enter the name Dr P A Brown and click on OK.

Visual Basic for Excel 2003
Visual Basic for Excel 2003 A-1
Appendix A Programming structures Comments This appendix includes some definitions of programming terms and examples of
common programming structures (constructs) available to you when writing VBA code. For further information on their use, please see the online help system. Where square brackets […] are used, this indicates that this part of the structure is optional.
Programming Language A set of syntactic rules used to create a program. A program is defined by one or more subroutines and any number of functions. A procedure may be either a subroutine or a function.
Each subroutine must have specific start and end instructions.
Example Sub My_Program() . .
End Sub
Each function must have specific start and end instructions.
Example Function My_Function(arg) . .
End Function
Scope of procedures Functions can be called (executed) from other VB subroutines or functions or by a call via the contents of an Excel cell. Subroutines can be called from other subroutines or functions or via the Excel Tools Macro menu or via the VBE Run menu.
If their scope is Public then the item can be called from any module in the workbook or from the Excel Tools Macro menu (if a Subroutine) or Excel cell (if a Function). If their scope is Private then the item can only be called from the module in which the item is defined. By default the scope is set to Public. Scope can be specifically set by preceeding the Sub or Function defintion by the desired scope.
Example Public Function my_calc()
Forms Besides procedures VBE can also be used to create forms. These are special windows (known as custom dialog boxes) that contain a mixture of text and special controls (such as command buttons, pull down lists etc). These controls can be selected from special toolbar called a toolbox and positioned in the window. VB code can be associated with the controls such that clicking on a control can start off programming activity.
Comments
It is a good idea to include informative non-executable comments into a program. Any line or part of a line that begins with the ‘ character is ignored by VB language interpreter.
Example ‘ Putting comments in a program is good practice

Visual Basic for Excel 2003
Visual Basic for Excel 2003 A-2
Continuation Sometimes it is convenient to split a single statement over more then one line. To do this the underscore character preceded by at least one space character is used.
Example Sub _
My_Program()
Constants fixed values such as say 12 or TRUE or "THIS IS AN ERROR"
Variables A named item that can contain some information. There are rules to the names you can choose.
Declarations Optionally (in VB) you can list the variable (and its type) before its use using declaration statements.
Example dim i as integer
Types of variable Variables can hold various types of information e.g
Boolean, Integer, Long (long integer), Single (single-precision floating-point), Double (double-precision floating-point), Currency, Date, String or Variant.
If you do not specifically declare the type of a variable it will be given the Variant type. VB is very flexible when dealing with variant variables.
Objects Variables can also be "objects" such as Excel workbooks, worksheets, cell address ranges, type of fonts, charts etc.
Objects have a position in a hierarchy. For example, the Range object is below the Worksheet object which is below the Workbook object. The VB help system will show this relationship.
Often when referring to objects they will be defined by listing the parent object first and then the object itself e.g
Example Worksheets("Sheet1").Range("A1")
A period is used as the separator between objects.
Often if a parent object is not specified a default object will be assumed to be the parent. For example, the Activesheet object is assumed if a Range object is not qualified by a parent object.
Assigning values to variables Programming statements such as the following do this:
Example x=12 errmsg="You have made a mistake" torf=TRUE
Expressions A mixture of constants, variables and operators that produce as their result a value.
Example x+1
(x+y)/3 +4*z
Properties and Methods of Objects Objects have Properties that describe certain attributes about them and Methods that operate on them to change their state.

Visual Basic for Excel 2003
Visual Basic for Excel 2003 A-3
The size of a Font object for instance is referenced using the Size Property of the Font object.
Example Range("A2").Font.Size=12
To clear the contents of a particular range you can use the Clear method of the Range object.
Example Range("Z1:Z4").Clear
A period is used as the separator between the object and the Property or Method.
Quite often the properties and methods of an object will themselves have parameters that need be specified before getting the desired result.
Example Range("A1").Cells(2,3)
This results in a reference to a cell which is 2 rows down and three columns across from Cell A1. The Cell property can be given two arguments to qualify it.
More information about objects is given in Appendix B.
Testing variables You can use the IF .. THEN construct or IF .. THEN ... ELSE constructs to do this.
Example If x=1 then y=1
If ans="YES" Then test="TEST ONE" Else test= "TEST TWO"
You can also use a multi-line IF ... THEN … [ELSE …] ENDIF construct to do testing.
Example If ans="YES" Then test="TEST ONE" x=1 Else test= "TEST TWO" x=2 Endif
Looping Various constructs enable you to get a set of instructions performed many times. For example, the FOR... NEXT construct does this. The complete program that follows illustrates this:
Example Sub SumCol() colnum = 2 startrownum = 10 endrownum= 20 sumct = 0 For rownum= startrownum To endrownum ' we now use the CELLS property of the RANGE object to get the value of ‘ a particular cell, and then add it the current value of sumct and store the ‘ new total back into sumct overwriting what was there previously sumct = sumct + Range("A1").Cells(rownum, colnum) If sumct > 5000000 Then Exit For Next ' sumct will now have the sum of column 2 for rows 10 to 20. ' - Unless of course the sum was greater then 5000000 when ' it will contain whatever sum forced the exit statement from the loop MsgBox Str(sumct) ' MsgBox is a standard instruction that will output information ‘ to the screen ' Str is a standard function that takes an argument of type numeric ‘ and converts it to type text , suitable for display purposes End Sub

Visual Basic for Excel 2003
Visual Basic for Excel 2003 A-4
Some Common Programming structures
• For… To … [Step …] Next
Example For counter = startval To endval Step 2 tot=tot+counter if tot >1000 Then Exit For ‘the Exit For instruction if executed causes a jump ‘ to the instruction that follows “Next [counter]” Next [counter]
• Do… Loop Until
Example Do ct=ct+10 Loop Until ct>1000
• If… Then… [ELSE …]
Example If x=1 Then y=1 Else y=0
Alternatively, using the block syntax:
Example If x=1 Then y=1 z=1 Else y=0 z=0 End If
• For Each… Next
Example For Each cht in Sheets(“Sheet1”).ChartObjects ‘ cht is set in turn to each chart ‘ object on Sheet1 cht.Chart.ChartType = XlLine ‘ sets the specified chart type to be a Line Chart Next cht
Example For Each cl in Selection ‘ The Selection object is the currently highlighted range, ‘ cl is set in turn to each cell in that range cl.Font.size=10 cl.Value=0 Next cl
• Select Case… [Case Else …] End Select
Example Select Case quantity ‘ Note the different kind of CASE constructs there can be Case 0 To 49 discount = 0.1 Case 50 To 74: discount = 0.2 ‘can use : and follow it by a single statement Case Is >= 75 discount = 0.25 Case Else discount=0 End Select

Visual Basic for Excel 2003
Visual Basic for Excel 2003 B-1
Appendix B Visual Basic objects Comments Some of the items referred to in the examples are more complicated than simple
numeric constants and values. Such variables are called objects. For instance the variables that refer to Excel ranges, worksheets, charts, and workbooks are objects. This appendix gives a very rough explanation of how to find out what objects there are and how they interact.
Libraries Objects are grouped in classes (for example, Excel, Office) and their definitions stored in specific libraries. Visual Basic for Excel starts with a default set of libraries. Libraries can easily be added to the set (from the VBE Tools menu, select References). A reference to an object that is not in the current set of object definitions will cause an error.
Object hierarchy Objects have a position in a hierarchy. For example the Range object is below the Worksheet object which is below the Workbook object. The VB help system will show this relationship.
Often when referring to objects they will be defined by listing the parent object first and then the object itself e.g
Example Worksheets("Sheet1").Range("A1")
A period is used as the separator character in the hierarchy.
Often if a parent object is not specified a default object will be assumed to be the parent. For example the Activesheet object is assumed if a Range object is not qualified by a parent object.
Properties and methods Each object is defined by having a particular set of properties and methods. The period character is used as a separator when referring to the properties and methods of objects. For instance the Range object has a property called Cells that can be used to refer to a particular subset of the range.
Example Range(“A2..Z11”).Cells(1,1) refers to cell A2 in the currently active worksheet.
The object created by the use of the Cells property is itself a Range object. So the Font property of a Range object can be used to generate a Font object. The Size property of the Font object can then be used to set the size of the font.
Example Range(“A14..Z14”).Cells(2,1).Font.Size=12 will set the font size of cell A15 to 12 points.
A Range object has a Clear method that will clear all the cells in the range.
Example Range(“A1”).Clear will clear the contents and formatting of cell A1.
• Methods cause acts to be done to the object, while • Properties return simple values and objects that are associated with the object
As can be seen from these examples, each property and method has its own set of rules defining what arguments are necessary to construct a valid reference to it.
If present, the arguments are enclosed in parenthesis and separated by commas. Any text constant argument must be enclosed in double quotes.

Visual Basic for Excel 2003
There is an alternative form of specifying arguments using keywords that is useful when there are many arguments.
Example Workbooks.Open Filename:="C:\Sales.xls", ReadOnly:=True
Collection objects There are many objects that are used to control collections of objects of the same type. For instance the Workbooks object can be used to control all the Workbook objects. It can be used to create a Workbook, provide the names of all the Workbook objects, a count of the Workbook objects, etc.
In general the collection objects will share many methods and properties, for example, Count, Add, Item, Close.
Finding information about objects If you already know the name of an object and require further help (or you merely want to browse), then the Object browser tool can be used:
From the VBE View menu, select Object Browser (or press <F2>).
From the Project/Library dropdown box, select Excel (default <All Libraries>).
Under classes, select a class, (Range in Figure 5).
Right-click the mouse and select Help.
A separate help window will be created (if it does not already exist) containing information about the chosen item. Quite often there will be Properties and Methods buttons that can be clicked to get information about all the properties and methods for the chosen object.
Because it is sometimes difficult to guess whether a particular item is a property or a method, it is often necessary to look in both lists to find its definition.
When it is available on the help window, the Example button can be clicked to give useful information and the displayed example text pasted into your program to be edited for your own use.
Excel object model To display the hierarchy of Excel objects graphically:
Start the VBE (<Alt>+<F11>).
From the Help menu, select Microsoft Visual Basic Help.
If the Office Assistant appears you will need to disable it:
Right-click on the assistant and select Options.
Remove the tick from Use the Office Assistant and click on OK.
Select Help / Microsoft Visual Basic Help again.
Figure 5 - object browser window (<F2>)
Visual Basic for Excel 2003 B-2

Visual Basic for Excel 2003
Visual Basic for Excel 2003 B-3
Select the Answer Wizard tab.
Using the What would you like to do box, type Microsoft Excel Objects and click on Search.
Under Select topic to display, click on Microsoft Excel Objects.
Referring to worksheets and workbooks In general, all objects that refer to specific Excel items (such as ranges and charts) are properties and methods of the Application object. There is a special subclass of objects called the global subset, which is a set of those objects that can be used without putting the suffix Application. before them.
ActiveWorkbook and ActiveSheet are such global objects. They refer to the currently active workbook and worksheet respectively.
If a Range object is used, which is not specifically associated with a particular sheet or book, then it is assumed to refer to the ActiveWorkbook.ActiveSheet object.
If only one Excel workbook is open, then this will be defined to be the ActiveWorkbook. The sheet selected when the macro is run will be the ActiveSheet. If all the objects you want to access are in this sheet then there is no need to associate them with a parent object.
If you want to access objects in other sheets or workbooks, then objects such as Sheets and Workbooks need to be used.
Example Workbooks(“exone.xls”).Sheets(“Sheet1”).Range(“A1”) refers to cell A1 in Sheet1 of the workbook exone.xls.
Note Workbooks are only differentiated by their filename (including their suffix but not including their folder name) and names of sheets, folders and files are not case-dependent.
If the workbook is not already open then the macro will have to open it using the Workbooks Open method:
Example Workbooks.Open ("C:\Ex\Large.xls") A particular workbook may be made the active workbook via:
Example Workbook(“exone.xls”).Activate A particular sheet may be made the active sheet via:
Example Sheets(“Sheet2”).Activate
Warning Before the ActiveCell object can be used or a particular range selected using the Select method, then an ActiveSheet object must have been defined.
Declaring and assigning values to object variables When making repeated references to the same complex object it is more efficient to use variables to hold the objects and refer to these instead (see also Appendix C). It also gives better code readability.
Object variables can be declared just like simple variables using the Dim statement.
Example Dim Rngx As Range

Visual Basic for Excel 2003
Visual Basic for Excel 2003 B-4
To assign values to object variables, the Set statement must be used rather than the simple equals assignment statement:
Example Set Rngx = Range(“A1..Z26”) Rngx.Font.Size = 16
Note Object variables point to the object rather than are the object.
It is good practice to free such variables when they are no longer required. To do this set them to the special Nothing keyword.
Example Set Rngx = Nothing Many objects have a default property or method that is used when the object has not been fully specified. For a Range variable this property is normally the Value property.
Example The statement Range(“A1”)=Range(“B1”) will be treated as Range(“A1”).Value = Range(“B1”).Value
Visual Basic for Excel 2003
Visual Basic for Excel 2003 C-1
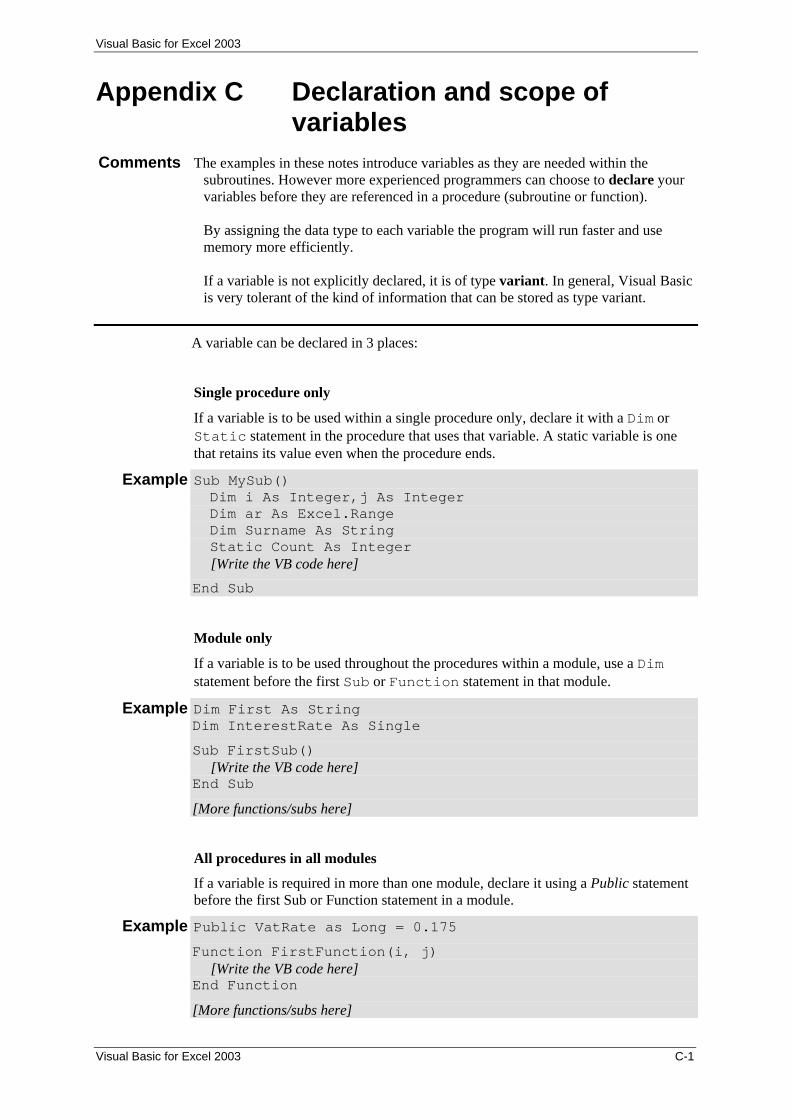
Appendix C Declaration and scope of variables
Comments The examples in these notes introduce variables as they are needed within the subroutines. However more experienced programmers can choose to declare your variables before they are referenced in a procedure (subroutine or function). By assigning the data type to each variable the program will run faster and use memory more efficiently. If a variable is not explicitly declared, it is of type variant. In general, Visual Basic is very tolerant of the kind of information that can be stored as type variant.
A variable can be declared in 3 places:
Single procedure only
If a variable is to be used within a single procedure only, declare it with a Dim or Static statement in the procedure that uses that variable. A static variable is one that retains its value even when the procedure ends.
Example Sub MySub() Dim i As Integer,j As Integer Dim ar As Excel.Range Dim Surname As String Static Count As Integer [Write the VB code here] End Sub
Module only
If a variable is to be used throughout the procedures within a module, use a Dim statement before the first Sub or Function statement in that module.
Example Dim First As String Dim InterestRate As Single
Sub FirstSub() [Write the VB code here] End Sub
[More functions/subs here]
All procedures in all modules
If a variable is required in more than one module, declare it using a Public statement before the first Sub or Function statement in a module.
Example Public VatRate as Long = 0.175 Function FirstFunction(i, j) [Write the VB code here] End Function
[More functions/subs here]

Visual Basic for Excel 2003
Visual Basic for Excel 2003 C-2
In the examples within this document, only a few procedures are used. However, as a large program is developed using multiple procedures across several modules, it becomes essential to declare all variables used.
Efficiency aside, spelling mistakes can occur within variable names leading to incorrect calculations.
Use the statement Option Explicit as the first line within a module to force the declaration of variables. The program will stop if a variable name has not been declared.
Note The VBE can be configured to automatically insert the Option Explicit line in new modules. From the Tools menu, select Options. Within the Editor tab, select Require Variable Declaration.
The declaration Dim i, j As Integer will declare j as an integer and i as a variant.
See the online help facility for more information on declaring variables and variable types.