VirtueMart vatmate® Extension Installation Guide · The VirtueMart vatmate Extension enables the...
9
Installation & Configuration Guide © 2018 vatmate® Version 1.3 Page 1 of 9 September 2018 VirtueMart vatmate® Extension Installation Guide Contents 1. INTRODUCTION ................................................................................................................................ 2 2. BACKGROUND ..................................................................................................................................2 3. INSTALLATION ..................................................................................................................................2 3.1. Before you start .......................................................................................................................2 3.2. Log in to Joomla Admin. ..........................................................................................................2 3.3. Configuration ........................................................................................................................... 4 3.3.1. Configure the vatmate® plugin .......................................................................................4 3.3.2 Configure VirtueMart..............................................................................................................6 3.4. Check Product Settings match in your Shop and in your vatmate® account .........................9
Transcript of VirtueMart vatmate® Extension Installation Guide · The VirtueMart vatmate Extension enables the...
Installation & Configuration Guide © 2018 vatmate® Version 1.3 Page 1 of 9 September 2018
VirtueMart vatmate® Extension Installation Guide
Contents 1. INTRODUCTION ................................................................................................................................ 2
2. BACKGROUND .................................................................................................................................. 2
3. INSTALLATION .................................................................................................................................. 2
3.1. Before you start ....................................................................................................................... 2
3.2. Log in to Joomla Admin. .......................................................................................................... 2
3.3. Configuration ........................................................................................................................... 4
3.3.1. Configure the vatmate® plugin ....................................................................................... 4
3.3.2 Configure VirtueMart.............................................................................................................. 6
3.4. Check Product Settings match in your Shop and in your vatmate® account ......................... 9
Installation & Configuration Guide © 2018 vatmate® Version 1.3 Page 2 of 9 September 2018
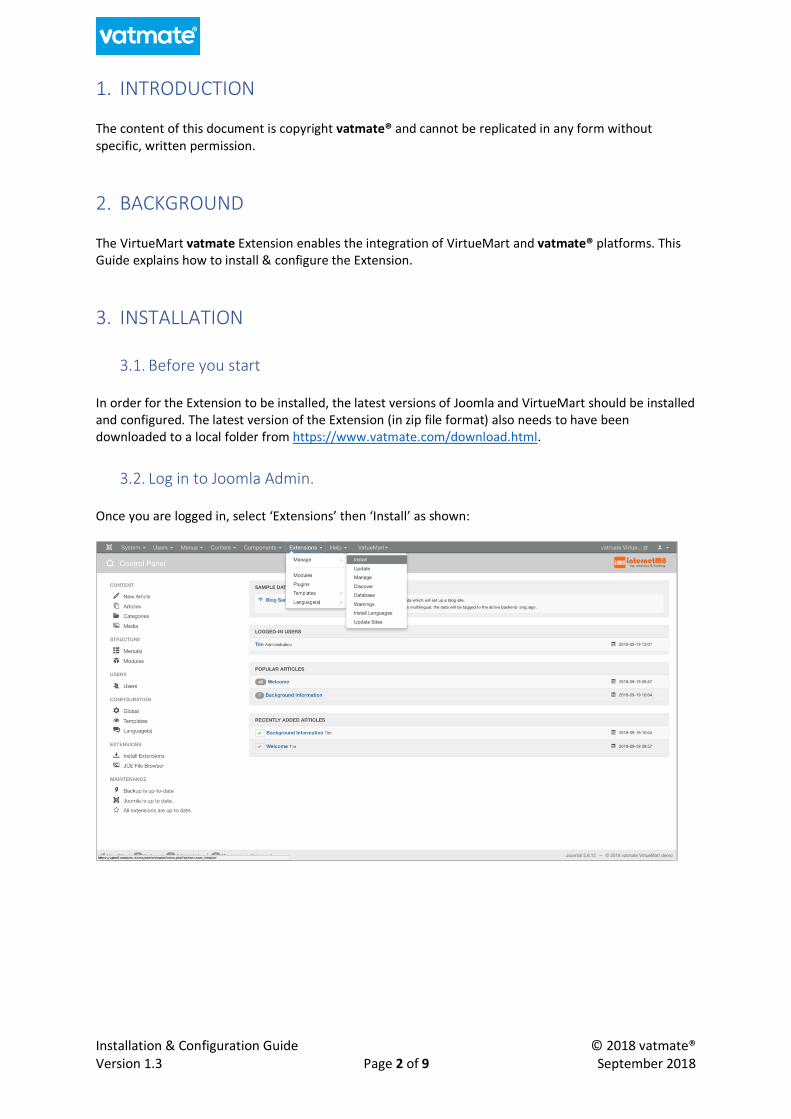
1. INTRODUCTION The content of this document is copyright vatmate® and cannot be replicated in any form without specific, written permission.
2. BACKGROUND The VirtueMart vatmate Extension enables the integration of VirtueMart and vatmate® platforms. This Guide explains how to install & configure the Extension.
3. INSTALLATION
3.1. Before you start In order for the Extension to be installed, the latest versions of Joomla and VirtueMart should be installed and configured. The latest version of the Extension (in zip file format) also needs to have been downloaded to a local folder from https://www.vatmate.com/download.html.
3.2. Log in to Joomla Admin. Once you are logged in, select ‘Extensions’ then ‘Install’ as shown:
Installation & Configuration Guide © 2018 vatmate® Version 1.3 Page 3 of 9 September 2018
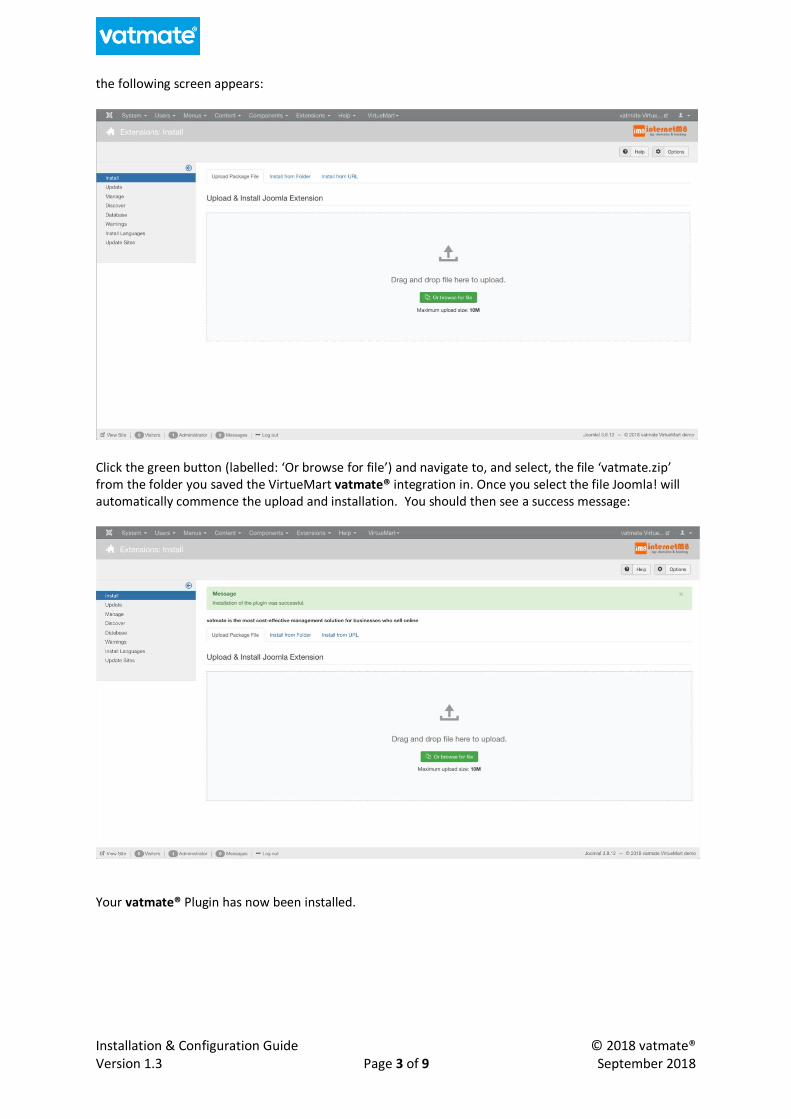
the following screen appears:
Click the green button (labelled: ‘Or browse for file’) and navigate to, and select, the file ‘vatmate.zip’ from the folder you saved the VirtueMart vatmate® integration in. Once you select the file Joomla! will automatically commence the upload and installation. You should then see a success message:
Your vatmate® Plugin has now been installed.
Installation & Configuration Guide © 2018 vatmate® Version 1.3 Page 4 of 9 September 2018
3.3. Configuration
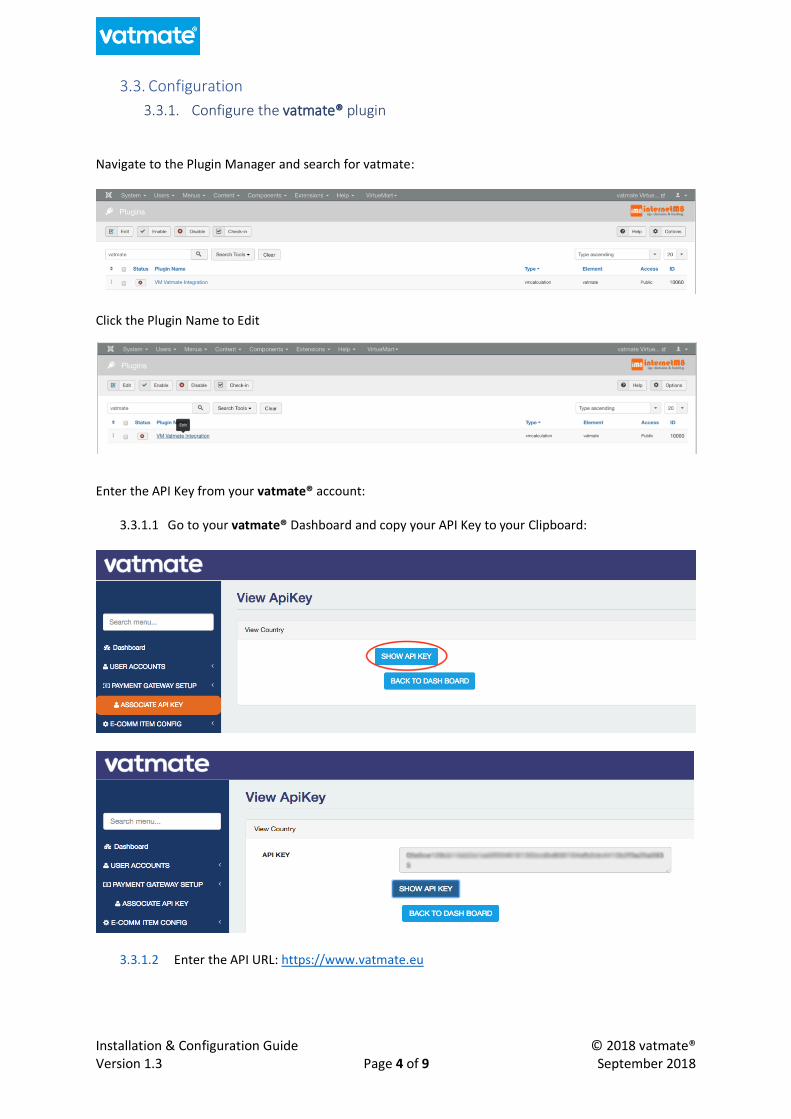
3.3.1. Configure the vatmate® plugin Navigate to the Plugin Manager and search for vatmate:
Click the Plugin Name to Edit
Enter the API Key from your vatmate® account:
3.3.1.1 Go to your vatmate® Dashboard and copy your API Key to your Clipboard:
3.3.1.2 Enter the API URL: https://www.vatmate.eu
Installation & Configuration Guide © 2018 vatmate® Version 1.3 Page 5 of 9 September 2018
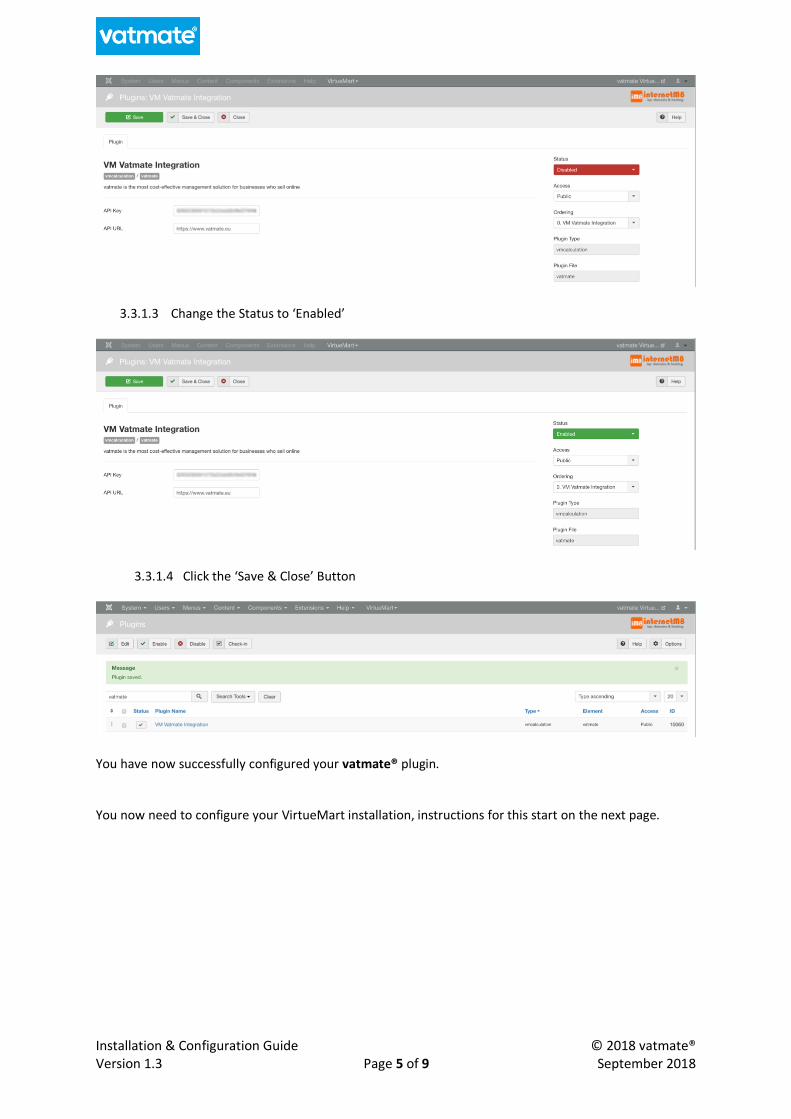
3.3.1.3 Change the Status to ‘Enabled’
3.3.1.4 Click the ‘Save & Close’ Button
You have now successfully configured your vatmate® plugin. You now need to configure your VirtueMart installation, instructions for this start on the next page.
Installation & Configuration Guide © 2018 vatmate® Version 1.3 Page 6 of 9 September 2018
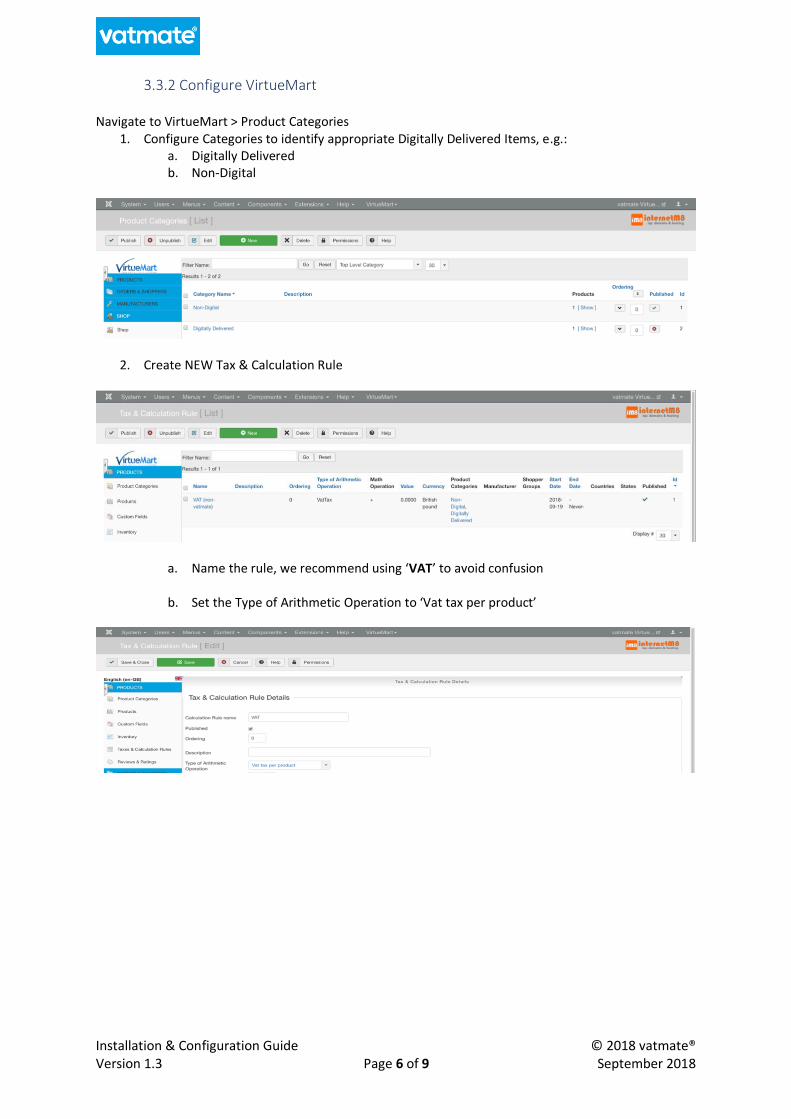
3.3.2 Configure VirtueMart Navigate to VirtueMart > Product Categories
1. Configure Categories to identify appropriate Digitally Delivered Items, e.g.: a. Digitally Delivered b. Non-Digital
2. Create NEW Tax & Calculation Rule
a. Name the rule, we recommend using ‘VAT’ to avoid confusion
b. Set the Type of Arithmetic Operation to ‘Vat tax per product’
Installation & Configuration Guide © 2018 vatmate® Version 1.3 Page 7 of 9 September 2018
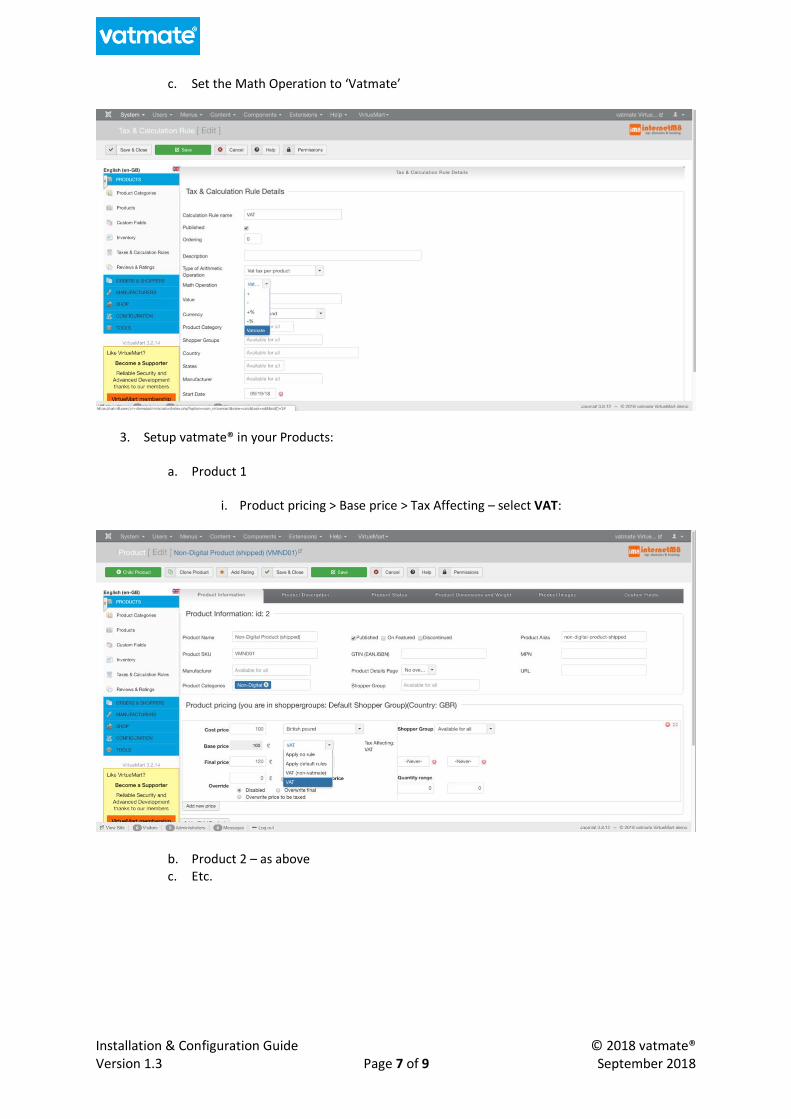
c. Set the Math Operation to ‘Vatmate’
3. Setup vatmate® in your Products:
a. Product 1
i. Product pricing > Base price > Tax Affecting – select VAT:
b. Product 2 – as above c. Etc.
Installation & Configuration Guide © 2018 vatmate® Version 1.3 Page 8 of 9 September 2018
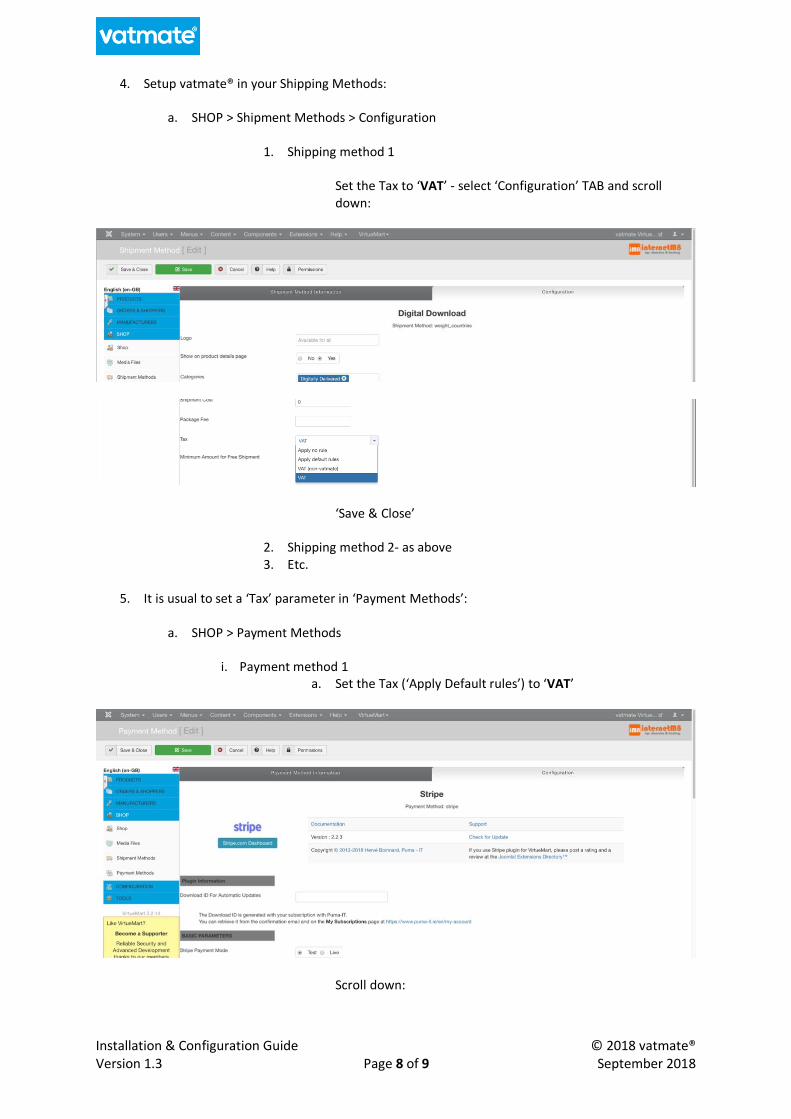
4. Setup vatmate® in your Shipping Methods:
a. SHOP > Shipment Methods > Configuration
1. Shipping method 1
Set the Tax to ‘VAT’ - select ‘Configuration’ TAB and scroll down:
‘Save & Close’
2. Shipping method 2- as above 3. Etc.
5. It is usual to set a ‘Tax’ parameter in ‘Payment Methods’:
a. SHOP > Payment Methods
i. Payment method 1
a. Set the Tax (‘Apply Default rules’) to ‘VAT’
Scroll down:
Installation & Configuration Guide © 2018 vatmate® Version 1.3 Page 9 of 9 September 2018
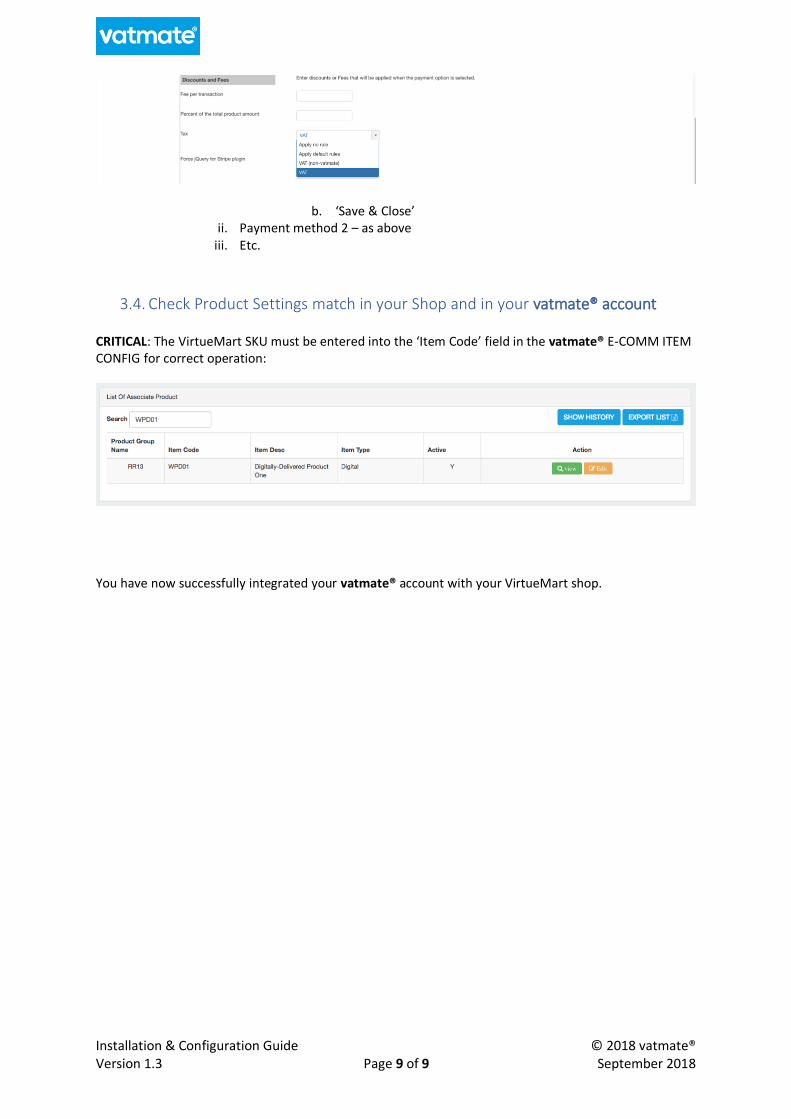
b. ‘Save & Close’ ii. Payment method 2 – as above
iii. Etc.
3.4. Check Product Settings match in your Shop and in your vatmate® account CRITICAL: The VirtueMart SKU must be entered into the ‘Item Code’ field in the vatmate® E-COMM ITEM CONFIG for correct operation:
You have now successfully integrated your vatmate® account with your VirtueMart shop.