Vintage TM Wall Installation Manualretainingwall.com/resources/installation-manuals/vintage... ·...
24
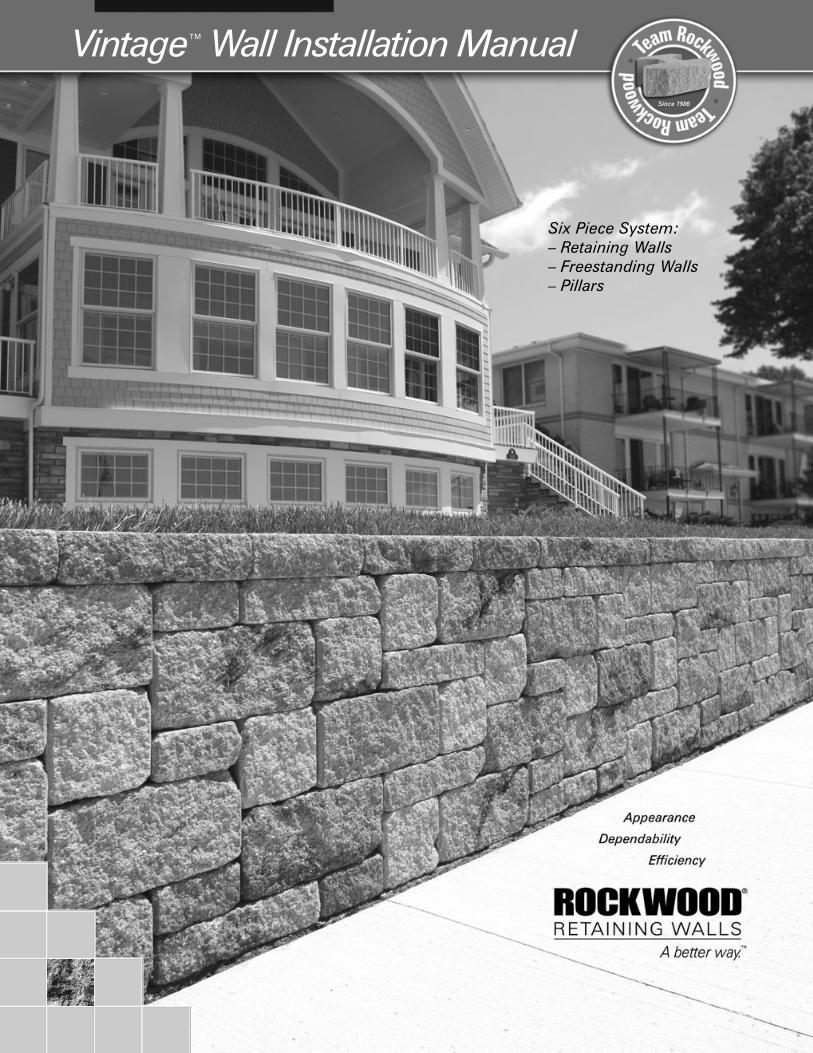
Vintage TM Wall Installation Manual Six Piece System: – Retaining Walls – Freestanding Walls – Pillars
Transcript of Vintage TM Wall Installation Manualretainingwall.com/resources/installation-manuals/vintage... ·...
VintageTM Wall Installation Manual
Six Piece System:– Retaining Walls– Freestanding Walls– Pillars
2
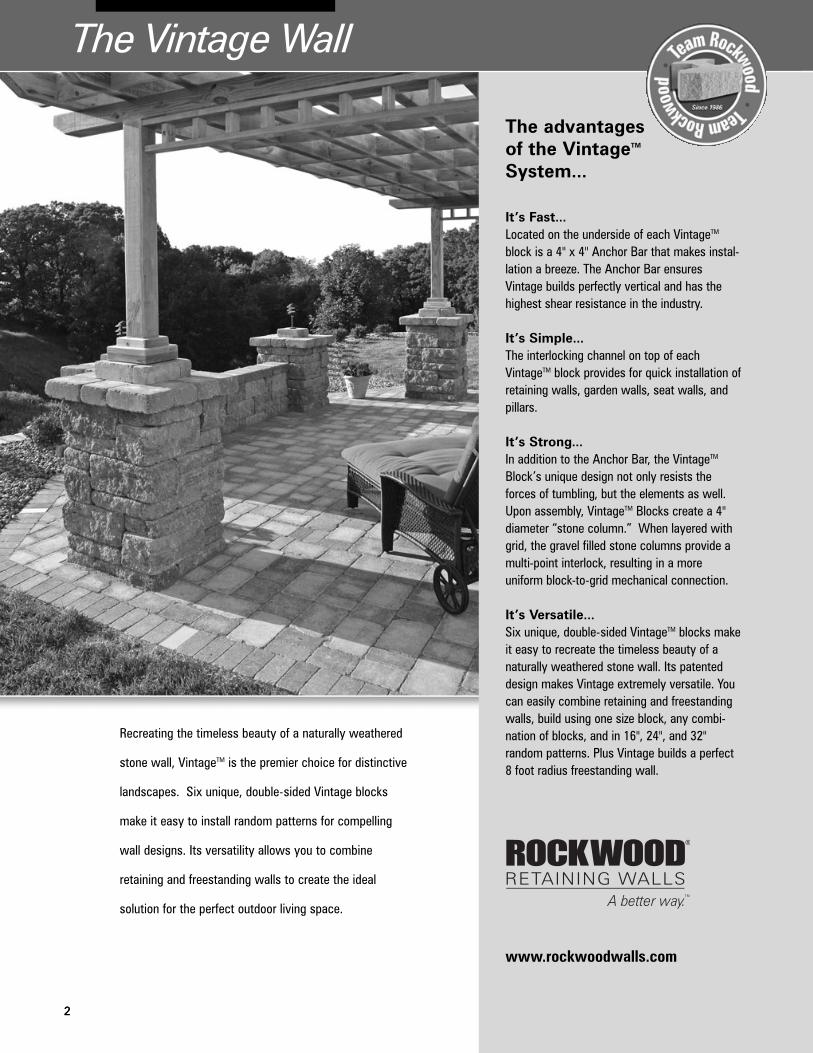
Recreating the timeless beauty of a naturally weathered
stone wall, VintageTM is the premier choice for distinctive
landscapes. Six unique, double-sided Vintage blocks
make it easy to install random patterns for compelling
wall designs. Its versatility allows you to combine
retaining and freestanding walls to create the ideal
solution for the perfect outdoor living space.
The advantages of the VintageTM
System...
It’s Fast... Located on the underside of each VintageTM
block is a 4" x 4" Anchor Bar that makes instal-lation a breeze. The Anchor Bar ensuresVintage builds perfectly vertical and has thehighest shear resistance in the industry.
It’s Simple... The interlocking channel on top of eachVintageTM block provides for quick installation ofretaining walls, garden walls, seat walls, andpillars.
It’s Strong... In addition to the Anchor Bar, the VintageTM
Block’s unique design not only resists theforces of tumbling, but the elements as well.Upon assembly, VintageTM Blocks create a 4"diameter “stone column.” When layered withgrid, the gravel filled stone columns provide amulti-point interlock, resulting in a moreuniform block-to-grid mechanical connection.
It’s Versatile... Six unique, double-sided VintageTM blocks makeit easy to recreate the timeless beauty of anaturally weathered stone wall. Its patenteddesign makes Vintage extremely versatile. Youcan easily combine retaining and freestandingwalls, build using one size block, any combi-nation of blocks, and in 16", 24", and 32"random patterns. Plus Vintage builds a perfect8 foot radius freestanding wall.
www.rockwoodwalls.com
The Vintage Wall
2

3
Planning Guide ............................................................. 4 - 5
Sketch Your Project ........................................................... 6
Vintage Blocks ................................................................... 7
Tools and Materials Needed ......................................... 7
Retaining WallsWall Patterns and Material Calculations.......................... 8
Retaining Walls – Construction Preparation .............. 9-10• Base Course Preparation • Leveling Pad Installation
– Walls Below 3' in Height– Walls Above 3' in Height
• Base Course Installation• Core and Drainage Fill• Successive Course Installation• Capping a Wall
Retaining Walls – Radius Curves .................................... 10• Convex (Outside)• Concave (Inside)
Retaining Walls – Corner Construction.......................... 10• Outside 90°• Inside 90°
Basic Stair Step w/Universal Cap .................................. 11 • Dimensions of the Steps • Excavating the Trench for the Base• Setting Successive Courses• Capping the Risers
Basic Stair Step w/Step Tread ....................................... 11• Dimensions of the Steps• Excavating the Trench for the Base• Setting Successive Courses• Completing a Step Tread Stair
Retaining Walls – Special Wall Applications ................. 12• Stepping a Vintage Wall• Vintage Branch Wall• Vintage Tiered Wall• End Wall Installation
Geosynthetic ReinforcementGrid Installation .............................................................. 13
• Preparation for Grid• Grid Placement • Preparation for Backfill • Backfill and Compact
Design Tables ............................................................ 14 - 16• 16" Pattern
Freestanding WallsWall Patterns and Material Calculations........................ 17
Radius Wall Patterns and Material Calculations ........... 18
Freestanding Walls – Getting Started ............................ 19• Base Course Preparation• Leveling Pad Installation• Base Course Installation• Add More Courses• Finish the Installation
Freestanding Walls – Radius Curve ................................ 19• Convex (Outside)• Concave (Inside)
Freestanding Walls – Corner Construction ................... 20 • Outside 90°• Inside 90°
Freestanding Walls – Special Applications .................... 20• Retaining Wall Integration
Freestanding Walls – Building a Pillar ............................ 21• Starting a Pillar • Add More Courses• Capping a Vintage Pillar
Glossary of Terms ............................................................ 22
Notes page........................................................................ 23
3
Table of Contents
325 Alliance Place NERochester, MN 55906
toll free888.288.4045phone507.529.2871fax507.529.2879
www.rockwoodwalls.com

4
Garden Walls vs.Retaining WallsThere is significant difference in the planning andconstruction of retaining walls depending on their use. Wallsbelow 4 feet in height are commonly referred to as gardenwalls, and in most cases, can be built without the input froma geotechnical engineer. Walls above 4 feet and walls withforces behind, or on top of them, require special considera-tions and need to be planned by a qualified engineer.
Before You BeginZoning and PermitsBefore you plan your project, learn about the necessaryzoning requirements and rules for excavating and buildingin your area. No matter how small your project, be sure youobtain the necessary permits before you start construction.
Know What’s Below!Whether you are planning to do it yourself or hire a profes-sional, smart digging means calling 811 before each job.Homeowners often make risky assumptions about whetheror not they should get their utility lines marked, but everydigging job requires a call – even small projects like plantingtrees and shrubs.
Material RequirementsUse the following methods to estimate the amount ofbase material, drainage rock, and adhesive you will needfor your project.
1. Base Material NeededA typical trench is 2' wide and 14" deep to bury a fullcourse of 8 inch block. Your base material must be aminimum of 6 inches (.5 ft.) in height.
__________ x __________ x __________ ÷ 27 = __________ Wall Length (ft) Base Height (ft) Base Width (ft) Cubic Yards*
*Add 10% for inconsistencies in the trench andcompaction.
2. Drainage Rock NeededYou need enough drainage rock to fill 1' behind the blockand to fill any cores.
__________________ x 1.33 ÷ 27 = ___________________Sq ft of wall Cubic Yards
3. Adhesive NeededThe amount of glue required depends on the type ofblock and construction. Use the guide below to estimatethe amount of adhesive required.
Approximate length of bead by bead diameter:
––––––––– (Bead Widths) –––––––––Tubes 1/8” bead 1/4 “ bead 3/8” bead10.5 oz. 129 ft 32 ft 14 ft29 oz. 355 ft 89 ft 39 ft
–– (Tube Sizes) –– 10.5 oz. 29 oz.
Tubes/Case 12 12Cases/Pallet 54 38
Professionals depend on Super-Stik™ adhesivefor its superior strength, time-tested performanceand versatility. Super-Stik is the ideal solution forSegmental Retaining Walls, Pavers, and Masonry.You can even apply it when damp!
Especially formulated for:• Use on wet or frozen surfaces• Superior strength and stability• Extreme temperatures• Waterproof bond
Planning Guide
5
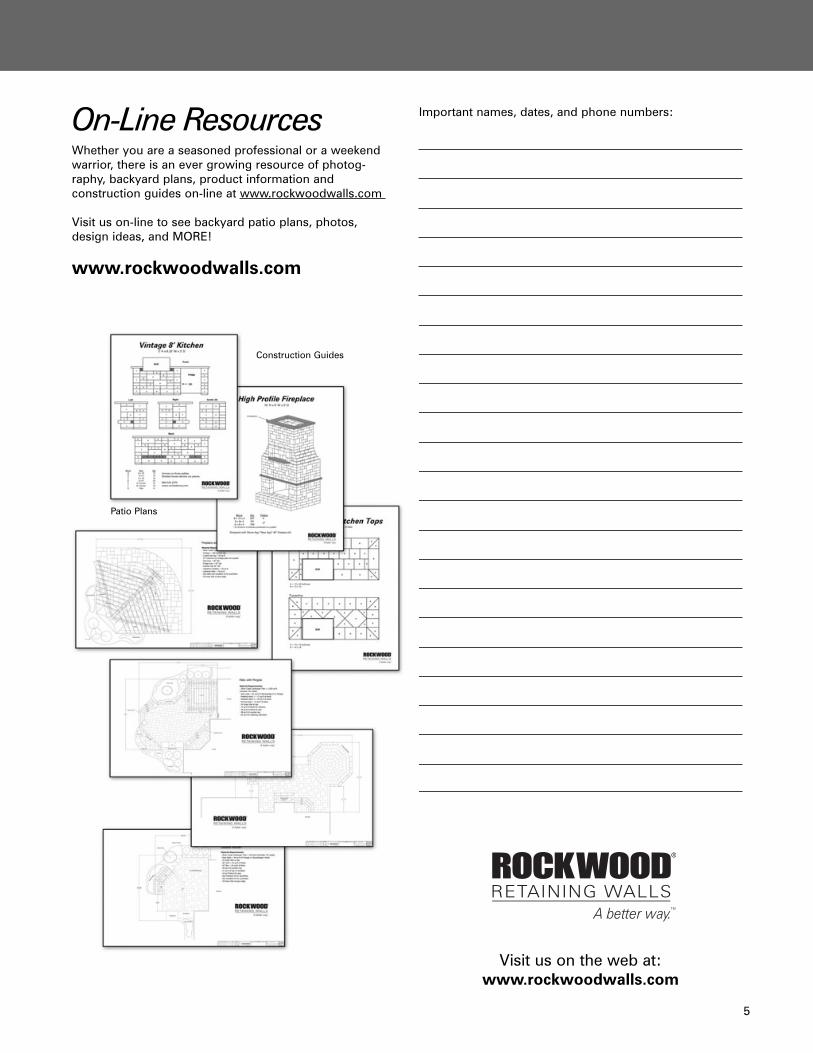
On-Line ResourcesWhether you are a seasoned professional or a weekendwarrior, there is an ever growing resource of photog-raphy, backyard plans, product information andconstruction guides on-line at www.rockwoodwalls.com
Visit us on-line to see backyard patio plans, photos,design ideas, and MORE!
www.rockwoodwalls.com
Important names, dates, and phone numbers:
Construction Guides
Patio Plans
Visit us on the web at:www.rockwoodwalls.com

6
For planning/sketching your Rockwood wall.

7
Base Material .............................................. 3/4" aggregate with finesDrainage Rock .............................................. 3/4" to 1" clean aggregateHammer & Chisel or Masonry Splitter ...... For splitting unitsMasonry Saw ............................................. For cutting unitsShovel .......................................................... Excavation Tamper ......................................................... CompactionSuper-StikTM Adhesive ................................. To secure split/cut units and capsRubber Mallet .............................................. For leveling blockString Line ................................................... Use to align unitsLevel ............................................................. To insure first course is level, front-to-back and side-to-sideGloves .......................................................... Protective hand-wear for positioning blockSafety Glasses ............................................. Always wear eye protection during construction
4" Universal Cap*Front: 4" H x 18" W x 10.5" DBack: 4" H x 14" W x 10.5" D
Weight: 54 lbs., 24 kg
Note: Unit availability, color, andspecifications vary by manufac-turer. Please contact yournearest Rockwood manufactureror dealer for more information.
Weights vary by manufacturer. *Split 2 sides. **Split 3 sides
4" Pillar Block (21" Pillars)*Size: 4" H x 15" W x 6" D
Weight: 26 lbs., 12 kg
4" Pillar/Corner Block (27" Pillars)*Size: 4" H x 18" W x 9" D
Weight: 50 lbs., 23 kg
4" Freestanding End/Corner Block**Size: 4" H x 18" W x 10" D
Weight: 58 lbs., 26 kg
8" Pillar Block (21" Pillars)*Size: 8" H x 15" W x 6" D
Weight: 52 lbs., 24 kg
8" Pillar/Corner Block (27" Pillars)*Size: 8" H x 18" W x 9" D
Weight: 100 lbs., 45 kg
8" Freestanding End/Corner Block**Size: 8" H x 18" W x 10" D
Weight: 116 lbs., 53 kg
Super-StikTM AdhesiveSize: 29oz. or 10.5 oz. tubes
Tools and Materials You Will Need
VintageTM Blocks
8" Block Small*Front: 8" H x 6" W x 10" DBack: 8" H x 6" W x 10" D
Weight: 30 lbs., 13 kg
8" Block Medium*Front: 8" H x 12" W x 10" DBack: 8" H x 10" W x 10" D
Weight: 50 lbs., 23kg
4" Block Small*Front: 4" H x 6" W x 10" DBack: 4" H x 6" W x 10" D
Weight: 15 lbs., 6 kg
4" Block Medium*Front: 4" H x 12" W x 10" DBack: 4" H x 10" W x 10" D
Weight: 25 lbs., 11 kg
4" Block Large*Front: 4" H x 18" W x 10" DBack: 4" H x 16" W x 10" D
Weight: 40 lbs., 18 kg
8" Block Large*Front: 8" H x 18" W x 10" DBack: 8" H x 16" W x 10" D
Weight: 80 lbs., 37 kg

8
Construction Preparationfor Retaining Walls
The first thing to consider is the wall height and combination of wall patterns you want to use in yourretaining wall design. The buried base should consist of8" x 18" block with a combination of 16", 24", and/or 32"wall patterns, which can be installed after embedment.To achieve the desired height of your wall, a combinationof any suggested wall pattern can be used. (i.e., 24" wall pattern can be topped with a 16" wall pattern or vice versa.)
Calculating Block Requirementsfor Retaining Walls
To calculate the number of individual blocks required foryour retaining wall, select a 16", 24", or 32" pattern andrefer to the example calculations below. Since eachpattern has a fixed number of blocks, calculating thequantity of blocks required is done by multiplying yourtotal wall square footage by the individual blocks perpattern.
Patterns & Calculations– Retaining Walls
Block Required for 16" Tall Retaining Wall (18 sq ft)9 - 8" x 18" Blocks = 9 sq ft9 - 8" x 12" Blocks = 6 sq ft9 - 8" x 6" Blocks = 3 sq ft
Example: 150 sq ft wall (150 ÷ 18 sq ft = 8.33 patterns)8" x 18" = 9 x 8.33 = 75 blocks8" x 12" = 9 x 8.33 = 75 blocks8" x 6" = 9 x 8.33 = 75 blocks
Block Required for 16" Tall Retaining Wall (12 sq ft)4 - 8" x 18" Blocks = 4 sq ft4 - 8" x 12" Blocks = 2.67 sq ft4 - 8" x 6" Blocks = 1.33 sq ft4 - 4" x 18" Blocks = 2 sq ft4 - 4" x 12" Blocks = 1.33 sq ft4 - 4" x 6" Blocks = 0.67 sq ft
Example: 150 sq ft wall (150 ÷ 12 sq ft = 12.5 patterns)8" x 18" = 4 x 12.5 = 50 blocks8" x 12" = 4 x 12.5 = 50 blocks8" x 6" = 4 x 12.5 = 50 blocks4" x 18" = 4 x 12.5 = 50 blocks4" x 12" = 4 x 12.5 = 50 blocks4" x 6" = 4 x 12.5 = 50 blocks
Block Required for 24" Tall Retaining Wall (10 sq ft)4 - 8" x 18" Blocks = 4 sq ft3 - 8" x 12" Blocks = 2 sq ft3 - 8" x 6" Blocks = 1 sq ft3 - 4" x 18" Blocks = 1.5 sq ft3 - 4" x 12" Blocks = 1 sq ft3 - 4" x 6" Blocks = 0.50 sq ft
Example: 150 sq ft wall (150 ÷ 10 sq ft = 15 patterns)8" x 18" = 4 x 15 = 60 blocks8" x 12" = 3 x 15 = 45 blocks8" x 6" = 3 x 15 = 45 blocks4" x 18" = 3 x 15 = 45 blocks4" x 12" = 3 x 15 = 45 blocks4" x 6" = 3 x 15 = 45 blocks
Block Required for 32" Tall Retaining Wall (16 sq ft)6 - 8" x 18" Blocks = 6 sq ft4 - 8" x 12" Blocks = 2.67 sq ft4 - 8" x 6" Blocks = 1.33 sq ft6 - 4" x 18" Blocks = 3 sq ft6 - 4" x 12" Blocks = 2 sq ft6 - 4" x 6" Blocks = 1 sq ft
Example: 150 sq ft wall (150 ÷ 16 sq ft = 9.375 patterns)8" x 18" = 6 x 9.375 = 57 blocks8" x 12" = 4 x 9.375 = 38 blocks8" x 6" = 4 x 9.375 = 38 blocks4" x 18" = 6 x 9.375 = 57 blocks4" x 12" = 6 x 9.375 = 57 blocks4" x 6" = 6 x 9.375 = 57 blocks
= Front (Long) sides of Vintage blockPattern examples and calculations:

Retaining Walls – Getting Started
Note: Vintage retaining walls may be built to a maximumtotal height of 40" without geogrid. Use a minimum 6"embedment and 12" of clean crushed rock behind wall.
Step 1 – Base Course Preparation Beginning at thewall’s lowestelevation, excavatea trench down thelength of the wallwith a minimumwidth of 24" toaccommodate atleast 6" of basematerial and 6" ofblock embedment.As a rule of thumb, for every 8" to 10" of wall height, 1" ofblock should be buried with a minimum of 6" base courseembedment. Step the trench up or down with respect toadjacent grade.
Step 2 – Leveling Pad InstallationNote: Unlike other wall systems, Vintage builds verticallywith no setback. For this reason, take extra caution to makesure the first course is level from front to back to preventtipping or overturning.
When buildingunder 3' in height,place and compacta minimum of 6"base material to95% StandardProctor. Verify thebase is level with atransit or handlevel. Be aware thebase material(commonly referred to as road base or base aggregate) willvary from region to region.
When building over 3' in height, it is highly recommendedto build on a 7.1˚ inclined base (a 1" setback). Simply place3" of material on top of your compacted leveling pad.Screed the excess material away using a level tied to anangled board, compact to 95% std. proctor. Walls 4' andabove need to be built with geosynthetic reinforcementand may need to be designed by a licensed engineer. Seepage 13 for details.
Step 3 – Base Course InstallationThe base coursewill consist ofVintage 8" x 18"blocks. Use a stringline for alignmenton straight wallapplications. Allblocks should restfirmly on the padand be centered onthe base to allowapproximately 6" of base area in front and behind the block.Level each block side-to-side, front-to-back, and across threefull blocks with a hand level. A rubber mallet may be usedto level and align the Vintage blocks.
Note: For best alignment results on straight walls use thestring line within the interlocking channel.
Step 4 – Core and Drainage FillPlace 3/4" to 1"clean aggregate(crushed rock) aminimum of 12"behind the blocks.This creates adrainage zone thathelps to unify andmaximize theperformance of thewall. Fill all Vintagecores with the same 3/4" to 1" clean aggregate to createvertical Stone Columns. Stone Columns unify the block andgrid connection to further strengthen the wall.
Step 5 – Successive Course InstallationPrior to addingsuccessive courses,the top of eachblock should beclean and free offoreign material.Follow your patternas you lay eachcourse. Placedrainage fill as inStep 4. Place thebackfill material behind the drainage rock in 8" lifts(maximum) and compact to 95% Standard Proctor. Fill allcores. Repeat this process for each successive course.
Large compaction or construction equipment should bekept a minimum of 3' from the back of the wall. This 3'area should be compacted with a vibratory platecompactor or a manual hand tamper.
9
Basic Installation– Retaining Walls
6"
24"
3"
0.5"
3.5" Screed Board
6" Compacted Base
Screed / Compact
Back
Front
24"

10
Special Applications– Retaining Walls
Step 6 – Capping a WallThe Universal Caphas both a finishedsurface andpalletized surface.The finishedsurface should beexposed on the topcourse to completethe wall.
Use Super-StikTM
adhesive to secure cap blocks to the wall. If Super-Stik isnot available, use an adhesive with high rubber content.
Retaining Walls – Convex (Outside)and Concave (Inside) Radius Curves
The trapezoidalshape of eachVintage block andits unique zero-degree setbackallows for variedconvex (outside)and concave(inside) radiuscurves. The radiusof a curve(typicallymeasured to theface of the block),can be changedwhen the angledsides of each blockare spread ortightened.However, theminimum radiusfor an outsidecurve (withoutcutting) can be no smaller than 8', while the minimumradius for an inside curve can be no smaller than 12'.When building curves, install the chosen 16", 24", or 32"pattern completely before proceeding with the nextadjacent wall pattern (see page 8).
Outside 90° Corner
Begin an outsidecorner by installingthe blocks fromthe corner out,when possible.
Stagger the CornerBlocks as eachsuccessive courseis installed.
Depending on the wall pattern, acombination of 4"and 8" CornerBlocks will be usedfor the corner wallinstallation.
Inside 90° Corner
Begin an insidecorner from thecorner of the walland install theblocks from thecorner out, whenpossible.
If you have tobuild the wall fromthe outside to thecorner, it may be necessary to cut blocks to secure aproper fit.
16" Pattern
Convex Curve
Concave Curve
24" Pattern
32" Pattern

11
Basic Stair Step w/Universal Cap
The installation described below uses Rockwood’sClassic® 6 for a basic stair step application. This willensure that full blocks fit the width of the stair stepswithout having to cut them, since each block is 18" inwidth.
Step 1 – Dimensions of the StepsThe step rise is 6" and the stepdepth is 10". Todetermine thenumber of risersneeded, divide theheight of the stairby the riser height.To determine thelength of the side stair walls, multiply the depth by thenumber of risers.
Step 2 – Excavating the Trench for the BaseFollow thestandard proce-dures for basecourse installationand place theblocks on theleveling pad sothere are no gapsbetween them.
Step 3 – Setting Successive CoursesExcavate aminimum of 6" ofbase materialunder all risers.Allow for the basematerial to extenda minimum of 18"behind eachsuccessive courseof 6" block. Propercompaction to95% Standard Proctor is crucial in a stair step application.Each successive riser should overlap the previous riser by2". Fill the cores and backfill behind the wall with thebase material and compact to 95% Standard Proctor.Repeat this process for each successive riser.
Step 4 – Capping the RisersWhen cappingrisers, make surethe top of therisers are sweptfree of foreignmaterial andsecure UniversalCaps in placeusing Super-StikTM
adhesive.
A tumbled cap may also be used for the step tread tohelp maintain the Vintage look.
Basic Stair Step w/Step Tread
The installation described below uses Rockwood’s StepTreads and is for a basic stair step application. It isrecommended the riser width be considered in 8" incre-ments for this particular application. This will ensure fullblocks fit the width of the stair steps without having to cutthem, since each Step Tread is 8" in width.
Step 1 – Dimensions of the StepsThe step rise is 6".The step depthmay vary from 10"to 13". Todetermine thenumber of risersneeded, divide theheight of the stairby the riser height.To determine the length of the side stair walls, multiplythe depth by the number of risers.
Step 2 – Excavating the Trench for the BaseFollow thestandard proce-dures for basecourse installationand place theblocks on theleveling pad sothere are no gapsbetween them.
Visit us on the web at:www.rockwoodwalls.com

12
Step 3 – Setting Successive CoursesExcavate for aminimum of 6" ofbase materialunder all StepTreads. Allow forthe base materialto extend aminimum of 18"behind eachsuccessive courseof Step Treads.Proper compaction to 95% Standard Proctor is crucial in astair step application. Each successive Step Tread shouldoverlap the previous riser by 2" to 5". Repeat this processfor each successive riser.
Special Wall Applications
Step 4 – Completing a Step Tread StairUse Super-StikTM
to secure the lastStep Tread course.On the next to thelast course, add aglue bead to theback half of eachtread top. Lay thelast course of StepTreads on the gluebead to secure inplace.
Stepping Down a WallA Vintage wall canbe stepped downto match a changein grade. At thepoint of gradetransition, set aVintage 4" or 8"End Block whereneeded. Finish thetop of your wallwith tumbledUniversal Cap Blocks.
Branch WallBranched wallsrequire a minimumof one courseembedment, as ifeach wall isindependent.
Tiered WallTiered walls maybe installed whereit is desirable oraestheticallypleasing to usemore than onewall. Upper wallscan exertsurcharge loads onlower walls. Inorder to designtiered walls independently, the walls must be set back adistance of at least twice the height of the lower wall.Whenever tiered walls are constructed, a qualified soilsengineer should be consulted.
End WallFor an exposedend wall, use acombination of 4"and 8" Vintage EndBlocks. Cut or splitblocks to fit.
Note: Ending afreestanding wallrequires aEnd/Corner block.Check with your supplier for availability.
Special Applications– Retaining Walls
Visit us on the web at:www.rockwoodwalls.com

13
Retaining Wall – Grid Installation
Geosynthetic reinforcement is an engineered product thatis typically comprised of polypropylene, polyester, orother high tensile material. Used in conjunction withsegmental retaining wall blocks, it helps stabilize the soilmass behind a wall. Depending on the wall design, thelength and the number of grid layers will vary.
Generally, the grid strength is in the rolled direction.Install the grid in the same direction as it is unrolled.Biaxial grid is another option in which the strength is thesame regardless of direction.
Step 1 – Preparation for GridThe area behindthe wall on thegrid layer needs tobe level with thetop of the blockand compacted to95% of theStandard Proctor(ASTM D698). Fill all cores.
Step 2 – Grid PlacementPlace the grid asclose to the face ofthe wall withoutexposing it.Ensure the grid isplaced with thestrength directionperpendicular tothe wall. Checkgrid manufacturerspecifications forproper grid placement instructions.
For ease of installation, grid placement is recommendedat the top of each wall pattern.
Step 3 – Preparation for BackfillPlace the nextcourse of block tostart a new 16",24", or 32" wallpattern. Pull thegrid back andstake it taut andfree of wrinkles.
Step 4 – Backfill and Compact Place 1/2" to 1"clean aggregate(crushed rock) aminimum of 12"behind the blocks.Fill all cores. Placeand compactbackfill on the gridin lifts no greaterthan 8". Whenpossible, it isrecommended the backfill is deposited directly behind thewall and pushed to the end of the grid to ensure itremains taut and wrinkle-free.
Drainage Rock(3/4" - 1" clean aggregate)
HeightVaries
12 "
Base Leveling Pad (3/4" aggregate with fines)
Compacted Native Soils
Geogrid Reinforcements
6"
Geosynthetic Reinforcement– Retaining Walls

14
Geosynthetic Reinforcement– Retaining Walls
5'
5'
5'
6'
7'
8'
10'
10'
10'
10'
10'
10'
5'
5'
6'
7'
8'
8'
4'
4'
5'
6'
7'
9'
9'
9'
9'
9'
4'
5'
6'
7'
8'
4'
4'
5'
6'
7'
7'
7'
7'
4'
5'
6'
7'
4'
4'
5'
6'
6'
6'
4 '
5'
6'
Design Tables for Vintage with Clay (φ = 26˚), using SG 200The design tables were determined using the following assumed soil parameters and conditions:• Unit weight (γ)=120pcf for all soil types.
• Friction angles (φ); (φ)=34˚ for Silty Coarse Sand (SM-GM). (φ)=30˚ for Silty Sand/Sandy Silt (SM-ML). (φ)=26˚ Clayey Silt/Silty Clay (ML-CL).
Designs assume a 6" compacted base aggregate leveling pad, and a swale directly behind wall. Rockwood’s design charts are for preliminary use only.
A final site specific design should be evaluated and approved by a qualified professional engineer.
Tables account for inclined base construction for walls over 3' in height. Vintage 16" Pattern for Retaining Walls
Level 3:1 Slope Surcharge: (100 lbs./sq. ft.)
4' Wall (Grid Layers at: 8", 16", 16", 8")
5'4" Wall (Grid Layers at: 8", 16", 16", 16", 8")
6'8" Wall (Grid Layers at: 8", 16", 16", 16", 16", 8")
8' Wall (Grid Layers at: 8", 16", 16", 16", 16", 16", 8")

15
5'
5'
5'
5'
6'
7'
5'
5'
5'
6'
7'
9'
5'
5'
5'
5'
6'
7'
4'
4'
5'
5'
6'
4'
4'
5'
6'
7'
4'
4
5'
5'
6'
4'
4'
5'
5'
4'
4'
5'
6'
4'
4'
5'
6'
4'
4'
5'
4'
4'
5'
4 '
4'
5'
Design Tables for Vintage with Sand Silt (φ = 30˚), using SG 200The design tables were determined using the following assumed soil parameters and conditions:• Unit weight (γ)=120pcf for all soil types.
• Friction angles (φ); (φ)=34˚ for Silty Coarse Sand (SM-GM). (φ)=30˚ for Silty Sand/Sandy Silt (SM-ML). (φ)=26˚ Clayey Silt/Silty Clay (ML-CL).
Designs assume a 6" compacted base aggregate leveling pad, and a swale directly behind wall. Rockwood’s design charts are for preliminary use only.
A final site specific design should be evaluated and approved by a qualified professional engineer.
Tables account for inclined base construction for walls over 3' in height. Vintage 16" Pattern for Retaining Walls
Level 3:1 Slope Surcharge: (100 lbs./sq. ft.)
4' Wall (Grid Layers at: 8", 16", 16", 8")
5'4" Wall (Grid Layers at: 8", 16", 16", 16", 8")
6'8" Wall (Grid Layers at: 8", 16", 16", 16", 16", 8")
8' Wall (Grid Layers at: 8", 16", 16", 16", 16", 16", 8")

16
5'
5'
5'
5'
6'
7'
5'
5'
5'
6'
7'
8'
5'
5'
5'
5'
6'
7'
4'
4'
4'
5'
6'
4'
4'
5'
6'
7'
4'
4
4'
5'
6'
4'
4'
4'
5'
4'
4'
5'
6'
4'
4'
4'
5'
4'
4'
4'
4'
4'
5'
4 '
4'
4'
Design Tables for Vintage with Sand (φ = 34˚), using SG 200The design tables were determined using the following assumed soil parameters and conditions:• Unit weight (γ)=120pcf for all soil types.
• Friction angles (φ); (φ)=34˚ for Silty Coarse Sand (SM-GM). (φ)=30˚ for Silty Sand/Sandy Silt (SM-ML). (φ)=26˚ Clayey Silt/Silty Clay (ML-CL).
Designs assume a 6" compacted base aggregate leveling pad, and a swale directly behind wall. Rockwood’s design charts are for preliminary use only.
A final site specific design should be evaluated and approved by a qualified professional engineer.
Tables account for inclined base construction for walls over 3' in height. Vintage 16" Pattern for Retaining Walls
Level 3:1 Slope Surcharge: (100 lbs./sq. ft.)
4' Wall (Grid Layers at: 8", 16", 16", 8")
5'4" Wall (Grid Layers at: 8", 16", 16", 16", 8")
6'8" Wall (Grid Layers at: 8", 16", 16", 16", 16", 8")
8' Wall (Grid Layers at: 8", 16", 16", 16", 16", 16", 8")
Geosynthetic Reinforcement– Retaining Walls

17
Construction Preparation for Freestanding Walls
The first thing to consider is the wall height and combi-nation of wall patterns you want to use in yourfreestanding wall design. The buried base should consistof 8" x 18" block with a combination of 16", 24", and/or 32"wall patterns, which can be installed after embedment.To achieve the desired height of your wall, a combinationof any suggested wall pattern can be used. (i.e., 24" wallpattern can be topped with a 16" wall pattern or viceversa.)
Calculating Block Requirementsfor Freestanding Walls
To calculate the number of individual blocks required foryour freestanding wall, select a 16", 24", or 32" pattern andrefer to the example calculations below. Since eachpattern has a fixed number of blocks, calculating thequantity of blocks required is done by multiplying yourtotal wall square footage by the individual blocks perpattern.
Note: Freestanding walls will likely require End Blocks.Check with your supplier for availability.
= Back (short) sides of Vintage block = Front (long) sides of Vintage block
Patterns & Calculations– Freestanding Walls
Block Required for 8" Tall Freestanding Wall (15.67 sq ft)8 - 8" x 18" Blocks = 7.56 sq ft
10 - 8" x 12" Blocks = 6.11 sq ft6 - 8" x 6" Blocks = 2 sq ft
Example: 150 sq ft wall (150 ÷ 15.67 sq ft = 9.57 patterns)8" x 18" = 8 x 9.57 = 77 blocks8" x 12" = 10 x 9.57 = 96 blocks8" x 6" = 6 x 9.57 = 58 blocks
Block Required for 16" Tall Freestanding Wall (7.56 sq ft)2 - 8" x 18" Blocks = 2 sq ft2 - 8" x 12" Blocks = 1.11 sq ft2 - 8" x 6" Blocks = .67 sq ft4 - 4" x 18" Blocks = 2 sq ft4 - 4" x 12" Blocks = 1.11 sq ft4 - 4" x 6" Blocks = .67 sq ft
Example: 150 sq ft wall (150 ÷ 7.56 sq ft = 20 patterns)8" x 18" = 2 x 20 = 40 blocks8" x 12" = 2 x 20 = 40 blocks8" x 6" = 2 x 20 = 40 blocks4" x 18" = 4 x 20 = 80 blocks4" x 12" = 4 x 20 = 80 blocks4" x 6" = 4 x 20 = 80 blocks
Block Required for 24" Tall Freestanding Wall (11.34 sq ft)5 - 8" x 18" Blocks = 4.89 sq ft3 - 8" x 12" Blocks = 1.67 sq ft3 - 8" x 6" Blocks = 1 sq ft4 - 4" x 18" Blocks = 2 sq ft4 - 4" x 12" Blocks = 1.11 sq ft4 - 4" x 6" Blocks = 0.67 sq ft
Example: 150 sq ft wall (150 ÷ 11.34 sq ft = 13.22 patterns)8" x 18" = 5 x 13.22 = 66 blocks8" x 12" = 3 x 13.22 = 40 blocks8" x 6" = 3 x 13.22 = 40 blocks4" x 18" = 4 x 13.22 = 53 blocks4" x 12" = 4 x 13.22 = 53 blocks4" x 6" = 4 x 13.22 = 53 blocks
Visit www.rockwoodwalls.com for additional Vintage patterns.
Pattern examples and calculations:

18
Construction Preparation for Freestanding Radius Walls
These freestanding Seat Wall patterns build a 8' outside radius.
= Front (long) sides of Vintage block
Block Required for 8" Tall Freestanding Radius Wall (8 sq ft)4 - 8" x 18" Blocks = 4 sq ft4 - 8" x 12" Blocks = 2.67 sq ft4 - 8" x 6" Blocks = 1.33 sq ft
Example: 150 sq ft wall (150 ÷ 8 sq ft = 18.75 patterns)8" x 18" = 4 x 18.75 = 75 blocks8" x 12" = 4 x 18.75 = 75 blocks8" x 6" = 4 x 18.75 = 75 blocks
Block Required for 16" Tall Freestanding Radius Wall (20 sq ft)5 - 8" x 18" Blocks = 6 sq ft5 - 8" x 12" Blocks = 2.67 sq ft5 - 8" x 6" Blocks = 1.33 sq ft9 - 4" x 18" Blocks = 3 sq ft
11 - 4" x 12" Blocks = 2 sq ft11 - 4" x 6" Blocks = 1 sq ft
Example: 150 sq ft wall (150 ÷ 20 sq ft = 7.5 patterns)8" x 18" = 5 x 7.5 = 38 blocks8" x 12" = 5 x 7.5 = 38 blocks8" x 6" = 5 x 7.5 = 38 blocks4" x 18" = 9 x 7.5 = 68 blocks4" x 12" = 11 x 7.5 = 83 blocks4" x 6" = 11 x 7.5 = 83 blocks
Block Required for 24" Tall Freestanding Radius Wall (30 sq ft)10 - 8" x 18" Blocks = 10 sq ft10 - 8" x 12" Blocks = 6.67 sq ft10 - 8" x 6" Blocks = 3.33 sq ft10 - 4" x 18" Blocks = 5 sq ft10 - 4" x 12" Blocks = 3.33 sq ft10 - 4" x 6" Blocks = 1.67 sq ft
Example: 150 sq ft wall (150 ÷ 30 sq ft = 5 patterns)8" x 18" = 10 x 5 = 50 blocks8" x 12" = 10 x 5 = 50 blocks8" x 6" = 10 x 5 = 50 blocks4" x 18" = 10 x 5 = 50 blocks4" x 12" = 10 x 5 = 50 blocks4" x 6" = 10 x 5 = 50 blocks
Patterns & Calculations– Freestanding Radius Walls
Visit us on the web at:www.rockwoodwalls.com
Visit www.rockwoodwalls.com for additional Vintage patterns.
Pattern examples and calculations:

19
Freestanding Walls – Getting Started
Note: Consult a qualified engineer for design considera-tions when building freestanding Vintage walls over 48" in height.
Step 1 – Base Course Preparation Beginning at thewall’s lowestelevation, excavatea trench down thelength of the wallto accommodate atleast 6" of basematerial and 6" ofblock embedment.As a rule of thumb,for every 8" to 10"of wall height, 1" of block should be buried with aminimum of 6" base course embedment. Step the trenchup or down with respect to adjacent grade.
The width of the trench for a Vintage wall should be aminimum of 24". Based on the type of application andwhat is retained, the depth of the leveling pad may vary. Ifnecessary, consult with an engineer.
After excavating the native soil, and prior to adding basematerial, remove loose material from the trench andcompact.
Step 2 – Leveling Pad InstallationPlace and compacta minimum of 6"base material to95% StandardProctor. Verify thebase is level with atransit or handlevel. Be aware thebase material(commonlyreferred to as roadbase or base aggregate) will vary from region to region.
Step 3 – Base Course InstallationThe base coursewill consist ofVintage 8" x 18"blocks. Use astring line foralignment onstraight wall appli-cations. All blocksshould rest firmlyon the pad and becentered on thebase to allow approximately 6" of base area in front andbehind the base block. Level each block side-to-side, front-to-back, and across three full blocks with a hand level. Arubber mallet may be used to level and align the Vintage
blocks. Lay blocks in alternating directions so there are nogaps between them.
Step 4 – Add more coursesWhen buildingsuccessivecourses, maintain aVintage 16", 24", or32" freestandingwall pattern (seepage 17).
Step 5 – Finish the InstallationPosition theUniversal Caps andadhere in placewith Super-StikTM
adhesive. Do not exceed amaximum height of 4' withoutconsulting aqualified engineer.
Note: The maximum height may be increased with unitinfill, grout, and/or post tensions with a concrete base orfooting.
Convex (Outside) and Concave (Inside) Radius CurvesFor a radius curved Vintage wall, place the blocks on theleveling pad so there are no gaps between them. You mayhave to alternate the facing direction of each block and/orcut the block to fit a radius curve.
Convex Curve
Concave Curve
Basic Installation– Freestanding Walls

20
Freestanding Walls – 90° Corners
Outside and Inside 90° CornersStagger the End Blocks as each successive course isinstalled so it is on the opposite side of the wall corner. A combination of 4" and 8" End Blocks will be used for thecorner wall installation.
Note: Before you plan your project, check with yourmanufacturer for availability of 10" deep freestanding wall corner blocks.
Note: Cutting may be required for inside and outsidecorner blocks.
Retaining/Freestanding WallIntegration
A Vintage freestanding wall can easily be integrated witha Vintage retaining wall. Begin installing the freestandingwall at the top of the retaining wall using the freestandingwall pattern.
16" Pattern
24" Pattern
32" Pattern
16" Pattern
24" Pattern
32" Pattern
Basic Installation– Freestanding Walls

21
Building Freestanding Pillars
Note: Before you plan your project, check with yourmanufacturer for availability of Vintage Pillar blocks.
Step 1 – Starting a Pillar Follow the stepson page 9 for aleveling pad installation, asdescribed in basicwall installation.
Using 8" PillarBlocks, bury thefirst course toestablish thefoundation for your Vintage pillar.
Design pillars in 12" lifts above the base course.
Note: To add additional reinforcement to pillarconstruction, use Super-Stik™ adhesive on each block.Check with your supplier to determine which concreteadhesive is recommended if Super-Stik adhesive is notavailable.
Step 2 – Add More CoursesEach pillar courseis built in 12" incre-ments, consistingof 4" and 8" tallVintage PillarBlocks.
Use adhesive oneach block as youbuild.
Step 3 – Add More Courses
Step 4 – Add More Courses
Step 5 – Add More Courses
Step 6 – Add More Courses
Step 7 – FinishingAdd Pillar Blocksso the last coursecreates a flushsurface as shown.
To finish the pillar, adhere yourdesired capmaterial securely in place usingSuper-Stikadhesive.
Special Applications – Pillars

22
What is the Anchor Bar?The Anchor Bar is a 4" x 2" x 5/8"projection on the bottom of the block thatis laid against the backside of the face ofthe two blocks below.
What is backfill?Backfill is the material placed behind thedrainage zone that has been removedand replaced during the constructionprocess. It needs to be compacted backto 95% Standard Proctor.
What is the base material?The leveling material used to distributethe weight of the blocks over a widerfoundation and to provide a workingsurface during construction. Basematerials are composed of coarse-grained material ranging in size from finesand to 1" aggregate.
What is batter?Batter is the angle at which the face ofthe wall is from being vertical.
What is clay?Clay is a fine-grained soil that typicallypossesses both plasticity andcohesiveness. It is considered a poor soilfor construction purposes.
What is compaction?Compaction is the densification of soilsby means of mechanical action withequipment such as a plate compactor,jumping jack, or hand tamper.Compaction is the most fundamentalelement in wall construction.
What is drain tile?Drain tile is perforated pipe placed in thebackfill and used to transport water awayfrom the wall. Drain tiles are typically 4"perforated PVC pipe.
What is a drainage zone?The drainage zone helps alleviate hydro-static pressure at the back of the block.3/4" to 1" clean aggregate (crushed rock)is placed a minimum of 12" directlybehind the blocks.
What is an expansion joint?An expansion joint is a space whichallows for expansion as to not adverselyaffect an adjacent structure.
What are fines?Fines are fine-grained soils, such as clayor silt.
What is friction angle? It is an angle that describes the rate atwhich a soils’ strength increases underloading. The greater the friction angle of asoil - the lesser the lateral loads on a wall.
What is filter fabric?It is a geotextile used to filter fines fromwater. It is commonly placed between thetopsoil and the backfill and drainagezones to eliminate the migration of soilsinto the drainage zone and to helpprevent wall face staining.
What is geosynthetic reinforcement?Typically known as geogrid, it is a hightensile polypropylene or polyestermaterial that helps stabilize the soil massbehind the wall. The number of gridlayers and grid lengths are determined bya number of variables; including wallheight, type of soil, etc.
What is grade?Grade is considered to be ground level.
What is a gravity wall?A gravity wall is able to resist soilpressure by relying only on its mass. Thistype of wall does not require geosyn-thetic reinforcement.
What is hydrostatic pressure?It is the pressure exerted on the back of awall by water in undrained or saturatedsoils.
What is a leveling pad?The level surface (gravel or concrete)used to distribute the weight of thestacked blocks over a wider foundationarea and to provide a working surfaceduring construction. The leveling pad istypically constructed with granular soil tofacilitate compaction.
What is retained soil?It is the soil, excluding backfill, which isretained by the wall.
What is silt?Silt is a fine-grained soil.
What is a Stone Column?It is a continuous vertical column ofaggregate material that is formed whenthe Rockwood block cores are filled. TheStone Column unifies grid and block intoan integrated structural system.
What is surcharge loading?It is a force exerted at the top of wall suchas loading from a slope, roadway, parkinglot, or building. Surcharge loading shouldbe considered in the design of a wall.
What is a swale?A ditch or canal used to divert wateraway from the back of the wall.
What are course-grained soils?Soils which contain less than 50%passing the #200 sieve by dry weight.Coarse-grained soils are typically morepermeable than fine-grained soils (claysand silts); exhibit very little cohesion andplasticity; and maintain their soil strengthunder adverse moisture conditions.
SAND - Coarse-grained material formedfrom disintegrated rock. [Sand passes theno. 4 sieve (4.76mm) and is retained onthe #200 sieve (0.074mm)].
GRAVEL - Coarse-grained materialformed from disintegrated rock. [Gravelpasses the 3" sieve (76.2mm) and isretained on the no. 4 sieve (4.76mm)].Gravels are generally more resistant toerosion than are sands.
What are fine-grained soils?Soils which contain greater than 50%passing the #200 sieve by dry weight.Fine-grained soils are typically lesspermeable than coarse-grained soils(sands and gravels); exhibit considerablecohesion and plasticity; and lose their soilstrength under adverse moisture condi-tions such as groundwater and surficialinfiltration.
CLAY - Fine, flat shaped particles that areinvisible to the naked eye and possessboth plasticity and cohesiveness.
SILT - Fine, granular particles that areinvisible to the naked eye and arenonplastic and noncohesive.
Glossary of Terms
Visit us on the web at: www.rockwoodwalls.com

23
Notes:
325 Alliance Place NERochester, MN 55906
toll free888.288.4045phone507.529.2871fax507.529.2879
www.rockwoodwalls.com
©Copyright 2009. All Rights Reserved. Made worldwide under license from Rockwood Retaining Walls, Inc. US and international patentsissued and pending. This information has been prepared for the benefit of customers interested in Rockwood Retaining Wall products. Itwas reviewed carefully prior to publication. Rockwood assumes no liability for its accuracy or completeness. Final determination of thesuitability of any information or material for the use contemplated, or for its manner of use, is the sole responsibility of the user. 909
Available at:
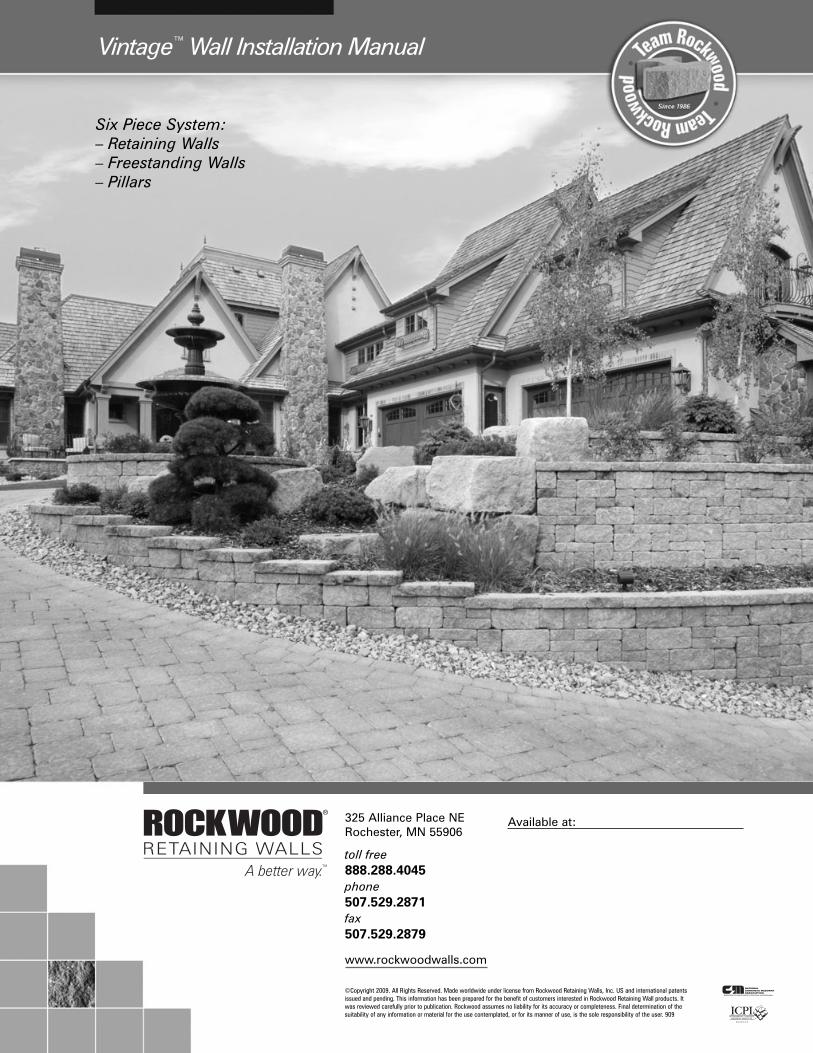
VintageTM Wall Installation Manual
Six Piece System:– Retaining Walls– Freestanding Walls– Pillars