Vendor Training HRC.ppt - Harbor Regional Center · 2013-01-28 · • The eBilling system is...
45
eBilling Training For the Vendor
Transcript of Vendor Training HRC.ppt - Harbor Regional Center · 2013-01-28 · • The eBilling system is...
eBilling Trainingg gFor the Vendor

All UsersLog In
1. Click the LAUNCH APPLICATION button.
Log In
C c e U C C O bu o2. Enter your User ID and Password3. Click the LOGIN button.4. If you do not have a User ID please contact
your Regional Centeryour Regional Center.
REMINDER: Please change your password the first time you log in. y g

All UsersAll UsersSystem Information
Y ill b t d t h d
Quick Facts
You will be prompted to change your password every ninety days.
After twenty-five minutes of inactivity, you will be y y, ylogged out of the system. Make sure to save all updates as you are making changes to avoid being logged out of the system and losing your work.
All UAll UsersHome Tab
Dashboard
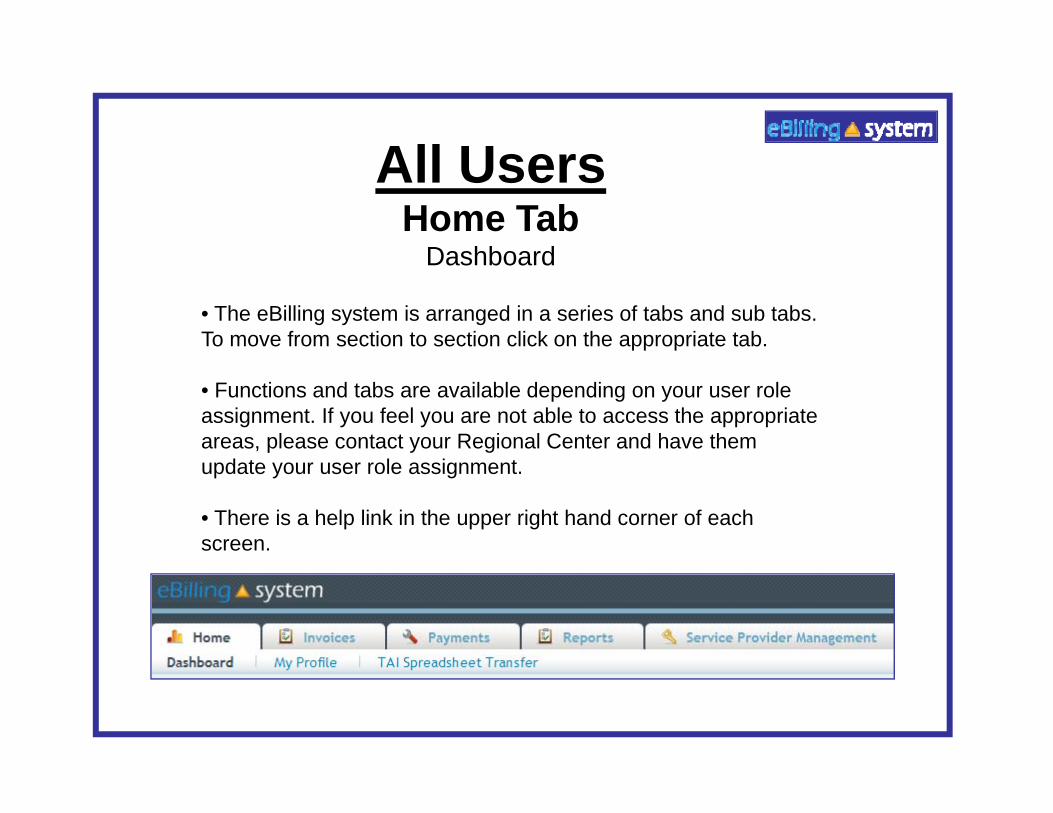
• The eBilling system is arranged in a series of tabs and sub tabs. To move from section to section click on the appropriate tab.
Dashboard
• Functions and tabs are available depending on your user role assignment. If you feel you are not able to access the appropriate areas, please contact your Regional Center and have them update your user role assignment.
• There is a help link in the upper right hand corner of each screen.
All Users
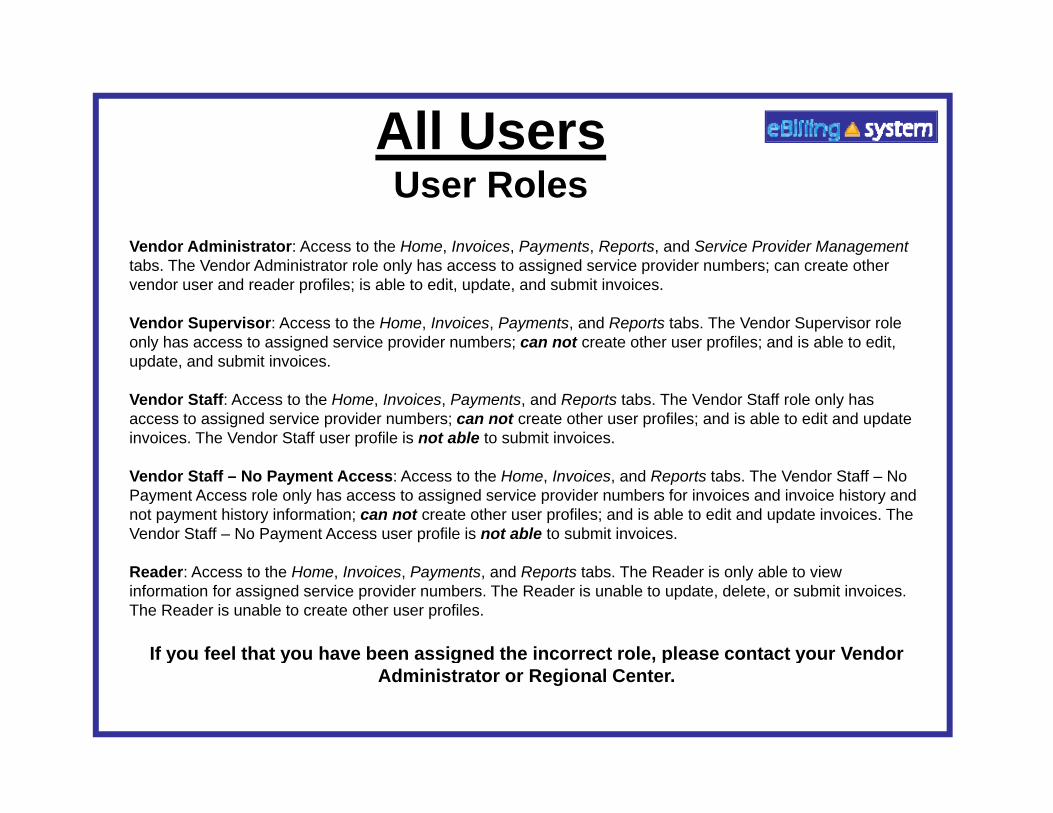
Vendor Administrator: Access to the Home, Invoices, Payments, Reports, and Service Provider Management
User Roles, , y , p , g
tabs. The Vendor Administrator role only has access to assigned service provider numbers; can create other vendor user and reader profiles; is able to edit, update, and submit invoices.
Vendor Supervisor: Access to the Home, Invoices, Payments, and Reports tabs. The Vendor Supervisor role only has access to assigned service provider numbers; can not create other user profiles; and is able to edit,
d t d b it i iupdate, and submit invoices.
Vendor Staff: Access to the Home, Invoices, Payments, and Reports tabs. The Vendor Staff role only has access to assigned service provider numbers; can not create other user profiles; and is able to edit and update invoices. The Vendor Staff user profile is not able to submit invoices.
Vendor Staff – No Payment Access: Access to the Home, Invoices, and Reports tabs. The Vendor Staff – No Payment Access role only has access to assigned service provider numbers for invoices and invoice history and not payment history information; can not create other user profiles; and is able to edit and update invoices. The Vendor Staff – No Payment Access user profile is not able to submit invoices.
Reader: Access to the Home, Invoices, Payments, and Reports tabs. The Reader is only able to view information for assigned service provider numbers. The Reader is unable to update, delete, or submit invoices. The Reader is unable to create other user profiles.
If you feel that you have been assigned the incorrect role, please contact your Vendor y y g p yAdministrator or Regional Center.
All UAll UsersHome Tab
My Profile
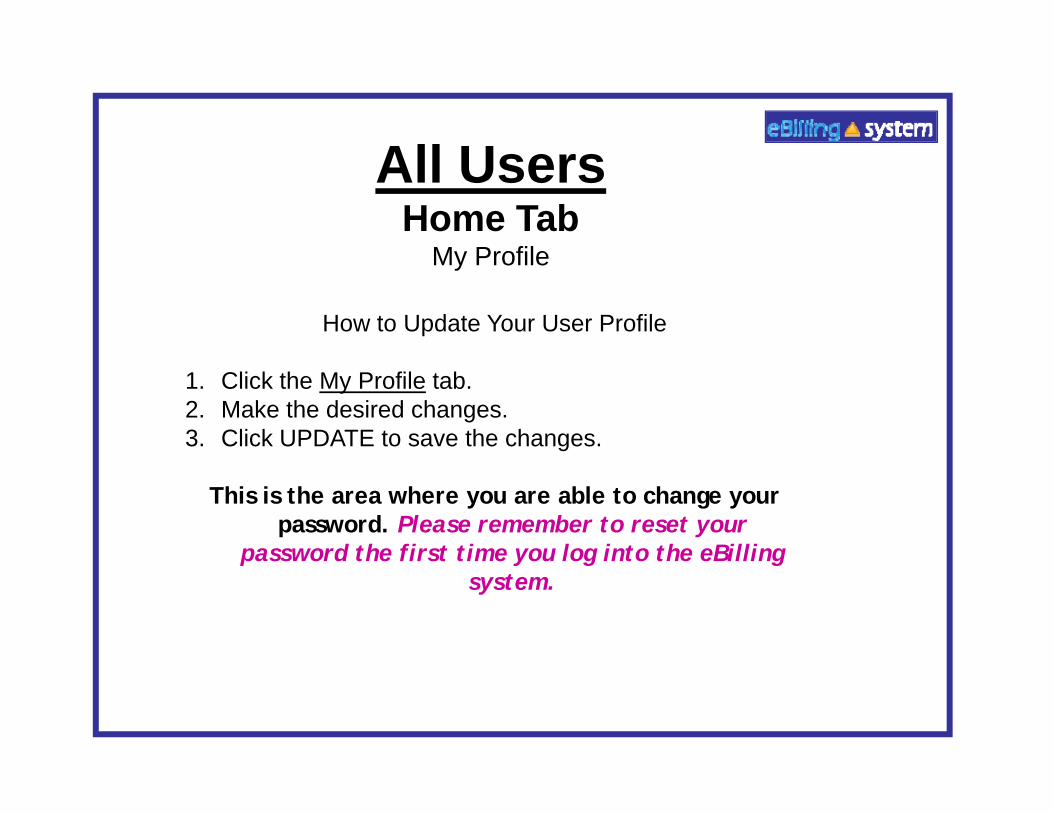
How to Update Your User Profile
My Profile
1. Click the My Profile tab.2. Make the desired changes.3. Click UPDATE to save the changes.
This is the area where you are able to change your password. Please remember to reset your
password the first time you log into the eBilling password the first time you log into the eBilling system.
All UsersAll UsersHome
Dashboard
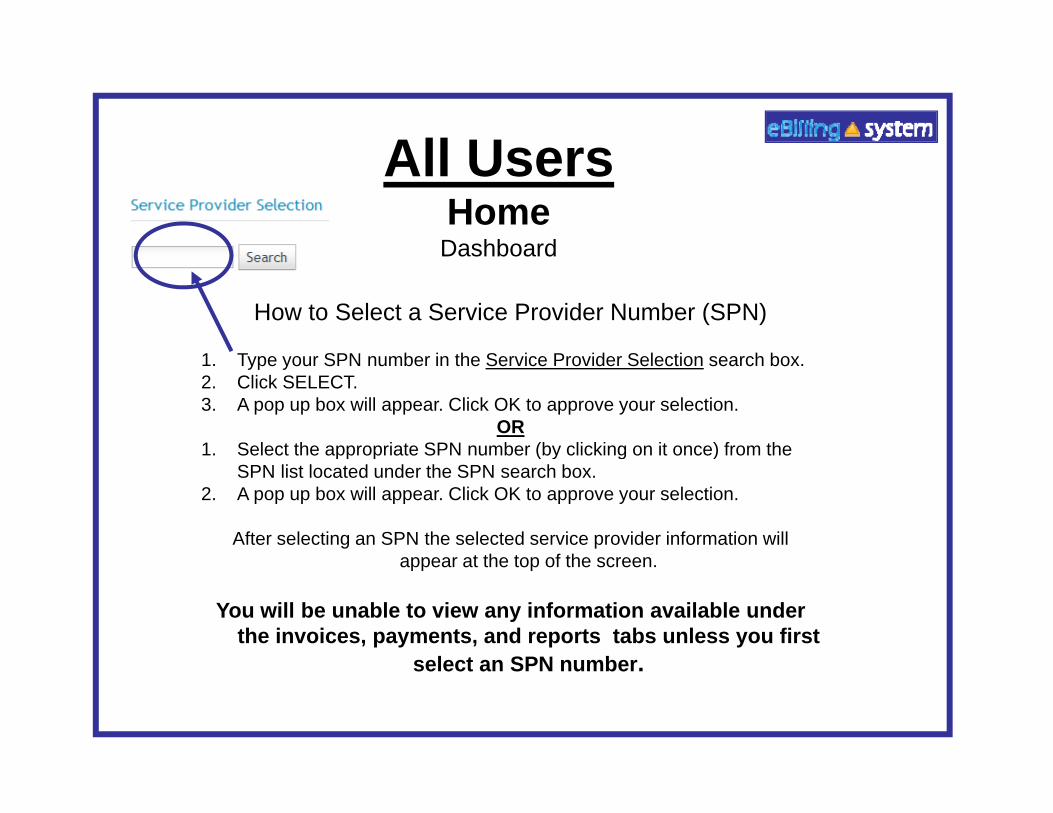
How to Select a Service Provider Number (SPN)
1 T SPN b i th S i P id S l ti h b
Dashboard
1. Type your SPN number in the Service Provider Selection search box.2. Click SELECT.3. A pop up box will appear. Click OK to approve your selection.
OR1. Select the appropriate SPN number (by clicking on it once) from the pp p ( y g )
SPN list located under the SPN search box.2. A pop up box will appear. Click OK to approve your selection.
After selecting an SPN the selected service provider information will appear at the top of the screenappear at the top of the screen.
You will be unable to view any information available under the invoices, payments, and reports tabs unless you first
select an SPN numberselect an SPN number.
All UsersAll UsersHome
Other Options
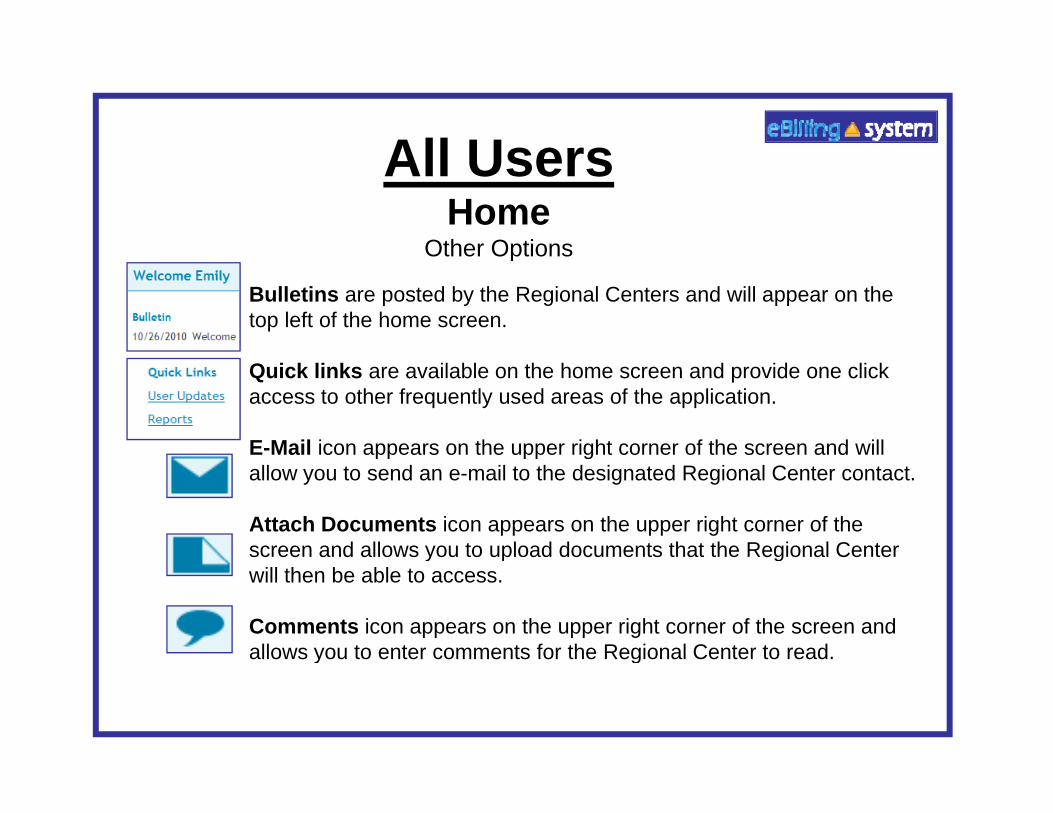
Bulletins are posted by the Regional Centers and will appear on the top left of the home screen.
Other Options
Quick links are available on the home screen and provide one click access to other frequently used areas of the application.
E-Mail icon appears on the upper right corner of the screen and will pp pp gallow you to send an e-mail to the designated Regional Center contact.
Attach Documents icon appears on the upper right corner of the screen and allows you to upload documents that the Regional Center y p gwill then be able to access.
Comments icon appears on the upper right corner of the screen and allows you to enter comments for the Regional Center to read. y g

All UsersAll UsersHome
Comments:• The invoice level comments will be available on the website. Invoice detail line level comments will be transferred to UFS for Regional Center staff to view. g
• Invoice detail line level comments are meant to convey important information to POS staff at the Regional Center (ex. This invoice line was deferred because…).
• Will be seen only by POS Regional Center staff.
• Should be kept brief (two sentences or less).
•Are not for communication with Service Coordinators.
• Are not an immediate or direct form of communication with the Regional Center. If you have a question or concern that requires an answer from the Regional y q q gCenter, you need to either call or e-mail your Regional Center contact.

All UsersAll UsersHome
Documents:
Attached documents will only be flagged on Regional Center reports if they are attached to specific invoice detail lines.
Documents attached at the invoice level will not appear on Regional Center reports.
If you would like Regional Centers to know that youIf you would like Regional Centers to know that you have attached a document to your invoice, it must beattached to an invoice detail line.
Vendor AdministratorVendor AdministratorService Provider Management
Users
Only users assigned to the Vendor Administrator role will have access to the Service Provider
Users
Management tab.
This is the area where Vendor Administrators will be able to:will be able to:
Search for Users Maintain User Profiles Create New User Profiles Assign Roles to Users Assign SPNs to Users
Vendor AdministratorVendor AdministratorService Provider Management
Users
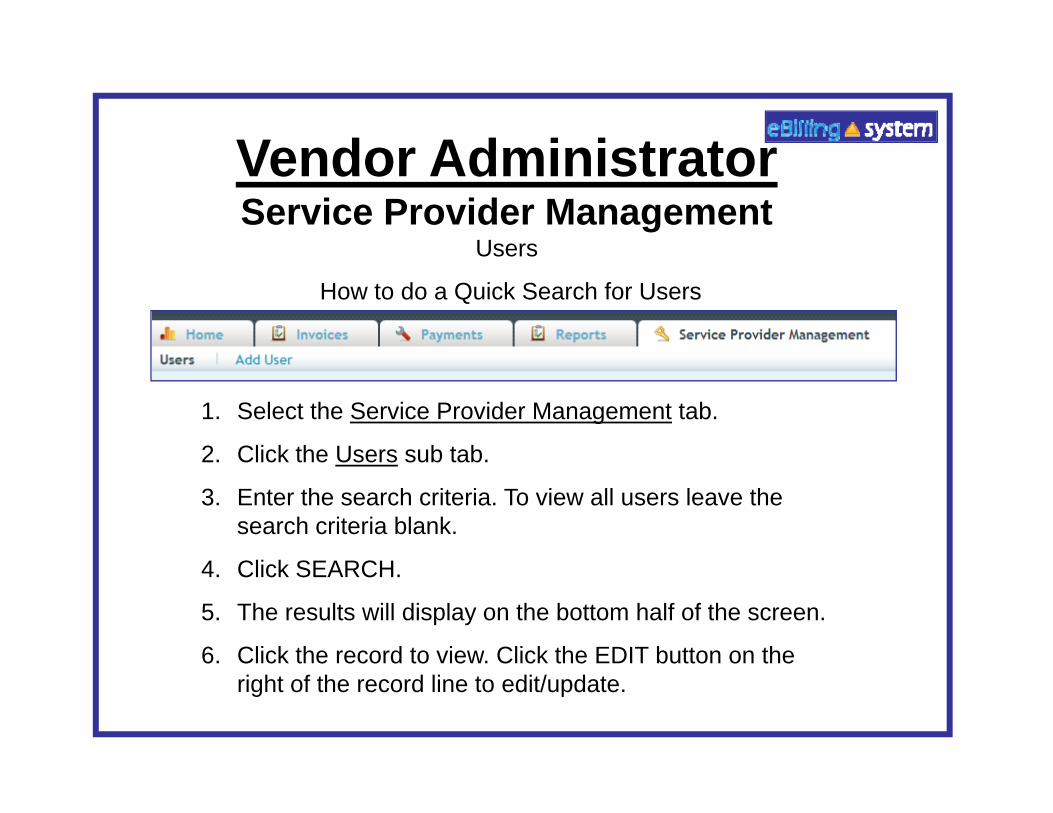
How to do a Quick Search for Users
Users
1. Select the Service Provider Management tab.
2 Click the Users sub tab2. Click the Users sub tab.
3. Enter the search criteria. To view all users leave the search criteria blank.
4 Cli k SEARCH4. Click SEARCH.
5. The results will display on the bottom half of the screen.
6. Click the record to view. Click the EDIT button on the6. Click the record to view. Click the EDIT button on the right of the record line to edit/update.

Vendor AdministratorVendor AdministratorService Provider Management
Users
How to Create New User Profiles
Users
1. Select the Service Provider Management tab.
2 Click the Add Users sub tab2. Click the Add Users sub tab.
3. Enter the new user profile information. Fields with a red star are required. The user role defaults to reader. Choose a new user role from the drop down menu ifChoose a new user role from the drop down menu if necessary.
4. Click ADD.
5 Cli k th ASSIGN SPN b tt t i SPN t thi5. Click the ASSIGN SPN button to assign SPNs at this time.
Vendor AdministratorVendor AdministratorService Provider Management
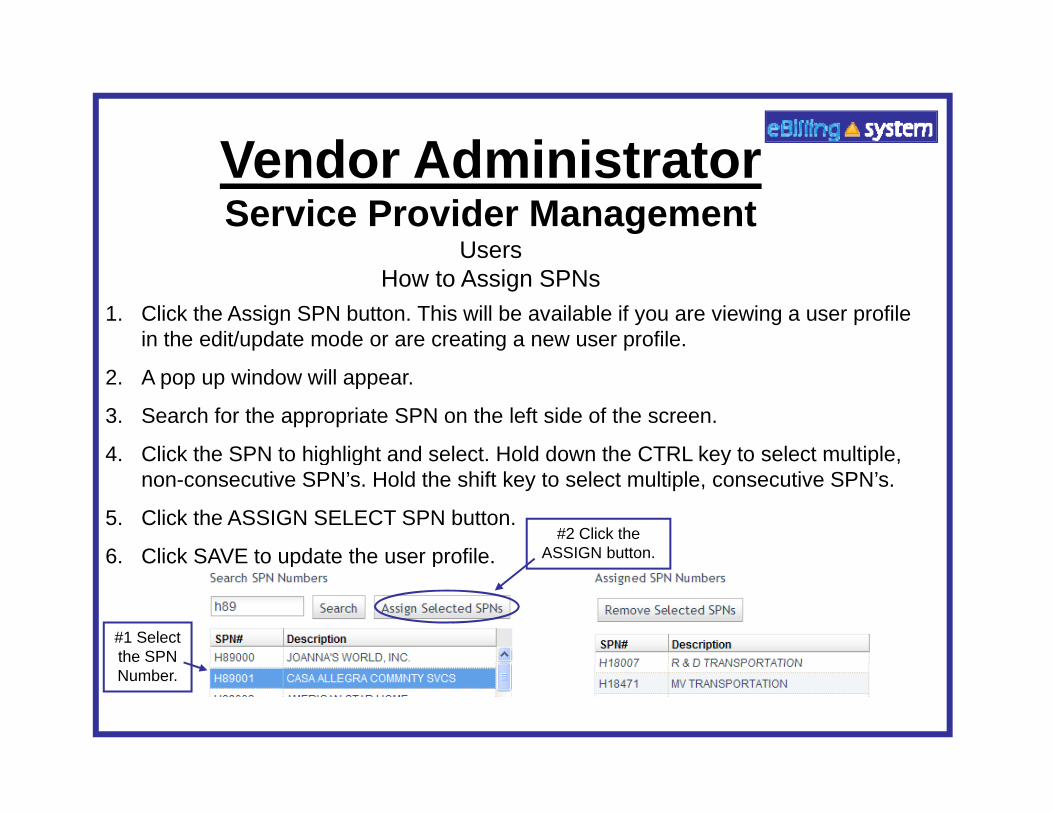
UsersUsersHow to Assign SPNs
1. Click the Assign SPN button. This will be available if you are viewing a user profile in the edit/update mode or are creating a new user profile.
2. A pop up window will appear.
3. Search for the appropriate SPN on the left side of the screen.
4 Click the SPN to highlight and select Hold down the CTRL key to select multiple4. Click the SPN to highlight and select. Hold down the CTRL key to select multiple, non-consecutive SPN’s. Hold the shift key to select multiple, consecutive SPN’s.
5. Click the ASSIGN SELECT SPN button.
6 Click SAVE to update the user profile#2 Click the
ASSIGN button.6. Click SAVE to update the user profile.
#1 Select the SPN Number.

InvoicesInvoicesInvoice
How to Search for an Invoice1 S l t t th i t i id b th h1. Select or enter the appropriate service provider number on the home
screen.2. Select the Invoices tab. TIP: If you would like to search for an invoice
that has been submitted select the Invoice History tab.y3. Enter the search criteria. If you would like to pull up all available
invoices then leave the search criteria blank.4. Click the SEARCH button.5 The search summary results will appear on the bottom half of the5. The search summary results will appear on the bottom half of the
screen. #2 Click
the SEARCH
#1 Enter search criteria.
SEARCH button.
InvoicesInvoicesInvoice
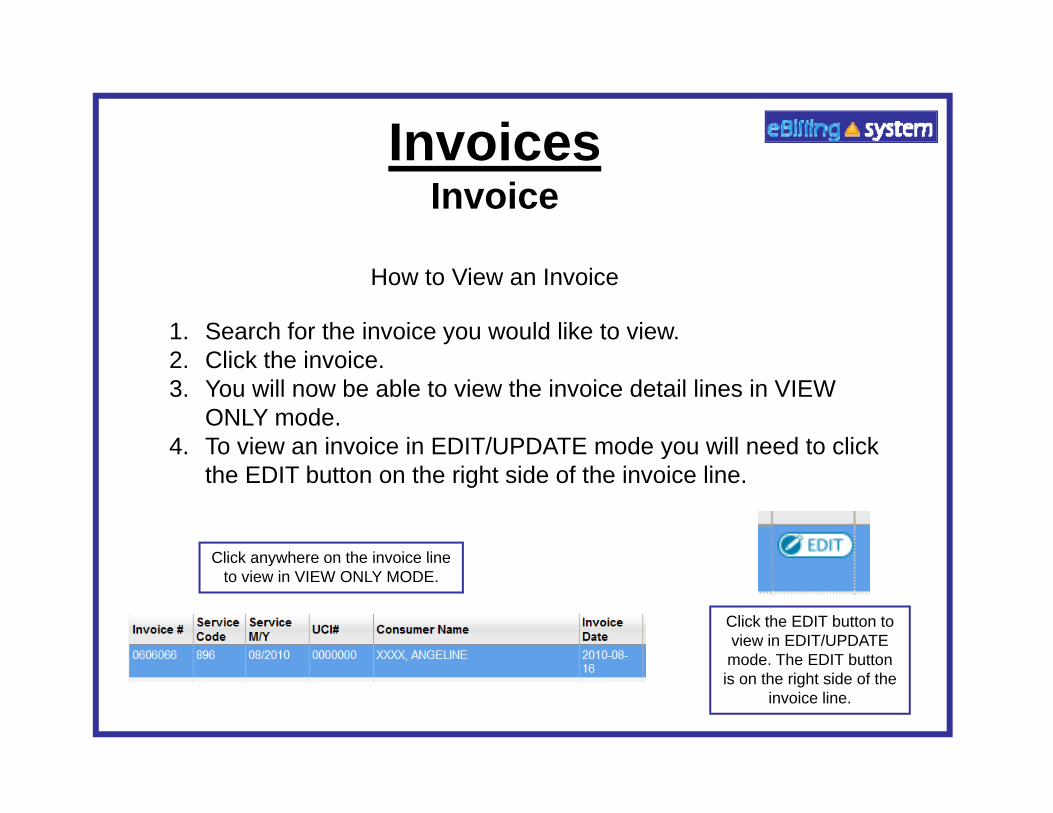
How to View an Invoice
1. Search for the invoice you would like to view. 2 Click the in oice2. Click the invoice.3. You will now be able to view the invoice detail lines in VIEW
ONLY mode.4. To view an invoice in EDIT/UPDATE mode you will need to click y
the EDIT button on the right side of the invoice line.
Click anywhere on the invoice line
Click the EDIT button to view in EDIT/UPDATE mode The EDIT button
Click anywhere on the invoice line to view in VIEW ONLY MODE.
mode. The EDIT button is on the right side of the
invoice line.
InvoicesInvoicesInvoice
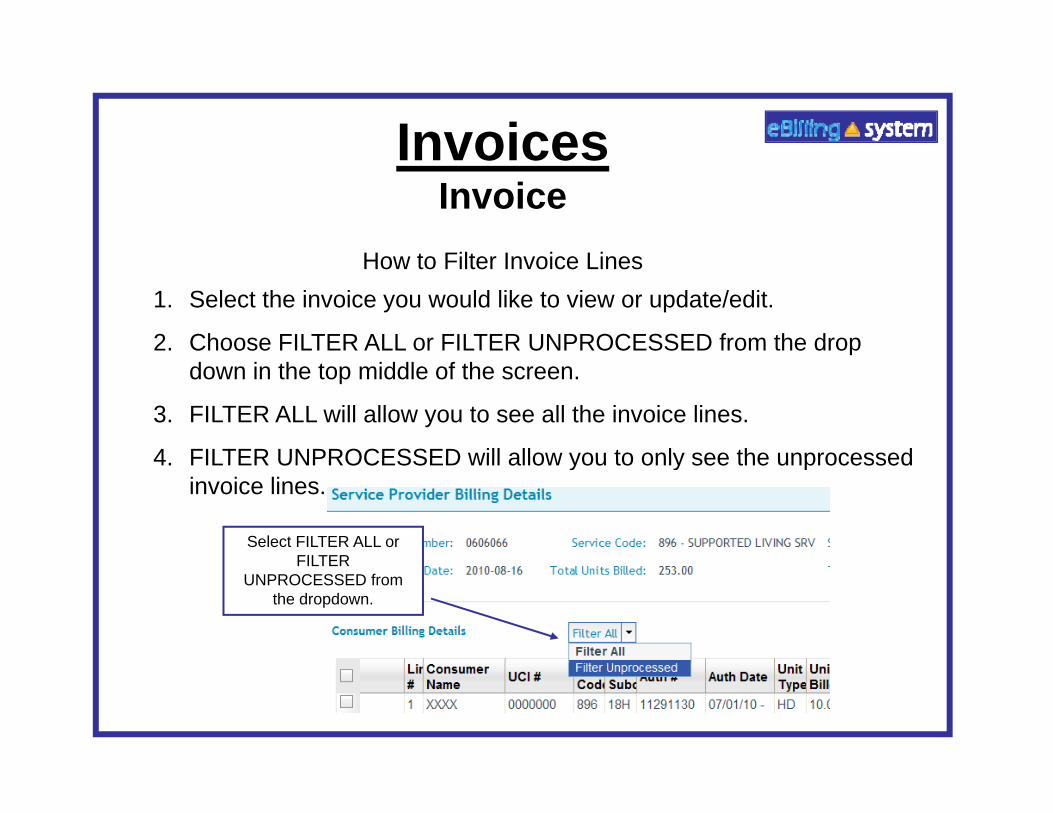
H t Filt I i LiHow to Filter Invoice Lines1. Select the invoice you would like to view or update/edit.
2. Choose FILTER ALL or FILTER UNPROCESSED from the drop down in the top middle of the screen.
3. FILTER ALL will allow you to see all the invoice lines.
4 FILTER UNPROCESSED will allow you to only see the unprocessed4. FILTER UNPROCESSED will allow you to only see the unprocessed invoice lines.
Select FILTER ALL or FILTERFILTER
UNPROCESSED from the dropdown.
InvoicesInvoicesInvoice
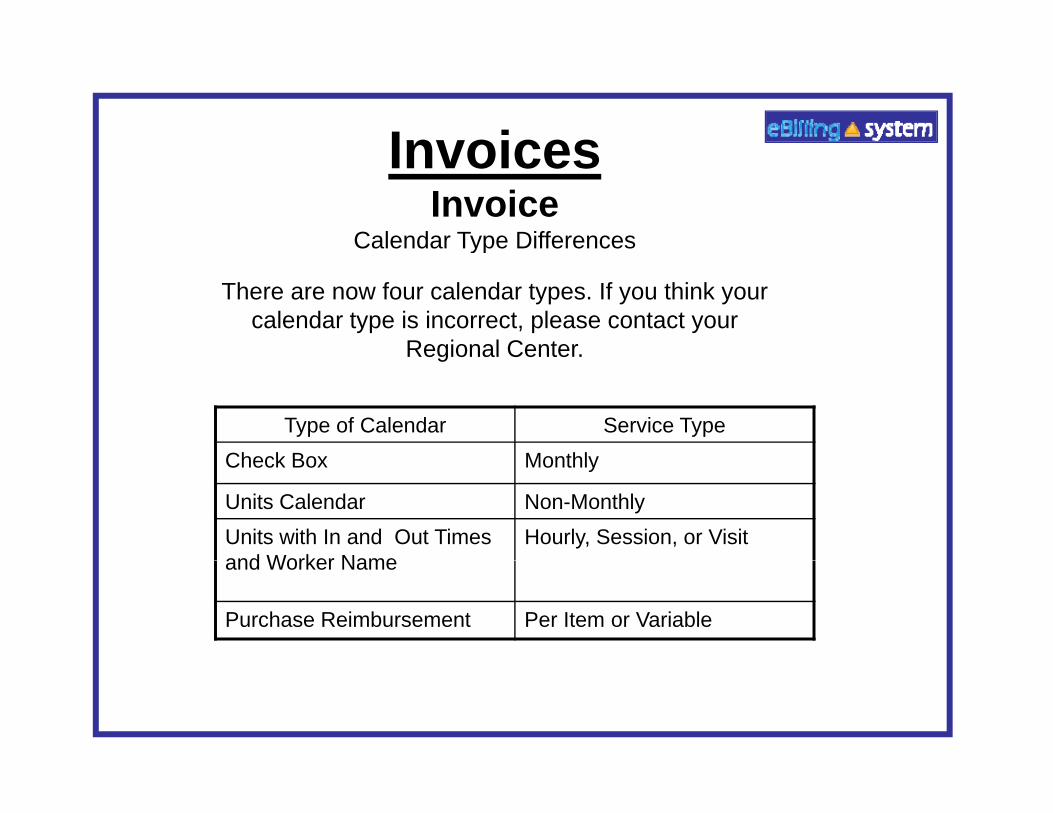
Calendar Type Differencesyp
There are now four calendar types. If you think your calendar type is incorrect, please contact your
Regional Center.Regional Center.
Type of Calendar Service TypeCheck Box MonthlyCheck Box Monthly
Units Calendar Non-MonthlyUnits with In and Out Times and Worker Name
Hourly, Session, or Visitand Worker Name
Purchase Reimbursement Per Item or Variable
InvoicesInvoicesInvoice
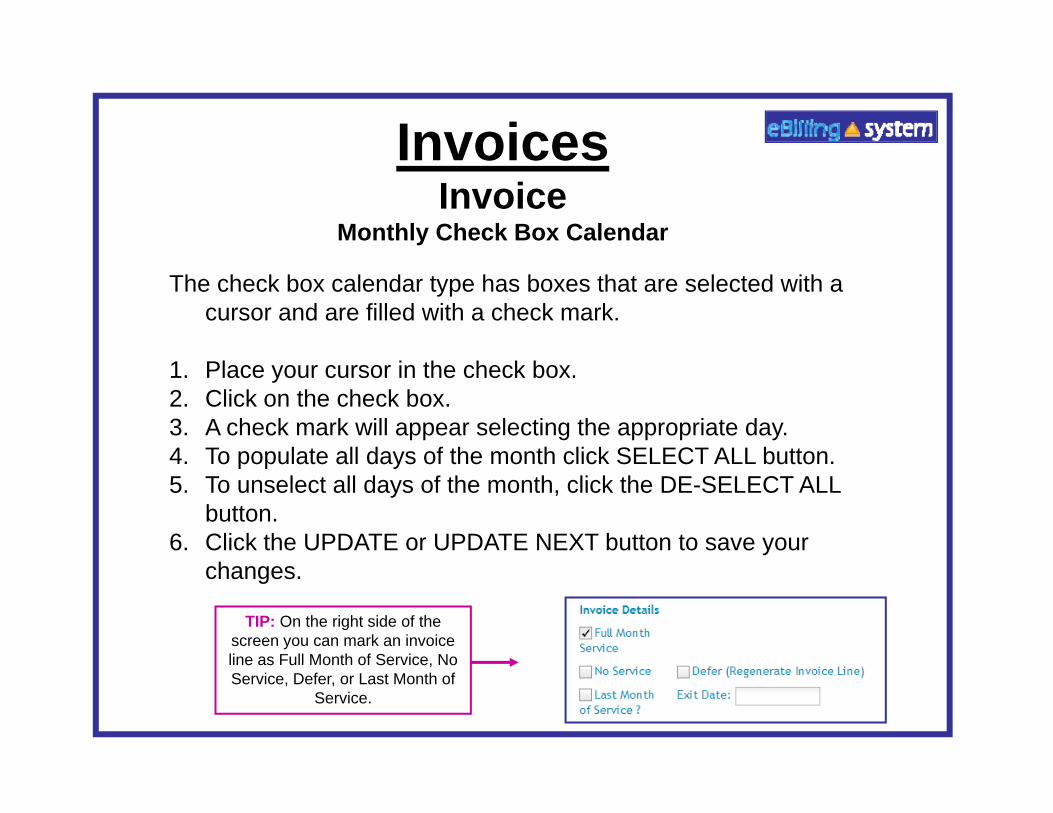
Monthly Check Box Calendar
The check box calendar type has boxes that are selected with a cursor and are filled with a check mark.
1. Place your cursor in the check box.2. Click on the check box.3. A check mark will appear selecting the appropriate day.4 To populate all days of the month click SELECT ALL button4. To populate all days of the month click SELECT ALL button.5. To unselect all days of the month, click the DE-SELECT ALL
button.6. Click the UPDATE or UPDATE NEXT button to save your
changes.
TIP: On the right side of the screen you can mark an invoice line as Full Month of Service Noline as Full Month of Service, No Service, Defer, or Last Month of
Service.
InvoicesInvoicesInvoice
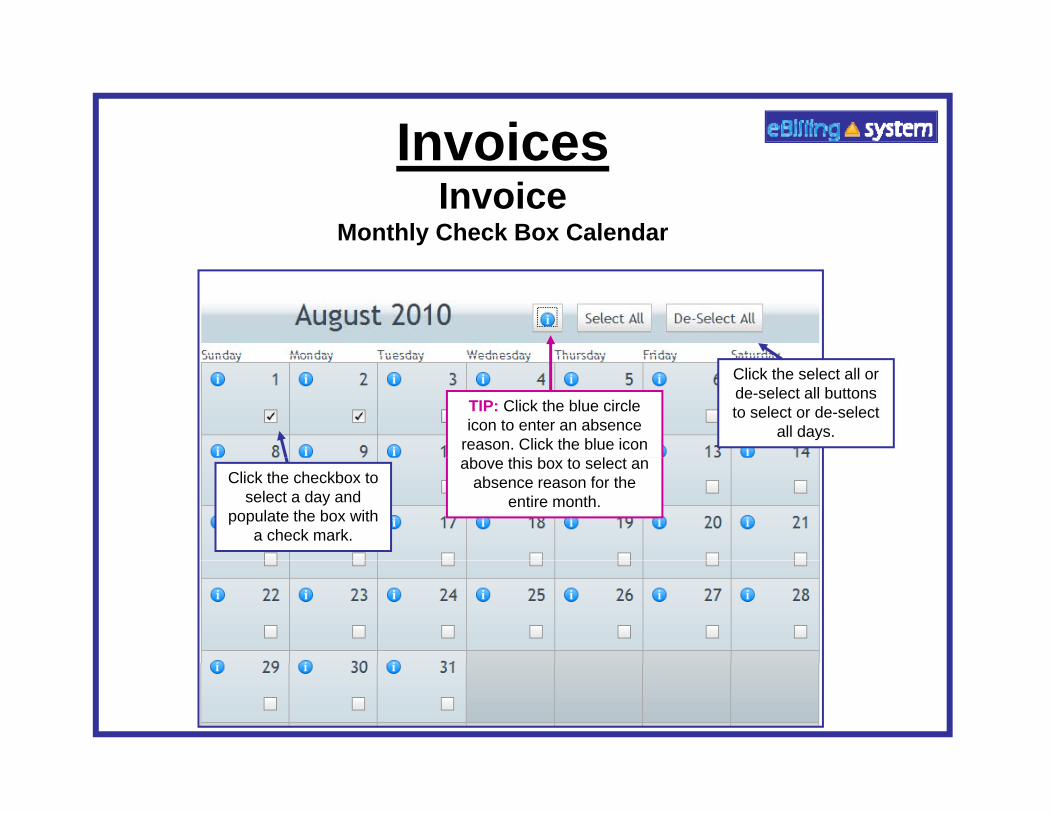
Monthly Check Box Calendar
Click the select all or de-select all buttons to select or de-select
all days.TIP: Click the blue circle icon to enter an absence
reason. Click the blue icon b thi b t l t
.
Click the checkbox to select a day and
populate the box with a check mark.
above this box to select an absence reason for the
entire month.

InvoicesInvoicesInvoice
Absences and Absence ReasonsAbsences and Absence ReasonsOn the Checkbox type calendar you have the option of entering an absence
for consumers. You must be viewing the invoice detail line in the EDIT/UPDATE mode.EDIT/UPDATE mode.
1. Click on the Blue Circle “I” icon. TIP: To apply an absence reason to the entire month make sure you select the icon at the top of the calendar. To apply an absence reason to individual day make sure to choose the icon pp y yon the day you would like to report the absence.
2. Select an absence reason from the drop down menu. Click OK.
3 The Blue Circle “I” icons will turn into blue stars for all days with reported3. The Blue Circle I” icons will turn into blue stars for all days with reported absences. Click the UPDATE button to save changes.
Click this icon After the absence is to report a consumer absence.
reported the circle will change into a
star.
InvoicesInvoicesInvoice
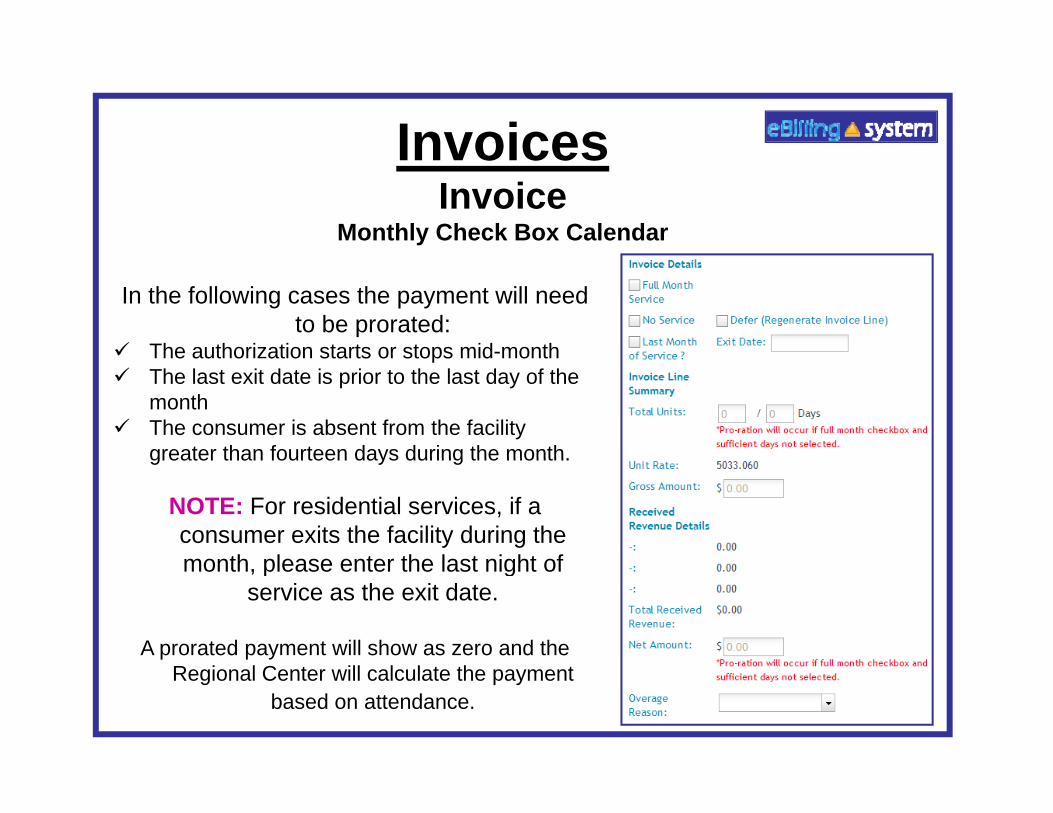
Monthly Check Box Calendar
In the following cases the payment will need to be prorated:
The authorization starts or stops mid-month The authorization starts or stops mid month The last exit date is prior to the last day of the
month The consumer is absent from the facility
greater than fourteen days during the monthgreater than fourteen days during the month.
NOTE: For residential services, if a consumer exits the facility during the month please enter the last night ofmonth, please enter the last night of
service as the exit date.
A prorated payment will show as zero and the Regional Center will calculate the payment
based on attendance.
InvoicesInvoicesInvoice
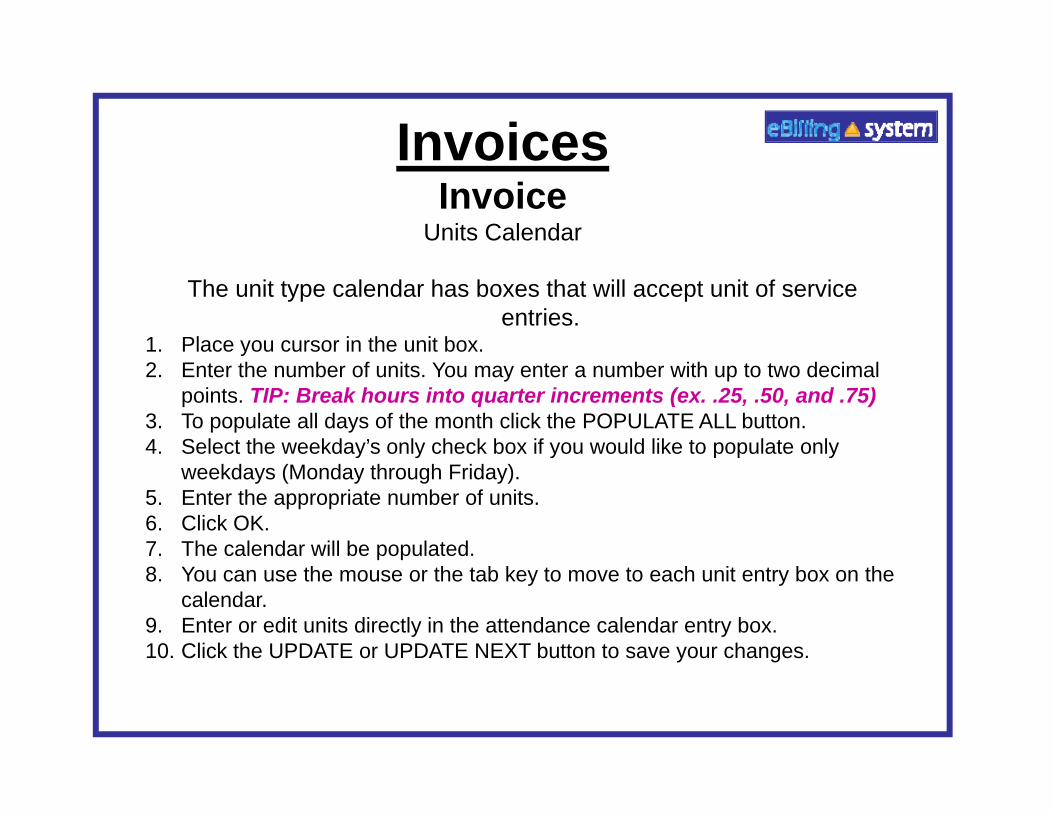
Units Calendar
The unit type calendar has boxes that will accept unit of service entries.
1. Place you cursor in the unit box.y2. Enter the number of units. You may enter a number with up to two decimal
points. TIP: Break hours into quarter increments (ex. .25, .50, and .75)3. To populate all days of the month click the POPULATE ALL button.4. Select the weekday’s only check box if you would like to populate only y y y y
weekdays (Monday through Friday). 5. Enter the appropriate number of units.6. Click OK.7. The calendar will be populated.8. You can use the mouse or the tab key to move to each unit entry box on the
calendar.9. Enter or edit units directly in the attendance calendar entry box.10. Click the UPDATE or UPDATE NEXT button to save your changes.
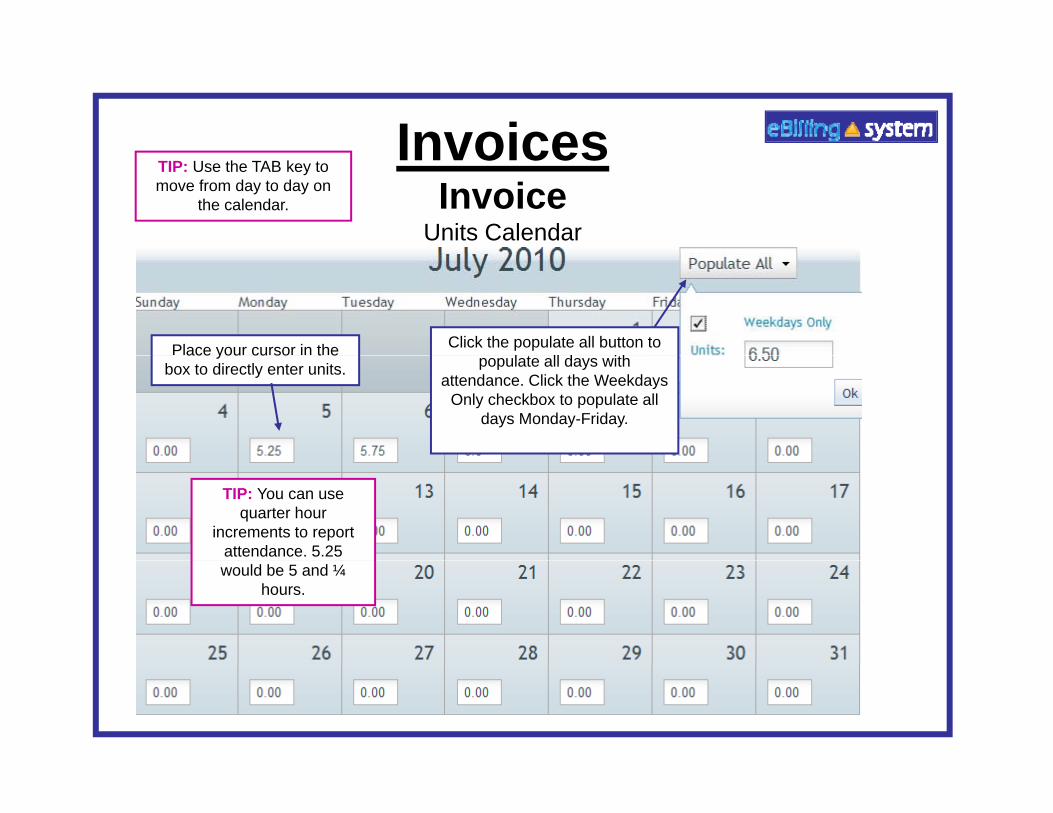
InvoicesInvoicesInvoice
Units Calendar
TIP: Use the TAB key to move from day to day on
the calendar.
Place your cursor in the Click the populate all button to l t ll d ith
ace you cu so t ebox to directly enter units. populate all days with
attendance. Click the Weekdays Only checkbox to populate all
days Monday-Friday.
TIP: You can use quarter hour
increments to report attendance. 5.25 would be 5 and ¼
hours.
InvoicesInvoicesInvoice
Units Calendar with In and Out Times and Worker Name
The In and Out calendar type has a date and day for each day of the month, fields to enter the in time, out time, and the worker name. If the unit type is hourly, the units and amounts are automatically calculated; yp y y
they will populate based on in and out times entered.
TIP: If the units are not hourly, but per session, visit, etc. the units will notautomatically calculate but will need to be manually enteredautomatically calculate, but will need to be manually entered.
1. Click in the In Time field and enter the time in four digit military time format. (ex. 1:15 PM would be 13:15, 9:45 AM would be 09:45, 8:00 AM would be entered as 08:00)
2. Tab or click in the Out Time field and enter the time in military time format.
3 Tab or click in the worker name field and enter the worker’s name3. Tab or click in the worker name field and enter the worker s name.4. Click the UPDATE or UPDATE NEXT button to save your changes.

InvoicesInvoicesInvoice
Units Calendar with In and Out Times and Worker NameTIP: Check Unit Type. If it is
hourly, the Units will automatically calculate when the time is entered
on the calendar.
TIP: You can use quarter hour
increments to report attendance. 9:15 AM
Use the tab key to move from the In Time, Out Time, and Worker Name fields. Time
d t b t d i f di it ilit
would be entered as 09:15.
needs to be entered in four digit military time (ex. 6:45 PM would be entered as
18:45).
Tip: The Units and Amount fields are automatically calculating.

InvoicesInvoicesInvoice
Units Purchase ReimbursementUnits Purchase Reimbursement
The one time purchase calendar type allows the entry of purchases.
1 Click on the ADD ROW button1. Click on the ADD ROW button.2. Click in the date field and select the appropriate date of purchase.3. Tab or click in the units field and enter the appropriate units.4. Tab or click in the amount field to enter the total amount.5. Click the UPDATE or UPDATE NEXT button to save your changes.6. Please be sure to attach your supporting documentation at the
invoice detail line level. Attached documents will only be flagged on Regional Center reports if they are attached to specific invoiceRegional Center reports if they are attached to specific invoice detail lines.
TIP: Accidently add a row? Click the DELETE button to remove it from the list.

InvoicesInvoicesInvoice
Units Purchase Reimbursement
#3 Attach supporting documentation to the
invoice detail line.
The total Units
#2 Enter the Date, Units, and
Amount
and Amount will automatically
populate.
#1 Click the ADD ROW
button.
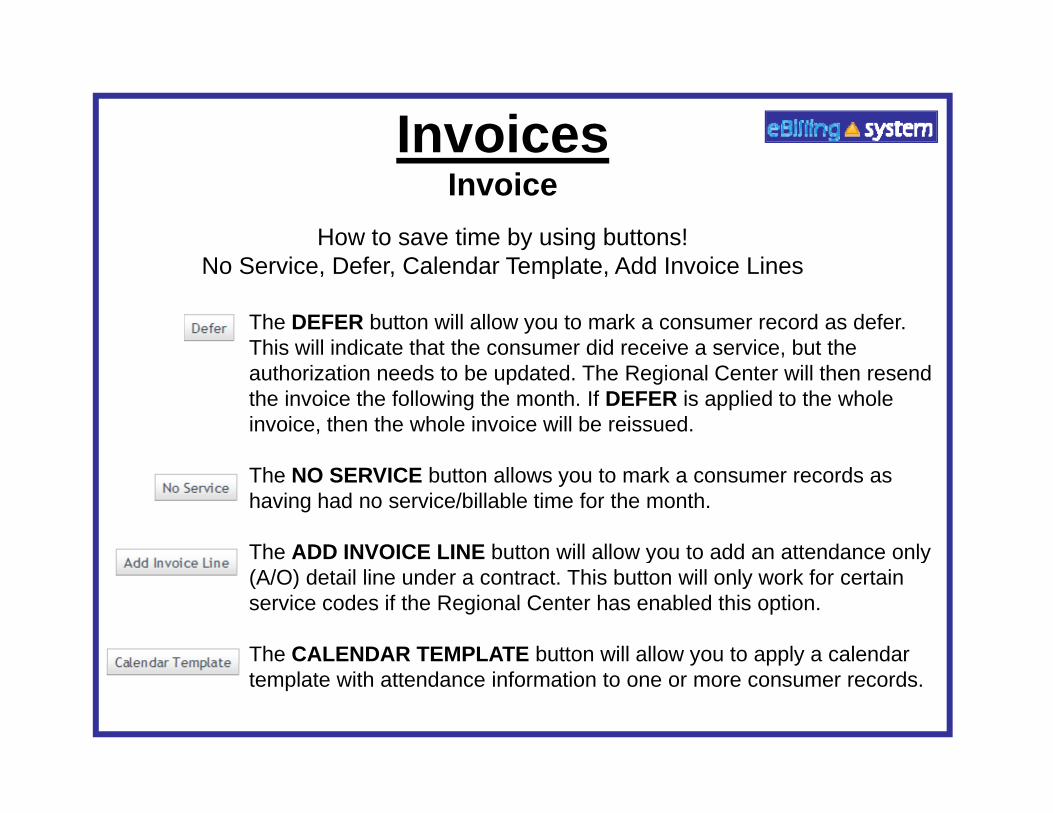
InvoicesInvoicesInvoice
How to save time by using buttons! No Service, Defer, Calendar Template, Add Invoice Lines
The DEFER button will allow you to mark a consumer record as defer. This will indicate that the consumer did receive a service, but the ,authorization needs to be updated. The Regional Center will then resend the invoice the following the month. If DEFER is applied to the whole invoice, then the whole invoice will be reissued.
The NO SERVICE button allows you to mark a consumer records as having had no service/billable time for the month.
The ADD INVOICE LINE button will allow you to add an attendance only y y(A/O) detail line under a contract. This button will only work for certain service codes if the Regional Center has enabled this option.
The CALENDAR TEMPLATE button will allow you to apply a calendar y pp ytemplate with attendance information to one or more consumer records.

InvoicesInvoicesInvoice
Using the No Service or Defer Buttons
1. Click on an invoice EDIT button. You must be in invoice edit/update mode.
2. Select lines you would like to apply the button to by clicking in the2. Select lines you would like to apply the button to by clicking in the check boxes on the left. TIP: To apply a mass update button to all invoice lines select the top left checkbox that is on the header line. This will mark all the invoice lines for update.
3 Click on the button (NO SERVICE or DEFER) you would like to use3. Click on the button (NO SERVICE or DEFER) you would like to use. 4. A flag will appear in the appropriate column.
Click this checkbox to select all invoice lines for update.
Otherwise select the checkboxes on the individual
After the records have been
updated, they will checkboxes on the individual
consumer lines. be marked with the appropriate flags.

InvoicesInvoicesInvoice
Using the Calendar Template Checkbox and Units Calendars Only
1. Click on an invoice EDIT button. You must be in edit/update mode.2. Select lines you would like to apply the button to by clicking in the
check boxes on the left. 3. Click on the CALENDAR TEMPLATE button. A window will pop up.4 Fill out the appropriate calendar with attendance information4. Fill out the appropriate calendar with attendance information.5. Click on APPLY TO ALL to apply the template to all invoices lines.
Select the APPLY TO SELECTED button to update only selected invoice lines. The invoice will be updated.
6. Click the SAVE button to save changes.7. Click the CLOSE button.8. All updated invoice lines will have an updated date and time stamp. 9 Individual lines must be updated with absences9. Individual lines must be updated with absences.
InvoicesInvoicesInvoice
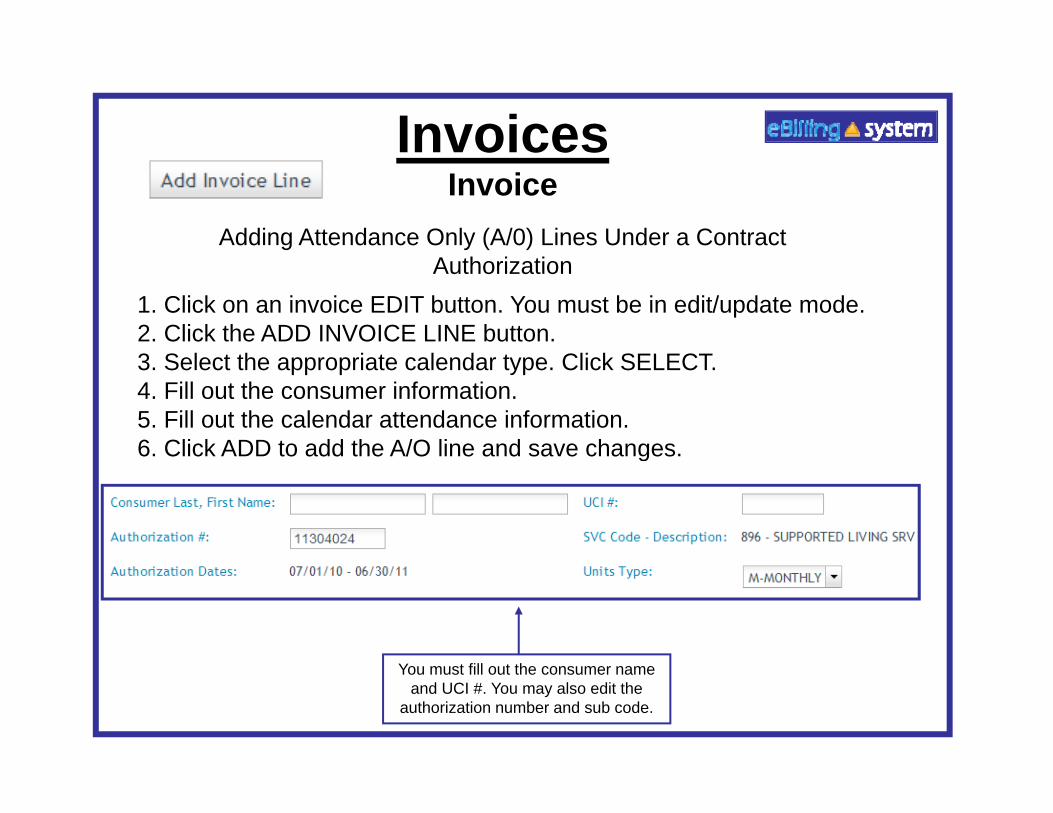
Adding Attendance Only (A/0) Lines Under a Contract Authorization
1. Click on an invoice EDIT button. You must be in edit/update mode.2. Click the ADD INVOICE LINE button. 3 S l t th i t l d t Cli k SELECT3. Select the appropriate calendar type. Click SELECT. 4. Fill out the consumer information. 5. Fill out the calendar attendance information. 6. Click ADD to add the A/O line and save changes. g
fYou must fill out the consumer name and UCI #. You may also edit the
authorization number and sub code.
InvoicesInvoicesInvoice
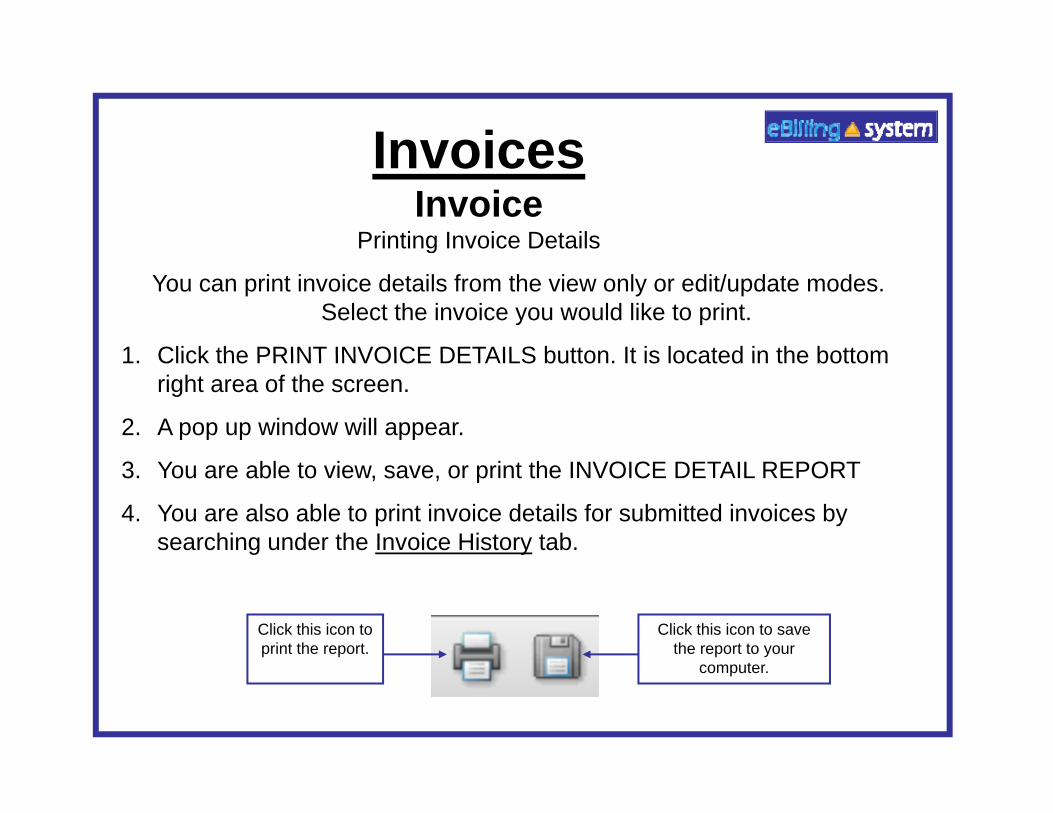
Printing Invoice Detailsg
You can print invoice details from the view only or edit/update modes. Select the invoice you would like to print.
1 Click the PRINT INVOICE DETAILS button It is located in the bottom1. Click the PRINT INVOICE DETAILS button. It is located in the bottom right area of the screen.
2. A pop up window will appear.
3. You are able to view, save, or print the INVOICE DETAIL REPORT
4. You are also able to print invoice details for submitted invoices by searching under the Invoice History tab.
Click this icon to print the report.
Click this icon to save the report to your
tcomputer.
InvoicesInvoicesInvoice
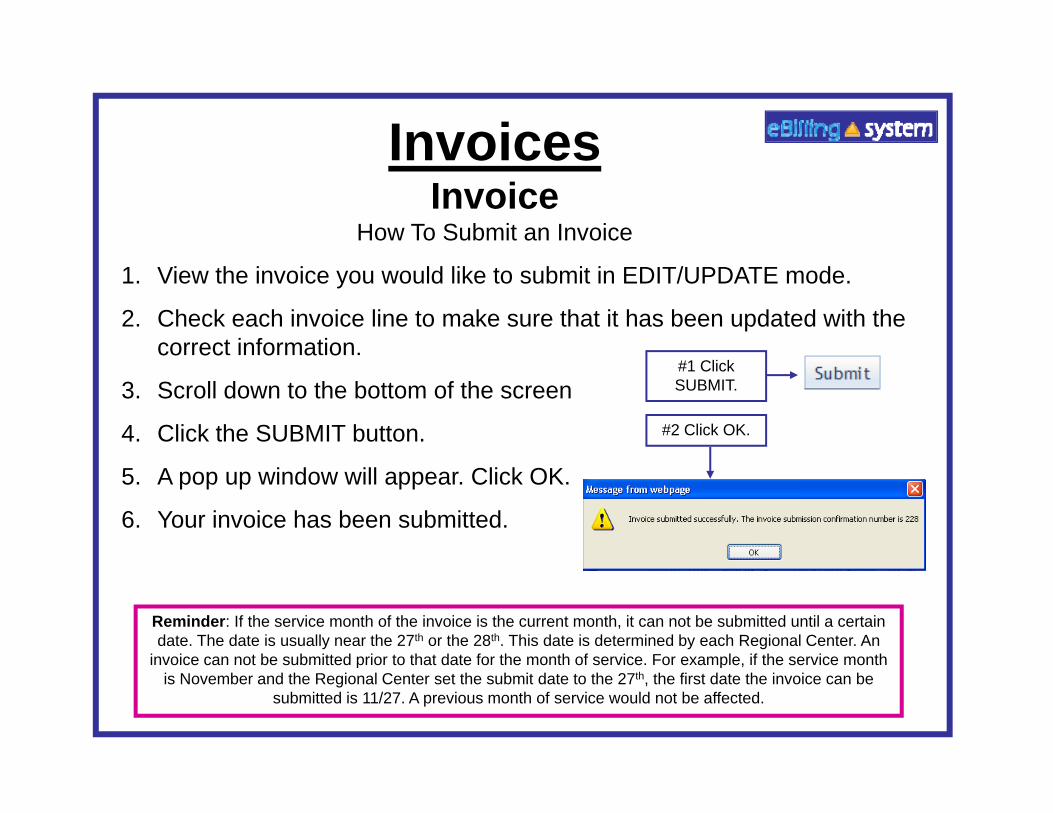
How To Submit an Invoice
1. View the invoice you would like to submit in EDIT/UPDATE mode.
2. Check each invoice line to make sure that it has been updated with the correct information.co ec o a o
3. Scroll down to the bottom of the screen
4. Click the SUBMIT button.
#1 Click SUBMIT.
#2 Click OK.
5. A pop up window will appear. Click OK.
6. Your invoice has been submitted.
Reminder: If the service month of the invoice is the current month, it can not be submitted until a certain date. The date is usually near the 27th or the 28th. This date is determined by each Regional Center. An
invoice can not be submitted prior to that date for the month of service For example if the service monthinvoice can not be submitted prior to that date for the month of service. For example, if the service month is November and the Regional Center set the submit date to the 27th, the first date the invoice can be
submitted is 11/27. A previous month of service would not be affected.
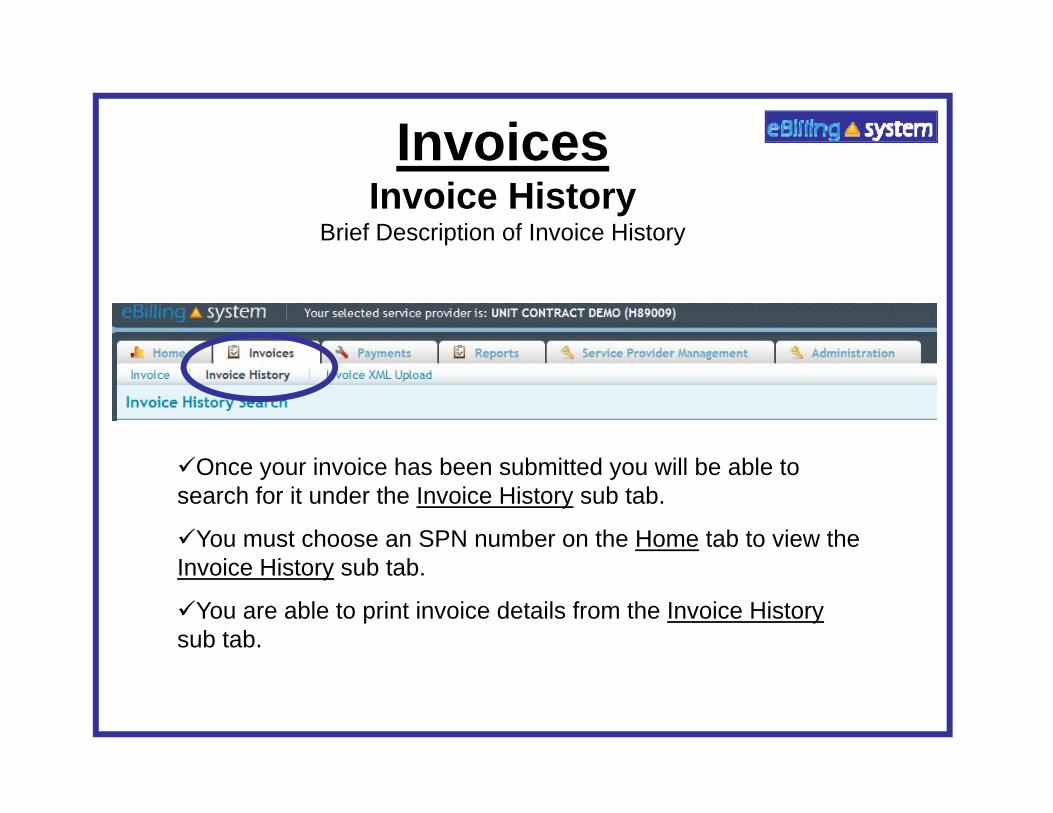
InvoicesInvoicesInvoice History
Brief Description of Invoice History
O i i h b b i d ill b blOnce your invoice has been submitted you will be able to search for it under the Invoice History sub tab.
You must choose an SPN number on the Home tab to view the I i Hi t b t bInvoice History sub tab.
You are able to print invoice details from the Invoice Historysub tab.

PaymentsPaymentsPayment History
EFT Payment History Search
You are able to search EFT Payment History in the same way that You are able to search EFT Payment History in the same way that you search for available invoices under the Invoices tab. Just choose the Payments tab, enter search criteria, and click the SEARCH button.
To view a selected EFT Payment History for an invoice clickTo view a selected EFT Payment History for an invoice, click anywhere on the invoice line.
To create a .CSV file of the Payment History, select the invoice, and click the CREATE CSV button You can either view the file or save it toclick the CREATE CSV button. You can either view the file or save it to your computer.
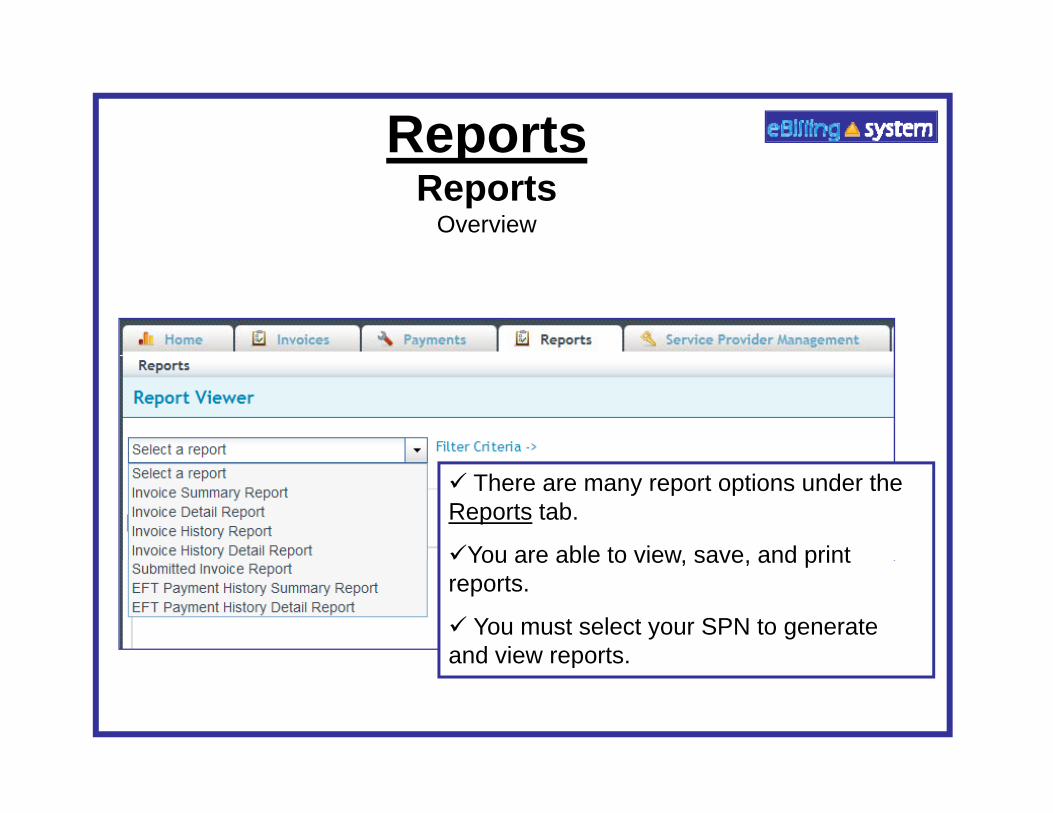
ReportsReportsReports
Overview
There are many report options under the Reports tab.
You are able to view, save, and printYou are able to view, save, and print reports.
You must select your SPN to generate and view reports.and view reports.

ReportsReportsReports
How to Generate a Report
1. Click the Reports tab. (Make sure you have selected the appropriate SPN).
2. Choose a report from the drop down menu on the left.C oose a epo o e d op do e u o e e
3. Enter the appropriate search criteria on the right hand side of the screen. (The search criteria will changed depending upon the report you’ve selected).p y )
4. Click SUBMIT.
#1 Choose Report. #2 Enter Search Criteria.#3 Click Submit.

ReportsReportsReports
Viewing and Printing Options
There are several options for viewing your report.
1. You can either print the report or save it to your computer.y
Click this icon to print the report.
Click this icon to save the report to your
computer.
2. You can open the report in a new window by clicking the Open in a New Window link that is located on the left side of the screen.
3. You can also use the scrollbar to view the report in the browser windowwindow.

HomeHomeDashboard
TAI and DS1964 Spreadsheet FilesA il bl Fil f D l dAvailable Files for Download
If you currently are e-mailed a Microsoft Excel turnaround invoice (TAI) or DS1964 (for service code 950 services), you may now choose to access that invoice on the eBilling website.
You will need to talk to your Regional Center about setting up your profile and posting your invoice to the eBilling website.
If you do choose to download your TAI or DS1964 from the eBilling website, you will see invoices available for download on the right hand side of the Home tab.
You will see files available for download on the right side of the Home Dashboard. There will be a blue DOWNLOAD button on the right side of each available invoice.
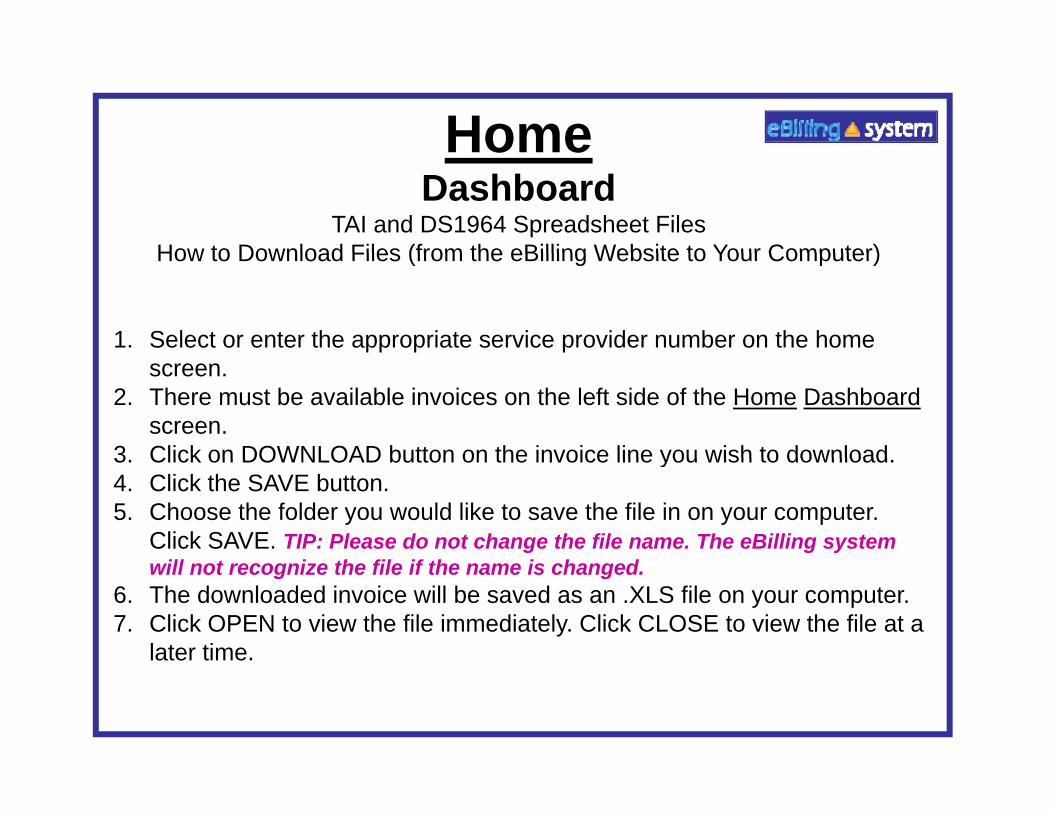
HomeHomeDashboard
TAI and DS1964 Spreadsheet FilesHow to Download Files (from the eBilling Website to Your Computer)How to Download Files (from the eBilling Website to Your Computer)
1. Select or enter the appropriate service provider number on the home screen.
2. There must be available invoices on the left side of the Home Dashboardscreen.
3 Click on DOWNLOAD button on the invoice line you wish to download3. Click on DOWNLOAD button on the invoice line you wish to download. 4. Click the SAVE button.5. Choose the folder you would like to save the file in on your computer.
Click SAVE. TIP: Please do not change the file name. The eBilling system ill t i th fil if th i h dwill not recognize the file if the name is changed.
6. The downloaded invoice will be saved as an .XLS file on your computer. 7. Click OPEN to view the file immediately. Click CLOSE to view the file at a
later time.

HHomeDashboard
TAI and DS1964 Spreadsheet FilesTAI and DS1964 Spreadsheet FilesXML
If you choose to upload your TAI spreadsheet or DS1964 to the eBilling website (instead of e-mailing it to your Regional Center) then you willwebsite (instead of e mailing it to your Regional Center) then you will
need to first convert it to a .XML document.
1. Fill out the invoice as your normally would.
2 Cli k h EXPORT XML b2. Click the EXPORT XML button.
3. Save your changes.
4. The XML file will be in the same folder as your original file. It will contain4. The XML file will be in the same folder as your original file. It will contain the same name, but be a .XML document.
The top file is the original Excel TAI. The bottom file is the XML file that isThe bottom file is the .XML file that is ready to be posted to the eBilling website.

HHomeDashboard
TAI and DS1964 Spreadsheet FilesTAI and DS1964 Spreadsheet FilesCompatibility
The new TAI and DS1964 spreadsheets are different than theThe new TAI and DS1964 spreadsheets are different than the old TAI and DS1964 spreadsheets.
Please make sure you use the new spreadsheets.
The old TAI and DS1964 spreadsheets are not compatible with the new eBilling system.
If you provide 950 services to consumers served by multiple Regional Centers, you will need to copy the information in the old DS1964 to the new DS1964 until all Regional Centers have switched to the new eBilling system.
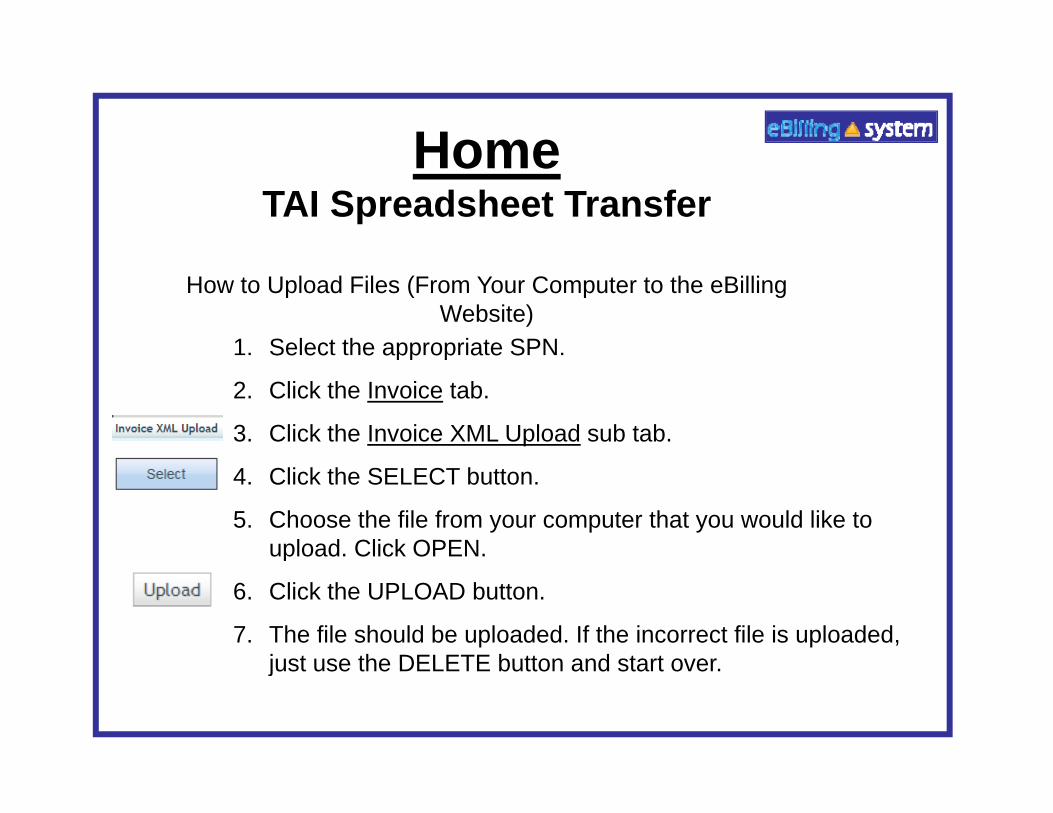
HomeHomeTAI Spreadsheet Transfer
How to Upload Files (From Your Computer to the eBilling Website)
1. Select the appropriate SPN.Se ec e app op a e S
2. Click the Invoice tab.
3. Click the Invoice XML Upload sub tab.
4. Click the SELECT button.
5. Choose the file from your computer that you would like to upload. Click OPEN.p
6. Click the UPLOAD button.
7. The file should be uploaded. If the incorrect file is uploaded, just use the DELETE button and start overjust use the DELETE button and start over.
Please contact Harbor Regional Center with any additional questions.
hrcadminsupport@harborrc [email protected]