
Using Zoom Client to Control a Meeting and an Online Class Zoom Client to Control a... · Last...
11
Last Modified: 8 Feburary 2020 Using Zoom Client to Control a Meeting and an Online Class Operations as a Meeting Host Prerequisites - Webcam and microphone - A headset with microphone is recommended for better sound quality. Control buttons are at the lower part of the screen Mute - To mute/unmute your own audio
Transcript of Using Zoom Client to Control a Meeting and an Online Class Zoom Client to Control a... · Last...

Last Modified: 8 Feburary 2020
Using Zoom Client to Control a Meeting
and an Online Class
Operations as a Meeting Host
Prerequisites
- Webcam and microphone
- A headset with microphone is recommended for better sound quality.
Control buttons are at the lower part of the screen
Mute
- To mute/unmute your own audio
Last Modified: 8 Feburary 2020
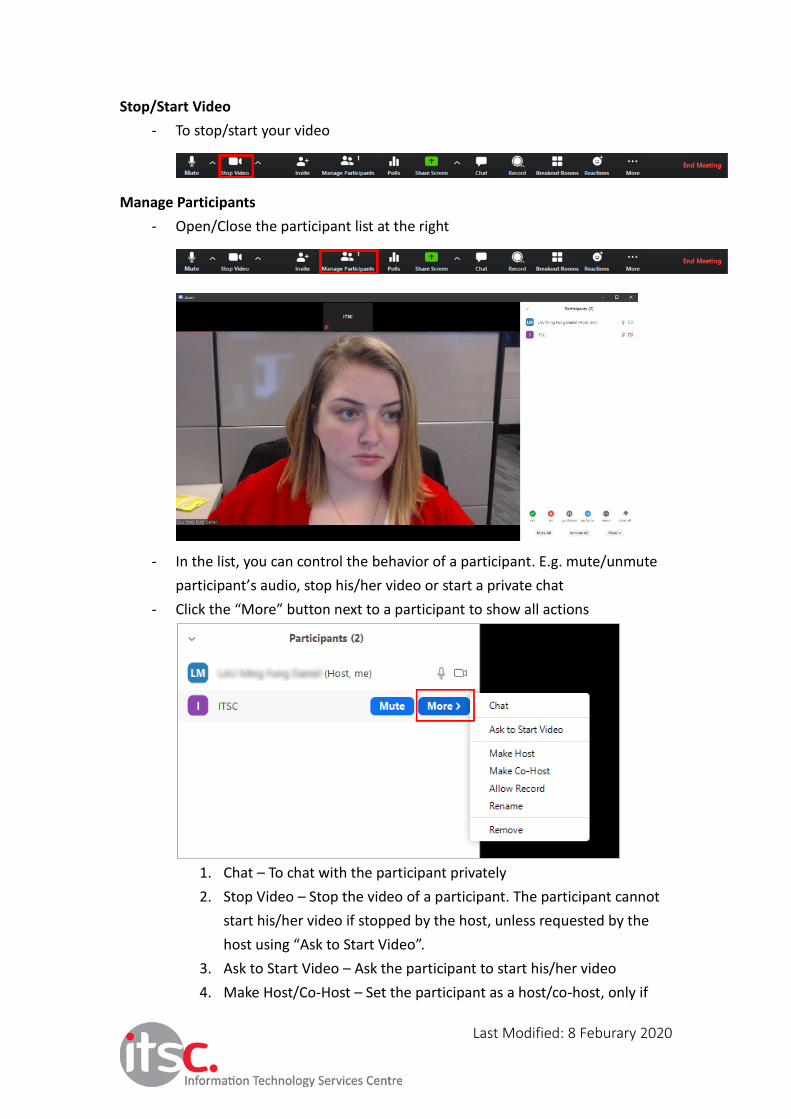
Stop/Start Video
- To stop/start your video
Manage Participants
- Open/Close the participant list at the right
- In the list, you can control the behavior of a participant. E.g. mute/unmute
participant’s audio, stop his/her video or start a private chat
- Click the “More” button next to a participant to show all actions
1. Chat – To chat with the participant privately
2. Stop Video – Stop the video of a participant. The participant cannot
start his/her video if stopped by the host, unless requested by the
host using “Ask to Start Video”.
3. Ask to Start Video – Ask the participant to start his/her video
4. Make Host/Co-Host – Set the participant as a host/co-host, only if

Last Modified: 8 Feburary 2020
the participant is a licensed user (All Lingnan staff/students are
licensed users)
5. Allow Record – Allow the participant to record meeting locally
6. Rename – Rename the displayed name of the participant
7. Remove – Remove the participant from current meeting
- You and the participants can communicate using a list of non-verbal
responses
- For example, a muted participant can raise hand and the host will be
notified
Last Modified: 8 Feburary 2020
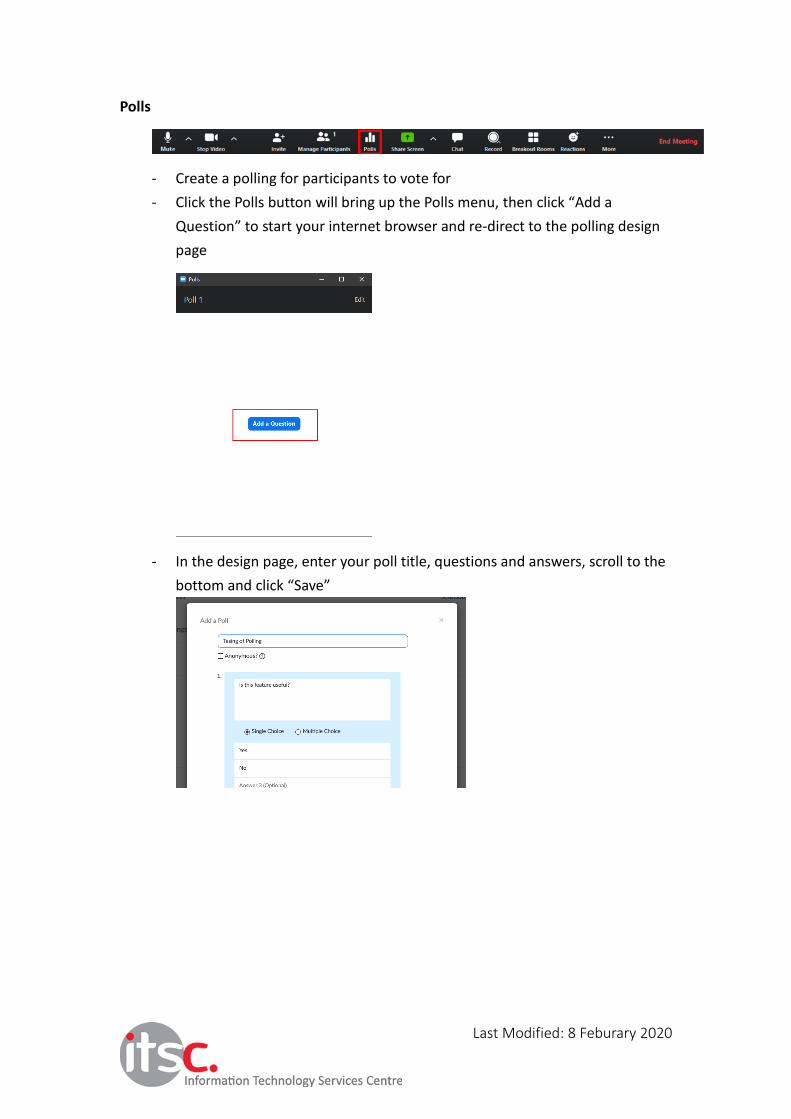
Polls
- Create a polling for participants to vote for
- Click the Polls button will bring up the Polls menu, then click “Add a
Question” to start your internet browser and re-direct to the polling design
page
- In the design page, enter your poll title, questions and answers, scroll to the
bottom and click “Save”
Last Modified: 8 Feburary 2020
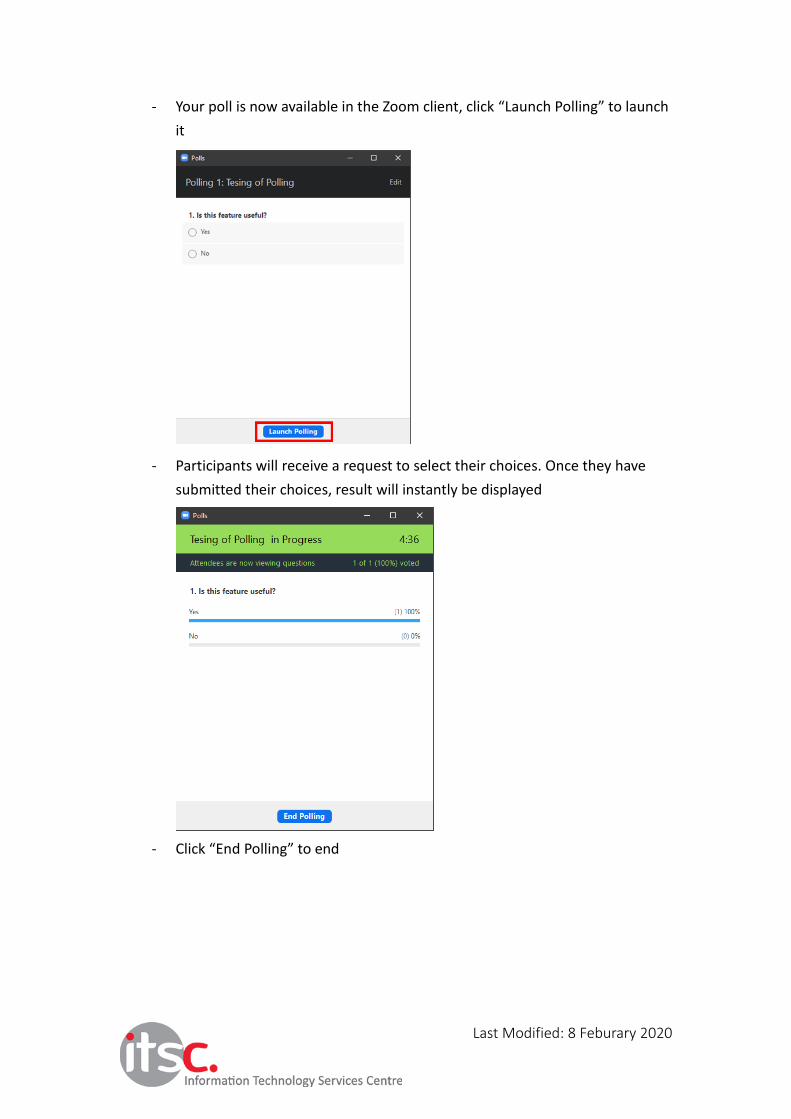
- Your poll is now available in the Zoom client, click “Launch Polling” to launch
it
- Participants will receive a request to select their choices. Once they have
submitted their choices, result will instantly be displayed
- Click “End Polling” to end
Last Modified: 8 Feburary 2020
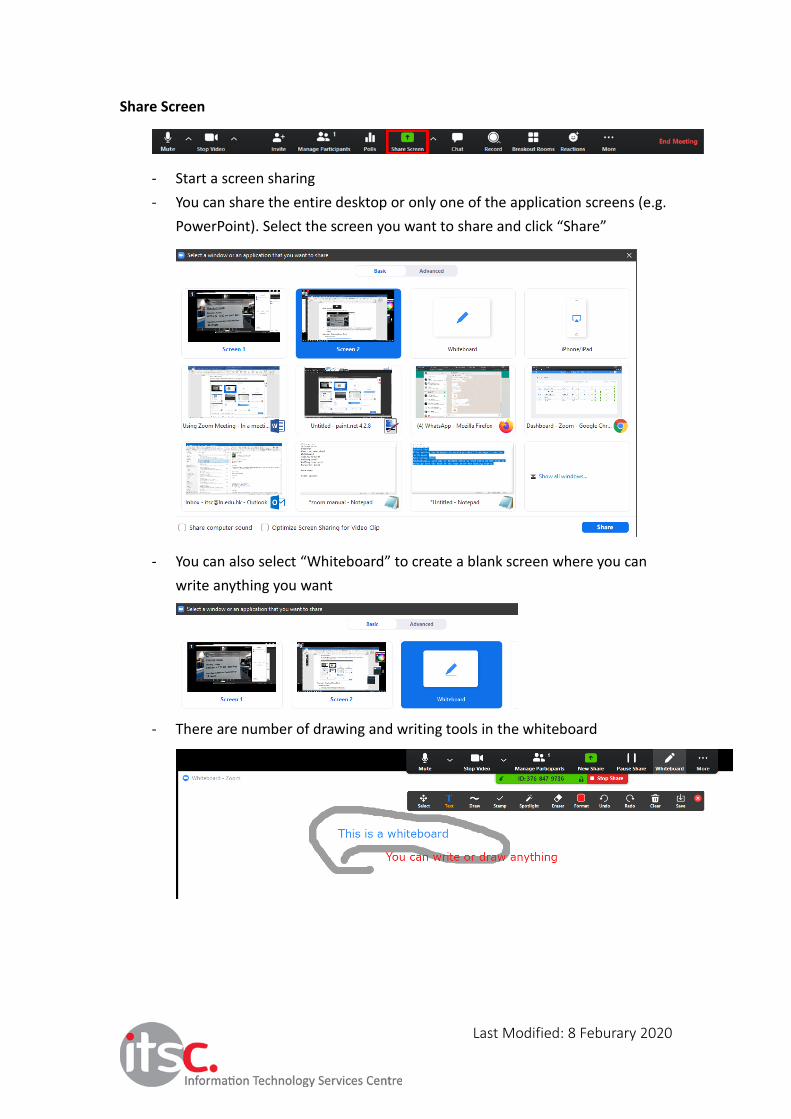
Share Screen
- Start a screen sharing
- You can share the entire desktop or only one of the application screens (e.g.
PowerPoint). Select the screen you want to share and click “Share”
- You can also select “Whiteboard” to create a blank screen where you can
write anything you want
- There are number of drawing and writing tools in the whiteboard

Last Modified: 8 Feburary 2020
- During a screen sharing, you can select a different screen to share by clicking
“New Share”
- You can always pause your sharing by clicking “Pause Share” or stop sharing
by clicking “Stop Share”
- Click the “More” menu to access other features like chat windows or
start/stop a recording

Last Modified: 8 Feburary 2020
Chat
- Participant list and chat menu will be opened, you can create broadcast
message or chat with a participant privately
- To start a private chat, double click the participant you want to chat with
- Click the down arrow beside “To:” to swap between public message and
private chat

Last Modified: 8 Feburary 2020
- To save your current chat dialogues manually during a meeting
1. Click the “More” button at the bottom of chat window
2. Click “Save Chat”
This will save your chat to your local recording location. The default
folder is your Documents folder > Zoom > Folder with meeting name,
date and time.
You are suggested to save your chats before leaving/end your meeting
Record
- Start or stop record a meeting/class, either locally or to the cloud
End Meeting
- Leave the meeting or end the meeting for all participants

Last Modified: 8 Feburary 2020
Operations as a Participant
Control buttons are at the lower part of the screen which is similar to a meeting host
Mute/Unmute
- To mute or umute your audio. Please note that the host may disallow you to
unmute your audio
Participants - Raise Hand
- Use “Raise Hand” in the Participants panel to get the attention of the host

Last Modified: 8 Feburary 2020
Record
- Click the “Record” button to record a meeting locally. You may need the
approval from the host to record a meeting


