
Using VMware Horizon View Client for Mac OS X - Official · PDF fileUsing VMware Horizon View...
48
Using VMware Horizon View Client for Mac OS X January 2014 Horizon View This document supports the version of each product listed and supports all subsequent versions until the document is replaced by a new edition. To check for more recent editions of this document, see http://www.vmware.com/support/pubs. EN-000668-00
Transcript of Using VMware Horizon View Client for Mac OS X - Official · PDF fileUsing VMware Horizon View...

Using VMware Horizon View Client forMac OS X
January 2014Horizon View
This document supports the version of each product listed andsupports all subsequent versions until the document isreplaced by a new edition. To check for more recent editionsof this document, see http://www.vmware.com/support/pubs.
EN-000668-00

Using VMware Horizon View Client for Mac OS X
2 VMware, Inc.
You can find the most up-to-date technical documentation on the VMware Web site at:
http://www.vmware.com/support/
The VMware Web site also provides the latest product updates.
If you have comments about this documentation, submit your feedback to:
Copyright © 2010–2014 VMware, Inc. All rights reserved. Copyright and trademark information.
VMware, Inc.3401 Hillview Ave.Palo Alto, CA 94304www.vmware.com

Contents
Using VMware Horizon View Client for Mac OS X 5
1 Setup and Installation 7
System Requirements for Mac Clients 7System Requirements for Real-Time Audio-Video 8Supported Desktop Operating Systems 8Preparing View Connection Server for Horizon View Client 9Configure the View Client Download Links Displayed in View Portal 9Install Horizon View Client on Mac OS X 11Add Horizon View Client to Your Dock 11Configuring Certificate Checking for End Users 12Horizon View Client Data Collected by VMware 12
2 Using URIs to Configure Horizon View Client 15
Syntax for Creating vmware-view URIs 15Examples of vmware-view URIs 17
3 Managing Server Connections and Desktops 21
Log In to a Remote Desktop for the First Time 21Certificate Checking Modes for Horizon View Client 23Searching for Desktops 24Switch Desktops 24Log Off or Disconnect from a Desktop 24Remove a View Server Shortcut from the Home Screen 25Reordering View Server and Remote Desktop Shortcuts 25Roll Back a Desktop 26
4 Using a Microsoft Windows Desktop on a Mac 27
Feature Support Matrix 27Internationalization 28Monitors and Screen Resolution 28Connect USB Devices 29
Configuring USB Redirection on a Mac OS X Client 31USB Redirection Properties 33USB Device Families 35Turn on Logging for USB Redirection 36
Using the Real-Time Audio-Video Feature for Webcams and Microphones 36When You Can Use Your Webcam 37Select a Default Microphone on a Mac OS X Client System 37Configuring Real-Time Audio-Video on a Mac OS X Client 38Configure a Preferred Webcam or Microphone on a Mac OS X Client System 38
VMware, Inc. 3
Copying and Pasting Text and Images 40Printing from a Remote Desktop 41
Enabling Virtual Printing on the Mac OS X Client 41Set Printing Preferences for the Virtual Printer Feature 42Using USB Printers 43
PCoIP Client-Side Image Cache 43
5 Troubleshooting Horizon View Client 45
Reset a Desktop 45Uninstalling Horizon View Client 46
Index 47
Using VMware Horizon View Client for Mac OS X
4 VMware, Inc.
Using VMware Horizon View Client for Mac OS X
This guide, Using VMware Horizon View Client for Mac OS X, provides information about installing and usingVMware® Horizon View™ software on a Mac to connect to a remote desktop in the datacenter.
The information in this document includes system requirements and instructions for installing and usingHorizon View Client for Mac OS X.
This information is intended for administrators who need to set up a Horizon View deployment thatincludes Mac client devices. The information is written for experienced system administrators who arefamiliar with virtual machine technology and datacenter operations.
VMware, Inc. 5

Using VMware Horizon View Client for Mac OS X
6 VMware, Inc.

Setup and Installation 1Setting up a Horizon View deployment for Mac clients involves using certain View Connection Serverconfiguration settings, meeting the system requirements for View servers and Mac clients, and downloadingand installing Horizon View Client for Mac from the VMware Web site.
This chapter includes the following topics:
n “System Requirements for Mac Clients,” on page 7
n “System Requirements for Real-Time Audio-Video,” on page 8
n “Supported Desktop Operating Systems,” on page 8
n “Preparing View Connection Server for Horizon View Client,” on page 9
n “Configure the View Client Download Links Displayed in View Portal,” on page 9
n “Install Horizon View Client on Mac OS X,” on page 11
n “Add Horizon View Client to Your Dock,” on page 11
n “Configuring Certificate Checking for End Users,” on page 12
n “Horizon View Client Data Collected by VMware,” on page 12
System Requirements for Mac ClientsYou can install Horizon View Client for Mac OS X on all Intel-based models of that use the Mac OS X 10.6.8or later operating system.
The Mac on which you install Horizon View Client, and the peripherals it uses, must meet certain systemrequirements.
Model Intel-based Mac
Memory At least 2GB of RAM
Operating systems n Horizon View Client for Mac OS X 2.2 and 2.3: Mac OS X Snow Leopard(10.6.8), Mac OS X Lion (10.7), Mac OS X Mountain Lion (10.8), and MacOS X Mavericks (10.9)
n Horizon View Client for Mac OS X 2.0 and 2.1: Mac OS X Snow Leopard(10.6.8), Mac OS X Lion (10.7), and Mac OS X Mountain Lion (10.8)
n View Client for Mac OS X 1.6 and 1.7: Mac OS X Snow Leopard (10.6.8),Mac OS X Lion (10.7), and Mac OS X Mountain Lion (10.8)
VMware, Inc. 7
n View Client for Mac OS X 1.4 and 1.5: Mac OS X Snow Leopard (10.6.8)and Mac OS X Lion (10.7)
View ConnectionServer, Security Server,and View Agent
Latest maintenance release of VMware View 4.6.x and later releases
If client systems connect from outside the corporate firewall, VMwarerecommends that you use a security server. With a security server, clientsystems will not require a VPN connection.
Display protocol forHorizon View
PCoIP or RDP
Software Requirementsfor RDP
Remote Desktop Connection Client for Mac from Microsoft, versions 2.0through 2.1.1. You can download this client from the Microsoft Web site.
NOTE Horizon View Client for Mac OS X does not work with MicrosoftRemote Desktop 8.0 and later releases.
Software Requirementsfor Virtual Printing
Horizon View Client 2.1 or later
System Requirements for Real-Time Audio-VideoReal-Time Audio-Video works with standard webcam, USB audio, and analog audio devices, and withstandard conferencing applications like Skype, WebEx, and Google Hangouts. To support Real-Time Audio-Video, your Horizon View deployment must meet certain software and hardware requirements.
Horizon View remotedesktop
The desktops must have View Agent 5.2 or later installed. The desktops mustalso have the corresponding Remote Experience Agent installed. Forexample, if View Agent 5.3 is installed, you must also install the RemoteExperience Agent from Horizon View 5.3 Feature Pack 1. See theVMware Horizon View Feature Pack Installation and Administration documentfor VMware Horizon View
Horizon View Clientsoftware
Horizon View Client 2.3 for Mac OS X or a later release
Horizon View Clientcomputer or clientaccess device
n Real-Time Audio-Video is supported on Mac OS X Mountain Lion (10.8)and later. It is disabled on all earlier Mac OS X operating systems.
n The webcam and audio device drivers must be installed, and thewebcam and audio device must be operable, on the client computer. Tosupport Real-Time Audio-Video, you do not have to install the devicedrivers on the desktop operating system where View Agent is installed.
Display protocol forHorizon View
PCoIP
Real-Time Audio-Video is not supported in RDP desktop sessions.
Supported Desktop Operating SystemsAdministrators create virtual machines with a guest operating system and install View Agent in the guestoperating system. End users can log in to these virtual machines from a client device.
For a list of the supported guest operating systems, see the "Supported Operating Systems for View Agent"topic in the Horizon View 4.6.x or 5.x installation documentation.
Using VMware Horizon View Client for Mac OS X
8 VMware, Inc.
Preparing View Connection Server for Horizon View ClientAdministrators must perform specific tasks to enable end users to connect to remote desktops.
Before end users can connect to View Connection Server or a security server and access a remote desktop,you must configure certain pool settings and security settings:
n If you are using a security server, as VMware recommends, verify that you are using the latestmaintenance releases of View Connection Server 4.6.x and View Security Server 4.6.x or later releases.See the VMware Horizon View Installation documentation.
n If you plan to use a secure tunnel connection for client devices and if the secure connection isconfigured with a DNS host name for View Connection Server or a security server, verify that the clientdevice can resolve this DNS name.
To enable or disable the secure tunnel, in View Administrator, go to the Edit View Connection ServerSettings dialog box and use the check box called Use secure tunnel connection to desktop.
n Verify that a desktop pool has been created and that the user account that you plan to use is entitled toaccess the remote desktop. See the topics about creating desktop pools in the VMware Horizon ViewAdministration documentation.
n To use two-factor authentication with Horizon View Client, such as RSA SecurID or RADIUSauthentication, you must enable this feature on View Connection Server. RADIUS authentication isavailable with View 5.1 or later View Connection Server. For more information, see the topics abouttwo-factor authentication in the VMware Horizon View Administration documentation.
Configure the View Client Download Links Displayed in View PortalBy default, when you open a browser and enter the URL of a View Connection Server instance, the portalpage that appears contains links to the VMware Download site for downloading Horizon View Client. Youcan change the default .
The default Horizon View Client links on portal page ensure that you are directed to the latest compatibleHorizon View Client installers. In some cases, however, you might want to have the links point to aninternal Web server, or you might want to make specific client versions available on your own ViewConnection Server. You can reconfigure the page to point to a different URL.
When you make links for Mac OS X, Linux, and Windows client systems, the correct operating systemspecific link is shown on the portal page. For example, if you browse to the portal page from a Windowssystem, only the link or links for Windows installers appear. You can make separate links for 32-bit and 64-bit installers. You can also make links for iOS and Android systems, but these operating systems are notautomatically detected, so that if you browse to the portal page from an iPad, for example, you see the linksfor both iOS and Android, if you created links for both.
IMPORTANT If you customize the portal page links, as described in this topic, and later installVMware Horizon View HTML Access on the server, your customized portal page is replaced by anHTML Access page. For information about customizing that page, see UsingVMware Horizon View HTML Access.
Prerequisites
n Download the installer files for the Horizon View Client types that you want to use in yourenvironment. The URL to the client download page is https://www.vmware.com/go/viewclients.
n Determine which HTTP server will host the installer files. The files can reside on a View ConnectionServer instance or on another HTTP server.
Chapter 1 Setup and Installation
VMware, Inc. 9
Procedure
1 On the HTTP server where the installer files will reside, create a folder for the installer files.
For example, to place the files in a downloads folder on the View Connection Server host, in the defaultinstallation directory, use the following path:
C:\Program Files\VMware\VMware View\Server\broker\webapps\downloads
The links to the files would then use URLs with the format https://server-name/downloads/client-installer-file-name. For example, a server with the name view.mycompany.com might use the followingURL for View Client for Windows: https://view.mycompany.com/downloads/VMware-Horizon-View-Client.exe. In this example, the folder named downloads is located in the webapps root folder.
2 Copy the installer files into the folder.
If the folder resides on View Connection Server, you can replace any files in this folder without havingto restart the VMware View Connection Server service.
3 On the View Connection Server machine, copy the portal-links.properties file and theportal.properties file located in install-path\Server\Extras\PortalExamples.
4 Create a portal folder the directory C:\ProgramData\VMware\VDM, and copy the portal-links.properties and portal.properties files into the portal folder.
5 Edit C:\ProgramData\VMware\VDM\portal\portal-links.properties file to point to the new location ofthe installer files.
You can edit the lines in this file and add to them if you need to create more links. You can also deletelines.
The following examples show properties for creating two links for View Client for Windows and twolinks for View Client for Linux:
link.win=https://server-name/downloads/VMware-Horizon-View-Client-x86_64-y.y.y-XXXX.exe#win
link.win.1=https://server-name/downloads/VMware-Horizon-View-Client-y.y.y-XXXX.exe#win
link.linux=https://server-name/downloads/VMware-Horizon-View-Client-x86_64-y.y.y-
XXXX.rpm#linux
link.linux.1=https://server-name/downloads/VMware-Horizon-View-Client-y.y.y-XXXX.tar.gz#linux
In this example, y.y.y-XXXX indicates the version and build number. The win text at the end of the lineindicates that this link should appear in the browser if the client has a Windows operating system. Usewin for Windows, linux for Linux, and mac for Mac OS X. For other operating systems, use unknown.
6 Edit C:\ProgramData\VMware\VDM\portal\portal.properties file to specify the text to display for thelinks.
These lines appear in the section of the file called # keys based on key names in portal-links.properties.
The following example shows the text that corresponds to the links specified for link.win andlink.win.1:
text.win=View Client for Windows 32 bit Client users
text.win.1=View Client for Windows 64 bit Client users
7 Restart the VMware View Connection Server service.
When end users enter the URL for View Connection Server, they see links with the text you specified. Thelinks point to the locations you specified.
Using VMware Horizon View Client for Mac OS X
10 VMware, Inc.

Install Horizon View Client on Mac OS XEnd users open Horizon View Client to connect to remote desktops from a Mac OS X physical machine. Youinstall Horizon View Client on Mac OS X client systems from a disk image file.
Prerequisites
n Verify that the client system uses a supported operating system. See “System Requirements for MacClients,” on page 7.
n Verify that you can log in as an administrator on the client system.
n If you plan to use the RDP display protocol to connect to a remote desktop, verify that the Mac clientsystem has Remote Desktop Connection Client for Mac from Microsoft, version 2.0 or later installed.
n Verify that you have the URL for a download page that contains the VMware Horizon View Clientinstaller. This URL might be the VMware Downloads page at http://www.vmware.com/go/viewclients,or it might be the URL for a View Connection Server instance.
When you browse to a View Connection Server URL, by default the links on that portal page point tothe VMware Downloads page. You can configure the links to point to a different location. For moreinformation, see “Configure the View Client Download Links Displayed in View Portal,” on page 9.Depending on how the page is configured, you might also see a link forVMware Horizon View HTML Access. HTML Access allows you to connect to a virtual desktop usingthe browser, without installing any client software. Because VMware Horizon View Client offers morefeatures and better performance than the HTML Access client, VMware generally recommends that youinstall the client software.
Procedure
1 From your Mac, browse to the URL for downloading the Horizon View Client installer file.
The file name format is VMware-Horizon-View-Client-y.y.y-xxxxxx.dmg, where xxxxxx is the buildnumber and y.y.y is the version number.
2 Double-click the .dmg file to open it and click Agree.
The contents of the disk image appear in a Horizon View Client Finder window.
3 In the Finder window, drag the View Client VMware Horizon View icon to the Applications foldericon.
If you are not logged in as an administrator user, you are prompted for an administrator user name andpassword.
What to do next
Start Horizon View Client and verify that you can log in to the correct remote desktop. See “Log In to aRemote Desktop for the First Time,” on page 21.
Add Horizon View Client to Your DockYou can add Horizon View Client to your Dock just as you do with any other application.
Procedure
1 In the Applications folder, select VMware Horizon View Client.
2 Drag the VMware Horizon View Client icon to the Dock.
3 To configure the Dock icon to open Horizon View Client at login or to show the icon in the Finder,select Options and select the appropriate command from the context menu.
Chapter 1 Setup and Installation
VMware, Inc. 11
When you quit Horizon View Client, the application shortcut remains in the Dock.
Configuring Certificate Checking for End UsersAdministrators can configure the certificate verification mode so that, for example, full verification is alwaysperformed.
Certificate checking occurs for SSL connections between View Connection Server and Horizon View Client.Administrators can configure the verification mode to use one of the following strategies:
n End users are allowed to choose the verification mode. The rest of this list describes the threeverification modes.
n (No verification) No certificate checks are performed.
n (Warn) End users are warned if a self-signed certificate is being presented by the server. Users canchoose whether or not to allow this type of connection.
n (Full security) Full verification is performed and connections that do not pass full verification arerejected.
For details about the types of verification checks performed, see “Certificate Checking Modes for HorizonView Client,” on page 23.
You can set the verification mode so that end users cannot change it. Set the "Security Mode" key inthe /Library/Preferences/com.vmware.view.plist file on Mac clients to one of the following values:
n 1 implements Never connect to untrusted servers.
n 2 implements Warn before connecting to untrusted servers.
n 3 implements Do not verify server identity certificates.
Horizon View Client Data Collected by VMwareIf your company participates in the customer experience improvement program, VMware collects data fromcertain Horizon View Client fields. Fields containing sensitive information are made anonymous.
NOTE This feature is available only if your Horizon View deployment uses View Connection Server 5.1 orlater. Client information is sent for View Client 1.7 and later clients.
VMware collects data on the clients to prioritize hardware and software compatibility. If your company'sadministrator has opted to participate in the customer experience improvement program, VMware collectsanonymous data about your deployment in order to improve VMware's response to customer requirements.No data that identifies your organization is collected. Horizon View Client information is sent first to ViewConnection Server and then on to VMware, along with data from Horizon View servers, desktop pools, andremote desktops.
Although the information is encrypted while in transit to View Connection Server, the information on theclient system is logged unencrypted in a user-specific directory. The logs do not contain any personallyidentifiable information.
To participate in the VMware customer experience improvement program, the administrator who installsView Connection Server can opt in while running the View Connection Server installation wizard, or anadministrator can set an option in View Administrator after the installation.
Using VMware Horizon View Client for Mac OS X
12 VMware, Inc.

Table 1‑1. Data Collected from Horizon View Clients for the Customer Experience Improvement Program
DescriptionIs This Field MadeAnonymous? Example Value
Company that produced theHorizon View Client application
No VMware
Product name No VMware Horizon View Client
Client product version No The format is x.x.x-yyyyyy, where x.x.x is the client versionnumber and yyyyyy is the build number.
Client binary architecture No Examples include the following:n i386n x86_64n arm
Client build name No Examples include the following:n VMware-Horizon-View-Client-Win32-Windowsn VMware-Horizon-View-Client-Linuxn VMware-Horizon-View-Client-iOSn VMware-Horizon-View-Client-Macn VMware-Horizon-View-Client-Androidn VMware-Horizon-View-Client-WinStore
Host operating system No Examples include the following:n Windows 8.1n Windows 7, 64-bit Service Pack 1 (Build 7601 )n iPhone OS 5.1.1 (9B206)n Ubuntu 10.04.4 LTSn Mac OS X 10.7.5 (11G63)
Host operating system kernel No Examples include the following:n Windows 6.1.7601 SP1n Darwin Kernel Version 11.0.0: Sun Apr 8 21:52:26 PDT
2012; root:xnu-1878.11.10~1/RELEASE_ARM_S5L8945Xn Darwin 11.4.2n Linux 2.6.32-44-generic #98-Ubuntu SMP Mon Sep 24
17:27:10 UTC 2012n unknown (for Windows Store)
Host operating systemarchitecture
No Examples include the following:n x86_64n i386n armv71n ARM
Host system model No Examples include the following:n Dell Inc. OptiPlex 960n iPad3,3n MacBookPro8,2n Dell Inc. Precision WorkStation T3400 (A04 03/21/2008)
Host system CPU No Examples include the following:n Intel(R) Core(TM)2 Duo CPU E8400 @ 3.00GHn Intel(R) Core(TM)2 Quad CPU Q6600 @ 2.40GHn unknown (for iPad)
Chapter 1 Setup and Installation
VMware, Inc. 13

Table 1‑1. Data Collected from Horizon View Clients for the Customer Experience Improvement Program(Continued)
DescriptionIs This Field MadeAnonymous? Example Value
Number of cores in the hostsystem's processor
No For example: 4
MB of memory on the host system No Examples include the following:n 4096n unknown (for Windows Store)
Using VMware Horizon View Client for Mac OS X
14 VMware, Inc.

Using URIs to ConfigureHorizon View Client 2
Using uniform resource identifiers (URIs), you can create a Web page or an email with links that end usersclick to launch Horizon View Client, connect to View Connection Server, and launch a specific desktop withspecific configuration options.
You can simplify the process of logging in to a remote desktop by creating Web or email links for end users.You create these links by constructing URIs that provide some or all of the following information, so thatyour end users do not need to supply it:
n View Connection Server address
n Port number for View Connection Server
n Active Directory user name
n Domain name
n Desktop display name
n Window size
n Desktop actions, including reset, log off, and start session
n Display protocol
n Options for redirecting USB devices
To construct a URI, you use the vmware-view URI scheme with Horizon View Client specific path and queryparts.
NOTE You can use URIs to launch Horizon View Client only if the client software is already installed onend users' client computers.
This chapter includes the following topics:
n “Syntax for Creating vmware-view URIs,” on page 15
n “Examples of vmware-view URIs,” on page 17
Syntax for Creating vmware-view URIsSyntax includes the vmware-view URI scheme, a path part to specify the desktop, and, optionally, a query tospecify desktop actions or configuration options.
VMware Horizon View URI SpecificationUse the following syntax to create URIs for launching Horizon View Client:
vmware-view://[authority-part][/path-part][?query-part]
VMware, Inc. 15
The only required element is the URI scheme, vmware-view. For some versions of some client operatingsystems, the scheme name is case-sensitive. Therefore, use vmware-view.
IMPORTANT In all parts, non-ASCII characters must first be encoded according to UTF-8 [STD63], and theneach octet of the corresponding UTF-8 sequence must be percent-encoded to be represented as URIcharacters.
For information about encoding for ASCII characters, see the URL encoding reference at http://www.utf8-chartable.de/.
authority-part Specifies the server address and, optionally, a user name, a non-default portnumber, or both. Server names must conform to DNS syntax.
To specify a user name, use the following syntax:
user1@server-address
Note that you cannot specify a UPN address, which includes the domain. Tospecify the domain, you can use the domainName query part in the URI.
To specify a port number, use the following syntax:
server-address:port-number
path-part Specifies the desktop. Use the desktop display name. If the display name hasa space in it, use the %20 encoding mechanism to represent the space.
query-part Specifies the configuration options to use or the desktop actions to perform.Queries are not case-sensitive. To use multiple queries, use an ampersand(&) between the queries. If queries conflict with each other, the last query inthe list is used. Use the following syntax:
query1=value1[&query2=value2...]
Supported QueriesThis topic lists the queries that are supported for this type of Horizon View Client. If you are creating URIsfor multiple types of clients, such as desktop clients and mobile clients, see the UsingVMware Horizon View Client guide for each type of client system.
action Table 2‑1. Values That Can Be Used with the action Query
Value Description
browse Displays a list of available desktops hosted on the specified server.You are not required to specify a desktop when using this action.If you use the browse action and specify a desktop, the desktop ishighlighted in the list of available desktops.
start-session Launches the specified desktop. If no action query is provided andthe desktop name is provided, start-session is the defaultaction.
reset Shuts down and restarts the specified desktop. Unsaved data islost. Resetting a remote desktop is the equivalent of pressing theReset button on a physical PC.
Using VMware Horizon View Client for Mac OS X
16 VMware, Inc.
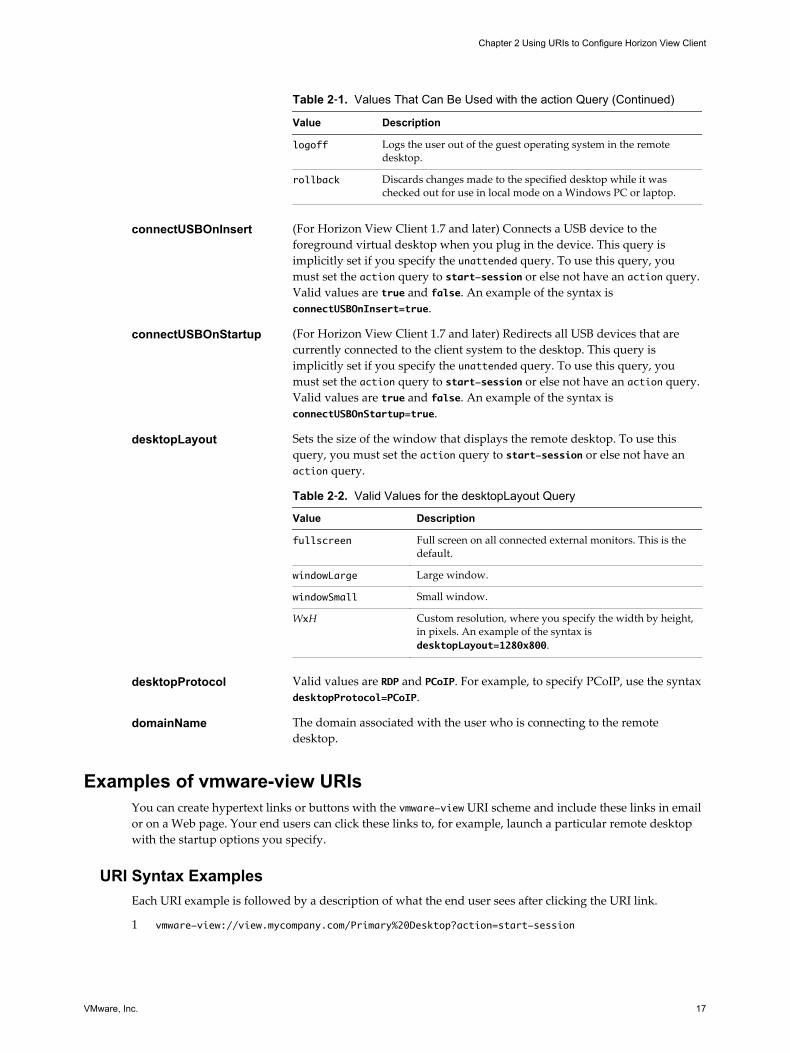
Table 2‑1. Values That Can Be Used with the action Query (Continued)
Value Description
logoff Logs the user out of the guest operating system in the remotedesktop.
rollback Discards changes made to the specified desktop while it waschecked out for use in local mode on a Windows PC or laptop.
connectUSBOnInsert (For Horizon View Client 1.7 and later) Connects a USB device to theforeground virtual desktop when you plug in the device. This query isimplicitly set if you specify the unattended query. To use this query, youmust set the action query to start-session or else not have an action query.Valid values are true and false. An example of the syntax isconnectUSBOnInsert=true.
connectUSBOnStartup (For Horizon View Client 1.7 and later) Redirects all USB devices that arecurrently connected to the client system to the desktop. This query isimplicitly set if you specify the unattended query. To use this query, youmust set the action query to start-session or else not have an action query.Valid values are true and false. An example of the syntax isconnectUSBOnStartup=true.
desktopLayout Sets the size of the window that displays the remote desktop. To use thisquery, you must set the action query to start-session or else not have anaction query.
Table 2‑2. Valid Values for the desktopLayout Query
Value Description
fullscreen Full screen on all connected external monitors. This is thedefault.
windowLarge Large window.
windowSmall Small window.
WxH Custom resolution, where you specify the width by height,in pixels. An example of the syntax isdesktopLayout=1280x800.
desktopProtocol Valid values are RDP and PCoIP. For example, to specify PCoIP, use the syntaxdesktopProtocol=PCoIP.
domainName The domain associated with the user who is connecting to the remotedesktop.
Examples of vmware-view URIsYou can create hypertext links or buttons with the vmware-view URI scheme and include these links in emailor on a Web page. Your end users can click these links to, for example, launch a particular remote desktopwith the startup options you specify.
URI Syntax ExamplesEach URI example is followed by a description of what the end user sees after clicking the URI link.
1 vmware-view://view.mycompany.com/Primary%20Desktop?action=start-session
Chapter 2 Using URIs to Configure Horizon View Client
VMware, Inc. 17

Horizon View Client is launched and connects to the view.mycompany.com server. The login box promptsthe user for a user name, domain name, and password. After a successful login, the client connects tothe desktop whose display name is displayed as Primary Desktop, and the user is logged in to theguest operating system.
NOTE The default display protocol and window size are used. The default display protocol is PCoIP.The default window size is full screen.
2 vmware-view://view.mycompany.com:7555/Primary%20Desktop
This URI has the same effect as the previous example, except that it uses the nondefault port of 7555 forView Connection Server. (The default port is 443.) Because a desktop identifier is provided, the desktopis launched even though the start-session action is not included in the URI.
3 vmware-view://[email protected]/Finance%20Desktop?desktopProtocol=PCoIP
Horizon View Client is launched and connects to the view.mycompany.com server. In the login box, theUser name text box is populated with the name fred. The user must supply the domain name andpassword. After a successful login, the client connects to the desktop whose display name is displayedas Finance Desktop, and the user is logged in to the guest operating system. The connection uses thePCoIP display protocol.
4 vmware-view://[email protected]/Finance%20Desktop?domainName=mycompany
Horizon View Client is launched and connects to the view.mycompany.com server. In the login box, theUser name text box is populated with the name fred, and the Domain text box is populated withmycompany. The user must supply only a password. After a successful login, the client connects to thedesktop whose display name is displayed as Finance Desktop, and the user is logged in to the guestoperating system.
5 vmware-view://view.mycompany.com/
Horizon View Client is launched, and the user is taken to the login prompt for connecting to theview.mycompany.com server.
6 vmware-view://view.mycompany.com/Primary%20Desktop?action=reset
Horizon View Client is launched and connects to the view.mycompany.com server. The login box promptsthe user for a user name, domain name, and password. After a successful login, Horizon View Clientdisplays a dialog box that prompts the user to confirm the reset operation for Primary Desktop. Afterthe reset occurs, depending on the type of client, the user might see a message indicating whether thereset was successful.
NOTE This action is available only if the View administrator has enabled this feature for end users.
7 vmware-view://
Horizon View Client is launched, and the user is taken to the page for entering the address of a ViewConnection Server instance.
HTML Code ExamplesYou can use URIs to make hypertext links and buttons to include in emails or on Web pages. The followingexamples show how to use the URI from the first URI example to code a hypertext link that says, Test Link,and a button that says, TestButton.
<html>
<body>
<a href="vmware-view://view.mycompany.com/Primary%20Desktop?action=start-session">Test
Link</a><br>
Using VMware Horizon View Client for Mac OS X
18 VMware, Inc.
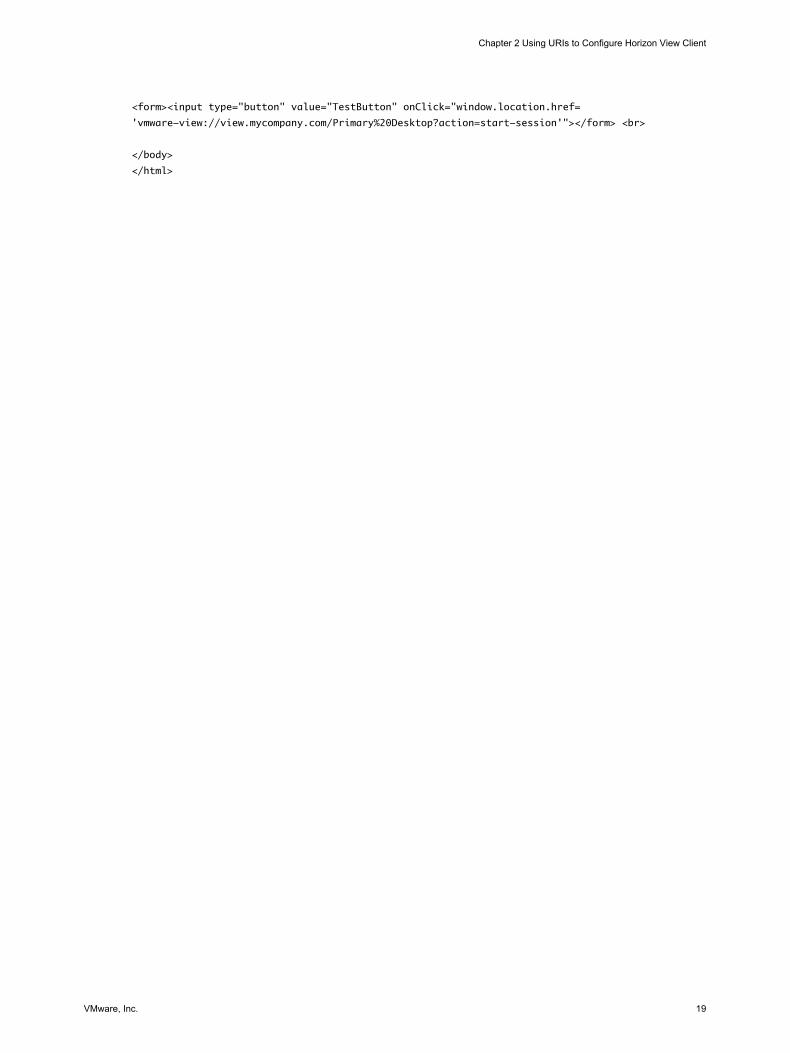
<form><input type="button" value="TestButton" onClick="window.location.href=
'vmware-view://view.mycompany.com/Primary%20Desktop?action=start-session'"></form> <br>
</body>
</html>
Chapter 2 Using URIs to Configure Horizon View Client
VMware, Inc. 19

Using VMware Horizon View Client for Mac OS X
20 VMware, Inc.
Managing Server Connections andDesktops 3
Use Horizon View Client to connect to View Connection Server or a security server and log in to or off of aremote desktop. For troubleshooting purposes, you can also reset a remote desktop assigned to you.
Depending on how the administrator configures policies for remote desktops, end users might be able toperform many operations on their desktops.
This chapter includes the following topics:
n “Log In to a Remote Desktop for the First Time,” on page 21
n “Certificate Checking Modes for Horizon View Client,” on page 23
n “Searching for Desktops,” on page 24
n “Switch Desktops,” on page 24
n “Log Off or Disconnect from a Desktop,” on page 24
n “Remove a View Server Shortcut from the Home Screen,” on page 25
n “Reordering View Server and Remote Desktop Shortcuts,” on page 25
n “Roll Back a Desktop,” on page 26
Log In to a Remote Desktop for the First TimeBefore you have end users access their remote desktops, test that you can log in to a remote desktop fromthe client system.
Prerequisites
n Obtain the credentials that you need to log in, such as Active Directory user name and password, RSASecurID user name and passcode, or RADIUS authentication user name and passcode.
n Obtain the domain name for logging in.
n Perform the administrative tasks described in “Preparing View Connection Server for Horizon ViewClient,” on page 9.
n If you are outside the corporate network and are not using a security server to access the remotedesktop, verify that your client device is set up to use a VPN connection and turn that connection on.
IMPORTANT VMware recommends using a security server rather than a VPN.
n Verify that you have the fully qualified domain name (FQDN) of the server that provides access to theremote desktop. You also need the port number if the port is not 443.
VMware, Inc. 21

n If you plan to use the RDP display protocol to connect to a remote desktop, verify that theAllowDirectRDP View Agent group policy setting is enabled.
n If your administrator has allowed it, you can configure the certificate checking mode for the SSLcertificate that the View server presents. See “Certificate Checking Modes for Horizon View Client,” onpage 23.
n If end users are allowed to use the Microsoft RDP display protocol, verify that the client system hasRemote Desktop Connection Client for Mac from Microsoft, version 2.0 or later. You can download thisclient from the Microsoft Web site.
Procedure
1 In the Applications folder, double-click VMware Horizon View Client.
2 Click Continue to start remote desktop USB and printing services, or click Cancel to useHorizon View Client without remote desktop USB and printing services.
If you click Continue, you must provide system credentials. If you click Cancel, you can enable remotedesktop USB and printing services later.
NOTE The prompt to start remote desktop USB and printing services appears the first time you launchHorizon View Client. It does not appear again, regardless of whether you click Cancel or Continue.
3 Click the Add Server icon on the Horizon View Client Home screen.
4 Enter the server name and a port number if required, and click Continue.
An example using a nondefault port is view.company.com:1443.
5 If you are prompted for RSA SecurID credentials or RADIUS authentication credentials, enter the username and passcode and click Continue.
6 Enter your user name and password, select a domain, and click Continue.
You might see a message that you must confirm before the login dialog box appears.
7 If the desktop security indicator turns red and a warning message appears, respond to the prompt.
Usually, this warning means that View Connection Server did not send a certificate thumbprint to theclient. The thumbprint is a hash of the certificate public key and is used as an abbreviation of the publickey. View Connection Server 4.6.1, 5.0.1, and later versions send thumbprint information, but earlierversions do not.
8 (Optional) Select the protocol.
The default is PCoIP. To use Microsoft RDP instead, click PCoIP under the desktop name to toggle andselect RDP.
9 Double-click a remote desktop shortcut to connect.
After you are connected, the client window appears. If Horizon View Client cannot connect to the desktop,perform the following tasks:
n Determine whether View Connection Server is configured not to use SSL. Horizon View Client requiresSSL connections. Check whether the global setting in View Administrator for the Use SSL for clientconnections check box is deselected. If so, you must either select the check box, so that SSL is used, orset up your environment so that clients can connect to an HTTPS enabled load balancer or otherintermediate device that is configured to make an HTTP connection to View Connection Server.
n Verify that the security certificate for View Connection Server is working properly. If it is not, in ViewAdministrator, you might also see that the View Agent on desktops is unreachable.
n Verify that the tags set on the View Connection Server instance allow connections from this user. Seethe VMware Horizon View Administration document.
Using VMware Horizon View Client for Mac OS X
22 VMware, Inc.

n Verify that the user is entitled to access this desktop. See the VMware Horizon View Administrationdocument.
n If you are using the RDP display protocol to connect to a remote desktop, verify that the clientcomputer allows remote desktop connections.
Certificate Checking Modes for Horizon View ClientAdministrators and sometimes end users can configure whether client connections are rejected if any orsome server certificate checks fail.
Certificate checking occurs for SSL connections between View Connection Server and Horizon View Client.Certificate verification includes the following checks:
n Is the certificate intended for a purpose other than verifying the identity of the sender and encryptingserver communications? That is, is it the correct type of certificate?
n Has the certificate expired, or is it valid only in the future? That is, is the certificate valid according tothe computer clock?
n Does the common name on the certificate match the host name of the server that sends it? A mismatchcan occur if a load balancer redirects Horizon View Client to a server that has a certificate that does notmatch the host name entered in Horizon View Client. Another reason a mismatch can occur is if youenter an IP address rather than a host name in the client.
n Is the certificate signed by an unknown or untrusted certificate authority (CA)? Self-signed certificatesare one type of untrusted CA.
To pass this check, the certificate's chain of trust must be rooted in the device's local certificate store.
NOTE For instructions about distributing a self-signed root certificate and installing it on Mac OS X clientsystems, see the Advanced Server Administration document for the Mac OS X Server you are using, availablefrom the Apple Web site.
In addition to presenting a server certificate, View Connection Server 4.6.1, 5.0.1, and later versions alsosend a certificate thumbprint to Horizon View Client. The thumbprint is a hash of the certificate public keyand is used as an abbreviation of the public key. If the View server does not send a thumbprint, you see awarning that the connection is untrusted.
If your administrator has allowed it, you can set the certificate checking mode. Select VMware HorizonView Client > Preferences from the menu bar. You have three choices:
n Never connect to untrusted servers. If any of the certificate checks fails, the client cannot connect to theserver. An error message lists the checks that failed.
n Warn before connecting to untrusted servers. If a certificate check fails because the server uses a self-signed certificate, you can click Continue to ignore the warning. For self-signed certificates, thecertificate name is not required to match the View Connection Server name you entered inHorizon View Client.
n Do not verify server identity certificates. This setting means that View does not perform any certificatechecking.
If the certificate checking mode is set to Warn, you can still connect to a View Connection Server instancethat uses a self-signed certificate.
If an administrator later installs a security certificate from a trusted certificate authority, so that all certificatechecks pass when you connect, this trusted connection is remembered for that specific server. In the future,if that server ever presents a self-signed certificate again, the connection fails. After a particular serverpresents a fully verifiable certificate, it must always do so.
Chapter 3 Managing Server Connections and Desktops
VMware, Inc. 23
Searching for DesktopsAfter you connect to a View server, the available desktops on that server appear on the Desktop Selectorwindow. In Horizon View Client 2.3 and later, you can search for a particular desktop by typing in theDesktop Selector window.
When you begin to type, Horizon View Client highlights the first matching desktop name. To connect to ahighlighted desktop, press the Enter key. If you continue to type after the first match is found,Horizon View Client continues to search for matching desktops. If Horizon View Client finds multiplematching desktops, you can press the Tab key to switch to the next match. If you stop typing for twoseconds and then begin to type again, Horizon View Client assumes that you are starting a new search.
Switch DesktopsIf you are connected to a desktop, you can switch to another desktop.
Procedure
u Select a remote desktop from the same server or a different server.
Option Action
Choose a different remote desktopon the same server
For Horizon View Client 2.1 and later, on the Desktop Selector window,double click the icon representing a different desktop pool. You can alsoclick the Disconnect button in the toolbar, or select Desktop > Disconnectfrom the menu bar.For Horizon View Client 2.0 and earlier versions, click the Disconnectbutton in the toolbar, or select Desktop > Disconnect from the menu bar.
Choose a different remote desktopon a different server
For Horizon View Client 2.1 and later, if you are entitled to multipledesktops, so that the Desktop Selector window is open, click theDisconnect from Server button at the right side of the toolbar in DesktopSelector window and disconnect from the server. If you are entitled to onlyone desktop, the Desktop Selector window is not open, you can selectDesktop > Disconnect from the menu bar and then startHorizon View Client again to connect to a different server.For Horizon View Client 2.0 and earlier versions, click the Disconnectfrom Server button at the right side of the toolbar in theHorizon View Client window.
Log Off or Disconnect from a DesktopIf you disconnect from a remote desktop without logging off, applications remain open.
Even if you do not have a remote desktop open, you can log off of the remote desktop operating system.Using this feature has the same result as sending Ctrl+Alt+Del to the desktop and then clicking Log Off.
NOTE The Windows key combination Ctrl+Alt+Del is not supported in remote desktops. To use theequivalent of pressing Ctrl+Alt+Del, select Desktop > Send Ctrl+Alt+Del from the menu bar.
Alternatively, you can press Fn+Control+Option+Delete on an Apple keyboard.
Using VMware Horizon View Client for Mac OS X
24 VMware, Inc.
Procedure
n Disconnect without logging off.
Option Action
Disconnect from the desktop andquit Horizon View Client
Click the Close button in the corner of the window or select File > Closefrom the menu bar.
Disconnect from the desktop andremain in Horizon View Client
Click the Disconnect button in the toolbar or select Disconnect > Desktopfrom the menu bar.
NOTE Your View administrator can configure your desktop to automatically log off whendisconnected. In that case, any open programs in your desktop are stopped.
n Log off and disconnect from a desktop.
Option Action
From within the desktop OS Use the Windows Start menu to log off.
From the menu bar Select Desktop > Log Off from the menu bar.If you use this procedure, files that are open on the remote desktop will beclosed without being saved first.
n Log off when you do not have a remote desktop open.
If you use this procedure, files that are open on the remote desktop will be closed without being savedfirst.
Option Action
From Home screen with servershortcuts
a Double-click the server shortcut and supply credentials.
These might include RSA SecurID credentials and credentials forlogging in to the desktop.
b Select the desktop and select Desktop > Log Off from the menu bar.
From Home screen with desktopshortcuts
Select the desktop and select Desktop > Log Off from the menu bar.
Remove a View Server Shortcut from the Home ScreenAfter you connect to a View server, a server shortcut is saved to the Horizon View Client Home screen.
You can remove a View Connection Server shortcut by selecting the shortcut and pressing the Delete key orby Control-clicking or right-clicking the shortcut on the Home screen and selecting Delete.
You cannot remove remote desktop shortcuts that appear after you connect to a server.
Reordering View Server and Remote Desktop ShortcutsIn Horizon View Client 2.3 and later, you can reorder View server and remote desktop shortcuts.
Each time you connect to a View server, Horizon View Client saves a server shortcut to the Home screen.You can reorder these View server shortcuts by selecting a shortcut and dragging it to a new position on theHome screen.
After you connect to a View server, the available desktops on that server appear in the Desktop Selectorwindow. You can reorder these remote desktop shortcuts by selecting a shortcut and dragging it to a newposition on the Desktop Selector window.
Chapter 3 Managing Server Connections and Desktops
VMware, Inc. 25

Roll Back a DesktopRolling back discards changes made to a virtual desktop that you checked out for use in local mode on aWindows PC or laptop.
You can roll back a remote desktop only if your View administrator has enabled this feature and only if youchecked out the desktop.
CAUTION If changes were made to the local mode desktop and those changes were not replicated back to theView server before rolling back, the changes are lost.
Prerequisites
n Obtain the credentials that you need to log in, such as Active Directory user name and password, RSASecurID user name and passcode, or RADIUS authentication user name and passcode.
n Back up the desktop to the server to preserve data or files.
You can use View Administrator to replicate data to the server, or, if the policy is set to allow it, you canuse View Client with Local Mode on the Windows client where the desktop is currently checked out.
Procedure
1 If the Horizon View Client Home screen displays View Connection Server shortcuts, double-click theshortcut for the server that accesses the desktop and supply credentials.
a If you are prompted for RSA SecurID credentials or RADIUS authentication credentials, enter theuser name and passcode and click Continue.
b Enter your user name and password in the login dialog box.
2 On the Horizon View Client Home screen that displays remote desktop shortcuts, select the desktopand select Desktop > Rollback from the menu bar.
After the remote desktop is rolled back, you can log in to it from the Mac client.
Using VMware Horizon View Client for Mac OS X
26 VMware, Inc.
Using a Microsoft Windows Desktopon a Mac 4
Horizon View Client for Mac OS X supports several features.
This chapter includes the following topics:
n “Feature Support Matrix,” on page 27
n “Internationalization,” on page 28
n “Monitors and Screen Resolution,” on page 28
n “Connect USB Devices,” on page 29
n “Using the Real-Time Audio-Video Feature for Webcams and Microphones,” on page 36
n “Copying and Pasting Text and Images,” on page 40
n “Printing from a Remote Desktop,” on page 41
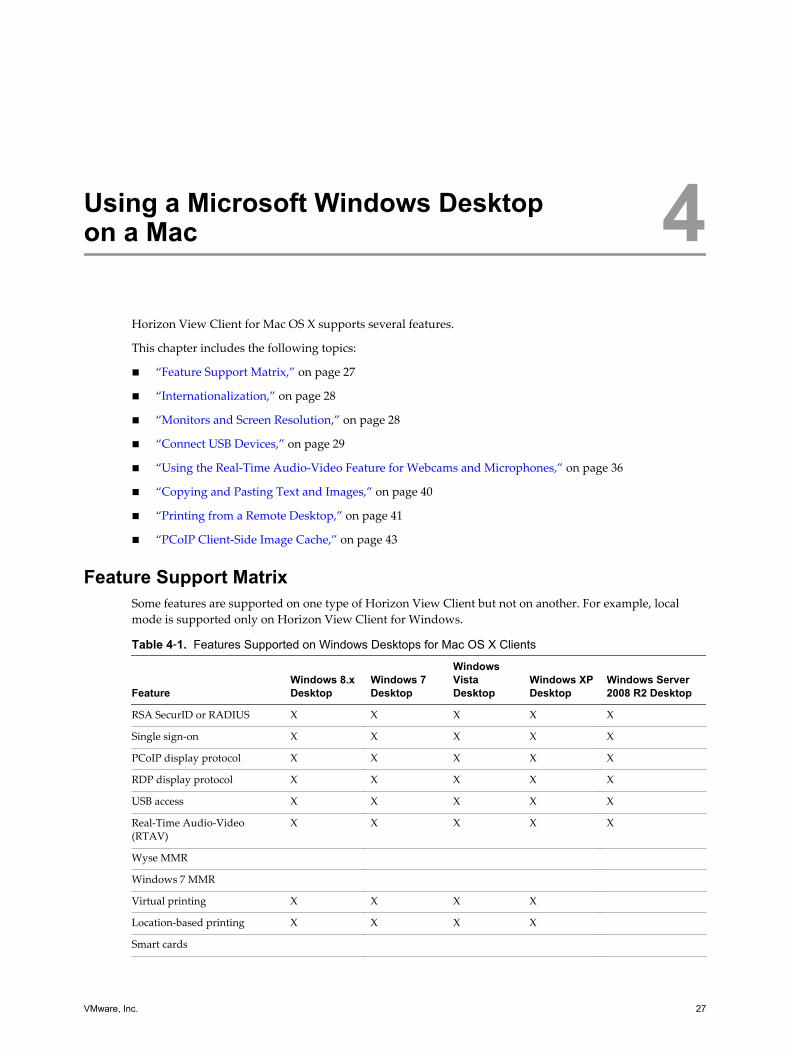
n “PCoIP Client-Side Image Cache,” on page 43
Feature Support MatrixSome features are supported on one type of Horizon View Client but not on another. For example, localmode is supported only on Horizon View Client for Windows.
Table 4‑1. Features Supported on Windows Desktops for Mac OS X Clients
FeatureWindows 8.xDesktop
Windows 7Desktop
WindowsVistaDesktop
Windows XPDesktop
Windows Server2008 R2 Desktop
RSA SecurID or RADIUS X X X X X
Single sign-on X X X X X
PCoIP display protocol X X X X X
RDP display protocol X X X X X
USB access X X X X X
Real-Time Audio-Video(RTAV)
X X X X X
Wyse MMR
Windows 7 MMR
Virtual printing X X X X
Location-based printing X X X X
Smart cards
VMware, Inc. 27

Table 4‑1. Features Supported on Windows Desktops for Mac OS X Clients (Continued)
FeatureWindows 8.xDesktop
Windows 7Desktop
WindowsVistaDesktop
Windows XPDesktop
Windows Server2008 R2 Desktop
Multiple monitors X X X X X
Local mode
Features that are supported on Windows desktops for Mac OS X Horizon View Client have the followingrestrictions.
n Windows 8.x desktops are supported only if you have Horizon View 5.2 or later servers and desktops.
n Windows Server 2008 R2 desktops are supported only if you have Horizon View 5.3 or later servers anddesktops.
n For information about establishing an RDP connection with a Windows 8.1 desktop, see the VMwareKB article at http://kb.vmware.com/kb/2059786.
n The Real-Time Audio-Video feature is supported only if you have Horizon View 5.2 with Feature Pack2 or later. For a complete list of requirements, see “System Requirements for Real-Time Audio-Video,”on page 8.
For more information about these features and their limitations, see the VMware Horizon View Planningdocument.
InternationalizationThe user interface and documentation are available in English, Japanese, French, German, SimplifiedChinese, Traditional Chinese, and Korean.
Monitors and Screen ResolutionWith Horizon View Client 2.0 and later, if you use the PCoIP display protocol, you can extend a remotedesktop to multiple monitors. If you have a Mac with Retina Display, you can see the remote desktop in fullresolution.
Using Multiple MonitorsIf you use the PCoIP display protocol when accessing a remote desktop, you can use up to two monitors,with a resolution of up to 2560x1600 per display. If you are using two monitors, the monitors can be side byside or vertically stacked.
When the 3D rendering feature is enabled, the maximum resolution is 1920x1200. Examples of 3Dapplications include Windows Aero themes, Microsoft Office 2010, and Google Earth.
To extend a remote desktop to multiple monitors you can use the Window > Full Screen menu item or theexpander arrows in the upper-right corner of the Horizon View Client window.
If you have a Mac with OS X Mavericks (10.9), open System Preferences, click Mission Control, and deselectDisplays have separate Spaces to use full screen with more than one monitor. You must log out to makeyour changes take effect.
Displaying a Remote Desktop on a High-Resolution Mac with Retina DisplayIf you use the PCoIP display protocol, Horizon View Client also supports very high resolutions for thoseclient systems with Retina Display. After you log in to a remote desktop, you can choose the Desktop >Resolution > Full Resolution menu item. This menu item appears only if the client system supports RetinaDisplay.
Using VMware Horizon View Client for Mac OS X
28 VMware, Inc.

If you use Full Resolution, the icons on the remote desktop are smaller but the display is sharper. If youconnect the client system to an external monitor, the display changes to Normal again.
Connect USB DevicesYou can use locally attached USB devices, such as thumb flash drives, cameras, and printers, from a remotedesktop. This feature is called USB redirection.
When you use this feature, most USB devices that are attached to the local client system become availablefrom a menu in Horizon View Client. You use the menu to connect and disconnect the devices.
Using USB devices with remote desktops has the following limitations:
n When you access a USB device from a menu in Horizon View Client and use the device in a remotedesktop, you cannot access the device on the local computer.
n USB devices that do not appear in the menu, but are available in a remote desktop, include humaninterface devices such as keyboards and pointing devices. The remote desktop and the local computeruse these devices at the same time. Interaction with these devices can sometimes be slow because ofnetwork latency.
n Large USB disk drives can take several minutes to appear in the desktop.
n Some USB devices require specific drivers. If a required driver is not already installed on a remotedesktop, you might be prompted to install it when you connect the USB device to the remote desktop.
n If you plan to attach USB devices that use MTP drivers, such as Android-based Samsung smart phonesand tablets, you must set Horizon View Client to automatically connect USB devices to your remotedesktop. Otherwise, if you try to manually redirect the USB device by using a menu item, the devicewill not be redirected unless you unplug the device and then plug it in again.
n Webcams are not supported for USB redirection.
n The redirection of USB audio devices depends on the state of the network and is not reliable. Somedevices require a high data throughput even when they are idle.
You can connect USB devices to a remote desktop either manually or automatically.
NOTE Do not redirect USB Ethernet connections to the remote desktop. Your remote desktop can connect toyour network if your local system is connected. If you have set your remote desktop to autoconnect USBdevices, you can add an exception to exclude your Ethernet connection. See “Configuring USB Redirectionon a Mac OS X Client,” on page 31 .
Prerequisites
n To use USB devices with a remote desktop, the View administrator must have enabled the USB featurefor the remote desktop.
This task includes installing the USB Redirection component of View Agent. For instructions, see thechapter about creating and preparing virtual machines, in the VMware Horizon View Administrationdocument.
This task can also include setting group policies to allow USB redirection. For more information, see thesection "USB Settings for the View Agent," in the VMware Horizon View Administration document.
n If this is the first time you are attempting to connect a USB device, you must provide the Administratorpassword. Horizon View Client will prompt you when it is time to do so.
Some components required for USB redirection that are already installed by Horizon View Client needto be configured, and configuration of these components requires Administrator privileges.
Chapter 4 Using a Microsoft Windows Desktop on a Mac
VMware, Inc. 29

Procedure
n Manually connect the USB device to a remote desktop.
a If this is the first time you are using the USB feature, from the VMware Horizon View Client menubar, click Desktop > USB > Start remote desktop USB services and provide the Administratorpassword when prompted.
Alternatively, you can click the USB device icon in the upper-left corner of the Horizon View Clientwindow.
b Connect the USB device to your local client system.
c From the VMware Horizon View Client menu bar, click Desktop > USB.
d Select the USB device.
The device is manually redirected from the local system to the remote desktop.
n Configure Horizon View Client to connect USB devices automatically to the remote desktop when youplug them in to the local system.
If you plan to connect devices that use MTP drivers, such as Android-based Samsung smart phones andtablets, be sure to use this autoconnect feature.
a Before you plug in the USB device, start Horizon View Client and connect to a remote desktop.
b If this is the first time you are using the USB feature, from the VMware Horizon View Client menubar, click Desktop > USB > Start remote desktop USB services and provide the Administratorpassword when prompted.
Alternatively, you can click the USB device icon in the upper-left corner of the Horizon View Clientwindow.
c From the VMware Horizon View Client menu bar, click Desktop > USB > Autoconnect USBDevices on Insert.
d Plug in the USB device.
USB devices that you connect to your local system after you start Horizon View Client are redirected tothe remote desktop.
n Configure Horizon View Client to connect USB devices automatically to the remote desktop whenHorizon View Client starts.
a If this is the first time you are using the USB feature, from the VMware Horizon View Client menubar, click Desktop > USB > Start remote desktop USB services and provide the Administratorpassword when prompted.
Alternatively, you can click the USB device icon in the upper-left corner of the Horizon View Clientwindow.
b From the VMware Horizon View Client menu bar, click Desktop > USB > Autoconnect USBDevices on Startup .
c Plug in the USB device and restart Horizon View Client.
USB devices that are connected to the local system when you start Horizon View Client are redirectedto the remote desktop.
The USB device appears in the desktop. This might take up to 20 seconds. The first time you connect thedevice to the desktop you might be prompted to install drivers.
If the USB device does not appear in the desktop after several minutes, disconnect and reconnect the deviceto the client computer.
Using VMware Horizon View Client for Mac OS X
30 VMware, Inc.
What to do next
If you have problems with USB redirection, see the topic about troubleshooting USB redirection problems inthe VMware Horizon View Administration document.
Configuring USB Redirection on a Mac OS X ClientWith Horizon View Client 1.7 and later versions, administrators can configure the client system to specifywhich USB devices can be redirected to a remote desktop.
You can configure USB policies for both View Agent, on the remote desktop, and Horizon View Client, onthe local system, to achieve the following goals:
n Restrict the types of USB devices that Horizon View Client makes available for redirection.
n Make View Agent prevent certain USB devices from being forwarded from a client computer.
n (Horizon View Client 2.0 and later) Specify whether Horizon View Client should split composite USBdevices into separate components for redirection.
Composite USB devices consist of a combination of two or more devices, such as a video input deviceand a storage device.
Configuration settings on the client might be merged with or overridden by corresponding policies set forView Agent on the remote desktop. For information about how USB settings on the client work inconjunction with View Agent USB policies, see the topics about using policies to control USB redirection, inthe VMware Horizon View Administration document.
IMPORTANT The USB redirection feature is available only when the version of View Agent and ViewConnection Server is Horizon View 4.6.1 or later. The USB filtering features and device splitting featuresdescribed in these topics are available with View Connection Server 5.1 and later.
Syntax for Configuring USB RedirectionYou can configure filtering and splitting rules to exclude or include USB devices from being redirected to aremote desktop. On a Mac OS X client, you configure USB functionality by using Terminal(/Applications/Utilities/Terminal.app) and running a command as root.
n To list the rules:
# sudo defaults read domain
For example:
# sudo defaults read com.vmware.viewusb
n To remove a rule:
# sudo defaults delete domain property
For example:
# sudo defaults delete com.vmware.viewusb ExcludeVidPid
n To set or replace a filter rule:
# sudo defaults write domain property value
Chapter 4 Using a Microsoft Windows Desktop on a Mac
VMware, Inc. 31

For example:
# sudo defaults write com.vmware.viewusb ExcludeVidPid vid-1234_pid-5678
IMPORTANT Some configuration parameters require the VID (vendor ID) and PID (product ID) for aUSB device. To find the VID and PID, you can search on the Internet for the product name combinedwith vid and pid. Alternatively, you can look in the USB Log file after you plug in the USB device to thelocal system when Horizon View Client is running. For more information, see “Turn on Logging forUSB Redirection,” on page 36.
n To set or replace a splitting rule for a composite device:
# sudo defaults write domain property value
For example:
# sudo defaults write com.vmware.viewusb AllowAutoDeviceSplitting true
# sudo defaults write com.vmware.viewusb SplitExcludeVidPid vid-03f0_Pid-2a12
# sudo defaults write com.vmware.viewusb SplitVidPid "'vid-0911_Pid-149a(exintf:03)'"
# sudo defaults write com.vmware.viewusb IncludeVidPid vid-0911_Pid-149a
Composite USB devices consist of a combination of two or more devices, such as a video input deviceand a storage device. The first line in this example turns on automatic splitting of composite devices.The second line excludes the specified composite USB device (Vid-03f0_Pid-2a12) from splitting.
The third line tells Horizon View Client to treat the components of a different composite device(Vid-0911_Pid-149a) as separate devices but to exclude the following component from being redirected:the component whose interface number is 03. This component is kept local.
Because this composite device includes a component that is ordinarily excluded by default, such as amouse or keyboard, the fourth line is necessary so that the other components of the composite deviceVid-0911_Pid-149a can be redirected to the remote desktop.
The first three properties are splitting properties. The last property is a filtering property. Filteringproperties are processed before splitting properties.
Example: Excluding a USB Ethernet DeviceOne example of a USB device you might want to exclude from redirection is a USB Ethernet device. Supposethat your Mac is using a USB Ethernet device to connect the network for the Mac client system to a remotedesktop. If you redirect the USB Ethernet device, your local client system will lose its connection to thenetwork and the remote desktop.
If you want to permanently hide this device from the USB connection menu, or if you have set your remotedesktop to autoconnect USB devices, you can add an exception to exclude your Ethernet connection.
sudo defaults write com.vmware.viewusb ExcludeVidPid vid-xxxx_pid-yyyy
In this example, xxxx is the vendor ID and yyyy is the product ID of the USB Ethernet adapter.
Using VMware Horizon View Client for Mac OS X
32 VMware, Inc.

USB Redirection PropertiesWhen creating filtering rules, you can use the USB redirection properties.
Table 4‑2. Configuration Properties for USB Redirection
Policy Name and Property Description
Allow Auto Device SplittingProperty:AllowAutoDeviceSplitting
(Horizon View Client 2.0 and later) Allow the automatic splitting of composite USBdevices.The default value is undefined, which equates to false.
Exclude Vid/Pid Device From SplitProperty:SplitExcludeVidPid
(Horizon View Client 2.0 and later) Excludes a composite USB device specified byvendor and product IDs from splitting. The format of the setting is vid-xxx1_pid-yyy1[;vid-xxx2_pid-yyy2]...You must specify ID numbers in hexadecimal. You can use the wildcard character(*) in place of individual digits in an ID.For example: vid-0781_pid-55**The default value is undefined.
Split Vid/Pid DeviceProperty:SplitVidPid
(Horizon View Client 2.0 and later) Treats the components of a composite USBdevice specified by vendor and product IDs as separate devices. The format of thesetting isvid-xxxx_pid-yyyy([exintf:zz[;exintf:ww ]])[;...]You can use the exintf keyword to exclude components from redirection byspecifying their interface number. You must specify ID numbers in hexadecimal,and interface numbers in decimal including any leading zero. You can use thewildcard character (*) in place of individual digits in an ID.For example: vid-0781_pid-554c(exintf:01;exintf:02)NOTE If the composite device includes components that are automaticallyexcluded, such as mouse and keyboard components, then View does notautomatically include the components that you have not explicitly excluded. Youmust specify a filter policy such as Include Vid/Pid Device to include thosecomponents.The default value is undefined.
Allow Audio Input DevicesProperty:AllowAudioIn
Allows audio input devices to be redirected.The default value is undefined, which equates to true.
Allow Audio Output DevicesProperty:AllowAudioOut
Allows audio output devices to be redirected.The default value is undefined, which equates to false.
Allow HIDProperty:AllowHID
Allows input devices other than keyboards or mice to be redirected.The default value is undefined, which equates to true.
Allow HIDBootableProperty:AllowHIDBootable
Allows input devices other than keyboards or mice that are available at boot time(also known as hid-bootable devices) to be redirected.The default value is undefined, which equates to true.
Allow Device Descriptor FailsafeProperty:AllowDevDescFailsafe
Allows devices to be redirected even if the Horizon View Client fails to get theconfig/device descriptors.To allow a device even if it fails the config/desc, include it in the Include filters, suchIncludeVidPid or IncludePath.The default value is undefined, which equates to false.
Allow Keyboard and Mouse DevicesProperty:AllowKeyboardMouse
Allows keyboards with integrated pointing devices (such as a mouse, trackball, ortouch pad) to be redirected.The default value is undefined, which equates to false.
Chapter 4 Using a Microsoft Windows Desktop on a Mac
VMware, Inc. 33

Table 4‑2. Configuration Properties for USB Redirection (Continued)
Policy Name and Property Description
Allow Smart CardsProperty:AllowSmartcard
Allows smart-card devices to be redirected.The default value is undefined, which equates to false.
Allow Video DevicesProperty:AllowVideo
Allows video devices to be redirected.The default value is undefined, which equates to true.
Disable Remote Configuration DownloadProperty:DisableRemoteConfig
Disables the use of View Agent settings when performing USB device filtering.The default value is undefined, which equates to false.
Exclude All DevicesProperty:ExcludeAllDevices
Excludes all USB devices from being redirected. If set to true, you can use otherpolicy settings to allow specific devices or families of devices to be redirected. If setto false, you can use other policy settings to prevent specific devices or families ofdevices from being redirected.If you set the value of Exclude All Devices to true on View Agent, and thissetting is passed to Horizon View Client, the View Agent setting overrides theHorizon View Client setting.The default value is undefined, which equates to false.
Exclude Device FamilyProperty:ExcludeFamily
Excludes families of devices from being redirected. The format of the setting isfamily_name_1[;family_name_2]...For example: bluetooth;smart-cardThe default value is undefined.NOTE (Horizon View Client 2.0 and later) If you have enabled automatic devicesplitting, View examines the device family of each interface of a composite USBdevice to decide which interfaces should be excluded. If you have disabledautomatic device splitting, View examines the device family of the whole compositeUSB device.
Exclude Vid/Pid DeviceProperty:ExcludeVidPid
Excludes devices with specified vendor and product IDs from being redirected. Theformat of the setting is vid-xxx1_pid-yyy2[;vid-xxx2_pid-yyy2]...You must specify ID numbers in hexadecimal. You can use the wildcard character(*) in place of individual digits in an ID.For example: vid-0781_pid-****;vid-0561_pid-554cThe default value is undefined.
Exclude PathProperty:ExcludePath
Exclude devices at specified hub or port paths from being redirected. The format ofthe setting is bus-x1[/y1]..._port-z1[;bus-x2[/y2]..._port-z2]...You must specify bus and port numbers in hexadecimal. You cannot use thewildcard character in paths.For example: bus-1/2/3_port-02;bus-1/1/1/4_port-ffThe default value is undefined.
Include Device FamilyProperty:IncludeFamily
Includes families of devices that can be redirected. The format of the setting isfamily_name_1[;family_name_2]...For example: storageThe default value is undefined.
Using VMware Horizon View Client for Mac OS X
34 VMware, Inc.
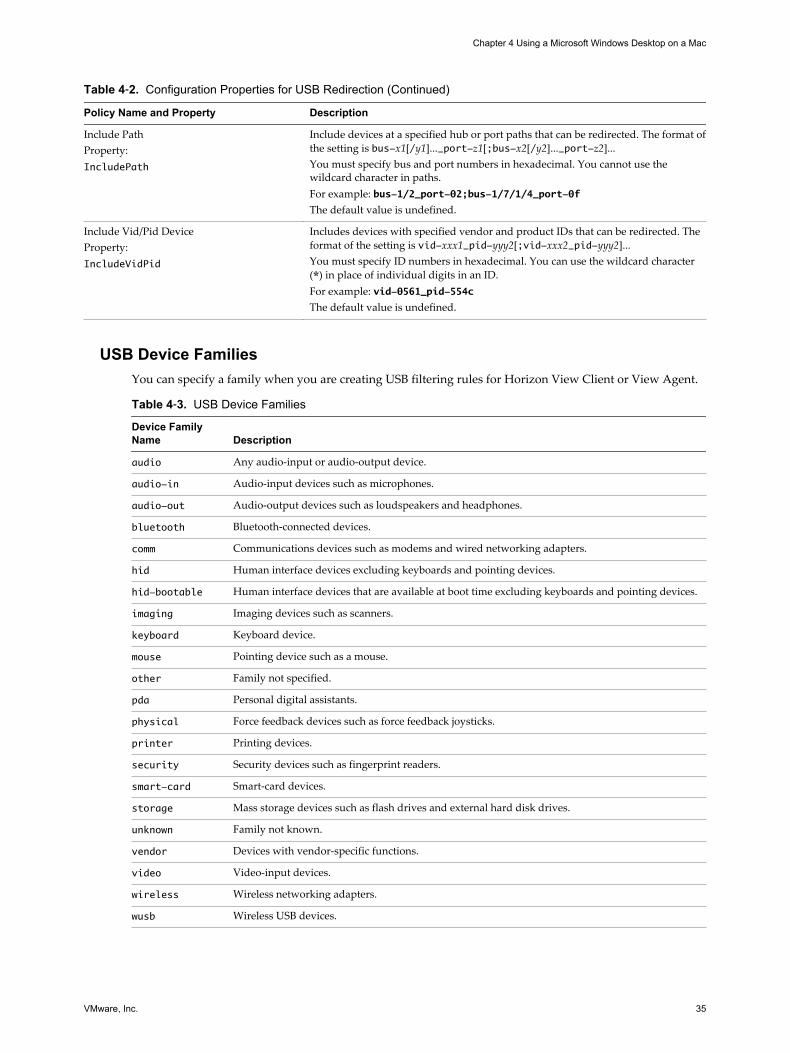
Table 4‑2. Configuration Properties for USB Redirection (Continued)
Policy Name and Property Description
Include PathProperty:IncludePath
Include devices at a specified hub or port paths that can be redirected. The format ofthe setting is bus-x1[/y1]..._port-z1[;bus-x2[/y2]..._port-z2]...You must specify bus and port numbers in hexadecimal. You cannot use thewildcard character in paths.For example: bus-1/2_port-02;bus-1/7/1/4_port-0fThe default value is undefined.
Include Vid/Pid DeviceProperty:IncludeVidPid
Includes devices with specified vendor and product IDs that can be redirected. Theformat of the setting is vid-xxx1_pid-yyy2[;vid-xxx2_pid-yyy2]...You must specify ID numbers in hexadecimal. You can use the wildcard character(*) in place of individual digits in an ID.For example: vid-0561_pid-554cThe default value is undefined.
USB Device FamiliesYou can specify a family when you are creating USB filtering rules for Horizon View Client or View Agent.
Table 4‑3. USB Device Families
Device FamilyName Description
audio Any audio-input or audio-output device.
audio-in Audio-input devices such as microphones.
audio-out Audio-output devices such as loudspeakers and headphones.
bluetooth Bluetooth-connected devices.
comm Communications devices such as modems and wired networking adapters.
hid Human interface devices excluding keyboards and pointing devices.
hid-bootable Human interface devices that are available at boot time excluding keyboards and pointing devices.
imaging Imaging devices such as scanners.
keyboard Keyboard device.
mouse Pointing device such as a mouse.
other Family not specified.
pda Personal digital assistants.
physical Force feedback devices such as force feedback joysticks.
printer Printing devices.
security Security devices such as fingerprint readers.
smart-card Smart-card devices.
storage Mass storage devices such as flash drives and external hard disk drives.
unknown Family not known.
vendor Devices with vendor-specific functions.
video Video-input devices.
wireless Wireless networking adapters.
wusb Wireless USB devices.
Chapter 4 Using a Microsoft Windows Desktop on a Mac
VMware, Inc. 35
Turn on Logging for USB RedirectionYou can use USB logs to troubleshoot and to determine the product ID and vendor ID of various devicesyou plug in to the client system.
You can enable trace logging either just for the current session or across reboots. To enable logging for thecurrent session, you use a shell command. To enable logging across reboots, add the shell command to theappropriate profile file.
Prerequisites
If you plan to configure trace logging to persist across system reboots, you must have Administrator or rootpermissions on the client system. This prerequisite does not apply if you plan to enable logging for thecurrent session only.
Procedure
n To enable logging for the current session only, use the launchctl command.
a Quit Horizon View Client so that the USB service daemon is stopped.
b Open a shell (/Applications/Utilities/Terminal.app) as the same user who startsHorizon View Client.
c Use the following command:
launchctl setenv VMWARE_VIEW_USBD_LOG_OPTIONS "-o log:trace"
d Restart Horizon View Client.
n To enable logging across reboots, add the launchctl command to the appropriate shell rc or profile filefor your choice of shell, such as ~/.bash_profile for the default Mac OS X shell.
Following is an example of the launchctl command to add:
setenv VMWARE_VIEW_USBD_LOG_OPTIONS "-o log:trace"
Using the Real-Time Audio-Video Feature for Webcams andMicrophones
With the Real-Time Audio-Video feature, you can use your local computer's webcam or microphone onyour remote desktop.
This feature is available when used in conjunction with VMware Horizon View 5.2 Feature Pack 2 or a laterrelease. For information about setting up the Real-Time Audio-Video feature and configuring the frame rateand image resolution in a remote desktop, see the VMware Horizon View Feature Pack Installation andAdministration guide. For information about configuring these settings on client systems, see the VMwareknowledge base article Setting Frame Rates and Resolution for Real-Time Audio-Video on Horizon View Clients, at http://kb.vmware.com/kb/2053644.
To download a test application that verifies the correct installation and operation of the Real-Time Audio-Video functionality, go to http://labs.vmware.com/flings/real-time-audio-video-test-application. This testapplication is available as a VMware fling, and therefore no technical support is available for it.
Using VMware Horizon View Client for Mac OS X
36 VMware, Inc.
When You Can Use Your WebcamIf your Horizon View administrator has configured the Real-Time Audio-Video feature, and if you use thePCoIP display protocol, a webcam that is built-in or connected to your local computer can be used on yourdesktop. You can use the webcam in conferencing applications such as Skype, Webex, or Google Hangouts.
During the setup of an application such as Skype, Webex, or Google Hangouts on your remote desktop, youcan choose VMware Virtual Microphone and VMware Virtual Webcam as input devices and VMwareVirtual Audio as output device from menus in the application. With many applications, however, thisfeature will just work, and selecting an input device will not be necessary.
If the webcam is currently being used by your local computer, it can be used by the remote desktopsimultaneously. Also, if the webcam is being used by the remote desktop, it can be used by your localcomputer at the same time.
NOTE If you are using a USB webcam, do not connect it from the Desktop > USB menu inHorizon View Client. To do so routes the device through USB redirection and the performance will beunusable for video chat.
If you have more than one webcam connected to your local computer, your administrator can configure apreferred webcam that will be used on your remote desktop. Consult with your Horizon Viewadministrator if you are not sure which webcam is selected.
Select a Default Microphone on a Mac OS X Client SystemIf you have multiple microphones on your client system, only one microphone is used on your remotedesktop. You can use System Preferences on your client system to specify which microphone is the defaultmicrophone on the remote desktop.
With the Real-Time Audio-Video feature, audio input devices and audio output devices work withoutrequiring the use of USB redirection, and the amount of network bandwidth required is greatly reduced.Analog audio input devices are also supported.
This procedure describes how to choose a microphone from the user interface of the client system.Administrators can also configure a preferred microphone by using the Mac OS X defaults system. See “Configure a Preferred Webcam or Microphone on a Mac OS X Client System,” on page 38.
IMPORTANT If you are using a USB microphone, do not connect it from the Desktop > USB menu inHorizon View Client. To do so routes the device through USB redirection and the device cannot use theReal-Time Audio-Video feature.
Prerequisites
n Verify that you have a USB microphone or another type of microphone installed and operational onyour client system.
n Verify that you are using the PCoIP display protocol for your remote desktop.
Procedure
1 On your client system, select Apple menu > System Preferences and click Sound.
2 Open the Input pane of Sound preferences.
3 Select the microphone that you prefer to use.
The next time that you connect to a remote desktop and start a call, the desktop uses the default microphonethat you selected on the client system.
Chapter 4 Using a Microsoft Windows Desktop on a Mac
VMware, Inc. 37

Configuring Real-Time Audio-Video on a Mac OS X ClientYou can configure Real-Time Audio-Video settings at the command line by using the Mac OS X defaultssystem. With the defaults system, you can read, write, and delete Mac OS X user defaults by using Terminal(/Applications/Utilities/Terminal.app).
Mac OS X defaults belong to domains. Domains typically correspond to individual applications. Thedomain for the Real-Time Audio-Video feature is com.vmware.rtav.
Syntax for Configuring Real-Time Audio-VideoYou can use the following commands to configure the Real-Time Audio-Video feature.
Table 4‑4. Command Syntax for Real-Time Audio-Video Configuration
Command Description
defaults write com.vmware.rtav scrWCamId "webcam-userid"
Sets the preferred webcam to use on remote desktops. When thisvalue is not set, the webcam is selected automatically by systemenumeration. You can specify any webcam connected to (or builtinto) the client system.
defaults write com.vmware.rtav srcAudioInId "audio-device-userid"
Sets the preferred microphone (audio-in device) to use on remotedesktops. When this value is not set, remote desktops use thedefault recording device set on the client system. You can specifyany microphone connected to (or built into) the client system.
defaults write com.vmware.rtav srcWCamFrameWidthpixels
Sets the image width. The value defaults to a hardcoded value of320 pixels. You can change the image width to any pixel value.
defaults write com.vmware.rtav srcWCamFrameHeightpixels
Sets the image height. The value defaults to a hardcoded value of240 pixels. You can change the image height to any pixel value.
defaults write com.vmware.rtav srcWCamFrameRate fps Sets the frame rate. The value defaults to 15 fps. You can changethe frame rate to any value.
defaults write com.vmware.rtav LogLevel "level" Sets the logging level for the Real-Time Audio-Video log file(/Library/Logs/VMware/vmware-RTAV-pid.log). You can setthe logging level to trace or debug.
defaults write com.vmware.rtav IsDisabled value Determines whether Real-Time Audio-Video is enabled ordisabled. Real-Time Audio-Video is enabled by default. (Thisvalue is not in effect.) To disable Real-Time Audio-Video on theclient, set the value to true.
defaults read com.vmware.rtav Displays Real-Time Audio-Video configuration settings.
defaults delete com.vmware.rtav setting Deletes a Real-Time Audio-Video configuration setting, forexample: defaults delete com.vmware.rtavsrcWCamFrameWidth
NOTE You can adjust frame rates from 1 fps up to a maximum of 25 fps and resolution up to a maximum of1920x1080. A high resolution at a fast frame rate might not be supported on all devices or in allenvironments.
Configure a Preferred Webcam or Microphone on a Mac OS X Client SystemWith the Real-Time Audio-Video feature, if you have multiple webcams or microphones on your clientsystem, only one webcam and one microphone can be used on your remote desktop. You specify whichwebcam and microphone are preferred at the command line by using the Mac OS X defaults system.
With the Real-Time Audio-Video feature, webcams, audio input devices, and audio output devices workwithout requiring USB redirection, and the amount of network bandwidth required is greatly reduced.Analog audio input devices are also supported.
Using VMware Horizon View Client for Mac OS X
38 VMware, Inc.

In most environments, there is no need to configure a preferred microphone or webcam. If you do not set apreferred microphone, remote desktops use the default audio device set in the client system's SystemPreferences. See “Select a Default Microphone on a Mac OS X Client System,” on page 37. If you do notconfigure a preferred webcam, the remote desktop selects the webcam by enumeration.
Prerequisites
n If you are configuring a preferred USB webcam, verify that the webcam is installed and operational onyour client system.
n If you are configuring a preferred USB microphone or other type of microphone, verify that themicrophone is installed and operational on your client system.
n Verify that you are using the PCoIP display protocol for your remote desktop.
Procedure
1 On your Mac OS X client system, start a webcam or microphone application to trigger an enumerationof camera devices or audio devices to the Real-Time Audio-Video log file.
a Attach the webcam or audio device.
b In the Applications folder, double-click VMware Horizon View Client to startHorizon View Client.
c Start a call and then stop the call.
2 Find log entries for the webcam or microphone in the Real-Time Audio-Video log file.
a In a text editor, open the Real-Time Audio-Video log file.
The Real-Time Audio-Video log file is named /Library/Logs/VMware/vmware-RTAV-pid.log, wherepid is the process ID of the current session.
b Search the Real-Time Audio-Video log file for entries that identify the attached webcams ormicrophones.
The following example shows how webcam entries might appear in the Real-Time Audio-Video log file:
2013-12-16T12:18:17.404Z| vthread-3| I120: RTAV: static void VideoInputBase::LogDevEnum() -
1 Device(s) found
2013-12-16T12:18:17.404Z| vthread-3| I120: RTAV: static void VideoInputBase::LogDevEnum() -
Name=FaceTime HD Camera (Built-in) UserId=FaceTime HD Camera (Built-
in)#0xfa20000005ac8509 SystemId=0xfa20000005ac8509
The following example shows how microphone entries might appear in the Real-Time Audio-Video logfile:
2013-12-16T12:18:17.404Z| vthread-3| I120: RTAV: int
AVCaptureEnumerateAudioDevices(MMDev::DeviceList&) -
2013-12-16T12:18:17.404Z| vthread-3| I120: RTAV: static void AudioCaptureBase::LogDevEnum()
- 2 Device(s) found
2013-12-16T12:18:17.404Z| vthread-3| I120: RTAV: static void AudioCaptureBase::LogDevEnum()
- Index=255 Name=Built-in Microphone UserId=Built-in Microphone#AppleHDAEngineInput:1B,
0,1,0:1 SystemId=AppleHDAEngineInput:1B,0,1,0:1
2013-12-16T12:18:17.404Z| vthread-3| I120: RTAV: static void AudioCaptureBase::LogDevEnum()
- Index=255 Name=Built-in Input UserId=Built-in Input#AppleHDAEngineInput:1B,0,1,1:2
SystemId=AppleHDAEngineInput:1B,0,1,1:2
Chapter 4 Using a Microsoft Windows Desktop on a Mac
VMware, Inc. 39

3 Find the webcam or microphone that you prefer in the Real-Time Audio-Video log file and make a noteof its user ID.
The user ID appears after the string UserId= in the log file. For example, the user ID of the internal facetime camera is FaceTime HD Camera (Built-in) and the user ID of the internal microphone is Built-inMicrophone.
4 In Terminal (/Applications/Utilities/Terminal.app), use the defaults write command to set thepreferred webcam or microphone.
Option Action
Set the preferred webcam Typedefaults write com.vmware.rtav srcWCamId "webcam-userid",where webcam-userid is the user ID of the preferred webcam, which youobtained from the Real-Time Audio-Video log file. For example:defaults write com.vmware.rtav srcWCamId "HD Webcam C525”
Set the preferred microphone Typedefaults write com.vmware.rtav srcAudioInId "audio-device-userid", where audio-device-userid is the user ID of the preferredmicrophone, which you obtained from the Real-Time Audio-Video log file.For example:defaults write com.vmware.rtav srcAudioInId "Built-in Microphone"
5 (Optional) Use the defaults read command to verify your changes to the Real-Time Audio-Video
feature.
For example: defaults read com.vmware.rtav
The command lists all of the Real-Time Audio-Video settings.
The next time you connect to a remote desktop and start a new call, the desktop uses the preferred webcamor microphone that you configured, if it is available. If the preferred webcam or microphone is not available,the remote desktop can use another available webcam or microphone.
Copying and Pasting Text and ImagesBy default, you can copy and paste text from your client system to a remote desktop. If your administratorenables the feature, you can also copy and paste text from a remote desktop to your client system orbetween two remote desktops. Some restrictions apply.
If you use the PCoIP display protocol and you are using a Horizon View 5.x or later remote desktop, yourView administrator can set this feature so that copy and paste operations are allowed only from your clientsystem to a remote desktop, or only from a remote desktop to your client system, or both, or neither.
Administrators configure the ability to copy and paste by using group policy objects (GPOs) that pertain toView Agent in remote desktops. For more information, see the topic about View PCoIP general sessionvariables in the VMware Horizon View Administration document, in the chapter about configuring policies.
Supported file formats include text, images, and RTF (Rich Text Format). The clipboard can accommodate1MB of data for copy and paste operations. If you are copying formatted text, some of the data is text andsome of the data is formatting information. For example, an 800KB document might use more than 1MB ofdata when it is copied because more than 200KB of RTF data might get put in the clipboard.
If you copy a large amount of formatted text or text and an image, when you attempt to paste the text andimage, you might see some or all of the plain text but no formatting or image. The reason is that the threetypes of data are sometimes stored separately. For example, depending on the type of document you arecopying from, images might be stored as images or as RTF data.
Using VMware Horizon View Client for Mac OS X
40 VMware, Inc.
If the text and RTF data together use less than 1MB, the formatted text is pasted. Often the RTF data cannotbe truncated, so that if the text and formatting use more than 1MB, the RTF data is discarded, and plain textis pasted.
If you are unable to paste all of the formatted text and images you selected in one operation, you might needto copy and paste smaller amounts in each operation.
You cannot copy and paste files between a remote desktop and the file system on your client computer.
Printing from a Remote DesktopFrom a remote desktop, you can print to a virtual printer or to a USB printer that is attached to your clientcomputer. Virtual printing and USB printing work together without conflict.
Enabling Virtual Printing on the Mac OS X ClientWith Horizon View Client 2.1 or later, if you use the PCoIP display protocol, you can use printersconfigured for your local computer from your virtual machine without installing printer drivers on thevirtual machine.
The virtual printing feature is available with no driver installation required.
When the virtual printing feature is enabled, the Desktop menu displays Printing Enabled.
You can enable virtual printing the first time you launch Horizon View Client. Click Continue whenHorizon View Client prompts you to start remote desktop USB and printing services and type your systemcredentials.
If you do not enable virtual printing the first time you launch Horizon View Client, you can use theDesktop menu to enable virtual printing.
n To enable virtual printing before you connect to a desktop, select Desktop > Start Printing Servicesfrom the VMware Horizon View Client menu. Click Continue in the Start remote desktop Printingservices dialog box and type your system credentials.
n To enable virtual printing after you connect to a desktop, select Desktop > Start Printing Services fromthe VMware Horizon View Client menu. Click Continue, type your system credentials, and reconnectto the desktop. If you cancel the desktop reconnection, you can click Desktop > Enable Printing andHorizon View Client prompts you to reconnect to the desktop again.
Chapter 4 Using a Microsoft Windows Desktop on a Mac
VMware, Inc. 41

Set Printing Preferences for the Virtual Printer FeatureThe virtual printing feature lets end users use local or network printers from a remote desktop withoutrequiring that additional print drivers be installed in the remote desktop. For each printer available throughthis feature, you can set preferences for data compression, print quality, double-sided printing, color, and soon.
After a printer is added on the local computer, Horizon View Client adds that printer to the list of availableprinters on the remote desktop. No further configuration is required. Users who have administratorprivileges can still install printer drivers on the remote desktop without creating a conflict with the virtualprinter component.
IMPORTANT This feature is not available for the following types of printers:
n USB printers that are using the USB redirection feature to connect to a virtual USB port in the remotedesktop
You must disconnect the USB printer from the remote desktop in order to use the virtual printingfeature with it.
n The Windows feature for printing to a file
Selecting the Print to file check box in a Print dialog box does not work. Using a printer driver thatcreates a file does work. For example, you can use a PDF writer to print to a PDF file.
This procedure is written for a remote desktop that has a Windows 7 or Windows 8.x (Desktop) operatingsystem. The procedure is similar but not exactly the same for Windows XP and Windows Vista.
Prerequisites
Verify that the Virtual Printing component of View Agent is installed on the remote desktop. In the remotedesktop file system, the drivers are located in C:\Program Files\Common Files\VMware\Drivers\VirtualPrinter.
Installing View Agent is one of the tasks required for preparing a virtual machine to be used as a remotedesktop. For more information, see the VMware Horizon View Administration document.
Procedure
1 In the Windows 7 or Windows 8.x remote desktop, click Start > Devices and Printers.
2 In the Devices and Printers window, right-click the default printer, select Printer Properties from thecontext menu, and select the printer.
In the remote desktop, virtual printers appear as <printer_name>#:<number>.
3 In the Printer Properties window, click the Device Setup tab and specify which settings to use.
4 On the General tab, click Preferences and specify which settings to use.
5 In the Printing Preferences dialog box, select the different tabs and specify which settings to use.
For the Page Adjustment advanced setting, VMware recommends that you retain the default settings.
6 Click OK.
Using VMware Horizon View Client for Mac OS X
42 VMware, Inc.

Using USB PrintersIn an Horizon View environment, virtual printers and redirected USB printers can work together withoutconflict.
A USB printer is a printer that is attached to a USB port on the local client system. To send print jobs to aUSB printer, you can either use the USB redirection feature or use the virtual printing feature. USB printingcan sometimes be faster than virtual printing, depending on network conditions.
n You can use the USB redirection feature to attach a USB printer to a virtual USB port in the remotedesktop as long as the required drivers are also installed on the remote desktop.
If you use this redirection feature the printer is no longer logically attached to the physical USB port onthe client and this is why the USB printer does not appear in the list of local printers on the local clientmachine. This also means that you can print to the USB printer from the remote desktop but not fromthe local client machine.
In the remote desktop, redirected USB printers appear as <printer_name>.
For information about how to connect a USB printer, see “Connect USB Devices,” on page 29.
n On some clients, you can alternatively use the virtual printing feature to send print jobs to a USBprinter. If you use the virtual printing feature you can print to the USB printer from both the remotedesktop and the local client, and you do not need to install print drivers on the remote desktop.
PCoIP Client-Side Image CachePCoIP client-side image caching stores image content on the client to avoid retransmission. This featurereduces bandwidth usage.
IMPORTANT This feature is available only when the version of View Agent and View Connection Server isView 5.0 or later.
The PCoIP image cache captures spatial, as well as temporal, redundancy. For example, when you scrolldown through a PDF document, new content appears from the bottom of the window and the oldest contentdisappears from the top of the window. All the other content remains constant and moves upward. ThePCoIP image cache is capable of detecting this spatial and temporal redundancy.
Because during scrolling, the display information sent to the client device is primarily a sequence of cacheindices, using the image cache saves a significant amount of bandwidth. This efficient scrolling has benefitsboth on the LAN and over the WAN.
n On the LAN, where bandwidth is relatively unconstrained, using client-side image caching deliverssignificant bandwidth savings.
n Over the WAN, to stay within the available bandwidth constraints, scrolling performance would bedegraded without client-side caching. Over the WAN, client-side caching saves bandwidth and ensurea smooth, highly responsive scrolling experience.
With client-side caching, the client stores portions of the display that were previously transmitted. The cachesize is 250MB.
With Horizon View Client 2.0 and later versions, if you use Horizon View 5.2 servers and desktops, a 90MBclient-side cache gives the equivalent performance of using a 250MB cache with earlier versions.
Chapter 4 Using a Microsoft Windows Desktop on a Mac
VMware, Inc. 43

Using VMware Horizon View Client for Mac OS X
44 VMware, Inc.

Troubleshooting Horizon View Client 5You can solve most problems with Horizon View Client by resetting the desktop or by reinstalling theVMware Horizon View Client application.
This chapter includes the following topics:
n “Reset a Desktop,” on page 45
n “Uninstalling Horizon View Client,” on page 46
Reset a DesktopYou might need to reset a desktop if the desktop operating system stops responding. Resetting shuts downand restarts the desktop. Unsaved data is lost.
Resetting a remote desktop is the equivalent of pressing the Reset button on a physical PC to force the PC torestart. Any files that are open on the remote desktop will be closed without being saved first.
You can reset the desktop only if your View administrator has enabled this feature.
Procedure
u Use the Reset command.
Option Action
From within the desktop OS Select Desktop > Reset from the menu bar.
From Home screen with servericons
a Double-click the server icon and supply credentials.
These might include RSA SecurID credentials and credentials forlogging in to the desktop.
b Select the desktop and select Desktop > Reset from the menu bar.
From Home screen with desktopicons
Select the desktop and select Desktop > Reset from the menu bar.
The operating system in the remote desktop is rebooted. Horizon View Client disconnects from the desktop.
What to do next
Wait an appropriate amount of time for system startup before attempting to connect to the remote desktop.
VMware, Inc. 45
Uninstalling Horizon View ClientYou can sometimes resolve problems with Horizon View Client by uninstalling and reinstalling theHorizon View Client application.
You uninstall Horizon View Client by using the same method that you usually use to uninstall any otherapplication.
Drag the VMware Horizon View Client application from the Applications folder to the Trash and emptythe trash.
After uninstalling is complete, you can reinstall the application.
See “Install Horizon View Client on Mac OS X,” on page 11.
Using VMware Horizon View Client for Mac OS X
46 VMware, Inc.

Index
Aautoconnect USB devices 29
Ccaching, client-side image 43certificates, ignoring problems 12, 23client image cache 43connect, USB devices 29copying text and images 40Ctrl+Alt+Delete 24customer experience program, desktop pool
data 12
Ddesktop
log off from 24reset 45roll back 26switch 24
device families 35devices
connecting USB 29USB 31, 36
disconnecting from a remote desktop 24Dock 11
Ffeature support matrix, for Mac OS X 27forwarding USB devices 31
Hhardware requirements, Mac 7Horizon View Client
disconnect from a desktop 24installing on Mac OS X 11setup for Mac clients 7starting 21system requirements for Mac OS X 7troubleshooting 45using View Portal to download 9
Iimage cache, client 43images, copying 40
Llog off 24logging, for USB devices 36
MMac OS X
installing Horizon View Client on 7installing View Client 11
microphone 37multiple monitors 28
Ooperating systems, supported on View Agent 8OS X, installing Horizon View Client 11
Ppasting text and images 40PCoIP client image cache 43prerequisites for client devices 9print from a desktop 41printers, setting up 42
RReal-Time Audio-Video, system requirements 8redirection
properties for USB devices 33USB 31, 36
relogging in to a remote desktop 21remote desktop, roll back 26reordering shortcuts 25reset desktop 45Retina Display 28roll back a remote desktop 26
Ssearching for remote desktops 24security servers 9Send Ctrl+Alt+Del menu command 24server connections 21server certificate verification 12server shortcuts 25shortcut for View Connection Server 25SSL certificates, verifying 12switch desktops 24system requirements, for Mac OS X 7
VMware, Inc. 47
Ttext, copying 40ThinPrint setup 42
Uuninstalling View Client 46UPNs, Horizon View Client 21URI examples 17URI syntax for View Clients 15URIs (uniform resource identifiers) 15USB redirection 31, 36USB device families 35USB devices 29USB printers 41, 43
Vverification modes for certificate checking 12View Agent, installation requirements 8View Connection Server, shortcuts for 25View Portal 9virtual printers 41virtual printing 41virtual printing feature 42
Wwebcam 36–38
Using VMware Horizon View Client for Mac OS X
48 VMware, Inc.

![VMware Horizon View Feature Pack 1 - Packt Publishing · VMware Horizon View Feature Pack 1 [2 ]Introducing View Feature Pack 1 The VMware Horizon View Feature Pack 1 is a free add-on](https://static.fdocuments.in/doc/165x107/5b97a64409d3f2e10f8cbf13/vmware-horizon-view-feature-pack-1-packt-publishing-vmware-horizon-view-feature.jpg)


![software.fujitsu.comsoftware.fujitsu.com/jp/manual/manualfiles/m170004/j2x17617/08enz...[VMware] Sections related to VMware [Horizon View] Sections related to VMware Horizon View [Hyper-V]](https://static.fdocuments.in/doc/165x107/5b02ccf77f8b9a2e228b6ed4/vmware-sections-related-to-vmware-horizon-view-sections-related-to-vmware-horizon.jpg)