VMware Horizon View Installation - View 5 · PDF fileVMware Horizon View Installation View 5.2...
130
VMware Horizon View Installation View 5.2 View Manager 5.2 View Composer 5.2 This document supports the version of each product listed and supports all subsequent versions until the document is replaced by a new edition. To check for more recent editions of this document, see http://www.vmware.com/support/pubs. EN-001020-01
Transcript of VMware Horizon View Installation - View 5 · PDF fileVMware Horizon View Installation View 5.2...
VMware Horizon View InstallationView 5.2
View Manager 5.2View Composer 5.2
This document supports the version of each product listed andsupports all subsequent versions until the document isreplaced by a new edition. To check for more recent editionsof this document, see http://www.vmware.com/support/pubs.
EN-001020-01
VMware Horizon View Installation
2 VMware, Inc.
You can find the most up-to-date technical documentation on the VMware Web site at:
http://www.vmware.com/support/
The VMware Web site also provides the latest product updates.
If you have comments about this documentation, submit your feedback to:
Copyright © 2010–2013 VMware, Inc. All rights reserved. Copyright and trademark information.
VMware, Inc.3401 Hillview Ave.Palo Alto, CA 94304www.vmware.com
Contents
VMware Horizon View Installation 5
1 System Requirements for Server Components 7
View Connection Server Requirements 7View Administrator Requirements 9View Composer Requirements 9View Transfer Server Requirements 11
2 System Requirements for Guest Operating Systems 15
Supported Operating Systems for View Agent 15Supported Operating Systems for Standalone View Persona Management 16Remote Display Protocol and Software Support 16
3 Preparing Active Directory 21
Configuring Domains and Trust Relationships 21Creating an OU for View Desktops 22Creating OUs and Groups for Kiosk Mode Client Accounts 22Creating Groups for View Users 22Creating a User Account for vCenter Server 22Create a User Account for View Composer 23Configure the Restricted Groups Policy 24Using View Group Policy Administrative Template Files 24Prepare Active Directory for Smart Card Authentication 25
4 Installing View Composer 29
Prepare a View Composer Database 29Configuring an SSL Certificate for View Composer 35Install the View Composer Service 35Configuring Your Infrastructure for View Composer 37
5 Installing View Connection Server 39
Installing the View Connection Server Software 39Installation Prerequisites for View Connection Server 40Install View Connection Server with a New Configuration 40Install a Replicated Instance of View Connection Server 45Configure a Security Server Pairing Password 50Install a Security Server 51Firewall Rules for View Connection Server 57Reinstall View Connection Server with a Backup Configuration 58Microsoft Windows Installer Command-Line Options 60Uninstalling View Products Silently by Using MSI Command-Line Options 61
VMware, Inc. 3
6 Installing View Transfer Server 63
Install View Transfer Server 64Add View Transfer Server to View Manager 65Configure the Transfer Server Repository 66Firewall Rules for View Transfer Server 67Installing View Transfer Server Silently 67
7 Configuring SSL Certificates for View Servers 71
Understanding SSL Certificates for View Servers 71Overview of Tasks for Setting Up SSL Certificates 73Obtaining a Signed SSL Certificate from a CA 74Configure View Connection Server, Security Server, or View Composer to Use a New SSL
Certificate 75Configure View Clients to Trust Root and Intermediate Certificates 80Configuring Certificate Revocation Checking on Server Certificates 82Configuring Certificate Checking in View Client for Windows 83Configure the PCoIP Secure Gateway to Use a New SSL Certificate 83View Transfer Server and SSL Certificates 87Setting View Administrator to Trust a vCenter Server or View Composer Certificate 88Benefits of Using SSL Certificates Signed by a CA 88
8 Configuring View for the First Time 89
Configuring User Accounts for vCenter Server and View Composer 89Configuring View Connection Server for the First Time 93Configuring View Client Connections 103Replacing Default Ports for View Services 109Sizing Windows Server Settings to Support Your Deployment 112
9 Adding the View Desktops Plug-in to the vSphere Web Client 115
Add the View Desktops Plug-in 115Search for View Users in the vSphere Web Client 119Remove the View Desktops Plug-in 120
10 Configuring Event Reporting 121
Add a Database and Database User for View Events 121Prepare an SQL Server Database for Event Reporting 122Configure the Event Database 123Configure Event Logging for Syslog Servers 124
Index 127
VMware Horizon View Installation
4 VMware, Inc.
VMware Horizon View Installation
VMware Horizon View Installation explains how to install the VMware® Horizon View™ server and clientcomponents.
Intended AudienceThis information is intended for anyone who wants to install VMware Horizon View. The information iswritten for experienced Windows or Linux system administrators who are familiar with virtual machinetechnology and datacenter operations.
VMware, Inc. 5

VMware Horizon View Installation
6 VMware, Inc.
System Requirements for ServerComponents 1
Hosts that run VMware Horizon View server components must meet specific hardware and softwarerequirements.
This chapter includes the following topics:
n “View Connection Server Requirements,” on page 7
n “View Administrator Requirements,” on page 9
n “View Composer Requirements,” on page 9
n “View Transfer Server Requirements,” on page 11
View Connection Server RequirementsView Connection Server acts as a broker for client connections by authenticating and then directingincoming user requests to the appropriate View desktop. View Connection Server has specific hardware,operating system, installation, and supporting software requirements.
n Hardware Requirements for View Connection Server on page 8You must install all View Connection Server installation types, including standard, replica, andsecurity server installations, on a dedicated physical or virtual machine that meets specific hardwarerequirements.
n Supported Operating Systems for View Connection Server on page 8You must install View Connection Server on a Windows Server 2008 R2 operating system.
n Virtualization Software Requirements for View Connection Server on page 8View Connection Server requires certain versions of VMware virtualization software.
n Network Requirements for Replicated View Connection Server Instances on page 8If you install replicated View Connection Server instances, configure the instances in the same locationand connect them over a high-performance LAN.
VMware, Inc. 7
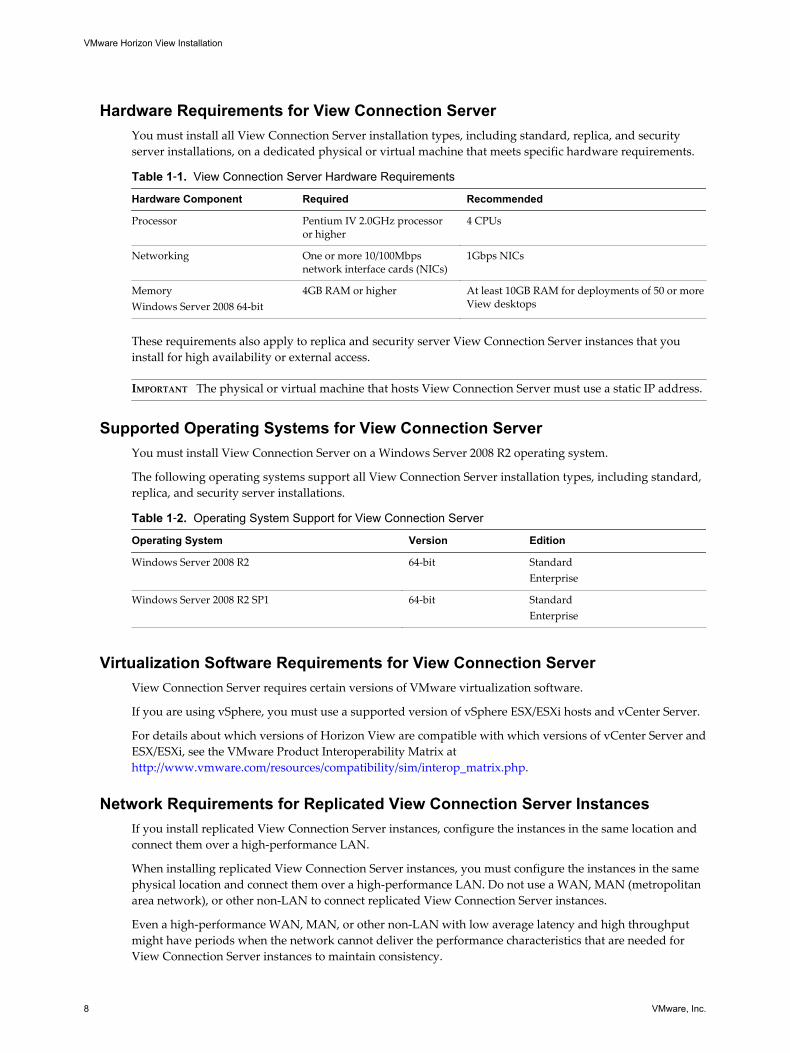
Hardware Requirements for View Connection ServerYou must install all View Connection Server installation types, including standard, replica, and securityserver installations, on a dedicated physical or virtual machine that meets specific hardware requirements.
Table 1‑1. View Connection Server Hardware Requirements
Hardware Component Required Recommended
Processor Pentium IV 2.0GHz processoror higher
4 CPUs
Networking One or more 10/100Mbpsnetwork interface cards (NICs)
1Gbps NICs
MemoryWindows Server 2008 64-bit
4GB RAM or higher At least 10GB RAM for deployments of 50 or moreView desktops
These requirements also apply to replica and security server View Connection Server instances that youinstall for high availability or external access.
IMPORTANT The physical or virtual machine that hosts View Connection Server must use a static IP address.
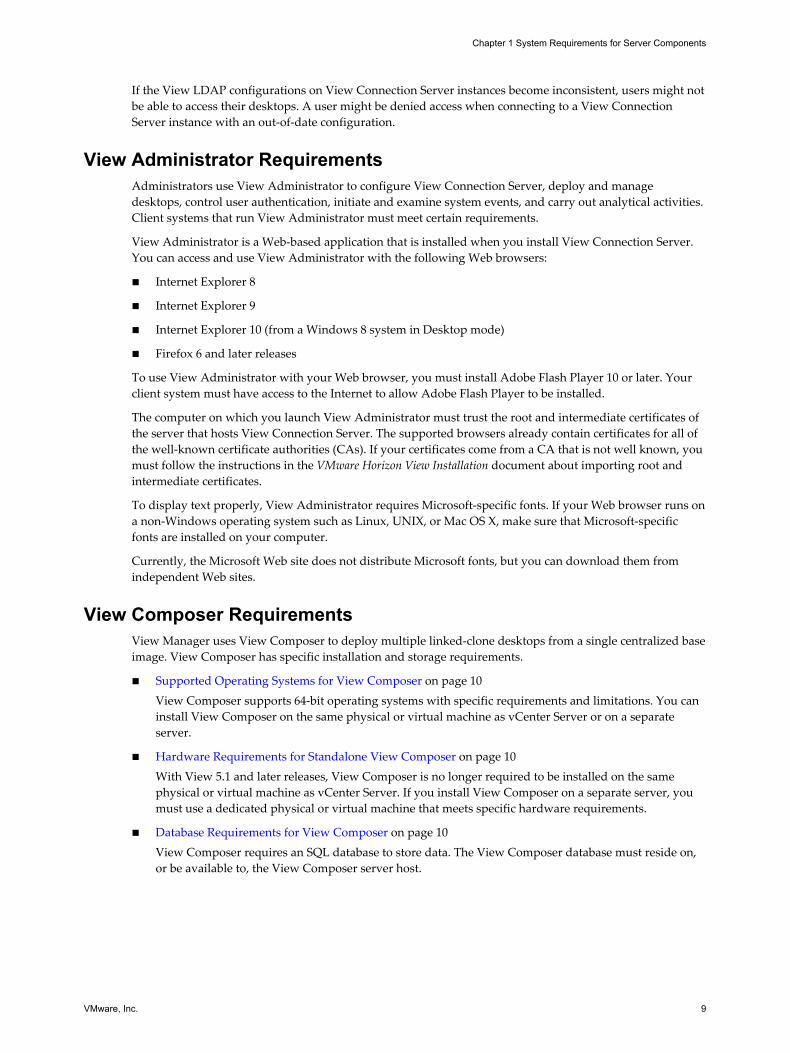
Supported Operating Systems for View Connection ServerYou must install View Connection Server on a Windows Server 2008 R2 operating system.
The following operating systems support all View Connection Server installation types, including standard,replica, and security server installations.
Table 1‑2. Operating System Support for View Connection Server
Operating System Version Edition
Windows Server 2008 R2 64-bit StandardEnterprise
Windows Server 2008 R2 SP1 64-bit StandardEnterprise
Virtualization Software Requirements for View Connection ServerView Connection Server requires certain versions of VMware virtualization software.
If you are using vSphere, you must use a supported version of vSphere ESX/ESXi hosts and vCenter Server.
For details about which versions of Horizon View are compatible with which versions of vCenter Server andESX/ESXi, see the VMware Product Interoperability Matrix at http://www.vmware.com/resources/compatibility/sim/interop_matrix.php.
Network Requirements for Replicated View Connection Server InstancesIf you install replicated View Connection Server instances, configure the instances in the same location andconnect them over a high-performance LAN.
When installing replicated View Connection Server instances, you must configure the instances in the samephysical location and connect them over a high-performance LAN. Do not use a WAN, MAN (metropolitanarea network), or other non-LAN to connect replicated View Connection Server instances.
Even a high-performance WAN, MAN, or other non-LAN with low average latency and high throughputmight have periods when the network cannot deliver the performance characteristics that are needed forView Connection Server instances to maintain consistency.
VMware Horizon View Installation
8 VMware, Inc.
If the View LDAP configurations on View Connection Server instances become inconsistent, users might notbe able to access their desktops. A user might be denied access when connecting to a View ConnectionServer instance with an out-of-date configuration.
View Administrator RequirementsAdministrators use View Administrator to configure View Connection Server, deploy and managedesktops, control user authentication, initiate and examine system events, and carry out analytical activities.Client systems that run View Administrator must meet certain requirements.
View Administrator is a Web-based application that is installed when you install View Connection Server.You can access and use View Administrator with the following Web browsers:
n Internet Explorer 8
n Internet Explorer 9
n Internet Explorer 10 (from a Windows 8 system in Desktop mode)
n Firefox 6 and later releases
To use View Administrator with your Web browser, you must install Adobe Flash Player 10 or later. Yourclient system must have access to the Internet to allow Adobe Flash Player to be installed.
The computer on which you launch View Administrator must trust the root and intermediate certificates ofthe server that hosts View Connection Server. The supported browsers already contain certificates for all ofthe well-known certificate authorities (CAs). If your certificates come from a CA that is not well known, youmust follow the instructions in the VMware Horizon View Installation document about importing root andintermediate certificates.
To display text properly, View Administrator requires Microsoft-specific fonts. If your Web browser runs ona non-Windows operating system such as Linux, UNIX, or Mac OS X, make sure that Microsoft-specificfonts are installed on your computer.
Currently, the Microsoft Web site does not distribute Microsoft fonts, but you can download them fromindependent Web sites.
View Composer RequirementsView Manager uses View Composer to deploy multiple linked-clone desktops from a single centralized baseimage. View Composer has specific installation and storage requirements.
n Supported Operating Systems for View Composer on page 10View Composer supports 64-bit operating systems with specific requirements and limitations. You caninstall View Composer on the same physical or virtual machine as vCenter Server or on a separateserver.
n Hardware Requirements for Standalone View Composer on page 10With View 5.1 and later releases, View Composer is no longer required to be installed on the samephysical or virtual machine as vCenter Server. If you install View Composer on a separate server, youmust use a dedicated physical or virtual machine that meets specific hardware requirements.
n Database Requirements for View Composer on page 10View Composer requires an SQL database to store data. The View Composer database must reside on,or be available to, the View Composer server host.
Chapter 1 System Requirements for Server Components
VMware, Inc. 9
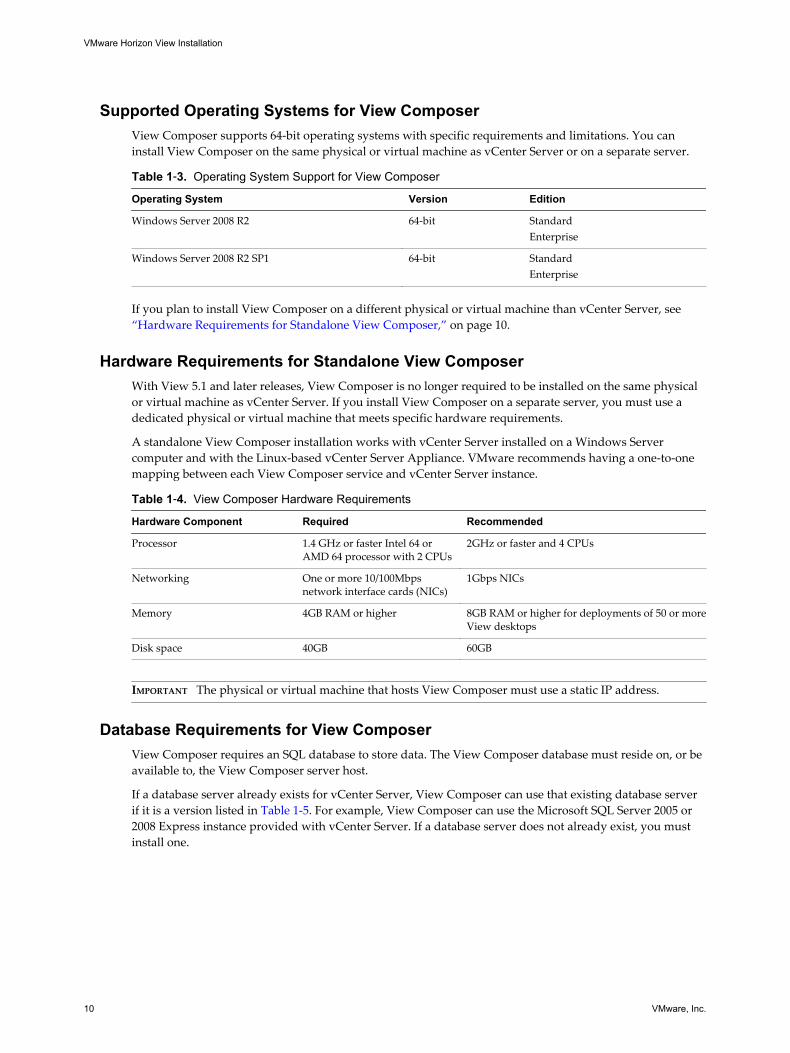
Supported Operating Systems for View ComposerView Composer supports 64-bit operating systems with specific requirements and limitations. You caninstall View Composer on the same physical or virtual machine as vCenter Server or on a separate server.
Table 1‑3. Operating System Support for View Composer
Operating System Version Edition
Windows Server 2008 R2 64-bit StandardEnterprise
Windows Server 2008 R2 SP1 64-bit StandardEnterprise
If you plan to install View Composer on a different physical or virtual machine than vCenter Server, see “Hardware Requirements for Standalone View Composer,” on page 10.
Hardware Requirements for Standalone View ComposerWith View 5.1 and later releases, View Composer is no longer required to be installed on the same physicalor virtual machine as vCenter Server. If you install View Composer on a separate server, you must use adedicated physical or virtual machine that meets specific hardware requirements.
A standalone View Composer installation works with vCenter Server installed on a Windows Servercomputer and with the Linux-based vCenter Server Appliance. VMware recommends having a one-to-onemapping between each View Composer service and vCenter Server instance.
Table 1‑4. View Composer Hardware Requirements
Hardware Component Required Recommended
Processor 1.4 GHz or faster Intel 64 orAMD 64 processor with 2 CPUs
2GHz or faster and 4 CPUs
Networking One or more 10/100Mbpsnetwork interface cards (NICs)
1Gbps NICs
Memory 4GB RAM or higher 8GB RAM or higher for deployments of 50 or moreView desktops
Disk space 40GB 60GB
IMPORTANT The physical or virtual machine that hosts View Composer must use a static IP address.
Database Requirements for View ComposerView Composer requires an SQL database to store data. The View Composer database must reside on, or beavailable to, the View Composer server host.
If a database server already exists for vCenter Server, View Composer can use that existing database serverif it is a version listed in Table 1-5. For example, View Composer can use the Microsoft SQL Server 2005 or2008 Express instance provided with vCenter Server. If a database server does not already exist, you mustinstall one.
VMware Horizon View Installation
10 VMware, Inc.
View Composer supports a subset of the database servers that vCenter Server supports. If you are alreadyusing vCenter Server with a database server that is not supported by View Composer, continue to use thatdatabase server for vCenter Server and install a separate database server to use for View Composer andView Manager database events.
IMPORTANT If you create the View Composer database on the same SQL Server instance as vCenter Server,do not overwrite the vCenter Server database.
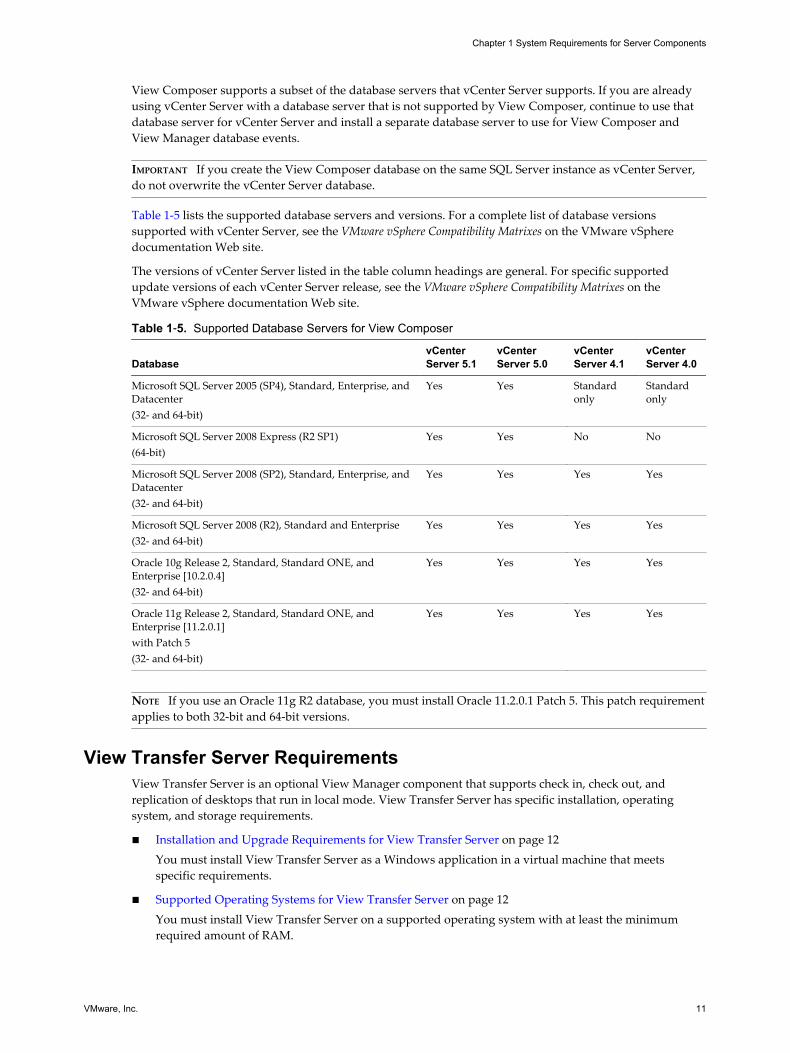
Table 1-5 lists the supported database servers and versions. For a complete list of database versionssupported with vCenter Server, see the VMware vSphere Compatibility Matrixes on the VMware vSpheredocumentation Web site.
The versions of vCenter Server listed in the table column headings are general. For specific supportedupdate versions of each vCenter Server release, see the VMware vSphere Compatibility Matrixes on theVMware vSphere documentation Web site.
Table 1‑5. Supported Database Servers for View Composer
DatabasevCenterServer 5.1
vCenterServer 5.0
vCenterServer 4.1
vCenterServer 4.0
Microsoft SQL Server 2005 (SP4), Standard, Enterprise, andDatacenter(32- and 64-bit)
Yes Yes Standardonly
Standardonly
Microsoft SQL Server 2008 Express (R2 SP1)(64-bit)
Yes Yes No No
Microsoft SQL Server 2008 (SP2), Standard, Enterprise, andDatacenter(32- and 64-bit)
Yes Yes Yes Yes
Microsoft SQL Server 2008 (R2), Standard and Enterprise(32- and 64-bit)
Yes Yes Yes Yes
Oracle 10g Release 2, Standard, Standard ONE, andEnterprise [10.2.0.4](32- and 64-bit)
Yes Yes Yes Yes
Oracle 11g Release 2, Standard, Standard ONE, andEnterprise [11.2.0.1]with Patch 5(32- and 64-bit)
Yes Yes Yes Yes
NOTE If you use an Oracle 11g R2 database, you must install Oracle 11.2.0.1 Patch 5. This patch requirementapplies to both 32-bit and 64-bit versions.
View Transfer Server RequirementsView Transfer Server is an optional View Manager component that supports check in, check out, andreplication of desktops that run in local mode. View Transfer Server has specific installation, operatingsystem, and storage requirements.
n Installation and Upgrade Requirements for View Transfer Server on page 12You must install View Transfer Server as a Windows application in a virtual machine that meetsspecific requirements.
n Supported Operating Systems for View Transfer Server on page 12You must install View Transfer Server on a supported operating system with at least the minimumrequired amount of RAM.
Chapter 1 System Requirements for Server Components
VMware, Inc. 11
n Storage Requirements for View Transfer Server on page 13View Transfer Server transfers static content to and from the Transfer Server repository and dynamiccontent between local desktops and remote desktops in the datacenter. View Transfer Server hasspecific storage requirements.
Installation and Upgrade Requirements for View Transfer ServerYou must install View Transfer Server as a Windows application in a virtual machine that meets specificrequirements.
IMPORTANT If users will be checking out local desktops that use the space-efficient sparse disk format (SE-Flex), available starting with vSphere 5.1, View Transfer Server must be hosted on a vSphere 5.1 or latervirtual machine (virtual hardware version 9). The SE Sparse disk format allows stale or deleted data withina guest operating system to be reclaimed with a wipe and shrink process.
To use the space reclamation feature, you must verify that your vCenter Server and hosts are version 5.1with ESXi 5.1 download patch ESXi510-201212001 or later. In an ESXi cluster, verify that all the hosts areversion 5.1 with download patch ESXi510-201212001 or later.
The virtual machine that hosts View Transfer Server must meet several requirements regarding networkconnectivity:
n It must be managed by the same vCenter Server instance as the local desktops that it will manage.
n It does not have to be part of a domain.
n It must use a static IP address.
The View Transfer Server software cannot coexist on the same virtual machine with any other ViewManager software component, including View Connection Server.
Do not manually add or remove PCI devices on the virtual machine that hosts View Transfer Server. If youadd or remove PCI devices, View might be unable to discover hot-added devices, which might cause datatransfer operations to fail.
You can install multiple View Transfer Server instances for high availability and scalability.
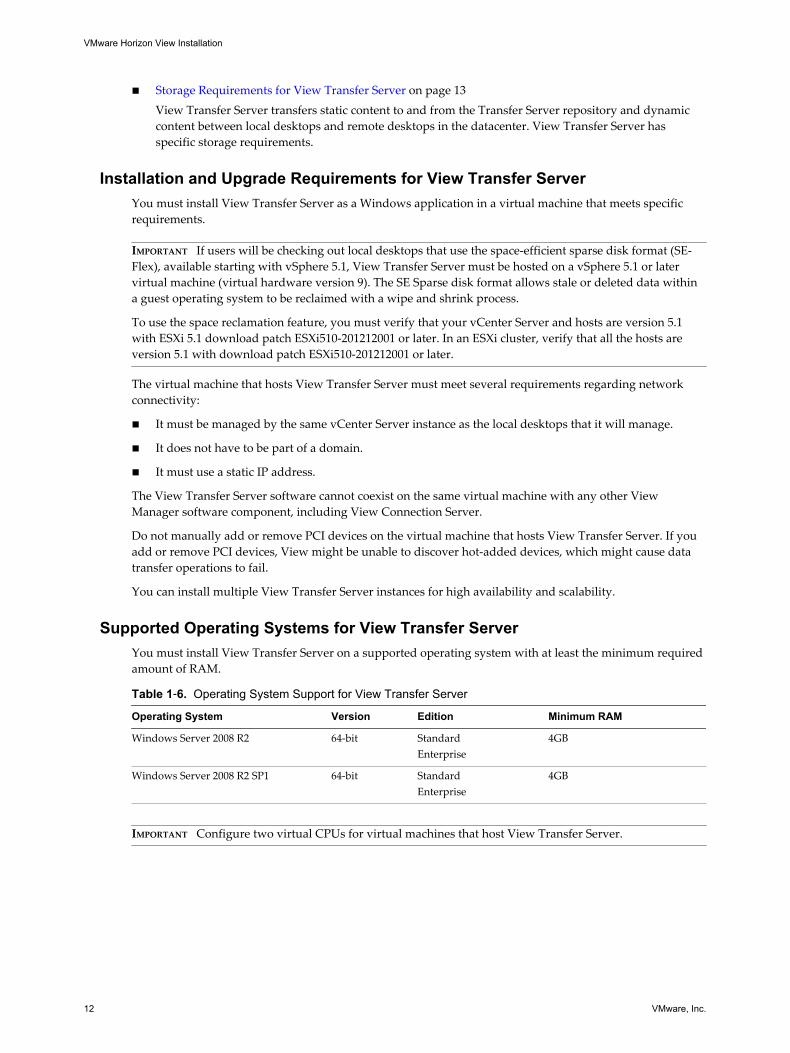
Supported Operating Systems for View Transfer ServerYou must install View Transfer Server on a supported operating system with at least the minimum requiredamount of RAM.
Table 1‑6. Operating System Support for View Transfer Server
Operating System Version Edition Minimum RAM
Windows Server 2008 R2 64-bit StandardEnterprise
4GB
Windows Server 2008 R2 SP1 64-bit StandardEnterprise
4GB
IMPORTANT Configure two virtual CPUs for virtual machines that host View Transfer Server.
VMware Horizon View Installation
12 VMware, Inc.
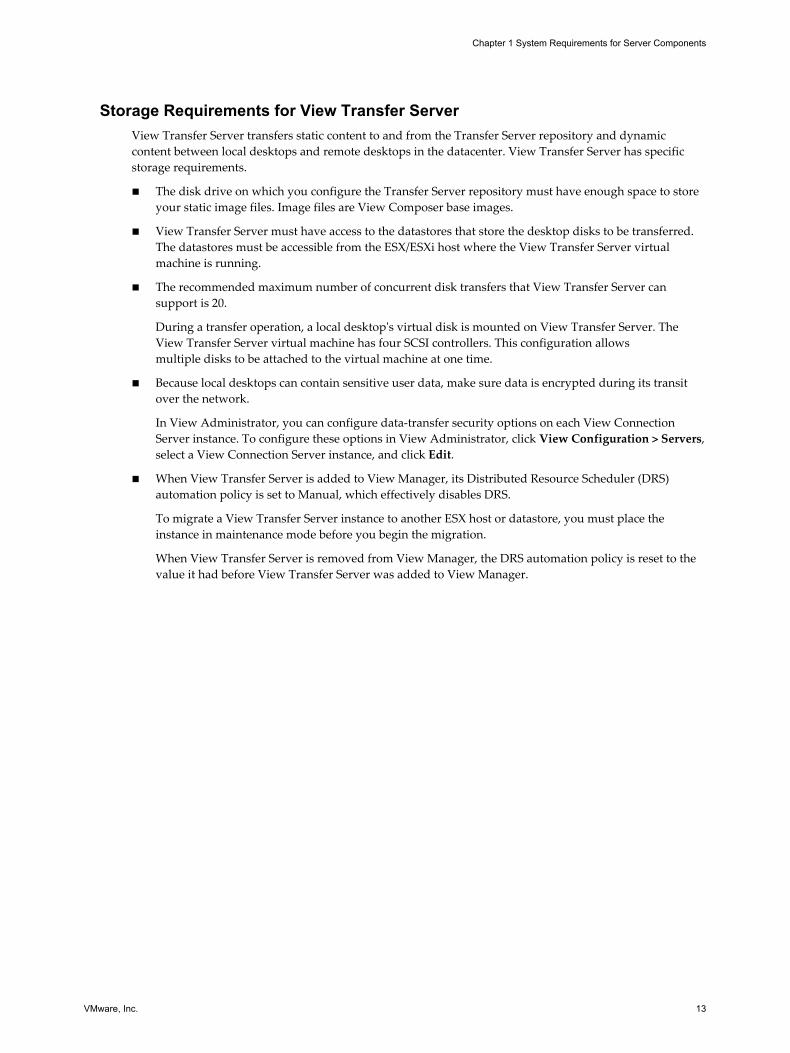
Storage Requirements for View Transfer ServerView Transfer Server transfers static content to and from the Transfer Server repository and dynamiccontent between local desktops and remote desktops in the datacenter. View Transfer Server has specificstorage requirements.
n The disk drive on which you configure the Transfer Server repository must have enough space to storeyour static image files. Image files are View Composer base images.
n View Transfer Server must have access to the datastores that store the desktop disks to be transferred.The datastores must be accessible from the ESX/ESXi host where the View Transfer Server virtualmachine is running.
n The recommended maximum number of concurrent disk transfers that View Transfer Server cansupport is 20.
During a transfer operation, a local desktop's virtual disk is mounted on View Transfer Server. TheView Transfer Server virtual machine has four SCSI controllers. This configuration allowsmultiple disks to be attached to the virtual machine at one time.
n Because local desktops can contain sensitive user data, make sure data is encrypted during its transitover the network.
In View Administrator, you can configure data-transfer security options on each View ConnectionServer instance. To configure these options in View Administrator, click View Configuration > Servers,select a View Connection Server instance, and click Edit.
n When View Transfer Server is added to View Manager, its Distributed Resource Scheduler (DRS)automation policy is set to Manual, which effectively disables DRS.
To migrate a View Transfer Server instance to another ESX host or datastore, you must place theinstance in maintenance mode before you begin the migration.
When View Transfer Server is removed from View Manager, the DRS automation policy is reset to thevalue it had before View Transfer Server was added to View Manager.
Chapter 1 System Requirements for Server Components
VMware, Inc. 13

VMware Horizon View Installation
14 VMware, Inc.
System Requirements for GuestOperating Systems 2
Systems running View Agent or Standalone View Persona Management must meet certain hardware andsoftware requirements.
This chapter includes the following topics:
n “Supported Operating Systems for View Agent,” on page 15
n “Supported Operating Systems for Standalone View Persona Management,” on page 16
n “Remote Display Protocol and Software Support,” on page 16
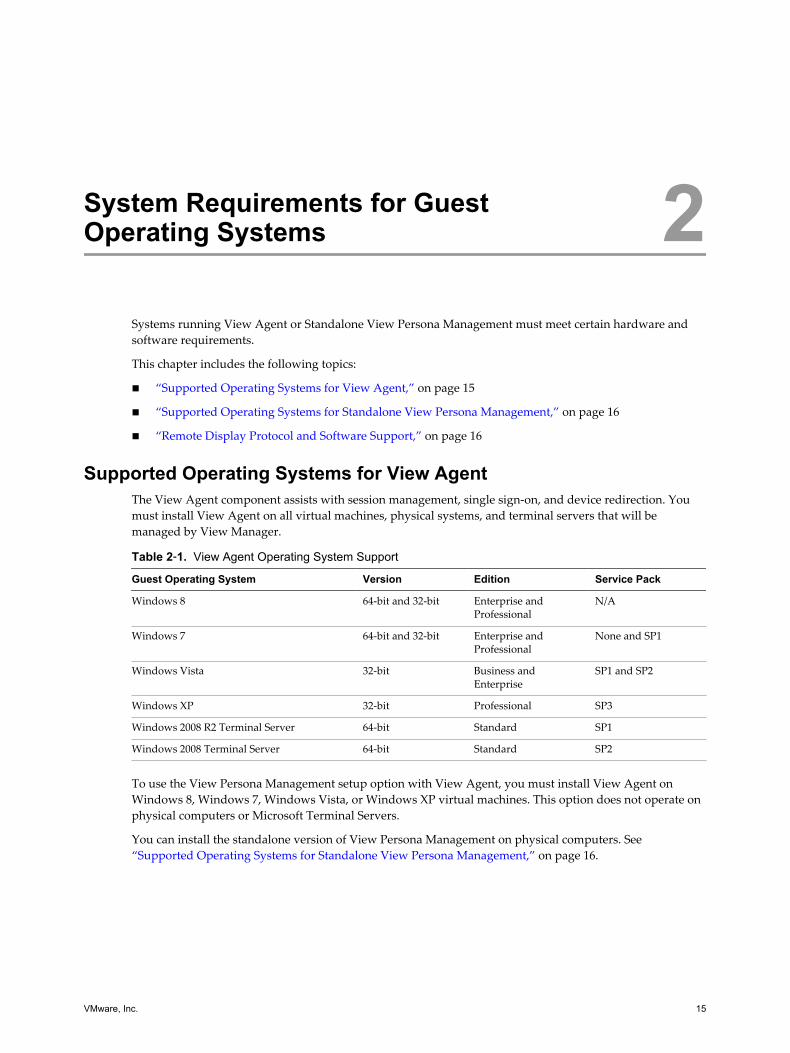
Supported Operating Systems for View AgentThe View Agent component assists with session management, single sign-on, and device redirection. Youmust install View Agent on all virtual machines, physical systems, and terminal servers that will bemanaged by View Manager.
Table 2‑1. View Agent Operating System Support
Guest Operating System Version Edition Service Pack
Windows 8 64-bit and 32-bit Enterprise andProfessional
N/A
Windows 7 64-bit and 32-bit Enterprise andProfessional
None and SP1
Windows Vista 32-bit Business andEnterprise
SP1 and SP2
Windows XP 32-bit Professional SP3
Windows 2008 R2 Terminal Server 64-bit Standard SP1
Windows 2008 Terminal Server 64-bit Standard SP2
To use the View Persona Management setup option with View Agent, you must install View Agent onWindows 8, Windows 7, Windows Vista, or Windows XP virtual machines. This option does not operate onphysical computers or Microsoft Terminal Servers.
You can install the standalone version of View Persona Management on physical computers. See “Supported Operating Systems for Standalone View Persona Management,” on page 16.
VMware, Inc. 15
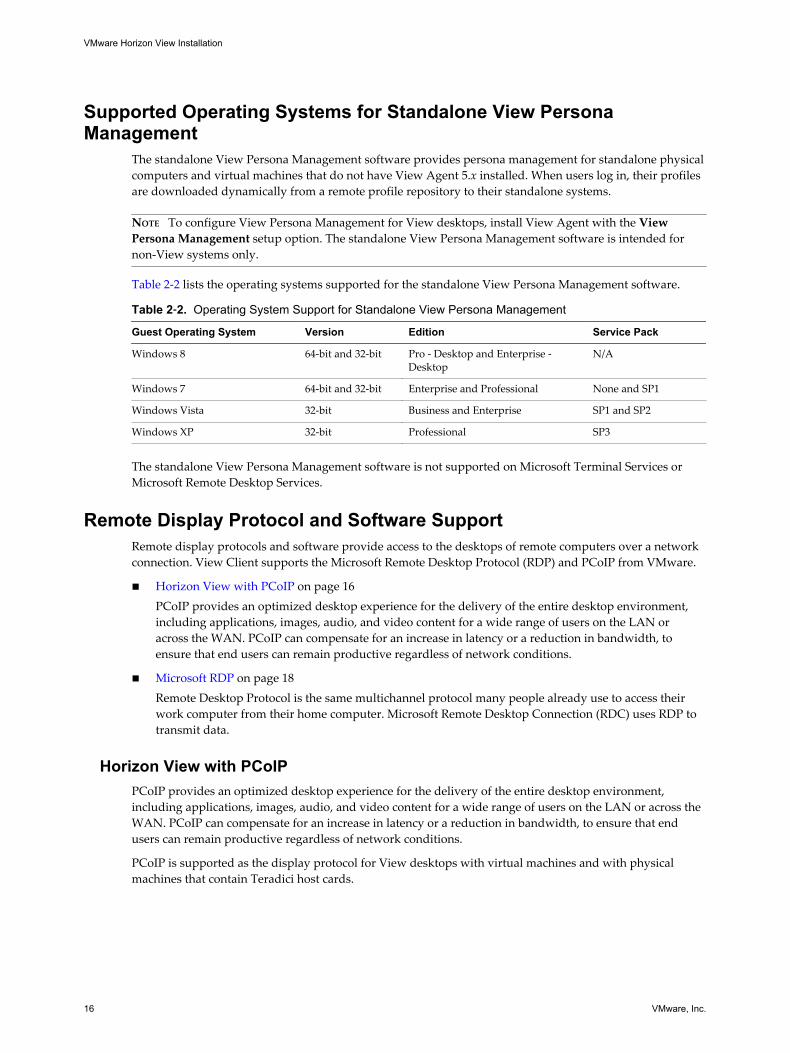
Supported Operating Systems for Standalone View PersonaManagement
The standalone View Persona Management software provides persona management for standalone physicalcomputers and virtual machines that do not have View Agent 5.x installed. When users log in, their profilesare downloaded dynamically from a remote profile repository to their standalone systems.
NOTE To configure View Persona Management for View desktops, install View Agent with the ViewPersona Management setup option. The standalone View Persona Management software is intended fornon-View systems only.
Table 2-2 lists the operating systems supported for the standalone View Persona Management software.
Table 2‑2. Operating System Support for Standalone View Persona Management
Guest Operating System Version Edition Service Pack
Windows 8 64-bit and 32-bit Pro - Desktop and Enterprise -Desktop
N/A
Windows 7 64-bit and 32-bit Enterprise and Professional None and SP1
Windows Vista 32-bit Business and Enterprise SP1 and SP2
Windows XP 32-bit Professional SP3
The standalone View Persona Management software is not supported on Microsoft Terminal Services orMicrosoft Remote Desktop Services.
Remote Display Protocol and Software SupportRemote display protocols and software provide access to the desktops of remote computers over a networkconnection. View Client supports the Microsoft Remote Desktop Protocol (RDP) and PCoIP from VMware.
n Horizon View with PCoIP on page 16PCoIP provides an optimized desktop experience for the delivery of the entire desktop environment,including applications, images, audio, and video content for a wide range of users on the LAN oracross the WAN. PCoIP can compensate for an increase in latency or a reduction in bandwidth, toensure that end users can remain productive regardless of network conditions.
n Microsoft RDP on page 18Remote Desktop Protocol is the same multichannel protocol many people already use to access theirwork computer from their home computer. Microsoft Remote Desktop Connection (RDC) uses RDP totransmit data.
Horizon View with PCoIPPCoIP provides an optimized desktop experience for the delivery of the entire desktop environment,including applications, images, audio, and video content for a wide range of users on the LAN or across theWAN. PCoIP can compensate for an increase in latency or a reduction in bandwidth, to ensure that endusers can remain productive regardless of network conditions.
PCoIP is supported as the display protocol for View desktops with virtual machines and with physicalmachines that contain Teradici host cards.
VMware Horizon View Installation
16 VMware, Inc.
PCoIP FeaturesKey features of PCoIP include the following:
n Users outside the corporate firewall can use this protocol with your company's virtual private network(VPN), or users can make secure, encrypted connections to a View security server in the corporateDMZ.
n Advanced Encryption Standard (AES) 128-bit encryption is supported and is turned on by default. Youcan, however, change the encryption key cipher to AES-192 or AES-256.
n Connections to Windows desktops with the View Agent operating system versions listed in “SupportedOperating Systems for View Agent,” on page 15 are supported.
n Connections from all types of View clients.
n MMR redirection is supported for some Windows client operating systems and some View desktop(agent) operating systems. See "Feature Support Matrix" in the VMware Horizon View ArchitecturePlanning document..
n USB redirection is supported for some client types.
n Audio redirection with dynamic audio quality adjustment for LAN and WAN is supported.
n Optimization controls for reducing bandwidth usage on the LAN and WAN.
n Multiple monitors are supported for some client types. For example, on Windows-based clients, youcan use up to four monitors and adjust the resolution for each monitor separately, with a resolution ofup to 2560x1600 per display. Pivot display and autofit are also supported.
When the 3D feature is enabled, up to 2 monitors are supported with a resolution of up to 1920 X 1200.
n 32-bit color is supported for virtual displays.
n ClearType fonts are supported.
n Copy and paste of text and images between a Windows-based client operating system and a Viewdesktop is supported, up to 1MB. Supported file formats include text, images, and RTF (Rich TextFormat). You cannot copy and paste system objects such as folders and files between systems.
For information about which client devices support specific PCoIP features, go to https://www.vmware.com/support/viewclients/doc/viewclients_pubs.html.
Recommended Guest Operating System SettingsRecommended guest operating system settings include the following settings:
n For Windows XP desktops: 768MB RAM or more and a single CPU.
n For Windows 7 or 8 desktops: 1GB of RAM or more and a dual CPU is recommended for playing inhigh-definition, full screen mode, or 720p or higher formatted video.
Chapter 2 System Requirements for Guest Operating Systems
VMware, Inc. 17
Video Quality Requirements
480p-formatted video You can play video at 480p or lower at native resolutions when the Viewdesktop has a single virtual CPU. If the operating system is Windows 7 orlater and you want to play the video in high-definition Flash or in full screenmode, the desktop requires a dual virtual CPU. Even with a dual virtualCPU desktop, as low as 360p-formatted video played in full screen mode canlag behind audio, particularly on Windows clients.
720p-formatted video You can play video at 720p at native resolutions if the View desktop has adual virtual CPU. Performance might be affected if you play videos at 720pin high definition or in full screen mode.
1080p-formatted video If the View desktop has a dual virtual CPU, you can play 1080p formattedvideo, although the media player might need to be adjusted to a smallerwindow size.
3D If you use VMware vSphere 5.1 or later, you can configure View desktops touse software or hardware accelerated graphics.
n With Virtual Shared Graphics Acceleration (vSGA), a vSphere 5.1feature that uses physical graphics cards installed on the ESXi hosts, youcan use 3D applications for design, modeling, and multimedia.
n With the software accelerated graphics feature, available with vSphere5.0 and later, you can use less demanding 3D applications such asWindows Aero themes, Microsoft Office 2010, and Google Earth.
This non-hardware accelerated graphics feature enables you to runDirectX 9 and OpenGL 2.1 applications without requiring a physicalgraphics processing unit (GPU).
For 3D applications, up to 2 monitors are supported, and the maximumscreen resolution is 1920 x 1200. The guest operating system on the Viewdesktops must be Windows 7 or later.
Hardware Requirements for Client SystemsFor information about processor and memory requirements, see the "Using VMware Horizon View Client"document for the specific type of desktop or mobile client device. Go to https://www.vmware.com/support/viewclients/doc/viewclients_pubs.html.
Microsoft RDPRemote Desktop Protocol is the same multichannel protocol many people already use to access their workcomputer from their home computer. Microsoft Remote Desktop Connection (RDC) uses RDP to transmitdata.
Microsoft RDP provides the following features:
n With RDP 6, you can use multiple monitors in span mode. RDP 7 has true multiple monitor support, forup to 16 monitors.
n You can copy and paste text and system objects such as folders and files between the local system andthe View desktop.
n 32-bit color is supported for virtual displays.
n RDP supports 128-bit encryption.
VMware Horizon View Installation
18 VMware, Inc.
n Users outside the corporate firewall can use this protocol with your company's virtual private network(VPN), or users can make secure, encrypted connections to a View security server in the corporateDMZ.
NOTE For Windows XP desktop virtual machines, you must install the RDP patches listed in MicrosoftKnowledge Base (KB) articles 323497 and 884020. If you do not install the RDP patches, a Windows Socketsfailed error message might appear on the client.
Hardware Requirements for Client SystemsFor information about processor and memory requirements, see the "Using VMware Horizon View Client"document for the specific type of client system. Go to https://www.vmware.com/support/viewclients/doc/viewclients_pubs.html.
NOTE iOS and Android client devices use only the PCoIP display protocol.
Chapter 2 System Requirements for Guest Operating Systems
VMware, Inc. 19

VMware Horizon View Installation
20 VMware, Inc.
Preparing Active Directory 3View uses your existing Microsoft Active Directory infrastructure for user authentication and management.You must perform certain tasks to prepare Active Directory for use with View.
View supports the following versions of Active Directory:
n Windows 2003 Active Directory
n Windows 2008 Active Directory
This chapter includes the following topics:
n “Configuring Domains and Trust Relationships,” on page 21
n “Creating an OU for View Desktops,” on page 22
n “Creating OUs and Groups for Kiosk Mode Client Accounts,” on page 22
n “Creating Groups for View Users,” on page 22
n “Creating a User Account for vCenter Server,” on page 22
n “Create a User Account for View Composer,” on page 23
n “Configure the Restricted Groups Policy,” on page 24
n “Using View Group Policy Administrative Template Files,” on page 24
n “Prepare Active Directory for Smart Card Authentication,” on page 25
Configuring Domains and Trust RelationshipsYou must join each View Connection Server host to an Active Directory domain. The host must not be adomain controller. You place View desktops in the same domain as the View Connection Server host or in adomain that has a two-way trust relationship with the View Connection Server host's domain.
You can entitle users and groups in the View Connection host's domain to View desktops and pools. Youcan also select users and groups from the View Connection Server host's domain to be administrators inView Administrator. To entitle or select users and groups from a different domain, you must establish atwo-way trust relationship between that domain and the View Connection Server host's domain.
Users are authenticated against Active Directory for the View Connection Server host's domain and againstany additional user domains with which a trust agreement exists.
NOTE Because security servers do not access any authentication repositories, including Active Directory,they do not need to reside in an Active Directory domain.
VMware, Inc. 21
Trust Relationships and Domain FilteringTo determine which domains it can access, a View Connection Server instance traverses trust relationshipsbeginning with its own domain.
For a small, well-connected set of domains, View Connection Server can quickly determine the full list ofdomains, but the time that it takes increases as the number of domains increases or as the connectivitybetween the domains decreases. The list might also include domains that you would prefer not to offer tousers when they log in to their View desktops.
You can use the vdmadmin command to configure domain filtering to limit the domains that a ViewConnection Server instance searches and that it displays to users. See the VMware Horizon ViewAdministration document for more information.
Creating an OU for View DesktopsYou should create an organizational unit (OU) specifically for your View desktops. An OU is a subdivisionin Active Directory that contains users, groups, computers, or other OUs.
To prevent group policy settings from being applied to other Windows servers or workstations in the samedomain as your desktops, you can create a GPO for your View group policies and link it to the OU thatcontains your View desktops. You can also delegate control of the OU to subordinate groups, such as serveroperators or individual users.
If you use View Composer, you should create a separate Active Directory container for linked-clonedesktops that is based on the OU for your View desktops. View administrators that have OU administratorprivileges in Active Directory can provision linked-clone desktops without domain administrator privileges.If you change administrator credentials in Active Directory, you must also update the credentialinformation in View Composer.
Creating OUs and Groups for Kiosk Mode Client AccountsA client in kiosk mode is a thin client or a locked-down PC that runs View Client to connect to a ViewConnection Server instance and launch a remote desktop session. If you configure clients in kiosk mode, youshould create dedicated OUs and groups in Active Directory for kiosk mode client accounts.
Creating dedicated OUs and groups for kiosk mode client accounts partitions client systems againstunwarranted intrusion and simplifies client configuration and administration.
See the VMware Horizon View Administration document for more information.
Creating Groups for View UsersYou should create groups for different types of View users in Active Directory. For example, you can createa group called VMware Horizon View Users for your View desktop users and another group calledVMware Horizon View Administrators for users that will administer View desktops.
Creating a User Account for vCenter ServerYou must create a user account in Active Directory to use with vCenter Server. You specify this user accountwhen you add a vCenter Server instance in View Administrator.
The user account must be in the same domain as your View Connection Server host or in a trusted domain.If you use View Composer, you must add the user account to the local Administrators group on the vCenterServer computer.
VMware Horizon View Installation
22 VMware, Inc.
You must give the user account privileges to perform certain operations in vCenter Server. If you use ViewComposer, you must give the user account additional privileges. See “Configuring User Accounts forvCenter Server and View Composer,” on page 89 for information on configuring these privileges.
Create a User Account for View ComposerIf you use View Composer, you must create a user account in Active Directory to use with View Composer.View Composer requires this account to join linked-clone desktops to your Active Directory domain.
To ensure security, you should create a separate user account to use with View Composer. By creating aseparate account, you can guarantee that it does not have additional privileges that are defined for anotherpurpose. You can give the account the minimum privileges that it needs to create and remove computerobjects in a specified Active Directory container. For example, the View Composer account does not requiredomain administrator privileges.
Procedure
1 In Active Directory, create a user account in the same domain as your View Connection Server host orin a trusted domain.
2 Add the Create Computer Objects, Delete Computer Objects, and Write All Properties permissions tothe account in the Active Directory container in which the linked-clone computer accounts are createdor to which the linked-clone computer accounts are moved.
The following list shows all the required permissions for the user account, including permissions thatare assigned by default:
n List Contents
n Read All Properties
n Write All Properties
n Read Permissions
n Reset Password
n Create Computer Objects
n Delete Computer Objects
NOTE If you select the Allow reuse of pre-existing computer accounts setting for a desktop pool, youonly need to add the following permissions:
n List Contents
n Read All Properties
n Read Permissions
n Reset Password
3 Make sure that the user account's permissions apply to the Active Directory container and to all childobjects of the container.
What to do next
Specify the account in View Administrator when you configure View Composer for vCenter Server andwhen you configure and deploy linked-clone desktop pools.
Chapter 3 Preparing Active Directory
VMware, Inc. 23
Configure the Restricted Groups PolicyTo be able to log in to a View desktop, users must belong to the local Remote Desktop Users group of theView desktop. You can use the Restricted Groups policy in Active Directory to add users or groups to thelocal Remote Desktop Users group of every View desktop that is joined to your domain.
The Restricted Groups policy sets the local group membership of computers in the domain to match themembership list settings defined in the Restricted Groups policy. The members of your View desktop usersgroup are always added to the local Remote Desktop Users group of every View desktop that is joined toyour domain. When adding new users, you need only add them to your View desktop users group.
Prerequisites
Create a group for View desktop users in your domain in Active Directory.
Procedure
1 On the Active Directory server, navigate to the Group Policy Management plug-in.
AD Version Navigation Path
Windows 2003 a Select Start > All Programs > Administrative Tools > Active DirectoryUsers and Computers.
b Right-click your domain and click Properties.c On the Group Policy tab, click Open to open the Group Policy
Management plug-in.d Right-click Default Domain Policy, and click Edit.
Windows 2008 a Select Start > Administrative Tools > Group Policy Management.b Expand your domain, right-click Default Domain Policy, and click
Edit.
2 Expand the Computer Configuration section and open Windows Settings\Security Settings.
3 Right-click Restricted Groups, select Add Group, and add the Remote Desktop Users group.
4 Right-click the new restricted Remote Desktop Users group and add your View desktop users group tothe group membership list.
5 Click OK to save your changes.
Using View Group Policy Administrative Template FilesView includes several component-specific group policy administrative (ADM) template files.
During View Connection Server installation, the View ADM template files are installed in theinstall_directory\VMware\VMware View\Server\Extras\GroupPolicyFiles directory on your ViewConnection Server host. You must copy these files to a directory on your Active Directory server.
You can optimize and secure View desktops by adding the policy settings in these files to a new or existingGPO in Active Directory and then linking that GPO to the OU that contains your View desktops.
See the VMware Horizon View Administration document for information on using View group policy settings.
VMware Horizon View Installation
24 VMware, Inc.
Prepare Active Directory for Smart Card AuthenticationYou might need to perform certain tasks in Active Directory when you implement smart cardauthentication.
n Add UPNs for Smart Card Users on page 25Because smart card logins rely on user principal names (UPNs), the Active Directory accounts of usersthat use smart cards to authenticate in View must have a valid UPN.
n Add the Root Certificate to Trusted Root Certification Authorities on page 26If you use a certification authority (CA) to issue smart card login or domain controller certificates, youmust add the root certificate to the Trusted Root Certification Authorities group policy in ActiveDirectory. You do not need to perform this procedure if the Windows domain controller acts as theroot CA.
n Add an Intermediate Certificate to Intermediate Certification Authorities on page 26If you use an intermediate certification authority (CA) to issue smart card login or domain controllercertificates, you must add the intermediate certificate to the Intermediate Certification Authoritiesgroup policy in Active Directory.
n Add the Root Certificate to the Enterprise NTAuth Store on page 27If you use a CA to issue smart card login or domain controller certificates, you must add the rootcertificate to the Enterprise NTAuth store in Active Directory. You do not need to perform thisprocedure if the Windows domain controller acts as the root CA.
Add UPNs for Smart Card UsersBecause smart card logins rely on user principal names (UPNs), the Active Directory accounts of users thatuse smart cards to authenticate in View must have a valid UPN.
If the domain a smart card user resides in is different from the domain that your root certificate was issuedfrom, you must set the user’s UPN to the Subject Alternative Name (SAN) contained in the root certificate ofthe trusted CA. If your root certificate was issued from a server in the smart card user's current domain, youdo not need to modify the user's UPN.
NOTE You might need to set the UPN for built-in Active Directory accounts, even if the certificate is issuedfrom the same domain. Built-in accounts, including Administrator, do not have a UPN set by default.
Prerequisites
n Obtain the SAN contained in the root certificate of the trusted CA by viewing the certificate properties.
n If the ADSI Edit utility is not present on your Active Directory server, download and install theappropriate Windows Support Tools from the Microsoft Web site.
Procedure
1 On your Active Directory server, start the ADSI Edit utility.
2 In the left pane, expand the domain the user is located in and double-click CN=Users.
3 In the right pane, right-click the user and then click Properties.
4 Double-click the userPrincipalName attribute and type the SAN value of the trusted CA certificate.
5 Click OK to save the attribute setting.
Chapter 3 Preparing Active Directory
VMware, Inc. 25
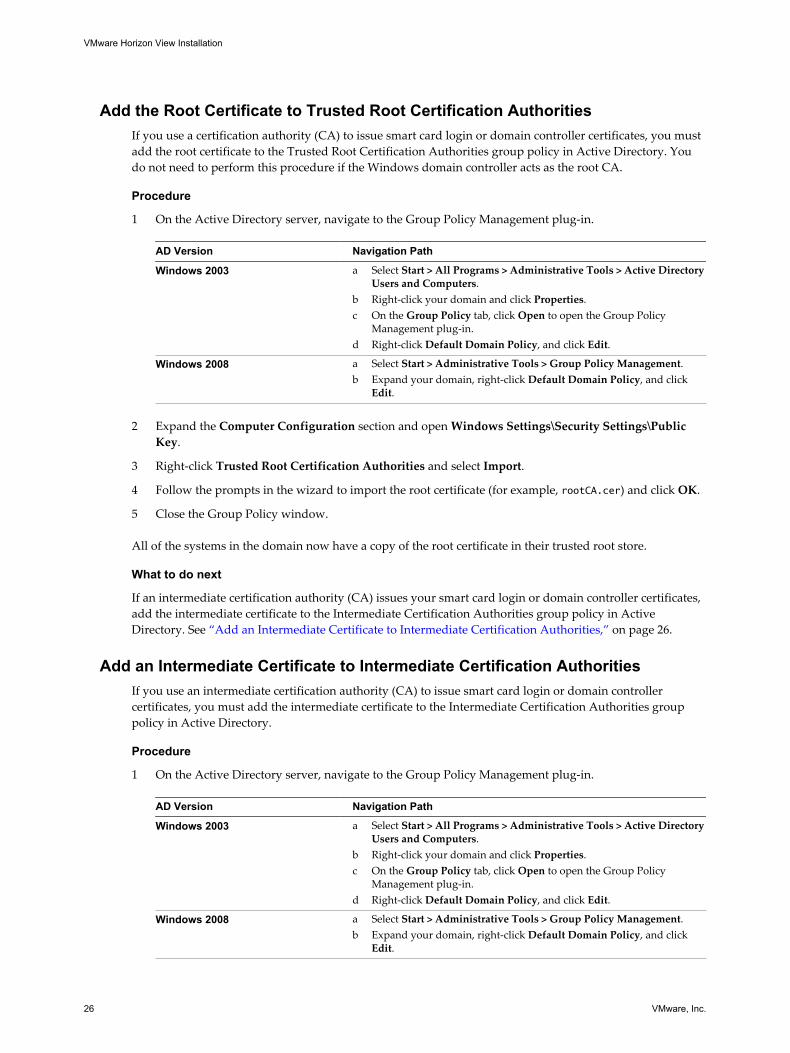
Add the Root Certificate to Trusted Root Certification AuthoritiesIf you use a certification authority (CA) to issue smart card login or domain controller certificates, you mustadd the root certificate to the Trusted Root Certification Authorities group policy in Active Directory. Youdo not need to perform this procedure if the Windows domain controller acts as the root CA.
Procedure
1 On the Active Directory server, navigate to the Group Policy Management plug-in.
AD Version Navigation Path
Windows 2003 a Select Start > All Programs > Administrative Tools > Active DirectoryUsers and Computers.
b Right-click your domain and click Properties.c On the Group Policy tab, click Open to open the Group Policy
Management plug-in.d Right-click Default Domain Policy, and click Edit.
Windows 2008 a Select Start > Administrative Tools > Group Policy Management.b Expand your domain, right-click Default Domain Policy, and click
Edit.
2 Expand the Computer Configuration section and open Windows Settings\Security Settings\PublicKey.
3 Right-click Trusted Root Certification Authorities and select Import.
4 Follow the prompts in the wizard to import the root certificate (for example, rootCA.cer) and click OK.
5 Close the Group Policy window.
All of the systems in the domain now have a copy of the root certificate in their trusted root store.
What to do next
If an intermediate certification authority (CA) issues your smart card login or domain controller certificates,add the intermediate certificate to the Intermediate Certification Authorities group policy in ActiveDirectory. See “Add an Intermediate Certificate to Intermediate Certification Authorities,” on page 26.
Add an Intermediate Certificate to Intermediate Certification AuthoritiesIf you use an intermediate certification authority (CA) to issue smart card login or domain controllercertificates, you must add the intermediate certificate to the Intermediate Certification Authorities grouppolicy in Active Directory.
Procedure
1 On the Active Directory server, navigate to the Group Policy Management plug-in.
AD Version Navigation Path
Windows 2003 a Select Start > All Programs > Administrative Tools > Active DirectoryUsers and Computers.
b Right-click your domain and click Properties.c On the Group Policy tab, click Open to open the Group Policy
Management plug-in.d Right-click Default Domain Policy, and click Edit.
Windows 2008 a Select Start > Administrative Tools > Group Policy Management.b Expand your domain, right-click Default Domain Policy, and click
Edit.
VMware Horizon View Installation
26 VMware, Inc.
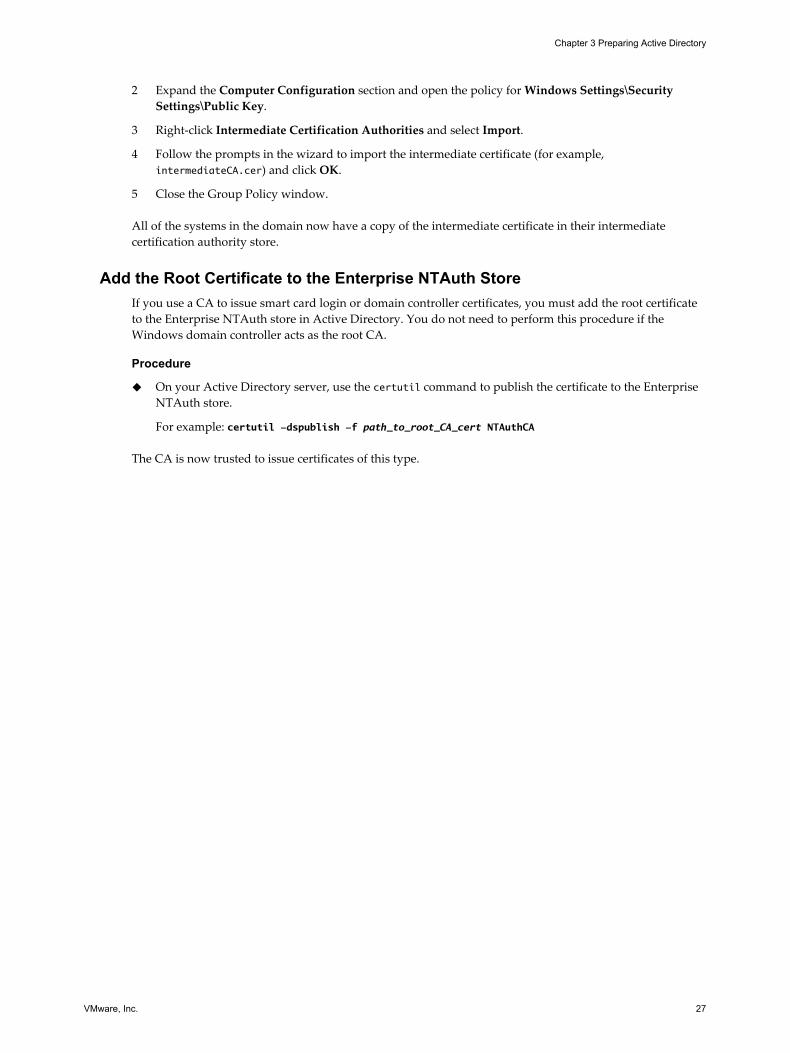
2 Expand the Computer Configuration section and open the policy for Windows Settings\SecuritySettings\Public Key.
3 Right-click Intermediate Certification Authorities and select Import.
4 Follow the prompts in the wizard to import the intermediate certificate (for example,intermediateCA.cer) and click OK.
5 Close the Group Policy window.
All of the systems in the domain now have a copy of the intermediate certificate in their intermediatecertification authority store.
Add the Root Certificate to the Enterprise NTAuth StoreIf you use a CA to issue smart card login or domain controller certificates, you must add the root certificateto the Enterprise NTAuth store in Active Directory. You do not need to perform this procedure if theWindows domain controller acts as the root CA.
Procedure
u On your Active Directory server, use the certutil command to publish the certificate to the EnterpriseNTAuth store.
For example: certutil -dspublish -f path_to_root_CA_cert NTAuthCA
The CA is now trusted to issue certificates of this type.
Chapter 3 Preparing Active Directory
VMware, Inc. 27

VMware Horizon View Installation
28 VMware, Inc.
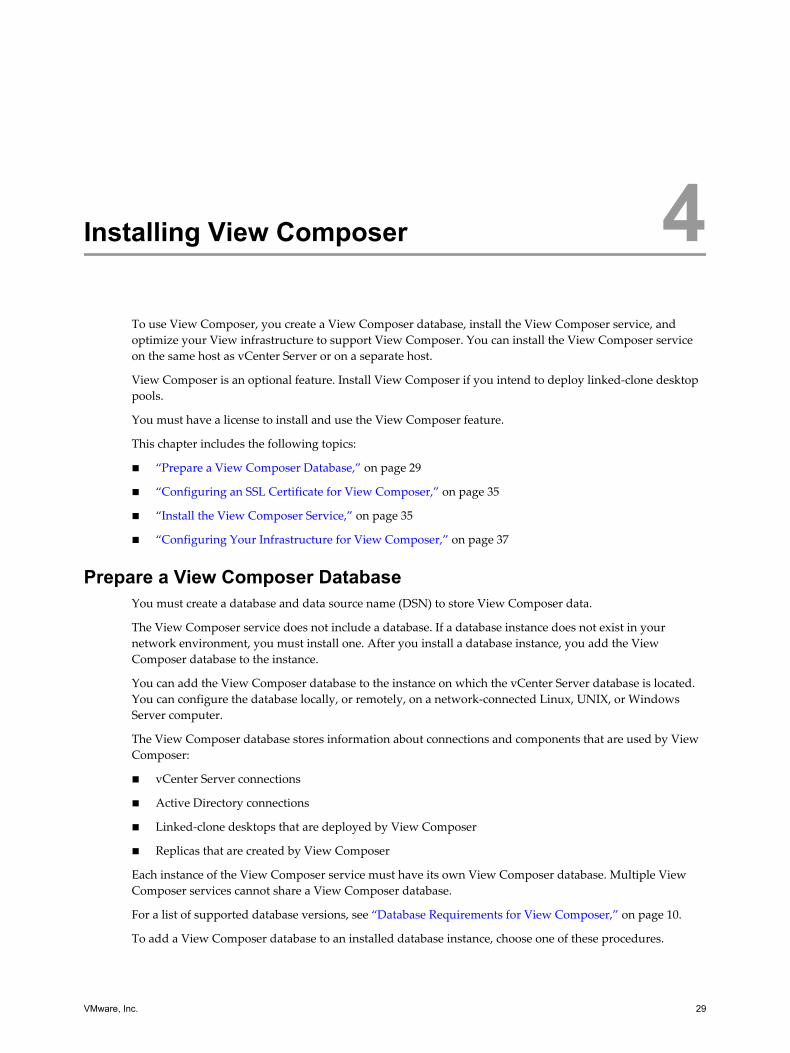
Installing View Composer 4To use View Composer, you create a View Composer database, install the View Composer service, andoptimize your View infrastructure to support View Composer. You can install the View Composer serviceon the same host as vCenter Server or on a separate host.
View Composer is an optional feature. Install View Composer if you intend to deploy linked-clone desktoppools.
You must have a license to install and use the View Composer feature.
This chapter includes the following topics:
n “Prepare a View Composer Database,” on page 29
n “Configuring an SSL Certificate for View Composer,” on page 35
n “Install the View Composer Service,” on page 35
n “Configuring Your Infrastructure for View Composer,” on page 37
Prepare a View Composer DatabaseYou must create a database and data source name (DSN) to store View Composer data.
The View Composer service does not include a database. If a database instance does not exist in yournetwork environment, you must install one. After you install a database instance, you add the ViewComposer database to the instance.
You can add the View Composer database to the instance on which the vCenter Server database is located.You can configure the database locally, or remotely, on a network-connected Linux, UNIX, or WindowsServer computer.
The View Composer database stores information about connections and components that are used by ViewComposer:
n vCenter Server connections
n Active Directory connections
n Linked-clone desktops that are deployed by View Composer
n Replicas that are created by View Composer
Each instance of the View Composer service must have its own View Composer database. Multiple ViewComposer services cannot share a View Composer database.
For a list of supported database versions, see “Database Requirements for View Composer,” on page 10.
To add a View Composer database to an installed database instance, choose one of these procedures.
VMware, Inc. 29

n Create a SQL Server Database for View Composer on page 30View Composer can store linked-clone desktop information in a SQL Server database. You create aView Composer database by adding it to SQL Server and configuring an ODBC data source for it.
n Create an Oracle Database for View Composer on page 32View Composer can store linked-clone desktop information in an Oracle 11g or 10g database. Youcreate a View Composer database by adding it to an existing Oracle instance and configuring anODBC data source for it. You can add a new View Composer database by using the Oracle DatabaseConfiguration Assistant or by running a SQL statement.
Create a SQL Server Database for View ComposerView Composer can store linked-clone desktop information in a SQL Server database. You create a ViewComposer database by adding it to SQL Server and configuring an ODBC data source for it.
Add a View Composer Database to SQL ServerYou can add a new View Composer database to an existing Microsoft SQL Server instance to store linked-clone data for View Composer.
If the database resides locally, on the system on which View Composer will be installed, you can use theIntegrated Windows Authentication security model. If the database resides on a remote system, you cannotuse this method of authentication.
Prerequisites
n Verify that a supported version of SQL Server is installed on the computer on which you will installView Composer or in your network environment. For details, see “Database Requirements for ViewComposer,” on page 10.
n Verify that you use SQL Server Management Studio or SQL Server Management Studio Express tocreate and administer the data source. You can download and install SQL Server Management StudioExpress from the following Web site.
http://www.microsoft.com/downloadS/details.aspx?familyid=C243A5AE-4BD1-4E3D-94B8-5A0F62BF7796
Procedure
1 On the View Composer computer, select Start > All Programs > Microsoft SQL Server 2008 orMicrosoft SQL Server 2005.
2 Select SQL Server Management Studio Express and connect to the existing SQL Server instance forvSphere Management.
3 In the Object Explorer panel, right-click the Databases entry and select New Database.
4 In the New Database dialog box, type a name in the Database name text box.
For example: viewComposer
5 Click OK.
SQL Server Management Studio Express adds your database to the Databases entry in the ObjectExplorer panel.
6 Exit Microsoft SQL Server Management Studio Express.
What to do next
Follow the instructions in “Add an ODBC Data Source to SQL Server,” on page 31.
VMware Horizon View Installation
30 VMware, Inc.
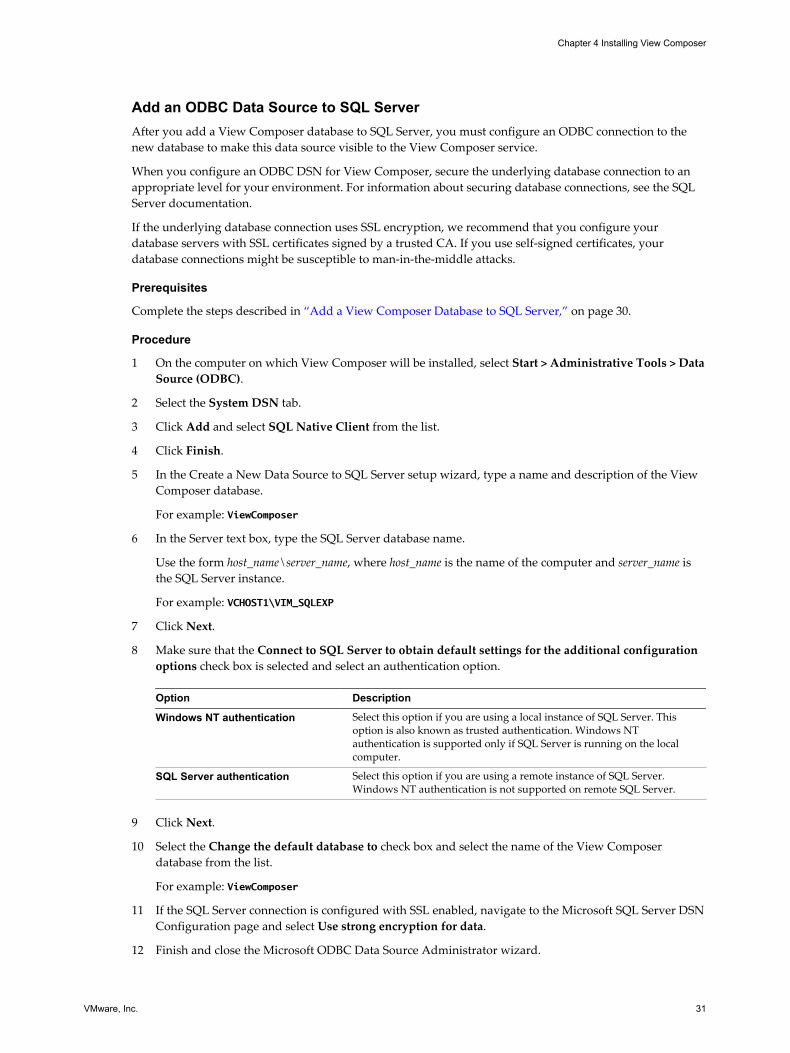
Add an ODBC Data Source to SQL ServerAfter you add a View Composer database to SQL Server, you must configure an ODBC connection to thenew database to make this data source visible to the View Composer service.
When you configure an ODBC DSN for View Composer, secure the underlying database connection to anappropriate level for your environment. For information about securing database connections, see the SQLServer documentation.
If the underlying database connection uses SSL encryption, we recommend that you configure yourdatabase servers with SSL certificates signed by a trusted CA. If you use self-signed certificates, yourdatabase connections might be susceptible to man-in-the-middle attacks.
Prerequisites
Complete the steps described in “Add a View Composer Database to SQL Server,” on page 30.
Procedure
1 On the computer on which View Composer will be installed, select Start > Administrative Tools > DataSource (ODBC).
2 Select the System DSN tab.
3 Click Add and select SQL Native Client from the list.
4 Click Finish.
5 In the Create a New Data Source to SQL Server setup wizard, type a name and description of the ViewComposer database.
For example: ViewComposer
6 In the Server text box, type the SQL Server database name.
Use the form host_name\server_name, where host_name is the name of the computer and server_name isthe SQL Server instance.
For example: VCHOST1\VIM_SQLEXP
7 Click Next.
8 Make sure that the Connect to SQL Server to obtain default settings for the additional configurationoptions check box is selected and select an authentication option.
Option Description
Windows NT authentication Select this option if you are using a local instance of SQL Server. Thisoption is also known as trusted authentication. Windows NTauthentication is supported only if SQL Server is running on the localcomputer.
SQL Server authentication Select this option if you are using a remote instance of SQL Server.Windows NT authentication is not supported on remote SQL Server.
9 Click Next.
10 Select the Change the default database to check box and select the name of the View Composerdatabase from the list.
For example: ViewComposer
11 If the SQL Server connection is configured with SSL enabled, navigate to the Microsoft SQL Server DSNConfiguration page and select Use strong encryption for data.
12 Finish and close the Microsoft ODBC Data Source Administrator wizard.
Chapter 4 Installing View Composer
VMware, Inc. 31
What to do next
Install the new View Composer service. See “Install the View Composer Service,” on page 35.
Create an Oracle Database for View ComposerView Composer can store linked-clone desktop information in an Oracle 11g or 10g database. You create aView Composer database by adding it to an existing Oracle instance and configuring an ODBC data sourcefor it. You can add a new View Composer database by using the Oracle Database Configuration Assistant orby running a SQL statement.
n Add a View Composer Database to Oracle 11g or 10g on page 32You can use the Oracle Database Configuration Assistant to add a new View Composer database to anexisting Oracle 11g or 10g instance.
n Use a SQL Statement to Add a View Composer Database to an Oracle Instance on page 33The View Composer database must have certain table spaces and privileges. You can use a SQLstatement to create the View Composer database in an Oracle 11g or 10g database instance.
n Configure an Oracle Database User for View Composer on page 33By default, the database user that runs the View Composer database has Oracle system administratorpermissions. To restrict the security permissions for the user that runs the View Composer database,you must configure an Oracle database user with specific permissions.
n Add an ODBC Data Source to Oracle 11g or 10g on page 34After you add a View Composer database to an Oracle 11g or 10g instance, you must configure anODBC connection to the new database to make this data source visible to the View Composer service.
Add a View Composer Database to Oracle 11g or 10gYou can use the Oracle Database Configuration Assistant to add a new View Composer database to anexisting Oracle 11g or 10g instance.
Prerequisites
Verify that a supported version of Oracle 11g or 10g is installed on the local or remote computer. See “Database Requirements for View Composer,” on page 10.
Procedure
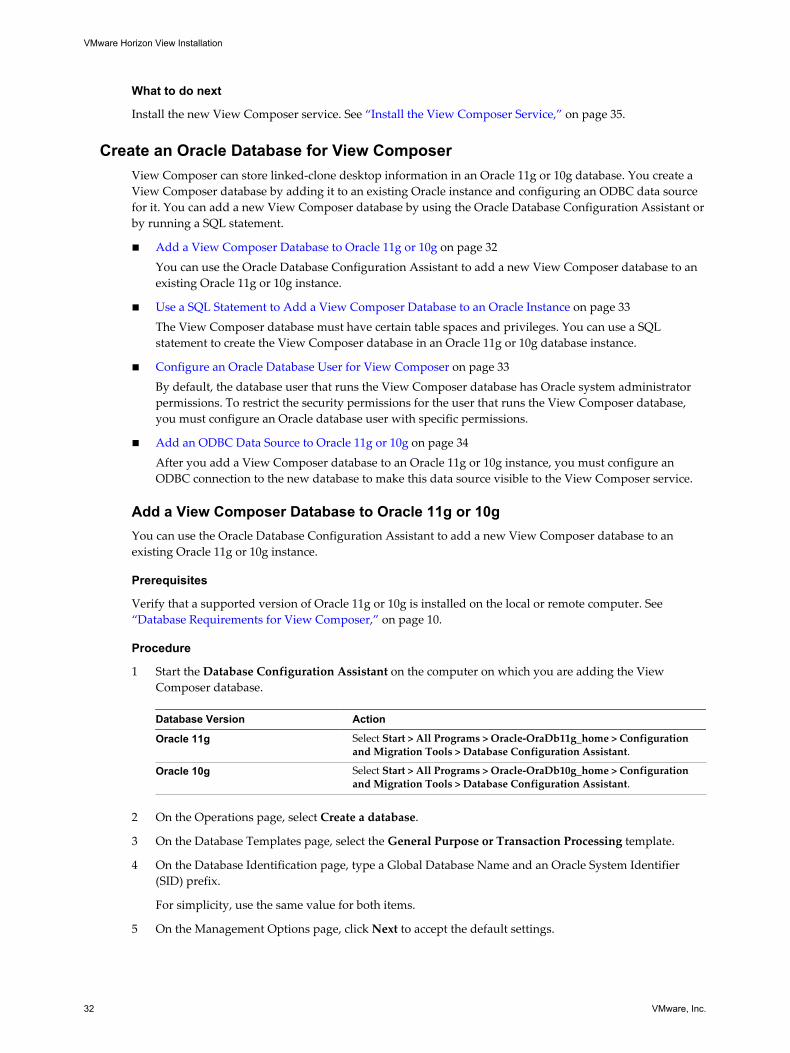
1 Start the Database Configuration Assistant on the computer on which you are adding the ViewComposer database.
Database Version Action
Oracle 11g Select Start > All Programs > Oracle-OraDb11g_home > Configurationand Migration Tools > Database Configuration Assistant.
Oracle 10g Select Start > All Programs > Oracle-OraDb10g_home > Configurationand Migration Tools > Database Configuration Assistant.
2 On the Operations page, select Create a database.
3 On the Database Templates page, select the General Purpose or Transaction Processing template.
4 On the Database Identification page, type a Global Database Name and an Oracle System Identifier(SID) prefix.
For simplicity, use the same value for both items.
5 On the Management Options page, click Next to accept the default settings.
VMware Horizon View Installation
32 VMware, Inc.
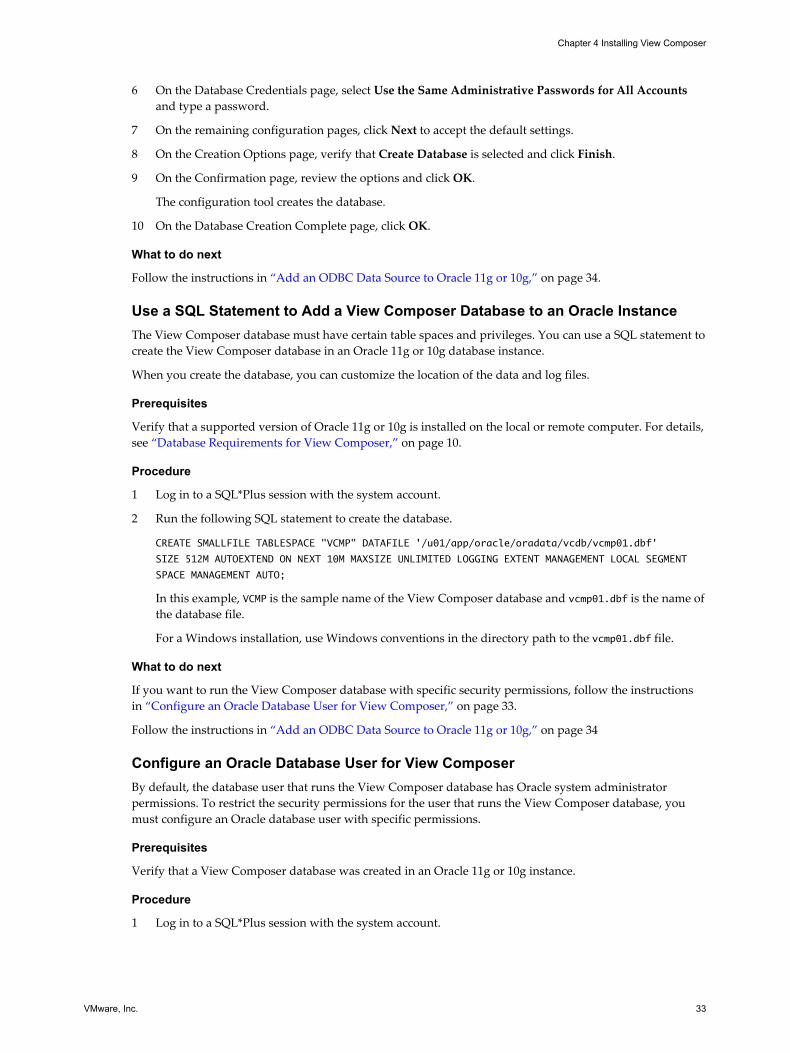
6 On the Database Credentials page, select Use the Same Administrative Passwords for All Accountsand type a password.
7 On the remaining configuration pages, click Next to accept the default settings.
8 On the Creation Options page, verify that Create Database is selected and click Finish.
9 On the Confirmation page, review the options and click OK.
The configuration tool creates the database.
10 On the Database Creation Complete page, click OK.
What to do next
Follow the instructions in “Add an ODBC Data Source to Oracle 11g or 10g,” on page 34.
Use a SQL Statement to Add a View Composer Database to an Oracle InstanceThe View Composer database must have certain table spaces and privileges. You can use a SQL statement tocreate the View Composer database in an Oracle 11g or 10g database instance.
When you create the database, you can customize the location of the data and log files.
Prerequisites
Verify that a supported version of Oracle 11g or 10g is installed on the local or remote computer. For details,see “Database Requirements for View Composer,” on page 10.
Procedure
1 Log in to a SQL*Plus session with the system account.
2 Run the following SQL statement to create the database.
CREATE SMALLFILE TABLESPACE "VCMP" DATAFILE '/u01/app/oracle/oradata/vcdb/vcmp01.dbf'
SIZE 512M AUTOEXTEND ON NEXT 10M MAXSIZE UNLIMITED LOGGING EXTENT MANAGEMENT LOCAL SEGMENT
SPACE MANAGEMENT AUTO;
In this example, VCMP is the sample name of the View Composer database and vcmp01.dbf is the name ofthe database file.
For a Windows installation, use Windows conventions in the directory path to the vcmp01.dbf file.
What to do next
If you want to run the View Composer database with specific security permissions, follow the instructionsin “Configure an Oracle Database User for View Composer,” on page 33.
Follow the instructions in “Add an ODBC Data Source to Oracle 11g or 10g,” on page 34
Configure an Oracle Database User for View ComposerBy default, the database user that runs the View Composer database has Oracle system administratorpermissions. To restrict the security permissions for the user that runs the View Composer database, youmust configure an Oracle database user with specific permissions.
Prerequisites
Verify that a View Composer database was created in an Oracle 11g or 10g instance.
Procedure
1 Log in to a SQL*Plus session with the system account.
Chapter 4 Installing View Composer
VMware, Inc. 33
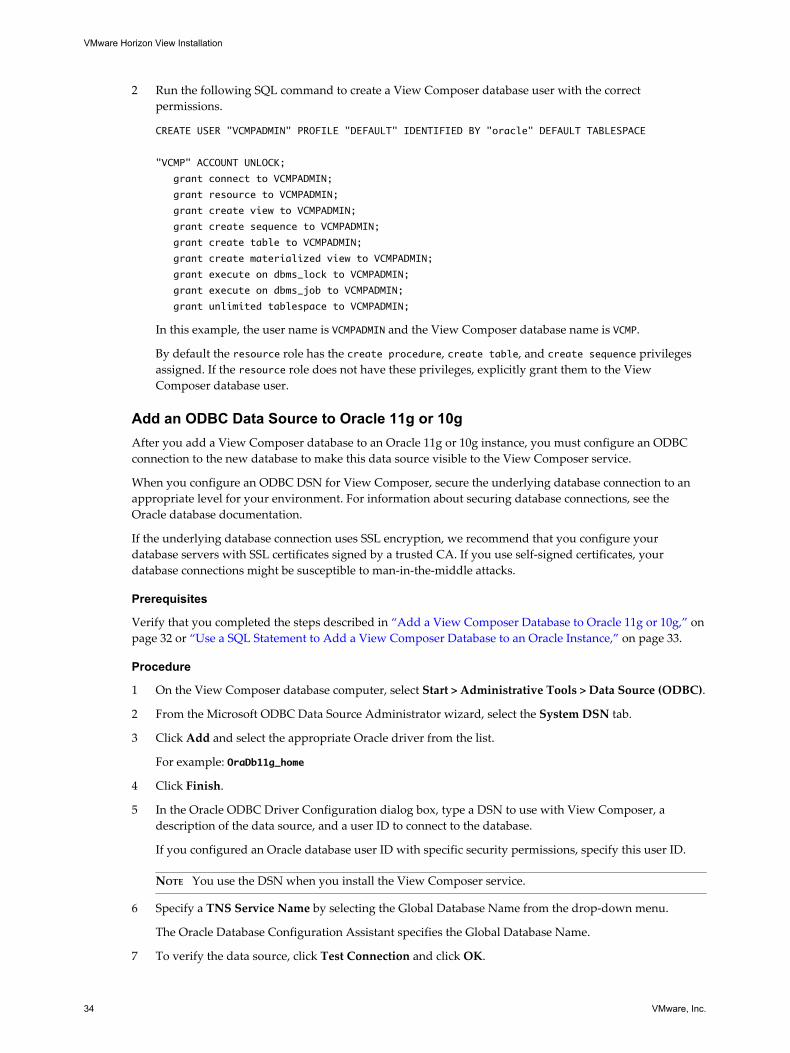
2 Run the following SQL command to create a View Composer database user with the correctpermissions.
CREATE USER "VCMPADMIN" PROFILE "DEFAULT" IDENTIFIED BY "oracle" DEFAULT TABLESPACE
"VCMP" ACCOUNT UNLOCK;
grant connect to VCMPADMIN;
grant resource to VCMPADMIN;
grant create view to VCMPADMIN;
grant create sequence to VCMPADMIN;
grant create table to VCMPADMIN;
grant create materialized view to VCMPADMIN;
grant execute on dbms_lock to VCMPADMIN;
grant execute on dbms_job to VCMPADMIN;
grant unlimited tablespace to VCMPADMIN;
In this example, the user name is VCMPADMIN and the View Composer database name is VCMP.
By default the resource role has the create procedure, create table, and create sequence privilegesassigned. If the resource role does not have these privileges, explicitly grant them to the ViewComposer database user.
Add an ODBC Data Source to Oracle 11g or 10gAfter you add a View Composer database to an Oracle 11g or 10g instance, you must configure an ODBCconnection to the new database to make this data source visible to the View Composer service.
When you configure an ODBC DSN for View Composer, secure the underlying database connection to anappropriate level for your environment. For information about securing database connections, see theOracle database documentation.
If the underlying database connection uses SSL encryption, we recommend that you configure yourdatabase servers with SSL certificates signed by a trusted CA. If you use self-signed certificates, yourdatabase connections might be susceptible to man-in-the-middle attacks.
Prerequisites
Verify that you completed the steps described in “Add a View Composer Database to Oracle 11g or 10g,” onpage 32 or “Use a SQL Statement to Add a View Composer Database to an Oracle Instance,” on page 33.
Procedure
1 On the View Composer database computer, select Start > Administrative Tools > Data Source (ODBC).
2 From the Microsoft ODBC Data Source Administrator wizard, select the System DSN tab.
3 Click Add and select the appropriate Oracle driver from the list.
For example: OraDb11g_home
4 Click Finish.
5 In the Oracle ODBC Driver Configuration dialog box, type a DSN to use with View Composer, adescription of the data source, and a user ID to connect to the database.
If you configured an Oracle database user ID with specific security permissions, specify this user ID.
NOTE You use the DSN when you install the View Composer service.
6 Specify a TNS Service Name by selecting the Global Database Name from the drop-down menu.
The Oracle Database Configuration Assistant specifies the Global Database Name.
7 To verify the data source, click Test Connection and click OK.
VMware Horizon View Installation
34 VMware, Inc.
What to do next
Install the new View Composer service. See “Install the View Composer Service,” on page 35.
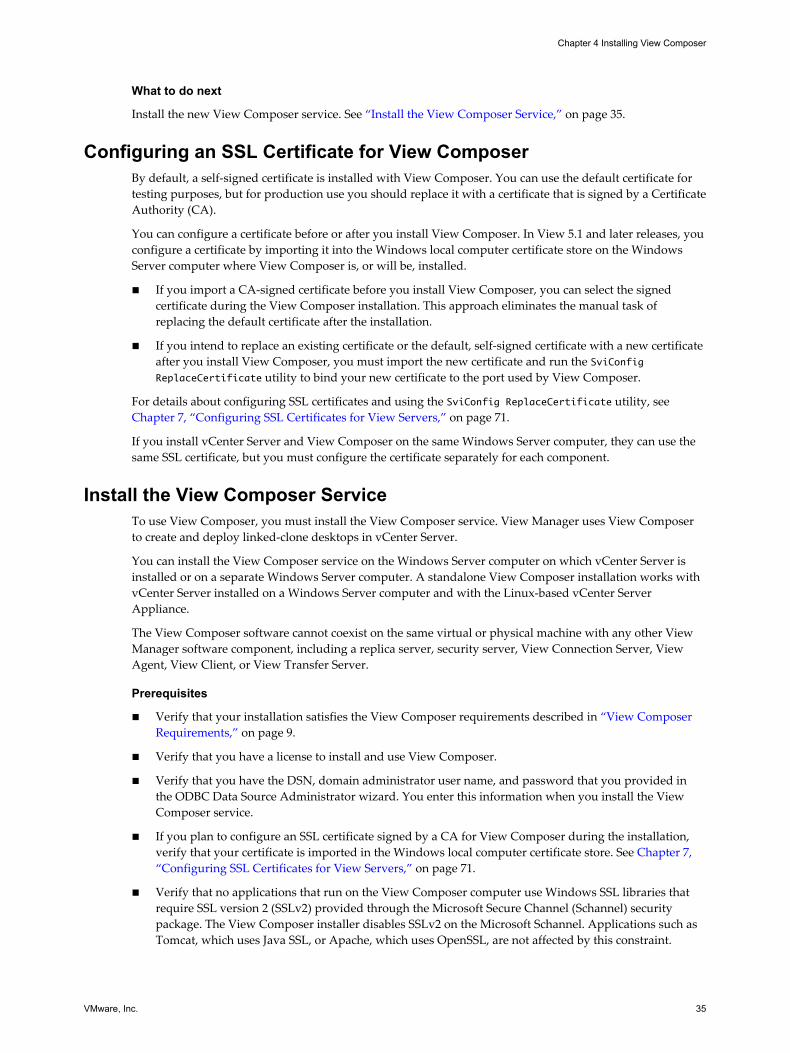
Configuring an SSL Certificate for View ComposerBy default, a self-signed certificate is installed with View Composer. You can use the default certificate fortesting purposes, but for production use you should replace it with a certificate that is signed by a CertificateAuthority (CA).
You can configure a certificate before or after you install View Composer. In View 5.1 and later releases, youconfigure a certificate by importing it into the Windows local computer certificate store on the WindowsServer computer where View Composer is, or will be, installed.
n If you import a CA-signed certificate before you install View Composer, you can select the signedcertificate during the View Composer installation. This approach eliminates the manual task ofreplacing the default certificate after the installation.
n If you intend to replace an existing certificate or the default, self-signed certificate with a new certificateafter you install View Composer, you must import the new certificate and run the SviConfigReplaceCertificate utility to bind your new certificate to the port used by View Composer.
For details about configuring SSL certificates and using the SviConfig ReplaceCertificate utility, see Chapter 7, “Configuring SSL Certificates for View Servers,” on page 71.
If you install vCenter Server and View Composer on the same Windows Server computer, they can use thesame SSL certificate, but you must configure the certificate separately for each component.
Install the View Composer ServiceTo use View Composer, you must install the View Composer service. View Manager uses View Composerto create and deploy linked-clone desktops in vCenter Server.
You can install the View Composer service on the Windows Server computer on which vCenter Server isinstalled or on a separate Windows Server computer. A standalone View Composer installation works withvCenter Server installed on a Windows Server computer and with the Linux-based vCenter ServerAppliance.
The View Composer software cannot coexist on the same virtual or physical machine with any other ViewManager software component, including a replica server, security server, View Connection Server, ViewAgent, View Client, or View Transfer Server.
Prerequisites
n Verify that your installation satisfies the View Composer requirements described in “View ComposerRequirements,” on page 9.
n Verify that you have a license to install and use View Composer.
n Verify that you have the DSN, domain administrator user name, and password that you provided inthe ODBC Data Source Administrator wizard. You enter this information when you install the ViewComposer service.
n If you plan to configure an SSL certificate signed by a CA for View Composer during the installation,verify that your certificate is imported in the Windows local computer certificate store. See Chapter 7,“Configuring SSL Certificates for View Servers,” on page 71.
n Verify that no applications that run on the View Composer computer use Windows SSL libraries thatrequire SSL version 2 (SSLv2) provided through the Microsoft Secure Channel (Schannel) securitypackage. The View Composer installer disables SSLv2 on the Microsoft Schannel. Applications such asTomcat, which uses Java SSL, or Apache, which uses OpenSSL, are not affected by this constraint.
Chapter 4 Installing View Composer
VMware, Inc. 35
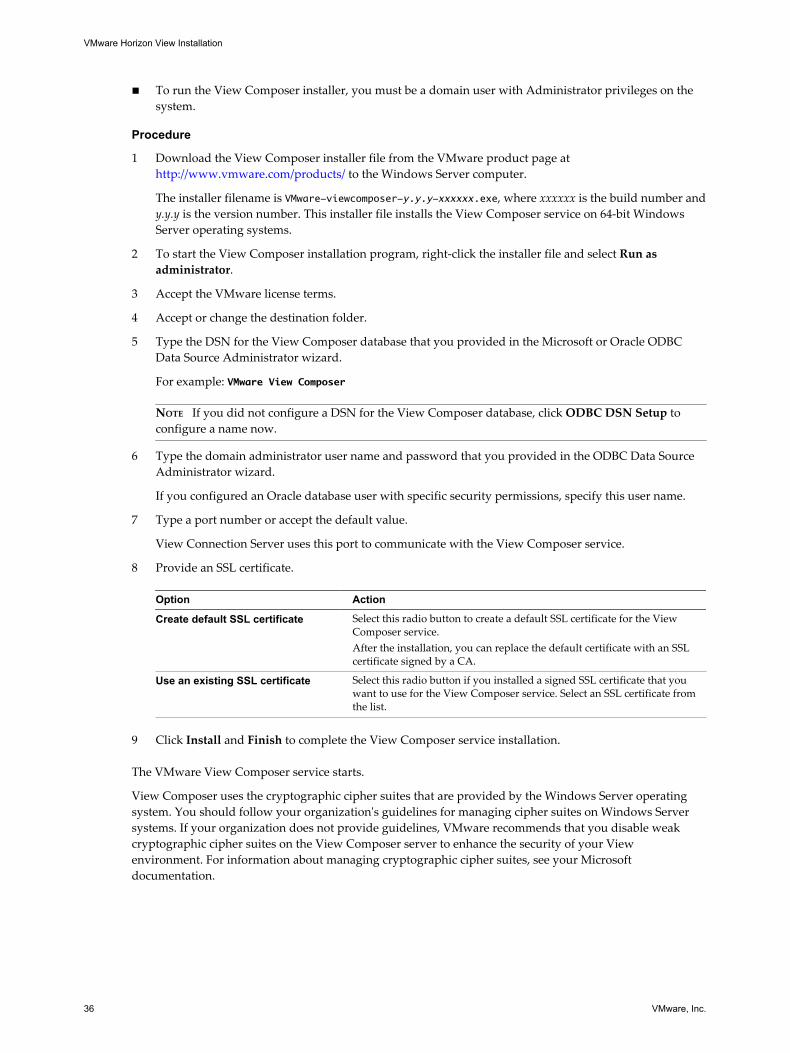
n To run the View Composer installer, you must be a domain user with Administrator privileges on thesystem.
Procedure
1 Download the View Composer installer file from the VMware product page at http://www.vmware.com/products/ to the Windows Server computer.
The installer filename is VMware-viewcomposer-y.y.y-xxxxxx.exe, where xxxxxx is the build number andy.y.y is the version number. This installer file installs the View Composer service on 64-bit WindowsServer operating systems.
2 To start the View Composer installation program, right-click the installer file and select Run asadministrator.
3 Accept the VMware license terms.
4 Accept or change the destination folder.
5 Type the DSN for the View Composer database that you provided in the Microsoft or Oracle ODBCData Source Administrator wizard.
For example: VMware View Composer
NOTE If you did not configure a DSN for the View Composer database, click ODBC DSN Setup toconfigure a name now.
6 Type the domain administrator user name and password that you provided in the ODBC Data SourceAdministrator wizard.
If you configured an Oracle database user with specific security permissions, specify this user name.
7 Type a port number or accept the default value.
View Connection Server uses this port to communicate with the View Composer service.
8 Provide an SSL certificate.
Option Action
Create default SSL certificate Select this radio button to create a default SSL certificate for the ViewComposer service.After the installation, you can replace the default certificate with an SSLcertificate signed by a CA.
Use an existing SSL certificate Select this radio button if you installed a signed SSL certificate that youwant to use for the View Composer service. Select an SSL certificate fromthe list.
9 Click Install and Finish to complete the View Composer service installation.
The VMware View Composer service starts.
View Composer uses the cryptographic cipher suites that are provided by the Windows Server operatingsystem. You should follow your organization's guidelines for managing cipher suites on Windows Serversystems. If your organization does not provide guidelines, VMware recommends that you disable weakcryptographic cipher suites on the View Composer server to enhance the security of your Viewenvironment. For information about managing cryptographic cipher suites, see your Microsoftdocumentation.
VMware Horizon View Installation
36 VMware, Inc.
Configuring Your Infrastructure for View ComposerYou can take advantage of features in vSphere, vCenter Server, Active Directory, and other components ofyour infrastructure to optimize the performance, availability, and reliability of View Composer.
Configuring the vSphere Environment for View ComposerTo support View Composer, you should follow certain best practices when you install and configurevCenter Server, ESX/ESXi, and other vSphere components.
These best practices let View Composer work efficiently in the vSphere environment.
n After you create the path and folder information for linked-clone virtual machines, do not change theinformation in vCenter Server. Instead, use View Administrator to change the folder information.
If you change this information in vCenter Server, View Manager cannot successfully look up the virtualmachines in vCenter Server.
n Make sure that the vSwitch settings on the ESX/ESXi host are configured with enough ports to supportthe total number of virtual NICs that are configured on the linked-clone virtual machines that run onthe ESX/ESXi host.
n When you deploy linked-clone desktops in a resource pool, make sure that your vSphere environmenthas enough CPU and memory to host the number of desktops that you require. Use vSphere Client tomonitor CPU and memory usage in resource pools.
n In vSphere 5.1 and later, a cluster that is used for View Composer linked clones can contain more thaneight ESX/ESXi hosts if the replica disks are stored on VMFS5 or later datastores or NFS datastores. Ifyou store replicas on a VMFS version earlier than VMFS5, a cluster can have at most eight hosts.
In vSphere 5.0, you can select a cluster with more than eight ESXi hosts if the replicas are stored on NFSdatastores. If you store replicas on VMFS datastores, a cluster can have at most eight hosts.
n Use vSphere DRS. DRS efficiently distributes linked-clone virtual machines among your hosts.
NOTE Storage vMotion is not supported for linked-clone desktops.
Additional Best Practices for View ComposerTo make sure that View Composer works efficiently, check that your dynamic name service (DNS) operatescorrectly, and run antivirus software scans at staggered times.
By making sure that DNS resolution operates correctly, you can overcome intermittent issues caused byDNS errors. The View Composer service relies on dynamic name resolution to communicate with othercomputers. To test DNS operation, ping the Active Directory and View Connection Server computers byname.
If you stagger the run times for your antivirus software, performance of the linked-clone desktops is notaffected. If the antivirus software runs in all linked clones at the same time, excessive I/O operations persecond (IOPS) occur in your storage subsystem. This excessive activity can affect performance of the linked-clone desktops.
Chapter 4 Installing View Composer
VMware, Inc. 37

VMware Horizon View Installation
38 VMware, Inc.
Installing View Connection Server 5To use View Connection Server, you install the software on supported computers, configure the requiredcomponents, and, optionally, optimize the components.
This chapter includes the following topics:
n “Installing the View Connection Server Software,” on page 39
n “Installation Prerequisites for View Connection Server,” on page 40
n “Install View Connection Server with a New Configuration,” on page 40
n “Install a Replicated Instance of View Connection Server,” on page 45
n “Configure a Security Server Pairing Password,” on page 50
n “Install a Security Server,” on page 51
n “Firewall Rules for View Connection Server,” on page 57
n “Reinstall View Connection Server with a Backup Configuration,” on page 58
n “Microsoft Windows Installer Command-Line Options,” on page 60
n “Uninstalling View Products Silently by Using MSI Command-Line Options,” on page 61
Installing the View Connection Server SoftwareDepending on the performance, availability, and security needs of your View deployment, you can install asingle instance of View Connection Server, replicated instances of View Connection Server, and securityservers. You must install at least one instance of View Connection Server.
When you install View Connection Server, you select a type of installation.
Standard installation Generates a View Connection Server instance with a new View LDAPconfiguration.
Replica installation Generates a View Connection Server instance with a View LDAPconfiguration that is copied from an existing instance.
Security serverinstallation
Generates a View Connection Server instance that adds an additional layer ofsecurity between the Internet and your internal network.
VMware, Inc. 39
Installation Prerequisites for View Connection ServerBefore you install View Connection Server, you must verify that your installation environment satisfiesspecific prerequisites.
n View Connection Server requires a valid license key for View Manager. The following license keys areavailable:
n View Manager
n View Manager with View Composer and Local Mode
n You must join the View Connection Server host to an Active Directory domain. View Connection Serversupports the following versions of Active Directory:
n Windows 2003 Active Directory
n Windows 2008 Active Directory
The View Connection Server host must not be a domain controller.
NOTE View Connection Server does not make, nor does it require, any schema or configurationupdates to Active Directory.
n Do not install View Connection Server on systems that have the Windows Terminal Server roleinstalled. You must remove the Windows Terminal Server role from any system on which you installView Connection Server.
n Do not install View Connection Server on a system that performs any other functions or roles. Forexample, do not use the same system to host vCenter Server.
n The system on which you install View Connection Server must have a static IP address.
n To run the View Connection Server installer, you must use a domain user account with Administratorprivileges on the system.
n When you install View Connection Server, you authorize a View Administrators account. You canspecify the local Administrators group or a domain user or group account. View assigns full ViewAdministration rights, including the right to install replicated View Connection Server instances, to thisaccount only. If you specify a domain user or group, you must create the account in Active Directorybefore you run the installer.
Install View Connection Server with a New ConfigurationTo install View Connection Server as a single server or as the first instance in a group of replicated ViewConnection Server instances, you use the standard installation option.
When you select the standard installation option, the installation creates a new, local View LDAPconfiguration. The installation loads the schema definitions, Directory Information Tree (DIT) definition,and ACLs and initializes the data.
After installation, you manage most View LDAP configuration data by using View Administrator. ViewConnection Server automatically maintains some View LDAP entries.
The View Connection Server software cannot coexist on the same virtual or physical machine with any otherView Manager software component, including a replica server, security server, View Composer, ViewAgent, View Client, or View Transfer Server.
When you install View Connection Server with a new configuration, you can participate in a customerexperience improvement program. VMware collects anonymous data about your deployment in order toimprove VMware's response to user requirements. No data that identifies your organization is collected.You can choose not to participate by deselecting this option during the installation. If you change your mind
VMware Horizon View Installation
40 VMware, Inc.
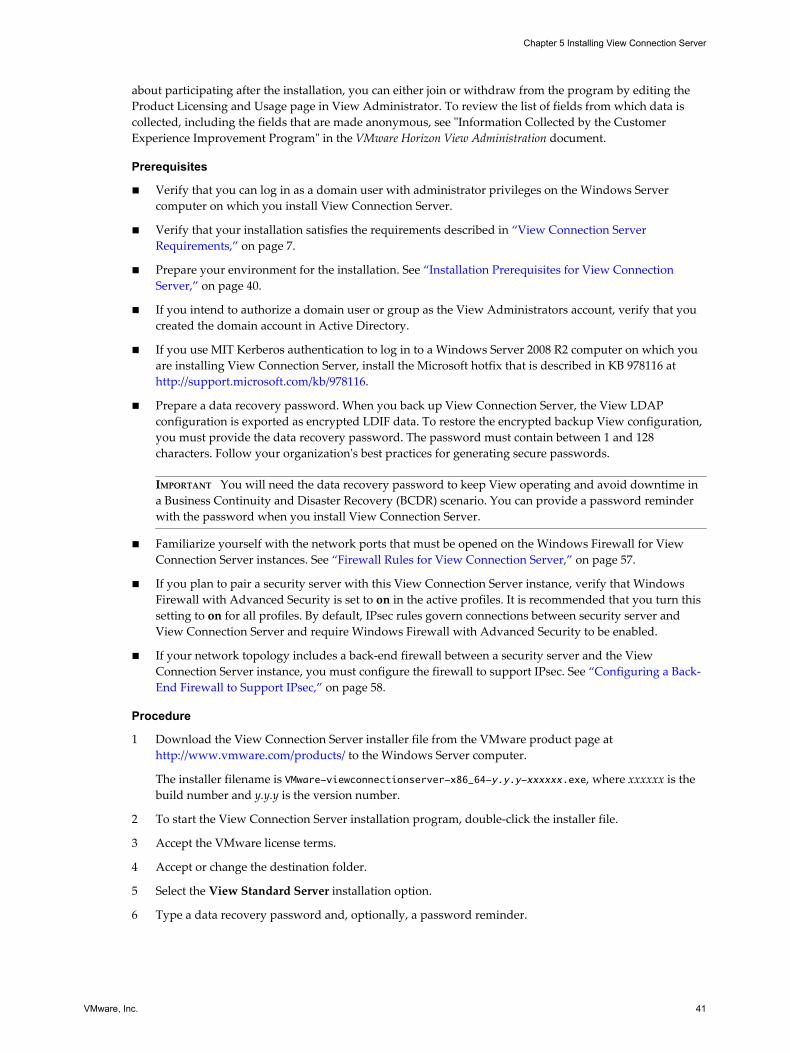
about participating after the installation, you can either join or withdraw from the program by editing theProduct Licensing and Usage page in View Administrator. To review the list of fields from which data iscollected, including the fields that are made anonymous, see "Information Collected by the CustomerExperience Improvement Program" in the VMware Horizon View Administration document.
Prerequisites
n Verify that you can log in as a domain user with administrator privileges on the Windows Servercomputer on which you install View Connection Server.
n Verify that your installation satisfies the requirements described in “View Connection ServerRequirements,” on page 7.
n Prepare your environment for the installation. See “Installation Prerequisites for View ConnectionServer,” on page 40.
n If you intend to authorize a domain user or group as the View Administrators account, verify that youcreated the domain account in Active Directory.
n If you use MIT Kerberos authentication to log in to a Windows Server 2008 R2 computer on which youare installing View Connection Server, install the Microsoft hotfix that is described in KB 978116 at http://support.microsoft.com/kb/978116.
n Prepare a data recovery password. When you back up View Connection Server, the View LDAPconfiguration is exported as encrypted LDIF data. To restore the encrypted backup View configuration,you must provide the data recovery password. The password must contain between 1 and 128characters. Follow your organization's best practices for generating secure passwords.
IMPORTANT You will need the data recovery password to keep View operating and avoid downtime ina Business Continuity and Disaster Recovery (BCDR) scenario. You can provide a password reminderwith the password when you install View Connection Server.
n Familiarize yourself with the network ports that must be opened on the Windows Firewall for ViewConnection Server instances. See “Firewall Rules for View Connection Server,” on page 57.
n If you plan to pair a security server with this View Connection Server instance, verify that WindowsFirewall with Advanced Security is set to on in the active profiles. It is recommended that you turn thissetting to on for all profiles. By default, IPsec rules govern connections between security server andView Connection Server and require Windows Firewall with Advanced Security to be enabled.
n If your network topology includes a back-end firewall between a security server and the ViewConnection Server instance, you must configure the firewall to support IPsec. See “Configuring a Back-End Firewall to Support IPsec,” on page 58.
Procedure
1 Download the View Connection Server installer file from the VMware product page at http://www.vmware.com/products/ to the Windows Server computer.
The installer filename is VMware-viewconnectionserver-x86_64-y.y.y-xxxxxx.exe, where xxxxxx is thebuild number and y.y.y is the version number.
2 To start the View Connection Server installation program, double-click the installer file.
3 Accept the VMware license terms.
4 Accept or change the destination folder.
5 Select the View Standard Server installation option.
6 Type a data recovery password and, optionally, a password reminder.
Chapter 5 Installing View Connection Server
VMware, Inc. 41

7 Choose how to configure the Windows Firewall service.
Option Action
Configure Windows Firewallautomatically
Let the installer configure Windows Firewall to allow the requirednetwork connections.
Do not configure Windows Firewall Configure the Windows firewall rules manually.Select this option only if your organization uses its own predefined rulesfor configuring Windows Firewall.
8 Authorize a View Administrators account.
Only members of this account can log in to View Administrator, exercise full View administrationrights, and install replicated View Connection Server instances and other View servers.
Option Description
Authorize the local Administratorsgroup
Allows users in the local Administrators group to administer View.
Authorize a specific domain user ordomain group
Allows the specified domain user or group to administer View.
9 If you specified a domain View Administrators account, and you are running the installer as a local
administrator or another user without access to the domain account, provide credentials to log in to thedomain with an authorized user name and password.
Use domain name\user name or user principal name (UPN) format. UPN format can [email protected].
10 Choose whether to participate in the customer experience improvement program.
If you participate, you can optionally select the type, size, and location of your organization.
11 Complete the installation wizard to finish installing View Connection Server.
12 Check for new patches on the Windows Server computer and run Windows Update as needed.
Even if you fully patched the Windows Server computer before you installed View Connection Server,the installation might have enabled operating system features for the first time. Additional patchesmight now be required.
The View services are installed on the Windows Server computer:
n VMware View Connection Server
n VMware View Framework Component
n VMware View Message Bus Component
n VMware View Script Host
n VMware View Security Gateway Component
n VMware View PCoIP Secure Gateway
n VMware View Blast Secure Gateway
n VMware View Web Component
n VMware VDMDS, which provides View LDAP directory services
For information about these services, see the VMware Horizon View Administration document.
VMware Horizon View Installation
42 VMware, Inc.
What to do next
Configure SSL server certificates for View Connection Server. See Chapter 7, “Configuring SSL Certificatesfor View Servers,” on page 71.
Perform initial configuration on View Connection Server. See Chapter 8, “Configuring View for the FirstTime,” on page 89.
If you plan to include replicated View Connection Server instances and security servers in your deployment,you must install each server instance by running the View Connection Server installer file.
If you are reinstalling View Connection Server on a Windows Server 2008 operating system and you have adata collector set configured to monitor performance data, stop the data collector set and start it again.
Install View Connection Server SilentlyYou can use the silent installation feature of the Microsoft Windows Installer (MSI) to perform a standardinstallation of View Connection Server on several Windows computers. In a silent installation, you use thecommand line and do not have to respond to wizard prompts.
With silent installation, you can efficiently deploy View components in a large enterprise.
Prerequisites
n Verify that you can log in as a domain user with administrator privileges on the Windows Servercomputer on which you install View Connection Server.
n Verify that your installation satisfies the requirements described in “View Connection ServerRequirements,” on page 7.
n Prepare your environment for the installation. See “Installation Prerequisites for View ConnectionServer,” on page 40.
n If you intend to authorize a domain user or group as the View Administrators account, verify that youcreated the domain account in Active Directory.
n If you use MIT Kerberos authentication to log in to a Windows Server 2008 R2 computer on which youare installing View Connection Server, install the Microsoft hotfix that is described in KB 978116 at http://support.microsoft.com/kb/978116.
n Familiarize yourself with the network ports that must be opened on the Windows Firewall for ViewConnection Server instances. See “Firewall Rules for View Connection Server,” on page 57.
n If you plan to pair a security server with this View Connection Server instance, verify that WindowsFirewall with Advanced Security is set to on in the active profiles. It is recommended that you turn thissetting to on for all profiles. By default, IPsec rules govern connections between security server andView Connection Server and require Windows Firewall with Advanced Security to be enabled.
n If your network topology includes a back-end firewall between a security server and the ViewConnection Server instance, you must configure the firewall to support IPsec. See “Configuring a Back-End Firewall to Support IPsec,” on page 58.
n Verify that the Windows computer on which you install View Connection Server has version 2.0 or laterof the MSI runtime engine. For details, see the Microsoft Web site.
n Familiarize yourself with the MSI installer command-line options. See “Microsoft Windows InstallerCommand-Line Options,” on page 60.
n Familiarize yourself with the silent installation properties available with a standard installation of ViewConnection Server. See “Silent Installation Properties for a View Connection Server StandardInstallation,” on page 44.
Chapter 5 Installing View Connection Server
VMware, Inc. 43
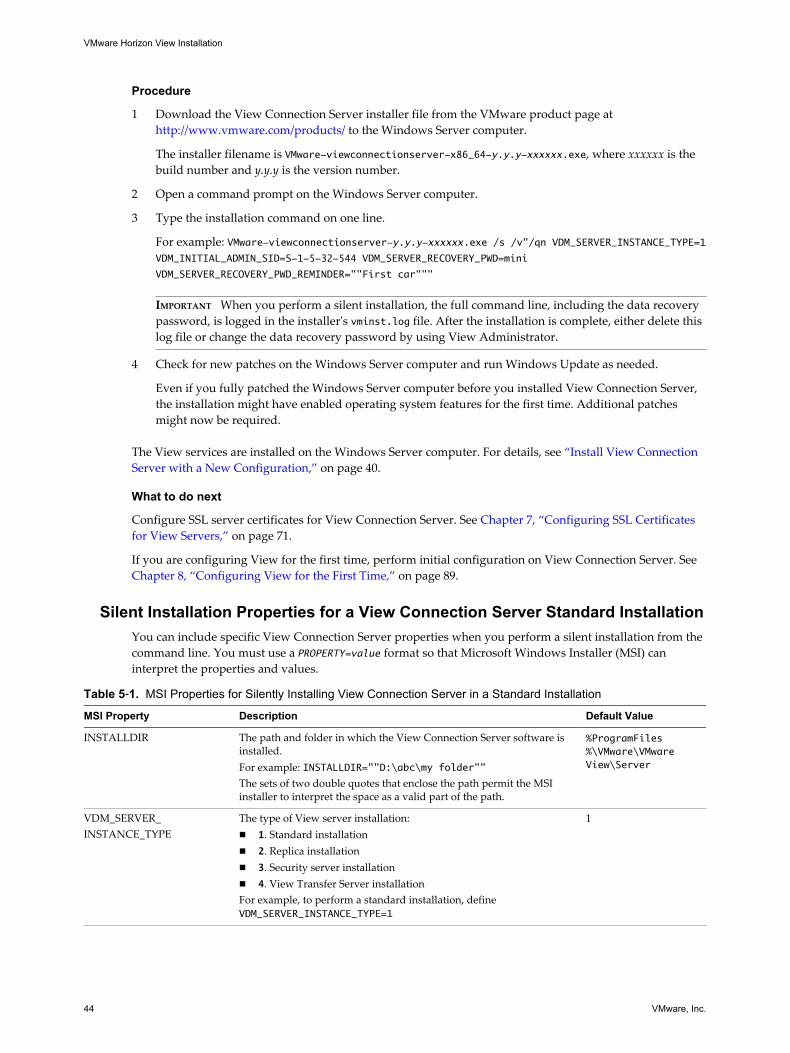
Procedure
1 Download the View Connection Server installer file from the VMware product page at http://www.vmware.com/products/ to the Windows Server computer.
The installer filename is VMware-viewconnectionserver-x86_64-y.y.y-xxxxxx.exe, where xxxxxx is thebuild number and y.y.y is the version number.
2 Open a command prompt on the Windows Server computer.
3 Type the installation command on one line.
For example: VMware-viewconnectionserver-y.y.y-xxxxxx.exe /s /v"/qn VDM_SERVER_INSTANCE_TYPE=1VDM_INITIAL_ADMIN_SID=S-1-5-32-544 VDM_SERVER_RECOVERY_PWD=mini
VDM_SERVER_RECOVERY_PWD_REMINDER=""First car"""
IMPORTANT When you perform a silent installation, the full command line, including the data recoverypassword, is logged in the installer's vminst.log file. After the installation is complete, either delete thislog file or change the data recovery password by using View Administrator.
4 Check for new patches on the Windows Server computer and run Windows Update as needed.
Even if you fully patched the Windows Server computer before you installed View Connection Server,the installation might have enabled operating system features for the first time. Additional patchesmight now be required.
The View services are installed on the Windows Server computer. For details, see “Install View ConnectionServer with a New Configuration,” on page 40.
What to do next
Configure SSL server certificates for View Connection Server. See Chapter 7, “Configuring SSL Certificatesfor View Servers,” on page 71.
If you are configuring View for the first time, perform initial configuration on View Connection Server. See Chapter 8, “Configuring View for the First Time,” on page 89.
Silent Installation Properties for a View Connection Server Standard InstallationYou can include specific View Connection Server properties when you perform a silent installation from thecommand line. You must use a PROPERTY=value format so that Microsoft Windows Installer (MSI) caninterpret the properties and values.
Table 5‑1. MSI Properties for Silently Installing View Connection Server in a Standard Installation
MSI Property Description Default Value
INSTALLDIR The path and folder in which the View Connection Server software isinstalled.For example: INSTALLDIR=""D:\abc\my folder""The sets of two double quotes that enclose the path permit the MSIinstaller to interpret the space as a valid part of the path.
%ProgramFiles%\VMware\VMwareView\Server
VDM_SERVER_INSTANCE_TYPE
The type of View server installation:n 1. Standard installationn 2. Replica installationn 3. Security server installationn 4. View Transfer Server installationFor example, to perform a standard installation, defineVDM_SERVER_INSTANCE_TYPE=1
1
VMware Horizon View Installation
44 VMware, Inc.
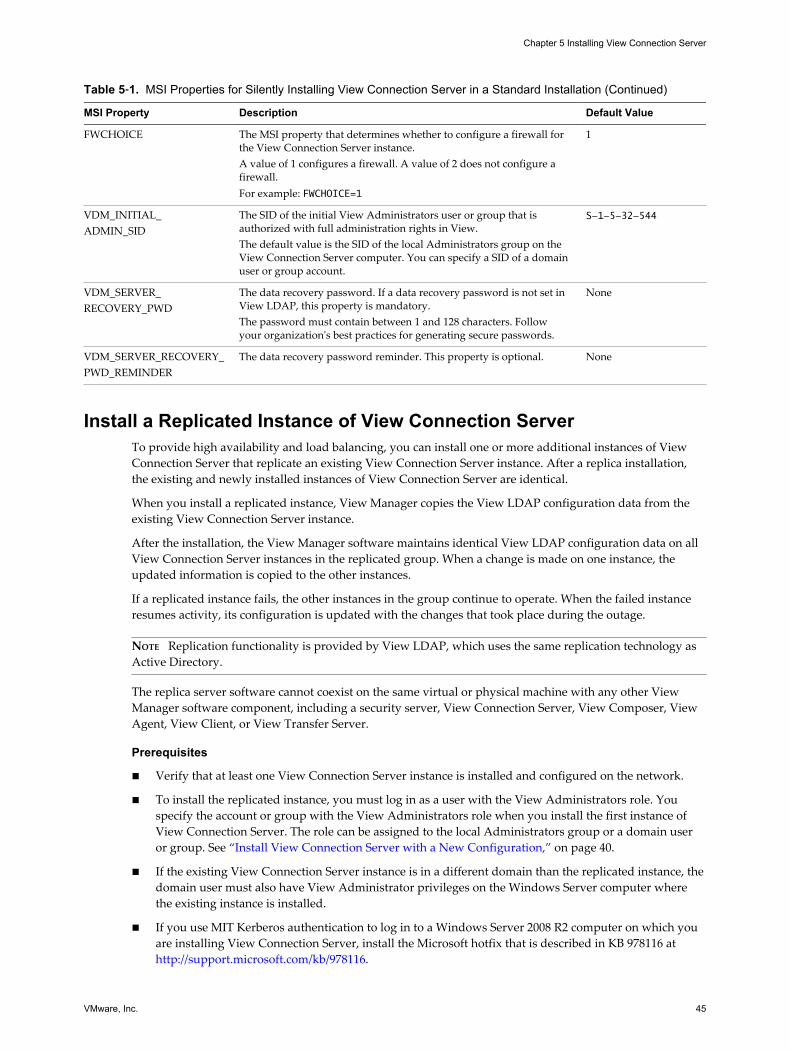
Table 5‑1. MSI Properties for Silently Installing View Connection Server in a Standard Installation (Continued)
MSI Property Description Default Value
FWCHOICE The MSI property that determines whether to configure a firewall forthe View Connection Server instance.A value of 1 configures a firewall. A value of 2 does not configure afirewall.For example: FWCHOICE=1
1
VDM_INITIAL_ADMIN_SID
The SID of the initial View Administrators user or group that isauthorized with full administration rights in View.The default value is the SID of the local Administrators group on theView Connection Server computer. You can specify a SID of a domainuser or group account.
S-1-5-32-544
VDM_SERVER_RECOVERY_PWD
The data recovery password. If a data recovery password is not set inView LDAP, this property is mandatory.The password must contain between 1 and 128 characters. Followyour organization's best practices for generating secure passwords.
None
VDM_SERVER_RECOVERY_PWD_REMINDER
The data recovery password reminder. This property is optional. None
Install a Replicated Instance of View Connection ServerTo provide high availability and load balancing, you can install one or more additional instances of ViewConnection Server that replicate an existing View Connection Server instance. After a replica installation,the existing and newly installed instances of View Connection Server are identical.
When you install a replicated instance, View Manager copies the View LDAP configuration data from theexisting View Connection Server instance.
After the installation, the View Manager software maintains identical View LDAP configuration data on allView Connection Server instances in the replicated group. When a change is made on one instance, theupdated information is copied to the other instances.
If a replicated instance fails, the other instances in the group continue to operate. When the failed instanceresumes activity, its configuration is updated with the changes that took place during the outage.
NOTE Replication functionality is provided by View LDAP, which uses the same replication technology asActive Directory.
The replica server software cannot coexist on the same virtual or physical machine with any other ViewManager software component, including a security server, View Connection Server, View Composer, ViewAgent, View Client, or View Transfer Server.
Prerequisites
n Verify that at least one View Connection Server instance is installed and configured on the network.
n To install the replicated instance, you must log in as a user with the View Administrators role. Youspecify the account or group with the View Administrators role when you install the first instance ofView Connection Server. The role can be assigned to the local Administrators group or a domain useror group. See “Install View Connection Server with a New Configuration,” on page 40.
n If the existing View Connection Server instance is in a different domain than the replicated instance, thedomain user must also have View Administrator privileges on the Windows Server computer wherethe existing instance is installed.
n If you use MIT Kerberos authentication to log in to a Windows Server 2008 R2 computer on which youare installing View Connection Server, install the Microsoft hotfix that is described in KB 978116 at http://support.microsoft.com/kb/978116.
Chapter 5 Installing View Connection Server
VMware, Inc. 45
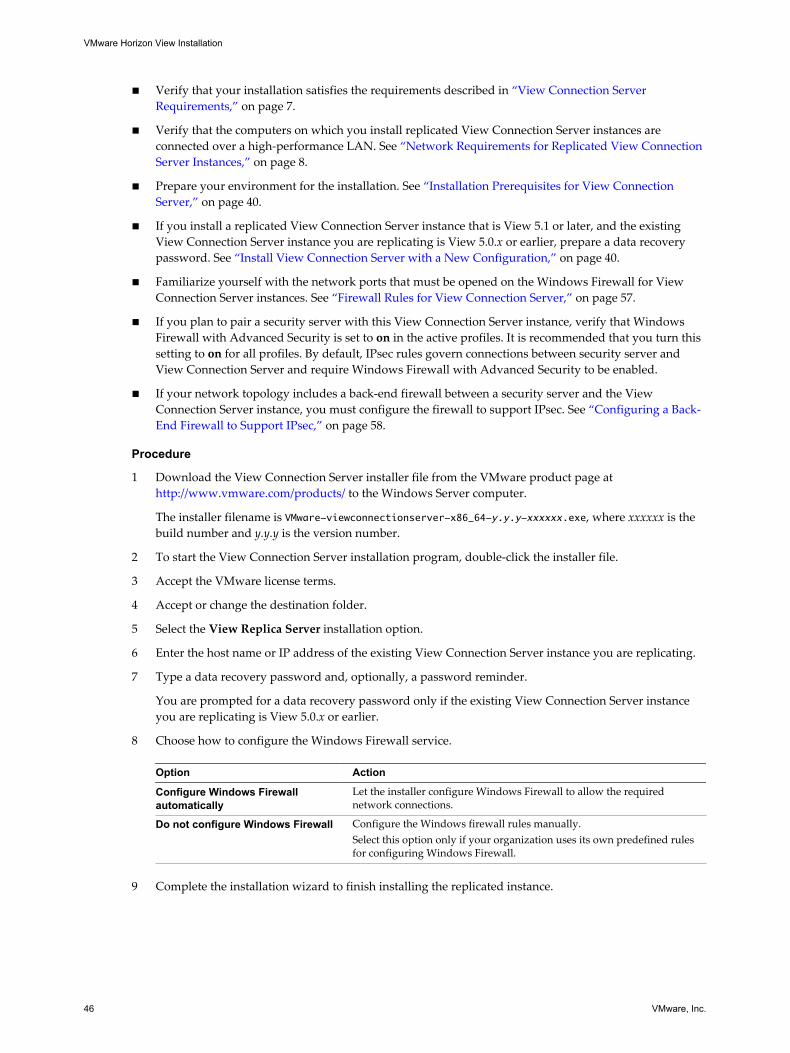
n Verify that your installation satisfies the requirements described in “View Connection ServerRequirements,” on page 7.
n Verify that the computers on which you install replicated View Connection Server instances areconnected over a high-performance LAN. See “Network Requirements for Replicated View ConnectionServer Instances,” on page 8.
n Prepare your environment for the installation. See “Installation Prerequisites for View ConnectionServer,” on page 40.
n If you install a replicated View Connection Server instance that is View 5.1 or later, and the existingView Connection Server instance you are replicating is View 5.0.x or earlier, prepare a data recoverypassword. See “Install View Connection Server with a New Configuration,” on page 40.
n Familiarize yourself with the network ports that must be opened on the Windows Firewall for ViewConnection Server instances. See “Firewall Rules for View Connection Server,” on page 57.
n If you plan to pair a security server with this View Connection Server instance, verify that WindowsFirewall with Advanced Security is set to on in the active profiles. It is recommended that you turn thissetting to on for all profiles. By default, IPsec rules govern connections between security server andView Connection Server and require Windows Firewall with Advanced Security to be enabled.
n If your network topology includes a back-end firewall between a security server and the ViewConnection Server instance, you must configure the firewall to support IPsec. See “Configuring a Back-End Firewall to Support IPsec,” on page 58.
Procedure
1 Download the View Connection Server installer file from the VMware product page at http://www.vmware.com/products/ to the Windows Server computer.
The installer filename is VMware-viewconnectionserver-x86_64-y.y.y-xxxxxx.exe, where xxxxxx is thebuild number and y.y.y is the version number.
2 To start the View Connection Server installation program, double-click the installer file.
3 Accept the VMware license terms.
4 Accept or change the destination folder.
5 Select the View Replica Server installation option.
6 Enter the host name or IP address of the existing View Connection Server instance you are replicating.
7 Type a data recovery password and, optionally, a password reminder.
You are prompted for a data recovery password only if the existing View Connection Server instanceyou are replicating is View 5.0.x or earlier.
8 Choose how to configure the Windows Firewall service.
Option Action
Configure Windows Firewallautomatically
Let the installer configure Windows Firewall to allow the requirednetwork connections.
Do not configure Windows Firewall Configure the Windows firewall rules manually.Select this option only if your organization uses its own predefined rulesfor configuring Windows Firewall.
9 Complete the installation wizard to finish installing the replicated instance.
VMware Horizon View Installation
46 VMware, Inc.
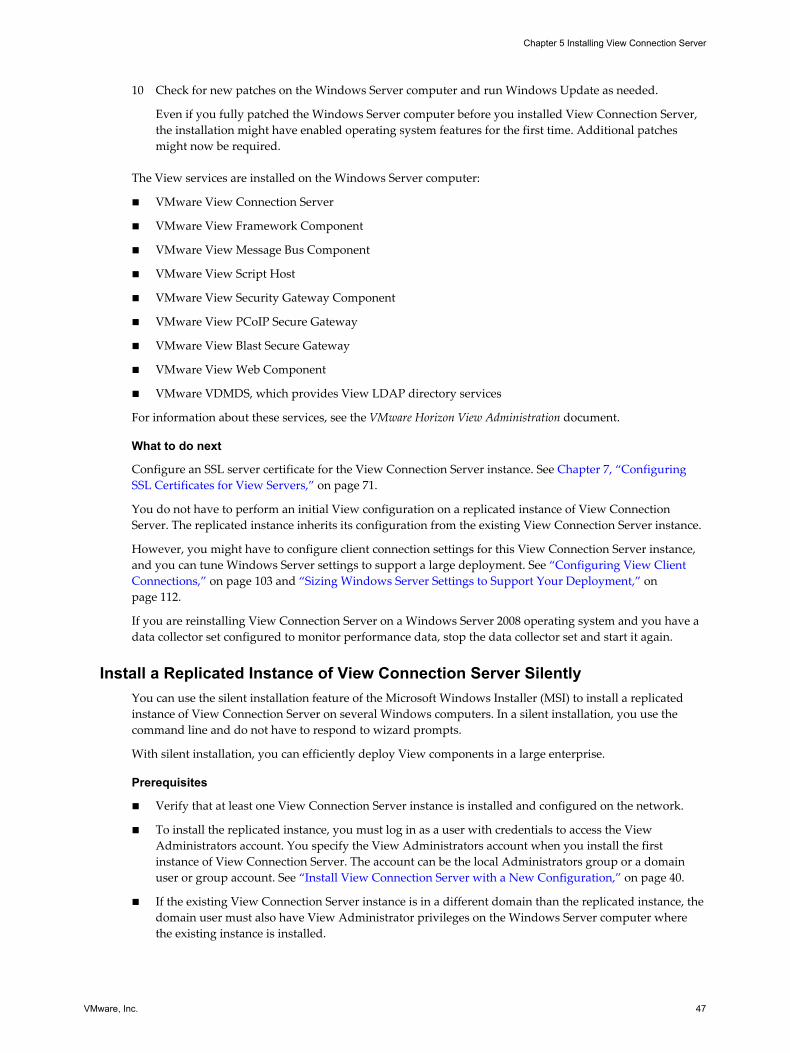
10 Check for new patches on the Windows Server computer and run Windows Update as needed.
Even if you fully patched the Windows Server computer before you installed View Connection Server,the installation might have enabled operating system features for the first time. Additional patchesmight now be required.
The View services are installed on the Windows Server computer:
n VMware View Connection Server
n VMware View Framework Component
n VMware View Message Bus Component
n VMware View Script Host
n VMware View Security Gateway Component
n VMware View PCoIP Secure Gateway
n VMware View Blast Secure Gateway
n VMware View Web Component
n VMware VDMDS, which provides View LDAP directory services
For information about these services, see the VMware Horizon View Administration document.
What to do next
Configure an SSL server certificate for the View Connection Server instance. See Chapter 7, “ConfiguringSSL Certificates for View Servers,” on page 71.
You do not have to perform an initial View configuration on a replicated instance of View ConnectionServer. The replicated instance inherits its configuration from the existing View Connection Server instance.
However, you might have to configure client connection settings for this View Connection Server instance,and you can tune Windows Server settings to support a large deployment. See “Configuring View ClientConnections,” on page 103 and “Sizing Windows Server Settings to Support Your Deployment,” onpage 112.
If you are reinstalling View Connection Server on a Windows Server 2008 operating system and you have adata collector set configured to monitor performance data, stop the data collector set and start it again.
Install a Replicated Instance of View Connection Server SilentlyYou can use the silent installation feature of the Microsoft Windows Installer (MSI) to install a replicatedinstance of View Connection Server on several Windows computers. In a silent installation, you use thecommand line and do not have to respond to wizard prompts.
With silent installation, you can efficiently deploy View components in a large enterprise.
Prerequisites
n Verify that at least one View Connection Server instance is installed and configured on the network.
n To install the replicated instance, you must log in as a user with credentials to access the ViewAdministrators account. You specify the View Administrators account when you install the firstinstance of View Connection Server. The account can be the local Administrators group or a domainuser or group account. See “Install View Connection Server with a New Configuration,” on page 40.
n If the existing View Connection Server instance is in a different domain than the replicated instance, thedomain user must also have View Administrator privileges on the Windows Server computer wherethe existing instance is installed.
Chapter 5 Installing View Connection Server
VMware, Inc. 47
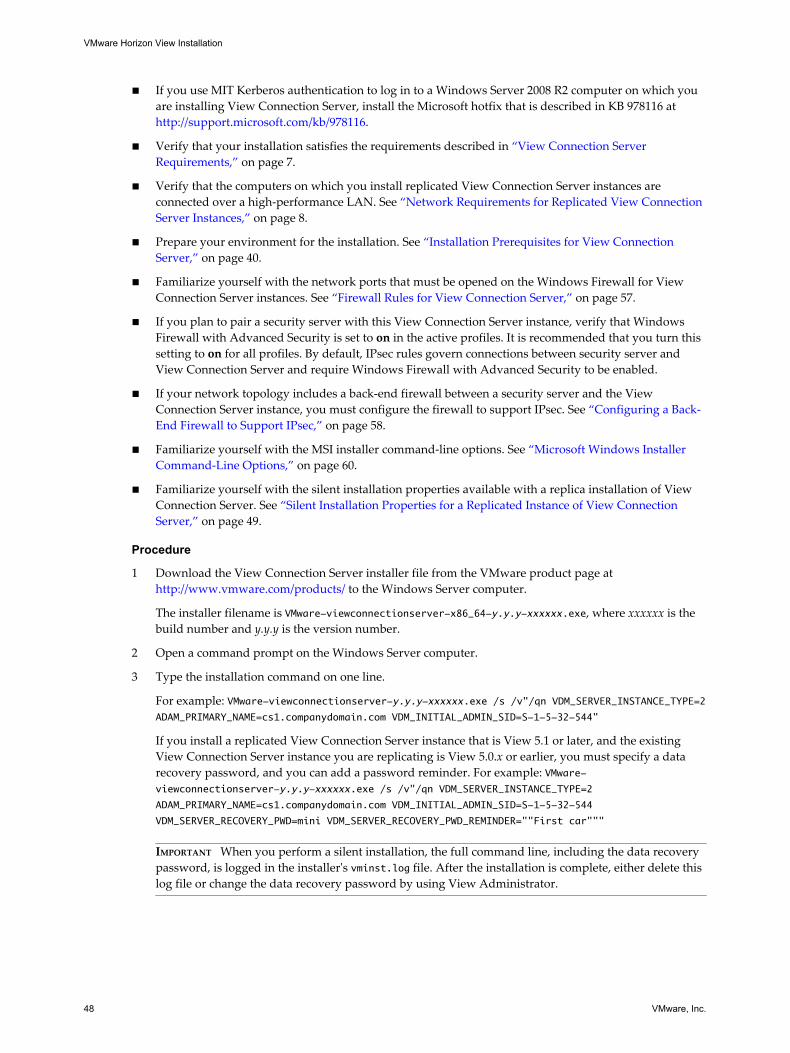
n If you use MIT Kerberos authentication to log in to a Windows Server 2008 R2 computer on which youare installing View Connection Server, install the Microsoft hotfix that is described in KB 978116 at http://support.microsoft.com/kb/978116.
n Verify that your installation satisfies the requirements described in “View Connection ServerRequirements,” on page 7.
n Verify that the computers on which you install replicated View Connection Server instances areconnected over a high-performance LAN. See “Network Requirements for Replicated View ConnectionServer Instances,” on page 8.
n Prepare your environment for the installation. See “Installation Prerequisites for View ConnectionServer,” on page 40.
n Familiarize yourself with the network ports that must be opened on the Windows Firewall for ViewConnection Server instances. See “Firewall Rules for View Connection Server,” on page 57.
n If you plan to pair a security server with this View Connection Server instance, verify that WindowsFirewall with Advanced Security is set to on in the active profiles. It is recommended that you turn thissetting to on for all profiles. By default, IPsec rules govern connections between security server andView Connection Server and require Windows Firewall with Advanced Security to be enabled.
n If your network topology includes a back-end firewall between a security server and the ViewConnection Server instance, you must configure the firewall to support IPsec. See “Configuring a Back-End Firewall to Support IPsec,” on page 58.
n Familiarize yourself with the MSI installer command-line options. See “Microsoft Windows InstallerCommand-Line Options,” on page 60.
n Familiarize yourself with the silent installation properties available with a replica installation of ViewConnection Server. See “Silent Installation Properties for a Replicated Instance of View ConnectionServer,” on page 49.
Procedure
1 Download the View Connection Server installer file from the VMware product page at http://www.vmware.com/products/ to the Windows Server computer.
The installer filename is VMware-viewconnectionserver-x86_64-y.y.y-xxxxxx.exe, where xxxxxx is thebuild number and y.y.y is the version number.
2 Open a command prompt on the Windows Server computer.
3 Type the installation command on one line.
For example: VMware-viewconnectionserver-y.y.y-xxxxxx.exe /s /v"/qn VDM_SERVER_INSTANCE_TYPE=2ADAM_PRIMARY_NAME=cs1.companydomain.com VDM_INITIAL_ADMIN_SID=S-1-5-32-544"
If you install a replicated View Connection Server instance that is View 5.1 or later, and the existingView Connection Server instance you are replicating is View 5.0.x or earlier, you must specify a datarecovery password, and you can add a password reminder. For example: VMware-viewconnectionserver-y.y.y-xxxxxx.exe /s /v"/qn VDM_SERVER_INSTANCE_TYPE=2
ADAM_PRIMARY_NAME=cs1.companydomain.com VDM_INITIAL_ADMIN_SID=S-1-5-32-544
VDM_SERVER_RECOVERY_PWD=mini VDM_SERVER_RECOVERY_PWD_REMINDER=""First car"""
IMPORTANT When you perform a silent installation, the full command line, including the data recoverypassword, is logged in the installer's vminst.log file. After the installation is complete, either delete thislog file or change the data recovery password by using View Administrator.
VMware Horizon View Installation
48 VMware, Inc.
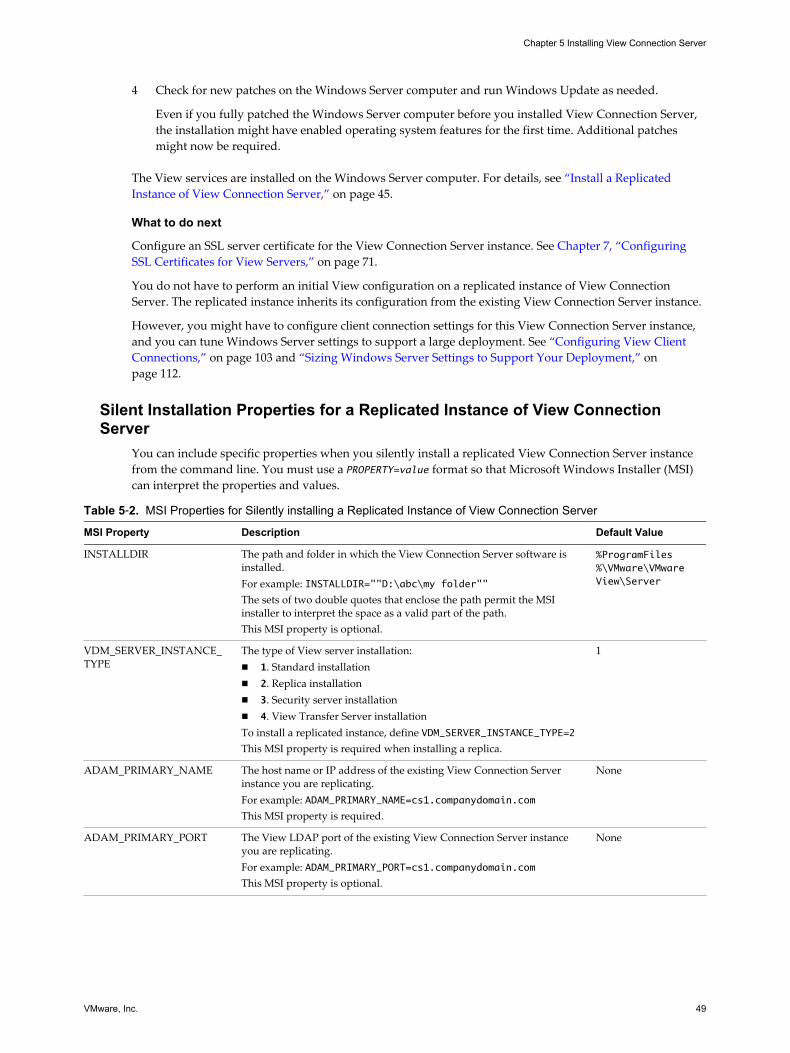
4 Check for new patches on the Windows Server computer and run Windows Update as needed.
Even if you fully patched the Windows Server computer before you installed View Connection Server,the installation might have enabled operating system features for the first time. Additional patchesmight now be required.
The View services are installed on the Windows Server computer. For details, see “Install a ReplicatedInstance of View Connection Server,” on page 45.
What to do next
Configure an SSL server certificate for the View Connection Server instance. See Chapter 7, “ConfiguringSSL Certificates for View Servers,” on page 71.
You do not have to perform an initial View configuration on a replicated instance of View ConnectionServer. The replicated instance inherits its configuration from the existing View Connection Server instance.
However, you might have to configure client connection settings for this View Connection Server instance,and you can tune Windows Server settings to support a large deployment. See “Configuring View ClientConnections,” on page 103 and “Sizing Windows Server Settings to Support Your Deployment,” onpage 112.
Silent Installation Properties for a Replicated Instance of View ConnectionServer
You can include specific properties when you silently install a replicated View Connection Server instancefrom the command line. You must use a PROPERTY=value format so that Microsoft Windows Installer (MSI)can interpret the properties and values.
Table 5‑2. MSI Properties for Silently installing a Replicated Instance of View Connection Server
MSI Property Description Default Value
INSTALLDIR The path and folder in which the View Connection Server software isinstalled.For example: INSTALLDIR=""D:\abc\my folder""The sets of two double quotes that enclose the path permit the MSIinstaller to interpret the space as a valid part of the path.This MSI property is optional.
%ProgramFiles%\VMware\VMwareView\Server
VDM_SERVER_INSTANCE_TYPE
The type of View server installation:n 1. Standard installationn 2. Replica installationn 3. Security server installationn 4. View Transfer Server installationTo install a replicated instance, define VDM_SERVER_INSTANCE_TYPE=2This MSI property is required when installing a replica.
1
ADAM_PRIMARY_NAME The host name or IP address of the existing View Connection Serverinstance you are replicating.For example: ADAM_PRIMARY_NAME=cs1.companydomain.comThis MSI property is required.
None
ADAM_PRIMARY_PORT The View LDAP port of the existing View Connection Server instanceyou are replicating.For example: ADAM_PRIMARY_PORT=cs1.companydomain.comThis MSI property is optional.
None
Chapter 5 Installing View Connection Server
VMware, Inc. 49
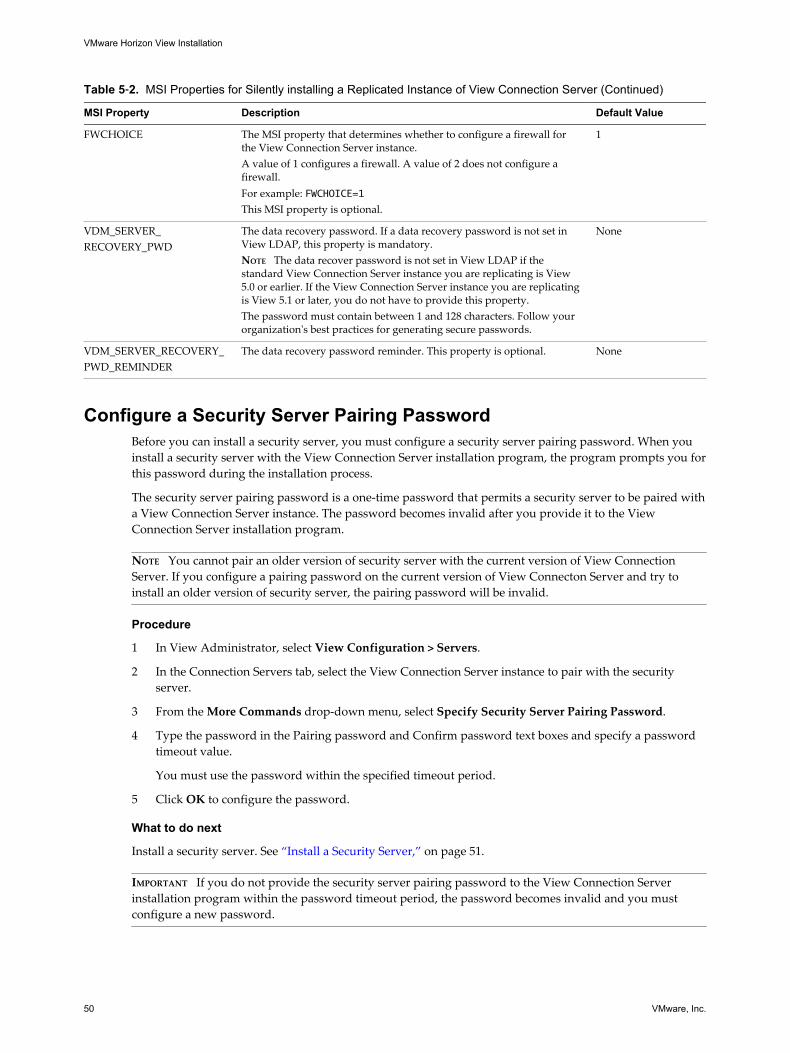
Table 5‑2. MSI Properties for Silently installing a Replicated Instance of View Connection Server (Continued)
MSI Property Description Default Value
FWCHOICE The MSI property that determines whether to configure a firewall forthe View Connection Server instance.A value of 1 configures a firewall. A value of 2 does not configure afirewall.For example: FWCHOICE=1This MSI property is optional.
1
VDM_SERVER_RECOVERY_PWD
The data recovery password. If a data recovery password is not set inView LDAP, this property is mandatory.NOTE The data recover password is not set in View LDAP if thestandard View Connection Server instance you are replicating is View5.0 or earlier. If the View Connection Server instance you are replicatingis View 5.1 or later, you do not have to provide this property.The password must contain between 1 and 128 characters. Follow yourorganization's best practices for generating secure passwords.
None
VDM_SERVER_RECOVERY_PWD_REMINDER
The data recovery password reminder. This property is optional. None
Configure a Security Server Pairing PasswordBefore you can install a security server, you must configure a security server pairing password. When youinstall a security server with the View Connection Server installation program, the program prompts you forthis password during the installation process.
The security server pairing password is a one-time password that permits a security server to be paired witha View Connection Server instance. The password becomes invalid after you provide it to the ViewConnection Server installation program.
NOTE You cannot pair an older version of security server with the current version of View ConnectionServer. If you configure a pairing password on the current version of View Connecton Server and try toinstall an older version of security server, the pairing password will be invalid.
Procedure
1 In View Administrator, select View Configuration > Servers.
2 In the Connection Servers tab, select the View Connection Server instance to pair with the securityserver.
3 From the More Commands drop-down menu, select Specify Security Server Pairing Password.
4 Type the password in the Pairing password and Confirm password text boxes and specify a passwordtimeout value.
You must use the password within the specified timeout period.
5 Click OK to configure the password.
What to do next
Install a security server. See “Install a Security Server,” on page 51.
IMPORTANT If you do not provide the security server pairing password to the View Connection Serverinstallation program within the password timeout period, the password becomes invalid and you mustconfigure a new password.
VMware Horizon View Installation
50 VMware, Inc.
Install a Security ServerA security server is an instance of View Connection Server that adds an additional layer of security betweenthe Internet and your internal network. You can install one or more security servers to be connected to aView Connection Server instance.
The security server software cannot coexist on the same virtual or physical machine with any other ViewManager software component, including a replica server, View Connection Server, View Composer, ViewAgent, View Client, or View Transfer Server.
Prerequisites
n Determine the type of topology to use. For example, determine which load balancing solution to use.Decide if the View Connection Server instances that are paired with security servers will be dedicatedto users of the external network. For information, see the VMware Horizon View Architecture Planningdocument.
IMPORTANT If you use a load balancer, you must have static IP addresses for the load balancer and eachsecurity server. For example, if you use a load balancer with two security servers, you need 3 static IPaddresses.
n Verify that your installation satisfies the requirements described in “View Connection ServerRequirements,” on page 7.
n Prepare your environment for the installation. See “Installation Prerequisites for View ConnectionServer,” on page 40.
n Verify that the View Connection Server instance to be paired with the security server is installed andconfigured and is running a View Connection Server version that is compatible with the security serverversion. See "Horizon View Component Compatibility Matrix" in the VMware Horizon View Upgradesdocument.
n Verify that the View Connection Server instance to be paired with the security server is accessible to thecomputer on which you plan to install the security server.
n Configure a security server pairing password. See “Configure a Security Server Pairing Password,” onpage 50.
n Familiarize yourself with the format of external URLs. See “Configuring External URLs for SecureGateway and Tunnel Connections,” on page 106.
n Verify that Windows Firewall with Advanced Security is set to on in the active profiles. It isrecommended that you turn this setting to on for all profiles. By default, IPsec rules govern connectionsbetween security server and View Connection Server and require Windows Firewall with AdvancedSecurity to be enabled.
n Familiarize yourself with the network ports that must be opened on the Windows Firewall for asecurity server. See “Firewall Rules for View Connection Server,” on page 57.
n If your network topology includes a back-end firewall between the security server and ViewConnection Server, you must configure the firewall to support IPsec. See “Configuring a Back-EndFirewall to Support IPsec,” on page 58.
n If you are upgrading or reinstalling the security server, verify that the existing IPsec rules for thesecurity server were removed. See “Prepare to Upgrade or Reinstall a Security Server,” on page 56.
Chapter 5 Installing View Connection Server
VMware, Inc. 51
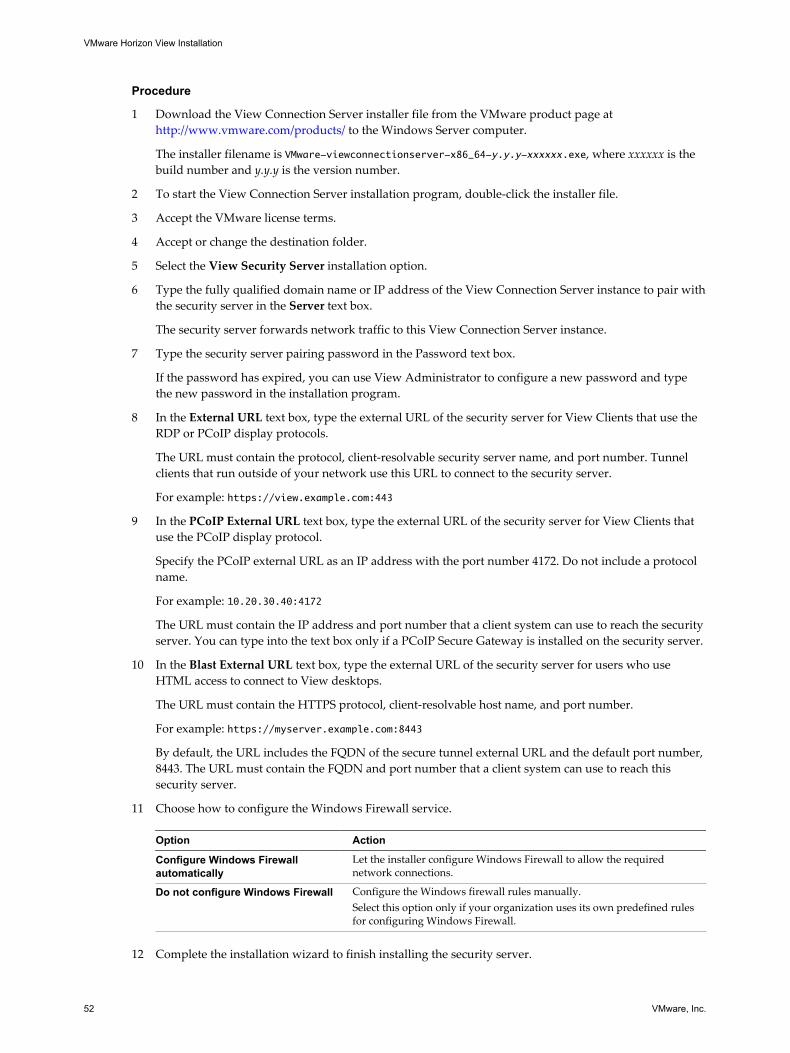
Procedure
1 Download the View Connection Server installer file from the VMware product page at http://www.vmware.com/products/ to the Windows Server computer.
The installer filename is VMware-viewconnectionserver-x86_64-y.y.y-xxxxxx.exe, where xxxxxx is thebuild number and y.y.y is the version number.
2 To start the View Connection Server installation program, double-click the installer file.
3 Accept the VMware license terms.
4 Accept or change the destination folder.
5 Select the View Security Server installation option.
6 Type the fully qualified domain name or IP address of the View Connection Server instance to pair withthe security server in the Server text box.
The security server forwards network traffic to this View Connection Server instance.
7 Type the security server pairing password in the Password text box.
If the password has expired, you can use View Administrator to configure a new password and typethe new password in the installation program.
8 In the External URL text box, type the external URL of the security server for View Clients that use theRDP or PCoIP display protocols.
The URL must contain the protocol, client-resolvable security server name, and port number. Tunnelclients that run outside of your network use this URL to connect to the security server.
For example: https://view.example.com:443
9 In the PCoIP External URL text box, type the external URL of the security server for View Clients thatuse the PCoIP display protocol.
Specify the PCoIP external URL as an IP address with the port number 4172. Do not include a protocolname.
For example: 10.20.30.40:4172
The URL must contain the IP address and port number that a client system can use to reach the securityserver. You can type into the text box only if a PCoIP Secure Gateway is installed on the security server.
10 In the Blast External URL text box, type the external URL of the security server for users who useHTML access to connect to View desktops.
The URL must contain the HTTPS protocol, client-resolvable host name, and port number.
For example: https://myserver.example.com:8443
By default, the URL includes the FQDN of the secure tunnel external URL and the default port number,8443. The URL must contain the FQDN and port number that a client system can use to reach thissecurity server.
11 Choose how to configure the Windows Firewall service.
Option Action
Configure Windows Firewallautomatically
Let the installer configure Windows Firewall to allow the requirednetwork connections.
Do not configure Windows Firewall Configure the Windows firewall rules manually.Select this option only if your organization uses its own predefined rulesfor configuring Windows Firewall.
12 Complete the installation wizard to finish installing the security server.
VMware Horizon View Installation
52 VMware, Inc.
The security server services are installed on the Windows Server computer:
n VMware View Security Server
n VMware View Framework Component
n VMware View Security Gateway Component
n VMware View PCoIP Secure Gateway
n VMware Blast Secure Gateway
For information about these services, see VMware Horizon View Administration.
The security server appears in the Security Servers pane in View Administrator.
NOTE If the installation is cancelled or aborted, you might have to remove IPsec rules for the security serverbefore you can begin the installation again. Take this step even if you already removed IPsec rules prior toreinstalling or upgrading security server. For instructions on removing IPsec rules, see “Prepare to Upgradeor Reinstall a Security Server,” on page 56.
What to do next
Configure an SSL server certificate for the security server. See Chapter 7, “Configuring SSL Certificates forView Servers,” on page 71.
You might have to configure client connection settings for the security server, and you can tune WindowsServer settings to support a large deployment. See “Configuring View Client Connections,” on page 103and “Sizing Windows Server Settings to Support Your Deployment,” on page 112.
If your users connect to the security server through HTML Access, you must enable a rule in the WindowsFirewall to open the HTML Access port. See “Open the Port Used by HTML Access on Security Servers,” onpage 105.
If you are reinstalling the security server on a Windows Server 2008 operating system and you have a datacollector set configured to monitor performance data, stop the data collector set and start it again.
Install a Security Server SilentlyYou can use the silent installation feature of the Microsoft Windows Installer (MSI) to install a securityserver on several Windows computers. In a silent installation, you use the command line and do not have torespond to wizard prompts.
With silent installation, you can efficiently deploy View components in a large enterprise.
Prerequisites
n Determine the type of topology to use. For example, determine which load balancing solution to use.Decide if the View Connection Server instances that are paired with security servers will be dedicatedto users of the external network. For information, see the VMware Horizon View Architecture Planningdocument.
IMPORTANT If you use a load balancer, you must have static IP addresses for the load balancer and eachsecurity server. For example, if you use a load balancer with two security servers, you need 3 static IPaddresses.
n Verify that your installation satisfies the requirements described in “View Connection ServerRequirements,” on page 7.
n Prepare your environment for the installation. See “Installation Prerequisites for View ConnectionServer,” on page 40.
Chapter 5 Installing View Connection Server
VMware, Inc. 53
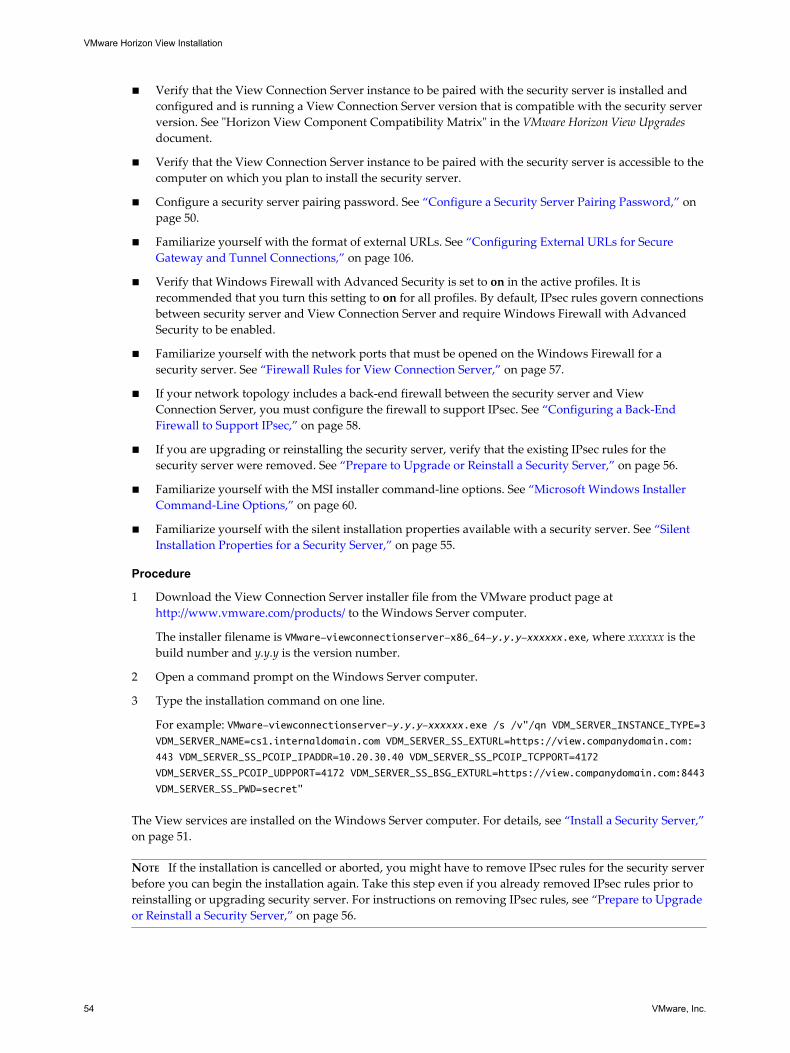
n Verify that the View Connection Server instance to be paired with the security server is installed andconfigured and is running a View Connection Server version that is compatible with the security serverversion. See "Horizon View Component Compatibility Matrix" in the VMware Horizon View Upgradesdocument.
n Verify that the View Connection Server instance to be paired with the security server is accessible to thecomputer on which you plan to install the security server.
n Configure a security server pairing password. See “Configure a Security Server Pairing Password,” onpage 50.
n Familiarize yourself with the format of external URLs. See “Configuring External URLs for SecureGateway and Tunnel Connections,” on page 106.
n Verify that Windows Firewall with Advanced Security is set to on in the active profiles. It isrecommended that you turn this setting to on for all profiles. By default, IPsec rules govern connectionsbetween security server and View Connection Server and require Windows Firewall with AdvancedSecurity to be enabled.
n Familiarize yourself with the network ports that must be opened on the Windows Firewall for asecurity server. See “Firewall Rules for View Connection Server,” on page 57.
n If your network topology includes a back-end firewall between the security server and ViewConnection Server, you must configure the firewall to support IPsec. See “Configuring a Back-EndFirewall to Support IPsec,” on page 58.
n If you are upgrading or reinstalling the security server, verify that the existing IPsec rules for thesecurity server were removed. See “Prepare to Upgrade or Reinstall a Security Server,” on page 56.
n Familiarize yourself with the MSI installer command-line options. See “Microsoft Windows InstallerCommand-Line Options,” on page 60.
n Familiarize yourself with the silent installation properties available with a security server. See “SilentInstallation Properties for a Security Server,” on page 55.
Procedure
1 Download the View Connection Server installer file from the VMware product page at http://www.vmware.com/products/ to the Windows Server computer.
The installer filename is VMware-viewconnectionserver-x86_64-y.y.y-xxxxxx.exe, where xxxxxx is thebuild number and y.y.y is the version number.
2 Open a command prompt on the Windows Server computer.
3 Type the installation command on one line.
For example: VMware-viewconnectionserver-y.y.y-xxxxxx.exe /s /v"/qn VDM_SERVER_INSTANCE_TYPE=3VDM_SERVER_NAME=cs1.internaldomain.com VDM_SERVER_SS_EXTURL=https://view.companydomain.com:
443 VDM_SERVER_SS_PCOIP_IPADDR=10.20.30.40 VDM_SERVER_SS_PCOIP_TCPPORT=4172
VDM_SERVER_SS_PCOIP_UDPPORT=4172 VDM_SERVER_SS_BSG_EXTURL=https://view.companydomain.com:8443
VDM_SERVER_SS_PWD=secret"
The View services are installed on the Windows Server computer. For details, see “Install a Security Server,”on page 51.
NOTE If the installation is cancelled or aborted, you might have to remove IPsec rules for the security serverbefore you can begin the installation again. Take this step even if you already removed IPsec rules prior toreinstalling or upgrading security server. For instructions on removing IPsec rules, see “Prepare to Upgradeor Reinstall a Security Server,” on page 56.
VMware Horizon View Installation
54 VMware, Inc.
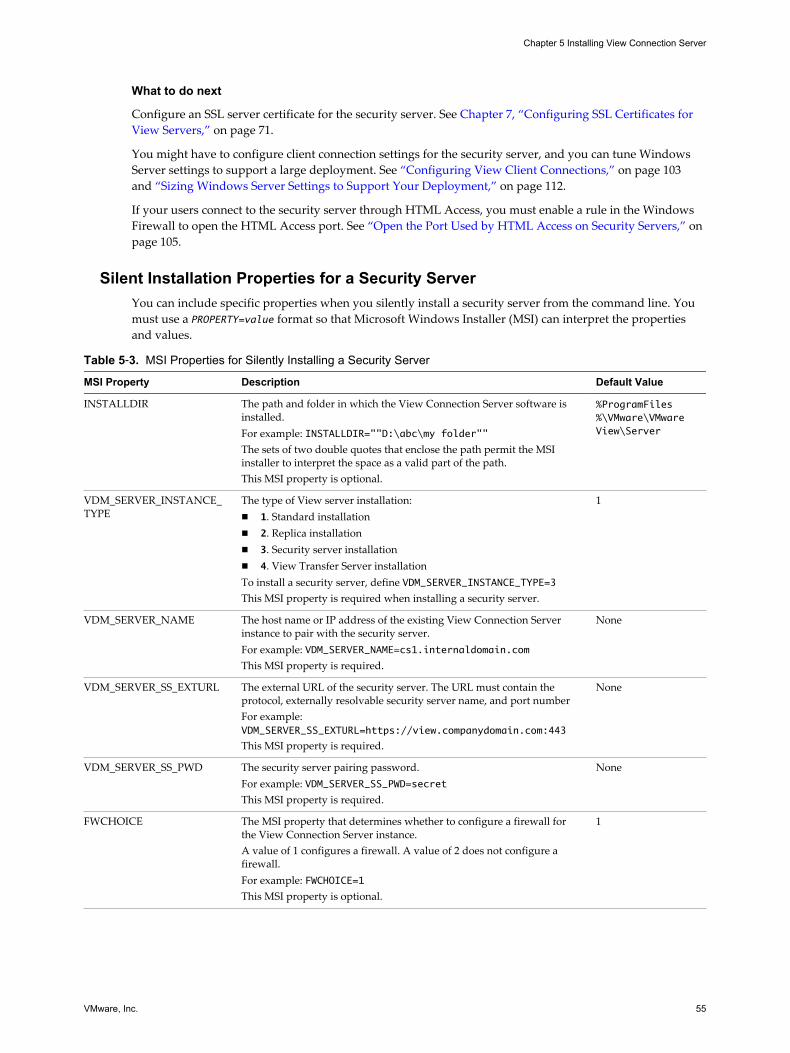
What to do next
Configure an SSL server certificate for the security server. See Chapter 7, “Configuring SSL Certificates forView Servers,” on page 71.
You might have to configure client connection settings for the security server, and you can tune WindowsServer settings to support a large deployment. See “Configuring View Client Connections,” on page 103and “Sizing Windows Server Settings to Support Your Deployment,” on page 112.
If your users connect to the security server through HTML Access, you must enable a rule in the WindowsFirewall to open the HTML Access port. See “Open the Port Used by HTML Access on Security Servers,” onpage 105.
Silent Installation Properties for a Security ServerYou can include specific properties when you silently install a security server from the command line. Youmust use a PROPERTY=value format so that Microsoft Windows Installer (MSI) can interpret the propertiesand values.
Table 5‑3. MSI Properties for Silently Installing a Security Server
MSI Property Description Default Value
INSTALLDIR The path and folder in which the View Connection Server software isinstalled.For example: INSTALLDIR=""D:\abc\my folder""The sets of two double quotes that enclose the path permit the MSIinstaller to interpret the space as a valid part of the path.This MSI property is optional.
%ProgramFiles%\VMware\VMwareView\Server
VDM_SERVER_INSTANCE_TYPE
The type of View server installation:n 1. Standard installationn 2. Replica installationn 3. Security server installationn 4. View Transfer Server installationTo install a security server, define VDM_SERVER_INSTANCE_TYPE=3This MSI property is required when installing a security server.
1
VDM_SERVER_NAME The host name or IP address of the existing View Connection Serverinstance to pair with the security server.For example: VDM_SERVER_NAME=cs1.internaldomain.comThis MSI property is required.
None
VDM_SERVER_SS_EXTURL The external URL of the security server. The URL must contain theprotocol, externally resolvable security server name, and port numberFor example:VDM_SERVER_SS_EXTURL=https://view.companydomain.com:443
This MSI property is required.
None
VDM_SERVER_SS_PWD The security server pairing password.For example: VDM_SERVER_SS_PWD=secretThis MSI property is required.
None
FWCHOICE The MSI property that determines whether to configure a firewall forthe View Connection Server instance.A value of 1 configures a firewall. A value of 2 does not configure afirewall.For example: FWCHOICE=1This MSI property is optional.
1
Chapter 5 Installing View Connection Server
VMware, Inc. 55
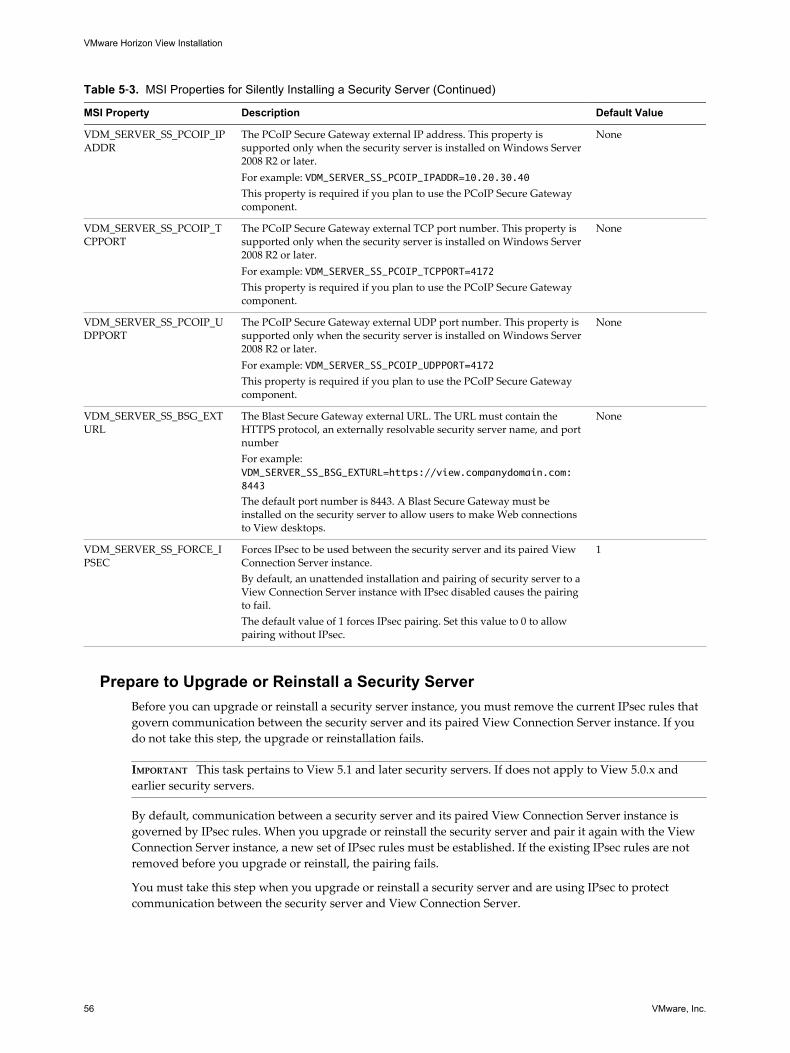
Table 5‑3. MSI Properties for Silently Installing a Security Server (Continued)
MSI Property Description Default Value
VDM_SERVER_SS_PCOIP_IPADDR
The PCoIP Secure Gateway external IP address. This property issupported only when the security server is installed on Windows Server2008 R2 or later.For example: VDM_SERVER_SS_PCOIP_IPADDR=10.20.30.40This property is required if you plan to use the PCoIP Secure Gatewaycomponent.
None
VDM_SERVER_SS_PCOIP_TCPPORT
The PCoIP Secure Gateway external TCP port number. This property issupported only when the security server is installed on Windows Server2008 R2 or later.For example: VDM_SERVER_SS_PCOIP_TCPPORT=4172This property is required if you plan to use the PCoIP Secure Gatewaycomponent.
None
VDM_SERVER_SS_PCOIP_UDPPORT
The PCoIP Secure Gateway external UDP port number. This property issupported only when the security server is installed on Windows Server2008 R2 or later.For example: VDM_SERVER_SS_PCOIP_UDPPORT=4172This property is required if you plan to use the PCoIP Secure Gatewaycomponent.
None
VDM_SERVER_SS_BSG_EXTURL
The Blast Secure Gateway external URL. The URL must contain theHTTPS protocol, an externally resolvable security server name, and portnumberFor example:VDM_SERVER_SS_BSG_EXTURL=https://view.companydomain.com:8443
The default port number is 8443. A Blast Secure Gateway must beinstalled on the security server to allow users to make Web connectionsto View desktops.
None
VDM_SERVER_SS_FORCE_IPSEC
Forces IPsec to be used between the security server and its paired ViewConnection Server instance.By default, an unattended installation and pairing of security server to aView Connection Server instance with IPsec disabled causes the pairingto fail.The default value of 1 forces IPsec pairing. Set this value to 0 to allowpairing without IPsec.
1
Prepare to Upgrade or Reinstall a Security ServerBefore you can upgrade or reinstall a security server instance, you must remove the current IPsec rules thatgovern communication between the security server and its paired View Connection Server instance. If youdo not take this step, the upgrade or reinstallation fails.
IMPORTANT This task pertains to View 5.1 and later security servers. If does not apply to View 5.0.x andearlier security servers.
By default, communication between a security server and its paired View Connection Server instance isgoverned by IPsec rules. When you upgrade or reinstall the security server and pair it again with the ViewConnection Server instance, a new set of IPsec rules must be established. If the existing IPsec rules are notremoved before you upgrade or reinstall, the pairing fails.
You must take this step when you upgrade or reinstall a security server and are using IPsec to protectcommunication between the security server and View Connection Server.
VMware Horizon View Installation
56 VMware, Inc.
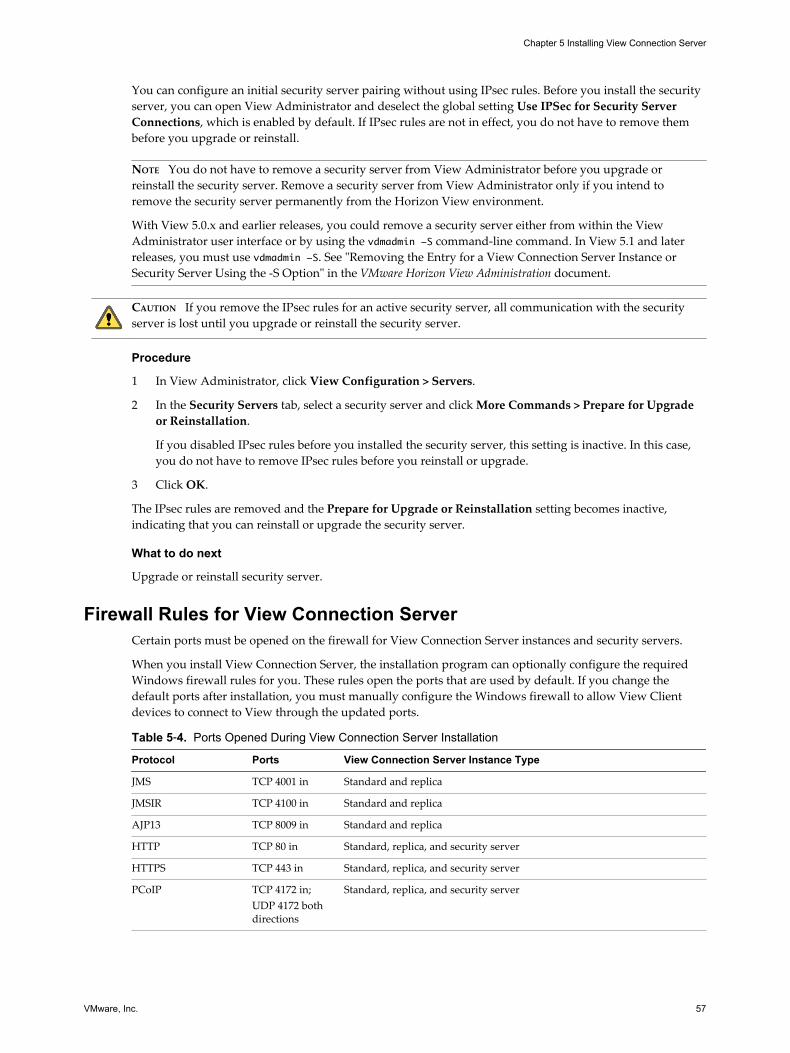
You can configure an initial security server pairing without using IPsec rules. Before you install the securityserver, you can open View Administrator and deselect the global setting Use IPSec for Security ServerConnections, which is enabled by default. If IPsec rules are not in effect, you do not have to remove thembefore you upgrade or reinstall.
NOTE You do not have to remove a security server from View Administrator before you upgrade orreinstall the security server. Remove a security server from View Administrator only if you intend toremove the security server permanently from the Horizon View environment.
With View 5.0.x and earlier releases, you could remove a security server either from within the ViewAdministrator user interface or by using the vdmadmin -S command-line command. In View 5.1 and laterreleases, you must use vdmadmin -S. See "Removing the Entry for a View Connection Server Instance orSecurity Server Using the -S Option" in the VMware Horizon View Administration document.
CAUTION If you remove the IPsec rules for an active security server, all communication with the securityserver is lost until you upgrade or reinstall the security server.
Procedure
1 In View Administrator, click View Configuration > Servers.
2 In the Security Servers tab, select a security server and click More Commands > Prepare for Upgradeor Reinstallation.
If you disabled IPsec rules before you installed the security server, this setting is inactive. In this case,you do not have to remove IPsec rules before you reinstall or upgrade.
3 Click OK.
The IPsec rules are removed and the Prepare for Upgrade or Reinstallation setting becomes inactive,indicating that you can reinstall or upgrade the security server.
What to do next
Upgrade or reinstall security server.
Firewall Rules for View Connection ServerCertain ports must be opened on the firewall for View Connection Server instances and security servers.
When you install View Connection Server, the installation program can optionally configure the requiredWindows firewall rules for you. These rules open the ports that are used by default. If you change thedefault ports after installation, you must manually configure the Windows firewall to allow View Clientdevices to connect to View through the updated ports.
Table 5‑4. Ports Opened During View Connection Server Installation
Protocol Ports View Connection Server Instance Type
JMS TCP 4001 in Standard and replica
JMSIR TCP 4100 in Standard and replica
AJP13 TCP 8009 in Standard and replica
HTTP TCP 80 in Standard, replica, and security server
HTTPS TCP 443 in Standard, replica, and security server
PCoIP TCP 4172 in;UDP 4172 bothdirections
Standard, replica, and security server
Chapter 5 Installing View Connection Server
VMware, Inc. 57
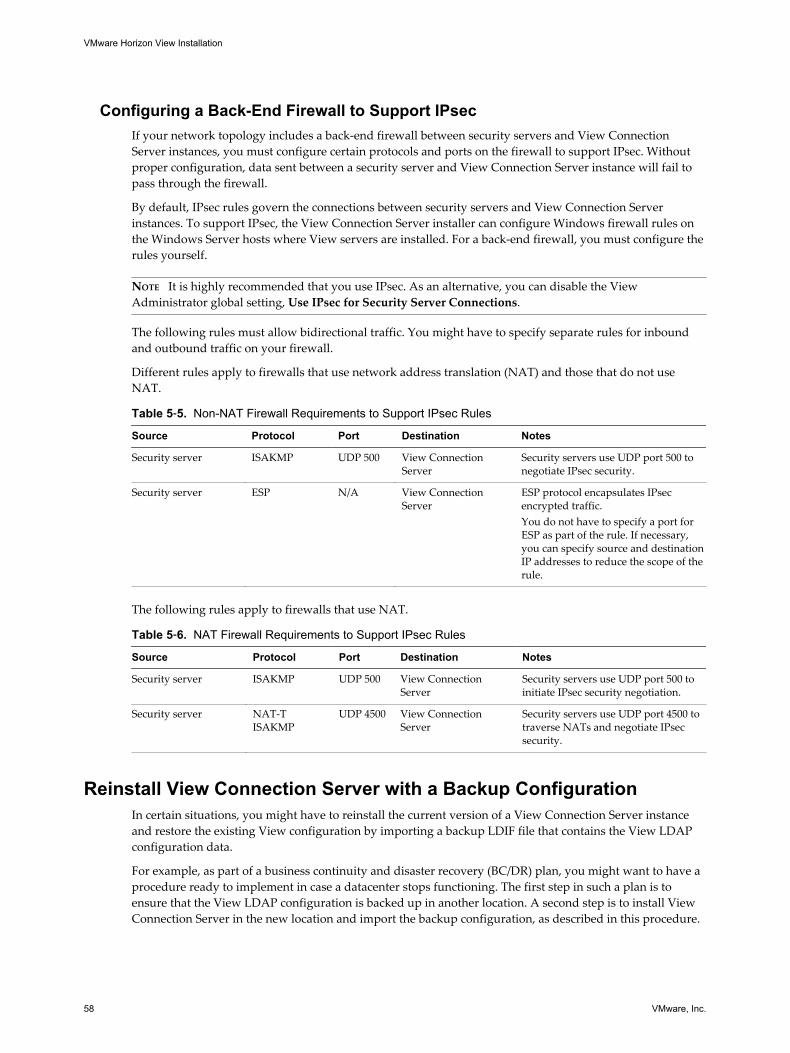
Configuring a Back-End Firewall to Support IPsecIf your network topology includes a back-end firewall between security servers and View ConnectionServer instances, you must configure certain protocols and ports on the firewall to support IPsec. Withoutproper configuration, data sent between a security server and View Connection Server instance will fail topass through the firewall.
By default, IPsec rules govern the connections between security servers and View Connection Serverinstances. To support IPsec, the View Connection Server installer can configure Windows firewall rules onthe Windows Server hosts where View servers are installed. For a back-end firewall, you must configure therules yourself.
NOTE It is highly recommended that you use IPsec. As an alternative, you can disable the ViewAdministrator global setting, Use IPsec for Security Server Connections.
The following rules must allow bidirectional traffic. You might have to specify separate rules for inboundand outbound traffic on your firewall.
Different rules apply to firewalls that use network address translation (NAT) and those that do not useNAT.
Table 5‑5. Non-NAT Firewall Requirements to Support IPsec Rules
Source Protocol Port Destination Notes
Security server ISAKMP UDP 500 View ConnectionServer
Security servers use UDP port 500 tonegotiate IPsec security.
Security server ESP N/A View ConnectionServer
ESP protocol encapsulates IPsecencrypted traffic.You do not have to specify a port forESP as part of the rule. If necessary,you can specify source and destinationIP addresses to reduce the scope of therule.
The following rules apply to firewalls that use NAT.
Table 5‑6. NAT Firewall Requirements to Support IPsec Rules
Source Protocol Port Destination Notes
Security server ISAKMP UDP 500 View ConnectionServer
Security servers use UDP port 500 toinitiate IPsec security negotiation.
Security server NAT-TISAKMP
UDP 4500 View ConnectionServer
Security servers use UDP port 4500 totraverse NATs and negotiate IPsecsecurity.
Reinstall View Connection Server with a Backup ConfigurationIn certain situations, you might have to reinstall the current version of a View Connection Server instanceand restore the existing View configuration by importing a backup LDIF file that contains the View LDAPconfiguration data.
For example, as part of a business continuity and disaster recovery (BC/DR) plan, you might want to have aprocedure ready to implement in case a datacenter stops functioning. The first step in such a plan is toensure that the View LDAP configuration is backed up in another location. A second step is to install ViewConnection Server in the new location and import the backup configuration, as described in this procedure.
VMware Horizon View Installation
58 VMware, Inc.
You might also use this procedure when you set up a second datacenter with the existing Viewconfiguration. Or you might use it if your View deployment contains only a single View Connection Serverinstance, and a problem occurs with that server.
You do not have to follow this procedure if you have multiple View Connection Server instances in areplicated group, and a single instance goes down. You can simply reinstall View Connection Server as areplicated instance. During the installation, you provide connection information to another ViewConnection Server instance, and View restores the View LDAP configuration from the other instance.
Prerequisites
n Verify that the View LDAP configuration was backed up to an encrypted LDIF file.
n Familiarize yourself with restoring a View LDAP configuration from an LDIF backup file by using thevdmimport command.
See "Backing Up and Restoring View Configuration Data" in the VMware Horizon View Administrationdocument.
n Familiarize yourself with the steps for installing a new View Connection Server instance. See “InstallView Connection Server with a New Configuration,” on page 40.
Procedure
1 Install View Connection Server with a new configuration.
2 Decrypt the encrypted LDIF file.
For example:
vdmimport -d -p mypassword
-f MyEncryptedexport.LDF > MyDecryptedexport.LDF
3 Import the decrypted LDIF file to restore the View LDAP configuration.
For example:
vdmimport -f MyDecryptedexport.LDF
NOTE At this stage, the View configuration is not yet accessible. View clients cannot access ViewConnection Server or connect to their desktops.
4 Uninstall the View Connection Server from the computer by using the Windows Add/RemovePrograms utility.
Do not uninstall the View LDAP configuration, called the AD LDS Instance VMwareVDMDS instance.You can use the Add/Remove Programs utility to verify that the AD LDS Instance VMwareVDMDSinstance was not removed from the Windows Server computer.
5 Reinstall View Connection Server.
At the installer prompt, accept the existing View LDAP directory.
What to do next
Configure View Connection Server and your View environment as you would after you install a ViewConnection Server instance with a new configuration.
Chapter 5 Installing View Connection Server
VMware, Inc. 59
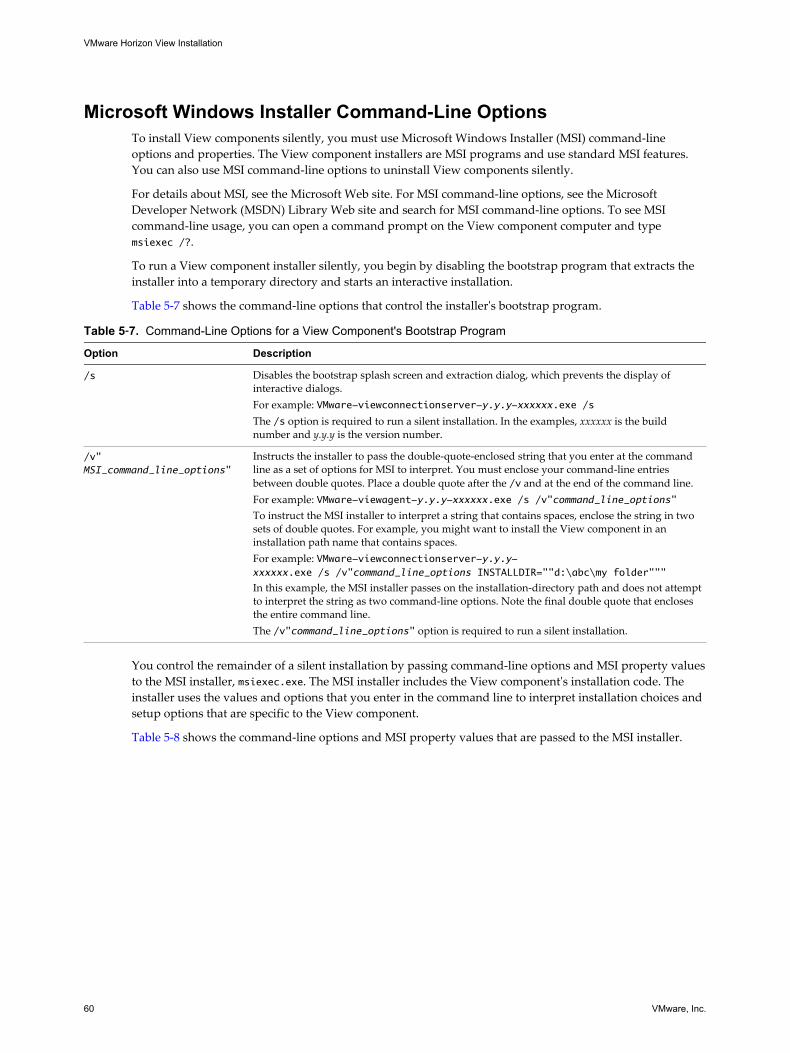
Microsoft Windows Installer Command-Line OptionsTo install View components silently, you must use Microsoft Windows Installer (MSI) command-lineoptions and properties. The View component installers are MSI programs and use standard MSI features.You can also use MSI command-line options to uninstall View components silently.
For details about MSI, see the Microsoft Web site. For MSI command-line options, see the MicrosoftDeveloper Network (MSDN) Library Web site and search for MSI command-line options. To see MSIcommand-line usage, you can open a command prompt on the View component computer and typemsiexec /?.
To run a View component installer silently, you begin by disabling the bootstrap program that extracts theinstaller into a temporary directory and starts an interactive installation.
Table 5-7 shows the command-line options that control the installer's bootstrap program.
Table 5‑7. Command-Line Options for a View Component's Bootstrap Program
Option Description
/s Disables the bootstrap splash screen and extraction dialog, which prevents the display ofinteractive dialogs.For example: VMware-viewconnectionserver-y.y.y-xxxxxx.exe /sThe /s option is required to run a silent installation. In the examples, xxxxxx is the buildnumber and y.y.y is the version number.
/v"MSI_command_line_options"
Instructs the installer to pass the double-quote-enclosed string that you enter at the commandline as a set of options for MSI to interpret. You must enclose your command-line entriesbetween double quotes. Place a double quote after the /v and at the end of the command line.For example: VMware-viewagent-y.y.y-xxxxxx.exe /s /v"command_line_options"To instruct the MSI installer to interpret a string that contains spaces, enclose the string in twosets of double quotes. For example, you might want to install the View component in aninstallation path name that contains spaces.For example: VMware-viewconnectionserver-y.y.y-xxxxxx.exe /s /v"command_line_options INSTALLDIR=""d:\abc\my folder"""
In this example, the MSI installer passes on the installation-directory path and does not attemptto interpret the string as two command-line options. Note the final double quote that enclosesthe entire command line.The /v"command_line_options" option is required to run a silent installation.
You control the remainder of a silent installation by passing command-line options and MSI property valuesto the MSI installer, msiexec.exe. The MSI installer includes the View component's installation code. Theinstaller uses the values and options that you enter in the command line to interpret installation choices andsetup options that are specific to the View component.
Table 5-8 shows the command-line options and MSI property values that are passed to the MSI installer.
VMware Horizon View Installation
60 VMware, Inc.
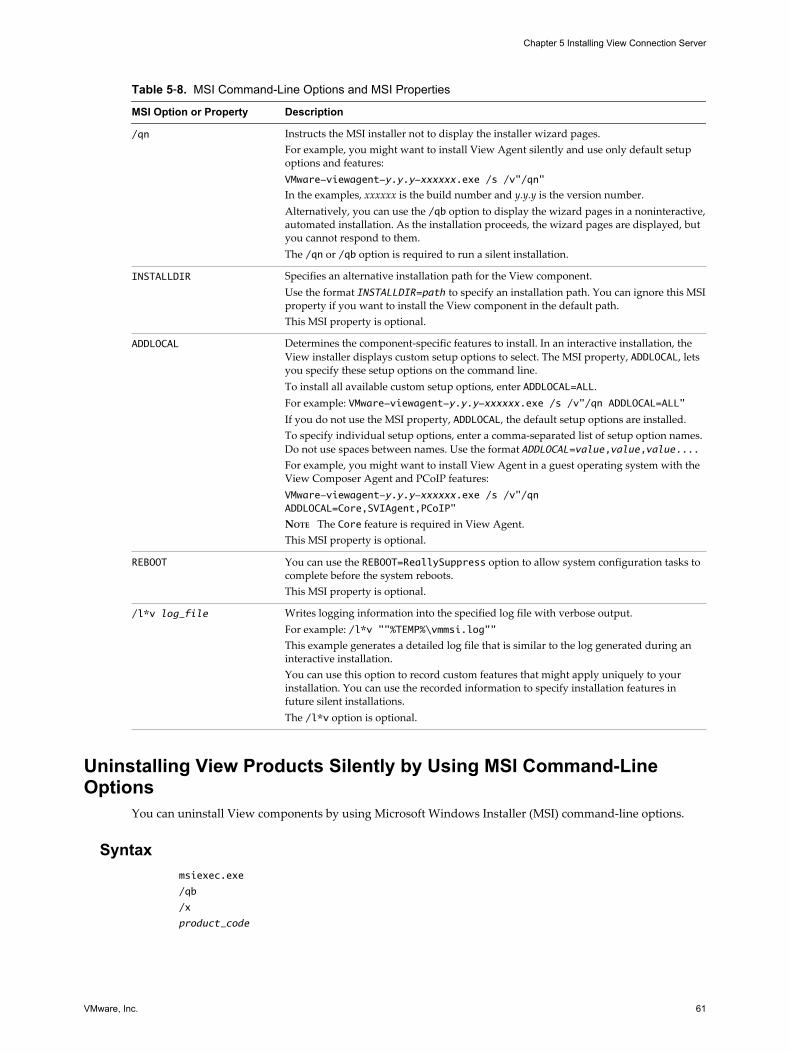
Table 5‑8. MSI Command-Line Options and MSI Properties
MSI Option or Property Description
/qn Instructs the MSI installer not to display the installer wizard pages.For example, you might want to install View Agent silently and use only default setupoptions and features:VMware-viewagent-y.y.y-xxxxxx.exe /s /v"/qn"
In the examples, xxxxxx is the build number and y.y.y is the version number.Alternatively, you can use the /qb option to display the wizard pages in a noninteractive,automated installation. As the installation proceeds, the wizard pages are displayed, butyou cannot respond to them.The /qn or /qb option is required to run a silent installation.
INSTALLDIR Specifies an alternative installation path for the View component.Use the format INSTALLDIR=path to specify an installation path. You can ignore this MSIproperty if you want to install the View component in the default path.This MSI property is optional.
ADDLOCAL Determines the component-specific features to install. In an interactive installation, theView installer displays custom setup options to select. The MSI property, ADDLOCAL, letsyou specify these setup options on the command line.To install all available custom setup options, enter ADDLOCAL=ALL.For example: VMware-viewagent-y.y.y-xxxxxx.exe /s /v"/qn ADDLOCAL=ALL"If you do not use the MSI property, ADDLOCAL, the default setup options are installed.To specify individual setup options, enter a comma-separated list of setup option names.Do not use spaces between names. Use the format ADDLOCAL=value,value,value....For example, you might want to install View Agent in a guest operating system with theView Composer Agent and PCoIP features:VMware-viewagent-y.y.y-xxxxxx.exe /s /v"/qnADDLOCAL=Core,SVIAgent,PCoIP"
NOTE The Core feature is required in View Agent.This MSI property is optional.
REBOOT You can use the REBOOT=ReallySuppress option to allow system configuration tasks tocomplete before the system reboots.This MSI property is optional.
/l*v log_file Writes logging information into the specified log file with verbose output.For example: /l*v ""%TEMP%\vmmsi.log""This example generates a detailed log file that is similar to the log generated during aninteractive installation.You can use this option to record custom features that might apply uniquely to yourinstallation. You can use the recorded information to specify installation features infuture silent installations.The /l*v option is optional.
Uninstalling View Products Silently by Using MSI Command-LineOptions
You can uninstall View components by using Microsoft Windows Installer (MSI) command-line options.
Syntax msiexec.exe
/qb
/x
product_code
Chapter 5 Installing View Connection Server
VMware, Inc. 61
OptionsThe /qb option displays the uninstall progress bar. To suppress displaying the uninstall progress bar,replace the /qb option with the /qn option.
The /x option uninstalls the View component.
The product_code string identifies the View component product files to the MSI uninstaller. You can find theproduct_code string by searching for ProductCode in the %TEMP%\vmmsi.log file that is created during theinstallation.
For information about MSI command-line options, see “Microsoft Windows Installer Command-LineOptions,” on page 60.
ExamplesUninstall a View Connection Server instance.
msiexec.exe /qb /x {D6184123-57B7-26E2-809B-090435A8C16A}
VMware Horizon View Installation
62 VMware, Inc.
Installing View Transfer Server 6View Transfer Server transfers data between local desktops and the datacenter during check in, check out,and replication. To install View Transfer Server, you install the software on a Windows Server virtualmachine, add View Transfer Server to your View Manager deployment, and configure the Transfer Serverrepository.
You must install and configure View Transfer Server if you deploy View Client with Local Mode on clientcomputers.
You must have a license to install View Transfer Server and use local desktops.
1 Install View Transfer Server on page 64View Transfer Server downloads system-image files, synchronizes data between local desktops andthe corresponding remote desktops in the datacenter, and transfers data when users check in andcheck out local desktops. You install View Transfer Server in a virtual machine that runs WindowsServer.
2 Add View Transfer Server to View Manager on page 65View Transfer Server works with View Connection Server to transfer files and data between localdesktops and the datacenter. Before View Transfer Server can perform these tasks, you must add it toyour View Manager deployment.
3 Configure the Transfer Server Repository on page 66The Transfer Server repository stores View Composer base images for linked-clone desktops that runin local mode. To give View Transfer Server access to the Transfer Server repository, you mustconfigure it in View Manager. If you do not use View Composer linked clones in local mode, you donot have to configure a Transfer Server repository.
4 Firewall Rules for View Transfer Server on page 67Certain incoming TCP ports must be opened on the firewall for View Transfer Server instances.
5 Installing View Transfer Server Silently on page 67You can install View Transfer Server silently by typing the installer filename and installation optionsat the command line. With silent installation, you can efficiently deploy View components in a largeenterprise.
VMware, Inc. 63

Install View Transfer ServerView Transfer Server downloads system-image files, synchronizes data between local desktops and thecorresponding remote desktops in the datacenter, and transfers data when users check in and check outlocal desktops. You install View Transfer Server in a virtual machine that runs Windows Server.
At runtime, View Transfer Server is deployed to an Apache Web Server. When you install View TransferServer, the installer configures Apache Web Server as a service on the virtual machine. The Apache serviceuses ports 80 and 443.
Prerequisites
n Verify that you have local administrator privileges on the Windows Server on which you will installView Transfer Server.
n Verify that your installation satisfies the View Transfer Server requirements described in “ViewTransfer Server Requirements,” on page 11.
n Verify that you have a license to install View Transfer Server and use local desktops.
n Verify that you did not manually add or remove PCI devices on the virtual machine on which you planto install View Transfer Server. If you add or remove PCI devices, View might be unable to discoverhot-added devices, which might cause data transfer operations to fail.
n Familiarize yourself with the network ports that must be opened on the Windows Firewall for ViewConnection Server instances. See “Firewall Rules for View Transfer Server,” on page 67.
Procedure
1 Download the View Connection Server installer file from the VMware product page at http://www.vmware.com/products/ to the Windows Server computer.
The installer filename is VMware-viewconnectionserver-x86_64-y.y.y-xxxxxx.exe, where xxxxxx is thebuild number and y.y.y is the version number.
2 To start the installation program, double-click the installer file.
3 Accept the VMware license terms.
4 Accept or change the destination folder.
5 Select View Transfer Server.
6 Configure the Apache Web Server to which View Transfer Server is deployed.
You can accept the default values for the network domain, Apache Server name, and administrator'semail address that are provided by the installer.
7 Choose how to configure the Windows Firewall service.
Option Action
Configure Windows Firewallautomatically
Let the installer configure Windows Firewall to allow the requirednetwork connections.
Do not configure Windows Firewall Configure the Windows firewall rules manually.
8 Complete the installation program to install View Transfer Server.
The VMware View Transfer Server, View Transfer Server Control Service, and VMware View FrameworkComponent services are installed and started on the virtual machine.
VMware Horizon View Installation
64 VMware, Inc.
What to do next
In View Administrator, add View Transfer Server to your View Manager deployment.
Add View Transfer Server to View ManagerView Transfer Server works with View Connection Server to transfer files and data between local desktopsand the datacenter. Before View Transfer Server can perform these tasks, you must add it to your ViewManager deployment.
You can add multiple View Transfer Server instances to View Manager. The View Transfer Server instancesaccess one common Transfer Server repository. They share the transfer workload for the local desktops thatare managed by a View Connection Server instance or by a group of replicated View Connection Serverinstances.
NOTE When View Transfer Server is added to View Manager, its Distributed Resource Scheduler (DRS)automation policy is set to Manual, which effectively disables DRS.
Prerequisites
n Verify that View Transfer Server is installed on a Windows Server virtual machine.
n Verify that vCenter Server is added to View Manager. The View Configuration > Servers page in ViewAdministrator displays vCenter Server instances that are added to View Manager.
n If View Transfer Server is version 5.1 or later, and you plan to use linked-clone desktops in local mode,verify that all replicated View Connection Server instances in the View configuration are version 5.1 orlater. If an earlier version of View Connection Server sends a request to publish a base image to theTransfer Server repository, View Transfer Server cannot perform the publish operation.
Procedure
1 In View Administrator, click View Configuration > Servers.
2 Click the Transfer Servers tab and click Add.
3 In the Add Transfer Server wizard, select the vCenter Server instance that manages the View TransferServer virtual machine and click Next.
4 Select the virtual machine where View Transfer Server is installed and click Finish.
View Connection Server reconfigures the virtual machine with four SCSI controllers. The multiple SCSIcontrollers allow View Transfer Server to perform an increased number of disk transfers concurrently.
In View Administrator, the View Transfer Server instance appears in the Transfer Servers panel. If noTransfer Server repository is configured, the View Transfer Server status changes from Pending to NoTransfer Server Repository Configured. If a Transfer Server repository is configured, the status changesfrom Pending to Initializing Transfer Server Repository to Ready.
This process can take several minutes. You can click the refresh button in View Administrator to check thecurrent status.
When the View Transfer Server instance is added to View Manager, the Apache service is started on theView Transfer Server virtual machine.
CAUTION If your View Transfer Server virtual machine is an earlier version than hardware version 7, youmust configure the static IP address on the View Transfer Server virtual machine after you add ViewTransfer Server to View Manager.
When multiple SCSI controllers are added to the View Transfer Server virtual machine, Windows removesthe static IP address and reconfigures the virtual machine to use DHCP. After the virtual machine restarts,you must re-enter the static IP address in the virtual machine.
Chapter 6 Installing View Transfer Server
VMware, Inc. 65
Configure the Transfer Server RepositoryThe Transfer Server repository stores View Composer base images for linked-clone desktops that run inlocal mode. To give View Transfer Server access to the Transfer Server repository, you must configure it inView Manager. If you do not use View Composer linked clones in local mode, you do not have to configurea Transfer Server repository.
If View Transfer Server is configured in View Manager before you configure the Transfer Server repository,View Transfer Server validates the location of the Transfer Server repository during the configuration.
If you plan to add multiple View Transfer Server instances to this View Manager deployment, configure theTransfer Server repository on a network share. Other View Transfer Server instances cannot access aTransfer Server repository that is configured on a local drive on one View Transfer Server instance.
Make sure that the Transfer Server repository is large enough to store your View Composer-generated baseimages. A base image can be several gigabytes in size.
If you configure a remote Transfer Server repository on a network share, you must provide a user ID withcredentials to access the network share. As a best practice, to enhance the security of access to the TransferServer repository, make sure that you restrict network access for the repository to View administrators.
Prerequisites
n Verify that View Transfer Server is installed on a Windows Server virtual machine.
n Verify that View Transfer Server is added to View Manager. See “Add View Transfer Server to ViewManager,” on page 65.
NOTE Adding View Transfer Server to View Manager before you configure the Transfer Serverrepository is a best practice, not a requirement.
Procedure
1 Configure a path and folder for the Transfer Server repository.
The Transfer Server repository can be on a local drive or a network share.
Option Action
Local Transfer Server repository On the virtual machine where View Transfer Server is installed, create apath and folder for the Transfer Server repository.For example: C:\TransferRepository\
Remote Transfer Server repository Configure a UNC path for the network share.For example: \\server.domain.com\TransferRepository\All View Transfer Server instances that you add to this View Managerdeployment must have network access to the shared drive.
2 In View Administrator, click View Configuration > Servers.
3 Put all View Transfer Server instances into maintenance mode.
a In the Transfer Servers panel, select a View Transfer Server instance.
b Click Enter Maintenance Mode and click OK.
The View Transfer Server status changes to Maintenance mode.
c Repeat Step 3a and Step 3b for each instance.
When all View Transfer Server instances are in maintenance mode, current transfer operations arestopped.
4 In the General panel on the Transfer Server repository page, click Edit.
VMware Horizon View Installation
66 VMware, Inc.

5 Type the Transfer Server repository location and other information.
Option Description
Network share n Path. Type the UNC path that you configured.n User name. Type the user ID of an administrator with credentials to
access the network share.n Password. Type the administrator password.n Domain. Type the domain name of the network share in NetBIOS
format. Do not use the .com suffix.
Local filesystem Type the path that you configured on the local View Transfer Servervirtual machine.
6 Click OK.
If the repository network path or local drive is incorrect, the Edit Transfer Server Repository dialogdisplays an error message and does not let you configure the location. You must type a valid location.
7 On the View Configuration > Servers page, select the View Transfer Server instance and click ExitMaintenance Mode.
The View Transfer Server status changes to Ready.
Firewall Rules for View Transfer ServerCertain incoming TCP ports must be opened on the firewall for View Transfer Server instances.
The installation program can optionally configure the required Windows firewall rules for you. These rulesopen the ports that are used by default. If you change the default ports after installation, you must manuallyconfigure the Windows firewall to allow View Client devices to connect to View Transfer Server through theupdated ports.
Table 6-1 lists the incoming TCP ports that must be opened on the firewall for View Transfer Serverinstances.
Table 6‑1. TCP Ports for View Transfer Server Instances
Protocol Ports
HTTP 80
HTTPS 443
Installing View Transfer Server SilentlyYou can install View Transfer Server silently by typing the installer filename and installation options at thecommand line. With silent installation, you can efficiently deploy View components in a large enterprise.
Set Group Policies to Allow Silent Installation of View Transfer ServerBefore you can install View Transfer Server silently, you must configure Microsoft Windows group policiesto allow installation with elevated privileges.
You must set Windows Installer group policies for computers and for users on the local computer.
Prerequisites
Verify that you have local administrator privileges on the Windows Server computer on which you willinstall View Transfer Server.
Chapter 6 Installing View Transfer Server
VMware, Inc. 67
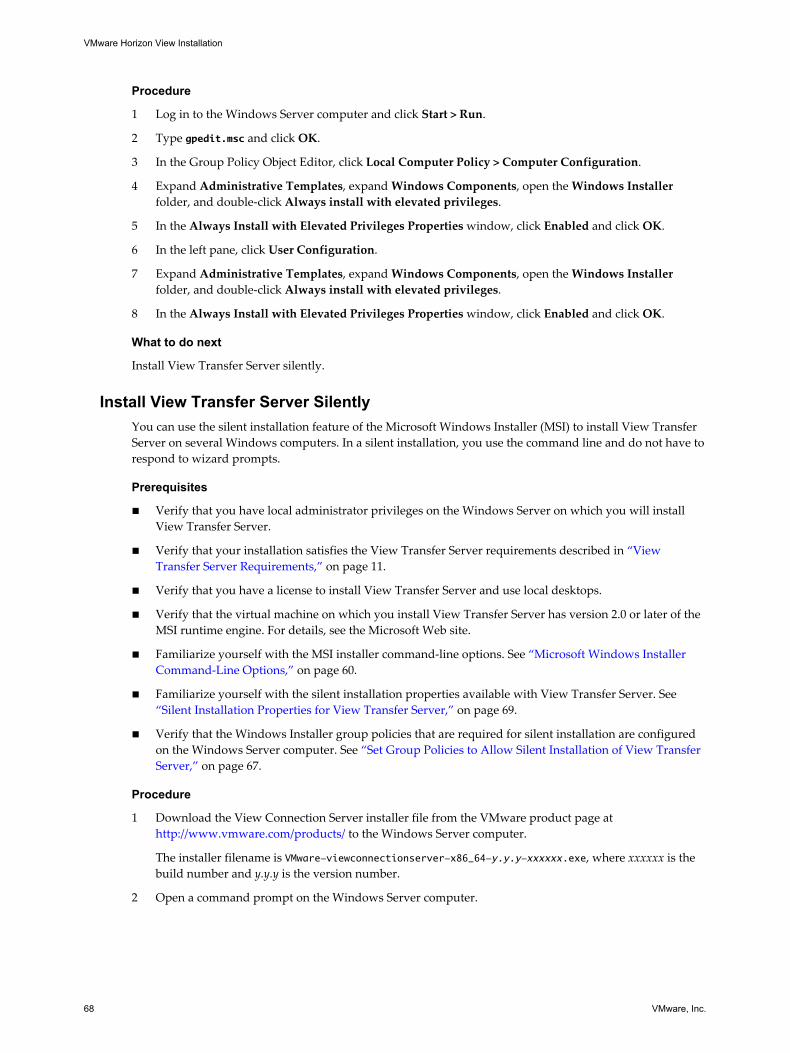
Procedure
1 Log in to the Windows Server computer and click Start > Run.
2 Type gpedit.msc and click OK.
3 In the Group Policy Object Editor, click Local Computer Policy > Computer Configuration.
4 Expand Administrative Templates, expand Windows Components, open the Windows Installerfolder, and double-click Always install with elevated privileges.
5 In the Always Install with Elevated Privileges Properties window, click Enabled and click OK.
6 In the left pane, click User Configuration.
7 Expand Administrative Templates, expand Windows Components, open the Windows Installerfolder, and double-click Always install with elevated privileges.
8 In the Always Install with Elevated Privileges Properties window, click Enabled and click OK.
What to do next
Install View Transfer Server silently.
Install View Transfer Server SilentlyYou can use the silent installation feature of the Microsoft Windows Installer (MSI) to install View TransferServer on several Windows computers. In a silent installation, you use the command line and do not have torespond to wizard prompts.
Prerequisites
n Verify that you have local administrator privileges on the Windows Server on which you will installView Transfer Server.
n Verify that your installation satisfies the View Transfer Server requirements described in “ViewTransfer Server Requirements,” on page 11.
n Verify that you have a license to install View Transfer Server and use local desktops.
n Verify that the virtual machine on which you install View Transfer Server has version 2.0 or later of theMSI runtime engine. For details, see the Microsoft Web site.
n Familiarize yourself with the MSI installer command-line options. See “Microsoft Windows InstallerCommand-Line Options,” on page 60.
n Familiarize yourself with the silent installation properties available with View Transfer Server. See “Silent Installation Properties for View Transfer Server,” on page 69.
n Verify that the Windows Installer group policies that are required for silent installation are configuredon the Windows Server computer. See “Set Group Policies to Allow Silent Installation of View TransferServer,” on page 67.
Procedure
1 Download the View Connection Server installer file from the VMware product page at http://www.vmware.com/products/ to the Windows Server computer.
The installer filename is VMware-viewconnectionserver-x86_64-y.y.y-xxxxxx.exe, where xxxxxx is thebuild number and y.y.y is the version number.
2 Open a command prompt on the Windows Server computer.
VMware Horizon View Installation
68 VMware, Inc.
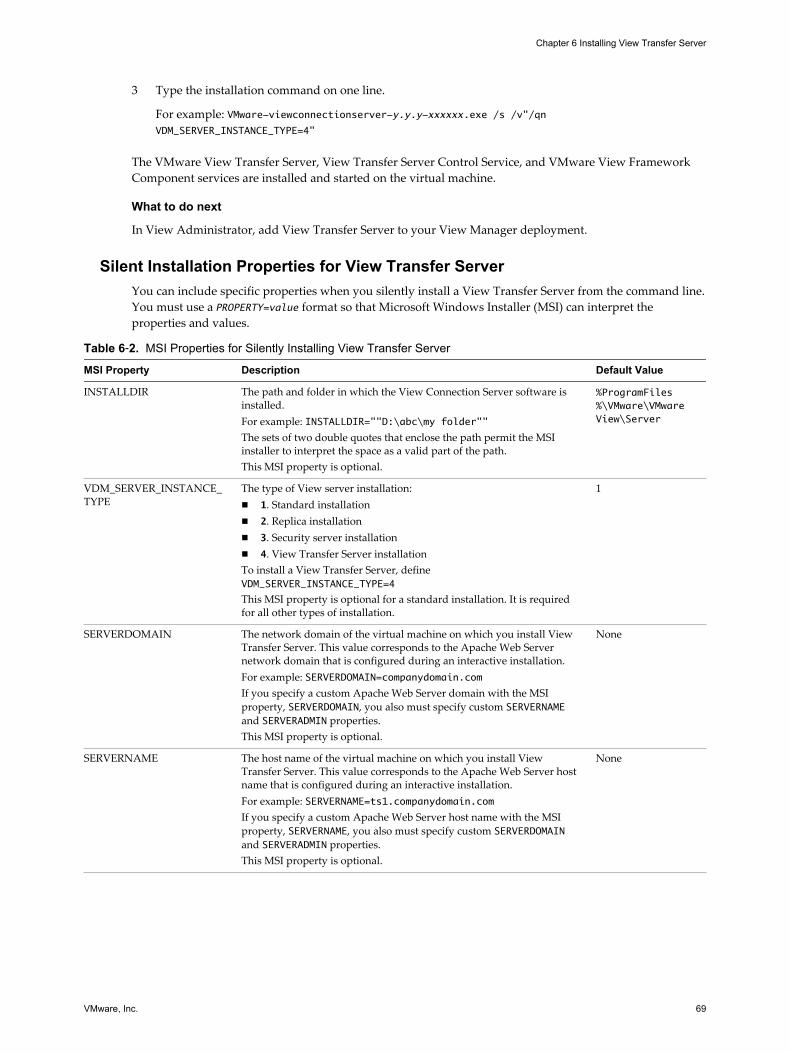
3 Type the installation command on one line.
For example: VMware-viewconnectionserver-y.y.y-xxxxxx.exe /s /v"/qnVDM_SERVER_INSTANCE_TYPE=4"
The VMware View Transfer Server, View Transfer Server Control Service, and VMware View FrameworkComponent services are installed and started on the virtual machine.
What to do next
In View Administrator, add View Transfer Server to your View Manager deployment.
Silent Installation Properties for View Transfer ServerYou can include specific properties when you silently install a View Transfer Server from the command line.You must use a PROPERTY=value format so that Microsoft Windows Installer (MSI) can interpret theproperties and values.
Table 6‑2. MSI Properties for Silently Installing View Transfer Server
MSI Property Description Default Value
INSTALLDIR The path and folder in which the View Connection Server software isinstalled.For example: INSTALLDIR=""D:\abc\my folder""The sets of two double quotes that enclose the path permit the MSIinstaller to interpret the space as a valid part of the path.This MSI property is optional.
%ProgramFiles%\VMware\VMwareView\Server
VDM_SERVER_INSTANCE_TYPE
The type of View server installation:n 1. Standard installationn 2. Replica installationn 3. Security server installationn 4. View Transfer Server installationTo install a View Transfer Server, defineVDM_SERVER_INSTANCE_TYPE=4
This MSI property is optional for a standard installation. It is requiredfor all other types of installation.
1
SERVERDOMAIN The network domain of the virtual machine on which you install ViewTransfer Server. This value corresponds to the Apache Web Servernetwork domain that is configured during an interactive installation.For example: SERVERDOMAIN=companydomain.comIf you specify a custom Apache Web Server domain with the MSIproperty, SERVERDOMAIN, you also must specify custom SERVERNAMEand SERVERADMIN properties.This MSI property is optional.
None
SERVERNAME The host name of the virtual machine on which you install ViewTransfer Server. This value corresponds to the Apache Web Server hostname that is configured during an interactive installation.For example: SERVERNAME=ts1.companydomain.comIf you specify a custom Apache Web Server host name with the MSIproperty, SERVERNAME, you also must specify custom SERVERDOMAINand SERVERADMIN properties.This MSI property is optional.
None
Chapter 6 Installing View Transfer Server
VMware, Inc. 69

Table 6‑2. MSI Properties for Silently Installing View Transfer Server (Continued)
MSI Property Description Default Value
SERVERADMIN The email address of the administrator of Apache Web Server that isconfigured with View Transfer Server.For example: [email protected] you specify a custom Apache Web Server administrator with the MSIproperty, SERVERADMIN, you also must specify custom SERVERDOMAINand SERVERNAME properties.This MSI property is optional.
None
FWCHOICE The MSI property that determines whether to configure a firewall forthe View Connection Server instance.A value of 1 configures a firewall. A value of 2 does not configure afirewall.For example: FWCHOICE=1This MSI property is optional.
1
VMware Horizon View Installation
70 VMware, Inc.
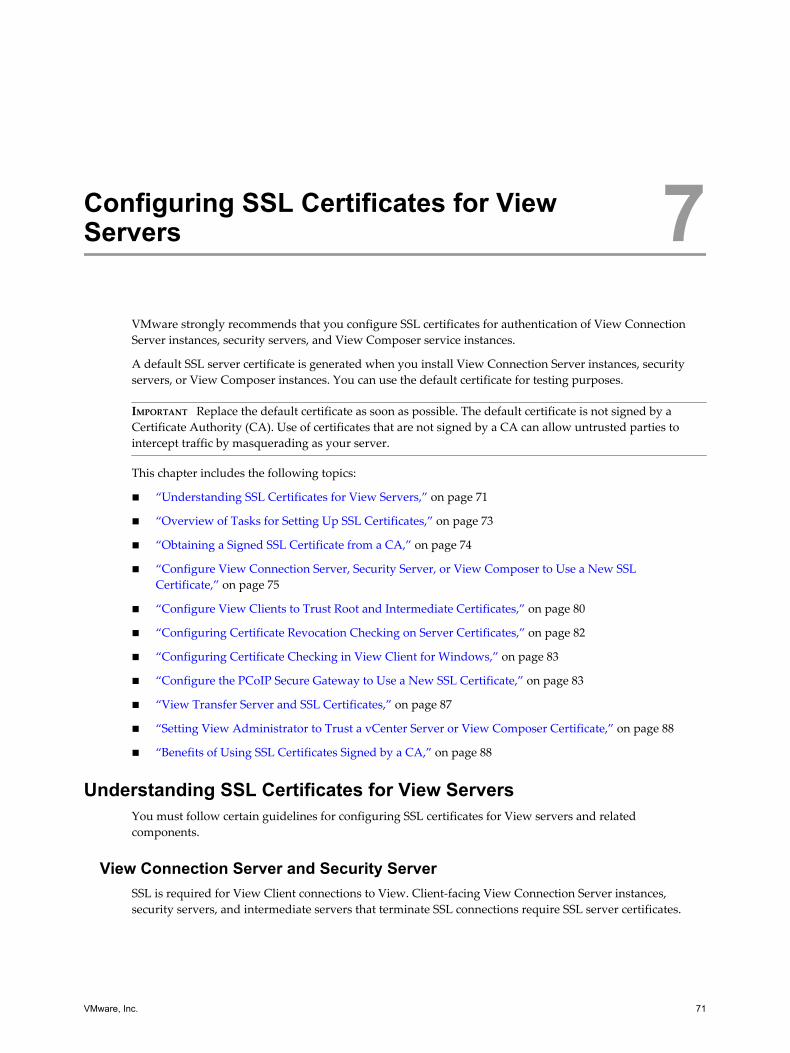
Configuring SSL Certificates for ViewServers 7
VMware strongly recommends that you configure SSL certificates for authentication of View ConnectionServer instances, security servers, and View Composer service instances.
A default SSL server certificate is generated when you install View Connection Server instances, securityservers, or View Composer instances. You can use the default certificate for testing purposes.
IMPORTANT Replace the default certificate as soon as possible. The default certificate is not signed by aCertificate Authority (CA). Use of certificates that are not signed by a CA can allow untrusted parties tointercept traffic by masquerading as your server.
This chapter includes the following topics:
n “Understanding SSL Certificates for View Servers,” on page 71
n “Overview of Tasks for Setting Up SSL Certificates,” on page 73
n “Obtaining a Signed SSL Certificate from a CA,” on page 74
n “Configure View Connection Server, Security Server, or View Composer to Use a New SSLCertificate,” on page 75
n “Configure View Clients to Trust Root and Intermediate Certificates,” on page 80
n “Configuring Certificate Revocation Checking on Server Certificates,” on page 82
n “Configuring Certificate Checking in View Client for Windows,” on page 83
n “Configure the PCoIP Secure Gateway to Use a New SSL Certificate,” on page 83
n “View Transfer Server and SSL Certificates,” on page 87
n “Setting View Administrator to Trust a vCenter Server or View Composer Certificate,” on page 88
n “Benefits of Using SSL Certificates Signed by a CA,” on page 88
Understanding SSL Certificates for View ServersYou must follow certain guidelines for configuring SSL certificates for View servers and relatedcomponents.
View Connection Server and Security ServerSSL is required for View Client connections to View. Client-facing View Connection Server instances,security servers, and intermediate servers that terminate SSL connections require SSL server certificates.
VMware, Inc. 71
By default, when you install View Connection Server or security server, the installation generates a self-signed certificate for the View server. However, the installation uses an existing certificate in the followingcases:
n If a valid certificate with a Friendly name of vdm already exists in the Windows Certificate Store
n If you upgrade to View 5.1 or later from an earlier release, and a valid keystore file is configured on theWindows Server computer. The installation extracts the keys and certificates and imports them into theWindows Certificate Store.
vCenter Server and View ComposerBefore you add vCenter Server and View Composer to View Manager in a production environment, makesure that vCenter Server and View Composer use certificates that are signed by a CA.
For information about replacing the default certificate for vCenter Server, see "Replacing vCenter ServerCertificates" on the VMware Technicap Papers site at http://www.vmware.com/resources/techresources/.
If you install vCenter Server and View Composer on the same Windows Server host, they can use the sameSSL certificate, but you must configure the certificate separately for each component.
PCoIP Secure GatewayTo comply with industry or jurisdiction security regulations, you can replace the default SSL certificate thatis generated by the PCoIP Secure Gateway (PSG) service with a certificate that is signed by a CA.Configuring the PSG service to use a CA-signed certificate is highly recommended, particularly fordeployments that require you to use security scanners to pass compliance testing. See “Configure the PCoIPSecure Gateway to Use a New SSL Certificate,” on page 83.
Blast Secure GatewayBy default, the Blast Secure Gateway (BSG) uses the SSL certificate that is configured for the ViewConnection Server instance or security server on which the BSG is running. If you replace the default, self-signed certificate for a View server with a CA-signed certificate, the BSG also uses the CA-signed certificate.
View Transfer ServerYou do not have to configure SSL certificates for View Transfer Server if you are installing View 5.1 or later.
A default, self-signed certificate is installed with View Transfer Server that View Connection Server uses tohandle secondary connections to View Clients. See “View Transfer Server and SSL Certificates,” onpage 87.
SAML 2.0 AuthenticatorVMware Horizon Suite uses SAML 2.0 authenticators to provide Web-based authentication andauthorization across security domains. If you want View to delegate authentication to the Horizon Suite,you can configure View to accept SAML 2.0 authenticated sessions from Horizon Suite. When HorizonApplication Manager is configured to support View, Horizon users can connect to View desktops byselecting desktop icons on the Horizon User Portal.
In View Administrator, you can configure SAML 2.0 authenticators for use with View Connection Serverinstances.
Before you add a SAML 2.0 authenticator in View Administrator, make sure that the SAML 2.0authenticator uses a certificate that is signed by a CA.
VMware Horizon View Installation
72 VMware, Inc.
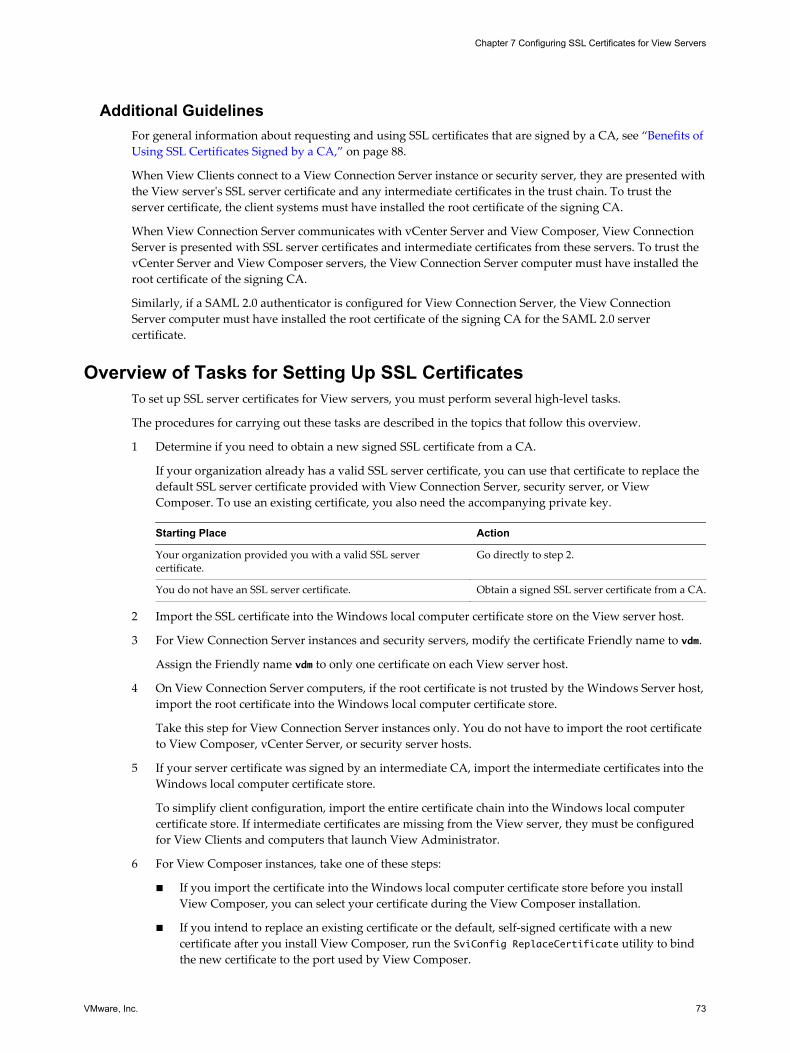
Additional GuidelinesFor general information about requesting and using SSL certificates that are signed by a CA, see “Benefits ofUsing SSL Certificates Signed by a CA,” on page 88.
When View Clients connect to a View Connection Server instance or security server, they are presented withthe View server's SSL server certificate and any intermediate certificates in the trust chain. To trust theserver certificate, the client systems must have installed the root certificate of the signing CA.
When View Connection Server communicates with vCenter Server and View Composer, View ConnectionServer is presented with SSL server certificates and intermediate certificates from these servers. To trust thevCenter Server and View Composer servers, the View Connection Server computer must have installed theroot certificate of the signing CA.
Similarly, if a SAML 2.0 authenticator is configured for View Connection Server, the View ConnectionServer computer must have installed the root certificate of the signing CA for the SAML 2.0 servercertificate.
Overview of Tasks for Setting Up SSL CertificatesTo set up SSL server certificates for View servers, you must perform several high-level tasks.
The procedures for carrying out these tasks are described in the topics that follow this overview.
1 Determine if you need to obtain a new signed SSL certificate from a CA.
If your organization already has a valid SSL server certificate, you can use that certificate to replace thedefault SSL server certificate provided with View Connection Server, security server, or ViewComposer. To use an existing certificate, you also need the accompanying private key.
Starting Place Action
Your organization provided you with a valid SSL servercertificate.
Go directly to step 2.
You do not have an SSL server certificate. Obtain a signed SSL server certificate from a CA.
2 Import the SSL certificate into the Windows local computer certificate store on the View server host.
3 For View Connection Server instances and security servers, modify the certificate Friendly name to vdm.
Assign the Friendly name vdm to only one certificate on each View server host.
4 On View Connection Server computers, if the root certificate is not trusted by the Windows Server host,import the root certificate into the Windows local computer certificate store.
Take this step for View Connection Server instances only. You do not have to import the root certificateto View Composer, vCenter Server, or security server hosts.
5 If your server certificate was signed by an intermediate CA, import the intermediate certificates into theWindows local computer certificate store.
To simplify client configuration, import the entire certificate chain into the Windows local computercertificate store. If intermediate certificates are missing from the View server, they must be configuredfor View Clients and computers that launch View Administrator.
6 For View Composer instances, take one of these steps:
n If you import the certificate into the Windows local computer certificate store before you installView Composer, you can select your certificate during the View Composer installation.
n If you intend to replace an existing certificate or the default, self-signed certificate with a newcertificate after you install View Composer, run the SviConfig ReplaceCertificate utility to bindthe new certificate to the port used by View Composer.
Chapter 7 Configuring SSL Certificates for View Servers
VMware, Inc. 73
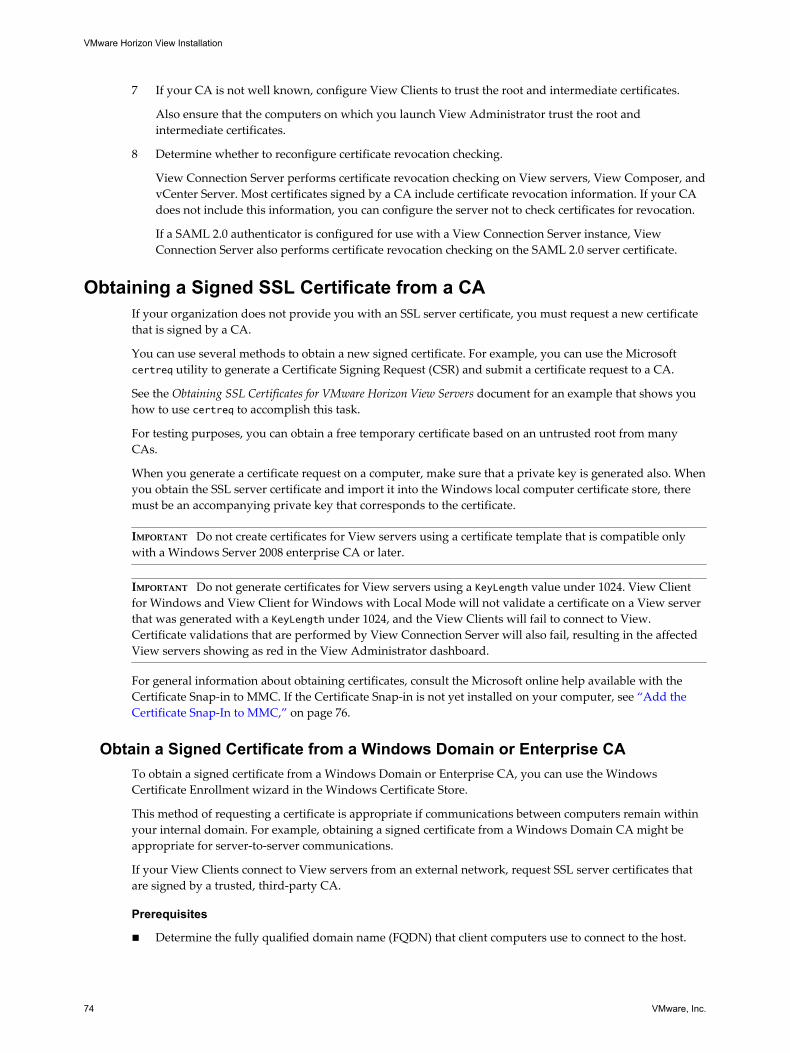
7 If your CA is not well known, configure View Clients to trust the root and intermediate certificates.
Also ensure that the computers on which you launch View Administrator trust the root andintermediate certificates.
8 Determine whether to reconfigure certificate revocation checking.
View Connection Server performs certificate revocation checking on View servers, View Composer, andvCenter Server. Most certificates signed by a CA include certificate revocation information. If your CAdoes not include this information, you can configure the server not to check certificates for revocation.
If a SAML 2.0 authenticator is configured for use with a View Connection Server instance, ViewConnection Server also performs certificate revocation checking on the SAML 2.0 server certificate.
Obtaining a Signed SSL Certificate from a CAIf your organization does not provide you with an SSL server certificate, you must request a new certificatethat is signed by a CA.
You can use several methods to obtain a new signed certificate. For example, you can use the Microsoftcertreq utility to generate a Certificate Signing Request (CSR) and submit a certificate request to a CA.
See the Obtaining SSL Certificates for VMware Horizon View Servers document for an example that shows youhow to use certreq to accomplish this task.
For testing purposes, you can obtain a free temporary certificate based on an untrusted root from manyCAs.
When you generate a certificate request on a computer, make sure that a private key is generated also. Whenyou obtain the SSL server certificate and import it into the Windows local computer certificate store, theremust be an accompanying private key that corresponds to the certificate.
IMPORTANT Do not create certificates for View servers using a certificate template that is compatible onlywith a Windows Server 2008 enterprise CA or later.
IMPORTANT Do not generate certificates for View servers using a KeyLength value under 1024. View Clientfor Windows and View Client for Windows with Local Mode will not validate a certificate on a View serverthat was generated with a KeyLength under 1024, and the View Clients will fail to connect to View.Certificate validations that are performed by View Connection Server will also fail, resulting in the affectedView servers showing as red in the View Administrator dashboard.
For general information about obtaining certificates, consult the Microsoft online help available with theCertificate Snap-in to MMC. If the Certificate Snap-in is not yet installed on your computer, see “Add theCertificate Snap-In to MMC,” on page 76.
Obtain a Signed Certificate from a Windows Domain or Enterprise CATo obtain a signed certificate from a Windows Domain or Enterprise CA, you can use the WindowsCertificate Enrollment wizard in the Windows Certificate Store.
This method of requesting a certificate is appropriate if communications between computers remain withinyour internal domain. For example, obtaining a signed certificate from a Windows Domain CA might beappropriate for server-to-server communications.
If your View Clients connect to View servers from an external network, request SSL server certificates thatare signed by a trusted, third-party CA.
Prerequisites
n Determine the fully qualified domain name (FQDN) that client computers use to connect to the host.
VMware Horizon View Installation
74 VMware, Inc.
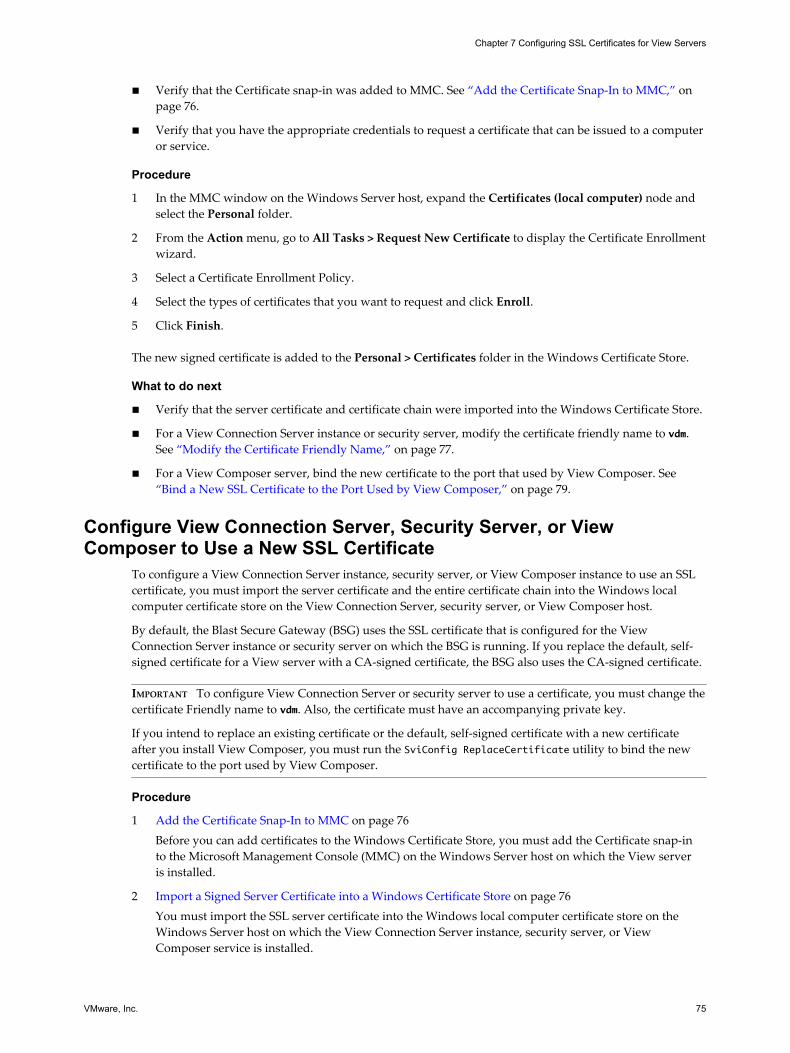
n Verify that the Certificate snap-in was added to MMC. See “Add the Certificate Snap-In to MMC,” onpage 76.
n Verify that you have the appropriate credentials to request a certificate that can be issued to a computeror service.
Procedure
1 In the MMC window on the Windows Server host, expand the Certificates (local computer) node andselect the Personal folder.
2 From the Action menu, go to All Tasks > Request New Certificate to display the Certificate Enrollmentwizard.
3 Select a Certificate Enrollment Policy.
4 Select the types of certificates that you want to request and click Enroll.
5 Click Finish.
The new signed certificate is added to the Personal > Certificates folder in the Windows Certificate Store.
What to do next
n Verify that the server certificate and certificate chain were imported into the Windows Certificate Store.
n For a View Connection Server instance or security server, modify the certificate friendly name to vdm.See “Modify the Certificate Friendly Name,” on page 77.
n For a View Composer server, bind the new certificate to the port that used by View Composer. See “Bind a New SSL Certificate to the Port Used by View Composer,” on page 79.
Configure View Connection Server, Security Server, or ViewComposer to Use a New SSL Certificate
To configure a View Connection Server instance, security server, or View Composer instance to use an SSLcertificate, you must import the server certificate and the entire certificate chain into the Windows localcomputer certificate store on the View Connection Server, security server, or View Composer host.
By default, the Blast Secure Gateway (BSG) uses the SSL certificate that is configured for the ViewConnection Server instance or security server on which the BSG is running. If you replace the default, self-signed certificate for a View server with a CA-signed certificate, the BSG also uses the CA-signed certificate.
IMPORTANT To configure View Connection Server or security server to use a certificate, you must change thecertificate Friendly name to vdm. Also, the certificate must have an accompanying private key.
If you intend to replace an existing certificate or the default, self-signed certificate with a new certificateafter you install View Composer, you must run the SviConfig ReplaceCertificate utility to bind the newcertificate to the port used by View Composer.
Procedure
1 Add the Certificate Snap-In to MMC on page 76Before you can add certificates to the Windows Certificate Store, you must add the Certificate snap-into the Microsoft Management Console (MMC) on the Windows Server host on which the View serveris installed.
2 Import a Signed Server Certificate into a Windows Certificate Store on page 76You must import the SSL server certificate into the Windows local computer certificate store on theWindows Server host on which the View Connection Server instance, security server, or ViewComposer service is installed.
Chapter 7 Configuring SSL Certificates for View Servers
VMware, Inc. 75
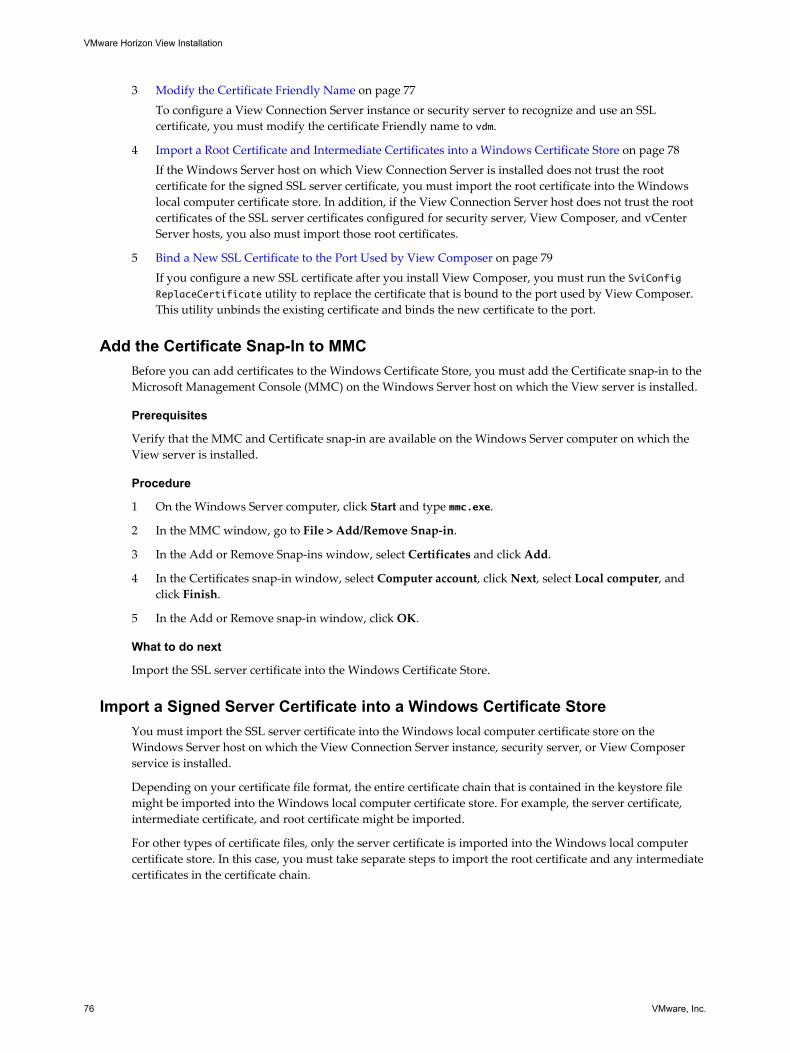
3 Modify the Certificate Friendly Name on page 77To configure a View Connection Server instance or security server to recognize and use an SSLcertificate, you must modify the certificate Friendly name to vdm.
4 Import a Root Certificate and Intermediate Certificates into a Windows Certificate Store on page 78If the Windows Server host on which View Connection Server is installed does not trust the rootcertificate for the signed SSL server certificate, you must import the root certificate into the Windowslocal computer certificate store. In addition, if the View Connection Server host does not trust the rootcertificates of the SSL server certificates configured for security server, View Composer, and vCenterServer hosts, you also must import those root certificates.
5 Bind a New SSL Certificate to the Port Used by View Composer on page 79If you configure a new SSL certificate after you install View Composer, you must run the SviConfigReplaceCertificate utility to replace the certificate that is bound to the port used by View Composer.This utility unbinds the existing certificate and binds the new certificate to the port.
Add the Certificate Snap-In to MMCBefore you can add certificates to the Windows Certificate Store, you must add the Certificate snap-in to theMicrosoft Management Console (MMC) on the Windows Server host on which the View server is installed.
Prerequisites
Verify that the MMC and Certificate snap-in are available on the Windows Server computer on which theView server is installed.
Procedure
1 On the Windows Server computer, click Start and type mmc.exe.
2 In the MMC window, go to File > Add/Remove Snap-in.
3 In the Add or Remove Snap-ins window, select Certificates and click Add.
4 In the Certificates snap-in window, select Computer account, click Next, select Local computer, andclick Finish.
5 In the Add or Remove snap-in window, click OK.
What to do next
Import the SSL server certificate into the Windows Certificate Store.
Import a Signed Server Certificate into a Windows Certificate StoreYou must import the SSL server certificate into the Windows local computer certificate store on theWindows Server host on which the View Connection Server instance, security server, or View Composerservice is installed.
Depending on your certificate file format, the entire certificate chain that is contained in the keystore filemight be imported into the Windows local computer certificate store. For example, the server certificate,intermediate certificate, and root certificate might be imported.
For other types of certificate files, only the server certificate is imported into the Windows local computercertificate store. In this case, you must take separate steps to import the root certificate and any intermediatecertificates in the certificate chain.
VMware Horizon View Installation
76 VMware, Inc.

For more information about certificates, consult the Microsoft online help available with the Certificatesnap-in to MMC.
NOTE If you off-load SSL connections to an intermediate server, you must import the same SSL servercertificate onto both the intermediate server and the off-loaded View server. For details, see "Off-load SSLConnections to Intermediate Servers" in the VMware Horizon View Administration document.
Prerequisites
Verify that the Certificate snap-in was added to MMC. See “Add the Certificate Snap-In to MMC,” onpage 76.
Procedure
1 In the MMC window on the Windows Server host, expand the Certificates (Local Computer) node andselect the Personal folder.
2 In the Actions pane, go to More Actions > All Tasks > Import.
3 In the Certificate Import wizard, click Next and browse to the location where the certificate is stored.
4 Select the certificate file and click Open.
To display your certificate file type, you can select its file format from the File name drop-down menu.
5 Type the password for the private key that is included in the certificate file.
6 Select Mark this key as exportable.
7 Select Include all extendable properties.
8 Click Next and click Finish.
The new certificate appears in the Certificates (Local Computer) > Personal > Certificates folder.
9 Verify that the new certificate contains a private key.
a In the Certificates (Local Computer) > Personal > Certificates folder, double-click the newcertificate.
b In the General tab of the Certificate Information dialog box, verify that the following statementappears: You have a private key that corresponds to this certificate.
What to do next
Modify the certificate Friendly name to vdm.
Modify the Certificate Friendly NameTo configure a View Connection Server instance or security server to recognize and use an SSL certificate,you must modify the certificate Friendly name to vdm.
You do not have to modify the Friendly name of SSL certificates that are used by View Composer.
Prerequisites
Verify that the server certificate is imported into the Certificates (Local Computer) > Personal > Certificatesfolder in the Windows Certificate Store. See “Import a Signed Server Certificate into a Windows CertificateStore,” on page 76.
Procedure
1 In the MMC window on the Windows Server host, expand the Certificates (Local Computer) node andselect the Personal > Certificates folder.
2 Right-click the certificate that is issued to the View server host and click Properties.
Chapter 7 Configuring SSL Certificates for View Servers
VMware, Inc. 77
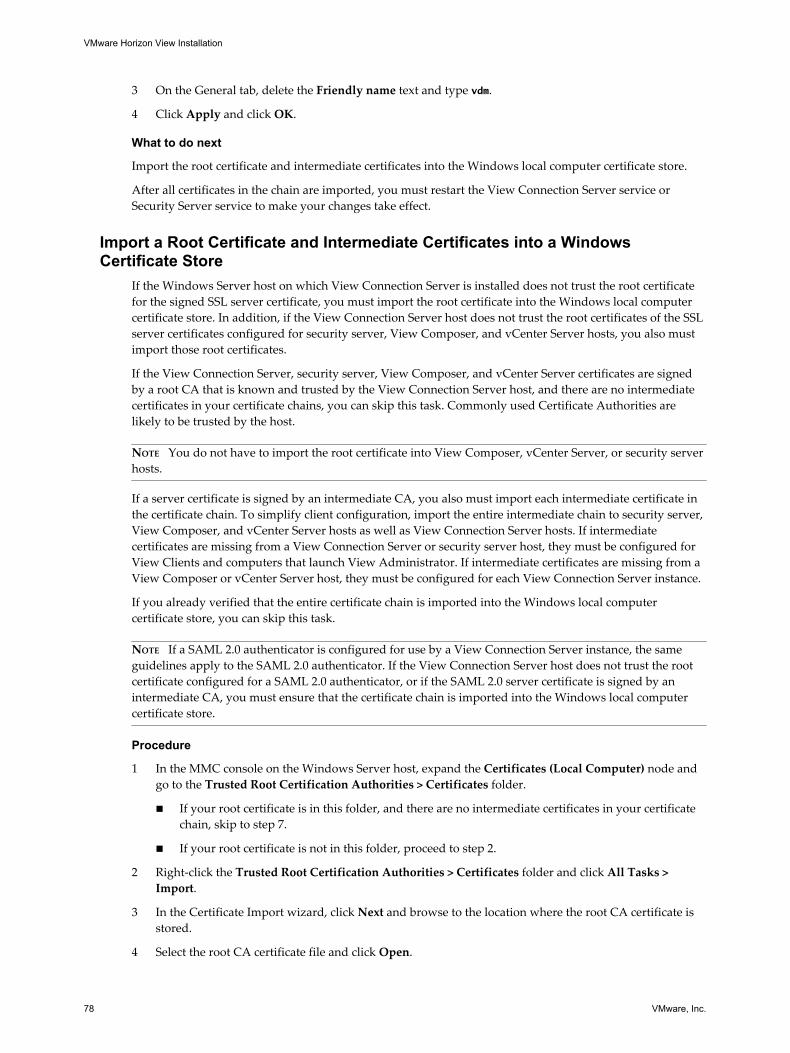
3 On the General tab, delete the Friendly name text and type vdm.
4 Click Apply and click OK.
What to do next
Import the root certificate and intermediate certificates into the Windows local computer certificate store.
After all certificates in the chain are imported, you must restart the View Connection Server service orSecurity Server service to make your changes take effect.
Import a Root Certificate and Intermediate Certificates into a WindowsCertificate Store
If the Windows Server host on which View Connection Server is installed does not trust the root certificatefor the signed SSL server certificate, you must import the root certificate into the Windows local computercertificate store. In addition, if the View Connection Server host does not trust the root certificates of the SSLserver certificates configured for security server, View Composer, and vCenter Server hosts, you also mustimport those root certificates.
If the View Connection Server, security server, View Composer, and vCenter Server certificates are signedby a root CA that is known and trusted by the View Connection Server host, and there are no intermediatecertificates in your certificate chains, you can skip this task. Commonly used Certificate Authorities arelikely to be trusted by the host.
NOTE You do not have to import the root certificate into View Composer, vCenter Server, or security serverhosts.
If a server certificate is signed by an intermediate CA, you also must import each intermediate certificate inthe certificate chain. To simplify client configuration, import the entire intermediate chain to security server,View Composer, and vCenter Server hosts as well as View Connection Server hosts. If intermediatecertificates are missing from a View Connection Server or security server host, they must be configured forView Clients and computers that launch View Administrator. If intermediate certificates are missing from aView Composer or vCenter Server host, they must be configured for each View Connection Server instance.
If you already verified that the entire certificate chain is imported into the Windows local computercertificate store, you can skip this task.
NOTE If a SAML 2.0 authenticator is configured for use by a View Connection Server instance, the sameguidelines apply to the SAML 2.0 authenticator. If the View Connection Server host does not trust the rootcertificate configured for a SAML 2.0 authenticator, or if the SAML 2.0 server certificate is signed by anintermediate CA, you must ensure that the certificate chain is imported into the Windows local computercertificate store.
Procedure
1 In the MMC console on the Windows Server host, expand the Certificates (Local Computer) node andgo to the Trusted Root Certification Authorities > Certificates folder.
n If your root certificate is in this folder, and there are no intermediate certificates in your certificatechain, skip to step 7.
n If your root certificate is not in this folder, proceed to step 2.
2 Right-click the Trusted Root Certification Authorities > Certificates folder and click All Tasks >Import.
3 In the Certificate Import wizard, click Next and browse to the location where the root CA certificate isstored.
4 Select the root CA certificate file and click Open.
VMware Horizon View Installation
78 VMware, Inc.
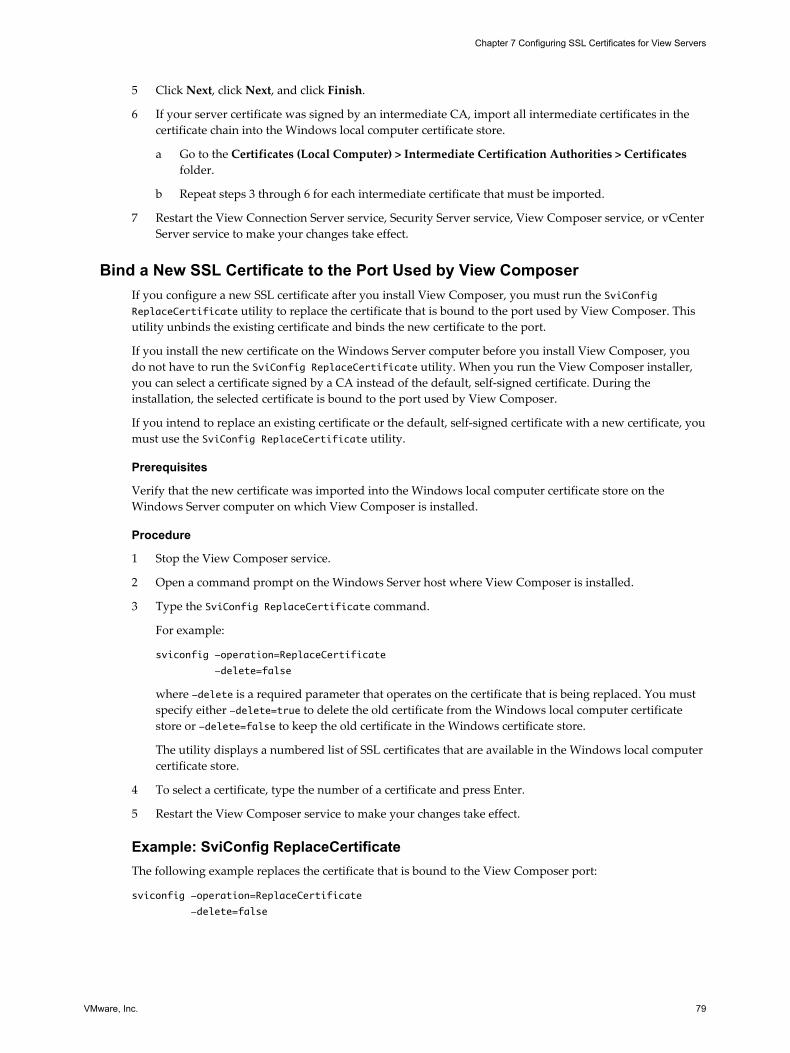
5 Click Next, click Next, and click Finish.
6 If your server certificate was signed by an intermediate CA, import all intermediate certificates in thecertificate chain into the Windows local computer certificate store.
a Go to the Certificates (Local Computer) > Intermediate Certification Authorities > Certificatesfolder.
b Repeat steps 3 through 6 for each intermediate certificate that must be imported.
7 Restart the View Connection Server service, Security Server service, View Composer service, or vCenterServer service to make your changes take effect.
Bind a New SSL Certificate to the Port Used by View ComposerIf you configure a new SSL certificate after you install View Composer, you must run the SviConfigReplaceCertificate utility to replace the certificate that is bound to the port used by View Composer. Thisutility unbinds the existing certificate and binds the new certificate to the port.
If you install the new certificate on the Windows Server computer before you install View Composer, youdo not have to run the SviConfig ReplaceCertificate utility. When you run the View Composer installer,you can select a certificate signed by a CA instead of the default, self-signed certificate. During theinstallation, the selected certificate is bound to the port used by View Composer.
If you intend to replace an existing certificate or the default, self-signed certificate with a new certificate, youmust use the SviConfig ReplaceCertificate utility.
Prerequisites
Verify that the new certificate was imported into the Windows local computer certificate store on theWindows Server computer on which View Composer is installed.
Procedure
1 Stop the View Composer service.
2 Open a command prompt on the Windows Server host where View Composer is installed.
3 Type the SviConfig ReplaceCertificate command.
For example:
sviconfig -operation=ReplaceCertificate
-delete=false
where -delete is a required parameter that operates on the certificate that is being replaced. You mustspecify either -delete=true to delete the old certificate from the Windows local computer certificatestore or -delete=false to keep the old certificate in the Windows certificate store.
The utility displays a numbered list of SSL certificates that are available in the Windows local computercertificate store.
4 To select a certificate, type the number of a certificate and press Enter.
5 Restart the View Composer service to make your changes take effect.
Example: SviConfig ReplaceCertificateThe following example replaces the certificate that is bound to the View Composer port:
sviconfig -operation=ReplaceCertificate
-delete=false
Chapter 7 Configuring SSL Certificates for View Servers
VMware, Inc. 79
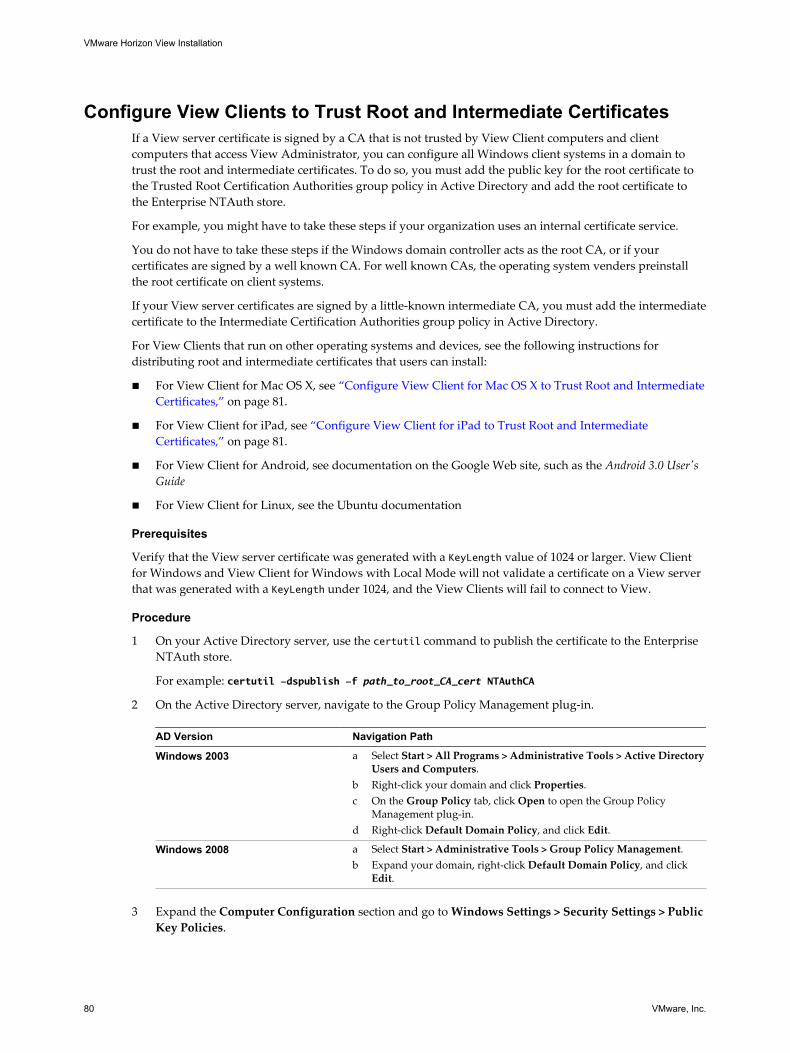
Configure View Clients to Trust Root and Intermediate CertificatesIf a View server certificate is signed by a CA that is not trusted by View Client computers and clientcomputers that access View Administrator, you can configure all Windows client systems in a domain totrust the root and intermediate certificates. To do so, you must add the public key for the root certificate tothe Trusted Root Certification Authorities group policy in Active Directory and add the root certificate tothe Enterprise NTAuth store.
For example, you might have to take these steps if your organization uses an internal certificate service.
You do not have to take these steps if the Windows domain controller acts as the root CA, or if yourcertificates are signed by a well known CA. For well known CAs, the operating system venders preinstallthe root certificate on client systems.
If your View server certificates are signed by a little-known intermediate CA, you must add the intermediatecertificate to the Intermediate Certification Authorities group policy in Active Directory.
For View Clients that run on other operating systems and devices, see the following instructions fordistributing root and intermediate certificates that users can install:
n For View Client for Mac OS X, see “Configure View Client for Mac OS X to Trust Root and IntermediateCertificates,” on page 81.
n For View Client for iPad, see “Configure View Client for iPad to Trust Root and IntermediateCertificates,” on page 81.
n For View Client for Android, see documentation on the Google Web site, such as the Android 3.0 User'sGuide
n For View Client for Linux, see the Ubuntu documentation
Prerequisites
Verify that the View server certificate was generated with a KeyLength value of 1024 or larger. View Clientfor Windows and View Client for Windows with Local Mode will not validate a certificate on a View serverthat was generated with a KeyLength under 1024, and the View Clients will fail to connect to View.
Procedure
1 On your Active Directory server, use the certutil command to publish the certificate to the EnterpriseNTAuth store.
For example: certutil -dspublish -f path_to_root_CA_cert NTAuthCA
2 On the Active Directory server, navigate to the Group Policy Management plug-in.
AD Version Navigation Path
Windows 2003 a Select Start > All Programs > Administrative Tools > Active DirectoryUsers and Computers.
b Right-click your domain and click Properties.c On the Group Policy tab, click Open to open the Group Policy
Management plug-in.d Right-click Default Domain Policy, and click Edit.
Windows 2008 a Select Start > Administrative Tools > Group Policy Management.b Expand your domain, right-click Default Domain Policy, and click
Edit.
3 Expand the Computer Configuration section and go to Windows Settings > Security Settings > PublicKey Policies.
VMware Horizon View Installation
80 VMware, Inc.

4 Import the certificate.
Option Description
Root certificate a Right-click Trusted Root Certification Authorities and select Import.b Follow the prompts in the wizard to import the root certificate (for
example, rootCA.cer) and click OK.
Intermediate certificate a Right-click Intermediate Certification Authorities and select Import.b Follow the prompts in the wizard to import the intermediate certificate
(for example, intermediateCA.cer) and click OK.
5 Close the Group Policy window.
All systems in the domain now have certificate information in their trusted root certificate stores andintermediate certificate stores that allows them to trust the root and intermediate certificates.
Configure View Client for Mac OS X to Trust Root and Intermediate CertificatesIf a View server certificate is signed by a CA that is not trusted by computers that run View Client for MacOS X, you can configure these computers to trust the root and intermediate certificates. You must distributethe root certificate and all intermediate certificates in the trust chain to the client computers.
Procedure
1 Deliver the root certificate and intermediate certificates to the computer that is running View Client forMac OS X.
2 Open the root certificate on the Mac OS X computer.
The certificate displays the following message: Do you want your computer to trust certificatessigned by CA name from now on?
3 Click Always Trust
4 Type the user password.
5 Repeat steps 2 through 4 for all intermediate certificates in the trust chain.
Configure View Client for iPad to Trust Root and Intermediate CertificatesIf a View server certificate is signed by a CA that is not trusted by iPads that run View Client for iPad, youcan configure the iPads to trust the root and intermediate certificates. You must distribute the root certificateand all intermediate certificates in the trust chain to the iPads.
Procedure
1 Send the root certificate and intermediate certificates as email attachments to the iPad.
2 Open the email attachment for the root certificate and select Install.
The certificate displays the following message:
Unverifiable Profile. The authenticity of Certificate name cannot be verified. Installing
this profile will change settings on your iPad.
Root Certificate. Installing the certificate Certificate name will add it to the list of
trusted certificates on your iPad.
3 Select Install again.
4 Repeat steps 2 and 3 for all intermediate certificates in the trust chain.
Chapter 7 Configuring SSL Certificates for View Servers
VMware, Inc. 81
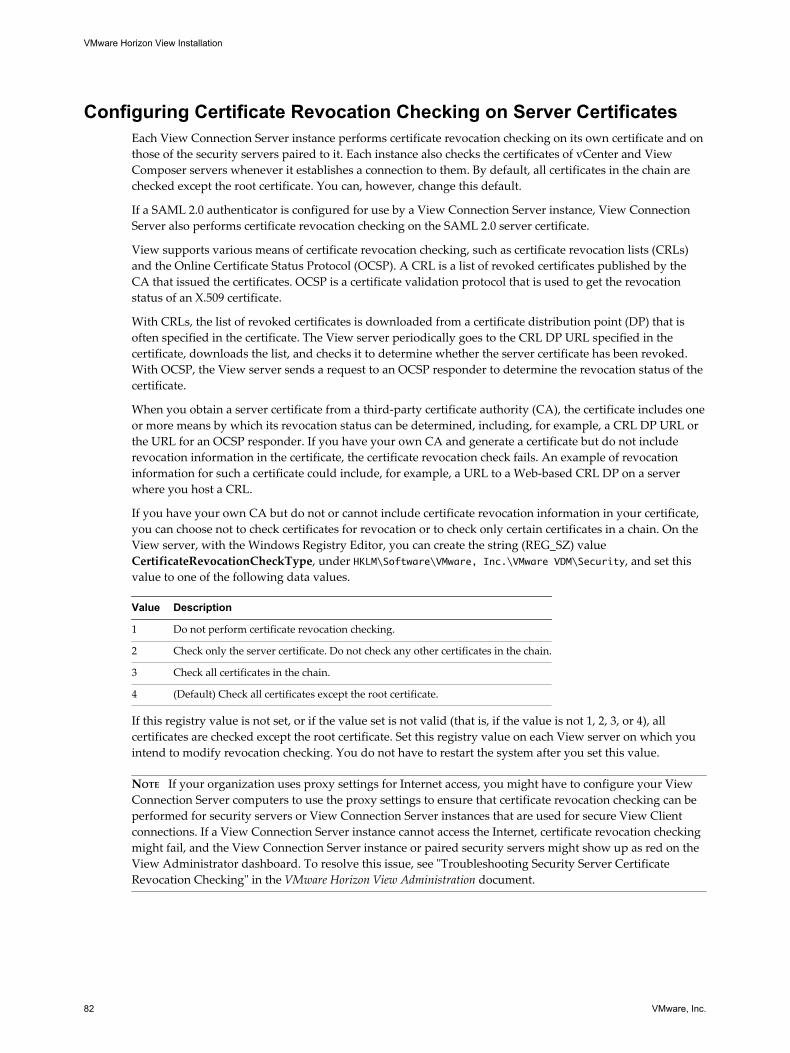
Configuring Certificate Revocation Checking on Server CertificatesEach View Connection Server instance performs certificate revocation checking on its own certificate and onthose of the security servers paired to it. Each instance also checks the certificates of vCenter and ViewComposer servers whenever it establishes a connection to them. By default, all certificates in the chain arechecked except the root certificate. You can, however, change this default.
If a SAML 2.0 authenticator is configured for use by a View Connection Server instance, View ConnectionServer also performs certificate revocation checking on the SAML 2.0 server certificate.
View supports various means of certificate revocation checking, such as certificate revocation lists (CRLs)and the Online Certificate Status Protocol (OCSP). A CRL is a list of revoked certificates published by theCA that issued the certificates. OCSP is a certificate validation protocol that is used to get the revocationstatus of an X.509 certificate.
With CRLs, the list of revoked certificates is downloaded from a certificate distribution point (DP) that isoften specified in the certificate. The View server periodically goes to the CRL DP URL specified in thecertificate, downloads the list, and checks it to determine whether the server certificate has been revoked.With OCSP, the View server sends a request to an OCSP responder to determine the revocation status of thecertificate.
When you obtain a server certificate from a third-party certificate authority (CA), the certificate includes oneor more means by which its revocation status can be determined, including, for example, a CRL DP URL orthe URL for an OCSP responder. If you have your own CA and generate a certificate but do not includerevocation information in the certificate, the certificate revocation check fails. An example of revocationinformation for such a certificate could include, for example, a URL to a Web-based CRL DP on a serverwhere you host a CRL.
If you have your own CA but do not or cannot include certificate revocation information in your certificate,you can choose not to check certificates for revocation or to check only certain certificates in a chain. On theView server, with the Windows Registry Editor, you can create the string (REG_SZ) valueCertificateRevocationCheckType, under HKLM\Software\VMware, Inc.\VMware VDM\Security, and set thisvalue to one of the following data values.
Value Description
1 Do not perform certificate revocation checking.
2 Check only the server certificate. Do not check any other certificates in the chain.
3 Check all certificates in the chain.
4 (Default) Check all certificates except the root certificate.
If this registry value is not set, or if the value set is not valid (that is, if the value is not 1, 2, 3, or 4), allcertificates are checked except the root certificate. Set this registry value on each View server on which youintend to modify revocation checking. You do not have to restart the system after you set this value.
NOTE If your organization uses proxy settings for Internet access, you might have to configure your ViewConnection Server computers to use the proxy settings to ensure that certificate revocation checking can beperformed for security servers or View Connection Server instances that are used for secure View Clientconnections. If a View Connection Server instance cannot access the Internet, certificate revocation checkingmight fail, and the View Connection Server instance or paired security servers might show up as red on theView Administrator dashboard. To resolve this issue, see "Troubleshooting Security Server CertificateRevocation Checking" in the VMware Horizon View Administration document.
VMware Horizon View Installation
82 VMware, Inc.
Configuring Certificate Checking in View Client for WindowsYou can use a security-related group policy setting in the View Client Configuration ADM template file(vdm_client.adm) to configure SSL server certificate checking in the Windows-based View Client.
Certificate checking occurs for SSL connections between View Connection Server and View Client.Certificate verification includes all the following checks:
n Has the certificate been revoked? Is it possible to determine whether the certificate has been revoked?
n Is the certificate intended for a purpose other than verifying the identity of the sender and encryptingserver communications? That is, is it the correct type of certificate?
n Has the certificate expired, or is it valid only in the future? That is, is the certificate valid according tothe computer clock?
n Does the common name on the certificate match the host name of the server that sends it? A mismatchcan occur if a load balancer redirects the View client to a server with a certificate that does not matchthe host name the user entered. A mismatch can also occur if the user enters an IP address rather than ahost name in the client.
n Is the certificate signed by an unknown or untrusted certificate authority (CA)? Self-signed certificatesare one type of untrusted CA.
To pass this check, the certificate's chain of trust must be rooted in the local certificate store of thedevice.
When you first set up a View environment, a default self-signed certificate is used. By default,Warn ButAllowis the certificate verification mode. In this mode, when either of the following server certificate issuesoccurs, a warning is displayed, but the user can choose to continue on and ignore the warning:
n A self-signed certificate is provided by the View server. In this case, it is acceptable if the certificatename does not match the View Connection Server name provided by the user in View Client.
n A verifiable certificate that was configured in your deployment has expired or is not yet valid.
You can change the default certificate verification mode. You can set the mode to No Security, so that nocertificate checking is done, or you can set the mode to Full Security, so that users are not allowed toconnect to the server if any one of the checks fails. You can also allow end users to set the mode forthemselves.
Use the Certificate verification mode group policy setting in the Client Configuration ADM template fileto change the verification mode. When this group policy setting is configured, the setting is locked in ViewClient. Users can view the selected verification mode in View Client, but cannot configure the setting. Whenthis group policy setting is not configured or disabled, View Client users can select a verification mode.
ADM template files for View components are installed in the install_directory\VMware\VMwareView\Server\Extras\GroupPolicyFiles directory on your View Connection Server host. For informationabout using these templates to control GPO settings, see the VMware Horizon View Administration document.
Configure the PCoIP Secure Gateway to Use a New SSL CertificateTo comply with industry or jurisdiction security regulations, you can replace the default SSL certificate thatis generated by the PCoIP Secure Gateway (PSG) service with a certificate that is signed by a CA.
In View 5.2 or later releases, the PSG service creates a default, self-signed SSL certificate when the servicestarts up. The PSG service presents the self-signed certificate to clients running View Client 2.0 (or ViewClient 5.2 for Windows) or later releases that connect to the PSG.
The PSG also provides a default legacy SSL certificate that is presented to clients running View Client 1.7 (orView Client 5.1 for Windows) or earlier releases that connect to the PSG.
Chapter 7 Configuring SSL Certificates for View Servers
VMware, Inc. 83
The default certificates provide secure connections from View Clients to the PSG and do not require furtherconfiguration in View Administrator. However, configuring the PSG service to use a CA-signed certificate ishighly recommended, particularly for deployments that require you to use security scanners to passcompliance testing.
Although it is not required, you are most likely to configure new CA-signed SSL certificates for your Viewservers before you replace the default PSG certificate with a CA-signed certificate. The procedures thatfollow assume that you already imported a CA-signed certificate into the Windows certificate store for theView server on which the PSG is running.
NOTE If you are using a security scanner for compliance testing, you might want to start by setting the PSGto use the same certificate as the View server and scan the View port before the PSG port. You can resolvetrust or validation issues that occur during the scan of the View port to ensure that these issues do notinvalidate your test of the PSG port and certificate. Next, you can configure a unique certificate for the PSGand do another scan.
Procedure
1 Verify That the Server Name Matches the PSG Certificate Subject Name on page 84When a View Connection Server instance or security server is installed, the installer creates a registrysetting with a value that contains the FQDN of the computer. You must verify that this value matchesthe server name part of the URL that security scanners use to reach the PSG port. The server name alsomust match the subject name or a subject alternate name (SAN) of the SSL certificate that you intend touse for the PSG.
2 Configure a PSG Certificate in the Windows Certificate Store on page 85To replace the default PSG certificate with a CA-signed certificate, you must configure the certificateand its private key in the Windows local computer certificate store on the View Connection Server orsecurity server computer on which the PSG is running.
3 Set the PSG Certificate Friendly Name in the Windows Registry on page 86The PSG identifies the SSL certificate to use by means of the server name and certificate Friendlyname. You must set the Friendly name value in the Windows registry on the View Connection Serveror security server computer on which the PSG is running.
4 (Optional) Force a CA-Signed Certificate to Be Used for Connections to the PSG on page 87You can ensure that all View Client connections to the PSG use the CA-signed certificate for the PSGinstead of the default legacy certificate. This procedure is not required to configure a CA-signedcertificate for the PSG. Take these steps only if it makes sense to force the use of a CA-signed certificatein your View deployment.
Verify That the Server Name Matches the PSG Certificate Subject NameWhen a View Connection Server instance or security server is installed, the installer creates a registry settingwith a value that contains the FQDN of the computer. You must verify that this value matches the servername part of the URL that security scanners use to reach the PSG port. The server name also must match thesubject name or a subject alternate name (SAN) of the SSL certificate that you intend to use for the PSG.
For example, if a scanner connects to the PSG with the URL https://view.customer.com:4172, the registrysetting must have the value view.customer.com. Note that the FQDN of the View Connection Server orsecurity server computer that is set during installation might not be the same as this external server name.
Procedure
1 Start the Windows Registry Editor on the View Connection Server or security server computer wherethe PCoIP Secure Gateway is running.
2 Navigate to the HKEY_LOCAL_MACHINE\SOFTWARE\Teradici\SecurityGateway\SSLCertPsgSni registrysetting.
VMware Horizon View Installation
84 VMware, Inc.
3 Verify that the value of the SSLCertPsgSni setting matches the server name in the URL that scannerswill use to connect to the PSG and matches the subject name or a subject alternate name of the SSLcertificate that you intend to install for the PSG.
If the value does not match, replace it with the correct value.
4 Restart the VMware View PCoIP Secure Gateway service to make your changes take effect.
What to do next
Import the CA-signed certificate into the Windows local computer certificate store and configure thecertificate Firendly name.
Configure a PSG Certificate in the Windows Certificate StoreTo replace the default PSG certificate with a CA-signed certificate, you must configure the certificate and itsprivate key in the Windows local computer certificate store on the View Connection Server or securityserver computer on which the PSG is running.
If you intend the PSG to use a unique certificate, you must import the certificate into the Windows localcomputer certificate store with an exportable private key and set the appropriate Friendly name.
If you intend the PSG to use the same certificate as the View server, you do not have to follow thisprocedure. However, in the Windows registry you must set the server name to match the View servercertificate subject name and set the Friendly name to vdm.
Prerequisites
n Verify that the key length is at least 1024 bits.
n Verify that the SSL certificate is valid. The current time on the View server computer must be within thecertificate start and end dates.
n Verify that the certificate subject name or a subject alternate name matches the SSLCertPsgSni setting inthe Windows registry. See “Verify That the Server Name Matches the PSG Certificate Subject Name,”on page 84.
n Verify that the Certificate snap-in was added to MMC. See “Add the Certificate Snap-In to MMC,” onpage 76.
n Familiarize yourself with importing a certificate into the Windows certificate store. See “Import aSigned Server Certificate into a Windows Certificate Store,” on page 76.
n Familiarize yourself with modifying the certificate Friendly name. See “Modify the Certificate FriendlyName,” on page 77.
Procedure
1 In the MMC window on the Windows Server host, open the Certificates (Local Computer) > Personalfolder.
2 Import the SSL certificate that is issued to the PSG by selecting More Actions > All Tasks > Import.
Select the following settings in the Certificate Import wizard:
a Mark this key as exportable
b Include all extendable properties
Complete the wizard to finish importing the certificate into the Personal folder
Chapter 7 Configuring SSL Certificates for View Servers
VMware, Inc. 85
3 Verify that the new certificate contains a private key by taking one of these steps:
n Verify that a yellow key appears on the certificate icon.
n Double-click the certificate and verify that the following statement appears in the CertificateInformation dialog box: You have a private key that corresponds to this certificate..
4 Right-click the new certificate and click Properties.
5 On the General tab, delete the Friendly name text and type the Friendly name that you have chosen.
Make sure that you enter exactly the same name in the SSLCertWinCertFriendlyName setting in theWindows registry, as described in the next procedure.
6 Click Apply and click OK.
The PSG presents the CA-signed certificate to View Client devices that connect to the View server overPCoIP.
NOTE This procedure does not affect legacy View Client devices. The PSG continues to present the defaultlegacy certificate to legacy View Client devices that connect the this View server over PCoIP.
What to do next
Configure the certificate Friendly name in the Windows registry.
Set the PSG Certificate Friendly Name in the Windows RegistryThe PSG identifies the SSL certificate to use by means of the server name and certificate Friendly name. Youmust set the Friendly name value in the Windows registry on the View Connection Server or security servercomputer on which the PSG is running.
The certificate Friendly name vdm is used by all View Connection Server instances and security servers. Bycontrast, you can configure your own certificate Friendly name for the PSG certificate. You must configure aWindows registry setting to enable the PSG to match the correct name with the Friendly name that you willset in the Windows certificate store.
The PSG can use the same SSL certificate as the View server on which the PSG is running. If you configurethe PSG to use the same certificate as the View server, the Friendly name must be vdm.
The Friendly name value, in both the registry and the Windows certificate store, is case sensitive.
Prerequisites
n Verify that the Window registry contains the correct subject name that is used to reach the PSG port andthat matches the PSG certificate subject name or subject alternate name. See “Verify That the ServerName Matches the PSG Certificate Subject Name,” on page 84.
n Verify that the certificate Friendly name is configured in the Windows local computer certificate store.See “Configure a PSG Certificate in the Windows Certificate Store,” on page 85.
Procedure
1 Start the Windows Registry Editor on the View Connection Server or security server computer wherethe PCoIP Secure Gateway is running.
2 Navigate to the HKEY_LOCAL_MACHINE\SOFTWARE\Teradici\SecurityGateway registry key.
3 Add a new String (REG_SZ) value, SSLCertWinCertFriendlyName, to this registry key.
VMware Horizon View Installation
86 VMware, Inc.
4 Modify the SSLCertWinCertFriendlyName value and type the certificate Friendly name to be used by thePSG.
For example: pcoip
If you use the same certificate as the View server, the value must be vdm.
5 Restart the VMware View PCoIP Secure Gateway service to make your changes take effect.
What to do next
Verify that View Client devices continue to connect to the PSG.
If you are using a security scanner for compliance testing, scan the PSG port.
(Optional) Force a CA-Signed Certificate to Be Used for Connections to the PSGYou can ensure that all View Client connections to the PSG use the CA-signed certificate for the PSG insteadof the default legacy certificate. This procedure is not required to configure a CA-signed certificate for thePSG. Take these steps only if it makes sense to force the use of a CA-signed certificate in your Viewdeployment.
In some cases, the PSG might present the default legacy certificate instead of the CA-signed certificate to asecurity scanner, invalidating the compliance test on the PSG port. To resolve this issue, you can configurethe PSG not to present the default legacy certificate to any device that attempts to connect.
IMPORTANT Performing this procedure prevents all legacy clients from connecting to this View server overPCoIP.
Prerequisites
Verify that all client devices that connect to this View server, including thin clients, run View Client 5.2 forWindows or View Client 2.0 or later releases. You must upgrade the legacy clients.
Procedure
1 Start the Windows Registry Editor on the View Connection Server or security server computer wherethe PCoIP Secure Gateway is running.
2 Navigate to the HKEY_LOCAL_MACHINE\SOFTWARE\Teradici\SecurityGateway registry key.
3 Add a new String (REG_SZ) value, SSLCertPresentLegacyCertificate, to this registry key.
4 Set the SSLCertPresentLegacyCertificate value to 0.
5 Restart the VMware View PCoIP Secure Gateway service to make your changes take effect.
View Transfer Server and SSL CertificatesYou do not have to configure SSL certificates for View Transfer Server if you are installing View 5.1 or later.
A default, self-signed certificate is installed with View Transfer Server that View Connection Server uses tohandle secondary connections to View clients.
When you add View Transfer Server to View, View Connection Server establishes a trust relationship withView Transfer Server. Communications between View Connection Server and View Transfer Server use JavaMessage Service (JMS). Messages containing sensitive data are encrypted.
When a View client requests a data transfer operation, which requires connecting to View Transfer Server,View Connection Server sends the thumbprint of the View Transfer Server certificate to the client. When theclient connects to the Apache server that is associated with View Transfer Server, View Client verifies thatthe thumbprint passed from View Connection Server matches the certificate thumbprint on the Apacheserver.
Chapter 7 Configuring SSL Certificates for View Servers
VMware, Inc. 87
Replacing the default certificate for View Transfer Server with a certificate that is signed by a CA would notsignificantly affect the secure communications between View Transfer Server, View Connection Server, andView clients.
In View 5.0.x and earlier versions, you did have to configure an SSL certificate for View Transfer Server.
If you are upgrading from View 5.0.x or earlier to View 5.1 or later, and you want to continue to use acertificate that is signed by a CA on the upgraded version of View Transfer Server, you must back up thecertificate, upgrade View Transfer Server, and configure the signed certificate for the new View TransferServer version.
If you configured a self-signed certificate for the old View Transfer Server, or you do not intend to use anexisting CA-signed certificate on the upgraded server, you do not have to configure a certificate again.During the upgrade, a valid, self-signed certificate is installed with View Transfer Server.
For more information, see the VMware Horizon View Upgrades document.
Setting View Administrator to Trust a vCenter Server or ViewComposer Certificate
In the View Administrator dashboard, you can configure View to trust a vCenter Server or View Composercertificate that is untrusted.
VMware strongly recommends that you configure vCenter Server and View Composer to use SSLcertificates that are signed by a CA. Alternatively, you can accept the thumbprint of the default certificatefor vCenter Server or View Composer.
Similarly, VMware recommends that you configure SAML 2.0 authenticators to use SSL certificates that aresigned by a CA. Alternatively, in the View Administrator dashboard you can configure View to trust anuntrusted SAML 2.0 server certificate by accepting the thumbprint of the default certificate.
Benefits of Using SSL Certificates Signed by a CAA CA is a trusted entity that guarantees the identity of the certificate and its creator. When a certificate issigned by a trusted CA, users no longer receive messages asking them to verify the certificate, and thinclient devices can connect without requiring additional configuration.
You can request an SSL server certificate that is specific to a Web domain such as www.mycorp.com, or youcan request a wildcard SSL server certificate that can be used throughout a domain such as *.mycorp.com. Tosimplify administration, you might choose to request a wildcard certificate if you need to install thecertificate on multiple servers or in different subdomains. Typically, domain-specific certificates are used insecure installations, and CAs usually guarantee more protection against losses for domain-specificcertificates than for wildcard certificates. If you use a wildcard certificate, you must ensure that the privatekey is transferrable between servers.
When you replace the default certificate with your own certificate, clients use your certificate to authenticatethe server. If your certificate is signed by a CA, the certificate for the CA itself is typically embedded in thebrowser or is located in a trusted database that the client can access. After a client accepts the certificate, itresponds by sending a secret key, which is encrypted with the public key contained in the certificate. Thesecret key is used to encrypt traffic between the client and the server.
VMware Horizon View Installation
88 VMware, Inc.
Configuring View for the First Time 8After you install the View server software and configure SSL certificates for the servers, you must take a fewadditional steps to set up a working View environment.
You configure user accounts for vCenter Server and View Composer, install a View license key, add vCenterServer and View Composer to your View environment, configure the PCoIP Secure Gateway and securetunnel, and, optionally, size Windows Server settings to support your View environment.
This chapter includes the following topics:
n “Configuring User Accounts for vCenter Server and View Composer,” on page 89
n “Configuring View Connection Server for the First Time,” on page 93
n “Configuring View Client Connections,” on page 103
n “Replacing Default Ports for View Services,” on page 109
n “Sizing Windows Server Settings to Support Your Deployment,” on page 112
Configuring User Accounts for vCenter Server and View ComposerTo use vCenter Server with View Manager, you must configure a user account with permission to performoperations in vCenter Server. To use View Composer, you must give this vCenter Server user additionalprivileges. To manage desktops that are used in local mode, you must give this user privileges in addition tothose that are required for View Manager and View Composer.
You also must create a domain user for View Composer in Active Directory. See “Create a User Account forView Composer,” on page 23.
Where to Use the vCenter Server User and Domain User for View ComposerAfter you create and configure these two user accounts, you specify the user names in View Administrator.
n You specify a vCenter Server user when you add vCenter Server to View Manager.
n You specify a domain user for View Composer when you configure View Composer for vCenter Server.
n You specify the domain user for View Composer when you create linked-clone pools.
VMware, Inc. 89
Configure a vCenter Server User for View Manager, View Composer, and LocalMode
To configure a user account that gives View Manager permission to operate in vCenter Server, you mustassign a role with appropriate privileges to that user. To use the View Composer service in vCenter Server,you must give the user account additional privileges. To manage desktops that are used in local mode, youmust give the user account privileges that include View Manager, View Composer, and local modeprivileges.
To support View Composer, you also must make this user a local system administrator on the vCenterServer computer.
Prerequisites
n In Active Directory, create a user in the View Connection Server domain or a trusted domain. See “Creating a User Account for vCenter Server,” on page 22.
n Familiarize yourself with the privileges that are required for the user account. See “View ManagerPrivileges Required for the vCenter Server User,” on page 91.
n If you use View Composer, familiarize yourself with the additional required privileges. See “ViewComposer Privileges Required for the vCenter Server User,” on page 92.
n If you manage local desktops, familiarize yourself with the additional required privileges. See “LocalMode Privileges Required for the vCenter Server User,” on page 92.
Procedure
1 In vCenter Server, prepare a role with the required privileges for the user.
n You can use the predefined Administrator role in vCenter Server. This role can perform alloperations in vCenter Server.
n If you use View Composer, you can create a limited role with the minimum privileges needed byView Manager and View Composer to perform vCenter Server operations.
In vSphere Client, click Home > Roles > Add Role, enter a role name such asView Composer Administrator, and select privileges for the role.
This role must have all the privileges that both View Manager and View Composer need to operatein vCenter Server.
n If you manage local desktops, you can create a limited role with the minimum privileges needed byView Manager, View Composer, and the local mode feature to perform vCenter Server operations.
In vSphere Client, click Home > Roles > Add Role, enter a role name such asLocal Mode Administrator, and select privileges for the role.
This role must have all the privileges that View Manager, View Composer, and the local modefeature need to operate in vCenter Server.
n If you use View Manager without View Composer and do not manage local desktops, you cancreate an even more limited role with the minimum privileges needed by View Manager toperform vCenter Server operations.
In vSphere Client, click Home > Roles > Add Role, enter a role name such asView Manager Administrator, and select privileges for the role.
2 In vSphere Client, right-click the vCenter Server at the top level of the inventory, click Add Permission,and add the vCenter Server user.
NOTE You must define the vCenter Server user at the vCenter Server level.
VMware Horizon View Installation
90 VMware, Inc.
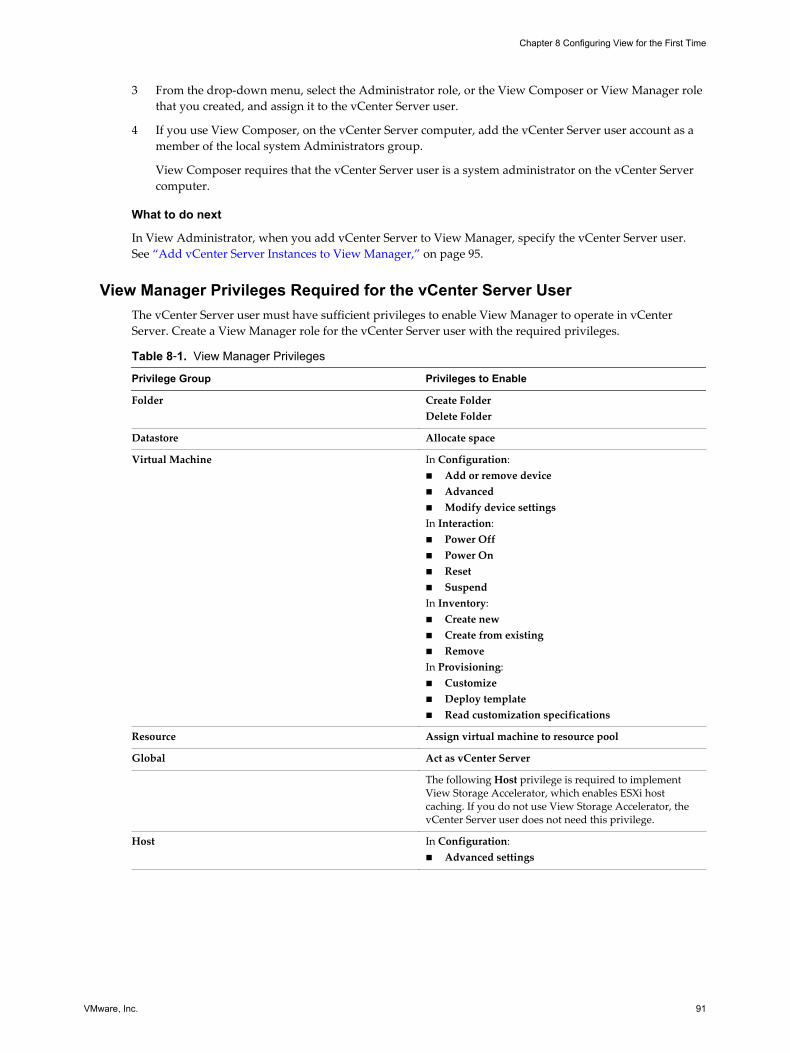
3 From the drop-down menu, select the Administrator role, or the View Composer or View Manager rolethat you created, and assign it to the vCenter Server user.
4 If you use View Composer, on the vCenter Server computer, add the vCenter Server user account as amember of the local system Administrators group.
View Composer requires that the vCenter Server user is a system administrator on the vCenter Servercomputer.
What to do next
In View Administrator, when you add vCenter Server to View Manager, specify the vCenter Server user.See “Add vCenter Server Instances to View Manager,” on page 95.
View Manager Privileges Required for the vCenter Server UserThe vCenter Server user must have sufficient privileges to enable View Manager to operate in vCenterServer. Create a View Manager role for the vCenter Server user with the required privileges.
Table 8‑1. View Manager Privileges
Privilege Group Privileges to Enable
Folder Create FolderDelete Folder
Datastore Allocate space
Virtual Machine In Configuration:n Add or remove devicen Advancedn Modify device settingsIn Interaction:n Power Offn Power Onn Resetn SuspendIn Inventory:n Create newn Create from existingn RemoveIn Provisioning:n Customizen Deploy templaten Read customization specifications
Resource Assign virtual machine to resource pool
Global Act as vCenter Server
The following Host privilege is required to implementView Storage Accelerator, which enables ESXi hostcaching. If you do not use View Storage Accelerator, thevCenter Server user does not need this privilege.
Host In Configuration:n Advanced settings
Chapter 8 Configuring View for the First Time
VMware, Inc. 91
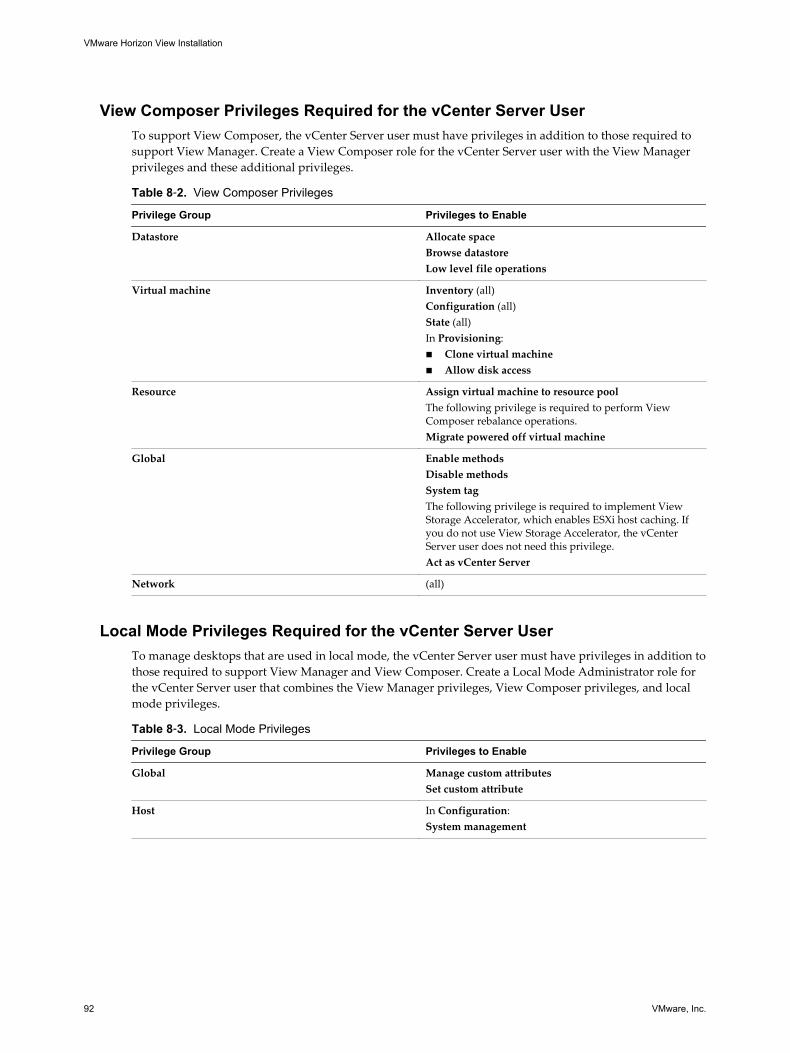
View Composer Privileges Required for the vCenter Server UserTo support View Composer, the vCenter Server user must have privileges in addition to those required tosupport View Manager. Create a View Composer role for the vCenter Server user with the View Managerprivileges and these additional privileges.
Table 8‑2. View Composer Privileges
Privilege Group Privileges to Enable
Datastore Allocate spaceBrowse datastoreLow level file operations
Virtual machine Inventory (all)Configuration (all)State (all)In Provisioning:n Clone virtual machinen Allow disk access
Resource Assign virtual machine to resource poolThe following privilege is required to perform ViewComposer rebalance operations.Migrate powered off virtual machine
Global Enable methodsDisable methodsSystem tagThe following privilege is required to implement ViewStorage Accelerator, which enables ESXi host caching. Ifyou do not use View Storage Accelerator, the vCenterServer user does not need this privilege.Act as vCenter Server
Network (all)
Local Mode Privileges Required for the vCenter Server UserTo manage desktops that are used in local mode, the vCenter Server user must have privileges in addition tothose required to support View Manager and View Composer. Create a Local Mode Administrator role forthe vCenter Server user that combines the View Manager privileges, View Composer privileges, and localmode privileges.
Table 8‑3. Local Mode Privileges
Privilege Group Privileges to Enable
Global Manage custom attributesSet custom attribute
Host In Configuration:System management
VMware Horizon View Installation
92 VMware, Inc.
Configuring View Connection Server for the First TimeAfter you install View Connection Server, you must install a product license, add vCenter Servers and ViewComposer services to View Manager. You can also allow ESXi hosts to reclaim disk space on linked-clonevirtual machines and configure ESXi hosts to cache virtual machine disk data.
If you install security servers, they are added to View Manager and appear in View Administratorautomatically.
View Administrator and View Connection ServerView Administrator provides a management interface for View Manager.
Depending on your View deployment, you use one or more View Administrator interfaces.
n Use one View Administrator interface to manage the View components that are associated with asingle, standalone View Connection Server instance or a group of replicated View Connection Serverinstances.
You can use the IP address of any replicated instance to log in to View Administrator.
n You must use a separate View Administrator interface to manage the View components for each single,standalone View Connection Server instance and each group of replicated View Connection Serverinstances.
You also use View Administrator to manage security servers and View Transfer Server instances associatedwith View Connection Server.
n Each security server is associated with one View Connection Server instance.
n Each View Transfer Server instance can communicate with any View Connection Server instance in agroup of replicated instances.
Log In to View AdministratorTo perform initial configuration tasks, you must log in to View Administrator.
Prerequisites
Verify that you are using a Web browser supported by View Administrator. See “View AdministratorRequirements,” on page 9.
Chapter 8 Configuring View for the First Time
VMware, Inc. 93
Procedure
1 Open your Web browser and enter the following URL, where server is the host name of the ViewConnection Server instance.
https://server/admin
NOTE You can use the IP address if you have to access a View Connection Server instance when thehost name is not resolvable. However, the host that you contact will not match the SSL certificate that isconfigured for the View Connection Server instance, resulting in blocked access or access with reducedsecurity.
Your access to View Administrator depends on the type of certificate that is configured on the ViewConnection Server computer.
Option Description
You configured a certificate signedby a CA for View ConnectionServer.
When you first connect, your Web browser displays View Administrator.
The default, self-signed certificatesupplied with View ConnectionServer is configured.
When you first connect, your Web browser might display a page warningthat the security certificate associated with the address is not issued by atrusted certificate authority.Click Ignore to continue using the current SSL certificate.
2 Log in as a user with credentials to access the View Administrators account.
You specify the View Administrators account when you install a standalone View Connection Serverinstance or the first View Connection Server instance in a replicated group. The View Administratorsaccount can be the local Administrators group (BUILTIN\Administrators) on the View ConnectionServer computer or a domain user or group account.
After you log in to View Administrator, you can use View Configuration > Administrators to change thelist of users and groups that have the View Administrators role.
Install the View Connection Server License KeyBefore you can use View Connection Server, you must enter the product license key.
The first time you log in, View Administrator displays the Product Licensing and Usage page.
After you install the license key, View Administrator displays the dashboard page when you log in.
You do not have to configure a license key when you install a replicated View Connection Server instance ora security server. Replicated instances and security servers use the common license key stored in the ViewLDAP configuration.
NOTE View Connection Server requires a valid license key for View 5.0. As of the release of View 4.0, theView license key is a 25-character key.
Procedure
1 If the View Configuration view is not displayed, click View Configuration in the left navigation pane.
2 Click Product Licensing and Usage.
3 On the Product Licensing table, click Edit License and enter the View Manager license serial number.
4 Click OK.
5 Verify the license expiration date.
VMware Horizon View Installation
94 VMware, Inc.
Add vCenter Server Instances to View ManagerYou must configure View Manager to connect to the vCenter Server instances in your View deployment.vCenter Server creates and manages the virtual machines that View Manager uses as desktop sources.
If you run vCenter Server instances in a Linked Mode group, you must add each vCenter Server instance toView Manager separately.
View Manager connects to the vCenter Server instance using a secure channel (SSL).
Prerequisites
n Install the View Connection Server product license key.
n Prepare a vCenter Server user with permission to perform the operations in vCenter Server that arenecessary to support View Manager. To use View Composer, you must give the user additionalprivileges. To manage desktops that are used in local mode, you must give the user privileges inaddition to those that are required for View Manager and View Composer.
See “Configure a vCenter Server User for View Manager, View Composer, and Local Mode,” onpage 90.
n Verify that an SSL server certificate is installed on the vCenter Server host. In a productionenvironment, install a valid SSL certificate that is signed by a trusted Certificate Authority (CA).
In a testing environment, you can use the default certificate that is installed with vCenter Server, butyou must accept the certificate thumbprint when you add vCenter Server to View.
n Verify that all View Connection Server instances in the replicated group trust the root CA certificate forthe server certificate that is installed on the vCenter Server host. Check if the root CA certificate is in theTrusted Root Certification Authorities > Certificates folder in the Windows local computer certificatestores on the View Connection Server hosts. If it is not, import the root CA certificate into the Windowslocal computer certificate stores.
See "Import a Root Certificate and Intermediate Certificates into a Windows Certificate Store" in theVMware Horizon View Installation document.
n Verify that the vCenter Server instance contains ESXi hosts. If no hosts are configured in the vCenterServer instance, you cannot add the instance to View.
n Familiarize yourself with the settings that determine the maximum operations limits for vCenter Serverand View Composer. See “Concurrent Operations Limits for vCenter Server and View Composer,” onpage 100 and “Setting a Concurrent Power Operations Rate to Support View Desktop Logon Storms,”on page 101.
Procedure
1 In View Administrator, click View Configuration > Servers.
2 In the vCenter Servers tab, click Add.
3 In the vCenter Server Settings server address text box, type the fully qualified domain name (FQDN) ofthe vCenter Server instance.
The FQDN includes the host name and domain name. For example, in the FQDNmyserverhost.companydomain.com, myserverhost is the host name and companydomain.com is the domain.
NOTE If you enter a server by using a DNS name or URL, View Manager does not perform a DNSlookup to verify whether an administrator previously added this server to View Manager by using itsIP address. A conflict arises if you add a vCenter Server with both its DNS name and its IP address.
Chapter 8 Configuring View for the First Time
VMware, Inc. 95
4 Type the name of the vCenter Server user.
For example: domain\user or [email protected]
5 Type the vCenter Server user password.
6 (Optional) Type a description for this vCenter Server instance.
7 Type the TCP port number.
The default port is 443.
8 Under Advanced Settings, set the concurrent operations limits for vCenter Server and View Composeroperations.
9 Click Next to display the View Composer Settings page.
What to do next
Configure View Composer settings.
n If the vCenter Server instance is configured with a signed SSL certificate, and View Connection Servertrusts the root certificate, the Add vCenter Server wizard displays the View Composer Settings page.
n If the vCenter Server instance is configured with a default certificate, you must first determine whetherto accept the thumbprint of the existing certificate. See “Accept the Thumbprint of a Default SSLCertificate,” on page 102.
If View Manager uses multiple vCenter Server instances, repeat this procedure to add the other vCenterServer instances.
Configure View Composer SettingsTo use View Composer, you must configure settings that allow View Manager to connect to the ViewComposer service. View Composer can be installed on its own separate host or on the same host as vCenterServer.
There must be a one-to-one mapping between each View Composer service and vCenter Server instance. AView Composer service can operate with only one vCenter Server instance. A vCenter Server instance canbe associated with only one View Composer service.
Prerequisites
n Your Active Directory administrator must create a domain user with permission to add and removevirtual machines from the Active Directory domain that contains your linked clones. To manage thelinked-clone machine accounts in Active Directory, the domain user must have Create ComputerObjects, Delete Computer Objects, and Write All Properties permissions.
See “Create a User Account for View Composer,” on page 23.
n Verify that you configured View Manager to connect to vCenter Server. To do so, you must completethe vCenter Server Information page in the Add vCenter Server wizard. See “Add vCenter ServerInstances to View Manager,” on page 95.
n Verify that this View Composer service is not already configured to connect to a different vCenterServer instance.
Procedure
1 In View Administrator, complete the vCenter Server Information page in the Add vCenter Serverwizard.
a Click View Configuration > Servers.
b In the vCenter Servers tab, click Add and provide the vCenter Server settings.
VMware Horizon View Installation
96 VMware, Inc.
2 On the View Composer Settings page, if you are not using View Composer, select Do not use ViewComposer.
If you select Do not use View Composer, the other View Composer settings become inactive. Whenyou click Next, the Add vCenter Server wizard displays the Storage Settings page. The View ComposerDomains page is not displayed.
3 If you are using View Composer, select the location of the View Composer host.
Option Description
View Composer is installed on thesame host as vCenter Server.
a Select View Composer co-installed with the vCenter Server.b Make sure that the port number is the same as the port that you
specified when you installed the View Composer service on vCenterServer. The default port number is 18443.
View Composer is installed on itsown separate host.
a Select Standalone View Composer Server.b In the View Composer server address text box, type the fully qualified
domain name (FQDN) of the View Composer host.c Type the name of the View Composer user.
For example: domain.com\user or [email protected] Type the password of the View Composer user.e Make sure that the port number is the same as the port that you
specified when you installed the View Composer service. The defaultport number is 18443.
4 Click Next to display the View Composer Domains page.
What to do next
Configure View Composer domains.
n If the View Composer instance is configured with a signed SSL certificate, and View Connection Servertrusts the root certificate, the Add vCenter Server wizard displays the View Composer Domains page.
n If the View Composer instance is configured with a default certificate, you must first determinewhether to accept the thumbprint of the existing certificate. See “Accept the Thumbprint of a DefaultSSL Certificate,” on page 102.
Configure View Composer DomainsYou must configure an Active Directory domain in which View Composer deploys linked-clone desktops.You can configure multiple domains for View Composer. After you first add vCenter Server and ViewComposer settings to View, you can add more View Composer domains by editing the vCenter Serverinstance in View Administrator.
Prerequisites
In View Administrator, verify that you completed the vCenter Server Information and View ComposerSettings pages in the Add vCenter Server wizard.
Procedure
1 On the View Composer Domains page, click Add to add the domain user for View Composer accountinformation.
2 Type the domain name of the Active Directory domain.
For example: domain.com
3 Type the domain user name, including the domain name.
For example: domain.com\admin
Chapter 8 Configuring View for the First Time
VMware, Inc. 97
4 Type the account password.
5 Click OK.
6 To add domain user accounts with privileges in other Active Directory domains in which you deploylinked-clone pools, repeat the preceding steps.
7 Click Next to display the Storage Settings page.
What to do next
Enable virtual machine disk space reclamation and configure View Storage Accelerator for View.
Allow vSphere to Reclaim Disk Space in Linked-Clone Virtual MachinesIn vSphere 5.1 and later, you can enable the disk space reclamation feature for View. Starting in vSphere 5.1,View creates linked-clone virtual machines in an efficient disk format that allows ESXi hosts to reclaimunused disk space in the linked clones, reducing the total storage space required for linked clones.
As users interact with linked-clone desktops, the clones' OS disks grow and can eventually use almost asmuch disk space as full-clone desktops. Disk space reclamation reduces the size of the OS disks withoutrequiring you to refresh or recompose the linked clones. Space can be reclaimed while the virtual machinesare powered on and users are interacting with their desktops.
Disk space reclamation is especially useful for deployments that cannot take advantage of storage-savingstrategies such as refresh on logoff. For example, knowledge workers who install user applications ondedicated desktops might lose their personal applications if the desktops were refreshed or recomposed.With disk space reclamation, View can maintain linked clones at close to the reduced size they start out withwhen they are first provisioned.
This feature has two components: space-efficient disk format and space reclamation operations.
In a vSphere 5.1 or later environment, when a parent virtual machine is virtual hardware version 9 or later,View creates linked clones with space-efficient OS disks, whether or not space reclamation operations areenabled.
To enable space reclamation operations, you must use View Administrator to enable space reclamation forvCenter Server and reclaim VM disk space for individual desktop pools. The space reclamation setting forvCenter Server gives you the option to disable this feature on all desktop pools that are managed by thevCenter Server instance. Disabling the feature for vCenter Server overrides the setting at the desktop poollevel.
The following guidelines apply to the space reclamation feature:
n It operates only on space-efficient OS disks in linked clones.
n It does not affect View Composer persistent disks.
n It works only with vSphere 5.1 or later and only on desktops that are virtual hardware version 9 orlater.
n It does not operate on full-clone desktops.
n It operates on virtual machines with SCSI controllers. IDE controllers are not supported.
n It operates on Windows XP and Windows 7 desktops only. It does not operate on Windows 8 desktops.
View Composer Array Integration is not supported in pools that contain virtual machines with space-efficient disks. View Composer Array Integration uses vStorage APIs for Array Integration (VAAI) nativeNFS snapshot technology to clone virtual machines.
VMware Horizon View Installation
98 VMware, Inc.
Prerequisites
n Verify that your vCenter Server and ESXi hosts are version 5.1 with ESXi 5.1 download patchESXi510-201212001 or later.
In an ESXi cluster, verify that all the hosts are version 5.1 with download patch ESXi510-201212001 orlater.
Procedure
1 In View Administrator, complete the Add vCenter Server wizard pages that precede the StorageSettings page.
a Select View Configuration > Servers.
b In the vCenter Servers tab, click Add.
c Complete the vCenter Server Information, View Composer Settings, and View Composer Domainspages.
2 On the Storage Settings page, make sure that Enable space reclamation is selected.
Space reclamation is selected by default if you are performing a fresh installation of View 5.2 or later.You must select Enable space reclamation if you are upgrading to View 5.2 or later from View 5.1 or anearlier release.
What to do next
On the Storage Settings page, configure View Storage Accelerator.
To finish configuring disk space reclamation in View, set up space reclamation for desktop pools.
Configure View Storage Accelerator for vCenter ServerIn vSphere 5.0 and later, you can configure ESXi hosts to cache virtual machine disk data. This feature,called View Storage Accelerator, uses the Content Based Read Cache (CBRC) feature in ESXi hosts. ViewStorage Accelerator improves View performance during I/O storms, which can take place when manydesktops start up or run anti-virus scans at once. The feature is also beneficial when administrators or usersload applications or data frequently. Instead of reading the entire OS or application from the storage systemover and over, a host can read common data blocks from cache.
By reducing the number of IOPS during boot storms, View Storage Accelerator lowers the demand on thestorage array, which lets you use less storage I/O bandwidth to support your View deployment.
You enable caching on your ESXi hosts by selecting the View Storage Accelerator setting in the vCenterServer wizard in View Administrator, as described in this procedure.
Make sure that View Storage Accelerator is also configured for individual desktop pools. View StorageAccelerator is enabled for pools by default, but this feature can be disabled or enabled when you create oredit a pool. To operate on a pool, View Storage Accelerator must be enabled for vCenter Server and for theindividual pool.
You can enable View Storage Accelerator on pools that contain linked clones and pools that contain fullvirtual machines.
View Storage Accelerator is also supported with local mode. Users can check out desktops in pools that areenabled for View Storage Accelerator. View Storage Accelerator is disabled while a desktop is checked outand reenabled after the desktop is checked in.
View Composer Array Integration is not supported in pools that are enabled for View Storage Accelerator.View Composer Array Integration uses vStorage APIs for Array Integration (VAAI) native NFS snapshottechnology to clone virtual machines.
Chapter 8 Configuring View for the First Time
VMware, Inc. 99
View Storage Accelerator is now qualified to work in configurations that use View replica tiering, in whichreplicas are stored on a separate datastore than linked clones. Although the performance benefits of usingView Storage Accelerator with View replica tiering are not materially significant, certain capacity-relatedbenefits might be realized by storing the replicas on a separate datastore. Hence, this combination is testedand supported.
Prerequisites
n Verify that your vCenter Server and ESXi hosts are version 5.0 or later.
In an ESXi cluster, verify that all the hosts are version 5.0 or later.
n Verify that the vCenter Server user was assigned the Global > Act as vCenter Server privilege invCenter Server. See the topics in the VMware Horizon View Installation documentation that describe ViewManager and View Composer privileges required for the vCenter Server user.
Procedure
1 In View Administrator, complete the Add vCenter Server wizard pages that precede the StorageSettings page.
a Select View Configuration > Servers.
b In the vCenter Servers tab, click Add.
c Complete the vCenter Server Information, View Composer Settings, and View Composer Domainspages.
2 On the Storage Settings page, make sure that the Enable View Storage Accelerator check box isselected.
This check box is selected by default.
3 Specify a default host cache size.
The default cache size applies to all ESXi hosts that are managed by this vCenter Server instance.
The default value is 1,024MB. The cache size must be between 100MB and 2,048MB.
4 To specify a different cache size for an individual ESXi host, select an ESXi host and click Edit cachesize.
a In the Host cache dialog box, check Override default host cache size.
b Type a Host cache size value between 100MB and 2,048MB and click OK.
5 On the Storage Settings page, click Next.
6 Click Finish to add vCenter Server, View Composer, and Storage Settings to View.
What to do next
To configure the PCoIP Secure Gateway, secure tunnel, and external URLs for client connections, see “Configuring View Client Connections,” on page 103.
To complete View Storage Accelerator settings in View, configure View Storage Accelerator for desktoppools. See "Configure View Storage Accelerator for Desktop Pools" in the VMware Horizon ViewAdministration document.
Concurrent Operations Limits for vCenter Server and View ComposerWhen you add vCenter Server to View or edit the vCenter Server settings, you can configure several optionsthat set the maximum number of concurrent operations that are performed by vCenter Server and ViewComposer.
You configure these options in the Advanced Settings panel on the vCenter Server Information page.
VMware Horizon View Installation
100 VMware, Inc.
Table 8‑4. Concurrent Operations Limits for vCenter Server and View Composer
Setting Description
Max concurrent vCenter provisioning operations Determines the maximum number of concurrent requeststhat View Manager can make to provision and delete fullvirtual machines in this vCenter Server instance.The default value is 20.This setting applies to full virtual machines only.
Max concurrent power operations Determines the maximum number of concurrent poweroperations (startup, shutdown, suspend, and so on) thatcan take place on virtual machines managed by ViewManager in this vCenter Server instance.The default value is 50.For guidelines for calculating a value for this setting, see “Setting a Concurrent Power Operations Rate to SupportView Desktop Logon Storms,” on page 101.This setting applies to full virtual machines and linkedclones.
Max concurrent View Composer maintenance operations Determines the maximum number of concurrent ViewComposer refresh, recompose, and rebalance operationsthat can take place on linked clones managed by this ViewComposer instance.The default value is 12.Desktops that have active sessions must be logged offbefore a maintenance operation can begin. If you forceusers to log off as soon as a maintenance operation begins,the maximum number of concurrent operations ondesktops that require logoffs is half the configured value.For example, if you configure this setting as 24 and forceusers to log off, the maximum number of concurrentoperations on desktops that require logoffs is 12.This setting applies to linked clones only.
Max concurrent View Composer provisioning operations Determines the maximum number of concurrent creationand deletion operations that can take place on linkedclones managed by this View Composer instance.The default value is 8.This setting applies to linked clones only.
Setting a Concurrent Power Operations Rate to Support View Desktop LogonStorms
The Max concurrent power operations setting governs the maximum number of concurrent poweroperations that can occur on View desktop virtual machines in a vCenter Server instance. Starting in View5.0, this limit is set to 50 by default. You can change this value to support peak power-on rates when manyusers log on to their desktops at the same time.
As a best practice, you can conduct a pilot phase to determine the correct value for this setting. For planningguidelines, see "Architecture Design Elements and Planning Guidelines" in the VMware Horizon ViewArchitecture Planning document.
The required number of concurrent power operations is based on the peak rate at which desktops arepowered on and the amount of time it takes for the desktop to power on, boot, and become available forconnection. In general, the recommended power operations limit is the total time it takes for the desktop tostart multiplied by the peak power-on rate.
For example, the average desktop takes two to three minutes to start. Therefore, the concurrent poweroperations limit should be 3 times the peak power-on rate. The default setting of 50 is expected to support apeak power-on rate of 16 desktops per minute.
Chapter 8 Configuring View for the First Time
VMware, Inc. 101
View waits a maximum of five minutes for a desktop to start. If the start time takes longer, other errors arelikely to occur. To be conservative, you can set a concurrent power operations limit of 5 times the peakpower-on rate. With a conservative approach, the default setting of 50 supports a peak power-on rate of 10desktops per minute.
Logons, and therefore desktop power on operations, typically occur in a normally distributed manner over acertain time window. You can approximate the peak power-on rate by assuming that it occurs in the middleof the time window, during which about 40% of the power-on operations occur in 1/6th of the time window.For example, if users log on between 8:00 AM and 9:00 AM, the time window is one hour, and 40% of thelogons occur in the 10 minutes between 8:25 AM and 8:35 AM. If there are 2,000 users, 20% of whom havetheir desktops powered off, then 40% of the 400 desktop power-on operations occur in those 10 minutes. Thepeak power-on rate is 16 desktops per minute.
Accept the Thumbprint of a Default SSL CertificateWhen you add vCenter Server and View Composer instances to Horizon View, you must ensure that theSSL certificates that are used for the vCenter Server and View Composer instances are valid and trusted byView Connection Server. If the default certificates that are installed with vCenter Server and ViewComposer are still in place, you must determine whether to accept these certificates' thumbprints.
If a vCenter Server or View Composer instance is configured with a certificate that is signed by a CA, andthe root certificate is trusted by View Connection Server, you do not have to accept the certificatethumbprint. No action is required.
If you replace a default certificate with a certificate that is signed by a CA, but View Connection Server doesnot trust the root certificate, you must determine whether to accept the certificate thumbprint. A thumbprintis a cryptographic hash of a certificate. The thumbprint is used to quickly determine if a presented certificateis the same as another certificate, such as the certificate that was accepted previously.
NOTE If you install vCenter Server and View Composer on the same Windows Server host, they can use thesame SSL certificate, but you must configure the certificate separately for each component.
For details about configuring SSL certificates, see Chapter 7, “Configuring SSL Certificates for ViewServers,” on page 71.
You first add vCenter Server and View Composer in View Administrator by using the Add vCenter Serverwizard. If a certificate is untrusted and you do not accept the thumbprint, you cannot add vCenter Serverand View Composer.
After these servers are added, you can reconfigure them in the Edit vCenter Server dialog box.
NOTE You also must accept a certificate thumbprint when you upgrade from an earlier release toHorizon View 5.1 or later, and a vCenter Server or View Composer certificate is untrusted, or if you replacea trusted certificate with an untrusted certificate.
On the View Administrator dashboard, the vCenter Server or View Composer icon turns red and an InvalidCertificate Detected dialog box appears. You must click Verify and follow the procedure shown here.
Similarly, in View Administrator you can configure a SAML 2.0 authenticator for use by a View ConnectionServer instance. If the SAML 2.0 server certificate is not trusted by View Connection Server, you mustdetermine whether to accept the certificate thumbprint. If you do not accept the thumbprint, you cannotconfigure the SAML 2.0 authenticator in Horizon View. After a SAML 2.0 authenticator is configured, youcan reconfigure it in the Edit View Connection Server dialog box.
Procedure
1 When View Administrator displays an Invalid Certificate Detected dialog box, click View Certificate.
2 Examine the certificate thumbprint in the Certificate Information window.
VMware Horizon View Installation
102 VMware, Inc.
3 Examine the certificate thumbprint that was configured for the vCenter Server or View Composerinstance.
a On the vCenter Server or View Composer host, start the MMC snap-in and open the WindowsCertificate Store.
b Navigate to the vCenter Server or View Composer certificate.
c Click the Certificate Details tab to display the certificate thumbprint.
Similarly, examine the certificate thumbprint for a SAML 2.0 authenticator. If appropriate, take thepreceding steps on the SAML 2.0 authenticator host.
4 Verify that the thumbprint in the Certificate Information window matches the thumbprint for thevCenter Server or View Composer instance.
Similarly, verify that the thumbprints match for a SAML 2.0 authenticator.
5 Determine whether to accept the certificate thumbprint.
Option Description
The thumbprints match. Click Accept to use the default certificate.
The thumbprints do not match. Click Reject.Troubleshoot the mismatched certificates. For example, you might haveprovided an incorrect IP address for vCenter Server or View Composer.
Configuring View Client ConnectionsView clients communicate with a View Connection Server or security server host over secure connections.
The initial View Client connection, which is used for user authentication and View desktop selection, iscreated over HTTPS when a user provides a domain name to View Client. If firewall and load balancingsoftware are configured correctly in your network environment, this request reaches the View ConnectionServer or security server host. With this connection, users are authenticated and a desktop is selected, butusers have not yet connected to View desktops.
When users connect to View desktops, by default View Client makes a second connection to the ViewConnection Server or security server host. This connection is called the tunnel connection because itprovides a secure tunnel for carrying RDP and other data over HTTPS.
When users connect to View desktops with the PCoIP display protocol, View Client can make a furtherconnection to the PCoIP Secure Gateway on the View Connection Server or security server host. The PCoIPSecure Gateway ensures that only authenticated users can communicate with View desktops over PCoIP.
When the secure tunnel or PCoIP Secure Gateway is disabled, View desktop sessions are establisheddirectly between the client system and the View desktop virtual machine, bypassing the View ConnectionServer or security server host. This type of connection is called a direct connection.
Desktop sessions that use direct connections remain connected even if View Connection Server is no longerrunning.
Typically, to provide secure connections for external clients that connect to a security server or ViewConnection Server host over a WAN, you enable both the secure tunnel and the PCoIP Secure Gateway. Youcan disable the secure tunnel and the PCoIP Secure Gateway to allow internal, LAN-connected clients toestablish direct connections to View desktops.
Certain View Client endpoints, such as thin clients, do not support the tunnel connection and use directconnections for RDP data, but do support the PCoIP Secure Gateway for PCoIP data.
Chapter 8 Configuring View for the First Time
VMware, Inc. 103
You can also provide secure connections to external users who use HTML Access to connect to Viewdesktops. The Blast Secure Gateway, enabled by default on View Connection Server and security serverhosts, ensures that only authenticated users can communicate with View desktops. With HTML Access,View Client software does not have to be installed on the users' endpoint devices.
SSL is required for all client connections to View Connection Server and security server hosts.
Configure the PCoIP Secure Gateway and Secure Tunnel ConnectionsYou use View Administrator to configure the use of the secure tunnel and PCoIP Secure Gateway. Thesecomponents ensure that only authenticated users can communicate with View desktops.
Clients that use the PCoIP display protocol can use the PCoIP Secure Gateway. Clients that use the RDPdisplay protocol can use the secure tunnel.
IMPORTANT A typical network configuration that provides secure connections for external clients includes asecurity server. To enable or disable the secure tunnel and PCoIP Secure Gateway on a security server, youmust edit the View Connection Server instance that is paired with the security server.
In a network configuration in which external clients connect directly to a View Connection Server host, youenable or disable the secure tunnel and PCoIP Secure Gateway by editing that View Connection Serverinstance in View Administrator.
Prerequisites
n If you intend to enable the PCoIP Secure Gateway, verify that the View Connection Server instance andpaired security server are View 4.6 or later.
n If you pair a security server to a View Connection Server instance on which you already enabled thePCoIP Secure Gateway, verify that the security server is View 4.6 or later.
Procedure
1 In View Administrator, select View Configuration > Servers.
2 In the View Connection Servers panel, select a View Connection Server instance and click Edit.
3 Configure use of the secure tunnel.
Option Description
Disable the secure tunnel Deselect Use secure tunnel connection to desktop.
Enable the secure tunnel Select Use secure tunnel connection to desktop. The secure tunnel is enabled by default.
4 Configure use of the PCoIP Secure Gateway.
Option Description
Enable the PCoIP Secure Gateway Select Use PCoIP Secure Gateway for PCoIP connections to desktop
Disable the PCoIP secure Gateway Deselect Use PCoIP Secure Gateway for PCoIP connections to desktop The PCoIP Secure Gateway is disabled by default.
5 Click OK to save your changes.
VMware Horizon View Installation
104 VMware, Inc.
Configure Secure HTML AccessIn View Administrator, you can configure the use of the Blast Secure Gateway to provide secure HTMLaccess to View desktops.
The Blast Secure Gateway ensures that only authenticated users can communicate with View desktops byusing HTML Access. View Client does not have to be installed on users' endpoint devices.
When the Blast Secure Gateway is not enabled, client Web browsers use HTML Access to establish directconnections to View desktop virtual machines, bypassing the Blast Secure Gateway.
IMPORTANT A typical network configuration that provides secure connections for external users includes asecurity server. To enable or disable the Blast Secure Gateway on a security server, you must edit the ViewConnection Server instance that is paired with the security server. If external users connect directly to aView Connection Server host, you enable or disable the Blast Secure Gateway by editing that ViewConnection Server instance.
Prerequisites
n If users select View desktops by using the Horizon User Portal, verify that Horizon Workspace isinstalled and configured for use with View Connection Server and that View Connection Server ispaired with a SAML 2.0 Authentication server.
n Verify that the secure tunnel is enabled. If the secure tunnel is disabled, the Blast Secure Gatewaycannot be enabled.
Procedure
1 In View Administrator, select View Configuration > Servers.
2 In the View Connection Servers panel, select a View Connection Server instance and click Edit.
3 Configure use of the Blast Secure Gateway.
Option Description
Enable the Blast Secure Gateway Select Use Blast Secure Gateway for HTML access to desktop
Disable the Blast secure Gateway Deselect Use Blast Secure Gateway for HTML access to desktop The Blast Secure Gateway is enabled by default.
4 Click OK to save your changes.
Open the Port Used by HTML Access on Security ServersWhen you install View Connection Server or security server, the View server installer creates the WindowsFirewall rule for the port that is used by HTML Access for client connections, but the installer leaves the ruledisabled until it is actually needed. When you later install HTML Access on a View Connection Serverinstance, the HTML Access installer automatically enables the rule to allow communication to that port.However, on security servers, you must manually enable the rule in the Windows Firewall to allowcommunication to the port.
By default, HTML Access uses TCP port 8443 for client connections to the Blast Secure Gateway.
Procedure
n To open the port used by HTML Access on a View Connection Server computer, install HTML Accesson that computer.
The HTML Access installer enables the VMware View Connection Server (Blast-In) rule in theWindows Firewall.
Chapter 8 Configuring View for the First Time
VMware, Inc. 105
n To open the port for HTML Access on a security server, manually enable the VMware ViewConnection Server (Blast-In) rule in the Windows Firewall.
Configuring External URLs for Secure Gateway and Tunnel ConnectionsTo use the secure tunnel, a client system must have access to an IP address, or a fully qualified domain name(FQDN) that it can resolve to an IP address, that allows the client to reach a View Connection Server orsecurity server host.
To use the PCoIP Secure Gateway, a client system must have access to an IP address that allows the client toreach a View Connection Server or security server host.
To use the Blast Secure Gateway, a user's endpoint device must have access to an FQDN that it can resolveto an IP address that allows the user's Web browser to reach a View Connection Server or security serverhost.
Using Tunnel Connections From External LocationsBy default, a View Connection Server or security server host can be contacted only by tunnel clients thatreside within the same network and are therefore able to locate the requested host.
Many organizations require that users can connect from an external location by using a specific IP addressor client-resolvable domain name, and a specific port. This information might or might not resemble theactual address and port number of the View Connection Server or security server host. The information isprovided to a client system in the form of a URL. For example:
n https://view-example.com:443
n https://view.example.com:443
n https://example.com:1234
n https://10.20.30.40:443
To use addresses like these in View Manager, you must configure the View Connection Server or securityserver host to return an external URL instead of the host's FQDN.
Configuring External URLsYou configure more than one external URL. The first URL allows client systems to make tunnel connections.A second URL allows client systems that use PCoIP to make secure connections through the PCoIP SecureGateway. You must specify the PCoIP external URL as an IP address, which allows client systems to connectfrom an external location.
A third URL allows users to make secure connections from their Web browsers through the Blast SecureGateway.
If your network configuration includes security servers, provide external URLs for the security servers.External URLs are not required on the View Connection Server instances that are paired with the securityservers.
The process of configuring the external URLs is different for View Connection Server instances and securityservers.
n For a View Connection Server instance, you set the external URLs by editing View Connection Serversettings in View Administrator.
n For a security server, you set the external URLs when you run the View Connection Server installationprogram. You can use View Administrator to modify an external URL for a security server.
VMware Horizon View Installation
106 VMware, Inc.
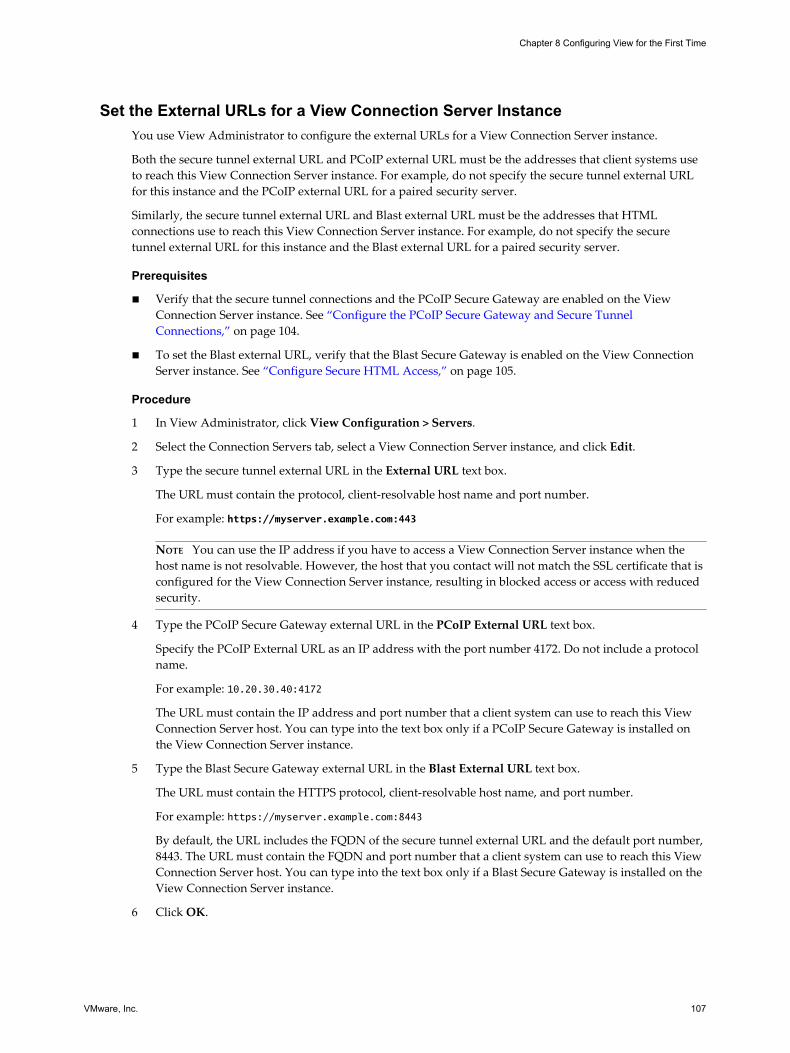
Set the External URLs for a View Connection Server InstanceYou use View Administrator to configure the external URLs for a View Connection Server instance.
Both the secure tunnel external URL and PCoIP external URL must be the addresses that client systems useto reach this View Connection Server instance. For example, do not specify the secure tunnel external URLfor this instance and the PCoIP external URL for a paired security server.
Similarly, the secure tunnel external URL and Blast external URL must be the addresses that HTMLconnections use to reach this View Connection Server instance. For example, do not specify the securetunnel external URL for this instance and the Blast external URL for a paired security server.
Prerequisites
n Verify that the secure tunnel connections and the PCoIP Secure Gateway are enabled on the ViewConnection Server instance. See “Configure the PCoIP Secure Gateway and Secure TunnelConnections,” on page 104.
n To set the Blast external URL, verify that the Blast Secure Gateway is enabled on the View ConnectionServer instance. See “Configure Secure HTML Access,” on page 105.
Procedure
1 In View Administrator, click View Configuration > Servers.
2 Select the Connection Servers tab, select a View Connection Server instance, and click Edit.
3 Type the secure tunnel external URL in the External URL text box.
The URL must contain the protocol, client-resolvable host name and port number.
For example: https://myserver.example.com:443
NOTE You can use the IP address if you have to access a View Connection Server instance when thehost name is not resolvable. However, the host that you contact will not match the SSL certificate that isconfigured for the View Connection Server instance, resulting in blocked access or access with reducedsecurity.
4 Type the PCoIP Secure Gateway external URL in the PCoIP External URL text box.
Specify the PCoIP External URL as an IP address with the port number 4172. Do not include a protocolname.
For example: 10.20.30.40:4172
The URL must contain the IP address and port number that a client system can use to reach this ViewConnection Server host. You can type into the text box only if a PCoIP Secure Gateway is installed onthe View Connection Server instance.
5 Type the Blast Secure Gateway external URL in the Blast External URL text box.
The URL must contain the HTTPS protocol, client-resolvable host name, and port number.
For example: https://myserver.example.com:8443
By default, the URL includes the FQDN of the secure tunnel external URL and the default port number,8443. The URL must contain the FQDN and port number that a client system can use to reach this ViewConnection Server host. You can type into the text box only if a Blast Secure Gateway is installed on theView Connection Server instance.
6 Click OK.
Chapter 8 Configuring View for the First Time
VMware, Inc. 107
Modify the External URLs for a Security ServerYou use View Administrator to modify the external URLs for a security server.
You initially configure these external URLs when you install a security server in the View Connection Serverinstallation program.
The secure tunnel external URL, PCoIP external URL, and Blast external URL must be the addresses thatclient systems use to reach this security server. For example, do not specify the secure tunnel external URLfor this security server and the PCoIP external URL for a paired View Connection Server instance.
Prerequisites
n For secure access to View desktops over PCoIP, verify that the security server version is View 4.6 orlater.
n For secure HTML access to View desktops, verify that the security server version is View 5.2 or later.
n Verify that the secure tunnel connections and the PCoIP Secure Gateway are enabled on the ViewConnection Server instance that is paired with this security server. See “Configure the PCoIP SecureGateway and Secure Tunnel Connections,” on page 104.
n To set the Blast external URL, verify that the Blast Secure Gateway is enabled on the View ConnectionServer instance that is paired with this security server. See “Configure Secure HTML Access,” onpage 105.
Procedure
1 In View Administrator, select View Configuration > Servers.
2 Select the Security Servers tab, select the security server, and click Edit.
The Edit button is unavailable if the security server is not upgraded to View Connection Server 4.6 orlater.
3 Type the Secure Tunnel external URL in the External URL text box.
The URL must contain the protocol, client-resolvable security server host name and port number.
For example: https://view.example.com:443
NOTE You can use the IP address if you have to access a security server when the host name is notresolvable. However, the host that you contact will not match the SSL certificate that is configured forthe security server, resulting in blocked access or access with reduced security.
4 Type the PCoIP Secure Gateway external URL in the PCoIP External URL text box.
Specify the PCoIP external URL as an IP address with the port number 4172. Do not include a protocolname.
For example: 10.20.30.40:4172
The URL must contain the IP address and port number that a client system can use to reach this securityserver. You can type into the text box only if a PCoIP Secure Gateway is installed on the security server.
5 Type the Blast Secure Gateway external URL in the Blast External URL text box.
The URL must contain the HTTPS protocol, client-resolvable host name, and port number.
For example: https://myserver.example.com:8443
By default, the URL includes the FQDN of the secure tunnel external URL and the default port number,8443. The URL must contain the FQDN and port number that a client system can use to reach thissecurity server. You can type into the text box only if a Blast Secure Gateway is installed on the securityserver.
VMware Horizon View Installation
108 VMware, Inc.
6 Click OK to save your changes.
View Administrator sends the updated external URLs to the security server. You do not need to restart thesecurity server service for the changes to take effect.
Replacing Default Ports for View ServicesDuring installation, View services are set up to listen on certain network ports by default. In certainorganizations, these ports must be changed to comply with organization policies or to avoid contention. Youcan change the default ports that are used by View Connection Server, security server, PCoIP SecureGateway, View Composer, and View Transfer Server services.
Changing ports is an optional setup task. Use the default ports if your deployment does not require you tochange them.
For a list of the default TCP and UDP ports that are used by View servers, see "View TCP and UDP Ports" inthe VMware Horizon View Security document.
Replace the Default HTTP Ports or NICs for View Connection Server Instancesand Security Servers
You can replace the default HTTP ports or NICs for a View Connection Server instance or security server byediting the locked.properties file on the View server computer. Your organization might require you toperform these tasks to comply with organization policies or to avoid contention.
The default SSL port is 443. The default non-SSL port is 80.
The port that is specified in the secure tunnel External URL does not change as a result of changes that youmake to ports in this procedure. Depending on your network configuration, you might have to change thesecure tunnel External URL port as well.
If the View server computer has multiple NICs, the computer listens on all NICs by default. You can selectone NIC to listen on the configured port by specifying the IP address that is bound to that NIC.
During installation, View configures the Windows firewall to open the required default ports. If you changea port number or the NIC on which it listens, you must manually reconfigure your Windows firewall toopen the updated ports so that View Client devices can connect to the View server.
Prerequisites
Verify that the port that is specified in the External URL for this View Connection Server instance or securityserver will continue to be valid after you change ports in this procedure.
Procedure
1 Create or edit the locked.properties file in the SSL gateway configuration folder on the ViewConnection Server or security server computer.
For example: install_directory\VMware\VMware View\Server\sslgateway\conf\locked.properties
The properties in the locked.properties file are case sensitive.
2 Add the serverPort or serverPortNonSsl property, or both properties, to the locked.properties file.
For example:
serverPort=4443
serverPortNonSsl=8080
Chapter 8 Configuring View for the First Time
VMware, Inc. 109
3 (Optional) If the View server computer has multiple NICs, select one NIC to listen on the configuredports.
Add the serverHost and serverHostNonSsl properties to specify the IP address that is bound to thedesignated NIC.
For example:
serverHost=10.20.30.40
serverHostNonSsl=10.20.30.40
Typically, both the SSL and non-SSL listeners are configured to use the same NIC. However, if you usethe serverProtocol=http property to off-load SSL for client connections, you can set the serverHostproperty to a separate NIC to provide SSL connections to systems that are used to launch ViewAdministrator.
If you configure SSL and non-SSL connections to use the same NIC, the SSL and non-SSL ports mustnot be the same.
4 Restart the View Connection Server service or security server service to make your changes take effect.
What to do next
If necessary, manually configure your Windows firewall to open the updated ports.
Replace the Default Ports or NICs for the PCoIP Secure Gateway on ViewConnection Server Instances and on Security Servers
You can replace the default ports or NICs that are used by a PCoIP Secure Gateway service that runs on aView Connection Server instance or security server. Your organization might require you to perform thesetasks to comply with organization policies or to avoid contention.
For client-facing TCP and UDP connections, the PCoIP Secure Gateway listens on port 4172 by default. ForUDP connections to View desktops, the PCoIP Secure Gateway listens on port 55000 by default.
The port that is specified in the PCoIP External URL does not change as a result of changes that you make toports in this procedure. Depending on your network configuration, you might have to change the PCoIPExternal URL port as well.
If the computer on which the PCoIP Secure Gateway is running has multiple NICs, the computer listens onall NICs by default. You can select one NIC to listen on the configured ports by specifying the IP addressthat is bound to that NIC.
Prerequisites
Verify that the port that is specified in the PCoIP External URL on the View Connection Server instance orsecurity server will continue to be valid after you change ports in this procedure.
Procedure
1 Start the Windows Registry Editor on the View Connection Server or security server computer wherethe PCoIP Secure Gateway is running.
2 Navigate to the HKEY_LOCAL_MACHINE\SOFTWARE\Teradici\SecurityGateway registry key.
3 Under this registry key, add one or more of the following String (REG_SZ) values with your updated portnumbers.
For example:
ExternalTCPPort "44172"
ExternalUDPPort "44172"
InternalUDPPort "55111"
VMware Horizon View Installation
110 VMware, Inc.
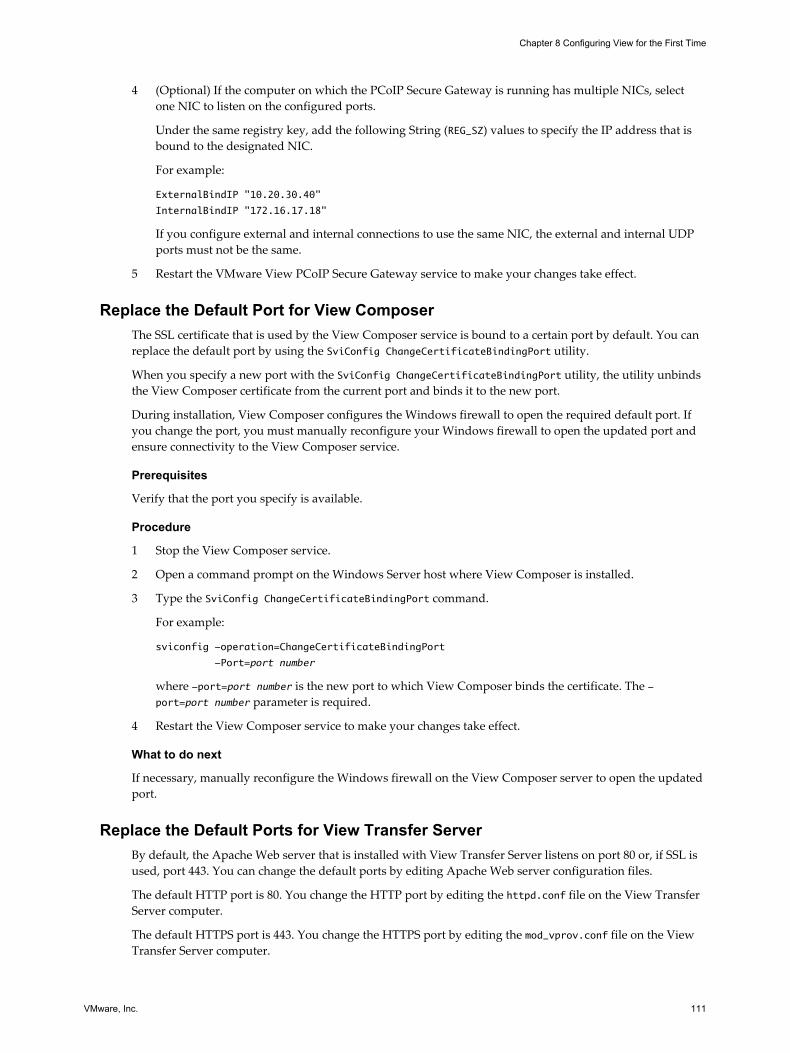
4 (Optional) If the computer on which the PCoIP Secure Gateway is running has multiple NICs, selectone NIC to listen on the configured ports.
Under the same registry key, add the following String (REG_SZ) values to specify the IP address that isbound to the designated NIC.
For example:
ExternalBindIP "10.20.30.40"
InternalBindIP "172.16.17.18"
If you configure external and internal connections to use the same NIC, the external and internal UDPports must not be the same.
5 Restart the VMware View PCoIP Secure Gateway service to make your changes take effect.
Replace the Default Port for View ComposerThe SSL certificate that is used by the View Composer service is bound to a certain port by default. You canreplace the default port by using the SviConfig ChangeCertificateBindingPort utility.
When you specify a new port with the SviConfig ChangeCertificateBindingPort utility, the utility unbindsthe View Composer certificate from the current port and binds it to the new port.
During installation, View Composer configures the Windows firewall to open the required default port. Ifyou change the port, you must manually reconfigure your Windows firewall to open the updated port andensure connectivity to the View Composer service.
Prerequisites
Verify that the port you specify is available.
Procedure
1 Stop the View Composer service.
2 Open a command prompt on the Windows Server host where View Composer is installed.
3 Type the SviConfig ChangeCertificateBindingPort command.
For example:
sviconfig -operation=ChangeCertificateBindingPort
-Port=port number
where -port=port number is the new port to which View Composer binds the certificate. The -port=port number parameter is required.
4 Restart the View Composer service to make your changes take effect.
What to do next
If necessary, manually reconfigure the Windows firewall on the View Composer server to open the updatedport.
Replace the Default Ports for View Transfer ServerBy default, the Apache Web server that is installed with View Transfer Server listens on port 80 or, if SSL isused, port 443. You can change the default ports by editing Apache Web server configuration files.
The default HTTP port is 80. You change the HTTP port by editing the httpd.conf file on the View TransferServer computer.
The default HTTPS port is 443. You change the HTTPS port by editing the mod_vprov.conf file on the ViewTransfer Server computer.
Chapter 8 Configuring View for the First Time
VMware, Inc. 111
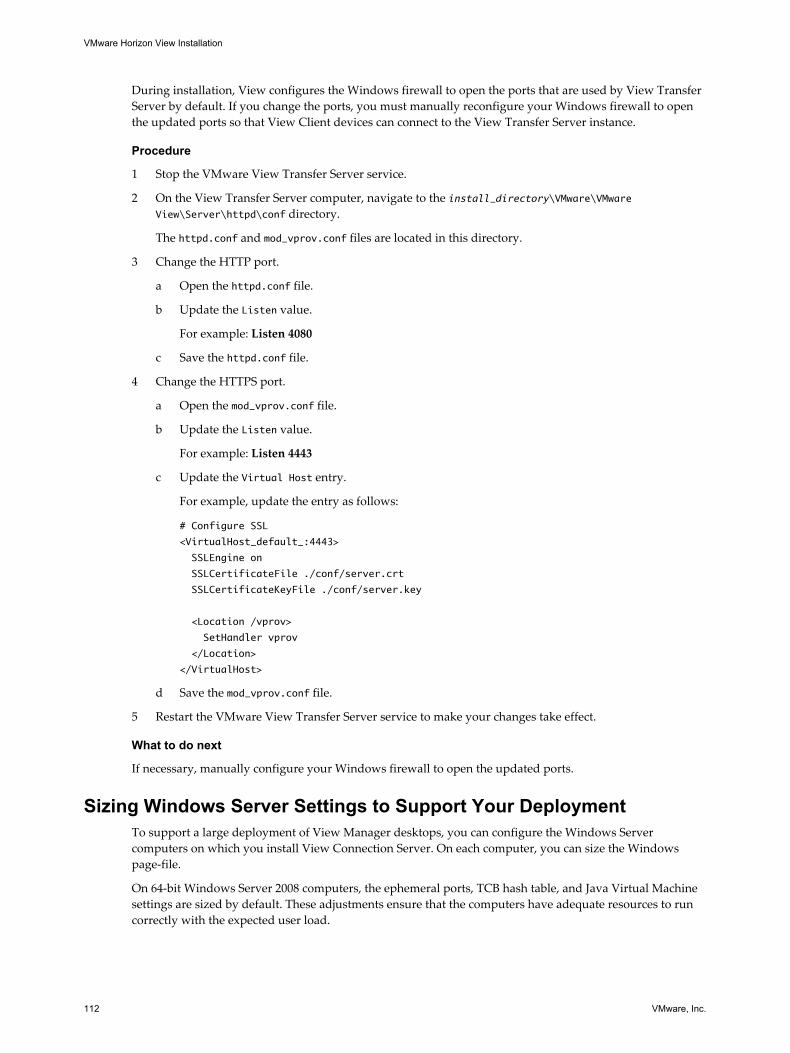
During installation, View configures the Windows firewall to open the ports that are used by View TransferServer by default. If you change the ports, you must manually reconfigure your Windows firewall to openthe updated ports so that View Client devices can connect to the View Transfer Server instance.
Procedure
1 Stop the VMware View Transfer Server service.
2 On the View Transfer Server computer, navigate to the install_directory\VMware\VMwareView\Server\httpd\conf directory.
The httpd.conf and mod_vprov.conf files are located in this directory.
3 Change the HTTP port.
a Open the httpd.conf file.
b Update the Listen value.
For example: Listen 4080
c Save the httpd.conf file.
4 Change the HTTPS port.
a Open the mod_vprov.conf file.
b Update the Listen value.
For example: Listen 4443
c Update the Virtual Host entry.
For example, update the entry as follows:
# Configure SSL
<VirtualHost_default_:4443>
SSLEngine on
SSLCertificateFile ./conf/server.crt
SSLCertificateKeyFile ./conf/server.key
<Location /vprov>
SetHandler vprov
</Location>
</VirtualHost>
d Save the mod_vprov.conf file.
5 Restart the VMware View Transfer Server service to make your changes take effect.
What to do next
If necessary, manually configure your Windows firewall to open the updated ports.
Sizing Windows Server Settings to Support Your DeploymentTo support a large deployment of View Manager desktops, you can configure the Windows Servercomputers on which you install View Connection Server. On each computer, you can size the Windowspage-file.
On 64-bit Windows Server 2008 computers, the ephemeral ports, TCB hash table, and Java Virtual Machinesettings are sized by default. These adjustments ensure that the computers have adequate resources to runcorrectly with the expected user load.
VMware Horizon View Installation
112 VMware, Inc.
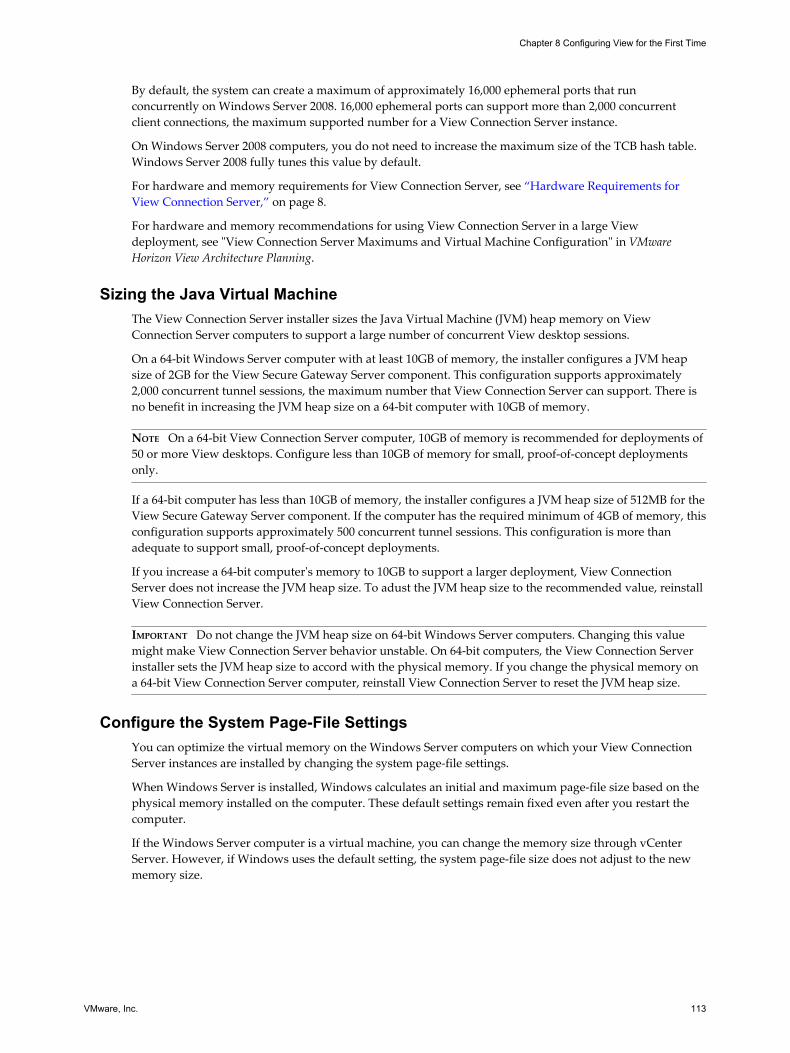
By default, the system can create a maximum of approximately 16,000 ephemeral ports that runconcurrently on Windows Server 2008. 16,000 ephemeral ports can support more than 2,000 concurrentclient connections, the maximum supported number for a View Connection Server instance.
On Windows Server 2008 computers, you do not need to increase the maximum size of the TCB hash table.Windows Server 2008 fully tunes this value by default.
For hardware and memory requirements for View Connection Server, see “Hardware Requirements forView Connection Server,” on page 8.
For hardware and memory recommendations for using View Connection Server in a large Viewdeployment, see "View Connection Server Maximums and Virtual Machine Configuration" in VMwareHorizon View Architecture Planning.
Sizing the Java Virtual MachineThe View Connection Server installer sizes the Java Virtual Machine (JVM) heap memory on ViewConnection Server computers to support a large number of concurrent View desktop sessions.
On a 64-bit Windows Server computer with at least 10GB of memory, the installer configures a JVM heapsize of 2GB for the View Secure Gateway Server component. This configuration supports approximately2,000 concurrent tunnel sessions, the maximum number that View Connection Server can support. There isno benefit in increasing the JVM heap size on a 64-bit computer with 10GB of memory.
NOTE On a 64-bit View Connection Server computer, 10GB of memory is recommended for deployments of50 or more View desktops. Configure less than 10GB of memory for small, proof-of-concept deploymentsonly.
If a 64-bit computer has less than 10GB of memory, the installer configures a JVM heap size of 512MB for theView Secure Gateway Server component. If the computer has the required minimum of 4GB of memory, thisconfiguration supports approximately 500 concurrent tunnel sessions. This configuration is more thanadequate to support small, proof-of-concept deployments.
If you increase a 64-bit computer's memory to 10GB to support a larger deployment, View ConnectionServer does not increase the JVM heap size. To adust the JVM heap size to the recommended value, reinstallView Connection Server.
IMPORTANT Do not change the JVM heap size on 64-bit Windows Server computers. Changing this valuemight make View Connection Server behavior unstable. On 64-bit computers, the View Connection Serverinstaller sets the JVM heap size to accord with the physical memory. If you change the physical memory ona 64-bit View Connection Server computer, reinstall View Connection Server to reset the JVM heap size.
Configure the System Page-File SettingsYou can optimize the virtual memory on the Windows Server computers on which your View ConnectionServer instances are installed by changing the system page-file settings.
When Windows Server is installed, Windows calculates an initial and maximum page-file size based on thephysical memory installed on the computer. These default settings remain fixed even after you restart thecomputer.
If the Windows Server computer is a virtual machine, you can change the memory size through vCenterServer. However, if Windows uses the default setting, the system page-file size does not adjust to the newmemory size.
Chapter 8 Configuring View for the First Time
VMware, Inc. 113
Procedure
1 On the Windows Server computer on which View Connection Server is installed, navigate to the VirtualMemory dialog box.
By default, Custom size is selected. An initial and maximum page-file size appear.
2 Click System managed size.
Windows continually recalculates the system page-file size based on current memory use and availablememory.
VMware Horizon View Installation
114 VMware, Inc.
Adding the View Desktops Plug-in tothe vSphere Web Client 9
The View Desktops plug-in lets you use the vSphere Web Client to find information about Viewdeployments that run in your vSphere environment. You add the View Desktops plug-in to the vSphereWeb Client by registering the plug-in with the vCenter Lookup Service.
In View 5.2, the View Desktops plug-in is a Tech Preview feature that lets you quickly navigate from usersof virtual desktops in View to the underlying virtual machines on which those virtual desktops are based.
Use the View Desktops plug-in to troubleshoot issues with a user's desktop. If a user calls in with a problemsuch as a desktop that is performing slowly, you can immediately jump to the user's virtual machine on theVirtual Machines page of the vSphere Web Client and troubleshoot the issue.
This chapter includes the following topics:
n “Add the View Desktops Plug-in,” on page 115
n “Search for View Users in the vSphere Web Client,” on page 119
n “Remove the View Desktops Plug-in,” on page 120
Add the View Desktops Plug-inTo add the View Desktops plug-in to the vSphere Web Client, you must configure the vCenter LookupService and register the plug-in. To perform these tasks, you run the regtool.cmd utility installed with ViewConnection Server.
Procedure
1 View Desktops Support for View Pods and vCenter Server Services on page 116The View Desktops plug-in supports a single pod of replicated View Connection Server instances. Youcannot use the View Desktops plug-in to search for desktops that are managed by different pods ofreplicated View Connection Server instances.
2 View Desktops Registration Prerequisites on page 116Before you add the View Desktops plug-in to the vSphere Web Client, you must verify that yourvSphere and View environments are prepared for the registration. You also must identify useraccounts with the administrator privileges required to register the plug-in.
3 Configure View to Recognize the vCenter Lookup Service on page 117You must configure View to recognize the vCenter Lookup Service. You perform this configurationtask once for all View Connection Server instances in a replicated group.
4 Register the View Desktops Plug-in on page 118You must register the View Desktops plug-in with the vCenter Single-Sign On Service and vCenterLookup Service.
VMware, Inc. 115
View Desktops Support for View Pods and vCenter Server ServicesThe View Desktops plug-in supports a single pod of replicated View Connection Server instances. Youcannot use the View Desktops plug-in to search for desktops that are managed by different pods ofreplicated View Connection Server instances.
Even if multiple View pods use the same vCenter Single Sign-On Service and vCenter Lookup Service, theView Desktops plug-in can support only one pod at a time.
To use the View Desktops plug-in for a different View pod, you must unregister the View Desktops plug-inon all the View Connection Server instances in the first pod and register the plug-in on the View ConnectionServer instances in the second pod.
Conversely, if one View pod is configured with multiple vCenter Server instances, each using its ownvCenter Single Sign-On Service and vCenter Lookup Service, you can configure the View Desktops plug-infor only one vCenter Lookup Service. To use the View Desktops plug-in for a different vCenter LookupService, you must unregister the View Desktops plug-in on all the View Connection Server instances andremove the vCenter Lookup Service from View Connection Server (the View pod). You can then configureand register the View pod to use the new vCenter Lookup Service.
For details about unregistering and removing the plug-in, see “Remove the View Desktops Plug-in,” onpage 120.
View Desktops Registration PrerequisitesBefore you add the View Desktops plug-in to the vSphere Web Client, you must verify that your vSphereand View environments are prepared for the registration. You also must identify user accounts with theadministrator privileges required to register the plug-in.
Procedure
n Verify that the following products are installed:
n VMware vSphere 5.1 or a later update or release
n VMware Horizon View 5.2 or a later update or release
n Verify that the vSphere Web Client is configured and accessible.
n Verify that system clocks on your vSphere and View systems are synchronized.
n Verify that valid SSL certificates are configured on your vSphere and View servers.
If the SSL certificate that is issued for the vCenter Lookup Service is not trusted by the View ConnectionServer computer on which you configure the View Desktops plug-in, you must accept the thumbpint ofthe vCenter Lookup Service certificate during the configuration step.
n Verify that snapshots were taken of the virtual machines on which the following vCenter Serverservices are installed:
n vCenter Single Sign-On
n vSphere Web Client
These services might be configured on separate systems or the same system.
VMware Horizon View Installation
116 VMware, Inc.
n Verify that you have a user with vCenter Single Sign-On (SSO) administrator privileges.
You must provide this account when you register the View Desktops plug-in.
a Log in to the vSphere Web Client with a user account that has vCenter SSO administratorprivileges.
For example, on a vCenter Server that runs on Windows Server, the default vCenter SSOadministrator user is Admin@System-Domain. On a vCenter Server Virtual Appliance, the default useris root@localos.
b Browse to Administration > Access > SSO Users and Groups.
The Users tab on the vCenter Single Sign-On Users and Groups page displays the users withvCenter SSO administrator privileges. You can use any displayed user.
n Verify that you have a user with the View Administrators role or Global Configuration and PolicyAdministrators role. You can also use a user with the View Administrators role on an individual folder.
You must provide this account when you configure the vCenter Lookup Service and register the ViewDesktops plug-in.
You authorize a View Administrators account when you install View Connection Server. See “InstallView Connection Server with a New Configuration,” on page 40.
In the View Administrator user interface, you can authorize additional users with the ViewAdministrators role or Global Configuration and Policy Administrators role. In addition, you canauthorize a user to have the View Administrators role on an individual folder. See "ManageAdministrators" in the VMware Horizon View Administration document.
What to do next
Configure the vCenter Lookup Service.
Configure View to Recognize the vCenter Lookup ServiceYou must configure View to recognize the vCenter Lookup Service. You perform this configuration taskonce for all View Connection Server instances in a replicated group.
Prerequisites
n Verify that your vCenter Server and View environments are prepared for the registration. See “ViewDesktops Registration Prerequisites,” on page 116.
Procedure
1 On the View Connection Server computer, navigate to the regtool.cmd utility, located in the followingdirectory:
install_directory\VMware\VMware View\Server\TechPreview\ViewAdminPlugin
2 (Optional) Set the JAVA_HOME environment variable to the jre folder.
For example: set JAVA_HOME=c:\Program Files\VMware\VMware View\Server\jre
3 Configure the vCenter Lookup Service.
For example:regtool.cmd configureLookupService -u view-admin@domain -ld https://lookup-server:
7444/lookupservice/sdk
view-admin@domain is the username and domain of a user with the View Administrators role.
lookup-server@domain is the host name or IP address and domain of the computer on which thevCenter Lookup Service is installed.
Chapter 9 Adding the View Desktops Plug-in to the vSphere Web Client
VMware, Inc. 117
4 If the SSL certificate that is issued for the vCenter Lookup Service is not trusted by the View ConnectionServer computer, accept the certificate thumbprint.
The following error message is displayed:
Error: The security certificate presented by this Lookup Service was not
issued by a trusted certificate authority. The thumbprint of the certificate is
thumbprint.
Return code: -1
Accept the thumbprint by using the -lt option and copying the thumbprint. You can copy thethumbprint that is displayed in the error message and paste it into the command line.
For example:regtool.cmd configureLookupService -u view-admin@domain -ld https://lookup-server:
7444/lookupservice/sdk -lt thumbprint
The thumbprint might look like this: 31:2A:32:50:1A:0B:34:B1:65:46:13:A8:0A:5E:F7:43:6E:A9:2C:3E
5 At the prompt, type the View Administrators user password.
A return code of 0 indicates that the configuration was successful.
NOTE When you type the password, the following warning message might appear. You can ignore thismessage:
log4j: WARN No appenders could be found for logger
<com.vmware.vim.vmomi.core.types.impl.VmodlContextImpl>.
log4j: WARN Please initialize the log4j system properly.
What to do next
Register the View Desktops plug-in.
Register the View Desktops Plug-inYou must register the View Desktops plug-in with the vCenter Single-Sign On Service and vCenter LookupService.
You must register the View Desktops plug-in on each View Connection Server instance in a replicatedgroup. Repeat this procedure on each View Connection Server computer.
NOTE The regtool.cmd register commands in this procedure assume that your View Connection Serverservice uses the default port, 443. If you change the default View Connection Server port, use the -p port-number option with the regtool.cmd register command to specify the custom port number.
Prerequisites
Verify that the vCenter Lookup Service is configured for the View Desktops plug-in. See “Configure View toRecognize the vCenter Lookup Service,” on page 117.
Procedure
1 On the View Connection Server computer, navigate to the regtool.cmd utility, located in the followingdirectory:
install_directory\VMware\VMware View\Server\TechPreview\ViewAdminPlugin
2 Register the View Desktops plug-in.
For example: regtool.cmd register -u view-admin@domain -lu sso-admin@domain
view-admin@domain is the username and domain of a user with the View Administrators role.
VMware Horizon View Installation
118 VMware, Inc.
sso-admin@domain is the username and domain of a user with vCenter SSO administrator privileges. Ona vCenter Server that runs on Windows Server, the default vCenter SSO administrator user isAdmin@System-Domain. On a vCenter Server Virtual Appliance, the default user is root@localos.
3 At the prompt, type the View Administrators user password.
4 At the prompt, type the vCenter SSO administrator user password.
A return code of 0 indicates that the configuration was successful.
NOTE When you type the password, the following warning message might appear. You can ignore thismessage:
log4j: WARN No appenders could be found for logger
<com.vmware.vim.vmomi.core.types.impl.VmodlContextImpl>.
log4j: WARN Please initialize the log4j system properly.
5 If necessary, restart the VMware vSphere Web Client Service.
In certain cases, this service must be restarted to allow the registration to take effect.
The service resides on the vCenter Server or another computer, not on the View Connection Servercomputer.
6 (Optional) Verify that the View Connection Server pod, View Desktops plug-in, and View ConnectionServer instance were registered successfully by using the regtool.cmd showDetails command.
For example: regtool.cmd showDetails -u view-admin@domain
What to do next
Log in to the vSphere Web Client to verify that the View Desktops plug-in was added. See “Search for ViewUsers in the vSphere Web Client,” on page 119.
Search for View Users in the vSphere Web ClientIn View Desktops in the vSphere Web Client, you can perform a quick search or simple search for a Viewuser, display the desktops that are associated with that user, and examine the underlying virtual machines.After you first configure the View Desktops plug-in, perform this task to verify that the plug-in was addedto the vSphere Web Client.
When you search for a View user in the vSphere Web Client, View Desktops displays floating desktops onwhich the user is logged in and dedicated desktops that are assigned to the user. Note that a floatingdesktop is displayed even when the session is in a disconnected state. If a user is entitled to a floatingdesktop pool but not logged in, no floating desktops in that pool are displayed.
This procedure uses quick search. You can also use a simple search to search for View users. In this TechPreview, you cannot use an advanced search to search for View users.
Prerequisites
n Verify that the View Desktops plug-in was configured with the vCenter Lookup Service and registeredwith the vSphere Web Client. See “Configure View to Recognize the vCenter Lookup Service,” onpage 117 and “Register the View Desktops Plug-in,” on page 118.
n Verify that you can log in to the vSphere Web Client as a user with the View Administrators role orView Administrators (Read only) role and with the vSphere Administrator privilege for the Viewdesktop virtual machines and vCenter Server folders that store the virtual machines.
If you search for desktops without having the vSphere Administrator privilege, the virtual machinenames are displayed as disabled links and you cannot access the virtual machine information.
Chapter 9 Adding the View Desktops Plug-in to the vSphere Web Client
VMware, Inc. 119
Procedure
1 Log in to the vSphere Web Client as a user with the View Administrators or View Administrators (readonly) role and the appropriate vSphere Administrator privileges.
For example: https://vSphere_Web_Client_IP_address_or_FQDN:9443/vsphere-client/
2 In the Search box, type the username of a View user.
3 Select the username from the search results.
4 Select a desktop from the list of desktops that is associated with the user.
5 Navigate to the Virtual Machines page to see details about the underlying desktop virtual machine.
Remove the View Desktops Plug-inTo remove the View Desktops plug-in from the vSphere Web Client, you must unregister the plug-in oneach View Connection Server instance in a replicated group. Next, you remove the vCenter Lookup Serviceconfiguration.
In a replicated group of View Connection Server instances, you cannot unregister the instance on which youfirst registered the View Desktops plug-in until all other instances are unregistered.
If you intend to perform maintenance operations on the View Connection Server instances in a replicatedgroup, you can use the -f option with the regtool.cmd removeLookUpService command to unregister all theView Connection Server instances and remove the vCenter Lookup Service configuration in one step.
If you intend to bring down a View Connection Server instance for scheduled maintenance, you mustunregister the instance from the vCenter Lookup Service before you start the maintenance procedure.
Procedure
1 On the View Connection Server computer, navigate to the regtool.cmd utility, located in the followingdirectory:
install_directory\VMware\VMware View\Server\TechPreview\ViewAdminPlugin
2 Unregister View Desktops plug-in.
For example: regtool.cmd unregister -u view-admin@domain
view-admin@domain is the username and domain of a user with the View Administrators role.
3 At the prompt, type the View Administrators user password.
A return code of 0 indicates that the configuration was successful.
4 Repeat the preceding steps to unregister the plug-in on all View Connection Server instances in areplicated group.
After all other instances are unregistered, unregister the plug-in on the instance on which you firstperformed the registration.
5 Remove the vCenter Lookup Service configuration from View Connection Server.
For example: regtool.cmd removeLookUpService -u view-admin@domain
You can run this command on any View Connection Server instance in a replicated group. Thecommand fails if the View Desktops plug-in is still registered on any View Connection Server instance.
6 At the prompt, type the View Administrators user password.
A return code of 0 indicates that the configuration was successful.
VMware Horizon View Installation
120 VMware, Inc.
Configuring Event Reporting 10You can create an event database to record information about View Manager events. In addition, if you usea Syslog server, you can configure View Connection Server to send events to a Syslog server or create a flatfile of events written in Syslog format.
This chapter includes the following topics:
n “Add a Database and Database User for View Events,” on page 121
n “Prepare an SQL Server Database for Event Reporting,” on page 122
n “Configure the Event Database,” on page 123
n “Configure Event Logging for Syslog Servers,” on page 124
Add a Database and Database User for View EventsYou create an event database by adding it to an existing database server. You can then use enterprisereporting software to analyze the events in the database.
The database server for the event database can reside on a View Connection Server host itself or on adedicated server. Alternatively, you can use a suitable existing database server, such as a server that hosts aView Composer database.
NOTE You do not need to create an ODBC data source for this database.
Prerequisites
n Verify that you have a supported Microsoft SQL Server or Oracle database server on a system that aView Connection Server instance has access to. For a list of supported database versions, see “DatabaseRequirements for View Composer,” on page 10.
n Verify that you have the required database privileges to create a database and user on the databaseserver.
n If you are not familiar with the procedure to create databases on Microsoft SQL Server database servers,review the steps in “Add a View Composer Database to SQL Server,” on page 30.
n If you are not familiar with the procedure to create databases on Oracle database servers, review thesteps in “Add a View Composer Database to Oracle 11g or 10g,” on page 32.
Procedure
1 Add a new database to the server and give it a descriptive name such as ViewEvents.
VMware, Inc. 121
2 Add a user for this database that has permission to create tables, views, and, in the case of Oracle,triggers and sequences, as well as permission to read from and write to these objects.
For a Microsoft SQL Server database, do not use the Integrated Windows Authentication securitymodel method of authentication. Be sure to use the SQL Server Authentication method ofauthentication.
The database is created, but the schema is not installed until you configure the database in ViewAdministrator.
What to do next
Follow the instructions in “Configure the Event Database,” on page 123.
Prepare an SQL Server Database for Event ReportingBefore you can use View Administrator to configure an event database on Microsoft SQL Server, you mustconfigure the correct TCP/IP properties and verify that the server uses SQL Server Authentication.
Prerequisites
n Create an SQL Server database for event reporting. See “Add a Database and Database User for ViewEvents,” on page 121.
n Verify that you have the required database privileges to configure the database.
n Verify that the database server uses the SQL Server Authentication method of authentication. Do notuse Windows Authentication.
Procedure
1 Open SQL Server Configuration Manager and expand SQL Server YYYY Network Configuration.
2 Select Protocols for server_name.
3 In the list of protocols, right-click TCP/IP and select Properties.
4 Set the Enabled property to Yes.
5 Verify that a port is assigned or, if necessary, assign one.
For information on the static and dynamic ports and how to assign them, see the online help for theSQL Server Configuration manager.
6 Verify that this port is not blocked by a firewall.
What to do next
Use View Administrator to connect the database to View Connection Server. Follow the instructions in “Configure the Event Database,” on page 123.
VMware Horizon View Installation
122 VMware, Inc.
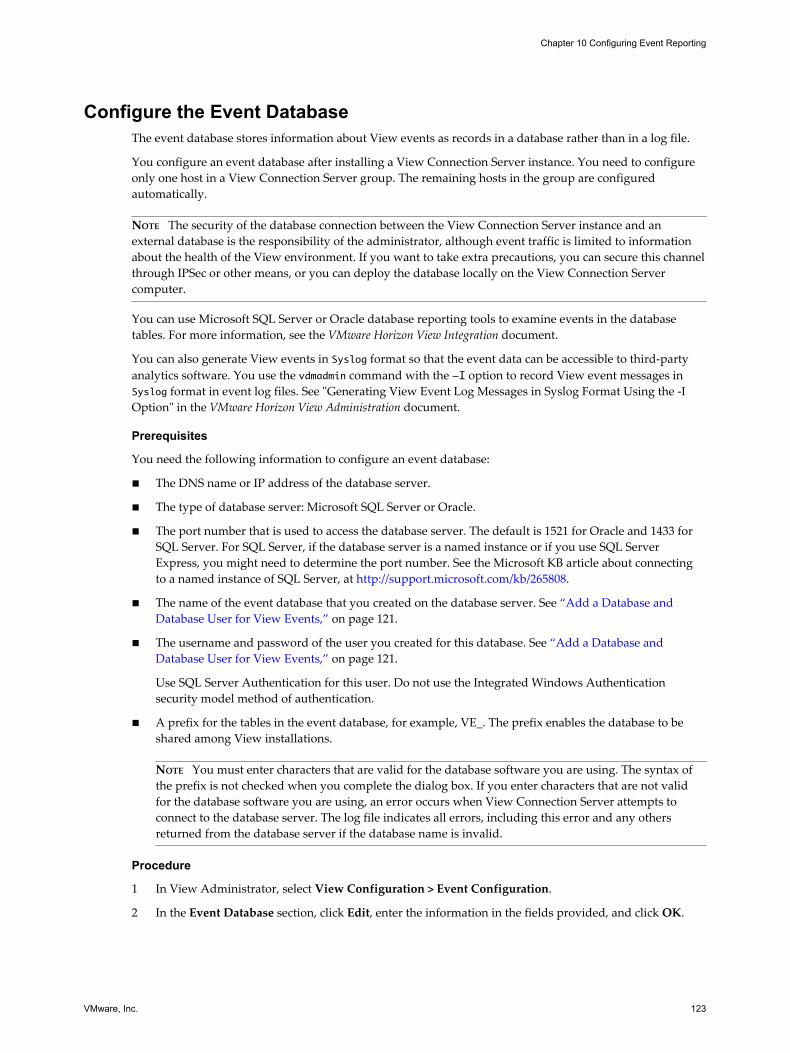
Configure the Event DatabaseThe event database stores information about View events as records in a database rather than in a log file.
You configure an event database after installing a View Connection Server instance. You need to configureonly one host in a View Connection Server group. The remaining hosts in the group are configuredautomatically.
NOTE The security of the database connection between the View Connection Server instance and anexternal database is the responsibility of the administrator, although event traffic is limited to informationabout the health of the View environment. If you want to take extra precautions, you can secure this channelthrough IPSec or other means, or you can deploy the database locally on the View Connection Servercomputer.
You can use Microsoft SQL Server or Oracle database reporting tools to examine events in the databasetables. For more information, see the VMware Horizon View Integration document.
You can also generate View events in Syslog format so that the event data can be accessible to third-partyanalytics software. You use the vdmadmin command with the -I option to record View event messages inSyslog format in event log files. See "Generating View Event Log Messages in Syslog Format Using the -IOption" in the VMware Horizon View Administration document.
Prerequisites
You need the following information to configure an event database:
n The DNS name or IP address of the database server.
n The type of database server: Microsoft SQL Server or Oracle.
n The port number that is used to access the database server. The default is 1521 for Oracle and 1433 forSQL Server. For SQL Server, if the database server is a named instance or if you use SQL ServerExpress, you might need to determine the port number. See the Microsoft KB article about connectingto a named instance of SQL Server, at http://support.microsoft.com/kb/265808.
n The name of the event database that you created on the database server. See “Add a Database andDatabase User for View Events,” on page 121.
n The username and password of the user you created for this database. See “Add a Database andDatabase User for View Events,” on page 121.
Use SQL Server Authentication for this user. Do not use the Integrated Windows Authenticationsecurity model method of authentication.
n A prefix for the tables in the event database, for example, VE_. The prefix enables the database to beshared among View installations.
NOTE You must enter characters that are valid for the database software you are using. The syntax ofthe prefix is not checked when you complete the dialog box. If you enter characters that are not validfor the database software you are using, an error occurs when View Connection Server attempts toconnect to the database server. The log file indicates all errors, including this error and any othersreturned from the database server if the database name is invalid.
Procedure
1 In View Administrator, select View Configuration > Event Configuration.
2 In the Event Database section, click Edit, enter the information in the fields provided, and click OK.
Chapter 10 Configuring Event Reporting
VMware, Inc. 123
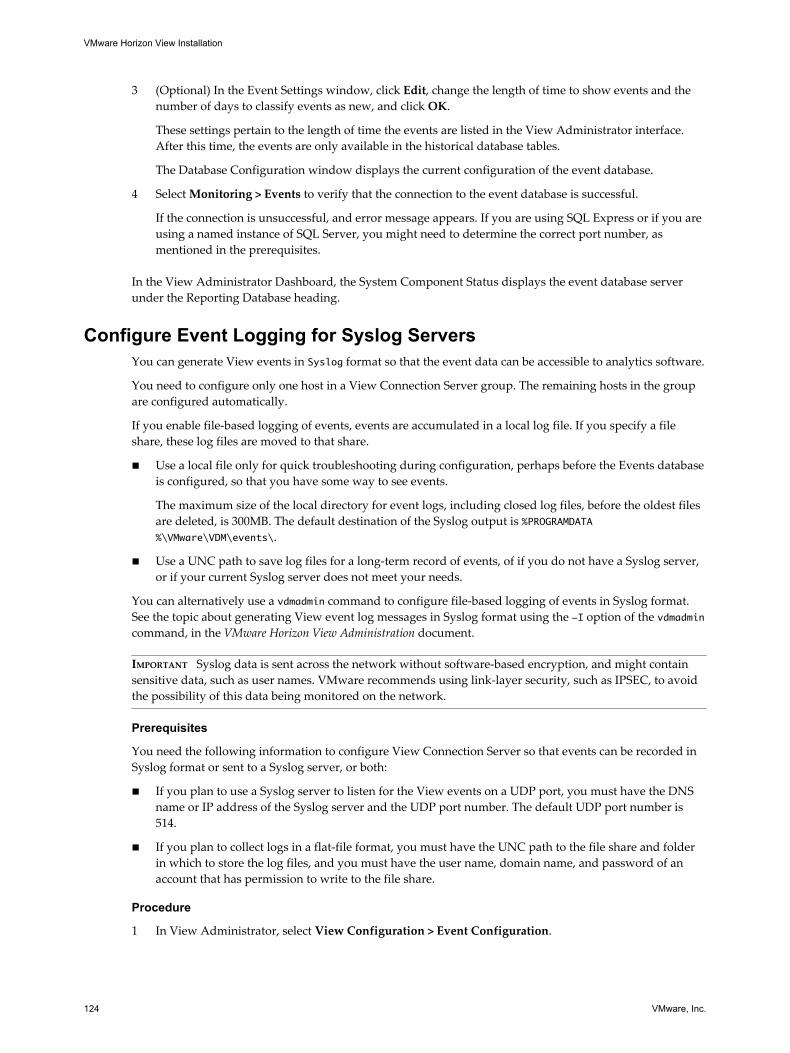
3 (Optional) In the Event Settings window, click Edit, change the length of time to show events and thenumber of days to classify events as new, and click OK.
These settings pertain to the length of time the events are listed in the View Administrator interface.After this time, the events are only available in the historical database tables.
The Database Configuration window displays the current configuration of the event database.
4 Select Monitoring > Events to verify that the connection to the event database is successful.
If the connection is unsuccessful, and error message appears. If you are using SQL Express or if you areusing a named instance of SQL Server, you might need to determine the correct port number, asmentioned in the prerequisites.
In the View Administrator Dashboard, the System Component Status displays the event database serverunder the Reporting Database heading.
Configure Event Logging for Syslog ServersYou can generate View events in Syslog format so that the event data can be accessible to analytics software.
You need to configure only one host in a View Connection Server group. The remaining hosts in the groupare configured automatically.
If you enable file-based logging of events, events are accumulated in a local log file. If you specify a fileshare, these log files are moved to that share.
n Use a local file only for quick troubleshooting during configuration, perhaps before the Events databaseis configured, so that you have some way to see events.
The maximum size of the local directory for event logs, including closed log files, before the oldest filesare deleted, is 300MB. The default destination of the Syslog output is %PROGRAMDATA%\VMware\VDM\events\.
n Use a UNC path to save log files for a long-term record of events, of if you do not have a Syslog server,or if your current Syslog server does not meet your needs.
You can alternatively use a vdmadmin command to configure file-based logging of events in Syslog format.See the topic about generating View event log messages in Syslog format using the -I option of the vdmadmincommand, in the VMware Horizon View Administration document.
IMPORTANT Syslog data is sent across the network without software-based encryption, and might containsensitive data, such as user names. VMware recommends using link-layer security, such as IPSEC, to avoidthe possibility of this data being monitored on the network.
Prerequisites
You need the following information to configure View Connection Server so that events can be recorded inSyslog format or sent to a Syslog server, or both:
n If you plan to use a Syslog server to listen for the View events on a UDP port, you must have the DNSname or IP address of the Syslog server and the UDP port number. The default UDP port number is514.
n If you plan to collect logs in a flat-file format, you must have the UNC path to the file share and folderin which to store the log files, and you must have the user name, domain name, and password of anaccount that has permission to write to the file share.
Procedure
1 In View Administrator, select View Configuration > Event Configuration.
VMware Horizon View Installation
124 VMware, Inc.

2 (Optional) In the Syslog area, to configure View Connection Server to send events to a Syslog server,click Add next to Send to syslog servers, and supply the server name or IP address and the UDP portnumber.
3 (Optional) To enable View event log messages to be generated and stored in Syslog format, in log files,select the Log to file: Enable check box.
The log files are retained locally unless you specify a UNC path to a file share.
4 (Optional) To store the View event log messages on a file share, click Add next to Copy to location, andsupply the UNC path to the file share and folder in which to store the log files, along with the username, domain name, and password of an account that has permission to write to the file share.
An example of a UNC path is:
\\syslog-server\folder\file
Chapter 10 Configuring Event Reporting
VMware, Inc. 125

VMware Horizon View Installation
126 VMware, Inc.
Index
AActive Directory
configuring domains and trust relationships 21preparing for smart card authentication 25preparing for use with View 21
Active Directory groupscreating for kiosk mode client accounts 22creating for View users and administrators 22
ADM template files 24antivirus software, View Composer 37
Bbrowser requirements 9
CCBRC, configuring for vCenter Server 99certificate revocation checking, enabling 82certificate signing requests, See CSRscertificates
accept the thumbprint 102benefits of using 88checking in View Client 83configuration overview 73configuring clients to trust the root 80creating new 74determining when to configure for View
Composer 35friendly name 77guidelines and concepts 71importing into a Windows certificate store 75obtaining from a CA 74obtaining signatures from Windows Certificate
Store 74replacing the default 71requirements 71trusting vCenter Server certificates in View
Administrator 88trusting View Composer certificates in View
Administrator 88View Client for iPad 81View Client for Mac OS X 81View Transfer Server 87
certutil command 27CRL (certificate revocation list) 82CSRs, creating through Windows Certificate
Enrollment 74
Ddatabases
creating for View Composer 29View events 121, 123
default certificate, replacing 71direct connections, configuring 104DNS resolution, View Composer 37documentation feedback, how to provide 5domain filtering 22
EEnterprise NTAuth store, adding root
certificates 27ESX/ESXi hosts, View Composer 37event database
creating for View 121, 123SQL Server configuration 122
events, sent to Syslog servers 124external URLs
configuring for a View Connection Serverinstance 107
modifying for a security server 108purpose and format 106
FFirefox, supported versions 9firewall rules
back-end firewall 58View Connection Server 57View Transfer Server 67
firewalls, configuring 40friendly name
modifying for SSL certificates 77registry setting for the PSG 86
Gglossary, where to find 5GPOs, linking to a View desktop OU 24Group Policy Objects, See GPOsGroupPolicyFiles directory 24guest operating system software
requirements 15
Hhardware requirements
PCoIP 16
VMware, Inc. 127
View Composer, standalone 10View Connection Server 8
host caching, for vCenter Server 99HTML access, configuring 105HTML Access, opening port 105httpd.conf file, changing View Transfer Server
port 111
Iinitial configuration, View 89intermediate certificates, adding to intermediate
certification authorities 26Intermediate Certification Authorities policy 26Internet Explorer, supported versions 9IPsec, configuring back-end firewall 58
JJVM heap size, default 113
Kkiosk mode, Active Directory preparation 22
Llicense key, View Connection Server 94local desktop configuration
adding a View Transfer Serverinstance 63–65
creating a vCenter Server user 90privileges for vCenter Server user 92
Mmax concurrent power operations, configuration
guidelines 101Microsoft SQL Server databases 10Microsoft Windows Installer
command-line options for silent installation 60MSI properties for View Transfer Server 69properties for replicated View Connection
Server 49properties for security server 55properties for View Connection Server 44uninstalling View Components silently 61
MMC, adding the certificate snap-in 76mod_vprov.conf, changing View Transfer Server
port 111
OOCSP responder, for certificate revocation
checking 82ODBC
connecting to Oracle 11g or 10g 34connecting to SQL Server 31
Oracle 10g, creating a View Composer databasewith a script 33
Oracle 10g databaseadding an ODBC data source 34
adding for View Composer 32configuring a database user 33
Oracle 11g, creating a View Composer databasewith a script 33
Oracle 11g databaseadding an ODBC data source 34adding for View Composer 32configuring a database user 33
Oracle databases 10organizational units, See OUsOUs
creating for kiosk mode client accounts 22creating for View desktops 22
Ppage-file size, View Connection Server 113PCoIP, hardware requirements 16PCoIP Secure Gateway
certificate subject name 84configuring an SSL certificate 83external URL 106importing a certificate 85preventing legacy client access 87
Persona Management, system requirements forstandalone installation 16
policiesIntermediate Certification Authorities 26Restricted Groups 24Trusted Root Certification Authorities 26
portchanging for PCoIP Secure Gateway 110changing for security server 109changing for View Composer 111changing for View Connection Server 109changing for View Transfer Server 111
ports, replacing defaults 109power operations, setting concurrency limits 101professional services 5
RRDP 18reinstalling, View Connection Server 58remote display protocols
PCoIP 16RDP 18
ReplaceCertificate option, sviconfig utility 79replicated instances
installing 45installing silently 47network requirements 8silent installation properties 49
Restricted Groups policy, configuring 24root certificate, importing into Windows
Certificate Store 78
VMware Horizon View Installation
128 VMware, Inc.
root certificatesadding to the Enterprise NTAuth store 27adding to trusted roots 26, 80
Ssecure tunnel, external URL 106security servers
configuring a pairing password 50configuring an external URL 106installer file 51installing silently 53modifying an external URL 108opening port for HTML Access 105operating system requirements 8prepare to upgrade or reinstall 56remove IPsec rules 56silent installation properties 55
silent installationgroup policies to allow installation 67replicated instances 47security servers 53View Connection Server 43View Transfer Server 67, 68
sizing Windows Server settings, increasing theJVM heap size 113
smart card authenticationActive Directory preparation 25UPNs for smart card users 25
software requirements, server components 7sparse disks, configuring for vCenter Server 98SQL Server database
adding an ODBC data source 31adding for View Composer 30preparing for event database 122
SQL Server databases 10SQL Server Management Studio Express,
installing 30SSL, accept a certificate thumbprint 102storage, reclaiming disk space 98support, online and telephone 5sviconfig utility
configuring certificates 79ReplaceCertificate option 79
Syslog servers, configuring View events to besent to 124
system page file size, Windows Server 113
TTCP ports
View Connection Server 57View Transfer Server 67
technical support and education 5thumbprint, accept for a default certificate 102Transfer Server repository, configuring 66trust relationships, configuring for View
Connection Server 21
Trusted Root Certification Authorities policy 26,80
Uuninstalling View components 61UPNs, smart card users 25user accounts
requirements 89vCenter Server 22, 89, 90View Composer 23, 89
userPrincipalName attribute 25
VvCenter Lookup Service
configuring for View Desktops 117registering the View Desktops plug-in 118support for View Desktops plug-in 116
vCenter Serverconfiguring concurrent operations limits 100configuring for View Composer 37configuring host caching 99configuring sparse disks 98creating a user for local mode 90installing the View Composer service 35user accounts 22, 89
vCenter Server instances, adding in ViewAdministrator 95
vCenter Server userlocal mode privileges 92vCenter Server privileges 91View Composer privileges 92
vCenter Single Sign-On Service, View Desktopsplug-in support 116
View Administratorlogging in 93overview 93requirements 9
View Agent, installation requirements 15View Client for iPad, trusting the root
certificate 81View Client for Mac OS X, trusting the root
certificate 81View clients, configuring connections 103View components, command-line options for
silent installation 60View Composer, hardware requirements for
standalone View Composer 10View Composer configuration
concurrent operations limits 100creating a user account 23creating a vCenter Server user 22, 89, 90domains 97privileges for the vCenter Server user 92settings in View Administrator 96SSL certificates 35
Index
VMware, Inc. 129
View Composer databaseODBC data source for Oracle 11g or 10g 34ODBC data source for SQL Server 31Oracle 11g and 10g 32requirements 10, 29SQL Server 30
View Composer infrastructureconfiguring vSphere 37optimizing 37testing DNS resolution 37
View Composer installationinstaller file 35overview 29requirements overview 9
View Composer upgradecompatibility with vCenter Server versions 10operating system requirements 10requirements overview 9
View Connection Server, hardwarerequirements 8
View Connection Server configurationclient connections 103event database 121, 123events for syslog servers 124external URL 106, 107first time 93overview 39replacing the default certificate 71sizing Windows Server settings 112system page file size 113trust relationships 21
View Connection Server installationinstallation types 39network configuration 8overview 39prerequisites 40product license key 94reinstalling with a backup configuration 58replicated instances 45requirements overview 7security servers 51silent 43silent installation properties 44single server 40supported operating systems 8virtualization software requirements 8
View desktopsadding plug-in to vSphere Web Client 115configuring direct connections 104prerequisite tasks for the View Desktops plug-
in 116registering the View Desktops plug-in 118removing the plug-in from vSphere Web
Client 120
View Storage Accelerator, configuring forvCenter Server 99
View Transfer Server, SSL certificates 87View Transfer Server configuration
adding an instance 65Transfer Server repository 66
View Transfer Server installationgroup policies for silent installation 67installer file 64overview 63requirements overview 11silent 67, 68silent installation properties 69storage requirements 13supported operating systems 12virtual machine requirements 12
vSphere, configuring for View Composer 37vSphere Web Client
adding View Desktops plug-in 115configure View Desktops plug-in 115removing the View Desktops plug-in 120searching for View users 119
WWeb browser requirements 9Windows Certificate Store
configuring certificates 75importing a certificate 76importing a root certificate 78obtaining a signed certificate 74
Windows Server, system page file size 113
VMware Horizon View Installation
130 VMware, Inc.
![software.fujitsu.comsoftware.fujitsu.com/jp/manual/manualfiles/m170004/j2x17617/08enz...[VMware] Sections related to VMware [Horizon View] Sections related to VMware Horizon View [Hyper-V]](https://static.fdocuments.in/doc/165x107/5b02ccf77f8b9a2e228b6ed4/vmware-sections-related-to-vmware-horizon-view-sections-related-to-vmware-horizon.jpg)