USER GUIDE User Guide Gua del Usuario
173
V CAST MULTIMEDIA PHONE with TOUCH SCREEN Voyager ™ is a trademark of Plantronics, Inc. used under license by Verizon Wireless. Voyager ™ is a trademark of Plantronics, Inc. used under license by Verizon Wireless. by User Guide Guía del Usuario TELÉFONO MULTIMEDIOS V CAST con PANTALLA SENSIBLE AL TACTO by G USER GUIDE MMBB0256801(1.3)
Transcript of USER GUIDE User Guide Gua del Usuario

V C A S T MU LT I M ED IA PH O N E w i t h TO U CH S CR EEN
Voyager™ is a trademark of Plantronics, Inc. used under license by Verizon Wireless.Voyager
™ is a trademark of Plantronics, Inc. used under license by Verizon Wireless.
by
User GuideGuía del Usuario
TELÉFONO MULTIMEDIOS V CAST con PANTALLA SENSIBLE AL TACTO
by
GU
SE
R G
UID
EM
MBB0256801(1.3)
VX10000_New_cover_1.3.qxd 1/9/08 3:12 PM Page 1

VX10000_New_cover_1.3.qxd 1/9/08 3:12 PM Page 4

VibeTouch™, LG and the LG logo are registered trademarksof LG Group and its related entities. All other trademarksare the property of their respective owners.
VX10000_New_cover_1.3.qxd 1/9/08 3:12 PM Page 5
1
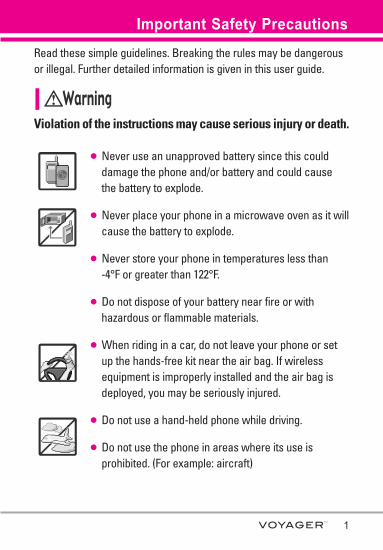
Read these simple guidelines. Breaking the rules may be dangerousor illegal. Further detailed information is given in this user guide.
Violation of the instructions may cause serious injury or death.
l Never use an unapproved battery since this coulddamage the phone and/or battery and could causethe battery to explode.
l Never place your phone in a microwave oven as it willcause the battery to explode.
l Never store your phone in temperatures less than -4°F or greater than 122°F.
l Do not dispose of your battery near fire or withhazardous or flammable materials.
l When riding in a car, do not leave your phone or setup the hands-free kit near the air bag. If wirelessequipment is improperly installed and the air bag isdeployed, you may be seriously injured.
l Do not use a hand-held phone while driving.
l Do not use the phone in areas where its use isprohibited. (For example: aircraft)
Important Safety Precautions

2
Important Safety Precautions l Do not expose the battery charger or adapter to direct
sunlight or use it in places with high humidity, such asa bathroom.
l Do not use harsh chemicals (such as alcohol,benzene, thinners, etc.) or detergents to clean yourphone. This could cause a fire.
l Do not drop, strike, or shake your phone severely. Itmay harm the internal circuit boards of the phone.
l Do not use your phone in high explosive areas as thephone may generate sparks.
l Do not damage the power cord by bending, twisting,pulling, or heating. Do not use the plug if it is loose asit may cause electric shock or fire.
l Do not place any heavy items on the power cord. Donot allow the power cord to be crimped as it maycause electric shock or fire.
l Do not handle the phone with wet hands while it isbeing charged. It may cause an electric shock orseriously damage your phone.
l Do not disassemble the phone.
3
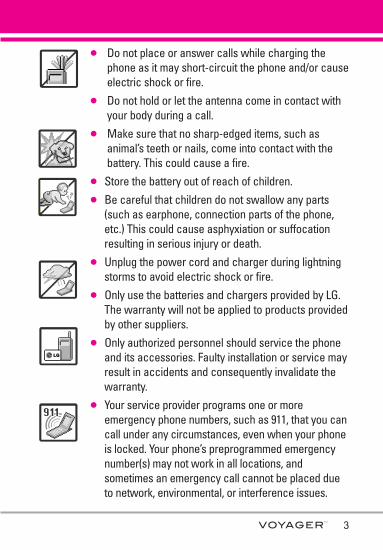
l Do not place or answer calls while charging thephone as it may short-circuit the phone and/or causeelectric shock or fire.
l Do not hold or let the antenna come in contact withyour body during a call.
l Make sure that no sharp-edged items, such asanimal’s teeth or nails, come into contact with thebattery. This could cause a fire.
l Store the battery out of reach of children.l Be careful that children do not swallow any parts
(such as earphone, connection parts of the phone,etc.) This could cause asphyxiation or suffocationresulting in serious injury or death.
l Unplug the power cord and charger during lightningstorms to avoid electric shock or fire.
l Only use the batteries and chargers provided by LG.The warranty will not be applied to products providedby other suppliers.
l Only authorized personnel should service the phoneand its accessories. Faulty installation or service mayresult in accidents and consequently invalidate thewarranty.
l Your service provider programs one or moreemergency phone numbers, such as 911, that you cancall under any circumstances, even when your phoneis locked. Your phone’s preprogrammed emergencynumber(s) may not work in all locations, andsometimes an emergency call cannot be placed dueto network, environmental, or interference issues.
4
Table of Contents
Important Safety Precautions .1Welcome . . . . . . . . . . . . . . . . . . . .8Technical Details . . . . . . . . . . . . .9
Important Information . . . . . . . . . . . .9
Phone Overview . . . . . . . . . . . .12Quick Glance of Touchpad andHow to Use It . . . . . . . . . . . . . . .14
Touch Sensitive Soft Keys . . . . . . . .14
Calibrating the Touch Screen .15Shortcut Menu . . . . . . . . . . . . . .16
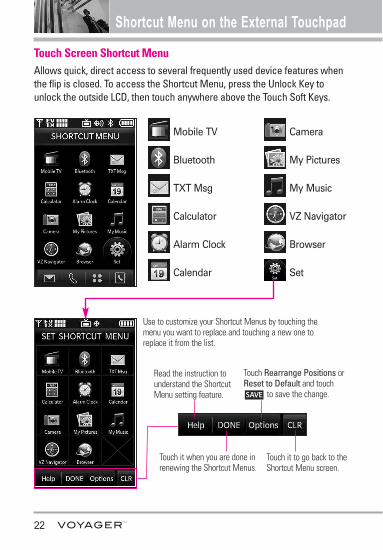
Touch Screen Shortcut Menu . . . .16
Entering and Editing Information . . . . . . . . . . . . . . . . .17
Text Input . . . . . . . . . . . . . . . . . . . . . . .17From the internal Qwerty® keypad .18
Menu Tree on the InternalScreen . . . . . . . . . . . . . . . . . . . . .19Menu Tree on the ExternalTouch Screen . . . . . . . . . . . . . . .21
Menu Access . . . . . . . . . . . . . . . . . . .21
Shortcut Menu on the ExternalTouchpad . . . . . . . . . . . . . . . . . . .22
Touch Screen Shortcut Menu . . . . .22
Getting Started with Your Phone . . . . . . . . . . . . . . . . . . . . . .23
The Battery . . . . . . . . . . . . . . . . . . . .23Installing the Battery . . . . . . . . . . . .23Removing the Battery . . . . . . . . . .23
Charging the Battery . . . . . . . . . . . .23Charging with USB . . . . . . . . . . . . . .23How to Install Your microSD™ Card . . . . . . . . . . . . . . . . . . . . . . . . . .24
How to Remove Your microSD™ Card . . . . . . . . . . . . . . . . . . . . . . . . . .24Battery Temperature Protection . . .25Battery Charge Level . . . . . . . . . . . .25Turning the Phone On and Off . . . .25Turning the Phone On . . . . . . . . . .25Turning the Phone Off . . . . . . . . . .25
Signal Strength . . . . . . . . . . . . . . . . .26Screen Icons . . . . . . . . . . . . . . . . . . .26Making Calls . . . . . . . . . . . . . . . . . . .26Correcting Dialing Mistakes . . . . . .26
Redialing Calls . . . . . . . . . . . . . . . . . .27Receiving Calls . . . . . . . . . . . . . . . . .27
Quick Access to ConvenientFeatures . . . . . . . . . . . . . . . . . . . .28
Vibrate Mode . . . . . . . . . . . . . . . . . . .28Mute Function . . . . . . . . . . . . . . . . . . .28Volume Quick Adjustment . . . . . . . .28Call Waiting . . . . . . . . . . . . . . . . . . . . .28Voice Commands . . . . . . . . . . . . . . . .29
Contacts in Your Phone’sMemory . . . . . . . . . . . . . . . . . . . .30
Storing Basics . . . . . . . . . . . . . . . . . .30Customizing Individual Entries . . . .31Speed Dial . . . . . . . . . . . . . . . . . . . . . .31Storing a Number with Pauses . . .32Adding Another Phone Number . .33Changing the Default Number . . . .33Deleting . . . . . . . . . . . . . . . . . . . . . . . .34Speed Dialing . . . . . . . . . . . . . . . . . . .35
GET IT NOW . . . . . . . . . . . . . . . . . . .371. Music & Tones . . . . . . . . . . . . . . . .37
5
1.1 V CAST Music . . . . . . . . . . . . . .381.2 Get New Ringtones . . . . . . . . . .381.3 My Ringtones . . . . . . . . . . . . . . .391.4 My Music . . . . . . . . . . . . . . . . . .40Playing Your Music . . . . . . . . . . . . .40Controlling the Music Player . . . . .41Exit From the Music Player . . . . . .41
1.5 My Sounds . . . . . . . . . . . . . . . . .421.6 Sync Music . . . . . . . . . . . . . . . . .42
2. Picture & Video . . . . . . . . . . . . . . .442.1 V CAST Mobile TV . . . . . . . . . . .442.2 V CAST Videos . . . . . . . . . . . . . .482.3 Get New Picture . . . . . . . . . . . . .502.4 My Pictures . . . . . . . . . . . . . . . .512.5 My Videos . . . . . . . . . . . . . . . . . .522.6 Take Picture . . . . . . . . . . . . . . . .542.7 Record Video . . . . . . . . . . . . . .55
3. Games . . . . . . . . . . . . . . . . . . . . . . . .564. Tools on the Go . . . . . . . . . . . . . . . .575. Extras . . . . . . . . . . . . . . . . . . . . . . . .58
MESSAGING . . . . . . . . . . . . . . . . . .591. New Message . . . . . . . . . . . . . . . .591.1 TXT Msg . . . . . . . . . . . . . . . . . . .591.2 Picture Msg . . . . . . . . . . . . . . . .611.3 Video Msg . . . . . . . . . . . . . . . . .63
2. Inbox . . . . . . . . . . . . . . . . . . . . . . . .653. Sent . . . . . . . . . . . . . . . . . . . . . . . . .664. Drafts . . . . . . . . . . . . . . . . . . . . . . . .685. Voicemail . . . . . . . . . . . . . . . . . . . . .696. Mobile IM . . . . . . . . . . . . . . . . . . . .70MSG Settings . . . . . . . . . . . . . . . . . . .70
1. Entry Mode (Word/ Abc/ ABC/ 123) . . . . . . . . . . . . . . . . . . . . . . .71
2. Auto Save (On/ Off/ Prompt) . . .713. Auto Erase (On/ Off) . . . . . . . . . .714. TXT Auto View (On/On+Readout/
Off) . . . . . . . . . . . . . . . . . . . . . . . .715. TXT Auto Play (On/Off) . . . . . . . .716. Pic-Video Auto Receive (On/Off) 717. Quick Text . . . . . . . . . . . . . . . . .718. Voicemail # . . . . . . . . . . . . . . . . .719. Callback # (On/Off) . . . . . . . . . .7110. Signature (None/ Custom) . . . .71
Erasing Messages . . . . . . . . . . . . . . .72CONTACTS . . . . . . . . . . . . . . . . . . . .731. New Contact . . . . . . . . . . . . . . . . . .732. Contact List . . . . . . . . . . . . . . . . . . .733. Groups . . . . . . . . . . . . . . . . . . . . . . .744. Speed Dials . . . . . . . . . . . . . . . . . . .755. In Case of Emergency (ICE) . . . .766. My Name Card . . . . . . . . . . . . . . . .77
RECENT CALLS . . . . . . . . . . . . . . . .781. Missed . . . . . . . . . . . . . . . . . . . . . . .782. Received . . . . . . . . . . . . . . . . . . . . .793. Dialed . . . . . . . . . . . . . . . . . . . . . . . .804. All . . . . . . . . . . . . . . . . . . . . . . . . . . . .815. View Timers . . . . . . . . . . . . . . . . . . .82
SETTINGS & TOOLS . . . . . . . . . . . .831. My Account . . . . . . . . . . . . . . . . . .832. Tools . . . . . . . . . . . . . . . . . . . . . . . . .832.1 Voice Commands . . . . . . . . . . . .832.1.1 Call <Name or Number> . . .84
6
Table of Contents
2.1.2 Send Msg to <Name orNumber> . . . . . . . . . . . . . . . .84
2.1.3 Go to <Menu> . . . . . . . . . . .852.1.4 Check <Item> . . . . . . . . . . . .852.1.5 Lookup <Name> . . . . . . . . . .852.1.6 My Account . . . . . . . . . . . . . .852.1.7 Help . . . . . . . . . . . . . . . . . . . .85
2.2 Calculator . . . . . . . . . . . . . . . . . .852.3 Calendar . . . . . . . . . . . . . . . . . . .862.4 Alarm Clock . . . . . . . . . . . . . . . .872.5 Stopwatch . . . . . . . . . . . . . . . . . .882.6 World Clock . . . . . . . . . . . . . . . .892.7 Notepad . . . . . . . . . . . . . . . . . . .902.8 Ez Tip Calc . . . . . . . . . . . . . . . . . .902.9 USB Mass Storage . . . . . . . . . .91
3. Bluetooth Menu . . . . . . . . . . . . . . .923.1 Add New Device . . . . . . . . . . . .93My Phone Name . . . . . . . . . . . . . . .95Turn On . . . . . . . . . . . . . . . . . . . . . . .96Discovery Mode . . . . . . . . . . . . . . . .96Supported Profiles . . . . . . . . . . . . . .97Last Search . . . . . . . . . . . . . . . . . . . .97Auto Pair Handsfree . . . . . . . . . . . . .97Transferring Audio . . . . . . . . . . . . . . .97
4. Sounds Settings . . . . . . . . . . . . . . .994.1 Master Volume . . . . . . . . . . . . . .994.2 Call Sounds . . . . . . . . . . . . . . . . .994.2.1 Call Ringtone . . . . . . . . . . .1004.2.2 Call Vibrate . . . . . . . . . . . . . .100
4.3 Alert Sounds . . . . . . . . . . . . . . .1014.4 Keypad Volume . . . . . . . . . . . .1014.5 Service Alerts . . . . . . . . . . . . . .102
4.6 Power On/Off . . . . . . . . . . . . . .103
5. Display Settings . . . . . . . . . . . . . .1035.1 Banner . . . . . . . . . . . . . . . . . . .1035.1.1.1 Internal Banner . . . . . . . . .1035.1.1.2 External Banner . . . . . . . .1045.1.2 ERI Banner . . . . . . . . . . . . . .104
5.2 Backlight . . . . . . . . . . . . . . . . . .1055.3 Wallpaper . . . . . . . . . . . . . . . . .1065.4 Screensaver . . . . . . . . . . . . . . .1075.5 Display Themes . . . . . . . . . . . .1085.6 Menu Fonts . . . . . . . . . . . . . . .1085.7 Dial Fonts . . . . . . . . . . . . . . . . .1095.8 Clock Format . . . . . . . . . . . . . .110
6. Phone Settings . . . . . . . . . . . . . . .1116.1 Standalone Mode (Airplane
Mode) . . . . . . . . . . . . . . . . . . . .1116.2 Set Shortcut Keys . . . . . . . . . .1116.3 Voice Commands . . . . . . . . . . .1126.4 Language . . . . . . . . . . . . . . . . .1136.5 Location . . . . . . . . . . . . . . . . . .1136.6 Security . . . . . . . . . . . . . . . . . . .1146.6.1 Edit Codes . . . . . . . . . . . . . .1156.6.2 Restrictions . . . . . . . . . . . . .1156.6.3 Phone Lock . . . . . . . . . . . . .1166.6.4 Lock Phone Now . . . . . . . .1176.6.5 Reset Default . . . . . . . . . . .1186.6.6 Restore Phone . . . . . . . . . .119
6.7 System Select . . . . . . . . . . . . .1206.8 NAM Select . . . . . . . . . . . . . . .1206.9 Auto NAM . . . . . . . . . . . . . . . .121
7. Call Settings . . . . . . . . . . . . . . . . .1227.1 Answer Options . . . . . . . . . . . .122
7
7.2 End Call Options . . . . . . . . . . . .1227.3 Auto Retry . . . . . . . . . . . . . . . .1237.4 TTY Mode . . . . . . . . . . . . . . . . .1247.5 One Touch Dial . . . . . . . . . . . . .1257.6 Voice Privacy . . . . . . . . . . . . . . .126
8. Touch Settings . . . . . . . . . . . . . . .1279. USB Auto Detection . . . . . . . . . .12710. Memory . . . . . . . . . . . . . . . . . . . .12810.1 Save Options . . . . . . . . . . . . .12910.2 Phone Memory . . . . . . . . . . .12910.3 Card Memory . . . . . . . . . . . . .130
11. Phone Info . . . . . . . . . . . . . . . . . .13111.1 My Number . . . . . . . . . . . . . .13111.2 SW/HW Version . . . . . . . . . . .13211.3 Icon Glossary . . . . . . . . . . . . .132
Music . . . . . . . . . . . . . . . . . . . . . . . . .133Browser . . . . . . . . . . . . . . . . . . . . . . .133Ending a Browser Session . . . . . . .133Browser Navigating . . . . . . . . . . . .133
Navigator . . . . . . . . . . . . . . . . . . . . . .137
Safety . . . . . . . . . . . . . . . . . . . . .138TIA Safety Information . . . . . . . . .138
Exposure to Radio Frequency Signal . . . . . . . . . . . . . . . . . . . . . . .138Antenna Care . . . . . . . . . . . . . . . .138Phone Operation . . . . . . . . . . . . . .138Tips on Efficient Operation . . . . . .139Driving . . . . . . . . . . . . . . . . . . . . . .139Electronic Devices . . . . . . . . . . . .139Pacemakers . . . . . . . . . . . . . . . . .139Hearing Aids . . . . . . . . . . . . . . . . .140
Other Medical Devices and HealthCare Facilities . . . . . . . . . . . . . . . .140Vehicles . . . . . . . . . . . . . . . . . . . . .140Aircraft . . . . . . . . . . . . . . . . . . . . . .140Blasting Areas . . . . . . . . . . . . . . . .140Potentially Explosive Atmosphere140For Vehicles Equipped with an Air Bag . . . . . . . . . . . . . . . . . . . . . . . .141
Safety Information . . . . . . . . . . . .141Charger and Adapter Safety . . . .142Battery Information and Care . . .142Explosion, Shock, and Fire Hazards . . . . . . . . . . . . . . . . . . . . .143General Notice . . . . . . . . . . . . . . .143
Caution: Avoid potential hearingloss. . . . . . . . . . . . . . . . . . . . . . . . . . .144FDA Consumer Update . . . . . . . .14610 Driver Safety Tips . . . . . . . . . . .154Consumer Information on SAR .156FCC Hearing-Aid Compatibility(HAC) Regulations for WirelessDevices . . . . . . . . . . . . . . . . . . . . . .158
Accessories . . . . . . . . . . . . . . .161LIMITED WARRANTYSTATEMENT . . . . . . . . . . . . . .162Glossary . . . . . . . . . . . . . . . . . . .165Terminology . . . . . . . . . . . . . . . . . .165Acronyms and Abbreviations . .165
Index . . . . . . . . . . . . . . . . . . . . . .167
8
Welcome
Thank you for choosing theVOYAGER™ cellular phonedesigned to operate with the latestdigital mobile communicationtechnology, Code Division MultipleAccess (CDMA). Along with themany advanced features of theCDMA system, such as greatlyenhanced voice clarity, thiscompact phone offers:l V CASTSM Mobile TV.l V CASTSM Music and Video
Capability.l Mobile IM.l VZ Navigator.l Mobile Email.l 52-key internal numeric keypad,
the external Touch Screen andauto Touch Screen lock.
l Customizable display themes andscreensavers.
l Built-in 2.0 Megapixel digitalcamera.
l Large, easy-to-read, 8-linebacklit LCD with status icons.
l Paging, messaging, Voicemail,and caller ID.
l Quick Access to the HTMLBrowser.
l Get It Now®.
l Long battery standby and talktime.
l Easy operation; use the keypador Touch Screen to choosemenus and answer prompts.
l Any key answer, auto withhandsfree, auto retry, onetouchand speed dialing with 99memory locations.
l Bilingual (English and Spanish)Capability.
l Bluetooth® wireless technology.
NOTE The Bluetooth® word mark and logosare owned by the Bluetooth SIG, Inc.and any use of such marks by LGElectronics is under license. Othertrademarks and trade names arethose of their respective owners.
TIPFind the interactive user guide on the web foryour convenience where you can freely surfand interactively learn how to use your phonestep-by-step. Go to http//:www.verizonwireless.com ->Support -> Phones & Devices -> then chooseEquipment Guide -> then select your phonemodel.
VOYAGER™ is a trademark ofPlantronics, Inc. used under licenseby Verizon Wireless.
9
Important InformationThis user’s guide provides importantinformation on the use and operationof your phone. Please read thisguide carefully prior to using thephone to be able to use your phoneto its greatest advantage and toprevent any accidental damage ormisuse. Any unapproved changes ormodifications will void yourwarranty.
Technical Details
The VOYAGER™ is an all digitalphone that operates on both CodeDivision Multiple Access (CDMA)frequencies: cellular services at 800MHz and Personal CommunicationServices (PCS) at 1.9 GHz.CDMA technology uses a featurecalled DSSS (Direct SequenceSpread Spectrum) that enables thephone to keep communication frombeing crossed and to use onefrequency channel by multipleusers in the same specific area.This results in a 10-fold capacityincrease when compared withanalog mode. In addition, featuressuch as soft/ softer handoff, hardhandoff, and dynamic RF powercontrol technologies combine toreduce call interruptions.
The Cellular and PCS CDMAnetworks consist of MSO (MobileSwitching Office), BSC (BaseStation Controller), BTS (BaseStation Transmission System), andMS (Mobile Station). 1xRTT system receives twice asmany subscribers in the wirelesssection as IS-95. Its battery life istwice as long as IS-95. High-speeddata transmission is also possible.EV-DO system is optimized for dataservice and is much faster than1xRTT system in applicable area.V CAST Mobile TV uses atechnology called MediaFLO.This Technology is used tobroadcast data to portable devicessuch as cell phones and PDAs.Broadcast data includes audio andvideo streams, individual video andaudio clips, as well as informationsuch as stock market quotes, sportsscores, and weather reports. The"F-L-O" in MediaFLO stands forForward Link Only which meansthat the data transmission path isone-way, from the tower to thedevice. The MediaFLO systemtransmits data on a frequencyseparate from the frequencies usedby current cellular networks.
The following table lists some majorCDMA standards.
Technical Details
10
Technical Details
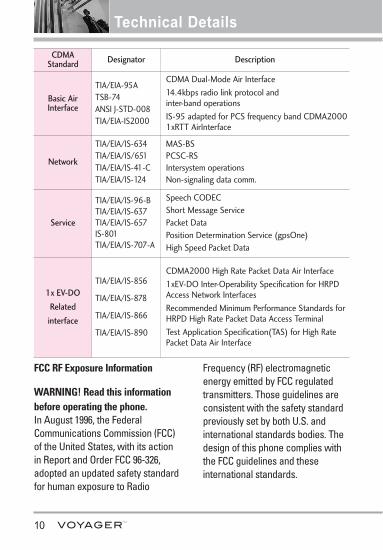
CDMAStandard Designator Description
Basic AirInterface
TIA/EIA-95ATSB-74ANSI J-STD-008TIA/EIA-IS2000
CDMA Dual-Mode Air Interface14.4kbps radio link protocol and inter-band operationsIS-95 adapted for PCS frequency band CDMA20001xRTT AirInterface
Network
TIA/EIA/IS-634TIA/EIA/IS/651TIA/EIA/IS-41-CTIA/EIA/IS-124
MAS-BSPCSC-RSIntersystem operationsNon-signaling data comm.
Service
TIA/EIA/IS-96-BTIA/EIA/IS-637TIA/EIA/IS-657IS-801TIA/EIA/IS-707-A
Speech CODECShort Message ServicePacket DataPosition Determination Service (gpsOne)High Speed Packet Data
1x EV-DO
Related
interface
TIA/EIA/IS-856
TIA/EIA/IS-878
TIA/EIA/IS-866
TIA/EIA/IS-890
CDMA2000 High Rate Packet Data Air Interface1xEV-DO Inter-Operability Specification for HRPDAccess Network InterfacesRecommended Minimum Performance Standards forHRPD High Rate Packet Data Access TerminalTest Application Specification(TAS) for High RatePacket Data Air Interface
FCC RF Exposure Information
WARNING! Read this informationbefore operating the phone.In August 1996, the FederalCommunications Commission (FCC)of the United States, with its actionin Report and Order FCC 96-326,adopted an updated safety standardfor human exposure to Radio
Frequency (RF) electromagneticenergy emitted by FCC regulatedtransmitters. Those guidelines areconsistent with the safety standardpreviously set by both U.S. andinternational standards bodies. Thedesign of this phone complies withthe FCC guidelines and theseinternational standards.
11
Bodily Contact During Operation
This device was tested for typicaluse with the back of the phone kept0.79 inches (2.0 cm) from the body.To comply with FCC RF exposurerequirements, a minimumseparation distance of 0.79 inches(2.0 cm) must be maintainedbetween the user’s body and theback of the phone, including theantenna, whether extended orretracted. Third-party belt-clips,holsters, and similar accessoriescontaining metallic componentsshould not be used. Avoid the useof accessories that cannot maintain0.79 inches (2.0 cm) distancebetween the user’s body and theback of the phone and have notbeen tested for compliance withFCC RF exposure limits.
Vehicle-Mounted the ExternalAntenna
(Optional, if available.)To satisfy FCC RF exposurerequirements, keep 8 inches (20 cm)between the user / bystander andvehicle-mounted the externalantenna. For more informationabout RF exposure, visit the FCCwebsite at www.fcc.gov.
FCC Notice and Cautions
This device and its accessories complywith part 15 of FCC rules. Operation issubject to the following two conditions:(1) This device and its accessories maynot cause harmful interference, and (2)this device and its accessories mustaccept any interference received,including interference that causesundesired operation.Any changes or modifications notexpressly approved in this user guidecould void your warranty for thisequipment. Use only the suppliedantenna. Use of unauthorized antennas(or modifications to the antenna) couldimpair call quality, damage the phone,void your warranty and/or violate FCCregulations.Don't use the phone with a damagedantenna. A damaged antenna couldcause a minor skin burn. Contact yourlocal dealer for a replacement antenna.
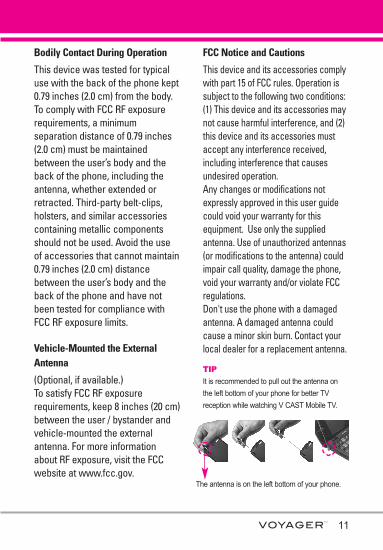
TIP
It is recommended to pull out the antenna onthe left bottom of your phone for better TVreception while watching V CAST Mobile TV.
The antenna is on the left bottom of your phone.
12
Phone Overview
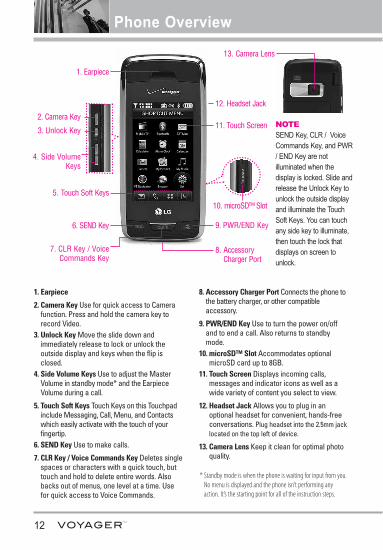
1. Earpiece
2. Camera Key Use for quick access to Camerafunction. Press and hold the camera key torecord Video.
3. Unlock Key Move the slide down andimmediately release to lock or unlock theoutside display and keys when the flip isclosed.
4. Side Volume Keys Use to adjust the MasterVolume in standby mode* and the EarpieceVolume during a call.
5. Touch Soft Keys Touch Keys on this Touchpadinclude Messaging, Call, Menu, and Contactswhich easily activate with the touch of yourfingertip.
6. SEND Key Use to make calls.
7. CLR Key / Voice Commands Key Deletes singlespaces or characters with a quick touch, buttouch and hold to delete entire words. Alsobacks out of menus, one level at a time. Usefor quick access to Voice Commands.
8. Accessory Charger Port Connects the phone tothe battery charger, or other compatibleaccessory.
9. PWR/END Key Use to turn the power on/offand to end a call. Also returns to standbymode.
10. microSD™ Slot Accommodates optionalmicroSD card up to 8GB.
11. Touch Screen Displays incoming calls,messages and indicator icons as well as awide variety of content you select to view.
12. Headset Jack Allows you to plug in anoptional headset for convenient, hands-freeconversations. Plug headset into the 2.5mm jacklocated on the top left of device.
13. Camera Lens Keep it clean for optimal photoquality.
12. Headset Jack
1. Earpiece
6. SEND Key
7. CLR Key / VoiceCommands Key
11. Touch Screen
10. microSD™ Slot
9. PWR/END Key
5. Touch Soft Keys
8. AccessoryCharger Port
* Standby mode is when the phone is waiting for input from you.No menu is displayed and the phone isn’t performing anyaction. It’s the starting point for all of the instruction steps.
4. Side VolumeKeys
2. Camera Key
3. Unlock Key
13. Camera Lens
NOTESEND Key, CLR / VoiceCommands Key, and PWR/ END Key are notilluminated when thedisplay is locked. Slide andrelease the Unlock Key tounlock the outside displayand illuminate the TouchSoft Keys. You can touchany side key to illuminate,then touch the lock thatdisplays on screen tounlock.
13
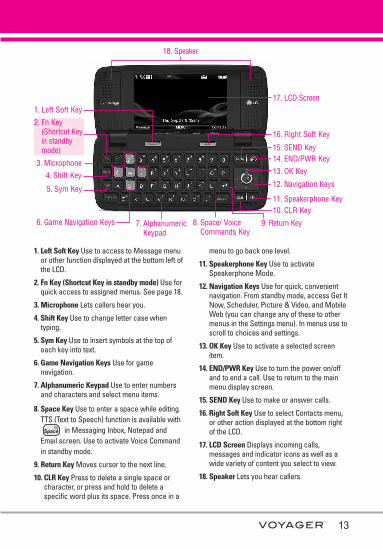
1. Left Soft Key Use to access to Message menuor other function displayed at the bottom left ofthe LCD.
2. Fn Key (Shortcut Key in standby mode) Use forquick access to assigned menus. See page 18.
3. Microphone Lets callers hear you.
4. Shift Key Use to change letter case whentyping.
5. Sym Key Use to insert symbols at the top ofeach key into text.
6. Game Navigation Keys Use for gamenavigation.
7. Alphanumeric Keypad Use to enter numbersand characters and select menu items.
8. Space Key Use to enter a space while editing.TTS (Text to Speech) function is available with
in Messaging Inbox, Notepad andEmail screen. Use to activate Voice Commandin standby mode.
9. Return Key Moves cursor to the next line.
10. CLR Key Press to delete a single space orcharacter, or press and hold to delete aspecific word plus its space. Press once in a
menu to go back one level.
11. Speakerphone Key Use to activateSpeakerphone Mode.
12. Navigation Keys Use for quick, convenientnavigation. From standby mode, access Get ItNow, Scheduler, Picture & Video, and MobileWeb (you can change any of these to othermenus in the Settings menu). In menus use toscroll to choices and settings.
13. OK Key Use to activate a selected screenitem.
14. END/PWR Key Use to turn the power on/offand to end a call. Use to return to the mainmenu display screen.
15. SEND Key Use to make or answer calls.
16. Right Soft Key Use to select Contacts menu,or other action displayed at the bottom rightof the LCD.
17. LCD Screen Displays incoming calls,messages and indicator icons as well as awide variety of content you select to view.
18. Speaker Lets you hear callers.
18. Speaker
2. Fn Key (Shortcut Keyin standbymode)
3. Microphone
7. AlphanumericKeypad
8. Space/ Voice Commands Key
9. Return Key
4. Shift Key
1. Left Soft Key
5. Sym Key
10. CLR Key
13. OK Key
15. SEND Key
16. Right Soft Key
11. Speakerphone Key
12. Navigation Keys
14. END/PWR Key
6. Game Navigation Keys
17. LCD Screen
14
Quick Glance of Touchpad and How to Use It
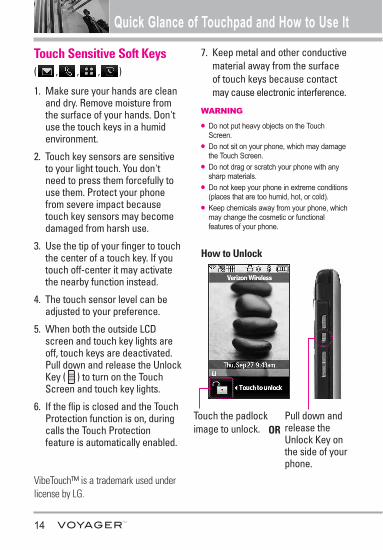
Touch Sensitive Soft Keys( , , , )
1. Make sure your hands are cleanand dry. Remove moisture fromthe surface of your hands. Don'tuse the touch keys in a humidenvironment.
2. Touch key sensors are sensitiveto your light touch. You don'tneed to press them forcefully touse them. Protect your phonefrom severe impact becausetouch key sensors may becomedamaged from harsh use.
3. Use the tip of your finger to touchthe center of a touch key. If youtouch off-center it may activatethe nearby function instead.
4. The touch sensor level can beadjusted to your preference.
5. When both the outside LCDscreen and touch key lights areoff, touch keys are deactivated.Pull down and release the UnlockKey ( ) to turn on the TouchScreen and touch key lights.
6. If the flip is closed and the TouchProtection function is on, duringcalls the Touch Protectionfeature is automatically enabled.
7. Keep metal and other conductivematerial away from the surfaceof touch keys because contactmay cause electronic interference.
WARNING
l Do not put heavy objects on the TouchScreen.
l Do not sit on your phone, which may damagethe Touch Screen.
l Do not drag or scratch your phone with anysharp materials.
l Do not keep your phone in extreme conditions(places that are too humid, hot, or cold).
l Keep chemicals away from your phone, whichmay change the cosmetic or functionalfeatures of your phone.
How to Unlock
Touch the padlockimage to unlock.
Pull down andrelease theUnlock Key onthe side of yourphone.
OR
VibeTouch™ is a trademark used underlicense by LG.
15
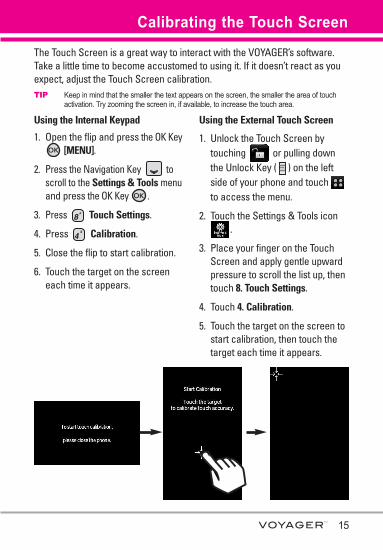
Calibrating the Touch Screen
The Touch Screen is a great way to interact with the VOYAGER’s software.Take a little time to become accustomed to using it. If it doesn’t react as youexpect, adjust the Touch Screen calibration.TIP Keep in mind that the smaller the text appears on the screen, the smaller the area of touch
activation. Try zooming the screen in, if available, to increase the touch area.
Using the Internal Keypad
1. Open the flip and press the OK Key[MENU].
2. Press the Navigation Key toscroll to the Settings & Tools menuand press the OK Key .
3. Press Touch Settings.
4. Press Calibration.
5. Close the flip to start calibration.
6. Touch the target on the screeneach time it appears.
Using the External Touch Screen
1. Unlock the Touch Screen bytouching or pulling downthe Unlock Key ( ) on the leftside of your phone and touch to access the menu.
2. Touch the Settings & Tools icon.
3. Place your finger on the TouchScreen and apply gentle upwardpressure to scroll the list up, thentouch 8. Touch Settings.
4. Touch 4. Calibration.
5. Touch the target on the screen tostart calibration, then touch thetarget each time it appears.
16
Shortcut Menu
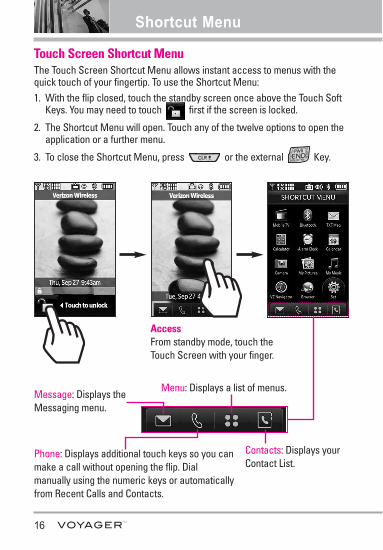
Touch Screen Shortcut MenuThe Touch Screen Shortcut Menu allows instant access to menus with thequick touch of your fingertip. To use the Shortcut Menu:1. With the flip closed, touch the standby screen once above the Touch Soft
Keys. You may need to touch first if the screen is locked.
2. The Shortcut Menu will open. Touch any of the twelve options to open theapplication or a further menu.
3. To close the Shortcut Menu, press or the external Key.
Menu: Displays a list of menus. Message: Displays theMessaging menu.
Contacts: Displays yourContact List.
Phone: Displays additional touch keys so you canmake a call without opening the flip. Dialmanually using the numeric keys or automaticallyfrom Recent Calls and Contacts.
AccessFrom standby mode, touch theTouch Screen with your finger.
17
Entering and Editing Information
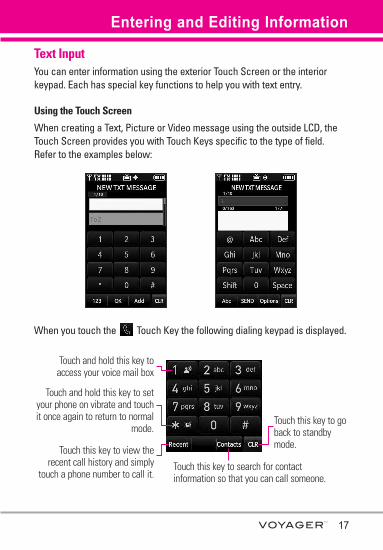
Text InputYou can enter information using the exterior Touch Screen or the interiorkeypad. Each has special key functions to help you with text entry.
Using the Touch Screen
When creating a Text, Picture or Video message using the outside LCD, theTouch Screen provides you with Touch Keys specific to the type of field. Refer to the examples below:
Touch and hold this key toaccess your voice mail box
Touch this key to view therecent call history and simply
touch a phone number to call it.Touch this key to search for contactinformation so that you can call someone.
Touch and hold this key to setyour phone on vibrate and touchit once again to return to normal
mode.Touch this key to goback to standbymode.
When you touch the Touch Key the following dialing keypad is displayed.
18
Entering and Editing Information
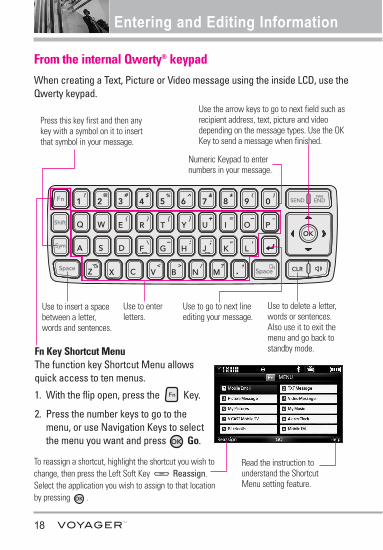
From the internal Qwerty® keypad
Fn Key Shortcut MenuThe function key Shortcut Menu allowsquick access to ten menus.
1. With the flip open, press the Key.
2. Press the number keys to go to themenu, or use Navigation Keys to selectthe menu you want and press Go.
Use the arrow keys to go to next field such asrecipient address, text, picture and videodepending on the message types. Use the OKKey to send a message when finished.
Use to enterletters.
Use to insert a spacebetween a letter,words and sentences.
Press this key first and then anykey with a symbol on it to insertthat symbol in your message.
Use to go to next lineediting your message.
Use to delete a letter,words or sentences.Also use it to exit themenu and go back tostandby mode.
Numeric Keypad to enternumbers in your message.
When creating a Text, Picture or Video message using the inside LCD, use theQwerty keypad.
To reassign a shortcut, highlight the shortcut you wish tochange, then press the Left Soft Key Reassign.Select the application you wish to assign to that locationby pressing .
Read the instruction tounderstand the ShortcutMenu setting feature.
19
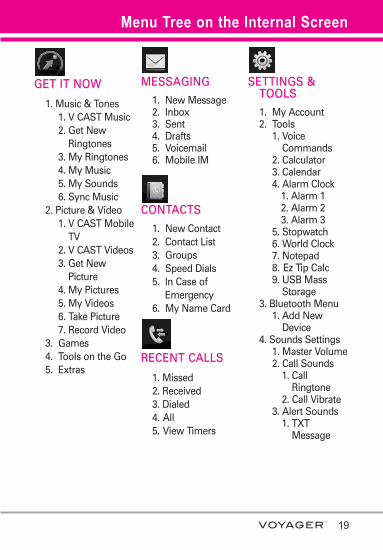
Menu Tree on the Internal Screen
GGETET IITT NNOWOW
1. Music & Tones1. V CAST Music2. Get New
Ringtones3. My Ringtones4. My Music5. My Sounds6. Sync Music
2. Picture & Video1. V CAST Mobile
TV2. V CAST Videos3. Get New
Picture4. My Pictures5. My Videos6. Take Picture7. Record Video
3. Games4. Tools on the Go5. Extras
MMESSAGINGESSAGING
1. New Message2. Inbox3. Sent4. Drafts5. Voicemail6. Mobile IM
CCONTONTACTSACTS
1. New Contact2. Contact List3. Groups4. Speed Dials5. In Case of
Emergency6. My Name Card
RRECENT CALLSECENT CALLS
1. Missed2. Received3. Dialed4. All5. View Timers
SETTINGS &SETTINGS &TOOLSTOOLS
1. My Account2. Tools
1. VoiceCommands
2. Calculator3. Calendar4. Alarm Clock
1. Alarm 12. Alarm 23. Alarm 3
5. Stopwatch6. World Clock7. Notepad8. Ez Tip Calc9. USB Mass
Storage3. Bluetooth Menu
1. Add NewDevice
4. Sounds Settings1. Master Volume2. Call Sounds
1. CallRingtone
2. Call Vibrate3. Alert Sounds
1. TXTMessage
20
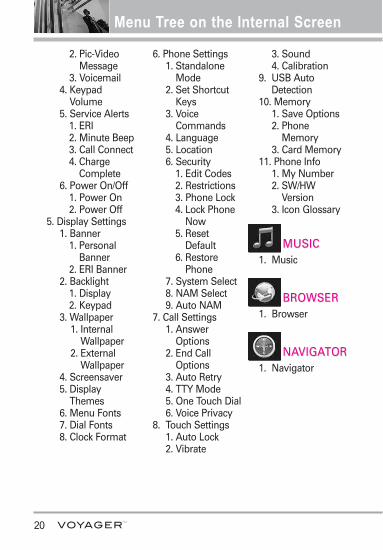
Menu Tree on the Internal Screen
2. Pic-VideoMessage
3. Voicemail 4. Keypad
Volume5. Service Alerts
1. ERI2. Minute Beep3. Call Connect4. Charge
Complete6. Power On/Off
1. Power On2. Power Off
5. Display Settings1. Banner
1. PersonalBanner
2. ERI Banner2. Backlight
1. Display2. Keypad
3. Wallpaper1. Internal
Wallpaper2. External
Wallpaper4. Screensaver5. Display
Themes6. Menu Fonts7. Dial Fonts8. Clock Format
6. Phone Settings1. Standalone
Mode2. Set Shortcut
Keys3. Voice
Commands4. Language5. Location6. Security
1. Edit Codes2. Restrictions3. Phone Lock4. Lock Phone
Now5. Reset
Default6. Restore
Phone7. System Select8. NAM Select9. Auto NAM
7. Call Settings1. Answer
Options2. End Call
Options3. Auto Retry4. TTY Mode5. One Touch Dial6. Voice Privacy
8. Touch Settings1. Auto Lock2. Vibrate
3. Sound4. Calibration
9. USB AutoDetection
10. Memory1. Save Options2. Phone
Memory3. Card Memory
11. Phone Info1. My Number2. SW/HW
Version3. Icon Glossary
MUSICMUSIC1. Music
BROWSERBROWSER1. Browser
NANAVIGAVIGATORTOR1. Navigator
21
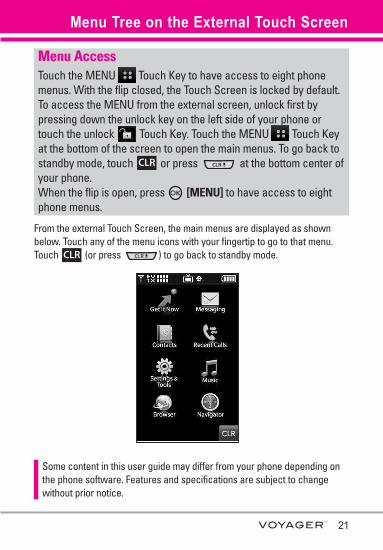
Menu Tree on the External Touch Screen
Some content in this user guide may differ from your phone depending onthe phone software. Features and specifications are subject to changewithout prior notice.
Menu AccessTouch the MENU Touch Key to have access to eight phonemenus. With the flip closed, the Touch Screen is locked by default. To access the MENU from the external screen, unlock first bypressing down the unlock key on the left side of your phone ortouch the unlock Touch Key. Touch the MENU Touch Keyat the bottom of the screen to open the main menus. To go back tostandby mode, touch or press at the bottom center ofyour phone.When the flip is open, press [MENU] to have access to eightphone menus.
CLR
From the external Touch Screen, the main menus are displayed as shownbelow. Touch any of the menu icons with your fingertip to go to that menu.Touch (or press ) to go back to standby mode.CLR
22
Shortcut Menu on the External Touchpad
Mobile TV
Bluetooth
TXT Msg
Calculator
Alarm Clock
Calendar
Camera
My Pictures
My Music
VZ Navigator
Browser
Set
Read the instruction tounderstand the ShortcutMenu setting feature.
Touch it when you are done inrenewing the Shortcut Menus.
Touch Rearrange Positions orReset to Default and touch
to save the change.SAVE
Touch it to go back to theShortcut Menu screen.
Use to customize your Shortcut Menus by touching themenu you want to replace and touching a new one toreplace it from the list.
Touch Screen Shortcut MenuAllows quick, direct access to several frequently used device features whenthe flip is closed. To access the Shortcut Menu, press the Unlock Key tounlock the outside LCD, then touch anywhere above the Touch Soft Keys.
23
Getting Started with Your Phone
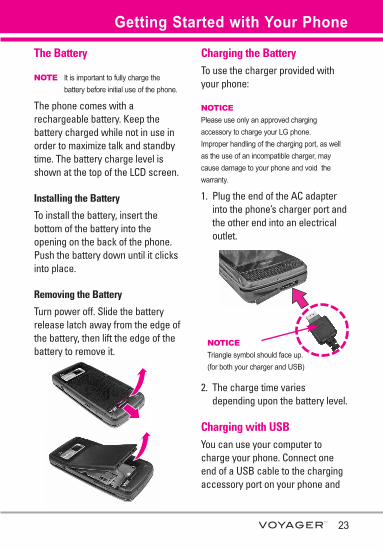
The Battery
NOTE It is important to fully charge thebattery before initial use of the phone.
The phone comes with arechargeable battery. Keep thebattery charged while not in use inorder to maximize talk and standbytime. The battery charge level isshown at the top of the LCD screen.
Installing the Battery
To install the battery, insert thebottom of the battery into theopening on the back of the phone.Push the battery down until it clicksinto place.
Removing the Battery
Turn power off. Slide the batteryrelease latch away from the edge ofthe battery, then lift the edge of thebattery to remove it.
Charging the BatteryTo use the charger provided withyour phone:
NOTICE
Please use only an approved chargingaccessory to charge your LG phone. Improper handling of the charging port, as wellas the use of an incompatible charger, maycause damage to your phone and void thewarranty.
1. Plug the end of the AC adapterinto the phone’s charger port andthe other end into an electricaloutlet.
2. The charge time variesdepending upon the battery level.
Charging with USBYou can use your computer tocharge your phone. Connect oneend of a USB cable to the chargingaccessory port on your phone and
NOTICE
Triangle symbol should face up.(for both your charger and USB)
24
Getting Started with Your Phone
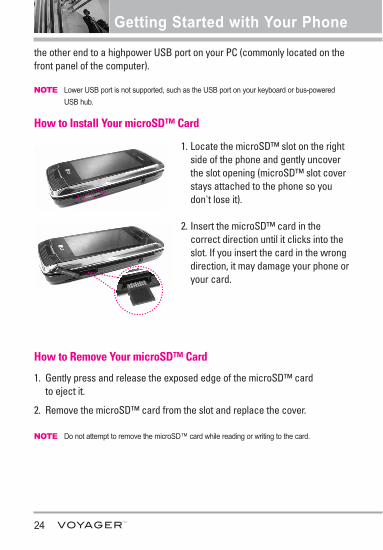
the other end to a highpower USB port on your PC (commonly located on thefront panel of the computer).
NOTE Lower USB port is not supported, such as the USB port on your keyboard or bus-poweredUSB hub.
How to Install Your microSD™ Card
1. Locate the microSD™ slot on the rightside of the phone and gently uncoverthe slot opening (microSD™ slot coverstays attached to the phone so youdon't lose it).
2. Insert the microSD™ card in thecorrect direction until it clicks into theslot. If you insert the card in the wrongdirection, it may damage your phone oryour card.
How to Remove Your microSD™ Card
1. Gently press and release the exposed edge of the microSD™ card to eject it.
2. Remove the microSD™ card from the slot and replace the cover.
NOTE Do not attempt to remove the microSD™ card while reading or writing to the card.
25
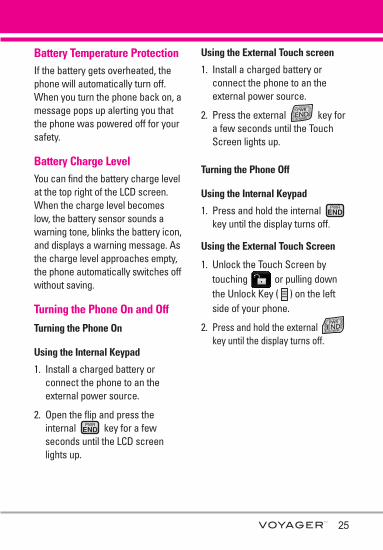
Battery Temperature ProtectionIf the battery gets overheated, thephone will automatically turn off.When you turn the phone back on, amessage pops up alerting you thatthe phone was powered off for yoursafety.
Battery Charge LevelYou can find the battery charge levelat the top right of the LCD screen.When the charge level becomeslow, the battery sensor sounds awarning tone, blinks the battery icon,and displays a warning message. Asthe charge level approaches empty,the phone automatically switches offwithout saving.
Turning the Phone On and Off
Turning the Phone On
Using the Internal Keypad
1. Install a charged battery orconnect the phone to an theexternal power source.
2. Open the flip and press theinternal key for a fewseconds until the LCD screenlights up.
Using the External Touch screen
1. Install a charged battery orconnect the phone to an theexternal power source.
2. Press the external key fora few seconds until the TouchScreen lights up.
Turning the Phone Off
Using the Internal Keypad
1. Press and hold the internal key until the display turns off.
Using the External Touch Screen
1. Unlock the Touch Screen bytouching or pulling downthe Unlock Key ( ) on the leftside of your phone.
2. Press and hold the external key until the display turns off.
26
Getting Started with Your Phone
Signal StrengthCall quality depends on the signalstrength in your area. You can tellhow much signal strength you haveby the number of bars next to thesignal strength icon: the more bars,the stronger the signal. If you’rehaving problems with signal quality,move to an open area or, wheninside a building, try moving near awindow.
Screen IconsWhen the phone is on, the top lineof the LCD screen displays phonestatus icons.
Using the Internal KeypadTo see the icon glossary, go toMENU -> Settings & Tools -> PhoneInfo -> Icon Glossary on your phone.
Using the External Touch Screen
1. Unlock the Touch Screen bytouching or pulling downthe Unlock Key ( ) on the leftside of your phone and touch to access the menu.
2. Touch .
3. Touch 11. Phone Info.
4. Touch 3. Icon Glossary.
Making Calls
NOTE To activate the speakerphone during acall, simply open the flip.
NOTE If the external Touch Screen backlightdims while on a call, touch any sidekey to turn the backlight back on.
Using the Internal Keypad
1. Make sure the phone is turnedon. If not, press the internal key for about three seconds. Ifnecessary, enter the lock code.
2. Enter the phone number (includethe area code if needed).
3. Press the internal key.
4. Press the internal key toend the call.
Correcting Dialing Mistakes
If you make a mistake while dialinga number, press once to erasethe last digit entered, or hold down
for at least 2 seconds to deleteall digits.
27
Using the External Touch screen
1. Touch the Touch Key that lookslike a phone , then a numerickeypad is displayed. Enter thephone number you want to call orsearch for a number in Contactsor Recent Calls.
2. Press the external key ortouch .
Redialing CallsPress and hold the external key or the internal key toredial the last number you dialed,received or missed in call history.The last 270 numbers are stored inthe call history list and you can alsoselect one of these to redial.
Receiving Calls
Using the Internal Keypad
1. When the phone rings orvibrates, there are several waysof answering a call, dependingon the phone setting:
l Flip Open: Open the flip (bydefault).
l Any Key: Press the internal key or any other key except theinternal key.
l Auto with Handsfree: The callautomatically connects whenconnected to a handsfree device.
NOTE If you press the Left Soft Key [Quiet] while the phone is ringing, theringing or vibration is muted for that call.
NOTE If you press the Right Soft Key [Ignore] while the phone is ringing andunlocked, the call will end or go tovoicemail.
Using the External Touch screen
1. When the phone rings or vibrates,
simply touch and press the
external key or touch the
Touch Key.
2. Press the external key toend the call.
Answer
Call

28
Vibrate ModeSets the phone to vibrate instead ofring ( is displayed). To setVibrate Mode, press and hold onthe internal keypad or touch and hold
.
To return to Normal Mode, press andhold again or touch and hold
.
Mute FunctionThe Mute Function prevents thetransmission of your voice to thecaller. To quickly activate Mute pressthe Left Soft Key [Mute] abovethe internal keypad or touch then to unmute press the Left SoftKey [Unmute] or touch
.
Volume Quick AdjustmentQuickly adjust ringer and earpiecevolumes by pressing the upper sidekey to increase and lower key todecrease.
NOTE The earpiece volume can only beadjusted during a call and Keypadvolume can only be adjusted throughthe Menu.
NOTE To turn off sounds, press and hold thelower side key for 3 seconds when theflip is open or closed, then press andhold the upper side key to return tonormal sounds mode.
Call WaitingDuring a call, one beep indicates thatyou have another incoming call.
Ignoring a Call WaitingIf you don't want to answer theincoming call, press the Right SoftKey [Ignore] when the flip isopen. If the flip is closed, touch
on the Touch Screen. TheCall Waiting beep stops and the callgoes to your voicemail, if available.
Answering a Call Waiting
1. Press the internal key/ theexternal key (whether theflip open or closed) toautomatically put the first call onhold and answer the new call.
2. Press the internal key/ theexternal key again to putthe second call on hold andreturn to the first caller.
Ignore
Unmute
Mute
Quick Access to Convenient Features
29
Voice CommandsVoice Commands allow you to dothings by verbal command (e.g., makecalls, confirm Voicemail, etc.).
1. Access the Voice Commandsfeature:
l With the flip open, press .
l With the flip closed and thescreen unlocked, give the aquick press (an extended pressactivates the Voice Recorderfeature instead).
l With the flip closed and thescreen unlocked, touch theTouch Screen to access theShortcut Menu, then touch theVoice Commands icon .
2. Follow the prompts to use yourvoice command(s).
NOTE Voice Commands can also be startedwith the designated key on yourBluetooth® device. Please check themanual of the Bluetooth® device forfurther instructions.
30
Contacts in Your Phone’s Memory
Storing Basics
Using the Internal Keypad
1. Enter a number (max. 48 digits),then press the Left Soft Key [Save].
2. Use the Navigation Key toscroll to Add New Contact/Update Existing, then press theOK Key .
3. Use the Navigation Key toscroll to Mobile 1/ Home/ Work/Mobile 2/ Fax, then press the OKKey .
4. Enter a name (max. 32 characters),then press the OK Key .
5. Press the internal key toexit, the internal key to call,or the Right Soft Key [Options].
Using the External Touch Screen
1. Unlock the Touch Screen bytouching or pulling downthe Unlock Key ( ) on the leftside of your phone.
2. Touch the contact touch soft key.
3. Touch .
4. Touch a field, use the pop-up touchkeys to enter information, thentouch . Do this for eachfield you want to enter.
5. When all fields are complete, touch.
6. Press the external key toexit, the external key tocall, or touch .
7. Touch .
OR
1. Unlock the Touch Screen bytouching or pulling downthe Unlock Key ( ) on the leftside of your phone.
2. Touch the phone touch soft key forthe phone dialing pad .
3. Use the number Touch Keys thatpop-up to enter the phone number.
4. Touch , then continuetouching fields and enteringinformation as necessary.
SAVE
SAVE
Options
SAVE
DONE
NEW
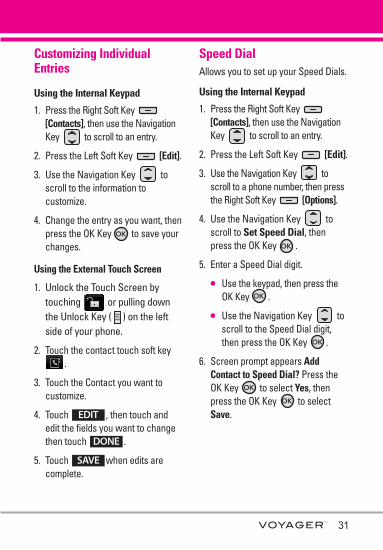
Customizing IndividualEntries
Using the Internal Keypad
1. Press the Right Soft Key [Contacts], then use the NavigationKey to scroll to an entry.
2. Press the Left Soft Key [Edit].
3. Use the Navigation Key toscroll to the information tocustomize.
4. Change the entry as you want, thenpress the OK Key to save yourchanges.
Using the External Touch Screen
1. Unlock the Touch Screen bytouching or pulling downthe Unlock Key ( ) on the leftside of your phone.
2. Touch the contact touch soft key.
3. Touch the Contact you want tocustomize.
4. Touch , then touch andedit the fields you want to changethen touch .
5. Touch when edits arecomplete.
Speed DialAllows you to set up your Speed Dials.
Using the Internal Keypad
1. Press the Right Soft Key [Contacts], then use the NavigationKey to scroll to an entry.
2. Press the Left Soft Key [Edit].
3. Use the Navigation Key toscroll to a phone number, then pressthe Right Soft Key [Options].
4. Use the Navigation Key toscroll to Set Speed Dial, thenpress the OK Key .
5. Enter a Speed Dial digit.
l Use the keypad, then press theOK Key .
l Use the Navigation Key toscroll to the Speed Dial digit,then press the OK Key .
6. Screen prompt appears AddContact to Speed Dial? Press theOK Key to select Yes, thenpress the OK Key to selectSave.
SAVE
DONE
EDIT
31
32
Contacts in Your Phone’s Memory
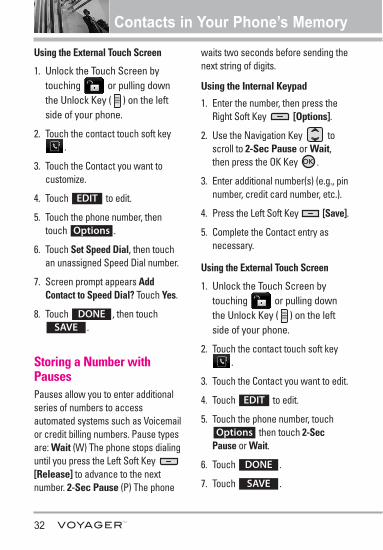
Using the External Touch Screen
1. Unlock the Touch Screen bytouching or pulling downthe Unlock Key ( ) on the leftside of your phone.
2. Touch the contact touch soft key.
3. Touch the Contact you want tocustomize.
4. Touch to edit.
5. Touch the phone number, thentouch .
6. Touch Set Speed Dial, then touchan unassigned Speed Dial number.
7. Screen prompt appears AddContact to Speed Dial? Touch Yes.
8. Touch , then touch.
Storing a Number withPausesPauses allow you to enter additionalseries of numbers to accessautomated systems such as Voicemailor credit billing numbers. Pause typesare: Wait (W) The phone stops dialinguntil you press the Left Soft Key [Release] to advance to the nextnumber. 2-Sec Pause (P) The phone
waits two seconds before sending thenext string of digits.
Using the Internal Keypad
1. Enter the number, then press theRight Soft Key [Options].
2. Use the Navigation Key toscroll to 2-Sec Pause or Wait,then press the OK Key .
3. Enter additional number(s) (e.g., pinnumber, credit card number, etc.).
4. Press the Left Soft Key [Save].
5. Complete the Contact entry asnecessary.
Using the External Touch Screen
1. Unlock the Touch Screen bytouching or pulling downthe Unlock Key ( ) on the leftside of your phone.
2. Touch the contact touch soft key.
3. Touch the Contact you want to edit.
4. Touch to edit.
5. Touch the phone number, touchthen touch 2-Sec
Pause or Wait.
6. Touch .
7. Touch . SAVE
DONE
Options
EDIT
SAVEDONE
Options
EDIT
33
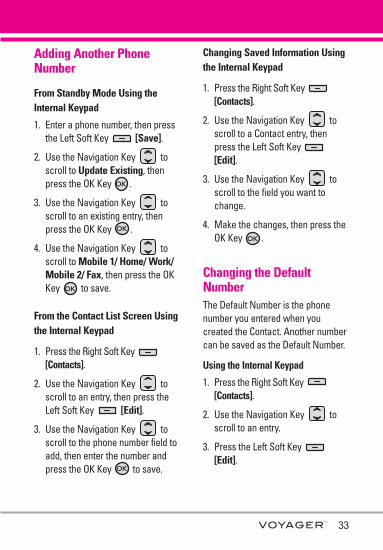
Adding Another PhoneNumber
From Standby Mode Using theInternal Keypad
1. Enter a phone number, then pressthe Left Soft Key [Save].
2. Use the Navigation Key toscroll to Update Existing, thenpress the OK Key .
3. Use the Navigation Key toscroll to an existing entry, thenpress the OK Key .
4. Use the Navigation Key toscroll to Mobile 1/ Home/ Work/Mobile 2/ Fax, then press the OKKey to save.
From the Contact List Screen Usingthe Internal Keypad
1. Press the Right Soft Key [Contacts].
2. Use the Navigation Key toscroll to an entry, then press theLeft Soft Key [Edit].
3. Use the Navigation Key toscroll to the phone number field toadd, then enter the number andpress the OK Key to save.
Changing Saved Information Usingthe Internal Keypad
1. Press the Right Soft Key [Contacts].
2. Use the Navigation Key toscroll to a Contact entry, thenpress the Left Soft Key [Edit].
3. Use the Navigation Key toscroll to the field you want tochange.
4. Make the changes, then press theOK Key .
Changing the DefaultNumberThe Default Number is the phonenumber you entered when youcreated the Contact. Another numbercan be saved as the Default Number.
Using the Internal Keypad
1. Press the Right Soft Key [Contacts].
2. Use the Navigation Key toscroll to an entry.
3. Press the Left Soft Key [Edit].
34
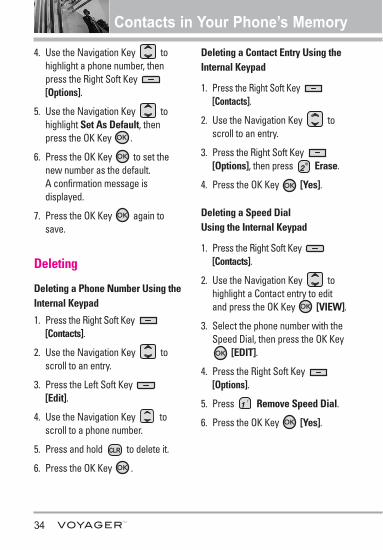
Contacts in Your Phone’s Memory
4. Use the Navigation Key tohighlight a phone number, thenpress the Right Soft Key [Options].
5. Use the Navigation Key tohighlight Set As Default, thenpress the OK Key .
6. Press the OK Key to set thenew number as the default. A confirmation message isdisplayed.
7. Press the OK Key again tosave.
Deleting
Deleting a Phone Number Using theInternal Keypad
1. Press the Right Soft Key [Contacts].
2. Use the Navigation Key toscroll to an entry.
3. Press the Left Soft Key [Edit].
4. Use the Navigation Key toscroll to a phone number.
5. Press and hold to delete it.
6. Press the OK Key .
Deleting a Contact Entry Using theInternal Keypad
1. Press the Right Soft Key [Contacts].
2. Use the Navigation Key toscroll to an entry.
3. Press the Right Soft Key [Options], then press Erase.
4. Press the OK Key [Yes].
Deleting a Speed Dial Using the Internal Keypad
1. Press the Right Soft Key [Contacts].
2. Use the Navigation Key tohighlight a Contact entry to editand press the OK Key [VIEW].
3. Select the phone number with theSpeed Dial, then press the OK Key
[EDIT].
4. Press the Right Soft Key [Options].
5. Press Remove Speed Dial.
6. Press the OK Key [Yes].
35
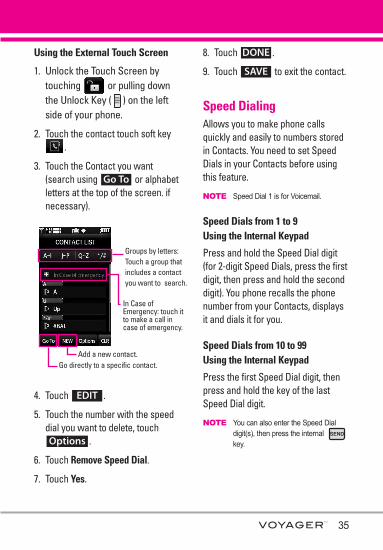
Using the External Touch Screen
1. Unlock the Touch Screen bytouching or pulling downthe Unlock Key ( ) on the leftside of your phone.
2. Touch the contact touch soft key.
3. Touch the Contact you want(search using or alphabetletters at the top of the screen. ifnecessary).
4. Touch .
5. Touch the number with the speeddial you want to delete, touch
.
6. Touch Remove Speed Dial.
7. Touch Yes.
8. Touch .
9. Touch to exit the contact.
Speed DialingAllows you to make phone callsquickly and easily to numbers storedin Contacts. You need to set SpeedDials in your Contacts before usingthis feature.
NOTE Speed Dial 1 is for Voicemail.
Speed Dials from 1 to 9 Using the Internal Keypad
Press and hold the Speed Dial digit(for 2-digit Speed Dials, press the firstdigit, then press and hold the seconddigit). You phone recalls the phonenumber from your Contacts, displaysit and dials it for you.
Speed Dials from 10 to 99 Using the Internal Keypad
Press the first Speed Dial digit, thenpress and hold the key of the lastSpeed Dial digit.
NOTE You can also enter the Speed Dialdigit(s), then press the internal key.
SAVE
DONE
Options
EDIT
Go To
Groups by letters:Touch a group thatincludes a contactyou want to search.
In Case ofEmergency: touch itto make a call incase of emergency.
Add a new contact.Go directly to a specific contact.
36
Contacts in Your Phone’s Memory
Speed Dials 97, 98, and 99
Speed Dials 97, 98, and 99 arepreset to access certain phoneaccount information: 97 (#BAL), 98(#MIN), and 99 (#PMT). UnlikeSpeed Dial 1, these can be changedif you want.
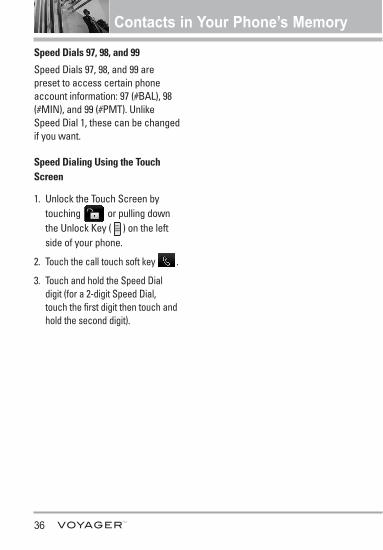
Speed Dialing Using the TouchScreen
1. Unlock the Touch Screen bytouching or pulling downthe Unlock Key ( ) on the leftside of your phone.
2. Touch the call touch soft key .
3. Touch and hold the Speed Dialdigit (for a 2-digit Speed Dial,touch the first digit then touch andhold the second digit).
37
GET IT NOW
GGEETT IITT NNOOWWGet It Now® allows you to do morethan just talk on your phone. Get ItNow is a technology and service thatallows you to download and useapplications on your phone. With Get It Now, it’s quick and easy topersonalize your phone to yourlifestyle and tastes. Just download theapplications that appeal to you. With awide range of software available,from ringtones to games toproductivity tools, you can be assuredthat you can find something useful,practical, or entertaining.
SHORTCUT
You can access the Get It Now feature directly byopening the flip and pressing the Navigation Key
to the right.
NOTE Do not insert or remove the microSDwhile playing, deleting or downloadingPictures/ Videos/ Music/ Sounds.
NOTE With the flip closed, if you answer acall while playing music, browsing thenet, watching TV/video, or using VZNavigatorSM, and end the call bypressing the external Key, thetouch screen will lock. Unlock thephone by sliding the Unlock Key ( )downwards.
Anything Unclear?From the Get It Now menu, press theRight Soft Key [Info] (if you’reusing the Touch Screen, touch )to see your memory status, activity log,help text, and Get It Now status. Use theHelp option to view information frombuying new applications to expiredapplications.
1. Music & TonesPersonalize your phone withringtones. A wide variety of choicesare available, such as current hits,pop, hip-hop, and more.
Access and OptionsUsing the Internal Keypad
1. Open the flip and press the OKKey [MENU].
2. Press the OK Key [Get ItNow].
3. Press Music & Tones.
4. Select a submenu by pressingthe number that correspondswith a submenu.
Using the External Touch Screen
1. Unlock the Touch Screen bytouching or pulling downthe Unlock Key ( ) on the left
Info
38
GET IT NOW
side of your phone and touch to access the menu.
2. Touch the Get It Now icon .
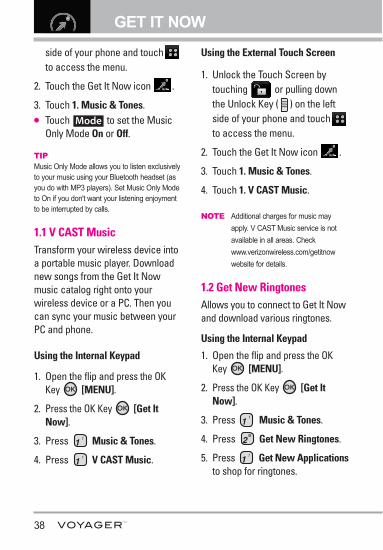
3. Touch 1. Music & Tones.l Touch to set the Music
Only Mode On or Off.
TIPMusic Only Mode allows you to listen exclusivelyto your music using your Bluetooth headset (asyou do with MP3 players). Set Music Only Modeto On if you don't want your listening enjoymentto be interrupted by calls.
1.1 V CAST MusicTransform your wireless device intoa portable music player. Downloadnew songs from the Get It Nowmusic catalog right onto yourwireless device or a PC. Then youcan sync your music between yourPC and phone.
Using the Internal Keypad
1. Open the flip and press the OKKey [MENU].
2. Press the OK Key [Get ItNow].
3. Press Music & Tones.
4. Press V CAST Music.
Using the External Touch Screen
1. Unlock the Touch Screen bytouching or pulling downthe Unlock Key ( ) on the leftside of your phone and touch to access the menu.
2. Touch the Get It Now icon .
3. Touch 1. Music & Tones.
4. Touch 1. V CAST Music.
NOTE Additional charges for music mayapply. V CAST Music service is notavailable in all areas. Checkwww.verizonwireless.com/getitnowwebsite for details.
1.2 Get New RingtonesAllows you to connect to Get It Nowand download various ringtones.
Using the Internal Keypad
1. Open the flip and press the OKKey [MENU].
2. Press the OK Key [Get ItNow].
3. Press Music & Tones.
4. Press Get New Ringtones.
5. Press Get New Applicationsto shop for ringtones.
Mode
Using the External Touch Screen
1. Unlock the Touch Screen bytouching or pulling downthe Unlock Key ( ) on the leftside of your phone and touch to access the menu.
2. Touch the Get It Now icon .
3. Touch 1. Music & Tones.
4. Touch 2. Get New Ringtones.
5. Touch 1. Get New Applicationsto shop for ringtones.
1.3 My RingtonesAllows you to select a desiredringtone, download a new ringtone.
Using the Internal Keypad
1. Open the flip and press the OKKey [MENU].
2. Press the OK Key [Get ItNow].
3. Press Music & Tones.
4. Press My Ringtones.
5. Use to scroll to a ringtoneand press the Left Soft Key [Set As].
l Ringtone
l Contact ID: Scroll and selectthe Contact to be identified by the
ringtone you selected.
l Alert Sounds: Press thecorresponding number key to setthe ringtone for one of thefollowing:All Messages/ TXT Message/Picture-Video Message/Voicemail
Using the External Touch Screen
1. Unlock the Touch Screen bytouching or pulling downthe Unlock Key ( ) on the leftside of your phone and touch to access the menu.
2. Touch the Get It Now icon .
3. Touch 1. Music & Tones.
4. Touch 3. My Ringtones.
5. Touch a ringtone and touch.
NOTE To scroll to ringtones not viewed onscreen, place your finger on the listand gently apply upward (ordownward) pressure. The bar alongthe right side of the screen indicateswhere you are in the list.
l 1. Ringtonel 2. Contact ID: Touch the Contact
to be identified by the ringtoneyou selected.
SET AS
39
40
GET IT NOWl 3. Alert Sounds: Touch the option
to set it as ringtone. All Messages/ TXT Message/Picture-Video Message/Voicemail
1.4 My Music Allows you to store and to listen tomusic right from your phone. Connectto V CAST to download a variety ofmusic, transfer music between yourphone and your PC, manage andorganize your music files, and more.
SHORTCUT
Unlock the Touch Screen by touching orpulling down the Unlock Key ( ) on the leftside of your phone, then touch the screen withyour finger to access the shortcut menu, thentouch the My Music icon .
NOTE File storage varies according to thesize of each file as well as memoryallocation of other applications.
Using the Internal Keypad
1. Open the flip and press the OKKey [MENU].
2. Press the OK Key [Get ItNow].
3. Press Music & Tones.
4. Press My Music.
5. Use the Navigation Key to
scroll to a submenu, then press theOK Key .
Using the External Touch Screen
1. Unlock the Touch Screen bytouching or pulling downthe Unlock Key ( ) on the leftside of your phone and touch to access the menu.
2. Touch the Get It Now icon .
3. Touch 1. Music & Tones.
4. Touch 4. My Music.
5. Touch a submenu to access yourmusic.
Playing Your Music
It’s easy to find and play the musicyou’ve stored in your phone.
Access My MusicUsing the Internal Keypad
1. Open the flip and press the OKKey [MENU].
2. Press the OK Key [Get ItNow].
3. Press Music & Tones.
4. Press My Music.
5. Scroll to one of the followingoptions, then press the OK Key .Genres/ Artists/ Albums/ Songs/Playlists/ Inbox/ Play All/ Shuffle
41
6. Scroll to a song and press the OKKey to start the Music Player.
Using the External Touch Screen
1. Unlock the Touch Screen bytouching or pulling downthe Unlock Key ( ) on the leftside of your phone and touch to access the menu.
2. Touch the Get It Now icon .
3. Touch 1. Music & Tones.
4. Touch 4. My Music.
5. Touch one of the following options.Genres/ Artists/ Albums/ Songs/Playlists/ Inbox/ Play All/ Shuffle
6. Touch the name of the song youwant to hear to start the musicplayer.
TIPSelecting Play All begins playing all of yourstored music in sequence one time through,then exits the Music Player.
Controlling the Music Player
If you keep the flip open whilelistening to your music, use thefollowing to control the Music Player:
l Left Soft Key [Repeat]Repeats the song.
l Right Soft Key [Options]Allows you to choose:Play All / Shuffle / My Music /Shop / Listeners also liked / Help
l : Adjust the volume.
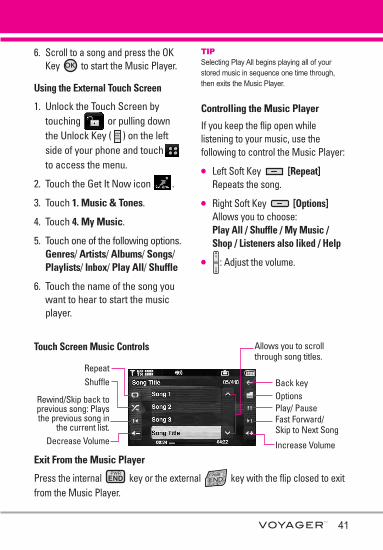
Touch Screen Music Controls
Repeat
Back keyOptionsPlay/ PauseFast Forward/ Skip to Next Song
Increase Volume
Allows you to scrollthrough song titles.
Shuffle
Rewind/Skip back toprevious song: Playsthe previous song in
the current list.Decrease Volume
Exit From the Music Player
Press the internal key or the external key with the flip closed to exitfrom the Music Player.
42
GET IT NOW
1.5 My SoundsAllows you to select a desiredsound or record a new sound.
Using the Internal Keypad
1. Open the flip and press the OKKey [MENU].
2. Press the OK Key [Get ItNow].
3. Press Music & Tones.
4. Press My Sounds.
5. Press Record New or scrolland select a sound using theNavigation Key .
Options with a sound file highlighted:
l Press the Left Soft Key [Erase].
l Press the OK Key [PLAY].
l Press the Right Soft Key [Options] to scroll to: Send/ To PIX Place/ Rename/Lock(Unlock)/ Erase All/ File Info
Using the External Touch Screen
1. Unlock the Touch Screen bytouching or pulling downthe Unlock Key ( ) on the leftside of your phone and touch to access the menu.
2. Touch the Get It Now icon .
3. Touch 1. Music & Tones.
4. Touch 5. My Sounds.
5. Touch 1. Record New or touch asound using your finger tips.
Options from here:
l Touch to erase theselected sound.
l Touch to send theselected sound.
l Touch to customizethe selected sound.To PIX Place/ Rename/Lock(Unlock)/ Erase All/ File Info
l Touch to go back toone level.
1.6 Sync MusicAllows you to synchronize yourmusic between your PC and yourphone. Transfer music files fromyour PC into your phone's memoryor microSD memory card (soldseparately) and vice versa. Transfermusic you purchased from theonline V CAST Music Store to yourPC.
CLR
Options
SEND
Erase
43
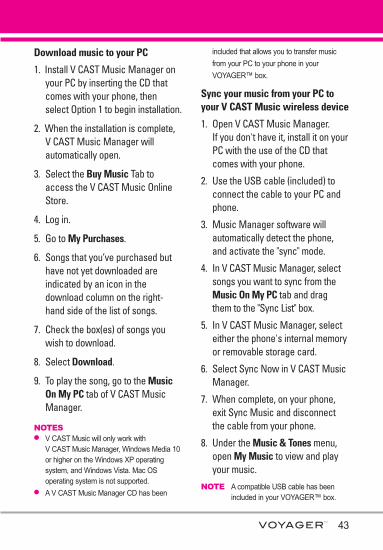
Download music to your PC
1. Install V CAST Music Manager onyour PC by inserting the CD thatcomes with your phone, thenselect Option 1 to begin installation.
2. When the installation is complete,V CAST Music Manager willautomatically open.
3. Select the Buy Music Tab toaccess the V CAST Music OnlineStore.
4. Log in.
5. Go to My Purchases.
6. Songs that you’ve purchased buthave not yet downloaded areindicated by an icon in thedownload column on the right-hand side of the list of songs.
7. Check the box(es) of songs youwish to download.
8. Select Download.
9. To play the song, go to the MusicOn My PC tab of V CAST MusicManager.
NOTESl V CAST Music will only work with
V CAST Music Manager, Windows Media 10or higher on the Windows XP operatingsystem, and Windows Vista. Mac OSoperating system is not supported.
l A V CAST Music Manager CD has been
included that allows you to transfer musicfrom your PC to your phone in yourVOYAGER™ box.
Sync your music from your PC toyour V CAST Music wireless device
1. Open V CAST Music Manager. If you don't have it, install it on yourPC with the use of the CD thatcomes with your phone.
2. Use the USB cable (included) toconnect the cable to your PC andphone.
3. Music Manager software willautomatically detect the phone,and activate the "sync" mode.
4. In V CAST Music Manager, selectsongs you want to sync from theMusic On My PC tab and dragthem to the "Sync List" box.
5. In V CAST Music Manager, selecteither the phone's internal memoryor removable storage card.
6. Select Sync Now in V CAST MusicManager.
7. When complete, on your phone,exit Sync Music and disconnectthe cable from your phone.
8. Under the Music & Tones menu,open My Music to view and playyour music.
NOTE A compatible USB cable has beenincluded in your VOYAGER™ box.
44
GET IT NOW
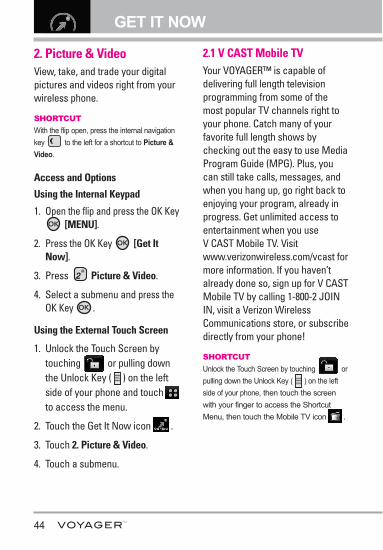
2. Picture & Video View, take, and trade your digitalpictures and videos right from yourwireless phone.
SHORTCUT
With the flip open, press the internal navigationkey to the left for a shortcut to Picture &Video.
Access and Options
Using the Internal Keypad
1. Open the flip and press the OK Key[MENU].
2. Press the OK Key [Get ItNow].
3. Press Picture & Video.
4. Select a submenu and press theOK Key .
Using the External Touch Screen
1. Unlock the Touch Screen bytouching or pulling downthe Unlock Key ( ) on the leftside of your phone and touch to access the menu.
2. Touch the Get It Now icon .
3. Touch 2. Picture & Video.
4. Touch a submenu.
2.1 V CAST Mobile TVYour VOYAGER™ is capable ofdelivering full length televisionprogramming from some of themost popular TV channels right toyour phone. Catch many of yourfavorite full length shows bychecking out the easy to use MediaProgram Guide (MPG). Plus, youcan still take calls, messages, andwhen you hang up, go right back toenjoying your program, already inprogress. Get unlimited access toentertainment when you use V CAST Mobile TV. Visitwww.verizonwireless.com/vcast formore information. If you haven’talready done so, sign up for V CASTMobile TV by calling 1-800-2 JOININ, visit a Verizon WirelessCommunications store, or subscribedirectly from your phone!
SHORTCUT
Unlock the Touch Screen by touching orpulling down the Unlock Key ( ) on the leftside of your phone, then touch the screenwith your finger to access the ShortcutMenu, then touch the Mobile TV icon .
45
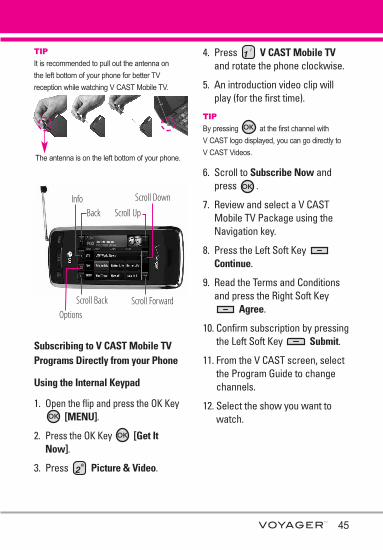
TIP
It is recommended to pull out the antenna onthe left bottom of your phone for better TVreception while watching V CAST Mobile TV.
Subscribing to V CAST Mobile TVPrograms Directly from your Phone
Using the Internal Keypad
1. Open the flip and press the OK Key[MENU].
2. Press the OK Key [Get ItNow].
3. Press Picture & Video.
4. Press V CAST Mobile TVand rotate the phone clockwise.
5. An introduction video clip willplay (for the first time).
TIP
By pressing at the first channel with V CAST logo displayed, you can go directly to V CAST Videos.
6. Scroll to Subscribe Now andpress .
7. Review and select a V CASTMobile TV Package using theNavigation key.
8. Press the Left Soft Key Continue.
9. Read the Terms and Conditionsand press the Right Soft Key
Agree.
10. Confirm subscription by pressingthe Left Soft Key Submit.
11. From the V CAST screen, selectthe Program Guide to changechannels.
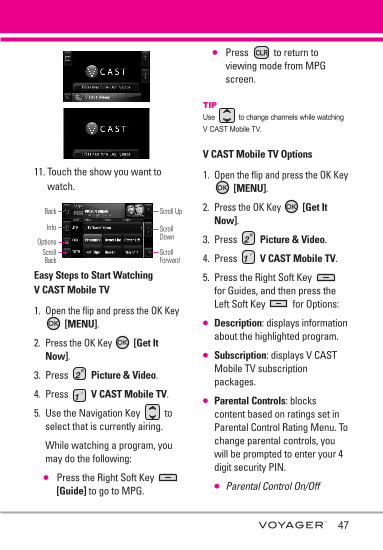
12. Select the show you want towatch.
The antenna is on the left bottom of your phone.
Back Scroll Up Info
Options Scroll Back Scroll Forward
Scroll Down
46
GET IT NOW
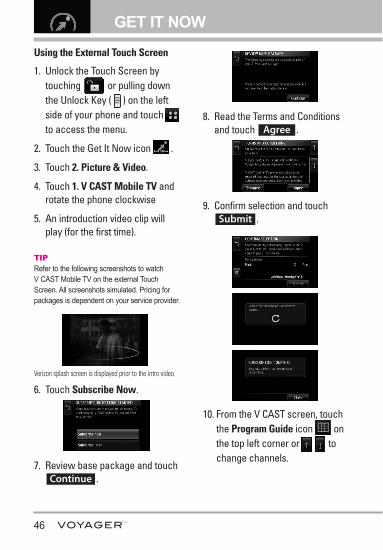
Using the External Touch Screen
1. Unlock the Touch Screen bytouching or pulling downthe Unlock Key ( ) on the leftside of your phone and touch to access the menu.
2. Touch the Get It Now icon .
3. Touch 2. Picture & Video.
4. Touch 1. V CAST Mobile TV androtate the phone clockwise
5. An introduction video clip willplay (for the first time).
TIPRefer to the following screenshots to watch V CAST Mobile TV on the external TouchScreen. All screenshots simulated. Pricing forpackages is dependent on your service provider.
Verizon splash screen is displayed prior to the intro video.
6. Touch Subscribe Now.
7. Review base package and touch.
8. Read the Terms and Conditionsand touch .
9. Confirm selection and touch.
10. From the V CAST screen, touchthe Program Guide icon onthe top left corner or tochange channels.
Submit
Agree
Continue
47
11. Touch the show you want towatch.
Easy Steps to Start Watching V CAST Mobile TV
1. Open the flip and press the OK Key[MENU].
2. Press the OK Key [Get ItNow].
3. Press Picture & Video.
4. Press V CAST Mobile TV.
5. Use the Navigation Key toselect that is currently airing.
While watching a program, youmay do the following:
l Press the Right Soft Key [Guide] to go to MPG.
l Press to return toviewing mode from MPGscreen.
TIP
Use to change channels while watching V CAST Mobile TV.
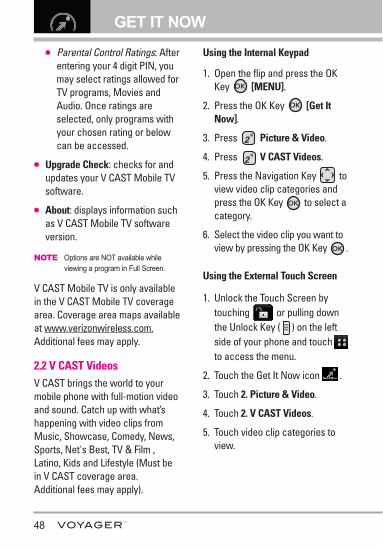
V CAST Mobile TV Options
1. Open the flip and press the OK Key[MENU].
2. Press the OK Key [Get ItNow].
3. Press Picture & Video.
4. Press V CAST Mobile TV.
5. Press the Right Soft Key for Guides, and then press theLeft Soft Key for Options:
l Description: displays informationabout the highlighted program.
l Subscription: displays V CASTMobile TV subscriptionpackages.
l Parental Controls: blockscontent based on ratings set inParental Control Rating Menu. Tochange parental controls, youwill be prompted to enter your 4digit security PIN.
l Parental Control On/Off
Back
Info
OptionsScrollBack
Scroll Up
ScrollDown
ScrollForward
48
GET IT NOWl Parental Control Ratings: After
entering your 4 digit PIN, youmay select ratings allowed forTV programs, Movies andAudio. Once ratings areselected, only programs withyour chosen rating or belowcan be accessed.
l Upgrade Check: checks for andupdates your V CAST Mobile TVsoftware.
l About: displays information suchas V CAST Mobile TV softwareversion.
NOTE Options are NOT available whileviewing a program in Full Screen.
V CAST Mobile TV is only availablein the V CAST Mobile TV coveragearea. Coverage area maps availableat www.verizonwireless.com.Additional fees may apply.
2.2 V CAST VideosV CAST brings the world to yourmobile phone with full-motion videoand sound. Catch up with what’shappening with video clips fromMusic, Showcase, Comedy, News,Sports, Net's Best, TV & Film ,Latino, Kids and Lifestyle (Must bein V CAST coverage area.Additional fees may apply).
Using the Internal Keypad
1. Open the flip and press the OKKey [MENU].
2. Press the OK Key [Get ItNow].
3. Press Picture & Video.
4. Press V CAST Videos.
5. Press the Navigation Key toview video clip categories andpress the OK Key to select acategory.
6. Select the video clip you want toview by pressing the OK Key .
Using the External Touch Screen
1. Unlock the Touch Screen bytouching or pulling downthe Unlock Key ( ) on the leftside of your phone and touch to access the menu.
2. Touch the Get It Now icon .
3. Touch 2. Picture & Video.
4. Touch 2. V CAST Videos.
5. Touch video clip categories toview.
49
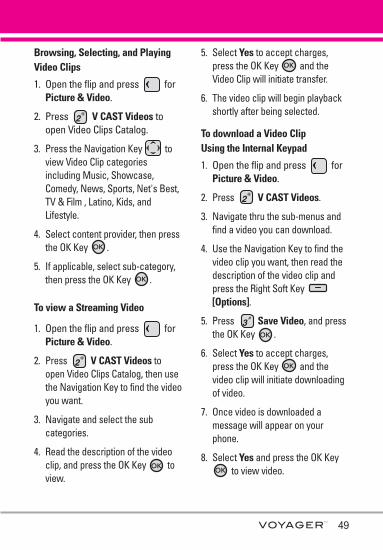
Browsing, Selecting, and PlayingVideo Clips
1. Open the flip and press forPicture & Video.
2. Press V CAST Videos toopen Video Clips Catalog.
3. Press the Navigation Key toview Video Clip categoriesincluding Music, Showcase,Comedy, News, Sports, Net's Best,TV & Film , Latino, Kids, andLifestyle.
4. Select content provider, then pressthe OK Key .
5. If applicable, select sub-category,then press the OK Key .
To view a Streaming Video
1. Open the flip and press forPicture & Video.
2. Press V CAST Videos toopen Video Clips Catalog, then usethe Navigation Key to find the videoyou want.
3. Navigate and select the subcategories.
4. Read the description of the videoclip, and press the OK Key toview.
5. Select Yes to accept charges,press the OK Key and theVideo Clip will initiate transfer.
6. The video clip will begin playbackshortly after being selected.
To download a Video ClipUsing the Internal Keypad
1. Open the flip and press forPicture & Video.
2. Press V CAST Videos.
3. Navigate thru the sub-menus andfind a video you can download.
4. Use the Navigation Key to find thevideo clip you want, then read thedescription of the video clip andpress the Right Soft Key [Options].
5. Press Save Video, and pressthe OK Key .
6. Select Yes to accept charges,press the OK Key and thevideo clip will initiate downloadingof video.
7. Once video is downloaded amessage will appear on yourphone.
8. Select Yes and press the OK Keyto view video.
50
GET IT NOW
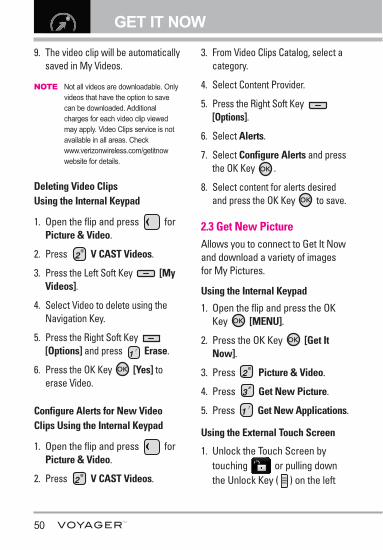
9. The video clip will be automaticallysaved in My Videos.
NOTE Not all videos are downloadable. Onlyvideos that have the option to savecan be downloaded. Additionalcharges for each video clip viewedmay apply. Video Clips service is notavailable in all areas. Checkwww.verizonwireless.com/getitnowwebsite for details.
Deleting Video ClipsUsing the Internal Keypad
1. Open the flip and press forPicture & Video.
2. Press V CAST Videos.
3. Press the Left Soft Key [MyVideos].
4. Select Video to delete using theNavigation Key.
5. Press the Right Soft Key [Options] and press Erase.
6. Press the OK Key [Yes] toerase Video.
Configure Alerts for New VideoClips Using the Internal Keypad
1. Open the flip and press forPicture & Video.
2. Press V CAST Videos.
3. From Video Clips Catalog, select acategory.
4. Select Content Provider.
5. Press the Right Soft Key [Options].
6. Select Alerts.
7. Select Configure Alerts and pressthe OK Key .
8. Select content for alerts desiredand press the OK Key to save.
2.3 Get New PictureAllows you to connect to Get It Nowand download a variety of imagesfor My Pictures.
Using the Internal Keypad
1. Open the flip and press the OKKey [MENU].
2. Press the OK Key [Get ItNow].
3. Press Picture & Video.
4. Press Get New Picture.
5. Press Get New Applications.
Using the External Touch Screen
1. Unlock the Touch Screen bytouching or pulling downthe Unlock Key ( ) on the left
51
side of your phone and touch to access the menu.
2. Touch the Get It Now icon .
3. Touch 2. Picture & Video.
4. Touch 3. Get New Picture.
5. Touch 1. Get New Applications.
2.4 My PicturesAllows you to view photos stored inthe phone.
SHORTCUT
Unlock the Touch Screen by touching orpulling down the Unlock Key ( ) on the leftside of your phone, then touch the screen withyour finger to access the shortcut menu, thentouch the My Pictures icon .
Using the Internal Keypad
1. Open the flip and press the OKKey [MENU].
2. Press the OK Key [Get ItNow].
3. Press Picture & Video.
4. Press My Pictures.
5. Select your desired picture withand press Right Soft Key[Options].
6. Select the options to customize.
Send Picture Message/ To PIX
Place/ Via BluetoothSet As Wallpaper/ Picture IDTake Picture Turns on the camerafunction.Get New Pictures Downloadsvarious pictures.Manage My Pics Allows you tomark the selected picture andapply options.Rename Renames the selectedpicture.Print Print via Bluetooth/ Print PreferencesFile Info Name/ Date/ Time/Resolution/ Size/ Type
NOTE The option 'Via Bluetooth' is notdisplayed when you select picturesprotected by DRM (Digital RightsManagement). Also, the option isavailable only when you select aBluetooth device that supportsreceiving pictures.
Using the External Touch Screen
1. Unlock the Touch Screen bytouching or pulling downthe Unlock Key ( ) on the leftside of your phone and touch to access the menu.
2. Touch the Get It Now icon .
3. Touch 2. Picture & Video.
4. Touch 4. My Pictures.
52
GET IT NOW
5. Touch your desired picture andtouch .
6. Touch the options to customize.
Send Picture Message/ To PIXPlace/ Via Bluetooth
Set As Wallpaper/ Picture ID
Take Picture Turns on the camerafunction.
Get New Pictures Downloadsvarious pictures.
Manage My Pics Allows you tomark the selected picture andapply options.
Rename Renames the selectedpicture.
Print Print via Bluetooth/ Print Preferences
File Info Name/ Date/ Time/Resolution/ Size/ Type
NOTE To scroll to options not viewed onscreen, place your finger on the listand gently apply upward (ordownward) pressure. The bar alongthe right side of the screen indicateswhere you are in the list.
2.5 My VideosAllows you to view videos stored inthe phone.
Using the Internal Keypad
1. Open the flip and press the OKKey [MENU].
2. Press the OK Key [Get ItNow].
3. Press Picture & Video.
4. Press My Videos.
5. Select a video with the NavigationKey and press the Right SoftKey [Options].
Select one of the following options(Options are dependent on filetypes):
Send Sends a video message.
Record Video Turns on the videocamera function.
To PIX Place Accesses the OnlineAlbum (PIX Place).
V CAST Videos Accesses V CASTVideos feature.
Manage My Videos Allows you tomark multiple videos.
Set As Wallpaper Displays theselected video file as thebackground for your phone.
Rename Renames the selectedvideo.
File Info Name/ Date/ Time/ Duration/ Size
Options
53
6. Press the OK Key to play.
NOTE File storage varies according to thesize of each file as well as memoryallocation of other applications.
l : Adjust the volume.
l Left Soft Key : Mute/Unmute.
l : Pause/ Play.
l Up Navigation Key : Shows the full screen.
l Down Navigation Key : Stop* For WMV files, the key ends playing
the clip and goes back to My Videos menu.
l Right Navigation Key : FF
l Left Navigation Key : Rewind
7. Press the Right Soft Key [Options] to select one of thefollowing options: Set As Wallpaper/ File Info
Using the External Touch Screen
1. Unlock the Touch Screen bytouching or pulling downthe Unlock Key ( ) on the leftside of your phone and touch to access the menu.
2. Touch the Get It Now icon .
3. Touch 2. Picture & Video.
4. Touch 5. My Videos.
5. Touch a video, then touch whatyou want to do , ,or .
Select one of the following options(Options are dependent on filetypes):
Send Sends a video message.
Record Video Turns on the videocamera function.
To PIX Place Accesses the OnlineAlbum (PIX Place).
V CAST Videos Accesses V CASTVideos feature.
Manage My Videos Allows you tomark multiple videos.
Set As Wallpaper Displays theselected video file as thebackground for your phone.
Rename Renames the selectedvideo.
File Info Name/ Date/ Time/ Duration/ Size
NOTE To scroll to options not viewed onscreen, place your finger on the listand gently apply upward (ordownward) pressure. The bar alongthe right side of the screen indicateswhere you are in the list.
OptionsPlayErase

54
GET IT NOW
2.6 Take PictureTake picturesstraight fromyour phone.
TIPSl To take a clear picture, set the proper
brightness level and zoom before taking thepicture.
l Avoid jolting the camera. l Wipe the camera lens with a soft cloth.
SHORTCUTSl Unlock the Touch Screen by touching
or pulling down the Unlock Key ( ) on theleft side of your phone, then touch the screenwith your finger to access the shortcut menu,then touch the Camera icon .
l The Side Camera Key ( ) is a shortcut keyto Take Picture in standby mode. Press andhold the key to launch Record Video mode. In Camera/Video preview screens, press theside camera key to take the picture/video.
Using the Internal Keypad
1. Open the flip and press the OKKey [MENU].
2. Press the OK Key [Get ItNow].
3. Press Picture & Video.
4. Press Take Picture.
5. Hold the phone horizontally to takepictures.
6. Set the brightness by pressing theNavigation Key , zoom bypressing the Navigation Key ,and press the Right Soft Key [Options] to change other settings.
NOTE Zooming is not available on thehighest resolution.
l Select the option(s) to customize.
RESOLUTION 1600X1200/1280X960/ 640X480/ 320X240
SELF TIMER Off/ 3 Seconds/ 5 Seconds/ 10 Seconds
WHITE BALANCE Auto/ Sunny/Cloudy/ Fluorescent/ Glow
SHUTTER SOUND Shutter/ NoSound /Say “Cheese”/ Ready! 1 2 3
COLOR EFFECTS Normal/Negative/ Aqua/ Sepia/Black&White
NIGHT MODE On/ Off
SAVE OPTION Internal/ External
PHOTOMETRY Average/ Spot
Camera Key
Adjust the zoom using the side keys. Adjust the zoom or brightness using thenavigation key.
Camera Lens
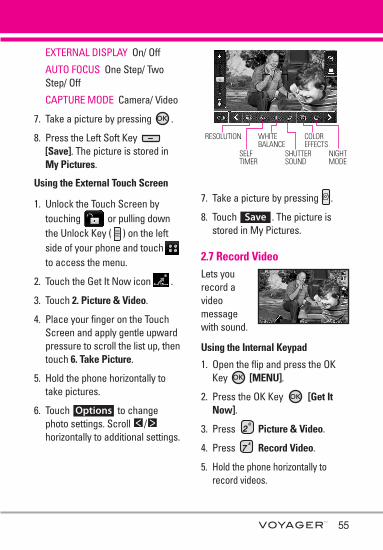
55
EXTERNAL DISPLAY On/ Off
AUTO FOCUS One Step/ TwoStep/ Off
CAPTURE MODE Camera/ Video
7. Take a picture by pressing .
8. Press the Left Soft Key [Save]. The picture is stored inMy Pictures.
Using the External Touch Screen
1. Unlock the Touch Screen bytouching or pulling downthe Unlock Key ( ) on the leftside of your phone and touch to access the menu.
2. Touch the Get It Now icon .
3. Touch 2. Picture & Video.
4. Place your finger on the TouchScreen and apply gentle upwardpressure to scroll the list up, thentouch 6. Take Picture.
5. Hold the phone horizontally totake pictures.
6. Touch to changephoto settings. Scroll /horizontally to additional settings.
7. Take a picture by pressing .
8. Touch . The picture isstored in My Pictures.
2.7 Record VideoLets yourecord avideomessagewith sound.
Using the Internal Keypad
1. Open the flip and press the OKKey [MENU].
2. Press the OK Key [Get ItNow].
3. Press Picture & Video.
4. Press Record Video.
5. Hold the phone horizontally torecord videos.
Save
><Options
RESOLUTION WHITEBALANCE
COLOREFFECTS
SELFTIMER
SHUTTERSOUND
NIGHTMODE
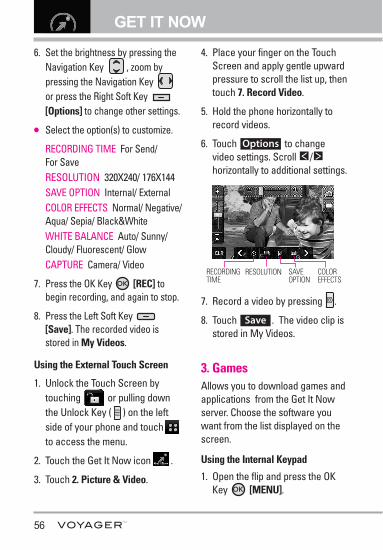
56
GET IT NOW
6. Set the brightness by pressing theNavigation Key , zoom bypressing the Navigation Key or press the Right Soft Key [Options] to change other settings.
l Select the option(s) to customize.
RECORDING TIME For Send/ For SaveRESOLUTION 320X240/ 176X144 SAVE OPTION Internal/ ExternalCOLOR EFFECTS Normal/ Negative/Aqua/ Sepia/ Black&WhiteWHITE BALANCE Auto/ Sunny/Cloudy/ Fluorescent/ GlowCAPTURE Camera/ Video
7. Press the OK Key [REC] tobegin recording, and again to stop.
8. Press the Left Soft Key [Save]. The recorded video isstored in My Videos.
Using the External Touch Screen
1. Unlock the Touch Screen bytouching or pulling downthe Unlock Key ( ) on the leftside of your phone and touch to access the menu.
2. Touch the Get It Now icon .
3. Touch 2. Picture & Video.
4. Place your finger on the TouchScreen and apply gentle upwardpressure to scroll the list up, thentouch 7. Record Video.
5. Hold the phone horizontally torecord videos.
6. Touch to changevideo settings. Scroll /horizontally to additional settings.
7. Record a video by pressing .
8. Touch . The video clip isstored in My Videos.
3. GamesAllows you to download games andapplications from the Get It Nowserver. Choose the software youwant from the list displayed on thescreen.
Using the Internal Keypad
1. Open the flip and press the OKKey [MENU].
Save
><Options
RECORDINGTIME
SAVEOPTION
COLOREFFECTS
RESOLUTION
57
2. Press the OK Key [Get ItNow].
3. Press Games.
4. Press the OK Key [Get NewApplications].
Using the External Touch Screen
1. Unlock the Touch Screen bytouching or pulling downthe Unlock Key ( ) on the leftside of your phone and touch to access the menu.
2. Touch the Get It Now icon .
3. Touch 3. Games.
4. Touch Get New Applications.
4. Tools on the GoEverything you need to know whileyou’re on the go.
Using the Internal Keypad
1. Open the flip and press the OKKey [MENU].
2. Press the OK Key [Get ItNow].
3. Press Tools on the Go.
4. Select your Tools on the Go, suchas Get New Applications then pressthe OK Key .
Using the External Touch Screen
1. Unlock the Touch Screen bytouching or pulling downthe Unlock Key ( ) on the leftside of your phone and touch to access the menu.
2. Touch the Get It Now icon .
3. Touch 4. Tools on the Go.
4. Touch Get New Applications.
VZ NavigatorSM
VZ Navigator is an applicationdownloadable from the Tools on theGo menu. Now you can find theaddress of a great restaurant or thenearest ATM. Check movie times.Discover the latest hot spots. Andknow exactly how to get whereyou’re going. VZ Navigator puts allthe advanced features of the latestGPS devices and systems on yourwireless device — at a fraction ofthe price.
SHORTCUT
To quickly access VZ Navigator, Unlock the
Touch Screen by touching or pulling down
the Unlock Key ( ) on the left side of your
phone, then touch the screen then touch the
Navigator icon .
58
NOTES • To use VZ Navigator, you mustturn location on. (See page 114)
• Download and subscriptionrequired for use only in NationalEnhanced Service CoverageArea: accuracy andcompleteness of information isnot guaranteed; informationabout location of device will beused to deliver service.Additional fees may apply. See brochure for details or visitwww.verizonwireless.com.
Mobile Email
Mobile Email is an applicationdownloadable from the Tools on theGo Menu. Don't miss an importantemail. Thanks to Mobile Email, youcan get your emails on your phone,while you're on the go. Mobile Emailworks with many providers,including Yahoo!, AOL, andVerizon.net. Get alerts from yourVOYAGER™ when new email hasarrived. Additional fees may apply. See brochure for details or visitwww.verizonwireless.com.
SHORTCUT
To quickly access Mobile Email, open the flip,press the key, then press MobileEmail.
NOTE Several Email providers are availableincluding Yahoo!®Mail,WindowsLiveMail, AOL®, AIM,Verizon.net, and others.
5. Extras
Using the Internal Keypad
1. Open the flip and press the OKKey [MENU].
2. Press the OK Key [Get ItNow].
3. Press Extras.
4. Press the OK Key [Get NewApplications].
Using the External Touch Screen
1. Unlock the Touch Screen bytouching or pulling downthe Unlock Key ( ) on the leftside of your phone and touch to access the menu.
2. Touch the Get It Now icon .
3. Touch 5. Extras.
4. Touch Get New Applications.
59
MMEESSSSAAGGIINNGGSHORTCUTSimply touch the Messaging icon on thetouchpad in standby mode with the flip closed.From standby mode with the flip open, pressingthe Left Soft Key is a hot key to yourMESSAGING.
l Check types of messages bypressing the Left Soft Key [Message] or touching theMessaging icon .
l Make a call to the callback number(in Inbox) by pressing the internal
key or the external key during a message check.
The phone can store over 540 messages.The information stored in the message isdetermined by phone mode and servicecapability. Other limits to availablecharacters per message may exist.Please check with your service providerfor system features and capabilities.
New Message AlertYour phone will alert you when youhave new messages.
1. The phone displays a message onthe screen.
2. The message icon ( ) isdisplayed on the display screen. Inthe case of a high prioritymessage, the icon will flash and awarning message is displayed.
1. New MessageAllows you to send messages (Text,Picture, and Video) and pages. Eachmessage has a destination (Address)and information (Message). These aredependent upon the type of messageyou want to send.
1.1 TXT Msg
The Basics of Sending a MessageUsing the Internal Keypad
1. Open the flip and press the OKKey [MENU].
2. Press the Navigation Key toaccess the Messaging menu andpress the OK Key .
3. Press New Message.
4. Press TXT Msg.
5. Enter the phone number of therecipient or the email address foran email message. You can enterup to 10 addresses for a singlemessage.
6. Press the OK Key .
7. Type your message (text or email).
8. Press the OK Key [SEND].A sending screen is displayed.
Using the External Touch Screen
1. Unlock the Touch Screen bytouching or pulling down
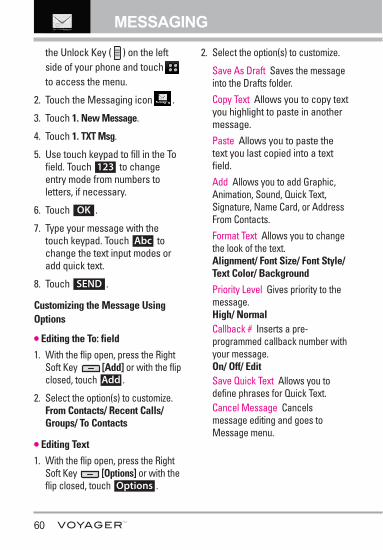
60
MESSAGING
the Unlock Key ( ) on the leftside of your phone and touch to access the menu.
2. Touch the Messaging icon .
3. Touch 1. New Message.
4. Touch 1. TXT Msg.
5. Use touch keypad to fill in the Tofield. Touch to changeentry mode from numbers toletters, if necessary.
6. Touch .
7. Type your message with thetouch keypad. Touch tochange the text input modes oradd quick text.
8. Touch .
Customizing the Message UsingOptions
l Editing the To: field
1. With the flip open, press the RightSoft Key [Add] or with the flipclosed, touch .
2. Select the option(s) to customize.From Contacts/ Recent Calls/Groups/ To Contacts
l Editing Text
1. With the flip open, press the RightSoft Key [Options] or with theflip closed, touch .
2. Select the option(s) to customize.
Save As Draft Saves the messageinto the Drafts folder. Copy Text Allows you to copy textyou highlight to paste in anothermessage.Paste Allows you to paste thetext you last copied into a textfield.Add Allows you to add Graphic,Animation, Sound, Quick Text,Signature, Name Card, or AddressFrom Contacts.Format Text Allows you to changethe look of the text. Alignment/ Font Size/ Font Style/Text Color/ Background
Priority Level Gives priority to themessage. High/ NormalCallback # Inserts a pre-programmed callback number withyour message.On/ Off/ EditSave Quick Text Allows you todefine phrases for Quick Text.Cancel Message Cancelsmessage editing and goes toMessage menu.
Options
Add
SEND
Abc
OK
123
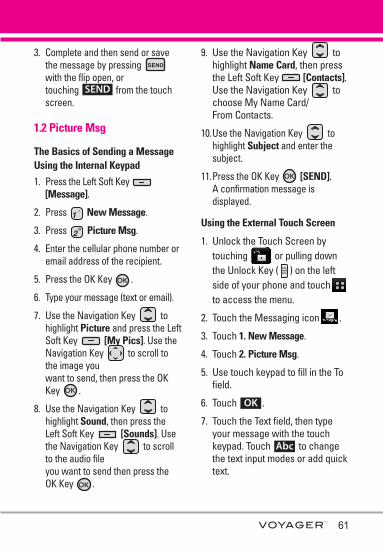
61
3. Complete and then send or savethe message by pressing with the flip open, ortouching from the touchscreen.
1.2 Picture Msg
The Basics of Sending a MessageUsing the Internal Keypad
1. Press the Left Soft Key [Message].
2. Press New Message.
3. Press Picture Msg.
4. Enter the cellular phone number oremail address of the recipient.
5. Press the OK Key .
6. Type your message (text or email).
7. Use the Navigation Key tohighlight Picture and press the LeftSoft Key [My Pics]. Use theNavigation Key to scroll tothe image youwant to send, then press the OKKey .
8. Use the Navigation Key tohighlight Sound, then press theLeft Soft Key [Sounds]. Usethe Navigation Key to scrollto the audio fileyou want to send then press theOK Key .
9. Use the Navigation Key tohighlight Name Card, then pressthe Left Soft Key [Contacts].Use the Navigation Key tochoose My Name Card/From Contacts.
10.Use the Navigation Key tohighlight Subject and enter thesubject.
11.Press the OK Key [SEND]. A confirmation message isdisplayed.
Using the External Touch Screen
1. Unlock the Touch Screen bytouching or pulling downthe Unlock Key ( ) on the leftside of your phone and touch to access the menu.
2. Touch the Messaging icon .
3. Touch 1. New Message.
4. Touch 2. Picture Msg.
5. Use touch keypad to fill in the Tofield.
6. Touch .
7. Touch the Text field, then typeyour message with the touchkeypad. Touch to changethe text input modes or add quicktext.
Abc
OK
SEND
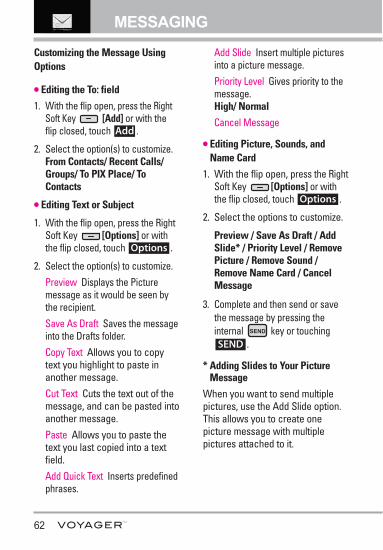
62
MESSAGING
Customizing the Message UsingOptions
l Editing the To: field
1. With the flip open, press the RightSoft Key [Add] or with theflip closed, touch .
2. Select the option(s) to customize.From Contacts/ Recent Calls/Groups/ To PIX Place/ ToContacts
l Editing Text or Subject
1. With the flip open, press the RightSoft Key [Options] or withthe flip closed, touch .
2. Select the option(s) to customize.Preview Displays the Picturemessage as it would be seen bythe recipient.Save As Draft Saves the messageinto the Drafts folder.Copy Text Allows you to copytext you highlight to paste inanother message.Cut Text Cuts the text out of themessage, and can be pasted intoanother message.Paste Allows you to paste thetext you last copied into a textfield.Add Quick Text Inserts predefinedphrases.
Add Slide Insert multiple picturesinto a picture message. Priority Level Gives priority to themessage. High/ Normal
Cancel Message
l Editing Picture, Sounds, andName Card
1. With the flip open, press the RightSoft Key [Options] or withthe flip closed, touch .
2. Select the options to customize.
Preview / Save As Draft / AddSlide* / Priority Level / RemovePicture / Remove Sound /Remove Name Card / CancelMessage
3. Complete and then send or savethe message by pressing theinternal key or touching
.
* Adding Slides to Your PictureMessage
When you want to send multiplepictures, use the Add Slide option.This allows you to create onepicture message with multiplepictures attached to it.
SEND
Options
Options
Add
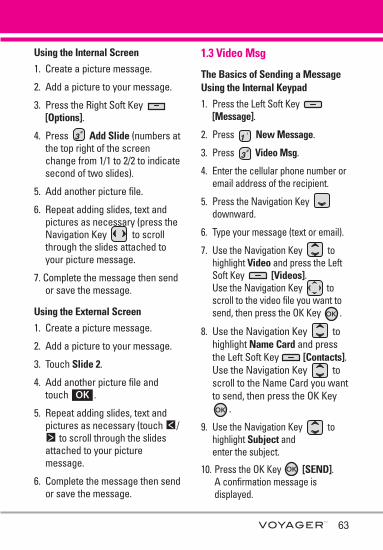
Using the Internal Screen
1. Create a picture message.
2. Add a picture to your message.
3. Press the Right Soft Key [Options].
4. Press Add Slide (numbers atthe top right of the screenchange from 1/1 to 2/2 to indicatesecond of two slides).
5. Add another picture file.
6. Repeat adding slides, text andpictures as necessary (press theNavigation Key to scrollthrough the slides attached toyour picture message.
7. Complete the message then sendor save the message.
Using the External Screen
1. Create a picture message.
2. Add a picture to your message.
3. Touch Slide 2.
4. Add another picture file andtouch .
5. Repeat adding slides, text andpictures as necessary (touch /
to scroll through the slidesattached to your picturemessage.
6. Complete the message then sendor save the message.
1.3 Video Msg
The Basics of Sending a MessageUsing the Internal Keypad
1. Press the Left Soft Key [Message].
2. Press New Message.
3. Press Video Msg.
4. Enter the cellular phone number oremail address of the recipient.
5. Press the Navigation Key downward.
6. Type your message (text or email).
7. Use the Navigation Key tohighlight Video and press the LeftSoft Key [Videos]. Use the Navigation Key toscroll to the video file you want tosend, then press the OK Key .
8. Use the Navigation Key tohighlight Name Card and pressthe Left Soft Key [Contacts]. Use the Navigation Key toscroll to the Name Card you wantto send, then press the OK Key
.
9. Use the Navigation Key tohighlight Subject andenter the subject.
10. Press the OK Key [SEND].A confirmation message isdisplayed.
><
OK
63
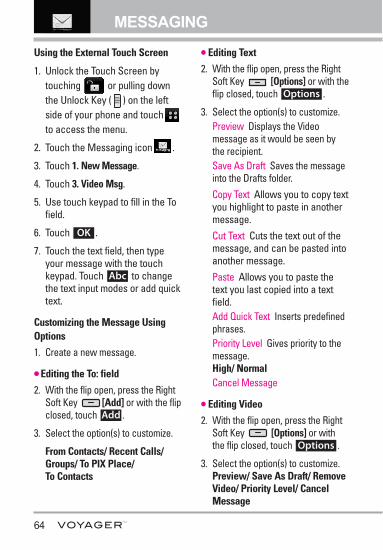
64
MESSAGING
Using the External Touch Screen
1. Unlock the Touch Screen bytouching or pulling downthe Unlock Key ( ) on the leftside of your phone and touch to access the menu.
2. Touch the Messaging icon .
3. Touch 1. New Message.
4. Touch 3. Video Msg.
5. Use touch keypad to fill in the Tofield.
6. Touch .
7. Touch the text field, then typeyour message with the touchkeypad. Touch to changethe text input modes or add quicktext.
Customizing the Message UsingOptions
1. Create a new message.
l Editing the To: field
2. With the flip open, press the RightSoft Key [Add] or with the flipclosed, touch .
3. Select the option(s) to customize.
From Contacts/ Recent Calls/Groups/ To PIX Place/ To Contacts
l Editing Text
2. With the flip open, press the RightSoft Key [Options] or with theflip closed, touch .
3. Select the option(s) to customize.Preview Displays the Videomessage as it would be seen bythe recipient.Save As Draft Saves the messageinto the Drafts folder.Copy Text Allows you to copy textyou highlight to paste in anothermessage.Cut Text Cuts the text out of themessage, and can be pasted intoanother message.Paste Allows you to paste thetext you last copied into a textfield.Add Quick Text Inserts predefinedphrases.Priority Level Gives priority to themessage. High/ NormalCancel Message
l Editing Video
2. With the flip open, press the RightSoft Key [Options] or withthe flip closed, touch .
3. Select the option(s) to customize.Preview/ Save As Draft/ RemoveVideo/ Priority Level/ CancelMessage
Options
Options
Add
Abc
OK
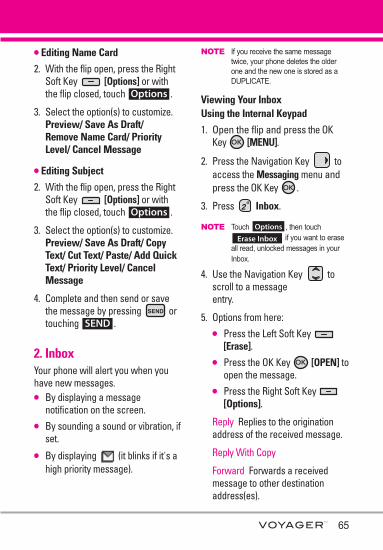
65
l Editing Name Card
2. With the flip open, press the RightSoft Key [Options] or withthe flip closed, touch .
3. Select the option(s) to customize.Preview/ Save As Draft/ Remove Name Card/ PriorityLevel/ Cancel Message
l Editing Subject
2. With the flip open, press the RightSoft Key [Options] or withthe flip closed, touch .
3. Select the option(s) to customize.Preview/ Save As Draft/ CopyText/ Cut Text/ Paste/ Add QuickText/ Priority Level/ CancelMessage
4. Complete and then send or savethe message by pressing ortouching .
2. InboxYour phone will alert you when youhave new messages.l By displaying a message
notification on the screen.l By sounding a sound or vibration, if
set.l By displaying (it blinks if it's a
high priority message).
NOTE If you receive the same messagetwice, your phone deletes the olderone and the new one is stored as aDUPLICATE.
Viewing Your Inbox Using the Internal Keypad
1. Open the flip and press the OKKey [MENU].
2. Press the Navigation Key toaccess the Messaging menu andpress the OK Key .
3. Press Inbox.
NOTE Touch , then touchif you want to erase
all read, unlocked messages in yourInbox.
4. Use the Navigation Key toscroll to a messageentry.
5. Options from here:l Press the Left Soft Key
[Erase].l Press the OK Key [OPEN] to
open the message.l Press the Right Soft Key
[Options].
Reply Replies to the originationaddress of the received message.
Reply With Copy
Forward Forwards a receivedmessage to other destinationaddress(es).
Erase Inbox
Options
SEND
Options
Options

66
MESSAGING
Lock/Unlock Locks or unlocks theselected message. Lockedmessages cannot be deleted by theErase Inbox and Erase All functions.Add To Contacts Stores thecallback number, email address,and numbers from the address ofthe received message into yourContacts.Erase Inbox Erases all read,unlocked messages stored in theInbox.Message Info Allows you to checkthe received message information.
Using the External Touch Screen
1. Unlock the Touch Screen bytouching or pulling downthe Unlock Key ( ) on the leftside of your phone and touch to access the menu.
2. Touch the Messaging icon .
3. Touch 2. Inbox.
4. Touch a message entry.
5. Options from here:l Touch .l Touch .l Touch .
Forward Forwards a receivedmessage to other destinationaddress(es).
Reply With CopySave Quick Text Allows you todefine phrases for Quick Text.Lock/Unlock Locks or unlocks theselected message. Lockedmessages cannot be deleted by theErase Inbox and Erase All functions.Add To Contacts Stores thecallback number, email address,and numbers from the address ofthe received message into yourContacts.Message Info Allows you to checkthe received message information.
Message Icon Reference
New/Unread TXT Messages
Opened/Read TXT Messages
Priority High
Locked
New/Unread Picture/VideoMessages
Open/Read Picture/VideoMessages
3. SentUp to 100 sent messages can bestored in Sent lists and contents ofsent messages verify whether thetransmission was successful or not.
Options
REPLY
Erase
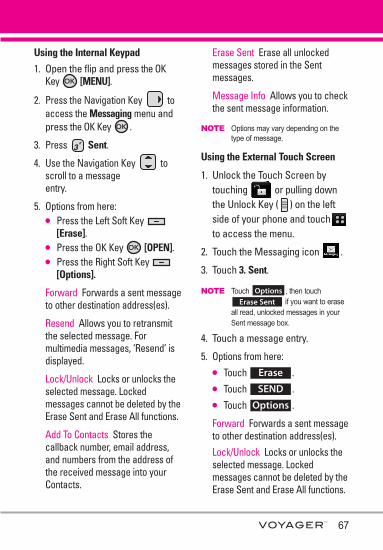
67
Using the Internal Keypad
1. Open the flip and press the OKKey [MENU].
2. Press the Navigation Key toaccess the Messaging menu andpress the OK Key .
3. Press Sent.
4. Use the Navigation Key toscroll to a messageentry.
5. Options from here:l Press the Left Soft Key
[Erase].l Press the OK Key [OPEN].l Press the Right Soft Key
[Options].
Forward Forwards a sent messageto other destination address(es).
Resend Allows you to retransmitthe selected message. Formultimedia messages, ‘Resend’ isdisplayed.
Lock/Unlock Locks or unlocks theselected message. Lockedmessages cannot be deleted by theErase Sent and Erase All functions.
Add To Contacts Stores thecallback number, email address,and numbers from the address ofthe received message into yourContacts.
Erase Sent Erase all unlockedmessages stored in the Sentmessages.
Message Info Allows you to checkthe sent message information.
NOTE Options may vary depending on thetype of message.
Using the External Touch Screen
1. Unlock the Touch Screen bytouching or pulling downthe Unlock Key ( ) on the leftside of your phone and touch to access the menu.
2. Touch the Messaging icon .
3. Touch 3. Sent.
NOTE Touch , then touchif you want to erase
all read, unlocked messages in yourSent message box.
4. Touch a message entry.
5. Options from here:l Touch .l Touch .l Touch .
Forward Forwards a sent messageto other destination address(es).Lock/Unlock Locks or unlocks theselected message. Lockedmessages cannot be deleted by theErase Sent and Erase All functions.
Options
SEND
Erase
Erase SentOptions
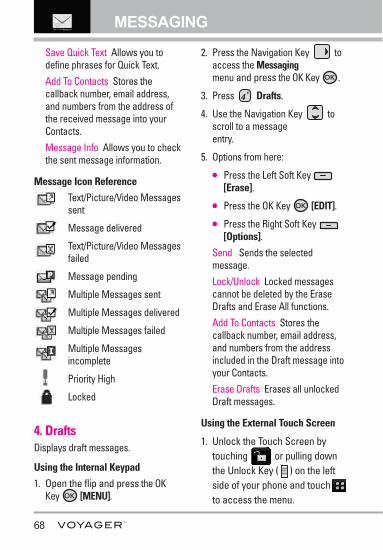
68
MESSAGING
Save Quick Text Allows you todefine phrases for Quick Text.Add To Contacts Stores thecallback number, email address,and numbers from the address ofthe received message into yourContacts.Message Info Allows you to checkthe sent message information.
Message Icon ReferenceText/Picture/Video Messagessent
Message delivered
Text/Picture/Video Messagesfailed
Message pending
Multiple Messages sent
Multiple Messages delivered
Multiple Messages failed
Multiple Messagesincomplete
Priority High
Locked
4. DraftsDisplays draft messages.
Using the Internal Keypad
1. Open the flip and press the OKKey [MENU].
2. Press the Navigation Key toaccess the Messagingmenu and press the OK Key .
3. Press Drafts.
4. Use the Navigation Key toscroll to a messageentry.
5. Options from here:
l Press the Left Soft Key [Erase].
l Press the OK Key [EDIT].
l Press the Right Soft Key [Options].
Send Sends the selectedmessage.Lock/Unlock Locked messagescannot be deleted by the EraseDrafts and Erase All functions.Add To Contacts Stores thecallback number, email address,and numbers from the addressincluded in the Draft message intoyour Contacts.Erase Drafts Erases all unlockedDraft messages.
Using the External Touch Screen
1. Unlock the Touch Screen bytouching or pulling downthe Unlock Key ( ) on the leftside of your phone and touch to access the menu.
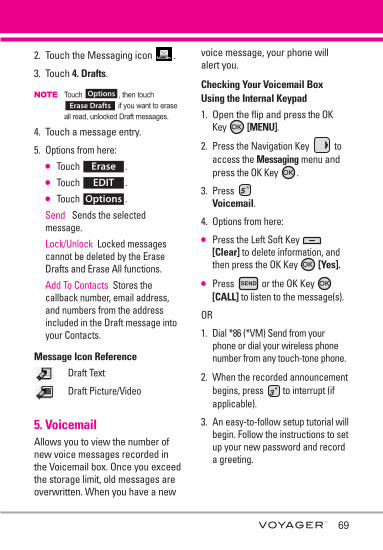
69
2. Touch the Messaging icon .
3. Touch 4. Drafts.
NOTE Touch , then touchif you want to erase
all read, unlocked Draft messages.
4. Touch a message entry.
5. Options from here:l Touch .l Touch .l Touch .Send Sends the selectedmessage.Lock/Unlock Locked messagescannot be deleted by the EraseDrafts and Erase All functions.Add To Contacts Stores thecallback number, email address,and numbers from the addressincluded in the Draft message intoyour Contacts.
Message Icon Reference
Draft Text
Draft Picture/Video
5. VoicemailAllows you to view the number ofnew voice messages recorded inthe Voicemail box. Once you exceedthe storage limit, old messages areoverwritten. When you have a new
voice message, your phone willalert you.
Checking Your Voicemail BoxUsing the Internal Keypad
1. Open the flip and press the OKKey [MENU].
2. Press the Navigation Key toaccess the Messaging menu andpress the OK Key .
3. Press Voicemail.
4. Options from here:
l Press the Left Soft Key [Clear] to delete information, andthen press the OK Key [Yes].
l Press or the OK Key [CALL] to listen to the message(s).
OR
1. Dial *86 (*VM) Send from yourphone or dial your wireless phonenumber from any touch-tone phone.
2. When the recorded announcementbegins, press to interrupt (ifapplicable).
3. An easy-to-follow setup tutorial willbegin. Follow the instructions to setup your new password and recorda greeting.
Options
EDIT
Erase
Erase Drafts
Options
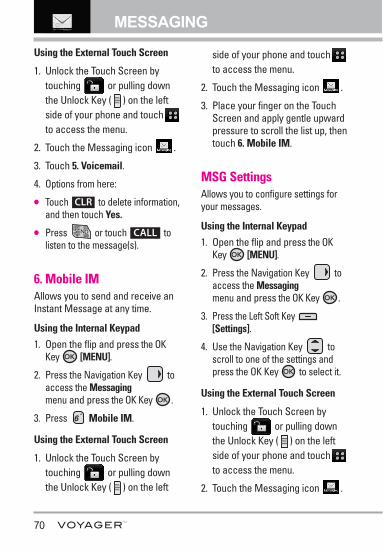
70
MESSAGING
Using the External Touch Screen
1. Unlock the Touch Screen bytouching or pulling downthe Unlock Key ( ) on the leftside of your phone and touch to access the menu.
2. Touch the Messaging icon .
3. Touch 5. Voicemail.
4. Options from here:
l Touch to delete information,and then touch Yes.
l Press or touch tolisten to the message(s).
6. Mobile IMAllows you to send and receive anInstant Message at any time.
Using the Internal Keypad
1. Open the flip and press the OKKey [MENU].
2. Press the Navigation Key toaccess the Messagingmenu and press the OK Key .
3. Press Mobile IM.
Using the External Touch Screen
1. Unlock the Touch Screen bytouching or pulling downthe Unlock Key ( ) on the left
side of your phone and touch to access the menu.
2. Touch the Messaging icon .
3. Place your finger on the TouchScreen and apply gentle upwardpressure to scroll the list up, thentouch 6. Mobile IM.
MSG SettingsAllows you to configure settings foryour messages.
Using the Internal Keypad
1. Open the flip and press the OKKey [MENU].
2. Press the Navigation Key toaccess the Messagingmenu and press the OK Key .
3. Press the Left Soft Key [Settings].
4. Use the Navigation Key toscroll to one of the settings andpress the OK Key to select it.
Using the External Touch Screen
1. Unlock the Touch Screen bytouching or pulling downthe Unlock Key ( ) on the leftside of your phone and touch to access the menu.
2. Touch the Messaging icon .
CALL
CLR
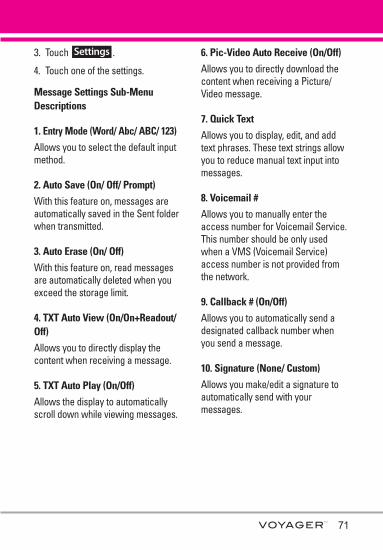
71
3. Touch .
4. Touch one of the settings.
Message Settings Sub-MenuDescriptions
1. Entry Mode (Word/ Abc/ ABC/ 123)
Allows you to select the default inputmethod.
2. Auto Save (On/ Off/ Prompt)
With this feature on, messages areautomatically saved in the Sent folderwhen transmitted.
3. Auto Erase (On/ Off)
With this feature on, read messagesare automatically deleted when youexceed the storage limit.
4. TXT Auto View (On/On+Readout/Off)
Allows you to directly display thecontent when receiving a message.
5. TXT Auto Play (On/Off)
Allows the display to automaticallyscroll down while viewing messages.
6. Pic-Video Auto Receive (On/Off)
Allows you to directly download thecontent when receiving a Picture/Video message.
7. Quick Text
Allows you to display, edit, and addtext phrases. These text strings allowyou to reduce manual text input intomessages.
8. Voicemail #
Allows you to manually enter theaccess number for Voicemail Service.This number should be only usedwhen a VMS (Voicemail Service)access number is not provided fromthe network.
9. Callback # (On/Off)
Allows you to automatically send adesignated callback number whenyou send a message.
10. Signature (None/ Custom)
Allows you make/edit a signature toautomatically send with yourmessages.
Settings
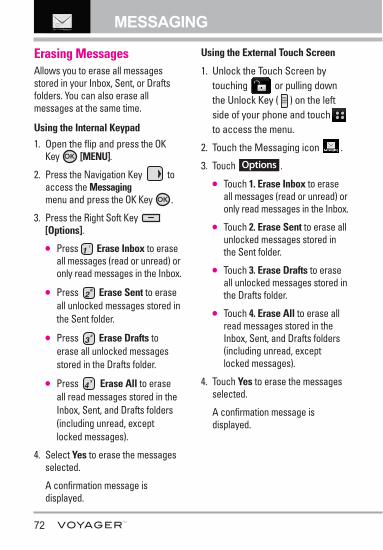
72
MESSAGING
Erasing MessagesAllows you to erase all messagesstored in your Inbox, Sent, or Draftsfolders. You can also erase allmessages at the same time.
Using the Internal Keypad
1. Open the flip and press the OKKey [MENU].
2. Press the Navigation Key toaccess the Messagingmenu and press the OK Key .
3. Press the Right Soft Key [Options].
l Press Erase Inbox to eraseall messages (read or unread) oronly read messages in the Inbox.
l Press Erase Sent to eraseall unlocked messages stored inthe Sent folder.
l Press Erase Drafts toerase all unlocked messagesstored in the Drafts folder.
l Press Erase All to eraseall read messages stored in theInbox, Sent, and Drafts folders(including unread, exceptlocked messages).
4. Select Yes to erase the messagesselected.
A confirmation message isdisplayed.
Using the External Touch Screen
1. Unlock the Touch Screen bytouching or pulling downthe Unlock Key ( ) on the leftside of your phone and touch to access the menu.
2. Touch the Messaging icon .
3. Touch .
l Touch 1. Erase Inbox to eraseall messages (read or unread) oronly read messages in the Inbox.
l Touch 2. Erase Sent to erase allunlocked messages stored inthe Sent folder.
l Touch 3. Erase Drafts to eraseall unlocked messages stored inthe Drafts folder.
l Touch 4. Erase All to erase allread messages stored in theInbox, Sent, and Drafts folders(including unread, exceptlocked messages).
4. Touch Yes to erase the messagesselected.
A confirmation message isdisplayed.
Options
73
CCOONNTTAACCTTSSThe Contacts Menu allows you tostore names, phone numbers andother information in your phone’smemory.
SHORTCUTPressing the Right Soft Key with the flipopen is the hot key to the Contacts List.
1. New ContactAllows you to add a new number toyour Contacts List.
NOTE Using this submenu, the number issaved as a new Contact. To save thenumber into an existing Contact, editthe Contact entry.
Using the Internal Keypad
1. Open the flip and press the OKKey [MENU].
2. Press the Navigation Key toscroll to Contacts, and press theOK Key .
3. Press New Contact.
4. Enter the name and press theNavigation Key downward.
5. Use the Navigation Key toscroll to the phone number type.
6. Enter the number and press theOK Key .
NOTE For more detailed information, seepage 30.
Using the External Touch Screen
1. Unlock the Touch Screen bytouching or pulling downthe Unlock Key ( ) on the leftside of your phone and touch to access the menu.
2. Touch the Contacts icon .
3. Touch 1. New Contact.
4. Enter the name and other contactinformation for each field.
l Touch a field, enter information,then touch .
5. Touch to save theinformation.
2. Contact ListAllows you to view your Contacts List.
Using the Internal Keypad
1. Open the flip and press the OKKey [MENU].
2. Press the Navigation Key toscroll to Contacts, and press theOK Key .
3. Press Contact List.
4. Press the Navigation Key toscroll through your Contactsalphabetically.
SAVE
DONE
74
CONTACTSl Press the Right Soft Key
[Options] to select one of thefollowing:New Contact/ Erase/ New TXTMessage/ New PictureMessage/ New VideoMessage/ Set As ICE Contact/Call/ Erase All/ Send NameCard
l Press the Left Soft Key [Edit] to edit.
Using the External Touch Screen
1. Unlock the Touch Screen bytouching or pulling downthe Unlock Key ( ) on the leftside of your phone and touch to access the menu.
2. Touch the Contacts icon .
3. Touch 2. Contact List.
4. Touch a Contact entry.
5. Options from here:
l Touch .
l Touch .
l Touch to select oneof the following:New TXT Message/ NewPicture Message/ New VideoMessage/ Send Name Card/ Set As ICE Contact
3. GroupsAllows you to view your groupedContacts, add a new group, changethe name of a group, delete a group,or send a message to everyone in theselected group.
Using the Internal Keypad
1. Open the flip and press the OKKey [MENU].
2. Press the Navigation Key toscroll to Contacts, and press theOK Key .
3. Press Groups.
4. Use the Navigation Key tohighlight a group.
l Press the Left Soft Key [New] to add a new group tothe list.
l Press the Right Soft Key [Options] to select one of thefollowing:New TXT Message/ NewPicture Message/ New VideoMessage/ Rename/ Erase/Add
l Press the OK Key [VIEW]to view the Group information.
Options
EDIT
Erase
Using the External Touch Screen
1. Unlock the Touch Screen bytouching or pulling downthe Unlock Key ( ) on the leftside of your phone and touch to access the menu.
2. Touch the Contacts icon .
3. Touch 3. Groups.
4. Options from here:
l Touch to add a newgroup to the list.
l Touch a group then touchto select one of the
following:New TXT Message/ NewPicture Message/ New VideoMessage
4. Speed DialsAllows you to view your list of SpeedDials or designate Speed Dials fornumbers entered in your Contacts.
Using the Internal Keypad
1. Open the flip and press the OKKey [MENU].
2. Press the Navigation Key toscroll to Contacts, and press theOK Key .
3. Press Speed Dials.
4. Use the Navigation Key toscroll to a Speed Dial position, orenter the Speed Dial digit andpress the OK Key .
5. Use the Navigation Key toscroll to the Contact then press theOK Key for SET.
6. Use the Navigation Key toscroll to a Contact entry, thenpress the OK Key .
7. Press the OK Key [Yes].A confirmation message isdisplayed.
Using the External Touch Screen
1. Unlock the Touch Screen bytouching or pulling downthe Unlock Key ( ) on the leftside of your phone and touch to access the menu.
2. Touch the Contacts icon .
3. Touch 4. Speed Dials.
4. Touch the Speed Dial position, orenter the Speed Dial digit.
5. Touch the Contact you wish toassign a Speed Dial.
6. Touch the number and then touchYes.
A confirmation message isdisplayed.
Options
NEW
75
76
CONTACTS
5. In Case of Emergency (ICE)This menu allows you to storenames, phone numbers and otherinformation, which will be veryhelpful in case of emergency. Also, itallows you to read, add, edit, or erasethe notes yourself as necessary incase an emergency takes place.
Using the Internal Keypad
1. Open the flip and press the OKKey [MENU].
2. Press the Navigation Key toscroll to Contacts, and press the OKKey .
3. Press In Case of Emergency.
4. Use the Navigation Key toscroll to Contact 1, 2, or 3, thenpress the OK Key [ADD].
5. Press to add Contact fromyour Contacts List.
Scroll to the Contact, then pressthe OK Key .
ICE Contact Assigned is displayed.
OR
Press to enter information notstored in your Contacts List.
6. The generic Contact label changesto the specified name.
Using the External Touch Screen
1. Unlock the Touch Screen bytouching or pulling downthe Unlock Key ( ) on the leftside of your phone and touch to access the menu.
2. Touch the Contacts icon .
3. Touch 5. In Case of Emergency.
4. Touch Contact 1, 2, or 3.
5. Touch From Contacts or NewContact.
ICE Contact Assigned is displayed.
OR
Enter information not stored in yourContacts List.
6. The generic Contact label changesto the specified name.
Entering Your ICE Personal InfoUsing the Internal Keypad
1. Open the flip and press the OKKey [MENU].
2. Press the Navigation Key toscroll to Contacts, and press the OKKey .
2. Press In Case of Emergency.
3. Scroll to Personal Info, then pressthe OK Key .
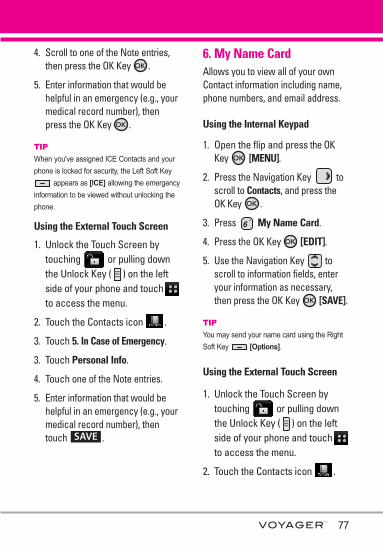
4. Scroll to one of the Note entries,then press the OK Key .
5. Enter information that would behelpful in an emergency (e.g., yourmedical record number), thenpress the OK Key .
TIP
When you've assigned ICE Contacts and yourphone is locked for security, the Left Soft Key
appears as [ICE] allowing the emergencyinformation to be viewed without unlocking thephone.
Using the External Touch Screen
1. Unlock the Touch Screen bytouching or pulling downthe Unlock Key ( ) on the leftside of your phone and touch to access the menu.
2. Touch the Contacts icon .
3. Touch 5. In Case of Emergency.
3. Touch Personal Info.
4. Touch one of the Note entries.
5. Enter information that would behelpful in an emergency (e.g., yourmedical record number), thentouch .
6. My Name CardAllows you to view all of your ownContact information including name,phone numbers, and email address.
Using the Internal Keypad
1. Open the flip and press the OKKey [MENU].
2. Press the Navigation Key toscroll to Contacts, and press theOK Key .
3. Press My Name Card.
4. Press the OK Key [EDIT].
5. Use the Navigation Key toscroll to information fields, enteryour information as necessary,then press the OK Key [SAVE].
TIP
You may send your name card using the RightSoft Key [Options].
Using the External Touch Screen
1. Unlock the Touch Screen bytouching or pulling downthe Unlock Key ( ) on the leftside of your phone and touch to access the menu.
2. Touch the Contacts icon .
SAVE
77
78
RECENT CALLS
3. Place your finger on the TouchScreen and apply gentle upwardpressure to scroll the list up, thentouch 6. My Name Card.
4. Touch .
5. Enter your information asnecessary, then touch .
RREECCEENNTT CCAALLLLSSThe Recent Calls Menu is a list ofthe last phone numbers or Contactentries for calls you placed,accepted, or missed. It's continuallyupdated as new numbers areadded to the beginning of the listand the oldest entries are removedfrom the bottom of the list.
1. MissedAllows you to view the list ofmissed calls; up to 90 entries.
Using the Internal Keypad
1. Open the flip and press the OKKey [MENU].
2. Press the Navigation Key toscroll to the RECENT CALLS menuand then press the OK Key .
3. Press Missed.
4. Use the Navigation Key toscroll to an entry, then
l Press the OK Key to viewthe entry.
l Press the internal keyto place a call to the number.
SAVE
EDIT
79
l Press the Right Soft Key [Options] to select:Save/ Erase/ Lock(Unlock)/Erase All/ View Timers
l Press the Left Soft Key [Message] to select:TXT Msg/ Picture Msg/ Video Msg
Using the External Touch Screen
1. Unlock the Touch Screen bytouching or pulling downthe Unlock Key ( ) on the leftside of your phone and touch to access the menu.
2. Touch the Recent Calls icon .
3. Touch 1. Missed.
NOTE Touch Options to Erase All missedcalls or View Timers.
4. Touch a Missed Call entry to viewthe entry. Options from here:
l Touch to place a call tothe number.
l Touch to send a
TXT Msg / Picture Msg / VideoMsg
l Touch Save/ Erase / Lock(Unlock) /View Timers
2. ReceivedAllows you to view the list ofincoming calls; up to 90 entries.
Using the Internal Keypad
1. Open the flip and press the OKKey [MENU].
2. Press the Navigation Key toscroll to the RECENT CALLS menuand press the OK Key .
3. Press Received.
4. Use the Navigation Key toscroll to an entry, then
l Press the OK Key to viewthe entry.
l Press the internal key toplace a call to the number.
l Press the Right Soft Key [Options] to select:Save/ Erase/ Lock(Unlock)/Erase All/ View Timers
l Press the Left Soft Key [Message] to select:TXT Msg/ Picture Msg/Video Msg
Options
MSG
Call
80
RECENT CALLS
Using the External Touch Screen
1. Unlock the Touch Screen bytouching or pulling downthe Unlock Key ( ) on the leftside of your phone and touch to access the menu.
2. Touch the Recent Calls icon .
3. Touch 2. Received.
NOTE Touch Options to Erase All receivedcalls or View Timers.
4. Touch a Received Call entry toview the entry. Options from here:
l Touch to place a call tothe number.
l Touch to send a
TXT Msg / Picture Msg / Video Msg
l Touch Save/ Erase / Lock(Unlock) /View Timers
3. DialedAllows you to view the list ofoutgoing calls; up to 90 entries.
Using the Internal Keypad
1. Open the flip and press the OKKey [MENU].
2. Press the Navigation Key toscroll to the RECENT CALLS menuand press the OK Key .
3. Press Dialed.
4. Use the Navigation Key toscroll to an entry, then
l Press the OK Key to viewthe entry.
l Press the internal key toplace a call to the number.
l Press the Right Soft Key [Options] to select:Save/ Erase/ Lock(Unlock)/Erase All/ View Timers
l Press the Left Soft Key [Message] to select:TXT Msg/ Picture Msg/ Video Msg
Using the External Touch Screen
1. Unlock the Touch Screen bytouching or pulling downthe Unlock Key ( ) on the leftside of your phone and touch to access the menu.
2. Touch the Recent Calls icon .
3. Touch 3. Dialed.
NOTE Touch Options to Erase All dialed callsor View Timers.
Options
MSG
Call
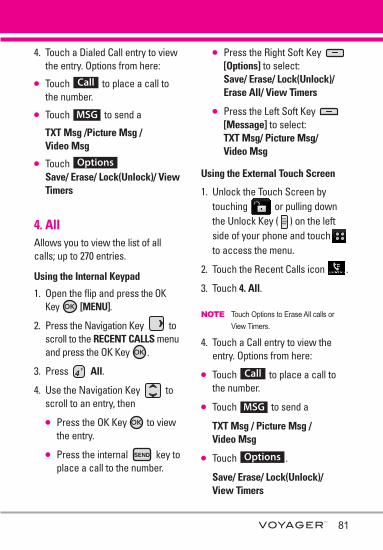
4. Touch a Dialed Call entry to viewthe entry. Options from here:
l Touch to place a call tothe number.
l Touch to send a
TXT Msg /Picture Msg /Video Msg
l Touch Save/ Erase/ Lock(Unlock)/ ViewTimers
4. AllAllows you to view the list of allcalls; up to 270 entries.
Using the Internal Keypad
1. Open the flip and press the OKKey [MENU].
2. Press the Navigation Key toscroll to the RECENT CALLS menuand press the OK Key .
3. Press All.
4. Use the Navigation Key toscroll to an entry, then
l Press the OK Key to viewthe entry.
l Press the internal key toplace a call to the number.
l Press the Right Soft Key [Options] to select:Save/ Erase/ Lock(Unlock)/Erase All/ View Timers
l Press the Left Soft Key [Message] to select:TXT Msg/ Picture Msg/ Video Msg
Using the External Touch Screen
1. Unlock the Touch Screen bytouching or pulling downthe Unlock Key ( ) on the leftside of your phone and touch to access the menu.
2. Touch the Recent Calls icon .
3. Touch 4. All.
NOTE Touch Options to Erase All calls orView Timers.
4. Touch a Call entry to view theentry. Options from here:
l Touch to place a call tothe number.
l Touch to send a
TXT Msg / Picture Msg / Video Msg
l Touch .
Save/ Erase/ Lock(Unlock)/ View Timers
Options
MSG
Call
Options
MSG
Call
81
SHORTCUT
To view a quick list of all your recentcalls, press the internal key or theexternal key from standby mode.
5. View TimersAllows you to view the duration ofselected calls.
Using the Internal Keypad
1. Open the flip and press the OKKey [MENU].
2. Press the Navigation Key toscroll to the RECENT CALLS menuand press the OK Key .
3. Press View Timers.
4. Use the Navigation Key toscroll to a call list.Last Call/ All Calls/ ReceivedCalls/ Dialed Calls/ RoamingCalls/ Transmit Data/ ReceivedData/ Total Data/ Last Reset/Lifetime Calls/ Lifetime DataCounter
5. Reset all the recorded timers bypressing the Right Soft Key [Reset All] if you want to reset.
Using the External Touch Screen
1. Unlock the Touch Screen bytouching or pulling down
the Unlock Key ( ) on the leftside of your phone and touch to access the menu.
2. Touch the Recent Calls icon .
3. Touch 5. View Timers.
4. Touch a call list.Last Call/ All Calls/ ReceivedCalls/ Dialed Calls/ RoamingCalls/ Transmit Data/ ReceivedData/ Total Data/ Last Reset/Lifetime Calls/ Lifetime DataCounter
5. Reset all the recorded timers bytouching if you want toreset.
ResetAll
82
RECENT CALLS
SSEETTTTIINNGGSS && TTOOOOLLSS1. My AccountCheck your subscriptioninformation ranging from yourpayment plan to your softwareupgrade or other available services.
Using the Internal Keypad
1. Open the flip and press the OKKey [MENU].
2. Press the Navigation Key toscroll to the Settings & Toolsmenu and press the OK Key .
3. Press My Account.
Using the External Touch Screen
1. Unlock the Touch Screen bytouching or pulling downthe Unlock Key ( ) on the leftside of your phone and touch to access the menu.
2. Touch the Settings & Tools icon.
3. Touch 1. My Account.
2. ToolsYour phone tools include VoiceCommands, Calculator, Calendar,Alarm Clock, Stopwatch, WorldClock, Notepad, Ez Tip Calc andUSB Mass Storage.
2.1 Voice CommandsThis feature provides you with thefollowing options equipped with AVR(Advanced Voice Recognition)technology. Each option has itsdetailed information on the phone andyou can check it out by pressing theLeft Soft Key [Info] or bytouching when operating thetouch screen.
Access and OptionsUsing the Internal Keypad
1. Open the flip and press the OKKey [MENU].
2. Press the Navigation Key toscroll to the Settings & Toolsmenu and press the OK Key .
3. Press Tools.
4. Press Voice Commands.
Info
83
SETTINGS & TOOLS

84
SETTINGS & TOOLS
Using the External Touch Screen
1. Unlock the Touch Screen bytouching or pulling downthe Unlock Key ( ) on the leftside of your phone and touch to access the menu.
2. Touch the Settings & Tools icon.
3. Touch 2. Tools.
4. Touch 1. Voice Commands.Your Voice Commands can becustomized by pressing the Right SoftKey [Settings] with the flipopen, or touching .
Digit Dial Readout On/ Off
Choice List Automatic/ Always Off
Sensitivity Control the sensitivity asReject More/ Automatic/ RejectLess.
Train Voice If the phone often asksyou to repeat voice command, trainthe phone to recognize your voicepatterns. Digit Dial/ Responses
Prompts Mode/ Audio Playback/TimeoutFor Mode, set Prompts/ Readout +Alerts/ Readout/ Tones Only. For Audio Playback, set Speakerphone or Earpiece.
For Timeout, set 5 seconds or 10 seconds.
Call Alert Ring Only/ Caller ID +Ring/ Name Repeat
2.1.1 Call <Name or Number>
Say "Call" and then call someonesimply by saying the phone number orname. Please speak clearly andexactly as in your Contacts list. Whenyou have more than one contactnumber, you can state the name andnumber type of the contact (forexample, 'Call John Work').
2.1.2 Send Msg to <Name or Number>
Say 'Send Message' and the voicecommand will prompt you for the typeof message. After choosing themessage type, system will ask you forthe contact name, number or group. Itwill automatically start a message. Ifyou say a full-sentence command,such as 'Send Message to Bob', itwould automatically start a textmessage without asking for themessage type. When using 'SendMessage' command, speak clearlyand say the number, group name, orname exactly as it is entered in yourContacts list.
Settings
85
2.1.3 Go to <Menu>
The 'Go to' command allows you toaccess a menu within the phone (forexample, 'Go to Calendar'). If no menu option is stated, a list ofoptions will be provided.
2.1.4 Check <Item>
The "Check" command allows you tocheck out a wide range of items fromthe battery level, service mode, signalstrength, GPS location, networkstatus, volume, number of missedcalls, voicemail, messages, to timeand date.
2.1.5 Lookup <Name>
You can look up names in yourContacts (for example, 'Lookup John'):Read out/ Create New/ Erase/Modify
2.1.6 My Account
The "My Account" command providesyou with direct access to your VerizonWireless account information.
2.1.7 Help
Provides a general guideline to usingVoice Commands.
2.2 CalculatorAllows you to perform simplemathematical calculations. You canenter numbers up to the eighthdecimal place. Calculations can bemade with up to 3 lines at one time.
SHORTCUT
Unlock the Touch Screen by touching orpulling down the Unlock Key ( ) on the leftside of your phone, then touch the screen withyour finger to access the shortcut menu, thentouch the Calculator Icon .
Using the Internal Keypad
1. Open the flip and press the OKKey [MENU].
2. Press the Navigation Key toscroll to the Settings & Toolsmenu and press the OK Key .
3. Press Tools.
4. Press Calculator.
5. Enter the numbers to get the valueyou want. To cancel a number, pressthe Left Soft Key [Reset].
6. Press the Right Soft Key [Options] to add parenthesis orpower among numbers forcalculation.
86
SETTINGS & TOOLS
Using the External Touch Screen
1. Unlock the Touch Screen bytouching or pulling downthe Unlock Key ( ) on the leftside of your phone and touch to access the menu.
2. Touch the Settings & Tools icon.
3. Touch 2. Tools.
4. Touch 2. Calculator.
5. Enter the numbers to get the valueyou want. To cancel a calculation,touch .
6. Touch to addparenthesis or power amongnumbers for calculation.
2.3 CalendarAllows you to keep your agendaconvenient and easy to access.Simply store your appointments andyour phone will alert you with areminder you set.
Using the Internal Keypad
SHORTCUT
Unlock the Touch Screen by touching orpulling down the Unlock Key ( ) on the leftside of your phone, then touch the screen withyour finger to access the shortcut menu, thentouch the Calendar Icon .
With the flip open, pressing the Navigation Keyfrom standby mode is a hot key to
Calendar by default.
1. Open the flip and press the OKKey [MENU].
2. Press the Navigation Key toscroll to the Settings & Toolsmenu and press the OK Key .
3. Press Tools.
4. Press Calendar.
5. Use the Navigation Key toscroll to the scheduled day.
Left Moves cursor to theprevious day.
Right Moves cursor to thenext day.
Up Moves to the previousweek.
Down Moves to the nextweek.
6. Press the Left Soft Key [Add].
7. Enter Subject, then scroll down toset other remaining settings.
8. Scroll to a Calendar setting field,then press the Left Soft Key [Set]. For each Calendar event youcan set:l Start Time l End Timel Repeat l Until
Options
Reset
l Alerts l Tonesl Vibrate
9. Use the Navigation Key tochoose a setting, then press theOK Key .
10.Press the OK Key [SAVE]when Calendar information iscomplete.
Using the External Touch Screen
1. Unlock the Touch Screen bytouching or pulling downthe Unlock Key ( ) on the leftside of your phone and touch to access the menu.
2. Touch the Settings & Tools icon.
3. Touch 2. Tools.
4. Touch 3. Calendar.
5. Touch the scheduled day.
6. Touch .
7. Touch Subject field and fill it in.
8. Scroll to a Calendar setting field.For each Calendar event you canset:l Start Time l End Timel Repeat l Untill Alerts l Tonesl Vibrate
9. Touch when Calendarinformation is complete.
2.4 Alarm ClockAllows you to set one of threealarms. At the alarm time, Alarm 1(or 2 or 3) will be displayed on theLCD screen and the alarm willsound.
SHORTCUT
Unlock the Touch Screen by touching orpulling down the Unlock Key ( ) on the leftside of your phone, then touch the screen withyour finger to access the shortcut menu, thentouch the Alarm Clock Icon .
Using the Internal Keypad
1. Open the flip and press the OKKey [MENU].
2. Press the Navigation Key toscroll to the Settings & Toolsmenu and press the OK Key .
3. Press Tools.
4. Press Alarm Clock.
5. Use the Navigation Key toscroll to an Alarm (1, 2, or 3), thenpress the OK Key .
6. Enter the alarm informationincluding:l Turn On/Off l Set Timel Repeat l Ringtone
SAVE
Add
87
88
SETTINGS & TOOLS
7. Use the Navigation Key toscroll to the information you wantto set, then press the Left SoftKey [Set] to view yoursetting choices.
8. Press the OK Key [SAVE]after setting all of the Alarm fieldsas necessary. When the alarm goes off, youcan choose to "snooze" or"dismiss" the alarm. To turn it off,press the OK Key , the sidekeys, any of the alphanumerickeys, or the vibrate mode key.
Using the External Touch Screen
1. Unlock the Touch Screen bytouching or pulling downthe Unlock Key ( ) on the leftside of your phone and touch to access the menu.
2. Touch the Settings & Tools icon.
3. Touch 2. Tools.
4. Touch 4. Alarm Clock.
5. Touch an Alarm (1, 2, or 3).
6. Enter the alarm informationincluding:l Turn On/Off l Set Timel Repeat l Ringtone
7. Touch after setting all ofthe Alarm fields as necessary.
2.5 StopwatchAllows you to use your phone astypical stopwatch. Start measuringtime and finish it pressing the OKKey .
Using the Internal Keypad
1. Open the flip and press the OKKey [MENU].
2. Press the Navigation Key toscroll to the Settings & Toolsmenu and press the OK Key .
3. Press Tools.
4. Press Stopwatch.
5. Press the OK Key [Start],then options from here:
l Press the Left Soft Key [Lap].
l Press the Right Soft Key [Reset].
Using the External Touch Screen
1. Unlock the Touch Screen bytouching or pulling downthe Unlock Key ( ) on the leftside of your phone and touch to access the menu.
SAVE
89
2. Touch the Settings & Tools icon.
3. Touch 2. Tools.
4. Touch 5. Stopwatch.
5. Touch , then options fromhere:
l Touch .
l Touch .
2.6 World ClockAllows you to determine the currenttime in another time zone or countryby navigating with the left or rightnavigation keys.
Using the Internal Keypad
1. Open the flip and press the OKKey [MENU].
2. Press the Navigation Key toscroll to the Settings & Toolsmenu and press the OK Key .
3. Press Tools.
4. Press World Clock.
5. Press the Right Soft Key [Cities] to choose from a list ofavailable cities.
6. Select a city from the list, thenpress the OK Key . The displayshows the position of the city on aglobal map.
7. Press the OK Key again tozoom in on the city and view itsdate and time infomation.
Using the External Touch Screen
1. Unlock the Touch Screen bytouching or pulling downthe Unlock Key ( ) on the leftside of your phone and touch to access the menu.
2. Touch the Settings & Tools icon.
3. Touch 2. Tools.
4. Place your finger on the TouchScreen and apply gentle upwardpressure to scroll the list up, thentouch 6. World Clock.
5. Touch to choose from alist of available cities.
6. Touch a city from the list. The display shows the position ofthe city on a global map.
7. Touch again to zoom in onthe city and view its date and timeinfomation.
NOTE With the Left Soft Key [Set DST]or touch set to daylight saving
time.
SetDST
OK
Cities
Reset
Lap
START
90
SETTINGS & TOOLS
2.7 NotepadAllows you to add, read, edit, anderase notes to yourself.
Using the Internal Keypad
1. Open the flip and press the OKKey [MENU].
2. Press the Navigation Key toscroll to the Settings & Toolsmenu and press the OK Key .
3. Press Tools.
4. Press Notepad.
5. Press the Left Soft Key [Add] to write a new note.
6. After filling in the note, press theOK Key to save it.
Using the External Touch Screen
1. Unlock the Touch Screen bytouching or pulling downthe Unlock Key ( ) on the leftside of your phone and touch to access the menu.
2. Touch the Settings & Tools icon.
3. Touch 2. Tools.
4. Place your finger on the TouchScreen and apply gentle upwardpressure to scroll the list up, thentouch 7. Notepad.
5. Touch to write a new note.
6. Touch to change the entrymode.
7. After filling in the note, touchto save it.
2.8 Ez Tip CalcAllows you to quickly and easilycalculate bill amounts using the billtotal, tip % and number of people asvariables.
Using the Internal Keypad
1. Open the flip and press the OKKey [MENU].
2. Press the Navigation Key toscroll to the Settings & Toolsmenu and press the OK Key .
3. Press Tools.
4. Press Ez Tip Calc.
5. Enter the variable fields (Total bill,Tip (%), Split) and thecorresponding calculation fields(tip and total for each person)appear automatically.
6. Press the Left Soft Key [Reset] for another calculation.
SAVE
Abc
Add
91
Using the External Touch Screen
1. Unlock the Touch Screen bytouching or pulling downthe Unlock Key ( ) on the leftside of your phone and touch to access the menu.
2. Touch the Settings & Tools icon.
3. Touch 2. Tools.
4. Place your finger on the TouchScreen and apply gentle upwardpressure to scroll the list up, thentouch 8. Ez Tip Calc.
5. Enter the variable fields (Totalbill, Tip %, Split).
l Touch the Total bill field andtouch keys appear to enter theamount.
l Touch the left and right arrowkeys to increase or decrease theamount(s).
Corresponding calculation fields(tip and total for each person)appear automatically.
6. Touch for anothercalculation.
2.9 USB Mass StorageThis menu allows you to transfercontent from your phone to your PC(or vice versa) when your phone isconnected to your PC with acompatible USB cable. You can onlyaccess this menu when a microSDcard is inserted in your phone (seepage 24 to insert it).
NOTE Do not insert or remove the microSDwhile playing, deleting or downloadingPictures/ Videos/ Music/ Sounds.
Using the Internal Keypad
1. Open the flip and press the OKKey [MENU].
2. Press the Navigation Key toscroll to the Settings & Toolsmenu and press the OK Key .
3. Press Tools.
4. Press USB Mass Storage.
Using the External Touch Screen
1. Unlock the Touch Screen bytouching or pulling downthe Unlock Key ( ) on the leftside of your phone and touch to access the menu.
2. Touch the Settings & Tools icon.
3. Touch 2. Tools.
Reset
92
SETTINGS & TOOLS
4. Place your finger on the TouchScreen and apply gentle upwardpressure to scroll the list up, thentouch 9. USB Mass Storage.
3. Bluetooth MenuThe VOYAGER™ is compatible withdevices that support the Bluetooth®
Headset, Handsfree, Dial UpNetworking, Stereo, PhonebookAccess, Basic Printing, Object Push,File Transfer, Basic Imaging andHuman Interface profiles.* You may create and store 20pairings within the VOYAGER™ andconnect to one device at a time. The approximate communicationrange for Bluetooth® wirelesstechnology is up to 30 feet (10 meters).Bluetooth QD ID B013121
SHORTCUT
Unlock the Touch Screen by touching orpulling down the Unlock Key ( ) on the leftside of your phone, then touch the screen withyour finger to access the shortcut menu, thentouch the Bluetooth Icon .
NOTE Read the user guide of eachBluetooth® accessory that you aretrying to pair with your phone becausethe instructions may be different.
NOTE Your phone is based on the Bluetooth®
specification, but it is not guaranteed towork with all devices enabled withBluetooth® wireless technology.
Phone does not support ALLBluetooth® OBEX Profiles.* For vehicle/accessory compatibility
go to www.verizonwireless.com/bluetoothchart.
TIPSl The Human Interface Design (HID) profile is
supported only from keyboard input andavailable only when the flip is open.
l The Headset, Handsfree, Dial Up Networkingand Stereo profiles supported by VOYAGER™provides you with the ability to use theintegrated music player (and optionalBluetooth stereo headset) to listen to WMA,MP3, AAC, AAC+, etc. music providing youwith lots of listening fun.
l Object Push Profile allows you to transfer acontact entry (vCard) and/or transfer acalendar event (vCal) to another OPP-enabledBluetooth device.
l Image transfer of user generated content isavailable via the Basic Imaging Profile.This profile allows sending of non-protectedimages to a compatible device for storing andprinting.
l Phonebook Access Profile allows your car kitand your phone to share information. Bypairing the devices and connecting with thisprofile, you can access and use your phonebook data while in your vehicle.
l File Transfer allows sending or receiving non-protected data files to a compatible Bluetoothdevice.
l Basic Print Profile is a profile to transfer user-generated images to a printer and print themout.The steps are: Open the flip and press the OKKey [MENU] -> press the OK Key to
93
access the Get It Now menu -> press Picture & Video -> press My Pictures ->Highlight the picture you want to print and pressthe Right Soft Key [Options] -> use theNavigation Key to scroll to Print and press
Print via Bluetooth to select a Bluetoothdevice and print.
3.1 Add New DevicePairing is the process that allowsthe handset to locate, establish, andregister 1-to-1 connection with thetarget device.
For pairing with a new Bluetooth®
device Using the Internal Keypad
1. Follow the Bluetooth® accessoryinstructions to set the device topairing mode.
2. Press the OK Key [MENU].
3. Press the Navigation Key toscroll to the Settings & Toolsmenu and press the OK Key .
4. Press Bluetooth Menu.
TIP
When the flip is closed, unlock the externalscreen by touching the unlock key icon. Thensimply touch the external screen to access theSHORTCUT MENU screen and touch theBluetooth menu.
5. Press Add New Device.Set the desired device to pairing.
6. If Bluetooth® power is set to off,you will be prompted to turnpower on. Select Yes and pressthe OK Key then press OKKey again.
7. The device will appear in AddNew Device menu once it hasbeen located. Highlight thedevice and press the OK Key .
8. The handset will prompt you forthe passcode. Consult theBluetooth® accessoryinstructions for the appropriatepasscode (typically “0000” - 4zeroes). Enter the passcode andpress the OK Key .
9. Once pairing is successful, selecteither Always Ask or AlwaysConnect and press the OK Key
. (except audio devices)
10. Once connected, you will seethe device listed in theBluetooth® Menu and theBluetooth® device connectedicon will show up on yourenunciator when connected tothe Bluetooth® device.
Using the External Touch Screen
1. Unlock the Touch Screen bytouching or pulling downthe Unlock Key ( ) on the left

94
SETTINGS & TOOLS
side of your phone and touch to access the menu.
2. Touch the Settings & Tools icon.
3. Touch 3. Bluetooth Menu.
4. Touch 1. Add New Device.Set the desired device to pairing.
6. If Bluetooth® power is set to off,you will be prompted to turnpower on. Touch Yes to beginsearch.
7. The device will appear in AddNew Device menu once it hasbeen located. Touch the device.
8. The handset will ask you for thepasscode. Consult the Bluetooth®
accessory instructions for theappropriate passcode (typically“0000” - 4 zeroes). Enter thepasscode.
9. Once pairing is successful, toucheither Always Ask or AlwaysConnect. (except audio devices)
10. Once connected, you will seethe device listed in theBluetooth® Menu and theBluetooth® device connectedicon will show up on yourenunciator when connected tothe Bluetooth® device.
Icon Reference in Adding NewDeviceWhen the Bluetooth® wirelessconnection is built and paired devicesare found, the following icons aredisplayed.
l Icon References When aBluetooth® Wireless Connectionis Searched (neither connectednor paired).
When an audio device issearched by yourVOYAGER™ device
When a PC is searched byyour VOYAGER™ device
When a PDA is searched byyour VOYAGER™ device
When another phonedevice is searched by yourVOYAGER™ device
When a printer is found byyour VOYAGER™ device
When other undefineddevices are found by yourVOYAGER™ device
When a keyboard is foundby your VOYAGER™ device
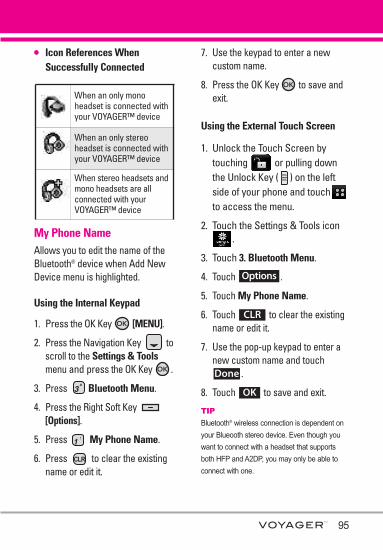
95
l Icon References WhenSuccessfully Connected
My Phone NameAllows you to edit the name of theBluetooth® device when Add NewDevice menu is highlighted.
Using the Internal Keypad
1. Press the OK Key [MENU].
2. Press the Navigation Key toscroll to the Settings & Toolsmenu and press the OK Key .
3. Press Bluetooth Menu.
4. Press the Right Soft Key [Options].
5. Press My Phone Name.
6. Press to clear the existingname or edit it.
7. Use the keypad to enter a newcustom name.
8. Press the OK Key to save andexit.
Using the External Touch Screen
1. Unlock the Touch Screen bytouching or pulling downthe Unlock Key ( ) on the leftside of your phone and touch to access the menu.
2. Touch the Settings & Tools icon.
3. Touch 3. Bluetooth Menu.
4. Touch .
5. Touch My Phone Name.
6. Touch to clear the existingname or edit it.
7. Use the pop-up keypad to enter anew custom name and touch
.
8. Touch to save and exit.
TIP
Bluetooth® wireless connection is dependent onyour Blueooth stereo device. Even though youwant to connect with a headset that supportsboth HFP and A2DP, you may only be able toconnect with one.
OK
Done
CLR
Options
When an only monoheadset is connected withyour VOYAGER™ device
When an only stereoheadset is connected withyour VOYAGER™ device
When stereo headsets andmono headsets are allconnected with yourVOYAGER™ device
96
SETTINGS & TOOLS
Turn OnAllows you to set the phone'sBluetooth® power On/Off.
Using the Internal Keypad
1. Open the flip and press the OKKey [MENU].
2. Press the Navigation Key toaccess the Settings & Tools menuand press the OK Key .
3. Press Bluetooth Menu.
4. Press the Left Soft Key [TurnOn].
NOTE By default, your device’s Bluetooth®
functionality is turned off.
Using the External Touch Screen
1. Unlock the Touch Screen bytouching or pulling downthe Unlock Key ( ) on the leftside of your phone and touch to access the menu.
2. Touch the Settings & Tools icon.
3. Touch 3. Bluetooth Menu.
4. Touch .
Discovery ModeAllows you to set whether yourdevice is able to be searched byother Bluetooth devices in the area.
Using the Internal Keypad
1. Press the OK Key [MENU].
2. Press the Navigation Key toscroll to the Settings & Toolsmenu and press the OK Key .
3. Press Bluetooth Menu.
4. Press the Right Soft Key [Options].
5. Press Discovery Mode.
TIP
Touch the Touch Key when the flip isclosed to enter Discovery Mode.
6. Use the Navigation Key toscroll to a setting, then press theOK Key .On/ Off
NOTE If you choose On for Discovery Mode,your device is able to be searched byother in-range Bluetooth® devices.
Using the External Touch Screen
1. Unlock the Touch Screen bytouching or pulling downthe Unlock Key ( ) on the leftside of your phone and touch to access the menu.
SHOW
ON
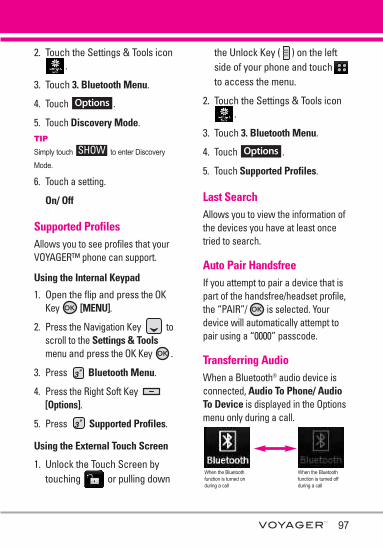
97
2. Touch the Settings & Tools icon.
3. Touch 3. Bluetooth Menu.
4. Touch .
5. Touch Discovery Mode.TIP
Simply touch to enter Discovery
Mode.
6. Touch a setting.
On/ Off
Supported ProfilesAllows you to see profiles that yourVOYAGER™ phone can support.
Using the Internal Keypad
1. Open the flip and press the OKKey [MENU].
2. Press the Navigation Key toscroll to the Settings & Toolsmenu and press the OK Key .
3. Press Bluetooth Menu.
4. Press the Right Soft Key [Options].
5. Press Supported Profiles.
Using the External Touch Screen
1. Unlock the Touch Screen bytouching or pulling down
the Unlock Key ( ) on the leftside of your phone and touch to access the menu.
2. Touch the Settings & Tools icon.
3. Touch 3. Bluetooth Menu.
4. Touch .
5. Touch Supported Profiles.
Last SearchAllows you to view the information ofthe devices you have at least oncetried to search.
Auto Pair HandsfreeIf you attempt to pair a device that ispart of the handsfree/headset profile,the “PAIR”/ is selected. Yourdevice will automatically attempt topair using a “0000” passcode.
Transferring AudioWhen a Bluetooth® audio device isconnected, Audio To Phone/ AudioTo Device is displayed in the Optionsmenu only during a call.
OptionsSHOW
Options
When the Bluetoothfunction is turned onduring a call
When the Bluetoothfunction is turned offduring a call
98
SETTINGS & TOOLS
Audio To Phone Sound comes fromthe handset.
Audio To Device Sound comes fromthe Bluetooth® audio device.
You have the following options in thepaired device.l For devices that support OBEX
profiles:
1. Remove Device: You can removethe device from the pairing list.
2. Rename Device: You can renamethe name of the paired device.
3. Incoming Security: Allows you toset permission before connectingan incoming device.
4. Service Discovery: Allows you tosearch for the services that theselected device supports.
5. Device Info: Shows the deviceinformation.
6. Send Name Card: You cantransfer Contacts list to otherdevices, except audio devices.
7. Send Calendar Event: You cantransfer Calendar events to otherdevices, except audio devices.
8. Send Image: You can transferimages to a device that supportsBasic Imaging Profile (BIP) profiles.
l For headset devices:
1. Remove Device: You can removethe device from the pairing list.
2. Rename Device: You can renamethe name of the paired device.
3. Service Discovery: Allows you tosearch for the services that theselected device supports.
4. Device Info: Shows the deviceinformation.
5. Send Name Card: You cantransfer Contacts list to otherdevices, except audio devices.
NOTES• If you want to connect to a device already in
your paired list, touch and hold the name ofthe device in the list to connect. For a list ofoptions to choose from, just touch the devicename.
• When the flip is open in the pairing list, youcan disconnect the connected device with theblue arrow signal by pressing the OK Key
. Reversely, you can turn it on bypressing the OK Key again.
• When an audio device is connected, then youselect another device and press the OK Key
, the connection is transferred from theaudio device to the other one.
• If your search fails to find any pairing device,or you want to search again, touch the
Touch Key to try again.• Print Picture allows you to print to devices that
support BPP profiles.
REFRESH
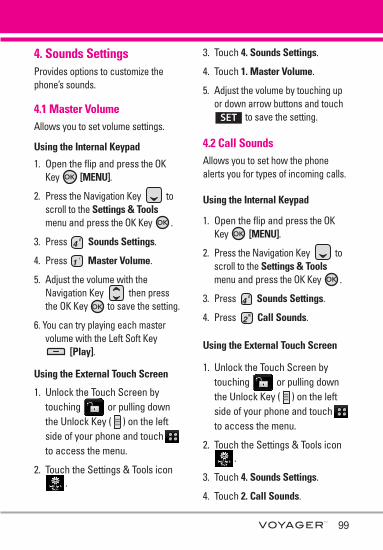
99
4. Sounds SettingsProvides options to customize thephone’s sounds.
4.1 Master VolumeAllows you to set volume settings.
Using the Internal Keypad
1. Open the flip and press the OKKey [MENU].
2. Press the Navigation Key toscroll to the Settings & Toolsmenu and press the OK Key .
3. Press Sounds Settings.
4. Press Master Volume.
5. Adjust the volume with theNavigation Key then pressthe OK Key to save the setting.
6. You can try playing each mastervolume with the Left Soft Key
[Play].
Using the External Touch Screen
1. Unlock the Touch Screen bytouching or pulling downthe Unlock Key ( ) on the leftside of your phone and touch to access the menu.
2. Touch the Settings & Tools icon.
3. Touch 4. Sounds Settings.
4. Touch 1. Master Volume.
5. Adjust the volume by touching upor down arrow buttons and touch
to save the setting.
4.2 Call SoundsAllows you to set how the phonealerts you for types of incoming calls.
Using the Internal Keypad
1. Open the flip and press the OKKey [MENU].
2. Press the Navigation Key toscroll to the Settings & Toolsmenu and press the OK Key .
3. Press Sounds Settings.
4. Press Call Sounds.
Using the External Touch Screen
1. Unlock the Touch Screen bytouching or pulling downthe Unlock Key ( ) on the leftside of your phone and touch to access the menu.
2. Touch the Settings & Tools icon.
3. Touch 4. Sounds Settings.
4. Touch 2. Call Sounds.
SET
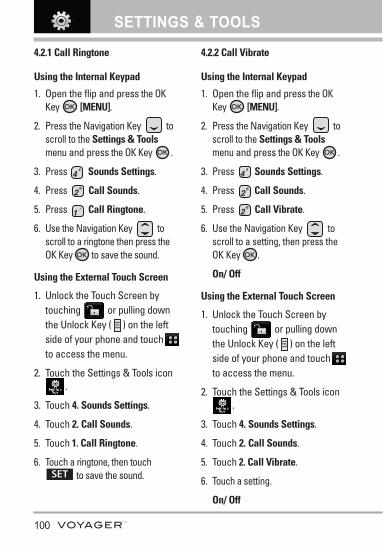
100
SETTINGS & TOOLS
4.2.1 Call Ringtone
Using the Internal Keypad
1. Open the flip and press the OKKey [MENU].
2. Press the Navigation Key toscroll to the Settings & Toolsmenu and press the OK Key .
3. Press Sounds Settings.
4. Press Call Sounds.
5. Press Call Ringtone.
6. Use the Navigation Key toscroll to a ringtone then press theOK Key to save the sound.
Using the External Touch Screen
1. Unlock the Touch Screen bytouching or pulling downthe Unlock Key ( ) on the leftside of your phone and touch to access the menu.
2. Touch the Settings & Tools icon.
3. Touch 4. Sounds Settings.
4. Touch 2. Call Sounds.
5. Touch 1. Call Ringtone.
6. Touch a ringtone, then touchto save the sound.
4.2.2 Call Vibrate
Using the Internal Keypad
1. Open the flip and press the OKKey [MENU].
2. Press the Navigation Key toscroll to the Settings & Toolsmenu and press the OK Key .
3. Press Sounds Settings.
4. Press Call Sounds.
5. Press Call Vibrate.
6. Use the Navigation Key toscroll to a setting, then press theOK Key .
On/ Off
Using the External Touch Screen
1. Unlock the Touch Screen bytouching or pulling downthe Unlock Key ( ) on the leftside of your phone and touch to access the menu.
2. Touch the Settings & Tools icon.
3. Touch 4. Sounds Settings.
4. Touch 2. Call Sounds.
5. Touch 2. Call Vibrate.
6. Touch a setting.
On/ Off
SET
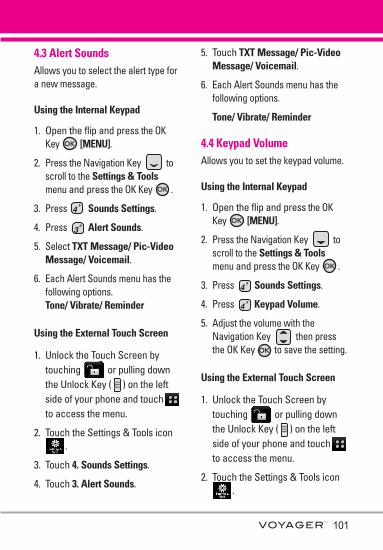
101
4.3 Alert SoundsAllows you to select the alert type fora new message.
Using the Internal Keypad
1. Open the flip and press the OKKey [MENU].
2. Press the Navigation Key toscroll to the Settings & Toolsmenu and press the OK Key .
3. Press Sounds Settings.
4. Press Alert Sounds.
5. Select TXT Message/ Pic-VideoMessage/ Voicemail.
6. Each Alert Sounds menu has thefollowing options.Tone/ Vibrate/ Reminder
Using the External Touch Screen
1. Unlock the Touch Screen bytouching or pulling downthe Unlock Key ( ) on the leftside of your phone and touch to access the menu.
2. Touch the Settings & Tools icon.
3. Touch 4. Sounds Settings.
4. Touch 3. Alert Sounds.
5. Touch TXT Message/ Pic-VideoMessage/ Voicemail.
6. Each Alert Sounds menu has thefollowing options.
Tone/ Vibrate/ Reminder
4.4 Keypad VolumeAllows you to set the keypad volume.
Using the Internal Keypad
1. Open the flip and press the OKKey [MENU].
2. Press the Navigation Key toscroll to the Settings & Toolsmenu and press the OK Key .
3. Press Sounds Settings.
4. Press Keypad Volume.
5. Adjust the volume with theNavigation Key then pressthe OK Key to save the setting.
Using the External Touch Screen
1. Unlock the Touch Screen bytouching or pulling downthe Unlock Key ( ) on the leftside of your phone and touch to access the menu.
2. Touch the Settings & Tools icon.
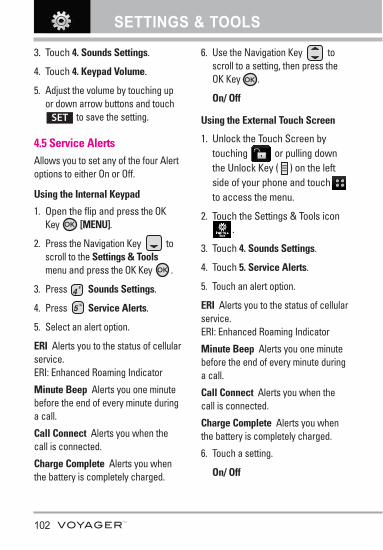
102
SETTINGS & TOOLS
3. Touch 4. Sounds Settings.
4. Touch 4. Keypad Volume.
5. Adjust the volume by touching upor down arrow buttons and touch
to save the setting.
4.5 Service AlertsAllows you to set any of the four Alertoptions to either On or Off.
Using the Internal Keypad
1. Open the flip and press the OKKey [MENU].
2. Press the Navigation Key toscroll to the Settings & Toolsmenu and press the OK Key .
3. Press Sounds Settings.
4. Press Service Alerts.
5. Select an alert option.
ERI Alerts you to the status of cellularservice. ERI: Enhanced Roaming Indicator
Minute Beep Alerts you one minutebefore the end of every minute duringa call.
Call Connect Alerts you when thecall is connected.
Charge Complete Alerts you whenthe battery is completely charged.
6. Use the Navigation Key toscroll to a setting, then press theOK Key .
On/ Off
Using the External Touch Screen
1. Unlock the Touch Screen bytouching or pulling downthe Unlock Key ( ) on the leftside of your phone and touch to access the menu.
2. Touch the Settings & Tools icon.
3. Touch 4. Sounds Settings.
4. Touch 5. Service Alerts.
5. Touch an alert option.
ERI Alerts you to the status of cellularservice. ERI: Enhanced Roaming Indicator
Minute Beep Alerts you one minutebefore the end of every minute duringa call.
Call Connect Alerts you when thecall is connected.
Charge Complete Alerts you whenthe battery is completely charged.
6. Touch a setting.
On/ Off
SET
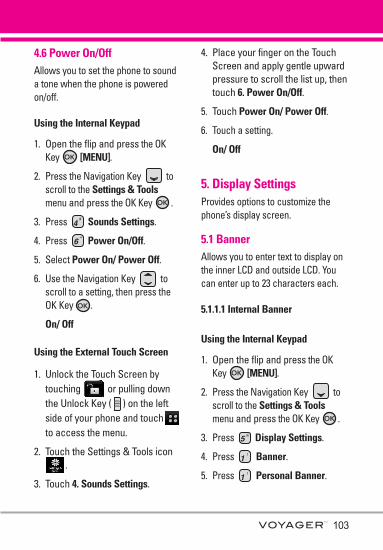
103
4.6 Power On/OffAllows you to set the phone to sounda tone when the phone is poweredon/off.
Using the Internal Keypad
1. Open the flip and press the OKKey [MENU].
2. Press the Navigation Key toscroll to the Settings & Toolsmenu and press the OK Key .
3. Press Sounds Settings.
4. Press Power On/Off.
5. Select Power On/ Power Off.
6. Use the Navigation Key toscroll to a setting, then press theOK Key .
On/ Off
Using the External Touch Screen
1. Unlock the Touch Screen bytouching or pulling downthe Unlock Key ( ) on the leftside of your phone and touch to access the menu.
2. Touch the Settings & Tools icon.
3. Touch 4. Sounds Settings.
4. Place your finger on the TouchScreen and apply gentle upwardpressure to scroll the list up, thentouch 6. Power On/Off.
5. Touch Power On/ Power Off.
6. Touch a setting.
On/ Off
5. Display SettingsProvides options to customize thephone’s display screen.
5.1 BannerAllows you to enter text to display onthe inner LCD and outside LCD. Youcan enter up to 23 characters each.
5.1.1.1 Internal Banner
Using the Internal Keypad
1. Open the flip and press the OKKey [MENU].
2. Press the Navigation Key toscroll to the Settings & Toolsmenu and press the OK Key .
3. Press Display Settings.
4. Press Banner.
5. Press Personal Banner.
104
SETTINGS & TOOLS
6. Press Internal Banner.
7. Enter the banner text you want todisplay on the inside LCD, thenpress the OK Key to save it.
Using the External Touch Screen
1. Unlock the Touch Screen bytouching or pulling downthe Unlock Key ( ) on the leftside of your phone and touch to access the menu.
2. Touch the Settings & Tools icon.
3. Touch 5. Display Settings.
4. Touch 1. Banner.
5. Touch 1. Personal Banner.
6. Touch 1. Internal Banner.
7. Enter the banner text and touch.
5.1.1.2 External Banner
Using the Internal Keypad
1. Open the flip and press the OKKey [MENU].
2. Press the Navigation Key toscroll to the Settings & Toolsmenu and press the OK Key .
3. Press Display Settings.
4. Press Banner.
5. Press Personal Banner.
6. Press External Banner.
7. Enter the text you want to displayon the outside LCD, then press theOK Key to save it.
Using the External Touch Screen
1. Unlock the Touch Screen bytouching or pulling downthe Unlock Key ( ) on the leftside of your phone and touch to access the menu.
2. Touch the Settings & Tools icon.
3. Touch 5. Display Settings.
4. Touch 1. Banner.
5. Touch 1. Personal Banner.
6. Touch 2. External Banner.
7. Enter the banner text and touch.
5.1.2 ERI Banner
If you use ERI Service, ERI Text isshown on the sub banner.
Using the Internal Keypad
1. Open the flip and press the OKKey [MENU].
SAVE
SAVE
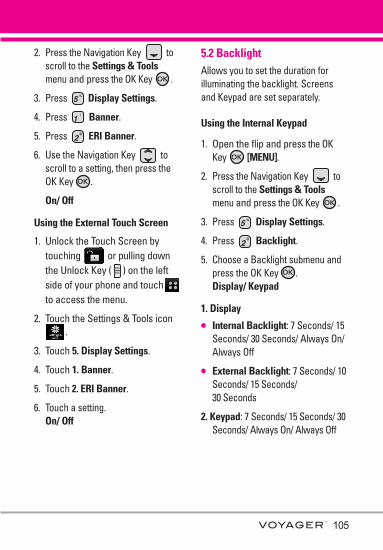
105
2. Press the Navigation Key toscroll to the Settings & Toolsmenu and press the OK Key .
3. Press Display Settings.
4. Press Banner.
5. Press ERI Banner.
6. Use the Navigation Key toscroll to a setting, then press theOK Key .
On/ Off
Using the External Touch Screen
1. Unlock the Touch Screen bytouching or pulling downthe Unlock Key ( ) on the leftside of your phone and touch to access the menu.
2. Touch the Settings & Tools icon.
3. Touch 5. Display Settings.
4. Touch 1. Banner.
5. Touch 2. ERI Banner.
6. Touch a setting.On/ Off
5.2 BacklightAllows you to set the duration forilluminating the backlight. Screensand Keypad are set separately.
Using the Internal Keypad
1. Open the flip and press the OKKey [MENU].
2. Press the Navigation Key toscroll to the Settings & Toolsmenu and press the OK Key .
3. Press Display Settings.
4. Press Backlight.
5. Choose a Backlight submenu andpress the OK Key .Display/ Keypad
1. Displayl Internal Backlight: 7 Seconds/ 15
Seconds/ 30 Seconds/ Always On/Always Off
l External Backlight: 7 Seconds/ 10Seconds/ 15 Seconds/ 30 Seconds
2. Keypad: 7 Seconds/ 15 Seconds/ 30Seconds/ Always On/ Always Off
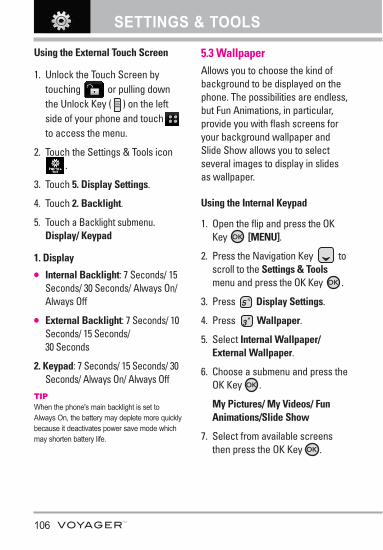
106
SETTINGS & TOOLS
Using the External Touch Screen
1. Unlock the Touch Screen bytouching or pulling downthe Unlock Key ( ) on the leftside of your phone and touch to access the menu.
2. Touch the Settings & Tools icon.
3. Touch 5. Display Settings.
4. Touch 2. Backlight.
5. Touch a Backlight submenu.Display/ Keypad
1. Displayl Internal Backlight: 7 Seconds/ 15
Seconds/ 30 Seconds/ Always On/Always Off
l External Backlight: 7 Seconds/ 10Seconds/ 15 Seconds/ 30 Seconds
2. Keypad: 7 Seconds/ 15 Seconds/ 30Seconds/ Always On/ Always Off
TIPWhen the phone's main backlight is set toAlways On, the battery may deplete more quicklybecause it deactivates power save mode whichmay shorten battery life.
5.3 WallpaperAllows you to choose the kind ofbackground to be displayed on thephone. The possibilities are endless,but Fun Animations, in particular,provide you with flash screens foryour background wallpaper andSlide Show allows you to selectseveral images to display in slidesas wallpaper.
Using the Internal Keypad
1. Open the flip and press the OKKey [MENU].
2. Press the Navigation Key toscroll to the Settings & Toolsmenu and press the OK Key .
3. Press Display Settings.
4. Press Wallpaper.
5. Select Internal Wallpaper/External Wallpaper.
6. Choose a submenu and press theOK Key .
My Pictures/ My Videos/ FunAnimations/Slide Show
7. Select from available screensthen press the OK Key .
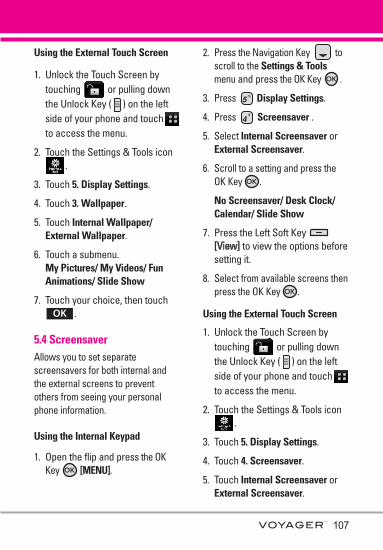
107
Using the External Touch Screen
1. Unlock the Touch Screen bytouching or pulling downthe Unlock Key ( ) on the leftside of your phone and touch to access the menu.
2. Touch the Settings & Tools icon.
3. Touch 5. Display Settings.
4. Touch 3. Wallpaper.
5. Touch Internal Wallpaper/External Wallpaper.
6. Touch a submenu.My Pictures/ My Videos/ FunAnimations/ Slide Show
7. Touch your choice, then touch.
5.4 ScreensaverAllows you to set separatescreensavers for both internal andthe external screens to preventothers from seeing your personalphone information.
Using the Internal Keypad
1. Open the flip and press the OKKey [MENU].
2. Press the Navigation Key toscroll to the Settings & Toolsmenu and press the OK Key .
3. Press Display Settings.
4. Press Screensaver .
5. Select Internal Screensaver orExternal Screensaver.
6. Scroll to a setting and press theOK Key .
No Screensaver/ Desk Clock/Calendar/ Slide Show
7. Press the Left Soft Key [[VViieeww]] to view the options beforesetting it.
8. Select from available screens thenpress the OK Key .
Using the External Touch Screen
1. Unlock the Touch Screen bytouching or pulling downthe Unlock Key ( ) on the leftside of your phone and touch to access the menu.
2. Touch the Settings & Tools icon.
3. Touch 5. Display Settings.
4. Touch 4. Screensaver.
5. Touch Internal Screensaver orExternal Screensaver.
OK
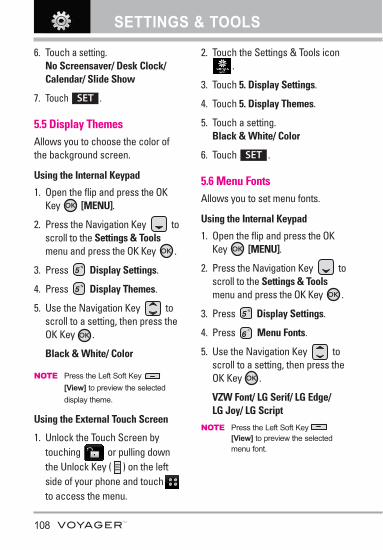
108
SETTINGS & TOOLS
6. Touch a setting.No Screensaver/ Desk Clock/Calendar/ Slide Show
7. Touch .
5.5 Display ThemesAllows you to choose the color ofthe background screen.
Using the Internal Keypad
1. Open the flip and press the OKKey [MENU].
2. Press the Navigation Key toscroll to the Settings & Toolsmenu and press the OK Key .
3. Press Display Settings.
4. Press Display Themes.
5. Use the Navigation Key toscroll to a setting, then press theOK Key .
Black & White/ Color
NOTE Press the Left Soft Key [View] to preview the selecteddisplay theme.
Using the External Touch Screen
1. Unlock the Touch Screen bytouching or pulling downthe Unlock Key ( ) on the leftside of your phone and touch to access the menu.
2. Touch the Settings & Tools icon.
3. Touch 5. Display Settings.
4. Touch 5. Display Themes.
5. Touch a setting.Black & White/ Color
6. Touch .
5.6 Menu FontsAllows you to set menu fonts.
Using the Internal Keypad
1. Open the flip and press the OKKey [MENU].
2. Press the Navigation Key toscroll to the Settings & Toolsmenu and press the OK Key .
3. Press Display Settings.
4. Press Menu Fonts.
5. Use the Navigation Key toscroll to a setting, then press theOK Key .
VZW Font/ LG Serif/ LG Edge/ LG Joy/ LG Script
NOTE Press the Left Soft Key [View] to preview the selectedmenu font.
SET
SET
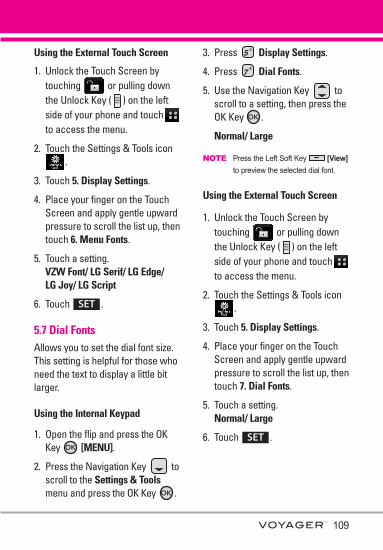
109
Using the External Touch Screen
1. Unlock the Touch Screen bytouching or pulling downthe Unlock Key ( ) on the leftside of your phone and touch to access the menu.
2. Touch the Settings & Tools icon.
3. Touch 5. Display Settings.
4. Place your finger on the TouchScreen and apply gentle upwardpressure to scroll the list up, thentouch 6. Menu Fonts.
5. Touch a setting.VZW Font/ LG Serif/ LG Edge/ LG Joy/ LG Script
6. Touch .
5.7 Dial FontsAllows you to set the dial font size.This setting is helpful for those whoneed the text to display a little bitlarger.
Using the Internal Keypad
1. Open the flip and press the OKKey [MENU].
2. Press the Navigation Key toscroll to the Settings & Toolsmenu and press the OK Key .
3. Press Display Settings.
4. Press Dial Fonts.
5. Use the Navigation Key toscroll to a setting, then press theOK Key .
Normal/ Large
NOTE Press the Left Soft Key [View]to preview the selected dial font.
Using the External Touch Screen
1. Unlock the Touch Screen bytouching or pulling downthe Unlock Key ( ) on the leftside of your phone and touch to access the menu.
2. Touch the Settings & Tools icon.
3. Touch 5. Display Settings.
4. Place your finger on the TouchScreen and apply gentle upwardpressure to scroll the list up, thentouch 7. Dial Fonts.
5. Touch a setting.Normal/ Large
6. Touch .SET
SET

110
SETTINGS & TOOLS
5.8 Clock FormatAllows you to choose the kind ofclock to be displayed on the LCDscreen.
Using the Internal Keypad
1. Open the flip and press the OKKey [MENU].
2. Press the Navigation Key toscroll to the Settings & Toolsmenu and press the OK Key .
3. Press Display Settings.
4. Press Clock Format.
5. Press Internal Clock or External Clock.
6. Use the Navigation Key toscroll to a setting, then press theOK Key .
Normal/ Analog/ Digital 1/ Digital2/ Dual(Set City in World Clock)/Off
NOTESl Press the Left Soft Key [View] to
preview the selected clock format.l If you set Dual clock for either the internal
or the external screen, the same city timeis displayed on both.
Using the External Touch Screen
1. Unlock the Touch Screen bytouching or pulling downthe Unlock Key ( ) on the leftside of your phone and touch to access the menu.
2. Touch the Settings & Tools icon.
3. Touch 5. Display Settings.
4. Place your finger on the TouchScreen and apply gentle upwardpressure to scroll the list up, thentouch 8. Clock Format.
5. Touch 1. Internal Clock or 2. External Clock.
6. Touch a setting.Normal/ Analog/ Digital 1/ Digital2/ Dual(Set City in World Clock)/Off
7. Touch .SET
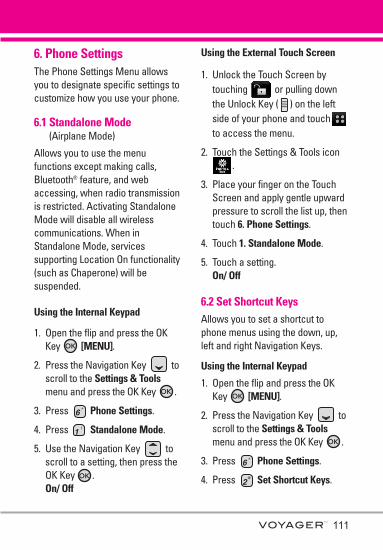
111
6. Phone SettingsThe Phone Settings Menu allowsyou to designate specific settings tocustomize how you use your phone.
6.1 Standalone Mode (Airplane Mode)
Allows you to use the menufunctions except making calls,Bluetooth® feature, and webaccessing, when radio transmissionis restricted. Activating StandaloneMode will disable all wirelesscommunications. When inStandalone Mode, servicessupporting Location On functionality(such as Chaperone) will besuspended.
Using the Internal Keypad
1. Open the flip and press the OKKey [MENU].
2. Press the Navigation Key toscroll to the Settings & Toolsmenu and press the OK Key .
3. Press Phone Settings.
4. Press Standalone Mode.
5. Use the Navigation Key toscroll to a setting, then press theOK Key .On/ Off
Using the External Touch Screen
1. Unlock the Touch Screen bytouching or pulling downthe Unlock Key ( ) on the leftside of your phone and touch to access the menu.
2. Touch the Settings & Tools icon.
3. Place your finger on the TouchScreen and apply gentle upwardpressure to scroll the list up, thentouch 6. Phone Settings.
4. Touch 1. Standalone Mode.
5. Touch a setting.On/ Off
6.2 Set Shortcut KeysAllows you to set a shortcut tophone menus using the down, up,left and right Navigation Keys.
Using the Internal Keypad
1. Open the flip and press the OKKey [MENU].
2. Press the Navigation Key toscroll to the Settings & Toolsmenu and press the OK Key .
3. Press Phone Settings.
4. Press Set Shortcut Keys.

112
SETTINGS & TOOLS
5. Use the Navigation Key toscroll to a shortcut key you wantto set.
6. Press the Left Soft Key [Set].
7. Use the Navigation Key toscroll to the shortcut you want,then press the OK Key .
8. Repeat as necessary to set allfour shortcut keys, then pressthe OK Key [DONE].
Using the External Touch Screen
1. Unlock the Touch Screen bytouching or pulling downthe Unlock Key ( ) on the leftside of your phone and touch to access the menu.
2. Touch the Settings & Tools icon.
3. Place your finger on the TouchScreen and apply gentle upwardpressure to scroll the list up, thentouch 6. Phone Settings.
4. Touch 2. Set Shortcut Keys.
5. Touch a shortcut key you want tochange, then touch the shortcutyou want to set.
6. Repeat as necessary to set allfour shortcut keys, then touch
.
6.3 Voice Commands
Using the Internal Keypad
1. Open the flip and press the OKKey [MENU].
2. Press the Navigation Key toscroll to the Settings & Toolsmenu and press the OK Key .
3. Press Phone Settings.
4. Press Voice Commands.Prompts Mode/ AudioPlayback/ TimeoutFor Mode, set Prompts/ Readout+ Alerts/ Readout/ Tones Only. For Audio Playback, setSpeakerphone or Earpiece.For Timeout, set 5 seconds or 10 seconds.Call Alert Ring Only/ Caller ID +Ring/ Name Repeat
Using the External Touch Screen
1. Unlock the Touch Screen bytouching or pulling downthe Unlock Key ( ) on the leftside of your phone and touch to access the menu.
2. Touch the Settings & Tools icon.
3. Place your finger on the TouchScreen and apply gentle upward
DONE
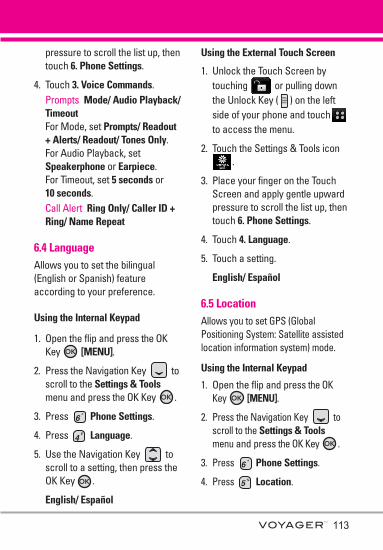
113
pressure to scroll the list up, thentouch 6. Phone Settings.
4. Touch 3. Voice Commands.Prompts Mode/ Audio Playback/TimeoutFor Mode, set Prompts/ Readout+ Alerts/ Readout/ Tones Only. For Audio Playback, setSpeakerphone or Earpiece.For Timeout, set 5 seconds or 10 seconds.Call Alert Ring Only/ Caller ID +Ring/ Name Repeat
6.4 LanguageAllows you to set the bilingual(English or Spanish) featureaccording to your preference.
Using the Internal Keypad
1. Open the flip and press the OKKey [MENU].
2. Press the Navigation Key toscroll to the Settings & Toolsmenu and press the OK Key .
3. Press Phone Settings.
4. Press Language.
5. Use the Navigation Key toscroll to a setting, then press theOK Key .
English/ Español
Using the External Touch Screen
1. Unlock the Touch Screen bytouching or pulling downthe Unlock Key ( ) on the leftside of your phone and touch to access the menu.
2. Touch the Settings & Tools icon.
3. Place your finger on the TouchScreen and apply gentle upwardpressure to scroll the list up, thentouch 6. Phone Settings.
4. Touch 4. Language.
5. Touch a setting.
English/ Español
6.5 LocationAllows you to set GPS (GlobalPositioning System: Satellite assistedlocation information system) mode.
Using the Internal Keypad
1. Open the flip and press the OKKey [MENU].
2. Press the Navigation Key toscroll to the Settings & Toolsmenu and press the OK Key .
3. Press Phone Settings.
4. Press Location.
114
SETTINGS & TOOLS
5. Use the Navigation Key toscroll to a setting, then press theOK Key .
Location On/ E911 Only
Using the External Touch Screen
1. Unlock the Touch Screen bytouching or pulling downthe Unlock Key ( ) on the leftside of your phone and touch to access the menu.
2. Touch the Settings & Tools icon.
3. Place your finger on the TouchScreen and apply gentle upwardpressure to scroll the list up, thentouch 6. Phone Settings.
4. Touch 5. Location.
5. Touch a setting.Location On/ E911 Only
NOTES
• GPS satellite signals are not always receivedby the phone under bad atmospheric andenvironmental conditions, indoors, etc.
• When a location lock mode is activated in theSecurity Menu, the lock code is requiredwhen you enter location menu. The lock codeis the same 4 digits you use as your devicelock code; initially the last 4 digits of yourphone number.
• When in Standalone Mode, servicessupporting Location On functionality (such asChaperone) will be suspended.
6.6 SecurityThe Security menu allows you tosecure the phone electronically.
Using the Internal Keypad
1. Open the flip and press the OKKey [MENU].
2. Press the Navigation Key toscroll to the Settings & Toolsmenu and press the OK Key .
3. Press Phone Settings.
4. Press Security.
5. Enter the four-digit lock code.The lock code is the last 4 digits ofyour mobile phone number if it isset. The lock code is the last 4digits of your MEID if your mobilephone number is not set.
Using the External Touch Screen
1. Unlock the Touch Screen bytouching or pulling downthe Unlock Key ( ) on the leftside of your phone and touch to access the menu.
2. Touch the Settings & Tools icon.
3. Place your finger on the TouchScreen and apply gentle upward
115
pressure to scroll the list up, thentouch 6. Phone Settings.
4. Place your finger on the TouchScreen and apply gentle upwardpressure to scroll the list up, thentouch 6. Security.
5. Enter the four-digit lock code.The lock code is the last 4 digits ofyour mobile phone number if it isset. The lock code is the last 4digits of your MEID if your mobilephone number is not set.
6.6.1 Edit Codes
Allows you to enter a new four-digitlock code.
Using the Internal Keypad
1. Open the flip and press the OKKey [MENU].
2. Press the Navigation Key toscroll to the Settings & Toolsmenu and press the OK Key .
3. Press Phone Settings.
4. Press Security.
5. Enter the four-digit lock code.
6. Press Edit Codes.
7. Choose Phone Only or Calls &Services, then enter your new lockcode. Enter it again to confirm it.
Using the External Touch Screen
1. Unlock the Touch Screen bytouching or pulling downthe Unlock Key ( ) on the leftside of your phone and touch to access the menu.
2. Touch the Settings & Tools icon.
3. Place your finger on the TouchScreen and apply gentle upwardpressure to scroll the list up, thentouch 6. Phone Settings.
4. Place your finger on the TouchScreen and apply gentle upwardpressure to scroll the list up, thentouch 6. Security.
5. Enter the four-digit lock code.
6. Touch 1. Edit Codes.
7. Choose Phone Only or Calls &Services, then enter your new lockcode. Enter it again to confirm it.
6.6.2 Restrictions
Allows you to set separate restrictionsfor Location Setting, Calls, Messages,and Dial Up Modem.
Using the Internal Keypad
1. Open the flip and press the OKKey [MENU].
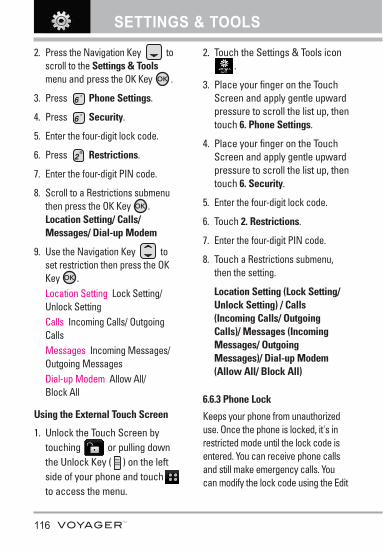
116
SETTINGS & TOOLS
2. Press the Navigation Key toscroll to the Settings & Toolsmenu and press the OK Key .
3. Press Phone Settings.
4. Press Security.
5. Enter the four-digit lock code.
6. Press Restrictions.
7. Enter the four-digit PIN code.
8. Scroll to a Restrictions submenuthen press the OK Key .Location Setting/ Calls/Messages/ Dial-up Modem
9. Use the Navigation Key toset restriction then press the OKKey . Location Setting Lock Setting/Unlock SettingCalls Incoming Calls/ OutgoingCalls Messages Incoming Messages/Outgoing MessagesDial-up Modem Allow All/ Block All
Using the External Touch Screen
1. Unlock the Touch Screen bytouching or pulling downthe Unlock Key ( ) on the leftside of your phone and touch to access the menu.
2. Touch the Settings & Tools icon.
3. Place your finger on the TouchScreen and apply gentle upwardpressure to scroll the list up, thentouch 6. Phone Settings.
4. Place your finger on the TouchScreen and apply gentle upwardpressure to scroll the list up, thentouch 6. Security.
5. Enter the four-digit lock code.
6. Touch 2. Restrictions.
7. Enter the four-digit PIN code.
8. Touch a Restrictions submenu,then the setting.
Location Setting (Lock Setting/Unlock Setting) / Calls(Incoming Calls/ OutgoingCalls)/ Messages (IncomingMessages/ OutgoingMessages)/ Dial-up Modem(Allow All/ Block All)
6.6.3 Phone Lock
Keeps your phone from unauthorizeduse. Once the phone is locked, it's inrestricted mode until the lock code isentered. You can receive phone callsand still make emergency calls. Youcan modify the lock code using the Edit
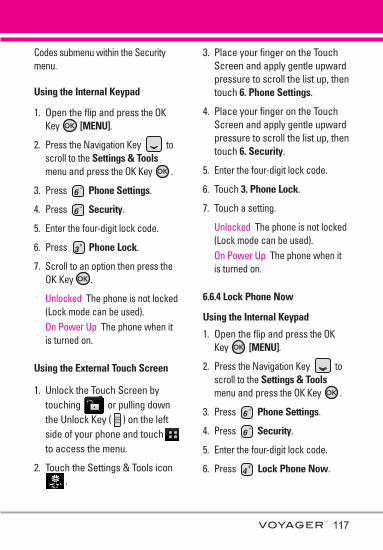
117
Codes submenu within the Securitymenu.
Using the Internal Keypad
1. Open the flip and press the OKKey [MENU].
2. Press the Navigation Key toscroll to the Settings & Toolsmenu and press the OK Key .
3. Press Phone Settings.
4. Press Security.
5. Enter the four-digit lock code.
6. Press Phone Lock.
7. Scroll to an option then press theOK Key .
Unlocked The phone is not locked(Lock mode can be used). On Power Up The phone when itis turned on.
Using the External Touch Screen
1. Unlock the Touch Screen bytouching or pulling downthe Unlock Key ( ) on the leftside of your phone and touch to access the menu.
2. Touch the Settings & Tools icon.
3. Place your finger on the TouchScreen and apply gentle upwardpressure to scroll the list up, thentouch 6. Phone Settings.
4. Place your finger on the TouchScreen and apply gentle upwardpressure to scroll the list up, thentouch 6. Security.
5. Enter the four-digit lock code.
6. Touch 3. Phone Lock.
7. Touch a setting.
Unlocked The phone is not locked(Lock mode can be used). On Power Up The phone when itis turned on.
6.6.4 Lock Phone Now
Using the Internal Keypad
1. Open the flip and press the OKKey [MENU].
2. Press the Navigation Key toscroll to the Settings & Toolsmenu and press the OK Key .
3. Press Phone Settings.
4. Press Security.
5. Enter the four-digit lock code.
6. Press Lock Phone Now.
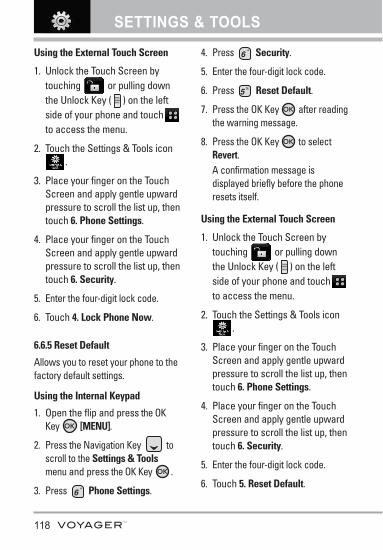
118
SETTINGS & TOOLS
Using the External Touch Screen
1. Unlock the Touch Screen bytouching or pulling downthe Unlock Key ( ) on the leftside of your phone and touch to access the menu.
2. Touch the Settings & Tools icon.
3. Place your finger on the TouchScreen and apply gentle upwardpressure to scroll the list up, thentouch 6. Phone Settings.
4. Place your finger on the TouchScreen and apply gentle upwardpressure to scroll the list up, thentouch 6. Security.
5. Enter the four-digit lock code.
6. Touch 4. Lock Phone Now.
6.6.5 Reset Default
Allows you to reset your phone to thefactory default settings.
Using the Internal Keypad
1. Open the flip and press the OKKey [MENU].
2. Press the Navigation Key toscroll to the Settings & Toolsmenu and press the OK Key .
3. Press Phone Settings.
4. Press Security.
5. Enter the four-digit lock code.
6. Press Reset Default.
7. Press the OK Key after readingthe warning message.
8. Press the OK Key to selectRevert.A confirmation message isdisplayed briefly before the phoneresets itself.
Using the External Touch Screen
1. Unlock the Touch Screen bytouching or pulling downthe Unlock Key ( ) on the leftside of your phone and touch to access the menu.
2. Touch the Settings & Tools icon.
3. Place your finger on the TouchScreen and apply gentle upwardpressure to scroll the list up, thentouch 6. Phone Settings.
4. Place your finger on the TouchScreen and apply gentle upwardpressure to scroll the list up, thentouch 6. Security.
5. Enter the four-digit lock code.
6. Touch 5. Reset Default.
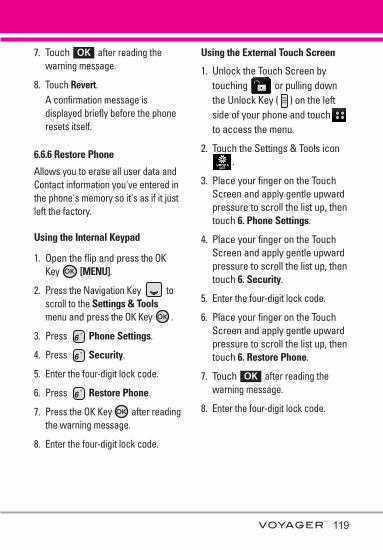
119
7. Touch after reading thewarning message.
8. Touch Revert.A confirmation message isdisplayed briefly before the phoneresets itself.
6.6.6 Restore Phone
Allows you to erase all user data andContact information you've entered inthe phone's memory so it's as if it justleft the factory.
Using the Internal Keypad
1. Open the flip and press the OKKey [MENU].
2. Press the Navigation Key toscroll to the Settings & Toolsmenu and press the OK Key .
3. Press Phone Settings.
4. Press Security.
5. Enter the four-digit lock code.
6. Press Restore Phone.
7. Press the OK Key after readingthe warning message.
8. Enter the four-digit lock code.
Using the External Touch Screen
1. Unlock the Touch Screen bytouching or pulling downthe Unlock Key ( ) on the leftside of your phone and touch to access the menu.
2. Touch the Settings & Tools icon.
3. Place your finger on the TouchScreen and apply gentle upwardpressure to scroll the list up, thentouch 6. Phone Settings.
4. Place your finger on the TouchScreen and apply gentle upwardpressure to scroll the list up, thentouch 6. Security.
5. Enter the four-digit lock code.
6. Place your finger on the TouchScreen and apply gentle upwardpressure to scroll the list up, thentouch 6. Restore Phone.
7. Touch after reading thewarning message.
8. Enter the four-digit lock code.
OK
OK
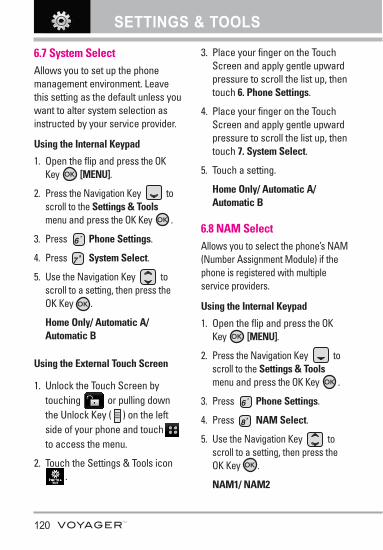
120
SETTINGS & TOOLS
6.7 System SelectAllows you to set up the phonemanagement environment. Leavethis setting as the default unless youwant to alter system selection asinstructed by your service provider.
Using the Internal Keypad
1. Open the flip and press the OKKey [MENU].
2. Press the Navigation Key toscroll to the Settings & Toolsmenu and press the OK Key .
3. Press Phone Settings.
4. Press System Select.
5. Use the Navigation Key toscroll to a setting, then press theOK Key .
Home Only/ Automatic A/Automatic B
Using the External Touch Screen
1. Unlock the Touch Screen bytouching or pulling downthe Unlock Key ( ) on the leftside of your phone and touch to access the menu.
2. Touch the Settings & Tools icon.
3. Place your finger on the TouchScreen and apply gentle upwardpressure to scroll the list up, thentouch 6. Phone Settings.
4. Place your finger on the TouchScreen and apply gentle upwardpressure to scroll the list up, thentouch 7. System Select.
5. Touch a setting.
Home Only/ Automatic A/Automatic B
6.8 NAM SelectAllows you to select the phone’s NAM(Number Assignment Module) if thephone is registered with multipleservice providers.
Using the Internal Keypad
1. Open the flip and press the OKKey [MENU].
2. Press the Navigation Key toscroll to the Settings & Toolsmenu and press the OK Key .
3. Press Phone Settings.
4. Press NAM Select.
5. Use the Navigation Key toscroll to a setting, then press theOK Key .
NAM1/ NAM2
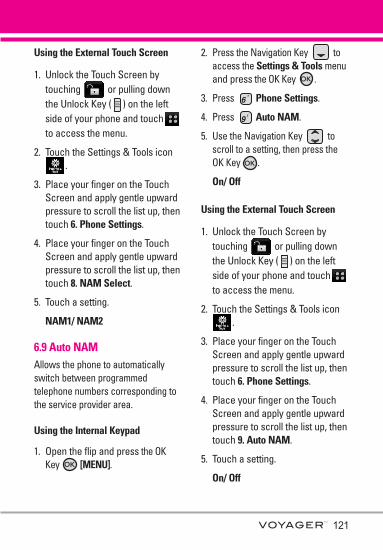
121
Using the External Touch Screen
1. Unlock the Touch Screen bytouching or pulling downthe Unlock Key ( ) on the leftside of your phone and touch to access the menu.
2. Touch the Settings & Tools icon.
3. Place your finger on the TouchScreen and apply gentle upwardpressure to scroll the list up, thentouch 6. Phone Settings.
4. Place your finger on the TouchScreen and apply gentle upwardpressure to scroll the list up, thentouch 8. NAM Select.
5. Touch a setting.
NAM1/ NAM2
6.9 Auto NAMAllows the phone to automaticallyswitch between programmedtelephone numbers corresponding tothe service provider area.
Using the Internal Keypad
1. Open the flip and press the OKKey [MENU].
2. Press the Navigation Key toaccess the Settings & Tools menuand press the OK Key .
3. Press Phone Settings.
4. Press Auto NAM.
5. Use the Navigation Key toscroll to a setting, then press theOK Key .
On/ Off
Using the External Touch Screen
1. Unlock the Touch Screen bytouching or pulling downthe Unlock Key ( ) on the leftside of your phone and touch to access the menu.
2. Touch the Settings & Tools icon.
3. Place your finger on the TouchScreen and apply gentle upwardpressure to scroll the list up, thentouch 6. Phone Settings.
4. Place your finger on the TouchScreen and apply gentle upwardpressure to scroll the list up, thentouch 9. Auto NAM.
5. Touch a setting.
On/ Off
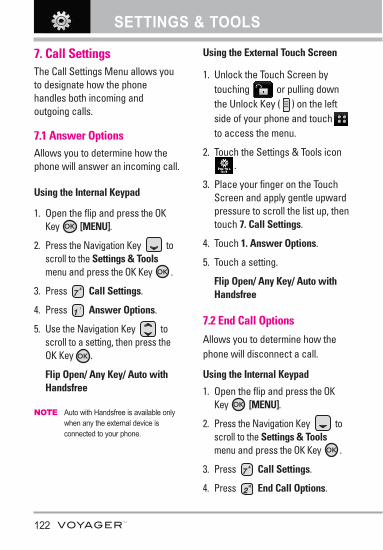
122
SETTINGS & TOOLS
7. Call SettingsThe Call Settings Menu allows youto designate how the phonehandles both incoming andoutgoing calls.
7.1 Answer OptionsAllows you to determine how thephone will answer an incoming call.
Using the Internal Keypad
1. Open the flip and press the OKKey [MENU].
2. Press the Navigation Key toscroll to the Settings & Toolsmenu and press the OK Key .
3. Press Call Settings.
4. Press Answer Options.
5. Use the Navigation Key toscroll to a setting, then press theOK Key .
Flip Open/ Any Key/ Auto withHandsfree
NOTE Auto with Handsfree is available onlywhen any the external device isconnected to your phone.
Using the External Touch Screen
1. Unlock the Touch Screen bytouching or pulling downthe Unlock Key ( ) on the leftside of your phone and touch to access the menu.
2. Touch the Settings & Tools icon.
3. Place your finger on the TouchScreen and apply gentle upwardpressure to scroll the list up, thentouch 7. Call Settings.
4. Touch 1. Answer Options.
5. Touch a setting.
Flip Open/ Any Key/ Auto withHandsfree
7.2 End Call Options
Allows you to determine how thephone will disconnect a call.
Using the Internal Keypad
1. Open the flip and press the OKKey [MENU].
2. Press the Navigation Key toscroll to the Settings & Toolsmenu and press the OK Key .
3. Press Call Settings.
4. Press End Call Options.
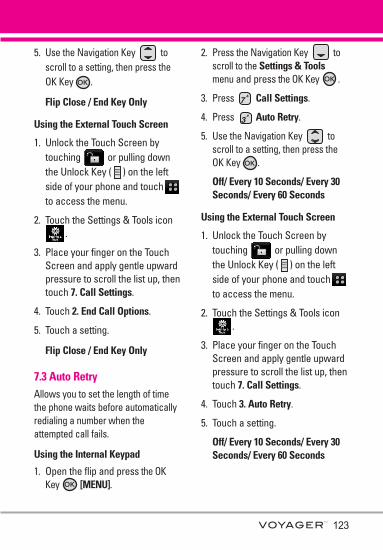
123
5. Use the Navigation Key toscroll to a setting, then press theOK Key .
Flip Close / End Key Only
Using the External Touch Screen
1. Unlock the Touch Screen bytouching or pulling downthe Unlock Key ( ) on the leftside of your phone and touch to access the menu.
2. Touch the Settings & Tools icon.
3. Place your finger on the TouchScreen and apply gentle upwardpressure to scroll the list up, thentouch 7. Call Settings.
4. Touch 2. End Call Options.
5. Touch a setting.
Flip Close / End Key Only
7.3 Auto RetryAllows you to set the length of timethe phone waits before automaticallyredialing a number when theattempted call fails.
Using the Internal Keypad
1. Open the flip and press the OKKey [MENU].
2. Press the Navigation Key toscroll to the Settings & Toolsmenu and press the OK Key .
3. Press Call Settings.
4. Press Auto Retry.
5. Use the Navigation Key toscroll to a setting, then press theOK Key .
Off/ Every 10 Seconds/ Every 30Seconds/ Every 60 Seconds
Using the External Touch Screen
1. Unlock the Touch Screen bytouching or pulling downthe Unlock Key ( ) on the leftside of your phone and touch to access the menu.
2. Touch the Settings & Tools icon.
3. Place your finger on the TouchScreen and apply gentle upwardpressure to scroll the list up, thentouch 7. Call Settings.
4. Touch 3. Auto Retry.
5. Touch a setting.
Off/ Every 10 Seconds/ Every 30Seconds/ Every 60 Seconds
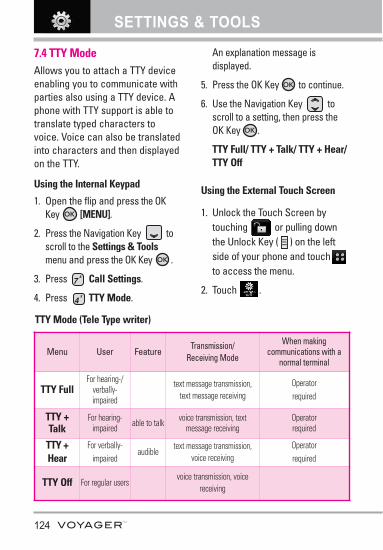
124
SETTINGS & TOOLS
7.4 TTY ModeAllows you to attach a TTY deviceenabling you to communicate withparties also using a TTY device. Aphone with TTY support is able totranslate typed characters tovoice. Voice can also be translatedinto characters and then displayedon the TTY.
Using the Internal Keypad
1. Open the flip and press the OKKey [MENU].
2. Press the Navigation Key toscroll to the Settings & Toolsmenu and press the OK Key .
3. Press Call Settings.
4. Press TTY Mode.
An explanation message isdisplayed.
5. Press the OK Key to continue.
6. Use the Navigation Key toscroll to a setting, then press theOK Key .
TTY Full/ TTY + Talk/ TTY + Hear/TTY Off
Using the External Touch Screen
1. Unlock the Touch Screen bytouching or pulling downthe Unlock Key ( ) on the leftside of your phone and touch to access the menu.
2. Touch .
Menu User FeatureTransmission/
Receiving Mode
When makingcommunications with a
normal terminal
TTY FullFor hearing-/
verbally-impaired
text message transmission,text message receiving
Operator required
TTY +Talk
For hearing-impaired able to talk voice transmission, text
message receivingOperator required
TTY +Hear
For verbally-impaired
audible text message transmission,
voice receiving Operator required
TTY Off For regular usersvoice transmission, voice
receiving
TTY Mode (Tele Type writer)
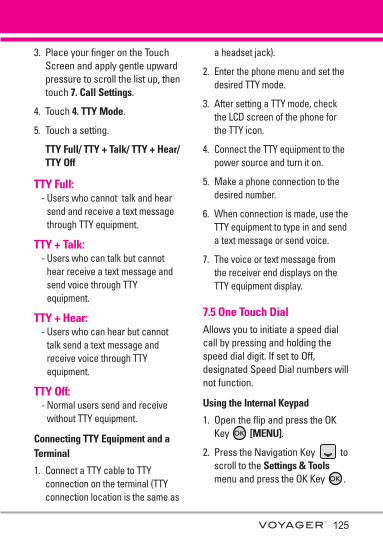
125
3. Place your finger on the TouchScreen and apply gentle upwardpressure to scroll the list up, thentouch 7. Call Settings.
4. Touch 4. TTY Mode.
5. Touch a setting.
TTY Full/ TTY + Talk/ TTY + Hear/TTY Off
TTY Full:- Users who cannot talk and hear
send and receive a text messagethrough TTY equipment.
TTY + Talk: - Users who can talk but cannot
hear receive a text message andsend voice through TTYequipment.
TTY + Hear: - Users who can hear but cannot
talk send a text message andreceive voice through TTYequipment.
TTY Off: - Normal users send and receive
without TTY equipment.
Connecting TTY Equipment and aTerminal
1. Connect a TTY cable to TTYconnection on the terminal (TTYconnection location is the same as
a headset jack).
2. Enter the phone menu and set thedesired TTY mode.
3. After setting a TTY mode, checkthe LCD screen of the phone forthe TTY icon.
4. Connect the TTY equipment to thepower source and turn it on.
5. Make a phone connection to thedesired number.
6. When connection is made, use theTTY equipment to type in and senda text message or send voice.
7. The voice or text message fromthe receiver end displays on theTTY equipment display.
7.5 One Touch DialAllows you to initiate a speed dialcall by pressing and holding thespeed dial digit. If set to Off,designated Speed Dial numbers willnot function.
Using the Internal Keypad
1. Open the flip and press the OKKey [MENU].
2. Press the Navigation Key toscroll to the Settings & Toolsmenu and press the OK Key .
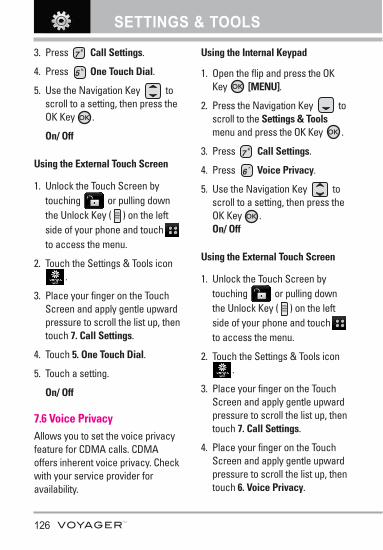
126
SETTINGS & TOOLS
3. Press Call Settings.
4. Press One Touch Dial.
5. Use the Navigation Key toscroll to a setting, then press theOK Key .
On/ Off
Using the External Touch Screen
1. Unlock the Touch Screen bytouching or pulling downthe Unlock Key ( ) on the leftside of your phone and touch to access the menu.
2. Touch the Settings & Tools icon.
3. Place your finger on the TouchScreen and apply gentle upwardpressure to scroll the list up, thentouch 7. Call Settings.
4. Touch 5. One Touch Dial.
5. Touch a setting.
On/ Off
7.6 Voice PrivacyAllows you to set the voice privacyfeature for CDMA calls. CDMAoffers inherent voice privacy. Checkwith your service provider foravailability.
Using the Internal Keypad
1. Open the flip and press the OKKey [MENU].
2. Press the Navigation Key toscroll to the Settings & Toolsmenu and press the OK Key .
3. Press Call Settings.
4. Press Voice Privacy.
5. Use the Navigation Key toscroll to a setting, then press theOK Key .On/ Off
Using the External Touch Screen
1. Unlock the Touch Screen bytouching or pulling downthe Unlock Key ( ) on the leftside of your phone and touch to access the menu.
2. Touch the Settings & Tools icon.
3. Place your finger on the TouchScreen and apply gentle upwardpressure to scroll the list up, thentouch 7. Call Settings.
4. Place your finger on the TouchScreen and apply gentle upwardpressure to scroll the list up, thentouch 6. Voice Privacy.
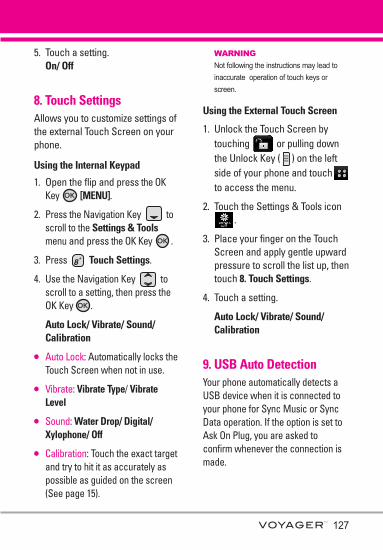
127
5. Touch a setting.On/ Off
8. Touch SettingsAllows you to customize settings ofthe external Touch Screen on yourphone.
Using the Internal Keypad
1. Open the flip and press the OKKey [MENU].
2. Press the Navigation Key toscroll to the Settings & Toolsmenu and press the OK Key .
3. Press Touch Settings.
4. Use the Navigation Key toscroll to a setting, then press theOK Key .
Auto Lock/ Vibrate/ Sound/Calibration
l Auto Lock: Automatically locks theTouch Screen when not in use.
l Vibrate: Vibrate Type/ VibrateLevel
l Sound: Water Drop/ Digital/Xylophone/ Off
l Calibration: Touch the exact targetand try to hit it as accurately aspossible as guided on the screen(See page 15).
WARNING
Not following the instructions may lead toinaccurate operation of touch keys orscreen.
Using the External Touch Screen
1. Unlock the Touch Screen bytouching or pulling downthe Unlock Key ( ) on the leftside of your phone and touch to access the menu.
2. Touch the Settings & Tools icon.
3. Place your finger on the TouchScreen and apply gentle upwardpressure to scroll the list up, thentouch 8. Touch Settings.
4. Touch a setting.
Auto Lock/ Vibrate/ Sound/Calibration
9. USB Auto DetectionYour phone automatically detects aUSB device when it is connected toyour phone for Sync Music or SyncData operation. If the option is set toAsk On Plug, you are asked toconfirm whenever the connection ismade.
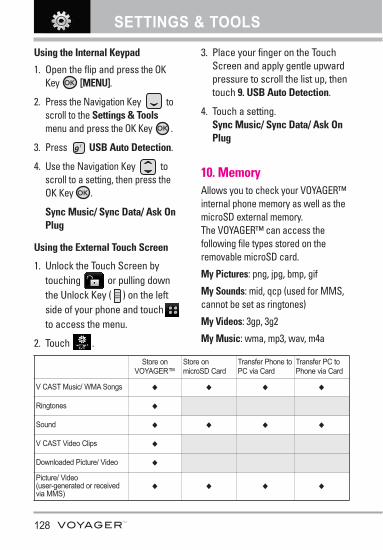
128
SETTINGS & TOOLS
Using the Internal Keypad
1. Open the flip and press the OKKey [MENU].
2. Press the Navigation Key toscroll to the Settings & Toolsmenu and press the OK Key .
3. Press USB Auto Detection.
4. Use the Navigation Key toscroll to a setting, then press theOK Key .
Sync Music/ Sync Data/ Ask OnPlug
Using the External Touch Screen
1. Unlock the Touch Screen bytouching or pulling downthe Unlock Key ( ) on the leftside of your phone and touch to access the menu.
2. Touch .
3. Place your finger on the TouchScreen and apply gentle upwardpressure to scroll the list up, thentouch 9. USB Auto Detection.
4. Touch a setting.Sync Music/ Sync Data/ Ask OnPlug
10. MemoryAllows you to check your VOYAGER™internal phone memory as well as themicroSD external memory. The VOYAGER™ can access thefollowing file types stored on theremovable microSD card.
My Pictures: png, jpg, bmp, gif
My Sounds: mid, qcp (used for MMS,cannot be set as ringtones)
My Videos: 3gp, 3g2
My Music: wma, mp3, wav, m4a
Store onVOYAGER™
Store onmicroSD Card
Transfer Phone toPC via Card
Transfer PC toPhone via Card
V CAST Music/ WMA Songs W W W W
Ringtones W
Sound W W W W
V CAST Video Clips W
Downloaded Picture/ Video W
Picture/ Video (user-generated or receivedvia MMS)
W W W W
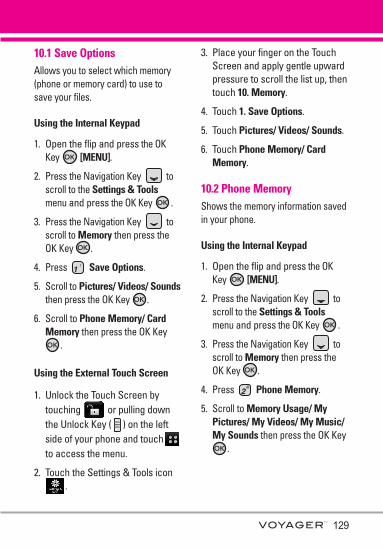
129
10.1 Save OptionsAllows you to select which memory(phone or memory card) to use tosave your files.
Using the Internal Keypad
1. Open the flip and press the OKKey [MENU].
2. Press the Navigation Key toscroll to the Settings & Toolsmenu and press the OK Key .
3. Press the Navigation Key toscroll to Memory then press theOK Key .
4. Press Save Options.
5. Scroll to Pictures/ Videos/ Soundsthen press the OK Key .
6. Scroll to Phone Memory/ CardMemory then press the OK Key
.
Using the External Touch Screen
1. Unlock the Touch Screen bytouching or pulling downthe Unlock Key ( ) on the leftside of your phone and touch to access the menu.
2. Touch the Settings & Tools icon.
3. Place your finger on the TouchScreen and apply gentle upwardpressure to scroll the list up, thentouch 10. Memory.
4. Touch 1. Save Options.
5. Touch Pictures/ Videos/ Sounds.
6. Touch Phone Memory/ CardMemory.
10.2 Phone MemoryShows the memory information savedin your phone.
Using the Internal Keypad
1. Open the flip and press the OKKey [MENU].
2. Press the Navigation Key toscroll to the Settings & Toolsmenu and press the OK Key .
3. Press the Navigation Key toscroll to Memory then press theOK Key .
4. Press Phone Memory.
5. Scroll to Memory Usage/ MyPictures/ My Videos/ My Music/My Sounds then press the OK Key
.
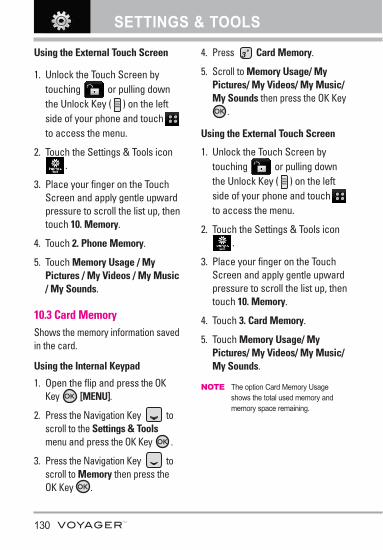
130
SETTINGS & TOOLS
Using the External Touch Screen
1. Unlock the Touch Screen bytouching or pulling downthe Unlock Key ( ) on the leftside of your phone and touch to access the menu.
2. Touch the Settings & Tools icon.
3. Place your finger on the TouchScreen and apply gentle upwardpressure to scroll the list up, thentouch 10. Memory.
4. Touch 2. Phone Memory.
5. Touch Memory Usage / MyPictures / My Videos / My Music/ My Sounds.
10.3 Card MemoryShows the memory information savedin the card.
Using the Internal Keypad
1. Open the flip and press the OKKey [MENU].
2. Press the Navigation Key toscroll to the Settings & Toolsmenu and press the OK Key .
3. Press the Navigation Key toscroll to Memory then press theOK Key .
4. Press Card Memory.
5. Scroll to Memory Usage/ MyPictures/ My Videos/ My Music/My Sounds then press the OK Key
.
Using the External Touch Screen
1. Unlock the Touch Screen bytouching or pulling downthe Unlock Key ( ) on the leftside of your phone and touch to access the menu.
2. Touch the Settings & Tools icon.
3. Place your finger on the TouchScreen and apply gentle upwardpressure to scroll the list up, thentouch 10. Memory.
4. Touch 3. Card Memory.
5. Touch Memory Usage/ MyPictures/ My Videos/ My Music/My Sounds.
NOTE The option Card Memory Usageshows the total used memory andmemory space remaining.
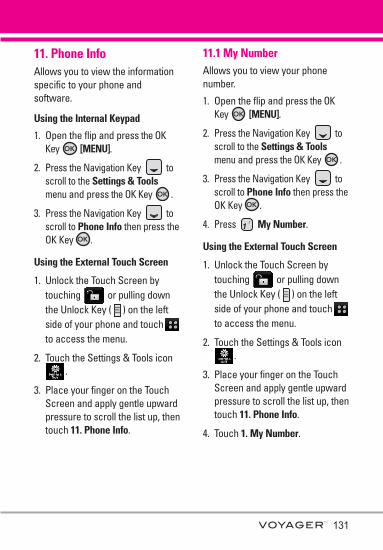
131
11. Phone InfoAllows you to view the informationspecific to your phone andsoftware.
Using the Internal Keypad
1. Open the flip and press the OKKey [MENU].
2. Press the Navigation Key toscroll to the Settings & Toolsmenu and press the OK Key .
3. Press the Navigation Key toscroll to Phone Info then press theOK Key .
Using the External Touch Screen
1. Unlock the Touch Screen bytouching or pulling downthe Unlock Key ( ) on the leftside of your phone and touch to access the menu.
2. Touch the Settings & Tools icon.
3. Place your finger on the TouchScreen and apply gentle upwardpressure to scroll the list up, thentouch 11. Phone Info.
11.1 My NumberAllows you to view your phonenumber.
1. Open the flip and press the OKKey [MENU].
2. Press the Navigation Key toscroll to the Settings & Toolsmenu and press the OK Key .
3. Press the Navigation Key toscroll to Phone Info then press theOK Key .
4. Press My Number.
Using the External Touch Screen
1. Unlock the Touch Screen bytouching or pulling downthe Unlock Key ( ) on the leftside of your phone and touch to access the menu.
2. Touch the Settings & Tools icon.
3. Place your finger on the TouchScreen and apply gentle upwardpressure to scroll the list up, thentouch 11. Phone Info.
4. Touch 1. My Number.
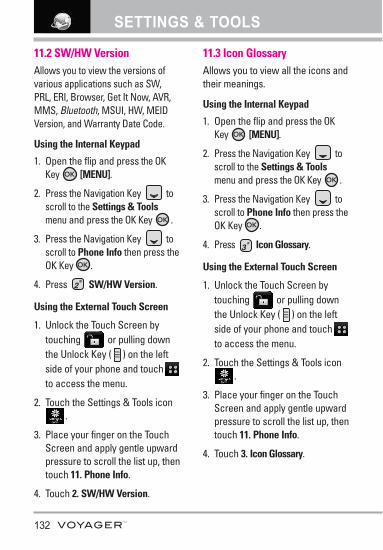
132
SETTINGS & TOOLS
11.2 SW/HW VersionAllows you to view the versions ofvarious applications such as SW,PRL, ERI, Browser, Get It Now, AVR,MMS, Bluetooth, MSUI, HW, MEIDVersion, and Warranty Date Code.
Using the Internal Keypad
1. Open the flip and press the OKKey [MENU].
2. Press the Navigation Key toscroll to the Settings & Toolsmenu and press the OK Key .
3. Press the Navigation Key toscroll to Phone Info then press theOK Key .
4. Press SW/HW Version.
Using the External Touch Screen
1. Unlock the Touch Screen bytouching or pulling downthe Unlock Key ( ) on the leftside of your phone and touch to access the menu.
2. Touch the Settings & Tools icon.
3. Place your finger on the TouchScreen and apply gentle upwardpressure to scroll the list up, thentouch 11. Phone Info.
4. Touch 2. SW/HW Version.
11.3 Icon GlossaryAllows you to view all the icons andtheir meanings.
Using the Internal Keypad
1. Open the flip and press the OKKey [MENU].
2. Press the Navigation Key toscroll to the Settings & Toolsmenu and press the OK Key .
3. Press the Navigation Key toscroll to Phone Info then press theOK Key .
4. Press Icon Glossary.
Using the External Touch Screen
1. Unlock the Touch Screen bytouching or pulling downthe Unlock Key ( ) on the leftside of your phone and touch to access the menu.
2. Touch the Settings & Tools icon.
3. Place your finger on the TouchScreen and apply gentle upwardpressure to scroll the list up, thentouch 11. Phone Info.
4. Touch 3. Icon Glossary.
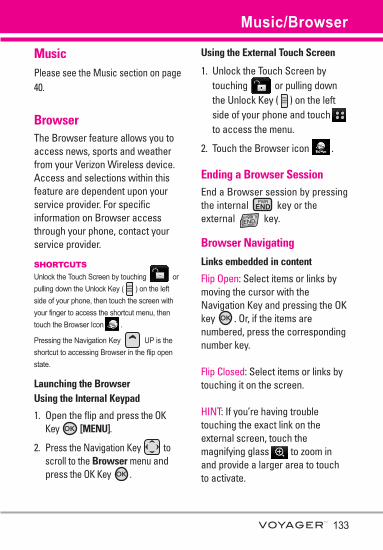
133
MusicPlease see the Music section on page40.
BrowserThe Browser feature allows you toaccess news, sports and weatherfrom your Verizon Wireless device.Access and selections within thisfeature are dependent upon yourservice provider. For specificinformation on Browser accessthrough your phone, contact yourservice provider.
SHORTCUTS
Unlock the Touch Screen by touching orpulling down the Unlock Key ( ) on the leftside of your phone, then touch the screen withyour finger to access the shortcut menu, thentouch the Browser Icon .
Pressing the Navigation Key UP is theshortcut to accessing Browser in the flip openstate.
Launching the BrowserUsing the Internal Keypad
1. Open the flip and press the OKKey [MENU].
2. Press the Navigation Key toscroll to the Browser menu andpress the OK Key .
Using the External Touch Screen
1. Unlock the Touch Screen bytouching or pulling downthe Unlock Key ( ) on the leftside of your phone and touch to access the menu.
2. Touch the Browser icon .
Ending a Browser SessionEnd a Browser session by pressingthe internal key or theexternal key.
Browser Navigating
Links embedded in content
Flip Open: Select items or links bymoving the cursor with theNavigation Key and pressing the OKkey . Or, if the items arenumbered, press the correspondingnumber key.
Flip Closed: Select items or links bytouching it on the screen.
HINT: If you’re having troubletouching the exact link on theexternal screen, touch themagnifying glass to zoom inand provide a larger area to touchto activate.
Music/Browser
134
Browser
Scrolling / Fast Scrolling
Flip Open: Use the Navigation Keyto scroll through the content.
Individual presses move a line at atime, or press and hold to movequickly up or down on the screen.
Flip Closed: Use your fingertip togently move the screen contents inthe direction you move your finger.How quickly you move your fingerdetermines the quickness of thescroll.
PanningPanning is when you moverandomly around in screen contentby moving fingertip (or pen-likestylus) to the area they want to see(only available when the flip isclosed).
CAUTION Do not use a sharp item for yourpen-like stylus because it could scratch yourscreen.
Return to Home Page
Flip Open: Press and hold orpress the Right Soft Key [Menu], then press Home.
Flip Closed: Touch , thentouch 7. Home.
Using the Browser Menu
Flip Open: Press the Right Soft Key[Menu] to view Browser
choices.
Flip Closed: Touch to view.
Items of Browser Menu
NOTE You may have to scroll down to seesome of the menu items listed below.
l Full Screen View Use the wholescreen including the annuciatorand command bar area to viewpages on both internal andexternal screens. You can get thecommand bar by touching anempty spot on the external screenand by pressing the Right Soft Keyon the internal screen.
l Go to WWW Allows entry of Webpage to access a specific Webpage.
l Favorites You can add bookmarks.l Display Rendering Allows mode
selection that changes the layoutof contents.
l Zoom Allows you to zoom thescreen in or out. Use the bar
to adjust the zoom. The bar fades out on the screenwithin several seconds.
l Refresh Allows you to reload thecurrent Web page.
l Home Returns to Home Page.
Menu
Menu
135
l Send URL Allows you to send thelink of the current page via a textmessage.
l Settings Allows you to set valuesabout browser features.Homepage Set the selected pageas Home Page.Display Set a Thumbnail option orscrolling. JavaScript Select On or Off.Timer Set the duration of each keypress or connection.Encryption Displays theauthenticaton setting menu andcertificates in device.
l Manage Memory Managesmemory used by browser.
l Information Show URL Redisplays currentWeb page.History Displays list of visited Webpages.About Displays the currentbrowser information.
Settings for Display Rendering inBrowser Menu
l SSttaannddaarrdd: Displays a standardbrowser screen with vertical andhorizontal page navigation.
l SSccrreeeenn OOppttiimmiizzeedd: Displaysvertically aligned contents of theWeb page which fit the size ofthe screen. Allows vertical
navigation only.l TTeexxtt OOnnllyy: Displays only text and
excludes images used in theWeb page.
Using Thumbnail Option inBrowser Menu
The entire outline of the Web pageis displayed in the corner, whichallows you to find out where youare on the page and move to whereyou want to go on the Web page.
To change the Thumbnail Optionsetting:
1. Open the flip and press theNavigation Key Up forlaunching the browser.
2. Press the Right Soft Key [MENU].
3. Press the Navigation Key toscroll through the Browser menuand press the OK Key .
4. Press to select Settings ->Display -> Thumbnail.
OR
1. Unlock the Touch Screen bytouching or pulling downthe Unlock Key ( ) on the leftside of your phone and touch to access the menu.
136
Browser
2. Touch the Browser icon .
3. Touch .
4. Use your fingertip to scroll thescreen upward, then touch
-> ->.
TIPTo access thumbnail when the option is set toOff, change settings by touching Menu ->Settings -> Display -> Thumbnail -> On orAuto.
l OOnn: thumbnail screen image isalways displayed in one cornerof the screen.
l OOffff: thumbnail screen image isnever displayed on the screen(by default).
l AAuuttoo: thumbnail screen image isdisplayed whenever a spot istouched on the screen or fingermoves up/ down softly on theright side of the screen.
Soft Keys
Soft Keys help to navigate or selectspecial functions associated withthe screen when using the internalscreen. Soft Keys can change foreach page and depend on thehighlighted item.
l Left Soft KeyThe Left Soft Key is used
primarily to return to the previousscreen.
l Center Soft KeyThe Center Soft Key [OK] is usedprimarily for selecting the itemcurrently indicated (highlighted).
l Right Soft KeyThe Right Soft Key is usedprimarily for a menu of secondaryoptions specific to the currentselection.
NOTE The external screen has similar SoftKey choices positioned at the bottomof the screen. Simply touch to activatethem.
Entering/Deleting Text, Numbers orSymbols
Flip Open: Use the QWERTYkeyboard to enter text. Press to delete.
Flip Closed: When text, numbers orsymbols need to be entered on theexternal screen, a Touch Keypadwill pop up. Simply touch thecharacters you want and touch
to delete.
TIP When you tap in an entry field fromthe Touch Screen, you will use atouch QWERTY® keypad.
CLR
ThumbnailDisplaySettings
Menu
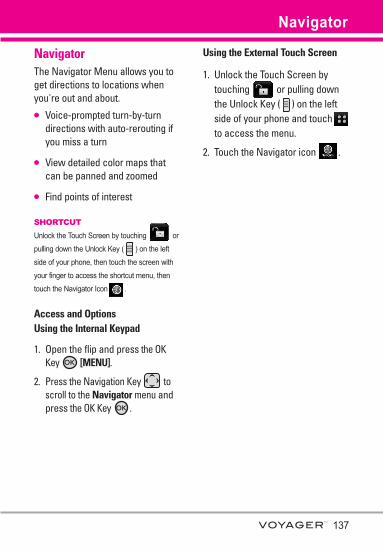
137
NavigatorThe Navigator Menu allows you toget directions to locations whenyou're out and about. l Voice-prompted turn-by-turn
directions with auto-rerouting ifyou miss a turn
l View detailed color maps thatcan be panned and zoomed
l Find points of interest
SHORTCUT
Unlock the Touch Screen by touching or
pulling down the Unlock Key ( ) on the left
side of your phone, then touch the screen with
your finger to access the shortcut menu, then
touch the Navigator Icon .
Access and OptionsUsing the Internal Keypad
1. Open the flip and press the OKKey [MENU].
2. Press the Navigation Key toscroll to the Navigator menu andpress the OK Key .
Using the External Touch Screen
1. Unlock the Touch Screen bytouching or pulling downthe Unlock Key ( ) on the leftside of your phone and touch to access the menu.
2. Touch the Navigator icon .
Navigator
138
Safety
TTIIAA SSaaffeettyyIInnffoorrmmaattiioonnThe following is the complete TIASafety Information for wirelesshandheld phones.
Exposure to Radio FrequencySignal
Your wireless handheld portablephone is a low power radiotransmitter and receiver. When ON,it receives and sends out RadioFrequency (RF) signals.In August, 1996, the FederalCommunications Commissions(FCC) adopted RF exposureguidelines with safety levels forhandheld wireless phones. Thoseguidelines are consistent with thesafety standards previously set byboth U.S. and internationalstandards bodies:
ANSI C95.1 (1992) *
NCRP Report 86 (1986)
ICNIRP (1996)* American National StandardsInstitute; National Council onRadiation Protection andMeasurements; InternationalCommission on Non-IonizingRadiation Protection
Those standards were based oncomprehensive and periodicevaluations of the relevantscientific literature. For example,over 120 scientists, engineers, andphysicians from universities,government health agencies, andindustry reviewed the availablebody of research to develop theANSI Standard (C95.1).The design of your phonecomplies with the FCCguidelines (and thosestandards).
Antenna Care
Use only the supplied or anapproved replacement antenna.Unauthorized antennas,modifications, or attachments coulddamage the phone and may violateFCC regulations.
Phone Operation
NORMAL POSITION: Hold thephone as you would any othertelephone with the antenna pointedup and over your shoulder.
139
Tips on Efficient Operation
For your phone to operate mostefficiently:Don’t touch the antennaunnecessarily when the phone is inuse. Contact with the antennaaffects call quality and may causethe phone to operate at a higherpower level than otherwise needed.
Driving
Check the laws and regulations onthe use of wireless phones in theareas where you drive and alwaysobey them. Also, if using yourphone while driving, please observethe following:l Give full attention to driving --
driving safely is your firstresponsibility;
l Use hands-free operation, ifavailable;
l Pull off the road and park beforemaking or answering a call ifdriving conditions or the lawrequire it.
Electronic Devices
Most modern electronic equipmentis shielded from RF signals.However, certain electronicequipment may not be shielded
against the RF signals from yourwireless phone.
Pacemakers
The Health Industry ManufacturersAssociation recommends that aminimum separation of six (6)inches be maintained between ahandheld wireless phone and apacemaker to avoid potentialinterference with the pacemaker.These recommendations areconsistent with the independentresearch by and recommendationsof Wireless Technology Research.Persons with pacemakers:l Should ALWAYS keep the phone
more than six (6) inches fromtheir pacemaker when the phoneis turned ON;
l Should not carry the phone in abreast pocket;
l Should use the ear opposite thepacemaker to minimize the potential forinterference;
l Should turn the phone OFFimmediately if there is anyreason to suspect thatinterference is taking place.
140
Safety
Hearing Aids
Some digital wireless phones mayinterfere with some hearing aids. Inthe event of such interference, youmay want to consult your serviceprovider (or call the customerservice line to discuss alternatives).
Other Medical Devices and HealthCare Facilities
If you use any other personalmedical device, consult themanufacturer of your device todetermine if it is adequatelyshielded from the external RFenergy. Your physician may be ableto assist you in obtaining thisinformation. Turn your phone OFF in health carefacilities when any regulationsposted in these areas instruct youto do so. Hospitals or health carefacilities may use equipment thatcould be sensitive to the externalRF energy.
Vehicles
RF signals may affect improperlyinstalled or inadequately shieldedelectronic systems in motorvehicles. Check with themanufacturer or its representativeregarding your vehicle. You should
also consult the manufacturer ofany equipment that has been addedto your vehicle.
Aircraft
FCC regulations prohibit using yourphone while in the air. Switch OFFyour phone before boarding anaircraft.
Blasting Areas
To avoid interfering with blastingoperations, turn your phone OFFwhen in a “blasting area” or inareas posted: “Turn off two-wayradio”. Obey all signs andinstructions.
Potentially Explosive Atmosphere
Turn your phone OFF when in anyarea with a potentially explosiveatmosphere and obey all signs andinstructions. Sparks in such areascould cause an explosion or fireresulting in bodily injury or evendeath.Areas with a potentially explosiveatmosphere are often, but notalways marked clearly. Potentialareas may include: fueling areas(such as gasoline stations); belowdeck on boats; fuel or chemicaltransfer or storage facilities;

141
vehicles using liquefied petroleumgas (such as propane or butane);areas where the air containschemicals or particles (such asgrain, dust, or metal powders); andany other area where you wouldnormally be advised to turn off yourvehicle engine.
For Vehicles Equipped with an AirBag
An air bag inflates with great force.DO NOT place objects, includingeither installed or portable wirelessequipment, in the area over the airbag or in the air bag deploymentarea. If in-vehicle wirelessequipment is improperly installedand the air bag inflates, seriousinjury could result.
SSaaffeettyy IInnffoorrmmaattiioonnPlease read and observe thefollowing information for safe andproper use of your phone and toprevent damage. Also, keep theuser guide in an accessible place atall times after reading it.
Violation of theinstructions may
cause minor or serious damage tothe product.
l Do not disassemble or opencrush, bend or deform, punctureor shred.
l Do not modify or remanufacture,attempt to insert foreign objectsinto the battery, immerse orexpose to water or other liquids,expose to fire, explosion or otherhazard.
l Only use the battery for thesystem for which it is specified.
l Only use the battery with acharging system that has beenqualified with the system perIEEE-Std-1725-2006. Use of anunqualified battery or chargermay present a risk of fire,explosion, leakage, or otherhazard.
l Do not short circuit a battery orallow metallic conductiveobjects to contact batteryterminals.
l Replace the battery only withanother battery that has beenqualified with the system per thisstandard, IEEE-Std-1725-2006.Use of an unqualified batterymay present a risk of fire,explosion, leakage or otherhazard.
Caution
142
Safetyl Promptly dispose of used
batteries in accordance withlocal regulations.
l Battery usage by children shouldbe supervised.
l Avoid dropping the phone orbattery. If the phone or battery isdropped, especially on a hardsurface, and the user suspectsdamage, take it to a servicecenter for inspection.
l At least, one of theAuthentication methods may beimplemented. (e.g. H/W, S/W,Mechanical, Hologram, etc.)
l Improper battery use may resultin a fire, explosion or otherhazard.
Charger and Adapter Safety
l The charger and adapter areintended for indoor use only.
l Insert the battery pack chargervertically into the wall powersocket.
l Only use the approved batterycharger. Otherwise, you maycause serious damage to yourphone.
l Use the correct adapter for yourphone when using the batterypack charger abroad.
Battery Information and Care
l Please dispose of your batteryproperly or take it to your localwireless carrier for recycling.
l The battery doesn’t need to beempty before recharging.
l Use only LG-approved chargersspecific to your phone modelsince they are designed tomaximize battery life.
l Do not disassemble or short-circuit the battery.
l Keep the battery’s metalcontacts clean.
l Replace the battery when it nolonger provides acceptableperformance. The battery can berecharged several hundred timesbefore replacement.
l Recharge the battery after longperiods of non-use to maximizebattery life.
l Battery life will vary due tousage patterns andenvironmental conditions.
143
l Use of extended backlighting,Browser, and data connectivitykits affect battery life and talk/standby times.
l The self-protection function ofthe battery cuts the power of thephone when its operation is in anabnormal state. In this case,remove the battery from thephone, reinstall it, and turn thephone on.
Explosion, Shock, and Fire Hazards
l Do not put your phone in a placesubject to excessive dust andkeep the minimum requireddistance between the powercord and heat sources.
l Unplug the power cord prior tocleaning your phone, and cleanthe power plug pin when it’sdirty.
l When using the power plug,ensure that it’s firmly connected.If not, it may cause excessiveheat or fire.
l If you put your phone in a pocketor bag without covering thereceptacle of the phone (powerplug pin), metallic articles (suchas a coin, paperclip or pen) mayshort-circuit the phone. Always
cover the receptacle when not inuse.
l Don’t short-circuit the battery.Metallic articles such as a coin,paperclip or pen in your pocketor bag may short-circuit the +and – terminals of the battery(metal strips on the battery) uponmoving. Short-circuit of theterminal may damage the batteryand cause an explosion.
General Notice
l Using a damaged battery orplacing a battery in your mouthmay cause serious injury.
l Do not place items containingmagnetic components such as acredit card, phone card, bankbook, or subway ticket near yourphone. The magnetism of thephone may damage the datastored in the magnetic strip.
l Talking on your phone for a longperiod of time may reduce callquality due to heat generatedduring use.
l When the phone is not used fora long period time, store it in asafe place with the power cordunplugged.
144
Safetyl Using the phone in proximity to
receiving equipment (i.e., TV orradio) may cause interference tothe phone.
l Do not use the phone if theantenna is damaged. If adamaged antenna contacts skin,it may cause a slight burn.Please contact an LG AuthorizedService Center to replace thedamaged antenna.
l Do not immerse your phone inwater. If this happens, turn it offimmediately and remove thebattery. If the phone does notwork, take it to an LG AuthorizedService Center.
l Do not paint your phone.l The data saved in your phone
might be deleted due to carelessuse, repair of the phone, orupgrade of the software. Pleasebackup your important phonenumbers. (Ringtones, textmessages, voice messages,pictures, and videos could alsobe deleted.) The manufacturer isnot liable for damage due to theloss of data.
l When you use the phone inpublic places, set the ringtone tovibration so you don't disturbothers.
l Do not turn your phone on or offwhen putting it to your ear.
l Use accessories, such asearphones and headsets, withcaution. Ensure that cables aretucked away safely and do nottouch the antenna unnecessarily.
CCaauuttiioonn:: AAvvooiidd ppootteennttiiaallhheeaarriinngg lloossss..Prolonged exposure to loud sounds(including music) is the mostcommon cause of preventablehearing loss. Some scientificresearch suggests that usingportable audio devices, such asportable music players and cellulartelephones, at high volume settingsfor long durations may lead topermanent noise induced hearingloss. This includes the use ofheadphones (including headsets,earbuds and Bluetooth® or otherwireless devices). Exposure to veryloud sound has also beenassociated in some studies with
145
tinnitus (a ringing in the ear),hypersensitivity to sound anddistorted hearing. Individualsusceptibility to noise-inducedhearing loss and other potentialhearing problems varies.The amount of sound produced bya portable audio device variesdepending on the nature of thesound, the device, the devicesettings and the headphones. Youshould follow some commonsenserecommendations when using anyportable audio device:l Set the volume in a quiet
environment and select thelowest volume at which you canhear adequately.
l When using headphones, turnthe volume down if you cannothear the people speaking nearyou or if the person sitting nextto you can hear what you arelistening to.
l Do not turn the volume up toblock out noisy surroundings. Ifyou choose to listen to yourportable device in a noisyenvironment, use noise-cancelling headphones to blockout background environmentalnoise.
l Limit the amount of time youlisten. As the volume increases,less time is required before yourhearing could be affected.
l Avoid using headphones afterexposure to extremely loudnoises, such as rock concerts,that might cause temporaryhearing loss. Temporary hearingloss might cause unsafe volumesto sound normal.
l Do not listen at any volume thatcauses you discomfort. If youexperience ringing in your ears,hear muffled speech orexperience any temporaryhearing difficulty after listeningto your portable audio device,discontinue use and consult yourdoctor.
You can obtain additionalinformation on this subject from thefollowing sources:
American Academy of Audiology11730 Plaza American Drive, Suite300Reston, VA 20190Voice: (800) 222-2336Email: [email protected]: www.audiology.org

146
Safety
National Institute on Deafness andOther Communication DisordersNational Institutes of Health31 Center Drive, MSC 2320Bethesda, MD USA 20892-2320Voice: (301) 496-7243Email: [email protected]:http://www.nidcd.nih.gov/health/hearing
National Institute for OccupationalSafety and HealthHubert H. Humphrey Bldg.200 Independence Ave., SWWashington, DC 20201Voice: 1-800-35-NIOSH (1-800-356-4674)Internet:http://www.cdc.gov/niosh/topics/noise/default.html
FFDDAA CCoonnssuummeerrUUppddaattee
The U.S. Food and DrugAdministration’s Centerfor Devices and
Radiological Health ConsumerUpdate on Mobile Phones:
1. Do wireless phones pose ahealth hazard?
The available scientific evidencedoes not show that any healthproblems are associated with usingwireless phones. There is no proof,however, that wireless phones areabsolutely safe. Wireless phonesemit low levels of Radio Frequency(RF) energy in the microwave rangewhile being used. They also emitvery low levels of RF when instandby mode. Whereas high levelsof RF can produce health effects(by heating tissue), exposure to lowlevel RF that does not produceheating effects causes no knownadverse health effects. Manystudies of low level RF exposureshave not found any biologicaleffects. Some studies havesuggested that some biologicaleffects may occur, but suchfindings have not been confirmedby additional research. In some
147
cases, other researchers have haddifficulty in reproducing thosestudies, or in determining thereasons for inconsistent results.
2. What is the FDA's roleconcerning the safety of wirelessphones?
Under the law, the FDA does notreview the safety of radiation-emitting consumer products suchas wireless phones before they canbe sold, as it does with new drugsor medical devices. However, theagency has authority to take actionif wireless phones are shown toemit Radio Frequency (RF) energyat a level that is hazardous to theuser. In such a case, the FDA couldrequire the manufacturers ofwireless phones to notify users ofthe health hazard and to repair,replace, or recall the phones sothat the hazard no longer exists.Although the existing scientific datadoes not justify FDA regulatoryactions, the FDA has urged thewireless phone industry to take anumber of steps, including thefollowing:l Support needed research into
possible biological effects of RFof the type emitted by wirelessphones;
l Design wireless phones in a waythat minimizes any RF exposureto the user that is not necessaryfor device function; and
l Cooperate in providing users ofwireless phones with the bestpossible information on possibleeffects of wireless phone use onhuman health.
The FDA belongs to an interagencyworking group of the federalagencies that have responsibilityfor different aspects of RF safety toensure coordinated efforts at thefederal level. The followingagencies belong to this workinggroup:l National Institute for
Occupational Safety and Health
l Environmental ProtectionAgency
l Occupational Safety and HealthAdministration
l National Telecommunicationsand Information Administration
The National Institutes of Healthparticipates in some interagencyworking group activities, as well.The FDA shares regulatoryresponsibilities for wireless phoneswith the Federal CommunicationsCommission (FCC). All phones that
148
Safety
are sold in the United States mustcomply with FCC safety guidelinesthat limit RF exposure. The FCCrelies on the FDA and other healthagencies for safety questions aboutwireless phones.The FCC also regulates the basestations that the wireless phonenetworks rely upon. While thesebase stations operate at higherpower than do the wireless phonesthemselves, the RF exposures thatpeople get from these base stationsare typically thousands of timeslower than those they can get fromwireless phones. Base stations arethus not the subject of the safetyquestions discussed in thisdocument.
3. What kinds of phones are thesubject of this update?
The term “wireless phone” refershere to handheld wireless phoneswith built-in antennas, often called“cell”, “mobile”, or “PCS” phones.These types of wireless phones canexpose the user to measurableRadio Frequency (RF) energybecause of the short distancebetween the phone and the user’shead. These RF exposures are limited byFCC safety guidelines that were
developed with the advice of theFDA and other federal health andsafety agencies. When the phone islocated at greater distances fromthe user, the exposure to RF isdrastically lower because aperson's RF exposure decreasesrapidly with increasing distancefrom the source. The so-called“cordless phones,” which have abase unit connected to thetelephone wiring in a house,typically operate at far lower powerlevels, and thus produce RFexposures far below the FCC safetylimits.
4. What are the results of theresearch done already?
The research done thus far hasproduced conflicting results, andmany studies have suffered fromflaws in their research methods.Animal experiments investigatingthe effects of Radio Frequency (RF)energy exposures characteristic ofwireless phones have yieldedconflicting results that often cannotbe repeated in other laboratories. Afew animal studies, however, havesuggested that low levels of RFcould accelerate the developmentof cancer in laboratory animals.However, many of the studies that
149
showed increased tumordevelopment used animals that hadbeen genetically engineered ortreated with cancer-causingchemicals so as to be pre-disposedto develop cancer in the absence ofRF exposure. Other studies exposedthe animals to RF for up to 22 hoursper day. These conditions are notsimilar to the conditions underwhich people use wireless phones,so we do not know with certaintywhat the results of such studiesmean for human health. Three largeepidemiology studies have beenpublished since December 2000.Between them, the studiesinvestigated any possibleassociation between the use ofwireless phones and primary braincancer, glioma, meningioma, oracoustic neuroma, tumors of thebrain or salivary gland, leukemia, orother cancers. None of the studiesdemonstrated the existence of anyharmful health effects fromwireless phone RF exposures.However, none of the studies cananswer questions about long-termexposures, since the averageperiod of phone use in thesestudies was around three years.
5. What research is needed todecide whether RF exposure fromwireless phones poses a healthrisk?
A combination of laboratory studiesand epidemiological studies ofpeople actually using wirelessphones would provide some of thedata that are needed. Lifetimeanimal exposure studies could becompleted in a few years. However,very large numbers of animalswould be needed to provide reliableproof of a cancer promoting effect,if one exists. Epidemiologicalstudies can provide data that isdirectly applicable to humanpopulations, but ten or more yearsfollow-up may be needed to provideanswers about some health effects,such as cancer. This is because theinterval between the time ofexposure to a cancer-causingagent and the time tumors develop— if they do — may be many, manyyears. The interpretation ofepidemiological studies ishampered by difficulties inmeasuring actual RF exposureduring day-to-day use of wirelessphones. Many factors affect thismeasurement, such as the angle atwhich the phone is held, or whichmodel of phone is used.

150
Safety
6. What is the FDA doing to find outmore about the possible healtheffects of wireless phone RF?
The FDA is working with the U.S.National Toxicology Program andwith groups of investigators aroundthe world to ensure that highpriority animal studies areconducted to address importantquestions about the effects ofexposure to Radio Frequency (RF)energy. The FDA has been a leadingparticipant in the World HealthOrganization International ElectroMagnetic Fields (EMF) Projectsince its inception in 1996. Aninfluential result of this work hasbeen the development of a detailedagenda of research needs that hasdriven the establishment of newresearch programs around theworld. The project has also helpeddevelop a series of publicinformation documents on EMFissues. The FDA and the CellularTelecommunications & InternetAssociation (CTIA) have a formalCooperative Research AndDevelopment Agreement (CRADA)to do research on wireless phonesafety. The FDA provides thescientific oversight, obtaining input
from experts in government,industry, and academicorganizations. CTIA-fundedresearch is conducted throughcontracts with independentinvestigators. The initial researchwill include both laboratory studiesand studies of wireless phoneusers. The CRADA will also includea broad assessment of additionalresearch needs in the context ofthe latest research developmentsaround the world.
7. How can I find out how muchRadio Frequency energy exposure Ican get by using my wirelessphone?
All phones sold in the United Statesmust comply with FederalCommunications Commission (FCC)guidelines that limit RadioFrequency (RF) energy exposures.The FCC established theseguidelines in consultation with theFDA and the other federal healthand safety agencies. The FCC limitfor RF exposure from wirelessphones is set at a SpecificAbsorption Rate (SAR) of 1.6 wattsper kilogram (1.6 W/kg). The FCClimit is consistent with the safetystandards developed by theInstitute of Electrical and Electronic
151
Engineering (IEEE) and the NationalCouncil on Radiation Protection andMeasurement. The exposure limittakes into consideration the body’sability to remove heat from thetissues that absorb energy from thewireless phone and is set wellbelow levels known to have effects.Manufacturers of wireless phonesmust report the RF exposure levelfor each model of phone to the FCC.The FCC website(http://www.fcc.gov/oet/rfsafety)gives directions for locating the FCCidentification number on yourphone so you can find your phone’sRF exposure level in the onlinelisting.
8. What has the FDA done tomeasure the Radio Frequencyenergy coming from wirelessphones?
The Institute of Electrical andElectronic Engineers (IEEE) isdeveloping a technical standard formeasuring the Radio Frequency(RF) energy exposure from wirelessphones and other wirelesshandsets with the participation andleadership of FDA scientists andengineers. The standard,“Recommended Practice forDetermining the Spatial-Peak
Specific Absorption Rate (SAR) inthe Human Body Due to WirelessCommunications Devices:Experimental Techniques”, setsforth the first consistent testmethodology for measuring the rateat which RF is deposited in theheads of wireless phone users. Thetest method uses a tissue-simulating model of the humanhead. Standardized SAR testmethodology is expected to greatlyimprove the consistency ofmeasurements made at differentlaboratories on the same phone.SAR is the measurement of theamount of energy absorbed intissue, either by the whole body ora small part of the body. It ismeasured in watts/kg (ormilliwatts/g) of matter. Thismeasurement is used to determinewhether a wireless phone complieswith safety guidelines.
9. What steps can I take to reducemy exposure to Radio Frequencyenergy from my wireless phone?
If there is a risk from theseproducts — and at this point we donot know that there is — it isprobably very small. But if you areconcerned about avoiding evenpotential risks, you can take a few
152
Safety
simple steps to minimize yourexposure to Radio Frequency (RF)energy. Since time is a key factor inhow much exposure a personreceives, reducing the amount oftime spent using a wireless phonewill reduce RF exposure. If youmust conduct extendedconversations by wireless phoneevery day, you could place moredistance between your body andthe source of the RF, since theexposure level drops offdramatically with distance. Forexample, you could use a headsetand carry the wireless phone awayfrom your body or use a wirelessphone connected to a remoteantenna. Again, the scientific datadoes not demonstrate that wirelessphones are harmful. But if you areconcerned about the RF exposurefrom these products, you can usemeasures like those describedabove to reduce your RF exposurefrom wireless phone use.
10. What about children usingwireless phones?
The scientific evidence does notshow a danger to users of wirelessphones, including children andteenagers. If you want to take stepsto lower exposure to Radio
Frequency (RF) energy, themeasures described above wouldapply to children and teenagersusing wireless phones. Reducingthe time of wireless phone use andincreasing the distance betweenthe user and the RF source willreduce RF exposure. Some groups sponsored by othernational governments have advisedthat children be discouraged fromusing wireless phones at all. Forexample, the government in theUnited Kingdom distributed leafletscontaining such a recommendationin December 2000. They noted thatno evidence exists that using awireless phone causes braintumors or other ill effects. Theirrecommendation to limit wirelessphone use by children was strictlyprecautionary; it was not based onscientific evidence that any healthhazard exists.
11. What about wireless phoneinterference with medicalequipment?
Radio Frequency (RF) energy fromwireless phones can interact withsome electronic devices. For thisreason, the FDA helped develop adetailed test method to measureElectro Magnetic Interference

153
(EMI) of implanted cardiacpacemakers and defibrillators fromwireless telephones. This testmethod is now part of a standardsponsored by the Association forthe Advancement of MedicalInstrumentation (AAMI). The finaldraft, a joint effort by the FDA,medical device manufacturers, andmany other groups, was completedin late 2000. This standard will allowmanufacturers to ensure thatcardiac pacemakers anddefibrillators are safe from wirelessphone EMI.The FDA has tested hearing aids forinterference from handheldwireless phones and helpeddevelop a voluntary standardsponsored by the Institute ofElectrical and Electronic Engineers(IEEE). This standard specifies testmethods and performancerequirements for hearing aids andwireless phones so that nointerference occurs when a personuses a “compatible” phone and a“compatible” hearing aid at thesame time. This standard wasapproved by the IEEE in 2000. The FDA continues to monitor theuse of wireless phones for possibleinteractions with other medicaldevices. Should harmful
interference be found to occur, theFDA will conduct testing to assessthe interference and work toresolve the problem.
12. Where can I find additionalinformation?
For additional information, pleaserefer to the following resources:
FDA web page on wireless phones(http://www.fda.gov/cellphones/)
Federal CommunicationsCommission (FCC) RF SafetyProgram(http://www.fcc.gov/oet/rfsafety)
International Commission on Non-lonizing Radiation Protection(http://www.icnirp.de)
World Health Organization (WHO)International EMF Project(http://www.who.int/emf)
National Radiological ProtectionBoard (UK)(http://www.nrpb.org.uk/)
154
Safety
1100 DDrriivveerr SSaaffeettyy TTiippssYour wireless phone gives you thepowerful ability to communicate byvoice almost anywhere, anytime.An important responsibilityaccompanies the benefits ofwireless phones, one that everyuser must uphold.When operating a car, driving isyour first responsibility. When usingyour wireless phone behind thewheel of a car, practice goodcommon sense and remember thefollowing tips:
1. Get to know your wireless phoneand its features such as speeddial and redial. Carefully readyour instruction manual andlearn to take advantage ofvaluable features most phonesoffer, including automatic redialand memory. Also, work tomemorize the phone keypad soyou can use the speed dialfunction without taking yourattention off the road.
2. When available, use a hands-free device. A number of hands-free wireless phone accessoriesare readily available today.Whether you choose an installed
mounted device for yourwireless phone or a speakerphone accessory, takeadvantage of these devices ifavailable to you.
3. Make sure you place yourwireless phone within easyreach and where you can reachit without removing your eyesfrom the road. If you get anincoming call at an inconvenienttime, if possible, let yourvoicemail answer it for you.
4. Suspend conversations duringhazardous driving conditions orsituations. Let the person you arespeaking with know you aredriving; if necessary, suspendthe call in heavy traffic orhazardous weather conditions.Rain, sleet, snow, and ice can behazardous, but so is heavytraffic. As a driver, your firstresponsibility is to pay attentionto the road.
5. Don’t take notes or look upphone numbers while driving. Ifyou are reading an address bookor business card, or writing a“to-do” list while driving a car,you are not watching where you
155
are going. It is common sense.Do not get caught in adangerous situation because youare reading or writing and notpaying attention to the road ornearby vehicles.
6. Dial sensibly and assess thetraffic; if possible, place callswhen you are not moving orbefore pulling into traffic. Try toplan your calls before you beginyour trip or attempt to coincideyour calls with times you may bestopped at a stop sign, red light,or otherwise stationary. But ifyou need to dial while driving,follow this simple tip -- dial only afew numbers, check the roadand your mirrors, then continue.
7. Do not engage in stressful oremotional conversations thatmay be distracting. Stressful oremotional conversations anddriving do not mix; they aredistracting and even dangerouswhen you are behind the wheelof a car. Make people you aretalking with aware you aredriving and if necessary,suspend conversations whichhave the potential to divert yourattention from the road.
8. Use your wireless phone to callfor help. Your wireless phone isone of the greatest tools you canown to protect yourself and yourfamily in dangerous situations --with your phone at your side,help is only three numbers away.Dial 911 or other localemergency number in the caseof fire, traffic accident, roadhazard, or medical emergency.Remember, it’s a free call on yourwireless phone!
9. Use your wireless phone to helpothers in emergencies. Yourwireless phone provides you aperfect opportunity to be a“Good Samaritan” in yourcommunity. If you see an autoaccident, crime in progress orother serious emergency wherelives are in danger, call 911 orother local emergency number,as you would want others to dofor you.
10. Call roadside assistance or aspecial wireless non-emergencyassistance number whennecessary. Certain situations youencounter while driving mayrequire attention, but are not

156
Safety
urgent enough to merit a call foremergency services. But youcan still use your wirelessphone to lend a hand. If you seea broken-down vehicle posingno serious hazard, a brokentraffic signal, a minor trafficaccident where no one appearsinjured or a vehicle you know tobe stolen, call roadsideassistance or other special non-emergency wireless number.
The above tips are meant asgeneral guidelines. Before decidingto use your mobile device whileoperating a vehicle, it isrecommended that you consultyour applicable jurisdiction’s locallaws or other regulations regardingsuch use. Such laws or otherregulations may prohibit orotherwise restrict the manner inwhich a driver may use his or herphone while operating a vehicle.
CCoonnssuummeerrIInnffoorrmmaattiioonn oonn SSAARR(Specific Absorption Rate)
This Model Phone Meets theGovernment’s Requirements forExposure to Radio Waves. Yourwireless phone is a radiotransmitter and receiver. It isdesigned and manufactured not toexceed the emission limits forexposure to radiofrequency (RF)energy set by the FederalCommunications Commission (FCC)of the U.S. Government. These FCCexposure limits are derived from therecommendations of two expertorganizations, the National Counselon Radiation Protection andMeasurement (NCRP) and theInstitute of Electrical andElectronics Engineers (IEEE). Inboth cases, the recommendationswere developed by scientific andengineering experts drawn fromindustry, government, andacademia after extensive reviewsof the scientific literature related tothe biological effects of RF energy. The exposure Limit for wirelessmobile phones employs a unit ofmeasurement known as theSpecific Absorption Rate, or SAR.The SAR is a measure of the rate of
157
absorption of RF energy by thehuman body expressed in units ofwatts per kilogram (W/kg). The FCCrequires wireless phones to complywith a safety limit of 1.6 watts perkilogram (1.6 W/kg). The FCCexposure limit incorporates asubstantial margin of safety to giveadditional protection to the publicand to account for any variations inmeasurements. Tests for SAR are conducted usingstandard operating positionsspecified by the FCC with the phonetransmitting at its highest certifiedpower level in all tested frequencybands. Although SAR is determinedat the highest certified power level,the actual SAR level of the phonewhile operating can be well belowthe maximum value. Because thephone is designed to operate atmultiple power levels to use onlythe power required to reach thenetwork, in general, the closer youare to a wireless base stationantenna, the lower the poweroutput. Before a phone model is availablefor sale to the public, it must betested and certified to the FCC thatit does not exceed the limitestablished by the government-adopted requirement for safe
exposure. The tests are performedin positions and locations (e.g., atthe ear and worn on the body) asrequired by the FCC for each model. This device was tested for typicalbody-worn operations with theback of the phone kept 0.79 inches(2.0 cm) between the user’s bodyand the back of the phone. Tocomply with FCC RF exposurerequirements, a minimumseparation distance of 0.79 inches(2.0 cm) must be maintainedbetween the user s body and theback of the phone. Third-party belt-clips, holsters, and similaraccessories containing metalliccomponents should not be used.Body-worn accessories that cannotmaintain 0.79 inches (2.0 cm)separation distance between theuser's body and the back of thephone, and have not been testedfor typical body-worn operationsmay not comply with FCC RFexposure limits and should beavoided. The FCC has granted an EquipmentAuthorization for this model phonewith all reported SAR levelsevaluated as in compliance with theFCC RF emission guidelines. The highest SAR value for thismodel phone when tested for use at

158
Safety
the ear is 0.765 W/kg and whenworn on the body, as described inthis user’s manual, is 0.893 W/kg.While there may be differencesbetween SAR levels of variousphones and at various positions,they all meet the governmentrequirement for safe exposure.SAR information on this modelphone is on file with the FCC andcan be found under the DisplayGrant section ofhttp://www.fcc.gov/oet/fccid aftersearching on FCC ID.To find information that pertains to aparticular model phone, this siteuses the phone FCC ID numberwhich is usually printed somewhereon the case of the phone.Sometimes it may be necessary toremove the battery pack to find thenumber. Once you have the FCC IDnumber for a particular phone,follow the instructions on thewebsite and it should providevalues for typical or maximum SARfor a particular phone.
Additional information on SpecificAbsorption Rates (SAR) can befound on the CellularTelecommunications IndustryAssociation (CTIA) website athttp://www.ctia.org/
*In the United States and Canada,the SAR limit for mobile phonesused by the public is 1.6 watts/kg(W/kg) averaged over one gram oftissue. The standard incorporates asubstantial margin of safety to giveadditional protection for the publicand to account for any variations inmeasurements.
FFCCCC HHeeaarriinngg--AAiiddCCoommppaattiibbiilliittyy ((HHAACC))RReegguullaattiioonnss ffoorrWWiirreelleessss DDeevviicceessOn July 10, 2003, the U.S. FederalCommunications Commission (FCC)Report and Order in WT Docket 01-309 modified the exception ofwireless phones under the HearingAid Compatibility Act of 1988 (HACAct) to require digital wirelessphones be compatible with hearing-aids. The intent of the HAC Act is toensure reasonable access totelecommunications services forpersons with hearing disabilities.While some wireless phones areused near some hearing devices(hearing aids and cochlearimplants), users may detect abuzzing, humming, or whining noise.Some hearing devices are more
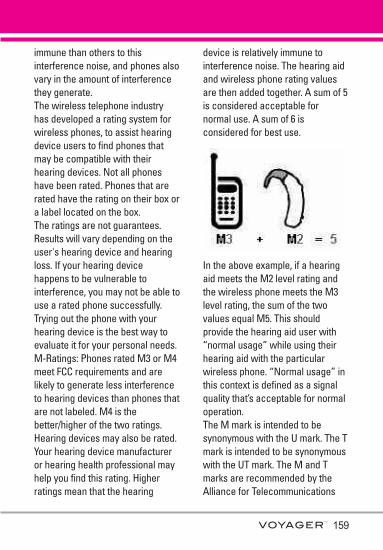
159
immune than others to thisinterference noise, and phones alsovary in the amount of interferencethey generate.The wireless telephone industryhas developed a rating system forwireless phones, to assist hearingdevice users to find phones thatmay be compatible with theirhearing devices. Not all phoneshave been rated. Phones that arerated have the rating on their box ora label located on the box.The ratings are not guarantees.Results will vary depending on theuser's hearing device and hearingloss. If your hearing devicehappens to be vulnerable tointerference, you may not be able touse a rated phone successfully.Trying out the phone with yourhearing device is the best way toevaluate it for your personal needs.M-Ratings: Phones rated M3 or M4meet FCC requirements and arelikely to generate less interferenceto hearing devices than phones thatare not labeled. M4 is thebetter/higher of the two ratings.Hearing devices may also be rated.Your hearing device manufactureror hearing health professional mayhelp you find this rating. Higherratings mean that the hearing
device is relatively immune tointerference noise. The hearing aidand wireless phone rating valuesare then added together. A sum of 5is considered acceptable fornormal use. A sum of 6 isconsidered for best use.
In the above example, if a hearingaid meets the M2 level rating andthe wireless phone meets the M3level rating, the sum of the twovalues equal M5. This shouldprovide the hearing aid user with“normal usage” while using theirhearing aid with the particularwireless phone. “Normal usage” inthis context is defined as a signalquality that’s acceptable for normaloperation.The M mark is intended to besynonymous with the U mark. The Tmark is intended to be synonymouswith the UT mark. The M and Tmarks are recommended by theAlliance for Telecommunications
160
Safety
Industries Solutions (ATIS). The Uand UT marks are referenced inSection 20.19 of the FCC Rules. TheHAC rating and measurementprocedure are described in theAmerican National StandardsInstitute (ANSI) C63.19 standard.When you're talking over the cellphone, it's recommended you'd turnthe BT (Bluetooth) mode off forHAC.
For information about hearing aidsand digital wireless phones
FCC Hearing Aid Compatibility andVolume Controlhttp://www.fcc.gov/cgb/dro/hearing.html
Gallaudet University, RERChttp://tap.gallaudet.edu/DigWireless.KS/DigWireless.htm
HLAA (Hearing Loss Association ofAmerica)http://www.hearingloss.org/learn/cellphonetech.asp
The Hearing Aid Compatibility FCCOrderhttp://hraunfoss.fcc.gov/edocs_public/attachmatch/FCC-03-168A1.pdf
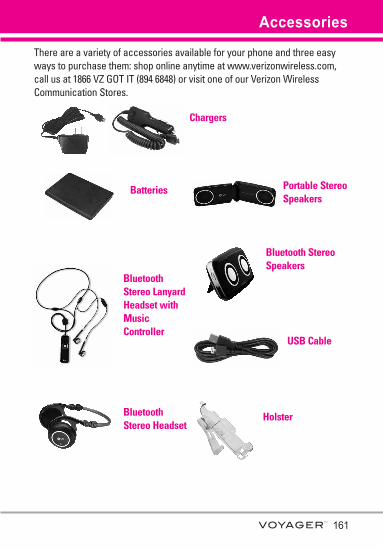
161
Accessories
There are a variety of accessories available for your phone and three easyways to purchase them: shop online anytime at www.verizonwireless.com,call us at 1866 VZ GOT IT (894 6848) or visit one of our Verizon WirelessCommunication Stores.
Chargers
Batteries Portable StereoSpeakers
Bluetooth StereoSpeakers
USB Cable
BluetoothStereo LanyardHeadset withMusicController
BluetoothStereo Headset
Holster
162
LIMITED WARRANTY STATEMENT
1. WHAT THIS WARRANTYCOVERS:
LG offers you a limited warrantythat the enclosed subscriber unitand its enclosed accessories willbe free from defects in material andworkmanship, according to thefollowing terms and conditions:
(1)The limited warranty for theproduct extends for TWELVE (12)MONTHS beginning on the dateof purchase of the product withvalid proof of purchase, orabsent valid proof of purchase,FIFTEEN (15) MONTHS from dateof manufacture as determined bythe unit's manufacture datecode.
(2)The limited warranty extendsonly to the original purchaser ofthe product and is not assignableor transferable to anysubsequent purchaser/end user.
(3)This warranty is good only to theoriginal purchaser of the productduring the warranty period aslong as it is in the U.S., includingAlaska, Hawaii, U.S. Territoriesand Canada.
(4)The external housing andcosmetic parts shall be free ofdefects at the time of shipment
and, therefore, shall not becovered under these limitedwarranty terms.
(5)Upon request from LG, theconsumer must provideinformation to reasonably provethe date of purchase.
(6)The customer shall bear the costof shipping the product to theCustomer Service Department ofLG. LG shall bear the cost ofshipping the product back to theconsumer after the completion ofservice under this limitedwarranty.
2. WHAT THIS WARRANTY DOESNOT COVER:
(1)Defects or damages resultingfrom use of the product in otherthan its normal and customarymanner.
(2)Defects or damages fromabnormal use, abnormalconditions, improper storage,exposure to moisture ordampness, unauthorizedmodifications, unauthorizedconnections, unauthorizedrepair, misuse, neglect, abuse,accident, alteration, improperinstallation, or other acts which
163
are not the fault of LG, includingdamage caused by shipping,blown fuses, spills of food orliquid.
(3)Breakage or damage toantennas unless caused directlyby defects in material orworkmanship.
(4)That the Customer ServiceDepartment at LG was notnotified by consumer of thealleged defect or malfunction ofthe product during the applicablelimited warranty period.
(5)Products which have had theserial number removed or madeillegible.
(6)This limited warranty is in lieu ofall other warranties, express orimplied either in fact or byoperations of law, statutory orotherwise, including, but notlimited to any implied warranty ofmarketability or fitness for aparticular use.
(7)Damage resulting from use ofnon LG approved accessories.
(8)All plastic surfaces and all otherexternally exposed parts that arescratched or damaged due tonormal customer use.
(9) Products operated outsidepublished maximum ratings.
(10) Products used or obtained in arental program.
(11) Consumables (such as fuses).
3. WHAT LG WILL DO:
LG will, at its sole option, eitherrepair, replace or refund thepurchase price of any unit that doesnot conform to this limited warranty.LG may choose at its option to usefunctionally equivalent re-conditioned, refurbished or newunits or parts or any units. Inaddition, LG will not re-install orback-up any data, applications orsoftware that you have added toyour phone. It is thereforerecommended that you back-upany such data or information priorto sending the unit to LG to avoidthe permanent loss of suchinformation.
4. STATE LAW RIGHTS:
No other express warranty isapplicable to this product. THEDURATION OF ANY IMPLIEDWARRANTIES, INCLUDING THEIMPLIED WARRANTY OFMARKETABILITY, IS LIMITED TO
164
LIMITED WARRANTY STATEMENT
THE DURATION OF THE EXPRESSWARRANTY HEREIN. LG SHALLNOT BE LIABLE FOR THE LOSS OFTHE USE OF THE PRODUCT,INCONVENIENCE, LOSS OR ANYOTHER DAMAGES, DIRECT ORCONSEQUENTIAL, ARISING OUTOF THE USE OF, OR INABILITY TOUSE, THIS PRODUCT OR FOR ANYBREACH OF ANY EXPRESS ORIMPLIED WARRANTY, INCLUDINGTHE IMPLIED WARRANTY OFMARKETABILITY APPLICABLE TOTHIS PRODUCT.Some states do not allow theexclusive limitation of incidental orconsequential damages orlimitations on how long an impliedwarranty lasts; so these limitationsor exclusions may not apply to you.This warranty gives you specificlegal rights and you may also haveother rights which vary from stateto state.
5. HOW TO GET WARRANTYSERVICE:
To obtain warranty service, pleasecall or fax to the followingtelephone numbers from anywherein the continental United States: Tel. 1-800-793-8896 or Fax. 1-800-448-4026
Or visit http://us.lgservice.com.Correspondence may also bemailed to:LG Electronics Service- MobileHandsets, P.O. Box 240007,Huntsville, AL 35824
DO NOT RETURN YOUR PRODUCTTO THE ABOVE ADDRESS. Pleasecall or write for the location of theLG authorized service centernearest you and for the proceduresfor obtaining warranty claims.
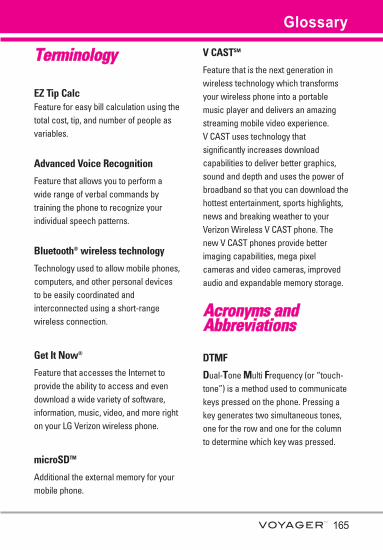
165
TTeerrmmiinnoollooggyy
EZ Tip CalcFeature for easy bill calculation using thetotal cost, tip, and number of people asvariables.
Advanced Voice Recognition
Feature that allows you to perform awide range of verbal commands bytraining the phone to recognize yourindividual speech patterns.
Bluetooth® wireless technology
Technology used to allow mobile phones,computers, and other personal devicesto be easily coordinated andinterconnected using a short-rangewireless connection.
Get It Now®
Feature that accesses the Internet toprovide the ability to access and evendownload a wide variety of software,information, music, video, and more righton your LG Verizon wireless phone.
microSDTM
Additional the external memory for yourmobile phone.
V CASTSM
Feature that is the next generation inwireless technology which transformsyour wireless phone into a portablemusic player and delivers an amazingstreaming mobile video experience. V CAST uses technology thatsignificantly increases downloadcapabilities to deliver better graphics,sound and depth and uses the power ofbroadband so that you can download thehottest entertainment, sports highlights,news and breaking weather to yourVerizon Wireless V CAST phone. Thenew V CAST phones provide betterimaging capabilities, mega pixelcameras and video cameras, improvedaudio and expandable memory storage.
AAccrroonnyymmss aannddAAbbbbrreevviiaattiioonnss
DTMF
Dual-Tone Multi Frequency (or “touch-tone”) is a method used to communicatekeys pressed on the phone. Pressing akey generates two simultaneous tones,one for the row and one for the columnto determine which key was pressed.
Glossary
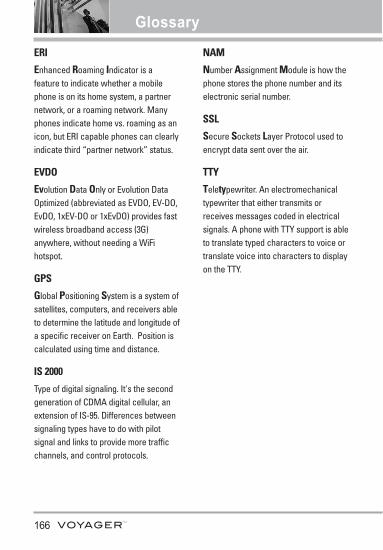
166
Glossary
ERI
Enhanced Roaming Indicator is afeature to indicate whether a mobilephone is on its home system, a partnernetwork, or a roaming network. Manyphones indicate home vs. roaming as anicon, but ERI capable phones can clearlyindicate third “partner network” status.
EVDO
Evolution Data Only or Evolution DataOptimized (abbreviated as EVDO, EV-DO,EvDO, 1xEV-DO or 1xEvDO) provides fastwireless broadband access (3G)anywhere, without needing a WiFihotspot.
GPS
Global Positioning System is a system ofsatellites, computers, and receivers ableto determine the latitude and longitude ofa specific receiver on Earth. Position iscalculated using time and distance.
IS 2000
Type of digital signaling. It's the secondgeneration of CDMA digital cellular, anextension of IS-95. Differences betweensignaling types have to do with pilotsignal and links to provide more trafficchannels, and control protocols.
NAM
Number Assignment Module is how thephone stores the phone number and itselectronic serial number.
SSL
Secure Sockets Layer Protocol used toencrypt data sent over the air.
TTY
Teletypewriter. An electromechanicaltypewriter that either transmits orreceives messages coded in electricalsignals. A phone with TTY support is ableto translate typed characters to voice ortranslate voice into characters to displayon the TTY.
10 Driver Safety Tips 154
A
Accessories 161Add New Device 93Alarm Clock 87Alert Sounds 101All 81Auto NAM 121Auto Retry 123
B
Backlight 105Banner 103Battery Charge Level 25Battery Temperature
Protection 25Bluetooth Menu 92Browser 133
C
Calculator 85Calendar 86Call Settings 122Call Sounds 99Call Waiting 28Card Memory 130Charging the Battery 23Clock Format 110Consumer Information on
SAR 156Contact List 73
D
Dial Fonts 109Dialed 80Display Settings 103Display Themes 108
Drafts 68
E
End Call Options 122Erasing Messages 72Extras 58Ez Tip Calc 90
F
FCC Hearing-AidCompatibility (HAC)Regulations for WirelessDevices 158
FDA Consumer Update 146
G
Games 56GET IT NOW 37Get New Picture 50Get New Ringtones 38Glossary 165
I
Icon Glossary 132Important Safety
Precautions 1In Case of Emergency (ICE)
76Inbox 65
K
Keypad Volume 101
L
Language 113LIMITED WARRANTY
STATEMENT 162Location 113
M
Making Calls 26Master Volume 99Memory 128Menu Fonts 108Menu Tree on the External
Touch Screen 21Menu Tree on the Internal
Screen 19MESSAGING 59Mobile IM 70MSG Settings 70Music 133Music & Tones 37Mute Function 28My Account 83My Music 40My Name Card 77My Number 131My Pictures 51My Ringtones 39My Sounds 42My Videos 52
N
NAM Select 120Navigator 137New Contact 73New Message 59Notepad 90
O
One Touch Dial 125
P
Phone Info 131Phone Memory 129Phone Overview 12
167
Index
Phone Settings 111Picture & Video 44Picture Msg 61Power On/Off 103
R
Received 79Receiving Calls 27Record Video 55Removing the Battery 23
S
Safety Information 141Save Options 129Screen Icons 26Screensaver 107Security 114Sent 66Service Alerts 102Set Shortcut Keys 111SETTINGS & TOOLS 83Shortcut Menu 16Signal Strength 26Sounds Settings 99Speed Dials 75Standalone Mode 111Stopwatch 88SW/HW Version 132Sync Music 42System Select 120
T
Take Picture 54Technical Details 9TIA Safety Information 138Tools 83Tools on the Go 57Touch Settings 127
TTY Mode 124
U
USB Auto Detection 127USB Mass Storage 91
V
V CAST Mobile TV 44V CAST Music 38V CAST Videos 48Vibrate Mode 28Video Msg 63View Timers 82Voice Commands 29, 83,
112Voice Privacy 126Voicemail 69Volume Quick Adjustment
28
W
Wallpaper 106World Clock 89
168
Index

MEMO

MEMO