Universal Remote Model: 39900 & ONA12AV058 PRODUCT …
13
Universal Remote Model: 39900 & ONA12AV058 PRODUCT MANUAL
Transcript of Universal Remote Model: 39900 & ONA12AV058 PRODUCT …

Universal Remote
Model: 39900 & ONA12AV058
PRODUCT MANUAL
2
Congratulations on your purchase of the ONN Universal Remote. This remote is capable of operating thousands of audio/video devices including TVs, DVD players, cable, satellite receivers, and more!
IMPORTANT:SAVE THIS MANUAL FOR FUTURE REFERENCE
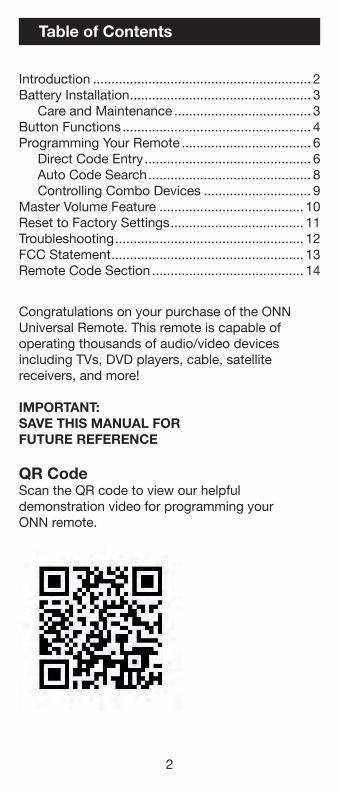
QR CodeScan the QR code to view our helpful demonstration video for programming your ONN remote.
Introduction ........................................................... 2Battery Installation ................................................. 3
Care and Maintenance ..................................... 3Button Functions ................................................... 4Programming Your Remote ................................... 6 Direct Code Entry ............................................. 6 Auto Code Search ............................................ 8 Controlling Combo Devices ............................. 9Master Volume Feature ....................................... 10Reset to Factory Settings .................................... 11Troubleshooting ................................................... 12FCC Statement .................................................... 13Remote Code Section ......................................... 14
Table of Contents

3
Your universal remote requires two (2) AAA Alkaline batteries (not included).
To Install the Batteries:1. Remove the battery compartment cover by
sliding the cover down.
2. Match the (+) and (-) marks on the batteries to the (+) and (-) marks inside the battery compartment, then insert two (2) AAA Alkaline batteries. Be sure to use fresh batteries.
3. Slide the battery compartment cover back into place.
Note: If your remote stops operating properly, replace the batteries with new ones. The remote will retain the codes you have programmed for up to 10 minutes after the batteries are removed.
Battery Precautions: • Do not mix old and new batteries.
• Do not mix alkaline, standard (carbon-zinc), or rechargeable (Ni-Cd, Ni-MH, etc.) batteries.
• Always remove old, weak or worn-out batteries promptly and recycle or dispose of them in accordance with local and national regulations.
Care and Maintenance• Keep the remote away from moisture. If it gets
wet, dry it immediately.
• Use and store the remote at normal household temperatures.
• Use a soft, damp cloth to clean the remote.
• If the remote is not going to be used for a long period of time, remove the batteries from the remote.
• Handle the remote with care.
Battery Installation

4
INPUT Selects the video inputs from available viewing sources.
NUMBERSEnter numbers for direct channel selection.
ON•OFF Turns the device On or Off.
MUTE Turns off the TV sound while the picture remains. In SHIFT mode OK Selects menu items for the device you are controlling.
EXIT Exits On-Screen Menus.
TV, CBL/SAT, VCR/AUX, DVD Selects the device to control.
Red Indicator Light when
any button is pressed.
Button Functions
DOT: Used to select digital channels, for example: 4.1, 9.2
RECORD, PLAY STOP, REW (rewind), FF (fast forward), PAUSE

5
MENU displays the Menu on the TV and
other devices. Use the SHIFT button to access this feature.
? (INFO) displays/selects on-screen channel information, etc.
ENTER For some TV models, used
after direct channel number entry to immediately change
to the selected channel.
VOLUME UP/DOWN Changes the volume
level of the device, normally the TV.
CHANNEL Up/Down Changes the channels. In SHIFT mode, these buttons navigate on-
screen cursors and are used to make
selections.
Button Functions, cont.
SETUP button is used to program the remote.
SHIFT is the alternative function of this button.Use the SHIFT button
to access the Menu and Navigation functions of your
device. To enter the SHIFT mode press this button once. To exit the shift mode, press
the SHIFT button again.NOTE: The red indicator light will blink when the remote is
in SHIFT mode.

6
Programming Your Remote
Your ONN universal remote control is designed to control up to 4 different audio/video devices such as TV, DVD, VCR, satellite, cable and audio using only one remote. To use this remote, you will need to program it to control the devices of your choice. There are two ways to program the remote - direct code entry or auto code search. Direct Code Entry (Recommended)
1. Locate the Remote Code List provided in this manual. Find the DEVICE CATEGORY you wish to program (for example TV, DVD, SAT, AUX) and then find the BRAND of that device. Circle all the codes under that brand. Example: For a GE TV, locate the TV code section then circle all of the GE TV codes.
2. Manually turn on the device you wish to control.
3. Press and hold the SETUP button until the red indicator light stays on (approximately 2 seconds) and then release the SETUP button.
4. Press and release the desired device button on the remote (TV, DVD, SAT, AUX). The red indicator will blink once and then remain on.
5. Enter the first 4-digit code previously found in the code list using the number buttons on the remote. If the code entered is a valid code, the red indicator light will turn off. If the code entered is not a valid code, the red indicator light will flash and remain on allowing you to re-enter the code.
Note: If no buttons are pressed for 35 seconds, the remote will exit the SETUP mode and you will have to start over.

7
Programming Your Remote
6. Point the remote at the device. Press the POWER button—if the device turns off, no further programming is required for that device. If the device does not turn off, return to step 3 and use the next code found in the code list. Continue this process until a code for your device is found.
To view a helpful demonstration video for programming your ONN remote, see QR code on page 2 of this manual.
Programming Notes• If your device does not respond to the remote
after trying all codes listed or your brand is not listed in the code list, use the Auto Code Search method to program your remote.
• Sometimes the first code that “works” with your device may operate only a few functions of your device. There may be another code in the code list that performs more functions. Try other codes from the code list for more functionality.
• You can use any device button to control other devices in your home entertainment system. For example, you can use the AUX device button to control an audio receiver or a DVD, VCR, satellite, etc.
• For combination devices, you may have to enter a code for each device. For example, for a VCR/DVD device, you may have to enter a code for the DVD under the DVD button and enter a code for the VCR using a different device button on the remote.
• Write down the code found to operate your device for future reference.

8
Programming Your Remote
Auto Code SearchThe Auto Code Search searches automatically through all of the codes stored in this remote. Read all the following steps prior to starting the auto search as you will need to be prepared to lock-in the proper code when found.
1. Manually turn on the device you wish to control.
2. Press and hold the SETUP button until the red indicator light stays on (approximately 4 seconds) and then release the button.
3. Press and release the desired device button on the remote (TV, DVD, SAT, AUX). The red indicator will blink once and then remain on.
4. Point the remote at the device and press and release the POWER button (for TV) or PLAY button (for DVD, VCR, etc.) to start the search. The red indicator will flash (approximately every 2 seconds) as the remote searches. Note: The remote must be pointed at the device for the duration of this search.
5. Place your finger on the #1 button so you are prepared to lock-in the code.
6. When the device shuts off or begins playing, press the #1 button to lock-in the code. The red indicator light will turn off. Note: You have approximately two seconds after the device shuts off or begins playing to lock-in the code.
7. Point the remote at the device and check to see if the remote operates the device as desired. If it does, no further programming is required for that device. If it does not, return to step 2 and start the auto search.

9
Programming Your Remote
To view a helpful demonstration video for programming your ONN remote, see QR code on page 2 of this manual.
Programming Notes
• This process may take several minutes as the remote contains many codes.
• The SETUP button can be used during the search process to reverse the direction of the search of the remote codes. For example, if you miss the code for your device and the remote is continuing to search (as indicated by the blinking red light), press the SETUP button and the code search will reverse direction and return to the code.
• When using the Auto Code Search programming method, the device button corresponding to the type of device you want to control must be selected (for example, the TV device button must be selected in step 3 if you want to control a TV, the DVD/VCR device button for a DVD player, etc.)
• Sometimes the first code that “works” with your device may operate only a few functions of your device. There may be another code in the code list that performs more functions. Continue the code search as directed above until the best code is found.
Controlling Combo DevicesSome Combo devices (e.g. TV/VCR, TV/DVD,
DVD/VCR, etc.) will require you to setup up two different Mode buttons to control both parts of the Combo device. For example, if you have a TV/DVD Combo, you might need to set up one code under the TV button to control the TV part AND a separate code (under any other Mode button) to control the DVD part.
10
Master Volume Feature
Master Volume FeatureThe Master Volume Feature allows you to select a single device (TV or audio receiver) that the volume control always controls. For example, the remote can be in TV mode while the volume buttons control the volume on your audio receiver instead of your TV.
Enabling the Master Volume Feature1. Press and hold the SETUP button
until the red indicator stays on (approximately 4 seconds) and then release the button.
2. Press and release desired device button (TV, DVD, SAT, AUX) for the device you wish to setup to control the volume.
3. Press and release the MUTE button.
4. Press and release the VOL + button. The red indicator will blink twice and then go off.
To test the feature put the remote in another mode such as the TV mode if you programmed the audio receiver to be the Master Volume Device. Point the remote at the audio receiver, press and hold either the VOL + or the VOL - button. If the audio receiver volume changes then the remote is programmed correctly. If the TV volume changes and not the audio receiver, you will have to repeat the steps above and test again.
Disabling the Master Volume Feature1. Press and hold the SETUP button
until the red indicator stays on (approximately 4 seconds) and then release the button.

11
2. Press and release the device button (TV, DVD, SAT, AUX) which is programmed to control the Master Volume Feature.
3. Press and release the MUTE button.
4. Press and release the VOL - button. The red indicator light will blink twice and go off.
To make sure the Master Volume Feature is disabled, put the remote in TV mode if you programmed the audio receiver to be the Master Volume Device. Point the remote at the TV and press a volume button. If the volume changes on the TV, the feature is disabled. If the volume on the audio receiver changes, and not the TV, you will have to repeat the steps above and test again.
Reset to Factory Settings1. Press and hold the SETUP button
until the red indicator stays on (approximately 4 seconds) and then release the button.
2. Press and release the OK button.
3. Press and release the number #0 button. The red indicator light will flash twice.
Master Volume Feature, cont.

12
Remote does not operate your device.• Make sure the batteries are fresh and
installed correctly.
• Aim the remote directly at your device, and make sure that there are no obstructions between the remote and device.
• Make sure you select the appropriate device on the remote you wish to control, for example, TV for TV, DVD for DVD, etc.
• Try programming the remote with a different code. See Direct Code Entry section.
• Remote may not be compatible with your device.
Remote does not operate some features of your device.• Sometimes a particular code might operate
a few features but not all. Try programming remote with a different code from the code list. See Direct Code Entry section.
• Remote may not be able to operate all features of your device or button names may be different than that of your original remotes.
Remote Code is not available for a combo device (e.g. TV/VCR, TV/DVD)
• Some Combo devices (e.g. TV/VCR, TV/DVD, DVD/VCR, etc.) will require you to set up two different Mode buttons to control both parts of the Combo device, For example, if you have a TV/DVD Combo, you might need to set up one code under the TV button to control the TV part AND a separate code (under any other Mode button) to control the DVD part.
BEFORE YOU RETURN THIS PRODUCT TO THE STORE, PLEASE VISIT THE WEBSITE www.myOnnRemote.com FOR FURTHER ASSISTANCE; OR CALL (800)-654-8483 FOR TECHNICAL SUPPORT.
Troubleshooting

13
FCC StatementThis device complies with Part 15 of the FCC Rules. Operation is subject to the following two conditions: (1) this device may not cause harmful interference, and (2) this device must accept any interference received, including interference that may cause undesired operation.
Warning: Changes or modifications to this unit not expressly approved by the party responsible for compliance could void the user’s authority to operate the equipment.
NOTE: This equipment has been tested and found to comply with the limits for a Class B digital device, pursuant to Part 15 of the FCC Rules. These limits are designed to provide reasonable protection against harmful interference in a residential installation. This equipment generates, uses and can radiate radio frequency energy and, if not installed and used in accordance with the instructions, may cause harmful interference to radio communications.However, there is no guarantee that interference will not occur in a particular installation. If this equipment does cause harmful interference to radio or television reception, which can be determined by turning the equipment off and on, the user is encouraged to try to correct the interference by one or more of the following measures:• Reorient or relocate the receiving antenna.• Increase the separation between the equipment
and receiver.• Connect the equipment into an outlet on a
circuit different from that to which the receiver is connected.
• Consult the dealer or an experienced radio/TV technician for help.
FCC Statement
Distributed by Wal-Mart Stores, Inc.Bentonville, AR 72716MADE IN CHINA