TWR-KV58F220M Quick Start Guide - NXP … Figure 1: Front side of TWR-KV58F220M Quick Start Guide...
12
TWR-KV58F220M Quick Start Guide Tower System Development Platform for Motor Control
Transcript of TWR-KV58F220M Quick Start Guide - NXP … Figure 1: Front side of TWR-KV58F220M Quick Start Guide...

TWR-KV58F220M Quick Start Guide Tower System Development Platform
for Motor Control

2Figure 1: Front side of TWR-KV58F220M
Quick Start Guide
Get to Know the TWR-KV58F220M BoardCortex M Programming
Header
LEDs
KV58F1M0VLQ22
General Purpose TWRE Connectors
Potentiometer
Open SDA USB Connector
UART Selection Jumpers
User Pushbuttons
LED Jumpers
Reset Button
3
freescale.com
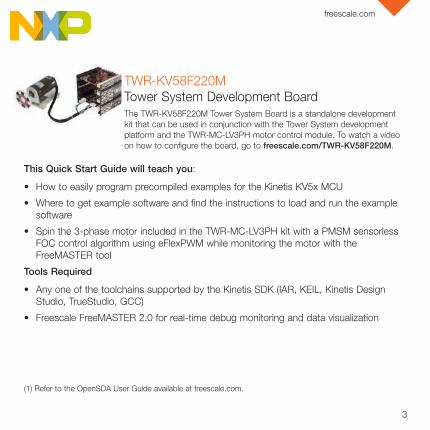
TWR-KV58F220M Tower System Development BoardThe TWR-KV58F220M Tower System Board is a standalone development kit that can be used in conjunction with the Tower System development platform and the TWR-MC-LV3PH motor control module. To watch a video on how to configure the board, go to freescale.com/TWR-KV58F220M.
This Quick Start Guide will teach you:
• How to easily program precompiled examples for the Kinetis KV5x MCU
• Where to get example software and find the instructions to load and run the example software
• Spin the 3-phase motor included in the TWR-MC-LV3PH kit with a PMSM sensorless FOC control algorithm using eFlexPWM while monitoring the motor with the FreeMASTER tool
Tools Required
• Any one of the toolchains supported by the Kinetis SDK (IAR, KEIL, Kinetis Design Studio, TrueStudio, GCC)
• Freescale FreeMASTER 2.0 for real-time debug monitoring and data visualization
(1) Refer to the OpenSDA User Guide available at freescale.com.

Software Installation Instructions
TWR-KV58F220M Features
Download Software and ToolsDownload installation
software and documentation under “Jump Start Your Design” at freescale.com/TWR-KV58F220M.
1
Quick Start Guide
• MKV58F1M0VLQ22 MCU (ARM® Cortex®-M7 220 MHz, 1 MB flash, four 12-bit ADCs up to 5 Msps, 4x FlexTimers and 2x eFlexPWM with 284ps resolution, up to 44x PWM channels, 144 LQFP)
• OpenSDA(1) debug circuit with mini USB connector and virtual serial port
• Four LEDs connected to PWM channels for dimming
• Four pushbuttons for user input or interrupts
• One potentiometer for user input (ADC measurements)
• One combined magnetometer and accelerometer for orientation and motion detection
• Motor control and auxiliary signal connectors
2 Install Software and Tools
• Install an IDE toolchain
IAR Embedded Workbench® for ARM® v7.40.4 or later, www.iar.com/freescale.
Kinetis Design Studio IDE at www.freescale.com/kds.
ARM KEIL v5.15 or later at https://www.keil.com/.
4

5
freescale.com
Atollic TrueStudio at http://www.atollic.com/index.php/truestudio.
ARM GCC at launchpad.net/gcc-arm-embedded.
• Install the mbed serial drivers located at http://developer.mbed.org/media/downloads/drivers/mbedWinSerial_16466.exe.
• Install the Kinetis SDK from www.freescale.com/ksdk.
• Install the free debug monitoring and data visualisation tool Freescale FreeMASTER v2.0, or later at www.freescale.com/FreeMASTER.
3 Default Jumper SettingsSee the default jumper settings
in the table below. Refer to the TWR-KV58F220M User Guide at freescale.com/TWR-KV58F220M for detailed jumper descriptions.
Option Setting
J1 ON
J2 OFF
J3 ON
J4 ON
J7 ON
J8 ON
J9 OFF
J10 ON
J11 1-2
J14 ALL OFF
J17 OFF
Option Setting
J19 ON
J20 ON
J21 ON
J23 2-3
J24 2-3
J25 2-3
J26 1-2
J28 ON
J29 ON
J30 1-2; 3-4; 5-6; 7-8
TWR-KV58F220M Initial Configuration
Option Setting
J1 ON
J2 OFF
J3 ON
J4 ON
J7 ON
J8 ON
J9 OFF
J10 ON
J11 1-2
J14 ALL OFF
J17 OFF
Option Setting
J19 ON
J20 ON
J21 ON
J23 2-3
J24 2-3
J25 2-3
J26 1-2
J28 ON
J29 ON
J30 1-2; 3-4; 5-6; 7-8

TWR-KV58F220M Initial Configuration (cont.)
4 Verification of Jumper Setting
TWR-KV58F220M comes preloaded with the CMSIS-DAP applications (MSD flash programmer and debug) and the bubble_level demo from the Kinetis SDK. Plug in the USB cable and watch LEDs illuminate with the tilt of the board.
5 Program a Precompiled Example Using the OpenSDA MSD Application
1) Connect your TWR-KV58F220M to your host PC.
Once the TWR-KV58F220M is connected to the host PC via the micro AB connector, J22, Windows should detect a new MBED drive.
6
Quick Start Guide
TWR-KV58F220M Tower System Module Demo

7
freescale.com
2) Program a precompiled example for the Kinetis KV5x MCU in the MBED drive, copy any binary file from the precompiled examples folder of the Quick Start Package. The demo will start automatically when the download is complete. To program a new demo, just copy any other binary file.
TWR-KV58F220M Tower System Module Demo (cont.)
6 Debug Your First IAR Project
1) Open the Kinetis SDK Getting Started Guide of your Kinetis SDK installation.
If you have not executed the instructions in Step 2 of this guide, then go back and perform these instructions.
Otherwise, simply navigate to <SDK root directory>/doc. In this folder, there is a document titled “Getting Started with Kinetis SDK (KSDK).” This document has all of the instructions necessary to get started with any toolchain supported by the SDK.
2) Launch the desired toolchain and load an application.
Follow the instructions in the “Run a demo using …” section of the Kinetis SDK guide to load and run the desired application.
TWR-KV58F220M Tower System Module Demo

Running a 3-Phase PMSM Motor
7 TWR-KV58F220M and TWR-MC-LV3PH Set Up
1) Connect the boards and the motor.
Connect TWR-KV58F220M and TWR-MC-LV3PH with the default jumper settings for the Kinetis KV58F220M and the jumper setup shown in the table for the TWR-MC-LV3PH.
Connect the motor to the three-prong connectors (J5) of the motor module.
First, plug the 24V power supply included in the TWR-MC-LV3PH kit into the barrel connector (J1) of the motor module.
Then, connect the USB cable to TWR-KV58F220M and the computer.
Option Setting
J2 1-2
J3 1-2
J10 1-2
J11 1-2
Option Setting
J12 1–2
J13 1-2
J14 1–2
TWR-MC-LV3PH: Jumper Settings
8
Quick Start Guide
R65638
Cross-Out

9
freescale.com
8 Monitor the Project with FreeMASTER
Launch Freescale FreeMASTER 2.0 from the Windows Start menu.
Note: At first start-up, you may have an error message regarding the COM connection.
Open the FreeMASTER project file pmsm_demo_twr-kv58.pmp following the path <TWR-KV58F220M Quick Start Pack root directory>/Freemaster/PMSM_ Sensorless_FOC. The application interface, PMSM Sensorless Vector Control on Kinetis, will appear in FreeMASTER. The speed, position, voltage and current consumption of the motor can be monitored and controlled.

Running a 3-Phase PMSM Motor (cont.)
10
Quick Start Guide
In the Project Options, set the COM port affected to the OpenSDA -CDC Serial Port (info available in Device Manager) and set the baud rate/speed to 19200 bps (check the option “Do not Open Port at Startup” to avoid error messages at FreeMASTER startup).
From the toolbar, select the action File->Start the communication.
Press button SW2 on the TWR-KV58F220M board to spin the motor in the demo mode with the predefined speed profile. Press the SW2 button again to stop running the motor.
Or, in FreeMASTER speedometer or speed selector box, select the requested speed and the motor will spin automatically counterclockwise or clockwise.

11
freescale.com

For more information, visit freescale.com/TWR-KV58F220M, freescale.com/Kinetis or freescale.com/Tower
Freescale and the Freescale logo are trademarks of Freescale Semiconductor, Inc., Reg. U.S. Pat. & Tm. Off. Tower is a trademark of Freescale Semiconductor, Inc. All other product or service names are the property of their respective owners. © 2015 Freescale Semiconductor, Inc.
Doc Number: KINKV5XQSG REV 0 Agile Number: 920-28704 Rev A
SupportVisit freescale.com/support for a list of phone numbers within your region.
WarrantyVisit freescale.com/warranty for complete warranty information.
Get StartedDownload installation software and documentation under “Jump Start Your Design” at freescale.com/TWR-KV58F220M.