IRC Protection Mainstreaming Training Manual - Field Testing Version

Training Manual Good Water, Sanitation & Environmental Hygiene Practices for Primary Schools

Acknowledgements
The development of this manual, ‘Training Manual on Good Water, Sanitation and Environmental Hygiene Practices for Primary Schools’, has been a cooperative effort.
We would like to thank the members of Live & Learn Environmental Education Maldives for willingly and expertly developing the activities and the materials of the manual.
We owe our gratitude to UNICEF for their invaluable support throughout the development of the manual. We particularly thank Ms. Shadiya Adam and Mr. David Proudfoot for their continuous assistance.
We also extend our heartfelt appreciation to Dr. Aishath Shehenaz Adam of the Educational Supervision and Quality Improvement Section for her guidance and encouragement.
Finally, our warm thanks go to the staff if the School Health Unit whose commitment to Health Promoting Schools Initiative provided the foundation for this manual.
Ministry of Education Maldives, 2008
Prepared for UNICEF and the School Health Unit, Ministry of Education – Male’, Maldives
July 2008
Live & Learn Environmental Education: PO BOX 3007 Male’, Maldives H. Huba (1st floor), Meduziyaaraiy Magu, Male’, Maldives P: (+960)3303585 E: [email protected] http://www.livelearn.org
Written by: Fathimath Shafeeqa, Mariyam Shazna, Elaine Glen and Robbie Henderson Adapted from materials including; ‘Live & Learn Environmental Education (2006) Water Sanitation & Hygiene Education Toolkit: A Critical Thinking Approach’, IRC (2005) ‘The Joy of Learning: Participatory lesson plans on hygiene, sanitation, water, health and the environment’. Proofed by: Mausooma Jaleel Design and layout by: Mariyam Omar and Karen Young Photography by: Live & Learn Environmental Education, Judith Smeets, Department of Public Health, Kris Buros, Ahmed Riyaz Jauhary and Reinhard Kikinger. Illustrations by: Naushad Waheed and Shirumeen Ahmed
© Copyright: UNICEF and Live & Learn Environmental Education
Disclaimer: This manual was prepared by consultants for UNICEF. The findings, interpretations, and conclusions expressed in it do not necessarily represent the views of UNICEF or those of its member governments. UNICEF does not guarantee the accuracy the accuracy of the data included in this report and accepts no responsibility for any consequences of their use.

1. Introduction 3 Who can use this manual? 3
Objectives 3
How to use this manual 4
Toolbox content 4
2. Background 5 School health promotion in the Maldives 6
Existing WASH situation in Maldivian schools 6
3. Participatory Principles and Techniques 7 Participatory Techniques 8
a. Learning by doing 8
b. Student team learning 9
c. The Inquiry learning Process 10
d. Story telling 13
e. Community problem solving 14
4. Participatory Activities and Tools: Personal Hygeine and Sanitation 16 Introduction 16
Learning Objectives 16
Overview of Topics 16
4.1 Topic: Germs, germs everywhere 17
4.2 Topic: Washing hands 19
4.3 Topic: Personal hygiene 22
4.4 Topic: Hygiene and Sanitation 25
4.5 Topic: International year of sanitation 2008 30
Contents

5. Participatory Activities and Tools: Water 34 Introduction 34
Learning Objectives 34
Overview of Topics 34
5.1 Topic: Why is water important? 35
5.2 Topic: Water sources on my island 38
5.3 Topic: Well water contamination 42
5.4 Topic: Rainwater contamination 47
5.5 Topic: Water contamination by faeces 51
5.6 Topic: Water collection methods, storage and handling 57
5.7 Topic: Water treatment 62
5.8 Topic: Water use and reuse in the home 64
6. Participatory Activities and Tools: Environmental Hygiene 70 Introduction 70
Learning Objectives 70
Overview of Topics 70
6.1 Topic: Cleanliness of foot paths, play area and roads 71
6.2 Topic: Good waste management 73
6.3 Topic: Good Water, Sanitation and Hygiene Practices 75
7. Ongoing Monitoring 76 References 79
Website Resources 79
Glossary 80
2

3
1 IntroduCtIon This manual has been developed as part of the Health Promoting Schools Initiative, and is
intended to be used in primary schools. The aim of this manual is to inculcate good water,
sanitation and hygiene practices in our children.
Who can use this manual?This training manual is a practical guide to be used by teachers and school health assistants who are involved in the
promotion of water, sanitation and hygiene practices (WASH). School WASH education is a specific part of the wider school
health education program that deals only with water and sanitation-related health problems in and around the school.
The manual has been designed to provide the necessary background to WASH topics for teachers and school health
assistants, as well as activities and materials for use with students. We hope that teachers and school health assistants are
able to use this manual for training in schools and adapt it to suit local conditions.
objectives This manual has been designed with twin objectives:
To raise knowledge and awareness of good water, sanitation and hygiene practices with teachers and school health •
assistants; and
To provide participatory tools, techniques and materials for teachers and school health assistants to promote improved •
water, sanitation and hygiene practices amongst students.

How to use this manualChapter 1 and 2 provides an introduction and background information that can be read prior to undertaking lessons in the
classroom. It addresses the rationale and reasoning for using participatory techniques and tools during teaching.
Chapter 3 goes into more detail on the participatory principles and techniques available for teachers and school health
assistants to use.
Chapters 4, 5 and 6 provide a step-by-step explanation of various participatory activities and tools that can be used for
water, sanitation and environmental hygiene topics. Physical materials designed to be used in this manual are provided
separately in a toolbox (see below).
Chapter 7 provides a discussion of the importance for ongoing monitoring to understand the effectiveness and impact of
the teaching in improving water, sanitation and hygiene practices in Maldivian schools.
toolbox content
Item details
Sequence story cards Nine A4 cards - a story called ‘Poor Jaraas,
no place to live’
Sequence story cards Twelve A4 cards - a story called ‘Water story’
Sequence cards Two A4 cards showing good and bad rainwater
collection practices
The ‘Kilaa Handi’ story book 1 A2 size big book and 5 A4 size small books
Unicef clips on CD/ DVD
Fenthiki hand washing song on CD/DVD
5 short TV spots on water, sanitation and health topics
Short song to accompany hand washing activity
Poster showing the water lens
Poster showing the water cycle
A2 poster showing the water lens
A2 poster showing the water lens
Super fenfulhi hand puppet A hand puppet of the ‘Super fenfulhi’ character
Board Game on Water, Sanitation and
Hygiene practices (WASH game)
A board game with messages on water, sanitation
and hygiene practices
4
5
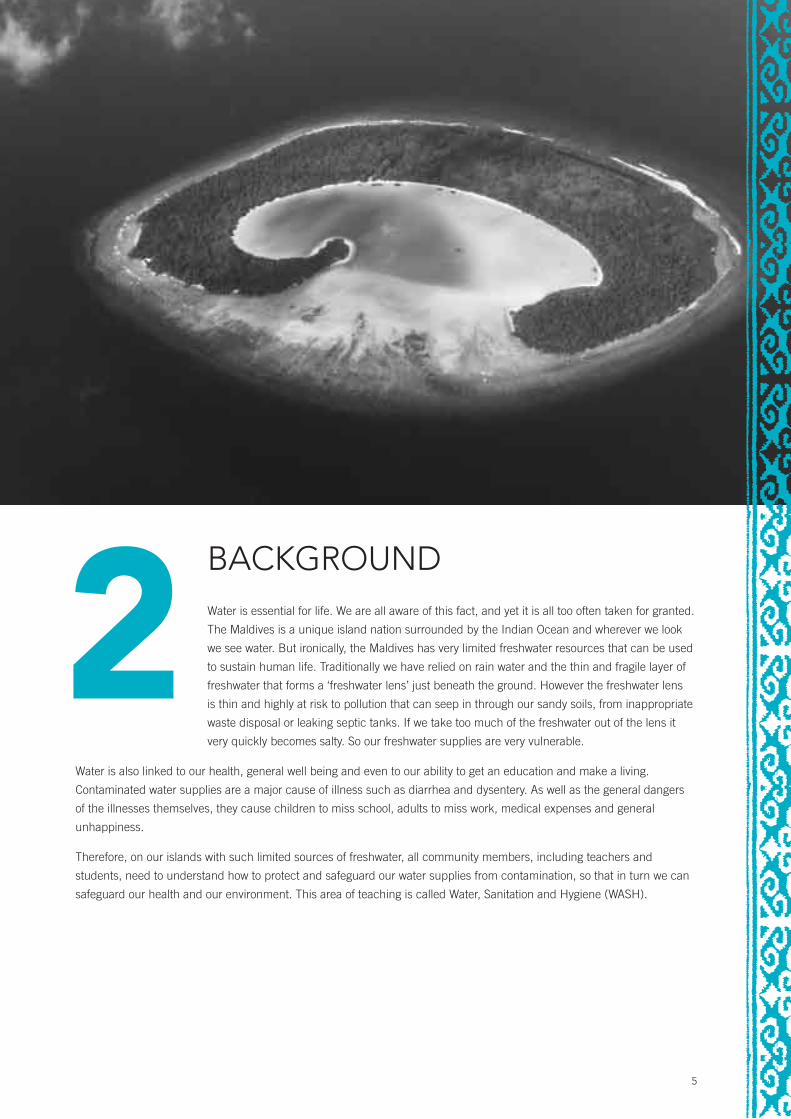
2BaCkground Water is essential for life. We are all aware of this fact, and yet it is all too often taken for granted.
The Maldives is a unique island nation surrounded by the Indian Ocean and wherever we look
we see water. But ironically, the Maldives has very limited freshwater resources that can be used
to sustain human life. Traditionally we have relied on rain water and the thin and fragile layer of
freshwater that forms a ‘freshwater lens’ just beneath the ground. However the freshwater lens
is thin and highly at risk to pollution that can seep in through our sandy soils, from inappropriate
waste disposal or leaking septic tanks. If we take too much of the freshwater out of the lens it
very quickly becomes salty. So our freshwater supplies are very vulnerable.
Water is also linked to our health, general well being and even to our ability to get an education and make a living.
Contaminated water supplies are a major cause of illness such as diarrhea and dysentery. As well as the general dangers
of the illnesses themselves, they cause children to miss school, adults to miss work, medical expenses and general
unhappiness.
Therefore, on our islands with such limited sources of freshwater, all community members, including teachers and
students, need to understand how to protect and safeguard our water supplies from contamination, so that in turn we can
safeguard our health and our environment. This area of teaching is called Water, Sanitation and Hygiene (WASH).

School health promotion in the Maldives In recent times much attention has been placed on
schools. This is because schools are a place of learning that
can model good practices for children to follow at school,
at home or in the wider community. Children are seen as
potential ‘change agents’ both now and as future adults.
However sometimes schools also can model poor practices
and may also be dangerous places where diseases can be
spread.
Existing WaSH situation in Maldivian schoolsIn 2002 a ‘situation analysis’ was conducted on ‘school
hygiene and sanitation education’ by the Maldives Water
and Sanitation Authority (MWSA), in consultation with the
Ministry of Education and UNICEF.
Barriers to change
The situation analysis painted a worrying situation in our
schools, which should be of concern to all community
members; parents, teachers and students alike. There is a
need to significantly improve WASH practices in Maldivian
schools. This training manual offers a systematic way to
promote awareness and education programs on water,
sanitation and hygiene topics with both teachers and
students. However this training program will only achieve
lasting WASH behaviour, if resources like toilet facilities
and safe water supply are available, enabling students to
apply newly acquired knowledge, attitudes and beliefs into
desirable behaviours.
6

3 PartICIPatorY PrInCIPLES and tECHnIQuESIn order to become effective promoters of water, sanitation and hygiene practices, teachers
require a certain level of hygiene awareness and commitment. It is important that teachers
and school health assistants demonstrate:
A working knowledge of the relationship between water, sanitation, hygiene behavior and health; •
Awareness about their importance as a role model, resulting in proper hygiene behavior; •
Skills to work with students in participatory ways; and •
Commitment to bring about improvements themselves or to request assistance when it’s needed. •
(UNICEF & IRC, 1998).
To support teachers, it is important, not only that good quality materials are developed, but also that they are properly
distributed and used by teachers and children. Teaching materials should be based and built upon the existing situation in
schools.
For WASH education to be effective, a number of basic criteria need to be taken into account:
It has to be practical and make the link between knowledge, attitude and behaviour.•
It has to be action-oriented.•
Its messages need to be relevant in the local context.•
Its messages need to be simple and understandable in the local context.•
Its messages need to be locally acceptable.•
It should stimulate reflection by students about their behaviour.•
7

It should repeat and reinforce messages over time and in •
a variety of ways.
It should make use of local communication methods. •
(UNICEF & IRC, 1998)
Participatory activities provide an opportunity for students
to use their knowledge and skills to analyze issues
both individually and as a group. This approach allows
students to use their own experience and benefit from the
experiences of other students. Participatory activities enable
participants to identify their own obstacles to improved
water, sanitation and hygiene practices. However teachers
must think about how the chosen method will effectively
address the planned content (knowledge, attitudes
and skills) and enable the student to learn in a fun and
interesting way (IRC, 2007).
Participatory techniquesThe following section outlines some specific participatory
techniques in more detail. This background material is
provided to help teachers fully understand the technique
and how to apply it successfully in the classroom.
Learning by doing:a.
The advantages of this technique are that (i) it links what
children learn with what they do; (ii) it links what children
do in class with what they do in the home; (iii) the activities
are not taught in one lesson and then forgotten; they are
learned and developed over a longer period of time.
Procedure for learning by doing
Identifying a local health issue and understanding it well: 1.
Children and/or their teacher/facilitator identify a priority
health issue. The issue chosen may relate to a stated
objective of the school curriculum or syllabus, or to a
health campaign taking place in the community. Once
an issue is identified, the children carry out activities
designed to increase their understanding of it.
Finding out more about the health issue: This step 2.
involves children in further information-gathering
activities. Some of these activities may take place
inside the school, while others might take place in
the community or at home. Ideally, these activities
help children to learn how to gather and document
information and develop important communication skills.
Discussing what’s been found out and planning action: 3.
Here the children organize their findings and use them
as a basis for planning action in relation to specific
health or hygiene problems they have identified during
step 2. The teacher/facilitator can take part in the
planning process, and help children to distinguish
between correct and incorrect information they might
have gathered.
Taking action: The children undertake the activities 4.
planned at step 3. These might take place in school,
community, or home, depending on the nature of the
Table 1: Examples of child-friendly methods suitable for life skills-based hygiene Education (courtesy of IRC, 2007)
Methods most suitable for age group 4-7 Methods most suitable for age group 8-12
Storytelling
Drama
Reciting poems and singing songs
Puppet plays
Language games
Reading stories
Walks
Conversations and discussions
Drawing, painting, colouring
Storytelling
Reading stories
Carrying out projects or surveys
Quizzes
Conversations and discussions
Singing and dancing
Drawing, painting, clay modelling, etc.
Writing compositions and creative writing
Brainstorming
Excursions
Drama, role playing, pantomime
Language and math games such as
crosswords
Development of maps, e.g. of the
community
Developing surveys and asking questions
8

9
health or hygiene issue chosen. The types of activities
undertaken may also depend on local customs and the
nature of the relationships in the community, including
between the school and the community.
Discussing results: The children and their teacher/5.
facilitator evaluate the effectiveness of their activities.
If unexpected problems have been encountered, it is
important for these to be discussed.
Discussing how we can be more effective next time 6.
and sustain action: Step 6 invites children to improve
upon the activities they implemented at step 4 and, if
appropriate, to repeat or continue their action.
Student team learning B. Student team learning is a good approach to be used when
giving knowledge about environment and hygiene issues.
The main aim is to develop the students’ understanding of
the link between water, sanitation and hygiene and their
health. They will learn personal hygiene practices as related
to washing hands and protecting well water, and how to
promote personal health. When school students work in
mixed groups, to help one another to do things under the
guidance of the teacher, it is always easy for the teacher
to introduce a new concept and practically undertake
the activities with the students so that the students
comprehend the concept easily.
Students benefit from a less academic side effect of team
learning, i.e. they learn how to feel good about themselves.
Students also take on new responsibilities and succeed
with these responsibilities; they come to gain confidence
in themselves and learn to solve their own problems.
Research shows that students have higher achievements
when they have confidence in themselves and when they
attribute success to their own abilities and not to luck.
In team learning, it is the students themselves who are
responsible for the success of a lesson and therefore they
tend to feel more responsible for the success of their own
learning.
In order to allow students to gain this power in the class,
teachers cannot simply lecture and let students take a
passive role.

Design activities, as in this manual, and let the students 1.
take initiative.
Be a facilitator and guide the students. 2.
Let the students be interdependent.3.
Allow face to face interaction among students.4.
Allow individual accountability for critically exploring the 5.
assigned material.
Allow each student to be aware of their involvement and 6.
how they will contribute to the discussion and activities.
Let students take ownership and pride in working 7.
together to discuss and find out new things.
the Inquiry learning ProcessC. Inquiry learning adopts a more student-centered approach.
Inquiry learning involves students in the active and careful
analysis of a situation or problem. In inquiry learning,
students use their own thinking skills to make their own
generalizations or conclusions - and thus are actively
involved in generating ‘knowledge’ in forms that are
meaningful to them.
There are many different approaches to inquiry learning,
depending upon the subject area or topic, the background
skills of students and the learning objectives of the
teacher. This generally means that no teaching is wholly
teacher-centered or wholly student-centered. Rather,
most classroom learning usually involves a mix of different
learning experiences along a range between teacher- and
student-centered approaches.
Inquiry-based learning occurs when students learn by
carrying out an investigation. That is, they find something
out for themselves rather than being told by the teacher.
To contribute effectively to the thinking skills needed
to explore water, sanitation and hygiene issues, inquiry
learning needs to include four stages in an iterative
process:
A Challenge•
After becoming aware of a significant question, issue
or problem, students may reach a state of puzzlement,
curiosity and/or concern and feel challenged to inquire
further. The next step is to clarify, define and redefine the
particular question, issue or problem to investigate.
Active student investigation •
Students gather resources and work out what they need
to know and do. They consider the problem, cast around,
imagine, try to predict, work out what they already know,
and/or assess their ability to succeed. This is the stage
when students analyze and interpret the data before
them.
Making generalizations•
Eventually students can synthesize what they have found
into generalizations or principles that can be used to
decide on possible solutions.
Reflection •
Students need to consider how they achieved what they
set out to do. They reflect, confirm, see where to improve,
plan new things, evaluate, and consider possible action.
a model for Inquiry Learning
1. Tuning In
Questions
Why should we investigate this? What do we already know?
How does this affect us? What do we want to find out? What
feelings or opinions do you have? What is the issue?
Objectives
Identifying and defining the issue. This involves activities
designed to:
Generate interest•
Establish current knowledge•
Draw on past experiences•
Identify possible aspects for investigating•
Examples
Considering a challenging question•
A field trip•
Considering a case study•
Discussing a value dilemma•
Studying maps, photos, posters, cartoons•
Having a visitor to the class•
Performing a task, game, or role-play•
Predicting about a given situation•
Word associations•
2. Deciding Directions
Questions
What would happen if…? What guess could we make
about…? What are we likely to see when…? How can we
explain…? What do we want to focus on? What questions
do we need to ask? Why is this happening?
10

Examples
Excursions and field trips•
Conducting experiments•
Guest speakers•
Collecting and analyzing statistics, maps•
Surveys and interviews•
Evaluating primary sources, case studies etc.•
Film, music, magazines, newspapers, books•
Seeking opinions•
4. Sorting Out
Questions
How might we sort out our information? What similarities
and differences can we see? How can we categorize
this information? How does this information compare or
contrast with other situations? What connections can we
see? What inferences or conclusions can we draw? Does
this information change our view of the issue?
Objectives
Data collection, processing and analysis, refining the
issues. This involves:
Organizing and presenting data•
Forming or modifying concepts through classification •
strategies
11
Objectives
Formulation of hypothesis involving:•
Choosing a focus•
Extending the scope•
Identifying and refining questions•
Examples
Brainstorming for suggestions•
Hypothesising•
Posing solutions to problems•
Identifying questions to guide investigation•
Predicting outcomes or consequences•
Developing tentative explanations•
Formulating propositions•
3. Finding Out
Questions
How are we going to find out about this? Who, what, where
has/is information we can use? How relevant or useful
is this information? Whose views are reflected in this
information? How else might we find out about this? How
are we going to present our data?
Objectives
The collection of data is not an end in itself, but a means
towards developing understandings.

Comparing and contrasting findings•
Discussing the issue and hypotheses•
Evaluating•
Examples
Recording impressions through art, music, personal •
journals and stories
Values clarification and analysis•
Drafting and editing•
Statistical analysis•
Grouping and labelling•
Making and interpreting graphs, charts•
Small group discussion•
5. Drawing Conclusions
Questions
What can we now say about . . . ? Have you changed your
thinking about . . . ? What differences and similarities did
you notice? What general conclusions can you make? What
evidence do you have to support this? How does this relate
to our earlier questions and hypotheses?
Objectives
Drawing conclusions requires students to express their •
understandings and communicate them to others. This
involves:
Interpreting information•
Developing and modifying generalizations•
Explaining similarities and differences•
Establishing connections•
Confirming, rejecting or modifying hypotheses and •
predictions
Examples
Making a model or a mural•
Devising a play•
Presenting a role-play•
Holding a debate•
Giving a report to talk•
6. Considering Social Action
Questions
How can we contribute to decisions made in the classroom
or school? What could be done about this issue? What
would happen if these things were done? How might
12
we make others aware of what we know? How can we
contribute to or influence decisions made in the community
and society? What should be done about this?
Objectives
Social action requires that students be active in decision
making during their inquiry and at its conclusion. This
involves:
Identifying action that could be an outcome of the •
enquiry
Implementing if appropriate•
7. Evaluation and Reflection
Questions
How realistic are my teaching plans for this particular •
group of students? (e.g. mental ability tests, past record
of achievement).
How should the students be grouped for more effective •
learning? (e.g. range of mental ability scores, past record
of achievement).
To what extent are the students ready for the next •
learning experience? (e.g. readiness tests, pre-tests over
needed skills, past record of achievement).
To what extent are students attaining the minimum •
essentials of the lesson? (e.g. mastery tests,
observation).
To what extent are students progressing beyond the •
minimum essentials? (e.g. periodic quizzes, general
achievement tests, observation).
At what point would a review be most beneficial? •
(e.g. periodic quizzes, observation).
What types of learning difficulties are the students •
encountering? (e.g. diagnostic tests, observation,
students conferences).
Which students are under-achievers? (Mental ability •
tests, achievement tests).
Which pupils should be referred to counseling, special •
achievement classes, or remedial programs? (e.g.
achievement tests, diagnostic tests, observation).
Which students have poor self-understanding? •
(e.g. self-ratings, student conferences).
What school mark should be assigned to each student? •
(e.g. review of all evaluation data).
How effective was my teaching? (e.g. achievement tests, •
students’ ratings, supervisors’ ratings)
Objectives
Evaluation focuses on the monitoring of curriculum
programs, practices and outcomes for the purpose of
review and development:
evaluation is more than measurement or assessment •
which are limited to quantitative descriptions of
students;
evaluation may include quantitative descriptions but it •
also includes qualitative or value judgments;
evaluation is a collective term for all those ways of •
obtaining feedback on a teaching-learning process.
Examples
Teacher-made Tests •
Work Samples •
Conferences and Interviews •
Logs and Diaries •
Checklists •
Anecdotal Records •
Story tellingd. Folktales about the relationship between the Earth and its
human inhabitants have been at the heart of storytelling
since earliest times. Not only do such stories offer a
source of inspiration, they also contain the potential for
understanding the many ways in which we value and
devalue our planet. Stories provide us with practical
insights into approaches to our most serious environmental
problems. For example through story telling important
messages regarding water, sanitation and hygiene
practices can be promoted in an interesting and enjoyable
way. The ‘Kilaa Handi’ storybook, included in materials
accompanying this manual, is an example of a story that
promotes good hygiene practices in children.
A good story is not only entertaining but is capable of
holding student attention while they learn important
concepts, attitudes and skills. Storytelling can be used to
explore important shared themes and vision. There are
many reasons why stories may be important in our cultures
and to each of us personally.
Using stories in teaching is an interesting way to see the
relationship between the environment and people. There
are many stories published and available which could be
used as a resource. The selection of stories to be used in
the classroom should be discussed among the teachers
because some stories are offensive and not appropriate to
be used in the classroom.
13
Stories safeguard and relate information as well as •
beliefs, and rules for living.
Stories remind us of other times and different places •
and lift us beyond the ‘here and now’. Through
stimulation of our imagination they can facilitate
the emergence of a fresh perspective on our actual
situation.
Each story has a beginning, middle, and end. A specific •
conflict and patterns of conflict resolution are usually
embedded within this structure.
Stories lead to powerful emotional responses. These •
emotions help us to clarify the way we feel and can
fuel the desire for change. Different people respond
differently to stories thereby touching on differences in
personal perceptions and diversity in general.
Stories nearly always generate communication. Not only •
does listening to a story create a warm bond between
us, once the story is finished we often automatically
turn to each other to talk and to share our responses.
Likewise, a good story can be retold to others.
Community problem solving E. Community problem solving is a teaching and learning
strategy that helps students learn to participate actively
in addressing local community concerns, with a view to
creating a more sustainable future.
There are eight major steps for guiding students through
the process of community problem solving, but they do
not have to be followed in a strict order. For example,
as students develop confidence in community problem
solving, the need to assess and develop their skills will
diminish. And often, new issues for investigation will arise
as you progress through the steps, requiring a recycling
backwards and forwards through the steps.
What is important is that the steps be used flexibly and be
adapted to local circumstances, to your own students, and
to your own approach to teaching.
Planning to use community problem solving
Some of the problems that might occur when using
community problem solving include:
Some students might not be used to teachers asking •
them to choose the topic (i.e. the local problem) they
want to study.
Some students could be puzzled when the teacher sets •
a problem but does not tell them the answer.
Some students lose their concentration when they are •
taken out of the classroom on fieldwork.
Sometimes local problems of interest to students may be •
the cause of controversy in the community.
Selecting the Issue
Selecting an issue that is practicable for students to
investigate is a key aspect of planning for community
problem solving.
The following criteria may help you – and your students –
choose a possible project and location:
The locations are readily accessible to students.•
There is no serious risk to the safety of students at these •
places.
The projects are within the range of ability of students.•
There is a genuine need in the community for this •
problem to be solved.
Students believe the problem is significant to them.•
It is important to bear these criteria for selecting problems
in mind. However, experience indicates that students are
most motivated when they work on problems of their own
choosing.
the Eight Steps of community problem solving
1. Exploring community problem solving
This first step involves providing students, teachers and
school administrators with information about the nature and
purpose of community problem solving. Other community
and educational groups who have used community
problem solving may be invited to explain the process
and give examples of how it was used in their context.
An important part of this step involves teachers and
administrators actively deciding to use community problem
solving as a teaching and learning strategy because it
acknowledges the importance of students working in their
local community.
2. Selecting problems
In this step the problem to be solved is chosen. Problems
can be selected in many ways. For example, a tour of the
school grounds or local community may provide ideas for
students to generate a list of problems they would like to
investigate. Students could then decide on one problem,
as a class, or a number of problems in small groups.
An important consideration when selecting a problem
is to ensure sufficient resources are available and that
the problem is manageable within the time frame for the
students involved. Students and teachers may need to
consider questions such as:
14

Why is this important to our community?•
Are my students able to tackle this problem?•
Do we have time to undertake the entire community •
problem solving process? Or should we choose a smaller
problem?
3. Evaluating and developing student skills
Students will need to draw upon a range of problem
solving, investigation and group work skills as they work
through the community problem solving process. Teachers
should evaluate which skills are needed and check that
their students have these skills before proceeding. They
should continuously monitor student’s skill levels and
provide opportunities as part of classroom activities for
ongoing skill development. The level of teacher guidance
throughout the community problem solving process
will depend on the students’ past experiences with the
process and the specific problem solving, group work and
investigation skills of the students in this step. Teachers
may need to consider questions such as:
What skills do my students need to undertake •
community problem solving?
What kind of guidance do I need to provide?•
4. Investigating the problem
This is the step where students explore the full scope of the
problem. This includes understanding the current situation
and the reasons why the problem developed. Teachers and
students might consider questions such as:
What is the current situation in our community and how •
significant is this to me, the local community, nation,
and for the world?
What changes have led to the development of the •
problem?
Are there any conflicts of interest among groups in our •
community?
How can decisions be made to resolve this issue?•
5. Developing visions of alternative futures
In this very important step, teachers encourage students to
develop visions of how they would like the current situation
to look in the future. Students and teachers could consider
questions such as:
What are our visions for the future?•
What are the alternatives?•
Which vision do we prefer and why?•
6. Planning actions
This step involves students developing an action plan
to achieve their selected vision for the problem being
investigated. An essential component of this step is the
evaluation of the action and careful consideration of
whether those actions will result in the desired changes.
Teachers and students may need to consider questions
such as:
What changes will bring us closer to the vision of •
sustainable futures?
What barriers must be overcome to allow these changes •
to take place?
List the steps that need to be taken to make these •
changes.
Note: This is the plan of action
7. Taking actions
This is the step where the action plan is implemented by
the students and teachers. In order for the community
problem solving process to be truly democratic, it is
important that students are allowed to freely choose to take
actions that address the community problem identified.
These actions may be within their own lifestyles and
families and/or in the wider community. Teachers and
students may need to ask questions such as:
How will the planned actions solve the problem?•
What is the role of students in deciding on these •
actions?
8. Evaluating actions and changes
It is important that this step follows the action-taking phase.
It is at this point that teachers and students review the
actions and identify the changes that have taken place.
They then compare these changes against their vision
for the future for the community problem they have been
working on. This evaluation may lead the groups to revise
their vision from Step 5 or develop a revised action plan
for Step 7. Students and teachers may need to consider
questions such as:
What actions did we take?•
What changes resulted?•
To what extent are these changes the same as in our •
vision?
How were barriers overcome?•
What did we learn from community problem solving?•
15
4PartICIPatorY aCtIVItIES and tooLS: PErSonaL HYgIEnE and SanItatIon
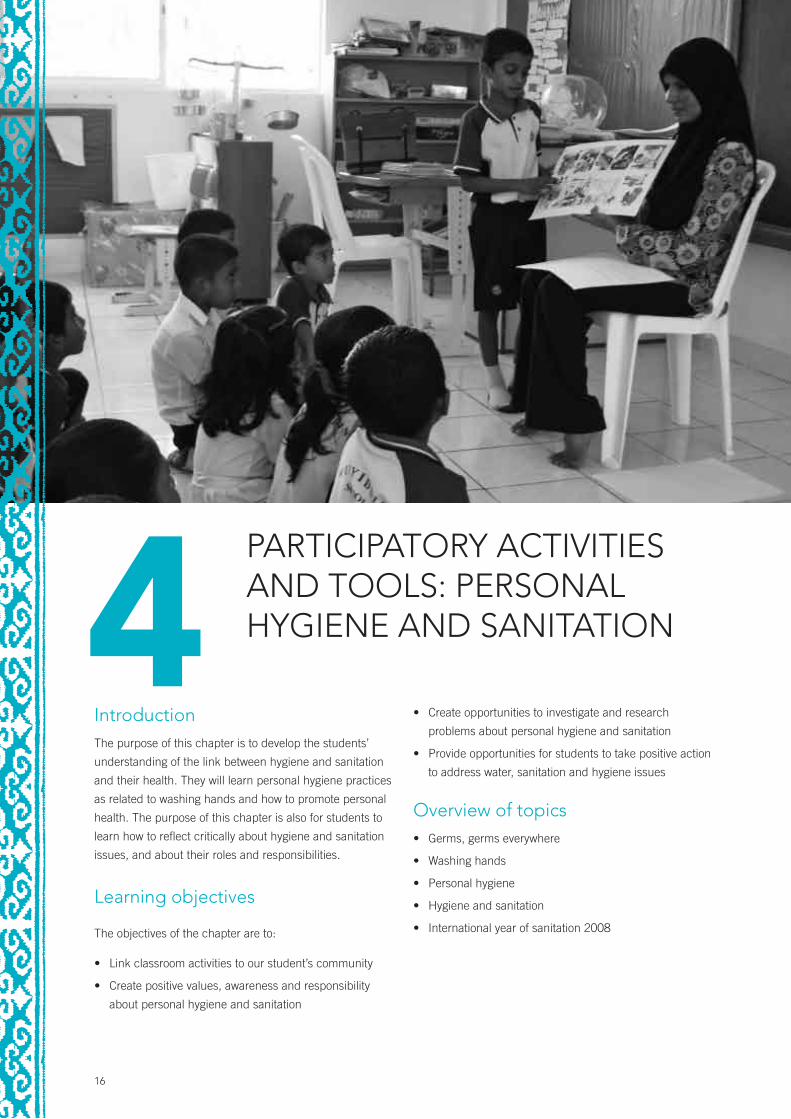
Introduction The purpose of this chapter is to develop the students’
understanding of the link between hygiene and sanitation
and their health. They will learn personal hygiene practices
as related to washing hands and how to promote personal
health. The purpose of this chapter is also for students to
learn how to reflect critically about hygiene and sanitation
issues, and about their roles and responsibilities.
Learning objectives
The objectives of the chapter are to:
Link classroom activities to our student’s community •
Create positive values, awareness and responsibility •
about personal hygiene and sanitation
Create opportunities to investigate and research •
problems about personal hygiene and sanitation
Provide opportunities for students to take positive action •
to address water, sanitation and hygiene issues
overview of topicsGerms, germs everywhere•
Washing hands•
Personal hygiene•
Hygiene and sanitation•
International year of sanitation 2008 •
16

Learning Objectives:
Students understand that germs are everywhere. •
Students understand that some germs can cause illness. •
Students can identify places where germs are likely to •
live.
Grades: 1-5
Time: Activity 1: 30 minutes
Materials needed:
Sequence story cards ‘Poor Jaaras, no place to live’ - for •
the beginning of the activity.
Teacher Resource Sheet 1- read to familiarize yourself •
with the background to the topic.
Introduction:
Start by explaining to the students that germs are essential
for human life. Bacteria in our mouths and intestines
help us to digest the food we eat and bacteria on our skin
protect us from invading viruses and bad bacteria. The
word “germs” is a general term for different types of tiny
organisms, or living things, commonly known as germs.
Bacteria and viruses are examples of two different types of
germs. Bacteria are virtually everywhere in our environment
and make up 60 per cent of the living matter on earth.
Of the billions of types of bacteria only about 50 are known
to cause infection.
What to do:
Activity 1- Poor Jaaras, no place to live
Have the children sit in a circle around the teacher and
read the sequence story ‘Poor Jaaras, no place to live’.
Once you have completed the story, ask the students to
discuss:
What do you feel when you hear this story?•
Would you like to live in this environment? Why?•
What types of places do germs like to live?•
Can you think of any places on your island where germs •
might live?
Are all germs bad? Are there good types of germs?•
What can you do to get rid of germs?•
Conclusion:
Finish the activity by reinforcing the idea that the word
‘germs’ is a general term for many different types of
organisms. Not all germs are bad and cause illness.
Discuss some of the ways to stop germs from spreading
with students.
4.1 topic: germs, germs everywhere…
NB. Teacher resource sheet information from materials on : www.canadian-health-network.ca/
17
teacher resource Sheet 1
What are germs?
Germs are essential for human life. Bacteria in our
mouths and intestines help us to digest the food we eat
and bacteria on our skin protect us from invading viruses
and bad bacteria. The word “germs” is a general term for
different types of tiny organisms, or living things, commonly
known as germs. Bacteria and viruses are examples of two
different types of germs. Bacteria are found everywhere
in our environment and make up 60 per cent of the living
matter on earth. Of the billions of types of bacteria only
about 50 are known to cause infection.
Viruses cause far more illnesses than bad bacteria because
they spread more easily. If more than one person in your
family has the same sickness, it is most likely that it is a
viral infection. Cold and flu viruses invade our cells and
rapidly grow in number causing symptoms like a runny
nose, coughs, aches and sore throats. Bacterial infections
are “opportunistic,” which means they tend to infect one
part of the body (e.g. pneumonia, an infection of the lungs
that usually comes on following a common cold or flu).
Antibiotics do not work against viruses.
Where do germs hide?
If you had to pick the place in your house with the most
disease-causing germs, what would you choose? Many
of us automatically think of the bathroom toilet seat or

18
bathroom floor. But the kitchen is the biggest hot-zone for
disease-causing germs. Top prize goes to the kitchen sink,
followed by the kitchen sponge.
Germs can live for a surprisingly long time on hard surfaces
like desks, doorknobs and tables. Most people get sick
when they touch something that is contaminated with
germs and then touch their eyes, nose or mouth. The
easiest way to reduce your chance of getting sick is to wash
your hands often with regular soap and water and avoid
touching your face.
teacher resource Sheet 2
Poor Jaraas – No place to live
1. Jaraas and his family lived in an old house on the island
of Kunifushi. It was wonderful! Lots of dark corners, thick
dust, old waste, cobwebs and dirty, messy places make
fantastic hiding places. They can play and grow well
there. Then when they are ready they can go and live
in children’s mouths, throats and stomachs and make
them really ill. Like all germs do.
2. As usual Jaraas and his friends were playing hide and
seek in the gutter. “Oh, what’s that? cried Jaraas. “Dirt
left behind by the cat… warm, smelly and sticky and
so good to play with and hide in”. Jaraas and his family
made a dirt castle and buried each other in it. This is
fun!
2. Their happy life took a turn when Moosa’s family moved
in. Moosa and his family were very clean. They did not
like the messy surroundings. “Time to clean up the
house” said Moosa.
“Yes, said Hawwa. “Dirty water and waste help insects
and other pests grow. The germs breed with them. Today
we’ll give those germs a lesson.”
4. Their enjoyable moment was interrupted. Moosa was
sweeping away the dried leaves and waste on the roof.
The gutter was next. “Save yourselves” cried Jaraas as
he ran towards the well while others jumped into the
water tank.
5. Swimming in the dirty water was fun! So was inside the
water tank. The water had turned a wonderful sticky
green. It had a lovely, stinky smell. Some of his family
members slid down the stained walls
of the tank while others caught rides on hundreds of
mosquitoes buzzing around.
6. At that moment Moosa emptied the water tank and
cleaned it with chlorinated water, as he does regularly
during the rainy season. All the mosquitoes flew away
and so did Jaraas and his family. This time they had to
hide in the toilet.
7. Good! No cleaners here! Just dirty slimy water.
A perfect home with food at arms length. They could
trace pictures in it too… It is fun! But then they heard
footsteps. Oh! No! They had to run again.
8. Jaraas and his family are fed up! This house is no good.
It is dangerous. Everywhere is being cleaned. “They
are using big sharp weapons to catch and destroy us”
said the scared and exhausted Jaraas. They ran into the
garden.
9. On Friday, Moosa’s family dug out the weeds and threw
out the smelly water and made a big pit for the dirt. The
rats ran out. The mosquitoes all flew away. Jaraas and
his family just escaped with their lives. They have been
running from the children ever since…. Unless they find
a lazy one who does not clean up!

4.2 topic: Washing hands
19
Learning Objectives:
Students understand the importance of washing hands. •
Students have the skills and knowledge to wash their •
hands properly.
Grades: 1-5
Time:
Activity 1: 30 minutes
Activity 2: 30 minutes
Materials needed:
Liquid soap, water and single use paper towel/ hand •
towel
Fenthiki song on CD/DVD- practice the song in Activity 2•
Super fenfulhi puppet (activity 2)•
Teacher Resource Sheet 1 - read to familiarize yourself •
with the background to the topic
Introduction:
Start by explaining to students that most intestinal,
stomach, and cold viruses are spread by our hands.
Through touch, micro organisms are transferred from the
fluids in the nose and mouth of one person to something
(e.g., a pencil, food, a phone) or to someone else. When
other people bring their hands or the object near their
mouths, the bacteria or viruses may find a new home.
What to do:
Activity 1: Shaking wet hands in a circle
Ask the students to stand in a circle. One student will
wet one of her/his hand and shake the hand of her/
his neighbour, who then shakes the hand of the other
neighbour and so on. The students will be surprised how
many of them will still feel the wetness in the hand.
Remind students that most intestinal, stomach, and cold
viruses are spread by our hands. Lead a discussion based
on this experience. Students should wash their hands after
this activity.
Lead a discussion with students about what might be
examples of good hand washing practice. The students will
learn that safe hygiene practices include good washing of
hands as follows:
use sufficient water•
use soap•
rub both hands at least 3 times vigorously•
rinse thoroughly•
hands should be rubbed dry with a clean towel. •
Ask students when they should wash their hands. Some
examples include:
after using the bathroom•
before lunch•
after interval time•
after blowing your nose•
20
after coughing•
after playing outside•
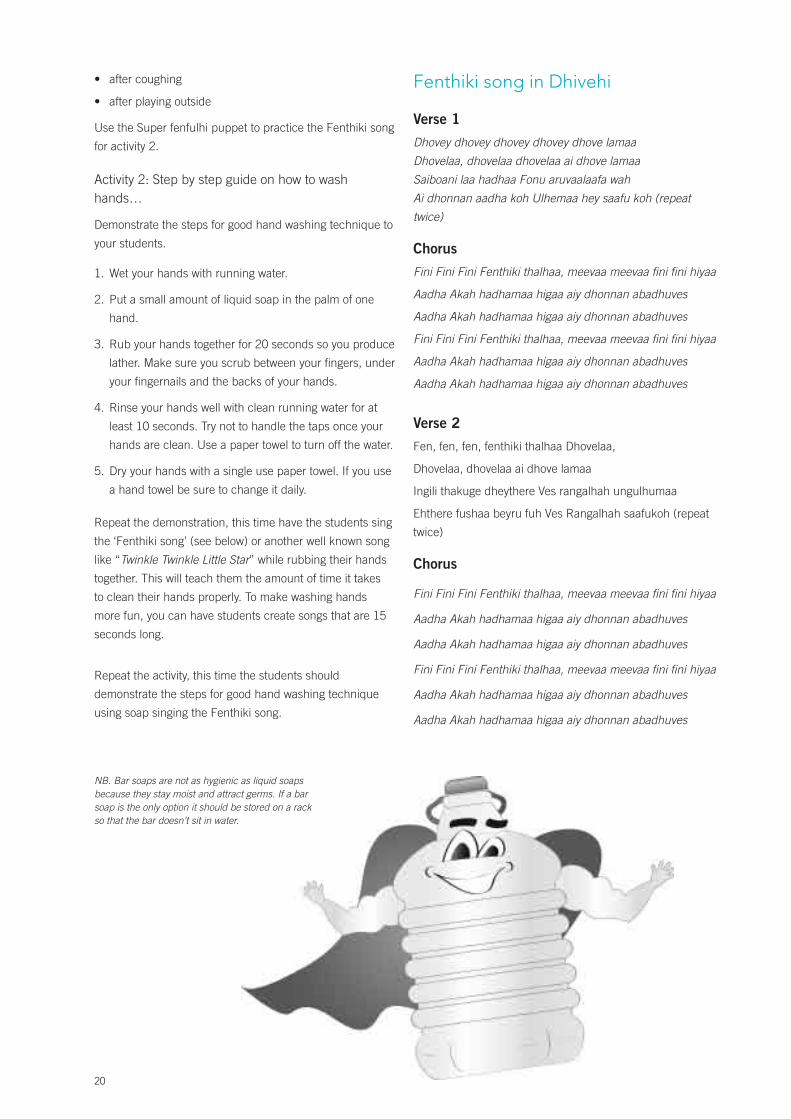
Use the Super fenfulhi puppet to practice the Fenthiki song
for activity 2.
Activity 2: Step by step guide on how to wash hands…
Demonstrate the steps for good hand washing technique to
your students.
Wet your hands with running water.1.
Put a small amount of liquid soap in the palm of one 2.
hand.
Rub your hands together for 20 seconds so you produce 3.
lather. Make sure you scrub between your fingers, under
your fingernails and the backs of your hands.
Rinse your hands well with clean running water for at 4.
least 10 seconds. Try not to handle the taps once your
hands are clean. Use a paper towel to turn off the water.
Dry your hands with a single use paper towel. If you use 5.
a hand towel be sure to change it daily.
Repeat the demonstration, this time have the students sing
the ‘Fenthiki song’ (see below) or another well known song
like “Twinkle Twinkle Little Star” while rubbing their hands
together. This will teach them the amount of time it takes
to clean their hands properly. To make washing hands
more fun, you can have students create songs that are 15
seconds long.
Repeat the activity, this time the students should
demonstrate the steps for good hand washing technique
using soap singing the Fenthiki song.
Fenthiki song in dhivehi
Verse 1
Dhovey dhovey dhovey dhovey dhove lamaa
Dhovelaa, dhovelaa dhovelaa ai dhove lamaa
Saiboani laa hadhaa Fonu aruvaalaafa wah
Ai dhonnan aadha koh Ulhemaa hey saafu koh (repeat
twice)
Chorus
Fini Fini Fini Fenthiki thalhaa, meevaa meevaa fini fini hiyaa
Aadha Akah hadhamaa higaa aiy dhonnan abadhuves
Aadha Akah hadhamaa higaa aiy dhonnan abadhuves
Fini Fini Fini Fenthiki thalhaa, meevaa meevaa fini fini hiyaa
Aadha Akah hadhamaa higaa aiy dhonnan abadhuves
Aadha Akah hadhamaa higaa aiy dhonnan abadhuves
Verse 2
Fen, fen, fen, fenthiki thalhaa Dhovelaa,
Dhovelaa, dhovelaa ai dhove lamaa
Ingili thakuge dheythere Ves rangalhah ungulhumaa
Ehthere fushaa beyru fuh Ves Rangalhah saafukoh (repeat
twice)
Chorus
Fini Fini Fini Fenthiki thalhaa, meevaa meevaa fini fini hiyaa
Aadha Akah hadhamaa higaa aiy dhonnan abadhuves
Aadha Akah hadhamaa higaa aiy dhonnan abadhuves
Fini Fini Fini Fenthiki thalhaa, meevaa meevaa fini fini hiyaa
Aadha Akah hadhamaa higaa aiy dhonnan abadhuves
Aadha Akah hadhamaa higaa aiy dhonnan abadhuves
NB. Bar soaps are not as hygienic as liquid soaps because they stay moist and attract germs. If a bar soap is the only option it should be stored on a rack so that the bar doesn’t sit in water.

Washing hands song in EnglishTune: Row Row Row your boat
Wet, wet, wet your hands, wet with water clean
Wash, wash, wash your hands, to keep them always clean
Put, put, put some soap, a little in your palm
Clean soap, liquid soap, use them always clean
Rub, rub, rub your hands, with soap and water clean
Scrub, scrub, scrub between, the fingers ten in all.
Rinse, rinse, rinse your hands well with water clean
Clean hands, clean hands, keep them always clean
Dry, dry, dry your hands, dry them really well
Cloth, towel, paper towel, dry with a towel clean
Conclusion:
Remind students that our hands spread an estimated 80%
of common infectious diseases like the common cold and
flu. But these disease-causing germs slide off easily with
good hand washing technique. Hand washing is easy to
learn, cheap and very effective at stopping the spread of
disease-causing germs.
teacher resource Sheet 1 Importance of washing hands
Hands spread an estimated 80% of common infectious
diseases like the common cold and flu. For example,
when you touch a doorknob that has the flu virus on it
and then touch your mouth, you can get sick. But these
disease-causing germs slide off easily with good hand
washing technique. Hand washing is easy to learn, cheap
and incredibly effective at stopping the spread of disease-
causing germs. Hand washing is a simple habit, something
most people do without thinking. Yet hand washing, when
done properly, is one of the best ways to avoid getting sick.
This simple habit requires only soap and water.
Good, frequent hand washing is the single best way to
prevent the spread of many common diseases. Washing
your hands is the best way to STOP germs from spreading.
Schools are full of germs and students have some power
in stopping the germs from spreading. A germ reduced
classroom will reduce students from missing school and
learning.
The dangers of not washing your hands
Despite the proven health benefits of hand washing, many
people don’t practice this habit as often as they should
— even after using the toilet. Throughout the day you
accumulate germs on your hands from a variety of sources,
such as direct contact with people, contaminated surfaces,
foods, even animals and animal waste. If you don’t wash
your hands frequently enough, you can infect yourself
with these germs by touching your eyes, nose or mouth.
And you can spread these germs to others by touching
them or by touching surfaces that they also touch, such as
doorknobs.
Infectious diseases that are commonly spread through
hand-to-hand contact include the common cold, flu and
several gastrointestinal disorders, such as infectious
diarrhea. While most people will get over a cold, the flu
can be much more serious. Inadequate hand hygiene also
contributes to food-related illnesses, such as salmonella
and E. coli infection, which can cause symptoms of nausea,
vomiting and diarrhea.
When should you wash your hands?
Although it’s impossible to keep your bare hands germ-free,
there are times when it’s critical to wash your hands to limit
the transfer of bacteria, viruses and other microbes.
Always wash your hands:
after using the toilet •
after changing a nappy — wash the nappy-wearer’s •
hands, too
after cleaning up a child who has gone to the bathroom•
after touching animals or animal waste •
before and after preparing food, especially before and •
immediately after handling raw meat, poultry or fish
after blowing your nose •
after coughing or sneezing into your hands •
before and after treating wounds or cuts •
before and after touching a sick or injured person •
after handling rubbish •
when using public restrooms•
after playing outside•
before eating food•
NB. Teacher Resource Sheet information from www.canadian-health-network.ca/ and www.mayoclinic.com/health/hand-washing/HQ00407. 21

22
Learning Objectives:
Students understand examples of good personal •
hygiene.
Students understand examples of bad personal hygiene. •
Students understand the importance of maintaining •
good personal hygiene.
Grades: 1-5
Time:
Activity 1: 30 minutes •
Materials needed:
‘Kilaa Handi’ storybook - for the beginning of the Activity. •
Teacher Resource Sheet 1- read to familiarize yourself •
with the background to the topic.
Introduction:
Start by explaining to students that hygiene is the practice
of keeping oneself and one’s surroundings clean, especially
in order to prevent illnesses or the spread of diseases
(Postma et al, 2004). This includes brushing your teeth,
washing your hands, and looking after hair and nails. If you
learn good practices when you are a child you can take
these lessons throughout your whole life.
What to do:
Activity 1: ‘Kilaa Handi’
Have the children sit in a circle around the teacher and
read the storybook ‘Kilaa Handi’. Allow adequate time for
the students to see the illustrations on each page.
When you have finished reading the story, ask the students
to discuss:
What do you feel when you hear this story?•
What did you think of Kilaa Handi? •
Why did Super Fenthiki take Thiththi Handi on a flight? •
Why didn’t Super Fenthiki take Kilaa handi on a flight?•
What are the things used by Kilaa handi to get clean?•
What is the main message of this story?•
Conclusion:
Remind students that taking care of personal hygiene is
important to stay healthy. Good habits include washing your
hands, brushing your teeth, washing and combing your hair
and not biting your nails.
4.3 topic: Personal hygiene
Kids need clean hands, too
You can help your students avoid getting sick by insisting
that they wash their hands properly and frequently. To get
students into the habit, teach by example. Wash your hands
with your children and supervise their hand washing. Place
hand-washing reminders at children’s eye level, such as a
chart by the bathroom sink for children to mark every time
they wash their hands. Make sure the sink is low enough
for children to use, or that it has a stool underneath so that
children can reach it. Tell your children to wash their hands
for as long as it takes them to sing Twinkle Twinkle Little
Star or the Fenthiki song. This works especially well with
younger children, who may rush when washing their hands.

NB. Teacher resource sheet information from www.hygieneexpert.co.uk/ImportanceOfGoodHygieneInChildren
23
teacher resource Sheet 1
Importance of Good Hygiene in Children
Teaching children to keep their body’s clean is an important
part of keeping them and their families healthy and helping
them to feel good about themselves. Teaching children
to care about the way they look is important to their self
esteem (i.e. what children think about themselves).
Parents and teachers can influence the way in which
children approach personal hygiene, which will stay with
them for life. Educating children on good hygiene is the
best way to avoid the spread of infection and disorders and
not just for childhood complaints; teaching the principles
of correct hygiene at an early age can help keep individuals
remain healthy in later life, and be taught to future
generations. Principles of hygiene should be made part of
everyday life and the best way for parents to teach their
children about good hygiene is to lead by example.
The incidence of illness relating to areas of personal
hygiene is more noticeable in children as they are learning
to take care of themselves and are exposed to many germs
whilst in the school environment or in a play area.
Important Considerations
Smelling clean
According to the experts young kids may sweat but they
don’t start having body odour until they reach puberty.
That’s when special sweat glands start pouring out sweat
which smells!
Clothes
Even if you do not sweat heavily, clothes can get stained,
dirty and generally grubby, so children need to change
them often.
Underclothes are right next to skin and collect dead
skin cells, sweat and possibly other unmentionable
stains. Overnight bacteria start to work on these stains
so clothes do not smell as nice on the second day of
wearing. Therefore students should change clothes and
underclothes often.
Feet
Students need to wash their feet well at least once a day
and then dry them carefully, especially between the toes
where more bacteria collect than anywhere else.
If students use public toilets, they need to be particularly
careful to wash their feet and dry them well. It is a good
idea to wear shoes on their feet too. Lots of other people
walk in bare feet in these places and students can easily
pick up fungal infections or other problems, such as warts!
Shoes
Students spend a lot of time on their feet and their shoes
are very close to the place where the largest collection of
sweat glands lives – on feet! Sweat gets into their shoes and
then bacteria arrives which love the moist leather or fabric
so much that they start multiplying quickly.
If students have one pair of shoes then try to get them off
as soon as you get home so that they can air and dry out
overnight. If students have more than one pair then use
them on alternate days to give them a better chance of
drying out.
Students may want to use foot powder on their feet and
inside their shoes. This can help too. Most school shoes or
running shoes will survive being washed by hand or even
in the washing machine. Keep shoes clean by brushing,
polishing or washing. They will look better, last longer and
be less likely to smell.
Oral Hygiene
Students’ milk teeth are likely to fall out and so they must
know how to prevent this happening to their adult teeth.
Along with good brushing technique, the importance of
dietary influences should be explained and alternatives to
sweets, biscuits and fizzy drinks should be made available.
Students should brush their teeth twice a day - after
breakfast and before going to bed. During the day, students
should fill their mouth with water and swish it around to get
rid of anything sticking to their teeth.
When students cough or sneeze they should be encouraged
to put their hand over their mouth, to try and minimize
germs passing into the air. Once the germs are in the air,
they can be easily passed on to other students. Also if
students are sick, they should be encouraged to stay at
home, to minimize the risks to other students.

Hand Washing
Hand-washing is the single most important factor relating to
the spread of infection, not just for children but for adults
of all ages. Children should be encouraged to wash their
hands before eating, after using the toilet, after handling
animals, if they are ill or if they are spending time with a
newborn.
When a child is ready to go to school, they are expected
to be able to use the toilet themselves and wash their
own hands; parents must make sure this is happening or
infections and diseases can spread.
Fungal Infections
Athlete’s foot and ringworms are also less likely to spread
if correct hand washing is achieved. Children should be
taught how to effectively wash their hands, including
between the fingers and under the nails; employ the use of
a nail brush if needed. Drying properly is also important to
prevent fungal infections from becoming worse. Children
should understand the importance of these actions also,
as well as using an individual towel if they have a fungal
infection.
Nails
Nail biting should be discouraged, particularly if the nails
are being swallowed. The nails and nail beds offer a perfect
environment for germs to live and breed. Nail biting allows
the transfer of these bugs to the mouth which can then lead
to the digestive tract causing many problems. An incidence
of diarrhoea can badly affect a child and they can become
quite ill from dehydration; this can happen very quickly in
the young. Even if correct hand washing takes place, there
will continue to be some germs under and around the nail,
if left they will not normally cause any harm, but transfer
to the mouth can cause problems. Keeping nails short will
help to reduce the amount of germs under the nail.
Hair Care
A suitable hair length and style, such as a bun, is a very
easy way of minimizing the risk of nits. These creatures
are spread by contact so by reducing the amount of hair
available to have contact with others will decrease the
chance of transmission. Hair does not have to be washed
daily as this can induce flaking of the scalp, itching and
removal of the natural oils.
The hair follicles [which the hair grows from] produce oil
which keeps the hair smooth. Students also have sweat
glands in your scalp, and dead skin cells come off the
scalp. The oil, sweat and dead cells all add together and
can make the hair greasy and look dirty unless washed
regularly.
There is no harm in bathing every day, but it is more
sensible to wash the hair every other day, using a frequent
use shampoo.
To keep hair clean:
wash regularly with shampoo (cheap ones are often as •
good as very expensive ones)
massage scalp well to remove dead skin cells, excess oil •
and dirt
rinse well with clear water•
conditioner is helpful for longer hair as it makes the hair •
smoother and easier to comb, but hair doesn’t need to
have conditioner
use a wide toothed comb for wet hair as it is easier to •
pull through.
Food Hygiene
Children should be encouraged to wash their hands before
meals and snacks, and should be discouraged from eating
off the floor; this is especially important if there are pets
in the house. Using cutlery allows the child to learn table
manners and will lessen the chance of the transfer of germs
from the hands to the mouth.
Teaching the correct principles of hygiene should begin
at as early an age as possible. It will help to prevent the
spread of infections and diseases. Children will follow the
example set to them, so adults should lead by example.
Less incidence of illness means fewer absences from
school.
24

Learning Objectives:
Students understand the link between hygiene and •
sanitation and their own health.
Students consider ideas about water, health and •
sanitation using the PMI (plus, minus, interesting)
approach.
Grades: 4-5
Time:
Activity 1: 1 hour•
Activity 2: 2 hours •
Materials needed:
‘UNICEF clips’ on CD/DVD and TV/DVD player - for the •
beginning of Activity 1
Student Work Sheet 1 - PMI cards for each participant •
for Activity 1
Student Work Sheet 2 - Role cards for the different •
groups for Activity 2.
Teacher Resource Sheet 1 – read to familiarize yourself •
with the background to the topic.
Introduction:
Start by introducing the idea that our personal hygiene
practices can affect our own health, or the health of our
family.
Dr Edward de Bono (who created the PMI thinking activity)
suggests that when people are first exposed to an idea, their
natural reaction would be to either approve or disapprove
of it. The PMI process helps students to explore ideas in
a more structured way, by identifying the good points (P
= plus), the bad points (M = minus), and the interesting
points (I = interesting) about the issue or idea.
This activity applies the PMI process to a series of water,
health and sanitation TV advertisements that were
produced by UNICEF in the Maldives. The activity is the
beginning of the process of critically thinking about the
advertisements and the issues that they relate to.
What to do:
Activity 1- PMI
Watch the UNICEF TV advertisements. 1.
Conduct a PMI on the advertisements (you may wish to 2.
watch them several times). The PMI requires students
to write down the plus, minus and interesting aspects of
the ideas contained in the advertisements (on the cards
provided). This can be done individually or in small
groups.
P= Plus: The things that you thought were good about •
the ideas in the advertisements
M= Minus: The things that you thought were negative •
about the ideas in the advertisements
I= Interesting: The ideas that were neither good nor bad •
but are worth noticing
Collate a big list of the students’ results on the board 3.
under the headings plus, minus and interesting.
Undertake a discussion about the PMI results with 4.
participation of the entire class. Ask students to think
about their initial reactions to the advertisements by
providing the reasons for their PMI results. Why did you
think the plus ideas were good? Why didn’t you like or
agree with the minus ideas? What exactly was interesting
about the interesting ideas?
In the discussions try to focus on plus points first, then
the minus points, and then the points that are neither
good nor bad but interesting. There may be instances
where one student identifies an idea as ‘plus’ while
another identifies the same idea as a ‘minus.’ There are
no definite answers in this activity, and the emphasis
should be placed on students explaining their ideas and
giving their opinions.
Organize the students into small groups. Ask each group 5.
to think of questions that they might have relating to the
ideas in the advertisements. What would the students
like to know more about? Share the questions with the
class and think of ways in which you could find answers
to these questions.
Activity 2- Role Play: TV production crew
Organize the students into small groups and 1.
provide each group with one or two of the UNICEF
advertisements to view.
Explain to each group that they are going to play the role 2.
of the television production crew responsible for creating
the UNICEF advertisements. In this role they will closely
examine the material in their advertisement so that they
can be interviewed by the media (the other students)
and answer questions about it. Each group should
include students playing the following roles (Student
Work Sheet 2):
4.4 topic: Hygiene and Sanitation
25

Writer/s:• develop the words and story in the
advertisement (spoken by the characters, written on
screen or narrated).
Film director/s: • determine the images that are
shown and the type of ‘shots’ that are taken (camera
placement, character movements etc)
Audio & music director/s:• decide on the choice of music
and sound effects to support the advertisement and
message
Hand out the role play cards to each group and ask 3.
group members to take on their particular TV production
roles and examine the advertisements. They will need
to understand them very well so that they can answer
questions asked about the advertisements by the media.
This will include answers to the questions written on
their role play cards (and any other questions asked by
the students).
When each group has thoroughly considered their 4.
advertisement and their role, they will be ready for the
‘press conference.’ Encourage the students to dress
up for their roles and organize the classroom to look
like a television studio. Each group will show, act out
(or describe) their advertisement and provide some
commentary about it. When it has concluded the rest of
the class (the media) will ask them questions regarding
it. The questions can be prompted by the teacher if
necessary (ensure that the key questions written on each
role play card are asked).
Each group should have a turn as the production crew, 5.
while everyone else will be involved in the role play as
‘the media.’
After the role play is completed conduct a classroom 6.
discussion:
Do you agree with the messages and ideas in the •
advertisements?
Why are these messages important? (Or why not?)•
How relevant are the points made by UNICEF in our •
community?
What practical experiences do you have that relate to •
these issues?
Conclusion:
Finish the activities by reminding students that our personal
hygiene practices can affect the health of our families and
communities. Remind students that it is also important to
use sanitation facilities where they are available (e.g. toilets
connected to septic tanks or sewerage systems) so that
human waste is channeled away from human contact.
26
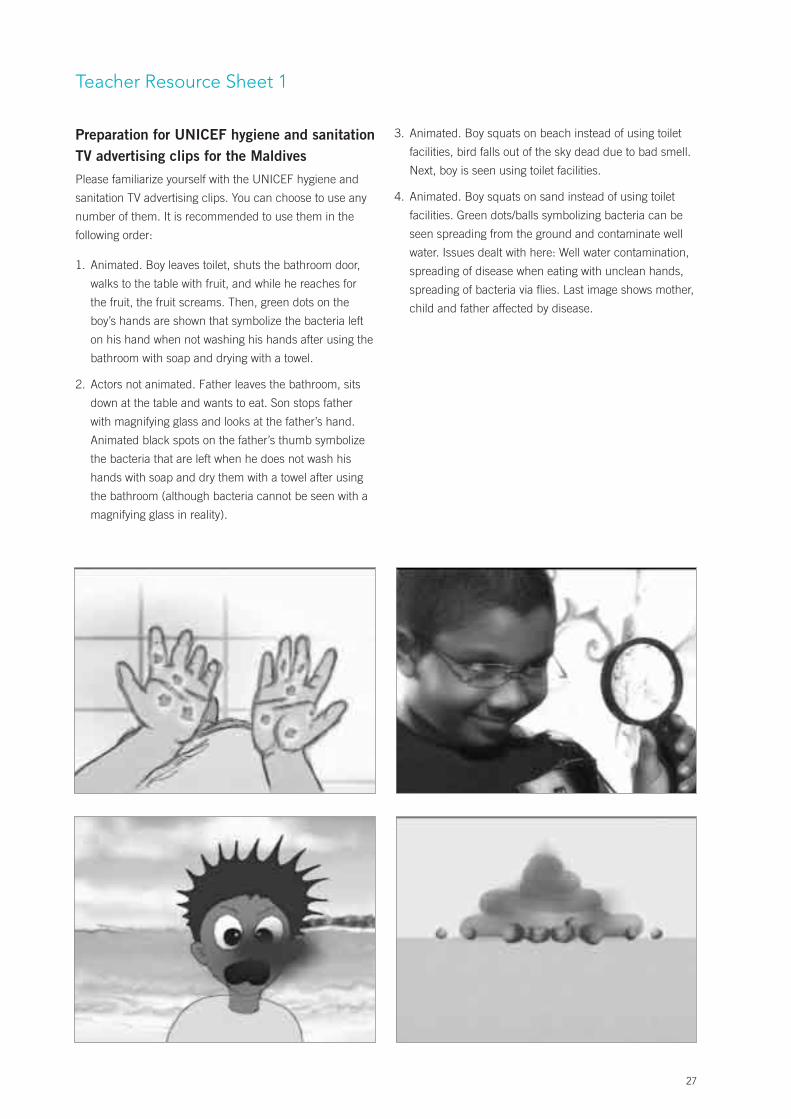
Preparation for UNICEF hygiene and sanitation TV advertising clips for the Maldives
Please familiarize yourself with the UNICEF hygiene and
sanitation TV advertising clips. You can choose to use any
number of them. It is recommended to use them in the
following order:
Animated. Boy leaves toilet, shuts the bathroom door, 1.
walks to the table with fruit, and while he reaches for
the fruit, the fruit screams. Then, green dots on the
boy’s hands are shown that symbolize the bacteria left
on his hand when not washing his hands after using the
bathroom with soap and drying with a towel.
Actors not animated. Father leaves the bathroom, sits 2.
down at the table and wants to eat. Son stops father
with magnifying glass and looks at the father’s hand.
Animated black spots on the father’s thumb symbolize
the bacteria that are left when he does not wash his
hands with soap and dry them with a towel after using
the bathroom (although bacteria cannot be seen with a
magnifying glass in reality).
Animated. Boy squats on beach instead of using toilet 3.
facilities, bird falls out of the sky dead due to bad smell.
Next, boy is seen using toilet facilities.
Animated. Boy squats on sand instead of using toilet 4.
facilities. Green dots/balls symbolizing bacteria can be
seen spreading from the ground and contaminate well
water. Issues dealt with here: Well water contamination,
spreading of disease when eating with unclean hands,
spreading of bacteria via flies. Last image shows mother,
child and father affected by disease.
teacher resource Sheet 1
27

Student Work Sheet 1Cut up these strips and provide each student with 3 slips (One Plus, One minus, One Interesting)
Plus (+) Minus (-) Interesting
Plus (+) Minus (-) Interesting
Plus (+) Minus (-) Interesting
Plus (+) Minus (-) Interesting
Plus (+) Minus (-) Interesting
Plus (+) Minus (-) Interesting
Plus (+) Minus (-) Interesting
Plus (+) Minus (-) Interesting
Plus (+) Minus (-) Interesting
28

Student Work Sheet 2Organise students into small groups and provide each group with a card.
Film director/s
You are the artistic film directors who researched the issues and determined the images that are shown and the type of ‘shots’ that are taken (camera placement, character movements etc)
You will be interviewed by the media about your role in the making of the advertisement. You will need to answer questions including: What is the main message of the advertisement? What special effects did you use to make the advertisement? What was the significance of a particular shot or image?
Script writer/s
You are the script writers who researched and developed the words and story in the advertisement. You will be interviewed by the media about your role in the development of the advertisement. You will need to answer questions including: What issue is the advertisement about? What is the main message of the advertisement? Why did you choose the script / words that were featured? How did you try to make the audience take notice of the advert?
Audio & music director/s
You are the artistic audio and music directors who researched the issues and decided on the choice of music and sound effects to support the advertisement and messages.
You will be interviewed by the media about your role in the making of the advertisement. You will need to answer questions including: What is the main message of the advertisement? How did you use sounds and music in the advertisement? Do you feel that the soundtrack makes an impact on the audience?
29

Learning Objectives:
Students recognize that 2008 is the International year of •
sanitation.
Students utilize the International year to raise awareness •
of hygiene and sanitation issues in their school and
community.
Grades: 6-7
Time:
Activity 1: 1 hour•
Activity 2: 2-3 hours (depending on awareness materials •
selected)
Materials needed:
Teacher Resource Sheet 1 and 2– read to familiarize •
yourself with the background to the topic.
Student Work Sheet 1 - Question sheet for each group •
for Activity 1
Introduction:
Start by explaining to students that the word ‘sanitation’
means the hygienic means of preventing human contact
from the hazards of wastes. The introduction of sanitation
systems into our communities (e.g. septic tanks, sewerage
systems, waste collection) has had a major impact on our
health and our development. Almost everyone living in the
developed world has access to a private, flush toilet served
by a continuous supply of piped water with taps and toilets
in close proximity. Human waste is channeled by pipes into
sewerage systems and treatment facilities, ensuring that
drinking water is separated from the pathogens carried in
faecal material. Today 2.6 billion people, including almost
one billion children, live without even basic sanitation.
What to do:
Activity 1- Sanitation and hygiene issues on my island
As a class research the sanitation and hygiene issues on
your island. Split students up into 3 groups and discuss
what problems there are with sanitation and hygiene on
your island using Student Work Sheet 1.
Ask each group to report its findings to the class. These 1.
can be summarised on the board in columns.
Activity 2- Planning an awareness campaign
By now, the students will have a good understanding of the
issues surrounding sanitation and hygiene issues on their
island. They are now in the position to formulate an action
plan of what they can do to improve sanitation and hygiene
issues. They identify here what they need to do at home,
at school, or at the community level to improve the hygiene
situation. Based on the list of issues developed in Activity
1, their task is to agree on at least three issues that need
increased awareness raising in their school and community.
Throughout 2008 there are several international days
celebrated, which you may be able to use to highlight
sanitation and hygiene issues:
World Water Day on 22 March with a focus on sanitation •
in 2008
World Health Day on 7 April •
World Environment Day on 5 June •
International Literacy Day on 8 September •
World Habitat Day on 6 October, and •
International Day for Disaster Reduction on 10 October •
Things to do could include for example:
Design an awareness campaign and create stickers, •
posters, songs, plays, radio messages, TV spots,
anything that can be used by your community to
educate people about hygiene and sanitation and to give
them ideas about what they can do.
Conduct an information day for the parents. •
Paint a mural.•
Write an article for your local newspaper or newsletter or •
encourage your newspaper to cover sanitation issues.
Conclusion:
Remind the students that we all have a responsibility to
practice good hygiene and sanitation habits in our homes
and schools. Students can also be ‘agents of change’ to
improve hygiene and sanitation habits in our communities.
By preparing a hygiene and sanitation awareness
campaign, students are participating in community problem
solving and actively applying their new knowledge their
island environment.
4.5 topic: International year of Sanitation 2008
30

31
teacher resource Sheet 1Sanitation is the hygienic means of preventing human
contact from the hazards of wastes to promote health.
(Wikipedia)
Sanitation is the most important medical advance since
1840. Improved sanitation reduces cholera, worms,
diarrhoea, pneumonia and malnutrition, among other
illnesses, that cause disease and death in millions of
people. Today 2.6 billion people, including almost one
billion children, live without even basic sanitation. Every 20
seconds, a child dies as a result of poor sanitation. That’s
1.5 million preventable deaths each year.
Sanitary Facilities
Toilets may seem like an unlikely catalyst for human
progress—but the evidence that they are is overwhelming.
Almost everyone living in the developed world has access
to a private, flush toilet served by a continuous supply
of piped water—with taps and toilets in close proximity.
Human waste is channeled by pipes into sewerage systems
and treatment facilities, ensuring that drinking water is
separated from the pathogens carried in faecal material.
Meanwhile, taps located in sanitation facilities enable
people to maintain personal hygiene. But at the other end
of the sanitation spectrum are the millions of people forced
to defecate in bags, buckets, fields or roadside ditches.
Water Quality
A vicious cycle of health impacts is established when
human waste is not treated properly. Bacteria, viruses
and parasites from human excreta (waste) enter the
environment, where they might remain for some time in
water or soil. By drinking contaminated water, or eating
food that has been irrigated with untreated water, these
micro-organisms infect people, who in turn will contaminate
the environment via their faeces and/or urine. When
wastewater is not handled properly it directly affects the
local living environment and groundwater where the waste
is produced. Discharge via a sewer or drain to a lagoon is
often chosen as an easy solution: the ´out of sight-out of
mind´ approach. However, this directly affects the marine
environment. Economic losses also result from untreated
wastewater such as: increased health care costs, lower
productivity and income losses due to illness, drop in fish
production, declines in tourism, etc.
Solid Waste sanitation
Solid waste (e.g. kitchen waste, cans, plastic bottles)
can cause a nuisance and look untidy, but can also pose
serious health problems if not properly managed. So there
is a need for solid waste sanitation systems too! Solid waste,
especially organic waste (such as kitchen waste) can
encourage fly breeding and attracts rats and other animals
that may transmit disease.

teacher resource Sheet 2
Water, sanitation and hygiene links to health
Facts and figures (updated November 2004)
“Water and Sanitation is one of the primary drivers of public
health. I often refer to it as “Health 101”, which means that
once we can secure access to clean water and to adequate
sanitation facilities for all people, irrespective of the
difference in their living conditions, a huge battle against
all kinds of diseases will be won.” Dr LEE Jong-wook,
Director-General, World Health Organization.
Diarrhoea
1.8 million people die every year from diarrhoeal •
diseases (including cholera); 90% are children under 5,
mostly in developing countries.
88% of diarrhoeal disease is attributed to unsafe water •
supply, inadequate sanitation and hygiene.
Improved water supply reduces diarrhoea morbidity by •
between 6% to 25%, if severe outcomes are included.
Improved sanitation reduces diarrhoea morbidity •
by 32%.
Hygiene interventions including hygiene education and •
promotion of hand washing can lead to a reduction of
diarrhoeal cases by up to 45%.
Improvements in drinking-water quality through •
household water treatment, such as chlorination at point
of use, can lead to a reduction of diarrhoea episodes
by between 35% and 39%.
Malaria
1.3 million people die of malaria each year, 90% of •
whom are children under 5.
There are 396 million episodes of malaria every year, •
most of the disease burden is in Africa south of the
Sahara.
Intensified irrigation, dams and other water related •
projects contribute importantly to this disease burden.
Better management of water resources reduces •
transmission of malaria and other vector-borne diseases,
such as Dengue fever.
Access to water supply as of 2002
In 2002, 1.1 billion people lacked access to improved •
water sources, which represented 17% of the global
population.
Over half of the world’s population has access to •
improved water through household connections
or yard tap.
Of the 1.1 billion without improved water sources, •
nearly two thirds live in Asia.
In sub-Saharan Africa, 42% of the population is still •
without improved water.
In order to meet the water supply MDG target, an •
additional 260 000 people per day up to 2015 should
gain access to improved water sources.
Between 2002 and 2015, the world’s population is •
expected to increase every year by 74.8 million people.
Access to sanitation as of 2002
In 2002, 2.6 billion people lacked access to improved •
sanitation, which represented 42% of the world’s
population.
Over half of those without improved sanitation – nearly •
1.5 billion people – live in China and India.
In sub-Saharan Africa sanitation coverage is a mere •
36%.
Only 31% of the rural inhabitants in developing •
countries have access to improved sanitation, as
opposed 73% of urban dwellers.
In order to meet the sanitation MDG target, and •
additional 370 000 people per day up to 2015 should
gain access to improved sanitation.
Emergencies and disasters
Almost two billion people were affected by natural •
disasters in the last decade of the 20th century, 86%
of them by floods and droughts.
Flooding increases the ever-present health threat •
from contamination of drinking-water systems from
inadequate sanitation, with industrial waste and by
refuse dumps.
Droughts cause the most ill-health and death because •
they often trigger and exacerbate malnutrition and
famine, and deny access to adequate water supplies.
Disaster management requires a continuous chain •
of activities that includes prevention, preparedness,
emergency response, relief and recovery.
Millennium Development Goals (MDGs)
By including water supply, sanitation and hygiene in
the MDGs, the world community has acknowledged the
importance of their promotion as development interventions
and has set a series of goals and targets.
NB. Teacher resource sheet information from http://www.who.int/
32

Student Work Sheet 1Use this table to gain information about the current status of water, sanitation and hygiene issues on your island.
Research Questions Answers
1. Waste Disposal
How is waste disposed on my island?
Describe any negative effects of current practices on the environment and community health.
2. Getting Clean Water
Where do I get clean water from? Where does the school get clean water from?
Are water sources on my island polluted?
What substances can pollute our water?
Describe any negative effects of current practices on the environment and community health.
3. Sanitation (management of human waste)
What happens to human waste from our homes? Or schools? Where does it go?
Describe any negative effects of current practices on the environment and community health.
33

5 PartICIPatorY aCtIVItIES and tooLS: WatEr
Introduction The purpose of this chapter is to develop the students’ understanding of the issues surrounding
water and their health. They will learn ways of protection, collection, handling and use of water at
a household and community level.
Learning objectivesThe objectives of the chapter are to:
Foster knowledge and awareness of issues about water on their island•
Link classroom activities to our student’s community and environment•
Create opportunities to investigate and research water problems•
overview of topicsWhyiswaterimportant? • Watersourcesonmyisland•
Wellwatercontamination • Rainwatercontamination•
Watercontaminationbyfeaces • Watercollectionmethods,storageandhandling•
Watertreatment • Wateruseandreuseinthehome•
34

Learning Objectives:
Students understand the water cycle.•
Students understand the importance of water on their •
island.
Grade: 4-7
Time:
Activity 1: 1 hour
Activity 2: 30 minutes
Materials needed:
Poster showing the water cycle•
Teacher Resource Sheet 1 – read to familiarize yourself •
with the background to the topic.
Introduction:
Start by explaining to students that water is essential
for life. Water is one of the most basic of human needs.
Without water, life could not exist. It is the most valuable
resource on Earth. Earth’s water is always in movement,
and the water cycle, also known as the hydrologic cycle,
describes the continuous movement of water on, above,
and below the surface of the Earth. Since the water cycle is
truly a “cycle”, there is no beginning or end. Humans and
all other organisms (animals and plants) depend on water
for their survival.
What to do:
Activity 1: Water and my community
Drama 1
Each person takes on a different role in the community:
mother, father, young person, baby, elder/chief, business
person, government official and maybe also include tree,
bird, insect or mammal.
Now imagine yourself in your community with lots of fresh
and clean water.
Imagine drinking all you need, doing a lot of washing,
cleaning, cooking, and swimming and imagine enough
water for everyone.
Maybe ask: what would your relationships to other people
be like?
Now imagine another scenario:
There was a drought and the freshwater lens went salty, the
tanks were empty and there was no rain.
What would you do? What would your relationships to
others be like?
Act out this drama.
After this exercise: take turns explaining what happened
and how you felt about the scenario. What issues or
problems arose and how did you deal with it? Has this
situation ever occurred before?
Drama 2
Explore the importance of fresh water in the natural
environment.
Role play: half the group are humans and half are animals
and plants.
Imagine the consequences if one group used up all
the water e.g. if humans used up all the water from the
environment without enough left for the rivers or streams or
for the animals. What would happen?
This exercise may explore the inter-connectedness between
humans/plants/animals and water.
After this exercise: take turns explaining what happened
and how you felt about the scenario. What issues or
problems arose and how did you deal with it? Has this
situation ever occurred before?
Activity 2: The water cycle
Show the poster on the water cycle to the students.
Explain to students the water cycle in the Maldives.
Highlight that our main source of freshwater is from the
freshwater lens and from rainwater. Both sources of water
are vulnerable to pollution.
Ask students the following discussion points:
A. How much water is available on the planet?
B. How much of the water available in the planet is fresh
water?
C. Why is water important for us and the planet?
D. Where does your drinking water come from?
E. Can human activities affect water quality? How?
Conclusion:
Remind the students that water is essential for life, all
life- but that it can easily become contaminated and cause
illness. In the Maldives our sources of freshwater are
limited and are vulnerable to pollution, so we must protect
these freshwater sources.
5.1 topic: Why is water important?
35

36
teacher resource Sheet 1Water is one of the most basic of human needs. Without
water, life could not exist. It is the most valuable resource
on Earth. Earth’s water is always in movement, and the
water cycle, also known as the hydrologic cycle, describes
the continuous movement of water on, above, and below
the surface of the Earth. Since the water cycle is truly a
“cycle,” there is no beginning or end. Water can change
state among liquid, vapor, and ice at various places in the
water cycle, with these processes happening in the blink of
an eye and over millions of years. Rain water that soaks into
the ground runs off the land and flows into streams, rivers,
lakes, ponds or into the sea. The sea, oceans or other
surface waters are heated by the sun and water (vapour)
rises up into the atmosphere to form clouds. When it rains
again the process starts all over again. As shown in the
illustration, the water cycle consists of the following:
1. Transpiration
Plants draw water in at the roots where it moves up to
the leaves and then evaporates. This process is called
transpiration and is responsible for much of the water that
enters the atmosphere. If plants are removed, particularly
trees, then this part of the water cycle is disrupted, there is
less transpiration and therefore less rain.
2. Evaporation
Energy supplied by the sun helps water to rise up
(evaporate) from water surfaces such as lakes, seas and
oceans, into the atmosphere. (Note that rainwater is always
fresh and not salty).
3. Condensation and rain
These drops of water in the atmosphere form (condense)
into clouds. The sun also provides the energy which drives
the weather systems to move the water vapor (clouds)
inland (otherwise, it would only rain over the oceans). Once
water condenses, it gets heavier, gravity takes over and the
water is pulled to the ground as rain water.
4. Runoff and infiltration
Rain water runs off the land and flows into oceans, lakes
and rivers. Rainwater can also soak into the soil, subsoil
and rock to become groundwater. The water moves down
into the ground because of gravity, passing between
particles of soil, sand, gravel, or rock until it reaches
impervious rock. This area becomes filled, or saturated with
water. This ground water may be very near the ground’s
surface or it may be hundreds of feet below. Wells that are
sunk in the ground tap into this groundwater, or sometimes
groundwater makes its way to the surface and forms a
spring.

5. Groundwater
Most groundwater is clean, but it can become polluted,
or contaminated. It can become polluted from sewage,
or when people apply too much fertilizer or pesticides to
their fields. When pollutants leak, spill, or are carelessly
dumped on the ground they can move through the soil
to contaminate the water. Because groundwater is deep
in the ground, groundwater pollution is generally difficult
and expensive to clean up. Sometimes people have to
find new places to dig a well because their own becomes
contaminated.
6. Storage
Huge quantities of water are stored in rivers, oceans, lakes
and glaciers.
Water Facts
Water covers 75% of the Earths surface, so we •
really are a water planet.
Over 97% of Earth’s water is salt water.•
2% is stored in glaciers and icecaps.•
1% of the Earth’s water is freshwater stored in •
groundwater or surface water.
37

5.2 topic: Water sources on my island
38
Learning Objectives:
Students understand that there is a freshwater lens •
underneath coral islands.
Students understand the possible sources of freshwater •
on their island.
Students understand that freshwater sources can be •
polluted.
Grade: 4-7
Time:
Activity 1: 30 minutes•
Activity 2: 1 hour•
Activity 3: 2-3 hours•
Materials needed:
Poster showing the freshwater lens•
A map of the island. •
Coloured pens or pencils. •
Teacher Resource Sheets 1 and 2– read to familiarize •
yourself with the background to the topic.
Introduction:
Start by explaining to students that source water is
untreated water from streams, lakes, or groundwater that
people use to supply private wells and public drinking water
systems. Source water comes from one of two sources:
surface water or groundwater. Surface water is water that is
open to the atmosphere and includes lakes, rivers, streams
and creeks. Groundwater is water found beneath the
Earth’s surface between the cracks and spaces in soil, sand
and rock. In the Maldives our source water mainly comes
from rainwater or from groundwater, as we do not have
rivers or freshwater lakes. Some Islands, including Male’,
use desalination. This technology can turn salty water into
clean drinkable water.
What to do:
Activity 1: The freshwater lens
Show the poster on the Freshwater lens to the students.
Explain to students how a lens of freshwater is formed on
coral islands in the Maldives. Explain that a freshwater
lens is a natural feature that makes it possible for life on
many small Maldivian Islands. The fresh water collects
below the ground and on top of the sea water, and is good
enough quality for plants, animals and communities to
use. This supply is replenished by rainfall which percolates
down through the coral and sand. Freshwater lenses are a
particularly important source of water on atoll islands, which
often have no surface water.
Talk about ways that the water in the freshwater lens can be
polluted (e.g. going salty, from leaking septic tanks etc).
Ask the students to draw a picture of the freshwater lens in
their notebooks.
Activity 2: Rainwater tanks
Start by explaining to students that rainwater provides the
main drinking water supply for 99% of all households in the
Maldives outside of Male’. It is the most important water for
the family, as it has the most direct effect on family health.
Divide the students into 4 groups and allocate the groups
to different sections of the island. In groups, walk around
the community and count how many rainwater tanks the
householders use. Students should ask 4 householders the
following questions:
Is rainwater their main source of freshwater at their •
house?
Is there enough water to last each year? If no, why not?•
How is the quality of their rainwater?•
Return to the classroom and collate the number of tanks
on their island and the response to the questions. Students
should now have a greater awareness of the importance of
rainwater.
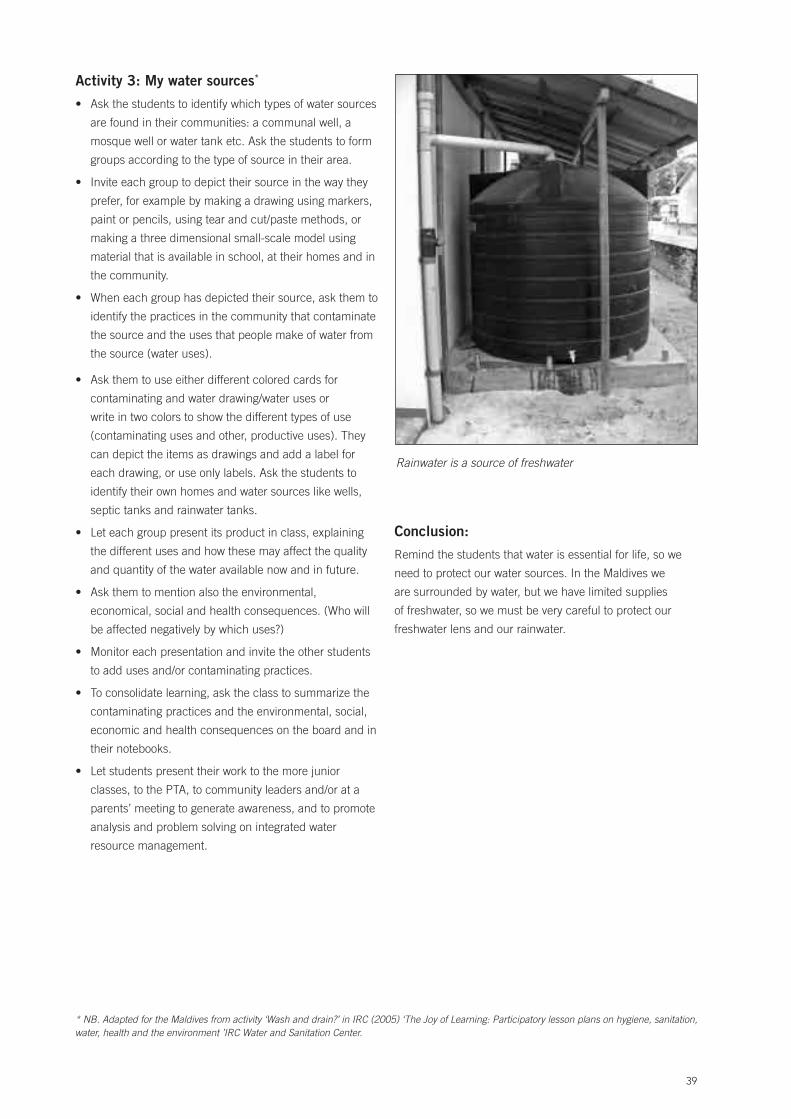
Activity 3: My water sources*
Ask the students to identify which types of water sources •
are found in their communities: a communal well, a
mosque well or water tank etc. Ask the students to form
groups according to the type of source in their area.
Invite each group to depict their source in the way they •
prefer, for example by making a drawing using markers,
paint or pencils, using tear and cut/paste methods, or
making a three dimensional small-scale model using
material that is available in school, at their homes and in
the community.
When each group has depicted their source, ask them to •
identify the practices in the community that contaminate
the source and the uses that people make of water from
the source (water uses).
Ask them to use either different colored cards for •
contaminating and water drawing/water uses or
write in two colors to show the different types of use
(contaminating uses and other, productive uses). They
can depict the items as drawings and add a label for
each drawing, or use only labels. Ask the students to
identify their own homes and water sources like wells,
septic tanks and rainwater tanks.
Let each group present its product in class, explaining •
the different uses and how these may affect the quality
and quantity of the water available now and in future.
Ask them to mention also the environmental, •
economical, social and health consequences. (Who will
be affected negatively by which uses?)
Monitor each presentation and invite the other students •
to add uses and/or contaminating practices.
To consolidate learning, ask the class to summarize the •
contaminating practices and the environmental, social,
economic and health consequences on the board and in
their notebooks.
Let students present their work to the more junior •
classes, to the PTA, to community leaders and/or at a
parents’ meeting to generate awareness, and to promote
analysis and problem solving on integrated water
resource management.
Conclusion:
Remind the students that water is essential for life, so we
need to protect our water sources. In the Maldives we
are surrounded by water, but we have limited supplies
of freshwater, so we must be very careful to protect our
freshwater lens and our rainwater.
Rainwater is a source of freshwater
* NB. Adapted for the Maldives from activity ‘Wash and drain?’ in IRC (2005) ‘The Joy of Learning: Participatory lesson plans on hygiene, sanitation, water, health and the environment ’IRC Water and Sanitation Center.
39

teacher resource Sheet 1
What is Source Water?*
Source water is untreated water from streams, lakes, or
groundwater that people use to supply private wells and
public drinking water systems. Source water comes from
one of two sources: surface water or groundwater. Surface
water is water that is open to the atmosphere and includes
lakes, rivers, streams, creeks and oceans. Groundwater
is water found beneath the Earth’s surface between the
cracks and spaces in soil, sand and rock. In the Maldives
our source water mainly comes from rainwater or from
groundwater.
Sources of Freshwater
Surface Water
Surface water is any water that is stored on the Earth’s
surface (including oceans). Fresh surface water includes
lakes, rivers, streams, ponds, pools and wetlands. It also
includes surface runoff, water that falls as precipitation and
flows across the land rather than soaking in.
Ground Water
14% of all fresh water is stored underground! Groundwater
is one of the world’s most important sources of fresh water –
one third of the people in the world rely on it. Ground water
is stored in rock pores, cracks and openings, which act like
a huge underground sponge. People take out this water by
digging wells, bores or by putting in pumps. Ground water
is replenished by rain fall, which soaks into the ground.
Compared to surface water, ground water moves very
slowly, sometimes only centimetres every year. The speed at
which ground water moves depends on the rock type and
gravity – some of the water deep in the ground may have
been there for thousands of years!
Water Table
When all the spaces between soil particles and rock
fractures fill up with water, the soil is said to be saturated.
The top of this zone is called the water table. The water
table can be centimetres or meters below the surface,
depending on rainfall and how much water is being used.
This water may be only days, weeks or months old.
Freshwater Lens
A freshwater lens is a natural feature that makes it possible
for life on many small Maldivian Islands. The fresh water
collects below the ground and on top of the sea water, and
is good enough quality for plants, animals and communities
to use. This supply is replenished by rainfall which
percolates down through the coral and sand. Freshwater
lenses are a particularly important source of water on atoll
islands, which often have no surface water.
The Importance of source water protection
Protecting water at the source is an important way to ensure
the health of humans, ecosystems and economies. Source
water protection also works to ensure that a clean and safe
environment is available for future generations.
Human Health
Protecting sources of water is essential to ensuring human
health. According to the 3rd World Water Forum, held in
2003, every year at least five million people die from water-
related diseases worldwide. These diseases are transmitted
either directly, as a result of infection from consuming
contaminated water or food, or indirectly, by ingesting
disease-carrying organisms. The majority of those affected
by water related mortality and morbidity are children under
the age of five.
Preventing contaminants from entering water sources is
an effective way to help ensure clean drinking water and
thus prevent human disease. This is important because
conventional water treatment methods cannot effectively
remove many hazardous chemicals. While source water
protection works to everyone’s benefit, it is of particular
concern for island consumers whose geographic location
may prevent them from having access to municipally
treated water/ desalinated water.
Ecosystem Health
An ecosystem is a biological community consisting of
interacting organisms and their surrounding physical
environment. Ecosystems have four main components: air,
water, land and living creatures (i.e., plants and animals,
including humans). Each component of an ecosystem
performs or contributes to a unique service or function
upon which all life depends.
Every ecosystem on Earth depends on water, of varying
amounts, for its survival. If either water quality or water
quantity is in any way degraded, this can have a serious
adverse impact on an ecosystem. Similarly, when
ecosystems become degraded, this has a negative impact
on water.
Economic Health
While there are costs associated with protecting water
sources, they are investments that serve to generate
economic vitality and growth. Communities with clean
water sources attract human settlement, development and
business.
NB. Teacher resource sheet information from http://www.pollutionprobe.org/Reports/swpprimer.pdf
40

41
teacher resource Sheet 2Water is essential for life. We are all aware of this fact, and
yet it is all too often taken for granted. The Maldives is a
unique island nation surrounded by the Indian Ocean and
wherever we look we see water. But ironically, the Maldives
has very limited freshwater resources that can be used to
sustain human life.
Traditionally we have relied on rain water and the thin and
fragile layer of freshwater that forms a ‘freshwater lens’ just
beneath the ground. Heavy rains may occur during our
monsoon periods, but the amount of rain is unpredictable,
and the wet times are separated by months of dry weather,
limiting the amount of rainwater available. The freshwater
lens is accessed through the many wells that we have
created. However the freshwater lens is thin and highly at
risk to pollution that can seep in through our sandy soils. If
we take too much of the freshwater out of the lens it very
quickly becomes salty. This is because the sea water that
sits underneath it rapidly moves in to fill the space if we
take too much out.
Some Islands, including Male’, use desalination. This
technology can turn dirty and salty water into clean
drinkable water. Maybe it is the answer? While this water
is clean, it is also very expensive and the cost raises
some very important questions. Who will pay to produce
this water? Can the community afford it? What are the
environmental costs of this water? Is it a better alternative
than looking after the water that we already have? Is it a
solution for everyone?
Growing population and development in the Maldives
has put increasing pressure on the fragile and limited
freshwater supplies. This pressure reached a crisis point
when the Tsunami swept onto our Islands in December
2004. Saltwater, sewerage and rubbish washed into wells
and soaked into the ground and rainwater tanks were
destroyed. People became aware of the importance of our
fresh water supply. However, the impact of the Tsunami on
water is small compared to the ongoing impacts of human
activities. These include:
Sewage disposal (e.g. toilet wastes)•
Rainwater collection•
Well management•
Extraction of groundwater (e.g. for desalination)•
Disposal of solid wastes (e.g. plastics, batteries, food •
scraps etc)
Hygiene practices•
Economic benefits of source water protection measures
can also be measured in terms of cost savings — that is,
the damage costs that may have resulted if water sources
were not protected. Preventing contamination at the source
also reduces the costs of treating water later in the drinking
water treatment process.

5.3 topic: Well water contamination
* Adapted for the Maldives from activity ‘I drink…safe water!’ in IRC (2005) ‘The Joy of Learning: Participatory lesson plans on hygiene, sanitation, water, health and the environment ’IRC Water and Sanitation Center.
42
Learning Objectives:
Students know the importance of safe drinking water •
and the risks of drinking water that is less safe.
Students know the main ways well water can become •
contaminated.
Grades: 1-5 (activity 1,2) 6-7 (activity 3)
Time:
Activity 1: 1 hour
Activity 2: 30 minutes
Activity 3: 2 hours
Materials needed:
Paper , pencils, paint or markers, scissors and glue and •
modeling clay (Activity 1)
Sequence story cards ‘Water Story’(activity 2)•
A map of the island(Activity 3)•
Teacher Resource Sheet 1- read to familiarize yourself •
with the background to the topic.
Teacher Resource Sheet 2- read to familiarize yourself •
with the background to the topic.
Introduction:
Start by explaining to students that well water is used by
all households in the Maldives. Most communities use
the well water for all non-drinking uses such as washing,
bathing and toileting. Well water provides about 90% of
the household water needs. Well water is therefore very
important to the household.
Unfortunately, all surveys of well water show that well water
is of worse quality than rainwater. It usually has about 100
times more bacteria in it and is 100 times more salty than
rainwater. Some wells also contain contamination from
septic tanks. Due to the presence of bacteria and other
compounds from septic tank discharge it is always better to
drink rainwater than well water. If you drink well water that
contains too much bacteria then it will make you sick, and
give you diarrhoea and vomiting.
What to do:
Activity 1: My well water*
Discuss how well water is used on their island•
Ask each child to draw/model/cut and paste his or her •
well (techniques adjusted to age).
Let them display their drawings on the wall or floor; •
older children may also group drawings by type of water
source.
Facilitate a discussion about what children and others do •
near wells, e.g. wash clothes, bathe, take drinking water,
etc.
Encourage the children to discuss what this means for •
the cleanliness of the water and what this may mean for
their stomachs if they drink this water.
Ask older children to write the names of water-borne •
diseases on the board/ cards.
Let the students make a drawing on the importance •
of safer drinking water in whatever way they wish (free
expression). Ask children to add messages.
Let them take the drawings home to show and, if agreed, •
put it on the wall at home.
The next day/lesson, facilitate an open discussion about •
what they have done at home with the drawing and how
their parent(s) reacted.

Conducting a survey.
43
Activity 2: Water Story
Have the children sit in a circle around the teacher and
read the ‘water story’ to the students using the sequence
cards.
The people of Paradise Island lived beside a mosque with
a well. They felt so blessed to have so much clean water
close by for drinking and cooking… but’ danger’ lived in
the well too! The people could not understand why so many
of them were sickly. Mothers spent so much time tending
to their sick children that house work was neglected and
families lived in confusion. With so many children getting
sick, school work suffered and grades fell…Men lost their
jobs because they spent so much time on sick leave. With
so many of their bread winners out of work, the island
chief called for an emergency meeting to discuss their
problem. They also went to the mosque to pray for divine
intervention. They even wrote to the government who sent
a health worker to the island. She looked in the bushes,
she looked in the trees, she sampled the air, she took
samples from the mosque well… Then she found what
she was looking for…That evening there was a meeting for
the island community. Then the health worker told them
about contaminated well water which was causing all their
problems.
After telling the story, initiate a discussion with the students
by asking some questions like:
A. What caused confusion among the community members
on Paradise Island?
B. Why did they have difficulty identifying the cause of the
problem?
C. What might have led to the contamination of the mosque
well?
D. How could you prevent well water from getting
contaminated?
After reading or telling of the story, organise the children in
pairs, small groups or individually, and ask them to discuss
and write down responses to the following points:
What do you like or do not like about the story?•
What is the relevance of water in this story?•
What are the main messages in this story?•
What could happen to the actors in this story if there •
was no positive outcome?
Activity 3: Well water quality on my island
Explain that the main ways that well water quality can
change is if substances from leaking septic tanks enter
the water (e.g. bacteria, viruses) or saltwater enters the
freshwater lens (if we pump out too much water) making it
more salty.
Divide the students into groups and allocate the groups
to different sections of the island. In groups, students
visit 4 houses in different locations of the island. Observe
the condition of each well (e.g. is it covered? does it have
cracks in the concrete?).
Answer the following questions;
Section of island (from the island map / or ward name) •
How many wells do the householders use? •
Are there pumps (electrical) connected to the well(s)? •
Is the well water salty? •
Does the water smell or taste unusual?•
Do they notice any differences in well water quality •
throughout the year?
Has anyone in the house ever been sick after drinking •
well water?
Return to the classroom and each group can present their
findings to the class. Summaries of the data collected
should be listed in columns on the board. From the data
ask the students whether it is likely that any wells on their
island are contaminated? Are any parts of the island worse
than others? Ask the students if they are surprised by their
findings?

Conclusion:
Remind the students that on coral islands everyone
uses well water in one way or another. So it is important
that the well water is protected. Well water can become
contaminated by leaking septic tanks or by salt water.
Once well water is polluted, it may no longer be suitable for
certain uses.
teacher resource Sheet 1
The freshwater lens and water going salty in the well
A proportion of the freshwater falling as rainfall on an island
infiltrates into the sandy soils and accumulates as fresh
groundwater. This freshwater, being less dense than saline
seawater, floats on the saline groundwater that infiltrates
the island from the sea. Because of density differences, a
freshwater lens develops, which in general terms is thickest
in the centre of the island, where groundwater levels are
highest (compared to mean sea level).
Why is there fresh water in the ground?
All small islands are surrounded by the sea which is salty.
The rain which falls on the island is fresh. About a third
of this rainfall will soak into the ground and infiltrate into
the coral sand. This water collects in the sand and forms
a body of fresh water. The freshwater is not very thick
however (typically 2-7m on smaller islands) and floats on
salt water that is underneath it, that has entered the sand
below the sea level. The infiltrated freshwater eventually
flows to the sea.
Why does the groundwater salinity vary across the island?
The freshwater body or lens is surrounded by the sea. The
seawater also tries to get into the islands coral sand, but
is pushed out by the freshwater entering from the rainfall.
However the nearer you get to the coast the closer you are
to the sea, and the easier it is for seawater to come into
the land. At the coast there is no freshwater lens so the
groundwater becomes salty. The further inland a well is
located, the greater the thickness of the freshwater lens
and the fresher the water.
Well Water
i) When can I drink well water?
The saltiness or salinity of the well water varies from well
to well depending on several factors which are explained
below. You can use well water for drinking if it has a
salinity reading of 2,500 μS/cm. If it is more salty than this,
drinking it will make you sick. You can still use the well
water for non-drinking and non-cooking uses though.
44
ii) Why does my well water get more salty during the dry season?
During the dry season the amount of rainfall is reduced
and this means the amount of freshwater entering the
freshwater lens is also less. This means the freshwater
flows within the groundwater are less and this means that
more seawater can enter the island. The freshwater lens
then gets smaller. If you live towards the edge of your
island, you will notice your well water getting more salty
during the dry season.
iii) Why are Dhani wells usually fresher than pumped wells?
Dhani wells tend to be fresher than pumped wells for two
reasons. Firstly less water is taken from a dhani well than
a pumped well. This means there is more freshwater left in
the ground and so the lens stays fresher. The pumped well

takes out more groundwater, which reduces the amount of
fresh groundwater available to push out the seawater, and
so pumped wells tend to be slightly more salty.
Also pumped wells lower the water level in the well more
than dhani wells. There is a relationship between the height
of the freshwater level above sea level and the amount of
freshwater in the lens below sea level. Generally for every
1cm of freshwater above mean sea level there is 20 cm
below it. So when a pumped well lowers the water level in
the well by too much, the freshwater lens thickness below
the well reduces and saline water comes up and into the
well. This is known as saline-up-coning. The more water
you take from your well, the more likely it will become salty.
iv) How much water can I take before my well gets salty?
This is a difficult question to answer. It depends where your
house is located on the island, what type of abstraction
method you use (dhani or pump), whether you put
rainwater overflow water in the well, how you operate your
pump (continuously or on demand), how much water
your neighbours are taking, and how much of the waste
water you return back into the ground. If the island has a
sewerage system, the whole island may be taking out too
much groundwater to the sea. In this situation groundwater
may continue to get more salty. MWSA (Maldives Water and
Sanitation Authority) can provide a general household guide
for abstraction once they have carried out a water resources
assessment of the island.
v) How can I make my well less salty?
There are several simple things you can do to make your
well water as fresh as possible. These are listed below:
a. Direct your rainwater tank overflow either directly into
your well or into the ground next to your well. If you are
not collecting all the water off your roof for rainwater
harvesting then catch the rest and direct it into the well.
b. Construct your well with small holes in the side of your
well wall lining below the water level. This allows very
shallow fresh water to enter the well. This will be fresher
than water entering the well through its base alone.
c. Use the dhani abstraction method in preference to the
pump method.
d. Make sure your pump is of as low an abstraction rate
as possible. Large pumps will provide your water more
quickly but reduce the water level in the well by a greater
amount too.
e. Ideally get your pump to feed a water storage tank next
to your roof, and pump to it at a constant rate all day and
night. The storage tank can then provide your daily supply
under gravity. This will minimise the lowering of the well
water level.
f. Only take the water you need. Do not waste water.
g. Put your washing water into a catch pit or trench in your
household plot (but away from the well). Do not put used
washing water into the septic tank or the sewer line.
Washed water is freshwater (if it does not contain faeces
or urine) and can recharge the freshwater lens. Putting it
in the sewer line will send it into the sea and it will be lost
from the island.
h. Use smaller flush tanks (small 6 litre tanks) for the toilet
as less water is required for flushing than if you use a 12
litre tank.
teacher resource Sheet 2
Well contamination and how to prevent it:
There are a number of factors which affect the vulnerability
of your well and therefore the likelihood of your well
becoming contaminated. These are:
1. Condition of the well
• Anycracksinthewallwillenablewatertoenterthewell
without first passing through the ground.
• Wateroftengetsspiltaroundthewell,whenpouring
the dhani into jugs and bowls. This water falls onto the
ground and this will infiltrate back into the well. This
water may carry contaminants from household activities
with it.
• Theconcreteflooraroundthewellmustbefreefrom
cracks to avoid contamination of the well from used
water.
• Waterusedafterwashingoftencausepuddlesaround
the well if there is no proper drainage channel to direct
water away from the well.
• Manywellsdonothaveacoveronthem.
• Disposingoffaecesorcleaningsoiledclothesmust
not be done near the well. All of these are causes of
microbiological contamination of the groundwater.
2. Location of the well
• Anywellclosetothetoilet/bathroom,septictank,
washing water soakage pit, waste pile or puddles, will be
more likely to be contaminated than one further away.
• Wellslocatedinthegarden,nearthehouseandaway
from the septic tank will be less polluted.
45

46
• Talktoyourneighborstoagreeonthebestlocationfor
all your septic tanks.
Ideally the septic tank should be 15m from your well.
The further away the better. (Based on MWSA - Maldives
Water and Sanitation Authority -guidelines)
3. Additional sources of contamination
• Themostsignificantsourcesarelikelytobefueloilsand
chemicals. Some locations, such as the power house will
store more of these fluids than others.
• Fuelsandchemicalswillinterferewiththetreatment
process in the septic tank and enter the groundwater.
• Theconcreteslabshouldhaveabundededgewhich
would enable all the fuel to be held within it should the
fuel store leak. Any leak can then be cleared up and
removed to the island waste site.
• Washingwaterwillcontaindetergents.Thewashing
water catch pit can also contaminate your groundwater
but to a much lesser extent than the septic tank.
4. Septic tank discharge
• Surveysshowthatthemainsourceofcontaminationof
well water is septic tanks.
• Thecondition,sizeandmaintenanceofthehousehold
septic tank are contributing factors to affecting the water
quality in your well.
• Iftheseptictankiscrackedorbrokenthenuntreated
effluent will leak from the tank into the ground.
• Ifyoudon’tcleanoutthesludgefromyourtankthenit
won’t treat the effluent so effectively.
Actions to reduce well contamination and improve well water quality
There are some easy steps you can take to improve the
protection of your well and therefore improve its water
quality. These are listed below:
a) Repair all cracks to the well walls regularly and make
sure it is adequately sealed.
b) Remove all debris from around the well.
c) Put a metal well cover with a hinged lid on the top of the
well.
d) Build a concrete apron around the well which will direct
spills and rainwater away from the well.
These can be channeled into a pipe and flow further away
from the wellhead.
e) Clean the dhani, ideally with bleach, once a week.
f) Repair any cracks seen on the septic tank.
g) Make sure the dhani does not stand on the floor and has
a hanger to keep it in the air.
h) Empty the septic tank at least once a year of its sludge
and dispose appropriately.
i) If you build a new septic tank make sure it is big enough
for your household. MWSA
(Maldives Water and Sanitation Authority) can advise you
on the design of your septic tank.
j) If you build a new septic tank locate it as far away from
your well as possible. Check with your neighbours on the
locations of their wells as these might be close to where
you intend to put your tank.
k) Move the washing water catch pit away from the well
area.
l) Store fuel oils and chemicals away from the well area.
m) If you dig a new well make sure it is near the house and
far away from the septic tank.
n) Put the rainwater tank overflow pipe into the well.
Rainwater has less salt and bacteria than groundwater
and contains no nitrate and ammonia. The rainwater
will dilute the groundwater and improve the well water
quality. It will also help keep the septic tank effluent in
the groundwater away from the well.
o) Do not dispose of waste or human waste (e.g. nappies)
near the well (at least 15m).
p) Repair any cracks on the concrete floor around the well.
Learning Objectives:
Students can outline factors that result in unsafe •
rainwater.
Students feel able to evaluate good and bad behaviors •
related to the collection of rainwater.
Grades: 1.4 (activity 1-2), 5-7 (activity 3)
Time:
Activity 1: 30 minutesr•
Activity 2: 30 minutes•
Activity 3: 2 hours•
Materials needed:
Sequence cards Two A4 cards showing good and bad •
rainwater collection practices (activity 2)
Map of the island and notebooks (activity 3)•
Teacher Resource Sheets 1 and 2– read to familiarize •
yourself with the background to the topic.
Introduction: Start by explaining to students that rainwater
provides the main drinking water supply for 99% of all
households in the Maldives outside of Male’. It is the most
important water for the family, as it has the most direct
effect on family health. Despite this, 70% of all households
report their water tanks becoming empty in the dry season,
and up to 50% of tanks tested on some islands show poor
biological water quality. Surveys confirm rainwater is 100
times fresher than groundwater, and 100 times cleaner
than groundwater from bacteria. When rain falls it is very
clean and contains no bacteria and very little salt. But when
it lands on your house it flows over the roof into the gutters,
down the down-pipe and into the tank, it picks up dirt and
bacteria.
What to do:
Activity 1: Water Collection*
• Skit(littledrama)
• Identifysevenchildrenwhowanttodoaskit.
• Sharethestorybeloworasimilarstory.Giveeachchilda
role.
• Supportthegrouptoemphasizethesoundsandnoises
for effect and humor.
The scene opens near the communal rainwater tanks there
is a long queue of people waiting to collect water (children
1-3). Mariyam (child 4) is in the queue and talking to the
neighbors. There is a big Nika tree on top of the roof of
the island office where the water flows into the rainwater
tanks and rats (child 5) and bats (child 6) were happily
enjoying the Nika fruit and defecating on the roof. A family
of cats was also playing on the roof. The gutters were old
and leaking. At this moment a local teacher (child number
seven) comes in and silently observes the group.
• Askthegrouptostopwhattheyarealldoing.Draw
attention to activities that are going on using rhetorical
questions such as, are you really going to collect water
here when you see that the roof has not been cleaned
and rats and bats are defecating on the roof.
• Explainthesourceofthecontaminationlevelsstepwise,
which can result from defecation near the water source,
overhanging branches, old and leaking gutters, animals
playing on the overhanging branches and the roof.
• Askstudentswhatcanhappenwhenotherpeopledrink
this water.
Activity 2: Spot the difference
Show students the sequence cards showing ‘bad’ rainwater
collection practices. Ask students to name all of the bad
rainwater collection practices they can see. List these in
one column on the board.
Now show students the sequence cards showing ‘good’
rainwater collection practices. Ask students to name all of
the bad rainwater collection practices they can see. List
these in one column on the board.
Ask students what would happen if they used bad rainwater
collection practices? Ask students what would happen if
they used good rainwater collection practices? Ask students
if they have seen examples of good and bad rainwater
collection practices around their island?
Activity 3: Rainwater on my island
Explain that there are many ways that rainwater can be
contaminated (e.g. animal waste, receiving ‘first-flush storm
water which contains contaminants, overhanging branches
dropping leaves into gutters).
Divide the students into groups and allocate the groups
to different sections of the island. In groups, visit 3 house
holds in the island and observe and record how rainwater is
being collected.
5.4 topic: rainwater contamination
*Adapted for the Maldives from activity ‘The rainmakers?’ in IRC (2005) ‘The Joy of Learning: Participatory lesson plans on hygiene, sanitation, water, health and the environment ’IRC Water and Sanitation Center.
47
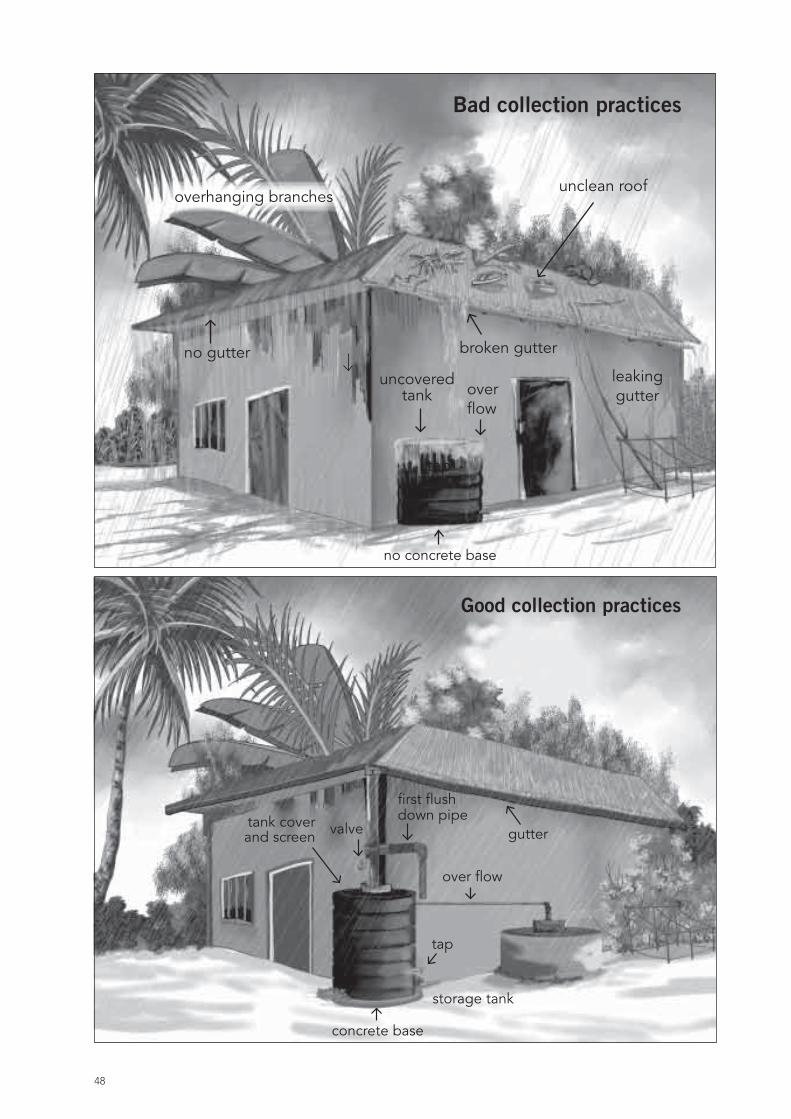
Bad collection practices
unclean roof
leaking gutter
no gutter broken gutter
overhanging branches
uncovered tank
tap
over flow
no concrete base
first flush down pipe
guttertank cover and screen
tap
storage tank
valve
over flow
concrete base
no concrete base
Good collection practices
48
teacher resource Sheet 1
Securing rainwater drinking water supplies
Rainwater provides the main drinking water supply for 99%
of all households in the Maldives outside of Male’. It is the
most important water for the family, as it has the most direct
effect on family health. Despite this, 70% of all households
report their water tanks becoming empty in the dry season,
and up to 50% of tanks tested on some islands show poor
biological water quality.
• Surveysconfirmrainwateris100timesfresherthan
groundwater, and 100 times cleaner than groundwater
from bacteria.
• Makesureyourrainwaterharvestingiscorrectlysizedto
provide water throughout the dry season, and that you
keep the roof and tanks clean. Keeping the rainwater as
clean as possible is very important.
Keeping rainwater as clean as possible
• Whenrainfallsitisverycleanandcontainsnobacteria
and very little salt. But when it lands on your house it
flows over the roof into the gutters, down the down-pipe
and into the tank, it picks up dirt and bacteria.
1. Clean the roof and gutters
• Reducetheamountofdirtandbacteriagoingintoyour
tank. Clean the roof once a month, and your gutters
once a week.
• MakesuretheFirstFlushvalveisopenbeforeyouwash
the roof – as you do not want wash water in the tank.
• Makesurenobrancheshangovertheroofasthesewill
attract birds, bats and insects, and allow rats to jump
onto the roof.
2. Put in a downpipe filter
• Putasmallgrillovertheentrancetothedownpipe.
• Afilterwhichallowsthewaterthroughbutno
mosquitoes will be even better.
3. Use a ‘first flush’ valve
• Thisisavalvewhichwhenopenpreventsthewaterfrom
entering the tank.
• Youshouldleavethisvalveopen,whenitisnotraining.
• Whenitstartstorain,letthewaterflowofftheroofand
past the open-valve for a few minutes. This prevents the
dust and dirt which may be on the roof entering your
tank. Then close the valve and the water will flow into the
tank.
• Thiswillstopmosquitoesandotherinsectsgetting
into the tank through the open end of the First Flush
downpipe.
4. Raise the tank and the tap of the ground
• Raisethetankoffthegroundby20-30cm.
• Havethetapnotattheverybaseofthetank,but
10-20cm above it. This prevents the tap from providing
water from the very base of the tank, where debris might
sink and collect.
• Adrainingtapcanbeputatthebaseofthetanktodrain
off any sediment collecting at the base of the tank.
5. Use a spill collector
• Constructasmallconcretetroughunderthetap,which
collects the spilt water and channels it away from the
tank. This will keep the area around the tank dry and
clean.
Write answers to the following questions;
1. Is the rainwater tank covered?
2. Are there over hanging branches above the tank?
3. Is the rain water tank clean?
•Theareasurroundingrainwatertankisclean?
•Theroofandguttersareclean?
•Topofthetankisclean?
4. Is there a first flush valve connected to the tank?
Follow-up questions
Return to the classroom and each group can present their
findings to the class. Summaries of the data collected
should be listed in columns on the board. Ask students
from their observations, what are the threats to rainwater?
What recommendations would they give to the households
to safeguard their rainwater? Ask the students if they are
surprised by their findings?
Conclusion:
Remind students that keeping the rainwater as clean as
possible, is very important. When rain falls it is very clean
and contains no bacteria and very little salt. But when it
lands on your house it flows over the roof into the gutters,
down the down-pipe and into the tank, it picks up dirt and
bacteria. So it is important to collect and store drinking
water safely. Otherwise we can become sick. Remind the
students of good and bad practices for collecting rainwater.
49

teacher resource Sheet 2
How to clean your rainwater tank
Students should not be encouraged to clean their rainwater
tank. An adult should be responsible for this task.
Remember to clean your water tank once a year.
You will need:
Liquid chlorine (such as Dash or Janola) or chlorine •
tablets
Buckets•
Brush•
Eye and hand protection (glasses, rubber gloves)•
Drain any water in the tank to level at top. Transfer water 1.
to clean contaminant free storage or temporary vessel.
Add 1 bottle of bleach or x number of chlorine tablets to 2.
the remaining water in the tank.
Climb inside the tank. Using a brush thoroughly scrub 3.
the bottom and sides of the tank.
Remove the water and bleach solution with a bucket.4.
Refill the tank with rain water.5.
Leave the water to settle overnight before use.6.
Disinfecting your rainwater tank
You should disinfect your tank only when one or more of
the following situations are present:
People are getting sick from drinking the water with sore •
stomachs and diarrhea.
Animal or human waste including bird droppings have •
entered the tank.
After tank repairs or maintenance where people have •
entered the tank.
The water has been tested and there is a known •
bacterial contamination
Calculate the volume of water in your tank. 1.
Add ½ bottle (125ml) of plain household grade 2.
unscented and uncolored bleach (with 4% active
chlorine) to every 1000 litres of water currently in your
tank.
Amount of water in the tank Amounts of bleach
1000 litres 125 ml
2000 litres 250 ml
3000 litres 375 ml
Etc Etc
Wait 24 hours after putting in the chlorine to allow 3.
enough time to disinfect the water before you drink
it. Any chlorine smell and taste in the water will go
away after a short time, if you find the taste of chlorine
unacceptable boil the water for at least 5 minutes before
drinking it.
A house with a good gutter.
50
6. Cleaning of the tank
• Cleanthetankonceayear.Youwillneedtogetinside
the tank and scrub the walls. If you can afford bleach,
then you can mix this with water to clean the tank.
• Keepthetopofyourtankclearfromdebris.
7. Fit an overflow pipe with a filter787
• Makesureyourtankhasanoverflowpipe,sothatwhen
it is full it can fill a second tank or divert water to freshen
your well. If the overflow pipe is open to the air (that is if
it is not in the next tank) it should be fitted with a filter to
prevent insects and small animals getting back into the
tank.
• Makesureyourtankwillnotbeemptyduringthedry
season: whilst it is important to ensure the water quality
in your rainwater tank is of as good a quality as possible,
if your tank goes dry you will not have any water at all.
Given the importance of rainwater to each household and
the poor quality of most groundwater in the Maldives, it is
important that rainwater collection is maximized.
This can be done by:
i) Adding a gutter to the entire roof area
ii) Adding a second tank
iii) Setting up communal tanks

Learning Objectives:
Students become aware of how water sources can be •
contaminated by faeces.
Students can identify some diseases associated with •
drinking contaminated water.
Grades: 1-5 (activity 1) 6-7 (activity 2)
Time:
Activity 1: 1 hour•
Activity 2: 1 hour•
Materials needed:
Sheets of (white or brown) paper, felt-tipped pens, •
finger-paint or pencils in different colors, natural
materials available near school or homes such as
pebbles, twigs, sand/soil, an old tin, glue and scissors
(optional), small cards or slips of paper, in two colors, a
map of the island.
Teacher Resource sheet 1- read to familiarize yourself •
with the background to the topic.
Introduction
According to UNICEF (1999) one gram of faeces can
contain 10, 000, 000 viruses, 1, 000, 000 bacteria, 1, 000
parasite cysts, 100 parasite eggs! Infectious diarrhoeas
(including dysentery, cholera and typhoid) are caused by
infectious agents like viruses, bacteria and parasites. These
agents get into humans via the mouth and are passed out
in faeces. So feaces is enemy no. 1! Ensuring that faecal
material does not get into water supplies at the source
is probably far more effective than boiling, filtering, and
covering water tanks. We need to protect well water and
rainwater from feacel contamination.
What to do:
Activity 1: What’s in your water?*
This activity involves a role-play for the students to act out.
Older children can make their own dramas. The play has
the following acting parts:
Aisha (a mother)•
A baby child•
The role-play is set in an island where Aisha is washing the
babies’ clothes and some soiled nappies are lying on top
of the well. The nappy falls accidentally into the well. The
soiled bed clothes are placed on top of the well and water
from the soiled clothes is dripping into the well. Aisha is
bathing the baby and the remaining dirty water in the dhani
is going back into the well. Water gets spilt around the well,
in the process of bathing the baby using the dhani. This
water falls onto the ground and this infiltrates back into the
well because there are cracks on the concrete floor near
the well. Water used after washing causes puddles around
the well and there is no proper drainage channel to direct
water away from the well.
After the role play ask questions to help children to reflect
critically on the role play presented. For example, ask the
students to explain what some of the bad practices around
the well were.
Explain that in the role play faeces entered the well water
after washing soiled clothes. However the most common
way faeces contaminate our well water is from leaking
septic tanks. Briefly explain that septic tanks are enclosures
that store and process wastes where no sewer system
exists, such as in islands or on boats. Treatment of waste in
septic tanks occurs by bacterial break down. The resulting
material is called sludge.
Ask the children for local names of diseases that may
be transmitted by drinking contaminated water. Link the
story with an overview and explanation of the diseases that
can come from drinking contaminated water. Depending
on age, include official names, symptoms, transmission,
prevention and treatment. Invite questions from all children
to get them to understand how many diseases can result
from contaminated water.
Activity 2: Where does it go?
In your school grounds investigate whether your well water
may potentially be contaminated by faeces. As a class, walk
into the school ground and locate your nearest well.
Write answers to the following questions;
What is the well water used for (i.e drinking)?•
Does the well water smell or look unusual?•
How close is the nearest toilet or septic tank? •
How often is the septic tank sludge pumped out?•
Has anyone ever tested the quality of the well water? •
5.5 topic: Water contamination by faeces
*Adapted for the Maldives from activity ‘What’s in your water?’ in IRC (2005) ‘The Joy of Learning: Participatory lesson plans on hygiene, sanitation, water, health and the environment ’IRC Water and Sanitation Center.
51
Does sewage effluent discharge into the lagoon? •
Are there any effects of sewage being discharged into •
the lagoon?
Return to the classroom. Discuss the answers to the
questions. Discuss with the students whether they
think there is a possibility that their well water may be
contaminated. Speak to the local Health Post about testing
the well water.
Conclusion:
Remind the students that water is essential for life, but
that well water can become contaminated by faeces from
nappies, soiled clothes or leaking septic tanks. If we drink
contaminated water we can become sick. There are many
diseases associated with drinking contaminated water. We
must all be careful not to let faeces (human waste) enter
our water supplies.
*Teacher resource sheet information from http://extoxnet.orst.edu/faqs/safedrink/sewage and http://www.extension.umn.edu/distribution/naturalre-sources/components/DD6946b
teacher resource Sheet 1
Water contamination by sewage (faeces)
According to UNICEF (1999) one gram of faeces can
contain 10, 000, 000 viruses, 1, 000, 000 bacteria, 1, 000
parasite cysts, 100 parasite eggs! Infectious diarrhoeas
(including dysentery, cholera and typhoid) are caused by
infectious agents like viruses, bacteria and parasites. These
agents get into humans via the mouth and are passed out
in faeces. So faeces is enemy no. 1! Ensuring that faecal
material does not get into water supplies at the source
is probably far more effective than boiling, filtering, and
covering water tanks (UNICEF, 1999).
Septic Tanks
In the Maldives most houses have a septic tank to
capture sewage (faeces) from the house. Septic tanks are
enclosures that store and process wastes where no sewer
system exists, such as in islands or on boats. Treatment of
waste in septic tanks occurs by bacterial break down. The
resulting material is called sludge.
Contamination of water from septic tanks oc-curs under various conditions:
Poor placement of septic leach fields can feed partially
treated waste water into a drinking water source. Leach
fields are part of the septic system for land based tanks and
include an area where waste water percolates through soil
as part of the treatment process.
Badly constructed percolation systems may allow water to
escape without proper treatment.
System failure can result in clogging and overflow to land
or surface water.
Why are septic systems a problem?*
In the islands it is particularly important to maintain your
septic system properly because soil and water conditions
near shore may make the system less efficient in treating
wastewater. Incomplete treatment can result in health risks
for humans and water quality problems.
Potential health risks are the most serious concern
related to failing septic systems. Hepatitis, dysentery, and
other diseases may be spread by bacteria, viruses, and
parasites in wastewater. These disease-causing organisms,
called pathogens, may make nearshore water unsafe for
recreation. Flies and mosquitoes that are attracted to and
breed in wet areas where wastewater reaches the surface
may also spread disease.
Inadequate treatment can also allow excess nutrients to
reach your lagoon, promoting algae or weed growth. Algal
blooms and abundant weeds not only make the lagoon
unpleasant for swimming and boating, but they also affect
water quality for fish and wildlife habitat. As plants die,
settle to the bottom, and break down, they use up oxygen
that fish need to survive.
Maintain the septic tank:
Discharge all sewage waste from the house into the •
septic tank. Don’t run wastewater from laundry or
directly into the drain field as the detergent or soap
scum will quickly clog soil pores and cause failure.
Do not add “starters” to your septic system.• Enough
bacteria are available in the wastes flushed into the
septic tank. Even after the tank has been pumped,
enough bacteria will be provided when you use the
system again.
Do not use additives in your system.• They are of no
benefit and may harm the system. Additives that cause
the accumulated sludge to increase in volume or float
will result in sludge being flushed into the drainfield,
plugging soil pores. Also, some additives, particularly
degreasers, may be carcinogens that will flow into
ground water with treated wastewater.
52

Remove the manhole cover when having the tank •
pumped to make sure that all solids have been removed.
The sludge in the tank should be mixed during pumping.
A tank cannot be adequately cleaned through a 4-inch
inspection pipe. Pumping through the inspection port
may clog the outlet baffle with scum and grease.
teacher resource Sheet 2
Health risks from contaminated water
Well water is used by all households in the Maldives. Most
communities use the well water for all non-drinking uses
such as washing, bathing and toileting. Well water provides
about 90% of the household water needs. Well water is
therefore very important to the household.
Unfortunately, all surveys of well water show that well water
is of worse quality than rainwater. It usually has about 100
times more bacteria in it and is 100 times more salty than
rainwater. Some wells also contain contamination from
septic tanks. Due to the presence of bacteria and other
compounds from septic tank discharge it is always better to
drink rainwater than well water.
If you drink well water that contains too much bacteria
then it will make you sick, and give you diarrhoea and
vomiting. This can lead to dehydration and for vulnerable
people (children and the elderly) even death. When people
get infected with diseases such as diarrhoea, typhoid and
hepatitis A, their excreta will contain large amounts of the
germs which cause the disease.
When people defecate in the open, flies will feed on the
excreta and can carry excreta on their bodies. When they
touch food excreta and germs are passed on the food.
Where there are germs there is always a risk of disease.
During the rainy season, excreta may be washed away by
rainwater and can run into wells, thus contaminating the
wells.
In many cultures it is believed that children’s faeces are
harmless and do not cause disease. This is not true. A
child’s faeces contain as many germs as an adult’s, and it
is very important to collect and dispose of children’s faeces
quickly and safely.
Many common diseases that can give diarrhoea can
spread from one person to another. Disposing of excreta
safely, preventing faecal contamination of water supplies
and improving personal hygiene particularly hand washing
with soap (at critical times such as after going to the toilet,
before eating and food preparation) would greatly reduce
spread of diseases significantly.
Water which is too salty will make you vomit, and may make
your skin itchy and sore. Most well water in the Maldives is
not too salty for drinking. Your health post may be able to
test your well for salt. People can drink salty water with a
conductivity reading up to 2,500 μS/cm. (WHO guidelines
suggest a maximum Chloride content of 250 mg/l for
potable uses which equates to a salinity of approximately
1,500 μS/cm. However experience in other small island
states confirms whilst this is desirable, a more realistic limit
is 2,500 μS/cm.)
Waterborne diseases
We are often unaware of how unsafe our water supplies can
be to our health. There are five broad categories of water
related diseases:
Group 1: Water-borne infections e.g. cholera, typhoid and
hepatitis.
Group 2: Water-shortage diseases e.g. skin infections,
trachoma.
Group 3: Water-impounding diseases e.g. schistosomiasis,
guinea worm.
Group 4: Water-arthropod diseases e.g. malaria, dengue
fever
Group 5: Chemical contaminants in excess or shortage
e.g. fluoride.
Some examples of water related diseases common in the
Maldives:
Typhoid
Typhoid is an infection of the intestinal tract and
bloodstream caused by bacteria. Clean water, hygiene,
and good sanitation prevent the spread of typhoid.
Contaminated water is a major reason for the spread of
the disease. People become infected after eating food
or drinking beverages that have been handled by a
person who is infected or by drinking water that has been
contaminated by sewage containing the bacteria. Typhoid
is common in the Maldives, principally because of the
problem of unsafe drinking-water and inadequate sewage
disposal.
53
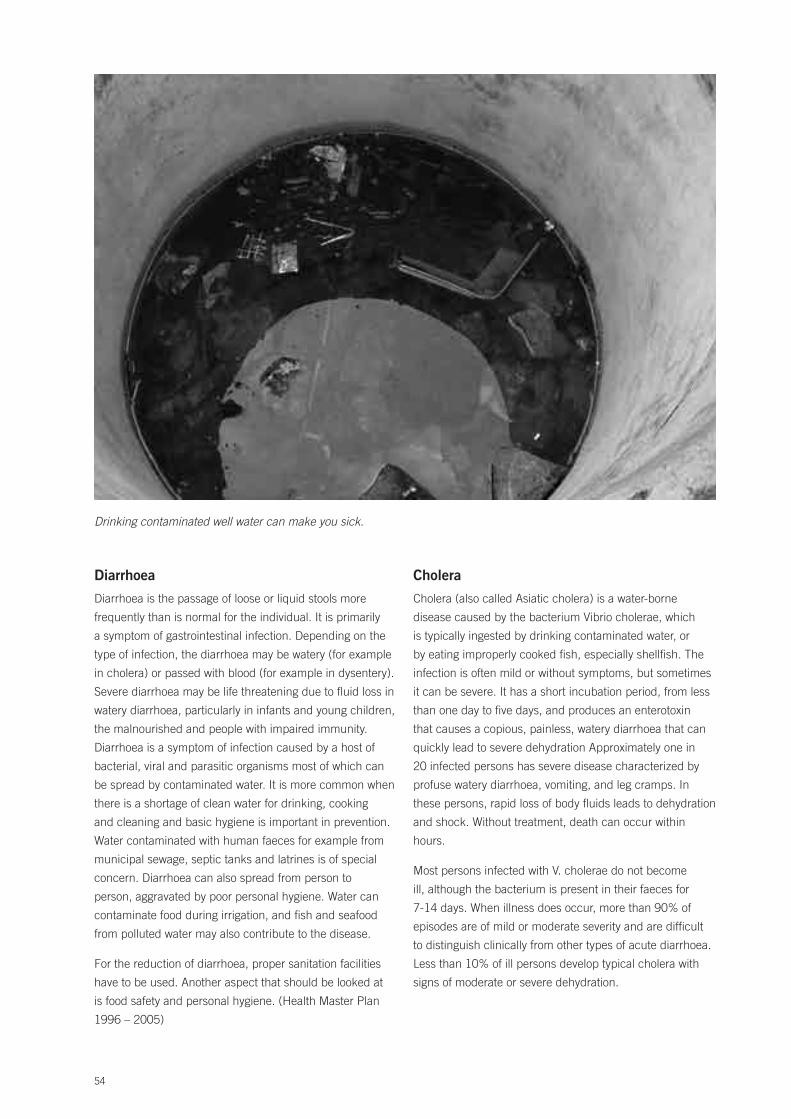
54
Diarrhoea
Diarrhoea is the passage of loose or liquid stools more
frequently than is normal for the individual. It is primarily
a symptom of gastrointestinal infection. Depending on the
type of infection, the diarrhoea may be watery (for example
in cholera) or passed with blood (for example in dysentery).
Severe diarrhoea may be life threatening due to fluid loss in
watery diarrhoea, particularly in infants and young children,
the malnourished and people with impaired immunity.
Diarrhoea is a symptom of infection caused by a host of
bacterial, viral and parasitic organisms most of which can
be spread by contaminated water. It is more common when
there is a shortage of clean water for drinking, cooking
and cleaning and basic hygiene is important in prevention.
Water contaminated with human faeces for example from
municipal sewage, septic tanks and latrines is of special
concern. Diarrhoea can also spread from person to
person, aggravated by poor personal hygiene. Water can
contaminate food during irrigation, and fish and seafood
from polluted water may also contribute to the disease.
For the reduction of diarrhoea, proper sanitation facilities
have to be used. Another aspect that should be looked at
is food safety and personal hygiene. (Health Master Plan
1996 – 2005)
Cholera
Cholera (also called Asiatic cholera) is a water-borne
disease caused by the bacterium Vibrio cholerae, which
is typically ingested by drinking contaminated water, or
by eating improperly cooked fish, especially shellfish. The
infection is often mild or without symptoms, but sometimes
it can be severe. It has a short incubation period, from less
than one day to five days, and produces an enterotoxin
that causes a copious, painless, watery diarrhoea that can
quickly lead to severe dehydration Approximately one in
20 infected persons has severe disease characterized by
profuse watery diarrhoea, vomiting, and leg cramps. In
these persons, rapid loss of body fluids leads to dehydration
and shock. Without treatment, death can occur within
hours.
Most persons infected with V. cholerae do not become
ill, although the bacterium is present in their faeces for
7-14 days. When illness does occur, more than 90% of
episodes are of mild or moderate severity and are difficult
to distinguish clinically from other types of acute diarrhoea.
Less than 10% of ill persons develop typical cholera with
signs of moderate or severe dehydration.
Drinking contaminated well water can make you sick.
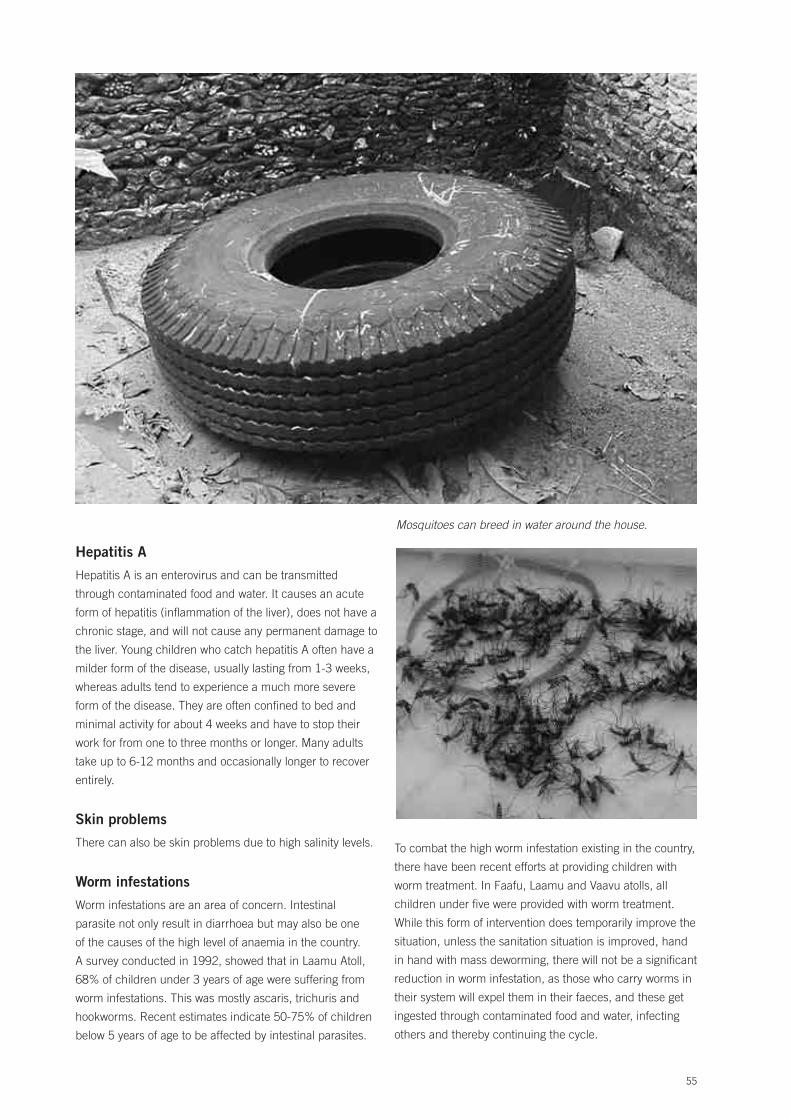
55
Hepatitis A
Hepatitis A is an enterovirus and can be transmitted
through contaminated food and water. It causes an acute
form of hepatitis (inflammation of the liver), does not have a
chronic stage, and will not cause any permanent damage to
the liver. Young children who catch hepatitis A often have a
milder form of the disease, usually lasting from 1-3 weeks,
whereas adults tend to experience a much more severe
form of the disease. They are often confined to bed and
minimal activity for about 4 weeks and have to stop their
work for from one to three months or longer. Many adults
take up to 6-12 months and occasionally longer to recover
entirely.
Skin problems
There can also be skin problems due to high salinity levels.
Worm infestations
Worm infestations are an area of concern. Intestinal
parasite not only result in diarrhoea but may also be one
of the causes of the high level of anaemia in the country.
A survey conducted in 1992, showed that in Laamu Atoll,
68% of children under 3 years of age were suffering from
worm infestations. This was mostly ascaris, trichuris and
hookworms. Recent estimates indicate 50-75% of children
below 5 years of age to be affected by intestinal parasites.
To combat the high worm infestation existing in the country,
there have been recent efforts at providing children with
worm treatment. In Faafu, Laamu and Vaavu atolls, all
children under five were provided with worm treatment.
While this form of intervention does temporarily improve the
situation, unless the sanitation situation is improved, hand
in hand with mass deworming, there will not be a significant
reduction in worm infestation, as those who carry worms in
their system will expel them in their faeces, and these get
ingested through contaminated food and water, infecting
others and thereby continuing the cycle.
Mosquitoes can breed in water around the house.

The programmes implemented for the control of worm
infestations have relied mainly on the deworming of
children below 5 or 3 years of age. While this alleviates the
problem to some extent, the lack of adequate attention
to sanitation and also education in the area of personal
hygiene means the situation will not be sustained. Future
interventions should, therefore, integrate deworming with
the provision of sanitation facilities and must go hand in
hand with effective education. (Health Master Plan 1996 –
2005)
Diseases spread by mosquitoes
Mosquitoes are a nuisance in most islands. This also gives
way to the breeding of mosquitoes transmitting dengue
and other diseases. There are several islands where the
mosquito population is so dense that it is impossible to
stay outdoors after it is dark. An integrated approach to
mosquito control combining chemical, biological and
environmental strategies need to be implemented in a
phased manner to eliminate mosquito breeding in at least
those islands where the mosquito density is extremely high.
(Health Master Plan, 1996 – 2005).
Dengue Fever
Dengue is the most common mosquito-borne viral
disease of humans that in recent years has become a
major international public health concern. Globally, 2.5
billion people live in areas where dengue viruses can be
transmitted.
Dengue fever is endemic in the Maldives, though no clear-
cut epidemic pattern has been identified. Aedes aegypti
and Aedes albopictus, the main vectors for the disease, are
widespread in the country. The first cases of dengue were
identified in 1979. Following this, in 1988 a major epidemic
of dengue hemorrhagic fever occurred with more than 200
cases and 9 deaths. Since then there have been no major
outbreaks, although sporadic cases have been reported.
However, in the last three to four years dengue fever (DF)
and dengue haemorrhagic fever (DHF) has been identified.
In 2003, 38 cases of DF/DHF were reported and in year
2002, 27 cases of DF/DHF were notified compared to 180
and 73 cases in 2000 and 2001 respectively. There is a
consistency seen in the incidence of DF/DHF where the
highest incidence rates are seen during the months of June
and July where the country experience monsoonal rains. On
average, 17 cases of DF/DHF were reported in June during
the 2000-2003 period and about 11 cases were reported in
May and July during the same period.
Quick facts about Dengue fever
Dengue is a flu-like viral disease spread by the bite of
infected mosquitoes. Dengue hemorrhagic fever is a severe,
often fatal, complication of dengue.
Prevention from Dengue centres on avoiding mosquito
bites in areas where dengue occurs or might occur and
eliminating breeding sites.
The mosquitoes that transmit dengue live among humans
and breed in discarded tires, flower pots, old oil drums, and
water storage containers close to human dwellings. Unlike
the mosquitoes that cause malaria, dengue mosquitoes bite
during the day.
Dengue fever usually starts suddenly with a high fever, rash,
severe headache, pain behind the eyes, and muscle and
joint pain. The severity of the joint pain has given dengue
the name “breakbone fever.” Nausea, vomiting, and loss of
appetite are common.
Most dengue infections result in relatively mild illness, but
some can progress to dengue hemorrhagic fever. With
dengue hemorrhagic fever, the blood vessels start to leak
and cause bleeding from the nose, mouth, and gums.
Bruising can be a sign of bleeding inside the body. Without
prompt treatment, the blood vessels can collapse, causing
shock (dengue shock syndrome). Dengue hemorrhagic
fever is fatal in about 5 percent of cases, mostly among
children and young adults.
There is no specific treatment for dengue. Persons with
dengue fever should rest and drink plenty of fluids. They
should be kept away from mosquitoes for the protection of
others. Dengue hemorrhagic fever is treated by replacing
lost fluids. Some patients need transfusions to control
bleeding.
Chikungunya
Chikungunya is a virus spread by mosquitoes. The
symptoms of Chikungunya (also called as Chicken Guinea)
include fever, which can reach 39°C, (102.2 °F), a rash
usually involving the limbs and trunk, and arthritis affecting
multiple joints which can be unbearable. There can also
be headache, conjunctival infection and slight sensitivity to
light. Fever typically lasts for two days and abruptly comes
down, however joint pain, intense headache, insomnia and
an extreme degree of prostration lasts for a variable period.
The mosquito species that transmits the Chikungunya virus
is the Aedes albopictus, commonly known as the Asian
tiger mosquito or forest mosquito. There being no vaccine
or preventive drug for chikungunya at present, the best way
to avoid the infection is to control the mosquito population
in the island and prevent mosquito bites.
56

* Activity 1- Adapted for the Maldives from activity ‘What a surprise’ in IRC (2005) ‘The Joy of Learning: Participatory lesson plans on hygiene, sanitation, water, health and the environment ’IRC Water and Sanitation Center.* Activity 2-Adapted for the Maldives from activity ‘Yoopy Scoopy’ in IRC (2005) ‘The Joy of Learning: Participatory lesson plans on hygiene, sanita-tion, water, health and the environment ’IRC Water and Sanitation Center.
Puppets can be used to tell stories.
57
Learning Objectives:
Students understand the possible sources of •
contamination if water is not collected or stored safely.
Grades: 1-5 (activity 1-3) 6-7 (activity 4)
Time:
Activity 1: 30 minutes•
Activity 2: 1 hour•
Activity 3: 1 hour•
Activity 4: 1 hour after school, then 1hour in class•
Materials needed:
Teacher Resource Sheet 1– read to familiarize yourself •
with the background to the topic.
Super fenfulhi puppet.•
Cards or slips of paper.•
Student Worksheet 1 – Safe and unsafe practices chart•
Introduction:
When rain falls it is very clean and contains no bacteria
and very little salt. But when we collect water, we can
accidentally contaminate our drinking water by using bad
water collection practices. For example we can use a dirty
water collection container, leave the lid of the container
off or touch the water with unclean hands. By doing these
things germs from surfaces or on our hands can move into
our drinking water. So when we drink it we may become ill.
What to do:
Activity 1: Super fenfulhi story*
Use the Super fenfulhi puppet to tell the story about a
typical unsafe way of locally storing and drawing water.
Once upon a time there was a beautiful green island called
Kanakuri with very happy people. It was the dry season and
there was a lot of work to be done. In one of the homes
there lived a very beautiful lady called Amina who used to
be the beauty of the village. She was married at the very
young and tender age of thirteen to a much older man
called Aboo Bakuru. He did not want her to go to secondary
school because he was not educated himself and saw no
purpose in it. He also felt that there was too much work to
do around the house and on his agricultural plot.
One day, as many other days during the dry season, Amina
returns from collecting fire wood at 7.00 o’clock to prepare
morning breakfast. Her husband is waiting outside the
house impatiently. He demands that she gets him breakfast
before he goes to work in the plot. However there was no
flour in the house and he asks Amina to go to the shop and
get the flour. Although Amina is tired from her work, she
obeys him and leaves the homestead. While Aboo Bakuru
is sitting under the tree waiting for Amina to come back his
five-year-old son wakes up and asks him for a cup of water.
Aboo Bakuru goes to the bandiyaa and removes the lid. He
draws water using an old, dirty tin. His son drinks the water
and gives back the tin. Aboo Bakuru puts the tin back into
the bandiyaa. He does not bother to replace the lid on the
bandiyaa. Half an hour later two neighbors come to his
home to discuss the election of the local island council.
They are interested in gaining Aboo Bakuru’s’s support. As
they look for chairs they ask him, “Where is the tea in this
house?” Aboo Bakuru quickly explains that his wife is away
but he can offer them some water.
As they follow him to the bandiyaa, they notice that there is
no lid. Aboo Bakuru puts his hand in the bandiya to get the
tin. At that moment, he feels something move and it is not
the tin! To the astonishment of Aboo Bakuru and his guests
a big brown rat runs over his arm and drops with a thud
5.6 topic: Water collection methods, storage and handling
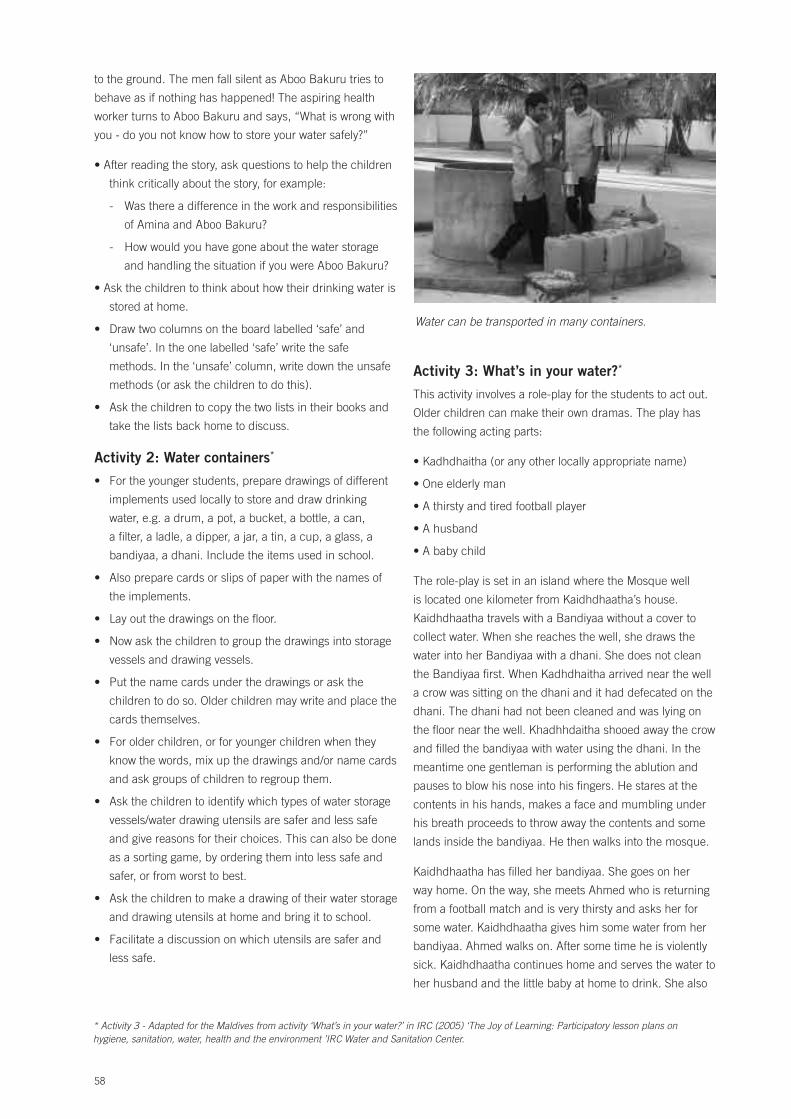
* Activity 3 - Adapted for the Maldives from activity ‘What’s in your water?’ in IRC (2005) ‘The Joy of Learning: Participatory lesson plans on hygiene, sanitation, water, health and the environment ’IRC Water and Sanitation Center.
Water can be transported in many containers.
58
to the ground. The men fall silent as Aboo Bakuru tries to
behave as if nothing has happened! The aspiring health
worker turns to Aboo Bakuru and says, “What is wrong with
you - do you not know how to store your water safely?”
•Afterreadingthestory,askquestionstohelpthechildren
think critically about the story, for example:
- Was there a difference in the work and responsibilities
of Amina and Aboo Bakuru?
- How would you have gone about the water storage
and handling the situation if you were Aboo Bakuru?
•Askthechildrentothinkabouthowtheirdrinkingwateris
stored at home.
• Drawtwocolumnsontheboardlabelled‘safe’and
‘unsafe’. In the one labelled ‘safe’ write the safe
methods. In the ‘unsafe’ column, write down the unsafe
methods (or ask the children to do this).
• Askthechildrentocopythetwolistsintheirbooksand
take the lists back home to discuss.
Activity 2: Water containers*
• Fortheyoungerstudents,preparedrawingsofdifferent
implements used locally to store and draw drinking
water, e.g. a drum, a pot, a bucket, a bottle, a can,
a filter, a ladle, a dipper, a jar, a tin, a cup, a glass, a
bandiyaa, a dhani. Include the items used in school.
• Alsopreparecardsorslipsofpaperwiththenamesof
the implements.
• Layoutthedrawingsonthefloor.
• Nowaskthechildrentogroupthedrawingsintostorage
vessels and drawing vessels.
• Putthenamecardsunderthedrawingsoraskthe
children to do so. Older children may write and place the
cards themselves.
• Forolderchildren,orforyoungerchildrenwhenthey
know the words, mix up the drawings and/or name cards
and ask groups of children to regroup them.
• Askthechildrentoidentifywhichtypesofwaterstorage
vessels/water drawing utensils are safer and less safe
and give reasons for their choices. This can also be done
as a sorting game, by ordering them into less safe and
safer, or from worst to best.
• Askthechildrentomakeadrawingoftheirwaterstorage
and drawing utensils at home and bring it to school.
• Facilitateadiscussiononwhichutensilsaresaferand
less safe.
Activity 3: What’s in your water?*
This activity involves a role-play for the students to act out.
Older children can make their own dramas. The play has
the following acting parts:
•Kadhdhaitha(oranyotherlocallyappropriatename)
•Oneelderlyman
•Athirstyandtiredfootballplayer
•Ahusband
•Ababychild
The role-play is set in an island where the Mosque well
is located one kilometer from Kaidhdhaatha’s house.
Kaidhdhaatha travels with a Bandiyaa without a cover to
collect water. When she reaches the well, she draws the
water into her Bandiyaa with a dhani. She does not clean
the Bandiyaa first. When Kadhdhaitha arrived near the well
a crow was sitting on the dhani and it had defecated on the
dhani. The dhani had not been cleaned and was lying on
the floor near the well. Khadhhdaitha shooed away the crow
and filled the bandiyaa with water using the dhani. In the
meantime one gentleman is performing the ablution and
pauses to blow his nose into his fingers. He stares at the
contents in his hands, makes a face and mumbling under
his breath proceeds to throw away the contents and some
lands inside the bandiyaa. He then walks into the mosque.
Kaidhdhaatha has filled her bandiyaa. She goes on her
way home. On the way, she meets Ahmed who is returning
from a football match and is very thirsty and asks her for
some water. Kaidhdhaatha gives him some water from her
bandiyaa. Ahmed walks on. After some time he is violently
sick. Kaidhdhaatha continues home and serves the water to
her husband and the little baby at home to drink. She also
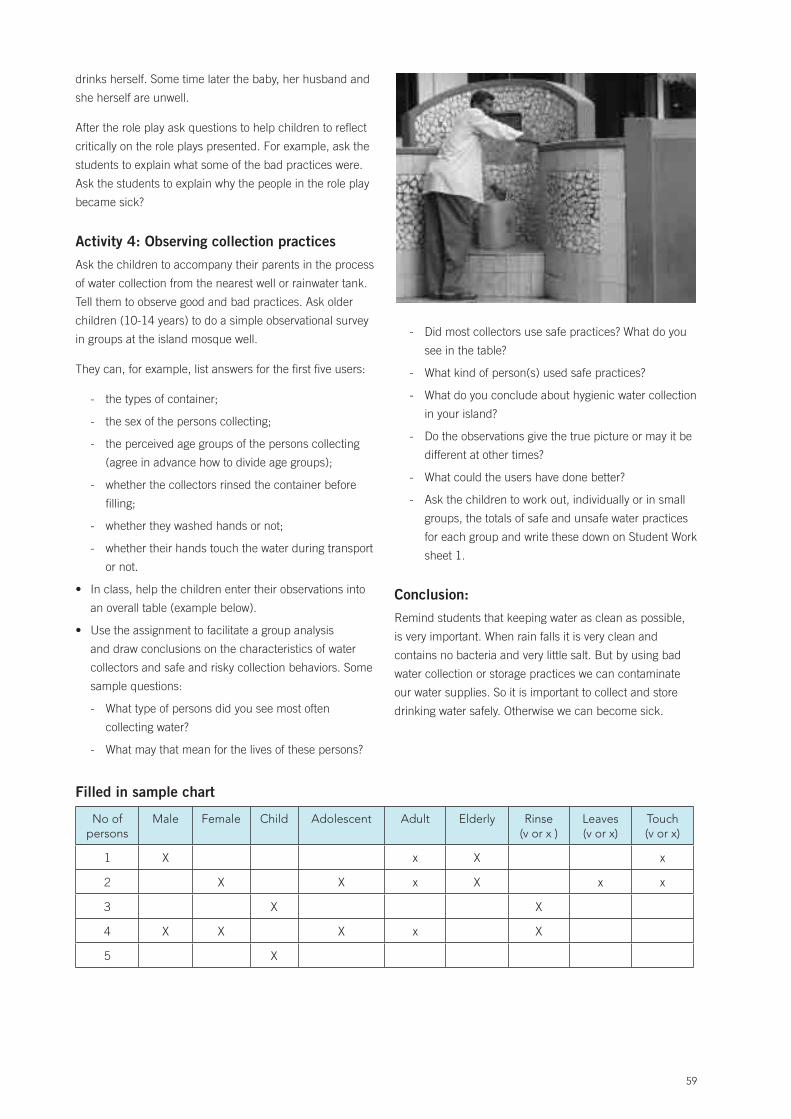
Filled in sample chart
no of persons
Male Female Child adolescent adult Elderly rinse (v or x )
Leaves (v or x)
touch (v or x)
1 X x X x
2 X X x X x x
3 X X
4 X X X x X
5 X
59
drinks herself. Some time later the baby, her husband and
she herself are unwell.
After the role play ask questions to help children to reflect
critically on the role plays presented. For example, ask the
students to explain what some of the bad practices were.
Ask the students to explain why the people in the role play
became sick?
Activity 4: Observing collection practices
Ask the children to accompany their parents in the process
of water collection from the nearest well or rainwater tank.
Tell them to observe good and bad practices. Ask older
children (10-14 years) to do a simple observational survey
in groups at the island mosque well.
They can, for example, list answers for the first five users:
- the types of container;
- the sex of the persons collecting;
- the perceived age groups of the persons collecting
(agree in advance how to divide age groups);
- whether the collectors rinsed the container before
filling;
- whether they washed hands or not;
- whether their hands touch the water during transport
or not.
In class, help the children enter their observations into •
an overall table (example below).
Use the assignment to facilitate a group analysis •
and draw conclusions on the characteristics of water
collectors and safe and risky collection behaviors. Some
sample questions:
- What type of persons did you see most often
collecting water?
- What may that mean for the lives of these persons?
- Did most collectors use safe practices? What do you
see in the table?
- What kind of person(s) used safe practices?
- What do you conclude about hygienic water collection
in your island?
- Do the observations give the true picture or may it be
different at other times?
- What could the users have done better?
- Ask the children to work out, individually or in small
groups, the totals of safe and unsafe water practices
for each group and write these down on Student Work
sheet 1.
Conclusion:
Remind students that keeping water as clean as possible,
is very important. When rain falls it is very clean and
contains no bacteria and very little salt. But by using bad
water collection or storage practices we can contaminate
our water supplies. So it is important to collect and store
drinking water safely. Otherwise we can become sick.

teacher resource Sheet 1
Safe household water collection and storage*
Regardless of whether or not collected household water
is initially of drinking water quality, it often becomes
contaminated with pathogens during transport and storage
due to unhygienic storage and handling practices.
Collection
Since ancient times, water for household use is collected
by a variety of physical methods ranging from manual (e.g.,
dipping), to passive (e.g., roof catchments and diversions)
to mechanical (e.g., pumps), and it is stored in a variety
containers. In developing countries, many of the traditional
types of water collection and storage methods employing
vessels of various compositions and sizes are still widely
used today. These include traditional pots or urns fashioned
from natural materials (e.g., gourds or wood) or fabricated
from clay, copper, brass and other impervious materials,
and flexible bags or other vessels made of animal hides,
other animal parts or fabrics treated to seal and prevent
leakage. Today, other metals, including aluminum, steel
and iron, as well as other materials, primarily plastics, have
come into widespread use for water collection and storage
in the form of buckets, jerry cans, picnic coolers and other
vessel types and shapes. Cisterns and other basins are also
still widely used for water collection and bulk storage near
or adjacent to dwellings, as they have been since ancient
times.
Storage
Higher levels of microbial contamination and decreased
microbial quality are associated with storage vessels having
wide openings (e.g., buckets and pots), vulnerability to
introduction of hands, cups and dippers that can carry fecal
contamination, and lack of a narrow opening for dispensing
water. Studies show that the use of containers with narrow
openings for filling, and dispensing devices such as
spouts or taps/spigots, protect the collected water during
storage and household use. Improved containers protect
stored household water from the introduction of microbial
contaminants via contact with hands, dippers, other fecally
contaminated vehicles or the intrusion of vectors.
The most desirable water storage vessels for many
household treatment and storage options are: (1) between
10-25 liters capacity, rectangular or cylindrical with one or
more handles and flat bottoms for portability and ease of
storage, (2) made of lightweight, oxidation-resistant plastic,
such as high-density polyethylene or polypropylene, for
durability and shock resistance, (3) fitted with a 6-9 cm
screw-cap opening to facilitate cleaning, but small enough
to discourage or prevent the introduction of hands or
dipping utensils, (4) fitted with a durable, protected and
easily closed spigot or spout for dispensing water, and (5)
provided with pictorial and/or written instructions for use
affixed permanently to the container, as well as an affixed
certificate of approval or authenticity. The cost of water
storage vessels is also an important consideration, as they
must be affordable or be subsidized. Locally available
buckets, pots, urns, jerry cans, barrels, used beverage
containers and flexible bags and flagons are usually low in
cost and readily available. However, only some of these,
in particular jerry cans, some plastic beverage containers,
some urns and some flexible vessels, have properties
and characteristics that are preferred or desirable as
readily transported water storage vessels. Others, such
as some buckets, cooking pots, some plastic beverage
containers and other cylindrical vessels are less desirable
for household water storage, but may be suitable for water
collection and transport, especially if they are lightweight,
have protective lids and are composed of easily cleaned
materials (e.g., plastics).
Other factors contributing to greater risks of microbial
contamination of stored water are higher temperatures,
increased storage times, higher levels of airborne
particulates (dust storms) and inadequate hand washing.
* Teacher resource sheet information from http://www.who.int/household_water/en/
60

Student Work Sheet 1
Safe and unsafe practices chart
After observing water collection practices record on the chart.
No of
persons
Male Female Child Adolescent Adult Elderly Rinse
(v or x )
Leaves
(v or x)
Touch
(v or x)
1
2
3
4
5
61
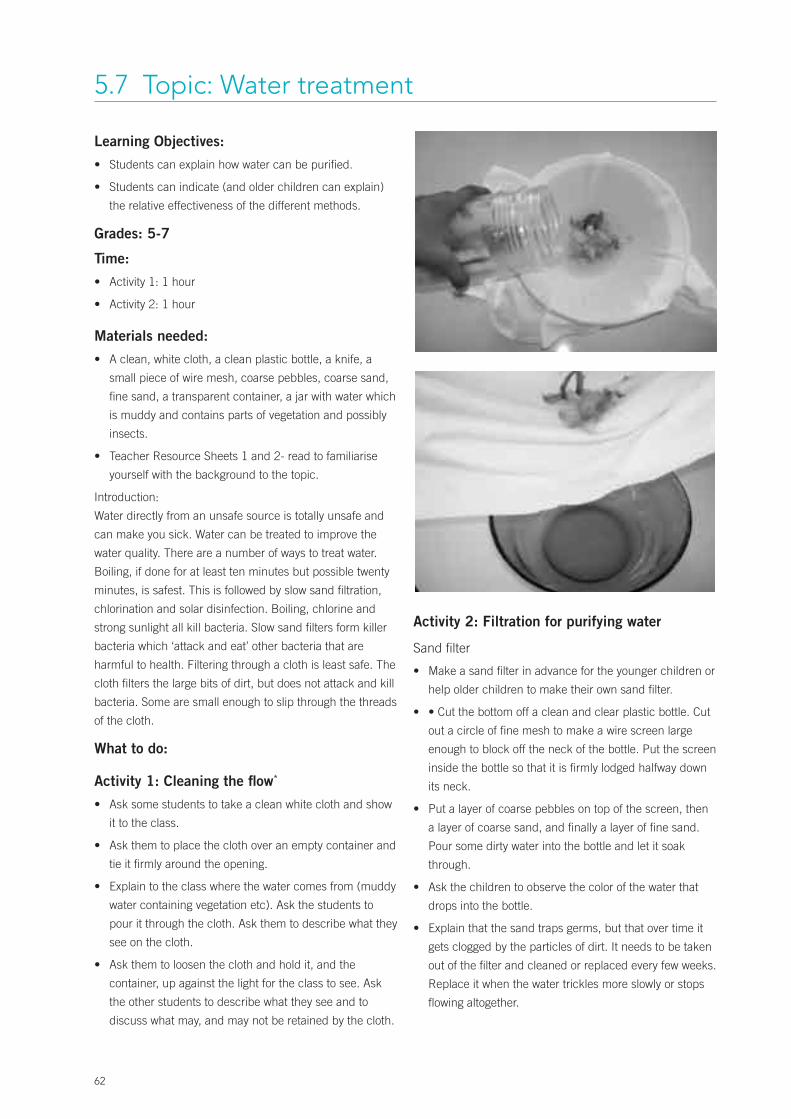
5.7 topic: Water treatment
62
Learning Objectives:
Students can explain how water can be purified.•
Students can indicate (and older children can explain) •
the relative effectiveness of the different methods.
Grades: 5-7
Time:
Activity 1: 1 hour•
Activity 2: 1 hour•
Materials needed:
A clean, white cloth, a clean plastic bottle, a knife, a •
small piece of wire mesh, coarse pebbles, coarse sand,
fine sand, a transparent container, a jar with water which
is muddy and contains parts of vegetation and possibly
insects.
Teacher Resource Sheets 1 and 2- read to familiarise •
yourself with the background to the topic.
Introduction:
Water directly from an unsafe source is totally unsafe and
can make you sick. Water can be treated to improve the
water quality. There are a number of ways to treat water.
Boiling, if done for at least ten minutes but possible twenty
minutes, is safest. This is followed by slow sand filtration,
chlorination and solar disinfection. Boiling, chlorine and
strong sunlight all kill bacteria. Slow sand filters form killer
bacteria which ‘attack and eat’ other bacteria that are
harmful to health. Filtering through a cloth is least safe. The
cloth filters the large bits of dirt, but does not attack and kill
bacteria. Some are small enough to slip through the threads
of the cloth.
What to do:
Activity 1: Cleaning the flow*
Ask some students to take a clean white cloth and show •
it to the class.
Ask them to place the cloth over an empty container and •
tie it firmly around the opening.
Explain to the class where the water comes from (muddy •
water containing vegetation etc). Ask the students to
pour it through the cloth. Ask them to describe what they
see on the cloth.
Ask them to loosen the cloth and hold it, and the •
container, up against the light for the class to see. Ask
the other students to describe what they see and to
discuss what may, and may not be retained by the cloth.
Activity 2: Filtration for purifying water
Sand filter
Make a sand filter in advance for the younger children or •
help older children to make their own sand filter.
•Cutthebottomoffacleanandclearplasticbottle.Cut•
out a circle of fine mesh to make a wire screen large
enough to block off the neck of the bottle. Put the screen
inside the bottle so that it is firmly lodged halfway down
its neck.
Put a layer of coarse pebbles on top of the screen, then •
a layer of coarse sand, and finally a layer of fine sand.
Pour some dirty water into the bottle and let it soak
through.
Ask the children to observe the color of the water that •
drops into the bottle.
Explain that the sand traps germs, but that over time it •
gets clogged by the particles of dirt. It needs to be taken
out of the filter and cleaned or replaced every few weeks.
Replace it when the water trickles more slowly or stops
flowing altogether.

Purification using ultraviolet rays
Get a transparent bottle and fill it with water and close •
the container.
Lay the bottle horizontally in strong sunlight on a flat •
surface. The process is even more effective if the bottom
half of the bottle is painted black or placed on a black
sheet of plastic that absorbs more heat thus helping to
kill more microbes.
Ask the children to discuss which of the different ways of
cleaning water they found easiest to use.
Ask them if they know other methods to purify water and
how water is made ‘safe and clean’ in their homes.
Ask them to explain each method orally or in writing and to
identify which methods are safer and which are less safe or
unsafe. Younger children can make three piles (safe, less
safe and unsafe). Ask older children to do a full ranking.
Ask them to explain why some methods are safe and others
not.
Conclusion:
Remind students that drinking water from an unsafe source
may make them sick and that there are ways to treat water
to improve the water quality. Boiling for 20 minutes is the
safest method.
Adapted for the Maldives from activity ‘Filtering the flow’ in IRC (2005) ‘The Joy of Learning: Participatory lesson plans on hygiene, sanitation, water, health and the environment ’IRC Water and Sanitation Center.
63
teacher resource Sheet 1
Water treatment options
- Boiling, if done for at least ten minutes but if possible 20, is safest.
- This is followed by slow sand filtration, chlorination and solar disinfection. Boiling, chlorine and strong sunlight all
kill bacteria. Slow sand filters form killer bacteria which ‘attack and eat’ other bacteria that are harmful to health.
- Filtering through a cloth is least safe. The cloth filters the large bits of dirt, but does not attack and kill bacteria.
Some are small enough to slip through the threads of the cloth. To illustrate this, draw a diagram of a woven
cloth.
- Alum and certain seeds clarify water but do not kill bacteria.
- Water directly from an unsafe source is totally unsafe.

Learning Objectives:
Students can demonstrate different water uses at home.•
Students understand the importance of conserving •
water.
Grades: 5-7
Time:
Activity 1: 30 minutes per day for 3 days and then 1 •
hour
Activity 2: 2 hours•
Materials needed:
A map of the island and notebooks. •
Teacher Resource Sheet 1– read to familiarize yourself •
with the background to the topic.
Student work sheets 1 and 2 (activity 1)•
Introduction:
Start by discussing with students about the multiple uses of
water at home and school. We all use water in many ways
that include drinking, bathing, washing and watering our
gardens, but water is a limited resource. That is why it is
important that we all find ways to conserve water every day
in every way. Children play an important role in making sure
that every drop counts and there are things you can do to
help your family save water. If everyone saves a little we can
save a lot.
What to do:
Explore the nature of water consumption in your •
community.
What do you use water for? Name the things you do with •
water.
Do you know how much water you consume in a day? •
Make an educated guess of the quantity and then
attempt to measure the amount used.
Activity 1: My water usage
Using Student Work Sheets 1 and 2 ask the students
monitor their drinking water use over a period of three
days and calculate the average use. The work sheets can
be adapted according to age level, and more complicated
mathematical calculations can be undertaken, such as
teacher resource Sheet 2
Plastics Can Help Make Safe Drinking Water Available Worldwide*
It seems like everyone carries a bottle of water around, but
the luxury of readily available bottled water is something
that not everyone in the world has access to. More than one
billion people worldwide drink unsafe water and nearly 3.5
million people, mainly children, die every year from drinking
microbe-contaminated water. But that empty plastic
water bottle could help make drinkable water more widely
available.
In an effort to make safe drinking water more accessible,
the World Health Organization is promoting an inexpensive
and simple method of water purification using sunlight
and soft drink bottles. SODIS or Solar Water Disinfection,
requires only sunlight, empty plastic soft drink bottles and
a black surface. Invented by the Swiss in 1991, it was
tested in Columbia, Bolivia, Togo, Burkina Faso, Indonesia,
Thailand and China where it was found to be highly
effective in eliminating water-borne pathogens such as
cholera.
The bottles are filled with water and placed horizontally on
a flat surface for about five hours in full sunlight where the
ultraviolet radiation kills most microorganisms. The process
is even more effective if the bottom half of the bottle is
painted black or placed on a black sheet of plastic that
absorbs more heat thus helping to kill more microbes.
SODIS does have its limitations. While it will reduce the
amount of microbial contaminates in water, it will not
purify chemically contaminated water. SODIS is not useful
for treating large volumes of water, but is more suited to
household use since an adequate supply of water can be
generated with a few bottles. Lastly, SODIS requires about
five hours of full sunlight to effectively kill microbes and if it
is a cloudy day, the process could take as long as two days.
Improved water quality can help prevent disease and
preventing disease can help alleviate poverty. The more
than one billion people without access to adequate
water resources are among the poorest in the world, so
inexpensive and easy water purification systems like SODIS
can be a significant improvement in overall health and well-
being.
*Student resource sheet information adapted from http://www.americanplasticscouncil.org/benefits/in_your_life/pop/power_plastics_june01
5.8 topic: Water use and reuse in the home
64

the drinking water use over a week, month or year, for the
family, the classroom and the whole island community. Ask
the students whether they are surprised by the results?
Activity 2: Water use on my island
Divide the students into groups and allocate the groups to
different sections of the island. In groups, students walk
around the community in different locations of the island
and identify ways in which people use water. Then in
groups, students visit 4 houses in different locations of the
island.
Answer the following questions;
• Sectionofisland(fromtheislandmap/orwardname)
• Whatwatersourcesdoesthehouseholduse(wellwater/
rainwater)?
• Howdotheycollectthewater(e.g.pump,water
containers)?
• Howmuchwaterdotheyuseeachday?
What household activities use the most water?•
Do they ever run out of water?•
Return to the classroom and each group can present their
findings to the class. Summaries of the data collected
should be listed in columns on the board. From the data
ask the students follow up questions:
The key questions to be discussed then are:
What activities use the most amount of water?•
How could practices be improved so that water is not •
wasted?
How do we make sure we have enough water now and •
in the future?
Conclusion:
Everyone needs water. We know that without water - we
are in trouble! Water is essential to life. Water is a primary/
essential substance on earth and is needed by everyone
and everything to live. Water is essential - life is water -
water is life. So we need to protect water and use it wisely!
65

teacher resource Sheet 1
Saving water
Water covers two thirds of the planet, but only 2.5% of
that amount is fresh water. Most of that is locked into ice
caps and glaciers, leaving only 0.08% of the earth’s water
available for human use. Water must be used wisely if there
is to be enough to meet the needs of future generations.
Awareness about the amount of water used in everyday
tasks is the first step in developing a responsible approach
to water use. Alternative ways of carrying out day to day
tasks using less water can then be explored.
In the Maldives, the Maldives Water and Sanitation
Company is responsible for the treatment and distribution
of desalinated water to Male’, Villingili and Hulhumale’ for
public consumption. In the islands, the island communities
have their own sources of drinking water, such as wells
and rainwater tanks. Unlike in Male’ (MWSC) the island
communities do not have experts regularly checking the
water’s quality. Wastewater is not treated nor used for any
purpose.
How we use water
We all use water in many ways that includes drinking,
bathing, washing and watering our gardens, but water is a
limited resource. That is why it is important that we all find
ways to conserve water every day in every way. Children
play an important role in making sure that every drop
counts and there are things you can do to help your family
save water. If everyone saves a little we can save a lot.
Some water facts:
Cooking a meal uses around 10 litres of water. •
Washing dishes in a sink uses about 9 litres of water. •
Washing clothes by hand can use up to 60 litres, •
washing machines can use 155 litres per cycle.
A 2 minute shower can use 30 litres of water. •
Flushing a toilet needs 11 litres of water. •
Saving water makes good sense
The average person uses 190 liters of water a day. If you
obtain water from a public water supply, your water bill lets
you know that each drop wasted costs you money. Those
of us who get our water from private wells are concerned
about wells going dry. These simple tips can help us all
save money and preserve precious water supplies.
What you can do at home to save water
Bathroom
• Turnthetapoffwhenyoubrushyourteeth.Ifyoubrush
your teeth twice a day, for two minutes each time, and
leave the tap running, you could be wasting around
12 litres (or just over a bucket) of water a day. That’s
over 4,300 litres per person, per year.
• Reduceyourshoweringtime.Everyminuteyoucut
from your shower time could save up to nine litres of
water if you have a water-efficient showerhead, and
up to 20 litres if you have an older style, conventional
showerhead.
• Usethehalfflushoptionwhenpossibleondualflush
toilets.
• Installadisplacementdeviceinthecistern(tank)of
single flush toilets, as it can save you a litre of water
every flush. You can do this by removing the lid of your
cistern and carefully placing a one litre sealed plastic
bottle filled with pebbles and water inside in a way that
won’t interfere with the flushing mechanism.
• Checkfortoiletleaksbyplacingafewdropsof
biodegradable food coloring into the cistern, and wait
for 30 minutes. If you have a leaking toilet, you will see
colored water in the toilet bowl and need to contact a
plumber. A slow, barely visible leak into your toilet bowl
can waste more than 4,000 liters of water a year. Visible,
constant leaks (with a hissing sound) can waste
95,000 liters a year.
Laundry
About 13 per cent of household water is used in the
laundry. Conventional top loading washing machines use
an average of 120 to 150 litres of water each load. Wash
only full loads of dishes and laundry. Reduce the number
of washing loads in a week and save water by combining
smaller loads and only washing when you have a full load.
• Adjustthewaterleveltosuitthesizeofyourloadand
use the economy cycle, if your machine has one.
• Ifyouarebuyinganewwashingmachine,choosea
water-efficient model with a water conservation rating
of AAA (or greater). Front loading machines and some
water efficient top loaders will save approximately
50 litres of water per load. They are also gentler on
your clothes and require less detergent.
Kitchen
• Rinsevegetablesinafullsinkorbucketofwater.
• Rinsedishesinafullsinkorpanofwater.
66

67
What you can do outdoors to save water
• Usemulcharoundshrubsandgardenplantstosavesoil
moisture and reduce evaporation.
Apply organic mulches 4 inches deep to keep plants
roots cool, prevent soil crusting, minimize evaporation,
and reduce weed growth. Night-time watering minimizes
evaporation.
• Ifyourcommunitypracticeswatering,watergardens
on alternate evenings instead of every day. Water your
garden early in the morning or late in evening. Don’t
water on cool, rainy or windy days.
• Plantdrought-tolerantorlowwater-useplantsand
grasses.
• Useabucketinsteadofahosetowashyourvehicle.
Tips on safeguarding water
All of us need clean water to drink. We can go for weeks •
without food, but only days without water. Contaminated
water can be a threat to anyone’s health, but especially
to young children.
Use Household Products Properly: BE CAREFUL...Many •
things around the home like paint or cleaners can harm
you and cause water pollution if they are not handled
and disposed of properly.
Care for Your Garden: Everyone needs to use fertilizers •
carefully. If too much fertilizer is used, the fertilizer can
wash into streams and cause water pollution.
Plant Trees and Shrubs: Trees and shrubs help prevent •
water pollution by soaking up extra fertilizer (nutrients).
Plants also prevent erosion by keeping the soil where it •
belongs − on the land and out of the water.
Control Bugs Carefully: Not all bugs are bad. It’s •
important to read labels and follow directions when
using pesticides (bug sprays). Some pesticides can
cause water pollution and even kill friendly insects like
ladybugs. Staff at your local Health Centre or other
relevant authority can teach your family safe, new ways
to control pests.
Control Rainwater: When lots of rain falls on hard •
surfaces like paved sidewalks and streets it can run
off carrying leaves, waste and car oil into drains. The
drains eventually seep into the water lens causing water
pollution.

Student Work Sheet 1
Uses of water at home: record how much water is used at home.
Activity
(use in litres)
Number of times a day
Total water used in litres
Water quality
How can water consumption be reduced?
Can the used water be reused? How?
Cooking main meal (10 l)
Other meals
Drinking (0.25 l per glass)
Washing dishes in a sink (9 l)
Washing clothes (how many?) by hand (60 l)
Washing with washing machine each cycle (155 l)
8 minute shower (120 l)
Cleaning teeth with tap running (5 l)
Cleaning teeth if tap is turned off (1 l)
Flushing of toilet (11 l)
Gardening
Other, for example play or: ___________
TOTALS
68
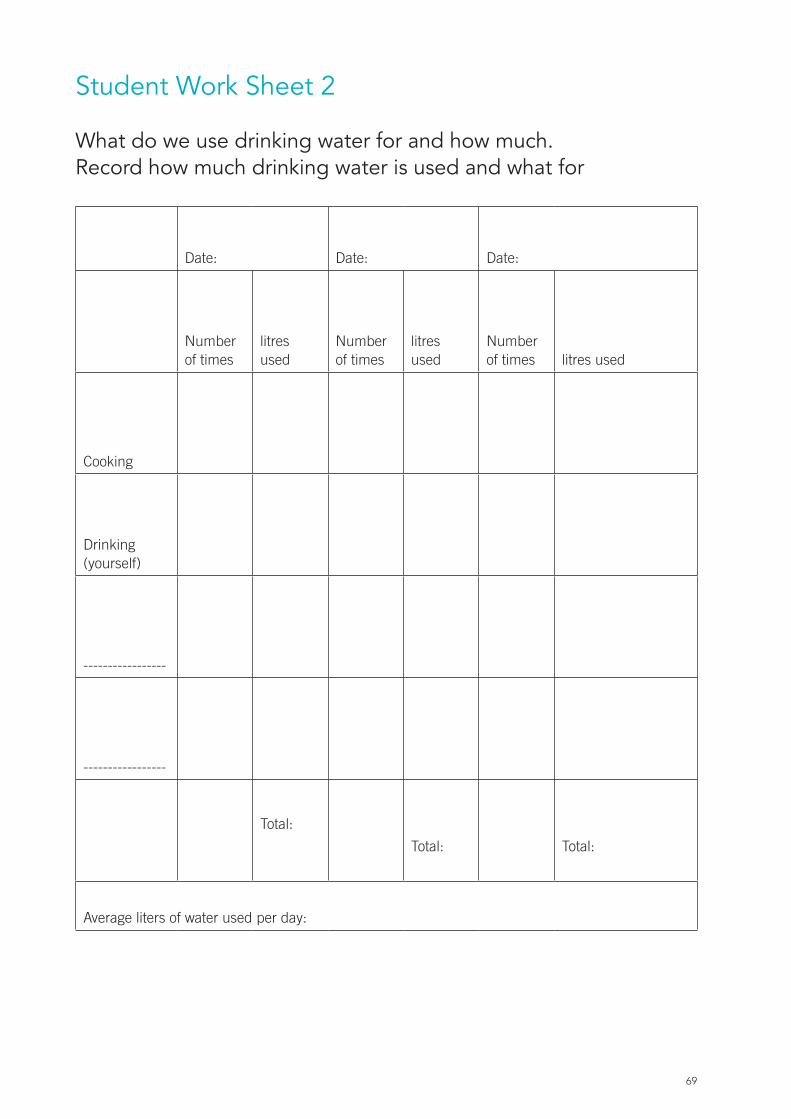
Student Work Sheet 2
What do we use drinking water for and how much. Record how much drinking water is used and what for
Date: Date: Date:
Number of times
litres used
Number of times
litres used
Number of times litres used
Cooking
Drinking (yourself)
-----------------
-----------------
Total:
Total: Total:
Average liters of water used per day:
69
70
6 PartICIPatorY aCtIVItIES and tooLS: EnVIronMEntaL HYgIEnE
Introduction The purpose of this chapter is to develop the students’ understanding of the link between
environmental hygiene at their school and on their island and their health.
Learning objectivesThe objectives of the chapter are to:
Foster knowledge and awareness of issues about environmental hygiene on their island•
Link classroom activities to our student’s community and environment•
overview of topicsCleanliness of foot paths, play areas and roads•
Good waste management•
WASH snakes and ladders board game•

6.1 topic: Cleanliness of foot paths, play area and roads
* Adapted for the Maldives from activity ‘Ouch and Bah’ in IRC (2005) ‘The Joy of Learning: Participatory lesson plans on hygiene, sanitation, water, health and the environment ’IRC Water and Sanitation Center.
71
Learning Objectives:
Students understand the effects of littering, on the •
environment and our health.
Students understand the need to keep footpaths, play •
areas and roads clean.
Grades: 3-7
Time:
Activity 1: 1 hour•
Materials needed:
Teacher Resource Sheet 1 – read to familiarize yourself •
with the background to the topic.
Introduction:
Start by explaining to students that litter is any type thrown
where it does not belong. Whenever waste is not properly
disposed of, it is considered litter. Litter is an important
environmental issue that is very easy to see around us.
Litter can be anything, from plastic bottles, drink cans, crisp
packets, chewing gum or even old machines or furniture
thrown in the ocean! The most common types of litter are
sweet wrappers, drinks cans, plastic drink bottles and fast
food wrappers. Litter does not look nice and also can affect
our health:
Litter attracts vermin and is a breeding ground for •
bacteria plus mosquitoes.
Litter can pose a threat to public health e.g. broken glass •
and syringes or hazardous materials can be a health
hazard in public places
What to do:
Activity 1: Litter walk*
Draw a map of your school and then take an environmental
walk with the children.
1. List the kinds of litter you see
2. Record the numbers of each kind of rubbish. What is the
most common?
3. Where does this waste come from? How did it get here?
4. What are the consequences of rubbish in the
schoolyard?
6. Who should be responsible for keeping the school clean?
7. What actions can you and your school take to ensure the
school is kept clean?
8. Go back into the class and look again at the map you
drew. Each group should mark on the map the locations
where most waste was found.
Explain that it is necessary to first understand what litter
is being produced so that you can develop a suitable litter
management plan. If you don’t know what litter there is how
will you know how to manage it?
Back in the classroom, ask the students to think of •
the effects of litter on the environment, health and
livelihoods. Write a list on the board.
Ask the students to draw a poster showing the effects of •
litter that can be displayed in their classroom.
Conclusion:
When we drop litter, it does not go away. Litter goes into our
swamps, oceans and affects our wildlife and our health.

72
teacher resource Sheet 1
What is litter?
Litter is waste of any type thrown where it does not belong.
Whenever waste is not properly disposed of, it is considered
litter. Litter is an important environmental issue that is very
easy to see around us.
Litter can be anything, from cigarette butts tossed on the
ground, plastic bottles, drink cans, crisp packets, chewing
gum or even old machines or furniture thrown in the ocean!
The most common types of litter are cigarette butts, sweet
wrappers, drinks cans, plastic drink bottles and fast food
wrappers.
Why is litter bad?
Litter can be dangerous to all living things and can cause
a whole range of problems for everyone in the community.
Litter can cause harm to wildlife and sometimes even
death.
Litter facts:
Litter can travel through the drainage system to lagoons •
and oceans
Litter attracts vermin and is a breeding ground for •
bacteria plus mosquitoes.
Litter can pose a threat to public health e.g. broken glass •
and syringes or hazardous materials can be a health
hazard in public places
Litter can be a fire hazard when e.g. carelessly discarded •
cigarette butts turn accumulated litter into potential fire
hazards
Litter harms wildlife and plants e.g. animals might eat •
litter mistaking it for food, while plastic sheets and oil
can cover and suffocate plants and animals living on the
seabed. Plastic litter can choke or suffocate birds and
marine life. Carelessly discarded containers can trap
small mammals. Old fishing line, rope, nets or wire can
trap land or marine life.
Litter creates a negative image of places, especially •
tourist locations e.g. a littered environment sends out a
message that people do not care for the environment
and that it is acceptable to litter.
Why do people litter?
All the litter you see in your environment comes from
people. Sometimes people litter thinking someone else
will clear up after them, or because areas are already
heavily littered and they think a bit more won’t make any
difference. People may also litter if rubbish bins are full and
there is nowhere convenient to dispose of their rubbish.
Research points to several factors that may affect littering
behaviour:
Lack of knowledge of the environmental effects of •
littering.
Litter has already accumulated. The more litter present •
the more people are inclined to litter.
Lack of social pressure to do the right thing. •
Absence of penalties or consistent enforcement. •
Number, placement and appearance of disposal •
containers at or near the site.
People who litter often feel no sense of pride in the areas •
they are littering.
They do not view the item as litter. That is often the case •
with cigarette butts.
What can be done?
The only way to reduce litter is for individuals to change
their behaviour. Bringing about behavioural change and
litter control needs a community focus, but individuals must
be behind any action to prevent and control litter.
Plastic bags can wash into the ocean and become a threat
to wildlife.

6.2 topic: good waste management
*Adapted for the Maldives from activity ‘Wonderful waste’ in IRC (2005) ‘The Joy of Learning: Participatory lesson plans on hygiene, sanita-tion, water, health and the environment ’IRC Water and Sanitation Center.
73
Learning Objectives:
Children learn to identify various types of solid waste and •
where they occur.
They can identify negative effects of careless disposal.•
They develop positive attitudes to a clean environment.•
Grades: 3-7
Time:
Activity 1: 30 minutes then after 1 week•
Activity 2: 1 hour•
Materials needed:
4 plastic containers, (can use water drinking bottles cut •
in half) 4 different waste materials -plastic, paper, fruit
waste, peel, skins, vegetables, leaves, etc. (Activity 1)
Paper, drawing materials, locally available waste •
materials (Activity 2).
Teacher Resource Sheet 1 and 2 – read to familiarize •
yourself with the background to the topic.
Introduction:
As our lifestyles have changed, so too have our waste
streams. Wastes are no longer just composed of organic
materials; they also are made from metals, plastics and
hazardous wastes. Also, we are producing a lot more waste.
This means that dumping mixed waste around our islands
at different places on the beach or forest, or burning it,
is no longer effective in removing waste from our islands.
These new wastes do not breakdown quickly, so the wastes
remain on our islands for longer, potentially affecting our
health, environment and livelihoods.
What to do:
Activity 1: Waste Decomposition
Take a few different waste materials and place one in each
container. Leave them in the containers and check them
each week. Are some things changing? Which are changing
and which are not?
Different materials break down at different rates – some
organics (matter derived from living things) can break down
very quickly while things like plastic may not break down.
With organic materials some have high nitrogen and break
down quickly while others have higher carbon and break
down slowly. When organic materials break down they will
make a smell and attract flies and rats.
Discuss with students:
A. What is the difference between organic and in-organic
waste?
B. What happens if we throw in-organic waste in waterways
and on the ground?
C. What breaks down the quickest, an apple core, a plastic
bag, or some paper?
D. Can waste affect human health?
Activity 2: Waste not, want not*
• Askthechildrentogooutandbringdifferenttypesof
waste materials from the school environment.
Alternatively, you can ask the children to bring materials
to school the following day.
• Askthechildrentoexhibitallthematerialsthatthey
have brought. Ask them to put the same materials
together (cans with cans, paper with paper, etc.).
• Facilitateadiscussionwiththechildrenonwhich
materials are biodegradable and which are non-
biodegradable.
• Facilitateadiscussionaboutthevariousrisksand
nuisances: e.g. bad smell, insects breeding, rats, and
implications for health (e.g. vector-borne diseases,
insect-breeding and insect-borne diseases (e.g. when
mosquitoes breed in water in empty cans, drums, etc.
and spread dengue), accidents (cuts, falls), general
contamination and degradation of the environment.
• Facilitateadiscussionaboutreduce,reuseand
recycling practices in the homes of the children and in
the community.
Conclusion:
Remind students that poor waste management practices
can impact our health and our environment. So we all need
to manage our wastes in ways to minimize impacts on our
community health.

Reuse – there are many things that we can use again
instead of throwing away, for example, use a plastic bottle
again for storing pickles or containers for water storage in
the fridge.
Recycle - this is the process where recyclable materials
(e.g. paper, plastic, glass, metal, aluminum, steel etc.) are
converted into new products. Never throw waste into the
sea or anywhere else in the environment.
74
teacher resource Sheet 1As our lifestyles have changed, so too have our waste
streams. Wastes are no longer just composed of organic
materials; they also are made from metals, plastics and
hazardous wastes. Also, we are producing a lot more waste.
This means that dumping mixed waste around our islands
at different places on the beach or forest, or burning it,
is no longer effective in removing waste from our islands.
These new wastes do not breakdown quickly, so the wastes
remain on our islands for longer, potentially affecting our
health, environment and livelihoods.
Poor waste management practices can impact our
health:(i) mosquitoes can breed in water collected in tins,
cans and plastics and contribute to the spread of mosquito
borne diseases such as dengue fever and chikungunya,
(ii) rotting organic matters attracts vectors such as rats
and crows, (iii) burning of plastics and wet organics
can cause local air pollution that can be inhaled by the
island inhabitants, and (iv) long term buried waste can
contaminate ground water potentially affecting the quality
of water in wells.
Poor waste management practices can also affect our
economy: (i) waste floating in the seas, on the reefs or
swept onto beaches is not attractive and impacts on
the image of the Maldives environment as a pristine
environment, especially for the tourism industry, and (ii)
waste floating in the seas can also damage boats (e.g.
stuck in propellers).
Poor waste management practices can also affect our land
and marine environments: (i) waste dumped on the beach
can pollute the water and spread it to other islands; (ii) non
biodegradable plastics can be ingested by animals such
as turtles, birds, dolphins, whales etc, and (iii) burying
wastes such as batteries and nappies can also pollute the
groundwater.
Reduce, reuse and recycle
Reduce – Using less of things, for example, don’t throw
away paper unless you have used both sides. Reduce
the use of plastics by using a longer life bag or a woven
basket. For example when we buy something from a shop
which is already packaged in a box or wrapped in paper or
plastic, we do not need to put it into another plastic bag. It
is even better to bring your own cloth bag and avoid plastic
altogether.
Maldives has a population of about 300,000 people, if
everyone used 4 disposable plastic bags each day, it would
calculate to 1200,000 plastic bags being thrown away
everyday of the year. This is a lot of plastic!
Waste floating in the sea can affect our livelihoods.
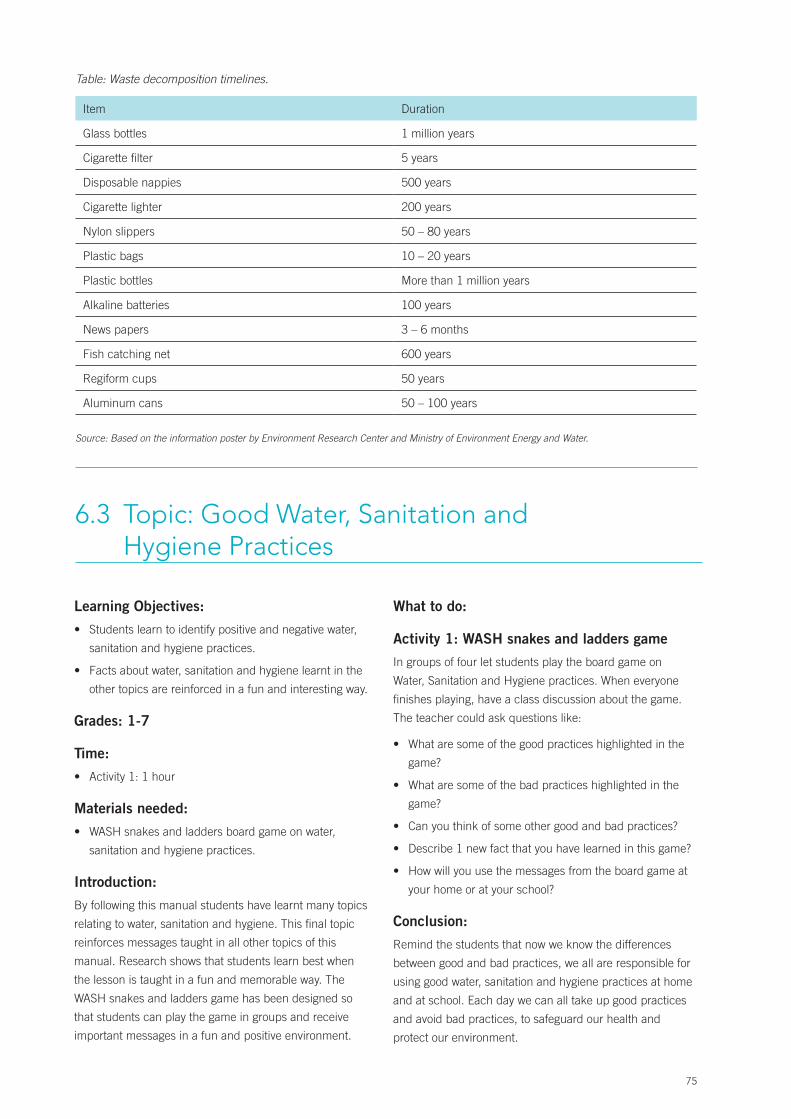
Learning Objectives:
Students learn to identify positive and negative water, •
sanitation and hygiene practices.
Facts about water, sanitation and hygiene learnt in the •
other topics are reinforced in a fun and interesting way.
Grades: 1-7
Time:
Activity 1: 1 hour•
Materials needed:
WASH snakes and ladders board game on water, •
sanitation and hygiene practices.
Introduction:
By following this manual students have learnt many topics
relating to water, sanitation and hygiene. This final topic
reinforces messages taught in all other topics of this
manual. Research shows that students learn best when
the lesson is taught in a fun and memorable way. The
WASH snakes and ladders game has been designed so
that students can play the game in groups and receive
important messages in a fun and positive environment.
What to do:
Activity 1: WASH snakes and ladders game
In groups of four let students play the board game on
Water, Sanitation and Hygiene practices. When everyone
finishes playing, have a class discussion about the game.
The teacher could ask questions like:
What are some of the good practices highlighted in the •
game?
What are some of the bad practices highlighted in the •
game?
Can you think of some other good and bad practices?•
Describe 1 new fact that you have learned in this game?•
How will you use the messages from the board game at •
your home or at your school?
Conclusion:
Remind the students that now we know the differences
between good and bad practices, we all are responsible for
using good water, sanitation and hygiene practices at home
and at school. Each day we can all take up good practices
and avoid bad practices, to safeguard our health and
protect our environment.
6.3 topic: good Water, Sanitation and Hygiene Practices
Table: Waste decomposition timelines.
Item Duration
Glass bottles 1 million years
Cigarette filter 5 years
Disposable nappies 500 years
Cigarette lighter 200 years
Nylon slippers 50 – 80 years
Plastic bags 10 – 20 years
Plastic bottles More than 1 million years
Alkaline batteries 100 years
News papers 3 – 6 months
Fish catching net 600 years
Regiform cups 50 years
Aluminum cans 50 – 100 years
Source: Based on the information poster by Environment Research Center and Ministry of Environment Energy and Water.
75

7 ongoIng MonItorIng This manual has been designed with twin objectives, to:
Raise knowledge and awareness of good water, sanitation and hygiene practices with teachers •
and school health assistants; and
Provide participatory tools, techniques and materials for teachers and school health assistants •
to promote improved water, sanitation and hygiene practices amongst students.
Students playing the WASH game.
Once teachers and school health assistants start to use this manual, it is very important to check to see if the manual is
achieving these objectives. This is called monitoring. When we monitor we are looking to see if the manual contains the
most useful activities and tools. We also want to check to see the impact of the manual on students; Are they more aware?
Have their practices changed?
Monitoring and evaluation by teachers
Teachers and school health assistants play an important role in monitoring and evaluating the implementation of the
manual. To check the quality and effectiveness of the WASH lesson plans, the teacher should be encouraged to fill out
an evaluation form at the end of each lesson (see below). This will help teachers to reflect on whether students achieve
learning outcomes and also help to improve the delivery of the topics over time (i.e. continuous improvement).
76

Monitoring and evaluation by school management and School Health Unit
Monitoring can also be carried out at a higher level, for
example by the school management and/or School Health
Unit. Some questions that can be asked at this level
include*:
Teacher training:
• Doteachers/schoolhealthassistantsunderstandthenew
topics and are they committed to implementing them?
• Arethey,attheendofthetraining,willingtosetgood
WASH examples in the school?
At the school:
• IsWASHeducationpartoftheschoolprogramme?
• CanWASHeducationbepracticedintheschool;are
facilities available and can they be used?
• DotheteacherssetgoodWASHexamplesintheschool?
After the lessons, are students more aware of WASH •
practices?
Have their WASH practices changed? How? Are these •
changes likely to be sustainable?
What has been the most significant change in WASH •
awareness or behavior at the school?
What barriers need to be overcome to improve WASH •
practices in the school?
For the extension into school, home and community:
• Domethodsandlearningmaterialslinklearninginthe
classroom with life skills at home and in the community?
• Doestheprogrammeeffectivelyaimtocomplement
classroom teaching with regular activity around the
school?
• Islearningintheschooltransferredthroughjointschool/
community activities or less formally through child-to-
child activities?
* Adapted from Postma, Leonie; Getkate, Renate and van Wijk, Christine (2004). Life Skills-Based Hygiene Education: A guidance document on concepts, development and experiences with life skills-based hygiene education in school sanitation and hygiene educa-tion programmes. Delft, The Netherlands, IRC International Water and Sanitation Centre. (Technical Paper Series; no. 42). 144 p.
77

teacher evaluation
name of activity
What were the learning outcomes
for this topic?
Was the time allocated
appropriate for the activity?
Was the content effectively
followed and thought out?
Is the content relevant to the
needs of the students?
Are students involved in active
learning and thinking?
Are all students involved and not
just some of them?
Did the students enjoy the
activity?
Were the methods and resources
appropriate for the teacher/
students?
Did the teacher feel that
the students have learned
something? (i.e. were the learning
outcomes achieved)
As a teacher do you think that
this activity could be improved,
and how?
Any other comments
78

referencesDavis and Lambert (2002) Engineering in Emergencies: A practical guide for relief workers’ ITDG Publishing, London
IRC (2005) ‘The Joy of Learning: Participatory lesson plans on hygiene, sanitation, water, health and the environment ’IRC
Water and Sanitation Center
Ministry of Health (1996), Health Master Plan 1996 – 2005, Male’ Republic of Maldives.
MWSA, MoE and UNICEF (2002) School Sanitation and Hygiene Education: Situation Analysis Republic of Maldives
Postma, Leonie; Getkate, Renate and van Wijk, Christine (2004). Life Skills-Based Hygiene Education: A guidance
document on concepts, development and experiences with life skills-based hygiene education in school sanitation and
hygiene education programmes. Delft, The Netherlands, IRC International Water and Sanitation Centre. (Technical Paper
Series; no. 42). 144 p.
UNICEF and IRC (1998) A Manual on School Sanitation and Hygiene Water, Environment and Sanitation Technical
Guidelines Series - No. 5.
UNICEF (1999) ‘A manual on hygiene promotion.’ Water, Environment and Sanitation Technical Guidelines Series No. 6
Website resources Child Health
www.cyh.com/
www.hygieneexpert.co.uk/
ImportanceOfGoodHygieneInChildren
www.mayoclinic.com/health/hand-washing/HQ00407
Environmental Education
www.livelearn.org
www.schoolsanitation.org
General Health
www.canadian-health-network.ca/
International year of Sanitation
http://esa.un.org/iys/
IRC- International Water and Sanitation Center
http://www.irc.nl/
Maldives Water and Sanitation Authority
www.mwsa.gov.mv/
Ministry of Environment, Energy and Water
www.meew.gov.mv/water/index.php
Ministry of Health
http://www.health.gov.mv/
Maldives Department of Public Health
http://www.dph.gov.mv/school_health.htm
Ministry of Education School Health Program
http://www.edc.edu.mv/pages/36
Sewage
extoxnet.orst.edu/faqs/safedrink/sewage and www.
extension.umn.edu/distribution/naturalresources/
components/DD6946b
UNICEF
http://www.unicef.org/wes/
WHO
http://www.who.int/water_sanitation_health/monitoring/en/
Water treatment
www.americanplasticscouncil.org/benefits/in_your_life/pop/
power_plastics_june01.html
79
glossaryBacteria:
A bacterium (plural: bacteria) is a unicellular
microorganism. Typically a few micrometres in length,
individual bacteria have a wide-range of shapes, ranging
from spheres to rods to spirals.
Biodegradable:
Easily broken down.
Contaminants:
to make something impure, unclean, or polluted, especially
by mixing harmful impurities into it or by putting it into
contact with something harmful
Decay:
To rot or become rotten; decompose.
Desalination:
The removal of salt (especially from sea water).
Ecosystem:
A community of plants, animals and micro-organisms that
are linked and that interact with each other and with the
physical environment.
Environment:
Everything that surrounds a living thing and affects its
growth and health.
Freshwater lens:
About a third of the rainfall will soak into the ground and
infiltrate into the coral sand. This water collects in the sand
and forms a body of fresh water.
Germs:
a general term for different types of tiny organisms, or living
things, commonly known as germs.
Hygiene:
the practice of keeping oneself and one’s surroundings
clean, especially in order to prevent illnesses or the spread
of diseases.
Non Bio Degradable:
Cannot be easily broken down.
Pathogen:
An agent of disease. A disease producer. The term
pathogen most commonly is used to refer to infectious
organisms (e.g. bacteria, viruses).
Percolation:
To cause (liquid, for example) to pass through a porous
substance or small holes; filter (e.g. rainwater passing
through sand).
Potable water:
Water suitable for drinking.
Rain gauge:
An instrument for measuring the quantity of rain at any
given place.
Rain Water harvesting:
collecting rain water.
Sanitation:
the hygienic means of preventing human contact from the
hazards of wastes to promote health.
Saturated: Soaked with moisture; unable to contain any
more water.
Sewage:
Fluid containing water borne, domestic and human waste.
Sustainable:
Capable of being sustained or maintained.
Virus:
A virus is a sub-microscopic infectious agent that is unable
to grow or reproduce outside a host cell.
80

Acknowledgements
The development of this manual, ‘Training Manual on Good Water, Sanitation and Environmental Hygiene Practices for Primary Schools’, has been a cooperative effort.
We would like to thank the members of Live & Learn Environmental Education Maldives for willingly and expertly developing the activities and the materials of the manual.
We owe our gratitude to UNICEF for their invaluable support throughout the development of the manual. We particularly thank Ms. Shadiya Adam and Mr. David Proudfoot for their continuous assistance.
We also extend our heartfelt appreciation to Dr. Aishath Shehenaz Adam of the Educational Supervision and Quality Improvement Section for her guidance and encouragement.
Finally, our warm thanks go to the staff if the School Health Unit whose commitment to Health Promoting Schools Initiative provided the foundation for this manual.
Ministry of Education Maldives, 2008
Prepared for UNICEF and the School Health Unit, Ministry of Education – Male’, Maldives
July 2008
Live & Learn Environmental Education: PO BOX 3007 Male’, Maldives H. Huba (1st floor), Meduziyaaraiy Magu, Male’, Maldives P: (+960)3303585 E: [email protected] http://www.livelearn.org
Written by: Fathimath Shafeeqa, Mariyam Shazna, Elaine Glen and Robbie Henderson Adapted from materials including; ‘Live & Learn Environmental Education (2006) Water Sanitation & Hygiene Education Toolkit: A Critical Thinking Approach’, IRC (2005) ‘The Joy of Learning: Participatory lesson plans on hygiene, sanitation, water, health and the environment’. Proofed by: Mausooma Jaleel Design and layout by: Mariyam Omar and Karen Young Photography by: Live & Learn Environmental Education, Judith Smeets, Department of Public Health, Kris Buros, Ahmed Riyaz Jauhary and Reinhard Kikinger. Illustrations by: Naushad Waheed and Shirumeen Ahmed
© Copyright: UNICEF and Live & Learn Environmental Education
Disclaimer: This manual was prepared by consultants for UNICEF. The findings, interpretations, and conclusions expressed in it do not necessarily represent the views of UNICEF or those of its member governments. UNICEF does not guarantee the accuracy the accuracy of the data included in this report and accepts no responsibility for any consequences of their use.

Training Manual Good Water, Sanitation & Environmental Hygiene Practices for Primary Schools