TRABAJO PRACTICO - sgd.gugler.com.ar GNU/Linux Nivel I Comandos TRABAJO PRACTICO GNU/LINUX Nivel I...
38
Curso GNU/Linux Nivel I Comandos TRABAJO PRACTICO GNU/LINUX Nivel I COMANDOS Integrante: Berón Ariel Jose Maria – [email protected] Ariel Jose Maria Berón 1
-
Upload
truongtuyen -
Category
Documents
-
view
216 -
download
0
Transcript of TRABAJO PRACTICO - sgd.gugler.com.ar GNU/Linux Nivel I Comandos TRABAJO PRACTICO GNU/LINUX Nivel I...

Curso GNU/Linux Nivel I Comandos
TRABAJO PRACTICO
GNU/LINUX Nivel I
COMANDOS
Integrante: Berón Ariel Jose Maria – [email protected]
Ariel Jose Maria Berón 1
Curso GNU/Linux Nivel I Comandos
Copyright (C) 2016 ARIEL JOSE MARIA BERON.
Permission is granted to copy, distribute and/or modify thisdocument under the terms of the GNU Free Documentation
License, Version 1.3 or any later version published by the FreeSoftware Foundation; with no Invariant Sections, no Front-Cover
Texts, and no Back-Cover Texts. A copy of the license is included inthe section entitled "GNU Free Documentation License".
Ariel Jose Maria Berón 2

Curso GNU/Linux Nivel I Comandos
Introducción
Este trabajo esta orientado a todas aquellas personas que estánincursionado en el mundo Linux .
Mi experiencia personal de salir del software privativo y el poco onulo uso de software libre por desconocimiento o por el estancamiento quegenera la posición dominante de la empresa de la “ventana”, en el mundo delos sistemas operativos.
A pesar de que las distribuciones de Linux cada vez son más y másamigables con el usuario promedio, y actualmente podemos realizar todas lasactividades básicas mediante herramientas con interfaz gráfica; la terminalsigue siendo una herramienta omnipresente en el mundo de GNU/Linux, es poresto que oriento este trabajo a los COMANDOS de la “tty” de GNU/LINUX ysacarnos del entorno gráfico.
Ariel Jose Maria Berón 3

Curso GNU/Linux Nivel I Comandos
Linux/Comandos
Los comandos, en su mayor parte, no son realmente más que pequeños programas incorporados en el sistema operativo. Técnicamente, lo único que diferencia los comandos de los programas (o de los scripts) es que los comandos siempre están en carpetas muy concretas (/bin, /usr/bin, y en el caso de haber iniciado sesión como superusuario, /sbin), así que no es necesario especificar dónde se encuentran.
Por ello, todas las reglas de sintaxis aplicables a los comandos son aplicables a cualquier programa o script de Bash, con un cambio: enlugar de escribir el nombre del comando, hay que especificar exactamente dónde esta el programa o script (la ruta del programa o script).
Ariel Jose Maria Berón 4
Curso GNU/Linux Nivel I Comandos
Contenido
1 Reglas de sintaxis
1.1 Capitalización
1.2 Parámetros
1.3 Rutas
1.4 Opciones (un tipo especial de parámetros)
2 Comandos
1. Información del Sistema
2. Apagar (Reiniciar o Cerrar Sesión)3. Archivos y Directorios4. Encontrar archivos5. Montando un sistema de ficheros6. Espacio de Disco7. Usuarios y Grupos8. Permisos en Ficheros (Usa ~ez_rdquo+ez_rdquo~ para colocar
permisos y ”-” para eliminar)9. Atributos especiales en ficheros (Usa ~ez_rdquo+ez_rdquo~
para colocar permisos y ”-” para eliminar)10.Archivos y Ficheros comprimidos11.Paquetes RPM (Red Hat, Fedora y similares)12.Actualizador de paquetes YUM (Red Hat, Fedora y similares)13.Paquetes Deb (Debian, Ubuntu y derivados)14.Actualizador de paquetes APT (Debian, Ubuntu y derivados)15.Ver el contenido de un fichero16.Manipulación de texto
Ariel Jose Maria Berón 5
Curso GNU/Linux Nivel I Comandos
17.Establecer carácter y conversión de ficheros18.Análisis del sistema de ficheros19.Formatear un sistema de ficheros20.Trabajo con la SWAP21.Salvas (Backup)22.CD-ROM23.Trabajo con la RED ( LAN y Wi-Fi)24.Redes de Microsoft Windows (SAMBA)25.Tablas IP (CORTAFUEGOS)26.Monitoreando y depurando27.Otro Comando Utiles
3 20 Comandos mas usados
4 GNU Free Documentation License
Ariel Jose Maria Berón 6

Curso GNU/Linux Nivel I Comandos
1. Reglas de sintaxis
1.1 Capitalización
Regla número 1: la distinción entre mayúsculas y minúsculas es crucial. Los nombres de los comandos siempre se escriben en minúsculas; los parámetros cambian de significado o son inservibles si se usa la capitalización incorrecta.
anais@pepeluis:~$ LS -Lbash: LS: no se encontró la ordenanais@pepeluis:~$ ls -ldrwxr-xr-x 1 pepeluis pepeluis 4096 mar 4 20:08 Documentosdrwxr-xr-x 2 pepeluis pepeluis 4096 mar 4 20:08 Escritoriodrwxr-xr-x 1 pepeluis pepeluis 4096 mar 8 19:37 experimentoanais@pepeluis:~$ ls -LDocumentos Escritorio experimento
1.2 Parámetros.
Regla número 2: todos los parámetros se separan por espacios; la consola reconoce la primera palabra como el nombre del comando (o la ruta del programa) y cada cadena de texto entre espacios como un parámetro.
anais@pepeluis:~$ cd Documentosanais@pepeluis:~/Documentos:$ lsdrwxr-xr-x 1 pepeluis pepeluis 4096 mar 4 23:24 Pinky y Cerebrodrwxr-xr-x 2 pepeluis pepeluis 4096 mar 6 13:35 Recetas de cocinaanais@pepeluis:~/Documentos:$ cd Pinky y Cerebrobash: cd: Pinky: No existe el fichero o el directorio
El sistema entendió "acceder a la carpeta Pinky" (el comando cd solo admite unargumento y considera los siguientes cháchara; otro comando podría haber intentado acceder a los archivos "Pinky", "y" y "Cerebro", por ejemplo). Para poder usar un espacio, lo más fácil es entrecomillar el nombre entre apóstrofos:
anais@pepeluis:~/Documentos$ cd 'Pinky y Cerebro'anais@pepeluis:~/Documentos/Pinky y Cerebro:$
También se pueden escribir las primeras letras y pulsar la tecla Tabulación paraactivar el auto-completado. El resultado sera éste:
anais@pepeluis:~/Documentos$ cd Pinky\ y\ Cerebro
Ariel Jose Maria Berón 7
Curso GNU/Linux Nivel I Comandos
(de haber varias opciones posibles, mantener pulsada la tecla Tabulación para que aparezcan todas en pantalla. Teclease unas cuantas letras más, y vuélvasea probar)
La barra inversa (\), que se puede obtener en teclados españoles pulsando Alt Gr + º, es un "carácter de escape". Esto significa que modifica el significado delcarácter siguiente: por ejemplo, \n significa "salto de línea". La barra es necesaria porque hay varios símbolos que tienen un significado especial en Bash (el espacio es el más evidente). Si rodea un argumento con apóstrofos, ninguno de estos símbolos usará su significado especial, pero será imposible acceder a ninguna carpeta con apóstrofos.
Existen muchas formas de usar parámetros con apóstrofos, si se sabe sintaxis de Bash. A este nivel básico, la forma más fácil y segura es sustituyendo el apóstrofo por '\.
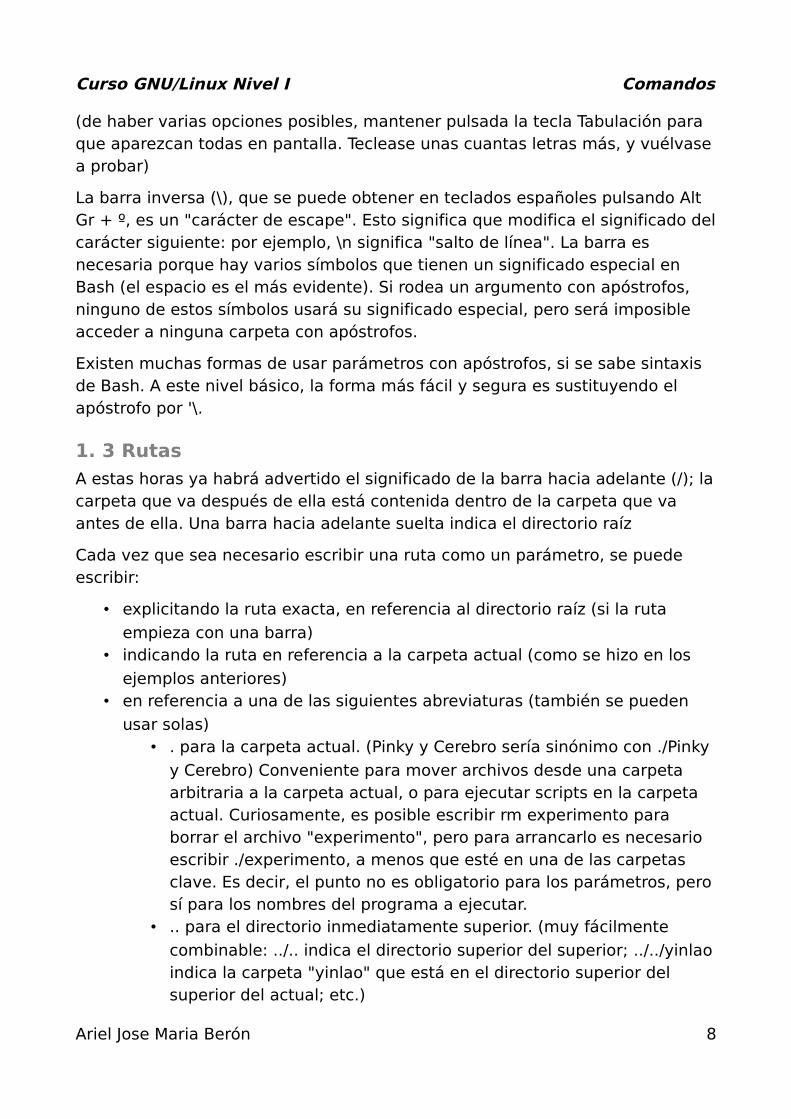
1. 3 Rutas
A estas horas ya habrá advertido el significado de la barra hacia adelante (/); lacarpeta que va después de ella está contenida dentro de la carpeta que va antes de ella. Una barra hacia adelante suelta indica el directorio raíz
Cada vez que sea necesario escribir una ruta como un parámetro, se puede escribir:
• explicitando la ruta exacta, en referencia al directorio raíz (si la ruta
empieza con una barra) • indicando la ruta en referencia a la carpeta actual (como se hizo en los
ejemplos anteriores) • en referencia a una de las siguientes abreviaturas (también se pueden
usar solas) • . para la carpeta actual. (Pinky y Cerebro sería sinónimo con ./Pinky
y Cerebro) Conveniente para mover archivos desde una carpeta arbitraria a la carpeta actual, o para ejecutar scripts en la carpeta actual. Curiosamente, es posible escribir rm experimento para borrar el archivo "experimento", pero para arrancarlo es necesario escribir ./experimento, a menos que esté en una de las carpetas clave. Es decir, el punto no es obligatorio para los parámetros, perosí para los nombres del programa a ejecutar.
• .. para el directorio inmediatamente superior. (muy fácilmente
combinable: ../.. indica el directorio superior del superior; ../../yinlaoindica la carpeta "yinlao" que está en el directorio superior del superior del actual; etc.)
Ariel Jose Maria Berón 8

Curso GNU/Linux Nivel I Comandos
• ~ para la carpeta personal (depende de qué nombre haya usado
para iniciar sesión)
1.4 Opciones (un tipo especial de parámetros)
Regla número 3: las opciones se escriben anteponiendo un guion, si constan deuna sola letra; o dos, si constan de varias. En casi todos los comandos (o por lo menos en todos los comandos de sistema) todas las opciones que se utilicen de una sola letra se pueden contraer juntando todas las letras y usando un sologuion al principio. Esto funciona excepto cuando las opciones necesiten, a su vez, parámetros; en este caso, el parámetro se aplica a la última opción.Ejemplo: ls -a -l equivale a ls -al
2. Comandos (400 aprox)
Me he encontrado en la Wiki de GUTL este completo listado con más de 400 comandos para GNU/Linux con su respectiva explicación, y los quiero compartir con ustedes para
Información del sistema
1. arch: mostrar la arquitectura de la máquina (1).2. uname -m: mostrar la arquitectura de la máquina (2).3. uname -r: mostrar la versión del kernel usado.4. dmidecode -q: mostrar los componentes (hardware) del sistema.5. hdparm -i /dev/hda: mostrar las características de un disco duro.6. hdparm -tT /dev/sda: realizar prueba de lectura en un disco duro.7. cat /proc/cpuinfo: mostrar información de la CPU.8. cat /proc/interrupts: mostrar las interrupciones.9. cat /proc/meminfo: verificar el uso de memoria.10.cat /proc/swaps: mostrar ficheros swap.11.cat /proc/version: mostrar la versión del kernel.12.cat /proc/net/dev: mostrar adaptadores de red y estadísticas.13.cat /proc/mounts: mostrar el sistema de ficheros montado.14.lspci -tv: mostrar los dispositivos PCI.15.lsusb -tv: mostrar los dispositivos USB.16.date: mostrar la fecha del sistema.17.cal 2011: mostrar el almanaque de 2011.18.cal 07 2011: mostrar el almanaque para el mes julio de 2011.19.date 041217002011.00: colocar (declarar, ajustar) fecha y hora.
Ariel Jose Maria Berón 9
Curso GNU/Linux Nivel I Comandos
20.clock -w: guardar los cambios de fecha en la BIOS.
Apagar (Reiniciar Sistema o Cerrar Sesión)
1. shutdown -h now: apagar el sistema (1).2. init 0: apagar el sistema (2).3. telinit 0: apagar el sistema (3).4. halt: apagar el sistema (4).5. shutdown -h hours:minutes &: apagado planificado del sistema.6. shutdown -c: cancelar un apagado planificado del sistema.7. shutdown -r now: reiniciar (1).8. reboot: reiniciar (2).9. logout: cerrar sesión.
Archivos y Directorios
1. cd /home: entrar en el directorio “home”.2. cd ..: retroceder un nivel.3. cd ../..: retroceder 2 niveles.4. cd: ir al directorio raíz.5. cd ~user1: ir al directorio user1.6. cd –: ir (regresar) al directorio anterior.7. pwd: mostrar el camino del directorio de trabajo.8. ls: ver los ficheros de un directorio.9. ls -F: ver los ficheros de un directorio.10.ls -l: mostrar los detalles de ficheros y carpetas de un directorio.11.ls -a: mostrar los ficheros ocultos.12.ls *[0-9]*: mostrar los ficheros y carpetas que contienen números.13.tree: mostrar los ficheros y carpetas en forma de árbol comenzando por
la raíz.(1)14.lstree: mostrar los ficheros y carpetas en forma de árbol comenzando
por la raíz.(2)15.mkdir dir1: crear una carpeta o directorio con nombre ‘dir1’.16.mkdir dir1 dir2: crear dos carpetas o directorios simultáneamente
(Crear dos directorios a la vez).17.mkdir -p /tmp/dir1/dir2: crear un árbol de directorios.18.rm -f file1: borrar el fichero llamado ‘file1’.19.rmdir dir1: borrar la carpeta llamada ‘dir1’.20.rm -rf dir1: eliminar una carpeta llamada ‘dir1’ con su contenido de
forma recursiva. (Si lo borro recursivo estoy diciendo que es con su contenido).
Ariel Jose Maria Berón 10

Curso GNU/Linux Nivel I Comandos
21.rm -rf dir1 dir2: borrar dos carpetas (directorios) con su contenido de forma recursiva.
22.mv dir1 new_dir: renombrar o mover un fichero o carpeta (directorio).23.cp file1: copiar un fichero.24.cp file1 file2: copiar dos ficheros al unísono.25.cp dir /* .: copiar todos los ficheros de un directorio dentro del directorio
de trabajo actual.26.cp -a /tmp/dir1 .: copiar un directorio dentro del directorio actual de
trabajo.27.cp -a dir1: copiar un directorio.28.cp -a dir1 dir2: copiar dos directorio al unísono.29.ln -s file1 lnk1: crear un enlace simbólico al fichero o directorio.30.ln file1 lnk1: crear un enlace físico al fichero o directorio.31.touch -t 0712250000 file1: modificar el tiempo real (tiempo de
creación) de un fichero o directorio.32.file file1: salida (volcado en pantalla) del tipo mime de un fichero texto.33.iconv -l: listas de cifrados conocidos.34.iconv -f fromEncoding -t toEncoding inputFile > outputFile: crea
una nueva forma del fichero de entrada asumiendo que está codificado en fromEncoding y convirtiéndolo a ToEncoding.
35.find . -maxdepth 1 -name *.jpg -print -exec convert ”{}” -resize 80×60 “thumbs/{}” \;: agrupar ficheros redimensionados en el directorio actual y enviarlos a directorios en vistas de miniaturas (requiere convertir desde ImagemagicK).
Encontrar archivos
1. find / -name file1: buscar fichero y directorio a partir de la raíz del sistema.
2. find / -user user1: buscar ficheros y directorios pertenecientes al usuario ‘user1’.
3. find /home/user1 -name \*.bin: buscar ficheros con extensión ‘. bin’ dentro del directorio ‘/ home/user1’.
4. find /usr/bin -type f -atime +100: buscar ficheros binarios no usados en los últimos 100 días.
5. find /usr/bin -type f -mtime -10: buscar ficheros creados o cambiados dentro de los últimos 10 días.
6. find / -name \*.rpm -exec chmod 755 ‘{}’ \;: buscar ficheros con extensión ‘.rpm’ y modificar permisos.
7. find / -xdev -name \*.rpm: Buscar ficheros con extensión ‘.rpm’
Ariel Jose Maria Berón 11

Curso GNU/Linux Nivel I Comandos
ignorando los dispositivos removibles como cdrom, pen-drive, etc.…8. locate \*.ps: encuentra ficheros con extensión ‘.ps’ ejecutados
primeramente con el command ‘updatedb’.9. whereis halt: mostrar la ubicación de un fichero binario, de ayuda o
fuente. En este caso pregunta dónde está el comando ‘halt’.10.which halt: mostrar la senda completa (el camino completo) a un
binario / ejecutable.
Montando un sistema de ficheros
1. mount /dev/hda2 /mnt/hda2: montar un disco llamado hda2. Verifique primero la existencia del directorio ‘/ mnt/hda2’; si no está, debe crearlo.
2. umount /dev/hda2: desmontar un disco llamado hda2. Salir primero desde el punto ‘/ mnt/hda2.
3. fuser -km /mnt/hda2: forzar el desmontaje cuando el dispositivo está ocupado.
4. umount -n /mnt/hda2: correr el desmontaje sin leer el fichero /etc/mtab. Útil cuando el fichero es de solo lectura o el disco duro está lleno.
5. mount /dev/fd0 /mnt/floppy: montar un disco flexible (floppy).6. mount /dev/cdrom /mnt/cdrom: montar un cdrom / dvdrom.7. mount /dev/hdc /mnt/cdrecorder: montar un cd regrabable o un
dvdrom.8. mount /dev/hdb /mnt/cdrecorder: montar un cd regrabable / dvdrom
(un dvd).9. mount -o loop file.iso /mnt/cdrom: montar un fichero o una imagen
iso.10.mount -t vfat /dev/hda5 /mnt/hda5: montar un sistema de ficheros
FAT32.11.mount /dev/sda1 /mnt/usbdisk: montar un usb pen-drive o una
memoria (sin especificar el tipo de sistema de ficheros).
Espacio de Disco
1. df -h: mostrar una lista de las particiones montadas.2. ls -lSr |more: mostrar el tamaño de los ficheros y directorios ordenados
por tamaño.3. du -sh dir1: Estimar el espacio usado por el directorio ‘dir1’.4. du -sk * | sort -rn: mostrar el tamaño de los ficheros y directorios
ordenados por tamaño.5. rpm -q -a –qf ‘%10{SIZE}t%{NAME}n’ | sort -k1,1n: mostrar el
Ariel Jose Maria Berón 12
Curso GNU/Linux Nivel I Comandos
espacio usado por los paquetes rpm instalados organizados por tamaño (Fedora, Redhat y otros).
6. dpkg-query -W -f=’${Installed-Size;10}t${Package}n’ | sort -k1,1n: mostrar el espacio usado por los paquetes instalados, organizados por tamaño (Ubuntu, Debian y otros).
Usuarios y Grupos
1. groupadd nombre_del_grupo: crear un nuevo grupo.2. groupdel nombre_del_grupo: borrar un grupo.3. groupmod -n nuevo_nombre_del_grupo viejo_nombre_del_grupo:
renombrar un grupo.4. useradd -c “Name Surname ” -g admin -d /home/user1 -s
/bin/bash user1: Crear un nuevo usuario perteneciente al grupo “admin”.
5. useradd user1: crear un nuevo usuario.6. userdel -r user1: borrar un usuario (‘-r’ elimina el directorio Home).7. usermod -c “User FTP” -g system -d /ftp/user1 -s /bin/nologin
user1: cambiar los atributos del usuario.8. passwd: cambiar contraseña.9. passwd user1: cambiar la contraseña de un usuario (solamente por
root).10.chage -E 2011-12-31 user1: colocar un plazo para la contraseña del
usuario. En este caso dice que la clave expira el 31 de diciembre de 2011.
11.pwck: chequear la sintaxis correcta el formato de fichero de ‘/etc/passwd’ y la existencia de usuarios.
12.grpck: chequear la sintaxis correcta y el formato del fichero ‘/etc/group’ y la existencia de grupos.
13.newgrp group_name: registra a un nuevo grupo para cambiar el grupo predeterminado de los ficheros creados recientemente.
Permisos en Ficheros (Usa ~ez_rdquo+ez_rdquo~ para colocar permisos y ”-” para eliminar)
1. ls -lh: Mostrar permisos.2. ls /tmp | pr -T5 -W$COLUMNS: dividir la terminal en 5 columnas.3. chmod ugo+rwx directory1: colocar permisos de lectura ®, escritura
(w) y ejecución(x) al propietario (u), al grupo (g) y a otros (o) sobre el directorio ‘directory1’.
4. chmod go-rwx directory1: quitar permiso de lectura ®, escritura (w) y
Ariel Jose Maria Berón 13

Curso GNU/Linux Nivel I Comandos
(x) ejecución al grupo (g) y otros (o) sobre el directorio ‘directory1’.5. chown user1 file1: cambiar el dueño de un fichero.6. chown -R user1 directory1: cambiar el propietario de un directorio y
de todos los ficheros y directorios contenidos dentro.7. chgrp group1 file1: cambiar grupo de ficheros.8. chown user1:group1 file1: cambiar usuario y el grupo propietario de
un fichero.9. find / -perm -u+s: visualizar todos los ficheros del sistema con SUID
configurado.10.chmod u+s /bin/file1: colocar el bit SUID en un fichero binario. El
usuario que corriendo ese fichero adquiere los mismos privilegios como dueño.
11.chmod u-s /bin/file1: deshabilitar el bit SUID en un fichero binario.12.chmod g+s /home/public: colocar un bit SGID en un directorio –similar
al SUID pero por directorio.13.chmod g-s /home/public: desabilitar un bit SGID en un directorio.14.chmod o+t /home/public: colocar un bit STIKY en un directorio. Permite
el borrado de ficheros solamente a los dueños legítimos.15.chmod o-t /home/public: desabilitar un bit STIKY en un directorio.
Atributos especiales en ficheros (Usa ~ez_rdquo+ez_rdquo~ para colocar permisos y ”-” para eliminar)
1. chattr +a file1: permite escribir abriendo un fichero solamente modo append.
2. chattr +c file1: permite que un fichero sea comprimido / descomprimidoautomaticamente.
3. chattr +d file1: asegura que el programa ignore borrar los ficheros durante la copia de seguridad.
4. chattr +i file1: convierte el fichero en invariable, por lo que no puede ser eliminado, alterado, renombrado, ni enlazado.
5. chattr +s file1: permite que un fichero sea borrado de forma segura.6. chattr +S file1: asegura que un fichero sea modificado, los cambios son
escritos en modo synchronous como con sync.7. chattr +u file1: te permite recuperar el contenido de un fichero aún si
este está cancelado.8. lsattr: mostrar atributos especiales.
Archivos y Ficheros comprimidos
1. bunzip2 file1.bz2: descomprime in fichero llamado ‘file1.bz2’.
Ariel Jose Maria Berón 14
Curso GNU/Linux Nivel I Comandos
2. bzip2 file1: comprime un fichero llamado ‘file1’.3. gunzip file1.gz: descomprime un fichero llamado ‘file1.gz’.4. gzip file1: comprime un fichero llamado ‘file1’.5. gzip -9 file1: comprime con compresión máxima.6. rar a file1.rar test_file: crear un fichero rar llamado ‘file1.rar’.7. rar a file1.rar file1 file2 dir1: comprimir ‘file1’, ‘file2’ y ‘dir1’
simultáneamente.8. rar x file1.rar: descomprimir archivo rar.9. unrar x file1.rar: descomprimir archivo rar.10.tar -cvf archive.tar file1: crear un tarball descomprimido.11.tar -cvf archive.tar file1 file2 dir1: crear un archivo conteniendo
‘file1’, ‘file2′ y’dir1’.12.tar -tf archive.tar: mostrar los contenidos de un archivo.13.tar -xvf archive.tar: extraer un tarball.14.tar -xvf archive.tar -C /tmp: extraer un tarball en / tmp.15.tar -cvfj archive.tar.bz2 dir1: crear un tarball comprimido dentro de
bzip2.16.tar -xvfj archive.tar.bz2: descomprimir un archivo tar comprimido en
bzip217.tar -cvfz archive.tar.gz dir1: crear un tarball comprimido en gzip.18.tar -xvfz archive.tar.gz: descomprimir un archive tar comprimido en
gzip.19.zip file1.zip file1: crear un archivo comprimido en zip.20.zip -r file1.zip file1 file2 dir1: comprimir, en zip, varios archivos y
directorios de forma simultánea.21.unzip file1.zip: descomprimir un archivo zip.
Paquetes RPM (Red Hat, Fedora y similares)
1. rpm -ivh package.rpm: instalar un paquete rpm.2. rpm -ivh –nodeeps package.rpm: instalar un paquete rpm ignorando
las peticiones de dependencias.3. rpm -U package.rpm: actualizar un paquete rpm sin cambiar la
configuración de los ficheros.4. rpm -F package.rpm: actualizar un paquete rpm solamente si este está
instalado.5. rpm -e package_name.rpm: eliminar un paquete rpm.6. rpm -qa: mostrar todos los paquetes rpm instalados en el sistema.7. rpm -qa | grep httpd: mostrar todos los paquetes rpm con el nombre
“httpd”.
Ariel Jose Maria Berón 15
Curso GNU/Linux Nivel I Comandos
8. rpm -qi package_name: obtener información en un paquete específico instalado.
9. rpm -qg “System Environment/Daemons”: mostar los paquetes rpm de un grupo software.
10.rpm -ql package_name: mostrar lista de ficheros dados por un paqueterpm instalado.
11.rpm -qc package_name: mostrar lista de configuración de ficheros dados por un paquete rpm instalado.
12.rpm -q package_name –whatrequires: mostrar lista de dependencias solicitada para un paquete rpm.
13.rpm -q package_name –whatprovides: mostar la capacidad dada por un paquete rpm.
14.rpm -q package_name –scripts: mostrar los scripts comenzados durante la instalación /eliminación.
15.rpm -q package_name –changelog: mostar el historial de revisions de un paquete rpm.
16.rpm -qf /etc/httpd/conf/httpd.conf: verificar cuál paquete rpm pertenece a un fichero dado.
17.rpm -qp package.rpm -l: mostrar lista de ficheros dados por un paquete rpm que aún no ha sido instalado.
18.rpm –import /media/cdrom/RPM-GPG-KEY: importar la firma digital de la llave pública.
19.rpm –checksig package.rpm: verificar la integridad de un paquete rpm.
20.rpm -qa gpg-pubkey: verificar la integridad de todos los paquetes rpm instalados.
21.rpm -V package_name: chequear el tamaño del fichero, licencias, tipos,dueño, grupo, chequeo de resumen de MD5 y última modificación.
22.rpm -Va: chequear todos los paquetes rpm instalados en el sistema. Usar con cuidado.
23.rpm -Vp package.rpm: verificar un paquete rpm no instalado todavía.24.rpm2cpio package.rpm | cpio –extract –make-directories *bin*:
extraer fichero ejecutable desde un paquete rpm.25.rpm -ivh /usr/src/redhat/RPMS/`arch`/package.rpm: instalar un
paquete construido desde una fuente rpm.26.rpmbuild –rebuild package_name.src.rpm: construir un paquete rpm
desde una fuente rpm.
Ariel Jose Maria Berón 16
Curso GNU/Linux Nivel I Comandos
Actualizador de paquetes YUM (Red Hat, Fedora y similares)
1. yum install package_name: descargar e instalar un paquete rpm.2. yum localinstall package_name.rpm: este instalará un RPM y tratará
de resolver todas las dependencies para ti, usando tus repositorios.3. yum update package_name.rpm: actualizar todos los paquetes rpm
instalados en el sistema.4. yum update package_name: modernizar / actualizar un paquete rpm.5. yum remove package_name: eliminar un paquete rpm.6. yum list: listar todos los paquetes instalados en el sistema.7. yum search package_name: Encontrar un paquete en repositorio rpm.8. yum clean packages: limpiar un caché rpm borrando los paquetes
descargados.9. yum clean headers: eliminar todos los ficheros de encabezamiento que
el sistema usa para resolver la dependencia.10.yum clean all: eliminar desde los paquetes caché y ficheros de
encabezado.
Paquetes Deb (Debian, Ubuntu y derivados)
1. dpkg -i package.deb: instalar / actualizar un paquete deb.2. dpkg -r package_name: eliminar un paquete deb del sistema.3. dpkg -l: mostrar todos los paquetes deb instalados en el sistema.4. dpkg -l | grep httpd: mostrar todos los paquetes deb con el nombre
“httpd”5. dpkg -s package_name: obtener información en un paquete específico
instalado en el sistema.6. dpkg -L package_name: mostar lista de ficheros dados por un paquete
instalado en el sistema.7. dpkg –contents package.deb: mostrar lista de ficheros dados por un
paquete no instalado todavía.8. dpkg -S /bin/ping: verificar cuál paquete pertenece a un fichero dado.
Actualizador de paquetes APT (Debian, Ubuntu y derivados)
1. apt-get install package_name: instalar / actualizar un paquete deb.2. apt-cdrom install package_name: instalar / actualizar un paquete deb
desde un cdrom.3. apt-get update: actualizar la lista de paquetes.4. apt-get upgrade: actualizar todos los paquetes instalados.5. apt-get remove package_name: eliminar un paquete deb del sistema.6. apt-get check: verificar la correcta resolución de las dependencias.
Ariel Jose Maria Berón 17
Curso GNU/Linux Nivel I Comandos
7. apt-get clean: limpiar cache desde los paquetes descargados.8. apt-cache search searched-package: retorna lista de paquetes que
corresponde a la serie «paquetes buscados».
Ver el contenido de un fichero
1. cat file1: ver los contenidos de un fichero comenzando desde la primera hilera.
2. tac file1: ver los contenidos de un fichero comenzando desde la última línea.
3. more file1: ver el contenido a lo largo de un fichero.4. less file1: parecido al commando ‘more’ pero permite salvar el
movimiento en el fichero así como el movimiento hacia atrás.5. head -2 file1: ver las dos primeras líneas de un fichero.6. tail -2 file1: ver las dos últimas líneas de un fichero.7. tail -f /var/log/messages: ver en tiempo real qué ha sido añadido al
fichero.
Manipulación de texto
1. cat file1 file2 .. | command <> file1_in.txt_or_file1_out.txt: sintaxisgeneral para la manipulación de texto utilizando PIPE, STDIN y STDOUT.
2. cat file1 | command( sed, grep, awk, grep, etc…) > result.txt: sintaxis general para manipular un texto de un fichero y escribir el resultado en un fichero nuevo.
3. cat file1 | command( sed, grep, awk, grep, etc…) » result.txt: sintaxis general para manipular un texto de un fichero y añadir resultado en un fichero existente.
4. grep Aug /var/log/messages: buscar palabras “Aug” en el fichero ‘/var/log/messages’.
5. grep ^Aug /var/log/messages: buscar palabras que comienzan con “Aug” en fichero ‘/var/log/messages’
6. grep [0-9] /var/log/messages: seleccionar todas las líneas del fichero ‘/var/log/messages’ que contienen números.
7. grep Aug -R /var/log/*: buscar la cadena “Aug” en el directorio ‘/var/log’y debajo.
8. sed ‘s/stringa1/stringa2/g’ example.txt: reubicar “string1” con “string2” en ejemplo.txt
9. sed ‘/^$/d’ example.txt: eliminar todas las líneas en blanco desde el ejemplo.txt
10.sed ‘/ *#/d; /^$/d’ example.txt: eliminar comentarios y líneas en
Ariel Jose Maria Berón 18

Curso GNU/Linux Nivel I Comandos
blanco de ejemplo.txt11.echo ‘esempio’ | tr ‘[:lower:]’ ‘[:upper:]’: convertir minúsculas en
mayúsculas.12.sed -e ‘1d’ result.txt: elimina la primera línea del fichero ejemplo.txt13.sed -n ‘/stringa1/p’: visualizar solamente las líneas que contienen la
palabra “string1”.
Establecer caracter y conversión de ficheros
1. dos2unix filedos.txt fileunix.txt: convertir un formato de fichero textodesde MSDOS a UNIX.
2. unix2dos fileunix.txt filedos.txt: convertir un formato de fichero de texto desde UNIX a MSDOS.
3. recode ..HTML < page.txt > page.html: convertir un fichero de texto en html.
4. recode -l | more: mostrar todas las conversiones de formato disponibles.
Análisis del sistema de ficheros
1. badblocks -v /dev/hda1: Chequear los bloques defectuosos en el disco hda1.
2. fsck /dev/hda1: reparar / chequear la integridad del fichero del sistema Linux en el disco hda1.
3. fsck.ext2 /dev/hda1: reparar / chequear la integridad del fichero del sistema ext 2 en el disco hda1.
4. e2fsck /dev/hda1: reparar / chequear la integridad del fichero del sistema ext 2 en el disco hda1.
5. e2fsck -j /dev/hda1: reparar / chequear la integridad del fichero del sistema ext 3 en el disco hda1.
6. fsck.ext3 /dev/hda1: reparar / chequear la integridad del fichero del sistema ext 3 en el disco hda1.
7. fsck.vfat /dev/hda1: reparar / chequear la integridad del fichero sistema fat en el disco hda1.
8. fsck.msdos /dev/hda1: reparar / chequear la integridad de un fichero del sistema dos en el disco hda1.
9. dosfsck /dev/hda1: reparar / chequear la integridad de un fichero del sistema dos en el disco hda1.
Formatear un sistema de ficheros
1. mkfs /dev/hda1: crear un fichero de sistema tipo Linux en la partición
Ariel Jose Maria Berón 19
Curso GNU/Linux Nivel I Comandos
hda1.2. mke2fs /dev/hda1: crear un fichero de sistema tipo Linux ext 2 en hda1.3. mke2fs -j /dev/hda1: crear un fichero de sistema tipo Linux ext3
(periódico) en la partición hda1.4. mkfs -t vfat 32 -F /dev/hda1: crear un fichero de sistema FAT32 en
hda1.5. fdformat -n /dev/fd0: formatear un disco flooply.6. mkswap /dev/hda3: crear un fichero de sistema swap.
Trabajo con la SWAP
1. mkswap /dev/hda3: crear fichero de sistema swap.2. swapon /dev/hda3: activando una nueva partición swap.3. swapon /dev/hda2 /dev/hdb3: activar dos particiones swap.
Salvas (Backup)
1. dump -0aj -f /tmp/home0.bak /home: hacer una salva completa del directorio ‘/home’.
2. dump -1aj -f /tmp/home0.bak /home: hacer una salva incremental deldirectorio ‘/home’.
3. restore -if /tmp/home0.bak: restaurando una salva interactivamente.4. rsync -rogpav –delete /home /tmp: sincronización entre directorios.5. rsync -rogpav -e ssh –delete /home ip_address:/tmp: rsync a través
del túnel SSH.6. rsync -az -e ssh –delete ip_addr:/home/public /home/local:
sincronizar un directorio local con un directorio remoto a través de ssh y de compresión.
7. rsync -az -e ssh –delete /home/local ip_addr:/home/public: sincronizar un directorio remoto con un directorio local a través de ssh y de compresión.
8. dd bs=1M if=/dev/hda | gzip | ssh user@ip_addr ‘dd of=hda.gz’: hacer una salva de un disco duro en un host remoto a través de ssh.
9. dd if=/dev/sda of=/tmp/file1: salvar el contenido de un disco duro a un fichero. (En este caso el disco duro es “sda” y el fichero “file1”).
10.tar -Puf backup.tar /home/user: hacer una salva incremental del directorio ‘/home/user’.
11.( cd /tmp/local/ && tar c . ) | ssh -C user@ip_addr ‘cd /home/share/ && tar x -p’: copiar el contenido de un directorio en un directorio remoto a través de ssh.
12.( tar c /home ) | ssh -C user@ip_addr ‘cd /home/backup-home &&
Ariel Jose Maria Berón 20

Curso GNU/Linux Nivel I Comandos
tar x -p’: copiar un directorio local en un directorio remoto a través de ssh.
13.tar cf – . | (cd /tmp/backup ; tar xf – ): copia local conservando las licencias y enlaces desde un directorio a otro.
14.find /home/user1 -name ‘*.txt’ | xargs cp -av –target-directory=/home/backup/ –parents: encontrar y copiar todos los ficheros con extensión ‘.txt’ de un directorio a otro.
15.find /var/log -name ‘*.log’ | tar cv –files-from=- | bzip2 > log.tar.bz2: encontrar todos los ficheros con extensión ‘.log’ y hacer un archivo bzip.
16.dd if=/dev/hda of=/dev/fd0 bs=512 count=1: hacer una copia del MRB (Master Boot Record) a un disco floppy.
17.dd if=/dev/fd0 of=/dev/hda bs=512 count=1: restaurar la copia del MBR (Master Boot Record) salvada en un floppy.
CD-ROM
1. cdrecord -v gracetime=2 dev=/dev/cdrom -eject blank=fast -force: limpiar o borrar un cd regrabable.
2. mkisofs /dev/cdrom > cd.iso: crear una imagen iso de cdrom en disco.3. mkisofs /dev/cdrom | gzip > cd_iso.gz: crear una imagen comprimida
iso de cdrom en disco.4. mkisofs -J -allow-leading-dots -R -V “Label CD” -iso-level 4 -o
./cd.iso data_cd: crear una imagen iso de un directorio.5. cdrecord -v dev=/dev/cdrom cd.iso: quemar una imagen iso.6. gzip -dc cd_iso.gz | cdrecord dev=/dev/cdrom –: quemar una imagen
iso comprimida.7. mount -o loop cd.iso /mnt/iso: montar una imagen iso.8. cd-paranoia -B: llevar canciones de un cd a ficheros wav.9. cd-paranoia – ”-3”: llevar las 3 primeras canciones de un cd a ficheros
wav.10.cdrecord –scanbus: escanear bus para identificar el canal scsi.11.dd if=/dev/hdc | md5sum: hacer funcionar un md5sum en un
dispositivo, como un CD.
Trabajo con la RED ( LAN y Wi-Fi)
1. ifconfig eth0: mostrar la configuración de una tarjeta de red Ethernet.2. ifup eth0: activar una interface ‘eth0’.3. ifdown eth0: deshabilitar una interface ‘eth0’.4. ifconfig eth0 192.168.1.1 netmask 255.255.255.0: configurar una
Ariel Jose Maria Berón 21

Curso GNU/Linux Nivel I Comandos
dirección IP.5. ifconfig eth0 promisc: configurar ‘eth0’en modo común para obtener
los paquetes (sniffing).6. dhclient eth0: activar la interface ‘eth0’ en modo dhcp.7. route -n: mostrar mesa de recorrido.8. route add -net 0/0 gw IP_Gateway: configurar entrada
predeterminada.9. route add -net 192.168.0.0 netmask 255.255.0.0 gw 192.168.1.1:
configurar ruta estática para buscar la red ‘192.168.0.0/16’.10.route del 0/0 gw IP_gateway: eliminar la ruta estática.11.echo “1” > /proc/sys/net/ipv4/ip_forward: activar el recorrido ip.12.hostname: mostrar el nombre del host del sistema.13.host www.example.com: buscar el nombre del host para resolver el
nombre a una dirección ip(1).14.nslookup www.example.com: buscar el nombre del host para resolver
el nombre a una direccióm ip y viceversa(2).15.ip link show: mostar el estado de enlace de todas las interfaces.16.mii-tool eth0: mostar el estado de enlace de ‘eth0’.17.ethtool eth0: mostrar las estadísticas de tarjeta de red ‘eth0’.18.netstat -tup: mostrar todas las conexiones de red activas y sus PID.19.netstat -tupl: mostrar todos los servicios de escucha de red en el
sistema y sus PID.20.tcpdump tcp port 80: mostrar todo el tráfico HTTP.21.iwlist scan: mostrar las redes inalámbricas.22.iwconfig eth1: mostrar la configuración de una tarjeta de red
inalámbrica.23.whois www.example.com: buscar en base de datos Whois.
Redes de Microsoft Windows (SAMBA)
1. nbtscan ip_addr: resolución de nombre de red bios.2. nmblookup -A ip_addr: resolución de nombre de red bios.3. smbclient -L ip_addr/hostname: mostrar acciones remotas de un host
en windows.
Tablas IP (CORTAFUEGOS)
1. iptables -t filter -L: mostrar todas las cadenas de la tabla de filtro.2. iptables -t nat -L: mostrar todas las cadenas de la tabla nat.3. iptables -t filter -F: limpiar todas las reglas de la tabla de filtro.4. iptables -t nat -F: limpiar todas las reglas de la tabla nat.
Ariel Jose Maria Berón 22
Curso GNU/Linux Nivel I Comandos
5. iptables -t filter -X: borrar cualquier cadena creada por el usuario.6. iptables -t filter -A INPUT -p tcp –dport telnet -j ACCEPT: permitir
las conexiones telnet para entar.7. iptables -t filter -A OUTPUT -p tcp –dport http -j DROP: bloquear las
conexiones HTTP para salir.8. iptables -t filter -A FORWARD -p tcp –dport pop3 -j ACCEPT:
permitir las conexiones POP a una cadena delantera.9. iptables -t filter -A INPUT -j LOG –log-prefix “DROP INPUT”:
registrando una cadena de entrada.10.iptables -t nat -A POSTROUTING -o eth0 -j MASQUERADE:
configurar un PAT (Puerto de traducción de dirección) en eth0, ocultando los paquetes de salida forzada.
11.iptables -t nat -A PREROUTING -d 192.168.0.1 -p tcp -m tcp –dport 22 -j DNAT –to-destination 10.0.0.2:22: redireccionar los paquetes diriguidos de un host a otro.
Monitoreando y depurando
1. top: mostrar las tareas de linux usando la mayoría cpu.2. ps -eafw: muestra las tareas Linux.3. ps -e -o pid,args –forest: muestra las tareas Linux en un modo
jerárquico.4. pstree: mostrar un árbol sistema de procesos.5. kill -9 ID_Processo: forzar el cierre de un proceso y terminarlo.6. kill -1 ID_Processo: forzar un proceso para recargar la configuración.7. lsof -p $$: mostrar una lista de ficheros abiertos por procesos.8. lsof /home/user1: muestra una lista de ficheros abiertos en un camino
dado del sistema.9. strace -c ls >/dev/null: mostrar las llamadas del sistema hechas y
recibidas por un proceso.10.strace -f -e open ls >/dev/null: mostrar las llamadas a la biblioteca.11.watch -n1 ‘cat /proc/interrupts’: mostrar interrupciones en tiempo
real.12.last reboot: mostrar historial de reinicio.13.lsmod: mostrar el kernel cargado.14.free -m: muestra el estado de la RAM en megabytes.15.smartctl -A /dev/hda: monitorear la fiabilidad de un disco duro a través
de SMART.16.smartctl -i /dev/hda: chequear si SMART está activado en un disco
duro.
Ariel Jose Maria Berón 23

Curso GNU/Linux Nivel I Comandos
17.tail /var/log/dmesg: mostrar eventos inherentes al proceso de carga delkernel.
18.tail /var/log/messages: mostrar los eventos del sistema.
Otros comandos útiles
1. apropos …keyword: mostrar una lista de comandos que pertenecen a las palabras claves de un programa; son útiles cuando tú sabes qué hace tu programa, pero de sconoces el nombre del comando.
2. man ping: mostrar las páginas del manual on-line; por ejemplo, en un comando ping, usar la opción ‘-k’ para encontrar cualquier comando relacionado.
3. whatis …keyword: muestra la descripción de lo que hace el programa.4. mkbootdisk –device /dev/fd0 `uname -r`: crear un floppy boteable.5. gpg -c file1: codificar un fichero con guardia de seguridad GNU.6. gpg file1.gpg: decodificar un fichero con Guardia de seguridad GNU.7. wget -r www.example.com: descargar un sitio web completo.8. wget -c www.example.com/file.iso: descargar un fichero con la
posibilidad de parar la descargar y reanudar más tarde.9. echo ‘wget -c www.example.com/files.iso‘ | at 09:00: Comenzar
una descarga a cualquier hora. En este caso empezaría a las 9 horas.10.ldd /usr/bin/ssh: mostrar las bibliotecas compartidas requeridas por el
programa ssh.11.alias hh=’history’: colocar un alias para un commando –hh= Historial.12.chsh: cambiar el comando Shell.13.chsh –list-shells: es un comando adecuado para saber si tienes que
hacer remoto en otra terminal.14.who -a: mostrar quien está registrado, e imprimir hora del último
sistema de importación, procesos muertos, procesos de registro de sistema, procesos activos producidos por init, funcionamiento actual y últimos cambios del reloj del sistema.
3. 20 comando mas usados
A continuación os dejamos las 20 órdenes más usadas para los novatos que quieran iniciarse en esta magia negra.
cd - Change directory
Ariel Jose Maria Berón 24
Curso GNU/Linux Nivel I Comandos
cd <directorio>
Cambia el directorio actual de trabajo, es decir, nos mueve a ese directorio.
rmdir - Remove directory
rmdir <directorio>
Elimina el directorio.
rm - Remove
user@server:~$ rm <archivo>
Elimina el archivo.
user@server:~$ rm -r <directorio>
Elimina el directorio y todo su contenido.
cp - Copy
user@server:~$ cp <origen> <destino>
Copia los archivos y directorios de origen a destino.
user@server:~$ cp -r <origen> <destino>
Hace lo mismo pero de forma recursiva, es decir, copia los directorios y su contenido.
mv - Move
user@server:~$ mv <origen> <destino>
Mueve los archivos o directorios de origen a destino. Mueve, no copia!
Clear -
user@server:~$ clear
Limpia todo el texto del terminal y lo deja como si acabaramos de abrirlo.
History - Historial
user@server:~$ history
Muestra los últimos comandos introducidos por el usuario actual.
Cat - Concatenar
user@server:~$ cat -n
Muestra el contenido de un archivo numerando las líneas.
Ariel Jose Maria Berón 25

Curso GNU/Linux Nivel I Comandos
Head -
user@server:~$ head
Muestra las primeras 10 líneas del archivo especificado.
Tail -
user@server:~$ tail
Muestra las últimas 10 líneas del archivo especificado.
pwd - Print work directory
user@server:~$ pwd
Muestra el direcorio de trabajo, es decir, en el que estas ubicado.
touch - Actualizar
user@server:~$ touch <nombre de archivo>
Crea un archivo vacío con el nombre especificado, si el archivo existe actualiza la fecha de modificación.
wget - www get
user@server:~$ wget <url>
Descarga el archivo del sitio web especificado.
user@server:~$ wget -r <url>
Descarga el sitio web especificado completo (-r de forma recursiva hasta 5 niveles del sitio).
ps - Process status
user@server:~$ ps -aux
Muestra información sobre todos los procesos que se están ejecutando en el sistema.
top - Top processes
user@server:~$ top
Muestra información sobre los procesos que más CPU consumen.
user@server:~$ top -u <username>
Muestra información sobre los procesos top solo ejecutados por un usuario concreto.
Ariel Jose Maria Berón 26
Curso GNU/Linux Nivel I Comandos
man - Manual
user@server:~$ man <nombre-comando>
Muestra las páginas de ayuda de ese comando.
whatis - What is this command
user@server:~$ whatis <nombre-comando>
Muestra una breve descripción sobre lo que hace o para que sirve el comando consultado.
unzip - un zip file
user@server:~$ unzip <nombre-archivo.zip>
Descomprime un archivo zip.
user@server:~$ unzip -l <nombre-archivo.zip>
Lista el contenido de un archivo sin descomprimirlo.
tar - Tape archive
Crea, muestra y extrae archivos .tar (el nombre viene de los sistemas de cinta magnetica antiguos)
user@server:~$ tar -cvf <nombre-archivo.tar> <archivo1> <archivo2>
Crea un archivo que contiene los archivos indicados.
user@server:~$ tar -xvf <nombre-archivo.tar>
Extrae el contenido del archivo tar.
gzip - GNU zip
user@server:~$ gzip <nombre-archivo>
Crea y descomprime archivos gzip.
Ariel Jose Maria Berón 27

Curso GNU/Linux Nivel I Comandos
Bibliografias:
https://es.wikibooks.org/wiki/Introducci%C3%B3n_a_Linux/Comandos
http://blog.desdelinux.net/mas-de-400-comandos-para-gnulinux-que-deberias-conocer/
https://wildwildweb.es/es/blog/los-20-comandos-linux-mas-usados
https://hipertextual.com/archivo/2013/11/comandos-linux/
Ariel Jose Maria Berón 28

Curso GNU/Linux Nivel I Comandos
4 GNU Free Documentation License Version 1.3, 3 November 2008
Copyright (C) 2000, 2001, 2002, 2007, 2008 Free Software Foundation, Inc. <http://fsf.org/> Everyone is permitted to copy and distribute verbatim copies of this license document, but changing it is not allowed.
0. PREAMBLE
The purpose of this License is to make a manual, textbook, or otherfunctional and useful document "free" in the sense of freedom: toassure everyone the effective freedom to copy and redistribute it,with or without modifying it, either commercially or noncommercially.Secondarily, this License preserves for the author and publisher a wayto get credit for their work, while not being considered responsiblefor modifications made by others.
This License is a kind of "copyleft", which means that derivativeworks of the document must themselves be free in the same sense. Itcomplements the GNU General Public License, which is a copyleftlicense designed for free software.
We have designed this License in order to use it for manuals for freesoftware, because free software needs free documentation: a freeprogram should come with manuals providing the same freedoms that thesoftware does. But this License is not limited to software manuals;it can be used for any textual work, regardless of subject matter orwhether it is published as a printed book. We recommend this Licenseprincipally for works whose purpose is instruction or reference.
1. APPLICABILITY AND DEFINITIONS
This License applies to any manual or other work, in any medium, thatcontains a notice placed by the copyright holder saying it can bedistributed under the terms of this License. Such a notice grants aworld-wide, royalty-free license, unlimited in duration, to use thatwork under the conditions stated herein. The "Document", below,refers to any such manual or work. Any member of the public is alicensee, and is addressed as "you". You accept the license if youcopy, modify or distribute the work in a way requiring permissionunder copyright law.
A "Modified Version" of the Document means any work containing theDocument or a portion of it, either copied verbatim, or withmodifications and/or translated into another language.
Ariel Jose Maria Berón 29
Curso GNU/Linux Nivel I Comandos
A "Secondary Section" is a named appendix or a front-matter section ofthe Document that deals exclusively with the relationship of thepublishers or authors of the Document to the Document's overallsubject (or to related matters) and contains nothing that could falldirectly within that overall subject. (Thus, if the Document is inpart a textbook of mathematics, a Secondary Section may not explainany mathematics.) The relationship could be a matter of historicalconnection with the subject or with related matters, or of legal,commercial, philosophical, ethical or political position regardingthem.
The "Invariant Sections" are certain Secondary Sections whose titlesare designated, as being those of Invariant Sections, in the noticethat says that the Document is released under this License. If asection does not fit the above definition of Secondary then it is notallowed to be designated as Invariant. The Document may contain zeroInvariant Sections. If the Document does not identify any InvariantSections then there are none.
The "Cover Texts" are certain short passages of text that are listed,as Front-Cover Texts or Back-Cover Texts, in the notice that says thatthe Document is released under this License. A Front-Cover Text maybe at most 5 words, and a Back-Cover Text may be at most 25 words.
A "Transparent" copy of the Document means a machine-readable copy,represented in a format whose specification is available to thegeneral public, that is suitable for revising the documentstraightforwardly with generic text editors or (for images composed ofpixels) generic paint programs or (for drawings) some widely availabledrawing editor, and that is suitable for input to text formatters orfor automatic translation to a variety of formats suitable for inputto text formatters. A copy made in an otherwise Transparent fileformat whose markup, or absence of markup, has been arranged to thwartor discourage subsequent modification by readers is not Transparent.An image format is not Transparent if used for any substantial amountof text. A copy that is not "Transparent" is called "Opaque".
Examples of suitable formats for Transparent copies include plainASCII without markup, Texinfo input format, LaTeX input format, SGMLor XML using a publicly available DTD, and standard-conforming simpleHTML, PostScript or PDF designed for human modification. Examples oftransparent image formats include PNG, XCF and JPG. Opaque formatsinclude proprietary formats that can be read and edited only byproprietary word processors, SGML or XML for which the DTD and/orprocessing tools are not generally available, and themachine-generated HTML, PostScript or PDF produced by some wordprocessors for output purposes only.
Ariel Jose Maria Berón 30
Curso GNU/Linux Nivel I Comandos
The "Title Page" means, for a printed book, the title page itself,plus such following pages as are needed to hold, legibly, the materialthis License requires to appear in the title page. For works informats which do not have any title page as such, "Title Page" meansthe text near the most prominent appearance of the work's title,preceding the beginning of the body of the text.
The "publisher" means any person or entity that distributes copies ofthe Document to the public.
A section "Entitled XYZ" means a named subunit of the Document whosetitle either is precisely XYZ or contains XYZ in parentheses followingtext that translates XYZ in another language. (Here XYZ stands for aspecific section name mentioned below, such as "Acknowledgements","Dedications", "Endorsements", or "History".) To "Preserve the Title"of such a section when you modify the Document means that it remains asection "Entitled XYZ" according to this definition.
The Document may include Warranty Disclaimers next to the notice whichstates that this License applies to the Document. These WarrantyDisclaimers are considered to be included by reference in thisLicense, but only as regards disclaiming warranties: any otherimplication that these Warranty Disclaimers may have is void and hasno effect on the meaning of this License.
2. VERBATIM COPYING
You may copy and distribute the Document in any medium, eithercommercially or noncommercially, provided that this License, thecopyright notices, and the license notice saying this License appliesto the Document are reproduced in all copies, and that you add noother conditions whatsoever to those of this License. You may not usetechnical measures to obstruct or control the reading or furthercopying of the copies you make or distribute. However, you may acceptcompensation in exchange for copies. If you distribute a large enoughnumber of copies you must also follow the conditions in section 3.
You may also lend copies, under the same conditions stated above, andyou may publicly display copies.
3. COPYING IN QUANTITY
If you publish printed copies (or copies in media that commonly haveprinted covers) of the Document, numbering more than 100, and theDocument's license notice requires Cover Texts, you must enclose thecopies in covers that carry, clearly and legibly, all these Cover
Ariel Jose Maria Berón 31
Curso GNU/Linux Nivel I Comandos
Texts: Front-Cover Texts on the front cover, and Back-Cover Texts onthe back cover. Both covers must also clearly and legibly identifyyou as the publisher of these copies. The front cover must presentthe full title with all words of the title equally prominent andvisible. You may add other material on the covers in addition.Copying with changes limited to the covers, as long as they preservethe title of the Document and satisfy these conditions, can be treatedas verbatim copying in other respects.
If the required texts for either cover are too voluminous to fitlegibly, you should put the first ones listed (as many as fitreasonably) on the actual cover, and continue the rest onto adjacentpages.
If you publish or distribute Opaque copies of the Document numberingmore than 100, you must either include a machine-readable Transparentcopy along with each Opaque copy, or state in or with each Opaque copya computer-network location from which the general network-usingpublic has access to download using public-standard network protocolsa complete Transparent copy of the Document, free of added material.If you use the latter option, you must take reasonably prudent steps,when you begin distribution of Opaque copies in quantity, to ensurethat this Transparent copy will remain thus accessible at the statedlocation until at least one year after the last time you distribute anOpaque copy (directly or through your agents or retailers) of thatedition to the public.
It is requested, but not required, that you contact the authors of theDocument well before redistributing any large number of copies, togive them a chance to provide you with an updated version of theDocument.
4. MODIFICATIONS
You may copy and distribute a Modified Version of the Document underthe conditions of sections 2 and 3 above, provided that you releasethe Modified Version under precisely this License, with the ModifiedVersion filling the role of the Document, thus licensing distributionand modification of the Modified Version to whoever possesses a copyof it. In addition, you must do these things in the Modified Version:
A. Use in the Title Page (and on the covers, if any) a title distinct from that of the Document, and from those of previous versions (which should, if there were any, be listed in the History section of the Document). You may use the same title as a previous version if the original publisher of that version gives permission.B. List on the Title Page, as authors, one or more persons or entities
Ariel Jose Maria Berón 32

Curso GNU/Linux Nivel I Comandos
responsible for authorship of the modifications in the Modified Version, together with at least five of the principal authors of the Document (all of its principal authors, if it has fewer than five), unless they release you from this requirement.C. State on the Title page the name of the publisher of the Modified Version, as the publisher.D. Preserve all the copyright notices of the Document.E. Add an appropriate copyright notice for your modifications adjacent to the other copyright notices.F. Include, immediately after the copyright notices, a license notice giving the public permission to use the Modified Version under the terms of this License, in the form shown in the Addendum below.G. Preserve in that license notice the full lists of Invariant Sections and required Cover Texts given in the Document's license notice.H. Include an unaltered copy of this License.I. Preserve the section Entitled "History", Preserve its Title, and add to it an item stating at least the title, year, new authors, and publisher of the Modified Version as given on the Title Page. If there is no section Entitled "History" in the Document, create one stating the title, year, authors, and publisher of the Document as given on its Title Page, then add an item describing the Modified Version as stated in the previous sentence.J. Preserve the network location, if any, given in the Document for public access to a Transparent copy of the Document, and likewise the network locations given in the Document for previous versions it was based on. These may be placed in the "History" section. You may omit a network location for a work that was published at least four years before the Document itself, or if the original publisher of the version it refers to gives permission.K. For any section Entitled "Acknowledgements" or "Dedications", Preserve the Title of the section, and preserve in the section all the substance and tone of each of the contributor acknowledgements and/or dedications given therein.L. Preserve all the Invariant Sections of the Document, unaltered in their text and in their titles. Section numbers or the equivalent are not considered part of the section titles.M. Delete any section Entitled "Endorsements". Such a section may not be included in the Modified Version.N. Do not retitle any existing section to be Entitled "Endorsements" or to conflict in title with any Invariant Section.O. Preserve any Warranty Disclaimers.
If the Modified Version includes new front-matter sections orappendices that qualify as Secondary Sections and contain no materialcopied from the Document, you may at your option designate some or allof these sections as invariant. To do this, add their titles to thelist of Invariant Sections in the Modified Version's license notice.These titles must be distinct from any other section titles.
Ariel Jose Maria Berón 33

Curso GNU/Linux Nivel I Comandos
You may add a section Entitled "Endorsements", provided it containsnothing but endorsements of your Modified Version by variousparties--for example, statements of peer review or that the text hasbeen approved by an organization as the authoritative definition of astandard.
You may add a passage of up to five words as a Front-Cover Text, and apassage of up to 25 words as a Back-Cover Text, to the end of the listof Cover Texts in the Modified Version. Only one passage ofFront-Cover Text and one of Back-Cover Text may be added by (orthrough arrangements made by) any one entity. If the Document alreadyincludes a cover text for the same cover, previously added by you orby arrangement made by the same entity you are acting on behalf of,you may not add another; but you may replace the old one, on explicitpermission from the previous publisher that added the old one.
The author(s) and publisher(s) of the Document do not by this Licensegive permission to use their names for publicity for or to assert orimply endorsement of any Modified Version.
5. COMBINING DOCUMENTS
You may combine the Document with other documents released under thisLicense, under the terms defined in section 4 above for modifiedversions, provided that you include in the combination all of theInvariant Sections of all of the original documents, unmodified, andlist them all as Invariant Sections of your combined work in itslicense notice, and that you preserve all their Warranty Disclaimers.
The combined work need only contain one copy of this License, andmultiple identical Invariant Sections may be replaced with a singlecopy. If there are multiple Invariant Sections with the same name butdifferent contents, make the title of each such section unique byadding at the end of it, in parentheses, the name of the originalauthor or publisher of that section if known, or else a unique number.Make the same adjustment to the section titles in the list ofInvariant Sections in the license notice of the combined work.
In the combination, you must combine any sections Entitled "History"in the various original documents, forming one section Entitled"History"; likewise combine any sections Entitled "Acknowledgements",and any sections Entitled "Dedications". You must delete all sectionsEntitled "Endorsements".
6. COLLECTIONS OF DOCUMENTS
Ariel Jose Maria Berón 34
Curso GNU/Linux Nivel I Comandos
You may make a collection consisting of the Document and otherdocuments released under this License, and replace the individualcopies of this License in the various documents with a single copythat is included in the collection, provided that you follow the rulesof this License for verbatim copying of each of the documents in allother respects.
You may extract a single document from such a collection, anddistribute it individually under this License, provided you insert acopy of this License into the extracted document, and follow thisLicense in all other respects regarding verbatim copying of thatdocument.
7. AGGREGATION WITH INDEPENDENT WORKS
A compilation of the Document or its derivatives with other separateand independent documents or works, in or on a volume of a storage ordistribution medium, is called an "aggregate" if the copyrightresulting from the compilation is not used to limit the legal rightsof the compilation's users beyond what the individual works permit.When the Document is included in an aggregate, this License does notapply to the other works in the aggregate which are not themselvesderivative works of the Document.
If the Cover Text requirement of section 3 is applicable to thesecopies of the Document, then if the Document is less than one half ofthe entire aggregate, the Document's Cover Texts may be placed oncovers that bracket the Document within the aggregate, or theelectronic equivalent of covers if the Document is in electronic form.Otherwise they must appear on printed covers that bracket the wholeaggregate.
8. TRANSLATION
Translation is considered a kind of modification, so you maydistribute translations of the Document under the terms of section 4.Replacing Invariant Sections with translations requires specialpermission from their copyright holders, but you may includetranslations of some or all Invariant Sections in addition to theoriginal versions of these Invariant Sections. You may include atranslation of this License, and all the license notices in theDocument, and any Warranty Disclaimers, provided that you also includethe original English version of this License and the original versionsof those notices and disclaimers. In case of a disagreement betweenthe translation and the original version of this License or a notice
Ariel Jose Maria Berón 35
Curso GNU/Linux Nivel I Comandos
or disclaimer, the original version will prevail.
If a section in the Document is Entitled "Acknowledgements","Dedications", or "History", the requirement (section 4) to Preserveits Title (section 1) will typically require changing the actualtitle.
9. TERMINATION
You may not copy, modify, sublicense, or distribute the Documentexcept as expressly provided under this License. Any attemptotherwise to copy, modify, sublicense, or distribute it is void, andwill automatically terminate your rights under this License.
However, if you cease all violation of this License, then your licensefrom a particular copyright holder is reinstated (a) provisionally,unless and until the copyright holder explicitly and finallyterminates your license, and (b) permanently, if the copyright holderfails to notify you of the violation by some reasonable means prior to60 days after the cessation.
Moreover, your license from a particular copyright holder isreinstated permanently if the copyright holder notifies you of theviolation by some reasonable means, this is the first time you havereceived notice of violation of this License (for any work) from thatcopyright holder, and you cure the violation prior to 30 days afteryour receipt of the notice.
Termination of your rights under this section does not terminate thelicenses of parties who have received copies or rights from you underthis License. If your rights have been terminated and not permanentlyreinstated, receipt of a copy of some or all of the same material doesnot give you any rights to use it.
10. FUTURE REVISIONS OF THIS LICENSE
The Free Software Foundation may publish new, revised versions of theGNU Free Documentation License from time to time. Such new versionswill be similar in spirit to the present version, but may differ indetail to address new problems or concerns. Seehttp://www.gnu.org/copyleft/.
Each version of the License is given a distinguishing version number.If the Document specifies that a particular numbered version of thisLicense "or any later version" applies to it, you have the option offollowing the terms and conditions either of that specified version or
Ariel Jose Maria Berón 36

Curso GNU/Linux Nivel I Comandos
of any later version that has been published (not as a draft) by theFree Software Foundation. If the Document does not specify a versionnumber of this License, you may choose any version ever published (notas a draft) by the Free Software Foundation. If the Documentspecifies that a proxy can decide which future versions of thisLicense can be used, that proxy's public statement of acceptance of aversion permanently authorizes you to choose that version for theDocument.
11. RELICENSING
"Massive Multiauthor Collaboration Site" (or "MMC Site") means anyWorld Wide Web server that publishes copyrightable works and alsoprovides prominent facilities for anybody to edit those works. Apublic wiki that anybody can edit is an example of such a server. A"Massive Multiauthor Collaboration" (or "MMC") contained in the sitemeans any set of copyrightable works thus published on the MMC site.
"CC-BY-SA" means the Creative Commons Attribution-Share Alike 3.0 license published by Creative Commons Corporation, a not-for-profit corporation with a principal place of business in San Francisco, California, as well as future copyleft versions of that license published by that same organization.
"Incorporate" means to publish or republish a Document, in whole or in part, as part of another Document.
An MMC is "eligible for relicensing" if it is licensed under this License, and if all works that were first published under this License somewhere other than this MMC, and subsequently incorporated in whole or in part into the MMC, (1) had no cover texts or invariant sections, and (2) were thus incorporated prior to November 1, 2008.
The operator of an MMC Site may republish an MMC contained in the siteunder CC-BY-SA on the same site at any time before August 1, 2009,provided the MMC is eligible for relicensing.
ADDENDUM: How to use this License for your documents
To use this License in a document you have written, include a copy ofthe License in the document and put the following copyright andlicense notices just after the title page:
Copyright (c) YEAR YOUR NAME. Permission is granted to copy, distribute and/or modify this document under the terms of the GNU Free Documentation License, Version 1.3 or any later version published by the Free Software Foundation;
Ariel Jose Maria Berón 37
Curso GNU/Linux Nivel I Comandos
with no Invariant Sections, no Front-Cover Texts, and no Back-Cover Texts. A copy of the license is included in the section entitled "GNU Free Documentation License".
If you have Invariant Sections, Front-Cover Texts and Back-Cover Texts,replace the "with...Texts." line with this:
with the Invariant Sections being LIST THEIR TITLES, with the Front-Cover Texts being LIST, and with the Back-Cover Texts being LIST.
If you have Invariant Sections without Cover Texts, or some othercombination of the three, merge those two alternatives to suit thesituation.
If your document contains nontrivial examples of program code, werecommend releasing these examples in parallel under your choice offree software license, such as the GNU General Public License,to permit their use in free software.
Ariel Jose Maria Berón 38