TO USE AKEYTSU WITH UNITY - home-Nukeygara · 2017-10-25 · HOW TO USE AKEYTSU WITH UNITY: The...
10
HOW TO USE AKEYTSU WITH UNITY: The process for animation retargeting using Unity (available with Unity 2017.1.0f3) and Akeytsu CREATE A CHARACTER TO USE IN UNITY: 1 – Import a mesh in Akeytsu and click on the “Create Unity3D Skeleton” button on the JOINT Tab.
-
Upload
nguyenkhuong -
Category
Documents
-
view
227 -
download
0
Transcript of TO USE AKEYTSU WITH UNITY - home-Nukeygara · 2017-10-25 · HOW TO USE AKEYTSU WITH UNITY: The...

HOW TO USE AKEYTSU WITH
UNITY:
The process for animation retargeting using Unity (available with Unity 2017.1.0f3) and Akeytsu
CREATE A CHARACTER TO USE IN UNITY:
1 – Import a mesh in Akeytsu and click on the “Create Unity3D Skeleton” button on the JOINT Tab.
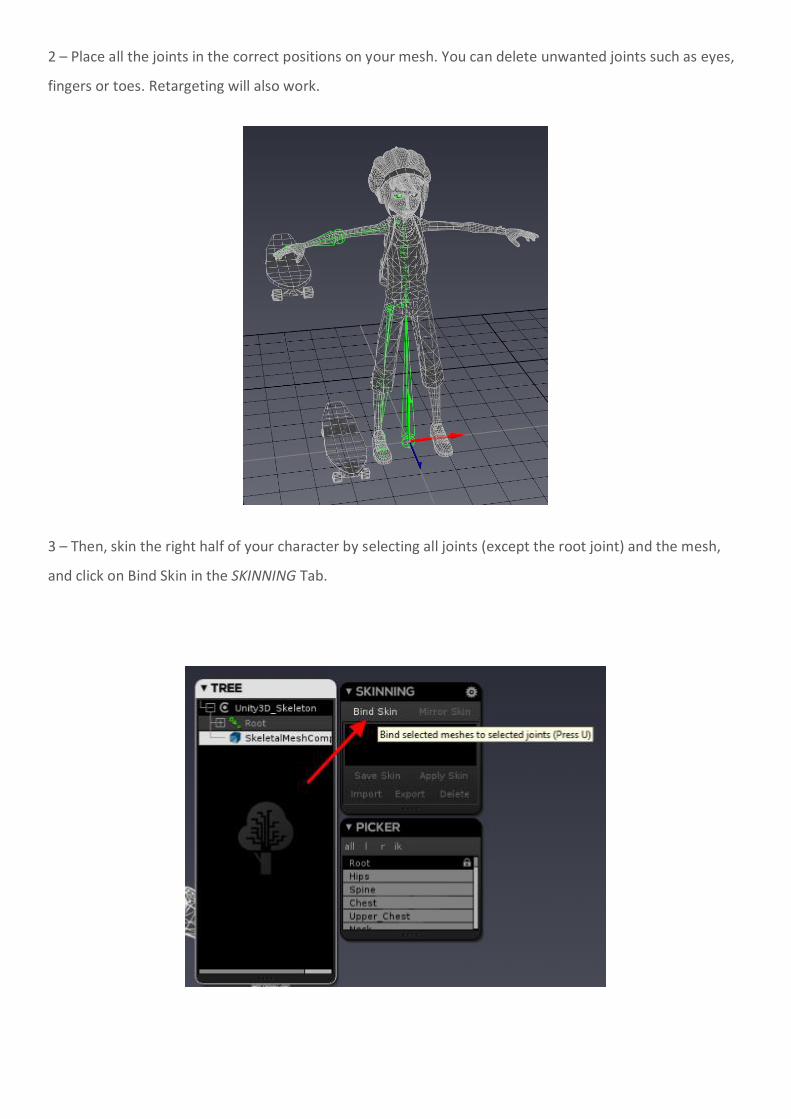
2 – Place all the joints in the correct positions on your mesh. You can delete unwanted joints such as eyes,
fingers or toes. Retargeting will also work.
3 – Then, skin the right half of your character by selecting all joints (except the root joint) and the mesh,
and click on Bind Skin in the SKINNING Tab.
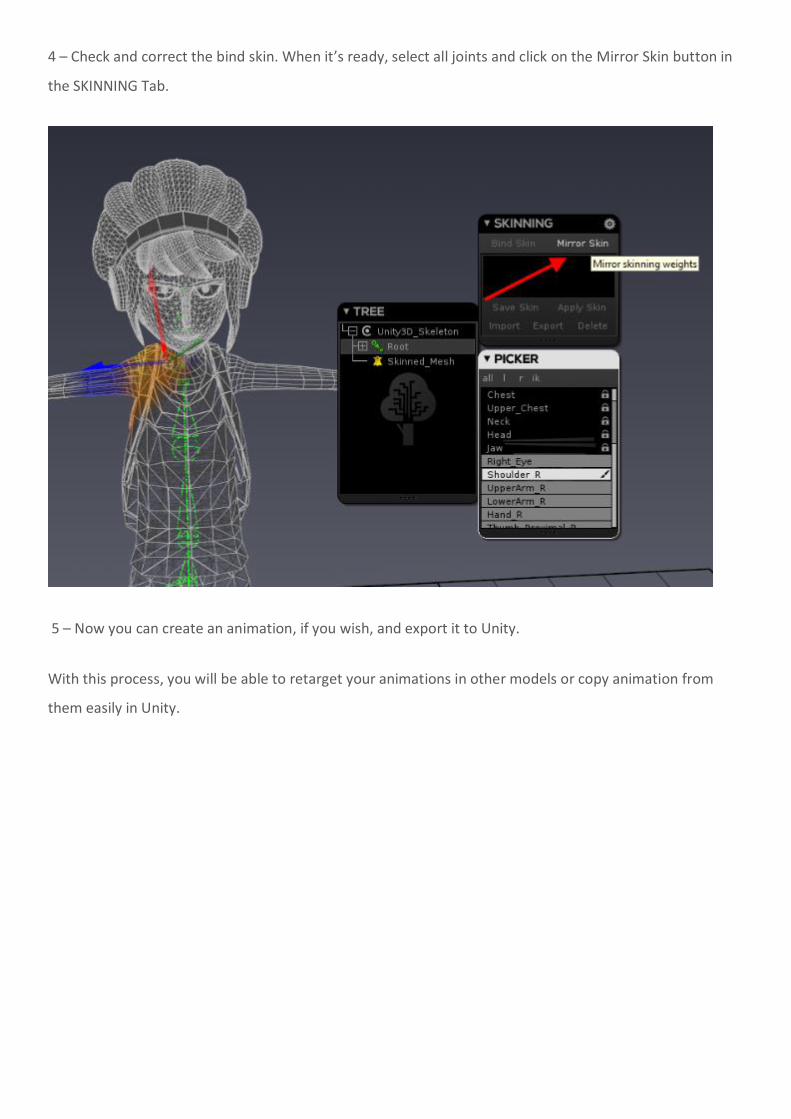
4 – Check and correct the bind skin. When it’s ready, select all joints and click on the Mirror Skin button in
the SKINNING Tab.
5 – Now you can create an animation, if you wish, and export it to Unity.
With this process, you will be able to retarget your animations in other models or copy animation from
them easily in Unity.
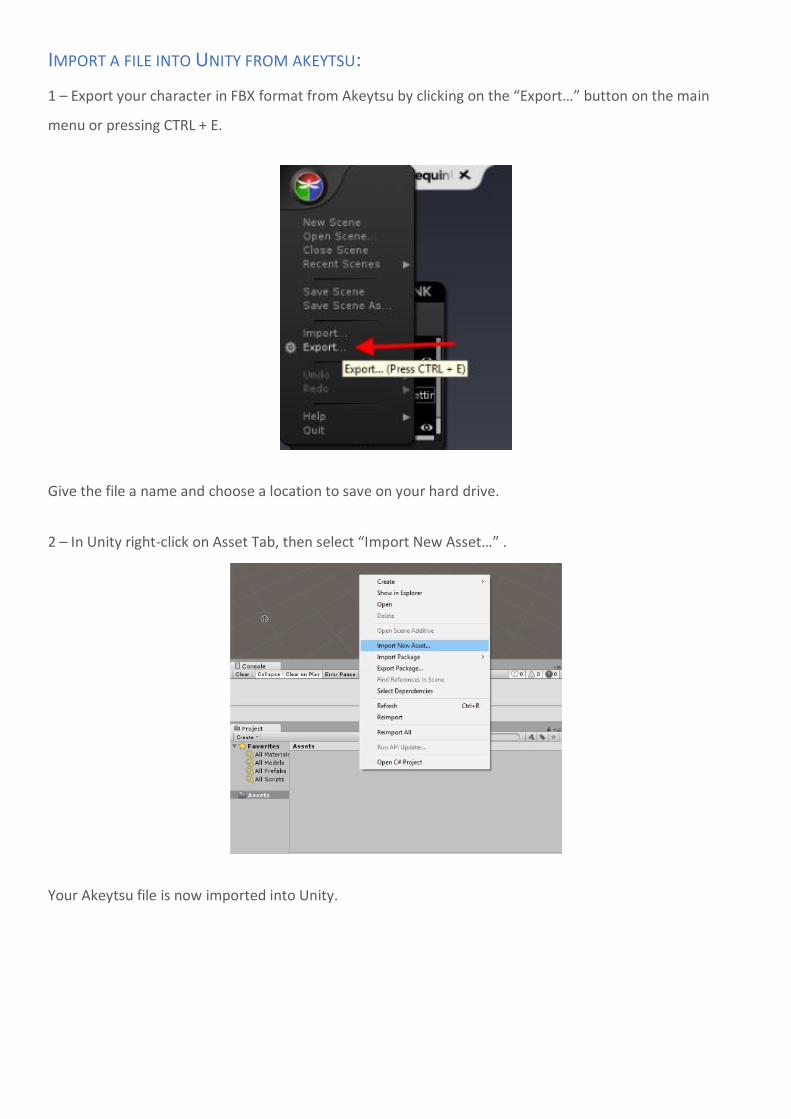
IMPORT A FILE INTO UNITY FROM AKEYTSU:
1 – Export your character in FBX format from Akeytsu by clicking on the “Export…” button on the main
menu or pressing CTRL + E.
Give the file a name and choose a location to save on your hard drive.
2 – In Unity right-click on Asset Tab, then select “Import New Asset…” .
Your Akeytsu file is now imported into Unity.
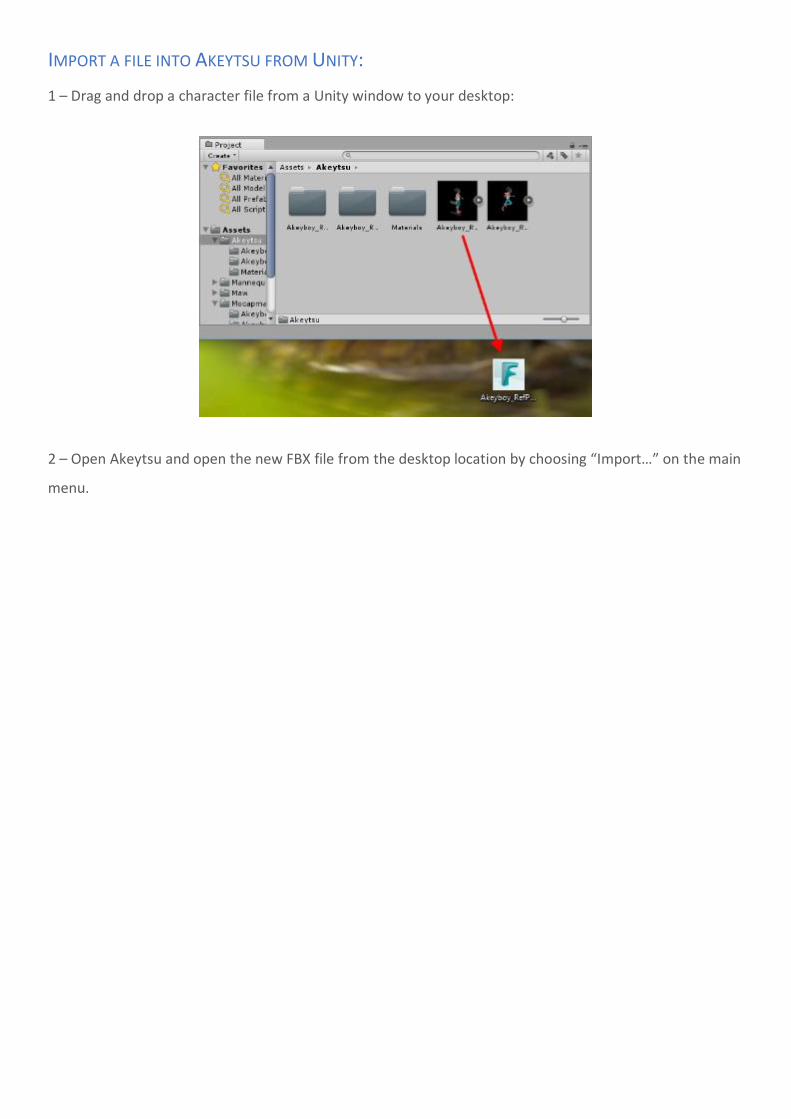
IMPORT A FILE INTO AKEYTSU FROM UNITY:
1 – Drag and drop a character file from a Unity window to your desktop:
2 – Open Akeytsu and open the new FBX file from the desktop location by choosing “Import…” on the main
menu.
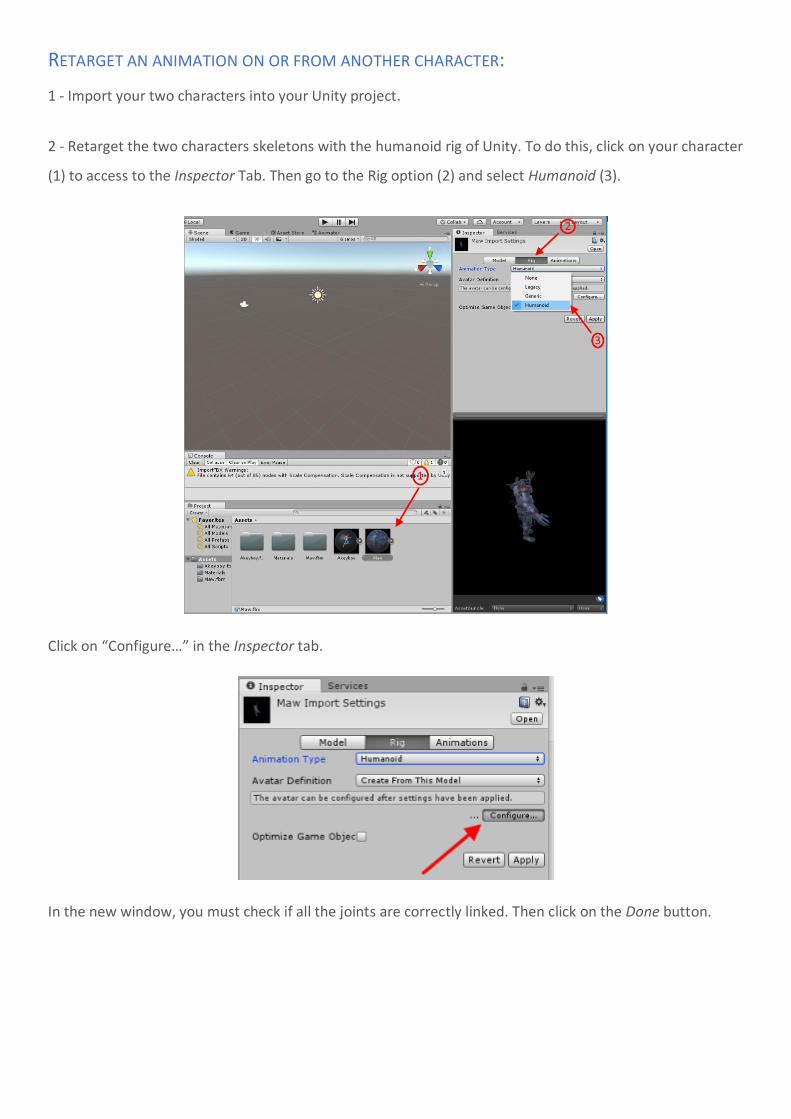
RETARGET AN ANIMATION ON OR FROM ANOTHER CHARACTER:
1 - Import your two characters into your Unity project.
2 - Retarget the two characters skeletons with the humanoid rig of Unity. To do this, click on your character
(1) to access to the Inspector Tab. Then go to the Rig option (2) and select Humanoid (3).
Click on “Configure…” in the Inspector tab.
In the new window, you must check if all the joints are correctly linked. Then click on the Done button.
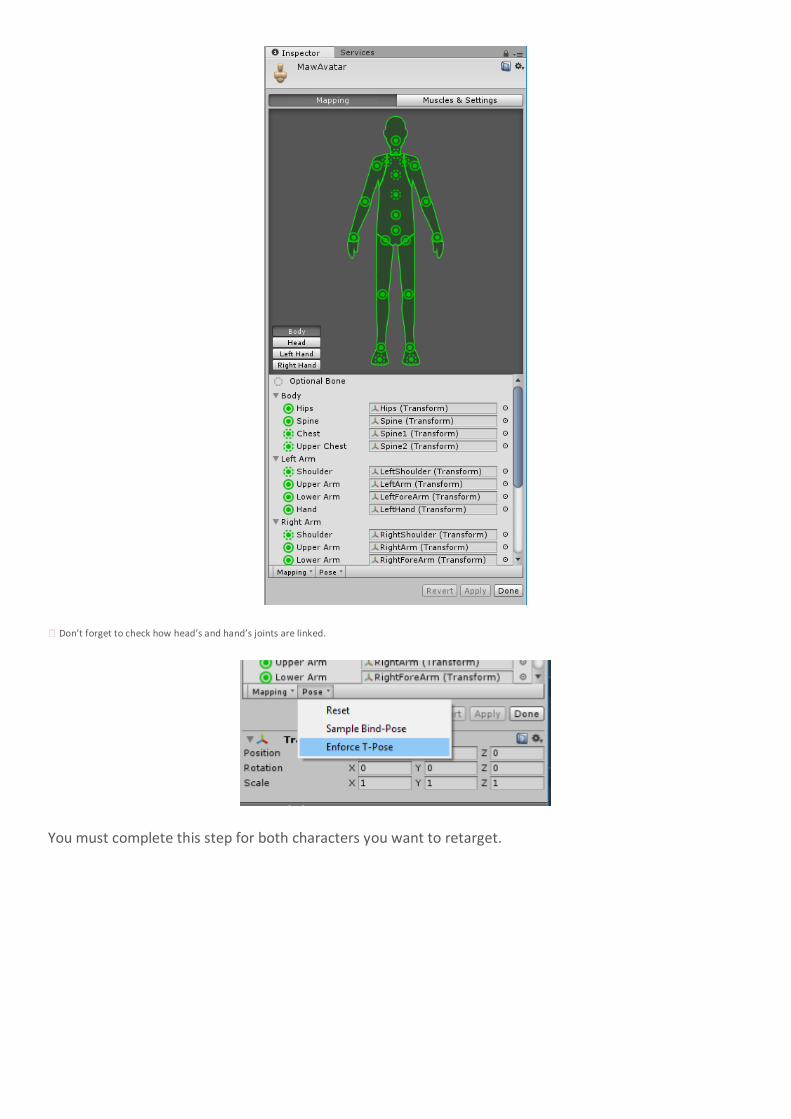
⚠ Don’t forget to check how head’s and hand’s joints are linked.
You must complete this step for both characters you want to retarget.
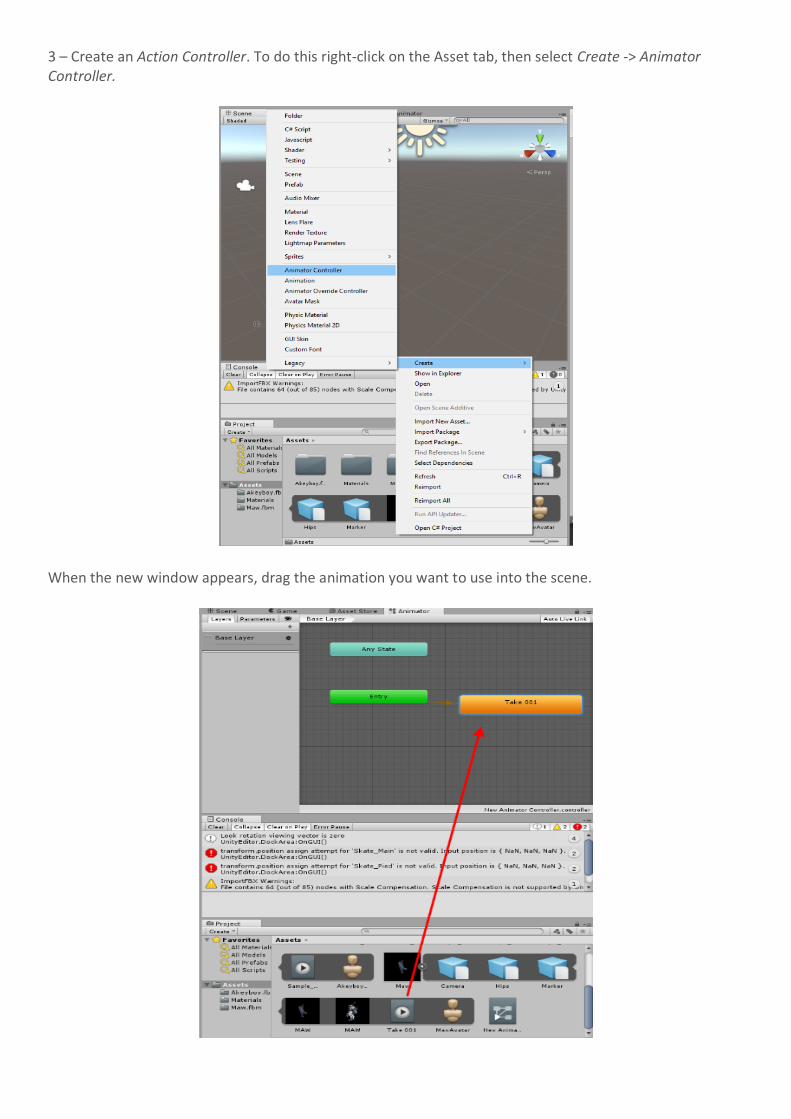
3 – Create an Action Controller. To do this right-click on the Asset tab, then select Create -> Animator Controller.
When the new window appears, drag the animation you want to use into the scene.
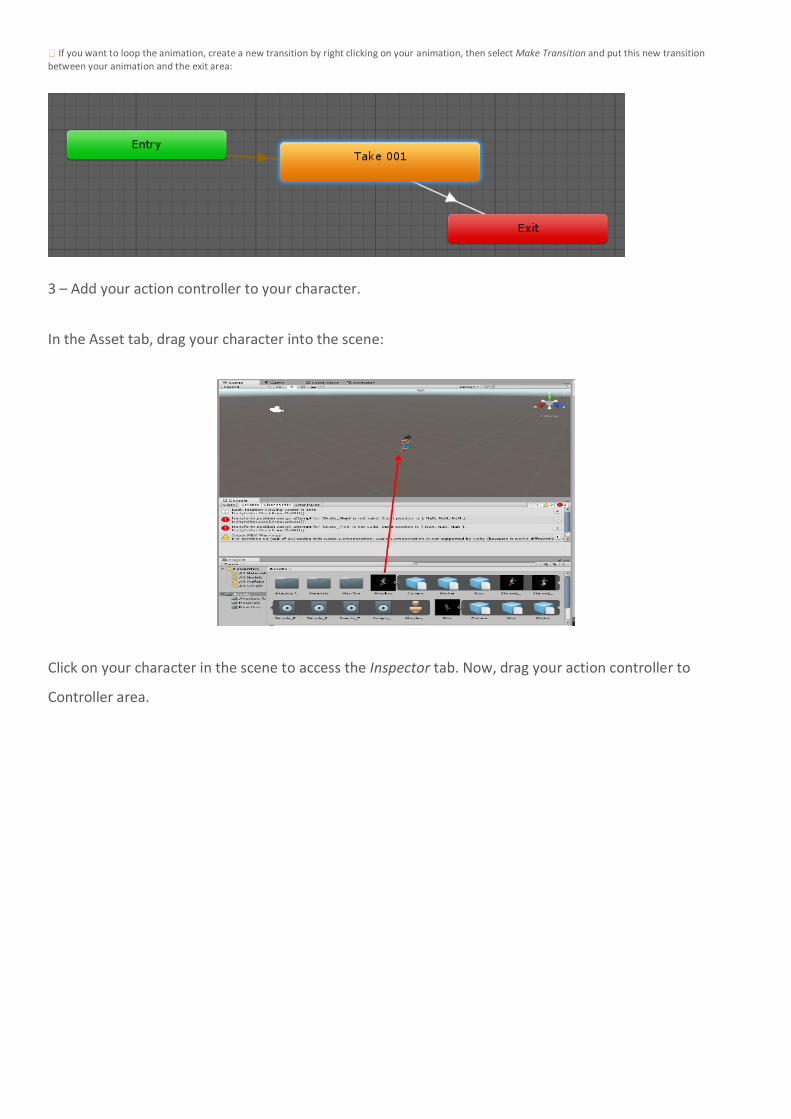
⚠ If you want to loop the animation, create a new transition by right clicking on your animation, then select Make Transition and put this new transition between your animation and the exit area:
3 – Add your action controller to your character.
In the Asset tab, drag your character into the scene:
Click on your character in the scene to access the Inspector tab. Now, drag your action controller to
Controller area.
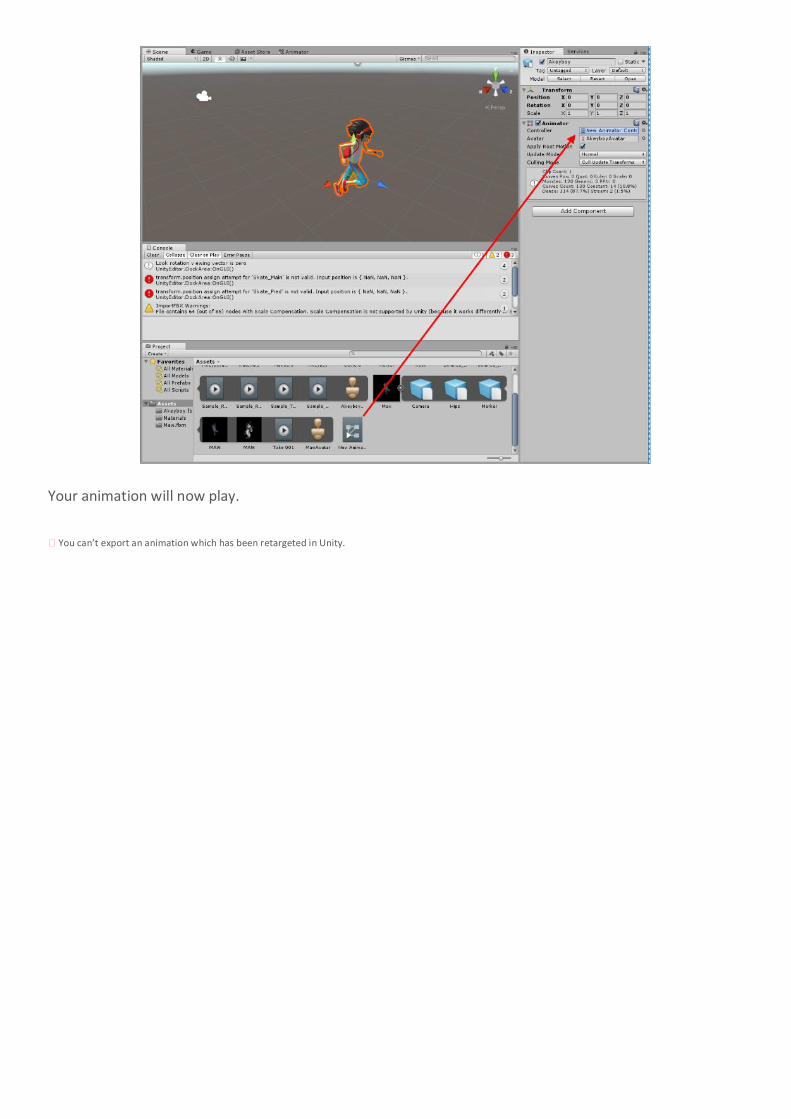
Your animation will now play.
⚠ You can’t export an animation which has been retargeted in Unity.