Thinkin Service
13
Page 1 Website - Thinkindragon.com Email id- [email protected] Whatsapp - +918126961804 Skype - drgntnkin Thinkin Service Thinkin Service Setup Manual Before setting up Thinkin Service, we need the server to have the following prerequisite software’s or frameworks in your server to build a conceivable environment. Get Laravel server from this link in no time https://www.cloudways.com/en/?id=315139 use “ TDRAGON ” to get 10% off on server billing *Min requirement - 2 GB digital ocean server which is min requirement for running the composer command and testing New to Laravel follow these link 1. https://laravel.com/ 2. https://www.cloudways.com/bl og/install-laravel-on- server/ 3. https://support.cloudways.com /deploy-laravel-on-cloudways/ For digital ocean cloud server of server provider have ubuntu server contents 1. LAMP Stack: Note: We don’t recommend cPanel or shared hosting, run only in the dedicated server or cloud server The server environment should have a Linux Operating System with Apache Server and MySQL database, PHP server scripting language. The following are the compatible versions of the LAMP stack a. Linux - Ubuntu - 18.04 or 16.04 (LTS is Preferred) or Equivalent b. Apache >= 2.4.25
Transcript of Thinkin Service
Page 1
Website - Thinkindragon.com
Email id- [email protected]
Whatsapp - +918126961804
Skype - drgntnkin
Thinkin Service
Thinkin Service Setup Manual Before setting up Thinkin Service, we need the server to have the following prerequisite
software’s or frameworks in your server to build a conceivable environment.
Get Laravel server from this link in no time https://www.cloudways.com/en/?id=315139 use
“ TDRAGON ” to get 10% off on server billing
*Min requirement - 2 GB digital ocean server which is min requirement for running the composer
command and testing
New to Laravel follow these link
1. https://laravel.com/
2. https://www.cloudways.com/bl og/install-laravel-on-
server/
3. https://support.cloudways.com
/deploy-laravel-on-cloudways/
For digital ocean cloud server of server provider have ubuntu
server contents
1. LAMP Stack:
Note: We don’t recommend cPanel or shared hosting, run only in the dedicated server or
cloud server
The server environment should have a Linux Operating System with Apache Server and
MySQL database, PHP server scripting language.
The following are the compatible versions of the LAMP stack
a. Linux - Ubuntu - 18.04 or 16.04 (LTS is Preferred) or Equivalent
b. Apache >= 2.4.25
Page 2
Website - Thinkindragon.com
Email id- [email protected]
Whatsapp - +918126961804
Skype - drgntnkin
c. MySQL >= 5.7
d. PHP >= 7.2
Additional PHP Modules required.
1. OpenSSL PHP Extension 2. PDO
PHP Extension
3. Mbstring PHP Extension
4. Tokenizer PHP Extension
5. XML PHP Extension Apache modules
6. Rewrite Module
2. Domain Name:
It is recommended that you get a domain name and an SSL certificate for the same for
our application to work with full functionality.
3. SSL Certificate: (free in Cloudways)
To maintain compatibility of the application across the web app along with live tracking
you need to have an SSL certificate to fetch the user location from the browser.
4. Composer: https://getcomposer.org/
Composer is required to download the dependencies for the application. Run
this command after installation composer self-update --1
Page 3
Website - Thinkindragon.com
Email id- [email protected]
Whatsapp - +918126961804
Skype - drgntnkin
INSTALLATION
1.Unzip the code in the server.
2. Set the following permissions
• sudo chgrp -R www-data storage bootstrap/cache public
• sudo chmod -R ug+rwx storage bootstrap/cache public To the following folders
• ./bootstrap
• ./storage
• ./public
3. Now edit the .env file in app root folder
DB_HOST = localhost (Provide Database host URL here)
DB_PORT = 3306 (Provide Database port here)
DB_DATABASE = thinkinService (Provide the Database name from step-5)
DB_USERNAME = root (Database username)
DB_PASSWORD = (Database password)
4.Run the following commands to complete setup
• composer install
• php artisan key:generate
• php artisan migrate --seed
• php artisan storage:link
5. By now the application should be live and ready for testing.
You can reach the admin panel from this URL yourdomain.com/admin/login
Default admin credentials are.
Username: [email protected] Password: password
You will also have demo accounts to access the user and Driver app, which you might like to
disable while moving the application to production check the admin panel for all details
Page 4
Website - Thinkindragon.com
Email id- [email protected]
Whatsapp - +918126961804
Skype - drgntnkin
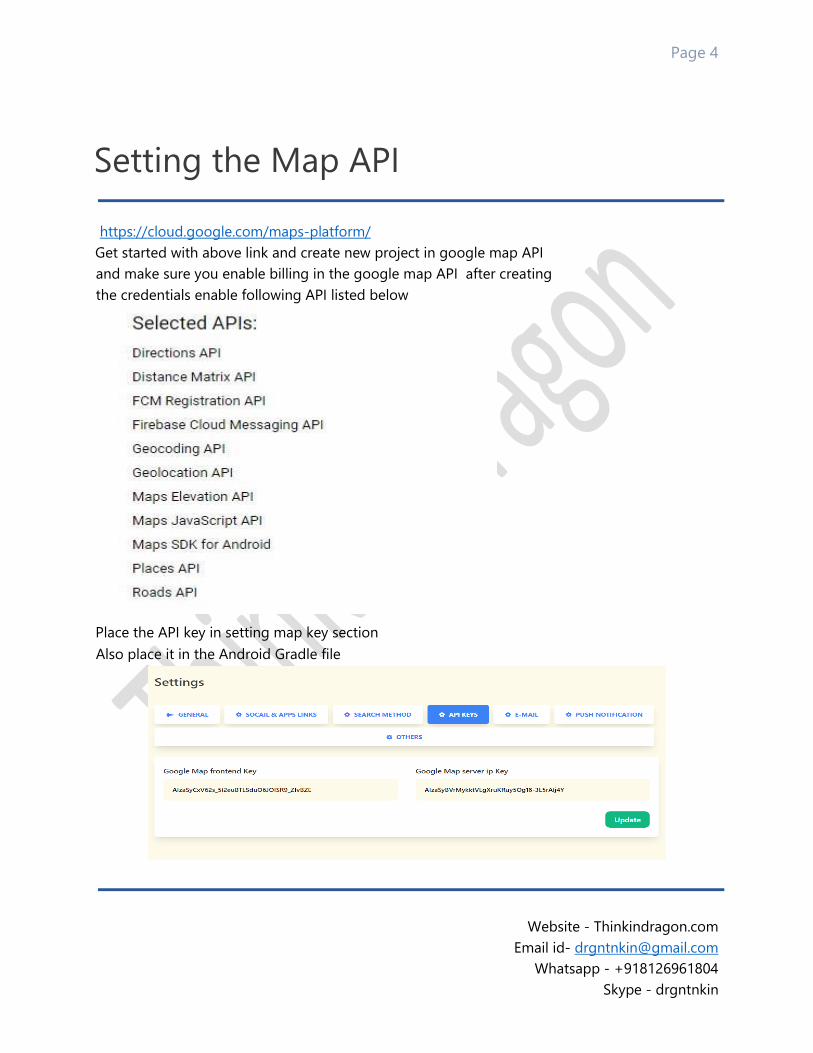
Setting the Map API
https://cloud.google.com/maps-platform/
Get started with above link and create new project in google map API
and make sure you enable billing in the google map API after creating
the credentials enable following API listed below
Place the API key in setting map key section
Also place it in the Android G radle file
Page 5
Website - Thinkindragon.com
Email id- [email protected]
Whatsapp - +918126961804
Skype - drgntnkin
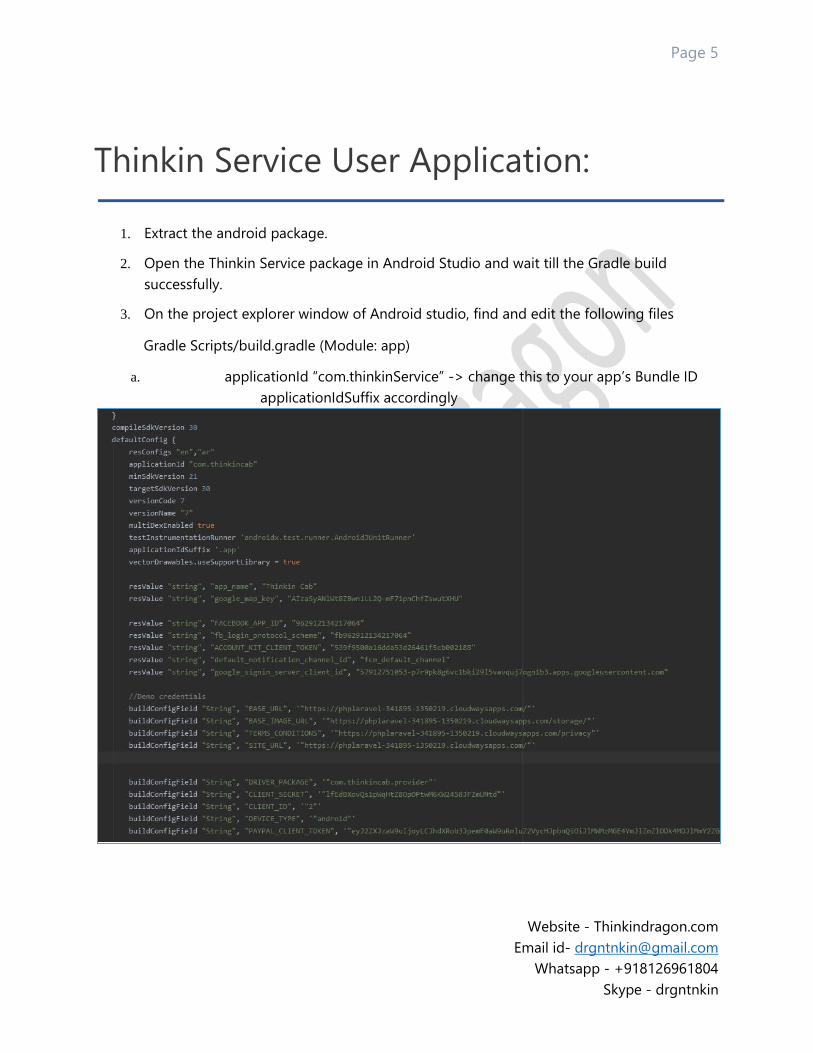
Thinkin Service User Application:
1. Extract the android package.
2. Open the Thinkin Service package in Android Studio and wait till the Gradle build
successfully.
3. On the project explorer window of Android studio, find and edit the following files
Gradle Scripts/build.gradle (Module: app)
a. applicationId “com.thinkinService” -> change this to your app’s Bundle ID
applicationIdSuffix accordingly

Page 6
Website - Thinkindragon.com
Email id- [email protected]
Whatsapp - +918126961804
Skype - drgntnkin
b. change values and the credentials in the screenshot above below
4. Configure your Application on the Google Firebase console, enable authentication and
Database base for the chat and download the googleservices.json, and replace them in
app/ folder.
5. Change the splash screen and icon for your own brand.
Open the project folder from the PC and follow the below-mentioned path: Thinkin
Service>app>src>main->res
You will find ‘mipmap’ folders in the different resolution names, you must save the icons and
splash screens in these folders according to the device size.
Also, you will find ‘drawable’ folders in the different resolution names, you must save the icons and
splash screens in these folders too according to the device size.
Now hit on the ‘run’ button the application will run successfully in the virtual device.
If you are planning to upload the app in the Play Store, you must generate the build. To do so,
click on ‘Build’ in Android Studio, choose ‘Generate Signed APK’ from the drop-down. Now, click
on create new and hit ‘Next’ to proceed.
Choose the path to the location where you want to save the key, give a folder name for the key
and click ‘OK’. Enter the information in the fields and click on ‘Finish’.
The APK will be generated and stored in the folder named by you.
Thinkin Service Provider/Driver Application:
1. Extract the android package.
2. Open the Thinkin service package in Android Studio and wait till the Gradle build
successfully.
3. On the project explorer window of Android studio, find and edit the following files
a. Gradle Scripts/build.gradle (Module: app)
Page 7
Website - Thinkindragon.com
Email id- [email protected]
Whatsapp - +918126961804
Skype - drgntnkin
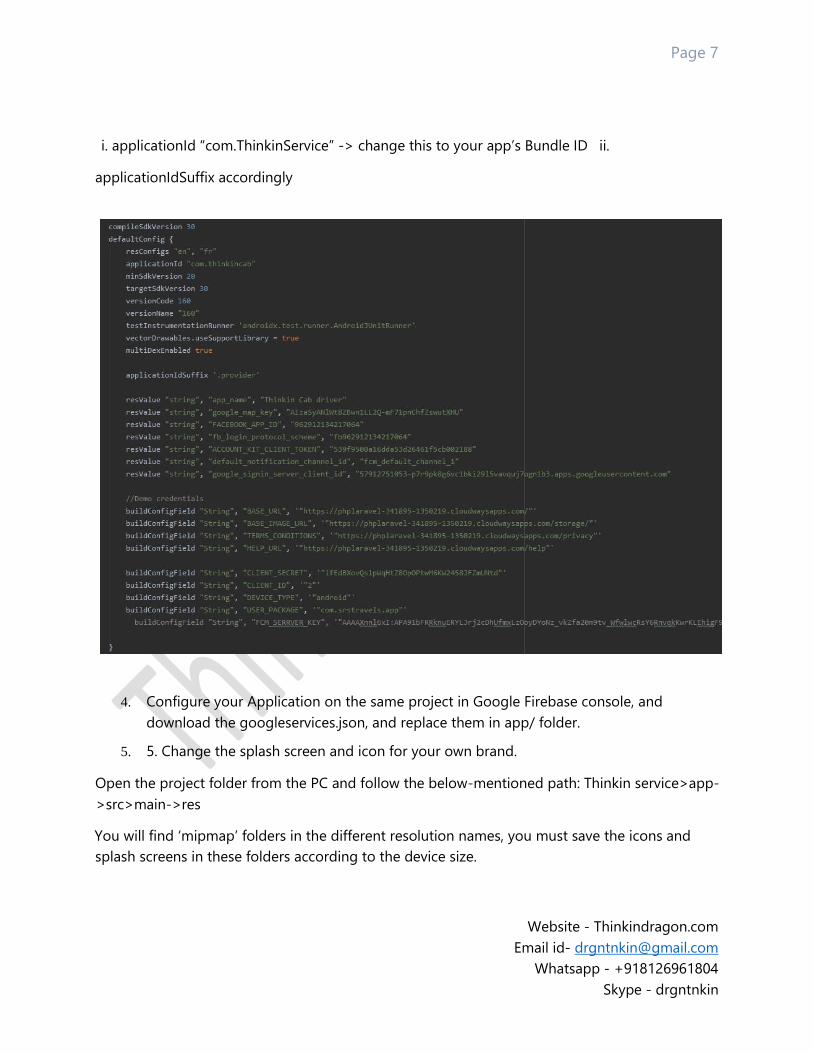
i. applicationId “com.ThinkinService” -> change this to your app’s Bundle ID ii.
applicationIdSuffix accordingly
4. Configure your Application on the same project in Google Firebase console, and
download the googleservices.json, and replace them in app/ folder.
5. 5. Change the splash screen and icon for your own brand.
Open the project folder from the PC and follow the below-mentioned path: Thinkin service>app-
>src>main->res
You will find ‘mipmap’ folders in the different resolution names, you must save the icons and
splash screens in these folders according to the device size.
Page 8
Website - Thinkindragon.com
Email id- [email protected]
Whatsapp - +918126961804
Skype - drgntnkin
Also, You will find ‘drawable’ folders in the different resolution names, you must save the icons
and splash screens in these folders too according to the device size.
Now hit on the ‘run’ button the application will run successfully in the virtual device.
If you are planning to upload the app in the Play Store, you must generate the build. To do so,
click on ‘Build’ in Android Studio, choose ‘Generate Signed APK’ from the drop-down. Now, click
on create new and hit ‘Next’ to proceed.
Choose the path to the location where you want to save the key, give a folder name for the key
and click ‘OK’. Enter the information in the fields and click on ‘Finish’.
The APK will be generated and stored in the folder named by you.
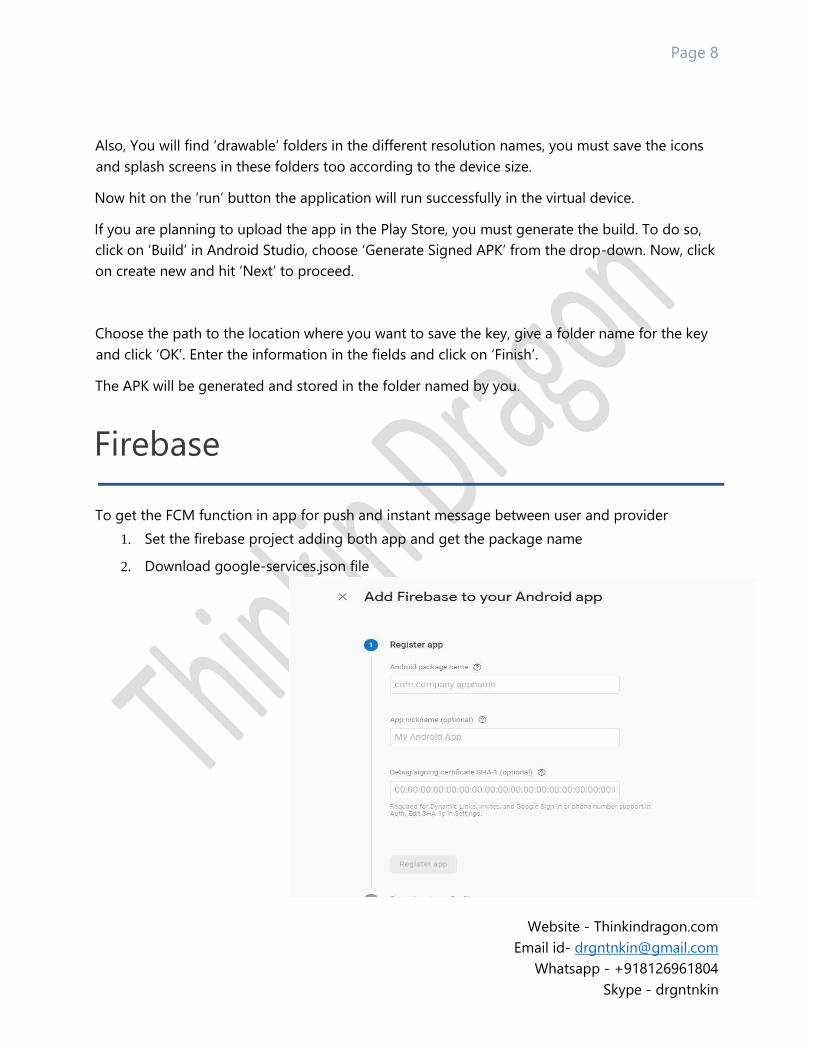
Firebase
To get the FCM function in app for push and instant message between user and provider
1. Set the firebase project adding both app and get the package name
2. Download google-services.json file
Page 9
Website - Thinkindragon.com
Email id- [email protected]
Whatsapp - +918126961804
Skype - drgntnkin
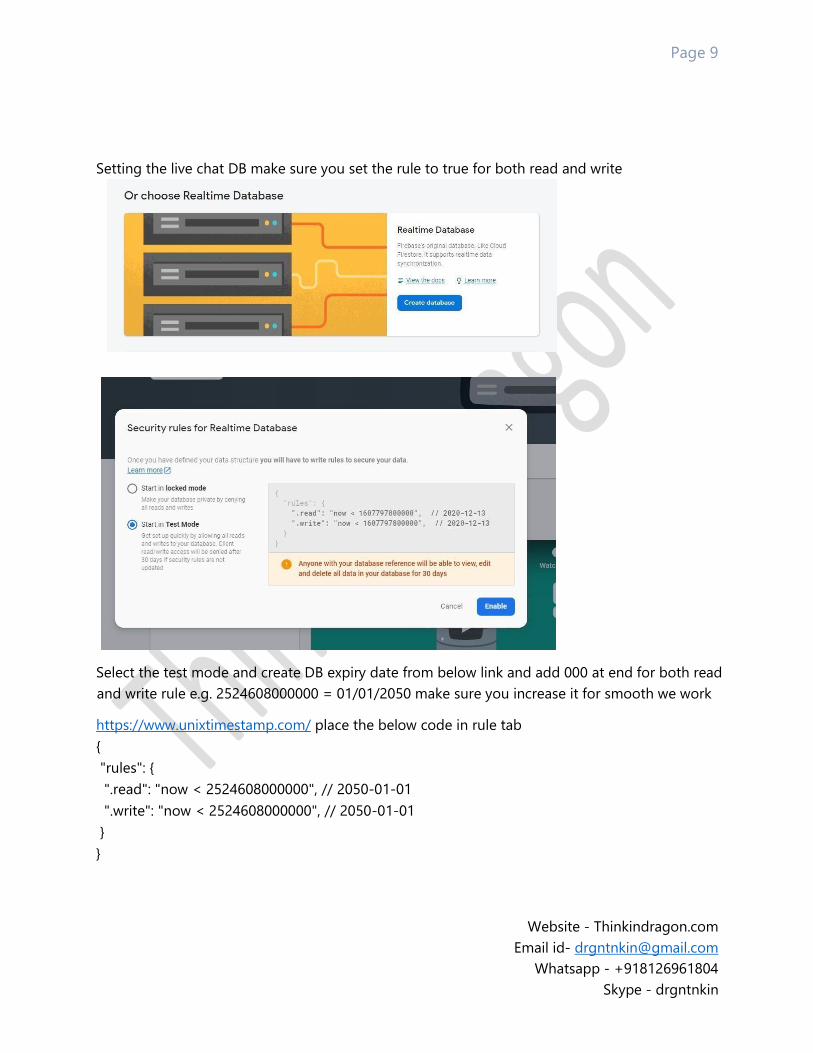
Setting the live chat DB make sure you set the rule to true for both read and write
Select the test mode and create DB expiry date from below link and add 000 at end for both read
and write rule e.g. 2524608000000 = 01/01/2050 make sure you increase it for smooth we work
https://www.unixtimestamp.com/ place the below code in rule tab
{
"rules": {
".read": "now < 2524608000000", // 2050-01-01
".write": "now < 2524608000000", // 2050-01-01
}
}
Page 10
Website - Thinkindragon.com
Email id- [email protected]
Whatsapp - +918126961804
Skype - drgntnkin
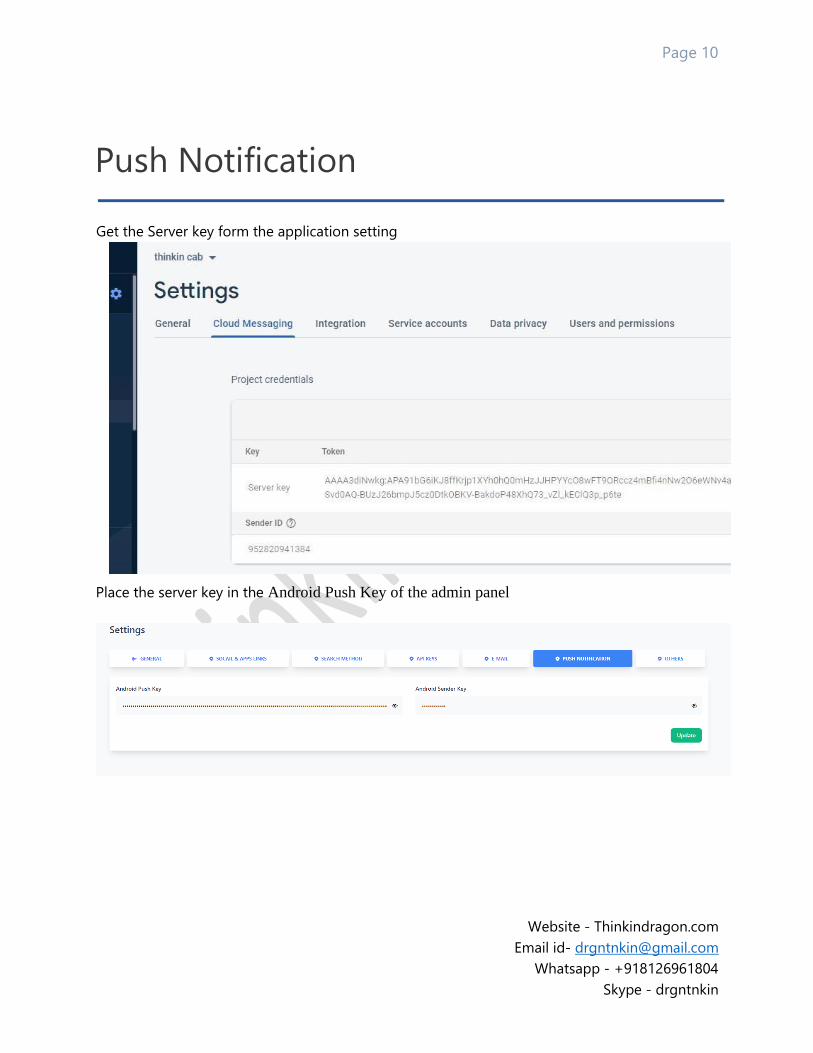
Push Notification
Get the Server key form the application setting
Place the server key in the Android Push Key of the admin panel
Page 11
Website - Thinkindragon.com
Email id- [email protected]
Whatsapp - +918126961804
Skype - drgntnkin
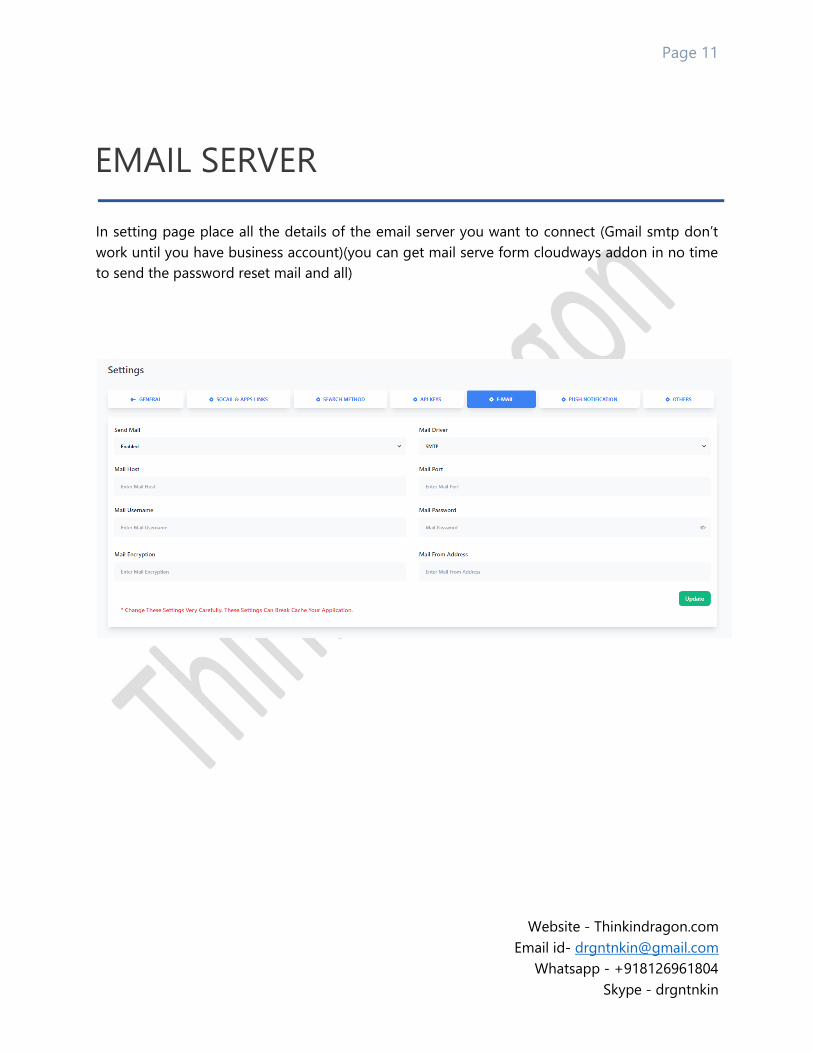
EMAIL SERVER
In setting page place all the details of the email server you want to connect (Gmail smtp don’t
work until you have business account)(you can get mail serve form cloudways addon in no time
to send the password reset mail and all)
Page 12
Website - Thinkindragon.com
Email id- [email protected]
Whatsapp - +918126961804
Skype - drgntnkin
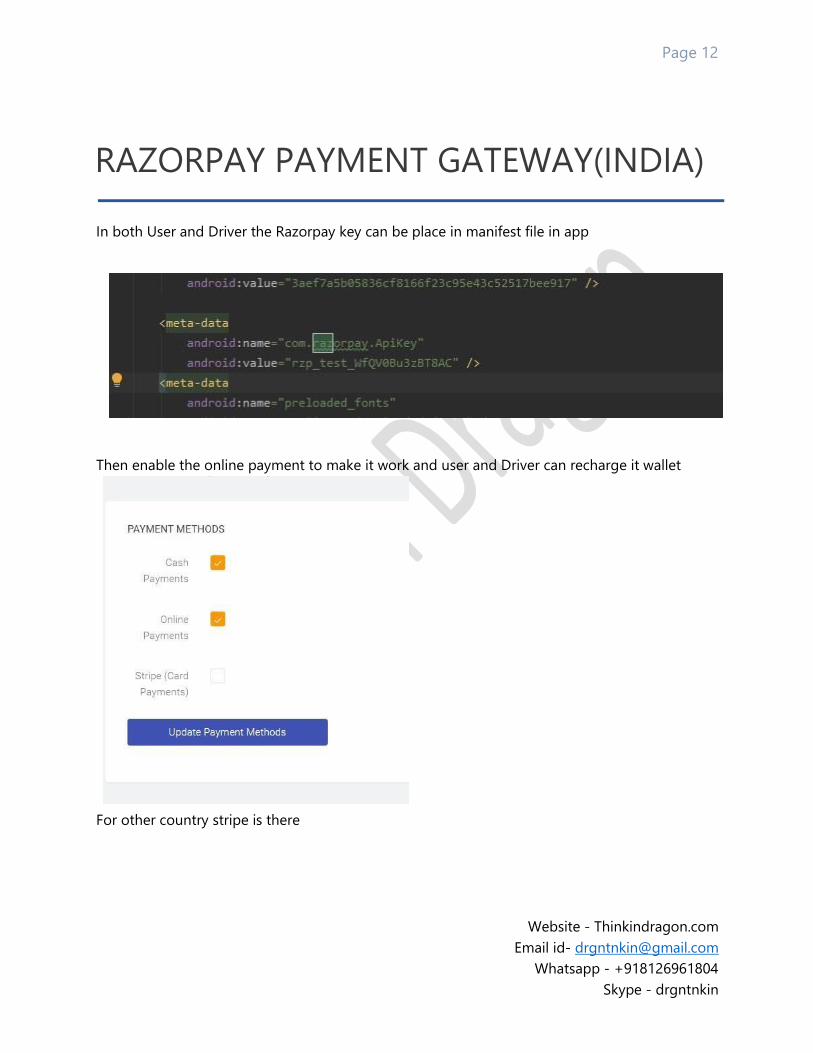
RAZORPAY PAYMENT GATEWAY(INDIA)
In both User and Driver the Razorpay key can be place in manifest file in app
Then enable the online payment to make it work and user and Driver can recharge it wallet
For other country stripe is there
Page 13
Website - Thinkindragon.com
Email id- [email protected]
Whatsapp - +918126961804
Skype - drgntnkin
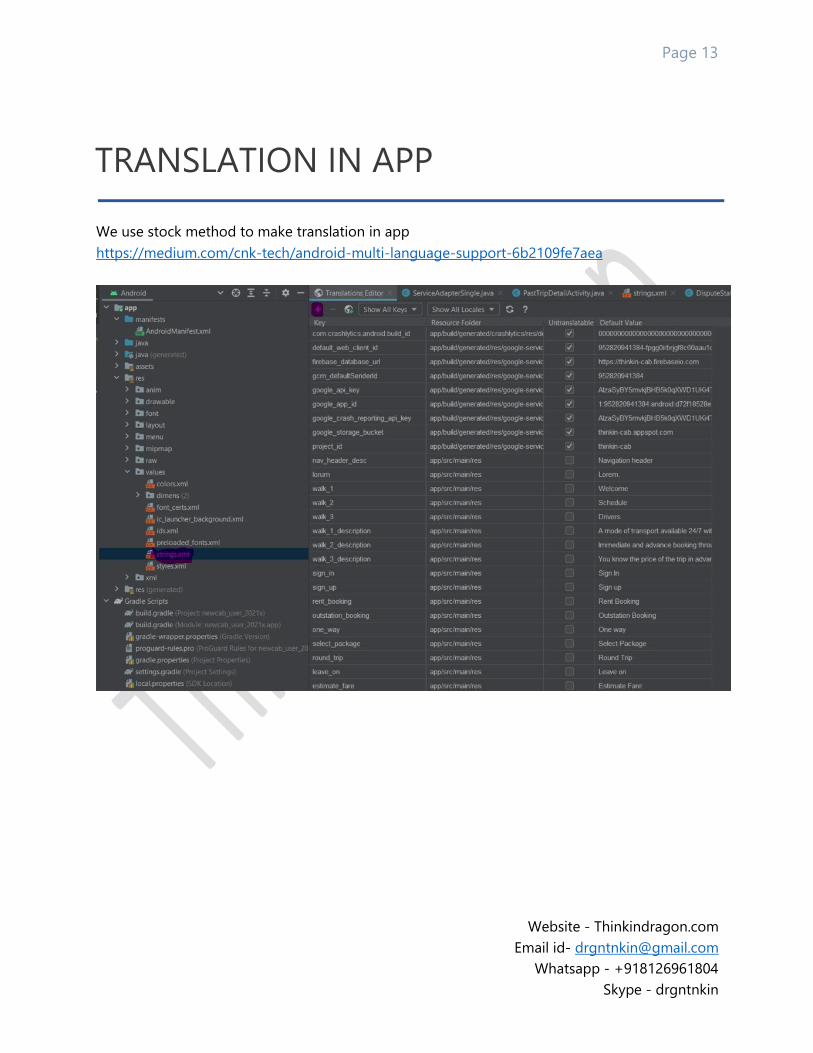
TRANSLATION IN APP
We use stock method to make translation in app
https://medium.com/cnk-tech/android-multi-language-support-6b2109fe7aea