Table of Contents - The Express Home Sushi Maker, Roller...
23
2
-
Upload
trinhquynh -
Category
Documents
-
view
222 -
download
3
Transcript of Table of Contents - The Express Home Sushi Maker, Roller...
2
3
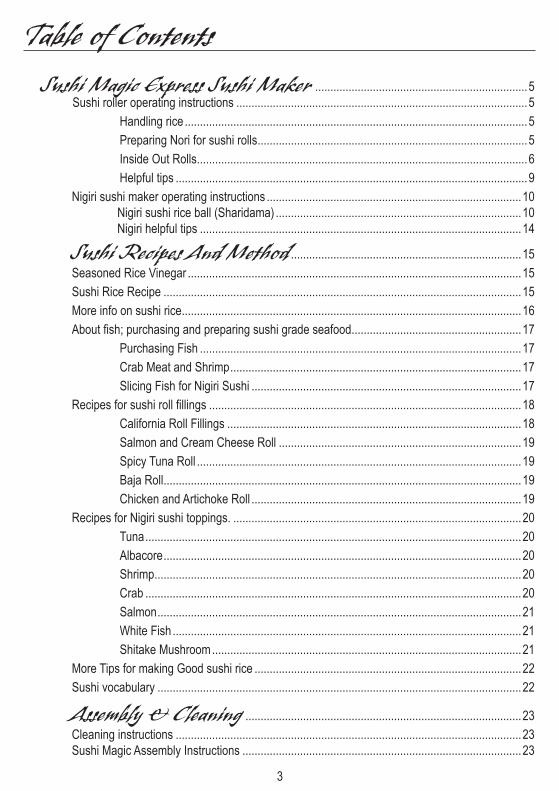
Table of Contents Sushi Magic Express Sushi Maker ......................................................................5 Sushi roller operating instructions ................................................................................................5
Handling rice .................................................................................................................5
Preparing Nori for sushi rolls .........................................................................................5
Inside Out Rolls .............................................................................................................6
Helpful tips ....................................................................................................................9
Nigiri sushi maker operating instructions ....................................................................................10 Nigiri sushi rice ball (Sharidama) .................................................................................10 Nigiri helpful tips ..........................................................................................................14
Sushi Recipes And Method ............................................................................15
Seasoned Rice Vinegar ..............................................................................................................15
Sushi Rice Recipe ......................................................................................................................15
More info on sushi rice ................................................................................................................16
About fish; purchasing and preparing sushi grade seafood ........................................................17
Purchasing Fish ..........................................................................................................17
Crab Meat and Shrimp ................................................................................................17
Slicing Fish for Nigiri Sushi .........................................................................................17
Recipes for sushi roll fillings .......................................................................................................18
California Roll Fillings .................................................................................................18
Salmon and Cream Cheese Roll ................................................................................19
Spicy Tuna Roll ...........................................................................................................19
Baja Roll ......................................................................................................................19
Chicken and Artichoke Roll .........................................................................................19
Recipes for Nigiri sushi toppings. ...............................................................................................20
Tuna ............................................................................................................................20
Albacore ......................................................................................................................20
Shrimp .........................................................................................................................20
Crab ............................................................................................................................20
Salmon ........................................................................................................................21
White Fish ...................................................................................................................21
Shitake Mushroom ......................................................................................................21
More Tips for making Good sushi rice ........................................................................................22
Sushi vocabulary ........................................................................................................................22
Assembly & Cleaning ...........................................................................................23
Cleaning instructions ..................................................................................................................23 Sushi Magic Assembly Instructions ............................................................................................23
4
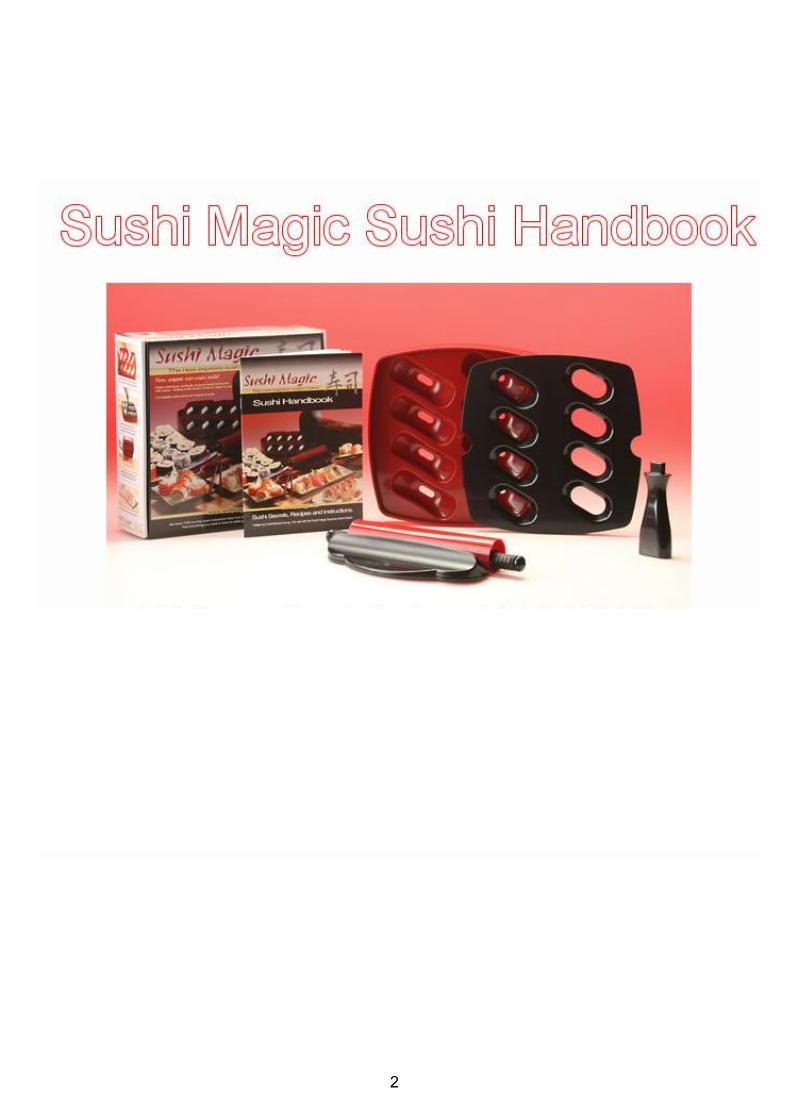
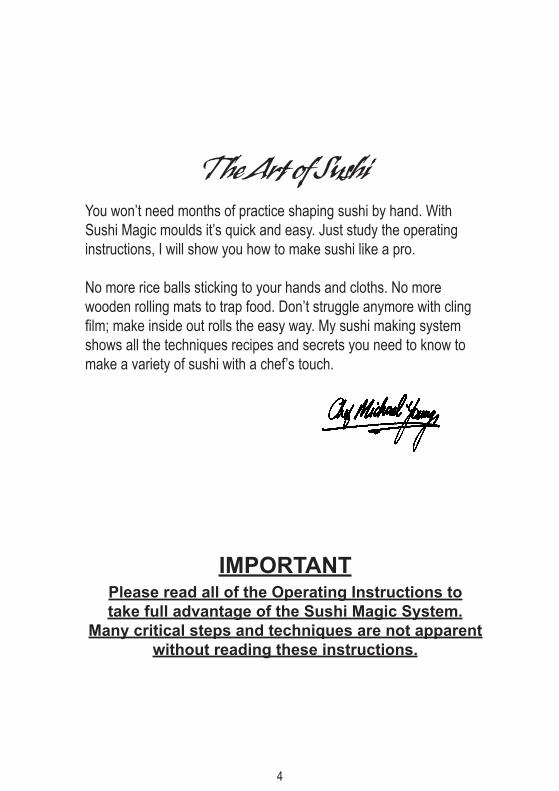
The Art of SushiYou won’t need months of practice shaping sushi by hand. With Sushi Magic moulds it’s quick and easy. Just study the operating instructions, I will show you how to make sushi like a pro.
No more rice balls sticking to your hands and cloths. No more wooden rolling mats to trap food. Don’t struggle anymore with cling film; make inside out rolls the easy way. My sushi making system shows all the techniques recipes and secrets you need to know to make a variety of sushi with a chef’s touch.
IMPORTANTPlease read all of the Operating Instructions totake full advantage of the Sushi Magic System.
Many critical steps and techniques are not apparentwithout reading these instructions.
5
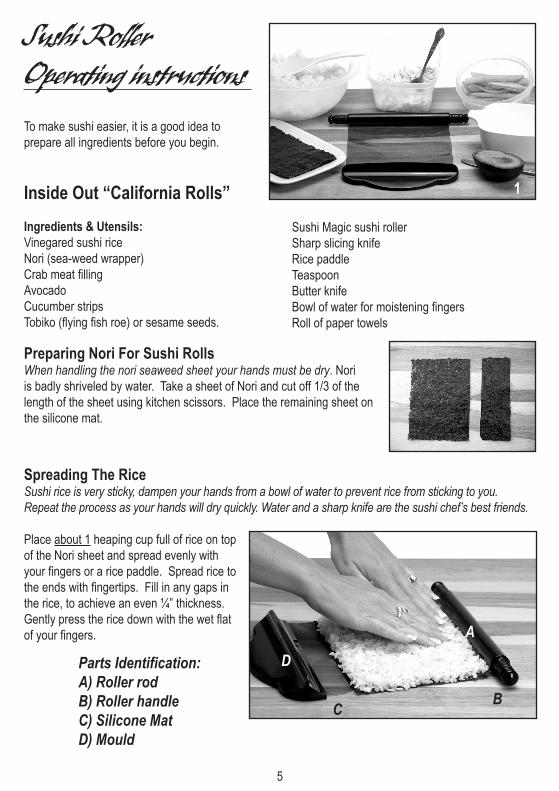
Preparing Nori For Sushi RollsWhen handling the nori seaweed sheet your hands must be dry. Nori is badly shriveled by water. Take a sheet of Nori and cut off 1/3 of the length of the sheet using kitchen scissors. Place the remaining sheet on the silicone mat.
Spreading The RiceSushi rice is very sticky, dampen your hands from a bowl of water to prevent rice from sticking to you. Repeat the process as your hands will dry quickly. Water and a sharp knife are the sushi chef’s best friends.
Place about 1 heaping cup full of rice on top of the Nori sheet and spread evenly with your fingers or a rice paddle. Spread rice to the ends with fingertips. Fill in any gaps in the rice, to achieve an even ¼” thickness. Gently press the rice down with the wet flat of your fingers.
Inside Out “California Rolls”
Ingredients & Utensils: Vinegared sushi riceNori (sea-weed wrapper)Crab meat fillingAvocadoCucumber stripsTobiko (flying fish roe) or sesame seeds.
Sushi Magic sushi rollerSharp slicing knifeRice paddleTeaspoonButter knifeBowl of water for moistening fingersRoll of paper towels
Sushi Roller Operating instructions To make sushi easier, it is a good idea to prepare all ingredients before you begin.
1
A
BC
DParts Identification:A) Roller rodB) Roller handleC) Silicone MatD) Mould
6
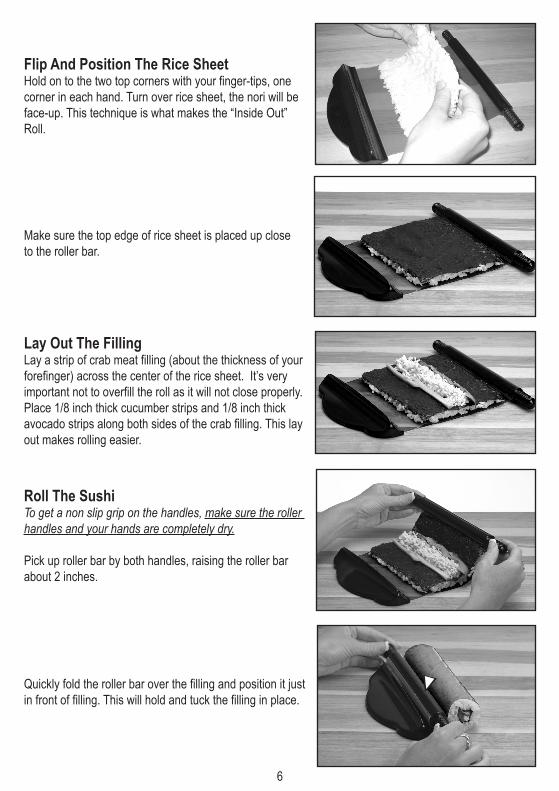
Flip And Position The Rice SheetHold on to the two top corners with your finger-tips, one corner in each hand. Turn over rice sheet, the nori will be face-up. This technique is what makes the “Inside Out” Roll.
Make sure the top edge of rice sheet is placed up close to the roller bar.
Lay Out The FillingLay a strip of crab meat filling (about the thickness of your forefinger) across the center of the rice sheet. It’s very important not to overfill the roll as it will not close properly. Place 1/8 inch thick cucumber strips and 1/8 inch thick avocado strips along both sides of the crab filling. This lay out makes rolling easier.
Roll The SushiTo get a non slip grip on the handles, make sure the roller handles and your hands are completely dry. Pick up roller bar by both handles, raising the roller bar about 2 inches.
Quickly fold the roller bar over the filling and position it just in front of filling. This will hold and tuck the filling in place.
7
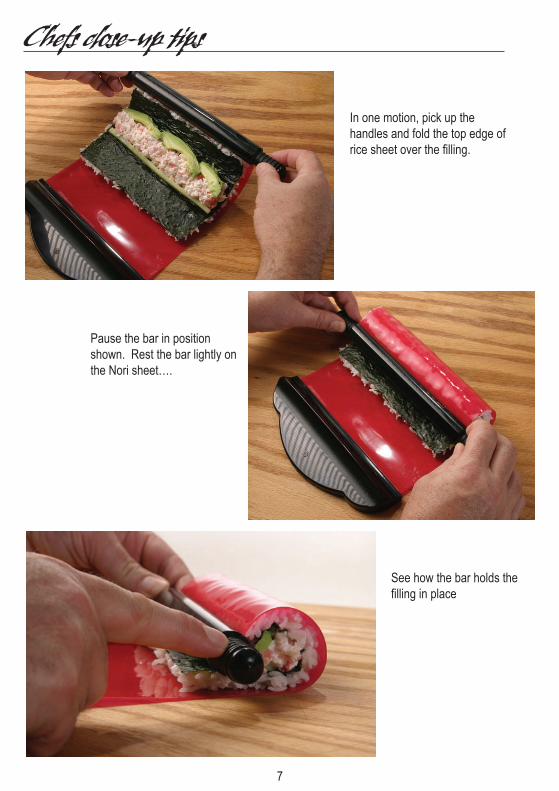
In one motion, pick up the handles and fold the top edge of rice sheet over the filling.
Pause the bar in position shown. Rest the bar lightly on the Nori sheet….
See how the bar holds the filling in place
Chefs close-up tips
8
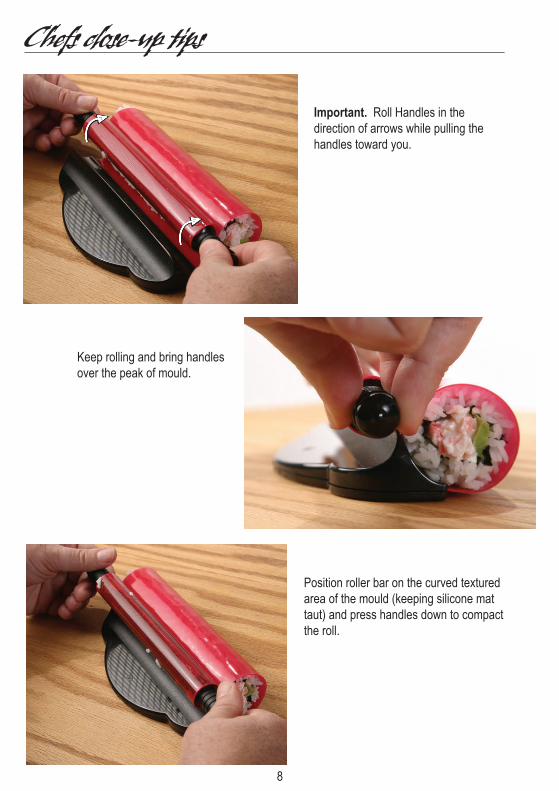
Important. Roll Handles in the direction of arrows while pulling the handles toward you.
Keep rolling and bring handles over the peak of mould.
Position roller bar on the curved textured area of the mould (keeping silicone mat taut) and press handles down to compact the roll.
Chefs close-up tips
9
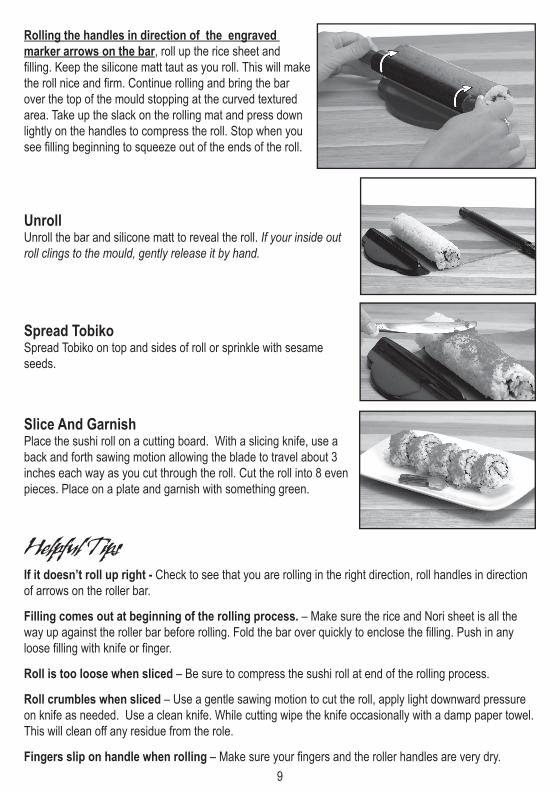
Rolling the handles in direction of the engraved marker arrows on the bar, roll up the rice sheet and filling. Keep the silicone matt taut as you roll. This will make the roll nice and firm. Continue rolling and bring the bar over the top of the mould stopping at the curved textured area. Take up the slack on the rolling mat and press down lightly on the handles to compress the roll. Stop when you see filling beginning to squeeze out of the ends of the roll.
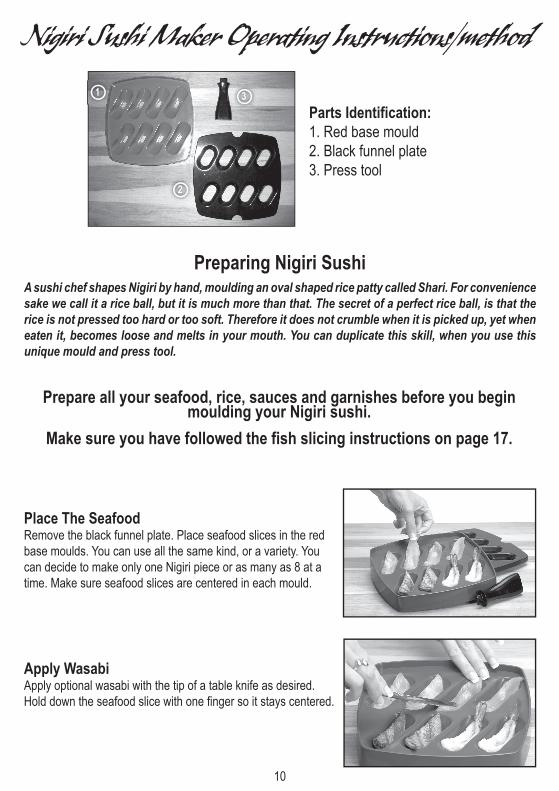
UnrollUnroll the bar and silicone matt to reveal the roll. If your inside out roll clings to the mould, gently release it by hand.
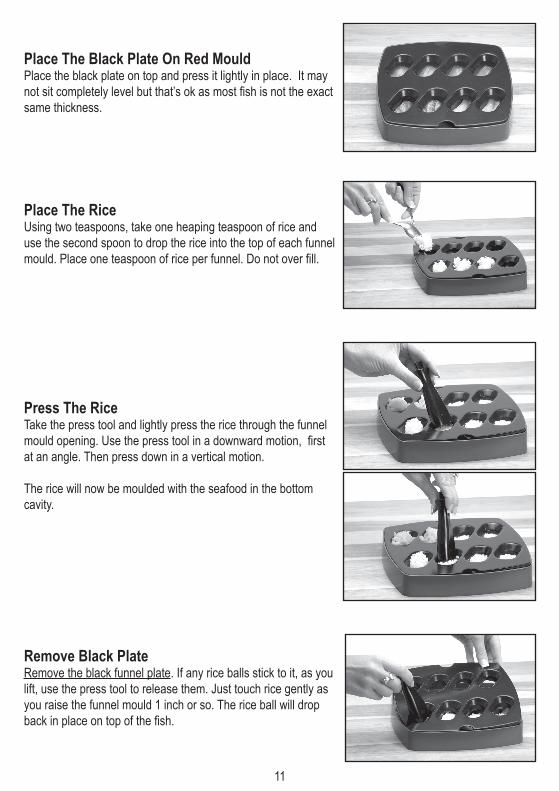
Spread TobikoSpread Tobiko on top and sides of roll or sprinkle with sesame seeds.
Slice And GarnishPlace the sushi roll on a cutting board. With a slicing knife, use a back and forth sawing motion allowing the blade to travel about 3 inches each way as you cut through the roll. Cut the roll into 8 even pieces. Place on a plate and garnish with something green.
Helpful Tips If it doesn’t roll up right - Check to see that you are rolling in the right direction, roll handles in direction of arrows on the roller bar.
Filling comes out at beginning of the rolling process. – Make sure the rice and Nori sheet is all the way up against the roller bar before rolling. Fold the bar over quickly to enclose the filling. Push in any loose filling with knife or finger.
Roll is too loose when sliced – Be sure to compress the sushi roll at end of the rolling process.
Roll crumbles when sliced – Use a gentle sawing motion to cut the roll, apply light downward pressure on knife as needed. Use a clean knife. While cutting wipe the knife occasionally with a damp paper towel. This will clean off any residue from the role.
Fingers slip on handle when rolling – Make sure your fingers and the roller handles are very dry.
10
1
2
3
Nigiri Sushi Maker Operating Instructions/method
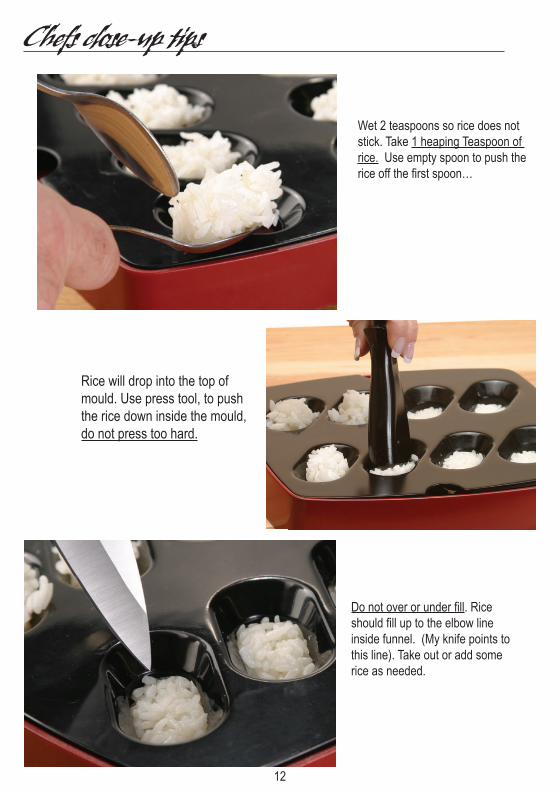
Parts Identification:1. Red base mould2. Black funnel plate3. Press tool
Preparing Nigiri SushiA sushi chef shapes Nigiri by hand, moulding an oval shaped rice patty called Shari. For convenience sake we call it a rice ball, but it is much more than that. The secret of a perfect rice ball, is that the rice is not pressed too hard or too soft. Therefore it does not crumble when it is picked up, yet when eaten it, becomes loose and melts in your mouth. You can duplicate this skill, when you use this unique mould and press tool.
Prepare all your seafood, rice, sauces and garnishes before you begin moulding your Nigiri sushi.
Make sure you have followed the fish slicing instructions on page 17.
Place The SeafoodRemove the black funnel plate. Place seafood slices in the red base moulds. You can use all the same kind, or a variety. You can decide to make only one Nigiri piece or as many as 8 at a time. Make sure seafood slices are centered in each mould.
Apply WasabiApply optional wasabi with the tip of a table knife as desired. Hold down the seafood slice with one finger so it stays centered.
11
Place The Black Plate On Red MouldPlace the black plate on top and press it lightly in place. It may not sit completely level but that’s ok as most fish is not the exact same thickness.
Place The RiceUsing two teaspoons, take one heaping teaspoon of rice and use the second spoon to drop the rice into the top of each funnel mould. Place one teaspoon of rice per funnel. Do not over fill.
Press The RiceTake the press tool and lightly press the rice through the funnel mould opening. Use the press tool in a downward motion, first at an angle. Then press down in a vertical motion.
The rice will now be moulded with the seafood in the bottom cavity.
Remove Black PlateRemove the black funnel plate. If any rice balls stick to it, as you lift, use the press tool to release them. Just touch rice gently as you raise the funnel mould 1 inch or so. The rice ball will drop back in place on top of the fish.
12
Wet 2 teaspoons so rice does not stick. Take 1 heaping Teaspoon of rice. Use empty spoon to push the rice off the first spoon…
Rice will drop into the top of mould. Use press tool, to push the rice down inside the mould, do not press too hard.
Do not over or under fill. Rice should fill up to the elbow line inside funnel. (My knife points to this line). Take out or add some rice as needed.
Chefs close-up tips
13
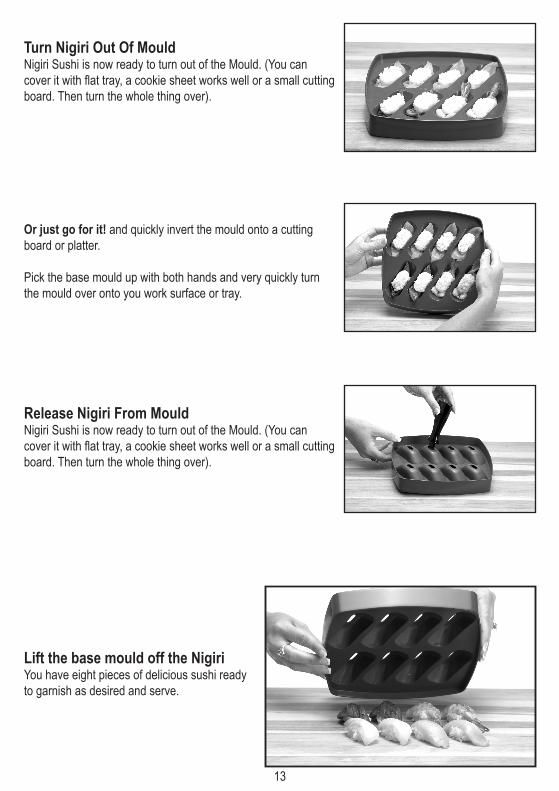
Turn Nigiri Out Of MouldNigiri Sushi is now ready to turn out of the Mould. (You can cover it with flat tray, a cookie sheet works well or a small cutting board. Then turn the whole thing over).
Or just go for it! and quickly invert the mould onto a cutting board or platter. Pick the base mould up with both hands and very quickly turn the mould over onto you work surface or tray.
Release Nigiri From MouldNigiri Sushi is now ready to turn out of the Mould. (You can cover it with flat tray, a cookie sheet works well or a small cutting board. Then turn the whole thing over).
Lift the base mould off the NigiriYou have eight pieces of delicious sushi ready to garnish as desired and serve.
14
Helpful Tips Nigiri Sushi maker
Rice ball sticks in funnel when funnel plate is removed – too much rice in the mould or too heavy a pressure when compacting with press tool.
Rice sticks to press tool – clean and moisten the end of the press tool.
Seafood has an oval ring mark on finished Nigiri – you are pressing the rice too hard in the mould. These marks can be smoothed out with the back of a spoon or your finger.
Rice ball falls apart when picked up – you are not compressing firm enough with the press tool, be gentle with pressure but push the rice all the way down. Rice ball too small - Your fish is cut too thick or you need to add more rice in the mould. Too many pieces of fish stick when turning out the mould - Rice is being pressed too hard. This may also damage soft fish such as tuna. Press the rice ball lightly.
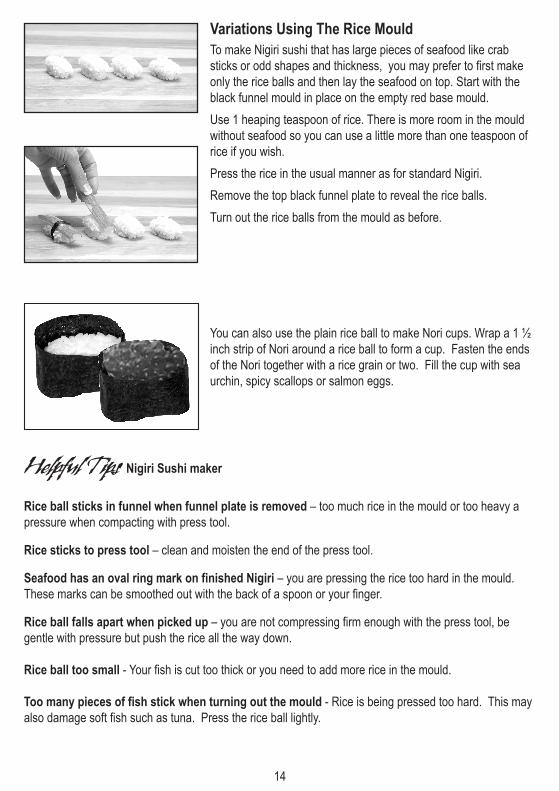
To make Nigiri sushi that has large pieces of seafood like crab sticks or odd shapes and thickness, you may prefer to first make only the rice balls and then lay the seafood on top. Start with the black funnel mould in place on the empty red base mould.
Use 1 heaping teaspoon of rice. There is more room in the mould without seafood so you can use a little more than one teaspoon of rice if you wish.
Press the rice in the usual manner as for standard Nigiri.
Remove the top black funnel plate to reveal the rice balls.
Turn out the rice balls from the mould as before.
You can also use the plain rice ball to make Nori cups. Wrap a 1 ½ inch strip of Nori around a rice ball to form a cup. Fasten the ends of the Nori together with a rice grain or two. Fill the cup with sea urchin, spicy scallops or salmon eggs.
Variations Using The Rice Mould
15
Recipes And Sushi MethodSeasoned Rice vinegar You will need this to season the rice. I like to use bottled “seasoned” rice vinegar I recommend some brands on my web site, but most are good. Also if you like you can make it from scratch with this recipe.
• ½ cup of rice vinegar (regular unseasoned)• 3 tablespoon powdered sugar • 1 teaspoon salt (sea salt you have it)
Heat the mixture in a non aluminum pan. Stir occasionally until all the sugar dissolves, (do not boil) set aside to cool.
Quick Sushi Rice Recipe: for rice cooker or saucepan methodThis is the best recipe to use in Sushi Magic. Makes enough rice for about 2-3 California rolls plus 20 assorted Nigiri sushi. Use a short grain rice. Brands such as Cal Rose, Nishiki, Shirakiku or Kokuho Rose. You can find these in most Asian food markets and many chain grocery stores in the Asian food or rice section. You can also buy sushi rice and other sushi ingredients online at www.sushimagic.com.
Ingredients;• 3 cups rice• 4 ½ cups water• 6 tablespoons seasoned rice vinegar
Method; Combine rice and water in saucepan or rice cooker. If using rice cooker, follow manufactures cooking directions; you can turn it on and forget about it, the cooker does the rest.
If using a saucepan, go with non stick, also make sure you use a tight or snug fitting lid. Bring rice and water to the boil on medium high heat with the lid off, be careful not to let it boil over. Stir with rice paddle turn down heat to very low and place lid on panSet timer for 20 minutes and simmer gently. After 10 minutes or so briefly remove the lid and give the rice a turn with the rice paddle or wooden spoon, so it does not stick or brown on the bottom. Replace lid and continue to cook.
When full 20 minutes is up turn off heat and let stand for 20 minutes.
When rice is finished cooking, it is time to cool the rice. Turn out the cooked rice into a large non metallic bowl, then sprinkle the seasoned rice vinegar over the rice. Cut and fold the rice with a rice paddle to incorporate the vinegar evenly through the rice. Let it all cool to between body and room temperature, your choice, then it is ready to make sushi. Always use freshly made rice, do not refrigerate. This dries the rice and causes it to fall apart when moulded for sushi.
16
Some key points when making sushi rice
• If using a Saucepan make sure the lid is tight, this will prevent too much water evaporation. Use a non stick pan.
• Accurately measure rice and water ingredients. • Don’t overcook or under cook your rice.• After rice and water boil, turn the heat very low and keep the lid on.• Sushi making is a gentle art - treat the rice gently. When cooked, don’t stir, fold it with the rice
paddle.
More information on sushi rice There seems to be a lot of mystery about how to make good sushi rice.
I’ve seen all kinds of recipes that come with rice cookers, or on bags of sushi rice and on the Internet. Some of these recipes don’t work.
Some comments on other methodology: Washing rice is optional. It is nice to do as it can remove excess starch. If you do wash your rice, make sure you drain it in a large sieve for 1 hour to drain all the water out. Any residual water left in the rice, may upset the balance of the sushi rice recipe., I have tried both washed and unwashed method and frankly, it is very difficult to tell the difference in the finished product.
Some like to cool rice in a special flat bottomed wooden bowl called a Hangiri, as it soaks up any excess vinegar and assists in the cooling process.
Fanning the rice while folding in the vinegar may give the rice a nice sheen, but I can honestly say when I have tried this my rice showed no significant benefit. However it is authentic and fun to do this. Other factors that may influence the finished sushi rice are the region the rice was grown and the mineral content of the water you use to cook with.
My quick recipe on page 15 is straight forward and will give you good sushi rice on a consistent basis.
See more sushi rice making tips and secrets on page 22.
Traditional Sushi Rice Recipe Ingredients:
• 1 cup of Botan Cal Rose rice• 1 ¼ cups water• 2 tablespoons seasoned rice wine vinegar
Do not wash the rice. In a rice cooker or pan, combine the rice and water and soak for one hour. Turn on the heat and cook the same way as for previous recipe “Quick Sushi Rice.” Note: The recipe produces a dryer rice and is not as easy to mould for Nigiri as my quick rice recipe.
17
About FishPurchasing fish: Sushi restaurants use both fresh and frozen fish. With today’s freezing technology, fish can be frozen quickly to retain freshness, flavor and color. As long as it is not kept frozen for a long time and goes to market quickly the fish will have a good fresh flavor, not fishy at all. However I do not recommend pre-packaged frozen fish unless it is specifically sushi grade. There are sushi grade fish suppliers on the Internet, providing fresh fish and frozen. Check my web site for links. Supermarkets sometimes have sushi grade fish. Most of the time it will have been frozen and defrosted before sale. This fish is OK when it has just been defrosted, but don’t keep it for sushi more than 2 days. Keep sushi fish on ice in the meat box part of your refrigerator. Tell your fish sales person that you need fish for sushi. Ask which days fish is delivered and get them to pick you out sushi grade fish. Never use fish with a fishy odor. Look for fillets that are bright in color, not dull, darkened or dry looking. Loins or thick fillets, not steaks, are best for slicing. Try to find fillets at least one inch thick so you can slice a wide enough piece for Nigiri sushi.
If you live near the coast you can locate fresh fish at the port or at small quality seafood stores. If fish is whole, it should be firm to touch not squishy, eyes bright not cloudy or discolored and scales must look fresh and bright not dull.
Crab MeatUse cooked real Crab meat or imitation, it’s your choice. It’s amazing how imitation crab tastes so good in sushi and that’s what I use. To select imitation crab, squeeze the packet with your fingers. If it is nice and soft, then the texture is good and product moist. If it is firm or hard when squeezed the product is dry and may be course in texture. Always pick the soft product.
ShrimpShrimp should be as fresh as possible, or fresh frozen. The shrimp should be 3 to 3½ inches long when they are stretched out straight. Ask your fish salesperson for size “26-30 count per pound”. Do not use previously “de-veined shrimp” they will not work for Nigiri sushi. Their backs are cut to remove the vein which causes the shrimp to split in two when butterflied for sushi. I have special directions for preparing shrimp in the Nigiri - shrimp sushi section of this book.
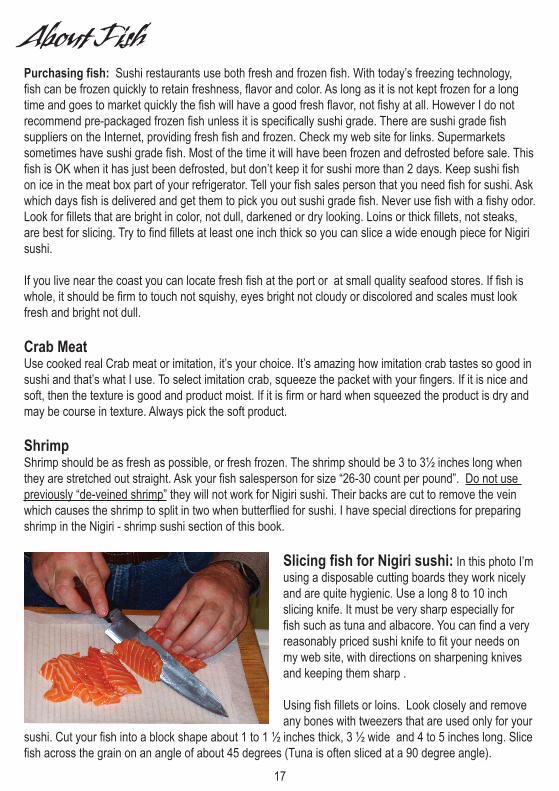
Slicing fish for Nigiri sushi: In this photo I’m using a disposable cutting boards they work nicely and are quite hygienic. Use a long 8 to 10 inch slicing knife. It must be very sharp especially for fish such as tuna and albacore. You can find a very reasonably priced sushi knife to fit your needs on my web site, with directions on sharpening knives and keeping them sharp .
Using fish fillets or loins. Look closely and remove any bones with tweezers that are used only for your
sushi. Cut your fish into a block shape about 1 to 1 ½ inches thick, 3 ½ wide and 4 to 5 inches long. Slice fish across the grain on an angle of about 45 degrees (Tuna is often sliced at a 90 degree angle).
18
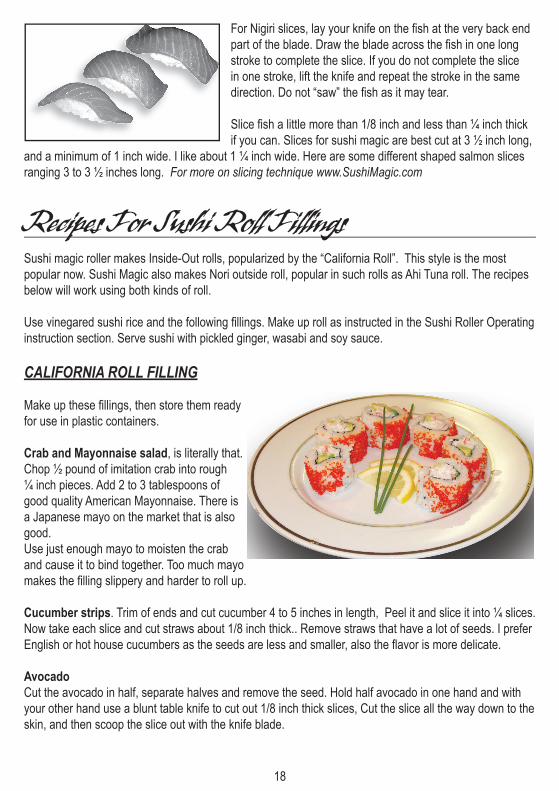
For Nigiri slices, lay your knife on the fish at the very back end part of the blade. Draw the blade across the fish in one long stroke to complete the slice. If you do not complete the slice in one stroke, lift the knife and repeat the stroke in the same direction. Do not “saw” the fish as it may tear.
Slice fish a little more than 1/8 inch and less than ¼ inch thick if you can. Slices for sushi magic are best cut at 3 ½ inch long,
and a minimum of 1 inch wide. I like about 1 ¼ inch wide. Here are some different shaped salmon slices ranging 3 to 3 ½ inches long. For more on slicing technique www.SushiMagic.com
Recipes For Sushi Roll FillingsSushi magic roller makes Inside-Out rolls, popularized by the “California Roll”. This style is the most popular now. Sushi Magic also makes Nori outside roll, popular in such rolls as Ahi Tuna roll. The recipes below will work using both kinds of roll.
Use vinegared sushi rice and the following fillings. Make up roll as instructed in the Sushi Roller Operating instruction section. Serve sushi with pickled ginger, wasabi and soy sauce.
CALIFORNIA ROLL FILLING
Make up these fillings, then store them ready for use in plastic containers.
Crab and Mayonnaise salad, is literally that. Chop ½ pound of imitation crab into rough ¼ inch pieces. Add 2 to 3 tablespoons of good quality American Mayonnaise. There is a Japanese mayo on the market that is also good.Use just enough mayo to moisten the crab and cause it to bind together. Too much mayo makes the filling slippery and harder to roll up.
Cucumber strips. Trim of ends and cut cucumber 4 to 5 inches in length, Peel it and slice it into ¼ slices. Now take each slice and cut straws about 1/8 inch thick.. Remove straws that have a lot of seeds. I prefer English or hot house cucumbers as the seeds are less and smaller, also the flavor is more delicate.
AvocadoCut the avocado in half, separate halves and remove the seed. Hold half avocado in one hand and with your other hand use a blunt table knife to cut out 1/8 inch thick slices, Cut the slice all the way down to the skin, and then scoop the slice out with the knife blade.
19
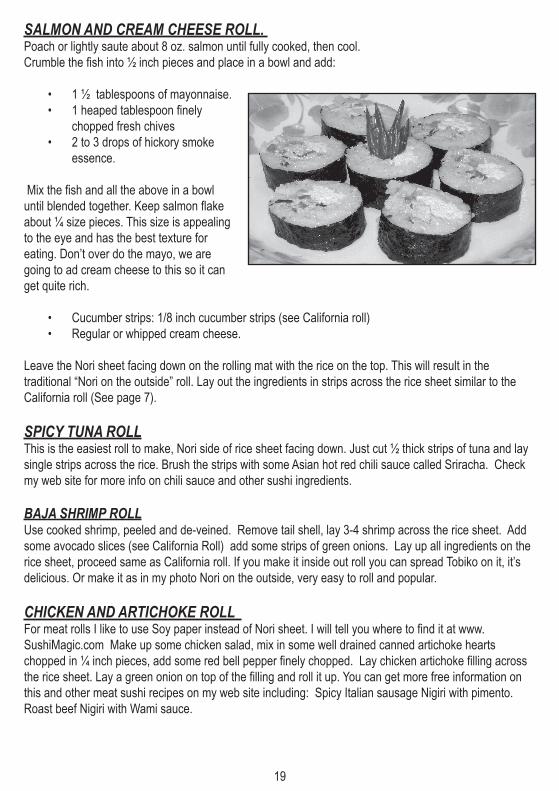
SALMON AND CREAM CHEESE ROLL. Poach or lightly saute about 8 oz. salmon until fully cooked, then cool.Crumble the fish into ½ inch pieces and place in a bowl and add:
• 1 ½ tablespoons of mayonnaise. • 1 heaped tablespoon finely
chopped fresh chives• 2 to 3 drops of hickory smoke
essence.
Mix the fish and all the above in a bowl until blended together. Keep salmon flake about ¼ size pieces. This size is appealing to the eye and has the best texture for eating. Don’t over do the mayo, we are going to ad cream cheese to this so it can get quite rich.
• Cucumber strips: 1/8 inch cucumber strips (see California roll) • Regular or whipped cream cheese.
Leave the Nori sheet facing down on the rolling mat with the rice on the top. This will result in the traditional “Nori on the outside” roll. Lay out the ingredients in strips across the rice sheet similar to the California roll (See page 7).
SPICY TUNA ROLLThis is the easiest roll to make, Nori side of rice sheet facing down. Just cut ½ thick strips of tuna and lay single strips across the rice. Brush the strips with some Asian hot red chili sauce called Sriracha. Check my web site for more info on chili sauce and other sushi ingredients.
BAJA SHRIMP ROLLUse cooked shrimp, peeled and de-veined. Remove tail shell, lay 3-4 shrimp across the rice sheet. Add some avocado slices (see California Roll) add some strips of green onions. Lay up all ingredients on the rice sheet, proceed same as California roll. If you make it inside out roll you can spread Tobiko on it, it’s delicious. Or make it as in my photo Nori on the outside, very easy to roll and popular.
CHICKEN AND ARTICHOKE ROLL For meat rolls I like to use Soy paper instead of Nori sheet. I will tell you where to find it at www.SushiMagic.com Make up some chicken salad, mix in some well drained canned artichoke hearts chopped in ¼ inch pieces, add some red bell pepper finely chopped. Lay chicken artichoke filling across the rice sheet. Lay a green onion on top of the filling and roll it up. You can get more free information on this and other meat sushi recipes on my web site including: Spicy Italian sausage Nigiri with pimento. Roast beef Nigiri with Wami sauce.

20
Recipes For Nigiri Sushi ToppingsFor sushi basics I’ve recommended sea food and ingredients that are easy to find. Please read the “About Fish” section before beginning Nigiri preparation. Review the Nigiri Sushi Maker operating instructionsAfter preparing your seafood, always wrap it in cling film and place as soon as possible back in the refrigerator. Serve Nigiri with pickled ginger, wasabi and soy sauce.
TUNA Tuna is a very soft and flaky fish, so must be cut with a very sharp knife. Cut regular size strips, and place in the sushi mould. Add wasabi and continue as directed in the Nigiri Sushi Maker operating instructions. Tuna does not need a garnish. Just season with wasabi and soy sauce as desired. Although fresh chives are very useful and easy for decorating sushi. Cut the chives in various sizes depending on your garnishing needs.
ALBACORE WITH GARLIC SCALLION AND PONZU SAUCE.Albacore is soft and flaky. Carefully slice with a very sharp knife. Prepare some finely chopped garlic and place 4-5 grains, on top of the finished Nigiri. Sprinkle with chopped green onion. Serve with Ponzu dipping sauce. Ponzu sauce can be found at the store or on line. I have an easy recipe on my web site at www.sushimagic.com.
SHRIMP SUSHI. Use the shrimp I recommend in the “About Fish” section. To prepare start with whole shrimp. You will need to skewer shrimp so it does not curl when cooked. To do this straighten out a shrimp by gripping it in the palm of your hand. Pass an 8 inch long wood skewer all the way through the shrimp. Pass the skewer inside the shell but close to the legs. Fit two shrimp on each skewer. Take a large frying pan and put about 1 inch of water in it. Bring to boil and then lay skewered shrimp in the pan. Do not cover. Cook for 2 minutes, turn the shrimp over and cook another 2 minutes. Remove from pan and place in a large bowl of iced water. This quick cooling process helps retain good texture and color. When cold remove skewers using a twist and pull motion so as not to break the shrimp. Remove shell and legs, leave the tail on.
Butterfly Shrimp using a paring knife. On the underside, cut the shrimp length ways as straight as possible down the middle. Do not cut all the way through! You will need to fold the shrimp open with your fingers without splitting it in half. Flatten the shrimp cut side facing up, if there is a vein, remove it. Lay cut side down on a plate, cover with plastic wrap and refrigerate until ready to use.
Tuna and Albacore together.
21
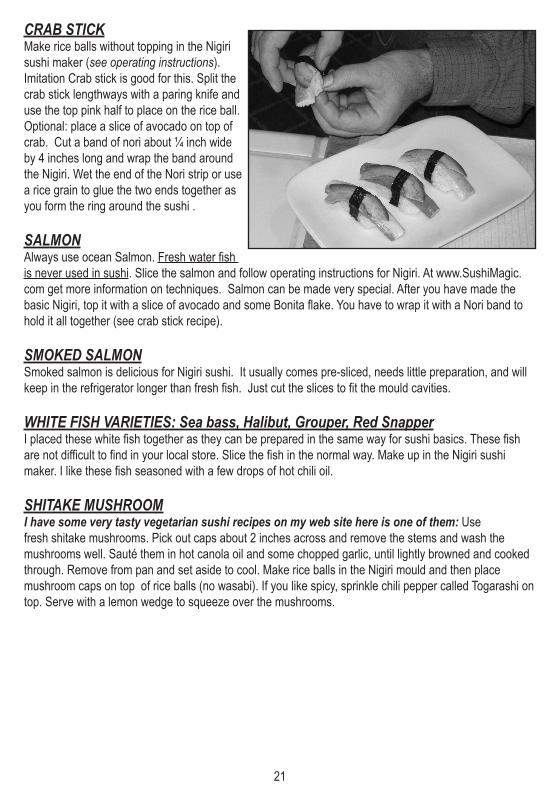
CRAB STICKMake rice balls without topping in the Nigiri sushi maker (see operating instructions).Imitation Crab stick is good for this. Split the crab stick lengthways with a paring knife and use the top pink half to place on the rice ball. Optional: place a slice of avocado on top of crab. Cut a band of nori about ¼ inch wide by 4 inches long and wrap the band around the Nigiri. Wet the end of the Nori strip or use a rice grain to glue the two ends together as you form the ring around the sushi .
SALMONAlways use ocean Salmon. Fresh water fish is never used in sushi. Slice the salmon and follow operating instructions for Nigiri. At www.SushiMagic.com get more information on techniques. Salmon can be made very special. After you have made the basic Nigiri, top it with a slice of avocado and some Bonita flake. You have to wrap it with a Nori band to hold it all together (see crab stick recipe).
SMOKED SALMON Smoked salmon is delicious for Nigiri sushi. It usually comes pre-sliced, needs little preparation, and will keep in the refrigerator longer than fresh fish. Just cut the slices to fit the mould cavities.
WHITE FISH VARIETIES: Sea bass, Halibut, Grouper, Red SnapperI placed these white fish together as they can be prepared in the same way for sushi basics. These fish are not difficult to find in your local store. Slice the fish in the normal way. Make up in the Nigiri sushi maker. I like these fish seasoned with a few drops of hot chili oil.
SHITAKE MUSHROOMI have some very tasty vegetarian sushi recipes on my web site here is one of them: Use fresh shitake mushrooms. Pick out caps about 2 inches across and remove the stems and wash the mushrooms well. Sauté them in hot canola oil and some chopped garlic, until lightly browned and cooked through. Remove from pan and set aside to cool. Make rice balls in the Nigiri mould and then place mushroom caps on top of rice balls (no wasabi). If you like spicy, sprinkle chili pepper called Togarashi on top. Serve with a lemon wedge to squeeze over the mushrooms.
22
Tips & Secrets for Making Great Sushi RiceUse a rice cooker or use a non stick saucepan, with a snug or tight fitting lid. Every rice cooker and saucepan is different and allows different amounts of water, to evaporate in the form of steam. That will effect how much water you need at the beginning of cooking and in turn, effect the outcome of the cooked rice. Too much water or too little water will result in the cooked rice having the wrong texture. Because of this, I developed the quick sushi rice recipe to give you more consistency in the texture of the finished rice. Making sushi rice is not as difficult as it seems, just follow my simple straight forward recipe and remember the key points.
If your saucepan belches out steam when the lid is on then you need to go and purchase a good rice cooker. Additionally with a rice cooker you can set it, walk away and forget it. It is the easiest way to cook sushi rice.
Some rice cookers have a hinged lid with a rubber seal around it. The lid closes tight and they have a steam vent for controlled release of steam. These are the best kind to buy. Some rice cookers have a loose fitting lid, with a small hole in the lid to release steam. It’s usually not large enough to release pressure and the lid lets steam and foam boil out, which can be messy. Whether you use a saucepan or rice cooker. The recipe 1 cup of rice to 1 ½ cups water will always make good rice. And allows for variables in water evaporation.
Sushi VocabularyArigato - Thank youGari - Pickled ginger served with sushiItamae-san - The Sushi Chef.Maki Zushi - Sushi Rolls Nigiri sushi - Pieces of raw seafood over vinegared rice balls. Nori – The dark rectangle sheet of dried sea vegetable used for rolled sushiSashimi - Raw fish served chilled, sliced, and arranged without rice.Shari - Vinegared sushi rice. Shoyu - Soy sauce. Tobiko – Orange color flying fish roe Wasabi – Green horseradish, condiment served with sushi.
23
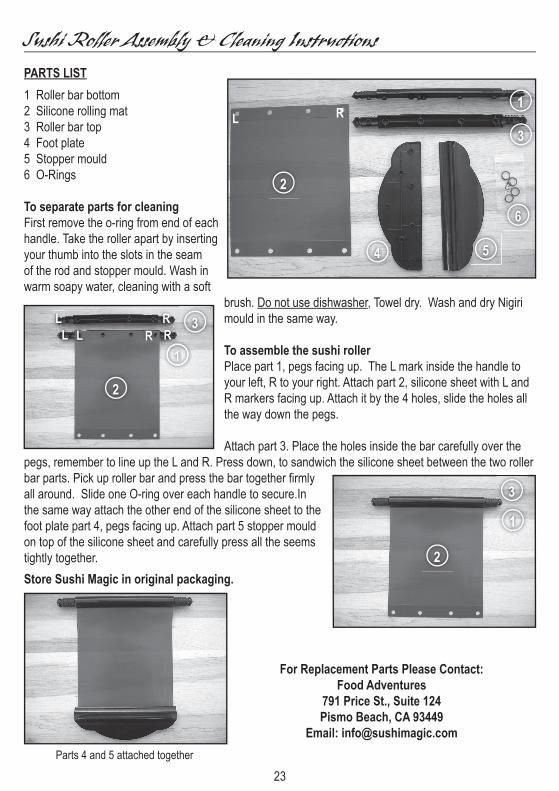
Sushi Roller Assembly & Cleaning Instructions PARTS LIST
1 Roller bar bottom 2 Silicone rolling mat 3 Roller bar top 4 Foot plate 5 Stopper mould6 O-Rings
To separate parts for cleaningFirst remove the o-ring from end of each handle. Take the roller apart by inserting your thumb into the slots in the seam of the rod and stopper mould. Wash in warm soapy water, cleaning with a soft
brush. Do not use dishwasher, Towel dry. Wash and dry Nigiri mould in the same way.
To assemble the sushi rollerPlace part 1, pegs facing up. The L mark inside the handle to your left, R to your right. Attach part 2, silicone sheet with L and R markers facing up. Attach it by the 4 holes, slide the holes all the way down the pegs.
Attach part 3. Place the holes inside the bar carefully over the pegs, remember to line up the L and R. Press down, to sandwich the silicone sheet between the two roller bar parts. Pick up roller bar and press the bar together firmly all around. Slide one O-ring over each handle to secure.In the same way attach the other end of the silicone sheet to the foot plate part 4, pegs facing up. Attach part 5 stopper mould on top of the silicone sheet and carefully press all the seems tightly together.
Store Sushi Magic in original packaging.
L R1
L R
3
54
2
3
1
2
2
1
L RL R3
Parts 4 and 5 attached together
6
For Replacement Parts Please Contact:Food Adventures
791 Price St., Suite 124 Pismo Beach, CA 93449
Email: [email protected]

24