T2000 Manual
106
TWILIGHT 2000 Game Program Copyright 0 1991 Paragon Software Corporation and Game Designers’ Workshop. Manual Copyright 0 1991 Paragon Software Corporation and Game Designers’ Workshop. Portions of this manual are Copyright 0 1990 Game Designers’ Workshop. Twilight 2000 Scenario by Marc Miller Game Design by Paul Conklin l Mark Seremet l Marc Miller l Don Wuenschell l Steve Suhy Written by Mark Seremet l Paul Conklin Programming by Don Wuenschell Computer Graphics by Steve Suhy Original Music Composed by Michael Powell Lead Playtesting by Kim Horman l Elvis Presley Manual and Written Supplements by Paul Conklin l Mark Seremet l F.J. Lennon Manual Design and Layout by Greg Smear-man, DeZine, Inc. Package Design by John Emory
description
manual for T2000 computer game
Transcript of T2000 Manual

TWILIGHT 2000
Game Program Copyright 0 1991 Paragon Software Corporation andGame Designers’ Workshop.
Manual Copyright 0 1991 Paragon Software Corporation andGame Designers’ Workshop.
Portions of this manual are Copyright 0 1990 Game Designers’ Workshop.
Twilight 2000
Scenario byMarc Miller
Game Design byPaul Conklin l Mark Seremet l Marc Miller l Don Wuenschell l Steve Suhy
Written byMark Seremet l Paul Conklin
Programming byDon Wuenschell
Computer Graphics bySteve Suhy
Original Music Composed byMichael Powell
Lead Playtesting byKim Horman l Elvis Presley
Manual and Written Supplements byPaul Conklin l Mark Seremet l F.J. Lennon
Manual Design and Layout byGreg Smear-man, DeZine, Inc.
Package Design byJohn Emory
Underdogs
scanned and compiled by Underdogs for Home of the Underdogs, http://underdogs.cjb.net
Underdogs
TWILIGHT 2000
TABLE OF CONTENTSBACKGROUNDCountdown to Armageddon . . . . . . . . . . . . . . . . . . . . . . . . . . . . . . . . . . . . . . . . . . . . . . . . . . . . . . . . . . . . . . . . . . . . . 5Introduction to the Main Scenario . . . . . . . . . . . . . . . . . . . . . . . . . . . . . . . . . . . . . . . . . . . . . . . . . . . . . . . . . . 12
GAME PLAYCharacter Generation.. .............................................................................. 13
Introduction ........................................................................................... 13Selecting from Icons .............................................................................. 14Main Party Disk Menu ......................................................................... 14Selecting Gender, Naming a Character, and Selecting a Face ....... .15Selecting a Character’s Country ......................................................... .15Selecting a Character’s Nationality ..................................................... 16Assigning Attributes ............................................................................ .16Background Skills .................................................................................. 17Selecting a Career .................................................................................. 18Assigning Skills .................................................................................... .25Secondary Activities ............................................................................ .29W a r Breaks Out.. ................................................................................... .30Selecting Weapons and Equipment ................................................... .31
In the Office ................................................................................................ 49Vehicle Pool ................................................................................................ 502-D - On the Ground ................................................................................. 53
Introduction .......................................................................................... .55

TWILIGHT 2000
Overhead Interface Screen ................................................................... .55Character Movement and Interaction ................................................ .59Character Sheets .................................................................................... .61Buildings ................................................................................................. .65
3-D - In a Vehicle ....................................................................................... .66Introduction ........................................................................................... .663-D Vehicle Interface Screen ................................................................. 66Vehicle Movement ................................................................................ .72Vehicle Combat ...................................................................................... .73Vehicles List ........................................................................................... .74
4

TWILIGHT 2000
-BACKGROUNDCountdown to 1989
Armageddon The year the Cold War ends. Across Europe, communist governments topple inresponse to pro-democracy demonstrations. In Poland, German ethnic clubs form inresponse to West Germany’s policy of accepting, as a German citizen, anyone who canprove himself of Germanic descent.
The Soviet Union’s new policy of encouraging political pluralism in Europe makesthe end of bureaucratic communism certain. The only European communist govern-ments which survive the revolution of 1989 are those outside the Warsaw Pact -Yugoslavia and Albania.
1990The long-awaited reunification of Germany occurs as a result of unlawful and
illegitimate elections. The four major powers: the United States, United Kingdom,
resentatives from 11 nations

TWILIGHT 2000
USSR and France, guarantee Poland’s territorial integrity in the event of Germanaggression. As part of their commitment, NATO and Warsaw Pact troops maintain apresence in the newly unified republic of Germany.
By the end of the year, Soviet troops begin to withdraw from Czechoslovakia, butthe governments of Poland and Hungary request continued Soviet troop presence andreaffirm their commitment to the Warsaw Pact. The Soviet military begins toreorganize along defensive lines and many divisions upgrade their existing weaponry.
Low-level armed violence spreads throughout Central Asia, although most of it failsto come to the attention to the rest of the world, which is distracted by events inGermany.
1991Germany opts for continued membership in NATO, but at a greatly reduced level
of commitment. Germany also places increasing pressure on NATO to reduce troopsin proportion to the Soviet withdrawal. The Germans pledge to station troops only inthe western part of its territory in return for a complete Soviet troop pullout fromEastern Germany.
Hungary protests that the Romanian government is withholding medical relief forthe AIDS epidemic. The Romanian government denies the charges and French medicalinvestigators accuse the Romanian government of concealing the size and severity ofthe AIDS infestation in rural portions of the country.
German ethnic groupsdemonstrate in Poland, pro-testing their alleged mistreat-
w PM i$ @ rn~t~ alliance between the U.S.S.R. and the Eastern European countries. It was14, @I$!& in Warsaw Poland, as an Eastern counterpart to NATO, one week after a rearmedred the Western defense organization. The original Warsaw Pact nations were the U.S.S.R,vakia, East Germany, Hungary, Poland and Romania. China did attend the conference but tiThey did however, p ledge their allegiance to the Pact members.withdrew from the Pact, but was pulled back into the alliance when Soviet troops crushed the
Czechoslovakia attempted to withdraw, but was forced back by an invasion made byWarsaw Pact forces led by the Soviet Union. Rumania, since 1961, has increased its independence from theU. S.S.R. by refusing to permit Warsaw Pact maneuvers within its borders.
The Pact was renewed for 2 0 years in 1985, and in 1986, the alliance had 181 divisions with more than 46, 000
ment by the Polish govem-ment.
1992Civil war in Albania re-
sults in the fall of the commu-nist leadership, which is re-placed by a military govem-ment. Albanian nationalists
tanks and nearly 6,000 aircraft a t the same time, NA TO forces had 143 divisions with approximately 20,000 tanksand 4,300 aircraft.

TWILIGHT 2000
demonstrate throughout Yugoslavia. The Yugoslavian government’s response iscareful and low-key, but firm.
1993Fighting in Central Asia escalates and continues for most of the year, but the Soviet
military gradually begins to gain the upper hand and regains control of most of theregion.
Peaceful pro-democracy demonstrations take place in China, but soon erupt intoviolence, forcing military intervention. The pro-democracy factions hold out formonths before the military manages to restore order.
1994After several years of intensive investment in the eastern third of the country,
Germany is finally showing signs of emerging as a world class economic superpower.East Germany has successfully integrated with the west. As Europe shows signs ofincreasing instability, Germany quietly increases its military force structure to fullstrength.
China presses the Soviet Union for border adjustments. Talks produce no tangibleresults and fighting erupts along the Chinese-Soviet border.
1995After a period of increasing tension, full scale war erupts between the Soviet Union
and the People’s Republic of China.The Chinese surpass the expectations of most military analysts; they mobilize
reserves from the interior and shift them to the fighting front. While the Sovietscontinue to make impressive gains, their losses also mount, and the tempo of theiradvance slows.
The Soviet Union had already been mobilizing additional troops from the westernmilitary districts; this action is now an emergency priority. As a stop-gap, a half dozencombat-ready divisions withdraw from Hungary and Poland and venture to the FarEast. But the Far Eastern front quickly becomes a region of death that devours Sovietdivisions as quickly as they can be committed.
As factory output switches more and more to wartime production, the flow ofconsumer goods dwindles to a trickle: The economic recovery that had begun in the

TWILIGHT 2000
early 1990s is wiped out, causing standards of living in the Soviet Union to plummet.As the first snows of winter fall, the Soviets solicit the remaining members of the
Warsaw Pact to serve on the Far Eastern front. Only two members respond: Polandand Bulgaria. Anxious to maintain strong defense ties with the Soviet Union as abulwark against Germany, the Poles send a motorized rifle division to fight in the FarEast.
In response to increasing regional instability, Germany declares its agreement of1991 on size and location of armed forces “obsolete in relation to the current Europeansituation.” Poland protests and begins bringing several divisions in western Poland tohigher states of readiness.
1996Their ranks swollen with newly mobilized troops, Soviet forces launch a spring
offensive against the Chinese. Despite initial gains, the drive soon stalls and horren-dous casualties are suffered. Winter witnesses a flood of new, modern militaryequipment through Chinese ports from NATO nations, particularly the United States.
In response to its obligations under the Warsaw Pact, Poland prepares to send anadditional division to the Far East. How-ever, several ethnic German soldiers inthe division announce their intention toresist transfer out of the country. A waveof demonstration in western Poland, byethnic Germans who support the soldiers,is violently suppressed by riot police,resulting in many deaths and numerousinjuries. Germany protests and movesseveral divisions closer to the border.
In mid-July there are several borderincidents between units of the Polish andGerman armies and frequent exchangesof artillery fire. On July 27, elements ofthe German III Corps cross the frontier inretaliation for what they describe as a“full-scale attack” by the Polish 4thMechanized Division. Within two days,Poland and Germany are officially at war.

TWILIGHT 2000
The Poles are supported by three Soviet divisions still stationed in Poland as part ofthe Warsaw Pact, but are still outnumbered by the German troops. What tips thebalance against the Germans is the surprising entry of the Czech Army into the war onthe side of the Warsaw Pact.
By the end of November, the Czech Army finally cracks the line of German reservistsholding the southern flank and cuts north into Germany, closing in on Berlin.
Claiming its actions were justified by the military provocations of Poland, and thatthey are now faced with dismemberment as a state, Germany turns to its NATOpartners for assistance. While the political leadership of the European members ofNATO debate the prudence of intervention, the U.S. Army crosses the frontier to aidGermany.
Within a week, France, Belgium, Italy and Greece demand that U.S. troops withdrawto their start line. When these demands are not met, these countries withdraw fromNATO in protest. British and Canadian forces cross the border, standing behind theU.S. and German position. However, Denmark and Holland remain uncommitted,still partners in NATO, but not a party to war.
1997In an attempt to restore the situation in Germany, Soviet and Czech troops return
to the offensive in southern Germany, but do not have the strength to make anysignificant gains. With the coming of spring, the NATO offensive gains momentum,and in April, the first German troops cross the frontier into Poland. By June 17, Warsawis surrounded and Polish Army units and the citizens of the city prepare for a siege.
By early July, NATO advance elements close in on the Polish-Soviet frontier in thecentra1 region, while continuing the siege on Warsaw. The Polish government, in exile,establishes its temporary capital in the city of Poznan.
On July9, with advance elements of the 1st German Army on Soviet soil, the Sovietsbegin to use tactical nuclear weapons sparingly. In the Far East, however, they are usedon a massive scale. Chinese mechanized columns are vaporized, caught in the openin imagined pursuit of the Soviet army.
The Chinese response is immediate, but Soviet forward troop units are dispersedand well prepared. Within a week, the Chinese riposte is spent, but the Soviet attackcontinues. The roads are choked with refugees fleeing from the cities, all of thempotential targets. China begins the rapid slide into anarchy and civil disorder.
On the western front, the forward elements of both armies on the Soviet-Polish

TWILIGHT 2000
frontier are hit hard by tactical nuclear strikes, as NATO matches the Warsaw pactwarhead for warhead. On September 15, the siege of Warsaw is lifted, and a week later,Czech and Italian troops begin a renewed offensive in southern Germany. Thesouthern offensive gains momentum, and NATO forces in Poland increase the rate oftheir withdrawal, practicing a scorched earth policy as they fall back.
Fearful of a general strategic exchange, neither side targets the land-based Inter-continental Ballistic Missiles of the other or launches enough warheads at once to riskconvincing the other side that an all-out attack is in progress. Neither side wishes tocross the threshold to nuclear oblivion in one bold step, so they inch across it, neverquite knowing they have done so until after the fact.
The exchanges continue, fitfully and irregularly, through November and thengradually begin to diminish.
1998The winter of 1997-98 is particularly cold. Civilian war casualties in the industrialized
nations have reached almost 15% by the turn of the year, but the worst is yet to come.Communication and transportation systems are nonexistent, and food distribution isimpossible. In the wake of nuclear war comes famine on a scale previously undreamedof. Only the exceptionally cold winter delays simultaneous epidemics.
With the spring thaw, the unburied dead finally bring on the epidemics that fewremaining medical professionals had dreaded, but were powerless to prevent. By thetime the epidemics have run their course, the global casualty rate is 50%.
The average strength of NATO combat divisions at the front falls to 8000. WarsawPact divisions now vary widely in strength, running from 500 to 10,000 effectives, butmostly in the 2000-4000 range. Lack of fuel, spare parts and ammunition temporarilyparalyze the armies. Though peace loomed on the horizon, no governments surviveto negotiate it. Only military command structures remain intact, and they are faithfulto the final orders of their governments.
In late June, the Pact forces in southern Germany renew their offensive in an attemptto seize the scattered surviving industrial sites in central Germany. Actually, the mostintact parts of Germany are those areas in the south, which had been under WarsawPact occupation. Galvanized into renewed action, NATO forces expend a maximumeffort to reform a coherent front, and the Pact offensive finally stalls.
As the autumnal rains begin, NATO and the Pact initiate a short and weak secondnuclear exchange, directed primarily at surviving industrial centers in the United

TWILIGHT 2000
Kingdom and Italy. Fighting diminishes to minor skirmishes as both sides prepare forwinter.
1999In Europe, the fronts are static for most of the year. Low troop densities mean that
infiltration raids become the most common form of warfare. The “front” ceases to bea line and becomes a deep occupied zone as troops settle into areas and begin farmingand small scale manufacturing to meet their supply requirements.
Many units stationed in barren areas drift apart or turn to marauding when suppliesfail to arrive. Although most attacks, by large bodies of marauders, are directed at areasheld by “theenemy,” they are soon directed at “allied” units as well; although this seldomoccurs against units of the same nationality.
The effects of the chaos, ensuing from the destruction of world trade and the deathof a sizeable portion of the population, are felt across the globe. No territory, howeverremote, remains untouched by the war. Even scientific stations in the antarctic andorbiting space laboratories are abandoned as the war drags on.
2000By the spring of the year 2000, the armies of Europe have settled into new
“cantonment” systems.Civil authority has virtually ceased to exist. Most military units are practicing
extensive recruiting in an attempt to maintain their strength, and stragglers are oftenincorporated into units, regardless of their nationality.
Thus, U.S. units contain a wide variety of former NATO and Warsaw Pact soldiersin addition to Americans.
In early January, the U.S. 1 1th Corps, stationed in Krakow, moves out of itscantonment on what is to become one of the last strategic offensives of the war....

TWILIGHT 2000
Introduction to the The principle objective of this computer role-playing adventure is to organize a
Main Scenariosquad of 20 soldiers and to utilize their talents to ultimately defeat the maniacal BaronCzarny, who has come to power in northern Poland. This goal is accomplished inseveral ways. First, you can generate 20 unique characters using Twilight 2000’senhanced graphic icon-driven character generator system. Secondly, you must chooseand command groups of four soldiers on numerous missions designed to gain territoryand increase the viability of Krakow, your base of operations. Lastly, after you havesufficiently expanded your regime of power, you must successfully wage war againstBaron Czarny and his Black Legion.
After you load Twilight 2000 (refer to your Technical Supplement), a screen of textsets the stage for the animated sequence which follows. After the opening sequenceends, there’s a transition to the character generation system where a series of optionsare uresented to vou.
Now its your turn! You create up to 20 characters for your squad - male or female- with a variety of nationalities, careers, attributes and skills. After your characters aregenerated, you are asked to choose the leader of your squad.
After you have selected your squad leader, you are placed in your office at theheadquarters building in Krakow. Now, you must use the skills of your squad to gainterritory, defeat marauders, and develop Krakow in an effort to wage a final waragainst Czarny. However, this goal is complicated by one awesome obstacle: Baron
wants you as bad as you want him, and he will stop at nothing to win.
Before the war, Tadeuz Czarny was an officer in the ( M o units of the people's Police, inPolish), the special riot police of the Polish government that gained a reputation for cruelty during theSolidarnosc demonstrations of the 1980’s. Czamy is in his late forties, so he cinvolve& it’s a fact that has not added to his popularity in certain arewhen ZOMO units were used to suppress antiwar riots in the year I:
in 1997, in response to the NATO offensive, ZOMO units were p ressed into franfl~ setvice> andCzarny’s unit was no exception. During this conflict, Czarpermanent disfigurement when a mortar round exploded directly in fa Polish hospital before returning to his hometown o f Wardressed in a black uniform and had assumed a

TWILIGHT 2000
Character Generation Twilight 2000 features the most exciting and unique character generation system
1. Introductionever implemented in a computer role-playing adventure. You can decide a character’sstrengths and weaknesses by choosing a set of basic attributes. As well, you areresponsible for enlisting your characters in a variety of services and careers that helpdevelop their skills and personalities. All of this is done from a unique, graphic icon-driven selection process.
The Twilight 2000 character generator is simple to use, but extremely detailed so thatyou have the power to mold your characters into likenesses of your choosing. This isimportant in a role-playing environment because your characters will undoubtedlygrow to mean more to you than just a picture associated with a name. This charactergeneration system lets you tailor characters who are truly your alto-egos.
In your spare time, you may want to generate extra characters and build more thanone squad. The system is capable of generating and saving five individual squads. Asquad may consist of up to 20 characters; however, after you have added a characterto a squad he is not available for selection in another squad. If a character is killedduring gameplay, he cannot be replaced. The more soldiers that are in your squad, thebetter your chances of finding the type of recruit who will best serve for a particularmission. It isn’t mandatory to generate extra squads or characters; there are alreadyseveral pre-generated squads that may be used.
The character generator also lets you make the decision whether or not you wanttotal control of the development process or if you want the computer to generatecharacters for you. For those f e w who want nothing to do with character generation,you can immediately get into the game with a squad of pre-generated characters. Howinvolved you want to get in the character generation process is entirely up to you.
Lastly, the Twilight 2000 character generator allows you to develop characters forthe actual pencil-and-paper role-playing game. Though some skills may not benecessary in the computer game, they have been left in for those individuals who wantto create characters for Twilight 2000 role-playing and for future sequels to thisp r o d u c t .

TWILIGHT 2000
2. Selecting from Icons Throughout the character generation process, you are asked to select options fromicons. The first option on the screen is always highlighted, and by scrolling through theicons the highlight moves from option to option. You can scroll through the icons withthe Up and Down Arrow keys on the keyboard, or you can use a joystick or mouse (yourTechnical Supplement provides detailed instructions). Press the <Enter> key, leftmouse button or joystick fire button 1 to make a selection from the icons. To abortselecting and to return to the previous screen, press the <Escape> key, right mousebutton or joystick fire button 2.
Each icon is labeled for ease of recognition. The only selections that can be chosen,however, are the ones that are a lighter shade of red. For example, the View Recruitselection, in the Main Party Disk Menu, appears in a darker shade of red if there is noone in the squad available to view.
NOTE: At the start of the game the original colors for the text that is displayed in thecharacter generator are shades of red. Light red refers to options you may select; darkred refers to options that you cannot select. You may change the color of these options,as well as the color of the highlighter.
To change the color of the usable icons, press the letter “L” and use the “<" and ">”keys to scroll through the color choices. To change the color of the unusable icons, pressthe letter “U” and use the “c” and ">” keys to scroll through the colors. If you want tochange the color of the highlighter, press the “H” key and use the “<" and ">" to scrollthrough the colors.
3. Main Party Disk Menu If you have not done so, load Twilight 2000 as per the instructions in your TechnicalSupplement. After the battle scene is finished playing, you are asked if you want tocontinue a saved game, create a platoon disk (see Technical Supplement) or start a newgame. If you select “Start New Game”, you are placed in the character generator wherethe Main Party Disk Menu appears. The options are:
1. Manually Recruit PlayerLets you begin the individual character development process.
2. Randomly Recruit PlayerThe computer develops the character for you.
3. Discharge RecruitLets you scroll through the squad and remove a specific character.
TWILIGHT 2000
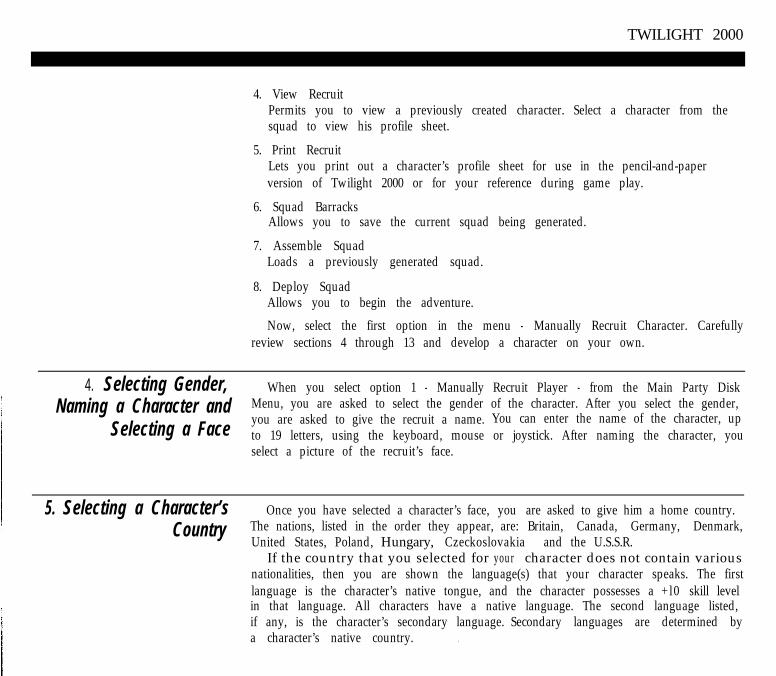
4. View RecruitPermits you to view a previously created character. Select a character from thesquad to view his profile sheet.
5. Print RecruitLets you print out a character’s profile sheet for use in the pencil-and-paperversion of Twilight 2000 or for your reference during game play.
6. Squad BarracksAllows you to save the current squad being generated.
7. Assemble SquadLoads a previously generated squad.
8. Deploy SquadAllows you to begin the adventure.
Now, select the first option in the menu - Manually Recruit Character. Carefullyreview sections 4 through 13 and develop a character on your own.
4. Selecting Gender, When you select option 1 - Manually Recruit Player - from the Main Party DiskNaming a Character and Menu, you are asked to select the gender of the character. After you select the gender,
Selecting a Face you are asked to give the recruit a name. You can enter the name of the character, upto 19 letters, using the keyboard, mouse or joystick. After naming the character, youselect a picture of the recruit’s face.
5. Selecting a Character’s Once you have selected a character’s face, you are asked to give him a home country.
Country The nations, listed in the order they appear, are: Britain, Canada, Germany, Denmark,United States, Poland, Hungary, Czeckoslovakia and the U.S.S.R.
If the country that you selected for your character does not contain variousnationalities, then you are shown the language(s) that your character speaks. The firstlanguage is the character’s native tongue, and the character possesses a +l0 skill levelin that language. All characters have a native language. The second language listed,if any, is the character’s secondary language. Secondary languages are determined bya character’s native country. .

TWILIGHT 2000
6. Selecting a Character’s Depending on the native country that you selected for a character, you may be asked
Nationality to select a corresponding nationality within that country. The four countries that offerdifferent nationalities are:
1. Britain: English, Welsh, Scottish and Irish.
2. Canada: Anglo-Canadian and French-Canadian.
3. Czechoslovakia: Czechoslovakian and Slovak.
4. U.S.S.R Russian, Azerbaijani, Ukrainian, Byelorussian, Georgian, Uzbek, Lithu-anian, Romanian, Latvian, Kazakh, Chuvash, Armenian, Estonian, Kirgiz, Tartar,Mordvinian, Taijik and Turkoman.
After the character’s nationality has been selected, the list of languages that he speaksare shown.
7. Assigning Attributes The next step in the character generation process is to assign a character a basic set ofattributes. Attributes range from 1 to 10 and can be assigned in one of two ways. They are:
Random GenerationWith this method, you have minimal control over the process. If you wish to develop
the character with the set of attributes displayed, select the Yes icon. If you select theNo icon, a new- set of attributes is randomly generated.
Allocation MethodThis method gives you complete control over the attributes that the player is
assigned. You are given a total of 32 points to distribute across the six attributes. Nosingle attribute may have a value of less than 1 or greater than 10.
The attributes are increased and decreased using the “+” and “-” icons displayedadjacent to the attributes.
The following are the basic attributes that are assigned to a character:Strength
Strength (STR) refers to the character’s muscular power. The higher a character’sstrength, the more effectively he can perform physical tasks. Strength also helpsdetermine the character’s hit capacities, body weight, throwing range and load that canbe carried without being encumbered.

TWILIGHT 2000
I ’
AgilityAgility (AGL) refers to a character’s physical coordination and ability while
performing detailed tasks. A character with a high agility rating is more likely tocomplete actions in a more timely manner than a character with a low agility rating.This attribute is also taken into account when determining the character’s body weight.Constitution
Constitution (CON) refers to a character’s physical stamina and ability to continueperforming demanding activities over an extended period of time. This attributeaffects the character’s resistance to disease and also influences his hit capacities.
CharismaCharisma (CHA) is the extent to which the character is admired and trusted by
strangers. It is a measure not only of physical appearance, but also of sensitivity andnatural charm.
IntelligenceIntelligence (INT) is a measure of the character’s ability to apply logic or arrive at
competent conclusions. Intelligence primarily affects the ability of the character tolearn.
EducationEducation (EDU) refers to the character’s performance in a formal academic setting.
Education also determines how far a character can get in a university and serves as aprerequisite for certain forms of higher education.
8. Background Skills After assigning the character a set of attributes, you are asked to select fourbackground skills for him. These skills represent the accumulated knowledge of thecharacter at age 17, based on his hobbies and education. A background skill may onlybe selected once for each character. The character then receives a skill level of +2 in thatparticular skill. The background skills are: Language, Swimming, Wheeled Vehicle,Unarmed Melee Combat, Horsemanship, Fishing, Small Boat, Motorcycle, Trackingand Farming.
If Language is selected as one of the background skills, a screen, listing all of thelanguages available, is displayed. Languages that cannot be selected are displayed ina darker shade of red. The character receives a skill level of +2 in the language selected.
For more information on skills, refer to page 27.

TWILIGHT 2000
9. Selecting a Career After selecting the character’s background skills, you must select a career for thecharacter from one of the three icons displayed on the screen. The three icons represent:Education, Civilian Careers and Military Careers.
After selecting the career type for the character, you are asked to select a specificoccupation that the character plans to endeavor in for the next four years. A charactermay change occupations after every four year term. Ex: A character becomes a Farmerfor his first four years. After being a Farmer for four years, he may join a military branchor go to school. The career types, and the occupations that are available under eachcareer, are:
EducationHigher education is a prerequisite for many careers, Certain forms of higher

TWILIGHT 2000
education have education requirements for admission. All schools are limited to oneterm, unless otherwise indicated.
Graduate UniversityA college offering academic study beyond a bachelor’s degree.Entry: Undergraduate degree, Education: 7+, Intelligence: 7+Special: One term provides a master’s degree; the second, and each subsequentterm, provides a Ph. D. degree.
Law SchoolA specialized division of a university that provides a law degree.Entry: Undergraduate degree, Education: 5+, Intelligence: 5+
Medical SchoolA specialized division of a university that provides a medical degree.Entry: Undergraduate degree, Biology: 3+, Chemistry: 2+
National Military AcademyA school that provides special military training.Entry: Education: 6+Special: Must enter the armed forces and either go through Officer Training orjoin a division of one of the services.
Technical SchoolA school that trains in a particular art, science, profession or trade.Entry: No Prerequisites
Undergraduate UniversityAn institution of learning that grants a bachelor’s degree in a specific field ofstudy.Entry: Education: 5+Special: Each additional term provides a bachelor’s degree in another field ofstudy. You also have the choice of electing to join ROTC.
Civilian OccupationsAttorneyA legal representative authorized to appear before the courts and argue cases.Entry: Law school

TWILIGHT 2000
Civil EngineerAn individual trained to design and build roads, bridges, etc.Entry: Master’s degree, Civil Engineering: 3+Special: In the event of war, the character is directly commissioned as a 1stLieutenant in the engineers.
Commercial PilotA person qualified to operate a commercial aircraft.Entry: Technical School, Pilot: 3+Special: In the event of war, the character is directly commissioned as a 2ndLieutenant in the aviation arm of the Army
Computer ProgrammerAn individual that writes programs for execution by a computer.Entry: Technical school or Undergraduate degree, Computer: 2+
Construction WorkerAn individual that builds structures such as homes, office buildings and stores.Entry: Strength: 4+
CriminalA person that commits crime for a living.Entry: Agility: 5+
EntertainerAn individual that diverts attention by singing, acting or some other form ofdistraction.Entry: Charisma: 8+
Factory WorkerA person that works in a facility that manufactures goods on a large scale.Entry: No Prerequisites
FarmerAn individual that owns a piece of land and either grows crops or raises live-stock.Entry: No Prerequisites
TWILIGHT 2000
Federal Law EnforcementAn individual that makes sure that the federal laws are adhered to.Entry: Law school, no prison record.
Government AgentA person authorized to act under governmental orders.Entry: Undergraduate degree, Intelligence: 6+Special: In the event of war, the character is not drafted, but continues to serve asan intelligent agent.
Idle RichAn individual that possesses an abundance of money.Entry: Charisma: 8+
JournalistAn individual that gathers, writes and edits news for newspapers or magazines.Entry: Undergraduate degree or Charisma: 7+
ManagerA person who is charged with the control of a business and its personnel.Entry: Undergraduate degree
MechanicAn individual who repairs and maintains machines.Entry: No Prerequisites
Medical DoctorA person licensed to practice medicine.Entry: Medical schoolSpecial: In the event of war, the character receives a direct commission as aCaptain in the Army Medical Corps.
ParamedicAn individual related to the medical profession in a supplementary capacity.Entry: Technical school, Medical: 2+
PoliticianA person who is active or skilled in politics.Entry: Charisma: 8+

TWILIGHT 2000
Special: In the event of war, the character cannot be drafted while currently inthis occupation.
PrisonIf captured as a criminal, the character is sent to prison.Entry: Captured while a criminal.Special: Released from prison after one term.
Private InvestigatorA person employed by an individual to solve or prevent a crime.Entry: Intelligence: 5+, Charisma: 5+
ProfessorA college or university teacher of the highest rank.Entry: Ph.D.
State/Local Law EnforcementAn individual entrusted by the city or state government to maintain order,prevent and detect crime, and enforce the laws.Entry: No prison record.
Truck DriverAn individual who transports objects by truck.Entry: Agility: 4+
Military OccupationsThere are four branches of the military and each one includes different types of
occupations. The following are the branches and their occupations:
0 ArmyThe military forces of a nation that are trained to fight on land.Entry: No PrerequisitesSpecial: Characters with an Intelligence and Education score of 7+ may enterOCS (Officer Candidate School).
Armor ArmThe armor division includes both tank units and Calvary units used for recon.Enlisted Entry: No PrerequisitesOfficer Entry: OCS, military academy or a commission.

TWILIGHT 2000
Artillery ArmThe artillery division provides indirect howitzer and rocket fire in support of theground forces, and mans air defense and long-range missile units.Enlisted Entry: Strength: 5+Officer Entry: Intelligence: 5+ and OCS, military academy or a commission.
Aviation ArmThe aviation division is responsible for flying and maintaining aircraft.Enlisted Entry: No PrerequisitesOfficer Entry: Agility: 6+ and OCS, military academy or a commission.
Engineer ArmThe engineer division is responsible for a variety of construction tasks in supportof combat units.Enlisted Entry: No PrerequisitesOfficer Entry: Civil Engineer: 2+ and OCS, military academy or a commission.
Infantry ArmThe infantry division is the largest of the combat arms. These are the troops thatwill do the actual ground fighting. These forces consist of Airborne, Ranger andMountain Infantry troops.Enlisted Airborne Entry: Constitution + Strength + Agility: 15+Officer Airborne Entry: Constitution + Strength + Agility: 14+ and OCS, militaryacademy or a commission.Enlisted Infantry Entry: No PrerequisitesOfficer Infantry Entry: OCS, military academy or a commission.Enlisted Mountain Infantry Erie: Strength + Agility: 10+Officer Mountain Infantry Entry: OCS, military, academy or a commission.Enlisted Ranger Entry: Constitution + Strength + Agility: 17+Officer Ranger Entry: Constitution + Strength + Agility: 16+ and OCS, militaryacademy or a commission.
Medical CorpsThe medical division is responsible for the maintenance of troop health at alltimes.Enlisted Entry: Education: 6+Officer Nurse Entry: Undergraduate degree, Medical: 3+ and OCS, militaryacademy or a commission.

TWILIGHT 2000
Artillery ArmThe artillery division provides indirect howitzer and rocket fire in support of theground forces, and mans air defense and long-range missile units.Enlisted Entry: Strength: 5+Officer Entry: Intelligence: 5+ and OCS, military academy or a commission.
Aviation ArmThe aviation division is responsible for flying and maintaining aircraft.Enlisted Entry: No PrerequisitesOfficer Entry: Agility: 6+ and OCS, military academy or a commission.
Engineer ArmThe engineer division is responsible for a variety of construction tasks in supportof combat units.Enlisted Entry: No PrerequisitesOfficer Entry: Civil Engineer: 2+ and OCS, military academy or a commission.
Infantry ArmThe infantry division is the largest of the combat arms. These are the troops thatwill do the actual ground fighting. These forces consist of Airborne, Ranger andMountain Infantry troops.Enlisted Airborne Entry: Constitution + Strength + Agility: 15+Officer Airborne Entry: Constitution + Strength + Agility: 14+ and OCS, militaryacademy or a commission.Enlisted Infantry Entry: No PrerequisitesOfficer Infantry Entry: OCS, military academy or a commission.Enlisted Mountain Infantry Entry: Strength + Agility: 10+Officer Mountain Infantry Entry: OCS, military academy or a commission.Enlisted Ranger Entry: Constitution + Strength + Agility: 17+Officer Ranger Entry: Constitution + Strength + Agility: 16+ and OCS, militaryacademy or a commission.
Medical CorpsThe medical division is responsible for the maintenance of troop health at alltimes.Enlisted Entry: Education: 6+Officer Nurse Entry: Undergraduate degree, Medical: 3+ and OCS, militaryacademy or a commission.

TWILIGHT 2000
Officer Doctor Entry: Medical school and OCS, military academy or a commis-sion.
Military Intelligence ArmThe intelligence division is responsible for interrogating prisoners and analyzingintelligence reports.Officer Entry: Intelligence: 7+ and OCS, military academy or a commission.
Special Forces ArmThe special forces division is best known for their distinctive green berets, andare trained to operate deep within enemy territory in support of the infantry.Enlisted Entry: Strength + Constitution + Agility: 18+, Language: 2+Officer Entry: Same as enlisted + OCS, military academy or a commission.
support ArmThe support division is a combination of a number of non-combat arms.Enlisted Entry: No PrerequisitesOfficer Entry: OCS, military academy or a commission.
0 MarinesThe military forces of a nation that are trained to perform amphibious missionsor to carry out conventional combat missions.Entry: Strength + Agility + Constitution: 15+ and no prison record.Special: Characters with an Intelligence and Education score of 7+ may enterOCS.NOTE: The occupations in the Marines are the same as the Army Infantry, butthe following occupations are added:
Force ReconThe force recon division is responsible for scouting reports and information fromthe front lines.Enlisted Entry: Strength + Agility + Constitution: 17+Officer Entry: Strength + Agility + Constitution: 17+ and OCS, military academyor a commission.
SniperThe sniper division is responsible for shooting targeted individuals.Enlisted Entry: Strength + Agility + Constitution: 19+

TWILIGHT 2000
0 NavyThe military forces of a nation that man both combat and sea-going supportvessels as well as a substantial air arm.Entry: No PrerequisitesSpecial: Characters with an Intelligence and Education score of 7+ may enterOCS.
SeamanEnlisted Entry: No prerequisitesNaval Officer Entry: OCS. military academy, or a commission.Naval Officer Aviator Entry: Agility 8+ and OCS, military academy or a com-mission.
SEALThe SEAL division's responsibilities are much like those of the Army SpecialForces Arm.Enlisted Entry: Strength + Agility + Constitution: 15+Officer Entry: Strength + Agility + Constitution: 15+ and OCS, military academyor a commission.
0 Air ForceThe military forces of a nation that fly and maintain the services largest portionof aircraft.Entry: No PrerequisitesSpecial: Characters with an Intelligence and Education score of 7+ may enterOCS.
The airman’s responsible is to repair and maintain the aircraft.Enlisted Entry: No Prerequisites
PilotThe pilot’s responsibilities include the flying of aircraft and the fighting thatoccurs in the air.Officer Entry: Agility: 6+ and OCS, military academy or a commission.

TWILIGHT 2000
10. Assigning Skills The Twilight 2000 character generator allows a character to acquire many skills.Skills are the most important part of a character because they determine the probabilityof successfully performing a task or action. Some skills are specific to a single task, whileothers can be applied to a variety of situations. Each skill begins at zero, representingan untrained basic working knowledge. As skills increase, the corresponding numberalso increases. The greater the skill level, the more successful a character is whenattempting a related task.
Skills: Basic and CascadeThere are two categories of skills in Twilight 2000: basic skills and cascade skills.
Basic skills pertain to the basic ability of a character to perform a certain task. Cascadeskills are a general category and offer the character an opportunity to gain a specializedskill. The following are examples of both types of skills:
Basic Skill: GunsmithCascade Skill: Pilot (you can choose from:)
Fixed WingRotary Wing
Assigning skills to a character actually occurs during the character’s career selectionprocess. During a four year term, you can select a specific number of skills. The numberof skills that you can select during a term are already set according to each specificcareer.
A character mav obtain skills in one of two ways: automatically or acquired. Au-tomatic skills include knowledge of the character’s native language, certain combatskills that all recruits are taught in basic training and skills supplied by a character’seducation or career. Acquired skills are learned during the character’s involvement ina career. These are the skills you assign the character.
To assign a skill using the keyboard, use the left and right arrow keys to select theskill and the “+” and “-” keys to increase or decrease the skill. If you are using a mouseor joystick, position the mouse cursor over the icon and use the left and right mousebuttons to increase and decrease the skill level while using fire button 1 and fire button2 to increase and decrease the levels.
As a character is awarded skill levels, they are added to the previous levels.However, once a character’s skill level in a particular skill equals the character’scontrolling attribute, all additional skill level awards count only as a half level insteadof a full level. The following is an example:

TWILIGHT 2000
A character with an Agility of 4 has a Wheeled Vehicle skill of 3. If the character isassigned another point in the skill of Wheeled Vehicle, the character’s skill level willequal 4. If the character receives an additional level, however, his skill only increasesto4 l/2, because the skill level has already reached the level of the controlling attribute.
All half levels are retained for long term improvement purposes, but are roundeddown for purpose of actual skill use. Thus, the character will have an effective skill rateof 4 until he receives an additional skill level promotion; then the character’s skill levelis increased to 5.
Although there are a total of 49 skills in the character generator, not all of them arenecessary for this computer game. The non-essential skills have been included forthree reasons. First, the skill system in the character generator is the basis for the pencil-and-paper role-playing version of Twilight 2000 and has been maintained for integrity.Second, the non-essential skills have been left in for those who wish to developcharacters for Twilight 2000 role-playing adventures. This compatibility would notexist if skills were eliminated for the sake of the computer game. Third, some skills thatare not necessary in this version of the Twilight 2000 computer game may come inhandy for future Twilight 2000 computer adventures. This is useful if you are planningto use the same characters in future Twilight 2000 computer games.
Following is a list and description of each skill anditscontrolling attribute. Skills thatare used in the game are in bold print.Strength
Aircraft Mechanic - Ability to repair and maintain aircraft.Hunting Bow - Ability to u s e a long b o wHeavy Weapons - Ability to use antitank missile launchers, rocket and grenadelaunchers and large-caliber guns.Armed Melee Combat - Ability to conduct hand-to-hand combat using a weapon,such as a knife.Unarmed Melee Combat - Ability to conduct hand-to hand combat.Mechanic - Ability to maintain and repair vehicles.Small Arms (Pistol) - Ability to use small arms (pistols).Small Arms (Rifle) - Ability to use small arms (rifle).Thrown Weapon - Ability to hit a target with a thrown weapon, such as a grenade,knife or rock.
EducationBiology - Knowledge of plant and animal biology.

TWILIGHT 2000
Chemistry - Knowledge of chemical interactions and compounds.Computer - Ability to operate and program a computer.Civil Engineer-Ability to plan/supervise the construction of bridges, buildings androads.Geology - Knowledge of rock formations and minerals.Medical - Ability to render first aid/medical care to injured or sick characters.Meteorology - Understanding of weather and the forces governing it.Mining Engineer - Ability to supervise the construction and operation of a mine.Metallurgy - Knowledge of melting ore into metal, forming alloys and fundamentalmetalworking.
ConstitutionCombat Engineer-Ability to perform tasks such as emplacing demolitions charges,building fortifications and camouflaging objects.Horsemanship - Ability to ride a horse.Motorcycle - Ability to ride a motorcycle.Mountaineering - Ability to climb steep slopes and sheer cliffs.Parachute - Ability to use a parachute.Scuba - Ability to use an aqualung or rebreather.Swimming - Ability to swim.
CharismaDisguise - Ability to alter appearance and to avoid recognition.Instruction - Ability to teach skills.Interrogation - Ability to persuade or force a person to reveal information.Language - Ability to speak and understand a given language.Leadership - Ability to inspire followers.Persuasion-Ability to phrase arguments in ways best calculated to gain acceptance.
AgilityElectronics - Ability to repair electronic devices.Forgery - Ability to forge a signature or document and have it accepted as genuine.Gunsmith - Ability to construct and repair weapons.Lockpick - Ability to pick a lock.Machinist - Ability to use machine tools to fabricate other machinery.Pilot (Fixed Wing) - Ability to fly aircraft, such as an airplane.Pilot (Rotary Wing) - Ability to fly aircraft, such as a helicopter.Small Boat - Ability to operate small boats.

TWILIGHT 2000
11. SecondaryActivities
Snow Skiing - Ability to travel using snow skis or snow shoes.Stealth - Ability to move silently without being spotted.Tracked Vehicle - Ability to drive a tracked vehicle, such as a tank.Warhead - Ability to arm, disarm and launch conventional and nuclear warheads.Wheeled Vehicle - Ability to drive a wheeled vehicle.
IntelligenceForward Observer - Ability to fire indirect weapons, such as grenade launchers,tank cannons and larger weaponry.Foraging - Ability to find food in the wild.Farming - General knowledge of growing food crops and raising livestock.Fishing - Ability to catch fish using a hook, line or net.Navigation - Ability to determine position and direction of travel using a map,compass and landmarks.Observation - Ability to spot concealed enemies and avoid ambushes.Scrounging - Ability to find man-made items, such as spare parts, domestic foodand ammunition.Tracking-Ability to follow vehicles, humans or animals by traces they leave behind.
After a character’s term is completed in a specific occupation, you may be asked tochoose a secondary activity for him. These secondary activities represent a character’shobbies and pastimes, which can provide valuable additional skills.
As a general rule, a character is allowed one secondary activity each term. Somecareers allow two secondary activities per career, while others allow none. The numberof allowed secondary activities per term is the number of skill levels received.
The skills that comprise the secondary activity list are: Disguise, Fishing, Foraging,Horsemanship, Hunting Bow, Language, Medical, Motorcycle, Mountaineering,Observation, Parachute, Pilot, Scuba, Small Arms, Small Boat, Snow Skiing, Swimming,Tracking, Melee Combat and Wheeled Vehicle.
After the secondary activity is selected, the computer automatically determines ifthe character is promoted if they are functioning within a military career. The resultis displayed on the screen.

TWILIGHT 2000
12. War Breaks Out At the end of each term, the computer generates a number between 1 and 10. If thenumber generated is equal to, or less than, the character’s current term number, therwar breaks out.
Once war breaks out, a character is drafted into the armed forces and spends oneterm in the service of your choice. If the character is already enlisted in a branch of themilitary, he remains in that branch of service. Again, at the end of the term, thecomputer determines if the character is promoted. The result is displayed on the screen
After the character’s term is completed, the computer determines the rest of thecharacter’s profile. These categories include:initiative
Initiative is the character’s readiness and ability to initiate action. A character’sinitiative never exceeds 7 and is never less than 1.Rads
Rads are a measure of the extent of exposure a character has suffered from radiationpoisoning. A character does not begin the game with a large dosage. If the charactersurpasses 50 rads during the game, he is checked once a day for radiation sickness. Ifthe character is exposed and receives more than 800 rads, he automatically dies.
AgeA character’s age is determined by the following formula: 17 + (terms x 4). As a
character gets older, he eventually begins to loose points in the Constitution, Strengthand Agility attributes.
Hit CapacityA character’s hit capacity is a measure of the amount of damage that a character can
receive before suffering a serious injury. Hit points can be suffered in several differentparts of the body: left leg, right leg, left arm, right arm, head, abdomen and chest.
LoadThe load is the amount of equipment a character can carry without being heavily
burdened. A character may carry up to twice his load amount, but the extra burdenslows his movement.
ContactsA contact is someone from the character’s past, usually a part of a character’s
educational or occupational background. The character mav encounter one of these

TWILIGHT 2000
contacts during the game. On the character profile sheet, there are two numbers listedafter each type of contact. The first number indicates how many contacts the characterhas in that particular field. The second number indicates how many of these contactsare foreign (of another nationality other than the character’s).
Throw RangeThrow range is the distance a character can accurately throw an object that weighs
one kilogram.
Base Hit NumbersThe character’s base hit numbers are used in combat to determine the chances of
hitting a target. There are four categories of base hit numbers. They are: Small Arms(Pistol), Small Arms (Rifle), Hunting B o w and Heavy Weapons.
The first number under each category is the close range hit number. This numberis twice the character’s skill in this category. The second number is the medium rangehit number and is the character’s actual skill in the category. The third number is thelong range hit number and is half of the character’s skill in the category. The fourthnumber is the extreme range hit number and is one-quarter of the character’s skill inthis category.
Unarmed Combat DamageUnarmed combat damage determines the degree of injury that a character inflicts
on an opponent if he hits him during melee combat.
13. SelectingWeapons and
Equipment
After the character has spent one term under fire. the character generation processis completed. All characters are assigned a basic load of equipment. This equipmentconsists of fatigues, a pack, combat webbing, thermal fatigues, a parka, one flashlight,personal medical kit, kevlar vest, kevlar helmet and six fragmentation grenades.
The next step is to assign weapons and equipment to the character. The characteris given a certain amount of money, depending on the time he spent in the military, topurchase weapons and equipment. You should spend all of the money that is availableor assign the character objects until his load limit is attained.
Following is a brief description and some statistical data on the weapons andequipment available:
Ammo: The type of ammunition the weapon uses.

TWILIGHT 2000
Wt: This is the weight of the object.
Mag: This represents the number of rounds that can be loaded into the weapon. Insome instances, ammunition is contained in a magazine or clip that is inserted intothe weapon.
Price: The weapons cost. There are also some letters listed after the price. The firstletter denotes the weapons availability in Europe, the U.S. and Japan. The secondletter is the weapons availability in the Soviet Union and China - V: Very Common,C: Common, S: Scarce, R: Rare.
ROF: The rate of fire a weapon can achieve. Each time the trigger is pulled on theweapon, this is the number of rounds it fires within a five second period. Someweapons have letters listed under this category. They are:
SS (Single Shot): The weapon can only fire one round before it needs reloaded.
BA (Bolt Action): Each time the weapon is fired, the bolt mechanism must beworked to eject the spent cartridge and load a fresh cartridge into the chamber.
LA (lever Action): Each time the weapon is fired, the lever must be worked to ejectthe spent cartridge and load a fresh cartridge into the chamber.
PA (Pump Action): Each time the weapon is fired, the slide-grip must be worked !to eject the spent cartridge and load a fresh cartridge into the chamber.
DAR (Double-Action Revolver): During the trigger pull on this type of weaponthe hammer is automatically cocked.
SA (Semiautomatic): This type of weapon fires one round with each squeeze o fthe trigger, and the force of the firing round is used to recock the weapon.
Dam: The amount of damage inflicted on an opponent when a direct hit is achieved.In the case of grenade launchers, rocket launchers and missile launchers, there aresometimes two values listed. The first one is usually preceded with the letter C,which stands for controlled. The second one is usually preceded with a B, whichstands for burst.
Pen: Reflects a weapon’s ability to penetrate armor. This rating may consist of thenotation Nil, indicating that the bullet will be stopped by any armor protection, or
it may have up to three different numeric ratings. If so, the first number represents

TWILIGHT 2000
both close and medium range, the second represents long range and the thirdrepresents extreme range. Some of these numbers have the letter C directly afterthem. The C stands for exploding round and the penetration listed is constantthroughout its range.
Blk: Is the protection offered by the weapon in close combat. Some weapons havetwo values listed. The first number represents the protection offered in combatwithin 2 meters. The second number is the protection in combat within 3 meters.
Recoil: The measure of how much the weapon kicks when it is fired. This affectsthe accuracy of the shot. There are t w o different types of recoil listed. One for SS(Single Shot) and one for bursts.
Rng: The range of the weapon in meters. The number listed on the table is for shortdistance. Medium distance would be twice the short distance, long distance twicethe medium and extreme distance twice the long.
IFR: The indirect fire range in meters for grenade launchers.
Rnd: Lists the type of rounds available for the weapon. In the computer version,there are only t w o types of rounds available. They are:
HE (High Explosive): .A high explosive round in a hollow case containing anexplosive compound. It can be set to detonate on impact or at a selected altitude.It can only be fired from a grenade launcher.
HEAT(High Explosive Antitank): A hollow shell filled with explosivecompounds.An inverted cone in the nose of the shell directs the explosive force forward intoa high energy let of superheated gas and molten metal, reducing the effectivenessof the round against soft targets but vastly increasing it against armor.
Rld: Is the number of rounds that can ‘be loaded into a weapon at one time.
U/I: Unit of Issue

TWILIGHT 2000
Small Arms - PistolsRevolvers
Automatic Pistols
.38 Special SnubnoseThe ”snubbie” is a weapon preferred by some civilian plain-
clothes policemen because its short barrel makes it more con-cealable and easier to draw.
Ammo: .38 SpecialWt: 0.5 kgMag: 6 revolverPrice: $375 (C/C)
-Recoil-Weapon R O F D a m Pen Blk.38 Snub DAR 1
s s Brst RngNil 1 3 - 4
M9 (M92S)The standard sidearm for U.S. military forces. the M9 is es-
sentially identical to the M92SAmmo: 9mm PWt: 1 kgMag: 15 boxPrice: $150 (V/S)
-Recoil -Weapon ROF Dam Pen B/k SS Brst RngM9 (M92S) SA 1 Ni l 1 2 - 12
.357 MagmunA more powerful revolver preferred by some civilian police
officers and private security guards. It is rarely found in mili-tary service.
Ammo: .357 MagnumWt: 0.5 kgMag: 6 revolverPrice: $450 (C/R)
-Recoil-apewe ,357 Mag DAR 2 l-Nil 1 3 - 12
HP-35The standard military sidearm of the British (and several other
armies),the HP-35 is considered by many to be the finest 9mmsemiautomatic pistol made.
Ammo: 9mm PWt: 1 kgMag: 13 boxPrice: $150 (S/R)
-Recoil-Weapon ROF Dam Pen Blk SS Brst Rng

TWILIGHT 2000
Small Arms Rifles Battle Rifles
PM MakarovThe standard military sidearm of most eastern European
states and widely used by police and internal security forcesAmmo: 9mm MWI: 0.5 kgMag: 8 boxPrice: $150 (S/V)
LlA1 (FN-FAL) G3The standard German assault rifle until replaced by the G11,
the G 3 was still widely used byterritorial and internal security troopsand now back in service with German troops.
Ammo 7 52-m NWt 5 kgMag 20 boxPrice: $500 (C/R). .

TWILIGHT 2000
Submachineguns UziOnce the standard miltary submachinegun of the German
Army, the Uzi is now returning to service as ammunition forthe G11 becomes increasingly hard to find.
Ammo: 9mm PWt: 4kgMag: 25 box or 32 boxPrice: $500 (V/C)
-Recoil-Weapon ROF Dam Pen Blk SS Brst RngUz i 5 1 Nil 2/3 1 2 30
AKRThe standard Eastern B!oc military submachinegun (with few
exceptions), the AKR i s merely a cut-down version of the AK-74.Although a bit heavy for a submachinegun, it has good accuracyand stopping power
Ammo: 5.45mm BWt: 4 kgMag: 30 boxPrice. $300 (SC)
-Recoil-Weapon ROF Dam Pen Blk ss Brst RngA K R 5 2 l-Nil 2/3 1 4 30
MP-5The standard submachinegun of German territorial troops
and police.Ammo: 9mm PWt: 3kgMag: 15 box or 30 boxPrice: $400 (C/S)
-Recoil-Weapon ROF Dam Pen B/k SS Brst RngM P - 5 5 1 Nil 3 1 3 30
M-12The Italian standard military and police submachinegun.Ammo: 9mm PWt: 3 kgMag: 32 box or 40 boxPrice: $400 (R/-)
WeaponM12
-Recoil-ROF Dam Pen B/k SS Brst Rng
5 2 I-Nil 4 1 2 40

TWILIGHT 2000
G l lA weapon of radical design and great effectiveness. the G11
replaced the G3 as the standard assault rifle and the Uzi as thestandard submachinegun of the West German Army. It is a ”bullpup”configuration weapon, which means the action is placed behindthe firing hand in the normally empty stock Thus, bullpup riflescan have a shorter length without needing a shorter barrel.
It differs from other combat rifles in that it fires caseless 4 7mmbullets. The compact nature of the weapon and low recoil of itsround makes it as handy as a submachinegun (even though it ISa rifle). and i t is included with submachineguns for this reason
Its caseless ammunition i s extremely compact, allowing a largemagazine capacity. Since there is no spent cartridge casing to eject,the rifle’s action is completely enclosed and thus is very reliable ina dirty environment. However. there is no way to reload the round,since it is completely consumed. and manufacture has largelyceased. Currently. although the weapon i s fairly common. ammu-nition for it is increasingly rare. and most German soIdiers haveequipped themselves with obsolete weapons.
Ammo: 4.7mm ClsWt: 4 kgMag: 50 boxPrice: $400 (S/R)
-Recoil-Weapon R O F D a m Pen B/k SS Brst RngG11 3 2 l-Nil 4 1 2 55
The standard combat rifle of the US. and Canadian armies.
M16A2the M16A2 (commonly called just M16) is in widespread useand is a popular and effective weapon.
Ammo: 5.56mm NWt: 3kgMag: 20 box or 30 boxPrice: $400 (V/C)
-Recoil-Weapon ROF Dam Pen B/k s s Brst RngM l 6A2 3 2 I - N i l 5 2 3 55
The standard combat rifle of the Eastern Bloc forces.Ammo: 5.45mm B
AK-74
Wt: 4 kgMag: 30 boxPrice: $300 (C/C)
-Recoil-Weapon ROF Dam Pen B/k SS Brst RngA K - 7 4 5 2 I - N i l 5 2 4 50

4
TWILIGHT 2000
L85 (IW)The standard British combat rifle, replacing the FAL. Like
the G11, the L85 is a bullpup configuration rifle. his rare outsideof British service.
Ammo: 5.56mm NWt: 5.5 kgMag: 20 box or 30 boxPrice: $1500 (R/R)
Weapon ROF Dam Pen Blk s s Brst RngL85(IW) 5 2 1-Nil 4 2 4 50
AKMThe modern version of the ubiquitous AK-47, the AKM is
perhaps the most widely used military small arm in the wor!d.and is a very popular one despite its underpowered and un-stable cartridge. Replaced in frontline service by the AK-74,many AKMs were rechambered to tire 5.45 Bloc ammunition(designated AKMR, for AKM Rechambered). Thus true AKMsare mostly found in use by militia units.
Ammo: 7.62 SWt: 4 kgMag: 30 boxPrice: $300 (C/V)
-Recoil-Weapon ROF Dam Pen Blk SS Brst RngA K M 5 3 Z-Nil 5 2 5 50
FA-MAS
The standard French military rifle. the FA-MAS is a bullpup Weapon ROF Dam Pen Blk SS Brst Rngconfiguration weapon and is rare outside of French service. FA-MAS 5 2 1-Nil 5 2 4 50
Ammo: 5.56mm NWt: 4 kgMag: 25 boxPrice: $500 (R/-)
TWILIGHT 2000
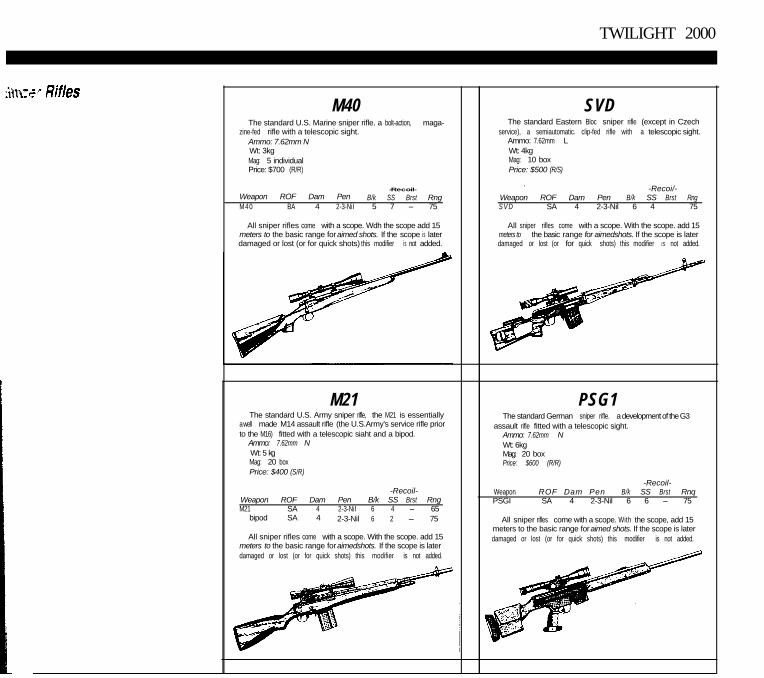
M40The standard U.S. Marine sniper rifle. a bolt-action, maga-
zine-fed rifle with a telescopic sight.Ammo: 7.62mm NWt: 3kgMag: 5 individualPrice: $700 (R/R)
-Recoil-Weapon ROF Dam Pen B/k SS Brst RngM40 BA 4 2-3-NiI 5 7 - 75
All sniper rifles come with a scope. Wdh the scope add 15meters to the basic range for aimed shots. If the scope i s laterdamaged or lost (or for quick shots) this modifier i s not added.
M21The standard U.S. Army sniper rifle, the M21 is essentially
a well made M14 assault rifle (the U.S.Army's service rifle priorto the M16) fitted with a telescopic siaht and a bipod.
Ammo: 7.62mm NWt: 5 kgMag: 20 boxPrice: $400 (S/R)
-Recoil-Weapon ROF Dam Pen B/k SS Brst RngM21 SA 4 2-3-NiI 6 4 - 65
bipod SA 4 2-3-Nil 6 2 - 75
All sniper rifles come with a scope. With the scope. add 15meters to the basic range for aimedshots. If the scope is laterdamaged or lost (or for quick shots) this modifier is not added.
SVDThe standard Eastern Bloc sniper rifle (except in Czech
service), a semiautomatic. clip-fed rifle with a telescopic sight.Ammo: 7.62mm LWt: 4kgMag: 10 boxPrice: $500 (R/S)
.-Recoi/-
Weapon ROF Dam Pen B/k SS Brst RngS V D SA 4 2-3-Nil 6 4 - 75
All sniper rifles come with a scope. With the scope. add 15meters to the basic range for aimedshots. If the scope is laterdamaged or lost (or for quick shots) this modifier IS not added.
PSG1The standard German sniper rifle. a development of the G3
assault rifle fitted with a telescopic sight.Ammo: 7.62mm NWt: 6kgMag: 20 boxPrice: $600 (R/R)
-Recoil-Weapon ROF Dam Pen B/k SS Brst RnqPSGI SA 4 2-3-Nil 6 6 - 75
All sniper rifles come with a scope. With the scope, add 15meters to the basic range for aimed shots. If the scope is laterdamaged or lost (or for quick shots) this modifier is not added.

TWILIGHT 2000
Automatic Rifles
Pump-Action ShotgunPump-action shotguns are widely used in western Europe
and have been widely taken into military use. The magazinegiven is for a common, extended-capacity, police-iesue weapon.
Ammo: 12 gaugeWt: 4 kgMag: 7 individualPrice: $300 (V/C)
-Recoil-Weapon ROF Dam PenPump
B/k SS Brst RngPA 5 3-4 Nil 5 2 - 40
C l o s e PA 9 Nilw/buckshot’
Medium 10 1 Nilw/buckshot’
M249The M249 Squad Automatic Weapon (SAW) is the standard U.S.
light automatic support weapon. It can accept either the standard30-round magazine of the M16A2 or a 200-round belt. lt is equippedwith a bipod.
Ammo: 5.56 NWt: 7kgMag: 30 box or 200 beltPrice: $1500 (S/R)
-Recoil-Weapon ROF Dam Pen B/k SS Brst RngM 2 4 9 10 2 I-Nil 5 1 3 60
bipod 10 2 l-Nil 5 1 2 75
H&K Combat Assault WeaponThe standard combat shotgun of the German and U.S.
armies (the U.S. weapon being a slightly modified versionproduced under license by Olin). the Heckler & Koch CAW isa bullpup configuration weapon. like the G11
Ammo: 12 gaugeWt: 4kgMag: 10 boxPrice: $800 (C/R)
-Recoil-Weapon ROF Dam Pen B/k SS Brst RngH&K CAW 5 5 3-4-Nil 4 2 13 40Close 5 9 Ni l
w/buckshot’Med ium 5x10 1 Ni l
w/buckshot*
RPK-74The standard Warsaw Pact light automatic support weapon.
the RPK-74 can accept either the same magazine as the AK-74or an oversized magazine.
Amm: 5.45mm Bwt: 4.5 kgMag: 30 box or 40 boxPrice: $1000 (S/C)
-Recoil-Weapon R O F D a m P e n Blk SS Brst RngRPK-74 10 2 l-Nil 5 1 6 50
b i i 10 2 l-Nil 5 1 3 75

TWILIGHT 2000
M60The standard US. general-purpose machinegun, a devel-
opment of the WWII German MG42. It is equipped with a bipodand can also be fired from a tripod (NLT). It accepts 1 00-roundbelts.
A m m o : 7.62mmWt: 10kgMag: 100 beltPrice: $1500 (S/R)
-Recoil-Weapon ROF D a m Pen Blk ss Brst RngM60 5 4 2-3-Nil 6 1 4 65
bipod 5 4 2-3-Nil 6 1 2 95tripod 5 4 2-3-NiI 6 1 2 125
PKThe standard Warsaw Pact medium machinegun, the PK
is usually found mounted on a vehicle. It is equipped with abipod and can also be tired from a tripod (PLT). II accepts 50-round belts.
Ammo: 7.62mm Wt:10 kgMag: 50 beltPrice: 5 2 0 0 0 ( R / S )
-Recoil-Weapon R O F D a m Pen B l k ss Brst RngPK 5 4 2-3-Nil 6 2 5 65
bipod 5 4 2-3-NiI 6 1 3 90tripod 5 4 2-3-Nil 6 1 2 125
MG3The standard German general purpose machinegun is a
slightly improved copy of the wartime MG42. It i s equippedwith a biid and can also be fired from a tripod (NMT). It ac-cepts 50-round belts.
Ammo: 7.62mm NWt: 8 kgMag: 50 beltPrice: 51500 (S/R)
Weapon ROF Dam Pen B l k SS Brst RngMG3 10 4 2-3-Nil 6 1 9 65
b@ 10 4 2-3-Nil 6 1 5 90trtpzd,10 4 2-3-Nil 6 1 3 125

TWILIGHT 2000
Grenade LaunchersM203
The standard infantry grenade launcher of the US and Ca-nadian armies, the M203 is a single-shot launcher which is at-tached to the bottom of an M16 rifle. A product-improved modelcan be detached and fired from a removable shoulder stock,but by 1995 this model had not completely replaced older ver-sions in military inventories. The Pl version is available for $700(S/R) and weighs two kilograms with shoulder stock.
Ammo: 40mm grenadesWt: 1.4 kg
Mag: 1 individualPrice: 5500 (C/S)
TypeM203
ROF Rng IFR Rnd Dam Pen1 100 400 HE C:3. B:12 N i l
HEDP C:3. B:12 4 cCHEM C:1, B:4 Ni lILLUM B:100 Ni l
Mk-19The standard infantry support grenade launcher in the
United States Armv. the Mk-19 is a tripod-mounted (NHT). belt-fed automatic weapon. It may also fire unbelted individualgrenades(ROF1). It may be fired only from a tripod or vehiclemount.
Ammo: 40mm grenades and 40mm high-velocity grenadesWt: 40 kgMag: 50 belt or 1 individualPrice: $5000 (S/R)
Type R O F Rnq IFR Rnd Dam PenMk-19 5 200 3 km HVHE C:3, B:12 Nil
HVHEDP C:3. B:12 4C
BG-1AK-47grenade launcher, developed for Afghanistan. lt can
be fitted to any AK series rifle.Ammo: 40mm grenadesWt: 1 kgMag: 1 individualPrice: $700 (-6)
TypeB G - 1 5
ROF Rng IFR Rnd Dam Pen1 100 300 HE C:3. B:12 N i l
HEDP C:3. B:12 4 cCHEM C:1, B:4 Ni lI L L U M B:100 Ni l
AGS-17The standard Warsaw Pact infantry support grenade
launcher, the AGS-17 is a tripod-mounted (PMT). drum-fedautomatic grenade launcher. It may be fired only from its tri-pod or from a vehicle mount.
Ammo: 30mm grenadesWt: 18kgMag: 30 beltPrice: $3000 (R/S)
Type R O F Rng IFR RndAGS-17 5 150 1700 HE
Dam PenC:2. B:12 N i l
TWILIGHT 2000
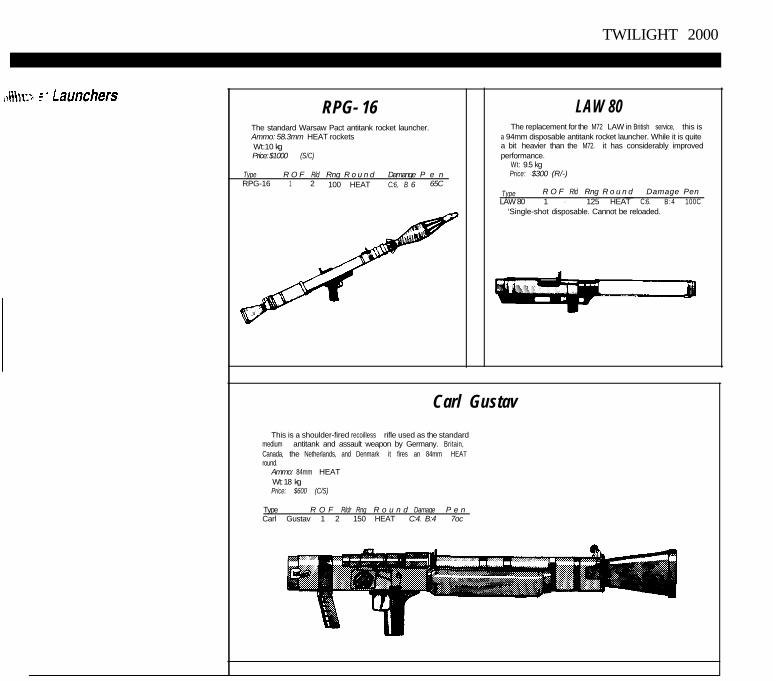
RPG- 16The standard Warsaw Pact antitank rocket launcher.Ammo: 58.3mm HEAT rocketsWt:10 kgPrice: $1000 (S/C)
Type R O F Rld Rng R o u n d Damange P e nRPG-16 1 2 100 HEAT C:6, B 6 65C
LAW 80The replacement for the M72 LAW in British service, this is
a 94mm disposable antitank rocket launcher. While it is quitea bit heavier than the M72. it has considerably improvedperformance.
Wt: 9.5 kgPrice: $300 (R/-)
Type R O F Rld Rng R o u n d Damage PenLAW 80 1 - 125 HEAT C:6. B:4 100C
‘Single-shot disposable. Cannot be reloaded.
Carl Gustav
This is a shoulder-fired recoilless rifle used as the standardmedium antitank and assault weapon by Germany. Britain,Canada, the Netherlands, and Denmark it fires an 84mm HEATround.
Ammo: 84mm HEATWt: 18 kgPrice: $600 (C/S)
Type R O F Rldr Rng R o u n d Damaqe P e nCarl Gustav 1 2 150 HEAT C:4. B:4 7oc
TWILIGHT 2000
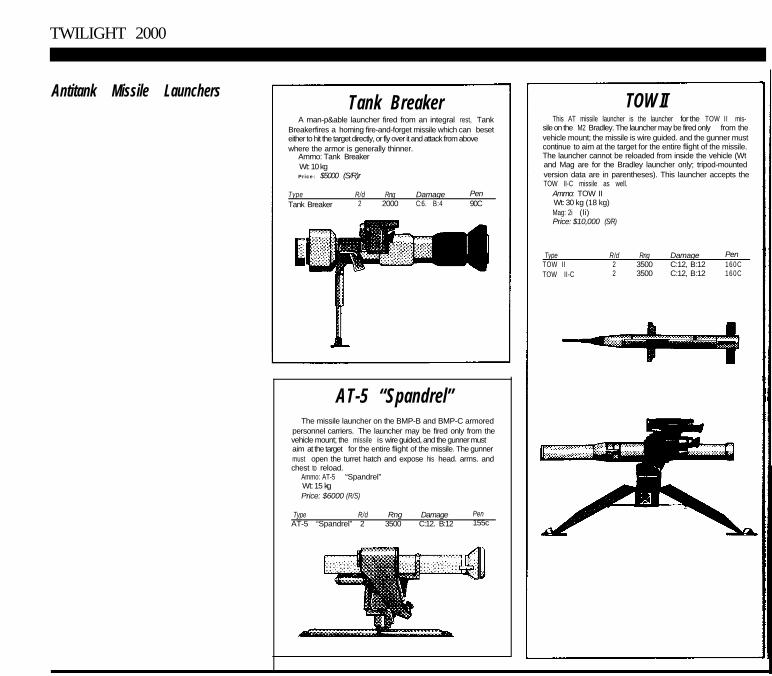
Antitank Missile LaunchersTank Breaker
A man-p&able launcher fired from an integral rest, TankBreakerfires a homing fire-and-forget missile which can beseteither to hit the target directly, or fly over it and attack from abovewhere the armor is generally thinner.
Ammo: Tank BreakerWt: 10 kgPrice: $5000 (S/R)r
TypeTank Breaker
R/d Rng Damage Pen2 2000 C:6. B:4 90C
AT-5 “Spandrel”The missile launcher on the BMP-B and BMP-C armored
personnel carriers. The launcher may be fired only from thevehicle mount; the missile is wire guided, and the gunner mustaim at the target for the entire flight of the missile. The gunnermust open the turret hatch and expose his head. arms. andchest to reload.
Ammo: AT-5 “Spandrel”Wt: 15 kgPrice: $6000 (R/S)
Type R/d Rng Damage PenAT-5 “Spandrel” 2 3500 C:12. B:12 155c
TOW IIThis AT missile launcher is the launcher for the TOW II mis-
sile on the M2 Bradley. The launcher may be fired only from thevehicle mount; the missile is wire guided. and the gunner mustcontinue to aim at the target for the entire flight of the missile.The launcher cannot be reloaded from inside the vehicle (Wtand Mag are for the Bradley launcher only; tripod-mountedversion data are in parentheses). This launcher accepts theTOW II-C missile as well.
Ammo: TOW IIWt: 30 kg (18 kg)Mag: 2i (li)Price: $10,000 (S/R)
TypeTOW IITOW II-C
R/d Rng Damage Pen2 3500 C:12, B:12 160C2 3500 C:12, B:12 160C

TWILIGHT 2000
Heavy Machineguns
AT-7 “Saxhorn”The Dragon PIP (Product Improved) is a man-portable
antitank missile designed to give the rifle squad some meansof dealing with armored vehicles at medium to long range.
Ammo: Dragon PIPWt: 8kgPrice: $1200 (R/-)
Type R/d Rng Damange Pen TypeAT-7 Saxhorn 2 1000 C:12. B:12 1000 Dragon PIP
M2HBThe M2 Heavy Barrel is the standard heavy machinegun
of every western European army. It accepts 1 OS-round beltsand may be fired only from a tripod (NHT) or from a vehiclemount.
Ammo: .50 BMG or SLAPWt: 42 kgMag: 105 beltPrice: $1600 (V/C)
Pen Blk SS Brst Rngwe napo ROF DamM2HB 5 8 2-2-3’ 8 3 14 65
tripod 5 8 2-2-3’ 8 2 7 150‘.50 SLAP ammunition has a penetration of 1-1 -2.
Dragon PIP
R/d Rng Damage Pen2 1000 C:12. B:12 1350
AC

TWILIGHT 2000
Hand GrenadesFragmentation Grenade
Upon exploding, the grenade scat-ters metal fragments throughout itsburst radius.Wt: .5 kgPrice: $4U.I: 1Dam: C:3, B:12Pen: Nil
EquipmentExplosivesAntitank Mine
This type of mine is laid on the groundin the path of an oncoming vehicle.The vehicle’s weight triggers it.Wt: 35 kgPrice: $100U.I: 1Dam: 18Pen: Nil
Plastic ExplosiveA plastic explosive can be moldedinto any shape and sticks to almostany surface. It does not explode un-less triggered by another explosion,usually a blasting cap.Wt: 1 kgPrice: $30U.I: 1Dam: 6Pen: Nil
Time-Delayed Plastic Explosive LockpicksSame as the plastic explosive, but Picks, shims, stethoscope and otherincludes a time-triggered device to equipment used to open any type ofset it off. lock.Wt: 1 kg Wt: .5 kgPrice: $30 Price: $20U.I: 1 U.I: 1Dam: 6Pen: Nil Vision Devices
Hand ToolsWheeled Vehicle Tools
Specialized tools for repair and main-tenance of wheeled vehicles.Wt: 10 kgPrice: $500U.I: 1
Tracked Vehicle ToolsSpecialized tools for repair and main-tenance of tracked vehicles.Wt: 15 kgPrice: $1000U.I: 1
Basic ToolsSmall hand tools that may be used fora variety of purposes.Wt: 5 kgPrice: $200U.I: 1
4x BinocularsAllows the user to see up to distancefour times greater than normal.Wt: .5 kgPrice: $100U.I: 1
25x Image IntensifierAllows the user to see in very littllight, They work the same way abinoculars, but also in the dark.Wt: 1 kgPrice: $2500U.I: 1
Telescopic Rifle SightMay be attached to any rifle to get better fix on a target. If a scope ismounted on the weapon, add 15 tthe character’s range figure for SmallArms (Rifle).Wt: .5 kgPrice: $500U.I: 1

TWILIGHT 2000
Starlight ScopeMay be attached to any rifle and ispowered from internal batteries. Al-lows the user to see a target at night.Wt: 2 kg Pr ice : $1000
Powered from internal batteries, aperson wears them like a regular pairof g l a s s e s They allow the user to see
i n t h e dark.Wt : 5 kg
- Price: $250
M256 Chemical Defector KitDetects and identifies the varieties ofchemical agent. The kit is usableonly once and must then be disposed
W t : 0 k gPrice: $20
Geiger CounterA device that detects nuclear radia-
Chemical Defense Suit and Mask Medical SuppliesAllows the user to survive in a chemi-cally infested atmosphere. AnestheticWt: 9 kg A drug that produces local insensibil-
Price: $1150 ity to pain and other sensation.
Price: $1000
Body ArmorKevlar Vest
U.I: 100Antibiotic
A drug used in the treatment of infec-This type of body armor is intendedto provide protection from fragmentsand is not to protect against direct
tious diseases.Wt: .2 kgPrice: $500
weapons fire. U.I: 100Wt: 4 kgPrice: $ 8 0 0U.I: 1
Flak JacketSame as Kevlar vest.
Pain RelieverA drug that relieves pain.Wt: .5 kgPrice: $500U.I: 100
Wt: 8 kgPrice: $400 SedativeU.I: 1 A drug that relieves pain and tension
Kevlar Helmetbv slowing bodily activity.
Same as kevlar vest, except it protectsWt: .5 kgPrice: $500
the head. U.I: 100Wt: .5 kgPrice: $100
1Blood
The fluid that circulates and distrib-utes oxygen and other chemicalsthroughout the body.Wt: .5 kgPrice: $25U.I: 1

TWILIGHT 2000
PlasmaThe liquid element of blood.Wt: .5 kgPrice: $10U.I: 1
Doctor’s Medical KitMedical equipment and drugs areincluded in this kit.Wt: 5 kgPrice: $1000U.I: 1
Personal GearSnow Shoes
Allows the user to walk on the sur-face of deep snow.Wt: 2 kgPrice: $100U.I: 1
Misc. EquipmentCompass
An instrument for determining di-rections.Wt: .5 kgPrice: $60U.I: 1
Hand Held RadioA small, readily portable two-wayradio.Wt: 1 kgPrice: $500U.I: 1
Four-Man TentA portable shelter of canvas that willprovide for four people.Wt: 12 kgPrice: $100U.I: 1
MRE (Meal-Ready to Eat)Small individually packed meals thatcan be eaten directly from the pack-age.Wt: 1 kgPrice: $3U.I: 1

TWILIGHT 2000
THE PAL SYSTEMThe PAL role-playing system, created by Paragon Software and Game Designers’
Workshop, was developed to make interaction between you and your computercharacters less cumbersome. In the past, computer game players were forced to makejudgement calls for each member of their party. For instance, playing with charactersA, B, C and D, it was necessary for the user to give B, C and D explicit instructions whena combat situation arose even though character A, as the party leader, should have beenthe only character under direct control of the user. Now, with the revolutionary PALsystem, the user is merely required to give general instructions and is then free to watchthe actions of his party unfold. PAL messages appear at the bottom of the screen whenthere is information available that helps the team. This area of the screen is termed the“message box”. The character best suited (based on skills) to volunteer informationrelays the data via the message box. For example, if your squad is out on a recon missionand there aresomeenemy soldiers a few hundred meters to the front, the character withthe best Observation skill might say something like, “There is a group of enemy soldiersin front of us and they are heading in our direction.”
Yet another feature of PAL is the unique ability for members of your squad tovolunteer to complete tasks. A typical situation would be attempting to arguepersuasively with an NPC; the member of your squad with the highest Persuasion skilltakes over, regardless of who your leader is.
PAL messages appear throughout the game, in both 2-D and 3-D sequences, and arealways displayed in the message box.
TWILIGHT 2000
I
IN THE OFFICEOnce you finish generating characters and assembling a squad, you are placed in the
headquarters office in Krakow. From this office, you control and expand your power-base throughout Poland. There are five active icons in the office that help youaccomplish your objectives.
To select the icons from a keyboard, use the left and right arrow keys to move pointer to the desired icon. If you are using a mouse, position the mouse pointer on thedesired icon. With a joystick, move the pointer to the desired icon by simply movingthe joystick left or right. Selections are made by pressing the <Enter> key on thekeyboard, the left button on the mouse and fire button 1 on the joystick. To abort theselection process, press the <Escape> key, right mouse button or joystick fire button 2
The icons are:1. Hand Held Radio - The hand held radio, located on the desk, is used
communicate with your intelligence officer, who conveys missions and pertindata to you.
After the radio is selected, a split screen appears with the intelligence officerthe right half and you, the leader, on the left. This is an animated sequencewhich you receive your orders and information about the next mission.
2. Computer - You may select the computer to view your current progress agBaron Czarny. When selected, a graphic of a computer screen with severagraphs is displayed. The bar graphs represent the amount of food, ammunimedicine, fuel and people you have won for Krakow. The morale bar graph imean of the other five categories and collectively illustrates your overall p emance against Czarny.
3. Filing Cabinet - The filing cabinet must be selected to organize a team of nthan four characters to complete a mission. When the cabinet is selected a

TWILIGHT 2000
press the <Enter> key to select it. If you wish to take the character on a particularmission, press the <Enter> key again. If you are using a mouse, position themouse pointer on the particular file that you want to view and press the left mousebutton. To take the character on a mission, press the left mouse button again. Witha joystick, move the joystick up and down to scroll through the files, and thenpress fire button 1 to select it. To take the character on a particular mission, pressfire button 1 again. In order to view all information about a character using thekeyboard or joystick, use the Up and Down arrow keys or move the joystick upand down to scroll through the pages. If you are using a mouse, position themouse pointer on the arrows in the upper and lower left sides of the file and pressthe left mouse button. To put a file back into the cabinet, press the <Escape> key,right mouse button or joystick fire button 2.
4. Map - The map can be accessedto view your current progress, ascompared to Baron Czarny’sprogress, and to peruse thegameplay area. The red pinsrepresent cities that Baron Czarnycontrols, and the white pins indi-cate cities that Krakow maintains.
After the map has been se-lected, a screen appears, display-ing a detailed map. To moveabout the map using a keyboard,use the left, right, up and downarrow keys. If you are using amouse, position the cursor on oneof the arrow keys in the corners ofthe map and press the left mousebutton. With a joystick, move thestick left, right, up and down toscroll through the map.
NOTE: Each graphic squarerepresents approximately one ki-lometer of area. Before scrollingaround the map, you can adjust
TWILIGHT 2000
the distance that each keystroke or button press will advance the map by pressingthe 1 through 9 keys (i.e. pressing 5 will scroll the map in five kilometerdistances). To return to the office screen press the <Escape> key, right mousebutton or joystick fire button 2.
5. Lamp - The lamp is selected after you receive a mission and assemble a team toaccomplish it. Once the lamp is selected, you are placed in the hallway outsideof the office where there are two doors displayed. The door with OFFICE printedon it returns you to the office screen. The door that has VEHICLE POOL printedon it places you in the vehicle pool where you select an appropriate vehicle (or novehicle) for the mission. To select one of the doors using the keyboard, use the leftand right arrow keys to position the pointer on the door, and then press Enter. Ifyou are using a mouse, position the cursor on the door and press the left mousebutton. With a joystick, position the pointer on the appropriate door and pressfire button 1 to select.

TWILIGHT 2000
Vehicle PoolAfter you have received a mission and selected a team to accomplish it, the next
step is to select a vehicle that is appropriate for the mission. After selecting thevehicle pool door in the hallway, a picture of the interior of the vehicle pool isdisplayed. Depending on whether or not you have acquired vehicles on yourmissions, there may or may not be any vehicles displayed. Even after you haveacquire several vehicles, there can only be two displayed inside the vehicle pool atthe same time.
There are two doors in the picture. The door on the right side of the screenreturns you to the hallway. The other door, located at the rear of the vehicle pool,allows your team to leave Krakow and attempt to accomplish a mission on foot. Toselect the doors using a keyboard, use the left and right arrow keys to position thepointer on a door. If you are using a mouse, position the pointer on a door. Witha joystick, move the joystick left and right to position the pointer on one of thedoors. To select a door, press the <Enter> key, left mouse button or joystick firebutton 1. To abort a selection, press the <Escape> key, right mouse button orjoystick fire button 2.
Certain vehicles should be used for particular missions. For example: If youknow that you are going to need a vehicle to haul cargo, it wouldn’t be sensible totake a T-72 tank if you have a 2 l/2 ton truck. In order to determine what vehiclesare available in the vehicle pool, you must consult the I.V.A.N. (Intelligence VehicleAcquisition Network) computer.
The I.V.A.N. computer is located on the right side of the screen in the vehiclepool office. To gain access to the computer using a keyboard or joystick, use the leftand right arrow keys or move the joystick left and right to position the pointer onthe office. If you are using a mouse, simply position the pointer on the office. Toselect it, press the <Enter> key, joystick fire button 1 or left mouse button. To abortthe selection, press the <Escape> key, joystick fire button 2 or right mouse button.
Once you have gained access to the I.V.A.N. computer, a representation of acomputer screen appears. All vehicles that are available are listed on the screen. If
TWILIGHT 2000
there are multiple vehicles available, the numbers are listed directly after the nameof the vehicle.
Notice that the first available vehicle in the list is highlighted. To scroll throughthe vehicle list using a keyboard or joystick, use the Up and Down arrow keys or
move the joystick up and down until the desiredoption is highlighted. If you are using a mouse,position the highlight on the option to be se-lected. To select a vehicle once it is highlighted,press the <Enter> key, joystick fire button 1 orleft mouse button. To abort selecting a vehicleand to return to the interior of the vehicle pool,press the <Escape> key, joystick fire button 2 orright mouse button.
After you select a vehicle, the computer screendisplays a side view of the vehicle as well asrotating 3-D perspective and a text description.To view any technical information about thevehicle using a keyboard or joystick, use the leftand right arrow keys or move the joystick leftand right to scroll through the pages of data. Ifyou are using a mouse, position the pointer onthe left or right arrows and press the left mousebutton to scroll through the pages. To switch toanother vehicle profile using the keyboard orjoystick, use the Up and Down arrow keys or
move the joystick up and down. If you are using a mouse, position the pointer onthe up or down arrows displayed, and press the left mouse button. To select avehicle, press the <Enter> key, joystick fire button 1 or left mouse button. Arequestor asks you if you are sure that this is the vehicle you want for this mission.If you are using a keyboard, press the “Y” key for yes and the "N" key for no. Witha mouse or joystick, position the pointer on the "Y" or "N", a n d press the left mousebutton or joystick fire button 1. To abort the selection of a vehicle and to return to themain I.V.A.N. computer screen, press the <Escape> key, right mouse button orjoystick fire button 2.
After you select your vehicle for the mission, an animated sequence showing thevehicle leaving the pool, is displayed.

TWILIGHT 2000
2-D- ON THE GROUND1. Introduction Throughout your adventures in Poland, you have the opportunity to travel to
numerous cities and villages. Some of these cities and villages are vastly populatedwith citizens and contain numerous buildings to explore, while others have a verysmall population and only a few structures. Your team members have to traversevarious types of land to reach their destinations. You may encounter anything fromdense forests and mountains to lakes and highly contaminated radiation zones.
As you travel throughout Poland, you also encounter many unique individuals.Some of the people you meet are simple dirt farmers, while others are members of areconstituted and sovereign form of society. As you guide your team, you meet newfriends willing to assist you in your battle against Czarny; some share importantinformation with you; others are willing to exchange their allegiance or weaponry forKrakow’s protection from aggressive outsiders.
However, not everyone you encounter during your travels is friendly. There areheinous characters in the game, some of whom include: pernicious marauders, angrycitizens and worst of all, Czarny’s Black Legion soldiers. Combat encompasses a vastmajority of the game, but isn’t essential to complete each mission. Your team may beattacked when you least expect it during a simple recon mission, but later, successfullycomplete a difficult mission without firing one shot.
While exploring Poland and completing missions, all action takes place on threegame screens: the 2-D Overhead Interface Screen, the Character Sheets and the 3-DVehicle Interface Screen.
2. 2-D; OverheadInterface Screen
A vast majority of the ground exploration and combat sequences take place on the2-D Overhead Interface Screen.
A) 2-D - Overhead View ScreenThe 7-D overhead view screen consists of a unique three-quarter view perspective.
This perspective is shown throughout the entire game, even in buildings - except

TWILIGHT 2000
during a vehicle sequence, when the per-spective changes to a 3-D view.
B) 2-D Ground IconsTheentiregameiscontrolledbyselecting
icons. After an icon is selected, the bottomsection of the screen is replaced by optionsfor that particular icon. If the selected icondoes not have any other options, a graphicmay appear to represent the icon or a win-dow appears with other options to selectfrom. The icons, listed in the order theyappear, from left to right, are:
1. Necessity Icon - The Necessity icon isused when your team needs to sleep or eatafter having been on a mission for anextended period of time. The team is re-quired to sleep and eat every eight hours.If they don’t, any actions they attempt arehindered.
When this icon is selected, the following options appear in a window:
@!I
Fishing Option - When this option is selected, a graphicappears that represents your team fishing. Text at the bottomof the screen, in the message box, informs you if your team hada successful catch.Foraging Option - When this option is selected, a graphicappears that represents the team foraging. Text at the bottom
of the screen, in the message box, informs you of the team’s results.Hunting Option - When this option is selected, a graphic appears that represents theteam hunting. Text at the bottom of the screen, in the message box, informs you if yourteam successfully made a kill.Sleeping Option - When this option is selected, a graphic appears that represents theteam sleeping. Text at the bottom of the screen, in the message box, informs you of theresults of the rest period.
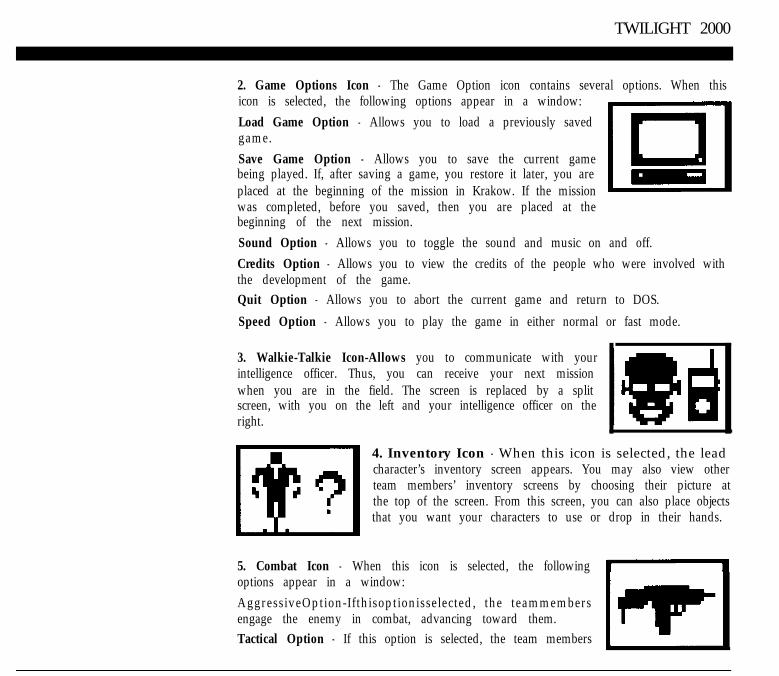
TWILIGHT 2000
2. Game Options Icon - The Game Option icon contains several options. When thisicon is selected, the following options appear in a window:Load Game Option - Allows you to load a previously savedgame.Save Game Option - Allows you to save the current gamebeing played. If, after saving a game, you restore it later, you areplaced at the beginning of the mission in Krakow. If the missionwas completed, before you saved, then you are placed at thebeginning of the next mission.Sound Option - Allows you to toggle the sound and music on and off.Credits Option - Allows you to view the credits of the people who were involved withthe development of the game.Quit Option - Allows you to abort the current game and return to DOS.
Speed Option - Allows you to play the game in either normal or fast mode.
.3. Walkie-Talkie Icon-Allows you to communicate with yourintelligence officer. Thus, you can receive your next missionwhen you are in the field. The screen is replaced by a splitscreen, with you on the left and your intelligence officer on theright.
4. Inventory Icon - When this icon is selected, the leadcharacter’s inventory screen appears. You may also view otherteam members’ inventory screens by choosing their picture atthe top of the screen. From this screen, you can also place objectsthat you want your characters to use or drop in their hands.
5. Combat Icon - When this icon is selected, the following b-doptions appear in a window:AggressiveOption-Ifthisoptionisselected, the teammembersengage the enemy in combat, advancing toward them.Tactical Option - If this option is selected, the team members
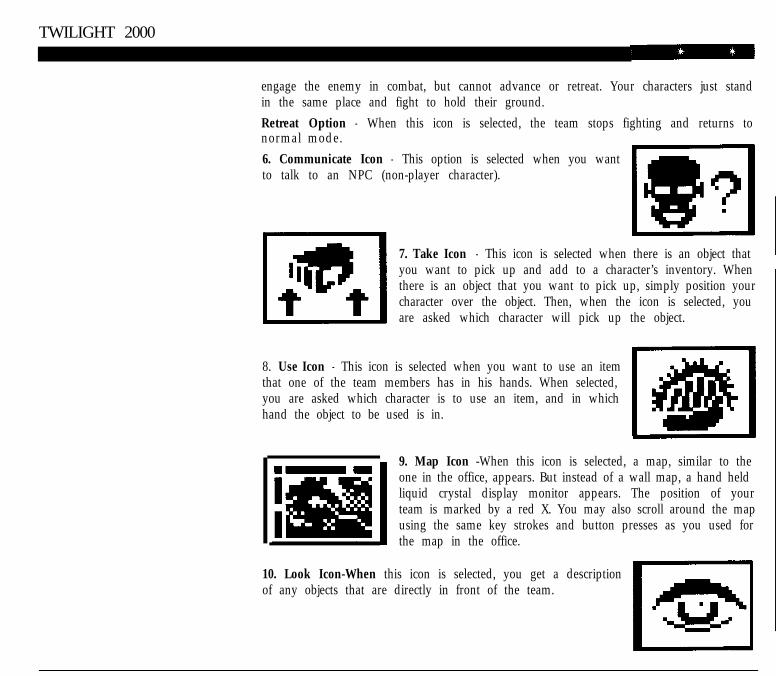
TWILIGHT 2000
engage the enemy in combat, but cannot advance or retreat. Your characters just standin the same place and fight to hold their ground.Retreat Option - When this icon is selected, the team stops fighting and returns tonormal mode.6. Communicate Icon - This option is selected when you wantto talk to an NPC (non-player character).
7. Take Icon - This icon is selected when there is an object thatyou want to pick up and add to a character’s inventory. Whenthere is an object that you want to pick up, simply position yourcharacter over the object. Then, when the icon is selected, youare asked which character will pick up the object.
8. Use Icon - This icon is selected when you want to use an itemthat one of the team members has in his hands. When selected,you are asked which character is to use an item, and in whichhand the object to be used is in.
9. Map Icon -When this icon is selected, a map, similar to theone in the office, appears. But instead of a wall map, a hand heldliquid crystal display monitor appears. The position of yourteam is marked by a red X. You may also scroll around the mapusing the same key strokes and button presses as you used forthe map in the office.
10. Look Icon-When this icon is selected, you get a descriptionof any objects that are directly in front of the team.

TWILIGHT 2000
To select an icon using a keyboard or joystick, press the space bar or joystick firebutton 2 and then use the left and right arrow keys or the joystick to position thehighlight on the desired option. If you are using a mouse, simply position the pointeron the desired icon. To select the icon, press the <Enter> key, joystick fire button 1 orleft mouse button.
Notice that the first option in a window is highlighted. If using a keyboard orjoystick, use the Up and Down arrow keys or move the joystick up and down tohighlight an option. If you are using a mouse, simply position the pointer on the optionto be selected. To select an option, press the <Enter> key, joystick fire button 1 or leftmouse button.
To abort selecting an icon or option from a window, press the <Escape> key, joystickfire button 2 or right mouse button.
3. Character During your team’s exploration of Poland, your party is represented by one
Movement and individual on the screen. This individual represents you, the leader. You can move theleader in any direction using a keyboard, mouse or joystick. Following, is a list of the
Interaction peripherals and how they work:
1. Keyboard: When you are moving a character on the map, the following keys onthe number pad are used:
Forward (Straight) = 8 Backward (Straight) = 2Forward (Left) = 7 Backward (Left) = 1Forward (Right) = 9 Backward Right) = 3Left = 4 Right = 6
You can also use the arrow key pad to substitute for the 8,2,6 and 4 keys.
2. Joystick: When you are moving a character on the map, the following joystickmotions are used:
Forward (Straight) = up Backward (Left) = down and leftForward (Left) = up and left Backward (Right) = down and rightForward (Right) = up and right Left = LeftBackward (Straight)= down Right = Right
3. Mouse: When moving a character on the map, simply place the mouse pointer onthe area that you want the character to walk to and press the left mouse button.
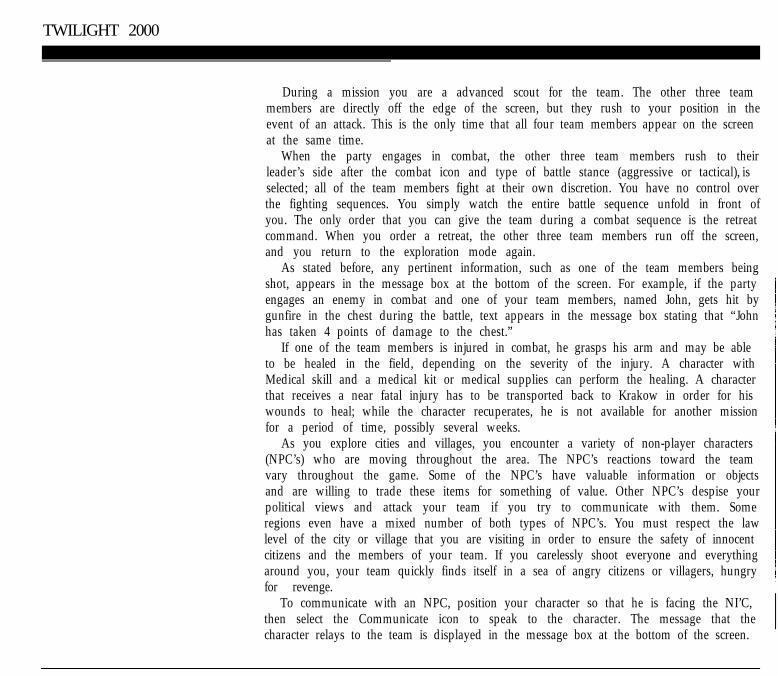
TWILIGHT 2000
During a mission you are a advanced scout for the team. The other three teammembers are directly off the edge of the screen, but they rush to your position in theevent of an attack. This is the only time that all four team members appear on the screenat the same time.
When the party engages in combat, the other three team members rush to theirleader’s side after the combat icon and type of battle stance (aggressive or tactical), isselected; all of the team members fight at their own discretion. You have no control overthe fighting sequences. You simply watch the entire battle sequence unfold in front ofyou. The only order that you can give the team during a combat sequence is the retreatcommand. When you order a retreat, the other three team members run off the screen,and you return to the exploration mode again.
As stated before, any pertinent information, such as one of the team members beingshot, appears in the message box at the bottom of the screen. For example, if the partyengages an enemy in combat and one of your team members, named John, gets hit bygunfire in the chest during the battle, text appears in the message box stating that “Johnhas taken 4 points of damage to the chest.”
If one of the team members is injured in combat, he grasps his arm and may be ableto be healed in the field, depending on the severity of the injury. A character withMedical skill and a medical kit or medical supplies can perform the healing. A characterthat receives a near fatal injury has to be transported back to Krakow in order for hiswounds to heal; while the character recuperates, he is not available for another missionfor a period of time, possibly several weeks.
As you explore cities and villages, you encounter a variety of non-player characters(NPC’s) who are moving throughout the area. The NPC’s reactions toward the teamvary throughout the game. Some of the NPC’s have valuable information or objectsand are willing to trade these items for something of value. Other NPC’s despise yourpolitical views and attack your team if you try to communicate with them. Someregions even have a mixed number of both types of NPC’s. You must respect the lawlevel of the city or village that you are visiting in order to ensure the safety of innocentcitizens and the members of your team. If you carelessly shoot everyone and everythingaround you, your team quickly finds itself in a sea of angry citizens or villagers, hungryfor revenge.
To communicate with an NPC, position your character so that he is facing the NI’C,then select the Communicate icon to speak to the character. The message that thecharacter relays to the team is displayed in the message box at the bottom of the screen.

TWILIGHT 2000
4. The CharacterSheet
At any time during a mission, you can access detailed character sheets for eachof your characters. To view a character sheet, you must first select the Inventoryicon at the bottom of the screen. After selecting this icon, the lead character’s sheetis displayed. To view another team member’s character sheet using a keyboard ora joystick, use the left and right arrow keys or the joystick to position the whitehighlight on the desired character’s picture whose profile you want to view. If youare using a mouse, position the hand pointer on the desired character. To select thecharacter, press the <Enter> key, joystick fire button 1 or left mouse button. Toabort the selection and return to the 2-D overhead, press the <Escape> key, joystickfire button 2 or right mouse button.
The character sheet contains the following information:A) The Character’s PictureB) Body Armor (currently beingworn by character)C) The Character’s Hit Capaci-tiesD) The Character’s InventoryE) Items (in left or right hands)F) The Character’s Personal In-formation (name, gender, age,nationality, rank, service branch,weight, initiative, rads, load,throw range, current loadweight, number of kills andnumber of missions completed)G) The Character’s Base HitNumbersH) The Character’s ContactsI) The Character’s AttributesJ) The Character’s Skills

TWILIGHT 2000
When a character’s profile sheet is shown, items A,B,C, and D aredisplayed. To viewthe rest of the character’s profile using a keyboard, use the left and right arrow keys toposition the white highlight on the left section of the screen (the section with the arrow-cand the scroll bar). Once this area is highlighted, press the up and down arrow keys toview the remaining information. If you are using a mouse, simply click on the arrowsin the upper and lower left corners of this section with the left mouse button.
With a joystick, position the white highlight on the left section of the screen, with thearrows and scroll bar, and move the joystick up and down to view the rest of theinformation.
To view the list of items on the inventory sheet, the same keystrokes and buttonpresses apply as were used for the profile sheets above. The only difference is that thewhite highlight or hand pointer has to be placed on the right section of the screen thatcontains the arrows and scroll bar.
To select an item from the inventory list, if you are using a keyboard or joystick,position the white highlight on the inventory list. Notice that the first item in the list ishighlighted. You can scroll through the list using the Up and Down arrow keys or bymoving the joystick up and down. With a mouse, simply position the hand pointer onthe item to be selected. To select an item, press the <Enter> key, joystick fire button 1or left mouse button. Once an item is selected, the white highlight turns to red or thehand pointer is displayed as a question mark pointer to indicate that an item has beenselected. You can then place the item back in the inventory list, in a different order, byplacing the red highlight or question mark pointer on the spot in the list where you wantto insert it and pressing the <Enter> key, joystick fire button 1 or left mouse button.Everything on the list is then moved down one spot. To abort selecting an item, and toreturn to the original order, press the <Escape> key, joystick fire button 2 or right mousebutton.
The character sheet screen is also used to exchange objects between characters in theteam and to place an object in a specific character’s hand. If, at any time during gameplay, you want to give an item to one of the other characters on the team, you shouldfirst select the Inventory icon. After you have selected the giving character, you canview all of his items by scrolling through the inventory list using the method describedabove.
To select an item from an inventory list with a keyboard or joystick, move the whitehighlight to the inventory list on the right of the screen. If you are using a mouse,position the hand pointer on the right of the screen. To select a specific item using akeyboard or joystick, use the Up and Down arrow keys or move the joystick up and
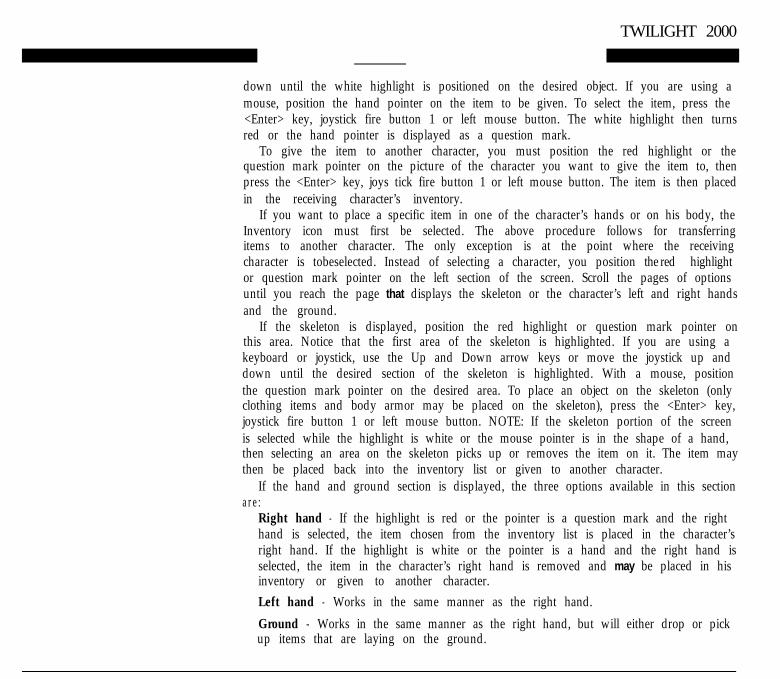
TWILIGHT 2000
down until the white highlight is positioned on the desired object. If you are using amouse, position the hand pointer on the item to be given. To select the item, press the<Enter> key, joystick fire button 1 or left mouse button. The white highlight then turnsred or the hand pointer is displayed as a question mark.
To give the item to another character, you must position the red highlight or thequestion mark pointer on the picture of the character you want to give the item to, thenpress the <Enter> key, joys tick fire button 1 or left mouse button. The item is then placedin the receiving character’s inventory.
If you want to place a specific item in one of the character’s hands or on his body, theInventory icon must first be selected. The above procedure follows for transferringitems to another character. The only exception is at the point where the receivingcharacter is tobeselected. Instead of selecting a character, you position the red highlightor question mark pointer on the left section of the screen. Scroll the pages of optionsuntil you reach the page that displays the skeleton or the character’s left and right handsand the ground.
If the skeleton is displayed, position the red highlight or question mark pointer onthis area. Notice that the first area of the skeleton is highlighted. If you are using akeyboard or joystick, use the Up and Down arrow keys or move the joystick up anddown until the desired section of the skeleton is highlighted. With a mouse, positionthe question mark pointer on the desired area. To place an object on the skeleton (onlyclothing items and body armor may be placed on the skeleton), press the <Enter> key,joystick fire button 1 or left mouse button. NOTE: If the skeleton portion of the screenis selected while the highlight is white or the mouse pointer is in the shape of a hand,then selecting an area on the skeleton picks up or removes the item on it. The item maythen be placed back into the inventory list or given to another character.
If the hand and ground section is displayed, the three options available in this sectionare:
Right hand - If the highlight is red or the pointer is a question mark and the righthand is selected, the item chosen from the inventory list is placed in the character’sright hand. If the highlight is white or the pointer is a hand and the right hand isselected, the item in the character’s right hand is removed and may be placed in hisinventory or given to another character.Left hand - Works in the same manner as the right hand.
Ground - Works in the same manner as the right hand, but will either drop or pickup items that are laying on the ground.

TWILIGHT 2000
When the hand and ground section of the screen is selected, notice that the firstoption is highlighted when you are using a key board or joystick. To scroll between theoptions, use the Up and Down arrow keys or move the joystick up and down. If youare using a mouse, position the pointer on the option desired. To select the option, pressthe <Enter> key, joystick fire button 1 or left mouse button.
There are also three options available on the character sheet. They are:
N P CLets you give an item to an NPC after it has been placed in one of the character’s
hands. After an item has been selected from the inventory list, if you are using akeyboard or mouse, position the red highlight on the NPC option and press <Enter>or joystick fire button 1 to give the item to the nearest non-player character. Afterselecting the item with a mouse, position the question mark pointer on the NPCoption and press the left mouse button.
If you want to abort giving an item to an NPC and return it to the inventory, pressthe <Escape> key, joystick fire button 2 or right mouse button.Info
After an item has been selected from the inventory list, the Info option providesdetailed statistical data about the object. If you are using a keyboard or joystick toselect an item, position the red highlight on the INFO option and press the <Enter>key or joystick fire button 1 to view the data. After selecting the item with a mouse,position the question mark pointer on the INFO option and press the left mousebutton.Description
After an item has been selected from the inventory list, the Description optionprovides a small informative definition of the object. If you are using a keyboardor joystick to select from the inventory, position the red highlight on the DESCRIP-TION option and press the <Enter> key or joystick fire button 1 to view the data.After selecting the item with a mouse, position the question mark pointer on theDESCRIPTION option and press the left mouse button.To return a selected item to the inventory, press the <Escape> key, joystick firebutton 2 or right mouse button.

TWILIGHT 2000
5. Buildings During your expeditions, your team encounters several different types of buildingsaccording to the size of the city or village that they are reconnoitering. Be sure to exploreall structures for objects that may be of use to the team. Be careful, there may be enemieslurking on the other side of a door, just waiting to ambush your team.
Sometimes doors to buildings are locked, so your team needs a character who hashigh Lockpick skill. If a character with Lockpick skill is not available, you can attemptto blow up the door with a hand grenade or a plastic explosive in order to gain accessto the structure.

TWILIGHT 2000
3-D - IN A VEHICLE1. Introduction Many of the missions in Twilight 2000 require the use of a vehicle. There are several
vehicles available, ranging from an American made Humm-vee (jeep) to a Soviet madeT-72 tank.
Initially, when you begin the game, you have no vehicles. The first eight missions ofthe game are designed to help you acquire one of each type of vehicle (refer to page 74for a brief description of all vehicles in the game). However, you can acquire more thanone of each vehicle during your adventures. For instance, during your travels, you maycome upon an abandoned or partially damaged truck or tank that has been left behind.Perhaps the vehicle needs refueling. Or, if the vehicle is damaged, one of the charactersin your party, with a high Mechanic skill, may be able to repair it and take it back toKrakow.
2. 3-D: VehicleInterface Screen
A vast majority of traveling between cities, and a high percentage of the combatsequences, take place on the 3-D Vehicle Interface Screen, To enter a vehicle, simplymove your character onto it.
A) 3-D Vehicle View ScreenThe 3-D vehicle view screen consists of a state-of-the-art, innovative 3-D perspective.
There are three different types of vehicle interface screens. They are:
Wheeled VehicleThis category includes the HMMWV and the 2 l/2 ton truck. Once the vehicle is
entered, a large section of the screen is represented by a 3-D display of everythingoutside of the vehicle. All objects, such as trees, buildings and even the hood of thevehicle, are realistically represented, just as a driver would actually see them.
The interior of the vehicle is represented by a dashboard display. The followinginstruments are located beside the steering wheel:
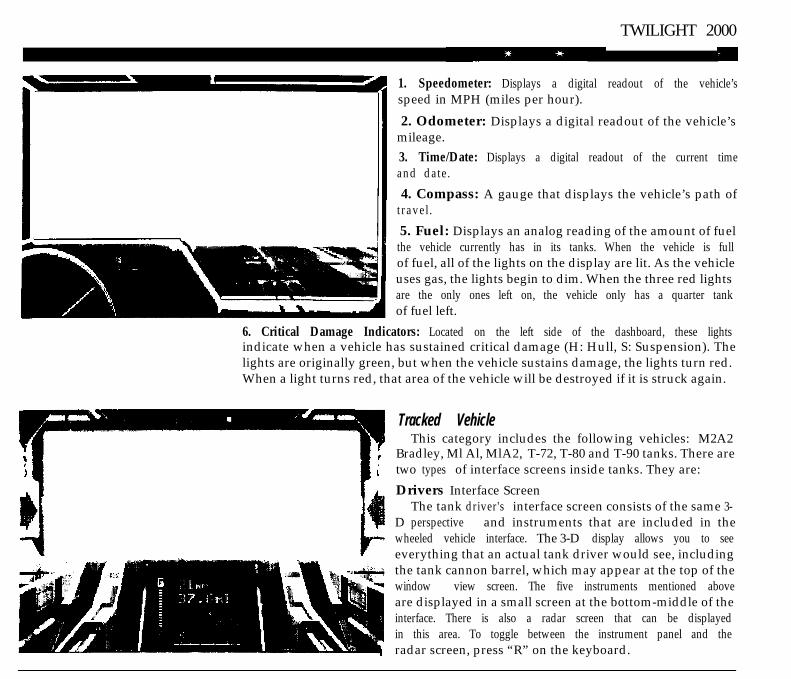
TWILIGHT 2000
1. Speedometer: Displays a digital readout of the vehicle’sspeed in MPH (miles per hour).
2. Odometer: Displays a digital readout of the vehicle’smileage.
3. Time/Date: Displays a digital readout of the current timeand date.
4. Compass: A gauge that displays the vehicle’s path oftravel.
5. Fuel: Displays an analog reading of the amount of fuelthe vehicle currently has in its tanks. When the vehicle is fullof fuel, all of the lights on the display are lit. As the vehicleuses gas, the lights begin to dim. When the three red lightsare the only ones left on, the vehicle only has a quarter tankof fuel left.
6. Critical Damage Indicators: Located on the left side of the dashboard, these lightsindicate when a vehicle has sustained critical damage (H: Hull, S: Suspension). Thelights are originally green, but when the vehicle sustains damage, the lights turn red.When a light turns red, that area of the vehicle will be destroyed if it is struck again.
Tracked VehicleThis category includes the following vehicles: M2A2
Bradley, Ml Al, MlA2, T-72, T-80 and T-90 tanks. There aretwo types of interface screens inside tanks. They are:
Drivers Interface ScreenThe tank driver's interface screen consists of the same 3-
D perspective and instruments that are included in thewheeled vehicle interface. The 3-D display allows you to seeeverything that an actual tank driver would see, includingthe tank cannon barrel, which may appear at the top of thewindow view screen. The five instruments mentioned aboveare displayed in a small screen at the bottom-middle of theinterface. There is also a radar screen that can be displayedin this area. To toggle between the instrument panel and the
m radar screen, press “R” on the keyboard.

TWILIGHT 2000
When the radar screen is displayed, your tank is placed in the center most point ofthe screen. The two lines that extend diagonally to the upper corners are your “field ofview” lines. These lines represent the limits of what you are actually seeing out of thedriver’s window. Hostiles are represented by the red dots on the screen, whilebuildings and other objects are represented by green dots. The circular lines on theradar represent 1000 meter intervals, and are used to estimate the distances that objectsare from you.
NOTE: The radar is not situated so that North is at the top, south at the bottom andso on. The top of the radar represents the actual direction in which the vehicle ispointing. For example, if your vehicle is heading West, the top of the radar screenrepresents West. The corresponding headings would then be: North to the right of theradar screen, South to the left and East at the bottom of the screen.
The only other difference on the interface is the location of the critical damageindicators. They are displayed at the top of the screen and are identical to the indicatorson wheeled vehicles, with one exception: the turret is also monitored (H: Hull, T: Turret,S: Suspension).
Gunner’s (Turret) Interface ScreenThe gunner’s interface screen differs slightly from the driver’s interface screen. The
difference being that the gunner’s view window is on the right side of the screen andis much smaller than the driver’s view window. The same3-D perspective is still visible through the window and thesame objects are displayed; even the tank cannon appears,on the left side of the viewing window. Also, the gunner’sinstrument panel is located on the left side of the interfacescreen instead of at the bottom.
The instruments, displayed on the panel, are:1. Ammo Picture: There is a picture of the current am-munition being used; it is displayed at the top of thepanel.2. Ammo Description/Rounds: Displayed beside theammo picture, this is a brief text description of the ammoand the number of rounds left.3. Turret Elevation/Firing Range: Displayed in themiddle of the panel, this represents the elevation of thecannon and the distance, in meters, of the firing range.

TWILIGHT 2000
4. Time/Date: Displays a digital readout of the current time and date.
5. Compass: Displayed at the bottom of the panel, this is a gauge that displays thevehicle’s path of travel.
6. Critical Damage Indicators: Located at the bottom of the interface, these indica-tors work in the same manner as in the driver’s interface.
The gunner’s (turret) mode also has a radar screen. To toggle between the instru-ment panel and the radar screen, press "R" on your keyboard. The turret radar operatesin the same basic manner as the driver’s radar screen. The only difference is that theturret works separately from the rest of the tank on the radar screen. On the radarscreen, the turret always remains stationary (pointed toward the top of the radarscreen). Although the turret of the tank does rotate, it remains pointed toward the topof the radar screen at all times.
On the radar screen, there is a red line that extends from the turret. This red line,called the “kill line”, is used to target on an object that you want to fire at. As the objectsare rotated on the radar screen, you simply continue to rotate the turret until the desiredobject is directly in alignment with the kill line.
B_) The Radar DisplayThe radar screen does not operate as a map view with north at the top of the screen
and south at the bottom. What you see on the screen, is a representation of your tankat the center of the radar display. It is always facing toward the top of the radar screen.Objects and other vehicles appear as points within the radar display. When the tank orturret rotates, the images of other objects or vehicles rotate around the image of yourtank. For example, imagine your tank is pointing directly at a farm building. On the 3-D view, the farm building would be in your field of view and, on the radar screen, theimage of the farm building would be directly above the image of your tank.
Now imagine yourself driving cross-country. An enemy tank is sneaking up on youfrom behind. On the 3-D view, you would not be able to see it. But, on the radar screen,the image of the enemy vehicle would appear as a red dot directly below the image ofyour tank. Objects to the right side of your tank will appear on the right side of the radarscreen, while objects to the left, appear on the left side of the display. If a radar imageappears within the field-of-view lines, then you should be able to see it within the 3-Dview, as long as it is not concealed by another object.

There are some options that are controlled by icons at the bottom of the screen in the3-D mode. After an icon is selected, the bottom section of the screen is replaced byoptions for that p articular icon. If the selected icon does not have any options, a graphicmay appear to represent the icon or a window appears with other options to selectfrom. The icons, listed in the order that they appear, from left to right, are:
1. Personnel Status Icon - When this icon is selected, theleader’s character sheet is displayed. You may view anycharacter’s sheet, but may not place objects in his hands, giveobjects to another character or drop an item. You may only
I%
+ a gIview his sheet. .
TWILIGHT 2000
C) 3-D Vehicle Icons
I
2. Game Options Icon - The Game Option icon contains sev-eral options. When this icon is selected, the following optionsappear in a window:
Load Game Option - Allows you to load a previously savedgame.
Save Game Option - Allows you to save the game currentlybeing played. If, after saving a game, you restore it later, you are placed at thebeginning of the mission in Krakow. If the mission was completed, before yousaved, then you are placed at the beginning of the next mission.
Sound Option - Allows you to toggle the sound and music on and off.
Credits Icon-Allows you to view the credits of the people who were involved withthe development of the game.
Quit Option - Allows you to abort the current game and return to DOS.
Speed Option - AIlows you to pIay the game in either normal or fast mode.
3. Infrared Icon-This icon should only be selected if it is darkoutside. Infrared allows you to see objects at marginal dis-tances in the dark. Everything that you see outside of thewindow in the vehicle is displayed in shades of green. NOTE:If you attempt to use the infrared during the daytime, every-

TWILIGHT 2000
thing turns green in the window view screen, and your sight is hindered.
4. Walkie-Talkie Icon-Allows you to communicate with yourintelligence officer. Thus, you can receive your next missionwhen you are in the field. The screen is replaced by a splitscreen, with you on the left and your intelligence officer on theright.
5. Map Icon - When this icon is selected, a map, similar to theone in the office, appears. But instead of a wall map, a hand heldliquid crystal display monitor appears. The position of yourteam is marked by a red X. You may also scroll around the mapusing the same key strokes and button presses as you used forthe map in the office.
6. Exit Icon - When this icon is selected, the team exits thevehicle.
To select an icon using a keyboard or joystick, press the space bar or joystick firebutton 2 and then use the left and right arrow keys or the joystick to position thehighlight on the desired option. If you are using a mouse, simply position the pointeron the desired icon. To select the icon, press the <Enter> key, joystick fire button 1 orleft mouse button.
Notice that the first option in a window is highlighted. If you are using a keyboardor joystick, use the Up and Down arrow keys or move the joystick up and down tohighlight an option; using a mouse, simply position the pointer on the option to beselected.
To select an option, press the <Enter> key, joystick fire button 1 or left mouse button.To abort selecting an icon or option from a window, press the <Escape> key, joystick
fire button 2 or right mouse button.

TWILIGHT 2000
3. Vehicle Movement When you first enter a tank, everyone is assigned to a station in accordance to hisskills. You, the leader, are placed in the driver’s mode. You can switch back and forthbetween the driver’s mode and the gunner’s mode with the “F1” and “F2” keysrespectively.
There are three peripherals that can be used to control a vehicle. They are:
1. Keyboard: When you are driving a vehicle, the following keys on the number padare used:
Accelerate = 8Decelerate = 2Right Turn = 6Left Turn = 4Brake = 5
If you are in combat, the following keys on the number pad are used to control theturret:
Turret Up = 8Turret Down = 2Turret Right = 6Turret Left = 4Fire = EnterToggle Weapons = Space Bar
You can also use the arrow key pad to substitute for the 8,2,6 and 4 keys.
2. Joystick: When you are driving a vehicle, the following joystick motions are used:Accelerate = Joystick UpDecelerate = Joystick DownRight Turn = Joystick RightLeft Turn = Joystick Left
If you are in combat, the following joystick motions are used to control the turret:Turret Up = Joystick UpTurret Down = Joystick DownTurret Right = Joystick Right

TWILIGHT 2000
Turret Left = Joystick LeftFire = Joystick Button 1Toggle Weapons = Joystick Button 2
3. Mouse: When you are using a mouse, the following motions are used to control thevehicle:
Accelerate = Move mouse pointer to top of screen.Decelerate = Move mouse pointer to bottom of screen.Right Turn = Move mouse pointer to right side of screen.Left Turn = Move mouse pointer to left side of screen.
If you are in combat, the following motions are used to control the turret:Turret Up = Move mouse pointer to top of screen.Turret Down = Move mouse pointer to bottom of screen.Turret Right = Move mouse pointer to right side of screen.Turret Left = Move mouse pointer to left side of screen.Fire = Left Mouse ButtonToggle Weapons = Right Mouse Button
There are also two alternate angles of view in the game, they are:1. Slot View: The slot view is actually an over the shoulder view of your vehicle. Toselect this view, press “F3” on the keyboard. Control of the vehicle depends on whatinterface your are in when you select the slot view.2. Enemy View: The enemy view places you behind the enemy’s vehicle, lookingdirectly toward your vehicle. To select this view, press “F4” on the keyboard.Control of your vehicle depends on what interface you are in when you select theenemy view.
4. Vehicle Combat During your travels throughout Poland, you are likely to encounter hostility,whether it be a group of marauders or some of Czarny's Black Legion forces, When aconflict occurs, you need to switch from the driver’s view to the gunner’s (turret) viewif you are in a tank. If you happen to be in a HMMWV or a 2 l/2 ton truck, you cannotdefend yourself against an aggressor because neither of these vehicles are armed.
Once you have the turret view displayed, you must switch the instrument panel
TWILIGHT 2000
over to the radar display (use the “R” key to toggle back and forth between the two).First, you must target on the aggressor. Rotate the turret left or right until the vehicleor object is within your field of view and the red “kill line” is on top of it. Next, you mustraise or lower the turret to equal the distance that the vehicle or object is from you. Thereare two ways to accomplish this. They are:
1. You can estimate the distance that the vehicle is from you by using the circularsector lines that are marked off every 1000 meters. After the distance has beenestimated, go back to the instrument panel and raise or lower the turret until the loftand distance indicators match your estimate. You may then fire at the target.2. You can keep the radar display on the instrument panel. There is a yellow dot thatmoves along the kill line in correspondence with the raising and lowering of theturret. Raiseorlower theturretuntil the yellow dotisdirectlyon the target. Once youare targeted, you can fire.The accuracy of the shot depends on the character’s Heavy Weapons skill level. If the
target is close to the mark, and the gunner has high Heavy Weapons skill, then the targetis hit. As a battle continues, and your vehicle is hit, the damage done to an area of yourvehicle is relayed to you via the message box.
5. Vehicles List Abandoned and damaged vehicles can be acquired during missions. If a characterhas high Mechanic or Electronic skills, he may be able to repair certain vehicles. Theserestored vehicles can be added to Krakow’s inventory.
Following is a brief description, along with some statistical data, of the vehiclesavailable in the game:
Price: The vehicles cost. There are also some letters listed after the price. The firstletter denotes the vehicles availability in Europe, the U.S. and Japan. The secondletter is the vehicles availability in the Soviet Union and China (V: Very Common,C: Common, S: Scarce, R: Rare).
Stabilization: This represents how accurate the weapons are if the vehicle istraveling across rough terrain.
Armament: This is the armament that the tank is equipped with.
Ammo: This is the amount of ammo that the vehicle is capable of carrying.

TWILIGHT 2000
Fuel Type: These are the types of fuel that the vehicle can use: D: Diesel, G: Gas, A:Alcohol.
Load: This is the vehicles interior cargo capacity, or how much weight the vehiclecan carry.
Veh Wt: This is the vehicle’s gross weight, including ammunition and fuel.
Crew: The first number represents the number of people needed to operate thevehicle. The second number is the amount of passengers the vehicle can carry.
Mnt: This number is the amount of maintenance - in hours - that is needed to repaira vehicle if it is moderately damaged.
Night Vision: This is equipment that lets you see in the dark.
Tr Mov: This is the vehicle’s travel movement under normal conditions. The firstnumber represents movement on roads, while the second number represents thevehicle’s travel movement across rough terrain.
Corn Mov: This is the vehicle’s combat movement. The first number representsmovement on roads while in combat, and the second number represents thevehicle’s combat movement across rough terrain.
Fuel Cap: This number represents the vehicle’s fuel capacity in liters.
Fuel Cons: This number represents the vehicle’s fuel consumption, in liters, withina four hour period.
Config: This is the vehicles configuration: Stnd: Standard (a wheeled vehicle); Trt:Turret (a tracked vehicle).
Susp: These figures represent the vehicles critical value damage - the amount ofdamage the suspension can sustain before it is destroyed. The first letter is thevehicle’s type of suspension: W: Wheeled, T: Tracked. The number listed after theletter is the critical damage value.
HF: These letters stand for hull front. The number represents the protection that thearmor on the front of the hull provides.
HS: These letters stand for hull side. The number represents the protection that thearmor on the side of the hull provides.

TWILIGHT 2000
HR: These letters stand for hull rear. The number represents the protection that thearmor on the rear of the hull provides.
TF: These letters stand for turret front. The number represents the protection thatthe armor on the front of the turret provides.
TS: These letters stand for turret side. The number represents the protection that thearmor on the side of the turret provides.
TR: These letters stand for turret rear. The number represents the protection thatthe armor on the rear of the turret provides.
NOTE: Some tanks have hulls and turrets that are fitted with special armor. Thesespecial tanks have letters listed after their armor values. The two types of specialarmor are: Sp: Spaced Armor; Cp: Compound Armor.

TWILIGHT 2000
Vehicles - Wheeled HMM WV (Hum- Vee)The above letters stand for high-mobility, multipurpose
wheeled vehicle. The H M M W V is a four-wheel-drive. off-road vehicle designed as a l ight scout, uti l i ty, and cargovehicle. It has replaced the jeep in U.S. service. It has aweapons mount(C) above the commander’s seat; however,no weapon is provided.
Tr Mov: 200/60Corn Mov: 50/l 5Fuel Cap: 90Fuel Cons: 30
Price: $20.000 (C/S)Fuel Type: D, G, ALoad: 1.25 tonsVeh Wt: 2 tonsCrew: 2+4Mnt: 2Night Vision: Headlights
Combat Stat ist icsConfig: Stnd HF: 1Susp: W(2) HS: 1
HR: 1
2 1/2-Ton Truck2 1/2-Ton Truck
A standard 6x6 cargo truck with moderate cross-countryperformance, capable of carrying 2 1/2 tons of cargo or anequivalent load of passengers.
Price: $15,000 (C/C)Fuel Type: D, ALoad: 2.5 tonsVeh Wt: 4 tonsCrew : 2Mnt: 4Night Vision; Headlights
Tr Mov: 180/35Corn Mov: 45/8Fuel Cap: 195Fuel Cons: 65
Combat StatisticsConfig: Stnd HF: 1Susp: W(3) HS: 1
HR: 1

TWILIGHT 2000
Vehicles - Tracked
Price:$200,000 (S/R)RF: +2
A tracked, amphibious, infantry fighting vehicle. This is an upgraded version of the orginal Bradley infantry f ight ing vehicle, theprincipal changes being the addition of 30 millimeters of appliquearmor to the front and sides of the vehicle, and adoption of thepowerful engine to deal with the increased vehicle weight Mainentrance to the passenger compartment is by two large, hingeddoors in the rear of the vehicle. There is a driver's hatch on the left front hull deck and hatches for the commander and gunner on topof the turret.There are two f i r ing ports on the left , two on the r ightand two on the rear. These firing ports will accept only the M231submachinegun and the M231 can fire to extreme range.
Tr Mov: 14O/llOStabilization: G o o dArmament: 25mm autocannon, twin TOW launcher, MAG Corn Mov: 35/30
MG, 6xM231Ammo: 300x25mm. 7xTOW II
Fuel Cap: 650
Fue l Type : D , AFuel Cons: 225
L o a d : 1.5 tonsVeh Wt: 33 tonsCrew: 3+7Mnt: 6Night V is ion: Passive IR/thermal imaging
C o m b a t StatisticsConfig: Trt TF: 10 HF: 14Susp: T: 4 TS: 6-Sp HS: 12-Sp
TR: 4-Sp H R : 6
An extensively improved version of the basic Ml. Themost significant changes are the substitution of a 120mmsmoothbore gun for the rifled 105mm gun of the M1, andthe use of depleted uranium armor inserts to increase thearmor protection on the hull and turret front.
Tr Mov: 140/l 10Corn Mov: 30/25Fuel Cap: 1920Fuel Cons: 560
Price: $650,000 (R/R)RF: + 4Armament : 120mm gun, MAG MG, M2HB MG (C)Stabilization: GoodAmmo: 40x120mmFue l Type : D, G, AvG. ALoad: 700 kgVeh Wf: 63 tonsCrew : 4Mnt: 14Night V is ion: Passive IR/thermal
Combat Stat ist icsConfig: Trt TF: 120-cp HF: 300-CpSusp: T: 6 TS: 40 H S : 16-Sp
TR: 16 HR: 16

TWILIGHT 2000
M1A2An Ml with a slightly higher superstructure and a small
casemate (unmanned) turret. The commander. gunner. anddriver riie in the vehicle chassis, and the gun is remotelycontrolled and automatically loaded. The driver, gunner andcommander ride side by side, and each has a hatch on thefront deck.
Tr Mov: 140/110Corn Mov: 35/30Fuel Cap: 1920Fuel Cons: 560
Price: $700,000 (R/R)RF:+5 Armament : 120mm gun, MAG MG, M2HB MG (C)Stabi l i za t ion: GoodAmmo: 40x120mmFuel Type: D, G, AvG. A
Combat StatisticsConfig: C I H TF: 120-Cp HF: 300-CpSusp: T: 6 TS: 40 HS: 16-Sp
TR: 20 HR: 16
Load: 700 kgVeh Wt: 59 tonsCrew: 3Mnt: 14Night V is ion: Passive IR/thermal
Price: $400,000 (R/R)RF: + 2Armament : 125mm gun, PK MG. DShK MG (C)Stabilization: FairAmmo: 40x125mmLoad: 500 kgVeh Wt: 40 tonsFuel Type: D, ACrew: 3Mnt: 16Night Vision: White Iight/lR spotl ight. act ive/passive IR
T-72A tracked main battle tank of Soviet manufacture. There
is a driver’s hatch on the middle front deck, and agunner’shatch and commander’s hatch on the turret deck. The gunis automatically reloaded. A weapons mount is located bythe commander’s hatch.
Tr Mov: 11 O/65Corn Mov: 25/l 5Fuel Cap: 960+400 in jettisonable rear drums
Fuel Cons: 300
Combat StatisticsConfig: Trl TF: 70Susp: T: 6 TS: 24
TR: 20
HF: 100HS: 16HR. 1 0
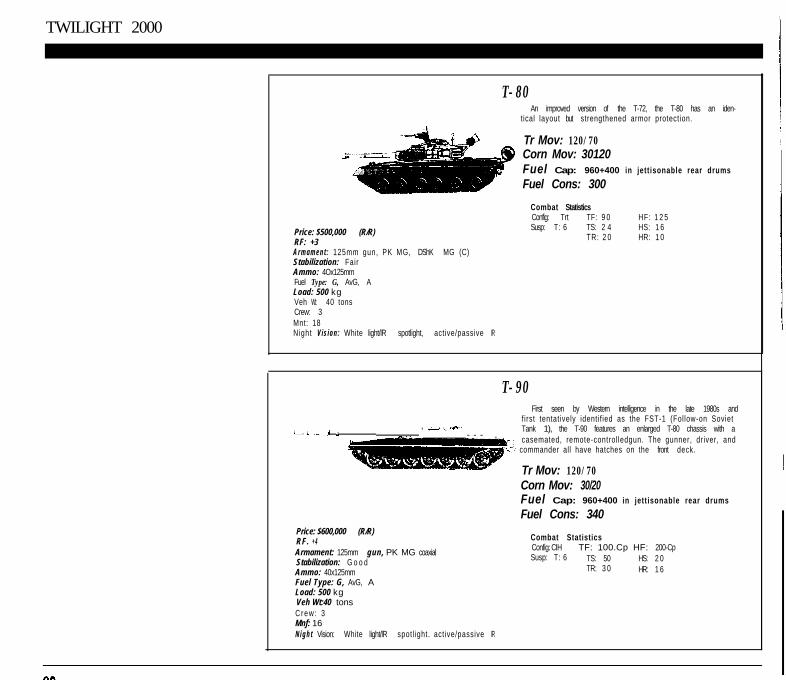
TWILIGHT 2000
T-80An improved version of the T-72, the T-80 has an iden-
tical layout but strengthened armor protection.
Tr Mov: 120/70Corn Mov: 30120
FdFuel Cap: 960+400 in jett isonable rear drums
Fuel Cons: 300
Price: $500,000 (R/R)RF: +3Armament : 125mm gun, PK MG, DShK MG (C)Stabilization: FairAmmo: 4Ox125mmFuel Type: G, AvG, ALoad: 500 kgVeh Wt: 40 tonsCrew: 3Mnt: 18Night Vision: White light/lR spotlight, active/passive IR
Combat StatisticsConfig: Trt TF: 9 0Susp: T: 6 TS: 2 4
TR: 2 0
HF: 1 2 5HS: 1 6HR: 1 0
T-90First seen by Western intelligence in the late 1980s and
first tentatively identif ied as the FST-1 (Follow-on Soviet L2
, d ‘_I .e- Tank 1), the T-90 features an enlarged T-80 chassis with a- - - ,
casemated, remote-control ledgun. The gunner, driver, and’ commander all have hatches on the front deck.
Tr Mov: 120/70Corn Mov: 30/20Fuel Cap: 960+400 in jett isonable rear drums
Fuel Cons: 340Price: $600,000 (R/R)RF. + 4Armament: 125mm gun, PK MG coaxialStabilization: G o o dAmmo: 40x125mm
Combat StatisticsConfig: CIH TF: 100.Cp HF: 200-CpSusp: T: 6 TS: 50 HS: 2 0
TR: 3 0 HR: 1 6
Fuel Type: G, AvG, ALoad: 500 kgVeh Wt:40 tonsCrew : 3Mnf: 16N i g h t Vision: White Iight/lR spotl ight. act ive/passive IR

Manual Addendum
CHARACTER The following changes have been made to the character generation sys-GENERATlON tem:
Main Party Disk Menu
1. Page 14: The Create a Platoon Disk option has been taken out. This is
automatically done now when you Assemble a Squad.
SELECTINGWEAPONS AND
EQUIPMENT
The following changes have been made to equipment selection:
1. Page 46: Under Explosives, the antitank mine has been taken out.
2. Page 47: Under SBC Equipment, both the M256 Chemical Detector Kit
and the Chemical Defense Suit and Mask have been taken out of the game.
All of the equipment and items available in the game must be placed in a
character's hands before they can be used. There are, however, a few excep-
tions t o this rule. Below i s a list of the equipment and items available and how
they are used
Explosives
Fragmentation Grenade: A grenade must be placed in a character’s hand
before it can be used, but this can only be done during combat. A character

automatically keeps using grenades until he runs out of them.
Plastic Explosive: When a plastic explosive is used, it is laid on the ground
directly in front of the character who is using it. How well a character uses the
explosive is dependent on his Combat Engineering skill.
Time Delayed Explosive: Same as plastic explosive, but you have more time
to get away from the explosion area.
Hand Tools
Wheeled Vehicle Tools: Used to repair HMMWV's and 2 l/2 ton trucks.
When these tools are used, the vehicle under repair must be directly in front
of the character.
Tracked Vehicle Tools: Same as the wheeled vehicle tools, with the exception
that they can only be used on tanks.
Basic Tools: Used to repair small equipment that a character can carry.
When basic tools are used, a menu is displayed asking you to select the person
that has the broken item and then to select the item the character has that
needs repaired.
Lockpicks: Used to open doors. When lockpicks are used, the character
picking the lock must be standing directly in front of the door.
Vision Devices
4X Binoculars: Used to view the area in front of the party. When binoculars
are used, the next several sections of the game playing area, in front of the
party, are displayed in succession, which allows you to see any objects or
NPC's that may be in front of the group.
25X Image Intensifiers: Same as the 4x binoculars, with the exception that

they allow the user to see at night.
Telescopic Rifle Sight: Used on a gun for better targeting results. When a
scope is used, a window is displayed asking you to select the character pos-
sessing the weapon that the scope is to be mounted to and then the weapon
that the scope is to be used on.
Starlight Scope: Same as the telescopic rifle sight, with the exception that it
allows the user to see a target at nighttime.
IR Goggles This item is an exception to the object in hand rule. The goggles
are placed on a character’s head from the character sheet screen. When in use,
they allow the user to see at nighttime.
NBC Equipment
Geiger Counter: Used to measure the amount of radiation in the area in
which the party is currently located. When used, text appears, in the message
box, alerting you to the current level of radiation present.
Body Armor
Kevlar Vest: This item is an exception to the object in hand rule. The vest is
placed on a character’s body from the character sheet screen.
Flak Jacket: Same as the Kevlar vest.
Kevlar Helmet: Used in the same manner as the IR goggles, but it only
protects the head from shrapnel.
Medical Supplies
Anesthetic: This item is an exception to the object in hand rule. It is used
automatically when the Healing option is selected (under the Necessity icon).
Antibiotic: Used to cure NPC’s. When an antibiotic is used, the NPC must
3

be directly in front of the character that is using it.
Pain Reliever: Same as anesthetic.
Sedative: Same as anesthetic.
Blood: Same as anesthetic.
Plasma: Same as anesthetic.
Doctors Medical Kit: Same as antibiotic.
Personal Medical Kit: Same as anesthetic.
Personal Gear
Snow Shoes: Placed on a character from the character sheet screen.
Misc. Equipment
Compass: Used to tell in which direction the party is facing.
Hand Held Radio: Used to bring a character from your squad in Krakow to
your present position or to dismiss a character currently in the party. When
the hand held radio is used, a window appears with the options Recruit and
Dismiss. If Recruit is selected, a list of the characters in your squad, in
Krakow, is displayed. Select the character you want to join the party. After a
character has been selected, he joins the party at its present location.
NOTE: If your party contains four characters, you must dismiss one of
them before the new character can join. If Dismiss is selected, a list of the
characters currently in the party, excluding you, the leader, is displayed.
Select the name of the character to be dismissed. Once dismissed, the charac-
ter returns to Krakow.
Four-Man Tent: This item is an exception to the object in hand rule. It is
automatically used when any of the options under the Necessity icon are
4

selected.
MRE: This item is an exception to the object in hand rule. It is automati-
cally used when one of the options under the Necessity icon is selected.
IN THE OFFICEThe following changes have been made in the office:
1. Page 50: Under the first icon description - Hand Held Radio - the
split screen with your character on the left has been taken out. Instead, the
intelligence officer appears on the right half, mission text on the left and the
mission and game times are displayed in the lower left corner of the screen.
2. Pages 50-51: Under the third icon description - Filing Cabinet - there are
now three choices available; represented by the first three drawers in the filing
cabinet. The first drawer allows you to view a character’s file or to select
characters for the current mission party (this is already described in the Game
Player’s Manual). The only change made here is that if you are using a mouse
to select the character for the current mission, you must position the mouse
cursor on the character’s name in the upper right corner of the folder and
press the left mouse button.
The second drawer displays the current party’s inventory sheets. This
allows you to exchange equipment and items etween characters before start-
ing a mission. A good example of this is if one of the characters in your squad
has an item you want to take on the current mission, but the character pos-
sessing the item has none of the skills needed for the mission. You can tempo-
rarily add the character to the party, give the needed item to another character
and then dismiss the giving character from the party. To do this, simply
recruit the character possessing the item into the party from the first drawer of5

the cabinet as described in the Game Player’s manual. Press the right mouse
button, <Escape> key or joystick fire button 2 to return to the office screen.
Then, select the second drawer in the cabinet and follow the instructions for
exchanging items between characters described on page 63, paragraph 2 of
the Game Player’s Manual. After the item has been exchanged, press the right
mouse button, <Escape> key or joystick fire button 2 to return to the office
screen. Select the first file drawer again and choose the unwanted character’s
file folder to dismiss him from the party.
The third drawer displays the Game Options menu. The options are
explained in detail under the section titled 2-D - On the Ground: Overhead
Interface Screen in this addendum and also on page 57 of the Game Player’s
Manual.
3. Page 51: Under the fourth icon description - Map - any cities that
Krakow maintains are indicated by green pins now instead of white pins.
4. Page 52: Under the fifth icon description - Lamp - you are placed in the
vehicle pool instead of a hallway.
The following changes have been made in the vehicle pool: VEHICLE POOL1. Page 53: In paragraph two, the door that is displayed on the right side of
the screen returns you to the office instead of a hallway.
2. Page 54: After a mission has been completed, the party may return to
Krakow to receive their new mission orders. The party must enter the ware-
house in Krakow in order to be returned to the office screen. If on foot, they
must enter the warehouse wherever the door is located and if in a vehicle, it
must be driven into the warehouse.
6

2-D; ON THEGROUND
The following changes have been made in the 2-D section of the game:
Overhead Interface Screen
1. Page 56: Another option has been included under the Necessity icon.
The Healing option allows you to heal any injured characters in the party.
When selected, you are presented with a list of the characters in the party and
asked which one will heal any injured characters. After this character is
selected, you are asked which character you wish to heal. The healing process
is automatic. Any medication your healing character possesses is used.
2. Pages 57 & 70: The Game Options Icon has been completely remodified.
The new icon description and the selections available from it are:
Game Options Icon. The Game Option icon contains several categories
of options. When this icon is selected, a screen displaying the following
categories and options is presented:
File Options
Load Game - Allows you to load a previously saved game.
Save Game - Allows you to save the current game being played. If,
after saving a game, you restore it later, you are placed at the begin-
ning of the mission in Krakow. If the mission was completed, before
you saved, then you are placed at the beginning of the next mission.
Quit Game - Allows you to abort the current game and return to
DOS.
Credits Option - Allows you to view the credits of the people who
were involved with the development of the game.
7

Game Speed
Full Animation - When this option is selected, the movement of the
characters on screen appear to be very smooth due to the five frame
animations. It is also the slowest of the three animated modes.
Half Animation - When this option is selected, the movement of
the characters on screen appear slightly choppy due to the three frame
animations. This mode is faster than the full frame animations, but
slower than the one frame.
One-Frame Animation - When this option is selected, the characters
have no animations. Instead, they are moved one block, or one kilometer,
by every key or button press. This is the fastest method of movement of
the three animated modes.
2-D Speed - Allows you to play the 2-D component of the game in
either normal or fast mode.
3-D Speed - Allows you to play the 3-D component of the game in
either normal or fast mode.
Game Visuals
Show Buildings - When this icon is selected, all buildings on the
map are displayed.
Hide Buildings - When this icon is selected, all buildings on the
map are hidden. You can still locate buildings by the shaded areas on
the ground that represent the structures.
NOTE: You may also use the “V” key on the keyboard to toggle the
buildings on and off.
8
Music
Allows you to toggle the music on and off.
Sound Effects
Allows you to toggle the sound effects on and off.
3. Pages 57 & 71: The Walkie-Talkie Icon has been modified. The split
screen with your character on the left has been taken out. Instead, the intelli-
gence officer appears on the right half and the mission text on the left.
4. Pages 57-58: Under Section B, icon description number five - Combat
Icon - has been completely remodified. The icon description and the selec-
tions available from it are:
Combat I c o n . When this icon is selected, the following options appear
in a window:
Descriptive Combat. If this option is selected, combat takes place by
individual rounds. The screen centers on each individual character or
NPC as they attack. The character’s actions and the results of those
actions are displayed in a window directly below the character.
Orders Phase Combat. If this option is selected, combat takes place
by you giving each individual member of your team orders. As each
order is carried out or as the enemy attacks, messages will appear in a
window below the characters. The orders that can be given to your
characters include:
Fire. A character fires his weapon at the closest NPC.
Melee. A character strikes the closest opponent with his hands or
any weapons that he may currently be holding at that time.
9

Change Equip. o r Weapon. A list is displayed of the character’s
available weapons for you to choose from.
Reload. A character reloads the weapon that he is currently using.
Walk. A character moves eight steps in the direction you specify.
Trot. A character moves 16 steps in the direction you specify.
Run. A character moves 32 steps in the direction you specify.
Retreat. This order is available under both forms of combat.
When selected, a character will retreat from the combat area.
The order of combat depends on your character’s Initiatives and
that of the enemy NPC’s. All of the same keystrokes and button
presses are used as described in the Game Player’s Manual on page 59.
5. Page 58: Under Section B, icon description number six - Communicate
Icon - now displays a window with two options if selected. The two options
are Hail and Talk. If the Hail option is selected, all NPC’s on the screen stop
moving. If the Talk option is selected, your characters attempt to converse
with the NPC that is directly in front of them.
6. Pages 58 & 71: The Map Icon has a few new additions. The first addi-
tion to the map is the Zoom mode. To zoom in or out on the map, simply
position the mouse cursor on the Zoom icon and press the left mouse button
or “Z” on the keyboard.
When zoomed in, notice that buildings are represented by colored blocks.
The index at the bottom of the mapper identifies each type of building. To
toggle back and forth between buildings in a city without walking around,
simply place the arrow cursor on the arrow next to the Zoom icon or the
arrow beside the Move icon and Dress the left mouse button or “N” (Next) or
1 0

“P’(Previous) on the keyboard.
The second addition to the map is the Move mode. You can use this mode
of transportation over walking or taking a vehicle to get the party to a destina-
tion. To move the party, simply position the mouse cursor on the move icon
and press the left mouse button. Then, move the yellow box by placing the
mouse cursor on the area of the map you wish the party to be placed at and
pressing the left mouse button then the right mouse button or by using the
same method used to move around the map in the office on page 51 in the
Game Player’s Manual. With a keyboard, press the “M” key and use the same
keystrokes to move the party as described for moving around the map in the
office. Once you have the party at the desired location, press the <Enter> key
then the <Escape> key to place the party at that location on the map.
Also, instead of your team’s position being marked by a red X, it is now
marked with a blinking yellow box; NPC’s are identified by a red box. You
may still view areas of the map by using the same keystrokes and button
presses described in the Game Player’s Manual on page 51.
7. Page 58: Under Section B, icon description number ten - Look Icon - also
describes any buildings or NPC’s in front of the team as long as someone in
the party has good Observation skill.
Character Movement and Interaction
1. Page 60: Paragraphs two and three will follow the rules set for combat
described in the section titled 2-D; Overhead Interface Screen under change
number three - Combat Icon - in this addendum.
NOTE: You may center your character on the screen by pressing the “C”
key on the keyboard.1 1

Character Sheets
1. Page 64: The NPC option has been taken out. An NPC automatically
takes the item they are looking for from you when you converse with them.
The following changes have been made in the 3-D section of the game:
Vehicle Combat
3-D; IN A VEHICLE
1. Pages 73-74: There is one addition to the vehicle combat component of
the game. Now, instead of battling an enemy in Manual mode, where you
must control the gunners station, a Director mode has been implemented.
When you engage an enemy in combat or are forced to battle an enemy, a
window is displayed with the following options available: Manual mode and
Director mode. The Manual mode of combat is the one already explained in
the Game Player’s Manual. You must operate the gunners station of the tank
to defeat the enemy.
If you select the Director mode of combat, the computer plays out the
entire battle scenario; all you do is sit back and watch. In the Director mode,
the computer also switches to different view points during the battle to give
you the best possible vantage point of the action. Once the combat phase is
completed, you are given manual control of the vehicle again.
1 2

NOTES
This addendum is designed to be used in conjunction with the Twilight 2000 Game
Player’s Manual.
One of the most disturbing aspects in producing entertainment software is the fact
that Game Player’s Manuals are always written and printed long before the project isactually completed. During the completion and playtesting phase of Twilight 2000,
several comments, suggestions and criticisms were made. All of these suggestions
were taken into account in the changes that were made to the initial game design.
Each change significantly improved the game. The changes made the game play
interface easier to use, thus placing the emphasis of the product on game play,
adventure and strategy.
We believe the changes have improved the playability of the game and we’ve tried
to create a game that is fun, challenging and convenient to learn and use. We hope
you find Twilight 2000 a rewarding and entertaining adventure. Good Luck....
Sincerely,
Marc Miller l Mark E. Seremet
Paul M. Conklin l Don Wuenschell
Steve Suhy
I
13
Paragon Software CorporationBerkshire Center
Suite 402, Route 30 EastGreensburg, PA 15601
Technical Support: (412) 838-l 173Monday - Friday, 8 am - 5 pm Eastern Time
Game Program Copyright 0 1991 Paragon Software Corporation and Game Designers’ Workshop.Addendum Copyright 0 1991 Paragon Software and Game Designers’ Workshop.
@J 1991 Paragon Software Corporation and Game Designers’ Workshop. All Rights Reserved.Twilight 2 0 0 0 is produced under license from Game Designers’ Workshop.

CHARACTER The following changes have been made to the character generation sys-GENERATION tem:
Main Party Disk Menu
1. Page 14: The Create a Platoon Disk option has been taken out. This is
automatically done now when you Assemble a Squad.
SELECTINGWEAPONS AND
EQUIPMENT
The following changes have been made to equipment selection:
1. Page 46: Under Explosives, the antitank mine has been taken out.
2. Page 47: Under NBC Equipment, both the M256 Chemical Detector Kit
and the Chemical Defense Suit and Mask have been taken out of the game.
All of the equipment and items available in the game must be placed in a
character’s hands before they can be used. There are, however, a few excep-
tions to this rule. Below is a list of the equipment and items available and how
they are used .
Explosives
Fragmentation Grenade: A grenade must be placed in a character’s hand
before it can be used, but this can only be done during combat. A character
1

automatically keeps using grenades until he runs out of them.
Plastic Explosive: When a plastic explosive is used, it is laid on the ground
directly in front of the character who is using it. How well a character uses the
explosive is dependent on his Combat Engineering skill.
Time Delayed Explosive: Same as plastic explosive, but you have more time
to get away from the explosion area.
Hand Tools
Wheeled Vehicle Tools: Used to repair HMMWV’s and 2 l/2 ton trucks.
When these tools are used, the vehicle under repair must be directly in front
of the character.
T r a c k e d Vehicle Tools: Same as the wheeled vehicle tools, with the exception
that they can only be used on tanks.
Basic Tools: Used to repair small equipment that a character can carry.
When basic tools are used, a menu is displayed asking you to select the person
that has the broken item and then to select the item the character has that
needs repaired.
Lockpicks: Used to open doors. When Iockpicks are used, the character
picking the lock must be standing directly in front of the door.
Vision Devices
4X Binoculars: Used to view the area in front of the party. When binoculars
are used, the next several sections of the game playing area, in front of the
party, are displayed in succession, which allows you to see any objects or
NPC's that may be in front of the group.
25X Huge Intensifiers: Same as the 4x binoculars, with the exception that
2

they allow the user to see at night.
Telescopic Rifle Sight: Used on a gun for better targeting results. When a
scope is used, a window is displayed asking you to select the character pos-
sessing the weapon that the scope is to be mounted to and then the weapon
that the scope is to be used on.
Starlight Scope: Same as the telescopic rifle sight, with the exception that it
allows the user to see a target at nighttime.
IR Goggles: This item is an exception to the object in hand rule. The goggles
are placed on a character’s head from the character sheet screen. When in use,
they allow the user to see at nighttime.
NBC Equipment
G e i g e r C o u n t e r : Used to measure the amount of radiation in the area in
which the party is currently located. When used, text appears, in the message
box, alerting you to the current level of radiation present.
Body Armor
K e v l a r Vest: This item is an exception to the object in hand rule. The vest is
placed on a character’s body from the character sheet screen.
Flak Jacket: Same as the Kevlar vest.
Kevlar Helmet: Used in the same manner as the IR goggles, but it only
protects the head from shrapnel.
Medical Supplies
Anesthetic: This item is an exception to the object in hand rule. It is used
automatically when the Healing option is selected (under the Necessity icon).
Antibiotic: Used to cure NPC’s. When an antibiotic is used, the NPC must
3

be directly in front of the character that is using it.
Pain Reliever: Same as anesthetic.
Sedative: Same as anesthetic.
Blood: Same as anesthetic.
Plasma: Same as anesthetic.
Doctors Medical Kit: Same as antibiotic.
Personal Medical Kit: Same as anesthetic.
Personal Gear
Snow Shoes: Placed on a character from the character sheet screen.
Misc. Equipment
Compass: Used to tell in which direction the party is facing.
Hand Held Radio: Used to bring a character from your squad in Krakow to
your present position or to dismiss a character currently in the party. When
the hand held radio is used, a window appears with the options Recruit and
Dismiss. If Recruit is selected, a list of the characters in your squad, in
Krakow, is displayed. Select the character you want to join the party. After a
character has been selected, he joins the party at its present location.
NOTE: If your party contains four characters, you must dismiss one of
them before the new character can join. If Dismiss is selected, a list of the
characters currently in the party, excluding you, the leader, is displayed.
Select the name of the character to be dismissed. Once dismissed, the charac-
ter returns to Krakow.
Four-Man Tent: This item is an exception to the object in hand rule. It is
automatically used when any of the options under the Necessity icon are
4
selected.
MXE: This item is an exception to the object in hand rule. It is automati-
cally used when one of the options under the Necessity icon is selected.
IN THE OFFICEThe following changes have been made in the office:
1. Page 50: Under the first icon description - Hand Held Radio - the
split screen with your character on the left has been taken out. Instead, the
intelligence officer appears on the right half, mission text on the left and the
mission and game times are displayed in the lower left corner of the screen.
2. Pages 50-51: Under the third icon description - Filing Cabinet - there are
now three choices available; represented by the first three drawers in the filing
cabinet. The first drawer allows you to view a character’s file or to select
characters for the current mission party (this is already described in the Game
Player’s Manual). The only change made here is that if you are using a mouse
to select the character for the current mission, you must position the mouse
cursor on the character’s name in the upper right corner of the folder and
press the left mouse button.
The second drawer displays the current party’s inventory sheets. This
allows you to exchange equipment and items etween characters before start-
ing a mission. A good example of this is if one of the characters in your squad
has an item you want to take on the current mission, but the character pos-
sessing the item has none of the skills needed for the mission. You can tempo-
rarily add the character to the party, give the needed item to another character
and then dismiss the giving character from the party. To do this, simply
recruit the character possessing the item into the party from the first drawer of
5
the cabinet as described in the Game Player’s manual. Press the right mouse
button, <Escape> key or joystick fire button 2 to return to the office screen.
Then, select the second drawer in the cabinet and follow the instructions for
exchanging items between characters described on page 63, paragraph 2 of
the Game Player’s Manual. After the item has been exchanged, press the right
mouse button, <Escape> key or joystick fire button 2 to return to the office
screen. Select the first file drawer again and choose the unwanted character’s
file folder to dismiss him from the party.
The third drawer displays the Game Options menu. The options are
explained in detail under the section titled 2-D - On the Ground: Overhead
Interface Screen in this addendum and also on page 57 of the Game Player’s
Manual.
3. Page 51: Under the fourth icon description - Map - any cities that
Krakow maintains are indicated by green pins now instead of white pins.
4. Page 52: Under the fifth icon description - Lamp - you are placed in the
vehicle pool instead of a hallway.
The following changes have been made in the vehicle pool: VEHICLE POOL1. Page 53: In paragraph two, the door that is displayed on the right side of
the screen returns you to the office instead of a hallway.
2. Page 54: After a mission has been completed, the party may return to
Krakow to receive their new mission orders. The party must enter the ware-
house in Krakow in order to be returned to the office screen. If on foot, they
must enter the warehouse wherever the door is located and if in a vehicle, it
must be driven into the warehouse.
6

2-D; ON THEGROUND
The following changes have been made in the 2-D section of the game:
Overhead Interface Screen
1. Page 56: Another option has been included under the Necessity icon.
The Healing option allows you to heal any injured characters in the party.
When selected, you are presented with a list of the characters in the party and
asked which one will heal any injured characters. After this character is
selected, you are asked which character you wish to heal. The healing process
is automatic. Any medication your healing character possesses is used.
2. Pages 57 & 70: The Game Options Icon has been completely remodified.
The new icon description and the selections available from it are:
Game Options Icon. The Game Option icon contains several categories
of options. When this icon is selected, a screen displaying the following
categories and options is presented:
File Options
If,Load Game - Allows you to load a previously saved game.
Save Game - Allows you to save the current game being played.
after saving a game, you restore it later, you are placed at the begin-
ning of the mission in Krakow. If the mission was completed, before
you saved, then you are placed at the beginning of the next mission.
Quit Game - Allows you to abort the current game and return to
DOS.
Credits Option - Allows you to view the credits of the people who
were involved with the development of the game.
7

Game Speed
Full Animation - When this option is selected, the movement of the
characters on screen appear to be very smooth due to the five frame
animations. It is also the slowest of the three animated modes.
Half Animation - When this option is selected, the movement of
the characters on screen appear slightly choppy due to the three frame
animations. This mode is faster than the full frame animations, but
slower than the one frame.
One-Frame Animation - When this option is selected, the characters
have no animations. Instead, they are moved one block, or one kilometer,
by every key or button press. This is the fastest method of movement of
the three animated modes.
2-D Speed - Allows you to play the 2-D component of the game in
either normal or fast mode.
3-D Speed - Allows you to play the 3-D component of the game in
either normal or fast mode.
Game Visuals
Show Buildings - When this icon is selected, all buildings on the
map are displayed.
Hide Buildings - When this icon is selected, all buildings on the
map are hidden. You can still locate buildings by the shaded areas on
the ground that represent the structures.
NOTE: You may also use the "V" key on the keyboard to toggle the
buildings on and off.
8

Music
Allows you to toggle the music on and off.
Sound Effects
Allows you to toggle the sound effects on and off.
3. Pages 57 & 71: The Walkie-Talkie Icon has been modified. The split
screen with your character on the left has been taken out. Instead, the intelli-
gence officer appears on the right half and the mission text on the left.
4. Pages 57-58: Under Section B, icon description number five - Combat
Icon - has been completely remodified. The icon description and the selec-
tions available from it are:
Combat Icon. When this icon is selected, the following options appear
in a window:
Descriptive Combat. If this option is selected, combat takes place by
individual rounds. The screen centers on each individual character or
NPC as they attack. The character’s actions and the results of those
actions are displayed in a window directly below the character.
Orders Phase Combat. If this option is selected, combat takes place
by you giving each individual member of your team orders. As each
order is carried out or as the enemy attacks, messages will appear in a
window below the characters. The orders that can be given to your
characters include:
Fire. A character fires his weapon at the closest NPC.
Melee. A character strikes the closest opponent with his hands or
any weapons that he may currently be holding at that time.
9

Change Equip. or Weapon. A list is displayed of the character’s
available weapons for you to choose from.
Reload. A character reloads the weapon that he is currently using.
Walk. A character moves eight steps in the direction you specify.
Trot. A character moves 16 steps in the direction you specify.
Run. A character moves 32 steps in the direction you specify.
Retreat. This order is available under both forms of combat.
When selected, a character will retreat from the combat area.
The order of combat depends on your character’s Initiatives and
that of the enemy NPC’s. All of the same keystrokes and button
presses are used as described in the Game Player’s Manual on page 59.
5. Page 58: Under Section B, icon description number six - Communicate
Icon - now displays a window with two options if selected. The two options
are Hail and Talk. If the Hail option is selected, all NPC’s on the screen stop
moving. If the Talk option is selected, your characters attempt to converse
with the NPC that is directly in front of them.
6. Pages 58 & 71: The Map Icon has a few new additions. The first addi-
tion to the map is the Zoom mode. To zoom in or out on the map, simply
position the mouse cursor on the Zoom icon and press the left mouse button
or “Z” on the keyboard.
When zoomed in, notice that buildings are represented by colored blocks.
The index at the bottom of the mapper identifies each type of building. To
toggle back and forth between buildings in a city without walking around,
simply place the arrow cursor on the arrow next to the Zoom icon or the
arrow beside the Move icon and press the left mouse button or “N”(Next) or
10
"P"(Previous) on the keyboard.
The second addition to the map is the Move mode. You can use this mode
of transportation over walking or taking a vehicle to get the party to a destina-
tion. To move the party, simply position the mouse cursor on the move icon
and press the left mouse button. Then, move the yellow box by placing the
mouse cursor on the area of the map you wish the party to be placed at and
pressing the left mouse button then the right mouse button or by using the
same method used to move around the map in the office on page 51 in the
Game Player’s Manual. With a keyboard, press the “M” key and use the same
keystrokes to move the party as described for moving around the map in the
office. Once you have the party at the desired location, press the <Enter> key
then the <Escape> key to place the party at that location on the map.
Also, instead of your team’s position being marked by a red X, it is now
marked with a blinking yellow box; NPC’s are identified by a red box. You
may still view areas of the map by using the same keystrokes and button
presses described in the Game Player’s Manual on page 51.
7. Page 58: Under Section B, icon description number ten - Look Icon - also
describes any buildings or NPC’s in front of the team as long as someone in
the party has good Observation skill.
Character Movement and Interaction
1. Page 60: Paragraphs two and three will follow the rules set for combat
described in the section titled 2-D; Overhead Interface Screen under change
number three - Combat Icon - in this addendum.
NOTE: You may center your character on the screen by pressing the “C”
key on the keyboard.1 1

Character Sheets
1. Page 64: The NPC option has been taken out. An NPC automatically
takes the item they are looking for from you when you converse with them. .
The following changes have been made in the 3-D section of the game: 3-D; IN A V E H I C L E
Vehicle Combat
1. Pages 73-74: There is one addition to the vehicle combat component of
the game. Now, instead of battling an enemy in Manual mode, where you
must control the gunners station, a Director mode has been implemented.
When you engage an enemy in combat or are forced to battle an enemy, a
window is displayed with the following options available: Manual mode and
Director mode. The Manual mode of combat is the one already explained in
the Game Player’s Manual. You must operate the gunners station of the tank
to defeat the enemy.
If you select the Director mode of combat, the computer plays out the
entire battle scenario; all you do is sit back and watch. In the Director mode,
the computer also switches to different view points during the battle to give
you the best possible vantage point of the action. Once the combat phase is
completed, you are given manual control of the vehicle again.
1 2

NOTES
This addendum is designed to be used in conjunction with the Twilight 2000 Game
Player’s Manual.
One of the most disturbing aspects in producing entertainment software is the fact
that Game Player’s Manuals are always written and printed long before the project is
actually completed. During the completion and playtesting phase of Twilight 2000,
several comments, suggestions and criticisms were made. All of these suggestions
were taken into account in the changes that were made to the initial game design.
Each change significantly improved the game. The changes made the game play
interface easier to use, thus placing the emphasis of the product on game play,
adventure and strategy.
We believe the changes have improved the playability of the game and we’ve tried
to create a game that is fun, challenging and convenient to learn and use. We hope
you find Twilight 2000 a rewarding and entertaining adventure. Good Luck....
Sincerely,
Marc Miller l Mark E. Seremet
Paul M. Conklin l Don Wuenschell
Steve Suhy
Paragon Software CorporationBerkshire Center
Suite 402, Route 30 EastGreensburg, PA 15601
13
Game Program Copyright 0 1991 Paragon Software Corporation and Game Designers’ Workshop.Addendum Copyright 0 1 9 9 1 Paragon Software and Game Designers’ Workshop.
6~ 1991 Paragon Software Corporation and Game Designers’ Workshop. All Rights Reserved.Twilight 2000 is produced under license from Game Designers’ Workshop.
Technical Support: (412) 838-l 373Monday - Friday, 8 am - 5 pm Eastern Time