Simple Machines · PDF fileSimple Machines MAKER Activities – Years 3-6 This Educational...
32
Simple Machines MAKER Activities – Years 3-6 This Educational Content is a certified and direct translation of Educational Content that was originally developed and quality approved by LEGO ® Education. It was developed for the US market and has not been changed in any manner to reflect local education standards or curriculum. We hope you find it helpful. LEGO and the LEGO logo are trademarks of the LEGO Group. ©2017 The LEGO Group. All rights reserved. 2017.05.10
Transcript of Simple Machines · PDF fileSimple Machines MAKER Activities – Years 3-6 This Educational...

Simple MachinesMAKER Activities – Years 3-6
This Educational Content is a certified and direct translation of Educational Content that was originally developed and quality approved by LEGO® Education. It was developed for the US market and has not been changed in any manner to reflect local education standards or curriculum. We hope you find it helpful.
LEGO and the LEGO logo are trademarks of the LEGO Group.©2017 The LEGO Group. All rights reserved. 2017.05.10

2LEGO and the LEGO logo are trademarks of the LEGO Group.©2017 The LEGO Group. All rights reserved. 2017.05.10
Table of Contents1. Classroom Management Tips ........................................................................................................................... 3
The LEGO® Education MAKER (Design) Process ................................................................................................. 3
Assessment ................................................................................................................................................................................... 5
Share it ............................................................................................................................................................................................. 5
2. Lesson Plan: Make a Digital Accessory ................................................................................................ 7
MAKER Connect ......................................................................................................................................................................... 10
Student Worksheet ................................................................................................................................................................... 11
Self-Assessment ........................................................................................................................................................................ 13
3. Lesson Plan: Wearables .......................................................................................................................................... 14
MAKER Connect ......................................................................................................................................................................... 17
Student Worksheet ................................................................................................................................................................... 18
Self-Assessment ........................................................................................................................................................................ 20
4. Lesson Plan: Make a Repeated Pattern................................................................................................ 21
MAKER Connect ......................................................................................................................................................................... 24
Student Worksheet ................................................................................................................................................................... 25
Self-Assessment ........................................................................................................................................................................ 27
5. Additional MAKER Briefs ......................................................................................................................................... 28
6. Student Worksheet ........................................................................................................................................................ 29
Self-Assessment ........................................................................................................................................................................ 31

3LEGO and the LEGO logo are trademarks of the LEGO Group.©2017 The LEGO Group. All rights reserved. 2017.05.10
Classroom Management Tips
Resources• LEGO® Education Simple Machines (9689) • Lesson plan for each project• Student worksheet for each project• Inspirational images for each project• Modeling materials already available in your class
How much time do you need?Each lesson is designed to take 90 minutes. If you work in shorter class periods, you can break this down into two 45 minute sessions.
PreparationIt is important to establish student groups. Groups of two work well. Ensure that each student has a copy of the MAKER worksheet for recording their design process. They will also need the LEGO Education Simple Machines set (one set for every two students is recommended).
Prior LearningBefore beginning these MAKER activities, it is recommended that students complete the principle models from the booklets supplied with each brick set.
However, if you prefer a more open-ended, explorative method, you can start out with this activity and allow students to find help on their own by referring to the principle models booklets.
The LEGO Education MAKER (Design) Process
Defining the ProblemIt is important that students define a real problem to solve from the start. The connect images are provided to help students to think about designing solutions for the needs of others, and not just for themselves. At this stage of the process, it is important that you not show examples of a final or sample solution.
BrainstormBrainstorming is an active part of making. Some students will find it easier to explore their thoughts through hands-on experimentation with the LEGO bricks, and others will prefer to make sketches and notes. Group work is essential, but it is important to allow time for students to work alone before sharing their ideas with their group.
Define the Design CriteriaDiscussing and finding an agreement about the best solution to build can involve a lot of negotiation, and may require different techniques depending on the students’ skills. For example: • Some students draw well.• Others may build part of a model and then describe what they mean. • Other students may be good at describing a strategy.
A9689
A1
A2
A3
A4
A5
A6
A7
6002501 LEGOeducation.com
7
1
2
3
4
5
6
B9689
6002503 LEGOeducation.com
B1
B2
B3
B4
B5
B6
1
2
3
4
5
6
C9689
6002502 LEGOeducation.com
C1
C2
C3
C4
1
2
3
4
D9689
6002504 LEGOeducation.com
D1
D2
D3
D4
D5
D6
D7
7
1
2
3
4
5
6

4LEGO and the LEGO logo are trademarks of the LEGO Group.©2017 The LEGO Group. All rights reserved. 2017.05.10
Encourage an ethos where students can share anything, no matter how abstract it might sound. Be active during this phase and ensure that the ideas the students choose are achievable.
It is important that the students set clear design criteria. Once the solution to the problem has been made, the students will return to these criteria, which will then form the basis for testing how well the solution works.
Go MAKEStudents must make one of their group’s ideas using the LEGO® set, and can use other materials if needed. If they are finding it hard to build their idea, encourage them to break problems down into smaller parts. Explain that they do not have to come up with the whole solution from the start. Remind students that this process is iterative and they must test, analyse, and revise their idea as they go.
Using this MAKER process does not mean you are following an inflexible set of steps. Instead, think of it as a set of practices.
For example, brainstorming may be prominent at the beginning of the process. However, students may also need to brainstorm ideas when they are trying to figure out ways to improve their idea, or when they have a bad test result and they must change some features of their design.
Review and Revise Your SolutionTo help students develop their critical thinking and communication skills, you may wish to have students from one group observe and critique another group’s solution. Peer review and formative feedback helps both the students giving, and the students receiving the feedback to improve their work.
Communicate Your SolutionThe student worksheet is helpful for basic documentation of the project. Students can also refer to it when presenting their work in front of the class. You may also wish to use the project as a portfolio for performance evaluations or for student self-evaluation.
Design criteria example: The design must..The design should…The design could…
Classroom Management Tips

5LEGO and the LEGO logo are trademarks of the LEGO Group.©2017 The LEGO Group. All rights reserved. 2017.05.10
Assessment
Where can I find the assessment materials?Assessment materials are provided for the first three projects. You will find them at the end of each student worksheet.
What learning goals are assessed? Students use the Maker self-assessment rubric to evaluate their design work. Each rubric includes four levels or achievement. The intention is to help students reflect on what they have done well and what they could have done better.
Using these rubrics, students assess themselves according to the ‘Four Bricks Scale’ in which the biggest brick represents the highest rating. In certain situations, you might consider asking your students to assess themselves using only two of the four bricks.
EmergingThe student is at the beginning stages of development in terms of content knowledge, ability to understand and apply content, and/or demonstration of coherent thoughts about a given topic. DevelopingThe student is able to present basic knowledge only (e.g., vocabulary), and cannot yet apply content knowledge or demonstrate comprehension of the concepts being presented.
ProficientThe student has concrete levels of comprehension of the content and concepts, and can demonstrate adequately the topics, content, or concepts being taught. The ability to discuss and apply concepts outside of the required assignment is lacking.
AccomplishedThe student can take concepts and ideas to the next level, apply concepts to other situations, and synthesise, apply, and extend knowledge to discussions that include extensions of ideas.
Share ItWe encourage you to share your students’ brilliant projects on the appropriate social media platforms using the hashtag #LEGOMAKER.
The MAKER ProjectsStart your MAKER journey with the following three activities:• Make a Digital accessory• Make a Wearable• Make a Repeated Pattern
#LEGOMAKER
Classroom Management Tips

6LEGO and the LEGO logo are trademarks of the LEGO Group.©2017 The LEGO Group. All rights reserved. 2017.05.10
The LEGO® Education MAKER (Design) Process
Classroom Management Tips
Defining the Problem
Brainstorm
Defining the Design Criteria
Go Make
Review and Revise Your Solution
Communicate Your Solution

7LEGO and the LEGO logo are trademarks of the LEGO Group.©2017 The LEGO Group. All rights reserved. 2017.05.10
Lesson Plan: Make a Digital Accessory
Learning GoalsAfter completing this lesson, students will have:• Defined a clear design need• Developed their ability to iterate and improve design solutions• Developed their problem-solving and communication skills
Duration2 x 45 mins (90 mins)
PreparationEnsure that each student has a copy of the MAKER worksheet for recording their design process. They will also need the LEGO® Simple Machines set (one set for every two students is recommended). For this MAKER task you will need a mobile phone and/or a tablet device for testing.
Other Materials Required (Optional)• Rubber bands• Thin cardboard• Thin plastic sheet
Procedure
1. Introduction/DiscussionHand out the worksheets and allow the students to interpret the activity for themselves, or read the MAKER connect text aloud to set the scene.
2. Find a ProblemAs students look at the connect images and questions, facilitate a discussion to steer them toward a problem. Once they have decided upon a problem to solve, ensure that they record it on their worksheet.
3. BrainstormStudents should initially work independently, spending three minutes to generate as many ideas as they can to solve the problem. They can use the bricks from the set during the brainstorming process, or sketch out their ideas in the space provided on the worksheet.
Students can now take turns sharing their ideas within their groups. Once all of the ideas have been shared, each group should select the best idea(s) to make. Be prepared to help facilitate this process to ensure that the students choose something that is possible to make.
Encourage diversity, not all student groups have to make the same thing.
Students must find a problem before they can start brainstorming ideas.

8LEGO and the LEGO logo are trademarks of the LEGO Group.©2017 The LEGO Group. All rights reserved. 2017.05.10
4. Choose the Best Idea Students must record up to three design criteria (three things their design must achieve) on their worksheet so that they can refer to it when they review and revise their solution.
5. Go MAKE Students make one of the ideas using the LEGO® Simple Machines set and other materials as needed.
Reinforce that students do not have to come up with the whole solution from the start. For example, if they are making a stand for a mobile phone, they could explore how to support the phone before thinking about how the viewing angle can be adjusted.
During the making process, remind students to test and analyse their idea as they go, making improvements where necessary. If you want students to submit their documentation at the end of the lesson, ensure that they record their design journey during the making stage using sketches and photos of their models.
6. Evaluate What You Have MadeStudents test and evaluate their designs against the design criteria they recorded before they started making their solution. They can record notes on their student worksheet.
7. Present Your ModelAllow time for each student or student group to present what they have made to the class. A good way to do this is to set out a table large enough to display all of the models. If time is short, two groups can present to each other.
8. AssessmentStudents use the Maker self-assessment rubric to evaluate their design work. Each rubric includes four levels of achievement. The intention is to help students reflect on what they have done well and what they could have done better.
9. Tidy UpEnsure that you leave enough time at the end of the lesson to break the models down and sort them back into the LEGO boxes. You will need approximately 10 minutes to do this.
Design criteria example: The design must..The design should…The design could…
How well does it work?What if…?
Lesson Plan: Make a Digital Accessory

9LEGO and the LEGO logo are trademarks of the LEGO Group.©2017 The LEGO Group. All rights reserved. 2017.05.10
Lesson Plan: Make a Digital Accessory
Possible Digital Accessory Solution, for InspirationNote: You are advised not to share these images with students.

10LEGO and the LEGO logo are trademarks of the LEGO Group.©2017 The LEGO Group. All rights reserved. 2017.05.10
MAKER Connect: Make a Digital Accessory
People use mobile technology every day. They make telephone calls, text, surf the web, play games, watch movies, and play music.
Look at the pictures below. • What can you see? • What problems can you see? • Can you make something to help?

11LEGO and the LEGO logo are trademarks of the LEGO Group.©2017 The LEGO Group. All rights reserved. 2017.05.10
Student Worksheet: Make a Digital Accessory
Name(s): Date:
Find a ProblemWhat problems can you see in the pictures? Pick one problem and describe it below.
BrainstormIndividual work: Now that you have found a problem, take three minutes to come up with ideas for solving it. Be prepared to share your ideas with your group.
Group work: Share and discuss your ideas for solving the problem.
Record as much as you can through sketches, photos and notes.
Use LEGO® bricks and sketches to explore your ideas.
Sometimes simple ideas are the best ideas.

12LEGO and the LEGO logo are trademarks of the LEGO Group.©2017 The LEGO Group. All rights reserved. 2017.05.10
Choose the Best IdeaYou should have come up with a number of ideas. Now choose the best one to make.
Write down three things your design must be able to do:
1.
2.
3.
Go MAKEIt is time to start making. Use parts from the LEGO® set to make your chosen idea. Test your design as you go and record any changes that you make.
Evaluate What You Have MadeHave you solved the problem that you found at the start of the lesson? Look back at the things you said your design must be able to do.
How well does your solution work? Suggest three things you could do better.
1.
2.
3.
Present Your ModelNow that you have finished, make a sketch or take a photo of your model, label the three most important parts, and explain how they work. You are now ready to present your model to the class.
Well done! What will you make next?
Three things your design must do.Example: The design must..The design should..The design could..
You can use other materials from around the classroom.
Print your photos and attach all of your work to a large sheet of paper or cardboard.
Student Worksheet: Make a Digital Accessory

13
Self-Assessment
LEGO and the LEGO logo are trademarks of the LEGO Group.©2017 The LEGO Group. All rights reserved. 2017.05.10
Describe what you did (Draw, write or add a photo):
Tell someone about the problem, you solved…
How did you do?
Date: Student Name:
Simple Machines – Maker Activity Self-AssessmentDefining Problems
Make a Digital Accessory
Directions: Circle the brick that shows how well you did. The bigger brick, the better you did.
We built, and tested one design or more based upon a problem we found.
We joined ideas to build a good solution to a problem we found.
We made our idea better based on our tests.
The final design was able to do everything it was supposed to do.

14LEGO and the LEGO logo are trademarks of the LEGO Group.©2017 The LEGO Group. All rights reserved. 2017.05.10
Lesson Plan: Wearables
Learning GoalsAfter completing this lesson, students will have:• Defined a clear design need• Developed their ability to iterate and improve design solutions• Developed their problem-solving and communication skills
Duration2 x 45 mins (90 mins)
PreparationEnsure that each student has a copy of the MAKER worksheet for recording their design process. They will also need the LEGO® Simple Machines set (one set for every two students is recommended).
Other Materials Required (Optional) • Rubber bands• Thin plastic sheet• Neoprene rubber sheet
Procedure
1. Introduction/DiscussionHand out the worksheets and allow the students to interpret the activity for themselves, or read the MAKER connect text aloud to set the scene.
2. Find a ProblemAs students look at the connect images and questions, facilitate a discussion to steer them toward a problem. Once they have decided upon a problem to solve, ensure that they record it on their worksheet.
3. BrainstormStudents should initially work independently, spending three minutes to generate as many ideas as they can to solve the problem. They can use the bricks from the set during the brainstorming process, or sketch out their ideas in the space provided on the worksheet.
Students can now take turns sharing their ideas within their groups. Once all of the ideas have been shared, each group should select the best idea(s) to make. Be prepared to help facilitate this process to ensure that the students choose something that is possible to make.
Encourage diversity, not all student groups have to make the same thing.
4. Choose the Best IdeaStudents must record up to three design criteria (three things their design must achieve) on their worksheet so that they can refer to it when they review and revise their solution.
Students must find a problem before they can start brainstorming ideas.
Design criteria example: The design must..The design should…The design could…

15LEGO and the LEGO logo are trademarks of the LEGO Group.©2017 The LEGO Group. All rights reserved. 2017.05.10
5. Go MAKE Students make one of the ideas using the LEGO® Simple Machines set and other materials as needed.
Reinforce that students do not have to come up with the whole solution from the start. For example, if they are making some eyewear/glasses, they could explore the shape and fit on the face before looking at the temples (ear supports).
During the making process, remind students to test and analyse their idea as they go, making improvements where necessary. If you want students to submit their documentation at the end of the lesson, ensure that they record their design journey during the making stage using sketches and photos of their models.
6. Evaluate What You Have MadeStudents test and evaluate their designs against the design criteria they recorded before they started making their solution. They can record notes on their student worksheet.
7. Present Your ModelAllow time for each student or student group to present what they have made to the class. A good way to do this is to set out a table large enough to display all of the models. If time is short, two groups can present to each other.
8. AssessmentStudents use the Maker self-assessment rubric to evaluate their design work. Each rubric includes four levels of achievement. The intention is to help students reflect on what they have done well and what they could have done better.
9. Tidy UpEnsure that you leave enough time at the end of the lesson to break the models down and sort them back into the LEGO boxes. You will need approximately 10 minutes to do this.
How well does it work?What if…?
Lesson Plan: Wearables

16LEGO and the LEGO logo are trademarks of the LEGO Group.©2017 The LEGO Group. All rights reserved. 2017.05.10
Lesson Plan: Wearables
Possible Wearable Technology Solution, for InspirationNote: You are advised not to share these images with students.

17LEGO and the LEGO logo are trademarks of the LEGO Group.©2017 The LEGO Group. All rights reserved. 2017.05.10
MAKER Connect: Make Wearable Technology
Wearable technology is being used more every day. We see it in heart monitors, mind-controlled and hand-controlled devices, virtual reality headsets, and smart watches that can pay for your shopping. These are just a few of the products that already exist.
Look at the pictures below. • What can you see? • What problems can you see? • Can you make something to help?

18LEGO and the LEGO logo are trademarks of the LEGO Group.©2017 The LEGO Group. All rights reserved. 2017.05.10
Student Worksheet: Make a Wearable
Name(s): Date:
Find a ProblemWhat problems can you see in the pictures? Pick one problem and describe it below.
BrainstormIndividual work: Now that you have found a problem, take three minutes to come up with ideas for solving it. Be prepared to share your ideas with your group.
Group work: Share and discuss your ideas for solving the problem.
Record as much as you can through sketches, photos and notes.
Use LEGO® bricks and sketches to explore your ideas.
Sometimes simple ideas are the best ideas.

19LEGO and the LEGO logo are trademarks of the LEGO Group.©2017 The LEGO Group. All rights reserved. 2017.05.10
Choose the Best IdeaYou should have come up with a number of ideas. Now choose the best one to make.
Write down three things your design must be able to do:
1.
2.
3.
Go MAKEIt is time to start making. Use parts from the LEGO® set to make your chosen idea. Test your design as you go and record any changes that you make.
Evaluate What You Have MadeHave you solved the problem that you found at the start of the lesson? Look back at the things you said your design must be able to do.
How well does your solution work? Suggest three things you could do better.
1.
2.
3.
Present Your ModelNow that you have finished, make a sketch or take a photo of your model, label the three most important parts, and explain how they work. You are now ready to present your model to the class.
Well done! What will you make next?
Three things your design must do.Example: The design must..The design should..The design could..
You can use other materials from around the classroom.
Print your photos and attach all of your work to a large sheet of paper or cardboard.
Student Worksheet: Make a Wearable

20
Self-Assessment
LEGO and the LEGO logo are trademarks of the LEGO Group.©2017 The LEGO Group. All rights reserved. 2017.05.10
Describe what you did (Draw, write or add a photo):
Tell someone about the problem, you solved…
How did you do?
Date: Student Name:
Directions: Circle the brick that shows how well you did. The bigger brick, the better you did.
We built a model based on one or more design ideas.
We joined two or more ideas to make our design better.
We made our idea better after we tested it.
We could tell the class how we made our model better.
Simple Machines – Maker Activity Self-AssessmentDeveloping and Using Models
Make a Wearable

21LEGO and the LEGO logo are trademarks of the LEGO Group.©2017 The LEGO Group. All rights reserved. 2017.05.10
Lesson Plan: Make a Repeated Pattern
Learning GoalsAfter completing this lesson, students will have:• Defined a clear design need• Developed their ability to iterate and improve design solutions• Developed their problem-solving and communication skills
Duration2 x 45 mins (90 mins)
PreparationEnsure that each student has a copy of the MAKER worksheet for recording their design process. They will also need the LEGO® Simple Machines set (one set for every two students is recommended).
Other Materials Required (Optional)• Rubber bands• Sheets of plain paper (legal or letter)• Colored felt pens or colored pencils
Procedure
1. Introduction/DiscussionHand out the worksheets and allow the students to interpret the activity for themselves, or read the MAKER connect text aloud to set the scene.
2. Find a ProblemAs students look at the connect images and questions, facilitate a discussion to steer them toward a problem. Once they have decided upon a problem to solve, ensure that they record it on their worksheet.
3. BrainstormStudents should initially work independently, spending three minutes to generate as many ideas as they can to solve the problem. They can use the bricks from the set during the brainstorming process, or sketch out their ideas in the space provided on the worksheet.
Students can now take turns sharing their ideas within their groups. Once all of the ideas have been shared, each group should select the best idea(s) to make. Be prepared to help facilitate this process to ensure that the students choose something that is possible to make.
Encourage diversity, not all student groups have to make the same thing.
4. Choose the Best Idea Students must record up to three design criteria (three things their design must achieve) on their worksheet so that they can refer to it when they review and revise their solution.
Students must find a problem before they can start brainstorming ideas.
Design criteria example: The design must..The design should…The design could…

22LEGO and the LEGO logo are trademarks of the LEGO Group.©2017 The LEGO Group. All rights reserved. 2017.05.10
5. Go MAKE Students make one of the ideas using the LEGO® Simple Machines set and other materials as needed.
Reinforce that students do not have to come up with the whole solution from the start. For example, if they are making a motorised drawing machine, they could first explore how to draw simple circles before drawing more complex shapes.
During the making process, remind students to test and analyse their idea as they go, making improvements where necessary. If you want students to submit their documentation at the end of the lesson, ensure that they record their design journey during the making stage using sketches and photos of their models.
6. Evaluate What You Have MadeStudents test and evaluate their designs against the design criteria they recorded before they started making their solution. They can record notes on their student worksheet.
7. Present Your ModelAllow time for each student or student group to present what they have made to the class. A good way to do this is to set out a table large enough to display all of the models. If time is short, two groups can present to each other.
8. AssessmentStudents use the Maker self-assessment rubric to evaluate their design work. Each rubric includes four levels of achievement. The intention is to help students reflect on what they have done well and what they could have done better.
9. Tidy UpEnsure that you leave enough time at the end of the lesson to break the models down and sort them back into the LEGO boxes. You will need approximately 10 minutes to do this.
How well does it work?What if…?
Lesson Plan: Make a Repeated Pattern

23LEGO and the LEGO logo are trademarks of the LEGO Group.©2017 The LEGO Group. All rights reserved. 2017.05.10
Lesson Plan: Make a Repeated Pattern
Possible Repeated Pattern Solution, for InspirationNote: You are advised not to share these images to students.

24LEGO and the LEGO logo are trademarks of the LEGO Group.©2017 The LEGO Group. All rights reserved. 2017.05.10
MAKER Connect: Make a Repeated Pattern
We live in a world full of symmetry and maths. Artists and designers can get ideas from this.
Look at the images below. • What can you see? • What patterns can you see? • Can you make something that repeats a pattern?
25LEGO and the LEGO logo are trademarks of the LEGO Group.©2017 The LEGO Group. All rights reserved. 2017.05.10
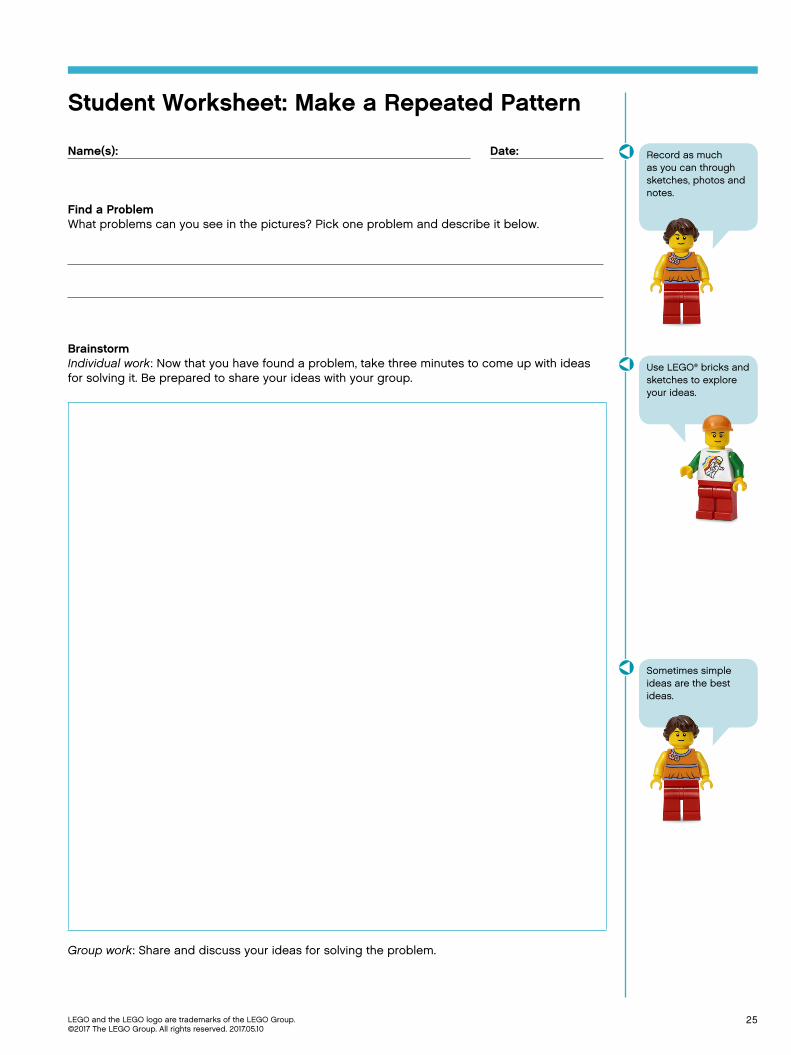
Student Worksheet: Make a Repeated Pattern
Name(s): Date:
Find a ProblemWhat problems can you see in the pictures? Pick one problem and describe it below.
BrainstormIndividual work: Now that you have found a problem, take three minutes to come up with ideas for solving it. Be prepared to share your ideas with your group.
Group work: Share and discuss your ideas for solving the problem.
Record as much as you can through sketches, photos and notes.
Use LEGO® bricks and sketches to explore your ideas.
Sometimes simple ideas are the best ideas.

26LEGO and the LEGO logo are trademarks of the LEGO Group.©2017 The LEGO Group. All rights reserved. 2017.05.10
Choose the Best IdeaYou should have come up with a number of ideas. Now choose the best one to make.
Write down three things your design must be able to do:
1.
2.
3.
Go MAKEIt is time to start making. Use parts from the LEGO® set to make your chosen idea. Test your design as you go and record any changes that you make.
Evaluate What You Have MadeHave you solved the problem that you found at the start of the lesson? Look back at the things you said your design must be able to do.
How well does your solution work? Suggest three things you could do better.
1.
2.
3.
Present Your ModelNow that you have finished, make a sketch or take a photo of your model, label the three most important parts, and explain how they work. You are now ready to present your model to the class.
Well done! What will you make next?
Three things your design must do.Example: The design must..The design should..The design could..
You can use other materials from around the classroom.
Print your photos and attach all of your work to a large sheet of paper or cardboard.
Student Worksheet: Make a Repeated Pattern

27
Self-Assessment
LEGO and the LEGO logo are trademarks of the LEGO Group.©2017 The LEGO Group. All rights reserved. 2017.05.10
Describe what you did (Draw, write or add a photo):
Tell someone about the problem, you solved…
How did you do?
Date: Student Name:
Directions: Circle the brick that shows how well you did. The bigger brick, the better you did.
We wrote down one or more things our design must do.
We drew one or more ideas on the worksheet.
We told the class how we made our idea better.
We used labeled photos to show the most important parts of our model.
Simple Machines – Maker Activity Self-AssessmentObtaining, Evaluating, and Communicating Information
Make a Repeated Pattern

28LEGO and the LEGO logo are trademarks of the LEGO Group.©2017 The LEGO Group. All rights reserved. 2017.05.10
Additional MAKER Briefs
Once you have completed these three projects, try out one from the list below using the same MAKER design process.
1. Go Make a Mechanical ToyToys can be made more interesting when they have parts that move when they are pulled or pushed along. Sometimes they even include handles that can be turned to make things jump out.
2. Go Make It Carry Something Every day we see fragile things being safely moved from one place to another. Some examples are: wheelbarrows, medical stretchers, ski-lifts, and cable cars.
3. Go Make a table top gameTable top games can help people make new friends, communicate and share new ideas, and just have fun together. Examples are mini sports games, problem solving puzzles and also games that help you remember the things you have learnt in class today.
A generic Student Worksheet, and self - assessment rubric for students to record their design process is included at the end of these materials.

29LEGO and the LEGO logo are trademarks of the LEGO Group.©2017 The LEGO Group. All rights reserved. 2017.05.10
Student Worksheet for your own MAKER project
Name(s): Date:
Find a ProblemWhat problems can you see in the pictures? Pick one problem and describe it below.
BrainstormIndividual work: Now that you have found a problem, take three minutes to come up with ideas for solving it. Be prepared to share your ideas with your group.
Group work: Share and discuss your ideas for solving the problem.
Record as much as you can through sketches, photos and notes.
Use LEGO® bricks and sketches to explore your ideas.
Sometimes simple ideas are the best ideas.

30LEGO and the LEGO logo are trademarks of the LEGO Group.©2017 The LEGO Group. All rights reserved. 2017.05.10
Choose the Best IdeaYou should have come up with a number of ideas. Now choose the best one to make.
Write down three things your design must be able to do:
1.
2.
3.
Go MAKEIt is time to start making. Use parts from the LEGO® set to make your chosen idea. Test your design as you go and record any changes that you make.
Evaluate What You Have MadeHave you solved the problem that you found at the start of the lesson? Look back at the things you said your design must be able to do.
How well does your solution work? Suggest three things you could do better.
1.
2.
3.
Present Your ModelNow that you have finished, make a sketch or take a photo of your model, label the three most important parts, and explain how they work. You are now ready to present your model to the class.
Well done! What will you make next?
Three things your design must do.Example: The design must..The design should..The design could..
You can use other materials from around the classroom.
Print your photos and attach all of your work to a large sheet of paper or cardboard.
Student Worksheet

31
Self-Assessment
LEGO and the LEGO logo are trademarks of the LEGO Group.©2017 The LEGO Group. All rights reserved. 2017.05.10
Describe what you did (Draw, write or add a photo):
Tell someone about the problem, you solved…
How did you do?
Date: Student Name:
Directions: Circle the brick that shows how well you did. The bigger brick, the better you did.
We built, and tested one design or more based upon a problem we found.
We joined ideas to build a good solution to a problem we found.
We made our idea better based on our tests.
The final design was able to do everything it was supposed to do.
Simple Machines – Maker Activity Self-AssessmentDefining Problems
Make a

LEGO and the LEGO logo are trademarks of the LEGO Group.©2017 The LEGO Group. All rights reserved. 2017.05.10
LEGOeducation.com