Silhouette Installation Instructions - Hunter Douglas · For more comprehensive cleaning...
16
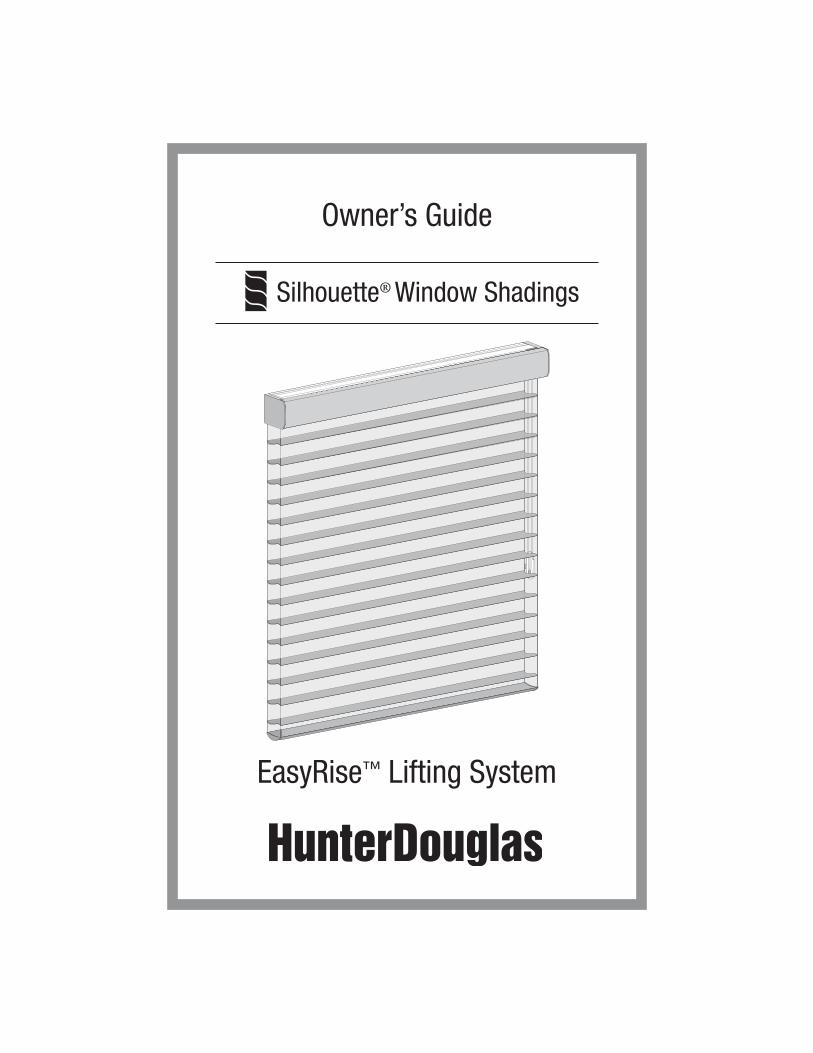
Owner’s Guide EasyRise ™ Lifting System Silhouette ® Window Shadings
-
Upload
duongnguyet -
Category
Documents
-
view
218 -
download
0
Transcript of Silhouette Installation Instructions - Hunter Douglas · For more comprehensive cleaning...
Owner’s Guide
EasyRise™ Lifting System
Silhouette® Window Shadings

2
CONTENTS
Introduction ...............................................................................................................2
Before You Begin ........................................................................................................2
Exploded View ...........................................................................................................3
Getting Started ...........................................................................................................4
Tools And Fasteners Needed .......................................................................................4
Mount The Installation Brackets ................................................................................5
Install The Shading ....................................................................................................8
Secure The Cord Tensioner ........................................................................................8
Operate The Shading .................................................................................................9
Adjust The Shading ....................................................................................................9
Attach The Accessories .............................................................................................10
Remove The Shading ...............................................................................................11
Care And Cleaning ...................................................................................................12
Child Safety .............................................................................................................13
Troubleshooting .......................................................................................................14
INTRODUCTION
THANK YOU for purchasing a Hunter Douglas product. Your new shading has been custom built for you from the highest quality materials.
BEFORE YOU BEGIN
Please review the instructions to acquaint yourself with all of the procedures.
If you need any assistance with operation or adjustments, call the Hunter Douglas Customer Information Center toll free at:
1-888-501-8364

3
EXPLODED VIEW
ContinuousCord Loop
Fabric(Front)
Bottom Rail
CordTensioner
EndCap
Hold-DownBracket
(Optional)
Dust Cover(Optional)
Back Cover(Optional WithInside Mounts)
HeadrailEnd Cap
Bottom RailWeightWeight
Clip
WeightClip
FabricVane
HeadrailLimitStop
Spacer Block
(Optional)
Installation
Bracket
Extension Bracket
(Optional)
LimitStop
Fabric(Rear)

4
GETTING STARTED
Remove the materials from the package. Keep the packaging until the shading meets your satisfaction.
Save these instructions for care and cleaning, shading removal, and reinstallation procedures.
Check the Exploded View to make sure you have all of the necessary parts.
n
n
n
TOOLS AND FASTENERS NEEDED
Flat blade and Phillips screwdrivers
Level
Pliers
Measuring tape
Pencil
Power drill, 1/4" driver,and drill bits
In addition, you will need fasteners designed to work with your specifi cmounting surfaces:
Contents of the hardware package may vary depending upon how the shading was ordered and how the shading will be mounted.
n
n
n
n
n
n
Mounting Surface Fastener
No. 6 Hex Head Screws (Provided)
Wall Anchors, Expansion Bolts(Not Provided)
Wood
Drywall, Plaster
Sheet Metal Screws(Not Provided)
Metal

5
MOUNT THE INSTALLATION BRACKETS
Bracket Placement
Measure 2" in from where the ends of the headrail will be located and mark the bracket location on the mounting surface.
Bracket placement is the same for inside and outside mounts.
The number of brackets is determined by the shading width.
CAUTION: Do not push down on the limit stops. Limit stop angle is setat the factory. Over-adjusting the limit stop is not reversible and may damage the shading.
Inside Mount Applications
Minimum mounting depth for bracket attachment is 1". Fully recessed mounting depth depends on the headrail.
NOTE: Add 1/4" to the minimum depth if using the optional back cover.
n
n
n
n
2"2"
Limit Stops (51/2" From Ends)
Space EvenlySpace Evenly
Normal Spacing (Shadings Over 36" Wide):
5"5"
Limit Stops (2" From Ends)
Space Evenly
Alternate Spacing (Maximum):
Space Evenly
Installation Brackets Required
2
Brackets RequiredShading Width
36¹⁄₈"
79¹⁄₈"
79"
96"
12" 36"
96¹⁄₈" 120"
3
4
5
--
--
Standard Headrail
Fully Recessed
Oversized Headrail
Fully Recessed
Quartette™ 4" Vane Headrail
Fully Recessed l
2⁷|₈" 3¹|₄" 3⁵|₈"

6
Bracket Installation
Use pliers to break off the upper tab of each bracket.If using the back cover option, see next section,Back Cover Installation.
NOTE: Remove the bottom tab on each installation bracket only if it interferes with the bracket installation.
Center each bracket over a mark on themounting surface.
Adjust bracket placement to accommodate any obstructions to the bottom rail, such as window cranks or handles.
Check that each bracket is level and the frontedges are aligned. Use the removed tabs as shims,if necessary.
Attach using two screws through the top holes.
NOTE: Failure to level and align the brackets may prevent them from functioning properly.
Back Cover Installation (Optional)
If using the back cover, use pliers to break offboth tabs on the installation brackets. Removethe tab from the back cover bracket.
Snap the prongs on the back cover bracketsinto the holes on the back of theinstallation brackets.
After bracket installation, install the cover intothe back cover bracket.
Outside Mount Applications
Bracket Installation
Center the shading over the window and mark the ends of the headrail.
Measure 2" in from the marks on the wall and mark the bracket locations.
Use pliers to break off both tabs on each mounting bracket.
Center each bracket over the marks on the mounting surface.
n
n
n
n
n
n
n
n
n
n
n
n
RemovableTabs
BackCover
Back CoverBracket
InstallationBracket
InstallationBracket
Remove This Tab
BackCover Bracket
2"
MinimumDepth
(See Chart)
11/8"Minimum
2"
Mark On Wall

7
Adjust bracket position to accommodate any obstructions to the bottom rail, such as window cranks or handles.
Check that each bracket is level and the tops are aligned. Use the removed tabs as shims, if necessary.
Attach using two screws through the rear holes.
Spacer Blocks (Optional)
Each spacer block projects brackets ½" from the mounting surface.
Mount spacer blocks with the solid side facing the mounting surface.
Use two mounting screws. Screws should be long enough to secure the bracket to the mounting surface.
Use a maximum of three spacer blocksper bracket.
End Mount Applications
End mount the headrail when conventional mounting techniques will not work; for example, in anarched window.
Mount the extension brackets on a surface at least 1¼" wide.
Attach the installation brackets to the extensionbrackets using the machine screws and nuts provided.
NOTE: Add ¼" to the minimum depth if using the optional back cover (see Inside Mount Applications).
CAUTION: For end mounting shadings wider than 48" into material other than a secure wall stud, use medium to heavy-duty wall anchors (not provided) matched to the wall thickness. Failure to mount the brackets securely may result in injury or property damage.
n
n
n
n
n
n
n
n
SpacerBlocks
1/2"1/2"
ExtensionBracket
11/4"MinimumDepth

8
INSTALL THE SHADING
Peel back the protective covering from the top of the headrail.
Hold the shading so the front faces you.
Push the top edge of the headrail under the locking tab on the installation bracket until it snaps into place. The locking tab will be visible.
Remove the protective covering from the headrail.
WARNING: Failure to snap the headrail securely into the installation brackets and secure the locking tabs may cause the shading to release unexpectedly.
SECURE THE CORD TENSIONER
It is imperative that the cord tensioner be properly secured to the wall or window frame to reduce children’s access to the cord loop. Young childrencan strangle in cord loops. They can also wrap cords around their necksand strangle.
Furthermore, the shading will not operate properly unless the cord tensioner is secured. A cord tensioner installation kit has been included with your shading. Follow the instructions in the kit to correctly secure the cord tensioner.
IMPORTANT: See the Child Safety Section on page 13.
n
n
n
n
n
n
Headrail
Flange
Locking Tab
InstallationBracket
Push untillocking tabsecures the
headrail.

9
Weight
WeightClip
WeightClip
OPERATE THE SHADING
Pull the rear cord of the cord loop to lower the shading.
With the shading fully lowered, continue to pull the rear cord to tiltthe bottom rail and open the vanes.
Pull the front cord of the cordloop to close the vanes and raisethe shading.
If the cord tensioner moves upthe cord, you have not secured itto the wall or window frame. You must do so for the shading to operate properly.
ADJUST THE SHADING
Test The Shading
Lower the shading, then slowly raise it.
If the fabric rolls unevenly or rubs against the end cap, check that the headrail is level. Level, if necessary.
If the fabric still rolls unevenly, the window may be out of square. Check that the window is square by measuring the diagonals. Shim the brackets, if necessary.
If the headrail is level and the window is square, adjust the bottom rail weight.
Adjust The Bottom Rail Weight
To release, insert a fl at blade screwdriver into a weight clip and turn clockwise.
Move the weight in 1" increments toward the side where the fabric is gathering.
n
n
n
n
n
n
n
n
n
n
1 2 4 53
Hun
terD
ougl
as®
HunterDouglas®
HunterDouglas®
HunterDouglas®
HunterDouglas®
Front Side Of Shading
CordTensioner

10
Secure the weight clips in position by turning them counterclockwise after making the adjustment.
Test and if necessary, adjust again.
NOTE: Skew adjustment is not possible by moving the limit stop assemblies.
ATTACH THE ACCESSORIES
Attach The Dust Cover (Optional)
Use the entire cover on outside mounts.
On inside mounts, trim the cover along a score to fi t over the portion of the headrail that protrudes from the window frame.
Cut the cover to fi t between extension brackets, when used.
Peel the backing from the double-sided tape to attach the cover to the headrail.
n
n
n
n
n
n
Overhead View (No Dust Cover)
Dust Cover (Outside Mount)
Dust Cover (Inside Mount)
Cut along a score to size the dust coverto !t any exposed part of the headrail assembly.
Fabric Roll
Move Weight

11
Attach The Hold-Down Brackets (Optional)
Hold-down brackets secure the bottom rail to the sill when the window shading is fully lowered. The bottom rail can still pivot when opening and closing the vanes,but the shading cannot be raised.
With the shading fully lowered, insert the pin on the hold-down bracket into the hole on the bottom rail end cap.
Mark the mounting hole locations on the mounting surface.
Center the hold-down brackets overthe mounting hole locations and checktheir alignment.
Attach using two screws.
NOTE: Disconnect the bottom rail from the hold-down bracktes to raise the shading.
REMOVE THE SHADING
Raise the shading all the way into the headrail.
Use the quick release card that came with your order to release the locking tab on the mounting brackets.
While the locking tab is released, slide the headrail slightly out from the brackets.
Once all locking tabs are released, remove the shading from the brackets.
n
n
n
n
n
n
n
n
Hole
Back Of Shading
Headrail
InstallationBracket
Lift locking tabto release
the headrail.
Insert cardbetween theheadrail and
the locking tab.

12
CARE AND CLEANING
Silhouette® window shadings are made of 100% polyester, which means they are inherently durable and resilient. However, care must be taken to avoid wrinkling the fabric, particularly where the vanes meet the facings.
The Palette® Fabric-Covered Headrail
Hand wash using a sponge or delicate cloth and mild soap solution; handle with care as you would any fine fabric.
Do not hand wash The Matisse Collection® fabric-covered headrail. Lightly dust with a clean, dry cloth.
Dusting
Regular light dusting with a feather duster is all the cleaning that is needed in most circumstances.
Vacuuming
Use a low suction, hand-held vacuum for more thorough dust removal.
Forced Air
Blow away dirt and debris between the vanes using clean compressed air.
Spot-Cleaning
Do not spot-clean Silhouette window shadings.
Ultrasonic Cleaning
Silhouette shadings can be ultrasonically cleaned by a professional, with the exception of Bon Soir™ light-dimming fabric.
Specify that a mild detergent solution be used.
Never immerse the headrail in the solution.
Dry the shading completely in the lowered position.
Electrostatic Cleaning
Do not use electrostatic cleaning devices such as Swiffer™ or Pledge Grab-it™
on any Silhouette window shadings.
For more comprehensive cleaning instructions, call the Hunter Douglas Customer Information Center toll free at:
1-888-501-8364A Note About Silhouette Fabric
As with all textiles, Silhouette fabric is subject to some variations. Slight wrinkling, puckering, or bowing is inherent to this textile product and should be considered normal, acceptable quality. These characteristics are not usually visible from the front or rear but may be visible from a side angle.
Precautions should be taken to reduce exposure to harsh environmental elements, such as salt air. Continuous exposure through open windows and doors will accelerate the fabric deterioration.
n
n
n
n

13
CHILD SAFETY
Young children can STRANGLE in cord loops. They can also wrap cords around their necks and STRANGLE.
Always keep cords out of the reach of children.
Move cribs, playpens and other furniture away from cords. Children can climb furniture to get to cords.
Attach the cord tensioner on the cord loop to the wall or window casement. This can prevent children from pulling cord loops around their necks.
Hunter Douglas provides a cord tensioner installation kit, with instructions. for attaching the cord tensioner. For the shading to operate properly, the cord tensioner must be correctly mounted and secured.
Only Hunter Douglas supplied cord tensioners and hardware should be used. Replacement parts may be obtained by contacting the Hunter Douglas Customer Information Center at 1-888-501-8364.
n
n
n
n
n
WARNINGFor more safety information call 1-888-501-8364
in the U.S. or 1-866-662-0666 in Canada.

14
TROUBLESHOOTING
Problem Solution
Vanes do not align on side-by-side shadings.
Vane alignment is only guaranteed within 1/4" when shadings are ordered at the same time, at the same height, with the same color and fabric, and when specifi ed on the order form.
Check that the windows are square and the same height.
n
n
The shading is hard to raise or lower, or will not raiseor lower.
Shadings cannot be forced into tight inside mount window openings. If an inside mount, check that the shading is installed correctly. Make sure there is clearance between the endsof the shading and the window casement.
Check that the installation brackets are level. Shim to level, if necessary.
If hold-down brackets are used, make sure they have been released.
Make sure the fabric is not caught.
n
n
n
n
The shading raises or lowers unevenly or the bottom rail is uneven when fully raised.
Check that the window is square by measuring the diagonals.
Check that the installation brackets are level. Shim to level, if necessary.
Adjust the bottom rail weight.
n
n
n
The shading will not snap into the installation brackets.
Check that the installation brackets are aligned and level.
Check that the locking tab on the installation bracket slides over the headrail.
n
n
The universal cord tensioner has climbed to the headrail.
Pull down on the spring to relieve tension and pull the universal cord tensioner to the bottom of the cord loop. Properly mount the cord tensioner. See Universal Cord Tensioner Installation Instructions.
n
The universal cordtensioner grabs onto thecord upon operation.
Check that the universal cord tensioner is mounted properly. Reinstall, if necessary.
n

15

PCN 5108395000 Rev. 6/07
© 1991, 2007 Hunter Douglas Inc. ® Registered trademark of Hunter Douglas Inc.
™ Trademark of Hunter Douglas Inc. Patented in the U.S. and foreign countries. Other U.S. and foreign patents pending. Swiffer™ is a trademark of Procter & Gamble Company.
Pledge Grab-it™ is a trademark of SC Johnson.
For assistance, call the Hunter Douglas
Customer Information Center
at 1-888-501-8364
Visit our Web site at hunterdouglas.com