Setup your mail account in Outlook Express 6, English version
6
1 Setup your mail account in Outlook Express 6, English version 1. Start Outlook Express and click on Tools Accounts 2. Click on Add Mail
Transcript of Setup your mail account in Outlook Express 6, English version

1
Setup your mail account in Outlook Express 6, English version
1. Start Outlook Express and click on Tools Accounts
2. Click on Add Mail
2
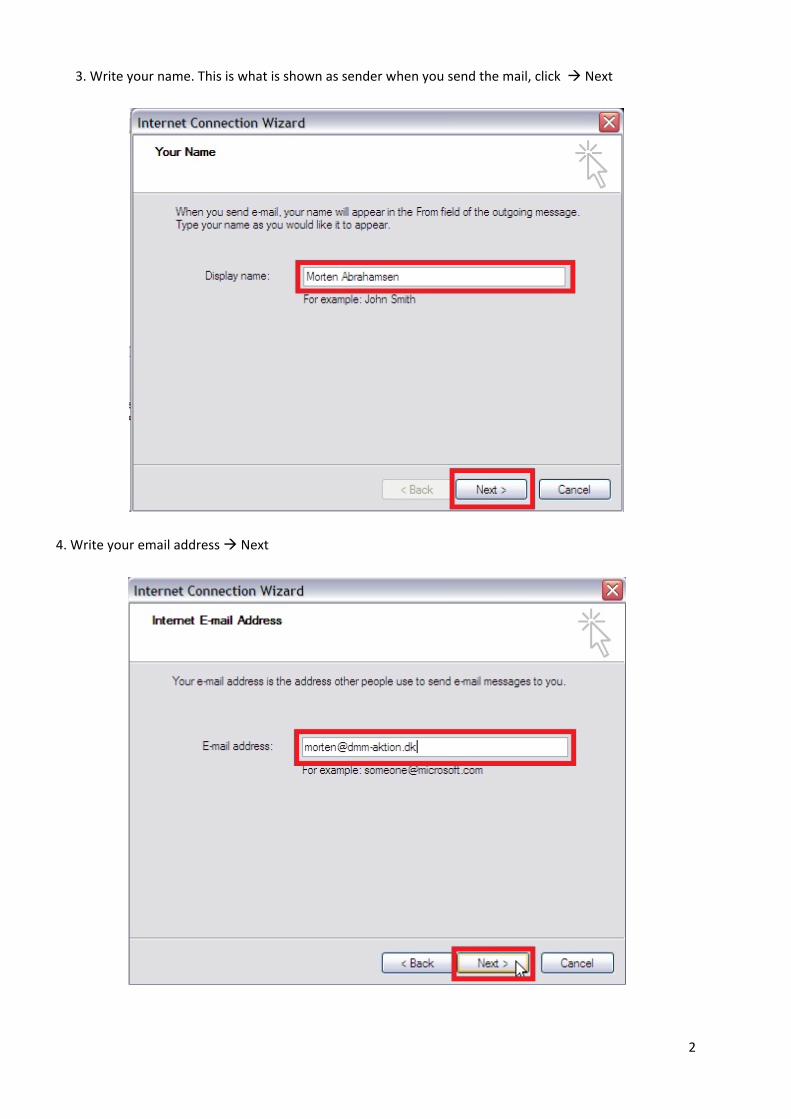
3. Write your name. This is what is shown as sender when you send the mail, click Next
4. Write your email address Next

3
5. Leave My Incoming mail server as: POP3
Server Settings:
‐ Server for incoming mail POP3: mail.e-advice.dk‐ Server for outgoing mail SMTP: mail.e-advice.dkWhen done, click à Next
6. Write account name: Your e‐mail address
Type in the password for your email account
Mark Remember Password
Click Next
4
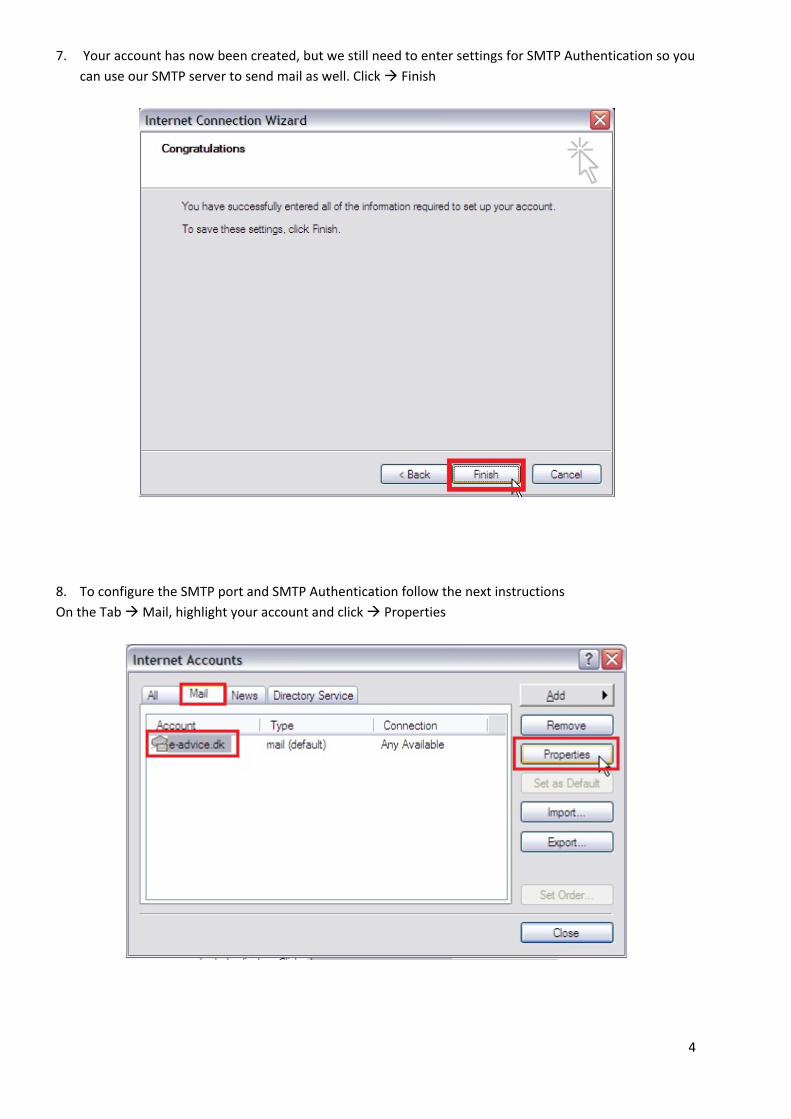
7. Your account has now been created, but we still need to enter settings for SMTP Authentication so you
can use our SMTP server to send mail as well. Click Finish
8. To configure the SMTP port and SMTP Authentication follow the next instructions
On the Tab Mail, highlight your account and click Properties
5
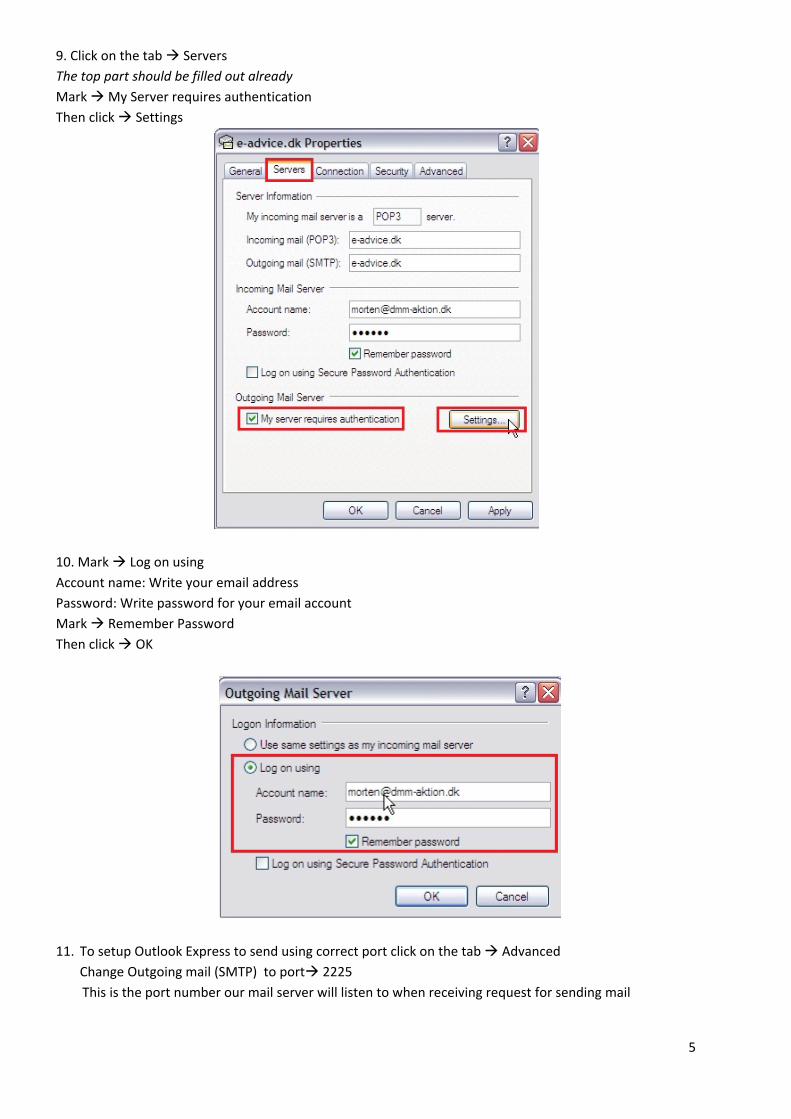
9. Click on the tab Servers
The top part should be filled out already
Mark My Server requires authentication
Then click Settings
10. Mark Log on using
Account name: Write your email address
Password: Write password for your email account
Mark Remember Password
Then click OK
11. To setup Outlook Express to send using correct port click on the tab Advanced
Change Outgoing mail (SMTP) to port 2225
This is the port number our mail server will listen to when receiving request for sending mail

6
All other settings use the default. If you have a very slow Internet connection and you get timeouts, you
can change the timeout settings to more than 1 minute, but only do this if you have timeout problems.
12. Close all windows and you are ready to start using your mail account in Outlook Express 6
13. If you want to go in and check your settings or if you already have your mail account installed in
Outlook 6 and only want to change/check the current SMTP Settings, please do the following
Start Outlook Express Tools Accounts Tab ”mail” Highlight your account . Click Settings
You are now back at point 8 on this instructions
You can follows/check all settings from point 8 to 12.