Recipes from P. Allen Smith's Seasonal Recipes from the Garden by P. Allen Smith

ediblecommunities.com
edible
Seasonal RecipesSPRING
communities

ediblecommunities.com
LETTER FROM THE EDITOR
Welcome to Edible Communit ies!
We’re al l about f resh seasonal produce, farmers markets,
and creat ing sustainable food systems. We dream about
our food and the people who grow it . Making i t as easy
as possible for others to do the same is what gets us out
of bed.
Now that spr ing has sprung, we have some simple reci-
pes that make the most of f leet ing spr ing del ights such
as asparagus and strawberr ies. We also want to remind
you that seasonal i ty appl ies to ingredients beyond fruits
and vegetables, so you’ l l f ind quick recipes for salmon
and lamb, too.
—Molly Watson
editor in chief , Edible Communit ies
RECIPES
Molly Watson
@mollywatsonaf
RECIPE PHOTOS
AND STYLING
Erin Scott
@erinscottstudio
DESIGN
Bruce Cole
@ediblesf
Strawberry Rosé Sangria
Beet Yogurt Dip
Spring Vegetable Fritto Misto
Radish Snap Pea Salad with Buttermilk
Dressing
Pearl Couscous Sweet Pea Salad
Nettle Soup with Horseradish Crème
Fraîche
Mustard Seed Radishes
Roasted Asparagus with...
Spring Herb Tortilla
Salmon with Spring Vegetables
Green Garlic Lamb Chops with Mint Chutney
Strawberry Fool
Spring Recipes
ABOUT EDIBLE COMMUNITIES: Edible Communit ies is a network of more than 80
individual ly owned publ icat ions across the US and Canada united by a s ingle miss ion: to
connect people to their local food, how it ’s produced, and who makes i t . We bel ieve that
local ly sourced, sustainably produced food matters to our health, to our communit ies,
and to the future of the world around us.
Contact Us: info@ediblecommunit ies.com
Mail : 369 Montezuma Ave, Suite 577, Santa Fe, NM 87501
Phone: 866-825-6053
20192
4
6
8
10
12
14
16
18
20
22
24
page
ediblecommunities.com
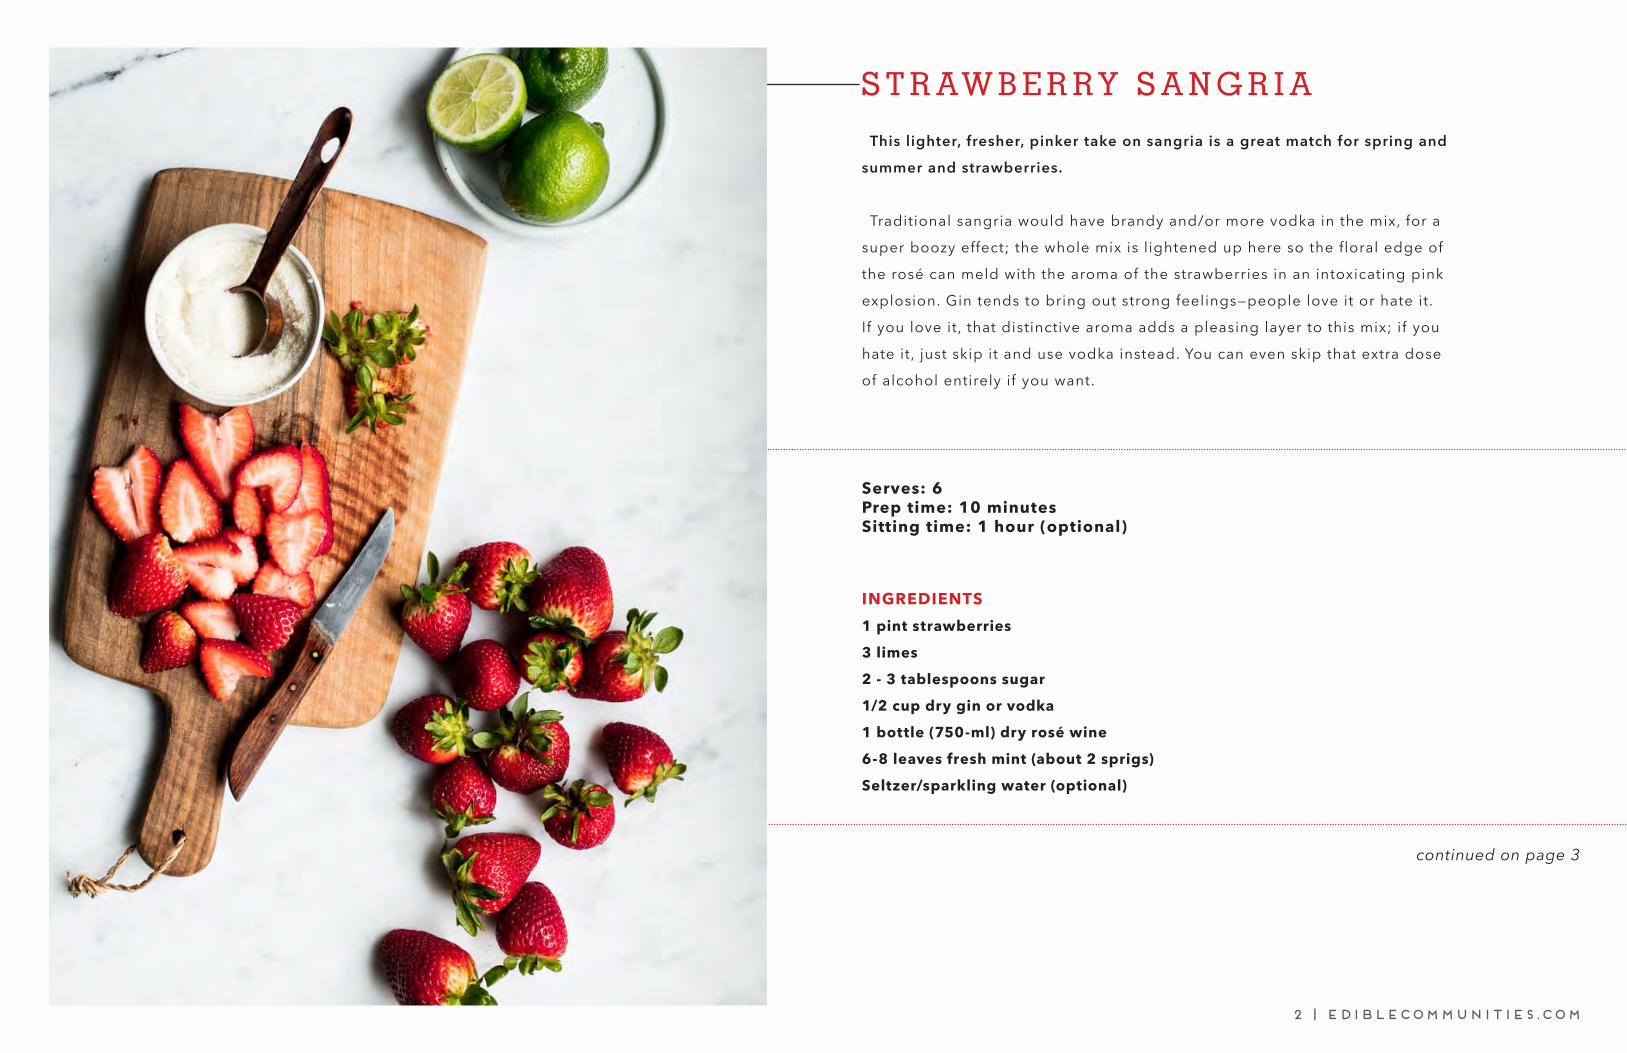
S T R AW B E R RY S A N G R I A
This lighter, fresher, pinker take on sangria is a great match for spring and
summer and strawberries.
Traditional sangria would have brandy and/or more vodka in the mix, for a
super boozy effect; the whole mix is lightened up here so the floral edge of
the rosé can meld with the aroma of the strawberries in an intoxicating pink
explosion. Gin tends to bring out strong feelings—people love it or hate it.
If you love it, that distinctive aroma adds a pleasing layer to this mix; if you
hate it, just skip it and use vodka instead. You can even skip that extra dose
of alcohol entirely if you want.
Serves: 6Prep time: 10 minutesSitting time: 1 hour (optional)
INGREDIENTS
1 pint strawberries
3 limes
2 - 3 tablespoons sugar
1/2 cup dry gin or vodka
1 bottle (750-ml) dry rosé wine
6-8 leaves fresh mint (about 2 sprigs)
Seltzer/sparkling water (optional)
2 | ediblecommunities.com
continued on page 3

ediblecommunities.com
1. Hull and slice the strawberries. You can
simply cut off their green tops, but cutting
those tops and the white flesh just under-
neath yields a prettier, heart-shaped slice.
To hull the berries, insert the tip of a paring
knife in and under the green stem and turn
the strawberry so the knife cuts out the
hull, or calyx.
2. Put the sliced strawberries, the juice of 2 of
the limes, the sugar, and the gin or vodka
in a pitcher. Stir to dissolve the sugar.
3. Let the mixture sit about 1 hour if you can.
This sitting time lets the alcohol pull flavor
out of the strawberries and will give the fi-
nal sangria a deeper, more fully strawberry
taste.
4. Pour in the wine.
5. Scrub the final lime clean, thinly slice it,
and add it to the pitcher.
6. Roll the mint leaves in your hands to re-
lease their fragrance. Stack them and use a
sharp knife to cut them into thin strips; add
the mint to the pitcher.
7. Pour into glasses full of ice. For a lighter
drink, use half sangria and half seltzer.
S T R AW B E R RY S A N G R I Ac o n t i n u e d
INSTRUCTIONS
3 | ediblecommunities.com
VARIATIONS:Make it razzy. Use raspberries in place of some or all of the strawberries—no need to slice them, just dump them in the pitcher.
Lemon-ade. Use lemons in place of the limes. Note that you may need to up the amount of sugar if you do.
Thyme to change. Use a sprig of thyme in place of (or in addition to) the mint for a savory, unexpected edge.
No way rosé. No rosé around? A dry white wine will be tasty too.

ediblecommunities.com
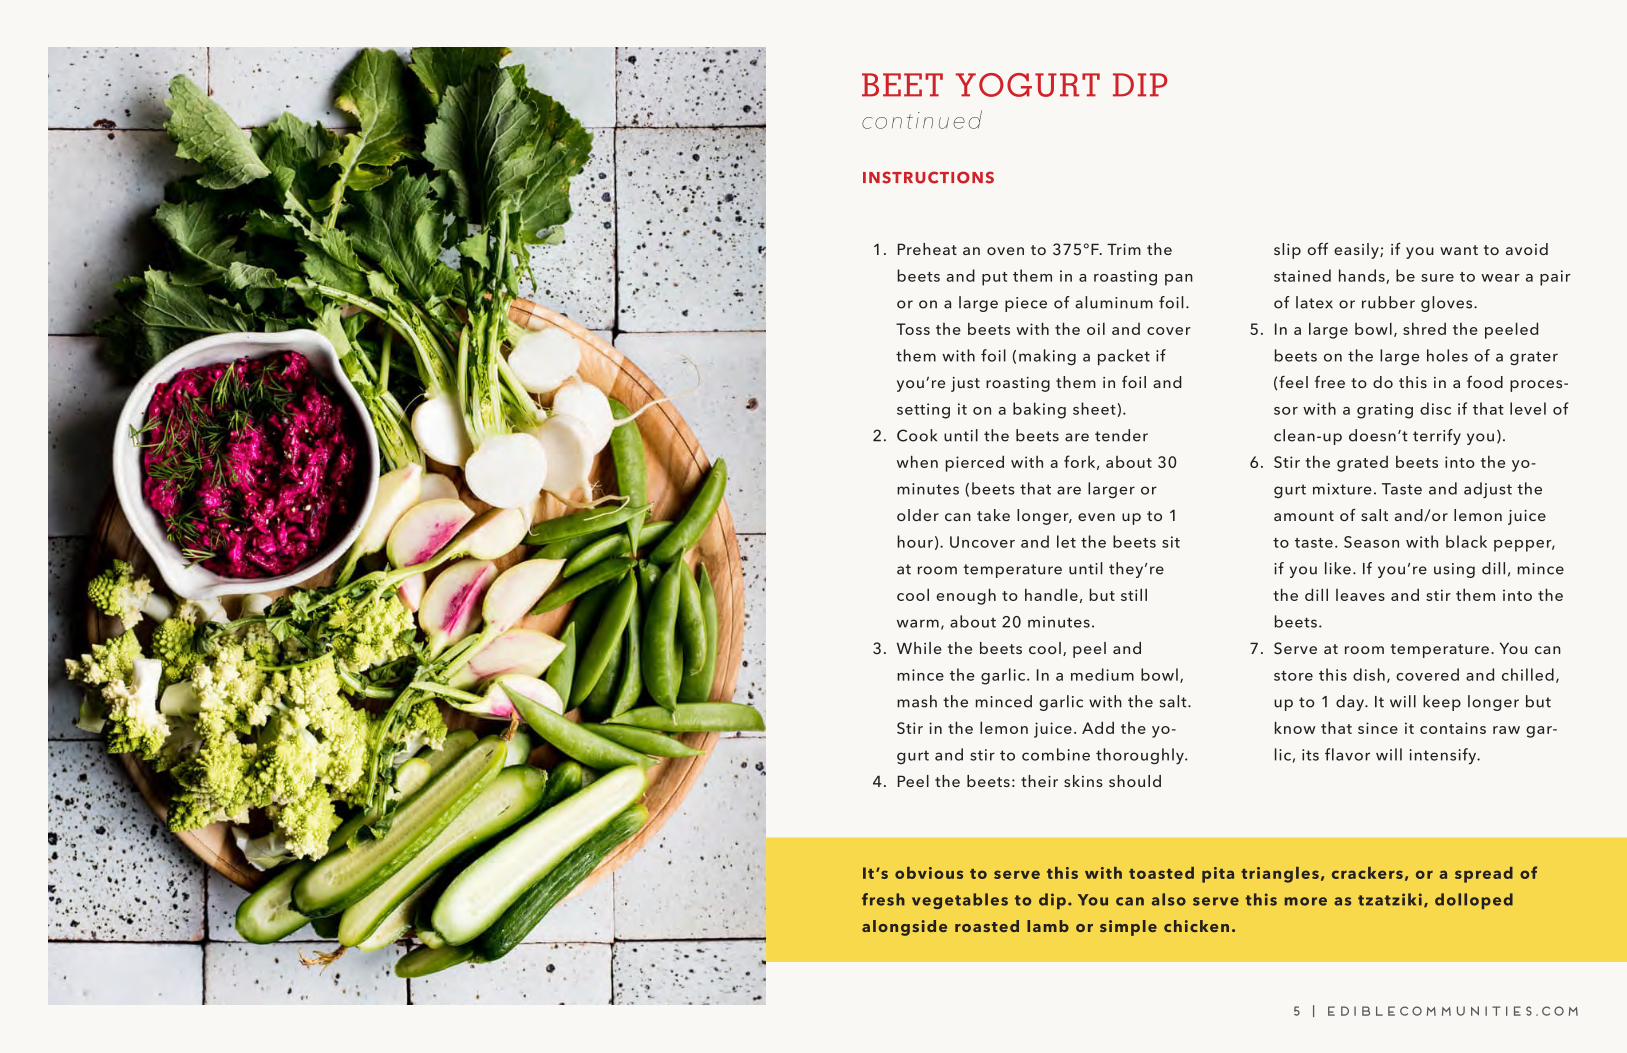
BEET YOGURT DIP
Roasted beets, garlic, and just enough yogurt to hold it all together create a hummus-like dip or spread full of color and flavor.
This dip is also a spread is also a salad. The roasted beets don’t just give a ton of flavor, they add a crazy amount of intense magenta color. Feel free to use Chioggia or golden beets, if you like—Chioggia (striped) beets will create a dish that’s a much softer pink, while golden beets will yield a dip that matches goldenrod paper at the office.
Serves: 4
Prep time: 15 minutes
Cook time: 45 minutes (for roasting the beets)
INGREDIENTS
4 medium beets
2 tablespoons plus 1 teaspoon extra virgin olive oil, divided
1 clove garlic
1/2 teaspoon salt, plus more to taste
1 tablespoon lemon juice
1 cup Greek or sheep-milk yogurt
Freshly ground black pepper, to taste (optional)
2 sprigs fresh dill (optional)
continued on page 5
4 | ediblecommunities.com
ediblecommunities.com
BEET YOGURT DIPcontinued
1. Preheat an oven to 375°F. Trim the beets and put them in a roasting pan or on a large piece of aluminum foil. Toss the beets with the oil and cover them with foil (making a packet if you’re just roasting them in foil and setting it on a baking sheet).
2. Cook until the beets are tender when pierced with a fork, about 30 minutes (beets that are larger or older can take longer, even up to 1 hour). Uncover and let the beets sit at room temperature until they’re cool enough to handle, but still warm, about 20 minutes.
3. While the beets cool, peel and mince the garlic. In a medium bowl, mash the minced garlic with the salt. Stir in the lemon juice. Add the yo-gurt and stir to combine thoroughly.
4. Peel the beets: their skins should
slip off easily; if you want to avoid stained hands, be sure to wear a pair of latex or rubber gloves.
5. In a large bowl, shred the peeled beets on the large holes of a grater (feel free to do this in a food proces-sor with a grating disc if that level of clean-up doesn’t terrify you).
6. Stir the grated beets into the yo-gurt mixture. Taste and adjust the amount of salt and/or lemon juice to taste. Season with black pepper, if you like. If you’re using dill, mince the dill leaves and stir them into the beets.
7. Serve at room temperature. You can store this dish, covered and chilled, up to 1 day. It will keep longer but know that since it contains raw gar-lic, its flavor will intensify.
It ’s obvious to serve this with toasted pita triangles, crackers, or a spread of
fresh vegetables to dip. You can also serve this more as tzatziki, dolloped
alongside roasted lamb or simple chicken.
5 | ediblecommunities.com
INSTRUCTIONS

ediblecommunities.com
This “mixed fry” of spring vegetables—asparagus, morels, snap peas, and more—is wonderfully fun and tasty.
Don’t feel confined to the list of vegetables below—use what ’s fresh and what you like. Know that the alcohol in the wine cooks off during frying; it ’s used here both for flavor and to keep the batter light (alcohol isn’t water and more of it cooks off faster), but if you don’t want to use it, wa-ter will work just fine. If you want to make this more of a meal, consider adding shrimp, scallops, or chunks of fish to the mix.
Serves 4-6Prep time: 10 minutesSitting time: 30 minutesCooking time: 20 minutes
INGREDIENTS
1 cup all-purpose flour
1/2 teaspoon salt, plus more to taste
1 cup dry white wine
1/2 cup seltzer water or soda water
2 green onions
1 cup snap peas
2 ounces morel mushrooms or brown cremini mushrooms
6 baby turnips with greens
1/2 pound asparagus spears
1 lemon
4 cups oil for frying
continued on page 7
S P R I N G V E G E TA B L E F R I T T O M I S T O
6 | ediblecommunities.com

ediblecommunities.com
1. In a large bowl, whisk together 1 cup
of the flour, 1/2 teaspoon of the salt,
and the wine. Make sure the mixture is
smooth and set it aside for 30 minutes.
2. While the mixture sits, prepare the veg-
etables. Trim and cut the green onions
into 2 1/2-inch lengths. Trim and de-
string the snap peas, if you like. Rinse
any grit from the morels and pat them
dry. Clean and trim the baby turnips,
leaving the greens attached, if you like.
Snap the asparagus and discard the
woody ends. Thinly slice half the lemon,
reserve the remaining half of lemon to
spritz the fritto misto when you serve it.
3. Heat the oil in a large pot over medium-
high heat. If you have a thermometer,
use it to know when the oil hits 350°F
- 375°F and keep it there. If you don’t
have a thermometer, know that the oil is
the correct temperature when a piece of
battered vegetable sizzles immediately
(if it doesn’t sizzle immediately, the oil
is too cold) when added to the oil, but
doesn’t sputter or throw off oil (which
would mean the oil is too hot).
4. Preheat an oven to 220°F. Set a cooling
rack in a baking pan. As the oil heats,
stir the seltzer water into the batter and
coat the vegetables. Work with 1 type of
vegetable at a time. Put the vegetables
in the batter, move them around to coat
them, and lift them out, letting excess
batter drip off. Put each piece in the hot
oil and fry, stirring or turning for even
cooking, until golden and tender. Only
put as many vegetables as fit in a single
layer. Time will vary depending on what
type and size, but 2-3 minutes is the
general range.
5. Lift the vegetables out of the oil using a
slotted spoon, birds nest, or tongs, and
transfer to the cooling rack set over a
baking sheet to drain. Keep in the warm
oven as you cook the remaining veg-
etables.
6. As soon as all the batches are done,
transfer all vegetables onto a serving
platter and serve hot with a spritz of
lemon. Season to taste with additional
salt, if you like.
S P R I N G V E G E TA B L E F R I T T O M I S T O
While a simple spritz of lemon is all this dish really needs at the end, if you insist
on a dipping sauce, both ponzu or aioli are good choices.
7 | ediblecommunities.com
INSTRUCTIONS
ediblecommunities.com
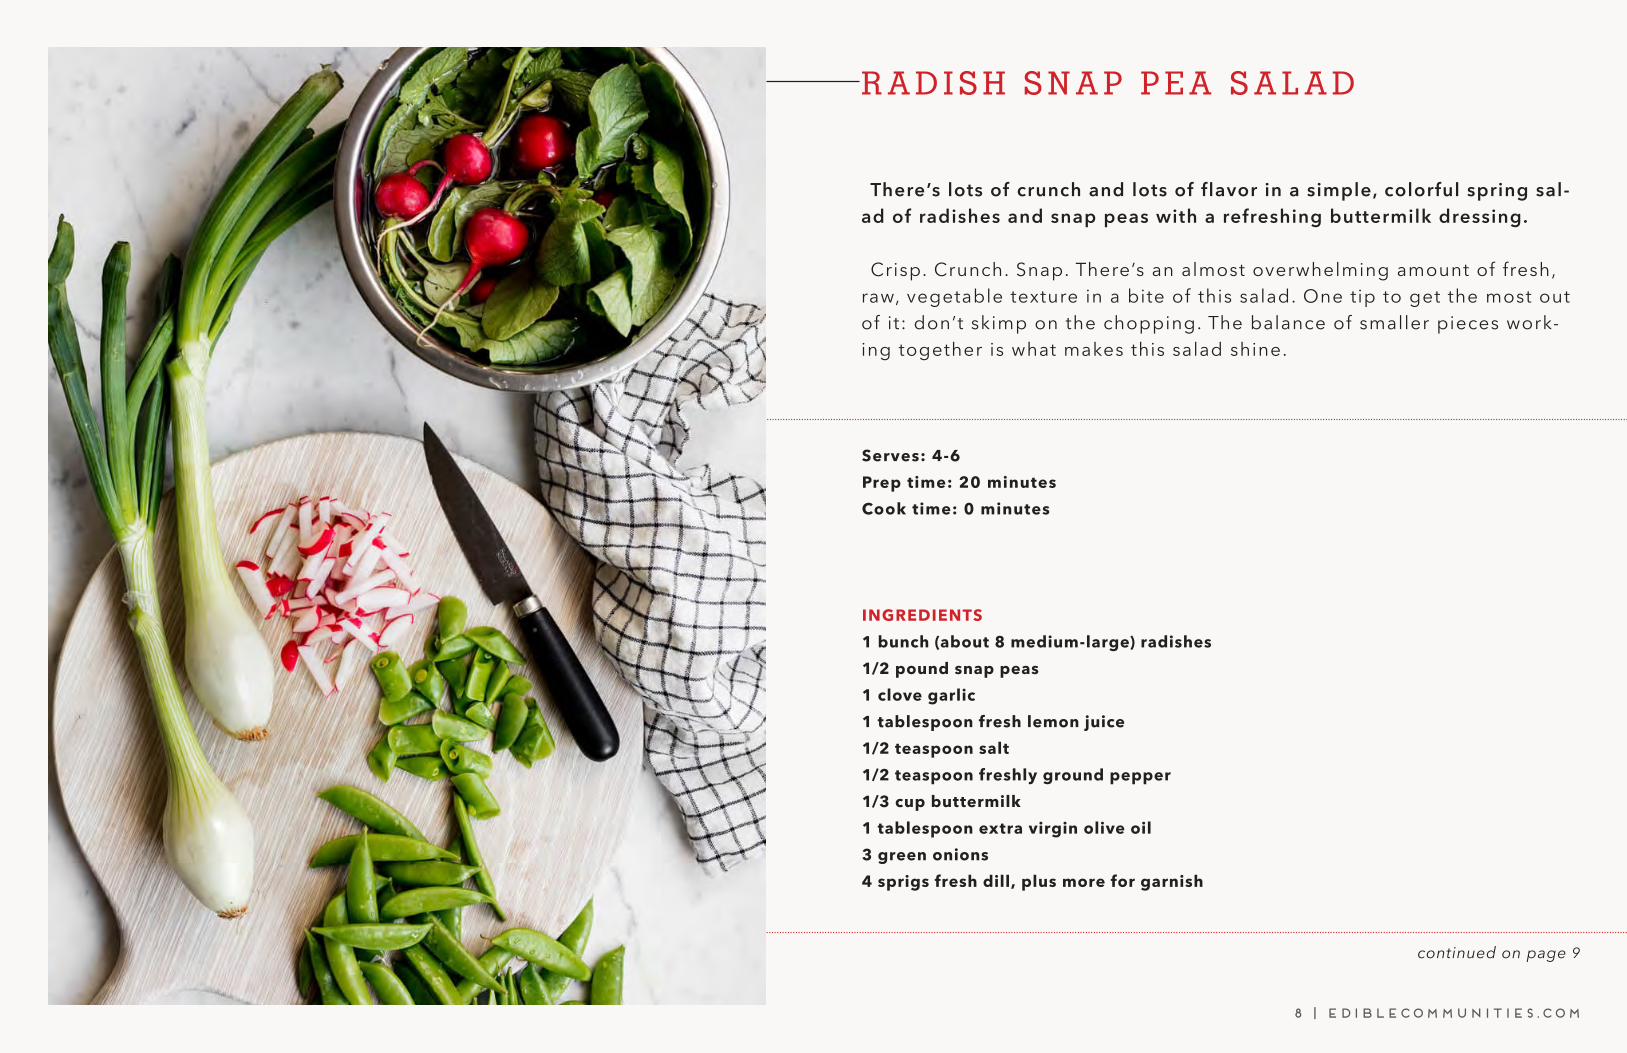
There’s lots of crunch and lots of flavor in a simple, colorful spring sal-ad of radishes and snap peas with a refreshing buttermilk dressing.
Crisp. Crunch. Snap. There’s an almost overwhelming amount of fresh, raw, vegetable texture in a bite of this salad. One tip to get the most out of it: don’t skimp on the chopping. The balance of smaller pieces work-ing together is what makes this salad shine.
Serves: 4-6
Prep time: 20 minutes
Cook time: 0 minutes
INGREDIENTS
1 bunch (about 8 medium-large) radishes
1/2 pound snap peas
1 clove garlic
1 tablespoon fresh lemon juice
1/2 teaspoon salt
1/2 teaspoon freshly ground pepper
1/3 cup buttermilk
1 tablespoon extra virgin olive oil
3 green onions
4 sprigs fresh dill, plus more for garnish
continued on page 9
R A D I S H S N A P P E A S A L A D
8 | ediblecommunities.com

ediblecommunities.com
1. Trim and rinse the radishes; de-string (if necessary) and rinse the snap peas. Pat dry and set aside while you make the dressing.
2. Peel and mince the garlic; put the gar-lic in a measuring cup or small bowl. Stir in the lemon juice, salt, pepper, buttermilk, and olive oil.
3. Trim the green onions; cut them in half lengthwise and mince them; add them to the dressing.
4. Mince the dill and stir it into the dress-ing. Set the dressing aside so the fla-vors can blend while you chop the vegetables.
5. Working with 1 radish at a time, cut it in half lengthwise, cut each half into 3-4 slices, turn them and stack them to cut the slices into 3-4 sticks. Repeat with the remaining radishes.
6. Trim the snap peas and cut the pods into 1/4- to 1/2-inch pieces.
7. Put the vegetables in a salad bowl, drizzle on the dressing to taste, toss to coat the vegetables evenly, and serve. Garnish with more dill, if you like.
R A D I S H S N A P P E A S A L A D c o n t i n u e d
INSTRUCTIONS
Don’t feel like chopping? Serve whole radishes and snap peas with the dressing
as a dip.
9 | ediblecommunities.com

ediblecommunities.com
Sweet green peas, pearl couscous, and lots of flavorful herbs make a crowd-pleasing spring salad.
Lots of little orbs bounce around in this salad that gets a triple dose of “lemon” from zest, juice, and lemongrass. The feta is optional, but some-thing about the creamy saltiness of it brings everything together in a magical way.
Serves: 6-8
Prep time: 20 minutes
Cook time: 10 minutes
INGREDIENTS
4 tablespoons extra virgin olive oil, divided
2 cups pearl couscous
2 1/2 cups chicken broth or salted water
5-inch piece of lemongrass
2 shallots
1 lemon
1/2 teaspoon salt, plus more to taste
1/2 teaspoon freshly ground black pepper, plus more to taste
1 1/2 cups shelled green peas
1 bunch (6 sprigs) dill
6 sprigs fresh mint
6 ounces feta (optional)
PEARL COUSCOUS SWEET PEA SALAD
10 | ediblecommunities.com
continued on page 11

ediblecommunities.com
1. In a medium saucepan, heat 1 table-spoon of the oil over medium-high heat. Add the couscous and cook, stir-ring, until it starts to toast with a few of the pieces starting to brown, about 3 minutes. Add the broth or salted water, bring to a boil, cover, and reduce the heat to low. Cook, undisturbed, until the liquid is mostly absorbed, 10 min-utes. Remove from the heat, uncover, and fluff the couscous and break it up as you transfer it to a large bowl or sheet pan to cool until no longer steaming, about 5 minutes.
2. While the couscous cooks, make the dressing. Trim and mince the lemon-grass. This is a tough, fibrous plant, so you really need to mince it as finely as possible to get the flavor of it without any tough pieces in the final salad. Put it in a salad bowl.
3. Peel the shallots, halve and thinly slice them; add them to the bowl.
4. Zest the lemon into the bowl, using a microplane if you have one or a fine grater or zester. Be sure to only grate off the bright yellow zest and leave the bitter white pith behind. Cut the lemon in half and juice it into the bowl.
5. Add the salt and pepper, then stir in the remaining 3 tablespoons of olive oil.
6. When the couscous is cooled off, add it to the dressing and toss to coat.
7. You can add the peas raw, or quickly cook them in boiling salted water for 2 minutes, drain, and cool off as quickly as possible by rinsing under cold wa-ter. Pat dry and add to the salad.
8. Finely chop the dill and mint leaves and add them to the salad (you can re-serve a few leaves to garnish the salad with, if you like).
9. Serve slightly warm or at room tem-perature, with crumbled feta on top, if you like.
In the unlikely event you have leftovers, know that all the green will fade a bit
after a night or two covered and chilled, but the flavors will blend beautifully.
PEARL COUSCOUS SWEET PEA SALADc o n t i n u e d
INSTRUCTIONS
11 | ediblecommunities.com
ediblecommunities.com
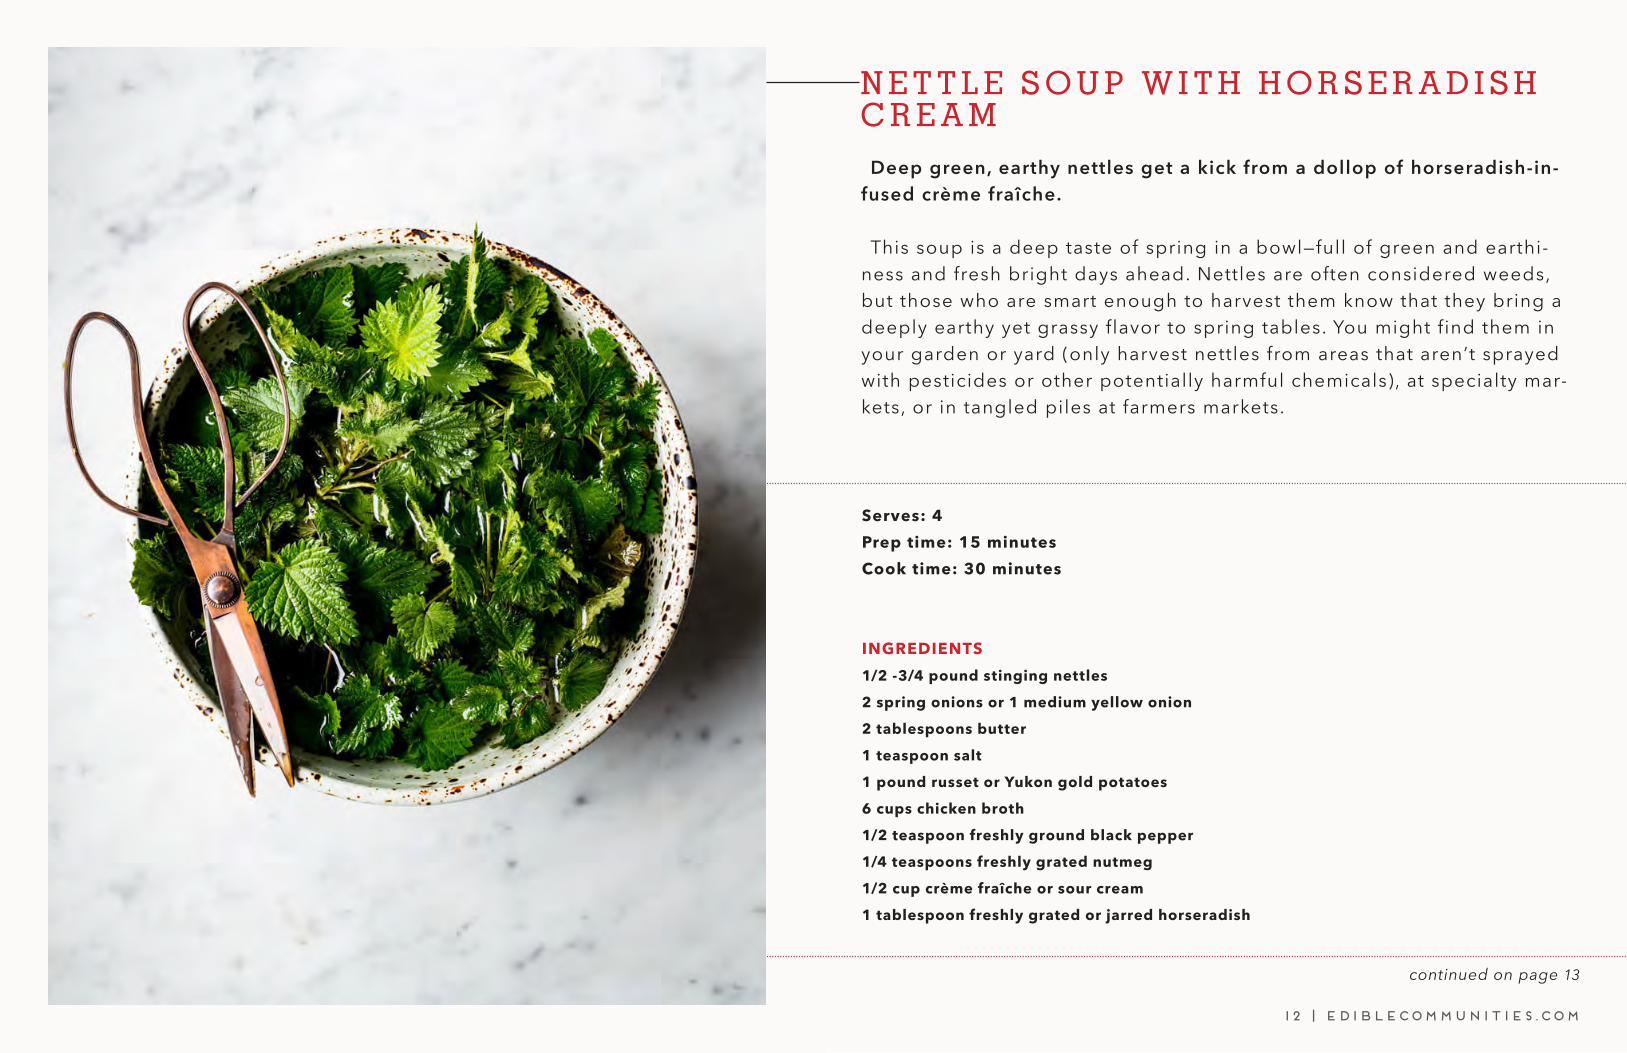
Deep green, earthy nettles get a kick from a dollop of horseradish-in-fused crème fraîche.
This soup is a deep taste of spring in a bowl—full of green and earthi-ness and fresh bright days ahead. Nettles are often considered weeds, but those who are smart enough to harvest them know that they bring a deeply earthy yet grassy flavor to spring tables. You might find them in your garden or yard (only harvest nettles from areas that aren’t sprayed with pesticides or other potentially harmful chemicals), at specialty mar-kets, or in tangled piles at farmers markets.
Serves: 4
Prep time: 15 minutes
Cook time: 30 minutes
INGREDIENTS
1/2 -3/4 pound stinging nettles
2 spring onions or 1 medium yellow onion
2 tablespoons butter
1 teaspoon salt
1 pound russet or Yukon gold potatoes
6 cups chicken broth
1/2 teaspoon freshly ground black pepper
1/4 teaspoons freshly grated nutmeg
1/2 cup crème fraîche or sour cream
1 tablespoon freshly grated or jarred horseradish
continued on page 13
N E T T L E S O U P W I T H H O R S E R A D I S H C R E A M
12 | ediblecommunities.com

ediblecommunities.com
1. With your hands covered with rubber gloves or plastic bags, rinse the nettles clean in cool running water. Nettles can be quite gritty, so make sure they are fully and totally clean.
2. Peel and roughly chop the onion and pota-toes.
3. In a large pot over medium-high heat, melt the butter. Add the onion and the salt and cook, stirring occasionally, until the onion is soft, about 3 minutes.
4. When the onions are soft, add the potatoes and the broth. Simmer until the potatoes are tender to the bite, 10 to 15 minutes.
5. Add the cleaned nettles and cook until
they’re tender, about more 10 minutes. Stir in the pepper and nutmeg.
6. While the potatoes and/or nettles cook, in a small bowl, stir the crème fraîche and horseradish together. Set aside.
7. Use an immersion blender to thoroughly purée the soup or whirl the soup in a blender (in batches, if necessary). For a silky smooth texture, run that purée through a food mill (extra work and totally optional!). Adjust the salt and pepper to taste.
8. Serve hot, with the horseradish cream on the side for diners to add as they like.
N E T T L E S O U P W I T H H O R S E R A D I S H C R E A Mc o n t i n u e d
INSTRUCTIONS
Nettles are often called stinging nettles for a reason: they sting. Wear gloves (or
plastic bags) on your hands when handling them when they’re raw—once they’re
cooked, all the sting is gone.
13 | ediblecommunities.com
ediblecommunities.com
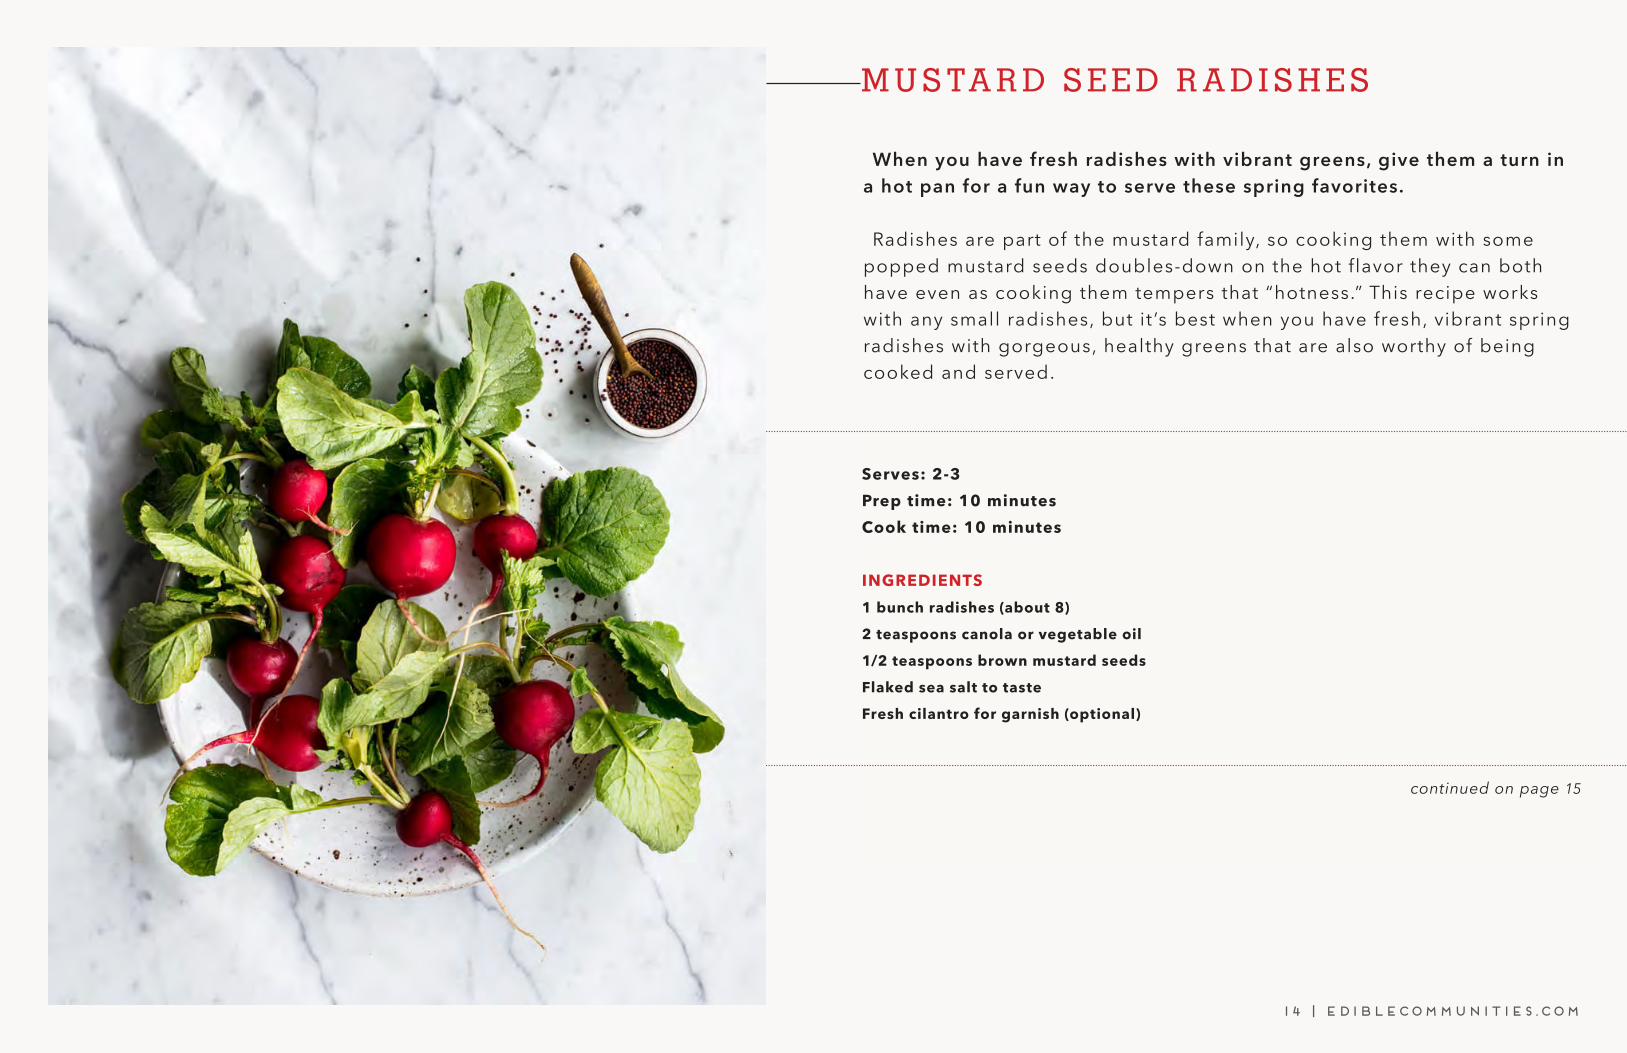
When you have fresh radishes with vibrant greens, give them a turn in a hot pan for a fun way to serve these spring favorites.
Radishes are part of the mustard family, so cooking them with some popped mustard seeds doubles-down on the hot flavor they can both have even as cooking them tempers that “hotness.” This recipe works with any small radishes, but it ’s best when you have fresh, vibrant spring radishes with gorgeous, healthy greens that are also worthy of being cooked and served.
continued on page 7
M U S TA R D S E E D R A D I S H E S
14 | ediblecommunities.com
Serves: 2-3
Prep time: 10 minutes
Cook time: 10 minutes
INGREDIENTS
1 bunch radishes (about 8)
2 teaspoons canola or vegetable oil
1/2 teaspoons brown mustard seeds
Flaked sea salt to taste
Fresh cilantro for garnish (optional)
continued on page 15

ediblecommunities.com
1. Clean clean clean the whole radishes, trimming off and discarding any yel-lowed or wilted leaves, as well as any unruly root ends (they look cool, but will remain tough even when cooked). Really clean the radishes. Really. Put the radishes, greens and all, in a large bowl of cool water. Swish them around to loosen any dirt and grit. Lift the radishes out of the water (don’t pour them out and dump all that dirt back on them!); repeat until the water in the bowl is clear.
2. Cut the radishes in half or quarters lengthwise, keeping a stem or two of leaves attached to as many radishes sections as possible.
3. Heat a large wide pot or wok over high heat, add the oil and swirl to coat the pan. Add the mustard seeds, cover, and let sizzle until they pop, about 1 minute.
4. Add the radishes and cook, stirring fre-quently, until the greens wilt and the radishes get just a bit tender, about 8 minutes.
5. Transfer the radishes to a serving platter and sprinkle with flaked sea salt to taste. Serve hot or warm.
M U S TA R D S E E D R A D I S H E S c o n t i n u e d
INSTRUCTIONS
If you happen to get a bunch of radishes with wilted or otherwise unap-petizing greens, trim them off and cook the radishes all on their own.
15 | ediblecommunities.com

ediblecommunities.com
R O A S T A S PA R A G U S W I T H . . .
There is no easier way to cook asparagus than to roast it—you’re just putting it in the oven and letting it do its thing.
Grilling is a close second, but you need to turn it and watch the flame, so roasting is, no question, easier. Roasting also tames the grassier herb-al flavor of asparagus and brings out a deeper, earthier, more savory edge.
Serves 4
Prep time: 10 minutes
Cook time: 15 minutes
INGREDIENTS
1 b u n c h ( a b o u t 1 p o u n d ) a s p a r a g u s
2 t a b l e s p o o n s e x t r a v i r g i n o l i v e o i l
1 / 2 t e a s p o o n s a l t
L e m o n w e d g e s o r o t h e r o p t i o n a l t o p p i n g s
continued on page 17
16 | ediblecommunities.com
INSTRUCTIONS
1. Heat an oven to 400°F. While the oven heats, prepare the asparagus: you can either break off the tough ends where they naturally snap by grabbing both ends of an asparagus spear and bending it until it breaks; or, for a more elegant presentation, trim off about 1/2 inch from the end of each spear and use a vegetable peeler to peel about halfway up the spear.
2. Arrange the asparagus spears in a single layer on a baking sheet or in a roasting pan. Whatever vessel you choose, make sure the asparagus isn’t crowded so there’s plenty of room for the hot air to circulate and brown the asparagus.

ediblecommunities.com
R O A S T A S PA R A G U S W I T H . . .
INSTRUCTIONS continued
Optional toppings:
• Lemon. Grate some lemon zest over the asparagus, cut the lemon into wedges to spritz with
fresh lemon juice
• Butter & Herbs. Top with a pat or two of butter and scatter on a handful of chopped fresh
herbs (parsley, mint, tarragon, and dill are all good choices)
• Aioli. Whisk or whirl in a blender 1 egg yolk, 2 cloves garlic (minced), and 1/2 teaspoon dry
mustard; slowly drip in 3/4 cup extra virgin olive oil, as it emulsifies with the egg a thick may-
onnaise will form; stir in 2 teaspoon lemon juice; add salt to taste
• Rouille. Add 1/2 teaspoon cayenne along with the mustard to the aioli
• Hard Egg. Put 1 to 2 eggs in a pan of boiling water, cook for 9 minutes, cool with cold water,
peel, and finely grate over the asparagus
• Soft Egg. Put 1 egg per person in a pan of boiling water, cook for 6 minutes, cool with cold
water, peel, put 1 egg on each serving of asparagus, sprinkling with salt to taste (a sprinkle of
Aleppo pepper can be good too!)
• Green Garlic. Finely chop ½ pound green garlic, in a frying pan over medium-high heat, cook the
green garlic with 1 tablespoon olive oil until tender, about 5 minutes; in a blender or food pro-
cessor, whirl the softened green garlic, 1/4 cup each pine nuts, extra-virgin olive oil, and grated
pecorino cheese to form a paste; add salt to taste before spooning over the asparagus.
17 | ediblecommunities.com
3. Drizzle the asparagus with the oil, toss to coat it, and spread the asparagus back into a single layer. Sprinkle with the salt and bake until the asparagus is tender and starting to brown on its tips, about 15 minutes. Serve hot, warm, or at room temperature with a spritz of lemon juice or any of the other optional toppings.

ediblecommunities.com
Spring herbs such as dill and mint work with leeks or spring onions and a bit of potato in this a lighter take on a classic Spanish tortilla.
First things first, don’t worry about the insane amount of olive oil called for in this recipe—most of it gets drained off after you cook the potatoes. Feel free to strain it and save it in the fridge to use the next time you cook potatoes.
Serves: 6 to 8Prep time: 10 minutesCook time: 45 minutes
INGREDIENTS
2 s m a l l l e e k s o r s p r i n g o n i o n s
1 / 2 c u p e x t r a v i r g i n o l i v e o i l , d i v i d e d
1 / 2 t e a s p o o n s a l t
2 Y u k o n g o l d p o t a t o e s
2 c l o v e s g a r l i c
1 c u p l e a v e s o f s p r i n g h e r b s o f y o u r c h o i c e ( m i n t , d i l l , f l a t - l e a f
p a r s l e y , c i l a n t r o )
8 e g g s
N o n s t i c k c o o k i n g s p r a y o i l
continued on page 19
S P R I N G H E R B T O R T I L L A
18 | ediblecommunities.com

ediblecommunities.com
1. Trim the leeks or spring onions. Cut them in half lengthwise and thinly slice them—including the darker green tops. If you encounter any dirt or grit in the process, clean them: put the slices in a large bowl, cover them with cool water, swish around to clean, and lift the slices out of the wa-ter (don’t dump the dirty water back on them!).
2. In a large pot over medium heat, add 2 tablespoons of the oil. Add the leeks or onions and the salt. Cook, stirring now and again, until the leeks or onions, including their green tops, are soft, about 10 min-utes.
3. Meanwhile, peel and thinly slice the po-tatoes. When the leeks or onions are soft, add the potatoes and the remaining oil to the pot. Cook, stirring occasionally and making sure to scrape up any bits sticking to the bottom of the pan, until the pota-toes are tender—they won’t really cook more once in the egg mixture, so make sure they’re soft!
4. Meanwhile, peel and mince the garlic. Mince the herbs.
5. When the potatoes are just soft, add the garlic and cook, stirring frequently, until fragrant, about 1 minute. Remove from the heat and stir in the herbs. Set a colander or strainer over a large bowl and drain the potato mixture.
6. While the potatoes drain, whisk the eggs together in a large bowl. Add the potatoes mixture and stir to combine everything.
7. Heat a 12-inch frying pan over medium heat. Once it’s hot, spray liberally with spray oil (or use a nonstick frying pan). Add the potato-egg mixture, using a spat-ula to arrange it evenly in the pan. Reduce the heat to low, cover, and cook until the eggs are set, about 20 minutes. The tortilla should not jiggle in the middle when you shake the pan. The result is more important than time here, so watch the tortilla over the clock.
8. If you want, you can pass the tortilla under a broiler to brown the top, which will be-come the bottom.
9. Turn out onto a large plate or serving platter. Serve—cut into slices—hot, warm, or at room temperature.
SPRING HERB TORTILLA c o n t i n u e d
Do as the Spanish do and slice up any leftovers to tuck into sandwiches.
INSTRUCTIONS
19 | ediblecommunities.com

ediblecommunities.com
S A L M O N W I T H S P R I N G V E G E TA B L E S
This is the easiest, least messy, least stinky way to cook fish—and end-lessly flexible as you switch out what you add to the packet.
If you’ve never tried cooking fish in a packet before, you need to give it a go. First, the fish stays really moist. Second, it contains that fishy smell than cooking fish can bring into a home. Third, it ’s crazy easy. Finally, it ’s crazy delicious. Skin-on filets will have more flavor; skinned filets will have less mess at the end—the choice is yours. Whichever you choose, be sure to remove any pin bones (you can feel them as you run your finger along the center of the filet—pull any out with small pliers or tweezers).
Serves: 4
Prep time: 15 minutes
Cook time: 15 minutes
INGREDIENTS
4 filets (about 6 ounces each) salmonSalt and pepper4 tablespoons butter or extra virgin olive oil4 - 8 spears asparagus2 green onions1/2 cup shelled green peas1 sprig fresh thyme
continued on page 21
20 | ediblecommunities.com

ediblecommunities.com
1. Heat an oven to 400°F.2. Prepare 4 sheets of parchment paper
or aluminum foil—about 18-inch long each.
3. Set a piece of salmon on each piece of parchment—put it on one half of the sheet so you can eventually fold the other side over it to enclose the fish. Sprinkle each filet with salt and pepper and top with 1 tablespoon of butter or oil each.
4. Trim or snap off and discard the woody ends of the asparagus. Cut the spears on the bias into thin slices and scatter them over the salmon.
5. Trim the green onions, cut them thinly on the bias, and scatter evenly over the salmon. Scatter the peas over the salmon, too.
6. Remove the leaves from the thyme sprig and add a few to each packet.
7. Enclose each filet into a packet by folding the parchment paper over and twisting the edges together to form a sealed packet. Set the packets on the baking sheet(s) for easier han-dling. Bake until the salmon is cooked through, about 15 minutes for 1-inch thick filets.
8. Serve the packets for diners to open dramatically at the table, if you like.
S A L M O N W I T H S P R I N G V E G E TA B L E Sc o n t i n u e d
INSTRUCTIONS
Variations
• Earthy. Add a sliced morel or two to each packet.
• Bright. Grate a bit of ginger and add a sprig or two of cilantro over each filet.
• Salty-Umami. Coat each filet with about 1/2 teaspoon miso.
• Herbalicious. Toss a large pinch of chopped herbs, such as dill or mint, into each
packet.
21 | ediblecommunities.com

ediblecommunities.com
The gentle garlic nature of green garlic is the ideal complement to the richness of lamb chops—mint chutney keeps things fresh.
Spring lamb is seasonal because, well, spring is when true baby lambs were available. Lamb is, technically, under a year old, so we can get lamb year-round (imports from New Zealand and Australia, with opposite sea-sons from North America, help the matter), but if you pay attention, you’ll notice lamb in the spring is more tender than other times of year. The chops here are treated simply with a bit of green garlic for more spring-y flavor.
Serves: 4
Prep time: 35 minutes
Cook time: 10 minutes
INGREDIENTS
8 lamb chops
2 stalks green garlic
2 teaspoons salt
1/2 teaspoon freshly ground black pepper
3 tablespoons extra-virgin olive oil, divided
Mint Chutney1 bunch (8-10 sprigs) fresh mint
1 bunch cilantro (or flat-leaf parsley if you don’t like cilantro)
2 cloves garlic
1-2 hot green chiles
1/2 teaspoon salt
2 teaspoons lemon or lime juice
G R E E N G A R L I C L A M B C H O P S W I T H M I N T C H U T N E Y
22 | ediblecommunities.com
continued on page 23

ediblecommunities.com
G R E E N G A R L I C L A M B C H O P S W I T H M I N T C H U T N E Yc o n t i n u e d
No green garlic in your parts? No problem! Cook up the chops without it—the
mint chutney adds plenty of flavor all on its own.
23 | ediblecommunities.com
INSTRUCTIONS
1. Pat the chops dry and set aside. 2. Trim and mince—really chop it!—the
green garlic. In a small bowl, combine the green garlic, salt, pepper, and 1 teaspoon of the olive oil. Slather the chops all over with the resulting paste and let sit for at least 30 minutes (or cover with plastic wrap and chill up to 4 hours; bring back to room tempera-ture for 30 minutes before cooking).
3. While the lamb sits, make the chutney: Put the mint and cilantro (or parsley) leaves in a blender or food processor; peel and chop the garlic and add it to the herbs; stem, seed, and roughly chop the chile(s) and add them; add the salt and lemon juice; pulse all of the ingredients until they make a sauce. Add more salt or lemon juice to taste.
4. Heat a large frying pan over medium heat. Heat 1 tablespoon of the olive oil, swirl to coat the pan and add the lamb chops in a single layer. Let them cook, undisturbed, until browned, 3 to 4 minutes. Turn them over and cook until browned on the other side, 3 to 4 more minutes. (This timing will re-sult in medium-rare to medium chops; cook less time for rare and more time for well.)
5. Serve the chops with the chutney for diners to add as they like.

ediblecommunities.com
S T R AW B E R RY F O O L
Simple mashed strawberries and sweetened whipped cream make an irresistible dessert that’s also beyond easy to make.
The name implies that one is a fool for strawberries. Fair enough. This is a classic English dessert of mashed sweetened strawberries folded into sweetened whipped cream. Make it for guests—they will never guess just how simple it is.
Serves: 8Prep time: 30 minutes
INGREDIENTS
1 pint strawberries
1/2 cup sugar, divided
½ teaspoon vanilla extract or 2 tablespoons kirsch or berry liqueur
1 pint (2 cups) heavy whipping cream
continued on page 25
24 | ediblecommunities.com

ediblecommunities.com
1. First, you need to hull the strawber-ries. You may be tempted to just lop off the top, but the better way is to insert the tip of a paring knife at an angle under the green top, twisting the strawberry so the knife cuts a circle around and under the green, popping out the hull or calyx—the green leaves and the white part un-derneath. Slice the hulled strawber-ries
2. In a medium bowl, put about 2/3 of the hulled strawberries, 2 table-spoons the sugar, and the vanilla or liqueur. Mash it all together. This mixture gets folded into the whipped cream; you can keep it as chunky as you like or mash it into more of a puree for a smoother tex-ture. Set aside.
3. In a large bowl, whip the cream with the remaining sugar using a mixer or whisk until firm peaks form—when you pull the beaters or whisk out of the cream, you should be able to hold it upside-down and have the peak of cream hold its shape. With a spatula, fold in strawberry mixture. Divide the fool among 8 glasses or bowls and top with remaining straw-berry slices. Serve immediately or cover and chill for up to 2 hours.
S T R AW B E R RY F O O Lc o n t i n u e d
INSTRUCTIONS
25 | ediblecommunities.com
No need to be traditional—this technique works with any soft summer berry or
fruit. Raspberry fool. Blueberry fool. Cherry fool. Peach fool. Go forth! Be a fool.

ediblecommunities.com
What’s in season when varies. On where you are. On late frosts, early heat waves, sudden storms. On all sorts of factors and variables. So while straw-berries are either flooding markets where you are or you’re still chomping at the bit for the locally grown ones to show up, make the most of them by storing them properly.
First and most importantly, don’t wash strawberries until you’re ready to eat them—they’re like bright red sponges ready to soak up any liquid in their realm.
If you’re planning on using them within a day, you can leave them on the counter or pop them in the fridge; for any longer storage, it ’s worth spreading them in a single layer on a paper towel-lined baking sheet and covering with another layer of paper towels—this both keeps them dry (and thus staves off mold) and makes sure they don’t crush each other.
LAST THOUGHTS:
TIPS FOR STORING STRAWBERRIES