Science Projects Section - Brevard Public...
30
Science Projects Page 1 of 30 CSI: Brevard Science Projects Section Guiding Field Experts Science Projects are an integral part of the Science curriculum. The Pacing Guide puts the teaching of Science Projects in the first semester. But we don’t want you to go in empty-handed! This section of CSI: Brevard will give guidelines and suggestions for how to successfully teach this part of the curriculum. In this section, you’ll find: The District’s position on Science Projects Finding support How to build a scientific community in your classroom and at your school How to fit the teaching of Science Projects into your plans (It’s easier than you think!) Tips for managing the process Friendly explanations of the requirements and jargon of Science Projects (plus examples!) Reproducible teacher/student/parent pages and samples
Transcript of Science Projects Section - Brevard Public...

Science Projects Page 1 of 30 CSI: Brevard
Science Projects Section
Guiding Field Experts Science Projects are an integral part of the Science curriculum. The Pacing Guide puts the teaching of Science Projects in the first semester. But we don’t want you to go in empty-handed! This section of CSI: Brevard will give guidelines and suggestions for how to successfully teach this part of the curriculum. In this section, you’ll find:
The District’s position on Science Projects Finding support How to build a scientific community in your
classroom and at your school How to fit the teaching of Science Projects into your
plans (It’s easier than you think!) Tips for managing the process Friendly explanations of the requirements and jargon
of Science Projects (plus examples!) Reproducible teacher/student/parent pages and
samples

Science Projects Page 2 of 30 CSI: Brevard
SCIENCE PROJECTS AND TAKING THE FEAR OUT OF SCIENCE FAIR
Guiding Field Experts Introduction Brevard Public Schools is committed to “a quality science program in every school.” Helping student-scientists master science process skills is essential in reaching this objective. Brevard is renowned for its successes in secondary level regional, state, and international science fair competitions and the elementary science fairs provide a valuable foundation and experience for the budding scientist as well as for the future Science Research student. The inclusion of Science Projects as an instructional unit in the elementary scope and sequence is one way of helping us ensure that all elementary students have access to a quality science program. Brevard is also committed to providing teachers with the proper instructional tools to make elementary Science Projects feasible. This section of CSI: BREVARD, along with on-going training, is useful to teachers looking to add to their “instructional tool box.” It’s a fact that Science Projects are a major undertaking for most elementary students and therefore appropriate instruction is necessary. Mandating completion of Science Projects without providing instruction and support leaves students discouraged about Science. It is unreasonable to expect an elementary student to have the skills necessary to complete a project without being provided the necessary process and content instruction. Teachers also need to provide ongoing guidance and encouragement. Teachers must teach how to do Science Projects. While the district mandates the teaching of Science Fair Projects, it does not mandate that students participate/enter in their school Science Fair. Participation in the school Science Fair is a school-based decision and may vary from school to school as well as from grade level to grade level. Many students are very proud of their learning and embrace the opportunity to “show off” what they have learned to judges and the school community at the school Science Fair. To other young students, the school Science Fair may be too stressful an event at this time and would be a better experience in later years. Let’s remember that keeping the fun and enjoyment in Science while teaching students the essential process skills will make Science Projects a positive memorable experience. The “I Do, We Do, You Do” technique applies well to Science Project instruction. Teachers are encouraged to first model how to do Science Projects involving everyone in their classroom. Students need to be guided through the process before they can attempt it independently.

Science Projects Page 3 of 30 CSI: Brevard
Support Just as students who are inexperienced with Science Projects need extra support, teachers vary in their experience levels and some may need to seek out support.
CSI: BREVARD—Use this Science Project section as a resource. Visit the BPS Elementary Programs website http://elementarypgms.brevard.k12.fl.us/science_fairs.htm for helpful Science Project suggestions and resources for teachers and families. Scott Foresman Science - Teacher’s Edition has much information about Science Projects and the science processes. Visit other Internet sites listed in this guide for more information about Science Projects. Science Fair Contact—Each school has identified a Science Fair Contact. This person attends District meetings about the Area Science Fair. He/she has the most up-to-date information and forms about the Science Fair guidelines, etc. Science Point of Contact (PoC)—Each school has identified a Science PoC who also attends district-level meetings and workshops and receives training in Science topics including Science Projects. Science Fair Committee—Is a Science Fair Committee established at your school? By having a committee, a team of people will share the responsibility for Science Fair. The committee is also a great place to exchange information, ideas, and enthusiasm for Science Fair. The members of the Committee then take that back to the grade level teams. We recommend that, at a minimum, at least one teacher per grade level, the Science PoC, and an administrator serve on this committee. Suggested responsibilities for this committee are:
1. Work with administration to set dates for the school Science Fair 2. Establish a school-wide project plan, with suggested dates for completion of each
component of the Science Fair projects. 3. Distribute Science Fair packets and information to teachers and students. 4. Give safety advice. 5. Answer questions (from teachers, students, parents) about the Science Fair
process. 6. Set up a Science Fair Kickoff to get the students interested in Science Fair
projects. 7. Get the word out about Science Fair, through the school website, newsletter, etc. 8. Ensure that all projects are in the correct category (Biological, Physical,
Environmental). 9. Coordinate a Science Fair Night to celebrate the wonderful projects the students
have completed. Many schools have other fun experiments set up for the students and
Science Projects Page 4 of 30 CSI: Brevard
parents. Some have their sixth graders run the experiments, taking some of the burden off the teachers and giving a sense of ownership to the students.
Grade Level Team—Working together as a grade level team to plan together and establish timelines and procedures can ease the burden. Taking advantage of teacher expertise by combining classes for initial instruction is one way of working smarter instead of harder. Community resources—Parents who are in science careers, retired science teachers, secondary school teachers or their students are sometimes happy to assist in various ways throughout the process. Teachers should be on the lookout for periodic Science Project trainings.
Questions to consider when planning Science Project Instruction.
What is the level of experience with Science Projects with my students? How well do my students understand the Scientific Method? How skilled are they in working independently? E.g. Researching, writing, collecting & analyzing data, graphing, drawing conclusions, etc. When is the school Science Fair? Working backwards from this date will help determine an appropriate start date. Don’t forget to allow ample time for classroom presentations. How intensive will my instruction need to be? E.g. One day per week (“Science Fair Fridays”) might be enough for some very experienced classes, but 3-5 times per week might be appropriate for others. What communication will the school and/or I be sending home? (Timeline, component due dates, a school “Science Project Handbook,” how-to-handouts, reminders, etc.)
The Uniqueness of Science Projects Working on a Science Project can be one of the most exciting, yet challenging, adventures a student will ever do in school. It is a unique way for students to satisfy their curiosity about the world around them while applying many reading, math, writing, and thinking skills they have learned. Students will discover a great deal about themselves and their abilities while learning what scientists do to understand the world and our place in it. Science Projects are so special that most adults still remember the ones they did in elementary school. Make the Science Project experience positive and memorable for your students by having fun and celebrating their success whenever you can!

Science Projects Page 5 of 30 CSI: Brevard
District Requirements for Science Projects For grades K-2, the emphasis is on providing initial instruction in the Science Project processes. Doing at least one “Whole Class Science Project” as a model is required. K-2 teachers may also choose to give students the option of completing an individual or team project. If so, further instruction and guidance will be necessary. For grades 3-6, the emphasis is two-fold: teaching the Science Project processes in greater depth and completion of “Individual/Team Science Projects.” Teachers should begin by doing at least one Whole Class Science Project to model the processes, then instruct and guide the students through each step of individual/team projects. NOTE: Team projects may not be allowed in your Area Science Fair. See Area Science Fair Handbook for details. Be sure students are aware of this before they decide to do a team project. Entry in School Science Fair-- While the district mandates the teaching of Science Fair Projects, it does not mandate that students participate/enter in their school Science Fair. Participation in the school Science Fair is a school-based decision and may vary from school to school as well as from grade level to grade level. Entry in Area Science Fair—Requirements regarding entry into Area Science Fairs can be found in the Area Science Fair Handbook. See your administrator or Area Science Fair Contact for details.
Teacher Approval of Science Projects 1. It is the teacher’s responsibility to approve individual/team Science Projects. Approve the
projects early in the process. Consider safety, student ability, project/content complexity, availability of resources/materials/support, and appropriateness of topic. Don’t wait until the day the projects are due to the Science Fair to check them for appropriateness and completion. Initial teacher approval before testing and periodic checks with component due dates will prevent a student from being excluded from the School Science Fair, a definite lose-lose situation!
2. If a project is initially disapproved, explain why and help guide the student to a more suitable project on the same topic, if possible.
3. Avoid any project that is dangerous, expensive, involves humans or vertebrate animals, involves controlled substances (cigarettes, alcohol, drugs), or is beyond the understanding or grade-level ability of the child. An adult supervisor must be present whenever students engage in any activity that is potentially dangerous. See the “Designated Supervisor” and “Qualified Scientist” entry in the Tips for a Successful Science Project section.
4. References: Area Fair guidelines provide details about types of projects and display material not allowed at the Area Fair. It is recommended that schools use the same guidelines.

Science Projects Page 6 of 30 CSI: Brevard
Concerns from Teachers about Science Projects “I’ m worried that I don’t have time to teach students how to do a Science Project.”
If you’re teaching Inquiry, you don’t have to stop teaching science to start teaching Science Projects—it’s already embedded in the process of Inquiry. Strand H (Nature of Science) of the SSS specifically addresses the skills needed for the Science Projects. These are a mandated part of our curriculum and should already be included in your lesson plans. About 25% of Grade 5 FCAT Science is based on Strand H. Teach content when teaching the processes of Science Projects. Choose a topic related to the cluster being studied at the time. For example: in grade 3, 1st semester, Physical & Chemical Science is being studied……..
o A “Start From Scratch Option” is to ask students what they already know about matter and energy. Encourage them to give real life examples that demonstrate what they know. Generate a class list of testable questions and develop one into a Whole Class Science Project. While doing the project take advantage of the teachable moments by discussing and reading about embedded content.
o A “Teacher Cheat Sheet” option is to use the “Full Inquiry” experiment that Scott Foresman provides at the end of each unit as a teacher guide to develop a full-blown Science Project. Especially refer to the “Go Further” box and the “Independent Full Inquiry” section at the end of the experiment. Don’t let the students know that this is what you are using. E.g. In Grade 3 Unit C, the Full Inquiry activity uses a toy car to investigate energy and distance traveled. A teacher might engage the class by having them spend time exploring ways toy cars move. Follow up by asking students what questions they have and lead them to develop a testable Science Project question, such as, “What would be the effect of adding more mass to a toy car on the distance it travels?” Or, “What happens to the distance a toy car travels when different “road surfaces” are used?”
Use Science Project time to teach Math benchmarks: data collection/analysis and METRIC measurement skills are easily integrated into Science Project instruction.
“I’m nervous about overseeing 25 different projects.”
Use the Science Fair Project Planner/Timeline (located at the end of this section) to keep students on track. Create a class record sheet listing the students and the various components of the Science Project. Check off as students complete each component. Use parents, high school mentors (particularly students involved in Science Research classes—talk to your local high school about arranging this) to meet with the students during

Science Projects Page 7 of 30 CSI: Brevard
your normal Science class. You can continue with your lessons while students are getting individualized attention on refining their projects. Consider implementing a “Science Fair Fridays” program in your class. Beginning early in the school year, have the students work on only Science Projects during your Friday Science class time. This way, you’re available for help and assistance (it could also be a good time for the mentors to come in).
Direct Instruction in Science Projects Science process skills are critical tools that students need to be successful scientists. A Whole Class Science Project that provides opportunities for students to use these skills should be completed during the first grading period. Science Projects are an excellent way to teach process skills and can be taught through directed, guided, or full inquiry. Teacher Tips for Direct Instruction
There are many places to obtain information, which may help your students with their science fair projects. At the end of this section are “Tips for a Successful Project” These pages are designed to be a quick reference tool for you to use to get some basic information. Any pages with shaded titles are suitable for you to copy and use with students as instructional tools. You are welcome to make minor changes to the material to suit your specific needs. For each component/step of the Science Project, teachers need to provide direct instruction. Coupling this instruction with a Whole Class Project directed by the teacher is very helpful. Start off with an explanation of the component, followed by examples. Demonstrate how the component applies to the Whole Class Project. Guide students with questions to help them do the component as a class. Depending on the grade level and student expertise, you might write each component on chart paper as the class completes it. Cooperative groups or individual students might write up a draft of the project in a class or individual Daily Log. When designing the procedures to test the question, have students brainstorm possible variables. Help them identify the following variables (see “Keeping it Fair” chart for further details and examples):
Independent Variable: the one condition you are testing Dependent Variable: what changes as a result of changing the independent variable; this is what you are measuring Control Variables: the things/conditions you keep constant throughout the
Experiment

Science Projects Page 8 of 30 CSI: Brevard
When it comes to conducting the test, involve as many students as possible in repeating the testing (multiple subjects or trials) and in collecting results (both measurable data and anecdotal observations). If time allows, a second Whole Class Project will reinforce the process skills and encourage independence when students complete their own projects. When students are working on their own individual projects, some level of direct instruction will still be necessary. Assigning without instruction is never acceptable! Periodic check-ups are critical. When given a huge task, most of us would need and appreciate someone checking on us and re-directing us before we go too far down a wrong path. It’s even truer for our students!
→ Schedule days when you will meet one-on-one with students. → Check the wording of their question and hypothesis. → Check whether they considered all variables in designing their testing procedures. → Check to be sure they are planning to repeat their testing 10 times or more. → Check to be sure they are recording (not typed!) measurable data and anecdotal
observations in their Daily Log on a day-to-day basis. → Check the format of their graph for accuracy. → Guide students in analyzing their results and drawing conclusions. → Guide and encourage them throughout the Science Project process.
“So what are the processes of a Science Project?” Please see the graphic “Scientific Method and Steps of a Science Project” located at the end of this section. “So what kind of Science Project is required?”
Allowable Projects: “Science Projects” are limited to the experimental type that uses the Scientific Method with a testable question. E.g. A student designs an experiment to test whether marine paint or house paint is better for warding off the growth of barnacles on dock pilings. This type of Science Project has a variable that can be tested (type of paint used). Projects Not Allowed: Research (What is a hurricane?) or model projects (A papier mache volcano) are not considered “Science Projects” for the purposes of Brevard Public Schools because they don’t involve testing. NOTE: Research or model projects have a definite place in a Science classroom and teachers are encouraged to use them depending on instructional objectives. However, the focus of “Science Projects” is clearly on student application of the Scientific Method and testable questions.
Science Projects Page 9 of 30 CSI: Brevard
Science Project Ideas from Day 1 Don’t look now, but Science Projects are all around you! To find them, students must:
OBSERVE – things and events that happen around them. WONDER – about what they observed and “what would happen if I …?”
Kids are born scientists. They observe and they want to know WHY something happened, or HOW they can change the outcome. Have you watched your students at recess trying to figure out a way to make the swings go higher? Or a way to make the ball go farther? Those are scientific questions! Science Projects are a way to capitalize on the natural scientist in every child.
The best project ideas do not necessarily come from a book or website on Science Fairs. They come from the unique questions that students ask because they are curious. This is what Inquiry is all about! Testable questions are everywhere! Encourage students to keep their eyes & ears open for observations and ideas. Jot them down when you hear them. Talk them over with the students and you’ll generate even more ideas. Have the students start a Question List in their Science Notebook. Start a Question Wall from Day 1. A Question Wall is a class list of questions that the students wonder about. Students love to write on chart paper, so let them add to questions about whatever strikes them as intriguing. One class project came right off the Question Wall: the students noticed that when they got their hands stamped in the Media Center, the ink was staining their clothes. They decided to do a project to test different kinds of inkpads for washability, then they reported their findings to the Librarian.
Real-life Student Examples: Alex found a project in the backyard when she observed caterpillars eating oleander leaves. She wondered what would happen if they were given a choice of other kinds of leaves also.
Chas found a project in a newspaper comic about chickens and their pecking order. After thinking and reading he decided to investigate “dominance hierarchy” by testing his goldfish to see if they had a “pecking order.”
Robert found a project while boating when he observed that the river was cloudier in some areas. He decided to test for clarity and pollutants at different river location - such as near housing, restaurants, marinas, and natural areas.
Science Projects Page 10 of 30 CSI: Brevard
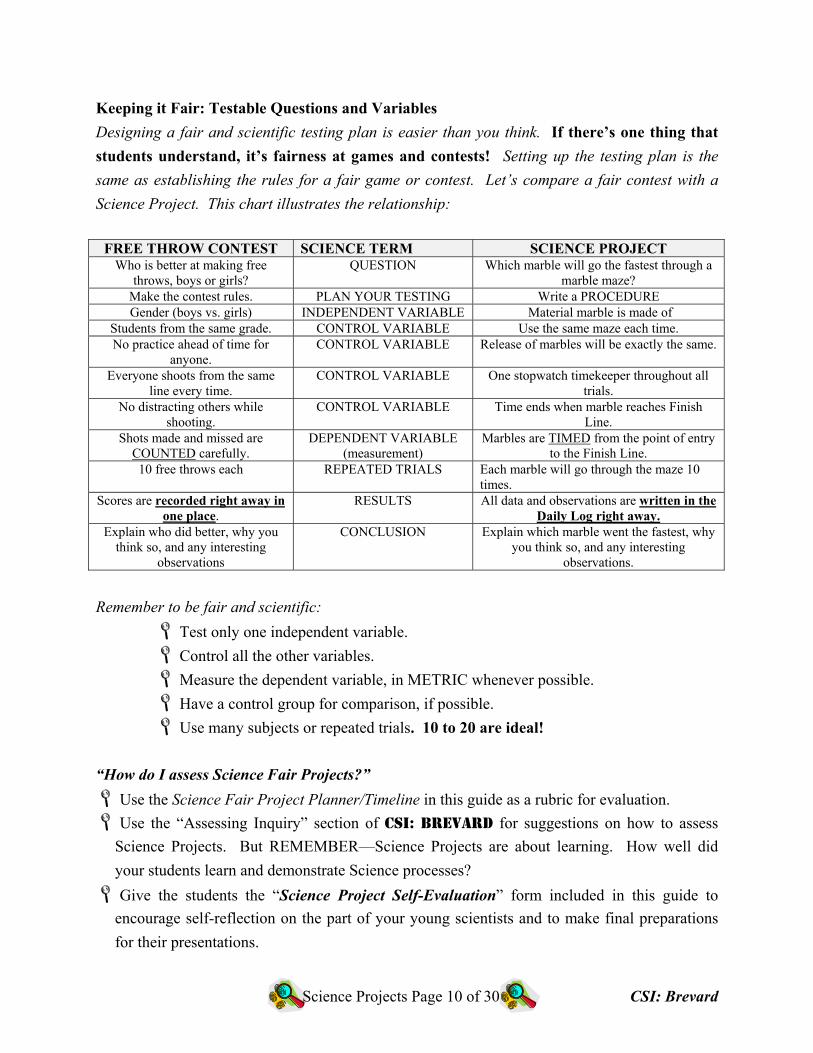
Keeping it Fair: Testable Questions and Variables Designing a fair and scientific testing plan is easier than you think. If there’s one thing that students understand, it’s fairness at games and contests! Setting up the testing plan is the same as establishing the rules for a fair game or contest. Let’s compare a fair contest with a Science Project. This chart illustrates the relationship:
FREE THROW CONTEST SCIENCE TERM SCIENCE PROJECT Who is better at making free
throws, boys or girls? QUESTION Which marble will go the fastest through a
marble maze? Make the contest rules. PLAN YOUR TESTING Write a PROCEDURE Gender (boys vs. girls) INDEPENDENT VARIABLE Material marble is made of
Students from the same grade. CONTROL VARIABLE Use the same maze each time. No practice ahead of time for
anyone. CONTROL VARIABLE Release of marbles will be exactly the same.
Everyone shoots from the same line every time.
CONTROL VARIABLE One stopwatch timekeeper throughout all trials.
No distracting others while shooting.
CONTROL VARIABLE Time ends when marble reaches Finish Line.
Shots made and missed are COUNTED carefully.
DEPENDENT VARIABLE (measurement)
Marbles are TIMED from the point of entry to the Finish Line.
10 free throws each REPEATED TRIALS Each marble will go through the maze 10 times.
Scores are recorded right away in one place.
RESULTS All data and observations are written in the Daily Log right away.
Explain who did better, why you think so, and any interesting
observations
CONCLUSION Explain which marble went the fastest, why you think so, and any interesting
observations. Remember to be fair and scientific:
Test only one independent variable. Control all the other variables. Measure the dependent variable, in METRIC whenever possible. Have a control group for comparison, if possible. Use many subjects or repeated trials. 10 to 20 are ideal!
“How do I assess Science Fair Projects?”
Use the Science Fair Project Planner/Timeline in this guide as a rubric for evaluation. Use the “Assessing Inquiry” section of CSI: BREVARD for suggestions on how to assess Science Projects. But REMEMBER—Science Projects are about learning. How well did your students learn and demonstrate Science processes? Give the students the “Science Project Self-Evaluation” form included in this guide to encourage self-reflection on the part of your young scientists and to make final preparations for their presentations.

Science Projects Page 11 of 30 CSI: Brevard
Benefits of Classroom Presentations When students present their Science Projects to their classmates, it produces many “teachable moments.” The teacher should capitalize on these moments through the use of questioning and discussion to connect to both Science Content and Processes.
Many Strand H benchmarks (Process benchmarks) can be addressed through classroom presentations of Science Projects. Teachers should ask questions to lead to a thorough understanding of the benchmarks.
SC.H.1.2.2 Teachers can help students realize that they have practiced “a successful method to observe the natural world by observing and recording, then analyzing and communicating the results.” SC.H.3.2.4 Teachers can help students realize “that, through the use of Science processes and knowledge, people can solve problems, make decisions, and form new ideas.”
Content Benchmarks from other strands—Connections to benchmarks from other strands can be revisited or introduced during class presentations.
SC.F.1.2.3 Teachers can help students understand “that living things are different but share similar structures.” If you have several students who completed projects on living things, you can lead a discussion on how the living things involved in their testing are different and how they are the same SC.B.1.2.1 Teachers can help students “know how to trace the flow of energy in a system.” If one student did an experiment about batteries and another studied plant growth, through questioning, the teacher can lead students to trace the flow of energy within each system.
Students become part of a “Scientific Community.” After completing their experiments, real scientists come together to present their results and answer the questions of other scientists, as they “defend” their work. Classroom presentations give your students the opportunity to experience this part of being a scientist, too. Assessment Opportunity Public Speaking (Reading benchmarks) Practice for Science Fair judging interview – if students are participating in the school fair
“A man’s errors are his portals of discovery.” ~James Joyce

Science Projects Page 12 of 30 CSI: Brevard
It’s been said that it takes a village to raise a child. Sometimes, it feels like it takes more than that to help all the students complete Science Projects. GOAL: To make successful completion of Science Projects a school-wide event supported by all HOW: Provide motivation by making it fun!
→ Kick-off, victory, or survivor parties → Dress up as a “scientist”—for the classroom, grade level, closed circuit
TV → Morning announcements: “special guests” (teachers, past winners—
displaying winning projects) → Make a school video (Science Committee, GSP class, 6th graders) of “At
the Science Fair” SHARE INFORMATION: Make it a topic of conversation.
→ Faculty meetings → Science Fair Committee reports → Newsletters—dates, help nights, websites → Sharing of “best practices” → School website
INSTRUCTION: Must be provided!
→ Post a class list from Day 1 with Science Project Ideas/Questions → Check Media Center resources for planning → Communicate to parents school support → Post a suggested project timeline for students → Regular, periodic instruction with handouts or booklet → Volunteers and Mentors—NASA, Science Research students, “Science
parents,” etc. → Struggling students—peer guide, project with “guaranteed results,” team
projects (if school allows)
Science Projects Page 13 of 30 CSI: Brevard
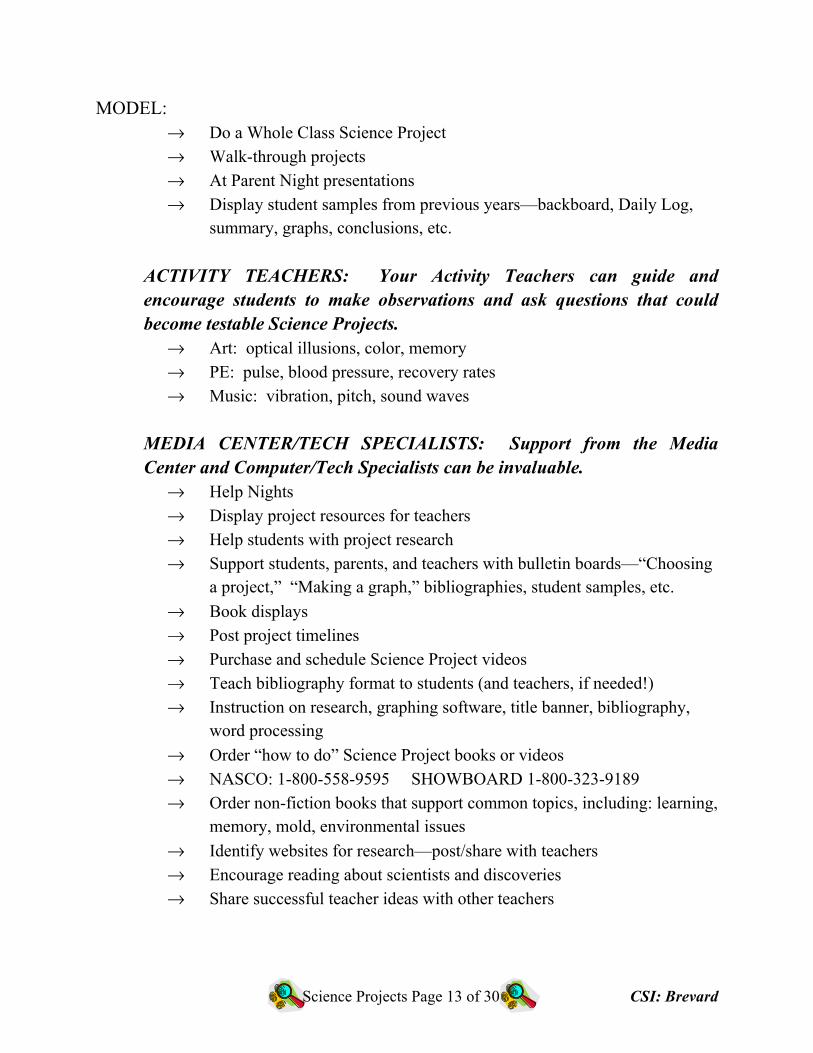
MODEL: → Do a Whole Class Science Project → Walk-through projects → At Parent Night presentations → Display student samples from previous years—backboard, Daily Log,
summary, graphs, conclusions, etc.
ACTIVITY TEACHERS: Your Activity Teachers can guide and encourage students to make observations and ask questions that could become testable Science Projects.
→ Art: optical illusions, color, memory → PE: pulse, blood pressure, recovery rates → Music: vibration, pitch, sound waves
MEDIA CENTER/TECH SPECIALISTS: Support from the Media Center and Computer/Tech Specialists can be invaluable.
→ Help Nights → Display project resources for teachers → Help students with project research → Support students, parents, and teachers with bulletin boards—“Choosing
a project,” “Making a graph,” bibliographies, student samples, etc. → Book displays → Post project timelines → Purchase and schedule Science Project videos → Teach bibliography format to students (and teachers, if needed!) → Instruction on research, graphing software, title banner, bibliography,
word processing → Order “how to do” Science Project books or videos → NASCO: 1-800-558-9595 SHOWBOARD 1-800-323-9189 → Order non-fiction books that support common topics, including: learning,
memory, mold, environmental issues → Identify websites for research—post/share with teachers → Encourage reading about scientists and discoveries → Share successful teacher ideas with other teachers

Science Projects Page 14 of 30 CSI: Brevard
TIPS FOR A SUCCESSFUL SCIENCE PROJECT & TEACHER/STUDENT REPRODUCIBLE PAGES
Successful Science Projects have one very important thing in common – quality support and guidance from the teacher: → You may wish to prepare your classroom with projects saved from previous years. Be
sure to include good examples and also a few non-examples. Students can critique these projects and have an idea how their project board should look. It’s much easier for students to do a part of the project when they have seen a model.
→ Plan a science fair “kick-off” activity during which time you model the scientific process. → Doing multiple experiments with students will help them become familiar with the
process and understand what to do on their individual projects. → The Scott Foresman Activity Book (Teacher’s Guide) offers another excellent resource
for teachers. Planning and organizing the Fair, creating successful projects, and ideas for planning a Family Science Night are all included in this Scott Foresman resource.
→ There are many places to obtain information that can help your students with their Science Projects. The following pages are “Tips for a Successful Science Project.” These pages are designed to be a quick reference tool for you to use to get some basic information. Any pages with shaded titles are suitable for you to copy and use with students as instructional tools. You are welcome to make minor changes to the material to suit your specific needs.
→ Consider using Foldables when teaching Science Projects. These engaging graphic organizers, developed by Dinah Zike (see Online Resources for web information), can be used when communicating with both students and parents.
Designated Supervisor and Qualified Scientist forms If a student is working with living organisms, including microorganisms, or potentially dangerous procedures, these forms are required and should remain on file at the school.
The Qualified Scientist form is used to identify an expert who can advise the student and approve procedures for safety, both for the student and the animals involved in the testing.
The Designated Supervisor form is used to identify an adult who will be responsible for ensuring that the approved procedures are followed. This adult supervises and ensures the safety of the student during testing. These forms are located in the Area Science Fair Handbook.

Science Projects Page 15 of 30 CSI: Brevard
Science Project Planner/ Timeline
Students – use this planner as a follow-up to what we are learning in class related
to Science Projects.
If you meet your deadlines, your project will be completed on time and you will not
be overwhelmed. Remember: Inch by inch, It’s a cinch!
Date Due Organizing Your Daily Log Value Earned
Get your Daily Log _____ _____
Set up log in two sections (Daily Work and Data) _____ _____
Hand write all entries (no typing) _____ _____
Make an entry each time to you do ANY work on your project _____ _____
Every entry is dated _____ _____
Date Due Finding a Topic and Phrasing the Question Value Earned
Choose a topic that interests you _____ _____
Research your topic and take notes in Daily Log _____ _____
Write bibliography (if required) _____ _____
Plan how you will ask your question (Include all the variables) _____ ______
Teacher approves topic and question _____ _____ Date Due Making Entries in Your Daily Log Value Earned
Write question in Daily Log _____ _____
Write hypothesis _____ _____
Write the procedure to set up your experiment _____ _____
Create a list of materials needed for the experiment _____ _____
Plan and draw table/chart to record data _____ _____
Date Due Conducting the Experiment Value Earned
Collect all materials _____ _____
Begin the experiment (take photos) _____ _____
Record results—observations and data—in Daily Log _____ _____
Repeat the experiment at least ten times (if possible) _____ _____
Create your graph from the data (if required) _____ _____
Analyze your results and write conclusions _____ _____
Date Due Creating the Display Value Earned
Obtain your backboard, plan your display _____ _____
Type all components and titles for your board (if possible) _____ _____
Attach all components to the board _____ _____
(Question, Hypothesis, Materials, Procedure, Results/Data/Graph, Conclusion, Photos)
Science Projects Page 16 of 30 CSI: Brevard
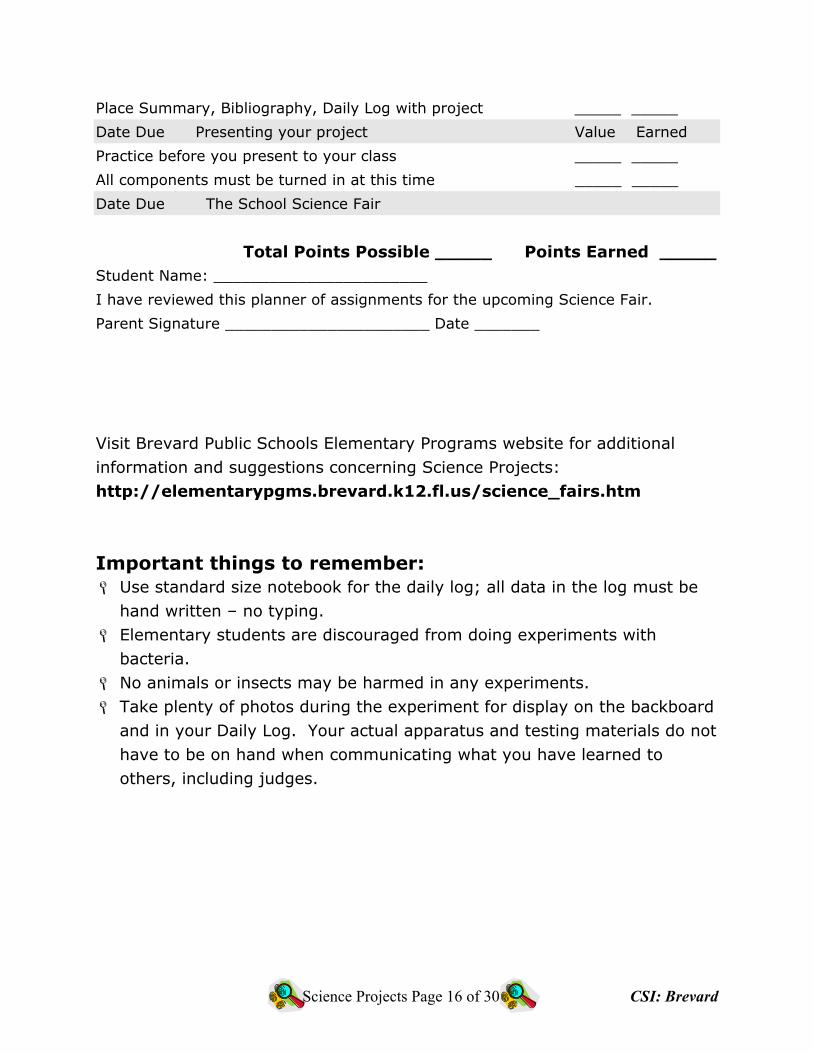
Place Summary, Bibliography, Daily Log with project _____ _____
Date Due Presenting your project Value Earned
Practice before you present to your class _____ _____
All components must be turned in at this time _____ _____
Date Due The School Science Fair
Total Points Possible _____ Points Earned _____ Student Name: _______________________
I have reviewed this planner of assignments for the upcoming Science Fair.
Parent Signature ______________________ Date _______
Visit Brevard Public Schools Elementary Programs website for additional information and suggestions concerning Science Projects: http://elementarypgms.brevard.k12.fl.us/science_fairs.htm Important things to remember:
Use standard size notebook for the daily log; all data in the log must be hand written – no typing.
Elementary students are discouraged from doing experiments with bacteria.
No animals or insects may be harmed in any experiments. Take plenty of photos during the experiment for display on the backboard and in your Daily Log. Your actual apparatus and testing materials do not have to be on hand when communicating what you have learned to others, including judges.

Science Projects Page 17 of 30 CSI: Brevard
Why Science Projects?
Students get to live real science by being a scientist. Students get to develop and demonstrate a wide range of skills (Reading, Writing, Math, etc). Students get to improve life-long skills of problem-solving and critical thinking. Students get to practice using tools of science and METRIC measurement. Students become more proficient at Scientific Thinking – 25% of FCAT Science.
How can parents help with Science Projects? Supervise and use resources to ensure safety—for both your
child and tested organisms. Ask questions instead of giving answers.
Questions place the responsibility on your child.
Questions help your child explore dimensions of problem.
Questions draw solutions from your child.
Questions communicate trust and confidence.
Questions help anticipate probable outcomes of different choices.
Use these questions to guide self-evaluation in your child: “What do you want to happen?”
“Do you think doing this will get you what you want?”
“What other ways might you try?”
Be interested, encouraging, and positive. Explain concepts that are difficult to understand. Structure work time. “Inch by inch, it’s a cinch.” Provide technical help. Purchase materials. Provide transportation. Help your child understand Science Projects are about learning, not winning!

Tips for a Successful Project
Science Projects Page 18 of 30 CSI: Brevard
Organize your Daily Log Your Daily Log should begin on the very best day of your project. It will include all
the information from the beginning to the end of your project. A detailed Daily Log with accurate records allows a scientist to describe their investigation so others can repeat it and try to replicate the results. Use a separate permanent bound or spiral notebook as your Daily Log and divide it into two sections: “Daily Work” and “Results/Data.”
→ In the Daily Work section write down all the things you do or think about concerning your project each day - like a diary. Write a date for each entry to show the day-to-day record of your progress while doing your project. Give details. Include your procedure, research, diagrams, photos, changes to the experiment, bibliography, etc.
→ In the Results/Data section make charts before you start your testing. Record all measurements, readings, etc. in these charts in ink as you measure them during your testing. If you make a mistake draw a line through it and rewrite it. Do not erase or “white out.” Data should not be recorded by typing. Record any and all other observations you make while testing also. A good scientist keeps careful, detailed records of findings and test results. Sometimes it’s the unexpected observation that leads to a new discovery.
Use your Project Planner/Timeline If you meet your deadlines, your project will be completed on time and you will not
be overwhelmed. Remember: Inch by inch, It’s a cinch!
Definition of the Categories When you choose your topic and your question, decide which category it fits in the
best. Some projects have a connection to more than one category. Choose the
category that matches the strongest focus of your project. Get advice from your
teacher or the school Science Fair committee.
Biological – Projects that deal with the vital processes of living organisms and
how these processes are affected as a result of manipulating a variable.
Experiments on plant growth, how the human body functions (pulse, blood
pressure, exercise), and animal behavior are all Biological Science experiments.
** No animals may be harmed during any experiments.

Science Projects Page 19 of 30 CSI: Brevard
Physical – Projects related to the physical sciences such as physics, chemistry and
astronomy that deal primarily with non-living materials. Experiments on force
and motion, matter, and energy are all in the Physical Science category.
Environmental – Projects dealing with man’s relationship with the earth and man’s
effect on the earth; man’s relationship with the natural and man made
surroundings. The student should clearly show the connection between
humans and their environment, both in the written and oral presentation.
Phrasing Your Question
Include your variables in your question. Label them! This will help you decide how to set
up your experiment. Remember affect is a verb and effect is a noun. Here are some
formats that work well:
How does _____________ affect the __________________ of a _________________?
Independent (Manipulated) variable Dependent (Responding) variable Controlled variable
(This is the one you are (this is what you will (all aspects of this variable
messing around with) measure and record) must remain constant)
How does temperature affect the bouncing height of a basketball?
How does wing shape affect the flying distance of a paper airplane?
or
What is the effect of __________ on the ______________________ of ______________ ?
Independent (Manipulated) variable Dependent (Responding) variable Controlled variable
(This is the one you are (this is what you will (all aspects of this variable
messing around with) measure and record) must remain constant)
What is the effect of storm water runoff on the water clarity in Lake Washington ?
What is the effect of temperature on the chlorine content in a swimming pool ?
or
Some questions are hard to fit in this format. Here are some other acceptable ways
that Science Project questions can be written:
→ What is the relationship between the kinds of birds at my bird feeder and the
different birdseeds that I put out?
→ What happens to the growth of barnacles on wood when different paint
additives are used?
→ What is the connection between the ramp height and the distance a toy car goes?

Science Projects Page 20 of 30 CSI: Brevard
Research Become an expert. The information you learn can help you design your
procedures, understand your results (data and observations) and draw conclusions.
It will also impress your classmates, teacher, judges, and even yourself! Your
sources don’t have to be books—you could interview an expert in the field, find
Internet resources, or watch a Science program on TV. Record your research
findings in your Daily Log, along with the source of the information for future
reference. Your teacher may have specific requirements about your research
(number of sources, if a bibliography is required, etc.).
Writing the Hypothesis
In order to write a hypothesis, you must have done some research. After reading
through your research you will be able to make a statement about what should
happen in your experiment. State your hypothesis in a positive manner. Avoid
statements like, “I think” and “I predict”. Tell what you are planning to do in your
experiment and tell how it will turn out – based on your research.
An “If ___, then ___ statement works well.
If I measure the bouncing height of a new basketball with three different
pressures, then the ball with the highest pressure will bounce 10% higher.
If I measure the flying distance of six styles of paper airplanes, then the plane
with the smallest wing angle will travel farthest.
If I test five different bubble solutions and measure the length of time the
bubbles last, then the solution with 10% soap plus glycerin will produce the
longest lasting bubbles.
Consider following your hypothesis with a rationale for your prediction. In the
example above about bouncing basketballs, you could mention something that you
noticed in PE. You could also write about a conversation you had with your mom
about your bike tires going flat. Also justify why you chose “10%” as your
estimate.

Science Projects Page 21 of 30 CSI: Brevard
Designing the Experiment Determine the procedure that you will follow to test your hypothesis and record it in your Daily Log. The procedure should explain the steps to be followed in order to find the answer to your question or problem. Think about necessary safety precautions that will be taken. Make a complete list in your Daily Log of all the materials you will need.
→ Identify the conditions (also called Controls) that will be kept the same during the experiment. These will help you run a fair, scientific test that will give you valid results.
→ Identify the one factor you will change (on purpose) to get a result. This is called the Independent variable (Also called Experimental or Manipulated variable).
→ Identify how your results will be measured. This is called the Dependent variable (also called Responding variable). It’s important to have results that can actually be measured. Use measuring tools with metric units whenever possible.
→ Most experiments have a Control Group. This is the group of subjects that is treated in the “normal” way so you can compare them to the Experimental Group (the group of subjects that have the one factor changed.)
A good procedure is very detailed – like a good recipe. This makes it easy for other scientists to duplicate your experiment so they can verify your results.
Conduct the Experiment Follow your procedure carefully to ensure fair, scientific testing. While testing, record all data, in ink, directly into your Daily Log. Don’t write measurements on a piece of paper and then copy them into your log – this can lead to errors. Be accurate and exact as you observe, measure, describe, count, or photograph. Work safely. The results will be more convincing and valid if you repeat the experiment as many times as possible, a minimum of 10 times. For example, an experiment that uses ten plants will give more valid results than one that tested only one or two plants. Understand that an experiment must be repeated many times and yield consistent results in order to draw valid conclusions.

Science Projects Page 22 of 30 CSI: Brevard
Analyzing the Results Results include both Data and Observations. Look at the measurements you recorded in your Daily Log closely. Think about the data and observations and decide what these results mean. If possible, examine your results mathematically using percentages, mean, median, range, and modes. Be sure to know the meanings of these words if you use them. Construct graphs or tables that will go on your backboard to show the results/data more clearly. Analyzing charts and graphs can help us understand patterns of change. The data will help you decide whether your hypothesis is supported or not. Identify data that is contradictory or unusual and try to explain it in your conclusions.
Writing the Conclusion The first step is to look at your data. Your conclusion can be written in two paragraphs.
Here is a possible format:
Part 1: Did your data support your hypothesis? If not, why do you think it did not? What
would you do differently the next time you did this experiment?
Part 2: Do not worry about “negative” results, or results that came out differently that you
expected. Just explain why you think you got these results. If your results turned out just
as you expected, explain why you think your experiment turned out this way.

Science Projects Page 23 of 30 CSI: Brevard
Writing the Summary (or Abstract) Your summary is a wrap-up of your entire project. It should be very
comprehensive and complete. A quality summary can be written in five
paragraphs. Here is a suggestion:
Paragraph 1: Tell what your question was and why you chose this topic.
My problem is “ ______?” I decided on this project because _______. I started
asking questions and found out that _____.
Paragraph 2: Tell your hypothesis and explain why you thought this would
happen.
My hypothesis was “_____.” I thought this would be true because ____.
Paragraph 3: Tell how you tested your hypothesis. Do not tell the step-by-step
procedures, just explain your experiment. Tell how many times you repeated your
tests, or show how many subjects you tested. Mention the variables you controlled
to make sure the testing was fair. Describe the difference between your control
group and your experimental group if you had them.
I tested my hypothesis by _____. To make sure the experiment was fair, I _____.
Paragraph 4: Tell about your results. Include some of your most important data
such as totals and averages of your measurements. You should also mention one
or two of your important or unusual observations.
While doing my project I observed that _____. Also _____. Another interesting
thing that happened was _____.
Paragraph 5: Tell about your conclusions. Say whether or not your data
supported your hypothesis. Tell the most important thing you learned by doing
your project. Tell how people in general, or scientists, might apply this information
in everyday life. If you do this project again, what would you do differently?
My data (did or did not) support my hypothesis. The most important thing I
learned was _____. My results show that _____. Tell how scientists or people in
general might use this information. If I were to do this project again, I would
probably _____.

Science Projects Page 24 of 30 CSI: Brevard
STUDENT SAMPLE: CONCLUSIONS
A student compared natural dyes to synthetic dyes using yarn.
1. In my hypothesis, I stated that natural dyes would fade more than synthetic dyes and my
results supported this. I was surprised that the synthetic dyes faded as much as they did.
Although I followed the dying instructions on the bottles of synthetic dye, there may have
been less fading if I left the wool in the solution longer. Other than the fruit dye, the
natural dyes had pretty good colorfastness.
2. There may have been more sun-fading if the experiment had been done in a different time
of year. There were so many cloudy days that I barely was able to get my yarn outside
for 20 days. Six weeks may have been a better amount of time to test for sun-fading.
3. When I added up the results from my color preference survey, part of my hypothesis was
supported. People preferred the brighter colors over the paler natural colors, which
would mean that the color quality of the natural colors is not as good, although the
majority did say that in theory, they would rather use natural dyes for reasons of
environmental consciousness.
4. I observed the many difficulties in dying things naturally – the problems with consistent
results when you think about all the different conditions affecting natural ingredients; the
natural ingredients must be fresh, so storage is a problem – I even had mold growing in
one of my dye jars! The preparation time was more than 10 times longer than it is for
synthetics – you have to collect, crush, simmer, mordant, and simmer again. With
synthetics you just heat and dye. These are probably the reasons why industry switched
to synthetics in the first place, but with mass production, many of these time problems
could be controlled.
5. I would like to conduct water quality tests on synthetic dyes, possibly by watering plants
with natural dyes and synthetic dyes to see if the heavy metals have a bad effect on living
things. If so, it may be a good idea to go back to more natural fabrics and dyes.
Was hypothesis supported by results?
Another hypothesis explained
How to improve the project Explanation
Explaining problems that arose
A new idea for a future project

Science Projects Page 25 of 30 CSI: Brevard
STUDENT SAMPLE: SUMMARY (or ABSTRACT)
One way to do a summary is to write five paragraphs! Each paragraph tells about one part of the project. It’s easier than it seems. Look at the student sample below and notice what each paragraph describes.
My problem is “Are Any Cleansers Safe for the Environment?” I decided on this project while
on the beach (where I live) and on the river (where I visit). I noticed that many, many plants and
animals were dying near the storm sewer drains. I started asking questions. I found out a lot of
cleaning materials were dumped down these drains.
My hypothesis was that the Baking Soda Detergent would be the best for plant life. I thought
that because an earlier project proved baking soda as a natural cleanser.
I tested my hypothesis by putting five different cleansers and three water plants in jars with 500
ml of water for twenty days. To make sure the experiement was fair I used the same size and
number of plants, the same amount of cleanser and the jars received the same amount of light. I
also kept them separate while taking pictures.
While doing my project I observed that the worst cleanser on the plants was Pine-Sol which was
the cleanser advertised the most. The cleanser that hurt the plants the least was Baking Soda
Detergent. On a pH scale of 5-10.5 it was a 9. The worst ones I found were Ajax, Pine-Sol, and
Simple Green. They were all sixes, in pH. Another good one was Scratch Guard. It rated a 7.
My results supported my hypothesis. The most important thing I learned was that one or two
commercial products are partially safe for the environment. The results have shown this:
Baking Soda-9, Scratch Guard-7. This information supports my hypothesis. If I did this project
again I would probably use more plants and test the pH more often.
1st paragraph tells what your question was and why you chose it.
2nd tells your hypothesis and explains why you thought that.
3rd tells how you tested your hypotheses. Don’t tell every step of your procedure – just summarize it.
4th tells about your results. Include some of your most important data-like totals and averages of measurements. You can mention 1 or 2 of your observations.
5th tells briefly about your conclusions. Say whether your results support your hypotheses. Tell the most important thing you learned.

Science Projects Page 26 of 30 CSI: Brevard
Science Project Self-Evaluation “HOORAY! I finished my project!”
“I feel proud of the work that I’ve done on my Science Project. If I want to perform my best in front of my class or at the School Science Fair if I am entering it, I need to evaluate my project to see if I can make any last minute preparations.” Here are some questions to ask myself:
→ Have I done enough research so that I’m an expert on my topic?
→ Have I reviewed my project well enough so I can explain it well and impress my teacher, my classmates, and possibly the judges?
→ Do I have all the parts on my backboard NEAT & ATTRACTIVE?
→ Does my Daily Log have 2 sections and is it thorough?
1) “Daily Work” with dated entries,
2) “Results/Data” – where charts show that I recorded measurements BY HAND and WHILE they were being made, plus OBSERVATIONS I made
→ Does my one page Summary (or Abstract) follow the “5 paragraph” formula (QHTRC)?
→ If my teacher required it, do I have a “Review of Literature,” “Reprint File” or handwritten “Research Notes” that will show that I tried to understand my topic(s)?
→ Do I have a Bibliography of DIFFERENT types of sources? (grades 5-6)
→ Did I do enough testing and was it “scientific?” Am I willing to do more if necessary?
→ Do my conclusions show that I did a lot of thinking about my testing, the DATA I collected, and my Review of Literature (Research)? Is it about one page long?
→ Do I have at least one GRAPH on my backboard?
→ When I present my project, will I be dressed up, standing tall, smiling, making eye contact, and polite?
We certainly hope you’ll be smiling and standing tall! We’re proud of the work you’ve done, too, and we want you to enjoy being a scientist as you proudly communicate your best work
to other “scientists.” CONGRATULATIONS!

Science Projects Page 27 of 30 CSI: Brevard
INTERNET HELP Gathering the Evidence
The following information is a suggested list of many resources to help with Science Fair. It contains links, tips and ideas for teachers, students, and parents. These suggested web sites will help make Brevard’s format of the Science Project easier to understand.
Science Fair Projects and Experiments
www.juliantrubin.com/branchesofsciencefair.html This is an excellent web site that gives topics, ideas, and resources.
Adventures of Science Bob www.sciencebob.com
This is an excellent web site that lists Science Projects and research links. It is also great for helping teachers with their lessons.
Teaching People to be Amazing
www.stevesplanger.com Click on Cool Experiments that are fun to do for Science Projects. It also shows different projects that students have done.
Science Project Encyclopedia www.cpet.ufl.edu/sciprog/
This is a great site after you get through the introduction. Click on Read an introduction to Science Projects, this will help parents and students understand what a Science Project is.
The Science Club www.scienceclub.org/kidquest.html
This site will get your Science Project questions answered.
Cyber-Fair www.isd77.k12.mn.us/resources/cf/welcome.html
This web site shows examples of Science Projects.

Science Projects Page 28 of 30 CSI: Brevard
SCIENTIFIC METHOD AND THE STEPS OF A SCIENCE PROJECT
Additional steps of the Science Project will include: ♦ Daily Log -- includes Daily Work and all Results ♦ Summary -- an overview of your entire project ♦ Bibliography -- a listing of resources used for research (required in grades
5-6 only) ♦ Presentation -- backboard display and oral presentation
Question
Research
Hypothesis
Procedure
Results (Data and Observations))
Initial Observations
Conclusion
What does the scientist want to learn more about?
Gathering of information to become an “expert”
An “educated” guess of an answer to the question
Written and carefully followed step-by-step experiment designed to test the hypothesis
Measurements collected during the experiment AND written description of what was noticed during the experiment
Things you observe and wonder about in the natural world
Did your data support your hypothesis? What did you learn?
Begin with
Develop
Then
Develop
Design
Finally
Collect

Science Projects Page 29 of 30 CSI: Brevard
I have not failed. I’ve just found 10,000 ways that won’t work Thomas Edison