Satellite Broadband Server SBS 1000 - Wired...
36
Satellite Broadband Server SBS 1000 Owner’s Handbook and Installation Instructions V2.1 Key information about your SBS is shown below: Serial Number: IP address: Downlink(s): Uplink(s): Installer: © 2008 Wired Ocean Limited
Transcript of Satellite Broadband Server SBS 1000 - Wired...

Satellite Broadband Server SBS 1000
Owner’s Handbook and
Installation Instructions V2.1
Key information about your SBS is shown below:
Serial Number: IP address: Downlink(s): Uplink(s): Installer:
© 2008 Wired Ocean Limited

CONTENTS 1.0 Overview 1.1 How the Wired Ocean System Works 1 2.0 Operating the SBS 2.1 Turning the SBS On and Off 3 2.2 Accessing the SBS User Interface 4 2.3 Navigating Around the SBS User Interface 5 3.0 Using the Service 3.1 Selecting the Downlink and Uplink 6 3.2 Connecting to the Internet 6 3.3 Sending and Receiving Email 8 3.4 Tips for Using the Service 10 3.5 Disconnecting 11 4.0 SBS Functions 4.1 LAN Configuration 12 4.2 Setting the Automatic Disconnect 13 4.3 Viewing Usage Statistics 14 4.4 Access Control 15 5.0 Troubleshooting 5.1 If You Can’t Access the SBS User Interface 16 5.2 If the First Arrow Doesn’t Highlight 18 5.3 If the Second Arrow Doesn’t Highlight 18 5.4 If the Third Arrow Doesn’t Highlight 19 5.5 Getting Help 20 Appendix 1: Installation Instructions The information contained in this document is subject to change without notice and should not be construed as a commitment by Wired Ocean Limited. Wired Ocean assumes no responsibility for any errors that may appear in this document, nor does it make expressed or implied warranty of any kind with regard to this material, including, but not limited to, the implied warranties of merchantability and fitness for a particular purpose. Wired Ocean shall not be liable for incidental or consequential damages in connection with, or arising out of the furnishing, performance, or use of this document and the programme material which it describes. V 2.1.
© 2008 Wired Ocean Limited

1. Overview
Welcome to Wired Ocean. We are dedicated to providing you with a high quality, easy to use service. We have an ongoing programme to improve the operation of our services and to make these improvements available to you through automatic downloads to your SBS. Any feedback you wish to provide to us is appreciated. [email protected]
1.1 How the Wired Ocean System Works
Your Satellite Broadband Server (SBS) enables all of the networked computers on board your vessel to connect with a high speed internet access via one of Wired Ocean’s satellite broadband services. It enables fast and cost effective access to web pages, email and other services normally available on the internet. The characteristics of the service you receive will vary according to the Wired Ocean service(s) you have subscribed to. The SBS receives high speed internet data (DVB downlink) such as web pages, incoming email, etc through the television receive only antenna (TVRO) on your vessel. The TVRO must be pointed towards one of the satellites that provide the Wired Ocean downlink services. These satellites have a wide variety of television programming which can be viewed at the same time as using the Wired Ocean service.
Page 1

1. Overview
The SBS sends data such as web page requests, email, etc from your vessel via the narrowband communications equipment (uplink) on your vessel that has been connected by your installer. Your SBS is designed to work with a wide range of mobile satellite, cellular and landline services to provide the uplink. Wired Ocean is not, however, responsible for the uplink service or uplink service charges. Control of the SBS – connecting, disconnecting, switching uplinks, switching satellite, viewing connection statistics, etc – is performed through a web browser that accesses the SBS User Interface from any locally connected computer.
Page 2

2. Operating the SBS
2.1 Turning the SBS On and Off The SBS has two lights and a rocker switch on the front of the unit. The rocker switch is used to power up the unit, the green light indicates that the unit is powered up and the red light indicates hard disk activity. By pressing and releasing the power switch the SBS performs a start-up sequence similar to that of a personal computer. Once switched on, the SBS on will normally take up to two minutes to start up and occasionally up to five minutes when it needs to perform a hard disk check. The SBS is designed to operate continuously without being shut down for long periods of time. However, should you need to turn it off you can use the “SHUT DOWN” command in the SBS’s User Interface: 1. Open the SBS User Interface (see 2.2 below). 2. Click on the “SETTINGS” tab and then the “GENERAL” tab. 3. Click once on the “SHUT DOWN” button at the bottom of the
page. Alternatively the unit may also be powered down by momentarily pressing the rocker-switch on the front panel. It will take up to one minute before the lights go off and it is then safe to unplug the SBS. Warning: If the SBS is disconnected from a power source before it has completely shut down then damage to the hard disk may occur.
Page 3

2. Operating the SBS
2.2 Accessing the SBS User Interface Once the SBS has been installed and is turned on you can manage both the SBS and your internet connection through the User Interface. The User Interface enables functions such as connecting, disconnecting, switching uplinks, switching satellite, viewing connection statistics, etc to be performed through a web browser on any connected computer. To access the SBS User Interface: Tip:
For easy access to the User Interface set it up as a shortcut or favourite at the top of your web browser.
1. Open a web browser on a computer connected to the SBS.
2. Type “wiredocean” in the address bar.
3. Press Enter. This will take you to the User Interface shown below.
Not all versions of all web browsers work in exactly the same way, so if typing “wiredocean” doesn’t get a response you may need to enter an IP address instead. The SBS is shipped with the default IP address of 192.168.1.1, so try typing “http://192.168.1.1” instead of “wiredocean”.
Page 4

2. Operating the SBS
Make sure that your computer is set to request an IP address from the SBS using DHCP. If not, see Sections 4.1 and 5.1 of this handbook. If you see the screen below then the User Access Control has been enabled. This requires a password to access the SBS User Interface - other functions of the SBS will still be running but you will not be able to start or stop connections. Please see Chapter 4.4 - Access Control - for more details.
2.3 Navigating Around the SBS User Interface The User Interface functions are grouped under three tabs:
The CONNECT tab is used to connect and disconnect from the internet and to view the status of the current connection.
The SETTINGS tab is used to manage the SBS and view SBS status information under three tabs:
► The UPLINK tab allows editing of existing uplinks and creation of new uplinks.
► The DOWNLINK tab provides downlink status information.
► The GENERAL TAB provides access to SBS network addresses, SBS status information, access control, technical configuration options, the update button and the shutdown button.
The STATS tab allows access to historical usage information.
Page 5

3. Using the Service
3.1 Selecting the Downlink and Uplink The satellite you use for the downlink will depend upon the Wired Ocean service(s) you have subscribed to. Which service you use for the uplink will depend on the uplink equipment connected to the SBS by your installer. To select the downlink and uplink: 1. Open the SBS User Interface (see Accessing the SBS User
Interface in Section 2.2 above). 2. The User Interface should automatically be displaying the
CONNECT page. If not then click on the “CONNECT” tab. 3. Select the satellite you wish to use from the “Downlink”
options (drop-down menu). 4. Select the uplink you wish to use from the “Uplink” options
(drop-down menu). Your choice of downlink and uplink will only come into effect when you click on the “CONNECT” button. If you are outside satellite coverage or your TVRO’s view of the satellite is ‘blocked’ or pointing at a satellite that doesn’t provide Wired Ocean service you can still use your SBS. Just select “NONE” from the “Downlink” options (drop-down menu), click on the “CONNECT”, button and the SBS will use the uplink communications device to both send and receive data although the service will be slower than normal in most cases. As all data (both to and from the vessel) is now using the uplink communications device you may find that it is more expensive than the standard Wired Ocean service.
3.2 Connecting to the Internet Having selected a satellite downlink and an uplink you can make your Wired Ocean connection to the internet using the SBS User Interface as follows: 1. Ensure you are on the “CONNECT” page (it contains the
Service Status Diagram – a picture of a ship and satellite) and that the satellite is coloured dark blue indicating a good receive signal.
2. Click once on the “CONNECT” button on the right of the Service Status Diagram.
Page 6

3. Using the Service
The service status diagram will now show your connection status as follows:
Once the uplink has connected the first of the three arrows on the status diagram will be highlighted in dark blue. This confirms that the uplink equipment is operational and the uplink connection has been established. It may take up to one minute depending on the uplink service being used.
When the connection to the Wired Ocean satellite communications hub has been established the second of the three arrows on the status diagram will be highlighted. This confirms that the SBS is able to collect requested data, deliver it to the hub and validate your subscription.
The SBS then performs a check to confirm that it can receive information from the Wired Ocean hub. When this is confirmed the third arrow will be highlighted. This confirms that the downlink satellite is operational, that the TVRO is operating correctly and the SBS is receiving the Wired Ocean downlink. Now that all three arrows are highlighted your Wired Ocean connection is up & running and you can access the internet. Once connected your session details are displayed at the bottom of the
Page 7

3. Using the Service
diagram and the “CONNECT” button changes to “DISCONNECT”, ready for when you want to terminate the connection. You can now access the internet by opening another browser window and email by opening your email client or by using web mail. It is recommended that the browser page showing the SBS User Interface is kept open to allow you to monitor your internet session. If you close the browser window that is displaying the SBS User Interface you will remain connected to the service until you reload the same page and click “DISCONNECT” or the connection times-out in accordance with the uplink timeout settings. Some router-based uplink devices such as Fleet Broadband, 3G, VSAT and Wi-Fi/WiMAX, may have their own connection management interfaces. If you need to access the connection management interface of one of these routers, first click “connect” on the SBS from a connected computer. You will then be able to access the connection management interface of the uplink router. Use the connection management interface of the uplink router to set the router to automatic connection. Once this is done, use the “CONNECT” button on the SBS User Interface to manage internet connections. If the SBS does not connect please refer to Sections 5.2 to 5.4 of this handbook.
3.3 Sending and Receiving Email The SBS supports email in the following three ways:
1. Via web mail access to an ISP’s mail servers. When the SBS is connected to the internet, access the ISP’s web site as you would normally.
2. Using a POP/SMTP email client (such as Outlook or Outlook Express) to connect through the internet to your email provider. Once the SBS is connected to the internet, open and operate the email system as usual and incoming and outgoing emails will pass transparently through the SBS. If your ISP does not allow you to send email using authenticated SMTP, they may block SMTP connections from outside their own network. This does not affect the ability to receive emails. If
Page 8

3. Using the Service
you have this problem we suggest you use a mail relay service (such as SMTP.com) for sending email. Alternatively you may use the Wired Ocean SMTP PROXY as described below.
3. Using a POP/SMTP email client coupled with Wired Ocean’s SMTP Proxy. This proxy captures all outgoing emails and relays them through Wired Ocean’s email server. This method of email transmission should be used only when you are having problems sending emails through your normal ISP (e.g. you get error messages reporting “ISP does not allow relaying of email” or similar).
Warning: When using SMTP Proxy to send emails with large attachments some email clients may timeout before the SMTP proxy has completed sending the email. If you wish to send large attachments over slow uplinks we suggest you use an ISP that is accessed using authenticated SMTP.
a. From the User Interface, click the “SETTINGS” tab and choose “GENERAL”. Click on “Mail” and enter a tick in the “SMTP Proxy” box. It is also highly recommended that each computer that uses SMTP proxy email has their “server timeout” set to maximum. To do this - open the email client (e.g. Outlook, Outlook Express etc), then:
b. For Microsoft Outlook click on “Tools”, “Email Accounts…”, “View or change email accounts”, click on the relevant email account (you might want to do this for all email accounts), “Change”, “More Settings”, “Advanced”, and move the “Server Timeouts” slider to 10 minutes.
c. For Microsoft Outlook Express click on “Tools”, “Accounts”, “Mail”, then click on the relevant email account (you might want to do this for all email accounts), “Properties”, “Advanced”, and move the “Server Timeouts” slider to 10 minutes.
In all cases it is important that, when sending emails, you do not disconnect from the Wired Ocean service until your email programme (or anti-virus proxy if you are using one) has confirmed that they have been sent.
Page 9

3. Using the Service
3.4 Tips for Using the Service
To optimise browsing speed (through quicker DNS lookups) from an attached computer you may wish to set the Internet browser to “automatically detect proxy setting”. To do this in Internet Explorer select “Tools”, “Internet Options”, then click on the “Connections” tab. Click on the “LAN settings” button and tick the box marked “Automatically detect settings” and click “OK” and “OK” again. Other browsers will have a very similar menu structure to change this. You can use the service status diagram on the CONNECT page to monitor your current session usage and the STATS page to review your usage history. For uplinks using packet data based services (e.g. Inmarsat MPDS and FleetBroadband, cellular 3G/GPRS, etc) your uplink bill will normally be volume based irrespective of how long you remain online. It is therefore possible to remain online without having to pay any time related charges. However, some web pages refresh themselves automatically, so be aware that if you leave your web browser open with these types of pages it may generate traffic even when the service is not being actively used. The same applies to some web applications such as MSN chat, ICQ, windows update, etc. For circuit based uplinks you will normally be paying a fixed rate for each minute the uplink is being used. Consequently, to limit your communications costs, you should disconnect the Wired Ocean internet connection when you have finished online. To ensure that you do not accidentally build up excessive uplink charges when you are not using the service it is strongly recommended that you use the inactivity timeout as described in Section 4.2. For some types of uplink device, use of the Wired Ocean service may pre-empt the ability to receive voice or fax calls while the service is connected. If you use your uplink device for a voice call this will normally disconnect the Wired Ocean service and you will need to reconnect as described in Section 3.2 (Connecting to the Internet) after the voice call has finished.
Page 10

3. Using the Service
For optimum uplink cost efficiency consider various uplinks to match your sailing pattern. For example, in coastal waters 3G or GPRS may be suitable and when further out to sea mobile satellite systems, generally have very wide service coverage.
3.5 Disconnecting You can terminate the connection from the CONNECT page of the User Interface as follows: 1. Click once on the “DISCONNECT” button on the right of the
Service Status Diagram. 2. The uplink channel is disconnected and the ”DISCONNECT”
button reverts back to “CONNECT” ready for when you want to start a new connection.
Page 11

4. SBS Functions
4.1 LAN Configuration If you already have a network set up, you can change the network settings of the SBS to fit in with your other computers. From the User Interface, click the “SETTINGS” tab and choose “GENERAL” then click on “Network”.
Here, you can set the SBS IP address and netmask, disable the DHCP server, or change the range of addresses it allocates. When changing any setting please ensure you click on the “Apply” button to make the change. We recommend that you keep the existing network settings and use the SBS as your DHCP server. If you disable DHCP you must manually set up DNS and gateway addresses of your network to match the IP address of the SBS.
Warning:
If you deselect DHCP and change the IP address of the SBS please ensure that you keep a permanent note of the new IP address. If the new IP address is lost or forgotten you will not be able to access the SBS for configuration or service purposes.
The SBS defaults to using DHCP to allocate network addresses (IP numbers) to computers on your network, and to tell them which route to use to access the internet. If your computer has been connected to a DHCP server in the past, you might need to prompt it to now use
Page 12

4. SBS Functions
the SBS or to “renew its DHCP lease”. This is best performed by rebooting the computer although it can also be made to happen in Windows by using the DOS commands ‘ipconfig release’ then ‘ipconfig renew’.
4.2 Setting the Automatic Disconnect The automatic disconnect is a mechanism that will terminate your communications session if no uplink activity (e.g. internet requests, email traffic etc) is detected for the period specified. This is a safety device that is especially important if you are using a circuit switched uplink channel. Please note that some computer programmes, software and web pages may automatically send internet requests which could keep the session activated. You can edit the “Inactivity timeout” for each uplink setting through the User Interface as follows: 1. Click on the “SETTINGS” tab and then the “UPLINK” tab. 2. From the “Edit connection:” drop-down menu select the uplink
connection that you wish to edit. 3. Enter the inactivity timeout period in seconds. 4. Once the period has been entered click on “SAVE
CHANGES”.
Page 13

4. SBS Functions
Note that “GPRS Preset” connections do not allow setting of a timeout. A timeout can be selected with manually configured GPRS connection settings.
4.3 Viewing Usage Statistics To help you keep track of your usage the User Interface includes statistics for each connection. Each time you disconnect the usage statistics are updated. To view the usage statistics from the User Interface, click on the “STATS” tab.
The ‘STATS’ table shows for each communications session:
The time and date the session started (GMT). The duration of the session. The type of uplink connection used The uplink traffic volume. The downlink service used. The downlink traffic volume.
Total figures for all sessions displayed are shown at the top of page and at the left hand side there is a “print this table” link. At the bottom of the page, the sessions can be filtered by date, type, etc so that a report can be compiled for any chosen connection type and any chosen range of dates. The usage entries and totals then reflect the time period selected.
Page 14

4. SBS Functions
4.4 Access Control
The SBS can be configured to only permit access to the User Interface when a password is correctly entered. This will lock out any attempted access to the User Interface from unauthorised users and will prevent them connecting, disconnecting or changing any of the settings. It will still allow access to the internet from any computer connected (directly or indirectly) to the SBS if the Wired Ocean service is connected. To enable Access control:
1. Select “SETTINGS”, “GENERAL”. 2. Click on the heading “Users”. 3. Tick the box labelled “Enable access control”.
4. You will now be presented with a box requesting you to enter
the Administrator password. 5. Enter your preferred choice of password and click the Apply
button. 6. Record the password somewhere securely so that you and
other authorised users can gain access with it in the future. You can change the password at any time using the same method as above and it will happen with immediate effect. If the password has been irrecoverably forgotten you will need to contact your installer or Wired Ocean.
Page 15

55.. TTrroouubblleesshhoooottiinngg
5.1 If You Can’t Access the SBS User Interface
This is most likely a local network issue. The SBS uses DHCP to allocate network addresses (IP numbers) to computers on your network, and to tell them which route to use to access the internet. If your computer has been connected to a DHCP server in the past, you might need to prompt it to now use the SBS, or to “renew its DHCP lease”. The following is a guide to the steps that can be taken: 1. Check that the SBS is on. This is shown by a continuous
green light and an intermittent red light. 2. Check that the connection LEDs are blinking on both the
Ethernet socket of the server and on the socket of the computer (if available). This indicates that the Ethernet connection is passing data. If the Ethernet LEDs are not lit or blinking it is very likely that the fault is a cable.
3. Perform a ‘ping test’ to check whether TCP/IP networking is functioning on both the SBS and the computer. From the computer open a command prompt window (the following example is for Windows XP operating system) select “start”; “Run”; type “cmd” and press the Enter key. Type in the command prompt window “ping 192.168.1.1” (or whatever IP address the SBS is using) and press the Enter key. A response should show:
“Reply from 192.168.1.1: bytes=32 time<1ms TTL=64”
This indicates that the computer has good connectivity and can ‘see’ the IP address of the SBS. Try again to access the User Interface as described in Section 2.2. If unsuccessful reboot the computer and then access the User Interface. If the computer receives no satisfactory ping response proceed to step 4.
4. Ensure that the internet settings on the client computer are set to automatic DHCP and DNS as follows (for Microsoft Windows XP):
► Click on “start”, and then “Control Panel”. ► On the left panel, if you see the option “Switch to
Classic View”, click it once, and it will change to "Switch to Category View".
► Double click on the “Network Connections” icon.
Page 16
55.. TTrroouubblleesshhoooottiinngg
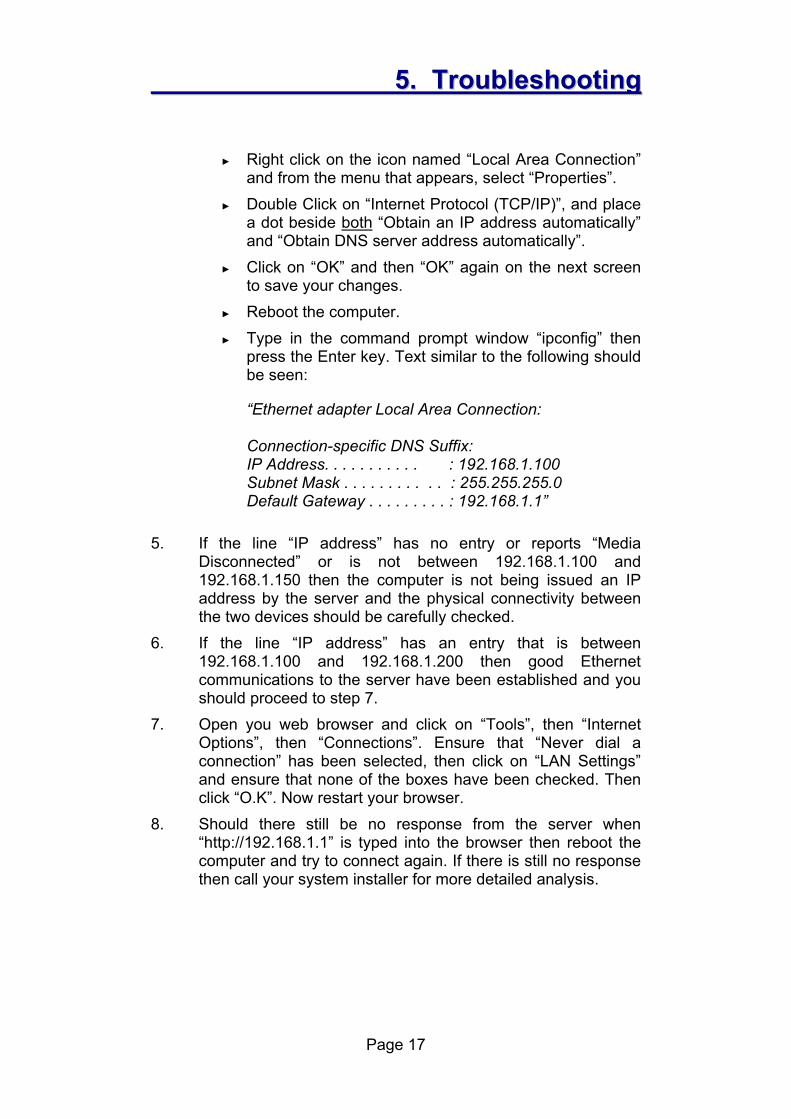
► Right click on the icon named “Local Area Connection” and from the menu that appears, select “Properties”.
► Double Click on “Internet Protocol (TCP/IP)”, and place a dot beside both “Obtain an IP address automatically” and “Obtain DNS server address automatically”.
► Click on “OK” and then “OK” again on the next screen to save your changes.
► Reboot the computer. ► Type in the command prompt window “ipconfig” then
press the Enter key. Text similar to the following should be seen:
“Ethernet adapter Local Area Connection:
Connection-specific DNS Suffix: IP Address. . . . . . . . . . . : 192.168.1.100 Subnet Mask . . . . . . . . . . . : 255.255.255.0 Default Gateway . . . . . . . . . : 192.168.1.1”
5. If the line “IP address” has no entry or reports “Media Disconnected” or is not between 192.168.1.100 and 192.168.1.150 then the computer is not being issued an IP address by the server and the physical connectivity between the two devices should be carefully checked.
6. If the line “IP address” has an entry that is between 192.168.1.100 and 192.168.1.200 then good Ethernet communications to the server have been established and you should proceed to step 7.
7. Open you web browser and click on “Tools”, then “Internet Options”, then “Connections”. Ensure that “Never dial a connection” has been selected, then click on “LAN Settings” and ensure that none of the boxes have been checked. Then click “O.K”. Now restart your browser.
8. Should there still be no response from the server when “http://192.168.1.1” is typed into the browser then reboot the computer and try to connect again. If there is still no response then call your system installer for more detailed analysis.
Page 17

55.. TTrroouubblleesshhoooottiinngg
5.2 If the First Arrow Doesn’t Highlight When you click the “CONNECT” button on the CONNECT page of the User Interface the first arrow on the Service Status Diagram should flash indicating that the SBS is ‘talking’ to the uplink device and then highlight when the device has been successfully engaged. If this does not happen the following should be investigated: 1. Ensure that the correct uplink device has been selected on the
Wired Ocean user interface. 2. Check that your selected uplink device is powered up and not
in use for other voice or data services. 3. Check that the connector to the uplink device is firmly plugged
into the device and the SBS and that the cabling is secure. 4. Restart the uplink device by powering-down then switching
back on. Make a note of the error wording you see in the status text under the ship icon and contact your installer for further diagnostics.
5.3 If the Second Arrow Doesn’t Highlight If the second arrow on the Service Status Diagram does not highlight successfully there is an uplink network connectivity problem. To assess the problem please investigate the following:
1. Check that the uplink antenna is not blocked or obscured. 2. Be sure that you’re in the service coverage area of the uplink
service being used. 3. If the capability exists make sure that you can use the uplink
device to make a phone call. 4. Check that the service provider username and password are
still valid (where relevant). 5. Ensure that you are activated with your service provider for
the type of data services you are using for the uplink. If you are away from your registered country ensure that you are enabled for roaming and are using the correct dialup numbers.
6. Ensure that any router-based uplink device (Fleet Broadband, 3G, VSAT and Wi-Fi/WiMAX) is connected to the internet.
Page 18

55.. TTrroouubblleesshhoooottiinngg
Sometimes network congestion can cause failed calls and so it may be a useful test to try again at another time when the network may be less congested. If the difficulty persists please contact your installer.
5.4 If the Third Arrow Doesn’t Highlight
If the first two arrows highlight but the third arrow continues to flash this indicates an issue with the reception of the satellite downlink. Potential causes are the TVRO installation (TVRO, cabling, multiswitch) not functioning correctly, the vessel being outside of the downlink coverage area, the downlink signal being ‘blocked’ by the vessel superstructure or port infrastructure or a temporary satellite outage. To determine the best course of action please check the following: 1. That the TVRO antenna is not blocked from seeing the
satellite. 2. That the TVRO is receiving television programming from the
same satellite your downlink service is on. This can be checked by :
► On the User Interface select the “SETTINGS” and “DOWNLINK” tabs. You will then see the screen shown below.
► Then click on “click here” at the bottom of the screen. This will display a readout of all the channels currently
Page 19

55.. TTrroouubblleesshhoooottiinngg
seen on that frequency on the satellite. These channels can then be checked against the television programming being received by the ship’s televisions or by comparing to data recorded at www.lyngsat.com for your selected satellite. If no channels are seen then no valid satellite signal is reaching the connector on the back of the SBS.
3. That the downlink signal strength is adequate. On the same DOWNLINK page (shown above) check the receive signal quality. If the “Signal strength” is better than 50% and the “Signal quality” is “good” or better proceed to the next step.
4. That the coaxial cable from the satellite receive antenna LNB is correctly connected to the SBS.
5. That the antenna cable plugged into the SBS is providing a good signal by removing it from the SBS and attaching it to a television receiver/decoder.
Should there still be no downlink signal call your system installer for a more detailed analysis.
5.5 Getting help If you are having difficulties with your Wired Ocean service and need further help please call your system installer for service advice. If you are unable to contact your system installer and your need is urgent Wired Ocean’s technical help can also be reached by: Email: [email protected]: +44 207 060 1094. Telephone: +44 207 060 1049.
Page 20

APPENDIX 1: INSTALLATION INSTRUCTIONS Background I. Introduction 1 II. Equipment Requirements 1 III. Uplink Connection Options 3 Setup IV. Step 1: Install the SBS 4 V. Step 2: Connect the Computer(s) 4 VI. Step 3: Connect the Uplink Device(s) 6 VII. Step 4: Connect the TVRO 7 VIII. Step 5: Installation Optimisation 8 IX. Step 6: Configure all Uplinks 9 Configuration Changes X Adding and Editing Uplinks 9 XI Changing the Uplink Transport Protocol 12

IInnssttaallllaattiioonn IInnssttrruuccttiioonnss
I. Introduction
This Installation Guide is for installers of the SBS and should be used in conjunction with the main sections of this Owner’s Handbook. Please read the Owner’s Handbook, especially Sections 1.1 and 2.1, before proceeding.
II. Equipment Requirements
The following items are required to complete installation of the SBS:
A Ku-band satellite receive antenna (TVRO). The SBS is designed to operate with TVROs using a 'Universal LNB' - having local oscillator frequencies of 9.750 GHz and 10.6 GHz and tuning range between 10.7 GHz and 12.75 GHz. If the TVRO has a Universal Quad LNB, in which each output is separately powered and independently supplies high/low vertical/horizontal to the terminated device, the SBS can be connected directly to the LNB.
In some cases a multiswitch (for example the Triax TMS5X8P)
should be installed between the TVRO and the SBS:
► With a Single Output LNB a multiswitch will enable the TVRO to feed the television receiver(s) and the SBS simultaneously.
► With a Quattro LNB in which there are 4 outputs - each output supplying different polarities or bands that cannot
Page 1

IInnssttaallllaattiioonn IInnssttrruuccttiioonnss
be changed (in other words the outputs supplying 'low vertical', 'low horizontal', 'high vertical', and 'high horizontal' - a multiswitch must always be used (and correctly connected to match the LNB outputs) otherwise the SBS or other satellite receive devices will not be able to switch between the different polarities and bands.
► A multiswitch is also needed with some (older) LNBs that
have a power consumption greater than the 250mA recommended from the LNB connection on the SBS.
► With a Quad LNB a multiswitch can be used if more than 4
satellite receive devices are required to operate independently of each other.
Coaxial cable terminated in f-type connectors to run between
the TVRO and the SBS, either directly or via a multiswitch. One or more communications devices for the uplink data
connection. Cabling between the uplink communications device(s) and the SBS, terminating in either an RS232 15 pin d-type connector or a USB (1 or 2) plug.
At least one computer. The SBS can provide internet connectivity to any type of personal computer that uses Microsoft, Apple Mac or Linux operating systems. To access the SBS’s User Interface the computer should have a JavaScript-enabled web browser such as Internet Explorer 5, 6 or 7, Mozilla, Firefox, Netscape 6 and above, Mac Safari, Mac MS Explorer.
If only one computer is to be connected directly to the SBS, an Ethernet crossover cable or switch or hub or router or wireless access point is needed to make the connection.
If more than one computer is to be connected to the SBS, an Ethernet switch, hub, router or wireless access point can be used with the relevant Ethernet cables. Or you can connect directly using an Ethernet crossover cable.
It is recommended that the SBS is powered from a UPS as
power surges, fluctuations or interruptions can cause damage to the hard disk drive. Recommended minimum specifications are 100W output power capacity and 240/220 Volts AC or 110 Volts AC input/output voltages.
Page 2

IInnssttaallllaattiioonn IInnssttrruuccttiioonnss
III. Uplink Connection Options The SBS supports three types of uplink connection: USB, RS232 and Ethernet. Multiple uplinks of any type can be connected by adding expansion ports to the SBS as required.
Local Area Network
WirelessAccess Point
Inmarsat Fleet, cellular GPRS, Globalstar etc.
TVRO antenna.Wide Area Network
VSAT 3G/GPRSrouter FleetBroadband Wi-Fi
Hotspot
USB to Ethernet adapter for multiple WAN ports.
GPRS, etc
USB to RS232 adapter for additional serial ports
USB hub for additional USB ports
USBRS232
USB
Ethernet
L-Bandco-axial
USB Connections: These are generally used for GSM/GPRS modems. The SBS has drivers for a range of USB devices. Please contact Wired Ocean to find out if a USB device that you plan to use is supported. The SBS has two built-in USB ports; if you need more, you can use a USB hub.
Warning: RS232 cables should be no longer than 2 metres when connected between the SBS and an uplink device. Longer cables may cause interference depending on the data rate and quality of cable. If longer cabling is needed, use a USB connection or an RS232 to RS422 converter.
RS232 Connections: Uplinks such as Inmarsat MPDS use RS232. The SBS has one built-in RS232 port; to add more, use USB-to-RS232 converters.
WAN Port Connections: To connect router-based uplink devices (Fleet Broadband, 3G, VSAT and Wi-Fi/WiMAX) WAN ports may be added to the SBS by using a D-Link DUB E100 USB to Ethernet converter.
Page 3

IInnssttaallllaattiioonn IInnssttrruuccttiioonnss
IV. Setup – Step 1: Install the SBS 1. Mount the SBS in an environment suitable for electronic
equipment and with convenient access to uplink and downlink cabling, power supply and connection to the computer(s). Ensure that the fan is not obstructed and the unit is able to draw air through the vents. The SBS can be mounted either vertically or horizontally however if the rack mount lugs are removed please ensure that the screws are replaced in the SBS as they maintain the structural integrity of the box.
2. Connect the power supply and UPS (if fitted).
Warning If the SBS is disconnected from a power source before it has correctly shut down damage to the hard disk may occur.
3. Power up the SBS by pressing and releasing the power switch. The SBS will perform a start-up sequence similar to that of a personal computer. Once switched on, the SBS on will generally take up to two minutes to start up and occasionally up to five minutes when it needs to perform a hard disk check.
Please refer to Section 2.1 of the Owner’s Handbook for more details and how to power the unit down.
V. Setup – Step 2: Connect the Computer(s)
Fitting the SBS into an existing network If there is a network already set up, you can change the network settings of the SBS to fit in with the existing computers. See Section 4.1 of the Owner’s Handbook. We advise, however, that you keep the existing settings and use the SBS as your DHCP server.
The first step is to connect at least one computer to the SBS as follows. 1. If you are connecting a single
computer use a crossover Ethernet cable to connect it to the SBS.
OR 1. If you are connecting multiple
computers (or a single computer) plug all the computers, including the SBS, into the switch or hub using standard Ethernet cables.
OR
Page 4

IInnssttaallllaattiioonn IInnssttrruuccttiioonnss
1. If you are using a wireless access point instead of a switch: ► Connect a computer to one of the access point’s LAN ports
using a network cable and ensure that the SBS is not connected to the LAN
► Make sure your computer is set to receive an IP address from the access point using DHCP.
► Log in to the access point’s configuration interface. ► Many wireless access points are routers as well. If yours is
a router, you will need to disable the WAN interface, or leave it blank, and turn off the DHCP server.
► Set the LAN IP address of the access point to 192.168.1.2 ► Set up the wireless network security. ► Now connect one of the wireless router’s LAN ports to the
LAN port on the SBS. Some routers will need a crossover cable, but most will work with a standard Ethernet cable.
► Connect your computers to your wireless access point, referring to the documentation that came with your computers’ wireless devices.
2. Make sure your computers are set to use DHCP. Here is how to do this in Windows XP: ► Go to the “Start Menu”, select “Control Panel”, then select
“Network Connections” ► Double-click the “Local Area Connection” icon. ► Select “Internet Protocol (TCP/IP)” within the connection
items ► Click on the “Properties” button. ► Under the General tab, select “Obtain an IP address
automatically” and “Obtain DNS server address automatically”
► Restart Windows. 3. Open your web browser, type “wiredocean” in the address bar,
and press the Enter key. You should see the SBS User Interface. If you don’t, try typing “192.168.1.1” in the address bar instead of “wiredocean”. If the User Interface still can’t be viewed refer to Section 5.1 of the Owner’s Handbook.
Page 5

IInnssttaallllaattiioonn IInnssttrruuccttiioonnss
VI. Setup – Step 3: Connect the Uplink Device(s)
Once all your computers have joined the network, and you can access the SBS User Interface, you can connect the uplink devices. The following general steps apply to any device you plan to use:
Tip: Before connecting with an uplink for the first time, you may wish to check that the uplink is set-up correctly as explained in Section X below.
1. If the uplink is a satellite or GSM phone, check that you can
make a phone call on the device. 2. If the device is a router (Fleet Broadband, 3G, VSAT and Wi-
Fi/WiMAX), check that it is connected to the Internet. Note that to access the router when it is plugged into a WAN port on the SBS, you should click “CONNECT” on the SBS first, so that the SBS activates that WAN port.
3. Check that the device is “data-enabled”. For example, the satellite account should be activated for the appropriate data services; the cellular account should allow data calls, and/or have 3G/GPRS enabled.
4. Connect the device to the SBS. 5. Select the relevant uplink service from the “Uplink” options
(drop-down menu) on the CONNECT page of the SBS User Interface. The SBS comes with some uplink settings that have been preloaded at the time of ordering. To edit or to add an uplink refer to Section X below.
6. Select “NONE” from the “Downlink” options (drop-down menu) on the CONNECT page (to connect with the uplink only as the downlink hasn’t been configured yet).
Once the connection is established, the status diagram will show a two-way connection to the internet. Once you have a working uplink, disconnect by clicking once on the “DISCONNECT” button on the right of the Service Status Diagram.
Page 6

IInnssttaallllaattiioonn IInnssttrruuccttiioonnss
VII. Setup – Step 4: Connect the TVRO
Connect the TVRO as follows: 1. Connect the cable from the
TVRO antenna to the f-type connector labelled “LNB IN” on the back of the SBS.
2. Make sure that the TVRO antenna controller is locked onto the correct satellite.
Warning: Please ensure that the coaxial cable from the TVRO is well supported in the vicinity of the SBS so that it cannot put undue strain on the f-type connector.
3. On the CONNECT page of the SBS User Interface, select the satellite you are using from the “Downlink” options (drop-down menu).
4. Select the uplink you wish to use from the “Uplink” options (drop-down menu).
5. Click once on the “CONNECT” button on the right of the Service Status Diagram.
Warning: If the antenna has a “sleep mode” (to stop the antenna actuators from continuously moving) it should be disabled. This will help prevent any momentary loss of signal when the antenna has drifted off the satellite position.
When all three arrows are highlighted in dark blue on the Service Status Diagram the Wired Ocean connection is up and running and you can access the internet. To disconnect, click once on the “DISCONNECT” button on the right of the Service Status Diagram. If the second or third arrows do not highlight as above please refer to Sections 5.3 and/or 5.4 of the Owner’s Handbook. The SBS is designed to stay running continuously. Should you need to turn it off you can use the “SHUT DOWN” command in the SBS’s User Interface:
Page 7

IInnssttaallllaattiioonn IInnssttrruuccttiioonnss
1. Open the SBS User Interface (see 2.2 below). 2. Click on the “SETTINGS” tab and then the “GENERAL” tab. 3. Click once on the “SHUT DOWN” button at the bottom of the
page. Alternatively the unit may also be powered down by momentarily pressing the rocker-switch on the front panel. It will take up to one minute before the lights go off and it is then safe to unplug the SBS.
VIII. Setup – Step 5: Installation Optimisation
There are a number of options you need to check before handing over the system for users to access:
1. Ensure that the email clients on connected computers are using authenticated SMTP for outgoing email (See Section 3.3 of the Owner’s Handbook).
2. Check that users can send and receive emails (using SMTP and POP3 protocols) to/from their preferred email provider and using their preferred email program. Some email providers ignore emails sent from IP addresses outside their own networks (to halt email relaying/spamming) and if so you may need to configure the Wired Ocean Service to provide an email proxy. See Owner’s Handbook Section 3.3 for further details.
3. Configure the transport protocol as described in Section XI to achieve the benefits of using the UDP uplink protocol.
4. Ensure that the antenna has “sleep mode” disabled in the antenna controller (normally an option in KVH antenna controllers).
5. Check “LNB type” is correct in the “Settings”, “General”, “Advanced Settings” menu. The default setting is set to “Universal” for normal European Ku band TVROs. However, some DECT phones (within 5 metres of the SBS or TVRO cabling) may cause local interference to the Eurobird signal. In such circumstances consider relocating the SBS and/or DECT phone/base station. If this is not possible select “Universal alt switch” and click on “Apply” to force the LNB to tune at a different IF frequency. Check the receive signal quality (Settings, Downlink) when doing this as some older LNBs are less efficient at this alternative frequency.
Page 8

IInnssttaallllaattiioonn IInnssttrruuccttiioonnss
IX. Setup – Step 6: Configure All Uplinks Configure any additional uplinks as required (See Section X below). Ensure that the Inactivity Timeout is set to the desired level for each uplink device (See Section 4.2 of the Owner’ Handbook). The Inactivity Timeout function is not available for GPRS preset uplinks, or for uplinks connected via the WAN port. The installation is now complete and should be carefully tested. The main sections of the Owner’s Handbook should now be used as the reference for operating the SBS.
X. Adding and Editing Uplinks Uplinks can be added and edited through the User Interface as follows:
1. Click on the “SETTINGS” tab and then the “UPLINK” tab. 2. To edit an uplink, select it from the “Edit Connection” drop-
down menu. To add one, choose “Add a new uplink” from the same menu.
3. Choose the relevant uplink type from the “Connection type” drop-down menu. The available fields will change according to the connection type selected. The different types of uplink and their settings are as follows:
Page 9

IInnssttaallllaattiioonn IInnssttrruuccttiioonnss
Modem Type Uplinks:
Inmarsat MPDS, GPRS, GSM, Analog modem, Globalstar, etc. View or Edit the following fields as necessary: ► Connection Name – a name that is used for selecting this
uplink in the future. ► Phone Number – the required dial-up number for the uplink
service. ► Username and Password. (Note that some devices will not
dial unless you put something into these fields, even though your uplink service provider might not require a login).
► Init String – any AT initialisation commands required by the uplink service (if required the uplink service provider can provide this information).
► Extra Init String – any AT initialisation commands required before the uplink service begins (if required the uplink service provider can provide this information).
► Inactivity Timeout (in seconds) – the Wired Ocean service will automatically disconnect if no uplink activity is detected for the period of time selected.
► Port – the physical connector on the SBS that the device will connect to. RS232 is the 15 pin d-type connector. USB is the small rectangular connector. The “Port“ drop down menu shows where the device is connected to your SBS (RS232 Serial Port, First USB Port, Second USB Port, etc.)
► Baud rate – the data rate between the SBS and the uplink device in bits per second (e.g. 115200 is 115200 bits per second). This is determined by the type of connection used. Normally 115200 or sometimes 57600.
► Flow control – (or RS232 RTS/CTS, XON/XOFF) for the serial interface to the uplink hardware should normally be set to ‘Auto’ (where the SBS automatically selects software flow control except for Globalstar and analogue modems where it selects hardware flow control). If you wish to install an uplink device that does not seem to be reacting correctly to the SBS please check the RS232 flow control that is recommended for your selected uplink device (it should be indicated in the relevant user manual).
Page 10

IInnssttaallllaattiioonn IInnssttrruuccttiioonnss
GPRS Preset Uplinks: The SBS has preset settings for a variety of GSM modems and cellular network operators. Select your phone type from the “phone” drop-down menu. Select your service provider from the “network operator” drop-down menu. Choose the port, port speed and flow control as above. Router Uplinks: If you have a router-based uplink device (3G, VSAT and Wi-Fi/WiMAX) on the same network as your SBS, you can use that router as the uplink. Select “router” from the “Connection type” drop-down menu. The only setting is the IP number of the router. WAN port Uplinks: To connect a router-based uplink device (3G, VSAT and Wi-Fi/WiMAX) to the SBS using the D-Link DUB E100 USB to Ethernet converter: ► Select WAN Port from the “Connection type” drop-down
menu. ► Select the required WAN Port number from the “WAN port
interface” drop-down menu. If there is no USB to Ethernet converter plugged in to a USB port, the “WAN port interface” drop-down menu is replaced by text reading “there is no WAN port available”
► Set WAN Port Network Settings. In most cases, it is advisable to allow the router that is plugged into the WAN port to assign the IP addressing and DNS for the WAN port via DHCP. To enable the DHCP client on the WAN port, check the “Get IP address automatically” checkbox. If the WAN port’s address is to be set manually, uncheck the checkbox, and enter the IP address of the other router in the “Gateway” field, the IP address you want the SBS’s WAN port to use in the “WAN port IP number” field, the network’s netmask in the “WAN port netmask” field, and the required DNS server’s IP number in the “DNS server” field.
Page 11

IInnssttaallllaattiioonn IInnssttrruuccttiioonnss
Fleet Broadband Uplink: To connect a FleetBroadband terminal to the SBS using D-Link DUB E100 USB to Ethernet converter: ► Choose Fleet Broadband from the “Connection type” drop-
down menu. ► Choose your terminal’s model from the “Fleet Broadband
terminal” drop-down menu. ► Type the Access Point Name in the “APN” field (for
example, bgan.inmarsat.com). ► Choose the WAN port interface and set up the addressing
of the WAN port as described above. Note that the Thrane & Thrane Sailor terminals do not allow their connection state to be managed from another device, so you should set these terminals to connect automatically. JRC terminals can be managed by the SBS and the SBS will configure the terminal for IP and initiate the connection automatically when the “CONNECT” button is clicked. Note that when using the JRC FB250 it is advisable to override the automatic DNS by entering your provider’s DNS server’s IP number (or Inmarsat’s DNS: 172.30.66.7) manually.
4. Once all settings have been correctly entered click on “SAVE
CHANGES”.
Now this uplink setting can be selected from the “Uplink” menu on the CONNECT page.
XI. Changing the Uplink Transport Protocol The SBS is configured to use either UDP or TCP/IP as uplink protocols (data channel from the SBS to the internet). Although the default is TCP/IP which will function over any type of uplink channel there are two advantages of switching to UDP.
1. Web browsing will be quicker as there is less handshaking needed.
Page 12

IInnssttaallllaattiioonn IInnssttrruuccttiioonnss
2. There will be a reduction in the data overhead on the uplink channel – potentially saving some uplink costs.
However UDP protocol, although reliable over most links, has been seen to be blocked by a few uplink providers' firewalls. So if you choose to change the protocol to UDP, it is strongly recommended that each of the uplinks is tested to make sure that all three arrows on the 'connect' page are highlighted when you connect. This will confirm that there is no problem with your uplink provider's firewall, and that you can reliably use UDP as the transport protocol. Note that this setting only applies when you are using the Wired Ocean downlink; it has no effect when the downlink is set to 'none'. To change the Uplink Transport Protocol:
1. Click on the “SETTINGS” tab and then the “GENERAL” tab. 2. Click on “Advanced Settings” (move the side bar up or down
until you see the contents). 3. Select TCP or UDP. The default is TCP.
Page 13